Conditioning & C our ee sher eries s laYing...
21
-
Upload
trinhhuong -
Category
Documents
-
view
213 -
download
0
Transcript of Conditioning & C our ee sher eries s laYing...


2
Conditioning & Cleaning Your lee asher series 605s PlaYing Cards
© Copyright, Lee Asher, 2012
All rights reserved. With the exception of short quotations for the purpose of review, no part of this manuscript, text or photo, may be reproduced in any form or by any means, electronic, stored in a retrieval system, photocopying, or otherwise, without the prior written permission of the publisher.
No part of this manuscript may be transmitted in any form or by any means, electronic, photocopying, or otherwise, without prior permission of the publisher.
This manuscript is designed to provide authoritative information with regard to the conditioning and cleaning your Lee Asher Series 605s Playing Cards. It is read with the understanding that neither the author, the publisher, nor anyone involved with this manuscript is responsible for anyone engaging in dangerous or damaging acts with or to their Playing Cards. The author, publisher, or anyone involved with this manuscript shall not be liable or held accountable for any such consequences.
Conditioning & Cleaning Your Lee Asher Series 605s Playing Cards broadcast rights (includes: Internet, Television, Video, or any other medium known or to be invented) shall be reserved by Lee Asher. Only written consent from Lee Asher authorizes permission for broadcast.
The Fournier logo is copyrighted by Fournier located in Vitoria, Spain. Fournier is owned by Jarden Inc. located in Rye, New York. Asher, Lee. Conditioning & Cleaning Your Lee Asher Series 605s Playing Cards
V.1
Playing Cards
Made in the United States of America

3
dediCation
In memory of Heraclio Fournier - A man with the visionary belief and passion to create wonderful playing cards!

4
table of Contents
Introduction ...........................................................................................5
Conditioning The Deck ..........................................................................7
Lee Asher’s 20 Minute Drills ..................................................................8
How Do You Know When You’re Finished?.......................................14
Essential Tips & Warnings ...................................................................15
Give Your 605s A Bath .........................................................................16
Microwave The Deck ...........................................................................18
Humidity Vs. Lee Asher Series 605s ....................................................19
Acknowledgements .............................................................................20
History Of Fournier And The 605s ......................................................21
Other Lee Asher Products ...................................................................21
Click on the links above to skip to that section

5
introduCtion I AM forever amazed at how little attention most magicians pay to the way in which they prepare their cards for use. Pianists are very particular about the tuning and regulation of their instrument; violinists carefully tune the violin and resin the bow; drummers tune and tighten the drum heads, nail their bass drums to the floor, adjust pedal tension and make sure that the kit doesn’t ring. Magicians, regardless of conditions, whip out a deck and expect it to perform. They complain bitterly when the deck ‘acts funny.’ - Dr. Wesley James (Enchantments 2004 pg.474).
Agreeing with Dr. James’ logic, magicians must take the time to condition their decks before performing and not expect a deck to operate without any preparation. Having your decks conditioned ensures one less issue to worry about during your presentation. But how can you break-in your cards? No one ever taught you how, let alone the proper way to do it.
That’s all about to change! After years of experimentation and practice, the techniques contained within this manuscript have given me great success. Now I offer them to you, for your benefit.
Before delving into how we break-in the deck, you must realize that not all playing cards are created equal. We usually get what we pay for. Therefore, some decks need more conditioning than others.
For instance, the majority of American playing cards require little conditioning. They’re in their best condition right out of the box (Photo 1). That’s a definite plus. They fan and manipulate with precision. Unfortunately, these cards tend to deteriorate much faster than brands that require more conditioning at the outset. Several uses render them virtually unusable. In some cases, even a single use will ruin them. Sad, isn’t it?
1

6
Most European decks are heavier and more durable than their contemporary American counterparts. They possess a varnish applied by spray onto the card’s surface that is baked until dry (Photo 2). The oil/resin varnish oxidizes and polymerizes into a tough film, producing a higher quality, more rigid and longer-lasting playing card. Besides offering extra protection to the paper underneath, this special varnish directly affects the “feel” of the cards. Their weight and sturdy properties offer the distinct impression of a robust deck of playing cards that has the ability to function at a higher level than other decks.
No doubt, 605s are quite rigid when they come out of the box and take upwards of ten hours of conditioning to break-down that tough coating. By applying a range of specific techniques learned from this manual, you will wear down the globules of varnish that coat the cards when they’re ‘factory fresh’. Afterward, you’ll have a nearly
indestructible deck of heavy gauge playing cards that you can rely on for months, if not years.
The 605s exist to service the needs of serious playing card aficionados. If you want a substantial deck with a remarkably resilient stock - these are simply the best cards available. Like a good pair of leather shoes or a baseball glove, the 605s soften with use, and slightly mold to fit the shape of your hand (Photo 3). They fan, spread, pass, faro in both directions, flourish and act like any other deck of cards. Additionally, they maintain their feel, integrity and hold their quality for a long period of time, unlike most every other cardboard deck currently on the market.
After you’ve spent hours conditioning and cleaning your Lee Asher 605’s, you won’t have to throw them away like other decks you’ve worn-out over time and prefer not to use. That’s a serious advantage!
Enjoy your 605s!
2
3

7
Conditioning the deCk
On average, it takes about ten hours to break-in a pack of Fournier 605s. The conditioning process has been broken up into a series of easy drills that only takes 20 minutes to perform. Practice these every day over four weeks, and you’ll have a reliable, conditioned deck that’s comfortable and familiar to handle. Though specifically designed for the 605s or any varnished deck, these conditioning techniques work with any brand of playing cards. We utilize a two-pronged approach consisting of flexibility and friction because both are integral to the conditioning process.
First we flex the cards in all directions. Flexibility plays an important role for playing cards because without it, they would be too rigid to manipulate. Trying to transpose two stiff packets in a pass-like fashion feels worse than it reads! The more limber and malleable the cards are, the easier and more efficient you can execute certain sleights and flourishes.
Second, we create as much friction between the 605s as possible to help wear down that ‘factory film’. When the varnished surfaces in contact move relative to each other, the force of friction between them converts kinetic energy into heat. Warmth from this heat, mechanical wear, and the pressures exerted from our hands through various techniques, helps smooth out the globules of oil/resin as well as give the cards a gleaming luster. Basically, we’re going to use the cards to polish each other.
Most of the card men on the Internet today are pressured into believing American playing cards are the best. They have little or no experience with European cards. Those who own a Fournier deck might have never received any instruction on the conditioning and proper maintenance of their cards. As a result, many otherwise-knowledgeable playing card workers are sadly uneducated about European playing cards. They know a well broken-in pack feels better to use than a brand new one, but they have an exaggerated idea of how difficult it is to break in a fresh pack.
Finally, conditioning a pack of 605s is also a natural way to strengthen your hands. Unlike using mechanical devices which leave your hands with an overly muscular look, the 605s develop the exact finger-stamina needed to manipulate any deck of cards.

8
Keep in mind, these exercises are performed slowly with exact precision and repetition. Until you break-in your deck, our goals for the drills are consistency mixed with frequency.
Once you’ve removed the cellophane from the box and the new deck, start the 20-minute routine described below. Each drill lasts two minutes and you’re encouraged to mix and vary them in any order you would like to keep it entertaining and interesting.
Drill 1 - Bridge Shuffles and Bowing the Pack: Begin with bridge shuffles (Photo 4). Once you’ve mixed them a fair bit, bow the cards in both directions, back and forth by riffling the edges with your thumb and/or first finger (Photo 5). Turn the deck on its side, the long-way, and bow the cards back and forth. Remember to perform this ‘flex-ercise’ with the deck face-up as well as face down.
4
5
lee asher’s 20 minute drills
9
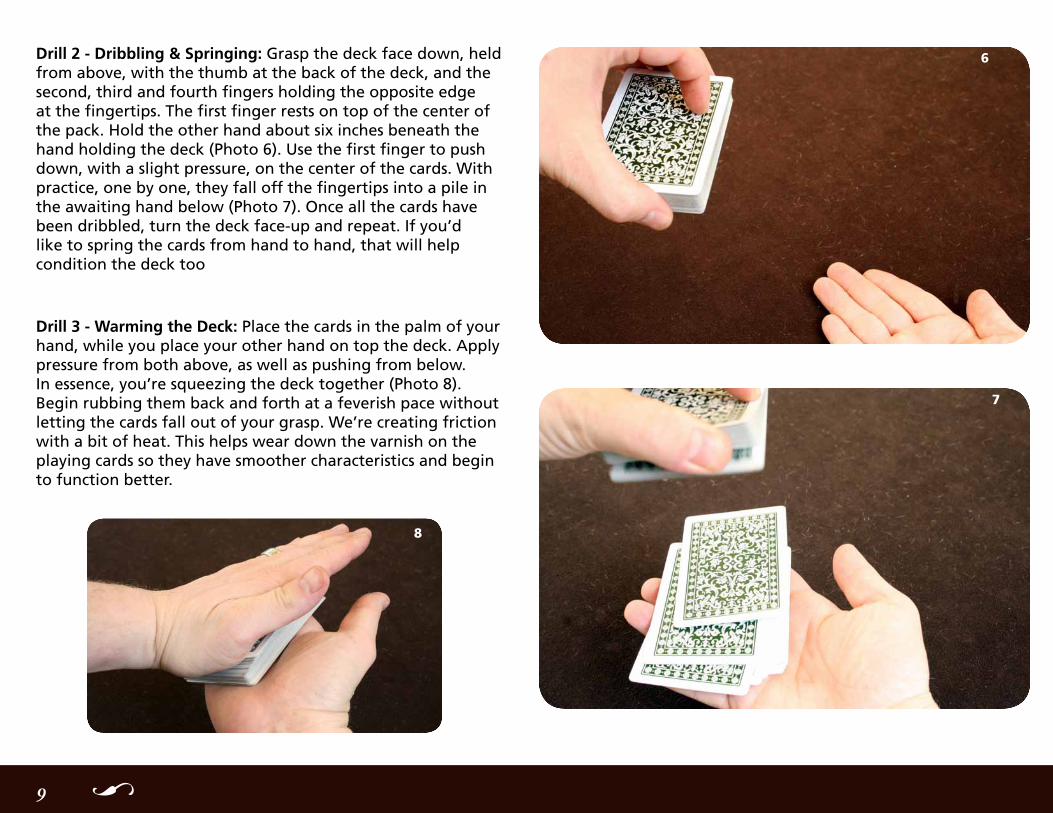
Drill 2 - Dribbling & Springing: Grasp the deck face down, held from above, with the thumb at the back of the deck, and the second, third and fourth fingers holding the opposite edge at the fingertips. The first finger rests on top of the center of the pack. Hold the other hand about six inches beneath the hand holding the deck (Photo 6). Use the first finger to push down, with a slight pressure, on the center of the cards. With practice, one by one, they fall off the fingertips into a pile in the awaiting hand below (Photo 7). Once all the cards have been dribbled, turn the deck face-up and repeat. If you’d like to spring the cards from hand to hand, that will help condition the deck too
Drill 3 - Warming the Deck: Place the cards in the palm of your hand, while you place your other hand on top the deck. Apply pressure from both above, as well as pushing from below. In essence, you’re squeezing the deck together (Photo 8). Begin rubbing them back and forth at a feverish pace without letting the cards fall out of your grasp. We’re creating friction with a bit of heat. This helps wear down the varnish on the playing cards so they have smoother characteristics and begin to function better.
6
7
8

10
Drill 4 - Aerating the Deck: During this ‘flex-ercise’, aerate the deck by squeezing it like you’re going to spring them. Hold the pack at the ends by the right thumb and fingers, and bent inward. Exert enough pressure to almost form the letter ‘c’ with the deck (Photo 9). While weakening the cards, it also allows air to flow across the surfaces of the cards. This helps prevent oils from sticking together. Apply this to both sides each time you implement this drill.
*Lynn Searles first published this technique under the description ‘The Weave In Shuffle’, though he credited his friend Alladin as the one who initially showed him (The Card Expert, pg. 29-32, 1938).
Drill 5 - Overhand Shuffling: Move into a two-minute round of overhand shuffling. Instead of randomly shuffling in clumps like you’re used to, run cards one at a time. Rub each card against the next one (Photo 10). This constant friction causes the oil/resin varnish to break down and smooth out. Once you shuffle the pasteboards from one hand to the other, turn them over, and repeat the process. Try to contact each card, on both sides to polish the factory-applied varnish.
9
10

11
Before spreading: Clean your workspace. Dirt can hide on counter tops and close-up pads; you create abrasions by rubbing the dirt across the cardboard as you spread them. This unnecessary friction develops a rash of tiny blemishes on the playing cards. Be sure to wipe your area clean before you begin.
Drill 6 - Washing the Deck: While seated at a table with a padded surface like a felt gaming table or on top of a magician’s close-up pad, casually spread out the cards. Like in a Casino, rub the cards over each other aimlessly mixing them (Photo 11). Poker dealers call this ‘washing’ the cards. It ensures randomness at the gaming tables, but for our purposes, it also affects the contact surface properties of the cards. Once the varnish begins to wear, the cards glide and move much easier due to their smoothness, or lack of friction. Remember to perform this drill with both sides of the deck.
Drill 7 - Ribbon Spreading: Because you’re already seated at the table, start ribbon spreading the cards (Photo 12). Begin at one side of the table and spread to the other. Maintain pressure as you sweep them across the close-up pad, but change your direction often. The more you spread, the smoother the surfaces of the deck become.
11
12

12
CAUTION: These next three drills require more knowledge of card handling. Improper use of these techniques may be detrimental to your playing cards.
Drill 8 - Faro Shuffling: Start faro shuffling the deck by cutting it into two, preferably equal packets (Photo 13). With both hands, adjust them onto each other to align everything, then push them in square by the short sides. The cards alternately weave into each other, much like a zipper (Photo 14). Coalesce the packets together or finish with a bridge shuffle. Either way, you’ll feel the cards rubbing against each other.
With time, 605s faro from both - the top down and the bottom up. No matter if the cards are traditionally or non-traditionally cut, once conditioned properly the 605s perform as you want.
Drill 9 - Fanning: It’s one of the best ways to condition your pack. While difficult at first, the more you run your thumb across the back of the deck and open and close the fan, the smoother the cards become (Photo 15). Keep working through the strenuous clumpy feeling by repeating your actions over and over. Make sure to fan your deck face-up and face down to affect both sides of the cards. Once broken in, your cards will fan as good as, if not better than, any other deck you own.
14
13
15

13
Drill 10 - Le Paul Spreads: Firmly grip the deck in the left hand, between the base of the left thumb and fingers, so that the ball of the right thumb presses down upon the top of the deck (Photo 16). With a powerful squeezing action, one by one, let the cards evenly spring or slide off the tips of your fingers. Simultaneously move the right hand towards the right, supporting the cards horizontally between your hands until the deck flows evenly off the tips of the left fingers (Photo 17). Once you’ve completed a Le Paul spread face-up, flip the deck over and perform it face down.
*Paul LePaul (Paul Shields Braden) first published this technique in 1949. Though rarely seen at the time of publication, expert card men played with this move years before it ever saw print. (The Card Magic of Paul LePaul,1949).
If you practice the above drills once a day, your deck should be broken in after four weeks.
If you’re more adventurous, you can practice much more per day and break them in even faster. By having these cards in your hands as much as possible, your chances increase of breaking them in. Be comfortable and proceed at your own pace.
16
17

14
how do You know when You’re finished?
Great question! There’s no exact answer because it’s subjective. However, firm cards feel springy when you’ve achieved the state of perfect condition. When you evenly spread the cards in the hands or on the table, they are smooth to the touch, with a tiny bit of friction. This resistance aids in many techniques like keeping two cards together when performing a double lift, or with flourishes like fans, springs, spreads, cuts, shuffles and other assorted displays of skill. No longer super-slippery or tacky in nature, the cards are under your complete control.
You'll find your sleight of hand improving using a conditioned pack of 605s. Your cards stay aligned as if stuck together with glue, or the two blocks of cards you’re holding a break between allow only a single card to propel into your palm during a side-steal action. Suddenly, riffle shuffle work, block push through techniques, strip outs and side steals feel more precise and refined with a well conditioned pack of 605s. The same goes for faro shuffles, passes, palming and other controls because they become less demanding and strenuous to execute.
There’s nothing better than a perfectly conditioned pack of 605s!
AUTHOR’S SECRET TIP:
Break-in the entire deck including the Lloyd’s of London guarantee card and jokers because the extra thickness of all 55 cards helps increase hand strength when practicing. Make sure you condition the entire pack in a uniform fashion instead of having three cards that don’t match the look and feel like the rest.
15
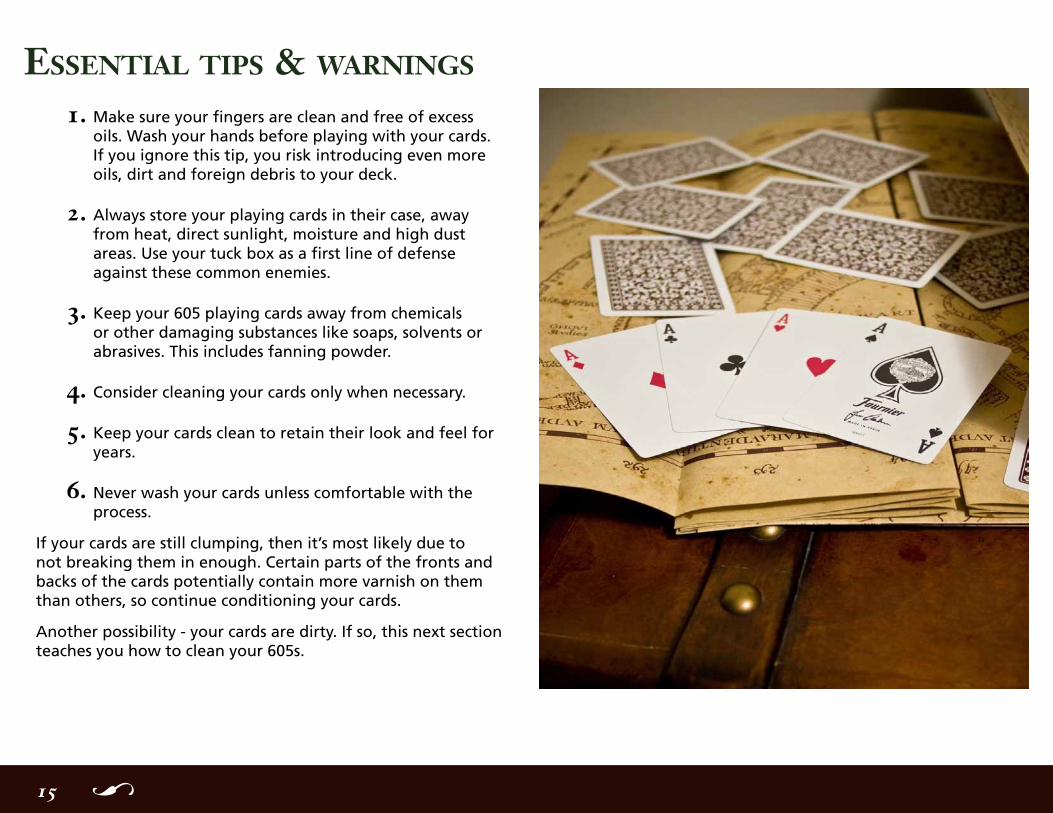
essential tiPs & warnings
1. Make sure your fingers are clean and free of excess oils. Wash your hands before playing with your cards. If you ignore this tip, you risk introducing even more oils, dirt and foreign debris to your deck.
2. Always store your playing cards in their case, away from heat, direct sunlight, moisture and high dust areas. Use your tuck box as a first line of defense against these common enemies.
3. Keep your 605 playing cards away from chemicals or other damaging substances like soaps, solvents or abrasives. This includes fanning powder.
4. Consider cleaning your cards only when necessary.
5. Keep your cards clean to retain their look and feel for years.
6. Never wash your cards unless comfortable with the process.
If your cards are still clumping, then it’s most likely due to not breaking them in enough. Certain parts of the fronts and backs of the cards potentially contain more varnish on them than others, so continue conditioning your cards.
Another possibility - your cards are dirty. If so, this next section teaches you how to clean your 605s.

16
give Your fournier 605s a bath
After playing with your cards for some time they tend to become tacky, especially for those with sweaty hands. Take a close look. Are there little dirt spots built up on your deck of 605s? Finger oils and microscopic dirt love to cling to the surface of playing cards. *With most cards, there’s little that can be done. The 605s are different!
Here’s how to care for your 605s by giving them a proper cleaning. Sure it’s a time-intensive process, but it’s worth it! It also means not having to throw away your deck of cards. That’s a considerable trade-off. Just remember to use caution ANYTIME you bring liquid in contact with your deck of cards.
Needed: - your dirty pack of 605s
- glass of clean, cold water
- 2 dry cloths (cotton)
- room to work on a clean, dry surface
Before starting: Clean your workspace and wash your hands. Dirt can hide between the grooves of tables and on counter tops; you create abrasions by rubbing the dirt across the cardboard as you clean it. This unnecessary friction develops a rash of tiny blemishes on the playing card. Play it safe and wipe your area and your hands clean before you begin.
18
Detailed Cleaning of your 605s:Step 1: Sit at the table with your deck, un-boxed, off to
the side. Rest the glass of clean cold water at arm’s length. Lay one of your cotton cloths down in front of you.
Step 2: Begin by taking one of the 55 cards and submerging it into the glass of water (Photo 18). Make sure water surrounds the entire card and hold it immersed for about 3 to 5 seconds. Any longer and you potentially risk ruining your playing card.
Step 3: Remove it from the water, shake it off, and lay it flat on the cloth in front of you.
*This specific bathing technique will not work with any USPCC brand cardboard playing cards.

17
Step 4: Using the cloth it’s resting upon, begin lightly wiping down the playing card using soft, straight, vertical strokes (Photo 19). Start to see the black dots (a medley of natural oils) detaching from the card. Make sure to swab the entire surface of the pasteboard.
Step 5: Flip the playing card over, then repeat Step 4.
Step 6: Pick it back up and gently wipe down all the edges of the card. Pay particular attention to cleaning these sides well because a decent amount of dirt amasses there.
Step 7: Lay the damp playing card on the dry table. Allow it to air dry for up to an hour per side. It’s important to avoid stacking cards on top of one another while still moist.
Step 8: Duplicate Steps 2 through 7 until you’ve cycled through your entire deck, drying each of the 55 cards to achieve the desired results.
Step 9: By the time you finish cleaning your last card, your first card should be dry to the touch. Take your other cloth (the dry one) and give each playing card one more quick buff (Photo 20). When they are all done drying, gather the cards and begin playing with them. Smile, because you’ll find they’ve maintained their specific feel throughout this entire cleansing process.
The ability to wash a deck of cards you’ve spent hours conditioning, instead of throwing it away, distinguishes the 605s from the competition. Because the 605s are varnished, dipping them in water will not ruin the actual cardboard. Nonetheless, bathing your 605s on a regular basis strips most of the varnish from the cards, rendering them less than optimal.
19
20

18
miCrowave the deCk This seems unconventional and extreme but if you stick your pack of 605s in the microwave, it breaks-down the varnish and helps condition the deck for you. Be careful with this technique, because there’s a chance that you’ll ruin the cards as well as the microwave you’re using. Again, proceed at your own risk and as cautiously as possible!
LEGAL WARNING NOTE: The author DOES NOT suggest you try this, because there’s a chance that the fumes are harmful, the process will contaminate food you cook after, and you might ruin you wonderful 605’s. However, we have been told that if you place your cards in a Ziploc bag and put it in a “craft use” microwave (one that you do not use for the preparation of food) it helps break down the varnish on the cards. Caution!
‘Nuking’ Your CardsUsing a new Ziploc® bag, stick all 55 cards inside (Photo 21), remove as much air as you can, seal the bag, then place it in the microwave (Photo 22). At first, implement the dosage in ten-second spurts (photo 23) until you find the right length of time at which you think your cards have transformed and feel less rigid and more flexible. This requires some experimentation on your part!
When you pull the deck out from the Ziploc® bag, be careful not to breathe in any fumes or burn yourself because of all the heat. Wait until they are cool enough to handle, then begin the twenty-minute conditioning routine detailed above.
Credit goes to Steve Johnson of Carmichael, California for being the first to stick 605s in a glass of water.
21
22
23
Believe it or not, when it’s all said and done, this helps to break-in your pack of 605s. It’s crazy, but true. My friend Ben Train from Toronto, Ontario brought this technique to my attention. Be careful though if improperly administered, damage occurs to your deck and microwave.

19
humiditY vs. the lee asher series 605s
If you’re new to Fournier cards, then you are going to appreciate this small section. Humidity sucks! It’s a major source of trouble for card men and its direct affects are found in the curling or buckling of the paper. Generally cards curl in one direction toward the way the paper sat on the blank roll before printing (Photo 24). Fluctuations in humidity levels, even within acceptable ranges, cause damage as the cards’ fibers shrink and expand.
Subsequently, if you live in a wet part of the world, there’s little to be done to keep the humidity from eroding your playing cards and making them difficult to handle. Ultimately, if not cared for, the 605s succumb to moisture.
Because of the oil/resin varnish used on the 605s, it minimizes and slows the damage caused by humidity. Remember, these cards are manufactured in the North of Spain (Vitoria), where the muggy weather wreaks havoc on ephemera. Fournier knows it and designed cards to withstand this kind of climate.
With all that said, a dry, cool, well-ventilated area is optimal. Avoid storing your 605s in the attic, basement, along a wall, or wherever else moisture and temperature fluctuate to the extremes and where condensation could occur. That invites the growth of mold and mildew, which breaks down the binder layers of the card and potentially mars the surface.
In extreme cases, consider using a dehumidifier or a fan to promote air circulation in the summer, or even spring and autumn if you live in a rainy climate.
Keep your cards clean of dirt and oils and they have a fighting chance to survive on the most humid of days.
On a hot and humid summer day in Toronto, Canada (2011)

20
Fournier (Jarden Inc.)
Kate Pascal
William Goodwin
Aaron Fisher
Keith Pascal
Ask Alexander.com
Tom and Judy Dawson
Devon Elliott
Dr. Wesley James
Mike Powers
Michael Ritter
JB Dumas
Hayato
Markus Cosinus
Ben Train
BJ Bueno
The 52 Plus Joker Organization
Steve Johnson
Rose Rings
My Folks
My Wife
And to all the esteemed members of the LV Magic Mafia.
aCknowledgments I would like to take this opportunity to thank everyone who helped make this manuscript come to fruition. In no particular order:

21
about fournier and the lee asher series 605s
Founded by Heraclio Fournier in 1868, the Fournier card company resides in Vitoria, Spain. Purchased by the US Playing Card Company in 1986, then Jarden Inc in 2004, they continue to keep their old-world style of printing which differentiates them from every other playing card manufacturer in the world.
Constant innovation, the desire to improve the quality of their playing cards, and the exquisite attention to detail make Fournier one of the world’s leading card manufacturers.
For more information about Fournier, please visit their official website.
about lee asher Lee Asher graduated from the University of Nevada, Las Vegas (UNLV) with a degree in hospitality and gaming in 1999. A serious playing card aficionado, Lee spent his life learning about and caring for playing cards so he’s thought of every little nuance that makes the 605s special - perfect for those who appreciate the finer things in life.
Now living in Toronto, Ontario with his wife and puppy, Lee Asher continues to innovate and create magic theories, sleight of hand and playing cards.
For more info about Lee Asher, please visit his official website.
lee asher 605s information
Design of the 605 series deck is simply elegant. While the original Fournier 505 back design invokes beauty and class, we revamped and modified it. Once out of pre-production, Fournier’s art team dubbed them ‘Lee Asher 605 series’.
Without a doubt, you will feel the difference between my high-end 605 series decks and the ones mass produced in the United States.
Each deck of cards go through twelve (12) different quality controls along the manufacturing process, including a final Intelligent Eye printing check and an optical infrared light test to make sure that each deck contains 55 cards.
Unlike other manufacturers, all Fournier decks are cut one-by-one in order to guarantee that all cards (including the edges) are exactly the same size. Has your curiosity been piqued? Purchase some 605s now.
Find more information about these high quality playing cards here.