Concrete Engineering and Technology Prof. Sudhir …textofvideo.nptel.ac.in/105104030/lec6.pdfwhere...
35
Concrete Engineering and Technology Prof. Sudhir Misra Department of Civil Engineering Indian Institute of Technology, Kanpur Lecture - 6 Basic properties of concrete (Refer Slide Time: 00:21) And welcome to this lecture on concrete engineering and technology, which is a course where we are trying to revise the basic principle underlying concrete science and engineering developing a framework, which helps us understand the present day scenario in concrete construction. Going through some of the issues involved in special and high performance concrete and their quality control testing, which includes performance based thinking; durability and maintenance as far as concrete structures are concerned. Now, we have seen this picture before, which gives as basic model as to how we are going to view reinforced concrete in this discussion. This is the concrete surrounding the reinforcing steel which is an integral part of reinforced concrete construction, and this concrete is made up of coarse aggregates suspended in mortar, or paste which is cement and water.
Transcript of Concrete Engineering and Technology Prof. Sudhir …textofvideo.nptel.ac.in/105104030/lec6.pdfwhere...

Concrete Engineering and Technology Prof. Sudhir Misra
Department of Civil Engineering Indian Institute of Technology, Kanpur
Lecture - 6
Basic properties of concrete
(Refer Slide Time: 00:21)
And welcome to this lecture on concrete engineering and technology, which is a course
where we are trying to revise the basic principle underlying concrete science and
engineering developing a framework, which helps us understand the present day scenario
in concrete construction. Going through some of the issues involved in special and high
performance concrete and their quality control testing, which includes performance
based thinking; durability and maintenance as far as concrete structures are concerned.
Now, we have seen this picture before, which gives as basic model as to how we are
going to view reinforced concrete in this discussion. This is the concrete surrounding the
reinforcing steel which is an integral part of reinforced concrete construction, and this
concrete is made up of coarse aggregates suspended in mortar, or paste which is cement
and water.

(Refer Slide Time: 00:52)
And if you look around the coarse aggregate particles, or the fine aggregate particles for
that matter, we have a transition zone which defines the transition from the real solid
cement paste to the aggregate phase, and if we look at blown up picture of the cement
paste, we have solid hydration products somewhere here and that is interspersed with
these pore spaces. We have seen how this pore spaces come about that is basically, on
account of the access water that we use in concrete, over and above that which is
required for hydration of the cement.
(Refer Slide Time: 02:11)

We also have gone through the constitution or the composition of normal concrete,
which consist of course, aggregate, fine aggregate cement and water.
(Refer Slide Time: 02:19)
And the basic processes proportioning, mixing, transportation, placing vibration
consolidation curing and from the point of view of a project, we normally have specific
conditions a set of specifications and structural design and construction methodology,
and then we go through this steps. Thus the discussion as far as the project is concerned
is very specific to that project and the engineer needs to pick and choose, the best option
as far as proportioning is concerned, mixing is concerned, transportation for that project
is concerned and so on and so forth.

(Refer Slide Time: 02:56)
Now, coming to the subject of concrete engineering and technology, this is the outline
which we have defined for ourselves, as far as revising the fundamentals of concrete and
that is what we are doing now.
(Refer Slide Time: 03:08)
Today’s discussion will be largely focused on properties of fresh and hardened concrete,
as we know them. We will confine our discussion to very simple concrete, we will not
get involve with complicated concretes, we will not get involve with special concretes as
far as normal concrete is concerned. What are the properties of fresh and hardened

concrete? We will discuss them in a framework that will help us better understand,
special concretes.
(Refer Slide Time: 03:41)
Now, concrete has basically two distinct states, the first state where it shows behavior
similar to that of a fluid, which can be pumped, it acquires the shape of the mold, in
which it is poured and has little resistance to deformation. In fact this property is at the
root of the popularity of concrete as a construction material in the present day. As far as
the hardened state is concerned, concrete transforms itself into a solid material with
substantial compressive strength and so on. This transformation is brought about by
hydration, and the hydrates of cement provide the basic structure of the chemical
products that give strength to the concrete.
Functionally, concrete should satisfy laid down criteria for the fresh state that is it should
have adequate workability and so on. As far as the hardened state is concerned, it should
have adequate strength as may be decided by the designer. Then there are specific
requirements, which may be in terms of durability. For example, there may be
restrictions on parameters such as the water cement ratio, the cement content and so on.
And there may be some requirements in terms of temperature rise during setting, and so
on and so forth. So, basically the properties of concrete that we study have to be around
these functional requirements that are concrete needs to satisfy.

(Refer Slide Time: 04:43)
(Refer Slide Time: 05:33)
A word about normal and special concretes, there has to be a certain range of the
variables over which the operation or the process can be called normal. And if any of
these processes goes out of that range, or another special process becomes involved, the
concrete needs to be treated as special. This is something which we must keep at the
back of our minds, when we are talking of properties and quality control, which involves
testing of concretes. So, the discussion today would be largely confine to normal
concretes.

(Refer Slide Time: 06:14)
Coming to the properties of fresh and hardened concrete, we know that it should have the
required properties in the fresh and hardened state, meet durability requirements. And
here are some of the properties which are actually listed, fresh concrete workability, air
content, segregation resistance, flow ability in hardened concrete, we have compressive
strength may be tensile, and flexural strength, stress strain curve, creep and shrinkage
and so on.
(Refer Slide Time: 06:36)

So, this here is the list of properties that we will be talking about in our discussion today,
as far as the properties of fresh concrete are concerned, workability, air content,
temperature setting time and bleeding. As far as hardened concrete is concerned, we will
try to focus on compressive strength, tensile and flexural strength, the modulus of
elasticity, the stress strain curve, creep and shrinkage, permeability and durability and
see where we go.
(Refer Slide Time: 06:50)
(Refer Slide Time: 07:06)

Now, coming to the workability part of it, what is workability? We often see in literature
term is workability and consistency. And if you look at the definitions, which may be
available in different texts, workability is defined as the ease of being able to work
concrete into different parts of a formwork. Consistency on the other hand, is sometimes
defined as the amount of work required to be done, in order to compact the concrete.
Please note that the two definitions are completely opposite in the sense that a concrete
with a high degree of workability, will have a low level of consistency
Now, given a concrete if it is very highly workable by the definition that is proposed
here, what it means is that it will easily occupy, the different corners of a mold and is
very easy to work with. It naturally implies that the amount of work done, or the amount
of work required to be done, in order that the concrete is compacted would be very low.
As far as we are concerned in this discussion not only in the discussion today, but also in
the discussion during the course of the different lectures, in this course we will follow
this definition of workability. When we say that the concrete is highly workable we mean
that it is very easy to work with, when it is harsh or less workable the concrete requires a
lot of work to be done, in order to compact it or in order to make sure that it occupies the
different corners in a formwork, and so on and so forth.
(Refer Slide Time: 08:57)
Now, let us come to a schematic or a qualitative description of workability. Workability
has a range from a stiff concrete to flowing concretes, and then in between here we have

what can be called a normal concrete and that is what I said that, in order for a concrete
to be classified normally. We have to understand that we are talking of a certain range of
workability, both on this side as well as on this side the concrete needs to be treated as a
special concrete and different tests, different specifications need to be brought into play.
So, as far as the methods for measuring quantitatively, the workability of normal
concrete is concerned. We have two tests the slump and the compaction factor there is a
slightly different range over which these tests help us, differentiate between two
concretes. When we go towards stiff concrete, the workability is better represented by a
test called the vebe time. When we go into the regime, where the concrete begins to flow
then the workability is better represented by a test like the slump flow.
What we must remember from this diagram is that in this range for example, the slump
or the compaction factor test is not a discerning test, it will not be able to differentiate
between the workability’s of one concrete versus another. Similarly, in this range the
slump and the compaction factor will be unsuccessful, in any attempt to classify the
concrete or characterize the concrete, or better understand their workability’s and we
need to go to the vebe time.
(Refer Slide Time: 11:34)
On the other hand vebe time will not be the best test, to carry out if the concrete
consistency or the workability is in this range. The times will almost mix the same that is
something, which we must remember when we pick and choose a particular test, we

should be careful then the test is appropriate and helps us, actually be able to
differentiate between two concretes or a concrete mix today, and tomorrow and so on
and so forth.
Now, coming to a few test let us look at the slump. This is the slump that we have for a
stiff concrete, if you notice the slump cone has largely retained with shape and we have
more or less a zero slump kind of concrete. Whereas, this test here is the slump, which is
normal and it is a normal concrete where the slump can be used, as a discerning test.
On this side here we have a highly workable concrete, and the slump cone completely
collapsed. And we need to differentiate or we need to measure the workability of
concrete not in terms of the slump, but in terms of the diameter of this is spread, this is
something which we will talk about in greater detail, when we are talking about special
high flowing concretes like the self compacting concrete and so on.
(Refer Slide Time: 12:41)
For the sake of completeness, this picture here shows the vebe apparatus for
determination of workability of concretes which are stiff, these concretes are used in
applications such as dams, roller compacted concrete pavements and so on. And the
measure that is the vebe test gives us a response in terms of seconds, I am leaving the
actual method out of the discussion today, and expect that you will be able to read it on
your own and know that how we determine, the actual seconds involve or the time

involved for the test to be completed and those seconds or that amount of time helps us,
quantify the workability of the concrete in terms of the vebe time.
(Refer Slide Time: 13:36)
Continuing from there let us talk of the compaction factor test basically, what this test
does is allows the concrete to fall from one container to another and then to another. And
we compare the density of the concrete obtained here, with respect to another density
which is obtained by filling the same container, and compacting the concrete using
vibrators and so on. So, that we get the maximum possible density.
So, the compaction factor is a measure of how much, the concrete allowed to fall from
this place to this place, and this place to this place how much has that been compacted
with respect to a properly compacted concrete, and with as far as that is concerned we
get numbers like 0.8, 0.9, 0.95 which moves towards more and more workable concretes.
If a concrete has a compaction factor of 1 what it means, is that the compaction achieve
by along the concrete to fall from container a to container b and finally, to container c is
the same as the amount of compaction that was obtained by filling the container c, with
the concrete and trying to compact it to the extent possible using internal vibrators, and
so on.

(Refer Slide Time: 15:11)
Now, let us come to segregation resistance which is a slightly different property concrete
we know is a mixture comprising of coarse aggregates suspended in mortar. Mortar
being a mixture comprising of fine aggregates suspended in a fluid phase of cement
paste, and a cement paste itself is a mixture of very fine cement particles suspended in
water, which is a fluid.
Now, separation of the solid phase from others in any of these cases whether, it is
concrete or it is mortal or it is paste can be called segregation. And the ability of the fluid
phase to resist it is called segregation resistance. So, as far as concrete is concerned for
example, if the mortal moves forward leaving all the coarse aggregate behind, we say
that the concrete, we say that the concrete does not have adequate segregation resistance
because the fluid that is mortar is not able to resist the separation of the coarse aggregate
from it.
Similarly, we can talk in terms of segregation a mortar and in the case of cement paste
segregation really boils on to the separation between water, and the cement particles. We
must remember that the properties of the fluid phase in all these cases, are time
dependent due to the continue hydration of cement, which starts as soon as the water and
cement come together and that happens in the mixture itself.
Accept that of course, in the first few minutes or the first few tens of minutes, we may
assume that that something which we have to live with. Having said all this there are no
standard tests to measure segregation resistance, and we can only talk in terms of
segregation resistance in qualitative terms that is we look at a concrete, or look at a
model and say that segregation has occurred, we are not able to quantify this so far, and
it is a challenge to concrete engineers to develop an appropriate and a robust test.
One of the important things we must remember, as far as concrete engineering is
concerned is that all the test that we do should be robust. We should be able to carry out
these tests in the field, often with not very sophisticated equipment often using not very
well educated or very highly qualified professionals. There may be professionals with the
lot of experience, but they may not have all the background that is required to understand
the hydration process, or the strength development process and all that.
(Refer Slide Time: 18:23)
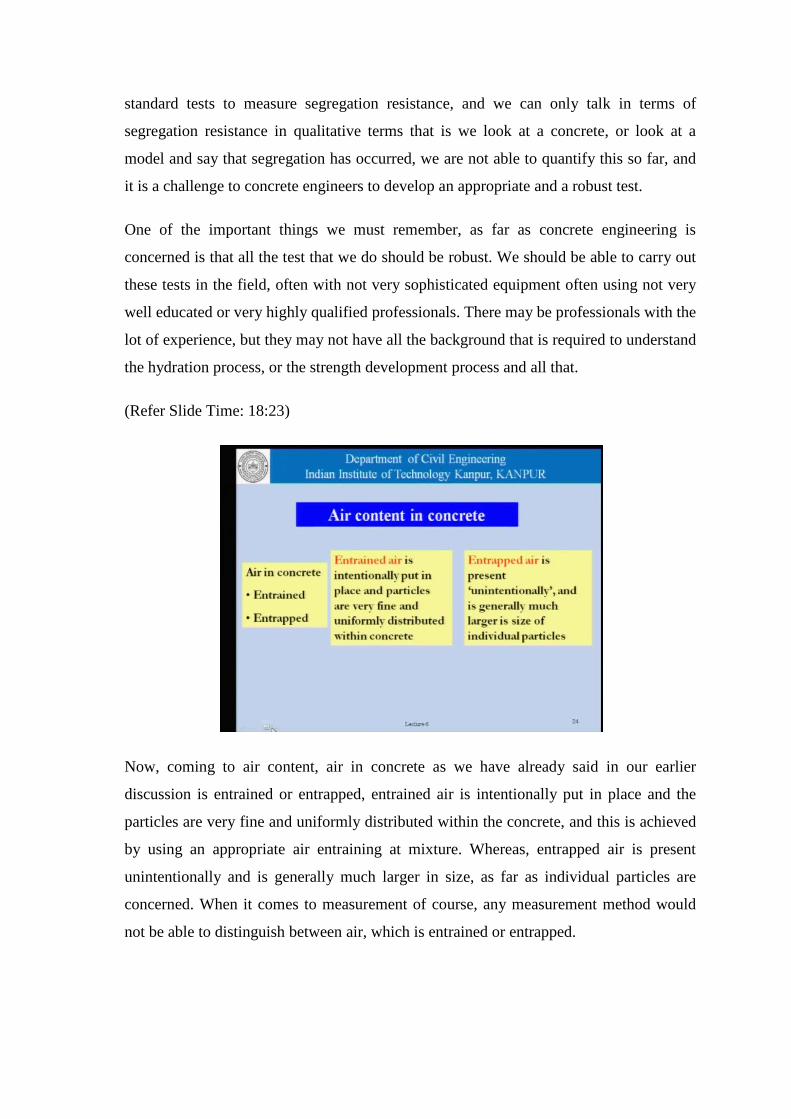
Now, coming to air content, air in concrete as we have already said in our earlier
discussion is entrained or entrapped, entrained air is intentionally put in place and the
particles are very fine and uniformly distributed within the concrete, and this is achieved
by using an appropriate air entraining at mixture. Whereas, entrapped air is present
unintentionally and is generally much larger in size, as far as individual particles are
concerned. When it comes to measurement of course, any measurement method would
not be able to distinguish between air, which is entrained or entrapped.

(Refer Slide Time: 19:06)
Let us take a look now as far as a content is concerned depending on whether, the
concrete is air entrained or non air entrained that is it has an air entraining at mixture, or
it does not have an air entraining at mixture. The air content may be taken as a specific
value may be about 1 and 2 percent depending on the shape, and size of aggregates
etcetera. However, and air content of about 4 to 6 percent is prescribed for concretes
which are exposed to cyclic freezing and thawing and what the air. Now, what is the air
entrainment to there are three things involved, one is increase in workability, air
entrainment increases workability through the ball bearing action of air particles.
There is a tendency for some decrement in strength, as the air particles serve as points for
stress concentration and also basically, they are voids and at the end of it higher the voids
the strength has to be low. Then it improves the resistance to cyclic freezing and thawing
so basically there are these three things, which we must keep in mind when we are
talking of air entrainment concrete.
As far as an interplay between these two is concerned, it will not be very fair to say that
air entrainment decreases the strength, though I have said here that air content decreases
the strength, we should remember that air entraining at mixtures also tend to disperse the
cement particles and that helps us get a larger, area available for the hydration of cement
and that tends to increase the strength of the cement paste or the concrete.

(Refer Slide Time: 21:22)
So, really speaking air entrainment does not necessarily lead to a net reduction in
strength, but in principle yes, as we increase the air the strength tends to go down. Now,
taking a closure look at the air entrainment concrete using air entraining agents, these
particles are in the range of about 30 to 250 micrometers and diameter, and they set in a
concrete matrix much the way this these red dots are shown. And there are water voids
which are all over the place and so on.
(Refer Slide Time: 21:45)

When it comes to the resistance against freezing and thawing, what we are trying to do
really is to see how these air particles help, in dissipating the forces that will arise or the
pressures that will arise, when these water voids or these voids full of water. The water
in these voids tends to freeze on account of a temperature in the atmosphere, which may
go below 0.
So, as the temperature goes below 0 here at the surface of concrete there is a thermal
gradient the temperature distribution within the concrete is established, and we see that
near the surface this water in the pores or pore spaces or voids that tends to freeze. And
once this water freezes it expands, and these air particles around the water they provide
some kind of a outlet for the water that is getting pushed out, on account of the freezing
action thereby, holding the concrete together in this area and that is how the kind of
loosely or simplistically explain, better performance of air entraining concretes as far as
freezing and thawing is concerned.
(Refer Slide Time: 23:14)
This is another schematic representation of how, we rate the durability factor and the air
content. This really is the result of a lot of test carried out with concretes in this range of
air content that is between 0 and say 1 and a half 2, 3 percent and concrete having air
content of 4 percent to 5, 7, 8 percent and there we see that the performance as far as the
durability factor is concerned, and this durability factor is a measure of the performance
of concrete under cyclic freezing and thawing.

This test being carried out by exposing the concrete to cyclic freezing and thawing, and
see how the pore structure in the concrete deteriorates or undergoes the stress, under the
action of these forces and we find that these concretes perform much better than the
concretes in this area, that is to say air entrainment helps the performance of concrete in
freezing and thawing.
(Refer Slide Time: 24:27)
(Refer Slide Time: 24:51)
This is a simple device of measuring, the air in fresh concrete and the importance of
using air measurement or air content measurement in fresh concrete, is becoming more

and more important, as we are using air entrained or air entraining at mixtures. Now,
coming to the temperature this here is a setup which is sometimes used to study, the
changes in temperature on account of the liberation of the heat of hydration, we have
seen that when cement hydrates it liberates a lot of heat, and that heat liberation leads to
an increase in the temperature of concrete, and we want to monitor this temperature rise
which is at the root of the formation or introduction of thermal stresses in the concrete.
And this setup which is shown here records, the increase in temperature in concrete on
account of the liberation of heat of hydration of cement. So, what we really do is place
the concrete which to use in a particular application. So, it is a test which is semi field
oriented, we decide the mix to be used in a particular project, use exactly that mix the
same materials especially, the cement and then try to study how the temperature rises for
that particular cement for that particular proportion, and we maintain adiabatic
conditions to get standard results. And variation in temperature of concrete is recorded
through an instrument panel as shown and of course, this is a close up of this container
which houses the concrete.
(Refer Slide Time: 26:18)
The initial temperature of placement is an important factor that determines, the
maximum temperature reached during hydration. At times efforts such as pre-cooling of
constituent materials, use of chilled water and so on are resorted to keep the temperature
of fresh concrete in check because there may be specifications, which say that the
temperature of fresh concrete should not exceed a certain number, may be 20 degree
centigrade may be 18 degree centigrade and so on, depending on the application.
So, measurement of the temperature of fresh concrete is a very important parameter, as
far as the quality control of concrete is concerned in those projects, that temperature of
fresh concrete is important when we try to understand, what will be the maximum
temperature that is reached during the hydration process. If we lower the temperature of
fresh concrete, we will get a lower peak temperature reached.
And if we are able to reduce the peak temperature raised, we will be addressed the
problem of introduction of thermal stresses in concrete construction. This discussion is
especially relevant, when we are talking of mass concrete applications such as though
that such as, those in dams sometimes in roller compacted concretes and also, sometimes
in high strength concretes where the amount of cement being used is really large.
(Refer Slide Time: 28:06)
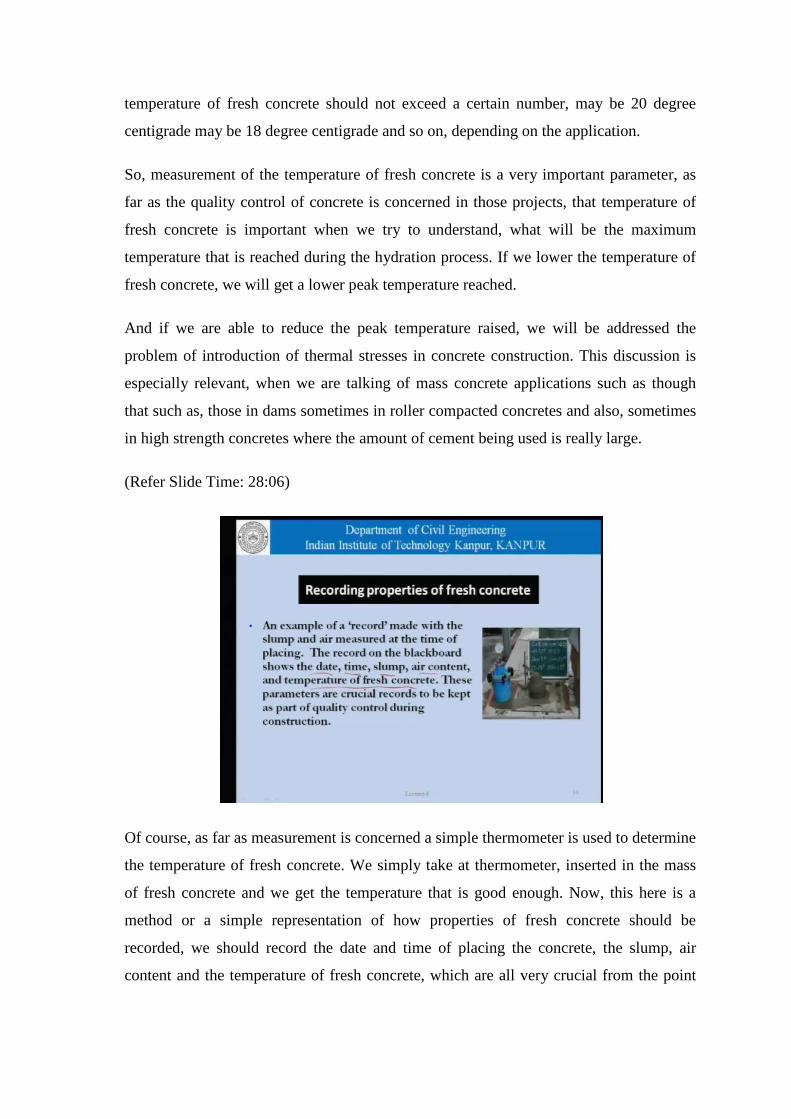
Of course, as far as measurement is concerned a simple thermometer is used to determine
the temperature of fresh concrete. We simply take at thermometer, inserted in the mass
of fresh concrete and we get the temperature that is good enough. Now, this here is a
method or a simple representation of how properties of fresh concrete should be
recorded, we should record the date and time of placing the concrete, the slump, air
content and the temperature of fresh concrete, which are all very crucial from the point

of view of good record keeping or archiving of properties of concrete used, in the
different pores of a concrete construction.
(Refer Slide Time: 28:36)
Now, coming to setting time…
(Refer Slide Time: 28:41)
Concrete sets overtime, as a result of the formation of more and more hydration
products, during hydration. Now, we are familiar with the setting of cement and we
know the initial setting time, and the final setting time of cement is a quality control
parameter. And we have specifications which say, that the cement should not have a

initial setting time higher than something or lower than something, it should not have a
final setting time, which is higher than something or lower than something.
Now, even though in the case of concrete the setting time of concrete itself is somewhat
related to that of cement, but it is obviously exactly not the same because the cement
setting times are determined using paste. Whereas, concrete is not a paste, concrete has
vary amounts of cement it has varying amounts of what a cement ratio, it is placed under
different conditions and therefore, it is not proper to talk in terms of relating directly, the
setting time of cement and that of concrete.
This picture here shows the view of the proctor’s apparatus, which is used for
determining the setting time of concrete, the principle is the same as that you use in the
vicat apparatus for cement and that is penetration resistance of course, we use a set of
needles as shown here, and these needles are changed over a period of time as more and
more setting takes place.
(Refer Slide Time: 31:13)
The test is carried out at regular intervals, we try to study the penetration of these
needles, and once the penetration resistance reaches a level of 500 PSI, and 4000 PSI.
And leaving in the conversion to the SI units out of here, please do it at your end, and
when the penetration resistance reaches these levels, we say that the concrete has reached
initial set and final set. The initial set corresponds to a penetration resistance of 500 PSI

and the final set refers to a penetration resistance of 4000 PSI, and of course, we must
make sure that that it is not taken very close to each other, or close to the edge.
We will talk about a little more, when we look at the actual set up, this shows the actual
set up this of course, is the same picture as we saw just now, this is the test for the setting
times being actually, carried out we can see that there is a mold which has been filled
with mortar. Now, the concrete is wet sieved to remove the coarse aggregate from the
concrete; and then we have basically, what is left here is mortar and here is the proctor
apparatus, where we are trying to plunge a needle into the concrete and observing the
penetration resistance on the dial gauge. There is a manual version there are automatic
version so on, which are available and at the end of it based on the values that we have
500 and 4000 that we talked about in the last slide, which are essentially arbitrary in
nature, we can define the times for the initial and final set.
(Refer Slide Time: 32:10)
This here is the schematic representation what really goes on, the setting time can be
affected by the presence of chemical and mineral admixtures. The initial setting time and
final setting time of cement is basically, a quality control measure for cement and not for
concrete. So, we may have a situation where if you plot penetration resistance, we can
get these values and what we try to do is to say that at this penetration resistance, which
is 500 P S I and at this penetration resistance which is 4000 PSI.

What are the times that correspond to the penetration resistance, and we take t 1 and t 2
to be the initial and final setting times. What is the importance of the setting time of
concrete as far as concrete and engineering is concerned, that is from the point of view of
cold joints, design of formwork removal, concreting rates as far as these things are
concerned, we are very much interested to know, what exactly is the setting time of
concrete. How much is the initial setting time, how much is the final setting time that
will help us better control formations of cold joints design of formwork, removal
concreting the rates of concreting and so on.
(Refer Slide Time: 33:31)
When we are doing setting time for concrete, when we are trying to do the setting time of
concrete or measure the setting time of concrete, we said that the concrete is wet sieved
to remove the coarse aggregate. Now, the logic for that is given here, it is only the mortar
phase that contributes to the setting of concrete. Coarse aggregates their presence does
not really affect the hydration process.
And therefore, we may say that we can actually, neglect them or ignore their presence
and just work with the mortar, as far as the setting time is concerned. Though in
principle, we can extend that argument to mortar as well and try to remove the sand, but
the engineering difficulty in removing sand from a concrete mixture, mix impossible for
us to do that and therefore, we are happy or we have to live with the fact, that we will
work with mortar, and try to call that as the setting time of concrete.

The method is based on penetration resistance to the needle, and the presence of an
aggregate, coarse aggregate could interfere with the readings whether or not the needle
comes in contact with the coarse aggregate or not as shown here. So, if there is a needle
here and we have a coarse aggregate setting, very close to the surface or coarse aggregate
is setting somewhere here, which is away from the surface the reading in this three cases
will be quite different.
So, in order to get rid or make sure that the readings that we get are independent of the
position of the coarse aggregate within the mass, we remove the coarse aggregate of
course, if we want to use the coarse aggregate then the size of the needle also, needs to
be changed. The size of the needle is decided on the basis of the size of the particles, that
the needle is trying to penetrate, but needle size should be larger than most of that
particle size. In fact, all the particles that are present in the phase that we are trying to
study here.
(Refer Slide Time: 35:57)
Now, coming to the last property of fresh concrete that we will discuss, that is bleeding.
Bleeding is a form of segregation and is the movement of water, present in concrete
towards the top of the placing. The some of this evaporate the water that cumulates or
appears in the surface some of it evaporates, some of it is absorbed back and results in
the higher water cement ratio in the top layer, we will try to take a look at the schematic
representation of this process in a later slide.

Here what is shown is how the bleeding is determined, we try to draw out and measure
the water that appears or collects at the top of a cylindrical vessel, and the bleeding water
is collected using a measuring cylinder and a pipette. So, what we do is collect the
concrete in a cylindrical vessel like this, which is covered with the lid and as the water if
we have this is the cylindrical lid we fill the concrete up to this point. Whatever, water
appears at the surface here that is drawn out, and the lid is closed back. This process is
continued till such time, as the water seizes to appear on the surface.
(Refer Slide Time: 37:06)
The test as it says, here involves filling up the concrete in a cylindrical vessel 25
centimeters in diameter up to height of 25 centimeters in three layers, damping each
layer for compaction. Concrete is then allowed to stand and the water collects at the top
surface is drawn off, using a pipette and the whole container may be gently tilted to one
side to facilitate collection of water, the water emerging at the top is collected at regular
intervals. And we continue this process till such time as the water seizes to appear.
This series of pictures here shows, what goes on in the bleeding process as water that
accumulates at the top during bleeding, part of it evaporates as shown here and part of it
is reabsorbed in the concrete and therefore, this concrete here becomes a small layer of
concrete, which has a water cement ratio which is higher than the main body concrete
here because this is the concrete, which has a water cement ratio of the original mix more
or less.

(Refer Slide Time: 37:33)
Whereas, this is the concrete here which has more water, the water in the mix as well as
the water that first appear at the top and that was reabsorbed on account of bleeding,
bleeding is measured in terms of a bleeding ratio, which is expressed as the ratio of the
water collected to that present in the sample. So, once we know the amount of concrete
that we have taken we know the mix proportion that concrete. So, we know the amount
of water in that sample depending, on how much water we have what proportion of it is
collected or is removed in the bleeding test, gives us the bleeding ratio.
And this diagram here shows how the accumulated water or accumulated bleeding water
moves initially, we do not have too much water coming, but gradually you find that a lot
of water moves in appears in the surface and finally, no more water appears at the
surface and that is the end of the bleeding test. We have this as the total amount of water
that has appeared, and this is the thing this parameter is compared with the water present
in the sample to give us the bleeding ratio.
Now, coming to the properties of hardened concrete as far as the characteristic
compressive strength is concerned, this here is a picture of how the strength that we
determine or variation of compressive strength goes in more or less, take it to be a
normal distribution about a certain mean. And the characteristic compressive strength is
defined as that number here, below which not more than 5 percent values fall that is the

area of under the curve below here area under the curve, up to this point is not more than
5 percent.
(Refer Slide Time: 39:36)
In other words, the area on this side of the curve which is the portion, which is higher
than the characteristic strength is 95 percent. And once we have this picture, we have
what is called the target proportioning compressive strength that is the strength, which is
used to proportional concrete mix and that is the mean value here. So, we need to target
the concrete proportions in a manner that the mean strength is here, which is higher than
the characteristic compressive strength by an amount, which is related to the standard
deviation that are obtained.
Such that once a large number of samples are tested, not more than 5 percent of those
samples will fall below the characteristic strength. Now, that is something which is part
of the discussion, when we do compressive strength determinations and do quality
control of hardened concrete, and try to see acceptance criteria and so on as we shall see
later on when we talk about quality control, and concrete construction.

(Refer Slide Time: 41:21)
Now, coming to tensile and flexural strength, these strengths or the tensile strength or the
flexural strength of the concrete are often given in terms of the compressive strength,
codes may give expressions to enable a designer to estimate the tensile or the flexural
strength, in certain cases where it is these parameters that really govern the design and
that happens for example, in road construction, repair works and all that, there in the
absence of data if we do not determine these parameters directly, they are allowed to
determine the or estimate, the tensile and flexural strength on compressive strength.
(Refer Slide Time: 42:10)

But if we have to actually determine them, this here are two methods which is a modulus
of rupture or the split cylinder test, which are used to estimate the tensile strength of
concrete maybe tensile cylinder strength or the modulus of rupture. Modulus of rupture
being determined by a prismatic beam and the split cylinder test, being carried out as
shown in this picture which essentially, involves applying the load on a cylinder in this
fashion, which gives us a stress distribution as shown here and causes the cylinder to
split along the diameter. So, this gives us the tensile strength or the split cylinder tensile
strength and that is how it determines tensile strength, should that be required in a
particular application.
(Refer Slide Time: 43:03)
When it comes to flexural strength, which again is required in certain structure which are
governed by flexural strength. The ASTM for example, gives us the alternative of the
third point loading or the center point loading. The third point loading basically, says that
we have a prismatic beam and we apply the load at two places on the top, and these three
spans are equal.
So, we have the third point loading that is what call the third point loading whereas in
this case the load is applied at the center. And depending on what method you are
following particular standard, we follow in a particular country, we determine the
flexural strength of concrete directly because this is indeed concrete failing in flexure,
directly we get this is indeed failure of concrete in flexure.

(Refer Slide Time: 44:03)
Now, coming to the stress strain curve and the modulus of elasticity of concrete that
again is a very important property, and sometimes we use a compressometer as shown
here using a cylindrical specimen, and the load being applied to the cylindrical specimen
and the deformation in the cylindrical being measured, or recorded using either dial
gauges that shown here in a compressometer, or using normal strain gauges which are
fixed to the surface of concrete. And we get the stress strain curve of the concrete and
based on the stress strain curve, we can calculate the modulus of elasticity.
(Refer Slide Time: 44:49)

Now, in the case of concrete the stress strain curve is often non-linear and then flat, we
are talking of strain at this axis and stress here. So, how do we determine or estimate the
modulus of elasticity of a material, which has a stress strain curve which is not really
linear. So, as far as concrete is concerned there are different definitions which tell us,
either we can take the tangents at different points and time, and the we can take the
tangents at different points, along the stress strain curve and that gives us the slope of
these lines, gives us the modulus of elasticity or we can talk in terms of a certain part of
this graph and try to talk in terms of a modulus of elasticity, which is essentially defined
by the slope of this line.
Another possibility is to talk in terms of the modulus of elasticity or the slope of the line
at the initial point of the stress strain curve. So, there are different ways of defining the
stress strain curve of concrete and different specifications, do different things.
Specifications also allow us to use an expression, which is of the type that the modulus
of velocity is equal to sum constant times, the root of characteristic strength or some
such expression, where this constant is given and this is an empirical equation which
allows a designer to estimate the modulus of elasticity, from only the characteristic
compressive strength, in the absence of the actual stress strain curve that can be obtained.
(Refer Slide Time: 46:48)
Continue on the properties of hardened concrete, we talked about shrinkage in concrete
and the creep. Now, as far as shrinkage is concerned though the shrinkage itself is very

small, but it is the source of quite lot of problem including cracking. There is shrinkage
cracking that occurs in concrete unless steps are taken to ensure that shrinkage is kept
under control, and extent of shrinkage that we get is related to the proportions of
concrete constituents and specially the type and properties of the cement, and the size of
aggregates.
So, this here is a length comparator which has a standard length bar, and based on this
length we can use the frame shown here to study the small changes in length, that occur
in a concrete prism which could be of a certain size. So, if we have a concrete prism
which is shown here and we have a length corresponding to that, the changes in this
length here, sometimes concrete expands or it contracts whatever dimensional changes
take place here that can be measured using a comparator. As far as the laboratory
techniques are concerned, there are often very sophisticated equipment which needs to be
fabricated and used, if we are doing a research work using shrinkage of concrete.
(Refer Slide Time: 48:24)
Coming to the last two properties permeability and durability, well take them up in a
separate discussion when we are talking in terms of the porosity of concrete relating it to
permeability, and both these parameters are very closely linked to durability studies. So,
there is something which we will do later.

(Refer Slide Time: 48:54)
And at this point we are ready to conclude the discussion for the day, and we should try
to see what else we need to know about to complete or understanding of what, we have
talked about today. I would like you to measure the workability of concrete in the
laboratory, and try to see how it varies, how it varies once we change especially the what
a content of the concrete. I would like you to make a list of air entraining admixtures
available in the market, and their chemical composition, it will be a good exercise to
understand, the chemistry involved at least to some extent of the interaction between the
chemical admixtures, and the cement and so on in terms of the air entrainment.
If we make a list of specifications that restrict the maximum temperature of concrete at
the time of placing as a quality control measure that will enable you to understand or
having appreciation of the fact as to why we need to measure, and record the temperature
of fresh concrete. We talked of three different test the vebe test, the normal slump test
and the slump flow kind of test, the compaction factor kind of test and of course, in
regions, where these tests can actually be used together they are obviously, is a
relationship between this test, if the compaction factor is increasing for different
concretes a, b, c and d which are increased, which are arranged in the order of increasing
compaction factors, how will this slumps vary.
What is a relationship between slump and a vebe test? A study of these relationships
between the different tests will help you understand, the whole idea of measurement of

workability better, and the last thing that I have here is to obtain and study the stress
strain curve of concrete, and compare it with an idealized curve, which is often used by a
designer; with this we come to an end of the discussion for the day.
Thank you.