
Computer Forensics CCIC Training - Amazon Web Services · 2019-05-23 · Computer Forensics CCIC...
12
Computer Forensics CCIC Training Chapter 15: Reporting and Timeline Lauren Pixley, Cassidy Elwell, and James Poirier May 2019 (Version 2)
Transcript of Computer Forensics CCIC Training - Amazon Web Services · 2019-05-23 · Computer Forensics CCIC...
Computer Forensics CCIC Training
Chapter 15: Reporting and Timeline
Lauren Pixley, Cassidy Elwell, and James PoirierMay 2019 (Version 2)

This work by California Cybersecurity Institute is licensed under a
Attribution-NonCommercial-NoDerivatives 4.0 International License.
Copyright © 2019. All rights reserved. Page 15-1
Introduction
After you complete your analysis of the forensic image, you will need to create a timeline and a report.
Since this is still an introduction to digital forensics, your report will be simple and you will only stick to
the key points of Who, What, When, Where, Why, and How. You will also want to create a very simple
timeline of only the important events that happened on the computer, such as an incriminating email
being sent or a file of interest being opened. This chapter will use the Craig Tucker case as an example.
Report
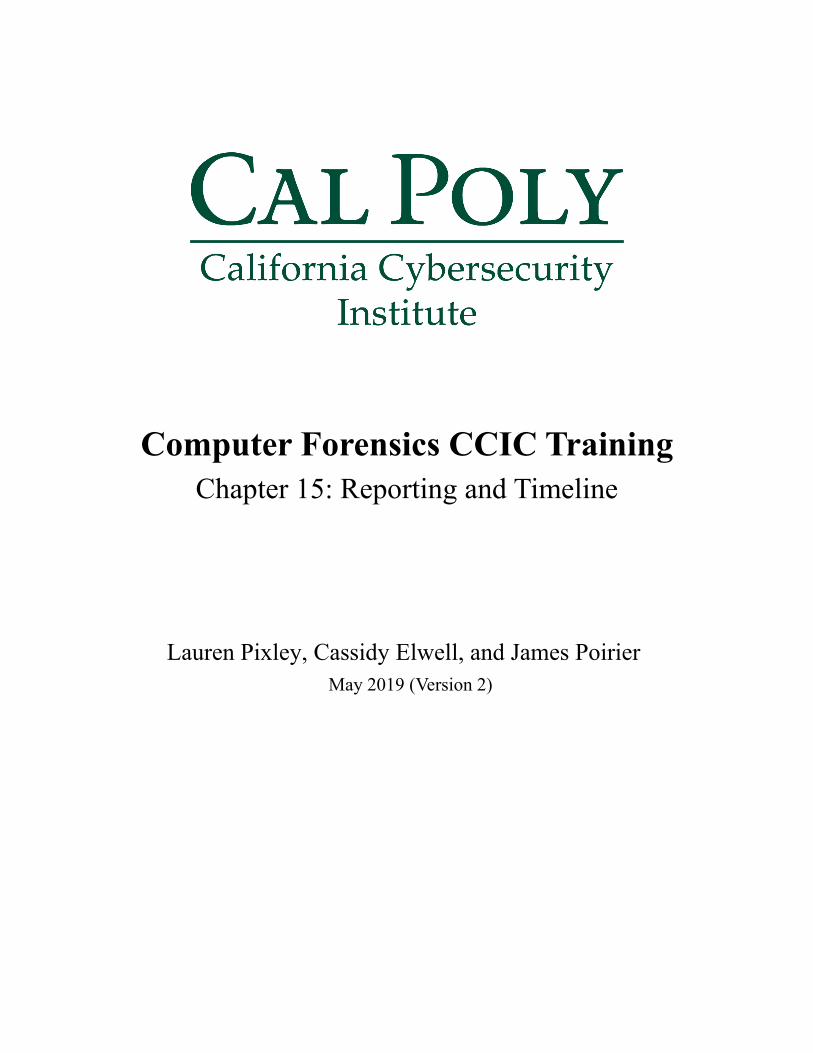
For the CCIC Event, you are expected to create a presentation (PowerPoint, Prezi, etc) that discusses
Who, What, When, Where, and How. When you answer these questions, you will want to support your
answer with as much evidence as possible. You can back up your answer with emails, Internet searches,
files opened, or anything else of interest that relates to your response. For your presentation, you will
want to have your title slide with the case name and each team member name.
Figure 15-1 – Title Slide with Case Name and Team Member Names

Chapter 15
Copyright © 2019. All rights reserved. Page 15-2
Your next slides should focus on the Who part of the report. When writing your answers on who the
suspect is and who they were communicating with, you can easily go beyond just the simple points made
below for the Craig Tucker case. Some cases you might find pictures of the suspect, personal documents
with their information, or see them logging into personal accounts online.
Who was the suspect?
1. You know based on the scenario given at the beginning that the main suspect was Craig Tucker.
2. After searching through the Windows Registry, you determined the only user account was named
Craig.
3. After going through the Windows 8 Mail App, you found emails that were sent and received by
Craig Tucker under the email address “[email protected]”.
4. After looking at the Google Chrome history and Windows 8 mail, you found Facebook accounts
for Craig Tucker.
5. After reviewing the Skype chat logs, you saw chats to and from Craig Tucker.
Reporting on who was using the computer is important, because later you want to be able to prove that the
suspect was the actual one behind the keyboard. You will also want to report who the suspect was talking
to, because you may need to make recommendations to go after other accomplices. Your second slide
after your title slide should focus on who the suspect was.
Figure 15-2 – Slide on Suspect
After the second slide, you will want to include a slide on who the suspect was communicating with. This
can include people he simply talked to or actual accomplices to a crime. Make sure to support your
findings and show how the suspect knows the person if possible. You will also want to report who the
suspect was talking to, because you may need to make recommendations to go after other accomplices.
Reporting and Timeline
Copyright © 2019. All rights reserved. Page 15-3
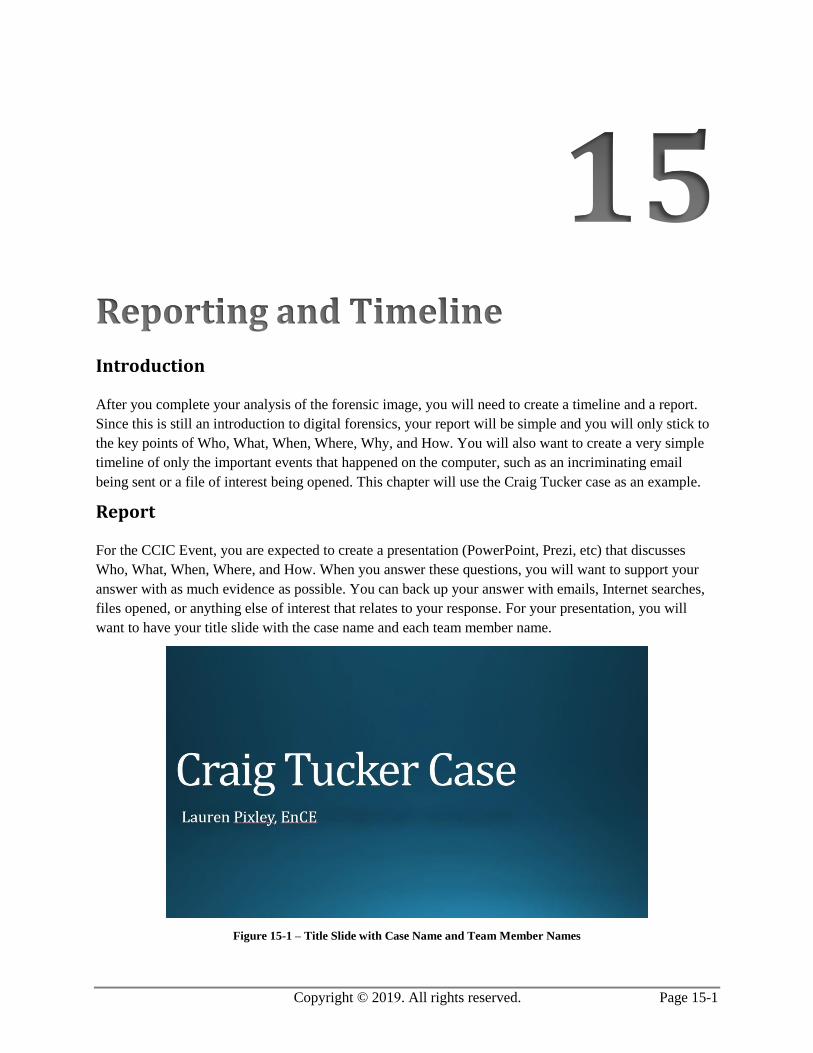
Who did the suspect talk to or work with?
1. Craig sent and received emails from Stan Marsh, Kyle Broflovski, and Kenny McCormick about
creating coupons. They also traded email attachments of coupons and guides on how to make
them.
2. Craig talked to Kenny McCormick through Skype chat about coupons.
3. Craig sent and received emails from Stan Marsh about underage pictures.
Figure 15-3 – Slide on Witnesses and Accomplices
Next, focus on the What section of your report. For this section, you want to include what crimes the
suspect committed or what they were planning on doing. You can support this through emails,
documents, guides, chat, or anything else that shows they intentionally did something or planned
something (see Figure 15-4). The What section can be put into one slide or multiple ones if necessary.
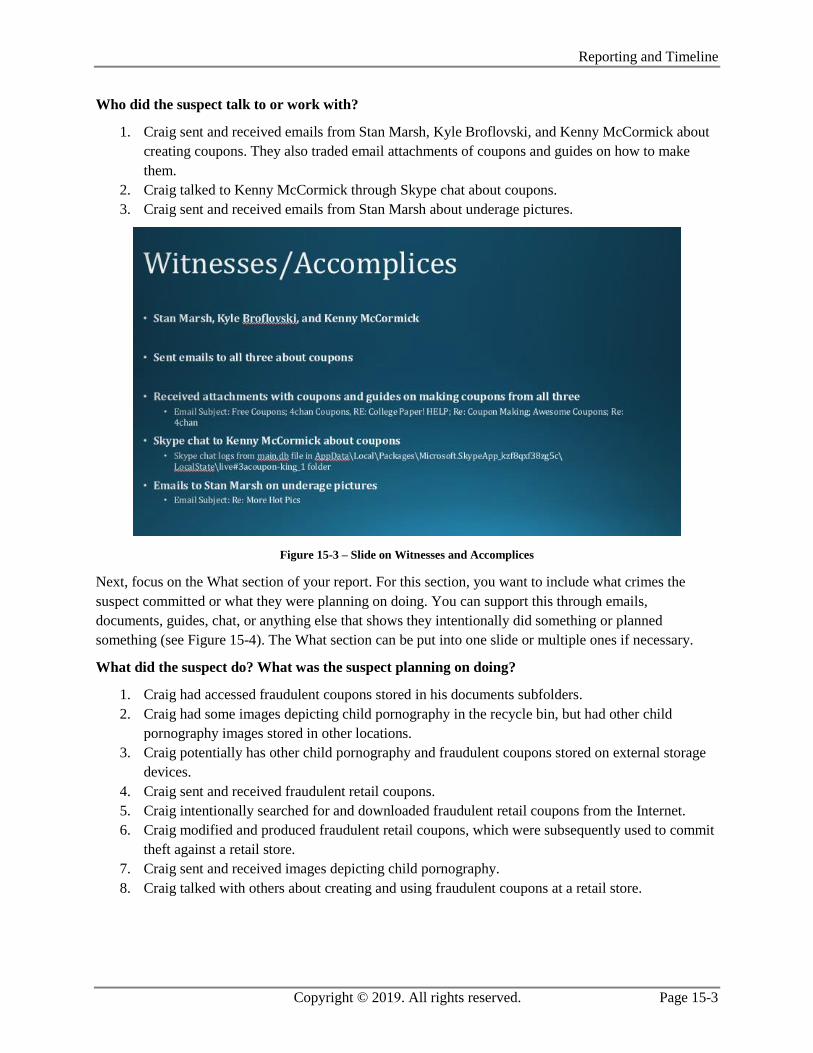
What did the suspect do? What was the suspect planning on doing?
1. Craig had accessed fraudulent coupons stored in his documents subfolders.
2. Craig had some images depicting child pornography in the recycle bin, but had other child
pornography images stored in other locations.
3. Craig potentially has other child pornography and fraudulent coupons stored on external storage
devices.
4. Craig sent and received fraudulent retail coupons.
5. Craig intentionally searched for and downloaded fraudulent retail coupons from the Internet.
6. Craig modified and produced fraudulent retail coupons, which were subsequently used to commit
theft against a retail store.
7. Craig sent and received images depicting child pornography.
8. Craig talked with others about creating and using fraudulent coupons at a retail store.

Chapter 15
Copyright © 2019. All rights reserved. Page 15-4
Figure 15-4 – Slide on Crimes Committed or Crimes Planned
After covering the What section, you will want to cover the How section. This ties together with the What
part because you need to not only answer what the suspect did or planned on doing, but also how they did
something or planned on doing something. You can include what software they used to accomplish
something, how they used external drives to store and access data, or documents and chat that shows how
they were going to commit a crime.
How did the suspect do the crime? How was the suspect planning on committing a crime?
1. Craig plugged in an external drive to access potential CP and fraudulent coupons.
2. Craig used the Windows 8 Mail App to send and receive emails with CP and fraudulent coupon
attachments.
3. Craig used Google Chrome to search for and download fraudulent coupons.
4. Craig used GIMP to modify and create fraudulent coupons.
5. Craig used Skype chat to plan with Kenny on using fraudulent coupons at Walmart.
Figure 15-5 – Slide on How Crime was Committed or How Crime was Planned
Reporting and Timeline
Copyright © 2019. All rights reserved. Page 15-5
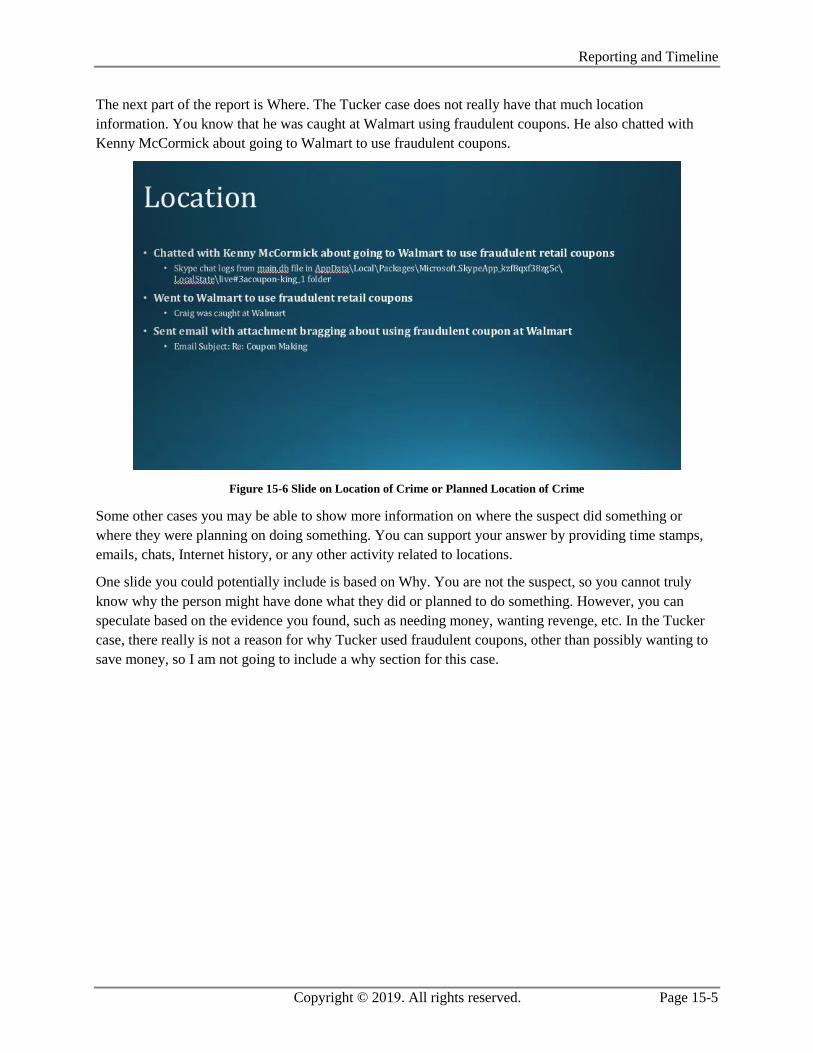
The next part of the report is Where. The Tucker case does not really have that much location
information. You know that he was caught at Walmart using fraudulent coupons. He also chatted with
Kenny McCormick about going to Walmart to use fraudulent coupons.
Figure 15-6 Slide on Location of Crime or Planned Location of Crime
Some other cases you may be able to show more information on where the suspect did something or
where they were planning on doing something. You can support your answer by providing time stamps,
emails, chats, Internet history, or any other activity related to locations.
One slide you could potentially include is based on Why. You are not the suspect, so you cannot truly
know why the person might have done what they did or planned to do something. However, you can
speculate based on the evidence you found, such as needing money, wanting revenge, etc. In the Tucker
case, there really is not a reason for why Tucker used fraudulent coupons, other than possibly wanting to
save money, so I am not going to include a why section for this case.

Chapter 15
Copyright © 2019. All rights reserved. Page 15-6
Timeline
After working on the Who, What, How, and Where sections, you will probably want to include a section
on When for your report. You will want to show when the suspect did certain things or when they
planned on doing something. The best way to achieve this is by creating a timeline. Timeline analysis can
usually become very complicated when you actually go into all the details about what was happening on
the computer. Since this is still an introduction to digital forensics, you are only going to create a very
simple timeline.
For this project, you will want to use the Office Timeline tool. You can download the 14-day free trial at
the following website:
https://www.officetimeline.com/14-days-trial
Note: You only need to enter an email address to get the 14-day free trial. Once they send you the Plus
Edition product key to the email address, simply open PowerPoint and click the Activate button under the
Office Timeline Free tab. From there, you just need to paste the product key and click the Activate button.
Once you have Office Timeline downloaded and installed, open Office Timeline and click the New
button.
Figure 15-7 – Click New Button on Office Timeline
When the Create New Timeline window opens, select the Metro timeline. Then, click the Next arrow in
the bottom right corner.
Figure 15-8 – Select Metro and Click Next Arrow

Reporting and Timeline
Copyright © 2019. All rights reserved. Page 15-7
On the next window, you will be prompted to enter the events and dates. You will also need to the click
the Clock button in the top right corner to add time stamps to each event. Use the Plus button in the top
right corner to continue to add more events. You can set different colors and shapes based on the types of
events. You may also want to check the Below box for certain events so the event text stays within the
bounds of the PowerPoint slide.
Ultimately it is up to you what events you want to include in your timeline. You may want to show when
certain Internet, file, email, or USB activity occurred. When creating your timeline, you may want to
either create a separate slide for each day or keep your timeline to only specific simple events. This will
help prevent the timeline from looking cluttered or confusing. For the Tucker case, I split the events that
occurred on the 18th to just one slide. Once you add all the events you want, click the Finish button in the
bottom right corner.
Figure 15-9 – Add Events, Dates, and Times and Click Finish
Since most of your events are broken down by the hour, you will want to change the timeline scale. To do
this, click on the Style Pane button under the Office Timeline+ tab. Then, click on the Timeline scale in
the main slide. The right pane of PowerPoint will show a button called Timeline Scale. Click on it and
then select Hours/Minutes (see Figure 15-10).

Chapter 15
Copyright © 2019. All rights reserved. Page 15-8
Figure 15-10 – Click Style Pane Button, Select Timeline Scale in Slide, and Choose Hours/Minutes under Timeline Scale
Note: You can also change where the timeline scale is by clicking the drop-down menu in the top bar
called Timeline Position. The Middle position may work the best because you can then choose to have
some events displayed above the timeline and some below.
After creating a timeline for one set of events, you can create another timeline on a different slide. This
may help separate the days and keep your timeline from getting cluttered. However, it is ultimately up to
you to choose what events you want to show in your timeline and how you want to report and present it.
Figure 15-11 – Timeline with More Events on Second Slide

Reporting and Timeline
Copyright © 2019. All rights reserved. Page 15-9
Depending on what case you are working on, you may want to show specific events that help support
your Who, What, When, Where, and How points you previously made in your slides. For example, on the
Tucker crime slide I showed a bullet point on how Tucker used GIMP to modify and produce fraudulent
retail coupons. I then included in my timeline when Tucker downloaded and installed GIMP, when he
accessed guides on how to make coupons, and when he modified a fraudulent coupon with GIMP.
If the case you are working on has a suspect planning to do something on a certain date, you may want to
include that in your timeline as well. Again, it is up to you to decide how to best show your work and
support your argument.
Figure 15-12 – Timeline of Events
After creating your timeline slides, you can also do a slide that just lists some events that you want to
discuss further. For example, if the suspect planned on doing something, you may want to include a
separate slide that discusses your findings further. It is up to you how you want to present all your
findings.
One last slide you should include is a recommendation slide for the event. As an examiner, you may not
always be asked to make recommendations, but for this event you will need to come up with
recommendations based on your findings. Some possible recommendations include other accomplices
that need to be looked into or where a suspect might be if they are on the run. For the Tucker case, the
only real recommendation you could make is to look into Stan, Kyle, and Kenny because they traded
coupons and underage pictures with Craig (see Figure 5-13).

Chapter 15
Copyright © 2019. All rights reserved. Page 15-10
Figure 15-13 Slide with Recommendations Based on Findings


