
Computer aided design
19
Notes for computer aided design lessons Photoshop 3ds Max Google Sketchup Year 2012 - 2013
-
Upload
gundie-buse -
Category
Documents
-
view
214 -
download
0
description
Computer aided design
Transcript of Computer aided design
Notes for computer aided design lessons Photoshop
3ds Max
Google Sketchup
Year 2012 - 2013

16/10/2012
1.Find image larger than 6MP
2. Open (Disney) streetview
3. Open saved “Sky” image in the PS5
4. Drag “Sky” image into Disney picture
5. Create a copy of Disney picture
6. Use magic wand to cut out the background
7.Press down Shift to add selections
8. Use Ctrl+T to rescale background
Ctrl+Shift+I – invert

13/11/2012
jj
Use the brush tool
To switch between black & white use X
12/11/2012
Press this to add a vector mask
Add layer with background
(Layer mask)
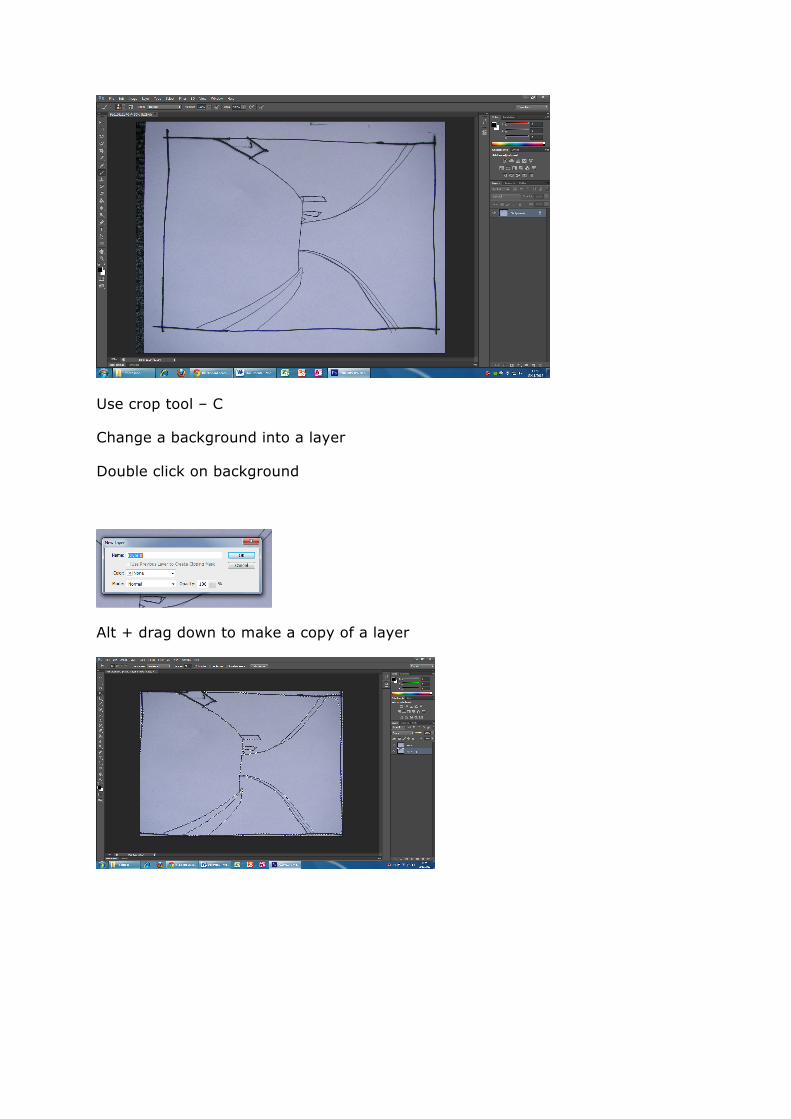
Use crop tool – C
Change a background into a layer
Double click on background
Alt + drag down to make a copy of a layer
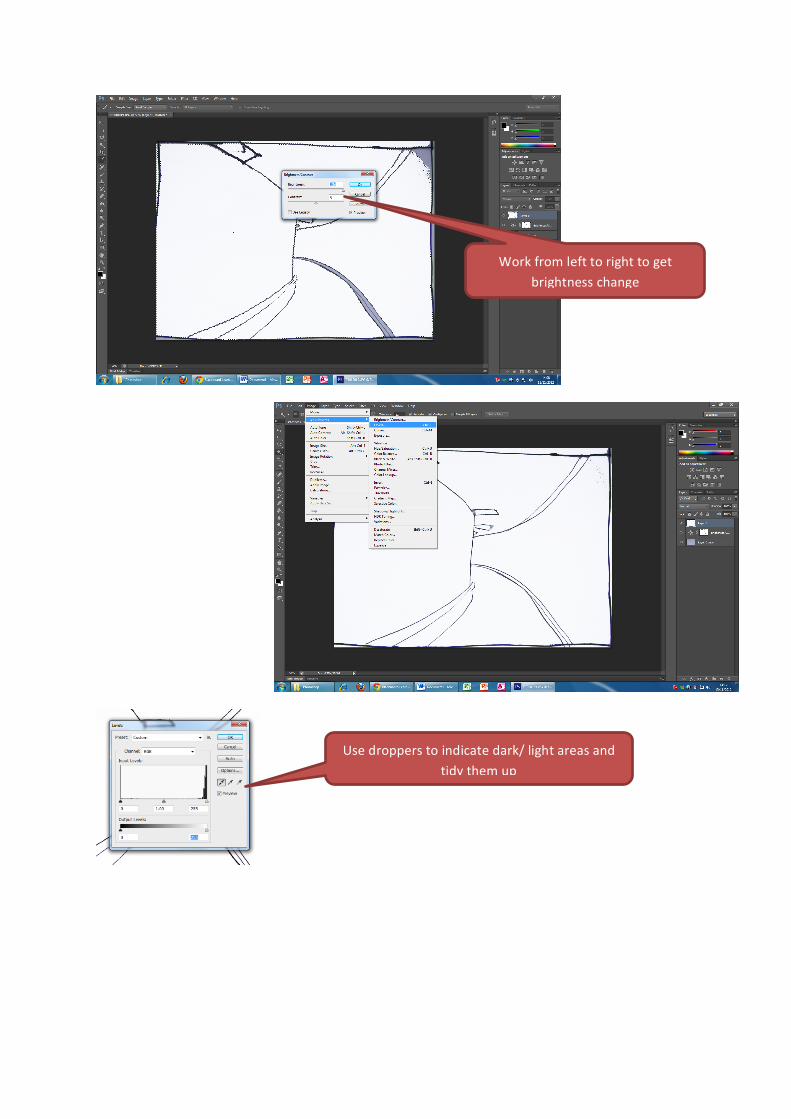
Work from left to right to get brightness change
Use droppers to indicate dark/ light areas and tidy them up

Can also use curve tool to
Use polygonal lasso tool to draw the shape of the wall
Ctrl and press in the layer
Arrow allows indicating the amount of black / white elements
Zoom out, use lasso tool to select an area

To add the contoures for the drawing go into layer
Draw gradient line from top, a bit out so light is not too intense
Pick foreground to transparent
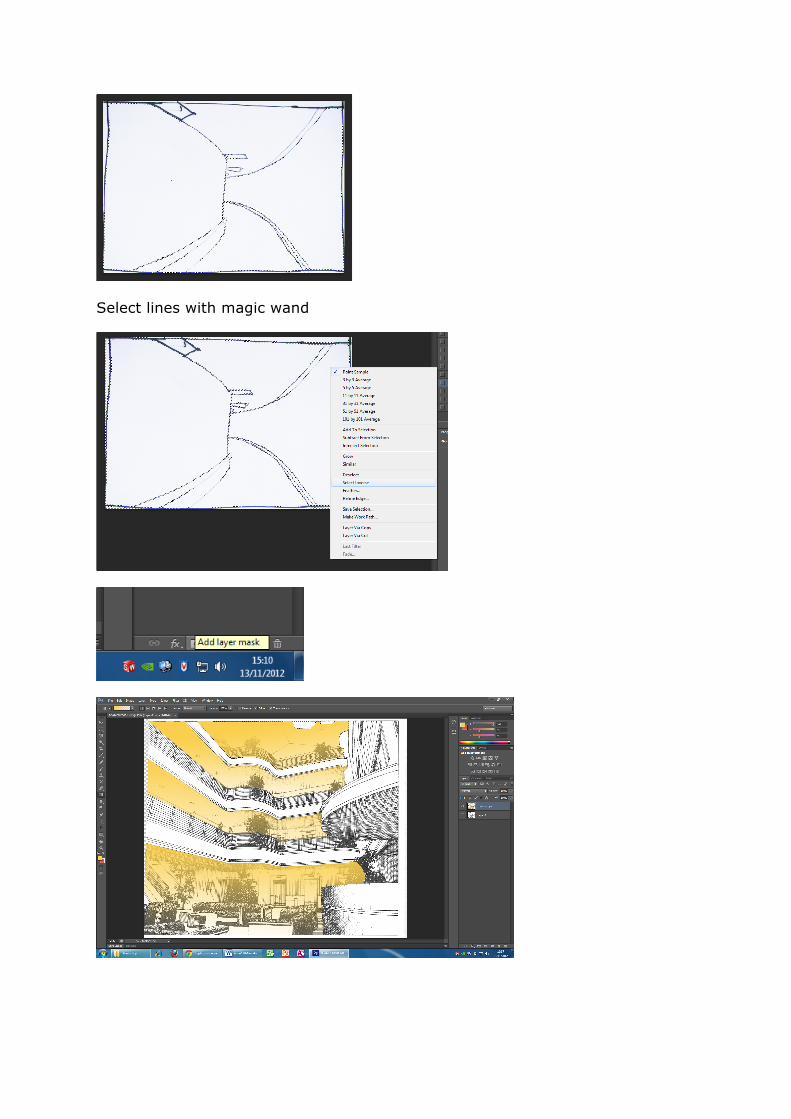
Select lines with magic wand
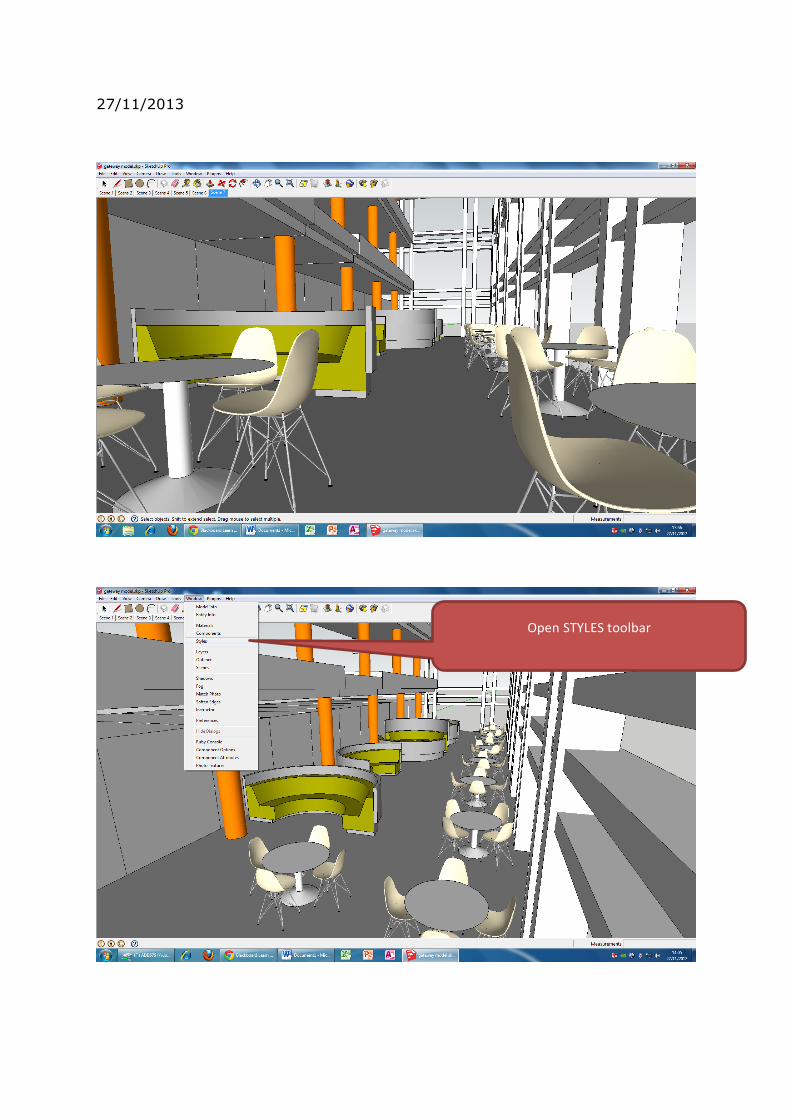
27/11/2013
Open STYLES toolbar

Export 2D
Change to 2000pixels wide so it is good rez for A4
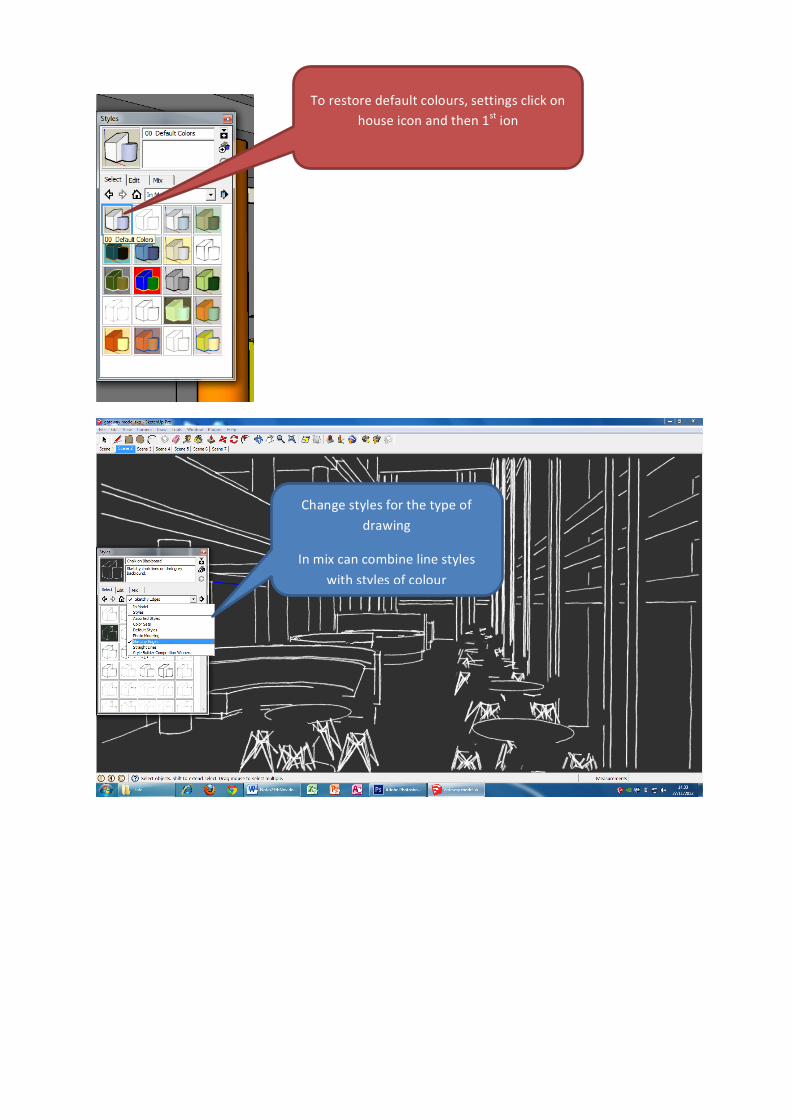
To restore default colours, settings click on house icon and then 1st ion
Change styles for the type of drawing
In mix can combine line styles with styles of colour
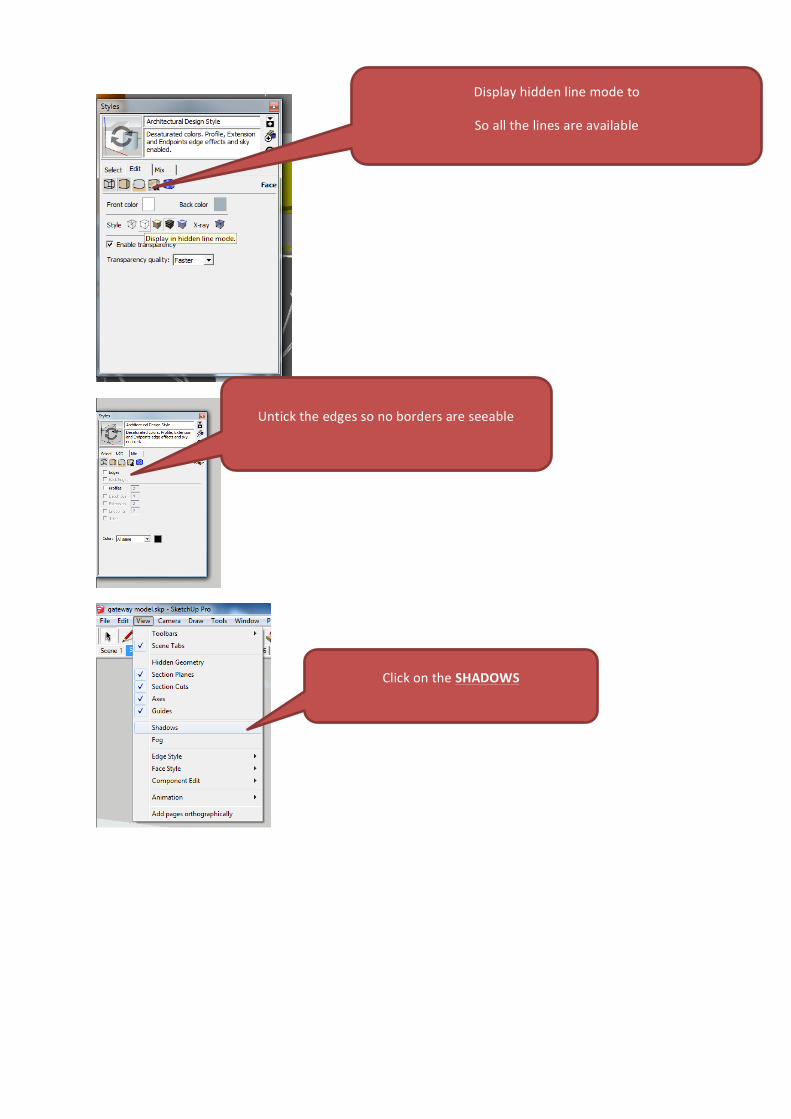
Display hidden line mode to
So all the lines are available
Untick the edges so no borders are seeable
Click on the SHADOWS

Change percentage of the OPACITY
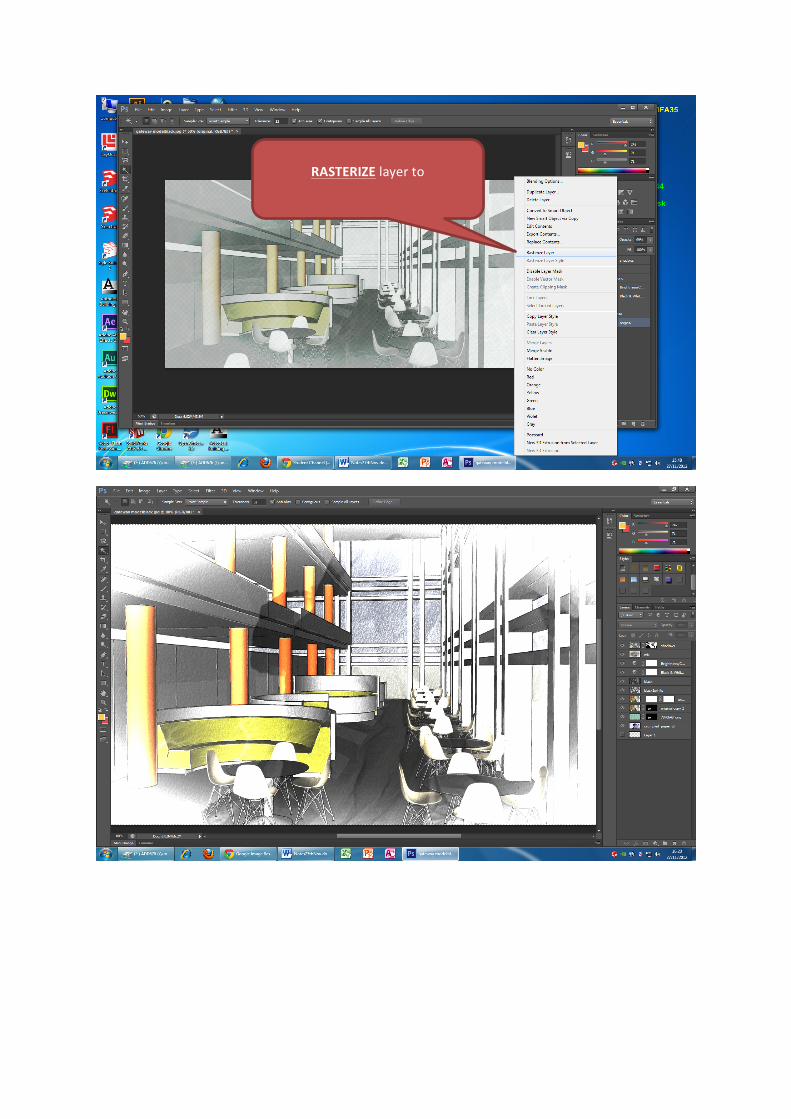
RASTERIZE layer to
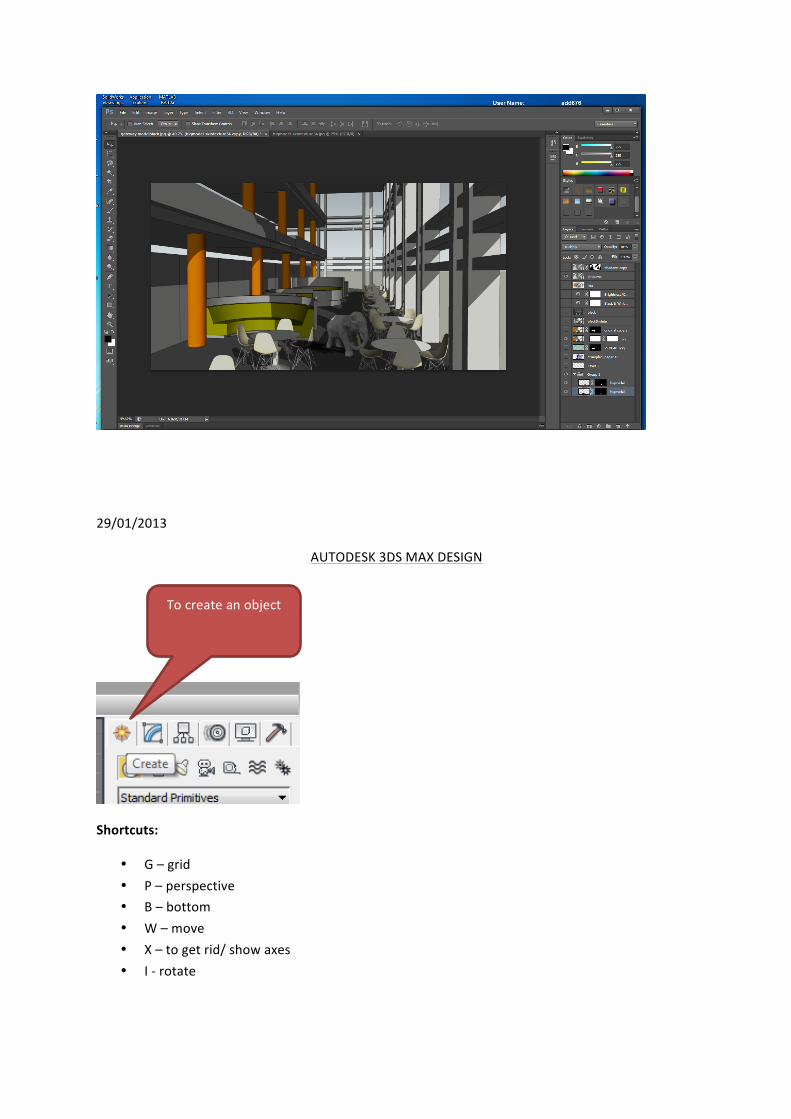
29/01/2013
AUTODESK 3DS MAX DESIGN
Shortcuts:
• G – grid • P – perspective • B – bottom • W – move • X – to get rid/ show axes • I -‐ rotate
To create an object

Copy tool
Hold down shift and drag the item you want to copy
Choose copy and select amout of items you want
F – switch the edges on
Modify
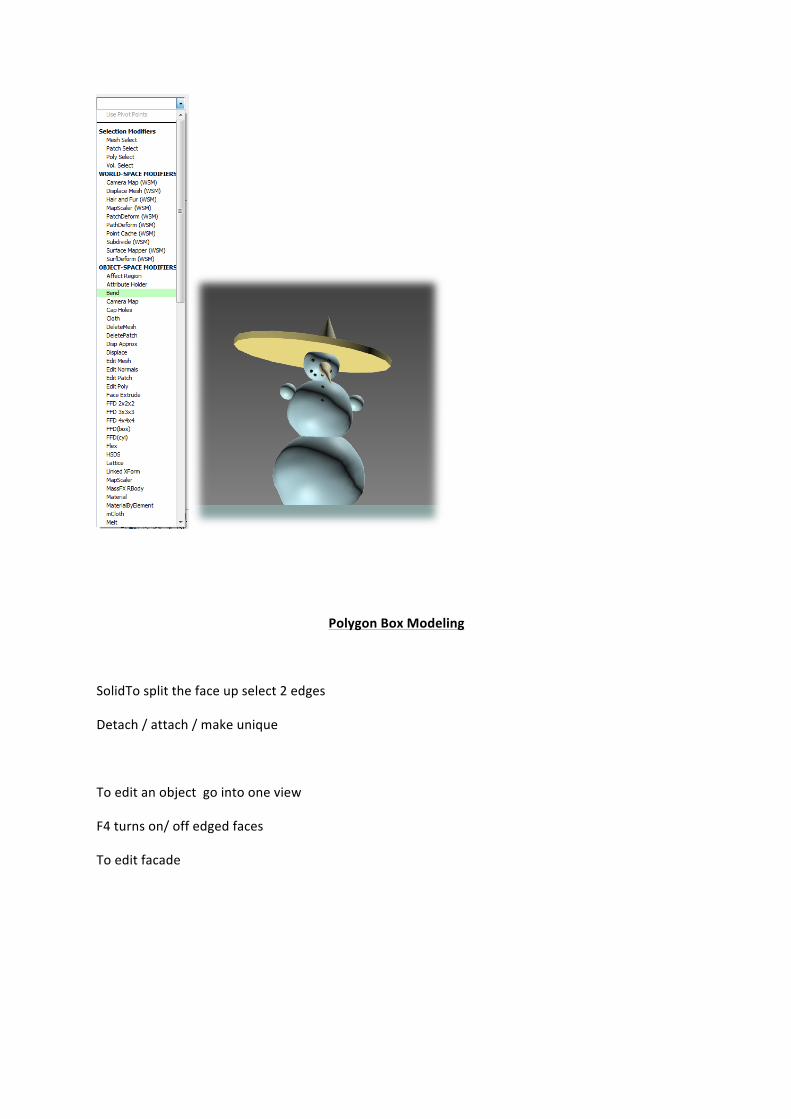
Polygon Box Modeling
SolidTo split the face up select 2 edges
Detach / attach / make unique
To edit an object go into one view
F4 turns on/ off edged faces
To edit facade

To select a row of faces hold Shift+line
To select the ones you want Ctrl+selection
Extrude
Outline
Insert
Bridge
Flip
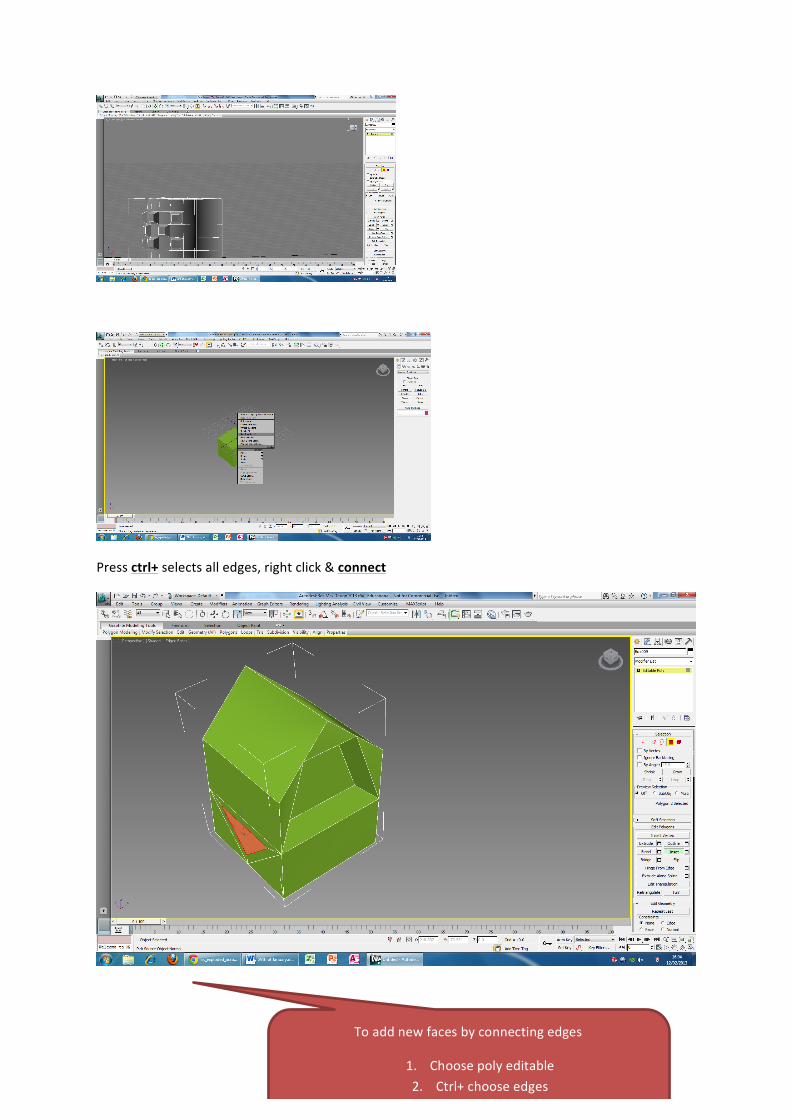
Press ctrl+ selects all edges, right click & connect
To add new faces by connecting edges
1. Choose poly editable 2. Ctrl+ choose edges 3. Right click -‐ connect


