Communiqué - CoolSpools · Communiqué also dovetails with ariadne‟s other products, ......
82
Communiqué User Guide Version V1R1M0 July 2006 ariadne software ltd, cheltenham, england
Transcript of Communiqué - CoolSpools · Communiqué also dovetails with ariadne‟s other products, ......

Communiqué
User Guide
Version V1R1M0 July 2006
ariadne software ltd, cheltenham, england
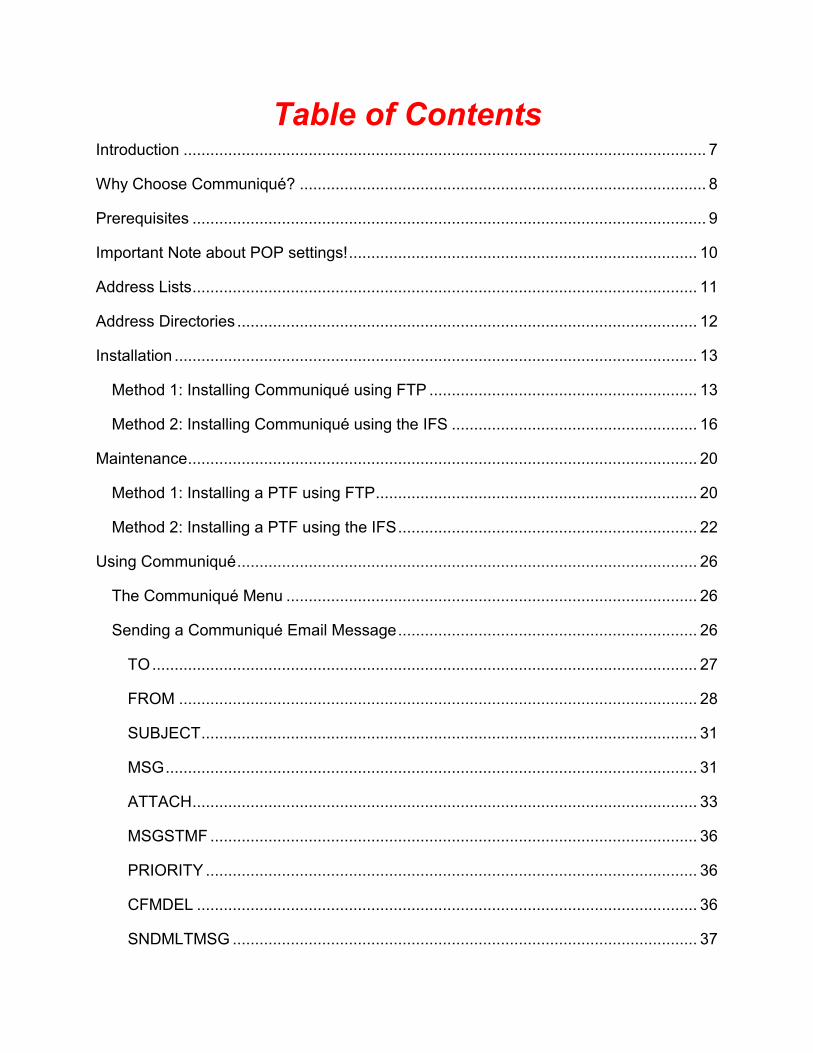
Table of Contents
Introduction ..................................................................................................................... 7
Why Choose Communiqué? ........................................................................................... 8
Prerequisites ................................................................................................................... 9
Important Note about POP settings! .............................................................................. 10
Address Lists ................................................................................................................. 11
Address Directories ....................................................................................................... 12
Installation ..................................................................................................................... 13
Method 1: Installing Communiqué using FTP ............................................................ 13
Method 2: Installing Communiqué using the IFS ....................................................... 16
Maintenance .................................................................................................................. 20
Method 1: Installing a PTF using FTP ........................................................................ 20
Method 2: Installing a PTF using the IFS ................................................................... 22
Using Communiqué ....................................................................................................... 26
The Communiqué Menu ............................................................................................ 26
Sending a Communiqué Email Message ................................................................... 26
TO .......................................................................................................................... 27
FROM .................................................................................................................... 28
SUBJECT ............................................................................................................... 31
MSG ....................................................................................................................... 31
ATTACH ................................................................................................................. 33
MSGSTMF ............................................................................................................. 36
PRIORITY .............................................................................................................. 36
CFMDEL ................................................................................................................ 36
SNDMLTMSG ........................................................................................................ 37

Working with Email Address Lists .............................................................................. 37
Creating an address list ............................................................................................. 40
ADRL ..................................................................................................................... 40
TEXT ...................................................................................................................... 40
Example: ................................................................................................................ 40
Changing an address list ........................................................................................... 41
ADRL ..................................................................................................................... 41
TEXT ...................................................................................................................... 41
Example: ................................................................................................................ 41
Copying an address list ............................................................................................. 42
FROMADRL ........................................................................................................... 42
TOADRL ................................................................................................................ 42
TEXT ...................................................................................................................... 42
CPYADRLE ............................................................................................................ 42
Deleting an address list ............................................................................................. 44
ADRL ..................................................................................................................... 44
Converting a Distribution List to an Address List ....................................................... 45
DSTL ...................................................................................................................... 45
ADRL ..................................................................................................................... 45
TEXT ...................................................................................................................... 45
HOSTNAME ........................................................................................................... 45
DOMAIN ................................................................................................................. 46
Working with Address List Entries ............................................................................. 48
ADRL ..................................................................................................................... 48
Adding an address list entry ...................................................................................... 50

ADRL ..................................................................................................................... 50
EMAIL .................................................................................................................... 50
NAME ..................................................................................................................... 50
TYPE ...................................................................................................................... 50
Changing an address list entry .................................................................................. 52
ADRL ..................................................................................................................... 52
EMAIL .................................................................................................................... 52
NAME ..................................................................................................................... 52
TYPE ...................................................................................................................... 52
Copying address list entries ....................................................................................... 53
FROMADRL ........................................................................................................... 53
TOADRL ................................................................................................................ 53
Removing an address list entry ................................................................................. 53
ADRL ..................................................................................................................... 53
EMAIL .................................................................................................................... 54
Working with Email Address Directories .................................................................... 55
Creating an address directory .................................................................................... 57
ADRDIR ................................................................................................................. 57
TEXT ...................................................................................................................... 57
Changing an address directory .................................................................................. 58
ADRDIR ................................................................................................................. 58
TEXT ...................................................................................................................... 58
Copying an address directory .................................................................................... 59
FROMADRDIR ....................................................................................................... 59
TOADRDIR ............................................................................................................ 59
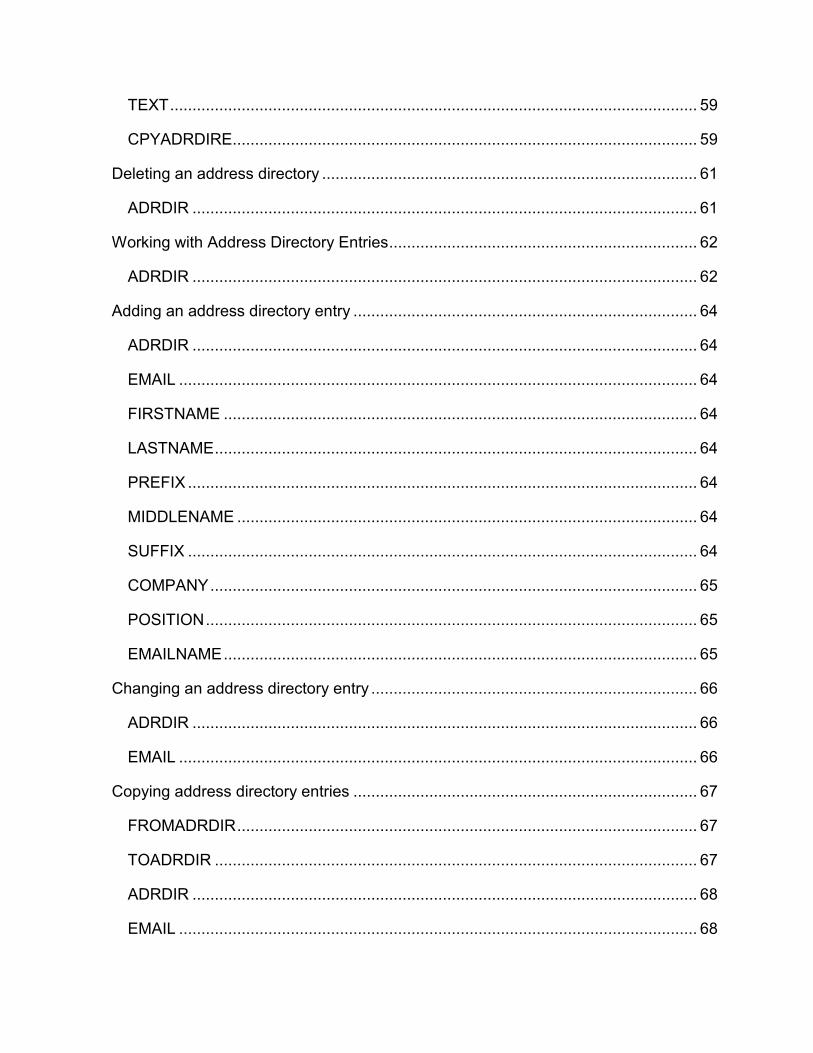
TEXT ...................................................................................................................... 59
CPYADRDIRE........................................................................................................ 59
Deleting an address directory .................................................................................... 61
ADRDIR ................................................................................................................. 61
Working with Address Directory Entries ..................................................................... 62
ADRDIR ................................................................................................................. 62
Adding an address directory entry ............................................................................. 64
ADRDIR ................................................................................................................. 64
EMAIL .................................................................................................................... 64
FIRSTNAME .......................................................................................................... 64
LASTNAME ............................................................................................................ 64
PREFIX .................................................................................................................. 64
MIDDLENAME ....................................................................................................... 64
SUFFIX .................................................................................................................. 64
COMPANY ............................................................................................................. 65
POSITION .............................................................................................................. 65
EMAILNAME .......................................................................................................... 65
Changing an address directory entry ......................................................................... 66
ADRDIR ................................................................................................................. 66
EMAIL .................................................................................................................... 66
Copying address directory entries ............................................................................. 67
FROMADRDIR ....................................................................................................... 67
TOADRDIR ............................................................................................................ 67
ADRDIR ................................................................................................................. 68
EMAIL .................................................................................................................... 68
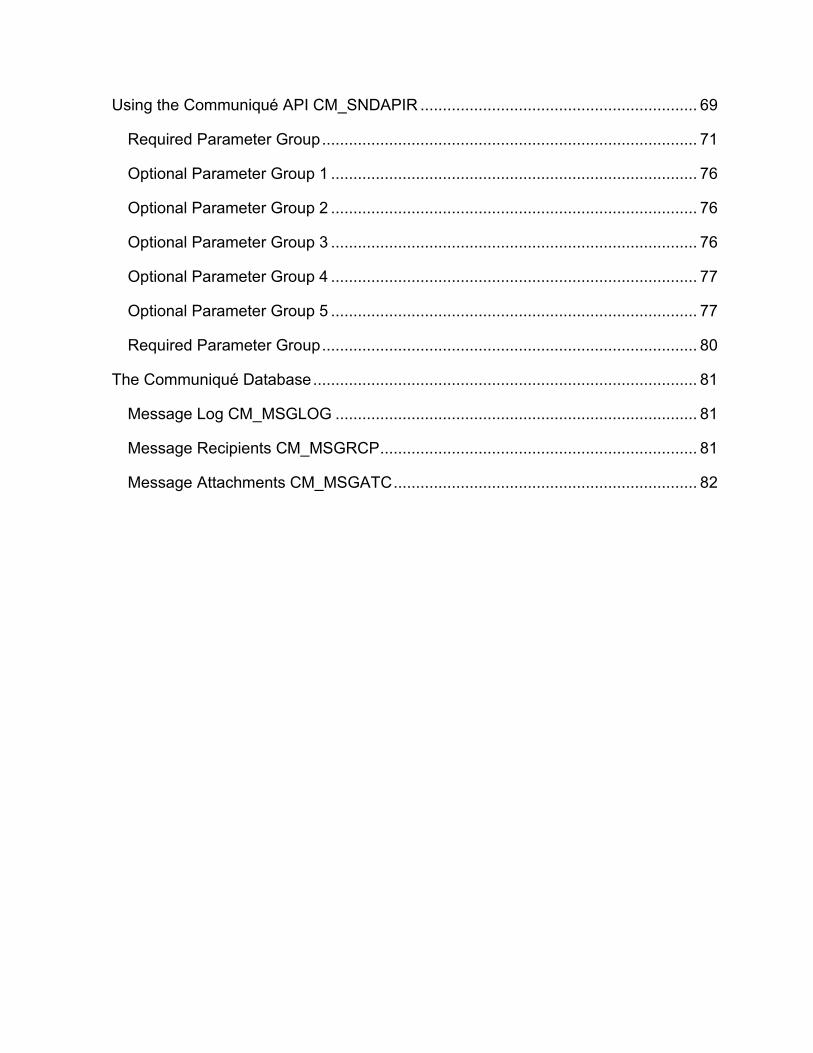
Using the Communiqué API CM_SNDAPIR .............................................................. 69
Required Parameter Group .................................................................................... 71
Optional Parameter Group 1 .................................................................................. 76
Optional Parameter Group 2 .................................................................................. 76
Optional Parameter Group 3 .................................................................................. 76
Optional Parameter Group 4 .................................................................................. 77
Optional Parameter Group 5 .................................................................................. 77
Required Parameter Group .................................................................................... 80
The Communiqué Database ...................................................................................... 81
Message Log CM_MSGLOG ................................................................................. 81
Message Recipients CM_MSGRCP ....................................................................... 81
Message Attachments CM_MSGATC .................................................................... 82
Communiqué User Guide V1R1 Page: 7
Introduction
Communiqué provides iSeries users and applications with easy to use but fully functioned facilities for sending email messages in MIME format.
With Communiqué you can:
send email to Internet email users as well as email users on the same iSeries or another iSeries
send email messages in simple text or HTML or alternative text/HTML formats
attach or embed text, HTML, image, video, audio or application binary files (for example, PDF files and Excel spreadsheets)
use a simple command interface or an API
create and manage named email address lists
send to multiple email addresses or to named email address lists
convert SNADS distribution lists to email address lists
Communiqué also dovetails with ariadne‟s other products, CoolSpools and Slipstream.
Installing Communiqué will enable the email capabilities inherent in those products (requires CoolSpools Version 4.1 and Slipstream Version 3.1. Once Communiqué is installed, using the CoolSpools email-related parameters will allow you to convert a spooled file to a stream file in PDF or a variety of other formats and send that stream file as an email attachment. Similarly, if Communiqué is installed, the Slipstream email-related parameters will enable you to convert a database file to an Excel spreadsheet or other stream file format and email that stream file as an attachment.
To make things even easier, Communique is also now available as a module in the CoolSpools Plus bundle. CoolSpools Plus bundles CoolSpools, Communiqué, Slipstream and CoolTools as a single licensed program using a single product library. If you are installing CoolSpools Plus (licensed program 5COOLSP), refer to the User Guide for CoolSpools Plus for details of how to install CoolSpools Plus.
Communiqué User Guide V1R1 Page: 8
Why Choose Communiqué?
There are many PC packages which enable you to send email. There are also packages that let you to send email from your iSeries using a GUI. So why choose Communiqué?
Communiqué provides a means of sending email from an iSeries command. That may not be as pretty as a GUI, but it‟s a darn sight easier to integrate with your existing applications.
Just think about it. How is a GUI going to help you convert your billing application to let you send invoices out to customers by email? With CoolSpools and Communiqué it can take little more than adding a few command calls to your CL program to convert your invoice spooled files to PDF format and email them.
To take another example, what if you want to email your internal users their sales report in Excel format each morning rather than printing it and distributing it on paper? A GUI is not much help there. With Slipstreams and Communiqué, you can run your query and save the output as an Excel file rather than a spooled file and then email the file as an attachment, all with a couple of simple program changes to call the appropriate commands.
One final idea for you: do you have to support iSeries batch jobs that run overnight or at weekends? Why not put a call to Communiqué in your program error handling routines? That way, when an error occurs, you can receive an email at home or in the office. Neat.

Communiqué User Guide V1R1 Page: 9
Prerequisites
Communiqué provides means of creating email messages in MIME (Multipurpose Internet Mail Extensions) format on the AS/400 or iSeries. For these email messages to be routed and delivered successfully, you must have previously configured and activated the appropriate email environment on your system. Furthermore, if the email is to be delivered to a user on another system, or to an Internet user, then the necessary TCP/IP communications connections must already have been put in place.
A number of IBM documents in PDF format are available for downloading from the ariadne website to assist you with configuring email on your system at www.ariadnesoftware.co.uk/email.htm.
For further information on how to set up your iSeries for email, consult the following IBM links:
http://publib.boulder.ibm.com/iseries/v5r1/ic2924/info/rzair/rzairgetstart.htm
http://www-912.ibm.com/s_dir/SLKBase.nsf/3ff1161e61e6c7468625661300765a3f/34879f5e413aa5cd8625697b0053f36a
OS/400 V5R21M0 or higher.
18 Mb of iSeries disk space.
No PC is required.
For CoolSpools integration: CoolSpools Version 4.1 or later
For Slipstream integration: Slipstream Version 3.1 or later.
Communiqué User Guide V1R1 Page: 10
Important Note about POP settings!
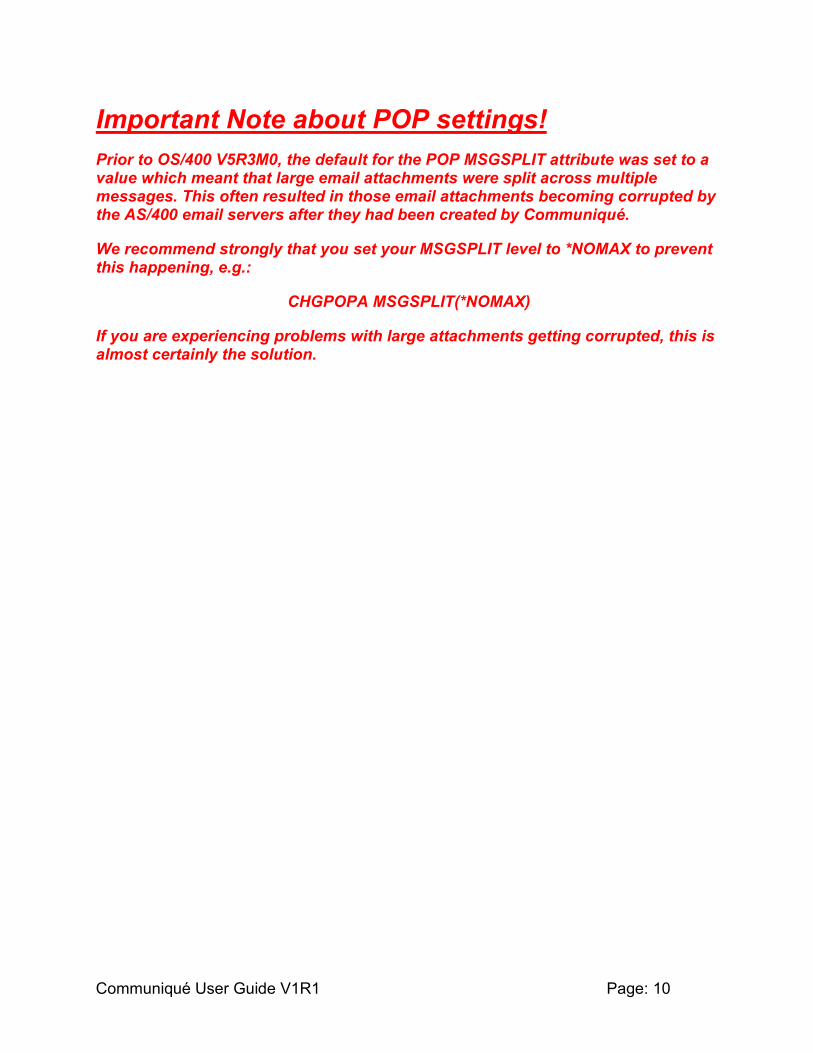
Prior to OS/400 V5R3M0, the default for the POP MSGSPLIT attribute was set to a value which meant that large email attachments were split across multiple messages. This often resulted in those email attachments becoming corrupted by the AS/400 email servers after they had been created by Communiqué.
We recommend strongly that you set your MSGSPLIT level to *NOMAX to prevent this happening, e.g.:
CHGPOPA MSGSPLIT(*NOMAX)
If you are experiencing problems with large attachments getting corrupted, this is almost certainly the solution.

Communiqué User Guide V1R1 Page: 11
Address Lists
Communiqué implements the concept of a named Email Address List. Address lists can be extremely useful when you need to send messages to groups of people on a regular basis. For example, you might create an address list for each department within your organization (e.g. SALES, MARKETING, IT etc.). Then, when you need to send a message to everyone in the Sales Dept., you just specify the SALES address list as a recipient for the message.
Communiqué provides a set of tools for creating and managing address lists and their contents.
Communiqué User Guide V1R1 Page: 12
Address Directories
Communiqué also implements the concept of a named Email Address Directory. Address directories store frequently used email addresses. You can search them and select email addresses from them when you specify TO(*SELECT) on the SNDCMNMSG command. Different directories can be used to keep email addresses relevant to different users or groups of users separate from one another, for ease of searching and selection. For example, you might create an address directory for each department within your organization (e.g. SALES, MARKETING, IT etc.). Then, when a member of the Sales Department needs to select an email address, s/he can simply look it up in the departmental directory.
Communiqué provides a set of tools for creating and managing address directories and their contents.
Communiqué User Guide V1R1 Page: 13
Installation
If you are installing CoolSpools Plus, please refer to the installation instructions in the CoolSpools Plus User Guide. These instructions apply only where you are installing the standalone version of Communiqué.
If you downloaded Communiqué from the Internet, or received the product via e-mail, you will have received a zip file called CMNQUEV1R1.ZIP. This zip file contains everything you need to get started with Communiqué. This section describes two possible procedures for installing Communiqué on your AS/400. We are hoping to simplify and automate this area in the near future. However, for the moment, please select one of the two methods described below and follow the steps carefully and in the order indicated. Steps to be carried out on the PC are shown in green, steps to be carried out on the AS/400 in blue.
Method 1: Installing Communiqué using FTP
This method uses FTP (File Transfer Protocol) to transfer the Communiqué product files from your PC to your AS/400. It is assumed that you have stored the CMNQUEV1R1.ZIP file which you downloaded from the Internet or received via e-mail on your PC and that you have enabled an FTP link between your PC and your AS/400.
Step 1
On your PC, create an install directory for Communiqué, either within Windows Explorer, or from the DOS prompt, e.g.:
md c:\CMNQUEV1R1
Save or copy the zip file that you downloaded or received into this directory.
Step 2
On your PC, unzip the contents of the zip file into the directory you just created using pkunzip, WinZip, Norton UnZip etc.
Step 3
On your AS/400, decide which library you wish to use for the install procedure and create a save file in that library, e.g.
crtsavf lib_name/CMNQUEV1R1
where lib_name is the name of the library you chose to use.
Step 4
On your PC, start an FTP session to your AS/400. You may use FTP packages such as
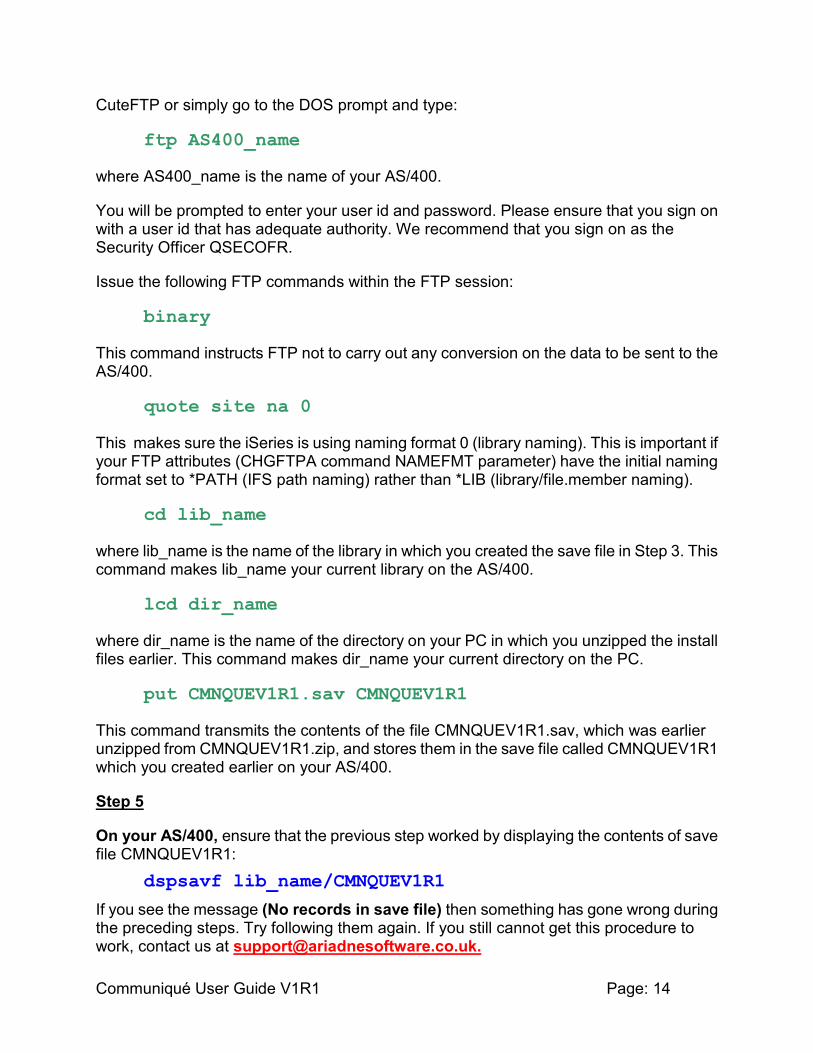
Communiqué User Guide V1R1 Page: 14
CuteFTP or simply go to the DOS prompt and type:
ftp AS400_name
where AS400_name is the name of your AS/400.
You will be prompted to enter your user id and password. Please ensure that you sign on with a user id that has adequate authority. We recommend that you sign on as the Security Officer QSECOFR.
Issue the following FTP commands within the FTP session:
binary
This command instructs FTP not to carry out any conversion on the data to be sent to the AS/400.
quote site na 0
This makes sure the iSeries is using naming format 0 (library naming). This is important if your FTP attributes (CHGFTPA command NAMEFMT parameter) have the initial naming format set to *PATH (IFS path naming) rather than *LIB (library/file.member naming).
cd lib_name
where lib_name is the name of the library in which you created the save file in Step 3. This command makes lib_name your current library on the AS/400.
lcd dir_name
where dir_name is the name of the directory on your PC in which you unzipped the install files earlier. This command makes dir_name your current directory on the PC.
put CMNQUEV1R1.sav CMNQUEV1R1
This command transmits the contents of the file CMNQUEV1R1.sav, which was earlier unzipped from CMNQUEV1R1.zip, and stores them in the save file called CMNQUEV1R1 which you created earlier on your AS/400.
Step 5
On your AS/400, ensure that the previous step worked by displaying the contents of save file CMNQUEV1R1:
dspsavf lib_name/CMNQUEV1R1
If you see the message (No records in save file) then something has gone wrong during the preceding steps. Try following them again. If you still cannot get this procedure to work, contact us at [email protected].
Communiqué User Guide V1R1 Page: 15
Step 6
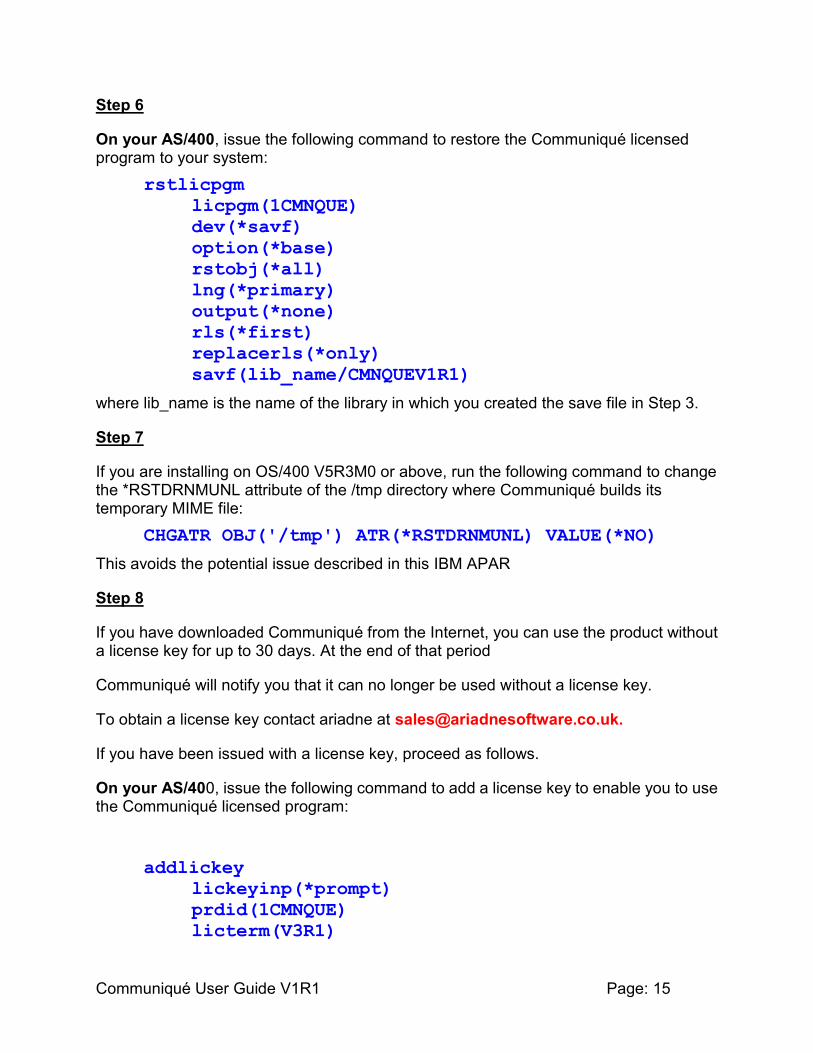
On your AS/400, issue the following command to restore the Communiqué licensed program to your system:
rstlicpgm
licpgm(1CMNQUE)
dev(*savf)
option(*base)
rstobj(*all)
lng(*primary)
output(*none)
rls(*first)
replacerls(*only)
savf(lib_name/CMNQUEV1R1)
where lib_name is the name of the library in which you created the save file in Step 3.
Step 7
If you are installing on OS/400 V5R3M0 or above, run the following command to change the *RSTDRNMUNL attribute of the /tmp directory where Communiqué builds its temporary MIME file:
CHGATR OBJ('/tmp') ATR(*RSTDRNMUNL) VALUE(*NO)
This avoids the potential issue described in this IBM APAR
Step 8
If you have downloaded Communiqué from the Internet, you can use the product without a license key for up to 30 days. At the end of that period
Communiqué will notify you that it can no longer be used without a license key.
To obtain a license key contact ariadne at [email protected].
If you have been issued with a license key, proceed as follows.
On your AS/400, issue the following command to add a license key to enable you to use the Communiqué licensed program:
addlickey
lickeyinp(*prompt)
prdid(1CMNQUE)
licterm(V3R1)
Communiqué User Guide V1R1 Page: 16
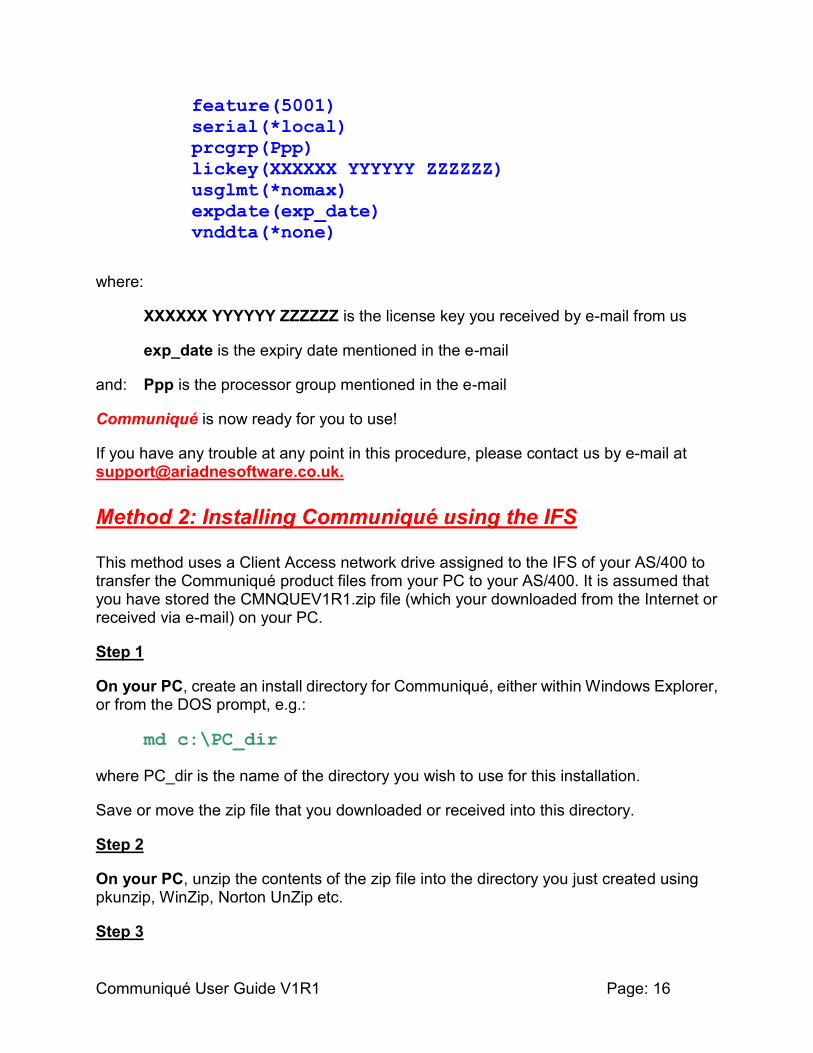
feature(5001)
serial(*local)
prcgrp(Ppp)
lickey(XXXXXX YYYYYY ZZZZZZ)
usglmt(*nomax)
expdate(exp_date)
vnddta(*none)
where:
XXXXXX YYYYYY ZZZZZZ is the license key you received by e-mail from us
exp_date is the expiry date mentioned in the e-mail
and: Ppp is the processor group mentioned in the e-mail
Communiqué is now ready for you to use!
If you have any trouble at any point in this procedure, please contact us by e-mail at [email protected].
Method 2: Installing Communiqué using the IFS
This method uses a Client Access network drive assigned to the IFS of your AS/400 to transfer the Communiqué product files from your PC to your AS/400. It is assumed that you have stored the CMNQUEV1R1.zip file (which your downloaded from the Internet or received via e-mail) on your PC.
Step 1
On your PC, create an install directory for Communiqué, either within Windows Explorer, or from the DOS prompt, e.g.:
md c:\PC_dir
where PC_dir is the name of the directory you wish to use for this installation.
Save or move the zip file that you downloaded or received into this directory.
Step 2
On your PC, unzip the contents of the zip file into the directory you just created using pkunzip, WinZip, Norton UnZip etc.
Step 3

Communiqué User Guide V1R1 Page: 17
On your PC, ensure that you have a network drive assigned to a directory in the root file system of your AS/400‟s IFS. This can be done in Windows Explorer by selecting Tools, Map Network Drive.
Create a directory in the IFS to receive the Communiqué files. This can be done in Windows Explorer by selecting File, New, Folder, or at the DOS prompt as follows:
md i:\IFS_dir
where I: is the network drive assigned to your AS/400 and IFS_dir is the name of the directory you wish to use for this installation.
Step 4
Copy the contents of your PC‟s install directory created in Step 1 above to the IFS directory created in Step 3 above using Windows Explorer, or from the DOS prompt as follows:
copy c:\PC_dir\*.* I:\IFS_dir
where PC_dir is the name of the directory on your PC, I: is the network drive assigned to your AS/400 and IFS_dir is the name of the directory you wish to use for this installation.
Step 5
On your AS/400, decide which library you wish to use for the install procedure and create a save file in that library, e.g.
crtsavf lib_name/CMNQUEV1R1
where lib_name is the name of the library you chose to use.
Step 6
On your AS/400, copy the contents of the CMNQUEV1R1.sav file from the IFS directory to the save file just created, by issuing the following command:
cpyfrmstmf
fromstmf(‘/IFS_dir/CMNQUEV1R1.sav’)
tombr(‘/qsys.lib/lib_name.lib/CMNQUEV1R1.file’)
mbropt(*replace)
cvtdta(*none)
endlinfmt(*fixed)
tabexpn(*no)
where IFS_dir is the name of the IFS directory into which you copied the install files in Step 4 above, and lib_name is the name of the library in which you created the save file in Step 5 above.

Communiqué User Guide V1R1 Page: 18
Step 7
On your AS/400, ensure that the previous step worked by displaying the contents of save file CMNQUEV1R1:
dspsavf lib_name/CMNQUEV1R1
where lib_name is the name of the library in which you created the save file in Step 5.
If you see the message (No records in save file) then something has gone wrong during the preceding steps. Try following them again. If you still cannot get this procedure to work, contact us at [email protected].
Step 8
On your AS/400, issue the following command to restore the Communiqué licensed program to your system:
rstlicpgm
licpgm(1CMNQUE)
dev(*savf)
option(*base)
rstobj(*all)
lng(*primary)
output(*none)
rls(*first)
replacerls(*only)
savf(lib_name/CMNQUEV1R1)
where lib_name is the name of the library in which you created the save file in Step 5.
Step 9
If you are installing on OS/400 V5R3M0 or above, run the following command to change the *RSTDRNMUNL attribute of the /tmp directory where Communiqué builds its temporary MIME file:
CHGATR OBJ('/tmp') ATR(*RSTDRNMUNL) VALUE(*NO)
This avoids the potential issue described in this IBM APAR
Step 10
If you have downloaded Communiqué from the Internet, you can use the product without a license key for up to 30 days. At the end of that period Communiqué will notify you that it can no longer be used without a license key.
To obtain a license key contact ariadne at [email protected].

Communiqué User Guide V1R1 Page: 19
If you have been issued with a license key, proceed as follows.
On your AS/400, issue the following command to add a license key to enable you to use the Communiqué licensed program:
addlickey
lickeyinp(*prompt)
prdid(1CMNQUE)
licterm(V3R1)
feature(5001)
serial(*local)
prcgrp(Ppp)
lickey(XXXXXX YYYYYY ZZZZZZ)
usglmt(*nomax)
expdate(exp_date)
vnddta(*none)
where:
XXXXX YYYYYY ZZZZZZ is the license key you received by e-mail from us
exp_date is the expiry date mentioned in the e-mail
and: Ppp is the processor group mentioned in the e-mail
Communiqué is now ready for you to use!
If you have any trouble at any point in this procedure, please contact us by e-mail at [email protected].

Communiqué User Guide V1R1 Page: 20
Maintenance
Periodically we will release Program Temporary Fixes (PTFs) in order to add new features or to resolve any problems found with Communiqué.
If you have installed CoolSpools Plus, please refer to the installation instructions in the CoolSpools Plus User Guide. These instructions apply only where you have installed the standalone version of Communiqué.
PTFs are supplied in the form of an AS/400 save file stored within a zip file, and can be downloaded from the Download section of the ariadne web site at http://www.ariadnesoftware.co.uk.
The procedure for loading and applying a PTF for Communiqué is as follows.
First download the PTF you require from the Internet. The PTF will be held in a file called Q1CMnnnn.zip, where nnnn is the PTF id.
This section describes two possible procedures for copying the AS/400 save file held in this zip file to your AS/400. We are hoping to simplify and automate this area in the near future. However, for the moment, please select one of the two methods described below and follow the steps carefully and in the order indicated. Steps to be carried out on the PC are shown in green, steps to be carried out on the AS/400 in blue.
Method 1: Installing a PTF using FTP
This method uses FTP (File Transfer Protocol) to transfer the PTF file from your PC to your AS/400. It is assumed that you have stored the zip file which you downloaded from the Internet on your PC and that you have enabled an FTP link between your PC and your AS/400.
Step 1
On your PC, create a directory for the PTF installation, either within Windows Explorer, or from the DOS prompt, or re-use the directory you used to install originally, e.g.:
md c:\CMNQUEV1R1
Save or copy the zip file that you downloaded or received into this directory.
Step 2
On your PC, unzip the contents of the zip file into the directory you just created using pkunzip, WinZip, Norton UnZip etc.
Step 3
Communiqué User Guide V1R1 Page: 21
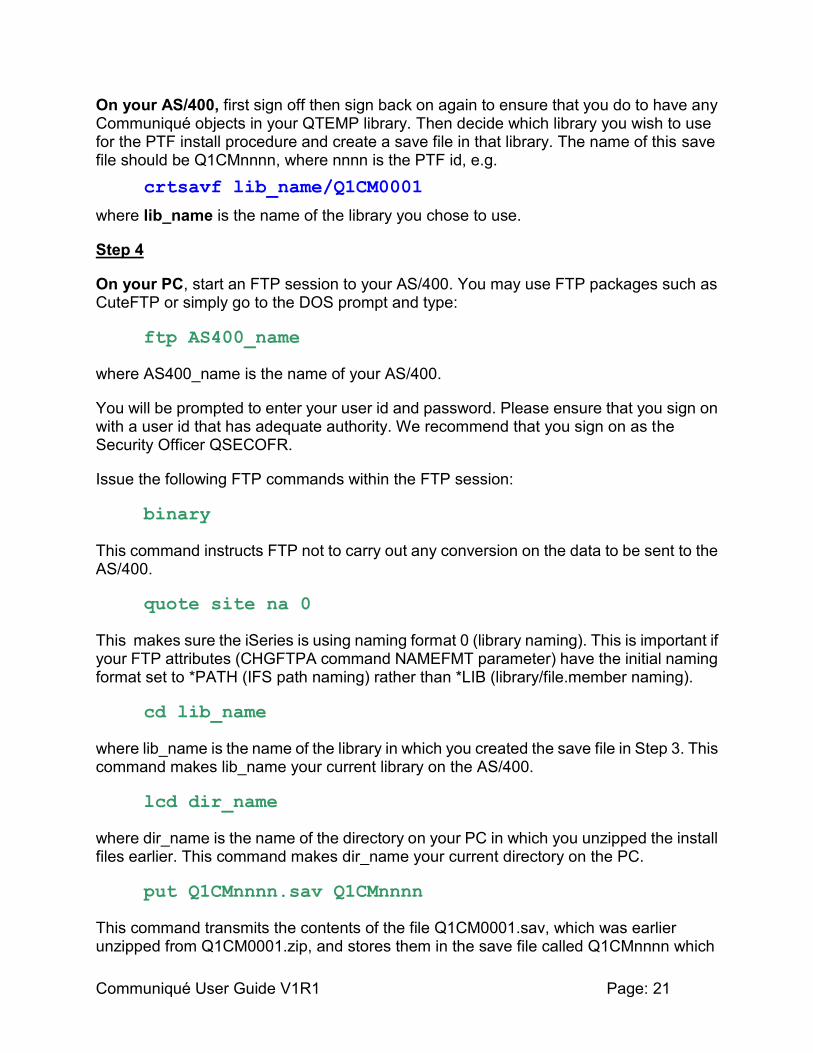
On your AS/400, first sign off then sign back on again to ensure that you do to have any Communiqué objects in your QTEMP library. Then decide which library you wish to use for the PTF install procedure and create a save file in that library. The name of this save file should be Q1CMnnnn, where nnnn is the PTF id, e.g.
crtsavf lib_name/Q1CM0001
where lib_name is the name of the library you chose to use.
Step 4
On your PC, start an FTP session to your AS/400. You may use FTP packages such as CuteFTP or simply go to the DOS prompt and type:
ftp AS400_name
where AS400_name is the name of your AS/400.
You will be prompted to enter your user id and password. Please ensure that you sign on with a user id that has adequate authority. We recommend that you sign on as the Security Officer QSECOFR.
Issue the following FTP commands within the FTP session:
binary
This command instructs FTP not to carry out any conversion on the data to be sent to the AS/400.
quote site na 0
This makes sure the iSeries is using naming format 0 (library naming). This is important if your FTP attributes (CHGFTPA command NAMEFMT parameter) have the initial naming format set to *PATH (IFS path naming) rather than *LIB (library/file.member naming).
cd lib_name
where lib_name is the name of the library in which you created the save file in Step 3. This command makes lib_name your current library on the AS/400.
lcd dir_name
where dir_name is the name of the directory on your PC in which you unzipped the install files earlier. This command makes dir_name your current directory on the PC.
put Q1CMnnnn.sav Q1CMnnnn
This command transmits the contents of the file Q1CM0001.sav, which was earlier unzipped from Q1CM0001.zip, and stores them in the save file called Q1CMnnnn which

Communiqué User Guide V1R1 Page: 22
you created earlier on your AS/400.
Step 5
On your AS/400, ensure that the previous step worked by displaying the contents of save file Q1CMnnnn:
dspsavf lib_name/Q1CMnnnn
If you see the message (No records in save file) then something has gone wrong during the preceding steps. Try following them again. If you still cannot get this procedure to work, contact us at [email protected].
Step 6
On your AS/400, issue the following command to load the PTF on to your system:
lodptf
licpgm(1CMNQUE)
dev(*savf)
select(1CMnnnn)
savf(lib_name/Q1CMnnnn)
where lib_name is the name of the library in which you created the save file in Step 3 and nnnn is the PTF id.
Step 7
On your AS/400, issue the following command to apply the PTF to your system:
apyptf
licpgm(1CMNQUE)
select(1CMnnnn)
apy(*temp)
where: nnnn is the PTF
If you have any trouble at any point in this procedure, please contact us by e-mail at [email protected].
Method 2: Installing a PTF using the IFS
This method uses a Client Access network drive assigned to the IFS of your AS/400 to transfer the PTF from your PC to your AS/400. It is assumed that you have stored the PTF zip file (which your downloaded from the Internet or received via e-mail) on your PC.
Step 1
On your PC, create an install directory for the PTF, either within Windows Explorer, or

Communiqué User Guide V1R1 Page: 23
from the DOS prompt, or use the directory you created for the original installation, e.g.:
md c:\PC_dir
where PC_dir is the name of the directory you wish to use for this installation.
Save or move the zip file that you downloaded or received into this directory.
Step 2
On your PC, unzip the contents of the zip file into the directory you just created using pkunzip, WinZip, Norton UnZip etc.
Step 3
On your PC, ensure that you have a network drive assigned to a directory in the root file system of your AS/400‟s IFS. This can be done in Windows Explorer by selecting Tools, Map Network Drive.
Create a directory in the IFS to receive the PTF. This can be done in Windows Explorer by selecting File, New, Folder, or at the DOS prompt as follows:
md i:\IFS_dir
where I: is the network drive assigned to your AS/400 and IFS_dir is the name of the directory you wish to use for this installation.
Step 4
Copy the contents of your PC‟s PTF directory created in Step 1 above to the IFS directory created in Step 3 above using Windows Explorer, or from the DOS prompt as follows:
copy c:\PC_dir\*.* I:\IFS_dir
where PC_dir is the name of the directory on your PC, I: is the network drive assigned to your AS/400 and IFS_dir is the name of the directory you wish to use for this installation.
Step 5
On your AS/400, first sign off then sign back on again to ensure that you do to have any Communiqué objects in your QTEMP library. Then decide which library you wish to use for the install procedure and create a save file in that library. The save file should be called Q1CMnnnn, where nnnn is the PTF id, e.g.
crtsavf lib_name/Q1CMnnnn
where lib_name is the name of the library you chose to use
and nnnn is the PTF id.
Communiqué User Guide V1R1 Page: 24
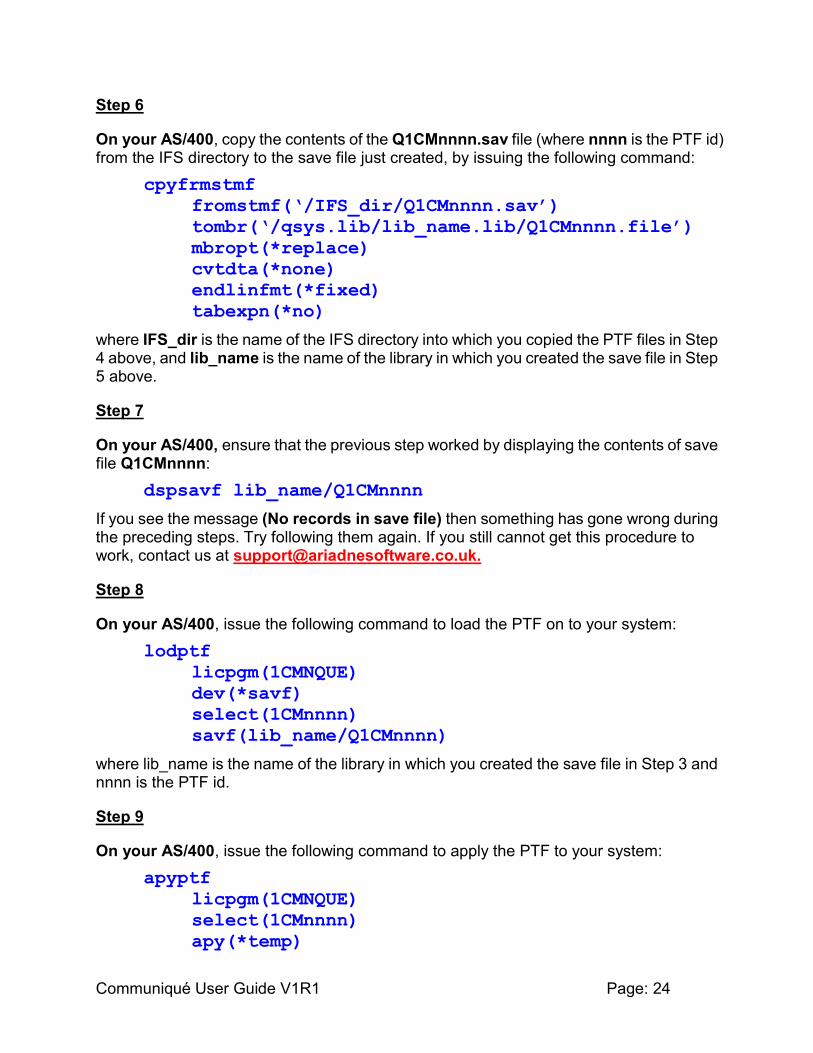
Step 6
On your AS/400, copy the contents of the Q1CMnnnn.sav file (where nnnn is the PTF id) from the IFS directory to the save file just created, by issuing the following command:
cpyfrmstmf
fromstmf(‘/IFS_dir/Q1CMnnnn.sav’)
tombr(‘/qsys.lib/lib_name.lib/Q1CMnnnn.file’)
mbropt(*replace)
cvtdta(*none)
endlinfmt(*fixed)
tabexpn(*no)
where IFS_dir is the name of the IFS directory into which you copied the PTF files in Step 4 above, and lib_name is the name of the library in which you created the save file in Step 5 above.
Step 7
On your AS/400, ensure that the previous step worked by displaying the contents of save file Q1CMnnnn:
dspsavf lib_name/Q1CMnnnn
If you see the message (No records in save file) then something has gone wrong during the preceding steps. Try following them again. If you still cannot get this procedure to work, contact us at [email protected].
Step 8
On your AS/400, issue the following command to load the PTF on to your system:
lodptf
licpgm(1CMNQUE)
dev(*savf)
select(1CMnnnn)
savf(lib_name/Q1CMnnnn)
where lib_name is the name of the library in which you created the save file in Step 3 and nnnn is the PTF id.
Step 9
On your AS/400, issue the following command to apply the PTF to your system:
apyptf
licpgm(1CMNQUE)
select(1CMnnnn)
apy(*temp)
Communiqué User Guide V1R1 Page: 25
where: nnnn is the PTF
If you have any trouble at any point in this procedure, please contact us by e-mail at [email protected].
Communiqué User Guide V1R1 Page: 26
Using Communiqué
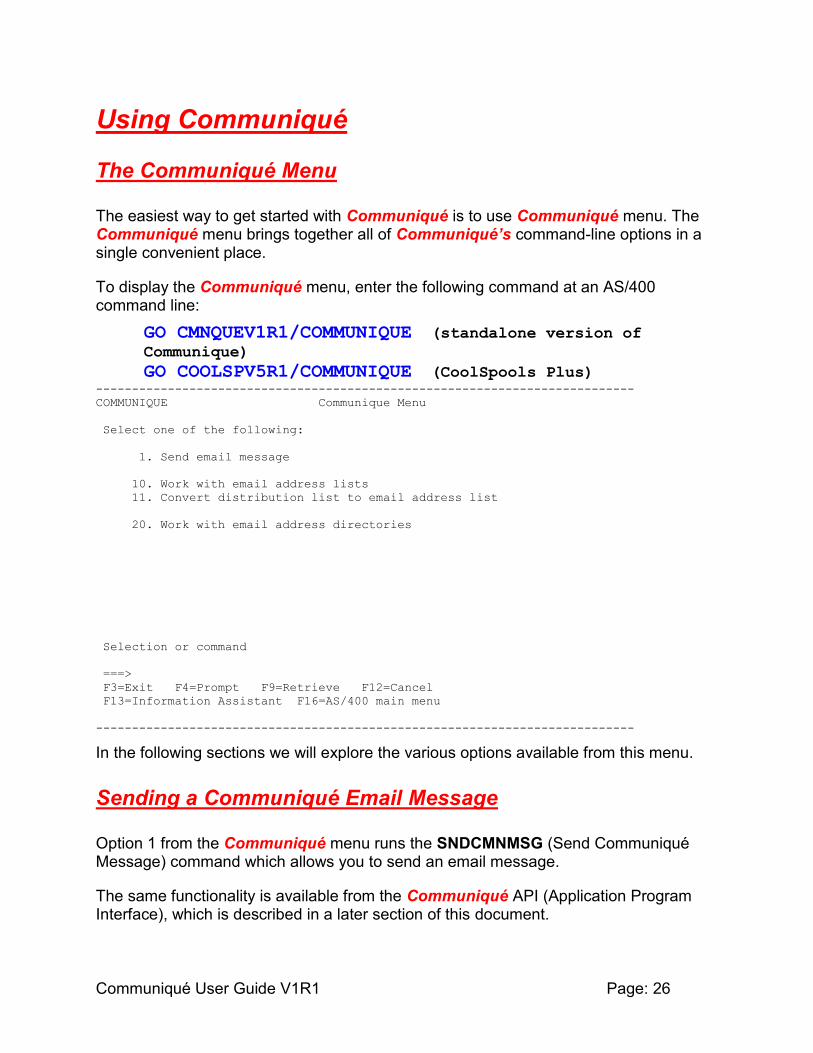
The Communiqué Menu
The easiest way to get started with Communiqué is to use Communiqué menu. The Communiqué menu brings together all of Communiqué’s command-line options in a single convenient place.
To display the Communiqué menu, enter the following command at an AS/400 command line:
GO CMNQUEV1R1/COMMUNIQUE (standalone version of
Communique)
GO COOLSPV5R1/COMMUNIQUE (CoolSpools Plus) ---------------------------------------------------------------------------
COMMUNIQUE Communique Menu
Select one of the following:
1. Send email message
10. Work with email address lists
11. Convert distribution list to email address list
20. Work with email address directories
Selection or command
===>
F3=Exit F4=Prompt F9=Retrieve F12=Cancel
F13=Information Assistant F16=AS/400 main menu
---------------------------------------------------------------------------
In the following sections we will explore the various options available from this menu.
Sending a Communiqué Email Message
Option 1 from the Communiqué menu runs the SNDCMNMSG (Send Communiqué Message) command which allows you to send an email message.
The same functionality is available from the Communiqué API (Application Program Interface), which is described in a later section of this document.

Communiqué User Guide V1R1 Page: 27
Command parameters are as follows.
TO
The TO (Recipients) parameter allows you to specify the email addresses to which the email message should be sent.
You can define up to 32 recipients for the message on this command parameter. If you need to send the same email address to more than 32 recipients simultaneously, you can do this by defining an address list and specifying the address list name on this parameter.
The default is the single value *SELECT: Communique will prompt you to enter the email address(es) to which the message should be sent or select the address(es) from an email address directory.
There are 3 elements to this parameter: Email address, Name and Type.
Email address
This is where you enter the email address to which the message is to be sent.
Note that while Communiqué will check that the email address that you enter conforms to the rules for valid email addresses, it is not possible to validate that the email address that you enter is correct or that the message will be deliverable.
For example, sales.ariadnesoftware.co.uk is not a valid email address (since it does not contain an @ sign), and Communiqué will reject it. However, [email protected] is a valid email address and Communiqué will allow it, but it is not ariadne‟s correct email address (it should be [email protected]) and the message will not be received.
Name
If you would like your email message to display the recipient‟s name rather than the email address when it is delivered, enter the name here.
The default value is *NONE, i.e. no name is provided and the email address will appear as the recipient instead.
For example, if you specify:
SNDCMNMSG TO(([email protected] *NONE))
when the message is received, the To: attribute will be shown as:
However, if you specify:

Communiqué User Guide V1R1 Page: 28
SNDCMNMSG TO(([email protected] „ariadne Sales‟))
when the message is received, the To: attribute will be shown as:
To: ariadne Sales
Type
Specify the type of recipient here.
Options are:
*PRI (Default) Primary recipient.
*CC Carbon copy recipient. An *CC recipient receives a copy of the message, and is identified to the primary recipient, but is not the primary recipient.
*BCC Blind carbon copy recipient. An *BCC recipient receives a copy of the message, but is not identified to the primary recipient or *CC recipients.
*ADRL Address list. If you wish to send to an address list, this is the value that must be entered.
Example:
Sending to ariadne Sales as a primary recipient with a copy to ariadne Marketing:
SNDCMNMSG TO( ([email protected] „Sales‟ *PRI)
([email protected] „Marketing‟ *CC))
Example:
Sending to an email address list called “Sales”:
SNDCMNMSG TO((Sales *ADRL *ADRL))
FROM
The FROM (Sender) parameter allows you to specify the sender of the email and the email address to which a response should be sent.
The default value is *CURRENT, which means that Communiqué will try to retrieve the email address of the user sending the email from the System Distribution Directory. If no email address can be determined for the user from the System Distribution Directory, you
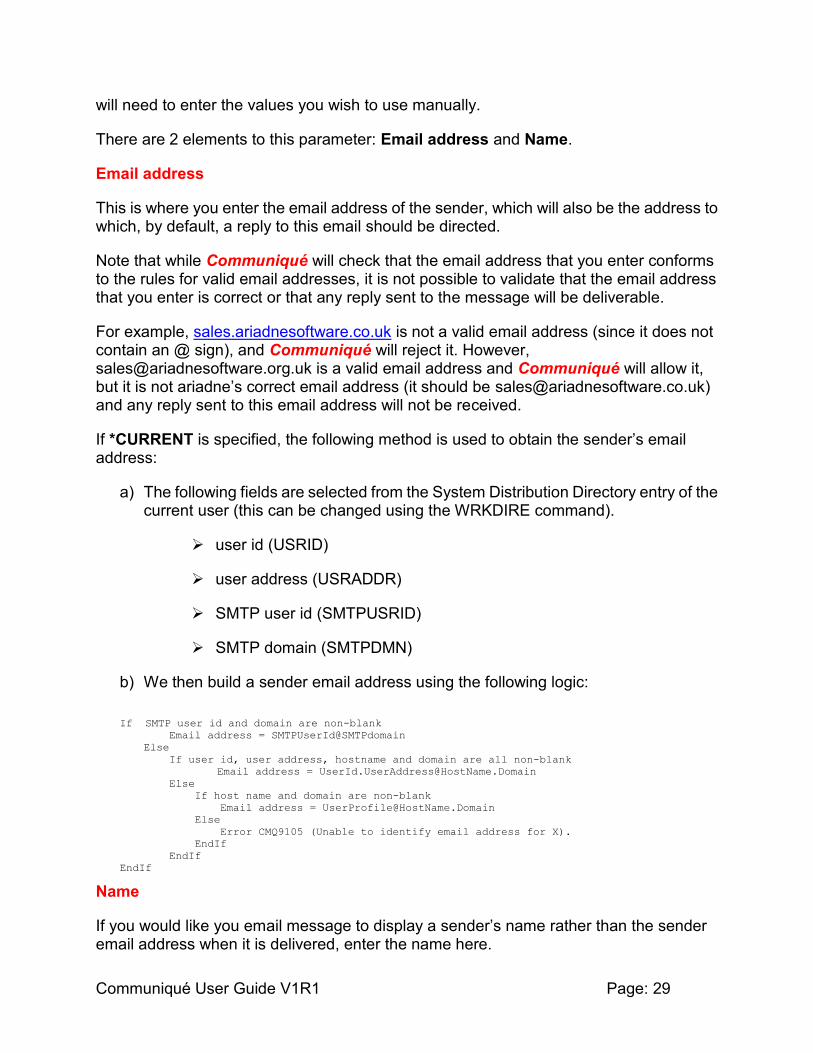
Communiqué User Guide V1R1 Page: 29
will need to enter the values you wish to use manually.
There are 2 elements to this parameter: Email address and Name.
Email address
This is where you enter the email address of the sender, which will also be the address to which, by default, a reply to this email should be directed.
Note that while Communiqué will check that the email address that you enter conforms to the rules for valid email addresses, it is not possible to validate that the email address that you enter is correct or that any reply sent to the message will be deliverable.
For example, sales.ariadnesoftware.co.uk is not a valid email address (since it does not contain an @ sign), and Communiqué will reject it. However, [email protected] is a valid email address and Communiqué will allow it, but it is not ariadne‟s correct email address (it should be [email protected]) and any reply sent to this email address will not be received.
If *CURRENT is specified, the following method is used to obtain the sender‟s email address:
a) The following fields are selected from the System Distribution Directory entry of the current user (this can be changed using the WRKDIRE command).
user id (USRID)
user address (USRADDR)
SMTP user id (SMTPUSRID)
SMTP domain (SMTPDMN)
b) We then build a sender email address using the following logic:
If SMTP user id and domain are non-blank
Email address = SMTPUserId@SMTPdomain
Else
If user id, user address, hostname and domain are all non-blank
Email address = [email protected]
Else
If host name and domain are non-blank
Email address = [email protected]
Else
Error CMQ9105 (Unable to identify email address for X).
EndIf
EndIf
EndIf
Name
If you would like you email message to display a sender‟s name rather than the sender email address when it is delivered, enter the name here.

Communiqué User Guide V1R1 Page: 30
The default value is *NONE, i.e. no name is provided and the email address will appear as the sender instead.
For example, if you specify:
SNDCMNMSG… FROM(([email protected] *NONE))
when the message is received, the From: attribute will be shown as:
From: [email protected]
However, if you specify:
SNDCMNMSG FROM(([email protected] „ariadne Sales‟))
when the message is received, the From: attribute will be shown as:
From: @ariadne Sales
If *CURRENT is specified, the following method is used to determine the sender‟s name:
a) The following fields are selected from the System Distribution Directory entry of the current user (this can be changed using the WRKDIRE command).
first name (FSTNAM)
last name (LSTNAM)
preferred name (PREFNAM)
user description (USRD)
surname (SURNAM)
given name (GIVENNAM)
user address (USRADDR)
b) We then build a sender name using the following logic:
If preferred name is non-blank
Sender name = preferred name
Else
If first name and last name are non-blank
Sender name = "FirstName LastName"
Else
If given name and surname are non-blank
Sender name = "GivenName Surname"
Else
If user description is non-blank
Sender name = user description
Else
Retrieve user profile attributes
If text description of user profile is non-blank
Sender name = user profile text description

Communiqué User Guide V1R1 Page: 31
Else
Sender name = blanks (no sender name will be used and the email address
will show as the sender)
End If
End If
End If
End If
End If
SUBJECT
The SUBJECT (Subject) parameter allows you to define a subject line for the message. You can enter up to 256 characters of free-format text.
Example:
SNDCMNMSG…SUBJECT(„Example subject line‟)
When this message is received, it will show as:
Subject: Example subject line
MSG
The MSG (Message) parameter allows you to enter the text of an email message directly on the command line.
Up to 512 characters of free-format text can be entered here. If you need to send more than 512 characters of text, then you can either use an embedded text or HTML file (see the ATTACH parameter below), or use the Communiqué API, which allows up to 4,096 characters of text on the equivalent parameter.
The message can be sent in either plain text, HTML or alternative plain text/HTML formats.
There are 2 elements to this parameter: Message text and Message format.
Message text:
You can enter the text of a short message here. Up to 512 characters can be entered.
When received, the message will be displayed exactly as it is entered, with the following exceptions:
If you want to force a line break, enter <br>. Even if the message is sent in plain text format, this HTML control will be interpreted and converted to a hard line break (carriage return-line feed sequence).
Other HTML controls may be entered, but will only be interpreted as HTML controls if the message is sent and delivered in HTML format.

Communiqué User Guide V1R1 Page: 32
Longer messages (up to 4096 bytes) can be sent using the Communiqué API CM_SNDAPIR.
Alternatively, specify *STMF for the message text and provide the name of a stream file on the MSGSTMF parameter. Communiqué will take the text of the message from the stream file specified.
Message format:
This is where you specify the format in which the message is sent.
Options are:
*BOTH (Default) The message is sent in alternative plain text/HTML format. This means that two copies of the message text will be sent: a plain text copy and an HTML copy. If the email client software used to receive the message can handle HTML messages, the HTML copy will be used, otherwise the plain text copy will be used.
*TEXT The message is sent in plain text format. The only HTML control which is interpreted is <br>, which Communiqué will convert to a hard line break.
*HTML The message is sent in HTML format. You can include HTML formatting (e.g. <b> </b> or <u> </u> to control bold text and underlining). Communiqué will take the text that you enter and wrap it with some basic HTML header and footer controls (<HTML> <HEAD> <BODY>). These controls should not therefore be included in the text of the message.
Example:
SNDCMNMSG…
MSG('Here''s a message <br>with<br>line <br>breaks.' *TEXT)
When this message is received, it will show as:
Here's a message with line breaks.
Example:
SNDCMNMSG…

Communiqué User Guide V1R1 Page: 33
MSG( 'Here''s a demonstration of a message with HTML controls.<br>
<b>This line is in bold, </b><br>
<u>While this line is underlined.</u>')
When this message is received, it will show as:
Here's a demonstration of a message with HTML controls.
This line is in bold, While this line is underlined.
ATTACH
The ATTACH (Attachments) parameter allows you to attach or embed up to 32 files to your email message.
There are 5 elements to this parameter: File name, Method, Content type, Code page and Attachment name in email.
File name:
This is where you enter the full path name of the file you wish to attach. The path name must be entered in IFS format. In other words, documents stored in shared folders must be referenced in the QDLS file system and database file members must be reference in the QSYS.LIB file system.
Method:
This is where you specify the method by which the file is sent.
Options are:
*ATTACH (Default) The file is sent as an attachment. It will appear as an attached file separate from the text of the email.
*EMBED The contents of the file are embedded in the text of the email and will follow the text of any message entered on the MSG parameter. Please note that your client email software is likely only to support the embedding of certain types of file, e.g. text, HTML and images.
Content type
The content type tells Communiqué and the receiving email software what type of data the attachment represents.
Communiqué User Guide V1R1 Page: 34
It is important that the content type is specified accurately, as Communiqué will process the attachment differently depending on the value you specify here. For example, if you specify the attachment type as *TEXT or *HTML, it will be handled using a technique appropriate to textual data, and may be converted from EBCDIC to ASCII, whereas any other content type will cause the attachment to be handled as binary data and sent unaltered.
Moreover, the receiving software may not handle the attachment appropriately if the content type is specified incorrectly. For example, if you send a PDF file attachment, but specify a content type of HTML, the receiving email software may attempt to display the PDF file as HTML, which will cause unwanted results.
Options are:
*FILE (Default) The content type will be inferred from the extension part of the file name.
You can control which file extensions are identified as
which content types by listing file extensions in the
second-level text of Slipstream messages
CMQ5000-CMQ5004. Each file extension must be from 1-5
characters long, padded with trailing blanks if less than 5
characters long. For example, message CMQ5001 controls
which file extensions identify image files. This message is
supplied with the value:
“JPG JPEG GIF BMP PNG TIF TIFF”.
You may change the text of this message, to add or remove
extensions, so long as you ensure that each extension is
exactly 5 characters long (including any trailing blanks) and
remembering that installing PTFs or a new release will
overwrite your changes.
Any file extension not listed in one of these messages will be
treated as application binary data.
*BINARY Application binary. This is the default MIME content type used for data types other than those which have distinct content types of their own (image, audio, video etc.)
*TEXT Identifies the attachment as plain ASCII text.
*HTML Identifies the attachment as HTML.
*IMAGE identifies the attachment as an image.
Communiqué User Guide V1R1 Page: 35
*VIDEO identifies the attachment as a video file.
*AUDIO identifies the attachment as an audio file.
Code page
This element allows you to identify the code page of the data in the attachment file. This value is used if the content type is indicated as *TEXT or *HTML to convert the data to ASCII format so it can be displayed by the client email software.
Options are:
*STMF (Default) The code page attribute of the file in the IFS is used.
1-65534 The code page to use.
Attachment name in email
This element allows you to specify the name of the attachment as it should appear in the email.
Options are:
*FILE (Default) The name of the attachment is the same as that of the file being attached.
Attachment_name The name to give the attachment in the email.
Example:
Attaching a PDF file:
SNDCMNMSG…
ATTACH(('‟/home/sales/salesreport.pdf *ATTACH *BINARY))
Example:
Embedding an HTML file:
SNDCMNMSG…
ATTACH(('‟/home/sales/salesreport.htm *EMBED *HTML))
Communiqué User Guide V1R1 Page: 36
MSGSTMF
The MSGSTMF (Stream file containing message) parameter allows you to specify the path name of a stream file from which the text of the message should be taken.
In order to use this parameter, specify MSG(*STMF).
This could be a text file or a complete HTML document. If a database file member is to be used, the name must be given according to IFS naming conventions (e.g. /QSYS.LIB/library_name.LIB/file_name.FILE/member_name.MBR).
PRIORITY
When the SNDCMNMSG command is prompted using F4, the PRIORITY (Priority) parameter only appears if you then also press F10 to display additional parameters.
Options are:
*NORMAL (Default) The message is sent specifying normal priority. When the message arrives, the client email software will not mark it as high or low priority.
*HIGH High priority. When the message arrives, the client email software will mark it as high priority.
*LOW Low priority. When the message arrives, the client email software will mark it as low priority.
CFMDEL
When the SNDCMNMSG command is prompted using F4, the CFMDEL (Confirm Delivery) parameter only appears if you then also press F10 to display additional parameters.
Options are:
*NO (Default) No confirmation of delivery if requested.
*YES The message is sent with an indication that you have requested that the recipient return confirmation of delivery. When the message is opened, if you have not switched off this feature, the client software will either send a confirmation message back to the sender of the email or ask you whether you wish to send such a confirmation.
If *YES is specified, you may specify up to 32 email address/name pairs to receive the confirmation messages.

Communiqué User Guide V1R1 Page: 37
The default is the single value *SENDER, which indicates that confirmation of delivery should be notified just to the email address specified as the sender on the FROM parameter.
SNDMLTMSG
When the SNDCMNMSG command is prompted using F4, the SNDMLTMSG (Send Multiple Messages) parameter only appears if you then also press F10 to display additional parameters.
Options are:
*NO (Default) If you are sending an email to more than one recipient, a single message will be created with multiple recipients. When the message is received, the reader will be able to see the names of all people to whom the message was sent.
*YES If you are sending an email to more than one recipient, multiple separate messages will be sent, one to each recipient. When the message is received, the reader will see only their own name and will not be able to see the names of all people to whom the message was sent.
Working with Email Address Lists
Option 10 from the Communiqué menu runs the WRKADRL (Work with Address Lists) command, which allows you to create and manage address lists. Email address lists provide a means of grouping email addresses so that you can conveniently send messages to groups of people, e.g. departments, customers who have bought a particular product etc.
Selecting option 10 or entering the WRKADRL command displays the address lists that you been defined so far.
Address list information is stored in file CM_ADRLST. If you wish to ensure that only a restricted number of people can maintain address lists, you should set the authorities on this file appropriately, for example by associating an authorization list with it.
--------------------------------------------------------------------------------------
Work with Address Lists
System: YOURSYS
Type options, press Enter.
1=Create 2=Change 3=Copy 4=Delete 5=Display 6=Print list entries
8=Work with list entries
Opt Address List Text 'description'

Communiqué User Guide V1R1 Page: 38
FINANCE Finance Department
IT I.T. Department
MARKETING Marketing Department
PRODUCTION Production Department
SALES Sales Department
Bottom
F3=Exit F5=Refresh F12=Cancel F17=Position to
--------------------------------------------------------------------------------------
Options that can be input against entries in the list are:
1=Create Select this option to create a new address list. This option is available only on the first line of the display. You can enter the name of the new address list in the space available if desired. This is equivalent to running the CRTADRL (Create Address List) command.
2=Change Select this option to change the details of an existing address list. This is equivalent to running the CHGADRL (Change Address List) command.
3=Copy Select this option to copy an existing address list and create a new address list. This is equivalent to running the CPYADRL (Copy Address List) command.
4=Delete Select this option to delete one or more address lists. This is equivalent to running the DLTADRL (Delete Address List) command.
5=Display Selection this option to display the details of an address list.
6=Print list entries Select this option to print the details of an address list and the entries it contains.
8=Work with list entries Select this option to work with the entries contained in an address list. This is equivalent to running the WRKADRLE (Work with Address List Entries) command.
Communiqué User Guide V1R1 Page: 39
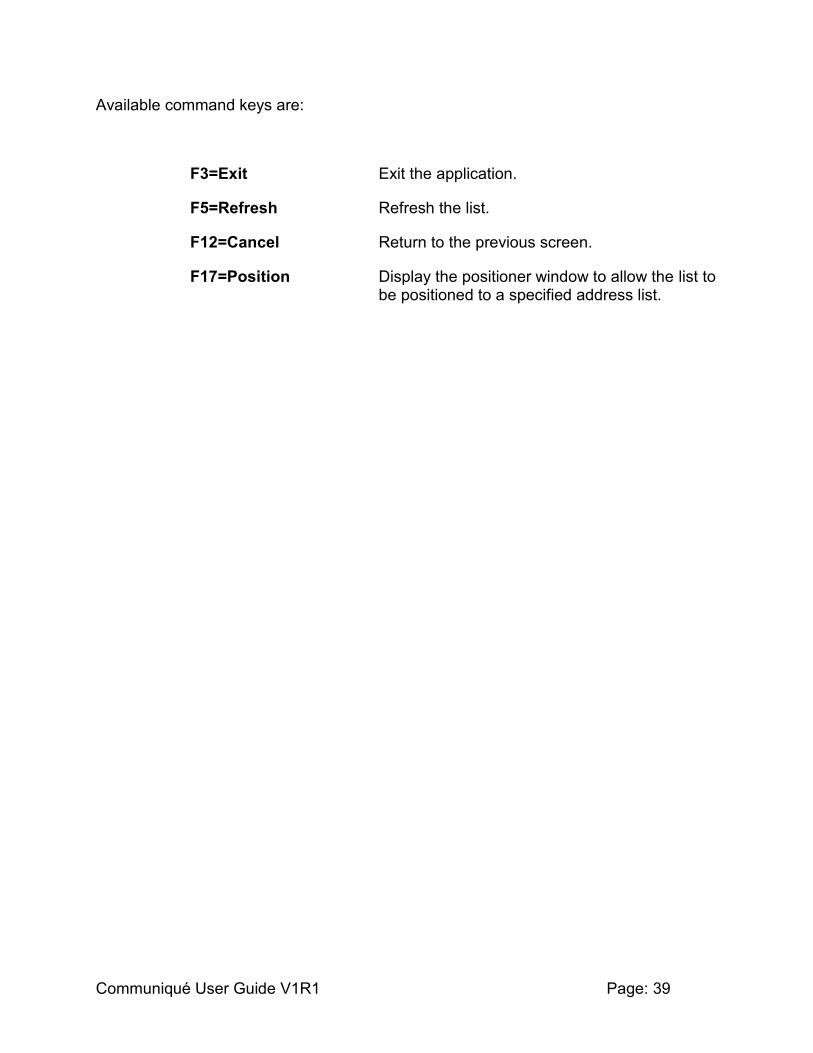
Available command keys are:
F3=Exit Exit the application.
F5=Refresh Refresh the list.
F12=Cancel Return to the previous screen.
F17=Position Display the positioner window to allow the list to be positioned to a specified address list.

Communiqué User Guide V1R1 Page: 40
Creating an address list
The CRTADRL (Create Address List) command allows you to create an address list.
Command parameters are as follows:
ADRL
The ADRL (Address list) parameter allows you to specify the name which will be used to identify the address list. The name must be unique and must conform to the normal rules for iSeries object names, except that it may be up to 20 characters in length.
TEXT
The TEXT (Text „Description‟) parameter enables you to enter up to 50 characters of free-format text to describe and further identify the address list, its contents and purpose.
Example:
Creating an address list to store the email addresses of members of the Sales Department.
CRTADRL ADRL(SALES) TEXT(„Sales Department‟)
Communiqué User Guide V1R1 Page: 41
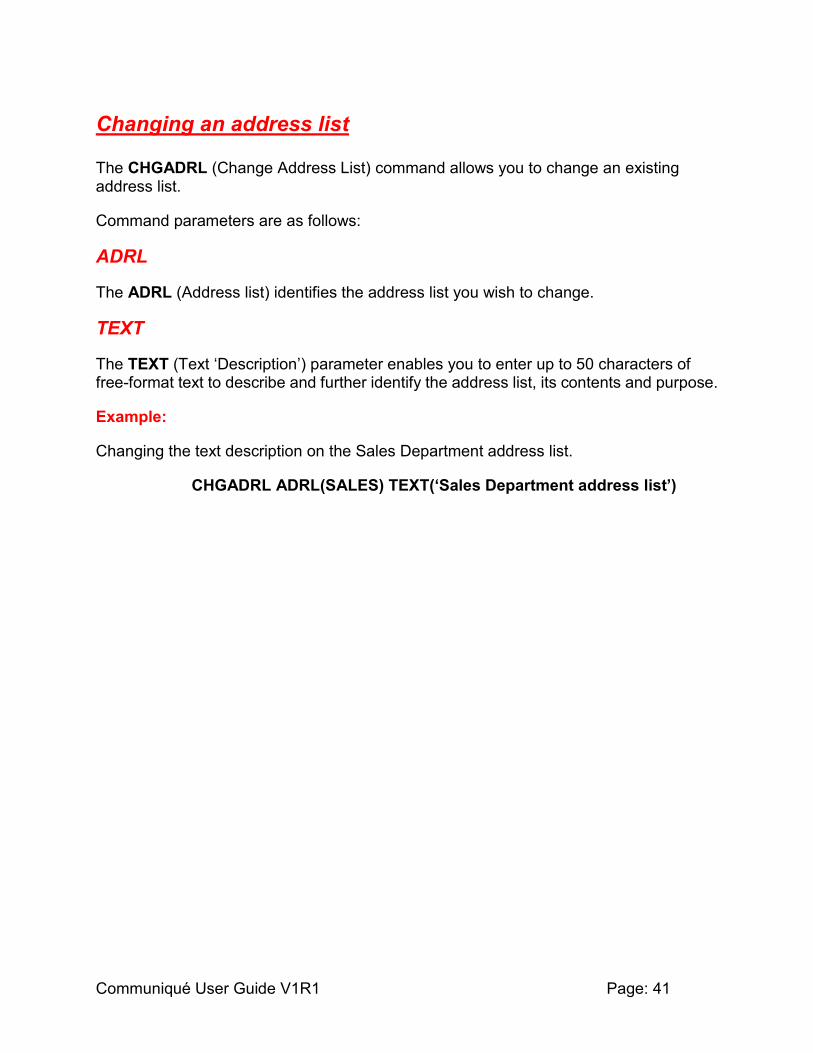
Changing an address list
The CHGADRL (Change Address List) command allows you to change an existing address list.
Command parameters are as follows:
ADRL
The ADRL (Address list) identifies the address list you wish to change.
TEXT
The TEXT (Text „Description‟) parameter enables you to enter up to 50 characters of free-format text to describe and further identify the address list, its contents and purpose.
Example:
Changing the text description on the Sales Department address list.
CHGADRL ADRL(SALES) TEXT(„Sales Department address list‟)

Communiqué User Guide V1R1 Page: 42
Copying an address list
The CPYADRL (Copy Address List) command allows you to copy an existing address list and create a new one.
Command parameters are as follows:
FROMADRL
The FROMADRL (From address list) identifies the address list you wish to copy.
TOADRL
The TOADRL (To address list) identifies the address list you wish to create.
TEXT
The TEXT (Text „Description‟) parameter enables you to enter up to 50 characters of free-format text to describe and further identify the new address list, its contents and purpose.
CPYADRLE
The CPYADRLE (Copy address list entries?) allows you to indicate whether you want to copy the contents of the existing address list or just its description.
Options are:
*YES (Default) Yes. The contents of the address list are copied.
*NO No. The contents of the address list are not copied.
Example:
Copy the Sales Department address list to create a combined Sales and Marketing list.
CPYADRL
FROMADRL(SALES)
TOADRL(SALES_AND_MARKETING)
TEXT(„Sales and Marketing address list‟)
CPYADRLE(*YES)

Communiqué User Guide V1R1 Page: 43
Communiqué User Guide V1R1 Page: 44
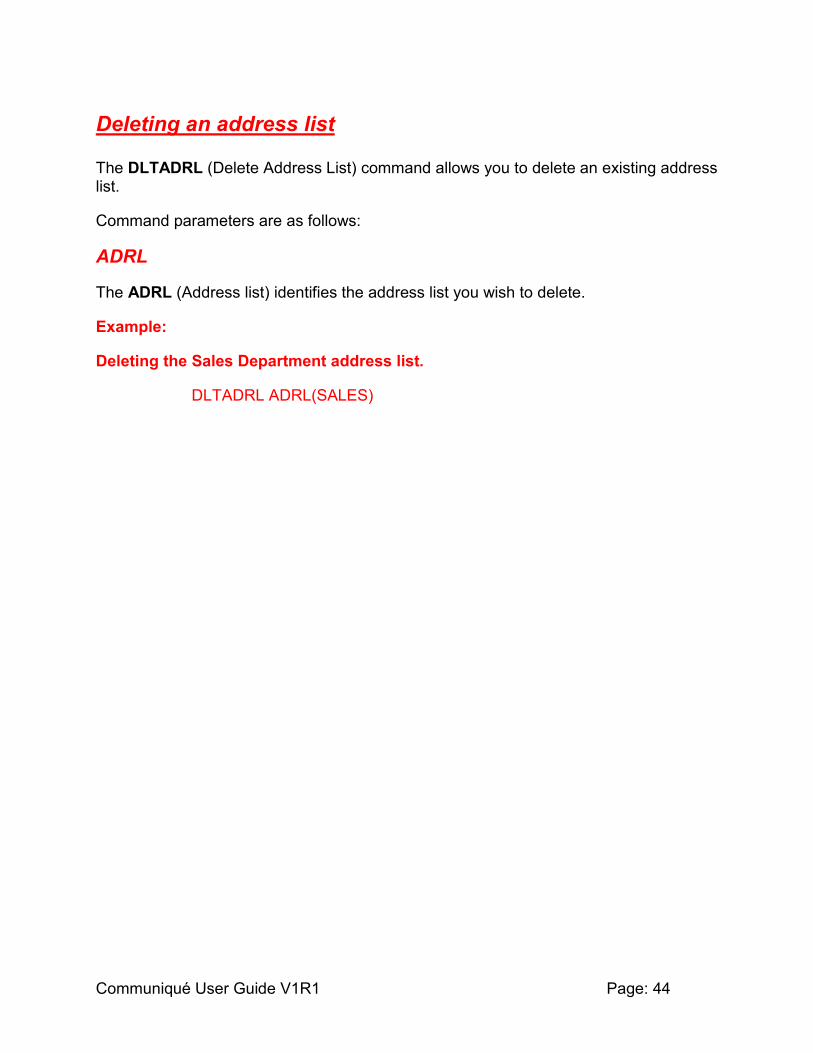
Deleting an address list
The DLTADRL (Delete Address List) command allows you to delete an existing address list.
Command parameters are as follows:
ADRL
The ADRL (Address list) identifies the address list you wish to delete.
Example:
Deleting the Sales Department address list.
DLTADRL ADRL(SALES)

Communiqué User Guide V1R1 Page: 45
Converting a Distribution List to an Address List
Option 11 from the Communiqué menu runs the CVTDSTADRL (Convert Distribution List to Address List) command which allows you to convert a SNADS distribution list to an address list for use with Communiqué.
If you were formerly a user of Office Vision/400, you may have SNADS distribution lists which are equivalent to Communiqué address lists and which you do not wish to have to recreate. This command allows you to automate the conversion of your existing SNADS distribution lists and create Communiqué address lists from them.
Command parameters are as follows:
DSTL
The DSTL(Distribution List) parameter identifies the distribution list you wish to convert.
ADRL
The ADRL (Address List) parameter specifies the name of the new address list your wish to create.
Options are:
*DSTL (Default) The name of the address list is derived from the name of the distribution list by concatenating the two parts of the distribution list name with an intervening underscore. For examples, a distribution list called „ARIADNE SALES‟ will become an address list called ARIADNE_SALES.
„Address list name‟ Enter a valid address list name of your own choosing.
TEXT
The TEXT (Text „Description‟) parameter enables you to enter up to 50 characters of free-format text to describe and further identify the new address list, its contents and purpose.
HOSTNAME
The TCP/IP host name to be used when converting distribution list entries to email addresses.
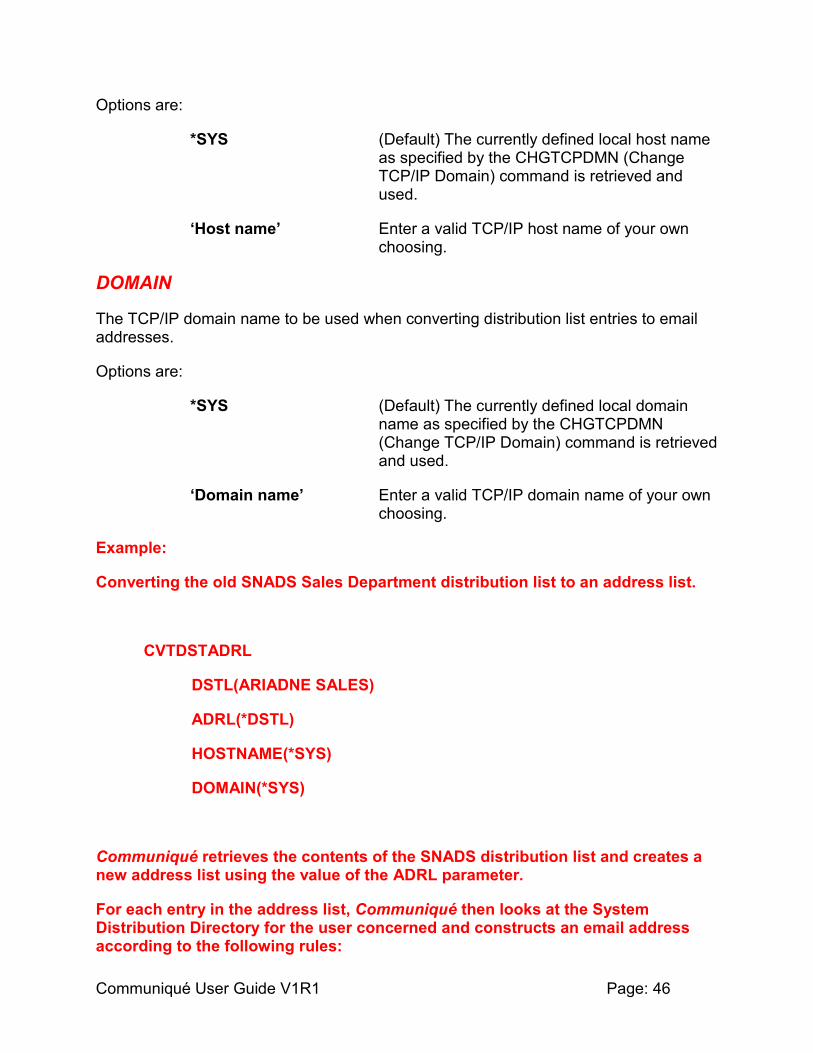
Communiqué User Guide V1R1 Page: 46
Options are:
*SYS (Default) The currently defined local host name as specified by the CHGTCPDMN (Change TCP/IP Domain) command is retrieved and used.
„Host name‟ Enter a valid TCP/IP host name of your own choosing.
DOMAIN
The TCP/IP domain name to be used when converting distribution list entries to email addresses.
Options are:
*SYS (Default) The currently defined local domain name as specified by the CHGTCPDMN (Change TCP/IP Domain) command is retrieved and used.
„Domain name‟ Enter a valid TCP/IP domain name of your own choosing.
Example:
Converting the old SNADS Sales Department distribution list to an address list.
CVTDSTADRL
DSTL(ARIADNE SALES)
ADRL(*DSTL)
HOSTNAME(*SYS)
DOMAIN(*SYS)
Communiqué retrieves the contents of the SNADS distribution list and creates a new address list using the value of the ADRL parameter.
For each entry in the address list, Communiqué then looks at the System Distribution Directory for the user concerned and constructs an email address according to the following rules:
Communiqué User Guide V1R1 Page: 47
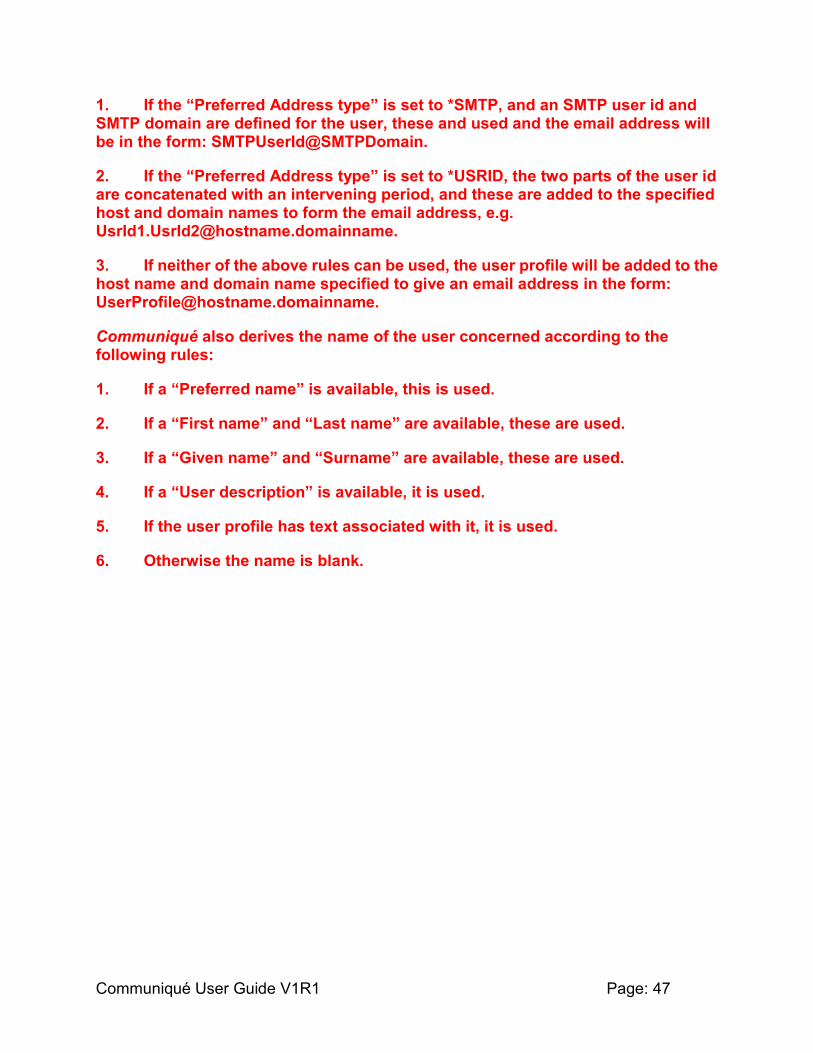
1. If the “Preferred Address type” is set to *SMTP, and an SMTP user id and SMTP domain are defined for the user, these and used and the email address will be in the form: SMTPUserId@SMTPDomain.
2. If the “Preferred Address type” is set to *USRID, the two parts of the user id are concatenated with an intervening period, and these are added to the specified host and domain names to form the email address, e.g. [email protected].
3. If neither of the above rules can be used, the user profile will be added to the host name and domain name specified to give an email address in the form: [email protected].
Communiqué also derives the name of the user concerned according to the following rules:
1. If a “Preferred name” is available, this is used.
2. If a “First name” and “Last name” are available, these are used.
3. If a “Given name” and “Surname” are available, these are used.
4. If a “User description” is available, it is used.
5. If the user profile has text associated with it, it is used.
6. Otherwise the name is blank.

Communiqué User Guide V1R1 Page: 48
Working with Address List Entries
Address list entry information is stored in file CM_LSTENT. If you wish to ensure that only a restricted number of people can maintain address lists, you should set the authorities on this file appropriately, for example by associating an authorization list with it.
The WRKADRLE (Work with Address List Entries) command allows you to add and manage address list entries.
There is a single command parameter
ADRL
The ADRL (Address list) identifies the address list whose entries you wish to work with.
Alternatively, use the WRKADRL (Work with address lists) command and enter option 8=Work with address list entries against the address list in which you are interested.
--------------------------------------------------------------------------------------
Work with Address List Entries
System: YOURSYS
Address list . . . . . : SALES
Text 'description' . . : Sales Department
Type options, press Enter.
1=Add 2=Change 4=Remove 5=Display 6=Print
Opt Email address
Bottom
F3=Exit F5=Refresh F12=Cancel F17=Position to
--------------------------------------------------------------------------------------
Options that can be input against entries in the list are:

Communiqué User Guide V1R1 Page: 49
1=Add Select this option to add a new address list entry. This option is available only on the first line of the display. You can enter the new email address in the space available if desired. This is equivalent to running the ADDADRLE (Add Address List Entry) command.
2=Change Select this option to change an existing address list entry. This is equivalent to running the CHGADRLE (Change Address List Entry) command.
4=Remove Select this option to remove one or more address list entries. This is equivalent to running the RMVADRLE (Remove Address List Entry) command.
5=Display Selection this option to display the details of an address list entry.
6=Print Select this option to print an address list entry.
Available command keys are:
F3=Exit Exit the application.
F5=Refresh Refresh the list.
F12=Cancel Return to the previous screen.
F17=Position Display the positioner window to allow the list to be positioned to a specified address list.

Communiqué User Guide V1R1 Page: 50
Adding an address list entry
The ADDADRLE (Add Address List Entry) command allows you to add an entry to an address list.
Command parameters are as follows:
ADRL
The ADRL (Address list) parameter allows you to specify the name of the address list to which the entry is to be added.
The EMAIL (Email address) parameter allows you to specify the email address to be added to the list. This must be a valid (i.e. well formed) email address and must be unique within the address list.
NAME
The NAME (Name) parameter enables you to enter the name of the person or organization the email address relates to.
TYPE
The TYPE (Type) parameter defines the manner in which messages are sent to the email address being added to the list when the address list is used.
Options are:
*PRI (Default) Primary recipient.
*CC Carbon copy recipient. An *CC recipient receives a copy of the message, and is identified to the primary recipient, but is not the primary recipient.
*BCC Blind carbon copy recipient. An *BCC recipient receives a copy of the message, but is not identified to the primary recipient or *CC recipients.
Example:
Adding an entry to the Sales Department address list.

Communiqué User Guide V1R1 Page: 51
ADDADRLE
ADRL(SALES)
EMAIL(„[email protected]‟)
NAME(„Joe Bloggs‟)
TYPE(*PRI)

Communiqué User Guide V1R1 Page: 52
Changing an address list entry
The CHGADRLE (Change Address List Entry) command allows you to change an address list entry.
Command parameters are as follows:
ADRL
The ADRL (Address list) parameter identifies the address list in which the entry you wish to change can be found.
The EMAIL (Email address) parameter identifies the address list entry you wish to change.
NAME
The NAME (Name) parameter enables you to enter the name of the person or organization the email address relates to.
TYPE
The TYPE (Type) parameter defines the manner in which messages are sent to the email address being added to the list when the address list is used.
Options are:
*PRI (Default) Primary recipient.
*CC Carbon copy recipient. An *CC recipient receives a copy of the message, and is identified to the primary recipient, but is not the primary recipient.
*BCC Blind carbon copy recipient. An *BCC recipient receives a copy of the message, but is not identified to the primary recipient or *CC recipients.
Example:
Changing an entry in the Sales Department address list.
CHGADRLE
ADRL(SALES)

Communiqué User Guide V1R1 Page: 53
EMAIL(„[email protected]‟)
NAME(„Joseph Bloggs‟) TYPE(*CC)
Copying address list entries
The CPYADRLE (Copy Address List Entries) command allows you to copy the contents of an existing address list to another address list.
Command parameters are as follows:
FROMADRL
The FROMADRL (From address list) identifies the address list whose contents you wish to copy.
TOADRL
The TOADRL (To address list) identifies the address list to which you wish to copy the address list entries.
Example:
Copy the contents of the Sales Department address list to a new, combined Sales and Marketing list.
CPYADRLE
FROMADRL(SALES)
TOADRL(SALES_AND_MARKETING)
Removing an address list entry
The RMVADRLE (Remove Address List Entry) command allows you to remove an entry from an address list.
Command parameters are as follows:
ADRL
The ADRL (Address list) parameter identifies the address list in which the entry you wish to remove can be found.

Communiqué User Guide V1R1 Page: 54
The EMAIL (Email address) parameter identifies the address list entry you wish to remove.
Example:
Removing Joe Bloggs from the Sales Department address list.
RMVADRLE
ADRL(SALES)
EMAIL(„[email protected]‟)

Communiqué User Guide V1R1 Page: 55
Working with Email Address Directories
Option 20 from the Communiqué menu runs the WRKADRDIR (Work with Email Address Directories) command, which allows you to create and manage email address directories.
Email address directories provide a means of storing the email addresses of people to whom you might wish to send emails. Communiqué allows you to search and select email addresses from email address directories when you specify TO(*SELECT) on the SNDCMNMSG command.
Address directory information is stored in file CM_ADRDIR. If you wish to ensure that only a restricted number of people can maintain address directories, you should set the authorities on this file appropriately, for example by associating an authorization list with it.
--------------------------------------------------------------------------------------
Communique - Work with Address Directories
System: ARIADNE1
Type options, press Enter.
1=Create 2=Change 3=Copy 4=Delete 5=Display 6=Print entries
8=Work with directory entries
Opt Address directory Text 'description'
*SYSTEM System email address directory
ACCOUNTS Accounts Department email address directory
PETE Pete's personal directory
SALES Sales Department email address directory
Bottom
F3=Exit F5=Refresh F12=Cancel F17=Position to
--------------------------------------------------------------------------------------
Options that can be input against entries in the list are:
1=Create Select this option to create a new address directory. This option is available only on the first line of the display. You can enter the name of the new address directory in the space available if

Communiqué User Guide V1R1 Page: 56
desired. This is equivalent to running the CRTADRDIR (Create Address Directory) command.
2=Change Select this option to change the details of an existing address directory. This is equivalent to running the CHGADRDIR (Change Address Directory) command.
3=Copy Select this option to copy an existing address directory and create a new address directory. This is equivalent to running the CPYADRDIR (Copy Address Directory) command.
4=Delete Select this option to delete one or more address directories. This is equivalent to running the DLTADRDIR (Delete Address Directory) command.
5=Display Selection this option to display the details of an address directory.
6=Print entries Select this option to print the details of an address directory and the entries it contains.
8=Work with entries Select this option to work with the entries contained in an address directory. This is equivalent to running the WRKADRDIRE (Work with Address Directory Entries) command.
Available command keys are:
F3=Exit Exit the application.
F5=Refresh Refresh the list.
F12=Cancel Return to the previous screen.
F17=Position Display the positioner window to allow the list to be positioned to a specified address directory.
Communiqué User Guide V1R1 Page: 57
Creating an address directory
The CRTADRDIR (Create Address Directory) command which allows you to create an address directory.
Command parameters are as follows:
ADRDIR
The ADRDIR (Address directory) parameter allows you to specify the name which will be used to identify the address directory. The name must be unique and must conform to the normal rules for iSeries object names, except that it may be up to 20 characters in length. The special value *SYSTEM is also allowed and is recommended for the system-wide directory.
TEXT
The TEXT (Text „Description‟) parameter enables you to enter up to 50 characters of free-format text to describe and further identify the address directory, its contents and purpose.
Example:
Creating an address directory to store the email addresses used by members of the Sales Department.
CRTADRDIR
ADRDIR(SALES)
TEXT(„Sales Department directory‟)
Communiqué User Guide V1R1 Page: 58
Changing an address directory
Option 12 from the Communiqué menu runs the CHGADRDIR (Change Address List) command which allows you to change an existing address directory.
Command parameters are as follows:
ADRDIR
The ADRDIR (Address directory) identifies the address directory you wish to change.
TEXT
The TEXT (Text „Description‟) parameter enables you to enter up to 50 characters of free-format text to describe and further identify the address directory, its contents and purpose.
Example:
Changing the text description on the Sales Department address directory.
CHGADRDIR
ADRDIR(SALES)
TEXT(„Sales Department address directory‟)
Communiqué User Guide V1R1 Page: 59
Copying an address directory
Option 13 from the Communiqué menu runs the CPYADRDIR (Copy Address List) command which allows you to copy an existing address directory and create a new one.
Command parameters are as follows:
FROMADRDIR
The FROMADRDIR (From address directory) identifies the address directory you wish to copy.
TOADRDIR
The TOADRDIR (To address directory) identifies the address directory you wish to create.
TEXT
The TEXT (Text „Description‟) parameter enables you to enter up to 50 characters of free-format text to describe and further identify the new address directory, its contents and purpose.
CPYADRDIRE
The CPYADRDIRE (Copy address directory entries command) allows you to indicate whether you want to copy the contents of the existing address directory or just its description.
Options are:
*YES (Default) Yes. The contents of the address directory are copied.
*NO No. The contents of the address directory are not copied.
Example:
Copy the Sales Department address directory to create a combined Sales and Marketing directory.
CPYADRDIR
FROMADRDIR(SALES)
TOADRDIR(SALES_AND_MARKETING)

Communiqué User Guide V1R1 Page: 60
TEXT(„Sales and Marketing address directory‟)
CPYADRDIRE(*YES)
Communiqué User Guide V1R1 Page: 61
Deleting an address directory
The DLTADRDIR (Delete Address List) command allows you to delete an existing address directory.
Command parameters are as follows:
ADRDIR
The ADRDIR (Address directory) identifies the address directory you wish to delete.
Example:
Deleting the Sales Department address directory.
DLTADRDIR ADRDIR(SALES)

Communiqué User Guide V1R1 Page: 62
Working with Address Directory Entries
Address Directory entry information is stored in file CM_DIRENT. If you wish to ensure that only a restricted number of people can maintain address directories, you should set the authorities on this file appropriately, for example by associating an authorization list with it.
The WRKADRDIRE (Work with Address Directory Entries) command allows you to add and manage address directory entries.
There is a single command parameter
ADRDIR
The ADRDIR (Address Directory) identifies the address directory whose entries you wish to work with.
Alternatively, use the WRKADRDIR (Work with address directories) command and enter option 8=Work with Address directory entries against the address directory in which you are interested.
--------------------------------------------------------------------------------------
Communique - Work with Address Directory Entries
System: ARIADNE1
Address directory . . : ACCOUNTS
Text 'description' . . : Accounts Department email address directory
Type options, press Enter.
1=Add 2=Change 4=Remove 5=Display
Opt Email address
Bottom
F3=Exit F5=Refresh F12=Cancel F17=Position
--------------------------------------------------------------------------------------
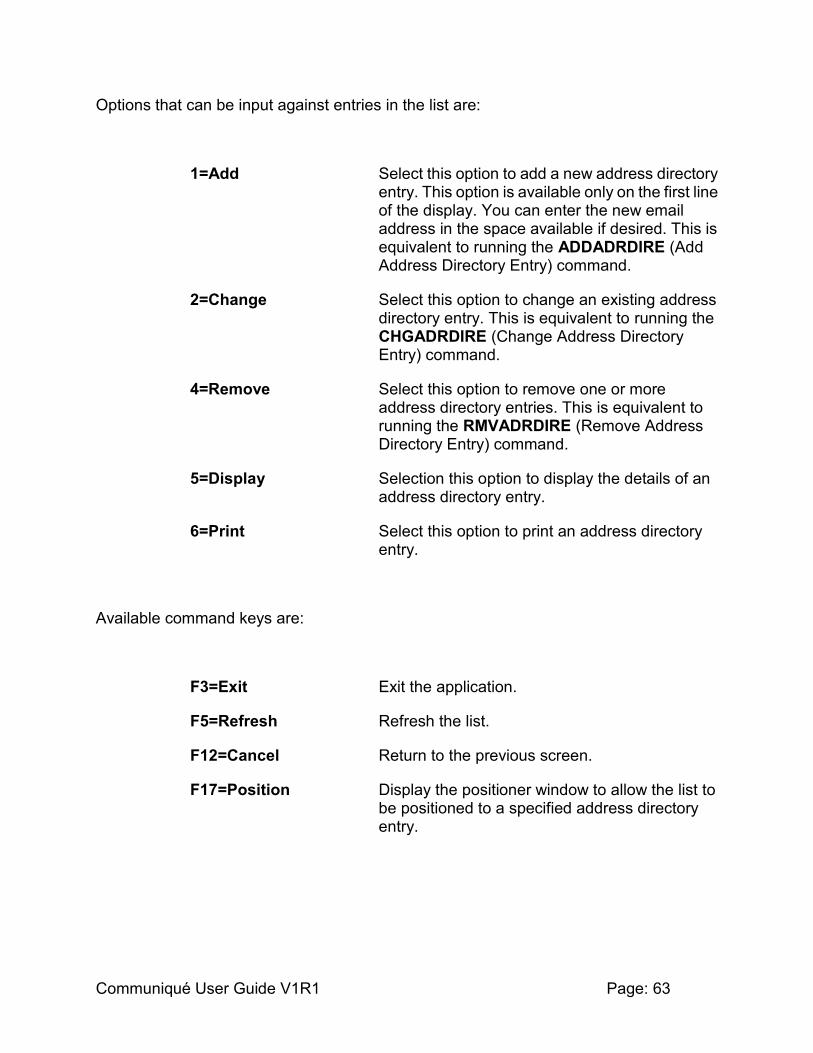
Communiqué User Guide V1R1 Page: 63
Options that can be input against entries in the list are:
1=Add Select this option to add a new address directory entry. This option is available only on the first line of the display. You can enter the new email address in the space available if desired. This is equivalent to running the ADDADRDIRE (Add Address Directory Entry) command.
2=Change Select this option to change an existing address directory entry. This is equivalent to running the CHGADRDIRE (Change Address Directory Entry) command.
4=Remove Select this option to remove one or more address directory entries. This is equivalent to running the RMVADRDIRE (Remove Address Directory Entry) command.
5=Display Selection this option to display the details of an address directory entry.
6=Print Select this option to print an address directory entry.
Available command keys are:
F3=Exit Exit the application.
F5=Refresh Refresh the list.
F12=Cancel Return to the previous screen.
F17=Position Display the positioner window to allow the list to be positioned to a specified address directory entry.

Communiqué User Guide V1R1 Page: 64
Adding an address directory entry
The ADDADRDIRE (Add Address Directory Entry) command allows you to add an entry to an address directory.
Command parameters are as follows:
ADRDIR
The ADRDIR (Address directory) parameter allows you to specify the name of the address directory to which the entry is to be added.
The EMAIL (Email address) parameter allows you to specify the email address to be added to the directory. This must be a valid (i.e. well formed) email address and must be unique within the address directory.
FIRSTNAME
The FIRSTNAME (First Name) parameter enables you to enter the first name of the person the email address relates to.
LASTNAME
The LASTNAME (Last Name) parameter enables you to enter the last name of the person the email address relates to.
PREFIX
The PREFIX (Prefix) parameter enables you to enter any part of the name of the person the email address relates to that should precede the first name (such as a title, e.g. Mrs., Dr, Professor etc.).
MIDDLENAME
The MIDDLENAME (Middle name or initials) parameter enables you to enter a middle name or set of initials for the person the email address relates to.
SUFFIX
The SUFFIX (Suffix) parameter enables you to enter any part of the name of the person the email address relates to that should follow the last name (e.g. PhD, Esq. etc.).

Communiqué User Guide V1R1 Page: 65
COMPANY
The COMPANY (Company or organization ) parameter enables you to enter the name of the company or organization to which the person the email address relates to belongs.
POSITION
The POSITION (Position or job title) parameter enables you to enter the position, job title or other role of the person the email address relates in the company or organization.
EMAILNAME
The EMAILNAME (Email Name) parameter defines the name of the person email address being added to the directory relates to as it should appear when an email sent to that person is delivered. The default is *GEN, which means that Communiqué should generate a name from the FIRSTNAME and LASTNAME parameters.
Example:
Adding an entry to the Sales Department address directory.
ADDADRDIRE
ADRDIR(SALES)
EMAIL(„[email protected]‟)
FIRSTNAME(„Joe‟
LASTNAME(„Bloggs‟)
COMPANY(„ariadne software ltd.‟)
POSITION(„Programmer‟)

Communiqué User Guide V1R1 Page: 66
Changing an address directory entry
The CHGADRDIRE (Change Address Directory Entry) command allows you to change an address directory entry.
Command parameters are as follows:
ADRDIR
The ADRDIR (Address directory) parameter identifies the address directory in which the entry you wish to change can be found.
The EMAIL (Email address) parameter identifies the address directory entry you wish to change.
See the ADDADRDIRE command above for details of the use of the other parameters.

Communiqué User Guide V1R1 Page: 67
Copying address directory entries
The CPYADRDIRE (Copy Address Directory Entries) command allows you to copy the contents of an existing address directory to another address directory.
Command parameters are as follows:
FROMADRDIR
The FROMADRDIR (From address directory) identifies the address directory whose contents you wish to copy.
TOADRDIR
The TOADRDIR (To address directory) identifies the address directory to which you wish to copy the address directory entries.
Example:
Copy the contents of the Sales Department address directory to a new, combined Sales and Marketing directory.
CPYADRDIRE
FROMADRDIR(SALES)
TOADRDIR(SALES_AND_MARKETING)

Communiqué User Guide V1R1 Page: 68
Removing an address directory entry
The RMVADRDIRE (Remove Address Directory Entry) command allows you to remove an entry from an address directory.
Command parameters are as follows:
ADRDIR
The ADRDIR (Address directory) parameter identifies the address directory in which the entry you wish to remove can be found.
The EMAIL (Email address) parameter identifies the address directory entry you wish to remove.
Example:
Removing Joe Bloggs from the Sales Department address directory.
RMVADRDIRE
ADRDIR(SALES)
EMAIL(„[email protected]‟)

Communiqué User Guide V1R1 Page: 69
Using the Communiqué API CM_SNDAPIR
As an alternative to using the SNDCMNMSG command, you can also call the Communiqué API to send an email message. If you want to send an email from a program written in a language such as RPG or COBOL, this may be easier than using SNDCMNMSG. In addition, the length of the free-format message text that can be defined when the API is employed is 4,096 bytes as opposed to 512 bytes when SNDCMNMSG is used.
When Communiqué is installed, a source file call CM_SRCFILE is included in library CMNQUEV1R1 (or COOLSPV5R1 if you have installed CoolSpools Plus). This contains two members:
1. An ILE RPG copybook called CM_SNDAPIP which contains the definitions you need to call the CM_SNDAPIR API.
2. A program called EXAMPLE which gives an example of how to call the API.
There are two possible forms in which parameters can be passed :
Communiqué Send Email Message (CM_SNDAPIR) API
Parameter List 1 (see source file CM_SRCFILE, member CM_SNDAPIP, prototype definition CM_SndMsg)
Required Parameter Group:
1 Format of sender structure Input CHAR(8)
2 Sender Input CHAR(*)
3 Number of recipients Input BINARY(4)
4 Format of recipient structures Input CHAR(8)
5 Recipient structures Input Array 1-32 of CHAR(*)
6 Subject Input VARCHAR(50)
7 Format of message structure Input CHAR(8)
8 Message structure Input CHAR(*)
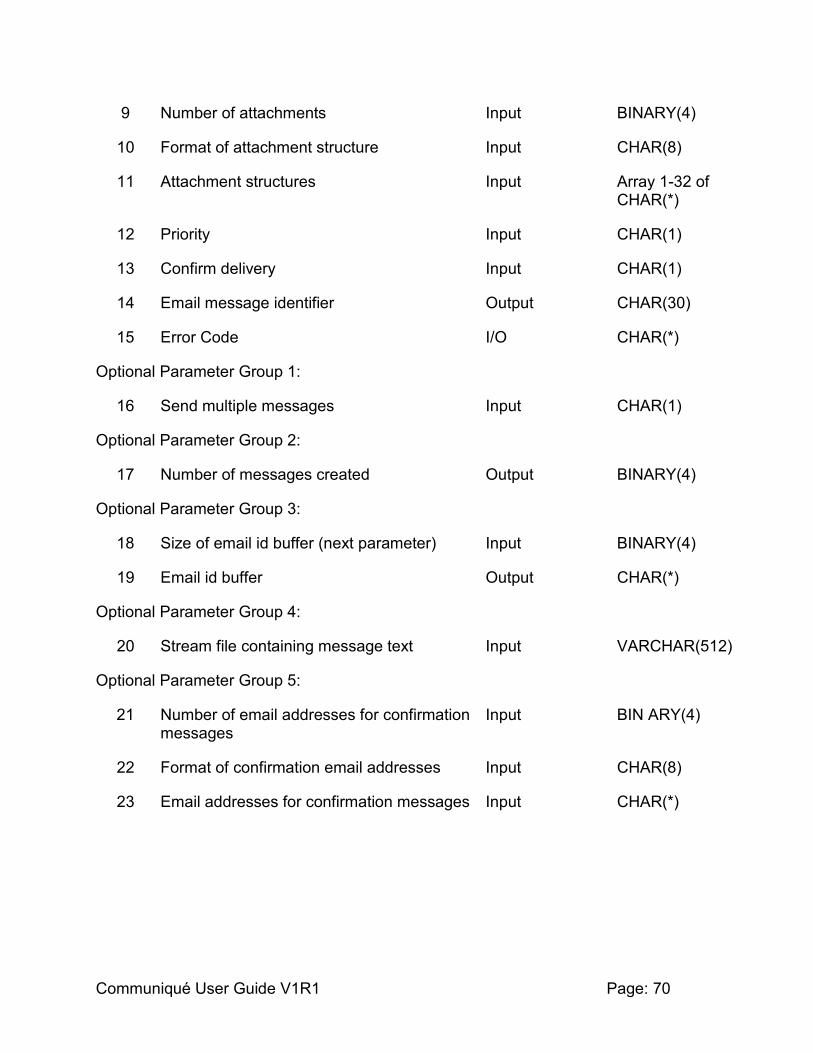
Communiqué User Guide V1R1 Page: 70
9 Number of attachments Input BINARY(4)
10 Format of attachment structure Input CHAR(8)
11 Attachment structures Input Array 1-32 of CHAR(*)
12 Priority Input CHAR(1)
13 Confirm delivery Input CHAR(1)
14 Email message identifier Output CHAR(30)
15 Error Code I/O CHAR(*)
Optional Parameter Group 1:
16 Send multiple messages Input CHAR(1)
Optional Parameter Group 2:
17 Number of messages created Output BINARY(4)
Optional Parameter Group 3:
18 Size of email id buffer (next parameter) Input BINARY(4)
19 Email id buffer Output CHAR(*)
Optional Parameter Group 4:
20 Stream file containing message text Input VARCHAR(512)
Optional Parameter Group 5:
21 Number of email addresses for confirmation messages
Input BIN ARY(4)
22 Format of confirmation email addresses Input CHAR(8)
23 Email addresses for confirmation messages Input CHAR(*)

Communiqué User Guide V1R1 Page: 71
Required Parameter Group
Note that many of the structures shown below include text fields preceded by a 2-byte length. In languages such as ILE RPG which support variable length character fields, these fields can be defined as variable length. For example, the Subject parameter shown as a structure below can be defined in ILE RPG as 50A VARYING.
Format of Sender Structure
INPUT; CHAR(8)
The format of the Sender parameter.
Currently only one value is permitted: CM_F0100
Sender Structure
INPUT; CHAR(*)
A structure identifying the sender of the message.
Offset
Type Field Dec Hex
0 0 BINARY(2) Length of sender email address
2 2 CHAR(128) Sender email address
130 82 BINARY(2) Length of sender name
134 86 CHAR(128) Sender name
Number of recipients
INPUT; BINARY(4)

Communiqué User Guide V1R1 Page: 72
The number of recipient structures that follow.
Format of Recipient Structures
INPUT; CHAR(8)
The format of the Recipient structures that follow.
Currently only one value is permitted: CM_T0100
Recipient Structures
INPUT; ARRAY 1-32 of CHAR(*)
An array of from 1 to 32 structures identifying recipients of the message.
Each element in the array is a structure in the following format.
Offset
Type Field Dec Hex
0 0 BINARY(2) Length of recipient email address
2 2 CHAR(128) Recipient email address
130 82 BINARY(2) Length of recipient name
134 86 CHAR(128) Recipient name or *ADRL
262 106 CHAR(10) Recipient type: *PRI, *CC, *BCC or *ADRL
Subject
INPUT; CHAR(*)
A structure defining the subject of the message
Offset
Type Field Dec Hex
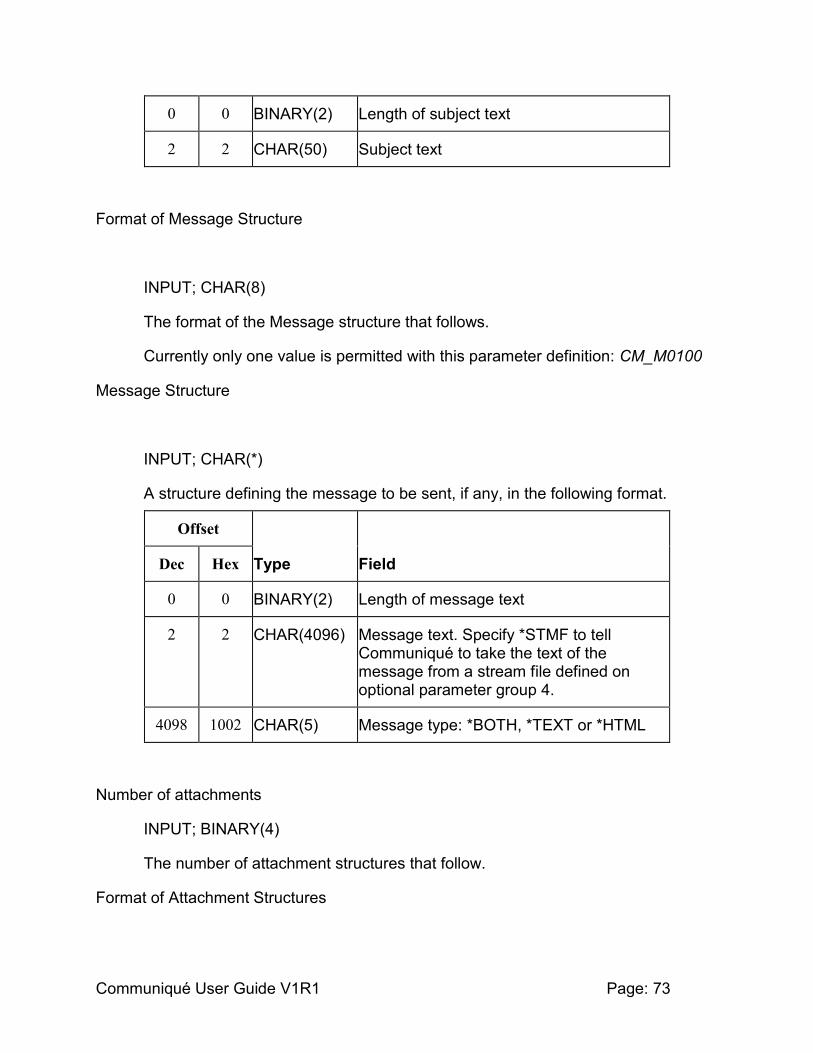
Communiqué User Guide V1R1 Page: 73
0 0 BINARY(2) Length of subject text
2 2 CHAR(50) Subject text
Format of Message Structure
INPUT; CHAR(8)
The format of the Message structure that follows.
Currently only one value is permitted with this parameter definition: CM_M0100
Message Structure
INPUT; CHAR(*)
A structure defining the message to be sent, if any, in the following format.
Offset
Type Field Dec Hex
0 0 BINARY(2) Length of message text
2 2 CHAR(4096) Message text. Specify *STMF to tell Communiqué to take the text of the message from a stream file defined on optional parameter group 4.
4098 1002 CHAR(5) Message type: *BOTH, *TEXT or *HTML
Number of attachments
INPUT; BINARY(4)
The number of attachment structures that follow.
Format of Attachment Structures
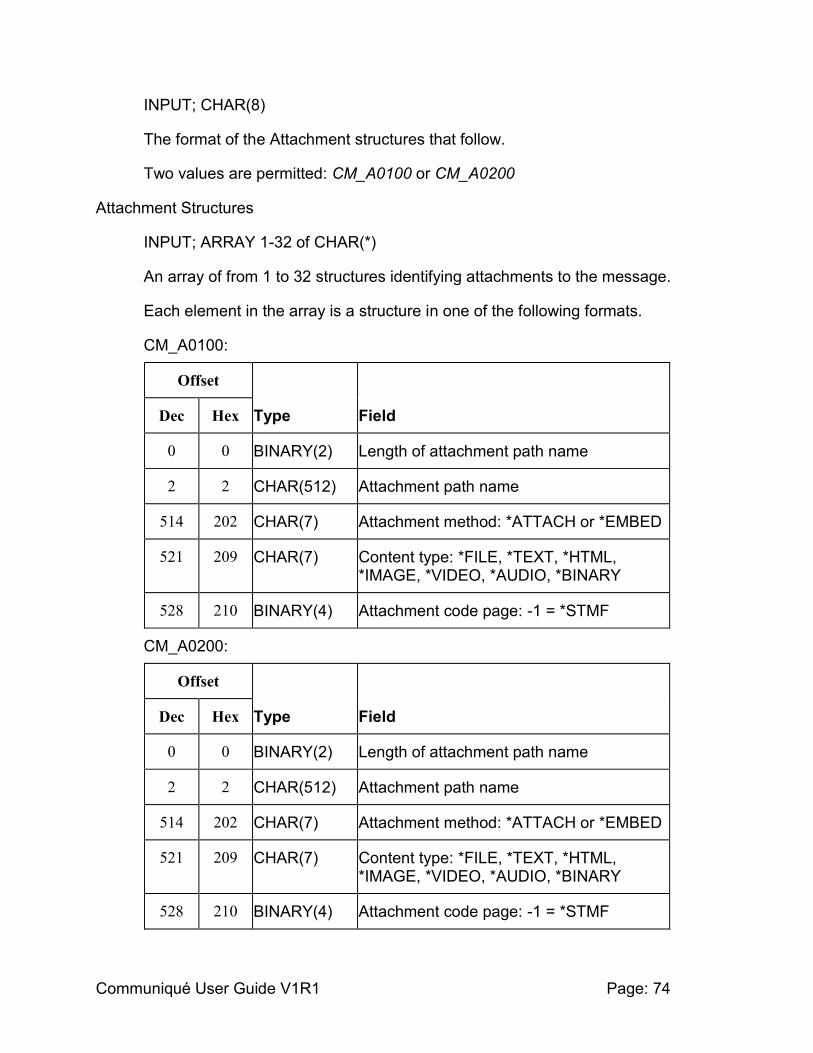
Communiqué User Guide V1R1 Page: 74
INPUT; CHAR(8)
The format of the Attachment structures that follow.
Two values are permitted: CM_A0100 or CM_A0200
Attachment Structures
INPUT; ARRAY 1-32 of CHAR(*)
An array of from 1 to 32 structures identifying attachments to the message.
Each element in the array is a structure in one of the following formats.
CM_A0100:
Offset
Type Field Dec Hex
0 0 BINARY(2) Length of attachment path name
2 2 CHAR(512) Attachment path name
514 202 CHAR(7) Attachment method: *ATTACH or *EMBED
521 209 CHAR(7) Content type: *FILE, *TEXT, *HTML, *IMAGE, *VIDEO, *AUDIO, *BINARY
528 210 BINARY(4) Attachment code page: -1 = *STMF
CM_A0200:
Offset
Type Field Dec Hex
0 0 BINARY(2) Length of attachment path name
2 2 CHAR(512) Attachment path name
514 202 CHAR(7) Attachment method: *ATTACH or *EMBED
521 209 CHAR(7) Content type: *FILE, *TEXT, *HTML, *IMAGE, *VIDEO, *AUDIO, *BINARY
528 210 BINARY(4) Attachment code page: -1 = *STMF
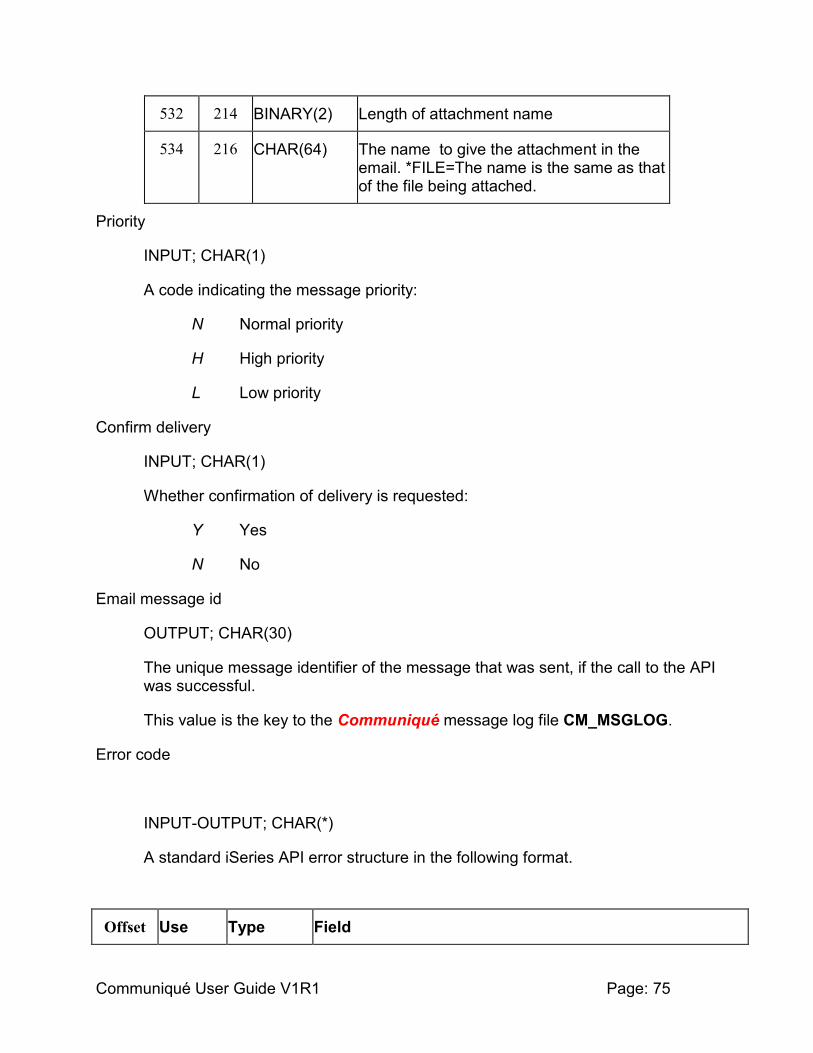
Communiqué User Guide V1R1 Page: 75
532 214 BINARY(2) Length of attachment name
534 216 CHAR(64) The name to give the attachment in the email. *FILE=The name is the same as that of the file being attached.
Priority
INPUT; CHAR(1)
A code indicating the message priority:
N Normal priority
H High priority
L Low priority
Confirm delivery
INPUT; CHAR(1)
Whether confirmation of delivery is requested:
Y Yes
N No
Email message id
OUTPUT; CHAR(30)
The unique message identifier of the message that was sent, if the call to the API was successful.
This value is the key to the Communiqué message log file CM_MSGLOG.
Error code
INPUT-OUTPUT; CHAR(*)
A standard iSeries API error structure in the following format.
Offset Use Type Field

Communiqué User Guide V1R1 Page: 76
Dec Hex
0 0 INPUT BINARY(4) Bytes provided
4 4 OUTPUT BINARY(4) Bytes available
8 8 OUTPUT CHAR(7) Exception ID
15 F OUTPUT CHAR(1) Reserved
16 10 OUTPUT CHAR(*) Exception data
Optional Parameter Group 1
Format of Sender Structure
INPUT; CHAR(1)
When sending an email to more than one recipient, whether a single message should be sent to a list of recipients or multiple messages generated, one per recipient.:
N (The default). No. A single message is generated with a list of recipients.
Y Yes. Multiple messages, one per recipient are generated.
Optional Parameter Group 2
Number of messages created
OUTPUT; BINARY(4)
The number of messages created by Communiqué in response to the request.
Optional Parameter Group 3
Size of email id buffer
INPUT; BINARY(4)
The size in bytes of the buffer specified on the following parameter.
Email id buffer
OUTPUT; CHAR(*)
A buffer into which Communiqué will place an array of CHAR(30) email identifiers in order to provide the caller with a list of the ids of the email messages generated.

Communiqué User Guide V1R1 Page: 77
Optional Parameter Group 4
Name of stream file containing message text.
If the message text specified for the message structure is *STMF, Communiqué will read the message text from the file specified here. There is no limit on the length of the data in the file, which could be an ASCII text file, an HTML file, or a database member (specify database files in IFS format i.e. /QSYS.LIB/library_name.LIB/file_name.FILE/member_name.MBR‟)
INPUT
Offset
Type Field Dec Hex
0 0 BINARY(2) Length of the stream file path
2 2 CHAR(512) Stream file path.
Optional Parameter Group 5
Number of email addresses for confirmation emails
INPUT; BINARY(4)
The number of confirmation recipient structures that follow.
Format of Confirmation Recipient Structures
INPUT; CHAR(8)
The format of the Confirmation Recipient structures that follow.
Currently only one value is permitted: CM_C0100
Confirmation Recipient Structures
INPUT; ARRAY 1-1024 of CHAR(*)
An array of from 1 to 1-1024 structures identifying email addresses to which the confirmation of delivery messages should be sent, when confirmation of delivery is requested. The default is to send the confirmation of delivery emails to the sender email address.
Each element in the array is a structure in the following format.
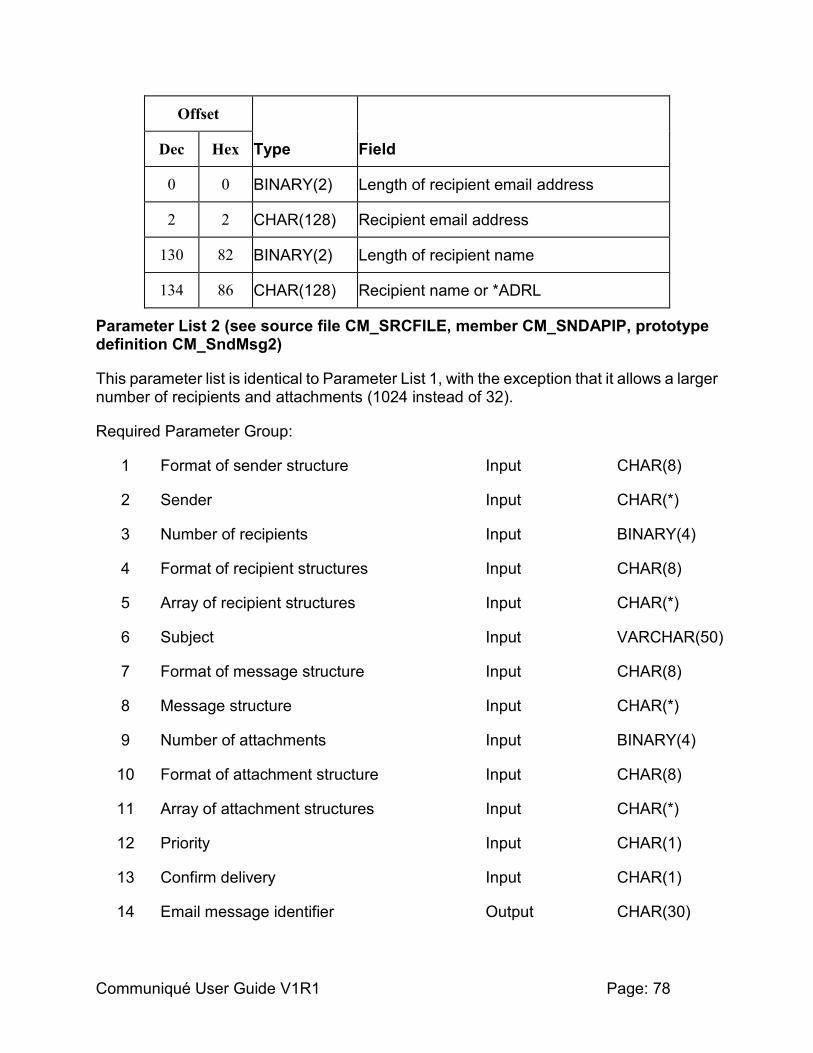
Communiqué User Guide V1R1 Page: 78
Offset
Type Field Dec Hex
0 0 BINARY(2) Length of recipient email address
2 2 CHAR(128) Recipient email address
130 82 BINARY(2) Length of recipient name
134 86 CHAR(128) Recipient name or *ADRL
Parameter List 2 (see source file CM_SRCFILE, member CM_SNDAPIP, prototype definition CM_SndMsg2)
This parameter list is identical to Parameter List 1, with the exception that it allows a larger number of recipients and attachments (1024 instead of 32).
Required Parameter Group:
1 Format of sender structure Input CHAR(8)
2 Sender Input CHAR(*)
3 Number of recipients Input BINARY(4)
4 Format of recipient structures Input CHAR(8)
5 Array of recipient structures Input CHAR(*)
6 Subject Input VARCHAR(50)
7 Format of message structure Input CHAR(8)
8 Message structure Input CHAR(*)
9 Number of attachments Input BINARY(4)
10 Format of attachment structure Input CHAR(8)
11 Array of attachment structures Input CHAR(*)
12 Priority Input CHAR(1)
13 Confirm delivery Input CHAR(1)
14 Email message identifier Output CHAR(30)
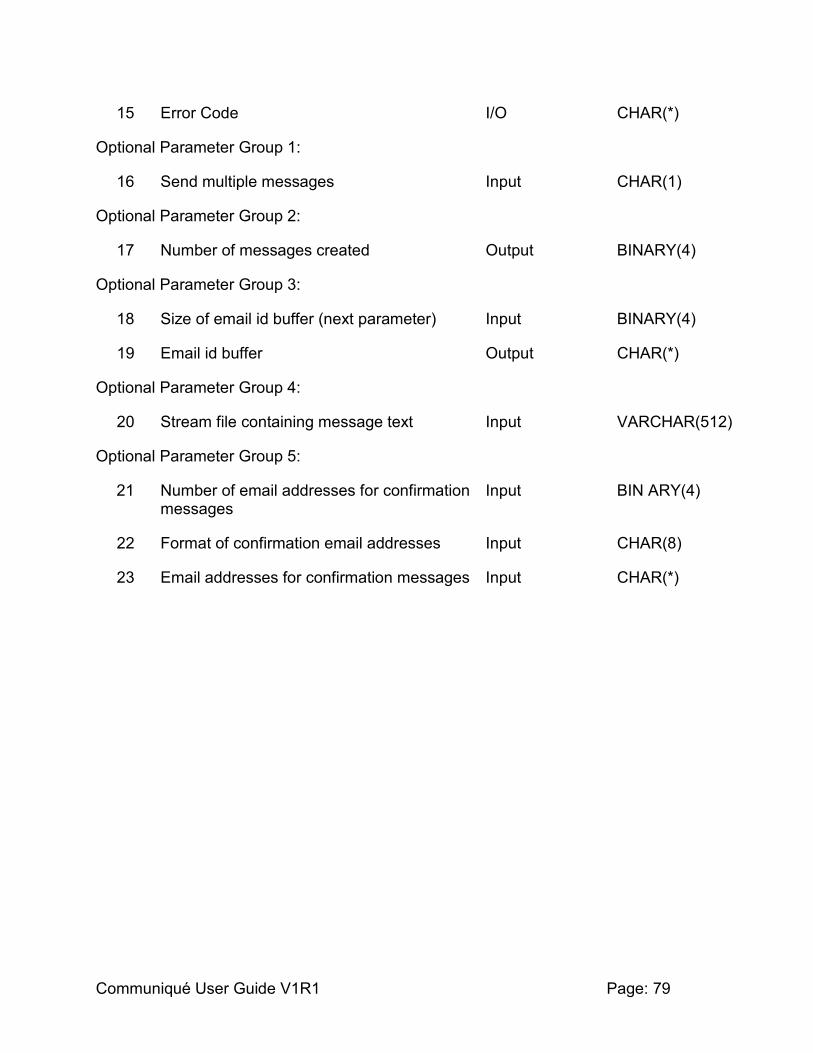
Communiqué User Guide V1R1 Page: 79
15 Error Code I/O CHAR(*)
Optional Parameter Group 1:
16 Send multiple messages Input CHAR(1)
Optional Parameter Group 2:
17 Number of messages created Output BINARY(4)
Optional Parameter Group 3:
18 Size of email id buffer (next parameter) Input BINARY(4)
19 Email id buffer Output CHAR(*)
Optional Parameter Group 4:
20 Stream file containing message text Input VARCHAR(512)
Optional Parameter Group 5:
21 Number of email addresses for confirmation messages
Input BIN ARY(4)
22 Format of confirmation email addresses Input CHAR(8)
23 Email addresses for confirmation messages Input CHAR(*)

Communiqué User Guide V1R1 Page: 80
Required Parameter Group
As above, except:
Array of Recipient Structures
INPUT; CHAR(*)
A buffer containing an array of from 1 to 1024 structures identifying recipients of the message.
Attachment Structures
INPUT; CHAR(*)
A buffer containing an array of from 1 to 1024 structures identifying attachments to the message.

Communiqué User Guide V1R1 Page: 81
The Communiqué Database
Communiqué includes a number of database tables which you may find useful. These are listed and explained below.
Message Log CM_MSGLOG
Message Log file CM_MSGLOG logs each email message that is sent.
Each message is identified by a 30-byte message identifier. This is the message identifier which is displayed in the completion message sent by the SNDCMNMSG command (“Communiqué message XXXXXXXXXXXXXXXXXXXXXXXXXXXXXX sent successfully.” and returned by the CM_SNDAPIR API.
Each log record also contains details:
when the message was sent
by which job it was sent
by which user it was sent
sender email address
sender name
subject
message text
message type
priority
confirm delivery option
Message Recipients CM_MSGRCP
Message Recipients file CM_MSGRCP logs recipients for each email message that is sent.
Each record is identified by the email identifier which is also the key to CM_MSGLOG.
Each record also contains:
recipient email address

Communiqué User Guide V1R1 Page: 82
recipient name
recipient type
Message Attachments CM_MSGATC
Message Attachments file CM_MSGATC logs attachments for each email message that is sent.
Each record is identified by the email identifier which is also the key to CM_MSGLOG.
Each record also contains:
attachment file name
attachment method
attachment content type
attachment code page