command reference - Cisco · C-2 Installation and Administration Guide for the Cisco TelePresence...
78
C-1 Installation and Administration Guide for the Cisco TelePresence Exchange System Release 1.0 OL-21567-01 APPENDIX C Command Reference Revised June 30, 2011 This appendix describes the CLI commands that are supported on the Cisco TelePresence Exchange System: • file dump, page C-3 • file get, page C-5 • file list, page C-7 • file search, page C-8 • file tail, page C-10 • file view, page C-12 • set adminserver changedbip, page C-14 • set adminserver trapvip, page C-15 • set cdp disable, page C-16 • set cdp enable, page C-17 • set cdp holdtime, page C-19 • set cdp timer, page C-20 • set network failover dis, page C-21 • set network failover ena, page C-23 • set network gateway, page C-24 • set network ip eth0, page C-25 • set password admin, page C-27 • set sipserver changedbip, page C-28 • set sipserver siplb dis, page C-29 • set sipserver siplb ena, page C-30 • set snmp trapdest add, page C-31 • set snmp trapdest del, page C-32 • set snmp user add, page C-34 • set snmp user del, page C-35 • show cdp, page C-36
Transcript of command reference - Cisco · C-2 Installation and Administration Guide for the Cisco TelePresence...
C-1Installation and Administration Guide for the Cisco TelePresence Exchange System Release 1.0
OL-21567-01
A P P E N D I X CCommand Reference
Revised June 30, 2011This appendix describes the CLI commands that are supported on the Cisco TelePresence Exchange System:
• file dump, page C-3
• file get, page C-5
• file list, page C-7
• file search, page C-8
• file tail, page C-10
• file view, page C-12
• set adminserver changedbip, page C-14
• set adminserver trapvip, page C-15
• set cdp disable, page C-16
• set cdp enable, page C-17
• set cdp holdtime, page C-19
• set cdp timer, page C-20
• set network failover dis, page C-21
• set network failover ena, page C-23
• set network gateway, page C-24
• set network ip eth0, page C-25
• set password admin, page C-27
• set sipserver changedbip, page C-28
• set sipserver siplb dis, page C-29
• set sipserver siplb ena, page C-30
• set snmp trapdest add, page C-31
• set snmp trapdest del, page C-32
• set snmp user add, page C-34
• set snmp user del, page C-35
• show cdp, page C-36
C-2Installation and Administration Guide for the Cisco TelePresence Exchange System Release 1.0
OL-21567-01
Appendix C Command Reference
• show dbip, page C-37
• show engineip, page C-38
• show network eth0, page C-39
• show network failover, page C-41
• show role, page C-43
• show siplb, page C-45
• show snmp trapdests, page C-46
• show snmp users, page C-47
• show trapvip, page C-48
• utils network ping, page C-49
• utils service adminserver start, page C-50
• utils service adminserver status, page C-51
• utils service adminserver stop, page C-52
• utils service database drbd disable-ha, page C-53
• utils service database drbd discard-node, page C-54
• utils service database drbd enable-ha, page C-55
• utils service database drbd force-discard-node, page C-56
• utils service database drbd force-keep-node, page C-57
• utils service database drbd force-mysql-reset, page C-58
• utils service database drbd keep-node, page C-60
• utils service database drbd replace-primary, page C-61
• utils service database status, page C-62
• utils service database sync, page C-64
• utils service list, page C-66
• utils service sipserver start, page C-67
• utils service sipserver status, page C-68
• utils service sipserver stop, page C-69
• utils service start, page C-70
• utils service stop, page C-71
• utils snmp get, page C-72
• utils snmp hardware-agents restart, page C-73
• utils snmp walk, page C-74
• utils system restart, page C-76
• utils system shutdown, page C-77
C-3Installation and Administration Guide for the Cisco TelePresence Exchange System Release 1.0
OL-21567-01
Appendix C Command Reference file dump
file dumpTo display the contents of one or more files on the screen, one page at a time, enter the following command.
file dump {activelog | inactivelog | install} file-spec [recent]
Syntax Description
Usage Guidelines If you specify multiple files in the file-spec, this command concatenates, or joins, the files and then displays the contents on the screen, one page at a time.
Examples The following example shows how to display the contents of one file that is in the active partition:
admin: file dump activelog ctc/log/server.log 2011-03-16 21:03:01,123 INFO [com.arjuna.ats.jbossatx.jta.TransactionManagerService]JBossTS Transaction Service (JTA version) - JBoss Inc.2011-03-16 21:03:01,124 INFO [com.arjuna.ats.jbossatx.jta.TransactionManagerService]Setting up property manager MBean and JMX layer2011-03-16 21:03:01,236 INFO [com.arjuna.ats.jbossatx.jta.TransactionManagerService]Starting recovery manager2011-03-16 21:03:01,293 INFO [com.arjuna.ats.jbossatx.jta.TransactionManagerService]Recovery manager started2011-03-16 21:03:01,293 INFO [com.arjuna.ats.jbossatx.jta.TransactionManagerService]Binding TransactionManager JNDI Reference2011-03-16 21:03:06,245 INFO [org.jboss.cache.TreeCache] viewAccepted():[10.22.140.75:32774|0] [10.22.140.75:32774]2011-03-16 21:03:06,257 INFO [org.jboss.cache.TreeCache] TreeCache local address is10.22.140.75:327742011-03-16 21:03:06,257 INFO [org.jboss.cache.TreeCache] State could not be retrieved (weare the first member in group)2011-03-16 21:03:06,257 INFO [org.jboss.cache.TreeCache] parseConfig(): PojoCacheConfigis empty2011-03-16 21:03:07,070 INFO [org.jboss.wsf.stack.jbws.NativeServerConfig] JBoss WebServices - Native2011-03-16 21:03:07,070 INFO [org.jboss.wsf.stack.jbws.NativeServerConfig]
activelog Displays the contents of one or more files that are in the currently active partition.
inactivelog Displays the contents of one or more files that are in the inactive partition, which, if the system had been upgraded, contains the previous version of the software and the logs from before the most recent upgrade.
install Displays the contents of one or more log files that are related to installation.
file-spec Specifies which file or files to dump onto the screen. You can use an asterisk (*) as a wildcard. Enter the file-spec as one of the following items:
• Directory
• Filename
• Directory path and filename
recent Displays the content of the most recently changed file in the directory.

C-4Installation and Administration Guide for the Cisco TelePresence Exchange System Release 1.0
OL-21567-01
Appendix C Command Reference file dump
jbossws-native-2.0.1.SP2_CP08 (build=201003171618)2011-03-16 21:03:07,474 INFO [org.jboss.jmx.adaptor.snmp.agent.SnmpAgentService] SNMPagent going active2011-03-16 21:03:07,629 INFO [org.jboss.ha.framework.interfaces.HAPartition.Partition-139-230] Initializing
Related Commands Command Description
file get Retrieves files by using SSH file transfer protocol (SFTP).
file list Lists the files and subdirectories that are in a specified directory.
file search Searches the content of log files and displays the lines that match a specified regular expression.
file tail Displays the last several lines of a file on the screen and displays appended data as the file grows.
file view Displays the contents of a file.
C-5Installation and Administration Guide for the Cisco TelePresence Exchange System Release 1.0
OL-21567-01
Appendix C Command Reference file get
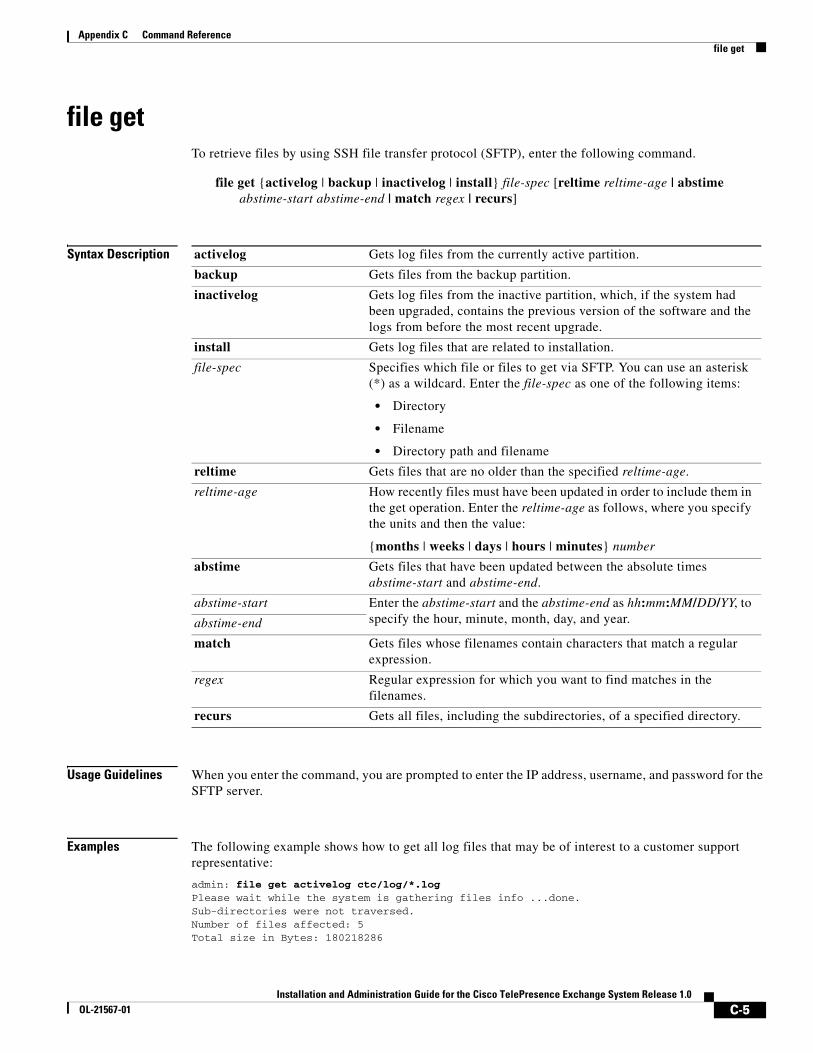
file getTo retrieve files by using SSH file transfer protocol (SFTP), enter the following command.
file get {activelog | backup | inactivelog | install} file-spec [reltime reltime-age | abstime abstime-start abstime-end | match regex | recurs]
Syntax Description
Usage Guidelines When you enter the command, you are prompted to enter the IP address, username, and password for the SFTP server.
Examples The following example shows how to get all log files that may be of interest to a customer support representative:
admin: file get activelog ctc/log/*.log Please wait while the system is gathering files info ...done.Sub-directories were not traversed.Number of files affected: 5Total size in Bytes: 180218286
activelog Gets log files from the currently active partition.
backup Gets files from the backup partition.
inactivelog Gets log files from the inactive partition, which, if the system had been upgraded, contains the previous version of the software and the logs from before the most recent upgrade.
install Gets log files that are related to installation.
file-spec Specifies which file or files to get via SFTP. You can use an asterisk (*) as a wildcard. Enter the file-spec as one of the following items:
• Directory
• Filename
• Directory path and filename
reltime Gets files that are no older than the specified reltime-age.
reltime-age How recently files must have been updated in order to include them in the get operation. Enter the reltime-age as follows, where you specify the units and then the value:
{months | weeks | days | hours | minutes} number
abstime Gets files that have been updated between the absolute times abstime-start and abstime-end.
abstime-start Enter the abstime-start and the abstime-end as hh:mm:MM/DD/YY, to specify the hour, minute, month, day, and year.abstime-end
match Gets files whose filenames contain characters that match a regular expression.
regex Regular expression for which you want to find matches in the filenames.
recurs Gets all files, including the subdirectories, of a specified directory.
C-6Installation and Administration Guide for the Cisco TelePresence Exchange System Release 1.0
OL-21567-01
Appendix C Command Reference file get
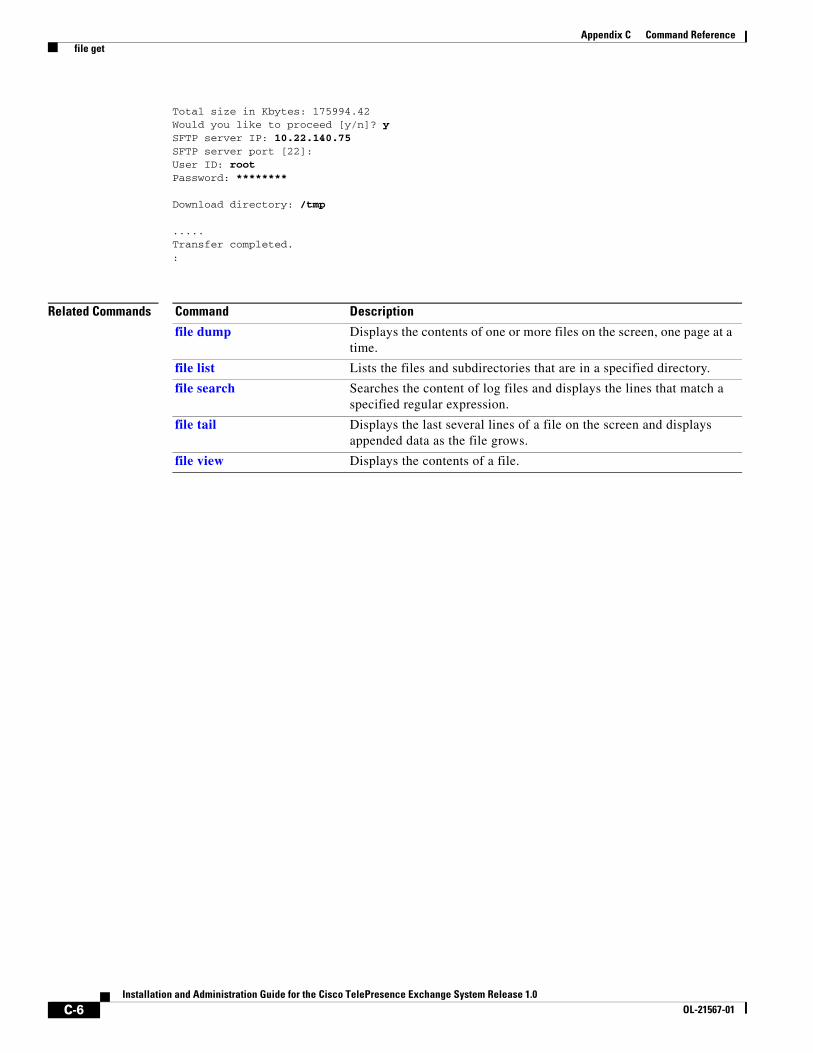
Total size in Kbytes: 175994.42Would you like to proceed [y/n]? y SFTP server IP: 10.22.140.75 SFTP server port [22]: User ID: root Password: ********
Download directory: /tmp
.....Transfer completed.:
Related Commands Command Description
file dump Displays the contents of one or more files on the screen, one page at a time.
file list Lists the files and subdirectories that are in a specified directory.
file search Searches the content of log files and displays the lines that match a specified regular expression.
file tail Displays the last several lines of a file on the screen and displays appended data as the file grows.
file view Displays the contents of a file.

C-7Installation and Administration Guide for the Cisco TelePresence Exchange System Release 1.0
OL-21567-01
Appendix C Command Reference file list
file listTo list the files and subdirectories in a directory, enter the following command.
file list {activelog | backup | inactivelog | install} file-spec [page] [detail] [reverse] [date] [size]
Syntax Description
Examples The following example shows how to list all active log files in a specified directory:
admin: file list activelog ctc/log/cisco/* ctc-engine-crm.log ctc-engine-hibernate.logctc-engine-initapp.log ctc-engine-interop-tps.logctc-engine-ivr.log ctc-engine-license.logctc-engine-meetme.log ctc-engine-netop.logctc-engine-ns.log ctc-engine-servicecontrol.logctc-engine-spring.log ctc-engine.logdir count = 0, file count = 12
Related Commands
activelog Specifies the currently active partition.
backup Specifies the backup partition.
inactivelog Specifies the inactive partition, which, if the system had been upgraded, contains the previous version of the software and the logs from before the most recent upgrade.
install Specifies the install partition.
file-spec Directory whose files and subdirectories you want to list. You can use an asterisk (*) as a wildcard.
page Displays the output one screen at a time.
detail Includes the details of each file and subdirectory in the list.
reverse Displays the list in the reverse sort order.
date Sorts the list items by date.
size Sorts the list items by file size.
Command Description
file dump Displays the contents of one or more files on the screen, one page at a time.
file get Retrieves files by using SSH file transfer protocol (SFTP).
file search Searches the content of log files and displays the lines that match a specified regular expression.
file tail Displays the last several lines of a file on the screen and displays appended data as the file grows.
file view Displays the contents of a file.
C-8Installation and Administration Guide for the Cisco TelePresence Exchange System Release 1.0
OL-21567-01
Appendix C Command Reference file search
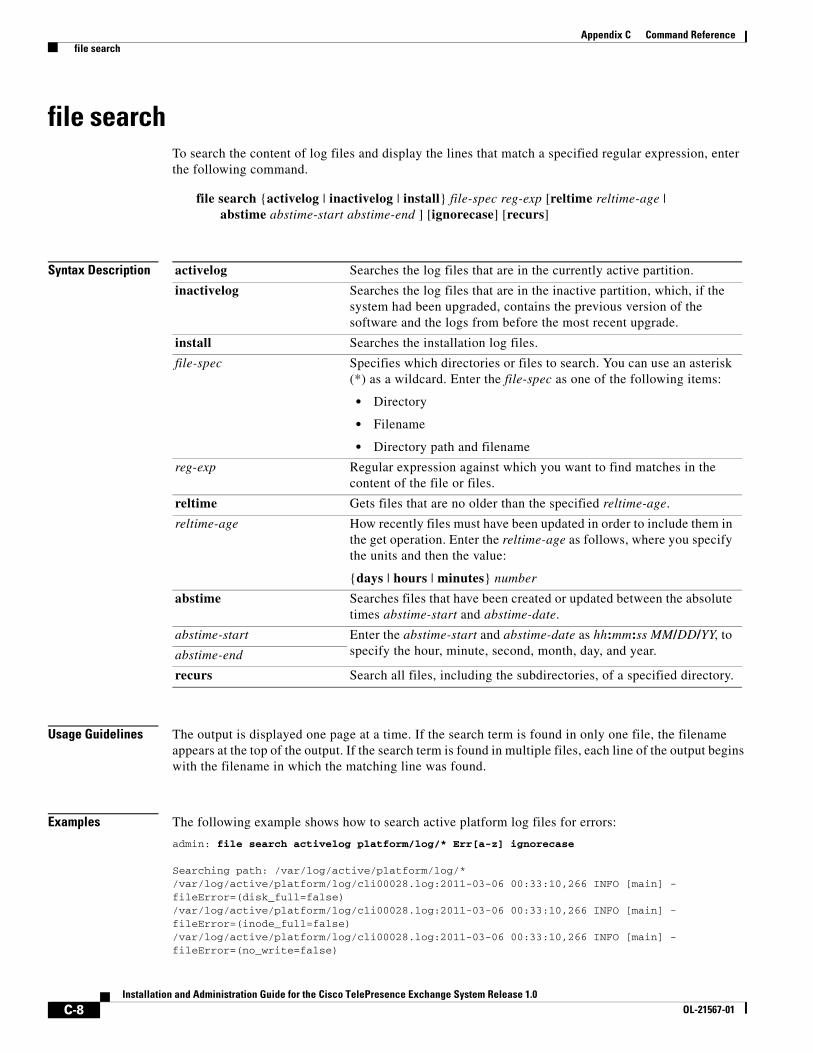
file searchTo search the content of log files and display the lines that match a specified regular expression, enter the following command.
file search {activelog | inactivelog | install} file-spec reg-exp [reltime reltime-age | abstime abstime-start abstime-end ] [ignorecase] [recurs]
Syntax Description
Usage Guidelines The output is displayed one page at a time. If the search term is found in only one file, the filename appears at the top of the output. If the search term is found in multiple files, each line of the output begins with the filename in which the matching line was found.
Examples The following example shows how to search active platform log files for errors:
admin: file search activelog platform/log/* Err[a-z] ignorecase
Searching path: /var/log/active/platform/log/*/var/log/active/platform/log/cli00028.log:2011-03-06 00:33:10,266 INFO [main] -fileError=(disk_full=false)/var/log/active/platform/log/cli00028.log:2011-03-06 00:33:10,266 INFO [main] -fileError=(inode_full=false)/var/log/active/platform/log/cli00028.log:2011-03-06 00:33:10,266 INFO [main] -fileError=(no_write=false)
activelog Searches the log files that are in the currently active partition.
inactivelog Searches the log files that are in the inactive partition, which, if the system had been upgraded, contains the previous version of the software and the logs from before the most recent upgrade.
install Searches the installation log files.
file-spec Specifies which directories or files to search. You can use an asterisk (*) as a wildcard. Enter the file-spec as one of the following items:
• Directory
• Filename
• Directory path and filename
reg-exp Regular expression against which you want to find matches in the content of the file or files.
reltime Gets files that are no older than the specified reltime-age.
reltime-age How recently files must have been updated in order to include them in the get operation. Enter the reltime-age as follows, where you specify the units and then the value:
{days | hours | minutes} number
abstime Searches files that have been created or updated between the absolute times abstime-start and abstime-date.
abstime-start Enter the abstime-start and abstime-date as hh:mm:ss MM/DD/YY, to specify the hour, minute, second, month, day, and year.abstime-end
recurs Search all files, including the subdirectories, of a specified directory.
C-9Installation and Administration Guide for the Cisco TelePresence Exchange System Release 1.0
OL-21567-01
Appendix C Command Reference file search
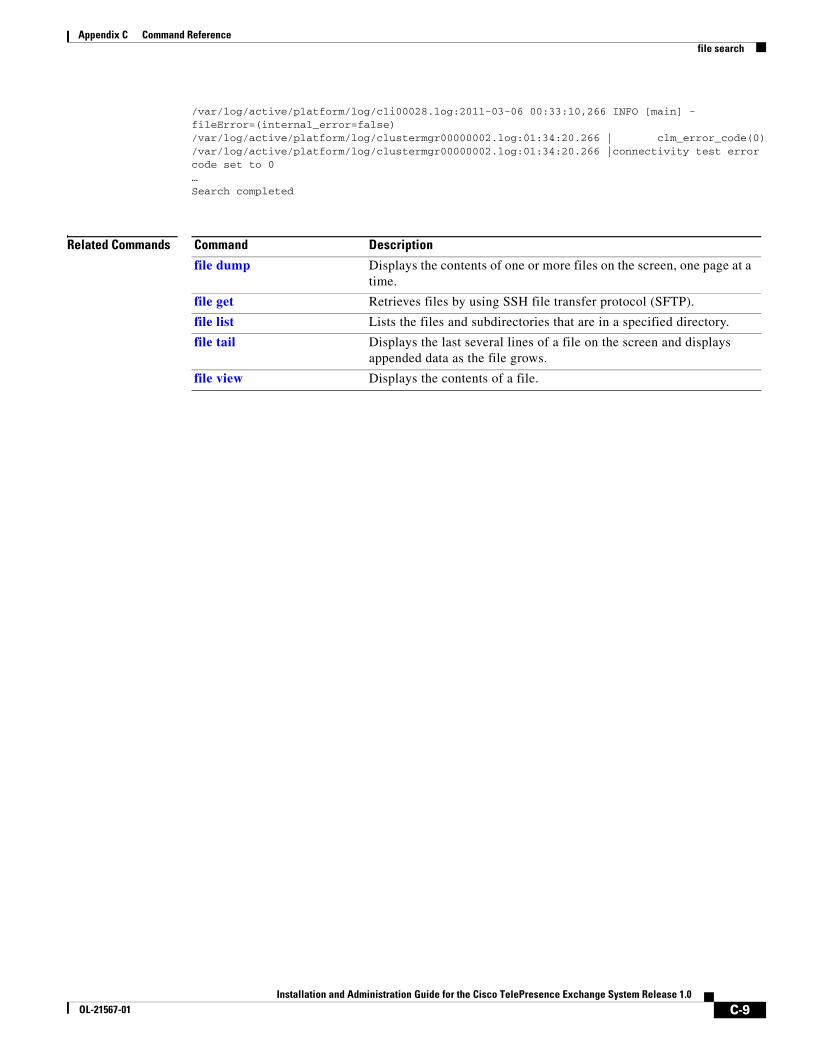
/var/log/active/platform/log/cli00028.log:2011-03-06 00:33:10,266 INFO [main] -fileError=(internal_error=false)/var/log/active/platform/log/clustermgr00000002.log:01:34:20.266 | clm_error_code(0)/var/log/active/platform/log/clustermgr00000002.log:01:34:20.266 |connectivity test errorcode set to 0…Search completed
Related Commands Command Description
file dump Displays the contents of one or more files on the screen, one page at a time.
file get Retrieves files by using SSH file transfer protocol (SFTP).
file list Lists the files and subdirectories that are in a specified directory.
file tail Displays the last several lines of a file on the screen and displays appended data as the file grows.
file view Displays the contents of a file.
C-10Installation and Administration Guide for the Cisco TelePresence Exchange System Release 1.0
OL-21567-01
Appendix C Command Reference file tail
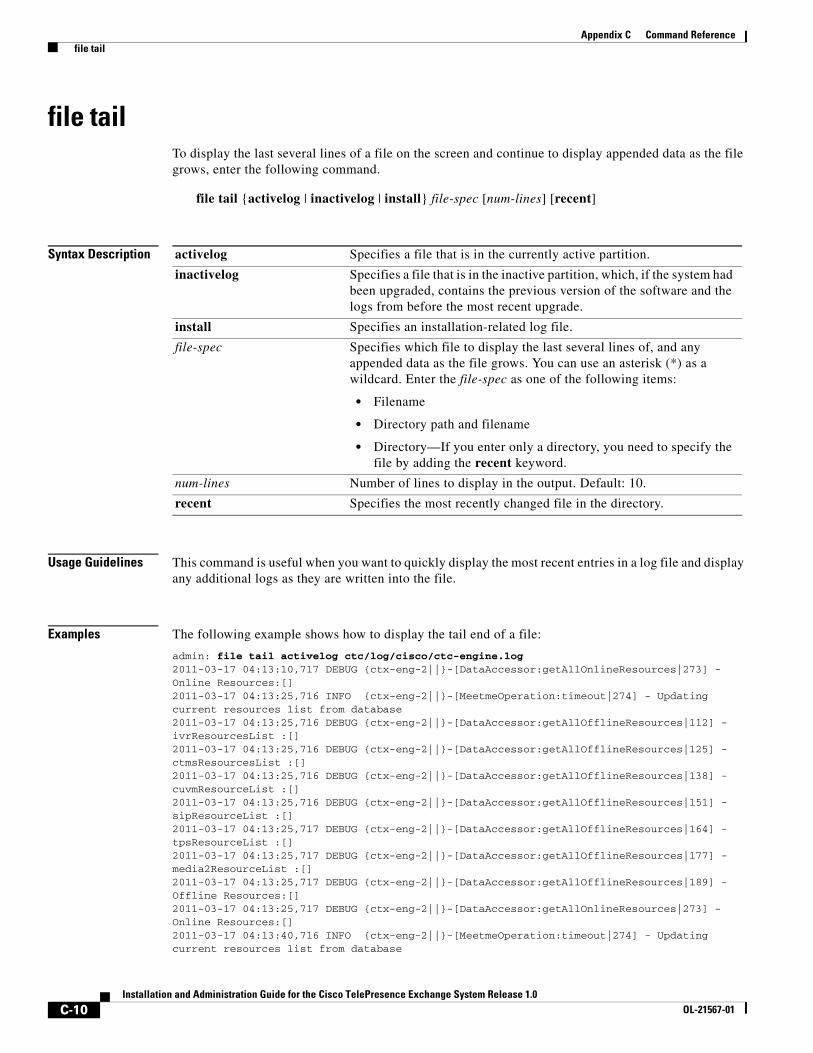
file tailTo display the last several lines of a file on the screen and continue to display appended data as the file grows, enter the following command.
file tail {activelog | inactivelog | install} file-spec [num-lines] [recent]
Syntax Description
Usage Guidelines This command is useful when you want to quickly display the most recent entries in a log file and display any additional logs as they are written into the file.
Examples The following example shows how to display the tail end of a file:
admin: file tail activelog ctc/log/cisco/ctc-engine.log 2011-03-17 04:13:10,717 DEBUG {ctx-eng-2||}-[DataAccessor:getAllOnlineResources|273] -Online Resources:[]2011-03-17 04:13:25,716 INFO {ctx-eng-2||}-[MeetmeOperation:timeout|274] - Updatingcurrent resources list from database2011-03-17 04:13:25,716 DEBUG {ctx-eng-2||}-[DataAccessor:getAllOfflineResources|112] -ivrResourcesList :[]2011-03-17 04:13:25,716 DEBUG {ctx-eng-2||}-[DataAccessor:getAllOfflineResources|125] -ctmsResourcesList :[]2011-03-17 04:13:25,716 DEBUG {ctx-eng-2||}-[DataAccessor:getAllOfflineResources|138] -cuvmResourceList :[]2011-03-17 04:13:25,716 DEBUG {ctx-eng-2||}-[DataAccessor:getAllOfflineResources|151] -sipResourceList :[]2011-03-17 04:13:25,717 DEBUG {ctx-eng-2||}-[DataAccessor:getAllOfflineResources|164] -tpsResourceList :[]2011-03-17 04:13:25,717 DEBUG {ctx-eng-2||}-[DataAccessor:getAllOfflineResources|177] -media2ResourceList :[]2011-03-17 04:13:25,717 DEBUG {ctx-eng-2||}-[DataAccessor:getAllOfflineResources|189] -Offline Resources:[]2011-03-17 04:13:25,717 DEBUG {ctx-eng-2||}-[DataAccessor:getAllOnlineResources|273] -Online Resources:[]2011-03-17 04:13:40,716 INFO {ctx-eng-2||}-[MeetmeOperation:timeout|274] - Updatingcurrent resources list from database
activelog Specifies a file that is in the currently active partition.
inactivelog Specifies a file that is in the inactive partition, which, if the system had been upgraded, contains the previous version of the software and the logs from before the most recent upgrade.
install Specifies an installation-related log file.
file-spec Specifies which file to display the last several lines of, and any appended data as the file grows. You can use an asterisk (*) as a wildcard. Enter the file-spec as one of the following items:
• Filename
• Directory path and filename
• Directory—If you enter only a directory, you need to specify the file by adding the recent keyword.
num-lines Number of lines to display in the output. Default: 10.
recent Specifies the most recently changed file in the directory.
C-11Installation and Administration Guide for the Cisco TelePresence Exchange System Release 1.0
OL-21567-01
Appendix C Command Reference file tail
Related Commands Command Description
file dump Displays the contents of one or more files on the screen, one page at a time.
file get Retrieves files by using SSH file transfer protocol (SFTP).
file list Lists the files and subdirectories that are in a specified directory.
file search Searches the content of log files and displays the lines that match a specified regular expression.
file view Displays the contents of a file.
C-12Installation and Administration Guide for the Cisco TelePresence Exchange System Release 1.0
OL-21567-01
Appendix C Command Reference file view
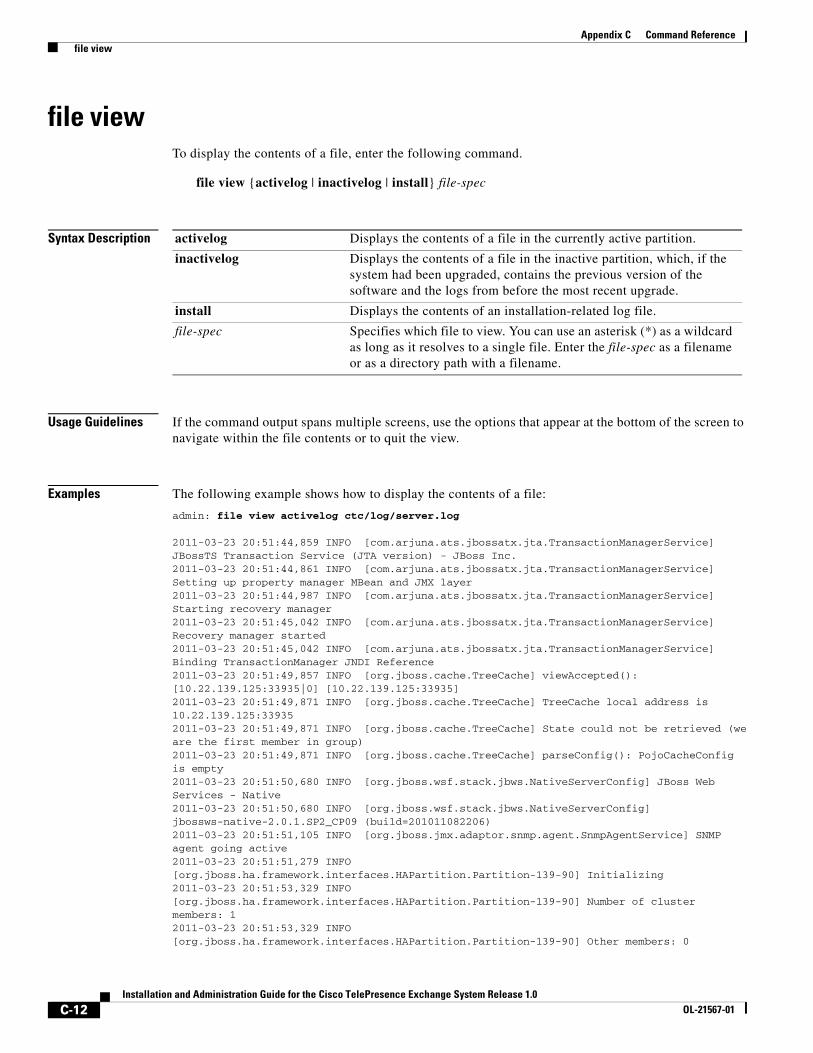
file viewTo display the contents of a file, enter the following command.
file view {activelog | inactivelog | install} file-spec
Syntax Description
Usage Guidelines If the command output spans multiple screens, use the options that appear at the bottom of the screen to navigate within the file contents or to quit the view.
Examples The following example shows how to display the contents of a file:
admin: file view activelog ctc/log/server.log
2011-03-23 20:51:44,859 INFO [com.arjuna.ats.jbossatx.jta.TransactionManagerService]JBossTS Transaction Service (JTA version) - JBoss Inc.2011-03-23 20:51:44,861 INFO [com.arjuna.ats.jbossatx.jta.TransactionManagerService]Setting up property manager MBean and JMX layer2011-03-23 20:51:44,987 INFO [com.arjuna.ats.jbossatx.jta.TransactionManagerService]Starting recovery manager2011-03-23 20:51:45,042 INFO [com.arjuna.ats.jbossatx.jta.TransactionManagerService]Recovery manager started2011-03-23 20:51:45,042 INFO [com.arjuna.ats.jbossatx.jta.TransactionManagerService]Binding TransactionManager JNDI Reference2011-03-23 20:51:49,857 INFO [org.jboss.cache.TreeCache] viewAccepted():[10.22.139.125:33935|0] [10.22.139.125:33935]2011-03-23 20:51:49,871 INFO [org.jboss.cache.TreeCache] TreeCache local address is10.22.139.125:339352011-03-23 20:51:49,871 INFO [org.jboss.cache.TreeCache] State could not be retrieved (weare the first member in group)2011-03-23 20:51:49,871 INFO [org.jboss.cache.TreeCache] parseConfig(): PojoCacheConfigis empty2011-03-23 20:51:50,680 INFO [org.jboss.wsf.stack.jbws.NativeServerConfig] JBoss WebServices - Native2011-03-23 20:51:50,680 INFO [org.jboss.wsf.stack.jbws.NativeServerConfig]jbossws-native-2.0.1.SP2_CP09 (build=201011082206)2011-03-23 20:51:51,105 INFO [org.jboss.jmx.adaptor.snmp.agent.SnmpAgentService] SNMPagent going active2011-03-23 20:51:51,279 INFO [org.jboss.ha.framework.interfaces.HAPartition.Partition-139-90] Initializing2011-03-23 20:51:53,329 INFO [org.jboss.ha.framework.interfaces.HAPartition.Partition-139-90] Number of clustermembers: 12011-03-23 20:51:53,329 INFO [org.jboss.ha.framework.interfaces.HAPartition.Partition-139-90] Other members: 0
activelog Displays the contents of a file in the currently active partition.
inactivelog Displays the contents of a file in the inactive partition, which, if the system had been upgraded, contains the previous version of the software and the logs from before the most recent upgrade.
install Displays the contents of an installation-related log file.
file-spec Specifies which file to view. You can use an asterisk (*) as a wildcard as long as it resolves to a single file. Enter the file-spec as a filename or as a directory path with a filename.
C-13Installation and Administration Guide for the Cisco TelePresence Exchange System Release 1.0
OL-21567-01
Appendix C Command Reference file view
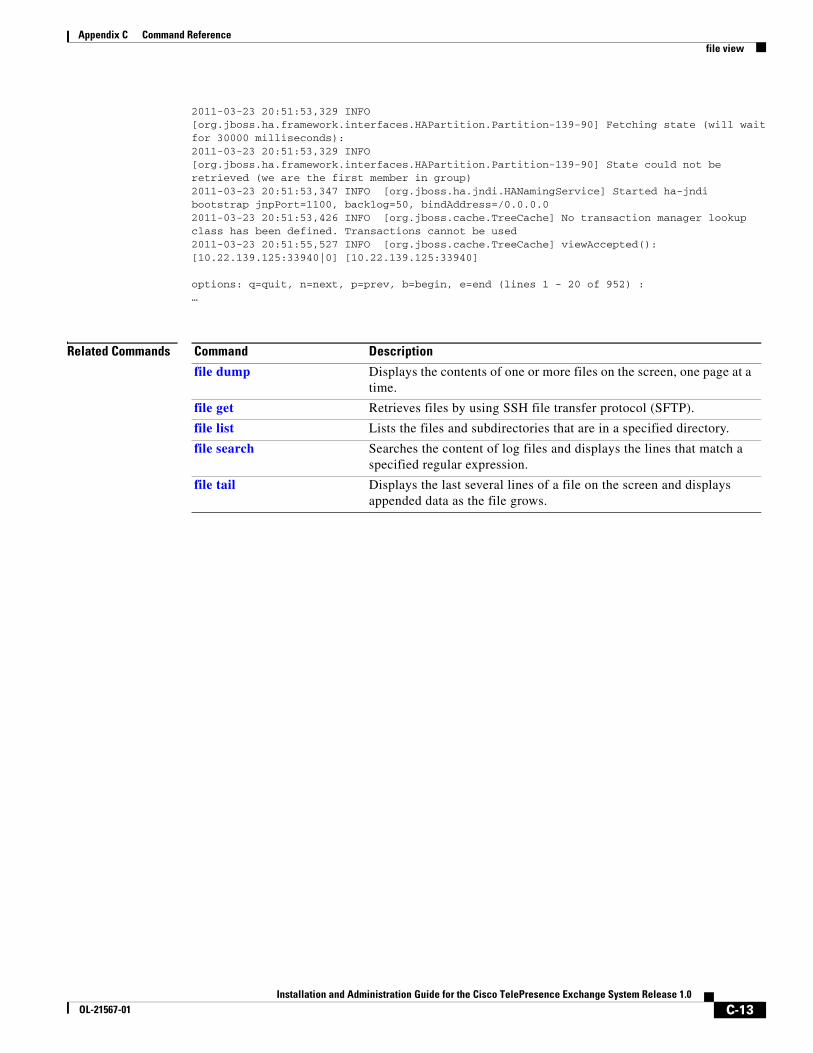
2011-03-23 20:51:53,329 INFO [org.jboss.ha.framework.interfaces.HAPartition.Partition-139-90] Fetching state (will waitfor 30000 milliseconds):2011-03-23 20:51:53,329 INFO [org.jboss.ha.framework.interfaces.HAPartition.Partition-139-90] State could not beretrieved (we are the first member in group)2011-03-23 20:51:53,347 INFO [org.jboss.ha.jndi.HANamingService] Started ha-jndibootstrap jnpPort=1100, backlog=50, bindAddress=/0.0.0.02011-03-23 20:51:53,426 INFO [org.jboss.cache.TreeCache] No transaction manager lookupclass has been defined. Transactions cannot be used2011-03-23 20:51:55,527 INFO [org.jboss.cache.TreeCache] viewAccepted():[10.22.139.125:33940|0] [10.22.139.125:33940]
options: q=quit, n=next, p=prev, b=begin, e=end (lines 1 - 20 of 952) : …
Related Commands Command Description
file dump Displays the contents of one or more files on the screen, one page at a time.
file get Retrieves files by using SSH file transfer protocol (SFTP).
file list Lists the files and subdirectories that are in a specified directory.
file search Searches the content of log files and displays the lines that match a specified regular expression.
file tail Displays the last several lines of a file on the screen and displays appended data as the file grows.
C-14Installation and Administration Guide for the Cisco TelePresence Exchange System Release 1.0
OL-21567-01
Appendix C Command Reference set adminserver changedbip
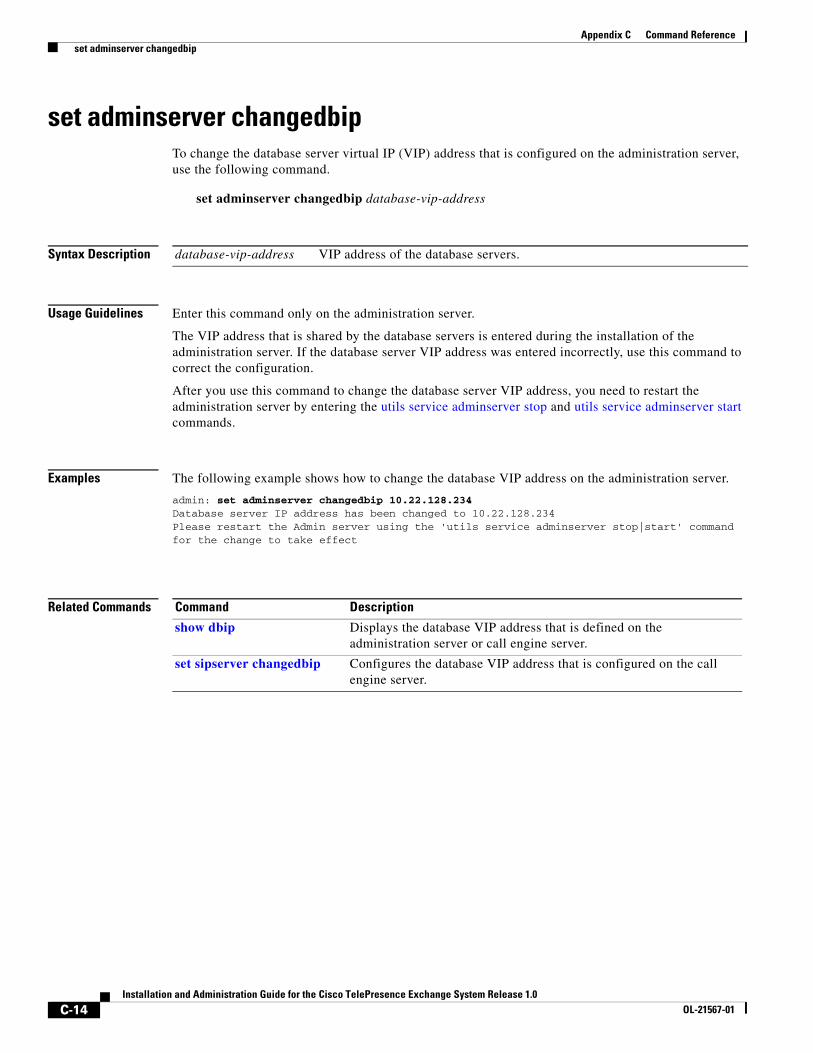
set adminserver changedbipTo change the database server virtual IP (VIP) address that is configured on the administration server, use the following command.
set adminserver changedbip database-vip-address
Syntax Description
Usage Guidelines Enter this command only on the administration server.
The VIP address that is shared by the database servers is entered during the installation of the administration server. If the database server VIP address was entered incorrectly, use this command to correct the configuration.
After you use this command to change the database server VIP address, you need to restart the administration server by entering the utils service adminserver stop and utils service adminserver start commands.
Examples The following example shows how to change the database VIP address on the administration server.
admin: set adminserver changedbip 10.22.128.234 Database server IP address has been changed to 10.22.128.234Please restart the Admin server using the 'utils service adminserver stop|start' commandfor the change to take effect
Related Commands
database-vip-address VIP address of the database servers.
Command Description
show dbip Displays the database VIP address that is defined on the administration server or call engine server.
set sipserver changedbip Configures the database VIP address that is configured on the call engine server.
C-15Installation and Administration Guide for the Cisco TelePresence Exchange System Release 1.0
OL-21567-01
Appendix C Command Reference set adminserver trapvip
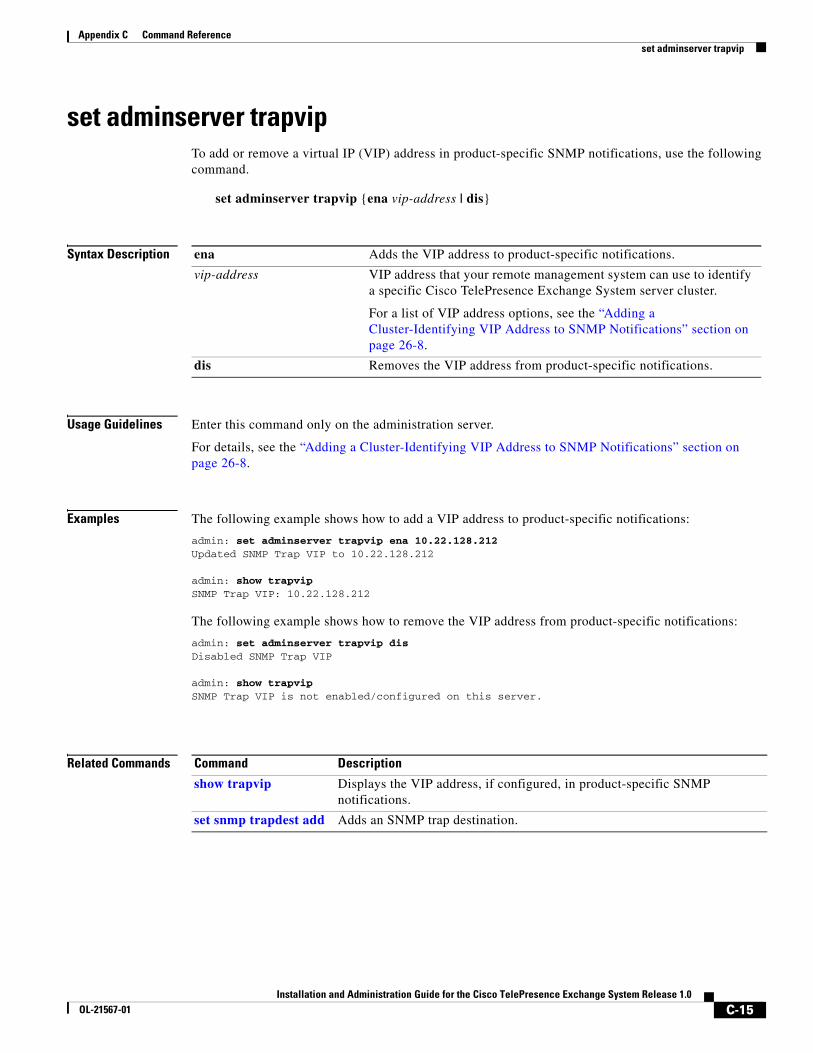
set adminserver trapvipTo add or remove a virtual IP (VIP) address in product-specific SNMP notifications, use the following command.
set adminserver trapvip {ena vip-address | dis}
Syntax Description
Usage Guidelines Enter this command only on the administration server.
For details, see the “Adding a Cluster-Identifying VIP Address to SNMP Notifications” section on page 26-8.
Examples The following example shows how to add a VIP address to product-specific notifications:
admin: set adminserver trapvip ena 10.22.128.212 Updated SNMP Trap VIP to 10.22.128.212
admin: show trapvip SNMP Trap VIP: 10.22.128.212
The following example shows how to remove the VIP address from product-specific notifications:
admin: set adminserver trapvip dis Disabled SNMP Trap VIP
admin: show trapvip SNMP Trap VIP is not enabled/configured on this server.
Related Commands
ena Adds the VIP address to product-specific notifications.
vip-address VIP address that your remote management system can use to identify a specific Cisco TelePresence Exchange System server cluster.
For a list of VIP address options, see the “Adding a Cluster-Identifying VIP Address to SNMP Notifications” section on page 26-8.
dis Removes the VIP address from product-specific notifications.
Command Description
show trapvip Displays the VIP address, if configured, in product-specific SNMP notifications.
set snmp trapdest add Adds an SNMP trap destination.
C-16Installation and Administration Guide for the Cisco TelePresence Exchange System Release 1.0
OL-21567-01
Appendix C Command Reference set cdp disable
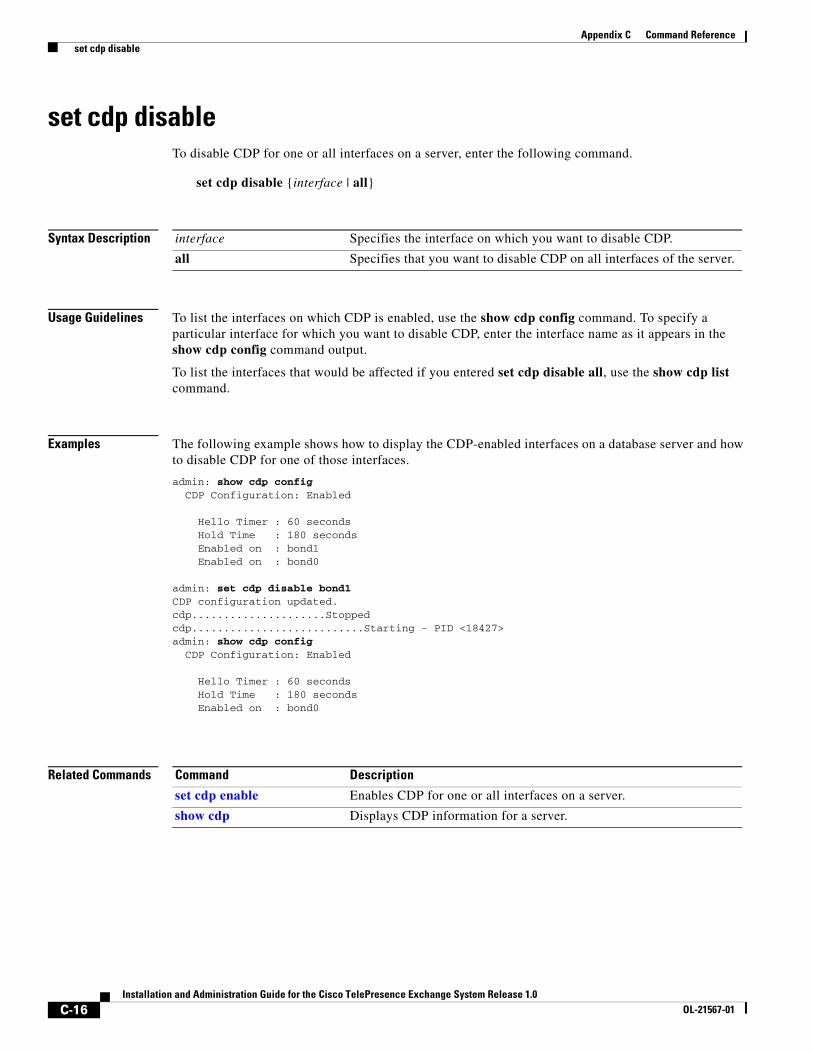
set cdp disableTo disable CDP for one or all interfaces on a server, enter the following command.
set cdp disable {interface | all}
Syntax Description
Usage Guidelines To list the interfaces on which CDP is enabled, use the show cdp config command. To specify a particular interface for which you want to disable CDP, enter the interface name as it appears in the show cdp config command output.
To list the interfaces that would be affected if you entered set cdp disable all, use the show cdp list command.
Examples The following example shows how to display the CDP-enabled interfaces on a database server and how to disable CDP for one of those interfaces.
admin: show cdp config CDP Configuration: Enabled Hello Timer : 60 seconds Hold Time : 180 seconds Enabled on : bond1 Enabled on : bond0 admin: set cdp disable bond1 CDP configuration updated.cdp.....................Stoppedcdp...........................Starting - PID <18427>admin: show cdp config CDP Configuration: Enabled Hello Timer : 60 seconds Hold Time : 180 seconds Enabled on : bond0
Related Commands
interface Specifies the interface on which you want to disable CDP.
all Specifies that you want to disable CDP on all interfaces of the server.
Command Description
set cdp enable Enables CDP for one or all interfaces on a server.
show cdp Displays CDP information for a server.
C-17Installation and Administration Guide for the Cisco TelePresence Exchange System Release 1.0
OL-21567-01
Appendix C Command Reference set cdp enable
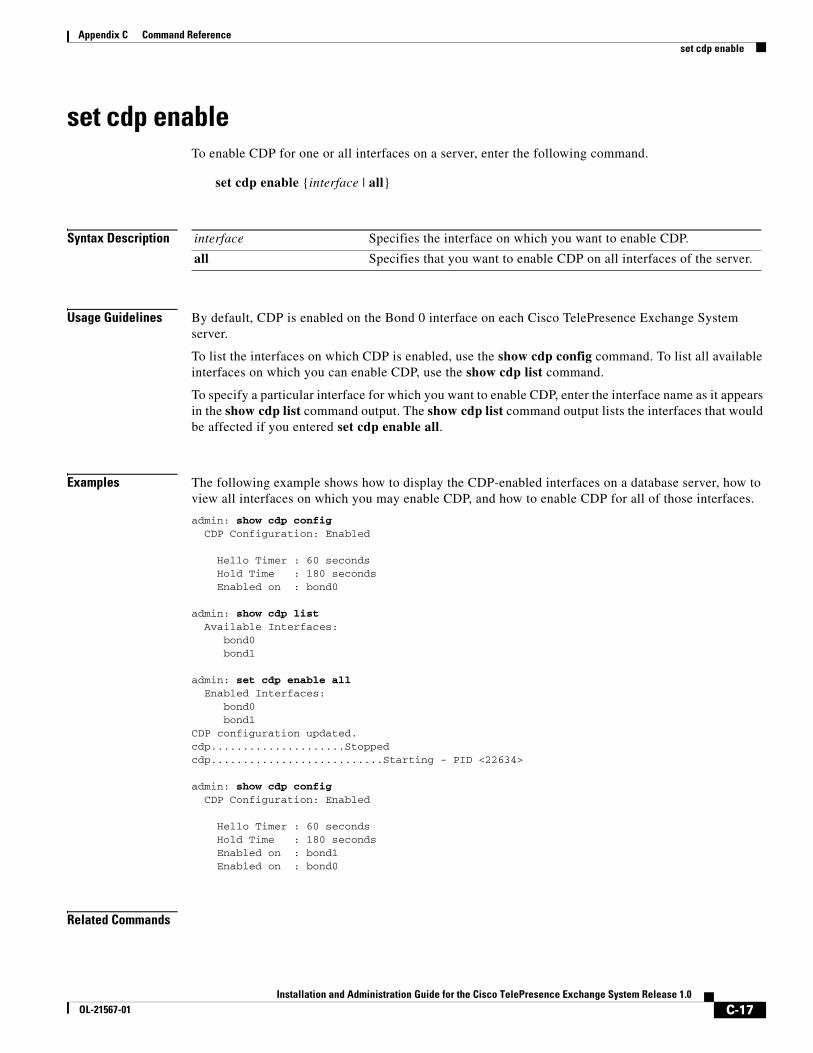
set cdp enableTo enable CDP for one or all interfaces on a server, enter the following command.
set cdp enable {interface | all}
Syntax Description
Usage Guidelines By default, CDP is enabled on the Bond 0 interface on each Cisco TelePresence Exchange System server.
To list the interfaces on which CDP is enabled, use the show cdp config command. To list all available interfaces on which you can enable CDP, use the show cdp list command.
To specify a particular interface for which you want to enable CDP, enter the interface name as it appears in the show cdp list command output. The show cdp list command output lists the interfaces that would be affected if you entered set cdp enable all.
Examples The following example shows how to display the CDP-enabled interfaces on a database server, how to view all interfaces on which you may enable CDP, and how to enable CDP for all of those interfaces.
admin: show cdp config CDP Configuration: Enabled Hello Timer : 60 seconds Hold Time : 180 seconds Enabled on : bond0 admin: show cdp list Available Interfaces: bond0 bond1 admin: set cdp enable all Enabled Interfaces: bond0 bond1CDP configuration updated.cdp.....................Stoppedcdp...........................Starting - PID <22634>
admin: show cdp config CDP Configuration: Enabled Hello Timer : 60 seconds Hold Time : 180 seconds Enabled on : bond1 Enabled on : bond0
Related Commands
interface Specifies the interface on which you want to enable CDP.
all Specifies that you want to enable CDP on all interfaces of the server.
C-18Installation and Administration Guide for the Cisco TelePresence Exchange System Release 1.0
OL-21567-01
Appendix C Command Reference set cdp enable
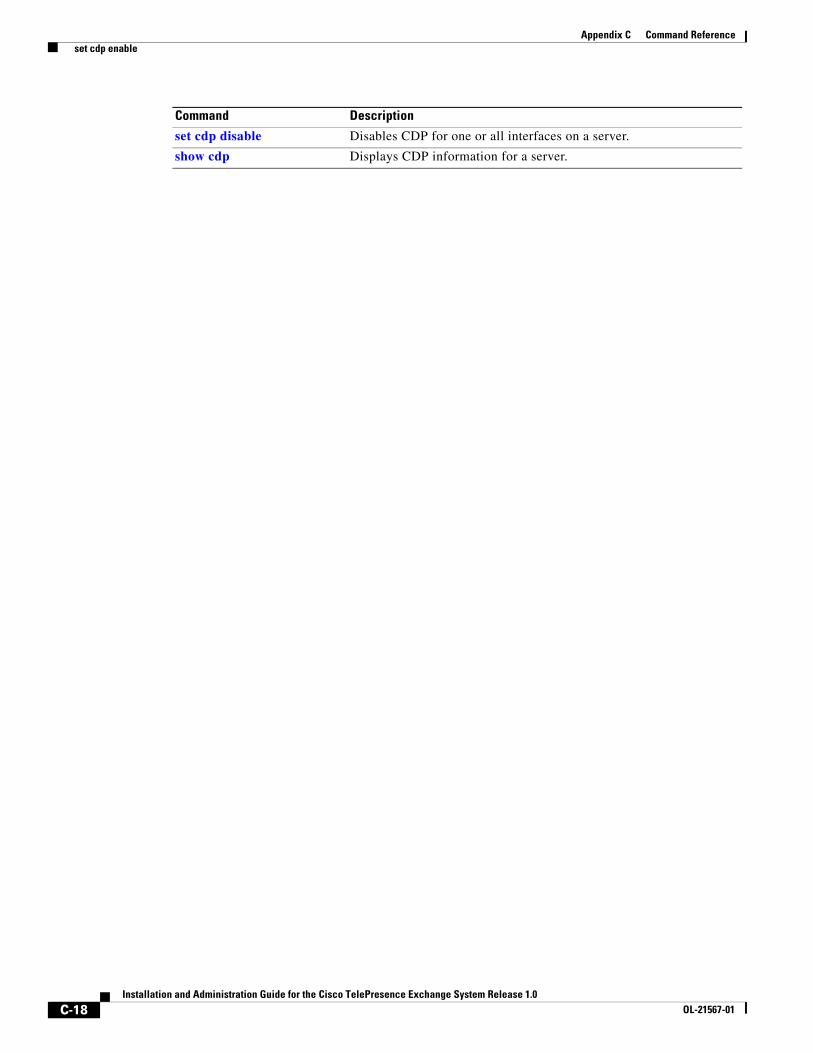
Command Description
set cdp disable Disables CDP for one or all interfaces on a server.
show cdp Displays CDP information for a server.
C-19Installation and Administration Guide for the Cisco TelePresence Exchange System Release 1.0
OL-21567-01
Appendix C Command Reference set cdp holdtime
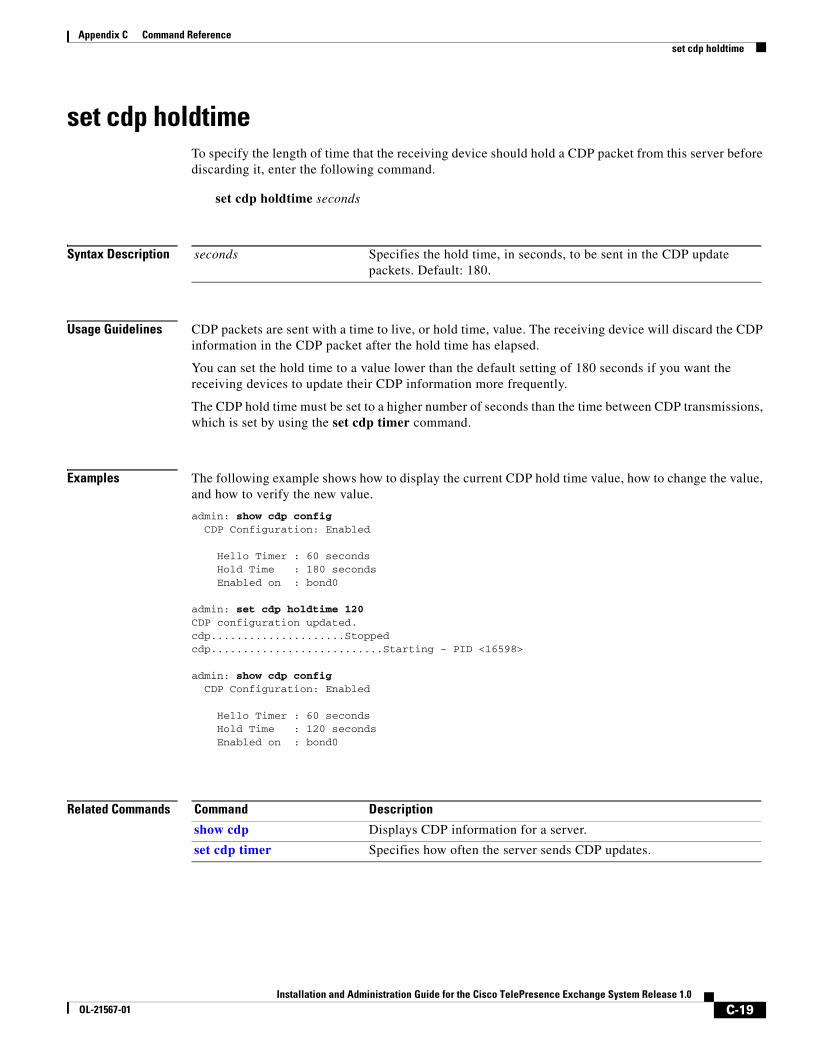
set cdp holdtimeTo specify the length of time that the receiving device should hold a CDP packet from this server before discarding it, enter the following command.
set cdp holdtime seconds
Syntax Description
Usage Guidelines CDP packets are sent with a time to live, or hold time, value. The receiving device will discard the CDP information in the CDP packet after the hold time has elapsed.
You can set the hold time to a value lower than the default setting of 180 seconds if you want the receiving devices to update their CDP information more frequently.
The CDP hold time must be set to a higher number of seconds than the time between CDP transmissions, which is set by using the set cdp timer command.
Examples The following example shows how to display the current CDP hold time value, how to change the value, and how to verify the new value.
admin: show cdp config CDP Configuration: Enabled Hello Timer : 60 seconds Hold Time : 180 seconds Enabled on : bond0 admin: set cdp holdtime 120 CDP configuration updated.cdp.....................Stoppedcdp...........................Starting - PID <16598>
admin: show cdp config CDP Configuration: Enabled Hello Timer : 60 seconds Hold Time : 120 seconds Enabled on : bond0
Related Commands
seconds Specifies the hold time, in seconds, to be sent in the CDP update packets. Default: 180.
Command Description
show cdp Displays CDP information for a server.
set cdp timer Specifies how often the server sends CDP updates.
C-20Installation and Administration Guide for the Cisco TelePresence Exchange System Release 1.0
OL-21567-01
Appendix C Command Reference set cdp timer
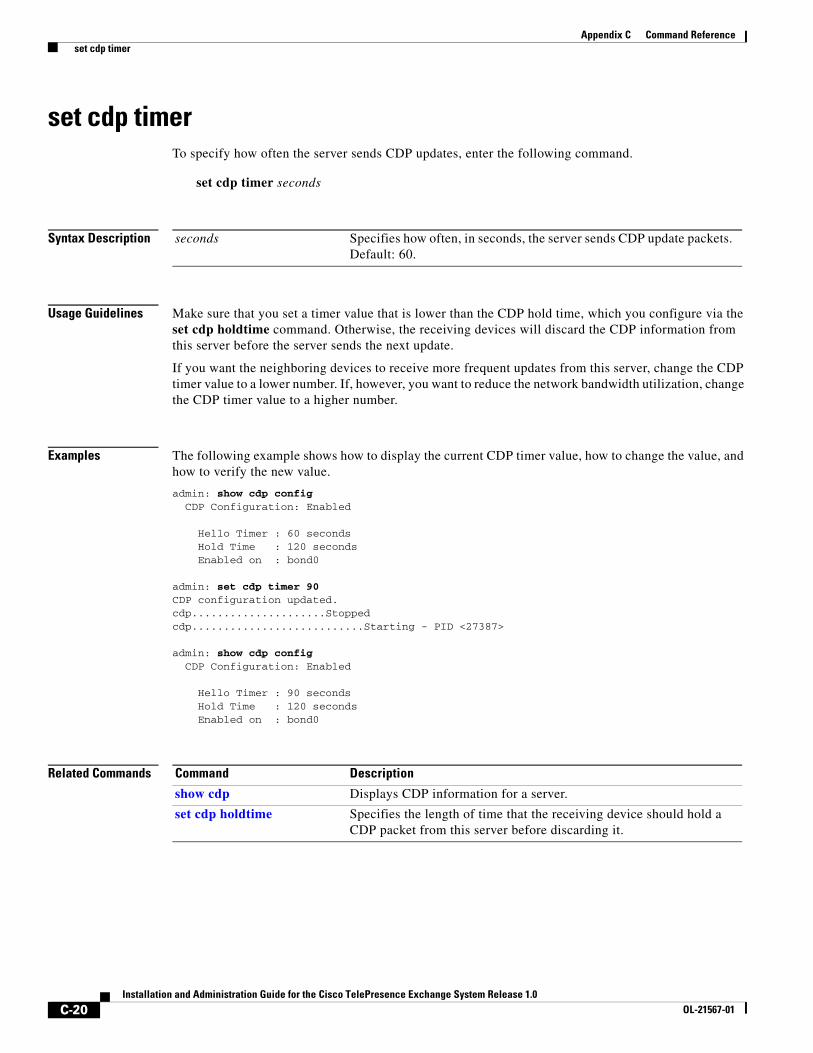
set cdp timerTo specify how often the server sends CDP updates, enter the following command.
set cdp timer seconds
Syntax Description
Usage Guidelines Make sure that you set a timer value that is lower than the CDP hold time, which you configure via the set cdp holdtime command. Otherwise, the receiving devices will discard the CDP information from this server before the server sends the next update.
If you want the neighboring devices to receive more frequent updates from this server, change the CDP timer value to a lower number. If, however, you want to reduce the network bandwidth utilization, change the CDP timer value to a higher number.
Examples The following example shows how to display the current CDP timer value, how to change the value, and how to verify the new value.
admin: show cdp config CDP Configuration: Enabled Hello Timer : 60 seconds Hold Time : 120 seconds Enabled on : bond0 admin: set cdp timer 90 CDP configuration updated.cdp.....................Stoppedcdp...........................Starting - PID <27387>
admin: show cdp config CDP Configuration: Enabled Hello Timer : 90 seconds Hold Time : 120 seconds Enabled on : bond0
Related Commands
seconds Specifies how often, in seconds, the server sends CDP update packets. Default: 60.
Command Description
show cdp Displays CDP information for a server.
set cdp holdtime Specifies the length of time that the receiving device should hold a CDP packet from this server before discarding it.
C-21Installation and Administration Guide for the Cisco TelePresence Exchange System Release 1.0
OL-21567-01
Appendix C Command Reference set network failover dis
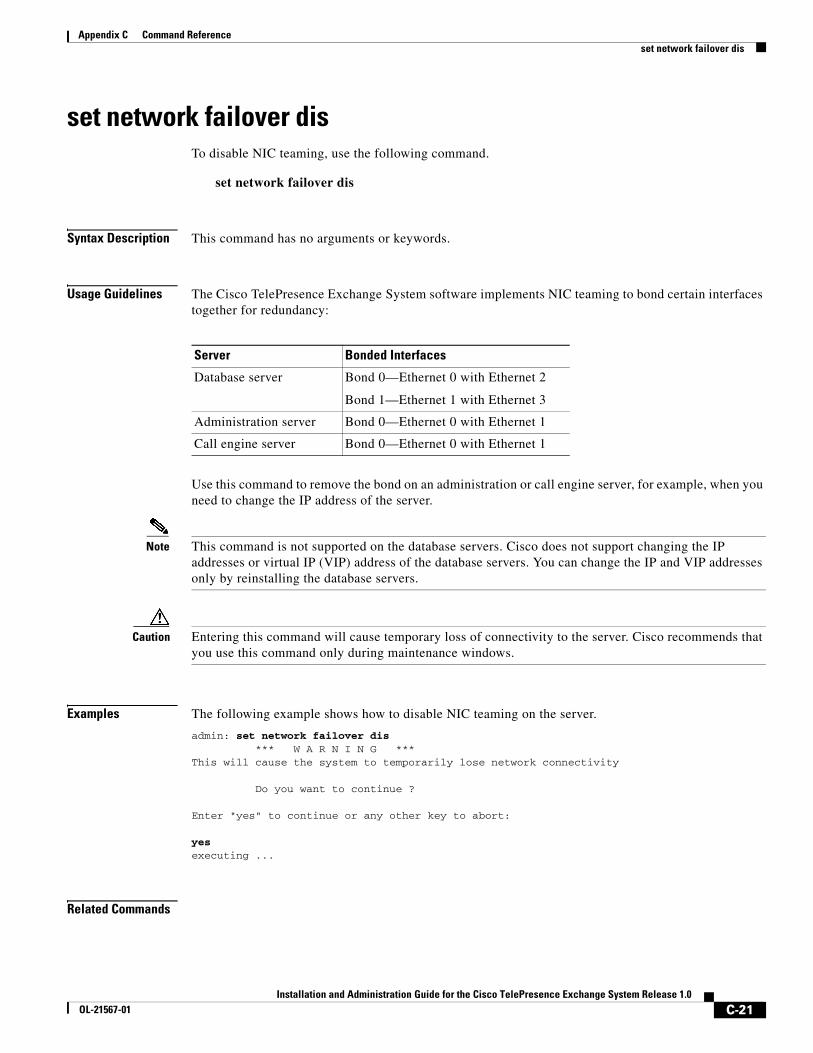
set network failover disTo disable NIC teaming, use the following command.
set network failover dis
Syntax Description This command has no arguments or keywords.
Usage Guidelines The Cisco TelePresence Exchange System software implements NIC teaming to bond certain interfaces together for redundancy:
Use this command to remove the bond on an administration or call engine server, for example, when you need to change the IP address of the server.
Note This command is not supported on the database servers. Cisco does not support changing the IP addresses or virtual IP (VIP) address of the database servers. You can change the IP and VIP addresses only by reinstalling the database servers.
Caution Entering this command will cause temporary loss of connectivity to the server. Cisco recommends that you use this command only during maintenance windows.
Examples The following example shows how to disable NIC teaming on the server.
admin: set network failover dis *** W A R N I N G ***This will cause the system to temporarily lose network connectivity
Do you want to continue ?
Enter "yes" to continue or any other key to abort:
yes executing ...
Related Commands
Server Bonded Interfaces
Database server Bond 0—Ethernet 0 with Ethernet 2
Bond 1—Ethernet 1 with Ethernet 3
Administration server Bond 0—Ethernet 0 with Ethernet 1
Call engine server Bond 0—Ethernet 0 with Ethernet 1
C-22Installation and Administration Guide for the Cisco TelePresence Exchange System Release 1.0
OL-21567-01
Appendix C Command Reference set network failover dis
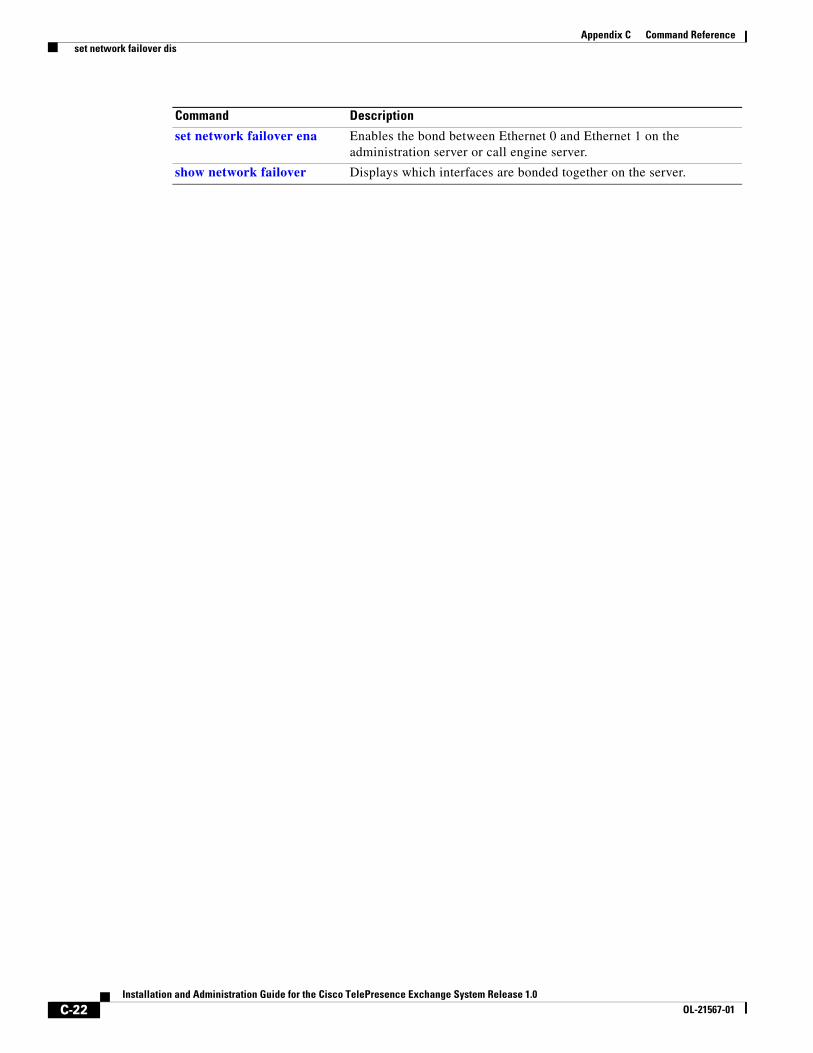
Command Description
set network failover ena Enables the bond between Ethernet 0 and Ethernet 1 on the administration server or call engine server.
show network failover Displays which interfaces are bonded together on the server.
C-23Installation and Administration Guide for the Cisco TelePresence Exchange System Release 1.0
OL-21567-01
Appendix C Command Reference set network failover ena
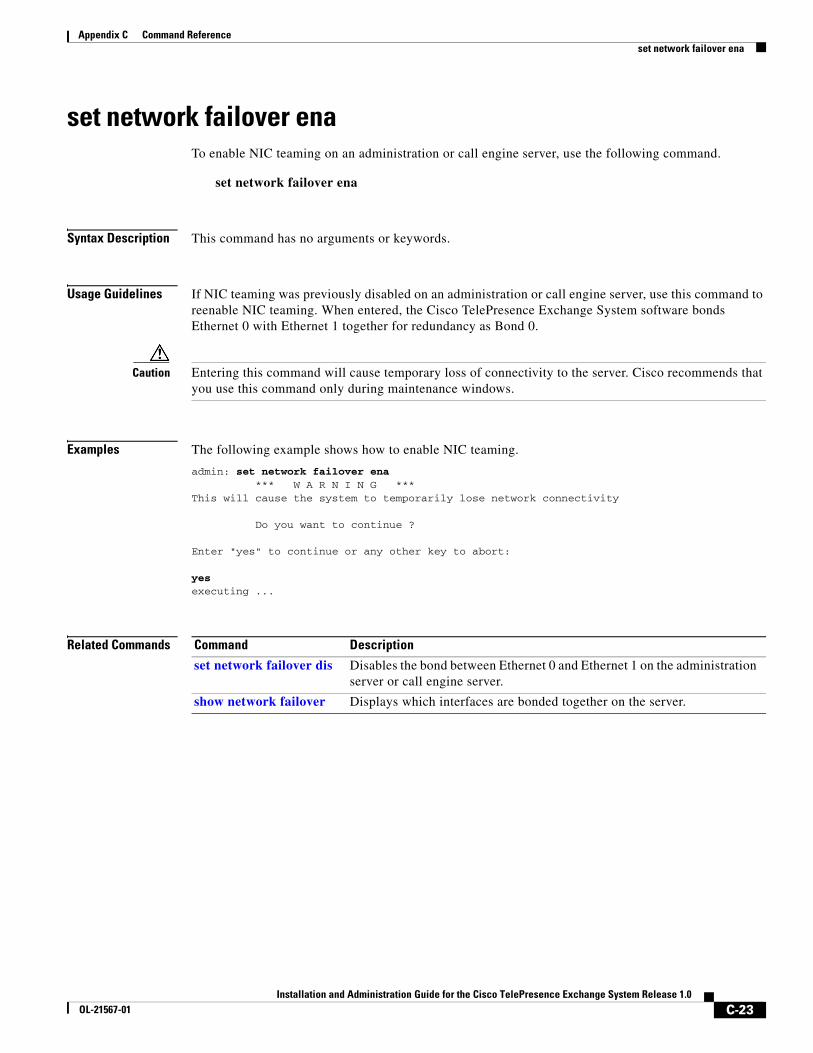
set network failover enaTo enable NIC teaming on an administration or call engine server, use the following command.
set network failover ena
Syntax Description This command has no arguments or keywords.
Usage Guidelines If NIC teaming was previously disabled on an administration or call engine server, use this command to reenable NIC teaming. When entered, the Cisco TelePresence Exchange System software bonds Ethernet 0 with Ethernet 1 together for redundancy as Bond 0.
Caution Entering this command will cause temporary loss of connectivity to the server. Cisco recommends that you use this command only during maintenance windows.
Examples The following example shows how to enable NIC teaming.
admin: set network failover ena *** W A R N I N G ***This will cause the system to temporarily lose network connectivity
Do you want to continue ?
Enter "yes" to continue or any other key to abort:
yes executing ...
Related Commands Command Description
set network failover dis Disables the bond between Ethernet 0 and Ethernet 1 on the administration server or call engine server.
show network failover Displays which interfaces are bonded together on the server.
C-24Installation and Administration Guide for the Cisco TelePresence Exchange System Release 1.0
OL-21567-01
Appendix C Command Reference set network gateway
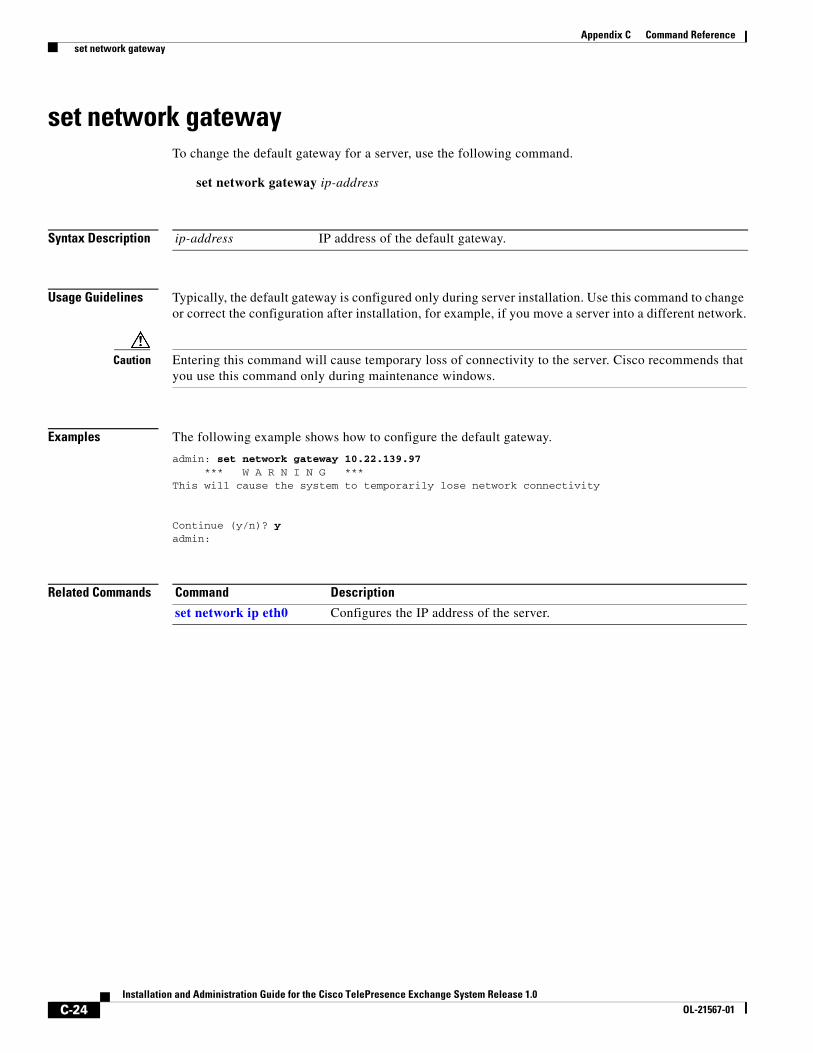
set network gatewayTo change the default gateway for a server, use the following command.
set network gateway ip-address
Syntax Description
Usage Guidelines Typically, the default gateway is configured only during server installation. Use this command to change or correct the configuration after installation, for example, if you move a server into a different network.
Caution Entering this command will cause temporary loss of connectivity to the server. Cisco recommends that you use this command only during maintenance windows.
Examples The following example shows how to configure the default gateway.
admin: set network gateway 10.22.139.97 *** W A R N I N G ***This will cause the system to temporarily lose network connectivity
Continue (y/n)? y admin:
Related Commands
ip-address IP address of the default gateway.
Command Description
set network ip eth0 Configures the IP address of the server.
C-25Installation and Administration Guide for the Cisco TelePresence Exchange System Release 1.0
OL-21567-01
Appendix C Command Reference set network ip eth0
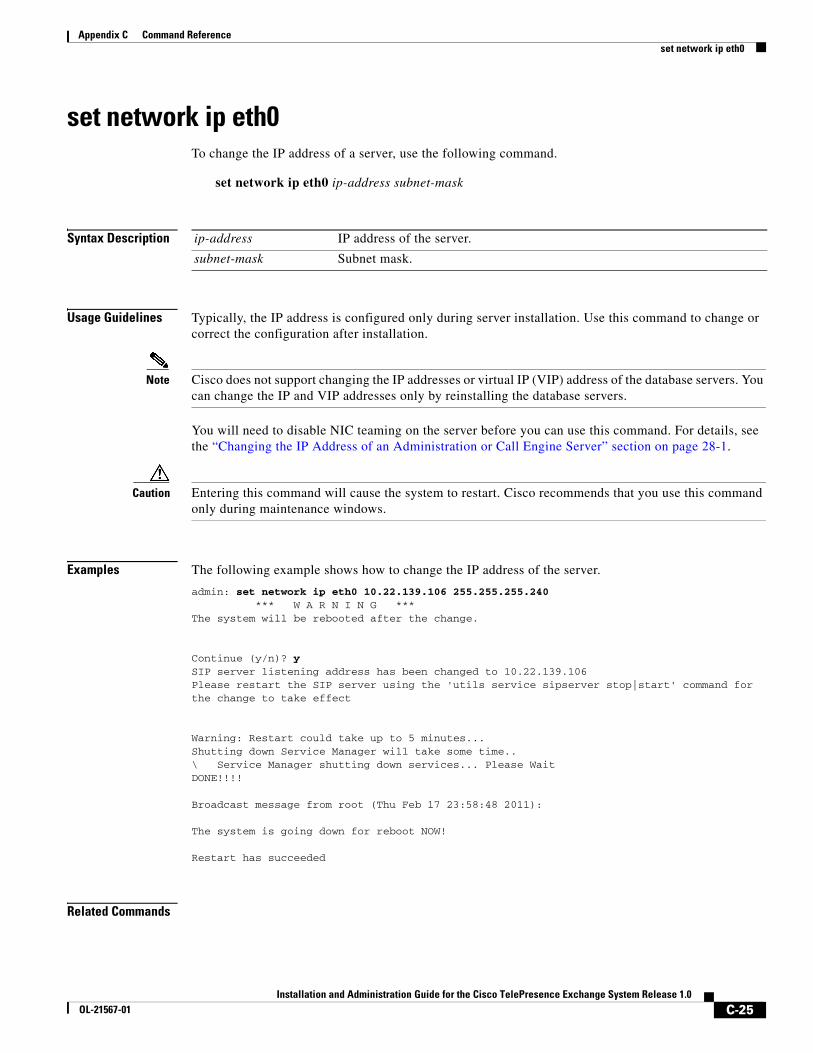
set network ip eth0To change the IP address of a server, use the following command.
set network ip eth0 ip-address subnet-mask
Syntax Description
Usage Guidelines Typically, the IP address is configured only during server installation. Use this command to change or correct the configuration after installation.
Note Cisco does not support changing the IP addresses or virtual IP (VIP) address of the database servers. You can change the IP and VIP addresses only by reinstalling the database servers.
You will need to disable NIC teaming on the server before you can use this command. For details, see the “Changing the IP Address of an Administration or Call Engine Server” section on page 28-1.
Caution Entering this command will cause the system to restart. Cisco recommends that you use this command only during maintenance windows.
Examples The following example shows how to change the IP address of the server.
admin: set network ip eth0 10.22.139.106 255.255.255.240 *** W A R N I N G ***The system will be rebooted after the change.
Continue (y/n)? y SIP server listening address has been changed to 10.22.139.106Please restart the SIP server using the 'utils service sipserver stop|start' command forthe change to take effect
Warning: Restart could take up to 5 minutes...Shutting down Service Manager will take some time.. \ Service Manager shutting down services... Please Wait DONE!!!!
Broadcast message from root (Thu Feb 17 23:58:48 2011):
The system is going down for reboot NOW!
Restart has succeeded
Related Commands
ip-address IP address of the server.
subnet-mask Subnet mask.
C-26Installation and Administration Guide for the Cisco TelePresence Exchange System Release 1.0
OL-21567-01
Appendix C Command Reference set network ip eth0
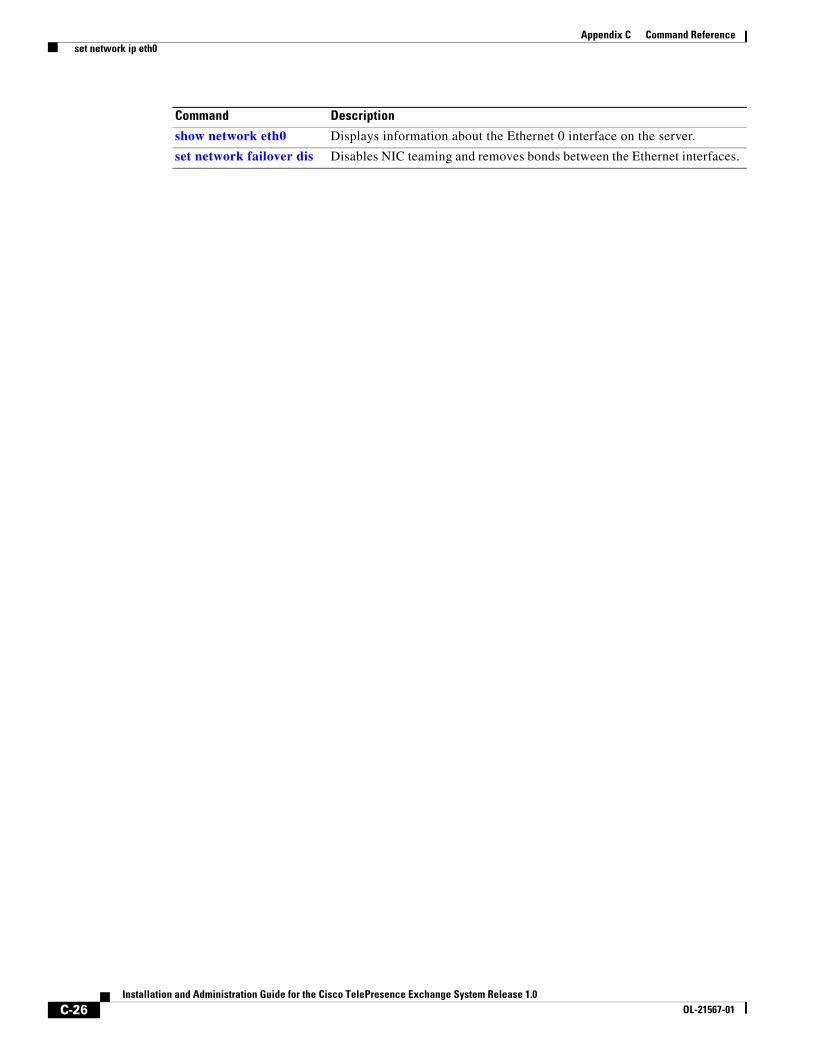
Command Description
show network eth0 Displays information about the Ethernet 0 interface on the server.
set network failover dis Disables NIC teaming and removes bonds between the Ethernet interfaces.
C-27Installation and Administration Guide for the Cisco TelePresence Exchange System Release 1.0
OL-21567-01
Appendix C Command Reference set password admin
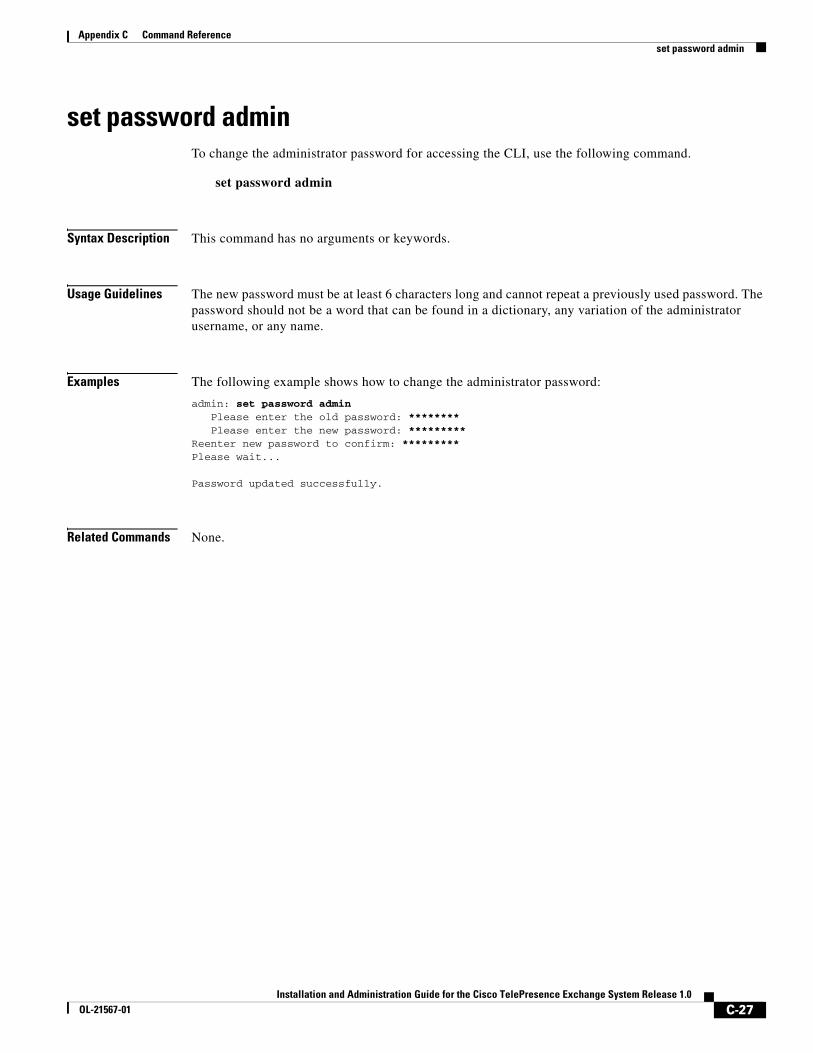
set password adminTo change the administrator password for accessing the CLI, use the following command.
set password admin
Syntax Description This command has no arguments or keywords.
Usage Guidelines The new password must be at least 6 characters long and cannot repeat a previously used password. The password should not be a word that can be found in a dictionary, any variation of the administrator username, or any name.
Examples The following example shows how to change the administrator password:
admin: set password admin Please enter the old password: ******** Please enter the new password: ********* Reenter new password to confirm: ********* Please wait...
Password updated successfully.
Related Commands None.
C-28Installation and Administration Guide for the Cisco TelePresence Exchange System Release 1.0
OL-21567-01
Appendix C Command Reference set sipserver changedbip
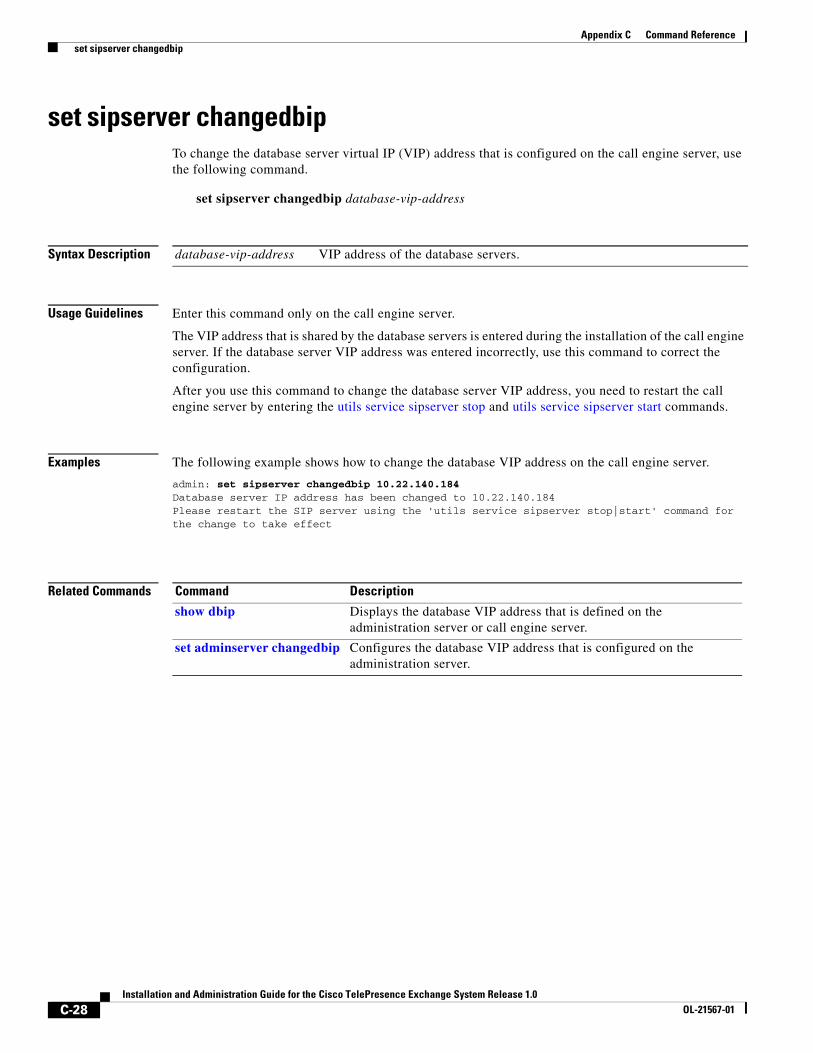
set sipserver changedbipTo change the database server virtual IP (VIP) address that is configured on the call engine server, use the following command.
set sipserver changedbip database-vip-address
Syntax Description
Usage Guidelines Enter this command only on the call engine server.
The VIP address that is shared by the database servers is entered during the installation of the call engine server. If the database server VIP address was entered incorrectly, use this command to correct the configuration.
After you use this command to change the database server VIP address, you need to restart the call engine server by entering the utils service sipserver stop and utils service sipserver start commands.
Examples The following example shows how to change the database VIP address on the call engine server.
admin: set sipserver changedbip 10.22.140.184 Database server IP address has been changed to 10.22.140.184Please restart the SIP server using the 'utils service sipserver stop|start' command forthe change to take effect
Related Commands
database-vip-address VIP address of the database servers.
Command Description
show dbip Displays the database VIP address that is defined on the administration server or call engine server.
set adminserver changedbip Configures the database VIP address that is configured on the administration server.
C-29Installation and Administration Guide for the Cisco TelePresence Exchange System Release 1.0
OL-21567-01
Appendix C Command Reference set sipserver siplb dis
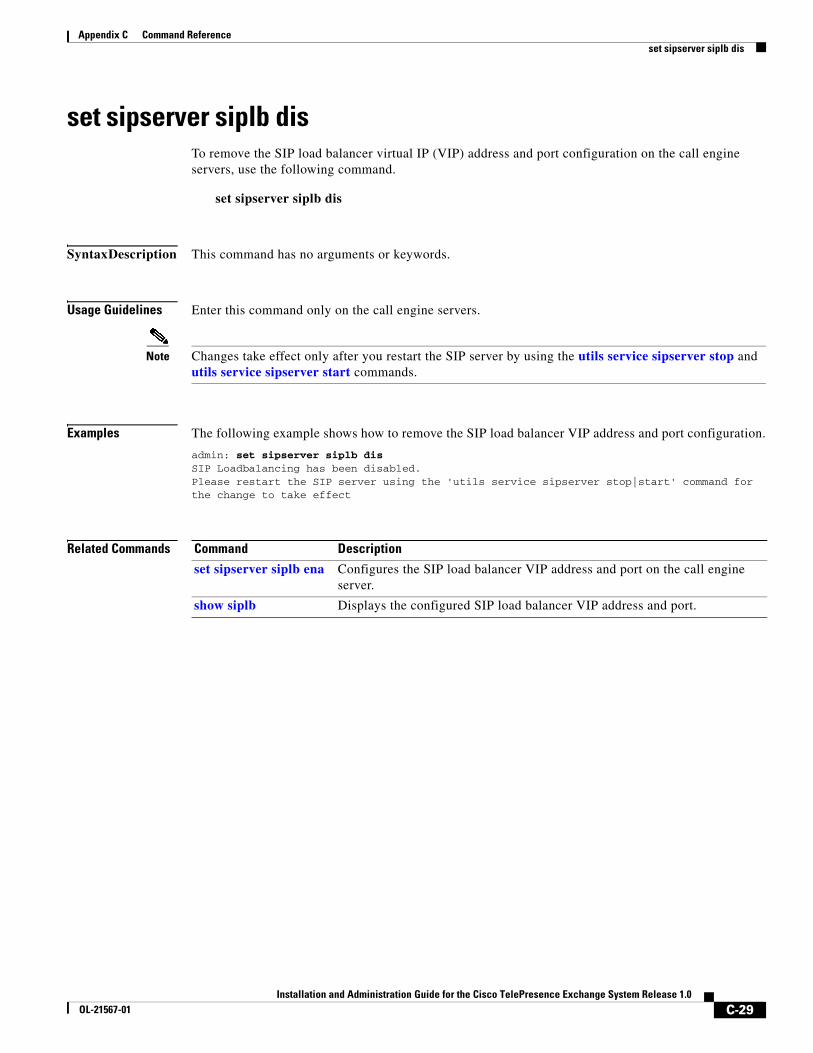
set sipserver siplb disTo remove the SIP load balancer virtual IP (VIP) address and port configuration on the call engine servers, use the following command.
set sipserver siplb dis
Syntax Description This command has no arguments or keywords.
Usage Guidelines Enter this command only on the call engine servers.
Note Changes take effect only after you restart the SIP server by using the utils service sipserver stop and utils service sipserver start commands.
Examples The following example shows how to remove the SIP load balancer VIP address and port configuration.
admin: set sipserver siplb dis SIP Loadbalancing has been disabled.Please restart the SIP server using the 'utils service sipserver stop|start' command forthe change to take effect
Related Commands Command Description
set sipserver siplb ena Configures the SIP load balancer VIP address and port on the call engine server.
show siplb Displays the configured SIP load balancer VIP address and port.
C-30Installation and Administration Guide for the Cisco TelePresence Exchange System Release 1.0
OL-21567-01
Appendix C Command Reference set sipserver siplb ena
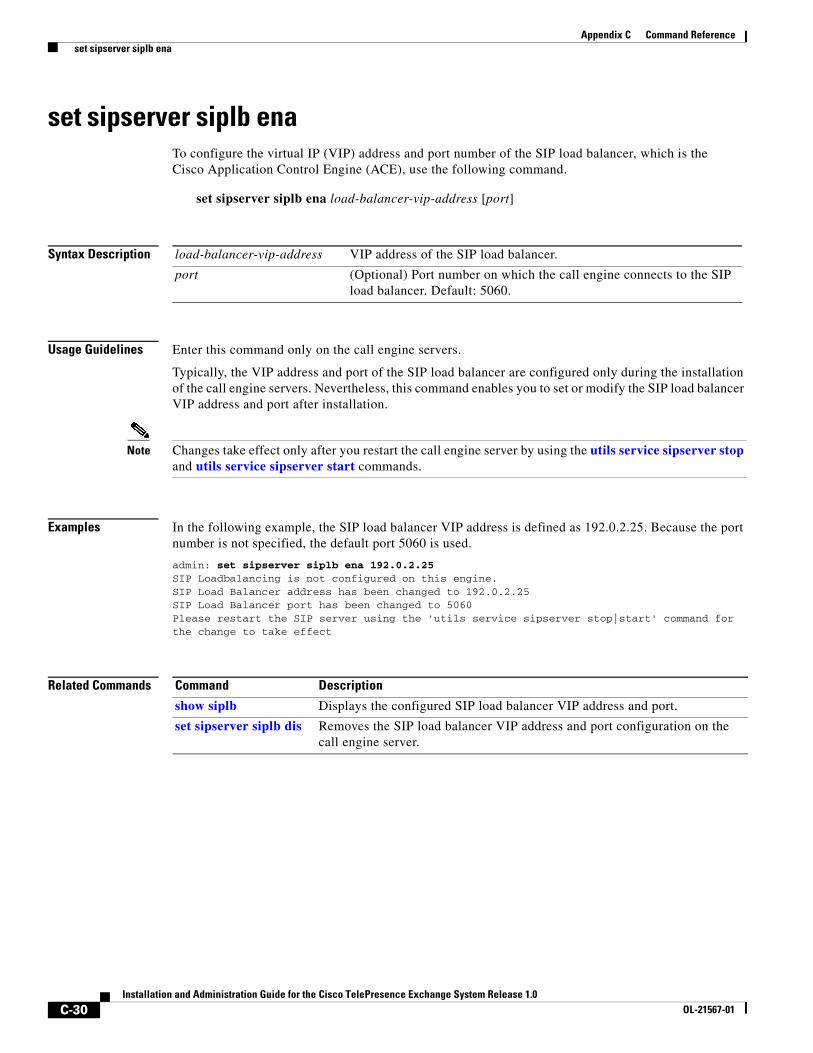
set sipserver siplb enaTo configure the virtual IP (VIP) address and port number of the SIP load balancer, which is the Cisco Application Control Engine (ACE), use the following command.
set sipserver siplb ena load-balancer-vip-address [port]
Syntax Description
Usage Guidelines Enter this command only on the call engine servers.
Typically, the VIP address and port of the SIP load balancer are configured only during the installation of the call engine servers. Nevertheless, this command enables you to set or modify the SIP load balancer VIP address and port after installation.
Note Changes take effect only after you restart the call engine server by using the utils service sipserver stop and utils service sipserver start commands.
Examples In the following example, the SIP load balancer VIP address is defined as 192.0.2.25. Because the port number is not specified, the default port 5060 is used.
admin: set sipserver siplb ena 192.0.2.25 SIP Loadbalancing is not configured on this engine.SIP Load Balancer address has been changed to 192.0.2.25SIP Load Balancer port has been changed to 5060Please restart the SIP server using the 'utils service sipserver stop|start' command forthe change to take effect
Related Commands
load-balancer-vip-address VIP address of the SIP load balancer.
port (Optional) Port number on which the call engine connects to the SIP load balancer. Default: 5060.
Command Description
show siplb Displays the configured SIP load balancer VIP address and port.
set sipserver siplb dis Removes the SIP load balancer VIP address and port configuration on the call engine server.
C-31Installation and Administration Guide for the Cisco TelePresence Exchange System Release 1.0
OL-21567-01
Appendix C Command Reference set snmp trapdest add
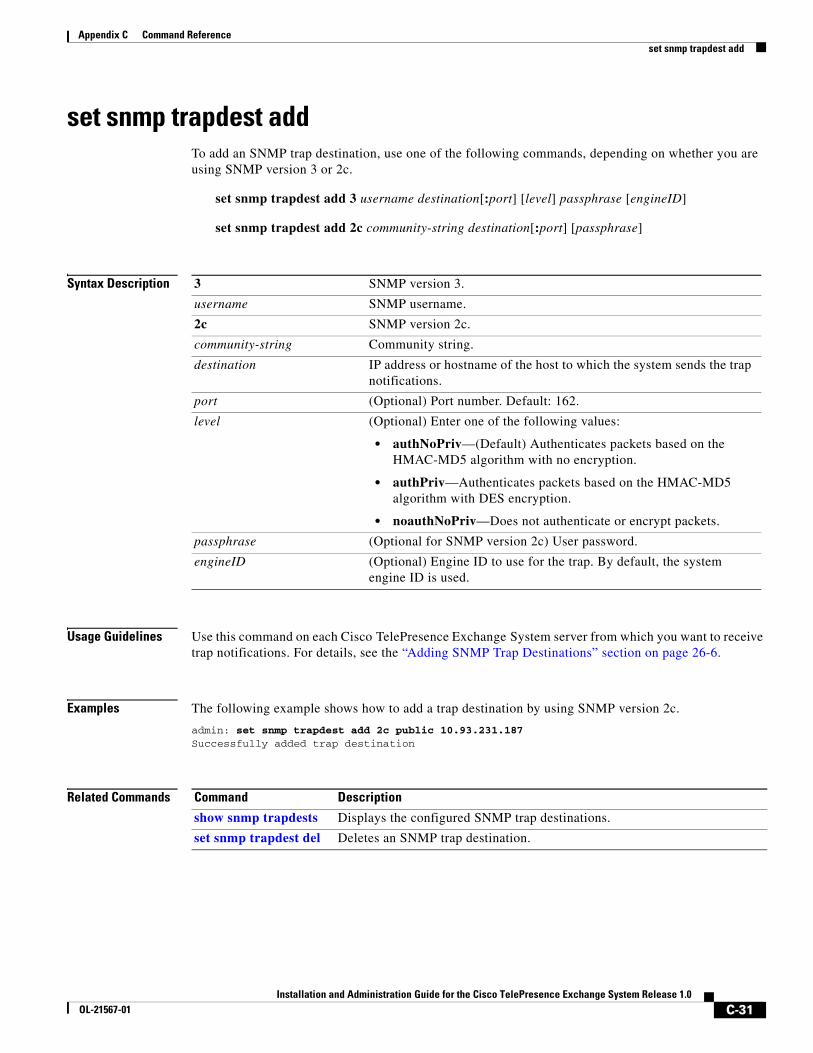
set snmp trapdest addTo add an SNMP trap destination, use one of the following commands, depending on whether you are using SNMP version 3 or 2c.
set snmp trapdest add 3 username destination[:port] [level] passphrase [engineID]
set snmp trapdest add 2c community-string destination[:port] [passphrase]
Syntax Description
Usage Guidelines Use this command on each Cisco TelePresence Exchange System server from which you want to receive trap notifications. For details, see the “Adding SNMP Trap Destinations” section on page 26-6.
Examples The following example shows how to add a trap destination by using SNMP version 2c.
admin: set snmp trapdest add 2c public 10.93.231.187 Successfully added trap destination
Related Commands
3 SNMP version 3.
username SNMP username.
2c SNMP version 2c.
community-string Community string.
destination IP address or hostname of the host to which the system sends the trap notifications.
port (Optional) Port number. Default: 162.
level (Optional) Enter one of the following values:
• authNoPriv—(Default) Authenticates packets based on the HMAC-MD5 algorithm with no encryption.
• authPriv—Authenticates packets based on the HMAC-MD5 algorithm with DES encryption.
• noauthNoPriv—Does not authenticate or encrypt packets.
passphrase (Optional for SNMP version 2c) User password.
engineID (Optional) Engine ID to use for the trap. By default, the system engine ID is used.
Command Description
show snmp trapdests Displays the configured SNMP trap destinations.
set snmp trapdest del Deletes an SNMP trap destination.
C-32Installation and Administration Guide for the Cisco TelePresence Exchange System Release 1.0
OL-21567-01
Appendix C Command Reference set snmp trapdest del
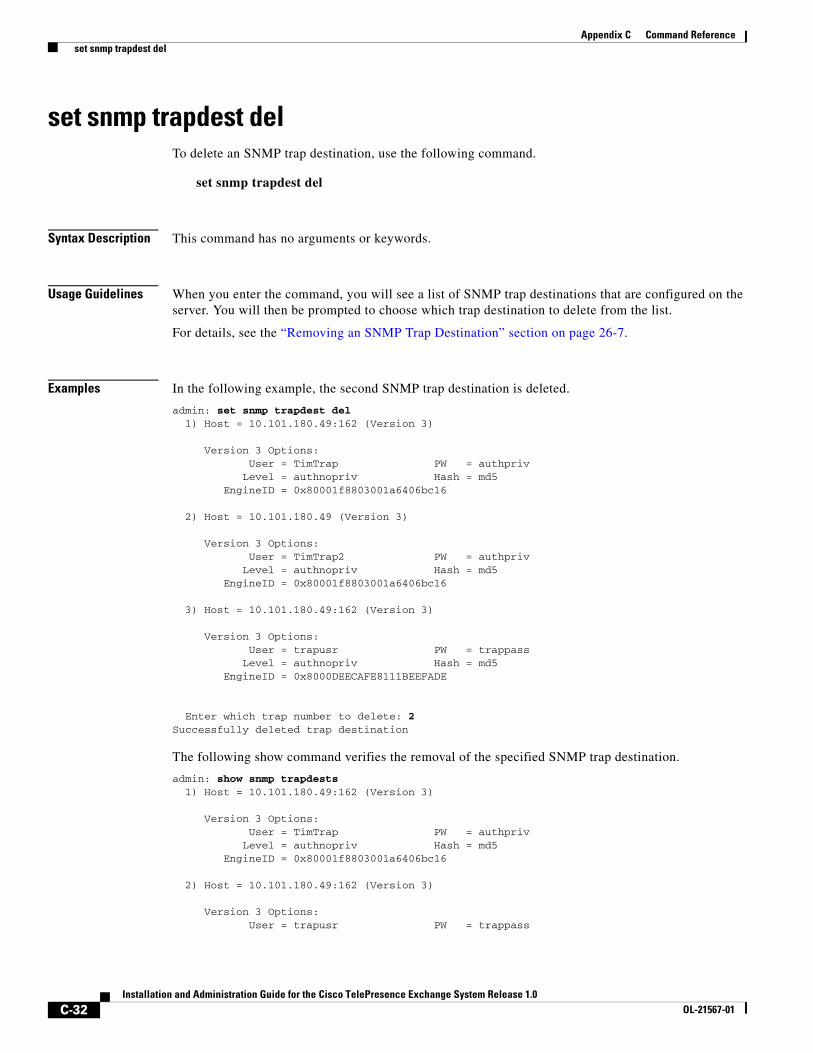
set snmp trapdest delTo delete an SNMP trap destination, use the following command.
set snmp trapdest del
Syntax Description This command has no arguments or keywords.
Usage Guidelines When you enter the command, you will see a list of SNMP trap destinations that are configured on the server. You will then be prompted to choose which trap destination to delete from the list.
For details, see the “Removing an SNMP Trap Destination” section on page 26-7.
Examples In the following example, the second SNMP trap destination is deleted.
admin: set snmp trapdest del 1) Host = 10.101.180.49:162 (Version 3)
Version 3 Options: User = TimTrap PW = authpriv Level = authnopriv Hash = md5 EngineID = 0x80001f8803001a6406bc16
2) Host = 10.101.180.49 (Version 3)
Version 3 Options: User = TimTrap2 PW = authpriv Level = authnopriv Hash = md5 EngineID = 0x80001f8803001a6406bc16
3) Host = 10.101.180.49:162 (Version 3)
Version 3 Options: User = trapusr PW = trappass Level = authnopriv Hash = md5 EngineID = 0x8000DEECAFE8111BEEFADE
Enter which trap number to delete: 2 Successfully deleted trap destination
The following show command verifies the removal of the specified SNMP trap destination.
admin: show snmp trapdests 1) Host = 10.101.180.49:162 (Version 3)
Version 3 Options: User = TimTrap PW = authpriv Level = authnopriv Hash = md5 EngineID = 0x80001f8803001a6406bc16
2) Host = 10.101.180.49:162 (Version 3)
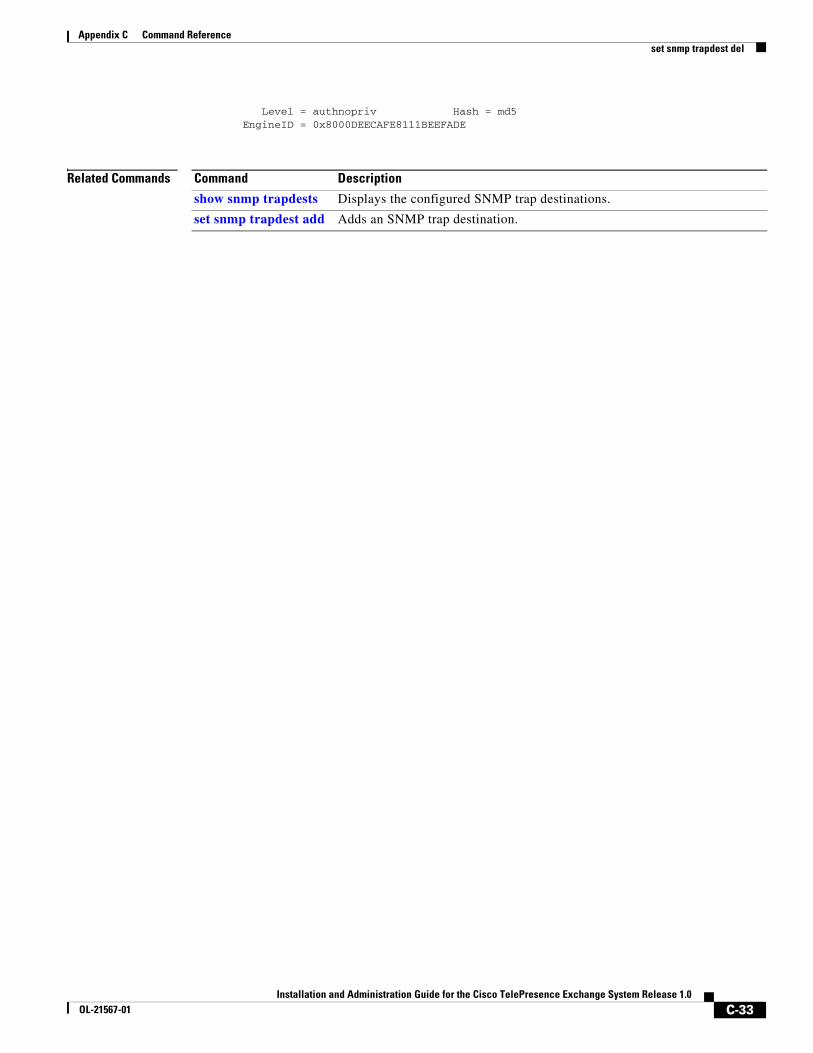
Version 3 Options: User = trapusr PW = trappass
C-33Installation and Administration Guide for the Cisco TelePresence Exchange System Release 1.0
OL-21567-01
Appendix C Command Reference set snmp trapdest del
Level = authnopriv Hash = md5 EngineID = 0x8000DEECAFE8111BEEFADE
Related Commands Command Description
show snmp trapdests Displays the configured SNMP trap destinations.
set snmp trapdest add Adds an SNMP trap destination.
C-34Installation and Administration Guide for the Cisco TelePresence Exchange System Release 1.0
OL-21567-01
Appendix C Command Reference set snmp user add
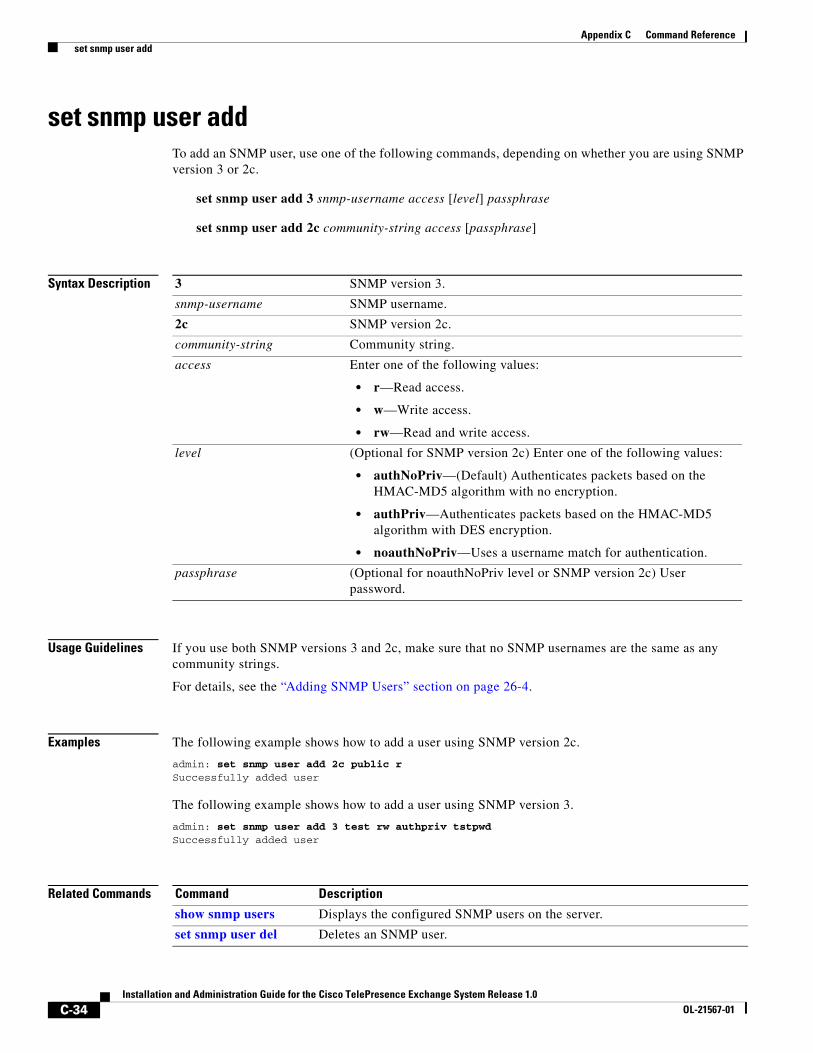
set snmp user addTo add an SNMP user, use one of the following commands, depending on whether you are using SNMP version 3 or 2c.
set snmp user add 3 snmp-username access [level] passphrase
set snmp user add 2c community-string access [passphrase]
Syntax Description
Usage Guidelines If you use both SNMP versions 3 and 2c, make sure that no SNMP usernames are the same as any community strings.
For details, see the “Adding SNMP Users” section on page 26-4.
Examples The following example shows how to add a user using SNMP version 2c.
admin: set snmp user add 2c public r Successfully added user
The following example shows how to add a user using SNMP version 3.
admin: set snmp user add 3 test rw authpriv tstpwd Successfully added user
Related Commands
3 SNMP version 3.
snmp-username SNMP username.
2c SNMP version 2c.
community-string Community string.
access Enter one of the following values:
• r—Read access.
• w—Write access.
• rw—Read and write access.
level (Optional for SNMP version 2c) Enter one of the following values:
• authNoPriv—(Default) Authenticates packets based on the HMAC-MD5 algorithm with no encryption.
• authPriv—Authenticates packets based on the HMAC-MD5 algorithm with DES encryption.
• noauthNoPriv—Uses a username match for authentication.
passphrase (Optional for noauthNoPriv level or SNMP version 2c) User password.
Command Description
show snmp users Displays the configured SNMP users on the server.
set snmp user del Deletes an SNMP user.
C-35Installation and Administration Guide for the Cisco TelePresence Exchange System Release 1.0
OL-21567-01
Appendix C Command Reference set snmp user del
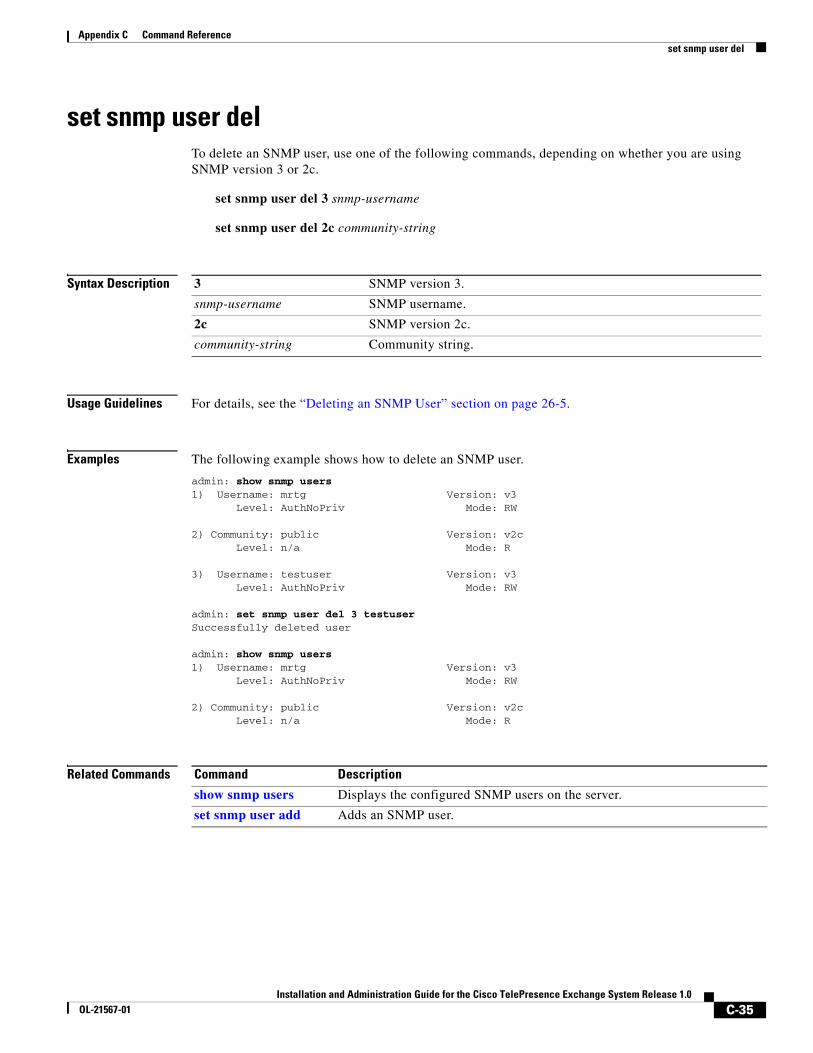
set snmp user delTo delete an SNMP user, use one of the following commands, depending on whether you are using SNMP version 3 or 2c.
set snmp user del 3 snmp-username
set snmp user del 2c community-string
Syntax Description
Usage Guidelines For details, see the “Deleting an SNMP User” section on page 26-5.
Examples The following example shows how to delete an SNMP user.
admin: show snmp users 1) Username: mrtg Version: v3 Level: AuthNoPriv Mode: RW
2) Community: public Version: v2c Level: n/a Mode: R
3) Username: testuser Version: v3 Level: AuthNoPriv Mode: RW
admin: set snmp user del 3 testuser Successfully deleted user
admin: show snmp users 1) Username: mrtg Version: v3 Level: AuthNoPriv Mode: RW
2) Community: public Version: v2c Level: n/a Mode: R
Related Commands
3 SNMP version 3.
snmp-username SNMP username.
2c SNMP version 2c.
community-string Community string.
Command Description
show snmp users Displays the configured SNMP users on the server.
set snmp user add Adds an SNMP user.
C-36Installation and Administration Guide for the Cisco TelePresence Exchange System Release 1.0
OL-21567-01
Appendix C Command Reference show cdp
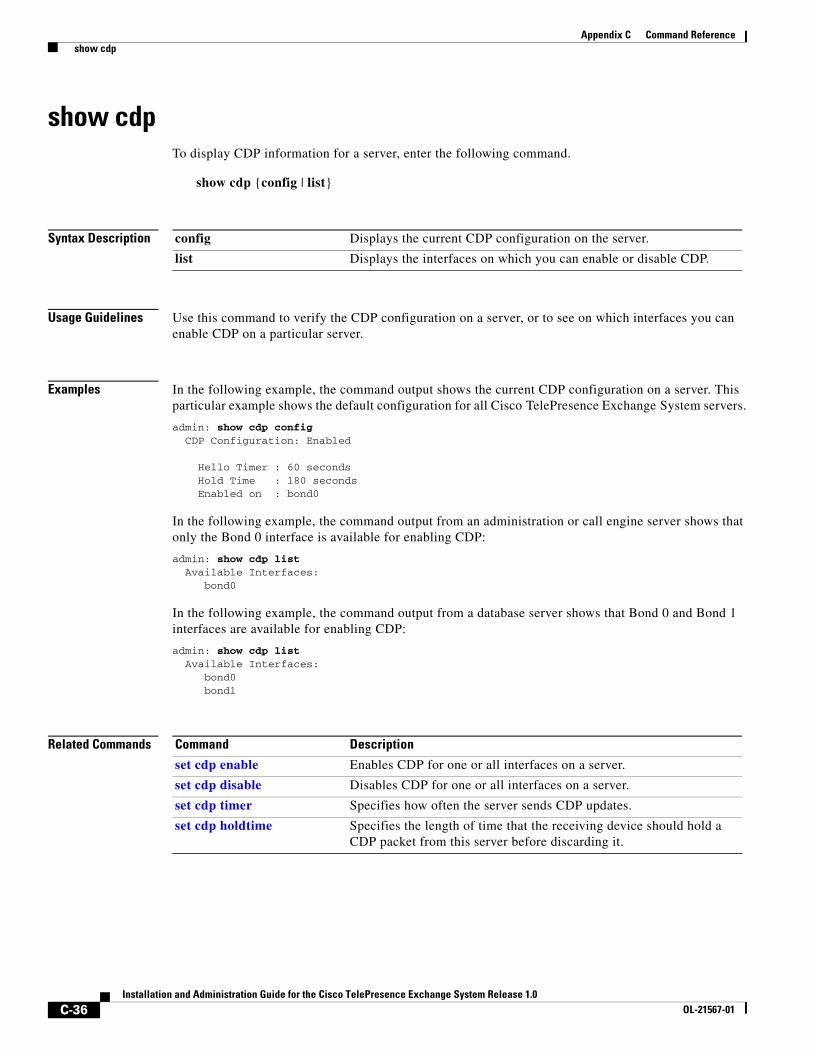
show cdpTo display CDP information for a server, enter the following command.
show cdp {config | list}
Syntax Description
Usage Guidelines Use this command to verify the CDP configuration on a server, or to see on which interfaces you can enable CDP on a particular server.
Examples In the following example, the command output shows the current CDP configuration on a server. This particular example shows the default configuration for all Cisco TelePresence Exchange System servers.
admin: show cdp config CDP Configuration: Enabled Hello Timer : 60 seconds Hold Time : 180 seconds Enabled on : bond0
In the following example, the command output from an administration or call engine server shows that only the Bond 0 interface is available for enabling CDP:
admin: show cdp list Available Interfaces: bond0
In the following example, the command output from a database server shows that Bond 0 and Bond 1 interfaces are available for enabling CDP:
admin: show cdp list Available Interfaces: bond0 bond1
Related Commands
config Displays the current CDP configuration on the server.
list Displays the interfaces on which you can enable or disable CDP.
Command Description
set cdp enable Enables CDP for one or all interfaces on a server.
set cdp disable Disables CDP for one or all interfaces on a server.
set cdp timer Specifies how often the server sends CDP updates.
set cdp holdtime Specifies the length of time that the receiving device should hold a CDP packet from this server before discarding it.
C-37Installation and Administration Guide for the Cisco TelePresence Exchange System Release 1.0
OL-21567-01
Appendix C Command Reference show dbip
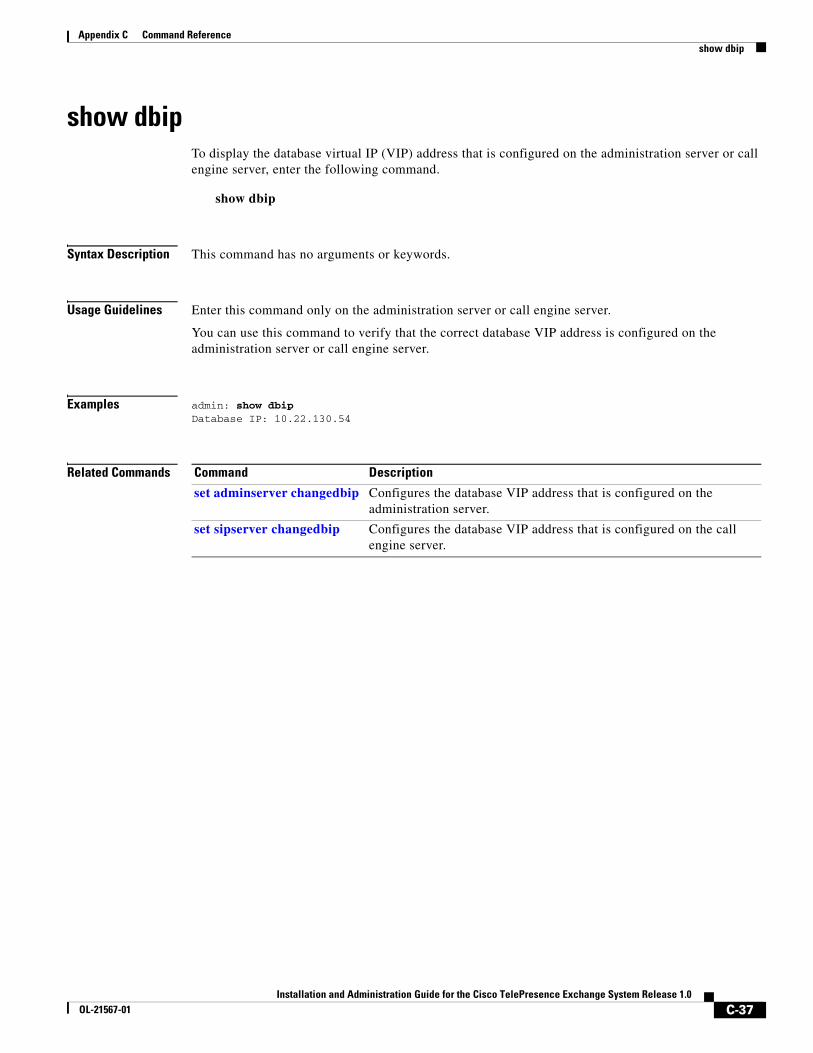
show dbipTo display the database virtual IP (VIP) address that is configured on the administration server or call engine server, enter the following command.
show dbip
Syntax Description This command has no arguments or keywords.
Usage Guidelines Enter this command only on the administration server or call engine server.
You can use this command to verify that the correct database VIP address is configured on the administration server or call engine server.
Examples admin: show dbip Database IP: 10.22.130.54
Related Commands Command Description
set adminserver changedbip Configures the database VIP address that is configured on the administration server.
set sipserver changedbip Configures the database VIP address that is configured on the call engine server.

C-38Installation and Administration Guide for the Cisco TelePresence Exchange System Release 1.0
OL-21567-01
Appendix C Command Reference show engineip
show engineipTo display which IP address the call engine server is using to listen for SIP messages, enter the following command.
show engineip
Syntax Description This command has no arguments or keywords.
Usage Guidelines Enter this command only on the call engine server.
If the command output shows an IP address that differs from the IP address of Ethernet 0 (or Bond 0), contact a customer service representative.
Examples In the following example, the call engine server is listening for SIP messages on 10.22.130.50, which matches the IP address of Bond 0.
admin: show engineip SIP Engine IP: 10.22.130.50
admin: show network eth0 eth0 has been overridden by Network Fault Tolerance.To view the Ethernet port configuration, please use following command: show network failover
admin: show network failover Bond 0DHCP : disabled Status : up IP Address : 10.22.130.50 IP Mask : 255.255.255.224Link Detected: no Mode : Auto disabled, N/A, N/A
Ethernet 0DHCP : disabled Status : up IP Address : IP Mask : Link Detected: yes Mode : Auto enabled, Full, 1000MB/s
Ethernet 1DHCP : disabled Status : up IP Address : IP Mask : Link Detected: yes Mode : Auto enabled, Full, 1000MB/s
DNSPrimary : Secondary : Options : timeout:5 attempts:2Domain : Gateway : 10.22.130.33 on Ethernet bond0
Related Commands Command Description
set network ip eth0 Changes the IP address of a server.
show network eth0 Displays the Ethernet port configuration.
show network failover Displays which interfaces are bonded together for network fault tolerance.
C-39Installation and Administration Guide for the Cisco TelePresence Exchange System Release 1.0
OL-21567-01
Appendix C Command Reference show network eth0
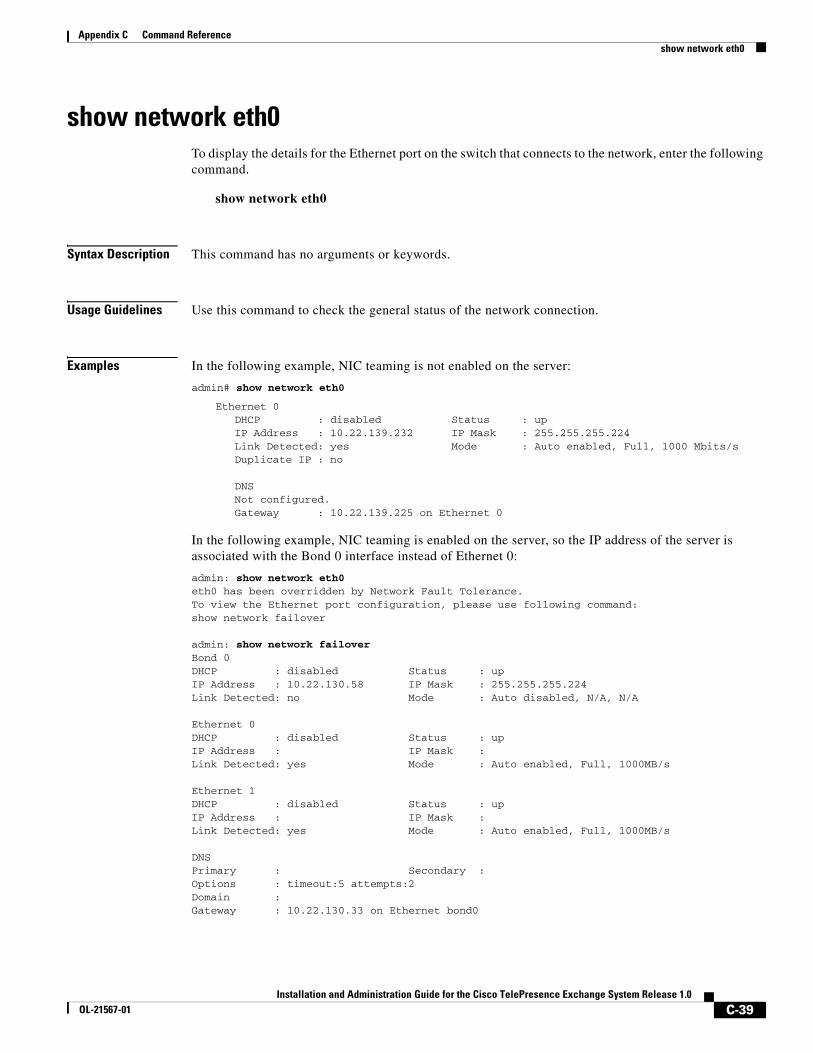
show network eth0To display the details for the Ethernet port on the switch that connects to the network, enter the following command.
show network eth0
Syntax Description This command has no arguments or keywords.
Usage Guidelines Use this command to check the general status of the network connection.
Examples In the following example, NIC teaming is not enabled on the server:
admin# show network eth0
Ethernet 0 DHCP : disabled Status : up IP Address : 10.22.139.232 IP Mask : 255.255.255.224 Link Detected: yes Mode : Auto enabled, Full, 1000 Mbits/s Duplicate IP : no
DNS Not configured. Gateway : 10.22.139.225 on Ethernet 0
In the following example, NIC teaming is enabled on the server, so the IP address of the server is associated with the Bond 0 interface instead of Ethernet 0:
admin: show network eth0 eth0 has been overridden by Network Fault Tolerance.To view the Ethernet port configuration, please use following command: show network failover
admin: show network failover Bond 0DHCP : disabled Status : up IP Address : 10.22.130.58 IP Mask : 255.255.255.224Link Detected: no Mode : Auto disabled, N/A, N/A
Ethernet 0DHCP : disabled Status : up IP Address : IP Mask : Link Detected: yes Mode : Auto enabled, Full, 1000MB/s
Ethernet 1DHCP : disabled Status : up IP Address : IP Mask : Link Detected: yes Mode : Auto enabled, Full, 1000MB/s
DNSPrimary : Secondary : Options : timeout:5 attempts:2Domain : Gateway : 10.22.130.33 on Ethernet bond0
C-40Installation and Administration Guide for the Cisco TelePresence Exchange System Release 1.0
OL-21567-01
Appendix C Command Reference show network eth0
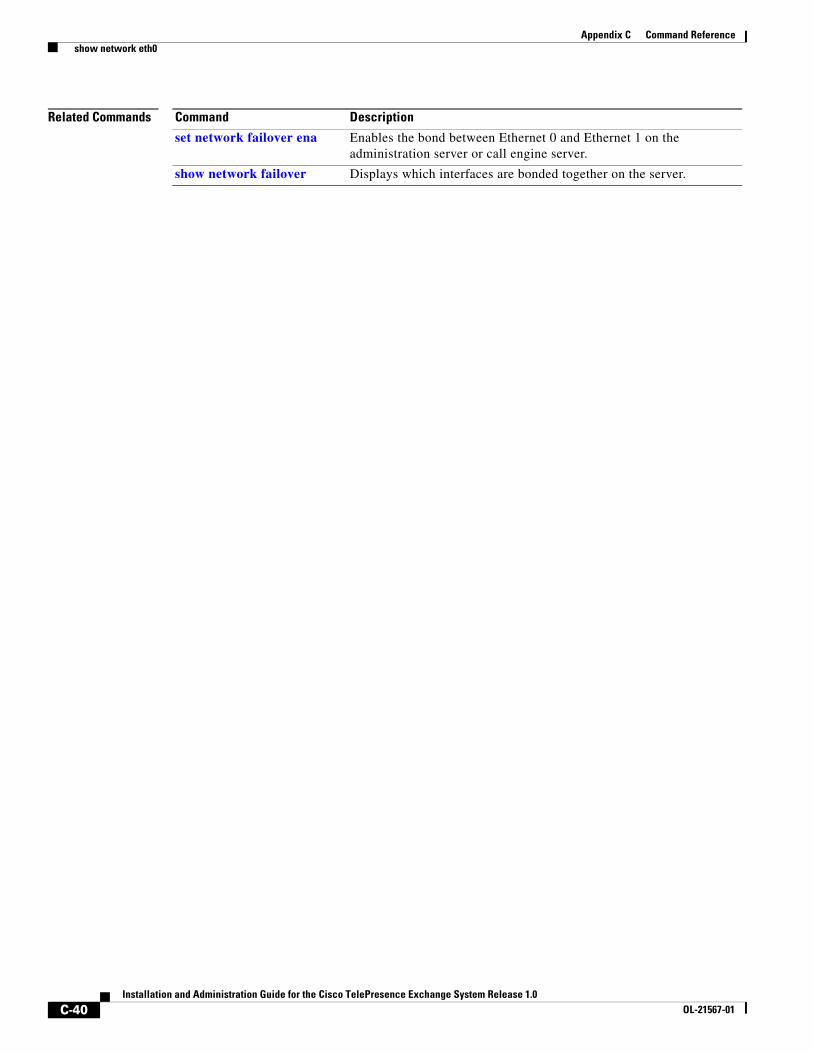
Related Commands Command Description
set network failover ena Enables the bond between Ethernet 0 and Ethernet 1 on the administration server or call engine server.
show network failover Displays which interfaces are bonded together on the server.
C-41Installation and Administration Guide for the Cisco TelePresence Exchange System Release 1.0
OL-21567-01
Appendix C Command Reference show network failover
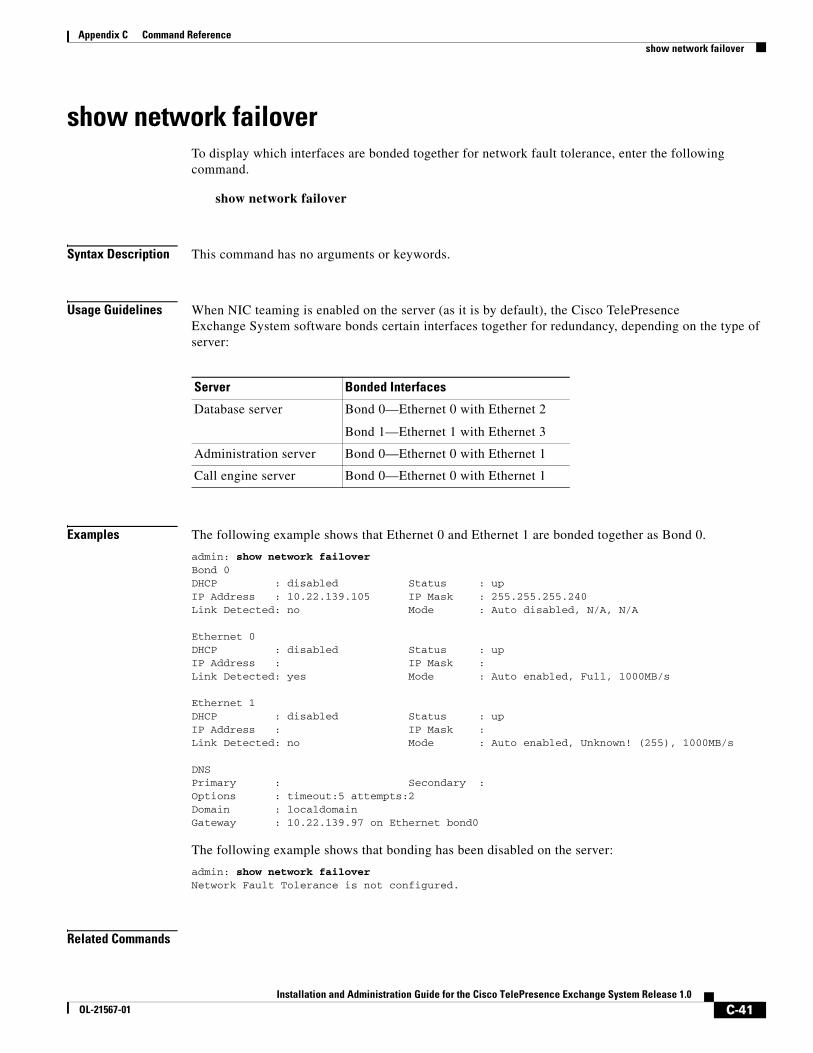
show network failoverTo display which interfaces are bonded together for network fault tolerance, enter the following command.
show network failover
Syntax Description This command has no arguments or keywords.
Usage Guidelines When NIC teaming is enabled on the server (as it is by default), the Cisco TelePresence Exchange System software bonds certain interfaces together for redundancy, depending on the type of server:
Examples The following example shows that Ethernet 0 and Ethernet 1 are bonded together as Bond 0.
admin: show network failover Bond 0DHCP : disabled Status : upIP Address : 10.22.139.105 IP Mask : 255.255.255.240Link Detected: no Mode : Auto disabled, N/A, N/A
Ethernet 0DHCP : disabled Status : upIP Address : IP Mask :Link Detected: yes Mode : Auto enabled, Full, 1000MB/s
Ethernet 1DHCP : disabled Status : upIP Address : IP Mask :Link Detected: no Mode : Auto enabled, Unknown! (255), 1000MB/s
DNSPrimary : Secondary :Options : timeout:5 attempts:2Domain : localdomainGateway : 10.22.139.97 on Ethernet bond0
The following example shows that bonding has been disabled on the server:
admin: show network failover Network Fault Tolerance is not configured.
Related Commands
Server Bonded Interfaces
Database server Bond 0—Ethernet 0 with Ethernet 2
Bond 1—Ethernet 1 with Ethernet 3
Administration server Bond 0—Ethernet 0 with Ethernet 1
Call engine server Bond 0—Ethernet 0 with Ethernet 1

C-42Installation and Administration Guide for the Cisco TelePresence Exchange System Release 1.0
OL-21567-01
Appendix C Command Reference show network failover
Command Description
set network failover dis
Disables the bond between Ethernet 0 and Ethernet 1 on the administration server or call engine server.
set network failover ena
Enables the bond between Ethernet 0 and Ethernet 1 on the administration server or call engine server.
C-43Installation and Administration Guide for the Cisco TelePresence Exchange System Release 1.0
OL-21567-01
Appendix C Command Reference show role
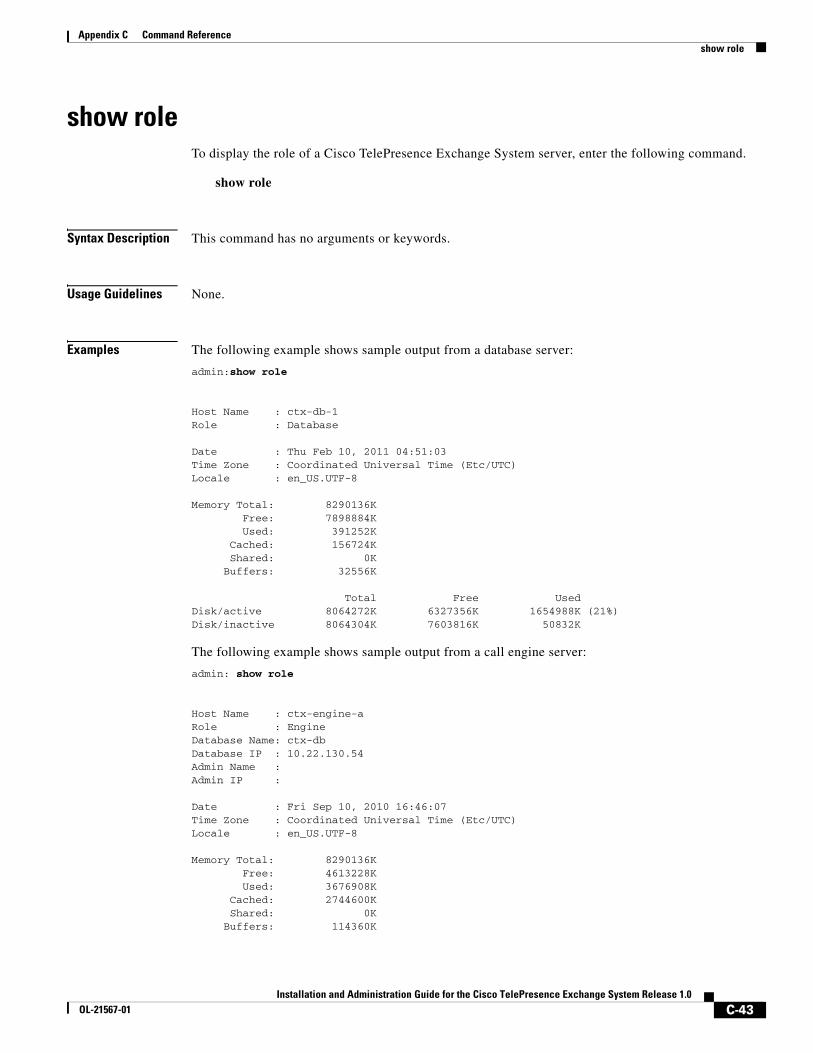
show roleTo display the role of a Cisco TelePresence Exchange System server, enter the following command.
show role
Syntax Description This command has no arguments or keywords.
Usage Guidelines None.
Examples The following example shows sample output from a database server:
admin:show role
Host Name : ctx-db-1Role : Database
Date : Thu Feb 10, 2011 04:51:03Time Zone : Coordinated Universal Time (Etc/UTC)Locale : en_US.UTF-8
Memory Total: 8290136K Free: 7898884K Used: 391252K Cached: 156724K Shared: 0K Buffers: 32556K
Total Free UsedDisk/active 8064272K 6327356K 1654988K (21%)Disk/inactive 8064304K 7603816K 50832K
The following example shows sample output from a call engine server:
admin: show role
Host Name : ctx-engine-aRole : EngineDatabase Name: ctx-dbDatabase IP : 10.22.130.54Admin Name : Admin IP :
Date : Fri Sep 10, 2010 16:46:07Time Zone : Coordinated Universal Time (Etc/UTC)Locale : en_US.UTF-8
Memory Total: 8290136K Free: 4613228K Used: 3676908K Cached: 2744600K Shared: 0K Buffers: 114360K
C-44Installation and Administration Guide for the Cisco TelePresence Exchange System Release 1.0
OL-21567-01
Appendix C Command Reference show role
Total Free UsedDisk/active 8064272K 5359072K 2623272K (33%)Disk/inactive 8064304K 7603816K 50832K
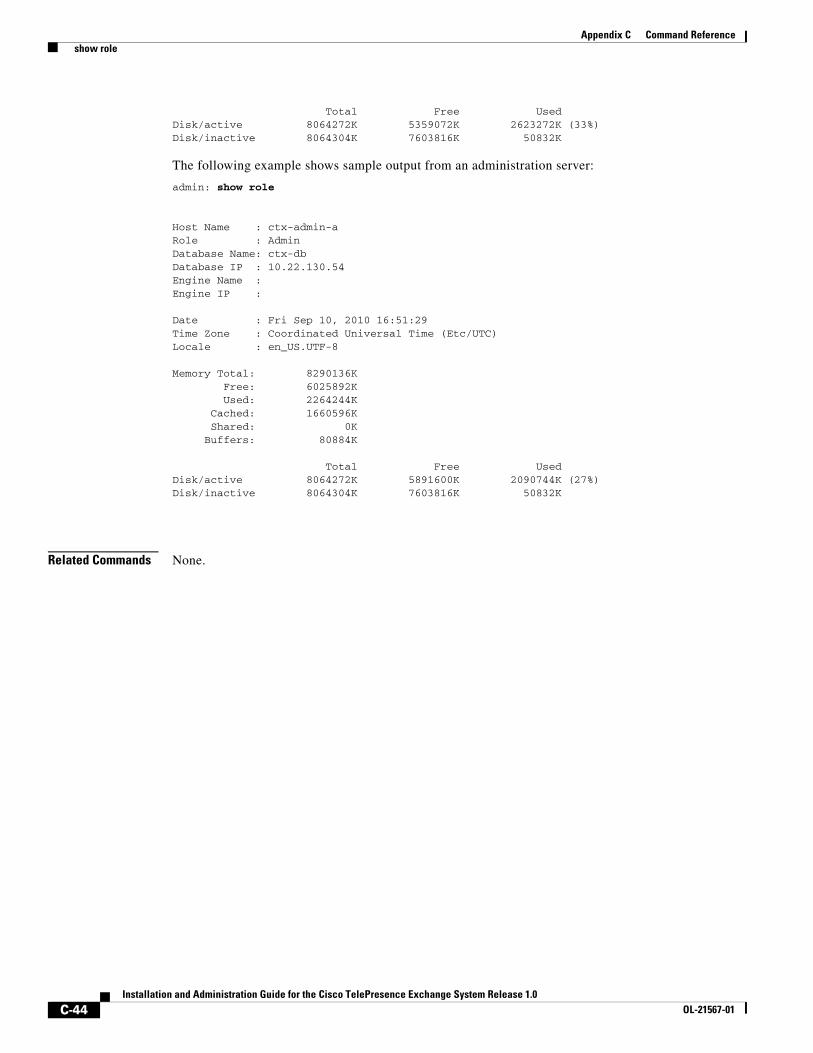
The following example shows sample output from an administration server:
admin: show role
Host Name : ctx-admin-aRole : AdminDatabase Name: ctx-dbDatabase IP : 10.22.130.54Engine Name : Engine IP :
Date : Fri Sep 10, 2010 16:51:29Time Zone : Coordinated Universal Time (Etc/UTC)Locale : en_US.UTF-8
Memory Total: 8290136K Free: 6025892K Used: 2264244K Cached: 1660596K Shared: 0K Buffers: 80884K
Total Free UsedDisk/active 8064272K 5891600K 2090744K (27%)Disk/inactive 8064304K 7603816K 50832K
Related Commands None.
C-45Installation and Administration Guide for the Cisco TelePresence Exchange System Release 1.0
OL-21567-01
Appendix C Command Reference show siplb
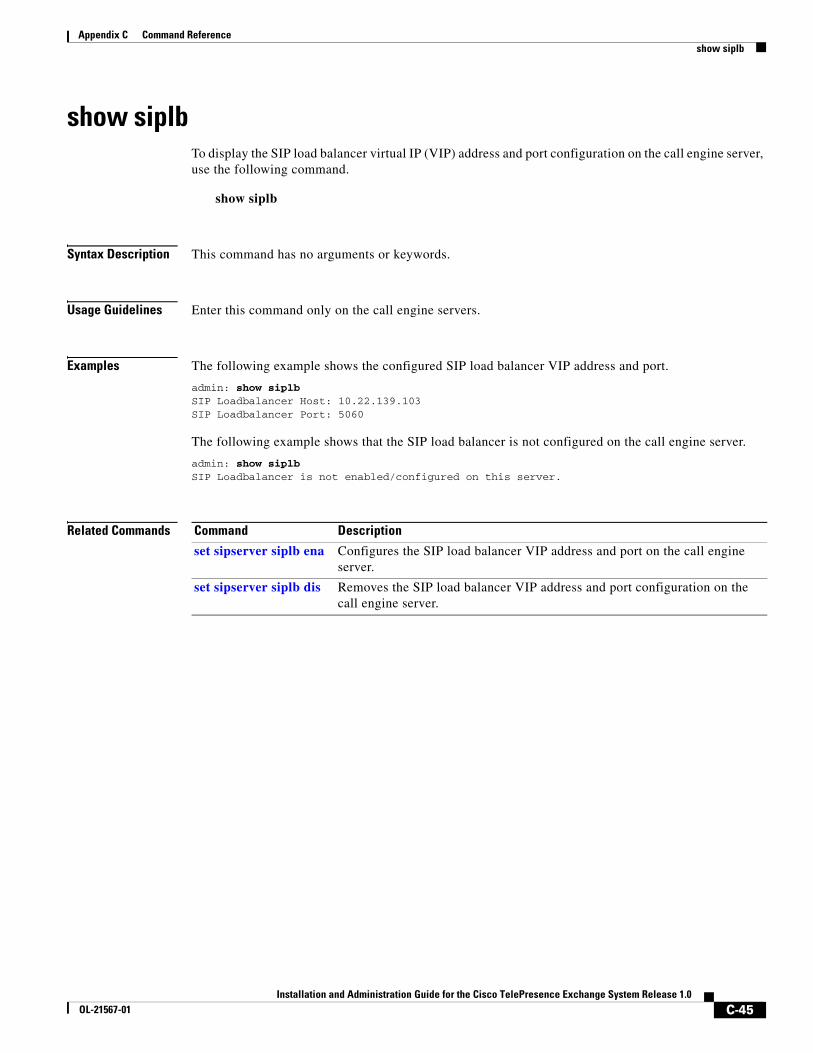
show siplbTo display the SIP load balancer virtual IP (VIP) address and port configuration on the call engine server, use the following command.
show siplb
Syntax Description This command has no arguments or keywords.
Usage Guidelines Enter this command only on the call engine servers.
Examples The following example shows the configured SIP load balancer VIP address and port.
admin: show siplb SIP Loadbalancer Host: 10.22.139.103SIP Loadbalancer Port: 5060
The following example shows that the SIP load balancer is not configured on the call engine server.
admin: show siplb SIP Loadbalancer is not enabled/configured on this server.
Related Commands Command Description
set sipserver siplb ena Configures the SIP load balancer VIP address and port on the call engine server.
set sipserver siplb dis Removes the SIP load balancer VIP address and port configuration on the call engine server.
C-46Installation and Administration Guide for the Cisco TelePresence Exchange System Release 1.0
OL-21567-01
Appendix C Command Reference show snmp trapdests
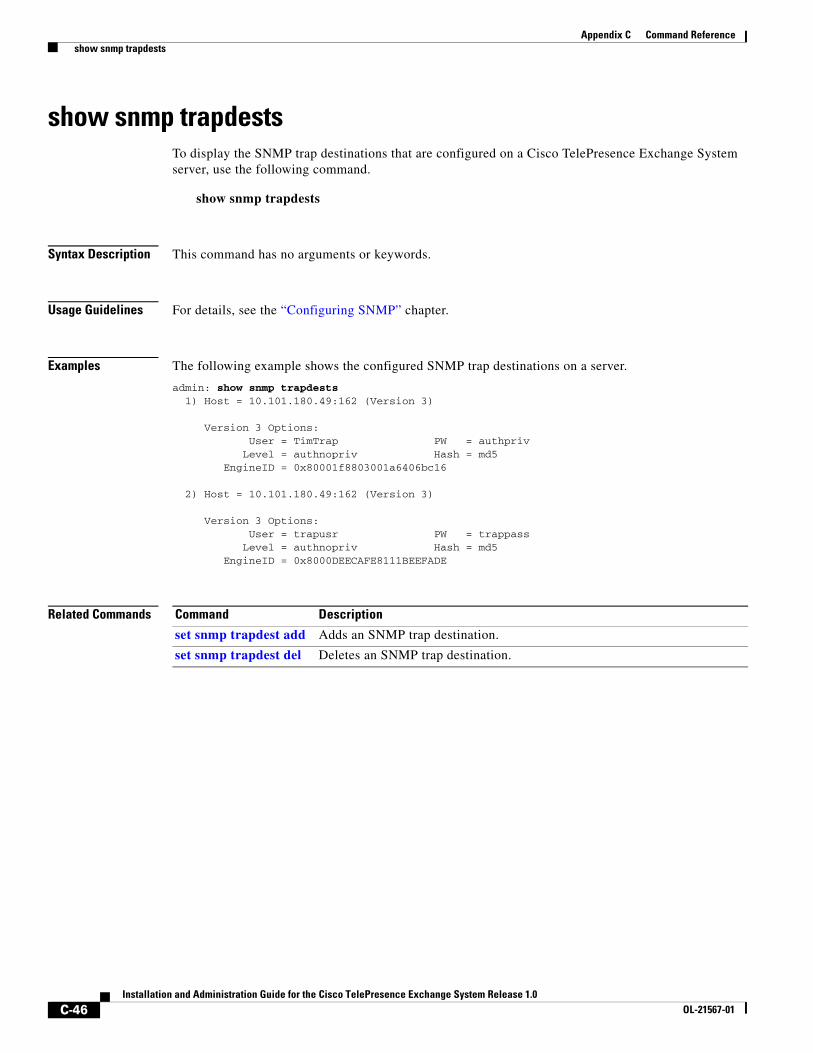
show snmp trapdestsTo display the SNMP trap destinations that are configured on a Cisco TelePresence Exchange System server, use the following command.
show snmp trapdests
Syntax Description This command has no arguments or keywords.
Usage Guidelines For details, see the “Configuring SNMP” chapter.
Examples The following example shows the configured SNMP trap destinations on a server.
admin: show snmp trapdests 1) Host = 10.101.180.49:162 (Version 3)
Version 3 Options: User = TimTrap PW = authpriv Level = authnopriv Hash = md5 EngineID = 0x80001f8803001a6406bc16
2) Host = 10.101.180.49:162 (Version 3)
Version 3 Options: User = trapusr PW = trappass Level = authnopriv Hash = md5 EngineID = 0x8000DEECAFE8111BEEFADE
Related Commands Command Description
set snmp trapdest add Adds an SNMP trap destination.
set snmp trapdest del Deletes an SNMP trap destination.

C-47Installation and Administration Guide for the Cisco TelePresence Exchange System Release 1.0
OL-21567-01
Appendix C Command Reference show snmp users
show snmp usersTo display the all SNMP users that are configured on a Cisco TelePresence Exchange System server, use the following command.
show snmp users
Syntax Description This command has no arguments or keywords.
Usage Guidelines For details, see the “Configuring SNMP” chapter.
Examples The following example shows the configured SNMP users.
admin: show snmp users 1) Username: admin Version: v3 Level: AuthNoPriv Mode: RW
2) Username: tim Version: v3 Level: AuthNoPriv Mode: RW
3) Community: TimRO Version: v2c Level: n/a Mode: R
4) Community: TimRW Version: v2c Level: n/a Mode: RW
Related Commands Command Description
set snmp user add Adds an SNMP user.
set snmp user del Deletes an SNMP user.
C-48Installation and Administration Guide for the Cisco TelePresence Exchange System Release 1.0
OL-21567-01
Appendix C Command Reference show trapvip
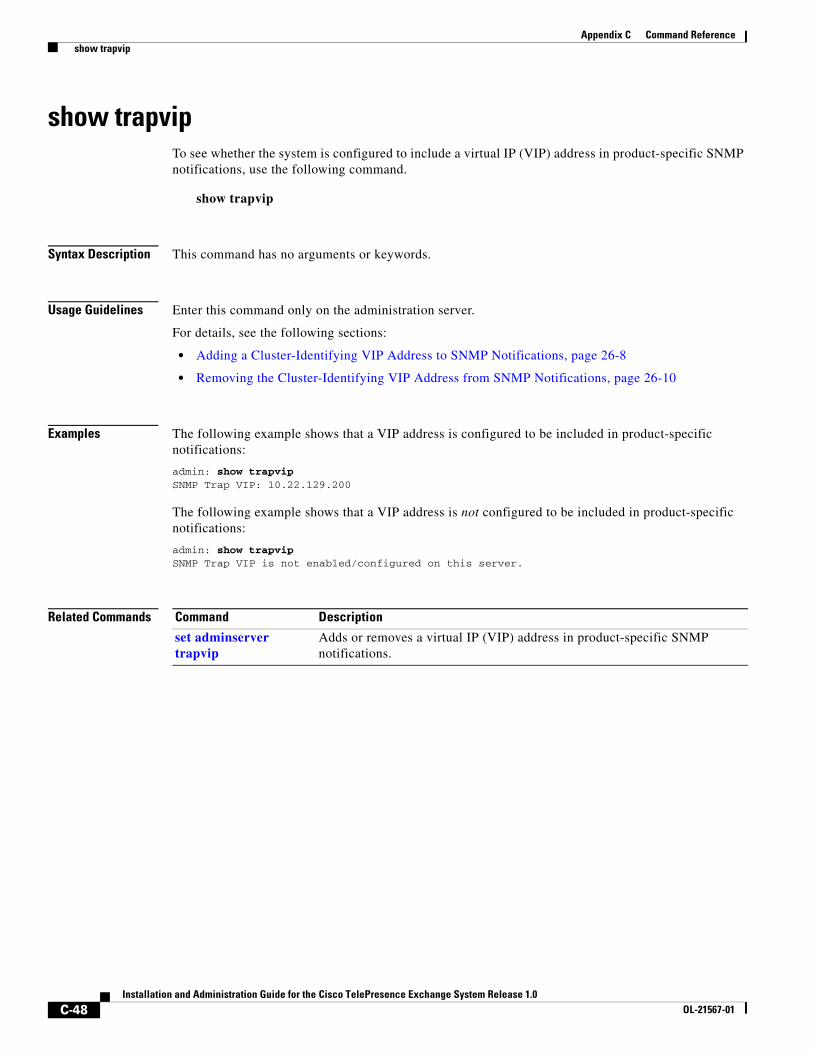
show trapvipTo see whether the system is configured to include a virtual IP (VIP) address in product-specific SNMP notifications, use the following command.
show trapvip
Syntax Description This command has no arguments or keywords.
Usage Guidelines Enter this command only on the administration server.
For details, see the following sections:
• Adding a Cluster-Identifying VIP Address to SNMP Notifications, page 26-8
• Removing the Cluster-Identifying VIP Address from SNMP Notifications, page 26-10
Examples The following example shows that a VIP address is configured to be included in product-specific notifications:
admin: show trapvip SNMP Trap VIP: 10.22.129.200
The following example shows that a VIP address is not configured to be included in product-specific notifications:
admin: show trapvip SNMP Trap VIP is not enabled/configured on this server.
Related Commands Command Description
set adminserver trapvip
Adds or removes a virtual IP (VIP) address in product-specific SNMP notifications.
C-49Installation and Administration Guide for the Cisco TelePresence Exchange System Release 1.0
OL-21567-01
Appendix C Command Reference utils network ping
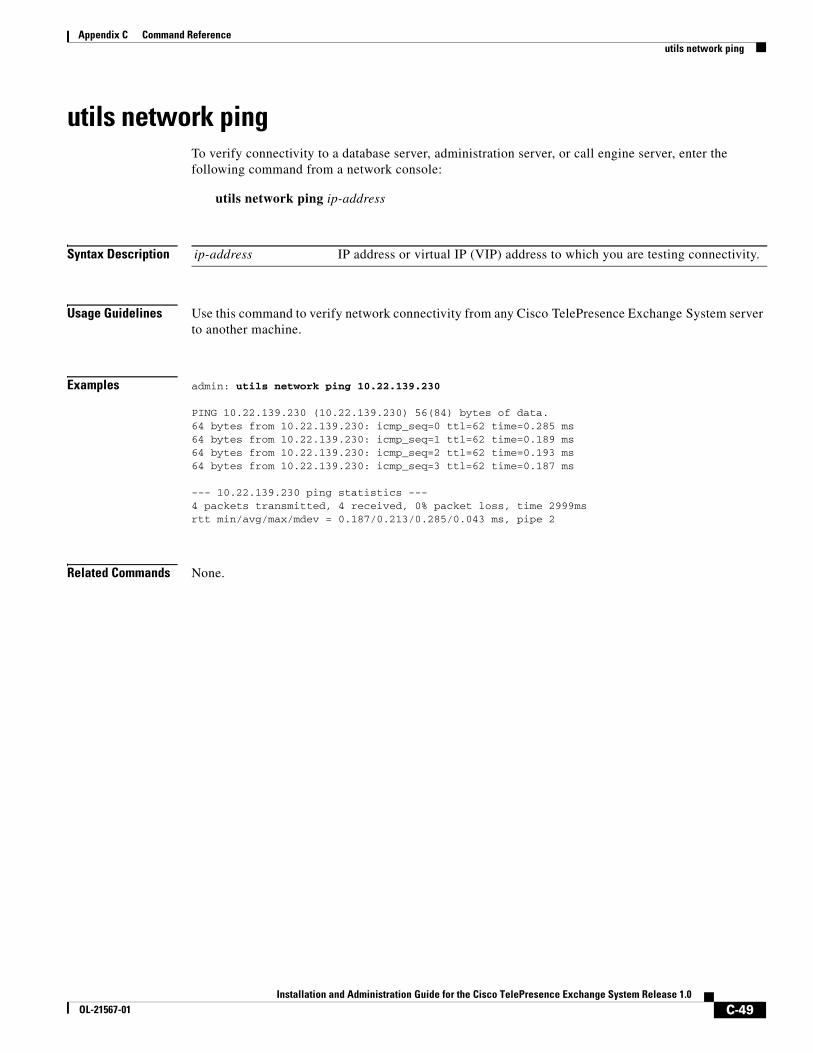
utils network pingTo verify connectivity to a database server, administration server, or call engine server, enter the following command from a network console:
utils network ping ip-address
Syntax Description
Usage Guidelines Use this command to verify network connectivity from any Cisco TelePresence Exchange System server to another machine.
Examples admin: utils network ping 10.22.139.230
PING 10.22.139.230 (10.22.139.230) 56(84) bytes of data.64 bytes from 10.22.139.230: icmp_seq=0 ttl=62 time=0.285 ms64 bytes from 10.22.139.230: icmp_seq=1 ttl=62 time=0.189 ms64 bytes from 10.22.139.230: icmp_seq=2 ttl=62 time=0.193 ms64 bytes from 10.22.139.230: icmp_seq=3 ttl=62 time=0.187 ms
--- 10.22.139.230 ping statistics --- 4 packets transmitted, 4 received, 0% packet loss, time 2999msrtt min/avg/max/mdev = 0.187/0.213/0.285/0.043 ms, pipe 2
Related Commands None.
ip-address IP address or virtual IP (VIP) address to which you are testing connectivity.
C-50Installation and Administration Guide for the Cisco TelePresence Exchange System Release 1.0
OL-21567-01
Appendix C Command Reference utils service adminserver start
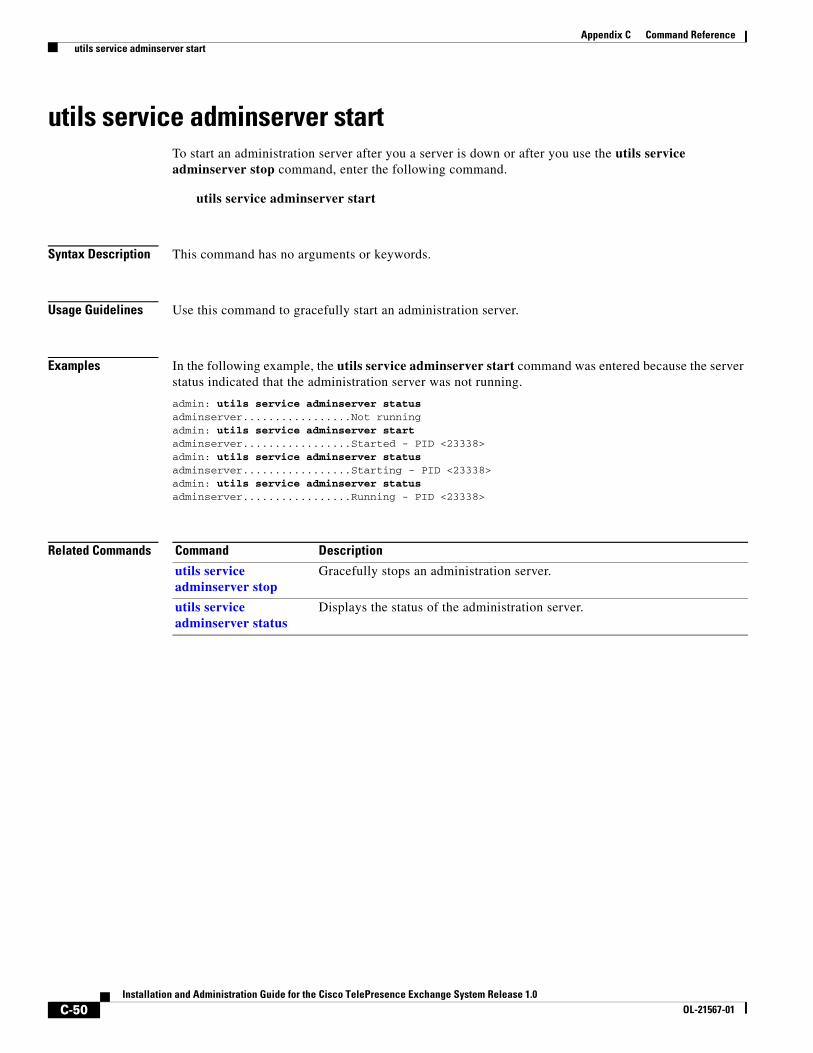
utils service adminserver startTo start an administration server after you a server is down or after you use the utils service adminserver stop command, enter the following command.
utils service adminserver start
Syntax Description This command has no arguments or keywords.
Usage Guidelines Use this command to gracefully start an administration server.
Examples In the following example, the utils service adminserver start command was entered because the server status indicated that the administration server was not running.
admin: utils service adminserver status adminserver.................Not running admin: utils service adminserver start adminserver.................Started - PID <23338>admin: utils service adminserver status adminserver.................Starting - PID <23338>admin: utils service adminserver status adminserver.................Running - PID <23338>
Related Commands Command Description
utils service adminserver stop
Gracefully stops an administration server.
utils service adminserver status
Displays the status of the administration server.
C-51Installation and Administration Guide for the Cisco TelePresence Exchange System Release 1.0
OL-21567-01
Appendix C Command Reference utils service adminserver status
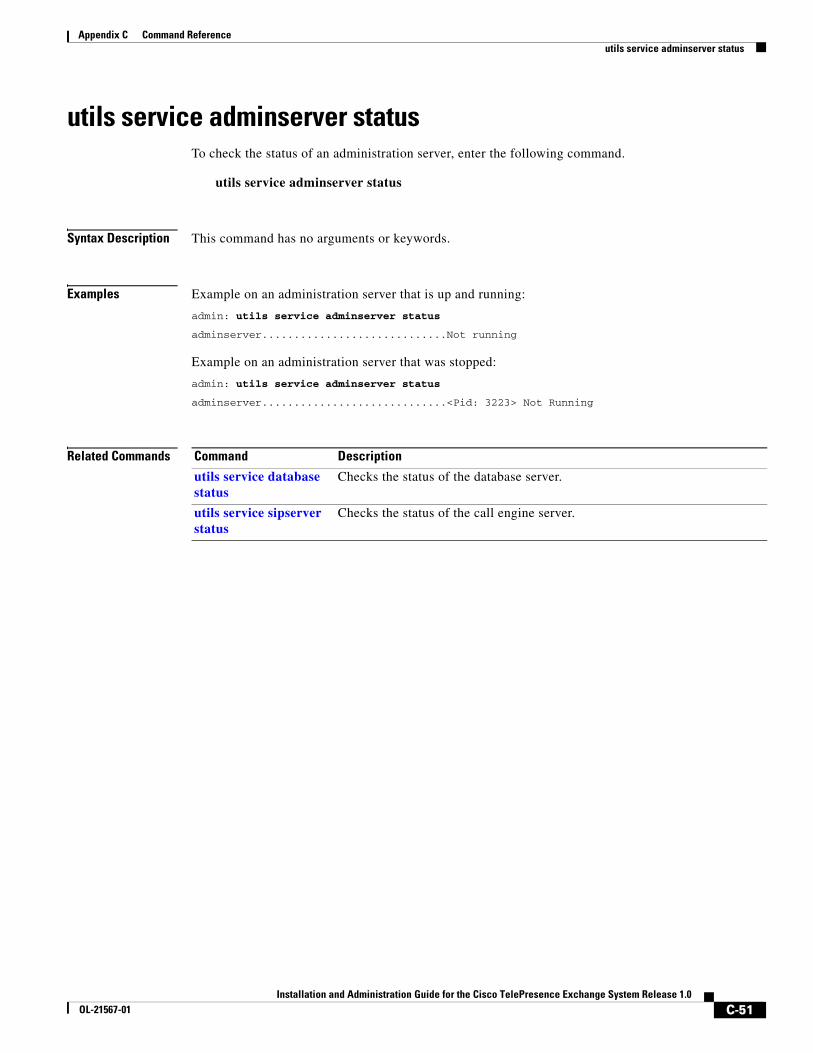
utils service adminserver statusTo check the status of an administration server, enter the following command.
utils service adminserver status
Syntax Description This command has no arguments or keywords.
Examples Example on an administration server that is up and running:
admin: utils service adminserver status
adminserver.............................Not running
Example on an administration server that was stopped:
admin: utils service adminserver status
adminserver.............................<Pid: 3223> Not Running
Related Commands Command Description
utils service database status
Checks the status of the database server.
utils service sipserver status
Checks the status of the call engine server.
C-52Installation and Administration Guide for the Cisco TelePresence Exchange System Release 1.0
OL-21567-01
Appendix C Command Reference utils service adminserver stop
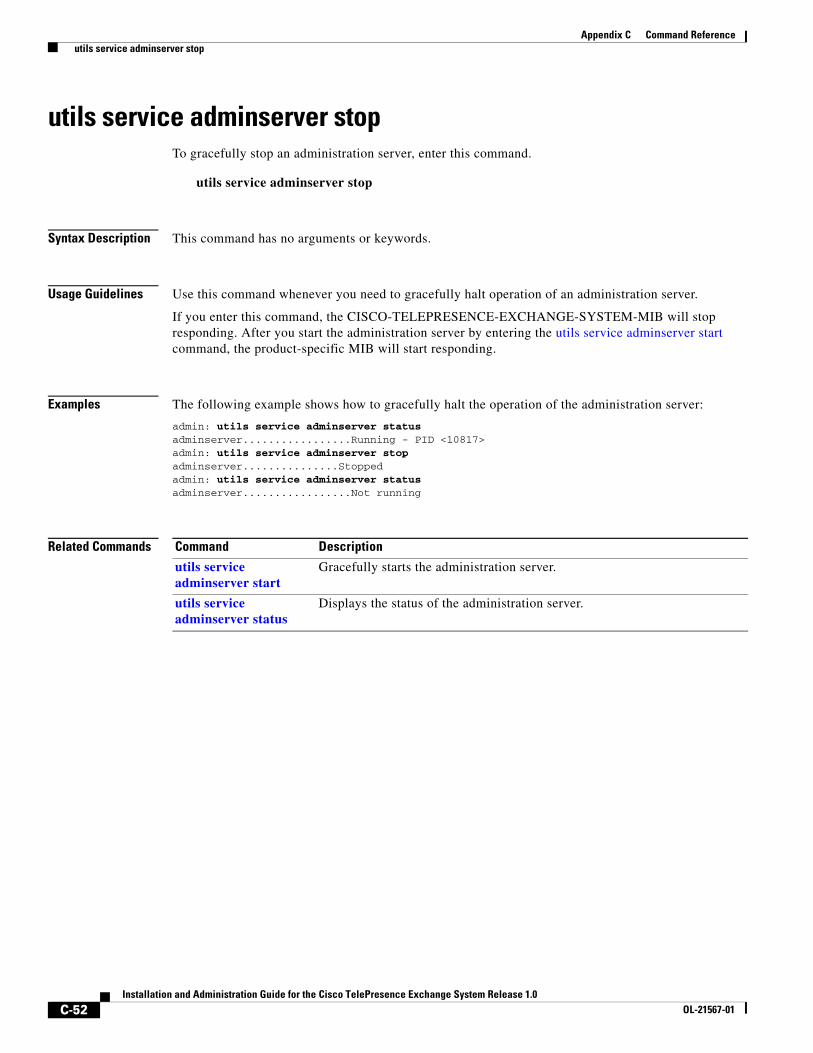
utils service adminserver stopTo gracefully stop an administration server, enter this command.
utils service adminserver stop
Syntax Description This command has no arguments or keywords.
Usage Guidelines Use this command whenever you need to gracefully halt operation of an administration server.
If you enter this command, the CISCO-TELEPRESENCE-EXCHANGE-SYSTEM-MIB will stop responding. After you start the administration server by entering the utils service adminserver start command, the product-specific MIB will start responding.
Examples The following example shows how to gracefully halt the operation of the administration server:
admin: utils service adminserver status adminserver.................Running - PID <10817>admin: utils service adminserver stop adminserver...............Stoppedadmin: utils service adminserver status adminserver.................Not running
Related Commands Command Description
utils service adminserver start
Gracefully starts the administration server.
utils service adminserver status
Displays the status of the administration server.
C-53Installation and Administration Guide for the Cisco TelePresence Exchange System Release 1.0
OL-21567-01
Appendix C Command Reference utils service database drbd disable-ha
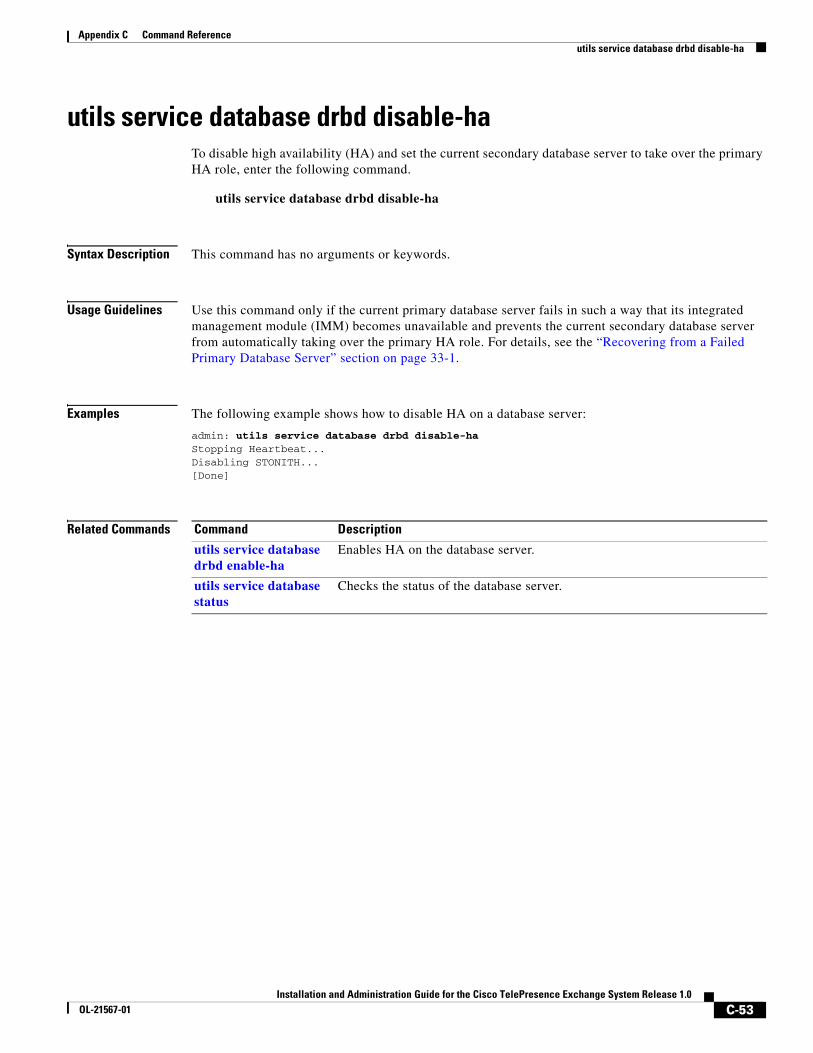
utils service database drbd disable-haTo disable high availability (HA) and set the current secondary database server to take over the primary HA role, enter the following command.
utils service database drbd disable-ha
Syntax Description This command has no arguments or keywords.
Usage Guidelines Use this command only if the current primary database server fails in such a way that its integrated management module (IMM) becomes unavailable and prevents the current secondary database server from automatically taking over the primary HA role. For details, see the “Recovering from a Failed Primary Database Server” section on page 33-1.
Examples The following example shows how to disable HA on a database server:
admin: utils service database drbd disable-ha Stopping Heartbeat...Disabling STONITH...[Done]
Related Commands Command Description
utils service database drbd enable-ha
Enables HA on the database server.
utils service database status
Checks the status of the database server.
C-54Installation and Administration Guide for the Cisco TelePresence Exchange System Release 1.0
OL-21567-01
Appendix C Command Reference utils service database drbd discard-node
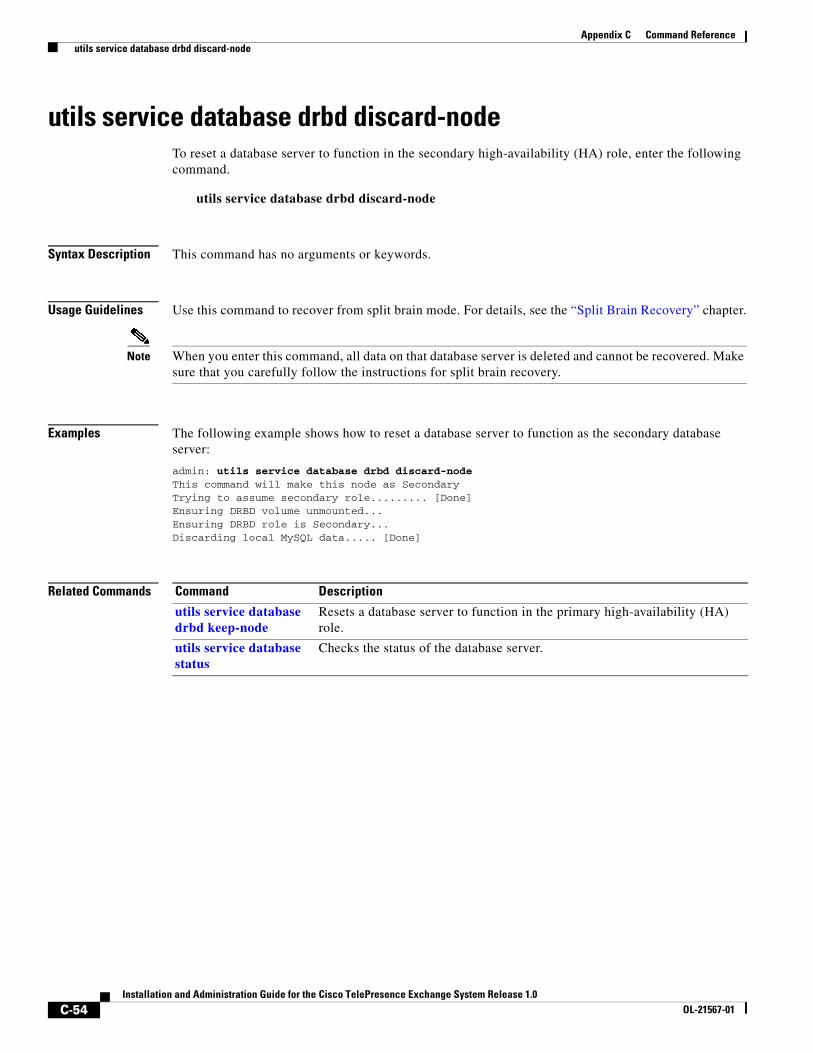
utils service database drbd discard-nodeTo reset a database server to function in the secondary high-availability (HA) role, enter the following command.
utils service database drbd discard-node
Syntax Description This command has no arguments or keywords.
Usage Guidelines Use this command to recover from split brain mode. For details, see the “Split Brain Recovery” chapter.
Note When you enter this command, all data on that database server is deleted and cannot be recovered. Make sure that you carefully follow the instructions for split brain recovery.
Examples The following example shows how to reset a database server to function as the secondary database server:
admin: utils service database drbd discard-node This command will make this node as SecondaryTrying to assume secondary role......... [Done]Ensuring DRBD volume unmounted...Ensuring DRBD role is Secondary...Discarding local MySQL data..... [Done]
Related Commands Command Description
utils service database drbd keep-node
Resets a database server to function in the primary high-availability (HA) role.
utils service database status
Checks the status of the database server.
C-55Installation and Administration Guide for the Cisco TelePresence Exchange System Release 1.0
OL-21567-01
Appendix C Command Reference utils service database drbd enable-ha
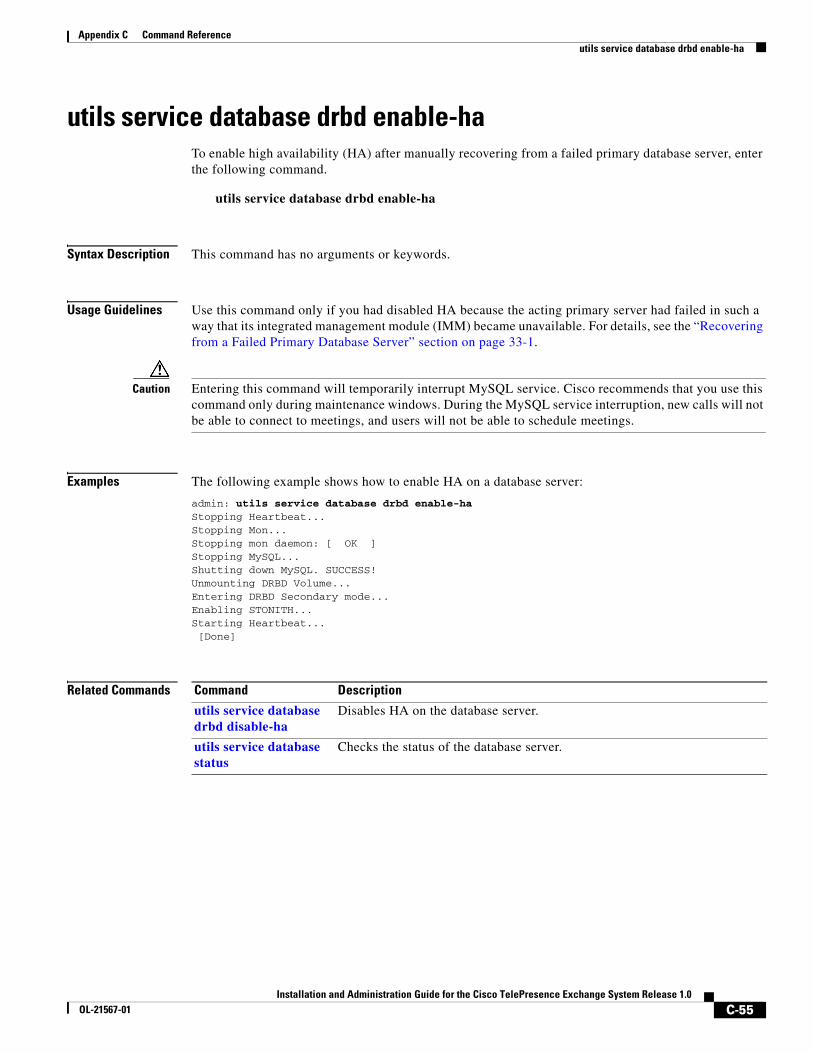
utils service database drbd enable-haTo enable high availability (HA) after manually recovering from a failed primary database server, enter the following command.
utils service database drbd enable-ha
Syntax Description This command has no arguments or keywords.
Usage Guidelines Use this command only if you had disabled HA because the acting primary server had failed in such a way that its integrated management module (IMM) became unavailable. For details, see the “Recovering from a Failed Primary Database Server” section on page 33-1.
Caution Entering this command will temporarily interrupt MySQL service. Cisco recommends that you use this command only during maintenance windows. During the MySQL service interruption, new calls will not be able to connect to meetings, and users will not be able to schedule meetings.
Examples The following example shows how to enable HA on a database server:
admin: utils service database drbd enable-ha Stopping Heartbeat...Stopping Mon...Stopping mon daemon: [ OK ]Stopping MySQL...Shutting down MySQL. SUCCESS! Unmounting DRBD Volume...Entering DRBD Secondary mode...Enabling STONITH...Starting Heartbeat... [Done]
Related Commands Command Description
utils service database drbd disable-ha
Disables HA on the database server.
utils service database status
Checks the status of the database server.
C-56Installation and Administration Guide for the Cisco TelePresence Exchange System Release 1.0
OL-21567-01
Appendix C Command Reference utils service database drbd force-discard-node
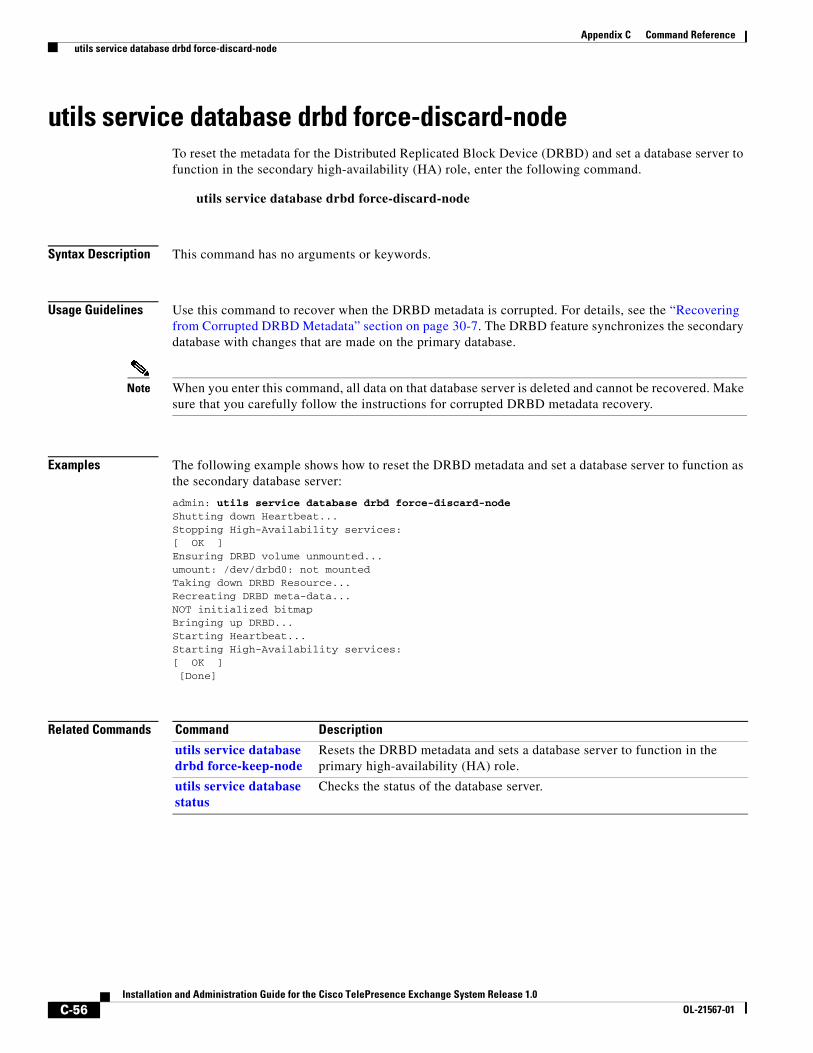
utils service database drbd force-discard-nodeTo reset the metadata for the Distributed Replicated Block Device (DRBD) and set a database server to function in the secondary high-availability (HA) role, enter the following command.
utils service database drbd force-discard-node
Syntax Description This command has no arguments or keywords.
Usage Guidelines Use this command to recover when the DRBD metadata is corrupted. For details, see the “Recovering from Corrupted DRBD Metadata” section on page 30-7. The DRBD feature synchronizes the secondary database with changes that are made on the primary database.
Note When you enter this command, all data on that database server is deleted and cannot be recovered. Make sure that you carefully follow the instructions for corrupted DRBD metadata recovery.
Examples The following example shows how to reset the DRBD metadata and set a database server to function as the secondary database server:
admin: utils service database drbd force-discard-node Shutting down Heartbeat...Stopping High-Availability services: [ OK ]Ensuring DRBD volume unmounted...umount: /dev/drbd0: not mountedTaking down DRBD Resource...Recreating DRBD meta-data...NOT initialized bitmapBringing up DRBD...Starting Heartbeat...Starting High-Availability services: [ OK ] [Done]
Related Commands Command Description
utils service database drbd force-keep-node
Resets the DRBD metadata and sets a database server to function in the primary high-availability (HA) role.
utils service database status
Checks the status of the database server.
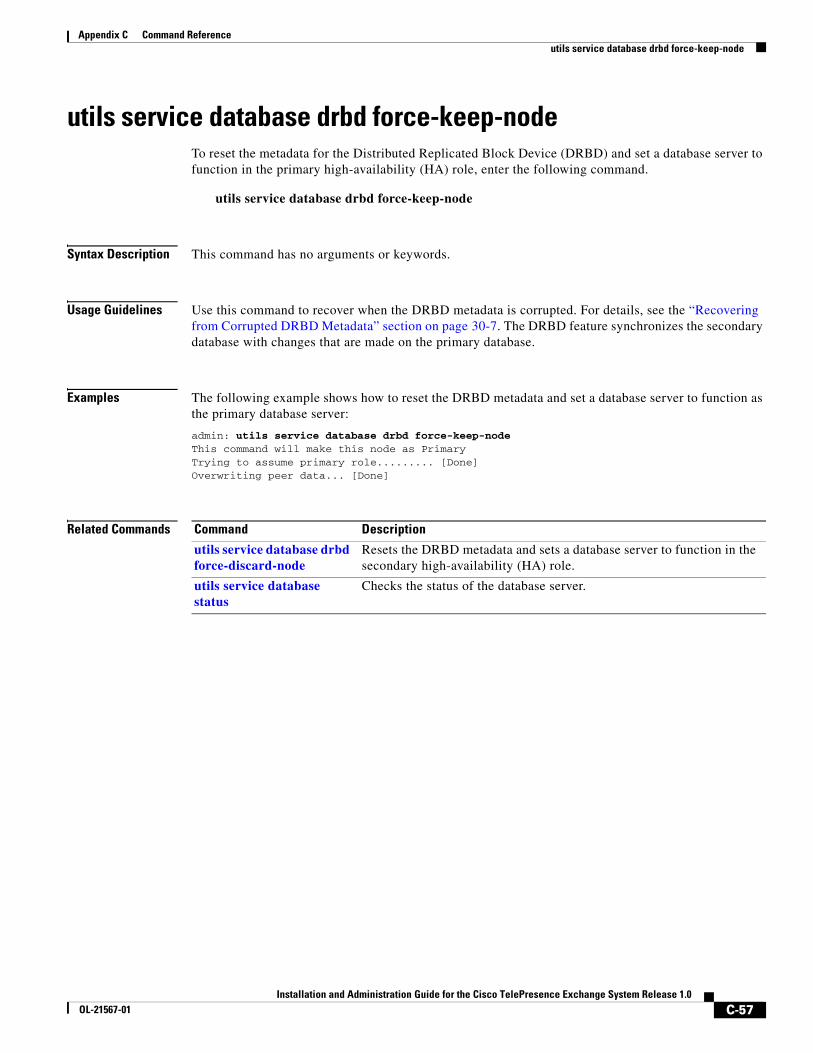
C-57Installation and Administration Guide for the Cisco TelePresence Exchange System Release 1.0
OL-21567-01
Appendix C Command Reference utils service database drbd force-keep-node
utils service database drbd force-keep-nodeTo reset the metadata for the Distributed Replicated Block Device (DRBD) and set a database server to function in the primary high-availability (HA) role, enter the following command.
utils service database drbd force-keep-node
Syntax Description This command has no arguments or keywords.
Usage Guidelines Use this command to recover when the DRBD metadata is corrupted. For details, see the “Recovering from Corrupted DRBD Metadata” section on page 30-7. The DRBD feature synchronizes the secondary database with changes that are made on the primary database.
Examples The following example shows how to reset the DRBD metadata and set a database server to function as the primary database server:
admin: utils service database drbd force-keep-node This command will make this node as PrimaryTrying to assume primary role......... [Done]Overwriting peer data... [Done]
Related Commands Command Description
utils service database drbd force-discard-node
Resets the DRBD metadata and sets a database server to function in the secondary high-availability (HA) role.
utils service database status
Checks the status of the database server.

C-58Installation and Administration Guide for the Cisco TelePresence Exchange System Release 1.0
OL-21567-01
Appendix C Command Reference utils service database drbd force-mysql-reset
utils service database drbd force-mysql-resetTo reformat the Distributed Replicated Block Device (DRBD) partition, restore a backup MySQL installation, and set a database server to function in the primary high-availability (HA) role, enter the following command.
utils service database drbd force-mysql-reset
Syntax Description This command has no arguments or keywords.
Usage Guidelines Use this command to recover when the MySQL database is corrupted. For details, see the “Corrupted MySQL Database Recovery” chapter.
Caution All data in the MySQL database will be lost and unrecoverable after entering this command. Make sure that you follow the corrupted MySQL database recovery procedures carefully.
Examples The following example shows how to reset the DRBD metadata and set a database server to function as the primary database server:
admin: utils service database drbd force-mysql-reset This command will make this node as PrimaryThis command will make this node as PrimaryTrying to assume primary role......... [Done]Temporarily stopping mon services...Stopping mon daemon: [FAILED]Stopping MySQL... ERROR! MySQL manager or server PID file could not be found!Ensuring DRBD volume unmounted...Rebuilding DRBD filesystem...Filesystem label=OS type: LinuxBlock size=4096 (log=2)Fragment size=4096 (log=2)5898240 inodes, 11796480 blocks589824 blocks (5.00%) reserved for the super userFirst data block=0Maximum filesystem blocks=12582912360 block groups32768 blocks per group, 32768 fragments per group16384 inodes per groupSuperblock backups stored on blocks: 32768, 98304, 163840, 229376, 294912, 819200, 884736, 1605632, 2654208, 4096000, 7962624, 11239424
Writing inode tables: done Creating journal (8192 blocks): doneWriting superblocks and filesystem accounting information: done
This filesystem will be automatically checked every 21 mounts or180 days, whichever comes first. Use tune2fs -c or -i to override.Remounting DRBD volume...Retrieving backup MySQL files...Starting MySQL...
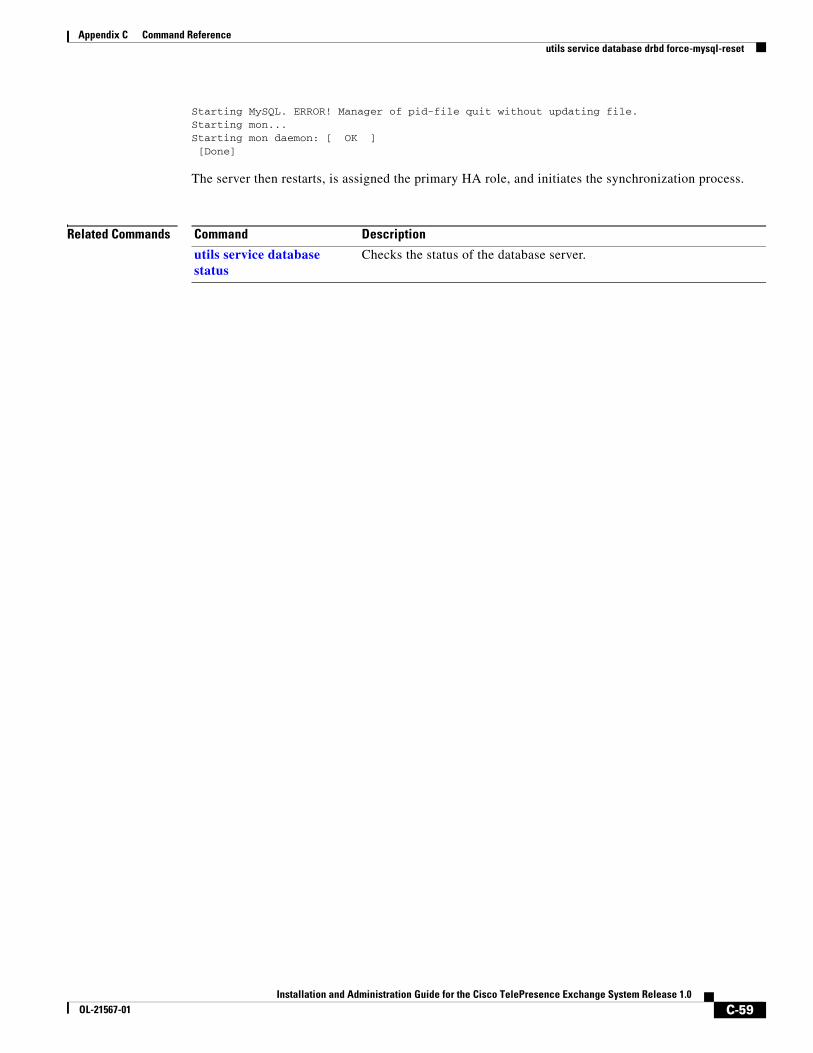
C-59Installation and Administration Guide for the Cisco TelePresence Exchange System Release 1.0
OL-21567-01
Appendix C Command Reference utils service database drbd force-mysql-reset
Starting MySQL. ERROR! Manager of pid-file quit without updating file.Starting mon...Starting mon daemon: [ OK ] [Done]
The server then restarts, is assigned the primary HA role, and initiates the synchronization process.
Related Commands Command Description
utils service database status
Checks the status of the database server.

C-60Installation and Administration Guide for the Cisco TelePresence Exchange System Release 1.0
OL-21567-01
Appendix C Command Reference utils service database drbd keep-node
utils service database drbd keep-nodeTo reset a database server to function in the primary high-availability (HA) role, enter the following command.
utils service database drbd keep-node
Syntax Description This command has no arguments or keywords.
Usage Guidelines Use this command to recover from split brain mode or after replacing a failed initial primary database server. For details, see one of the following sections:
• Split Brain Recovery, page 30-1
• Recovering from a Failed Primary Database Server, page 33-1
Examples The following example shows how to reset a database server to function as the current primary database server:
admin: utils service database drbd keep-node This command will make this node as PrimaryTrying to assume primary role......... [Done]Reconnecting to MySQL......... [Done]
Related Commands Command Description
utils service database drbd discard-node
Resets a database server to function in the secondary high-availability (HA) role.
utils service database status
Checks the status of the database server.
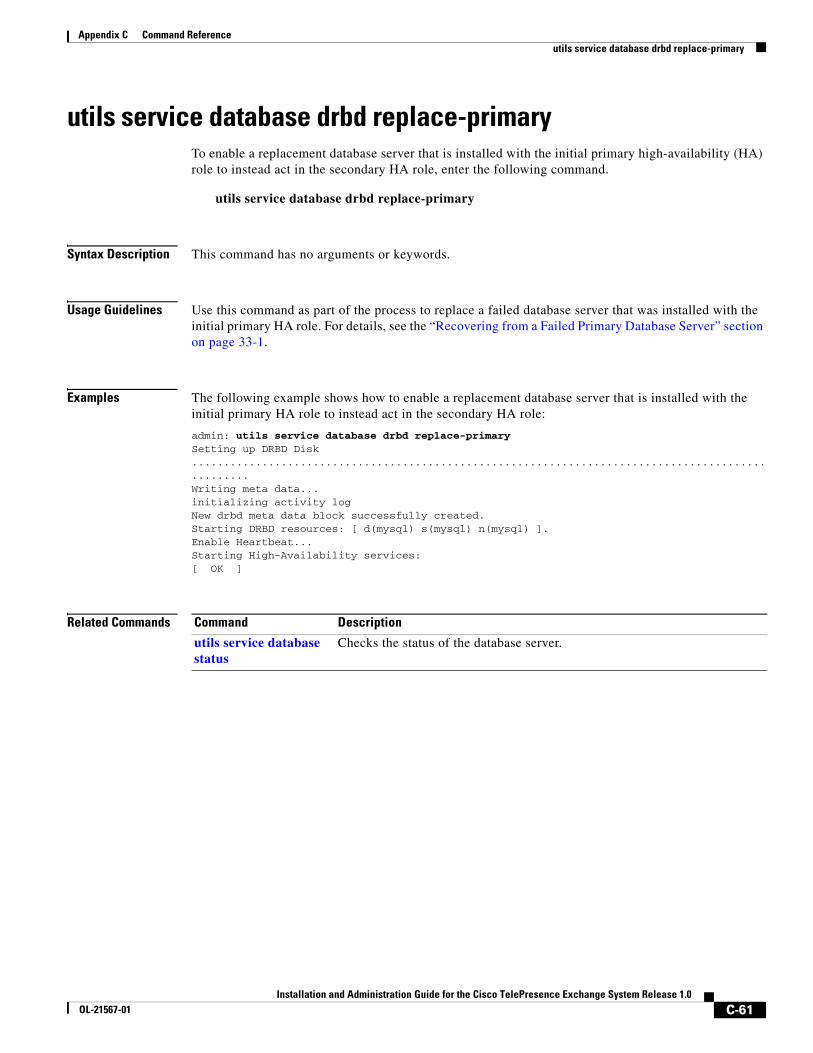
C-61Installation and Administration Guide for the Cisco TelePresence Exchange System Release 1.0
OL-21567-01
Appendix C Command Reference utils service database drbd replace-primary
utils service database drbd replace-primaryTo enable a replacement database server that is installed with the initial primary high-availability (HA) role to instead act in the secondary HA role, enter the following command.
utils service database drbd replace-primary
Syntax Description This command has no arguments or keywords.
Usage Guidelines Use this command as part of the process to replace a failed database server that was installed with the initial primary HA role. For details, see the “Recovering from a Failed Primary Database Server” section on page 33-1.
Examples The following example shows how to enable a replacement database server that is installed with the initial primary HA role to instead act in the secondary HA role:
admin: utils service database drbd replace-primary Setting up DRBD Disk ...................................................................................................Writing meta data...initializing activity logNew drbd meta data block successfully created.Starting DRBD resources: [ d(mysql) s(mysql) n(mysql) ].Enable Heartbeat...Starting High-Availability services: [ OK ]
Related Commands Command Description
utils service database status
Checks the status of the database server.
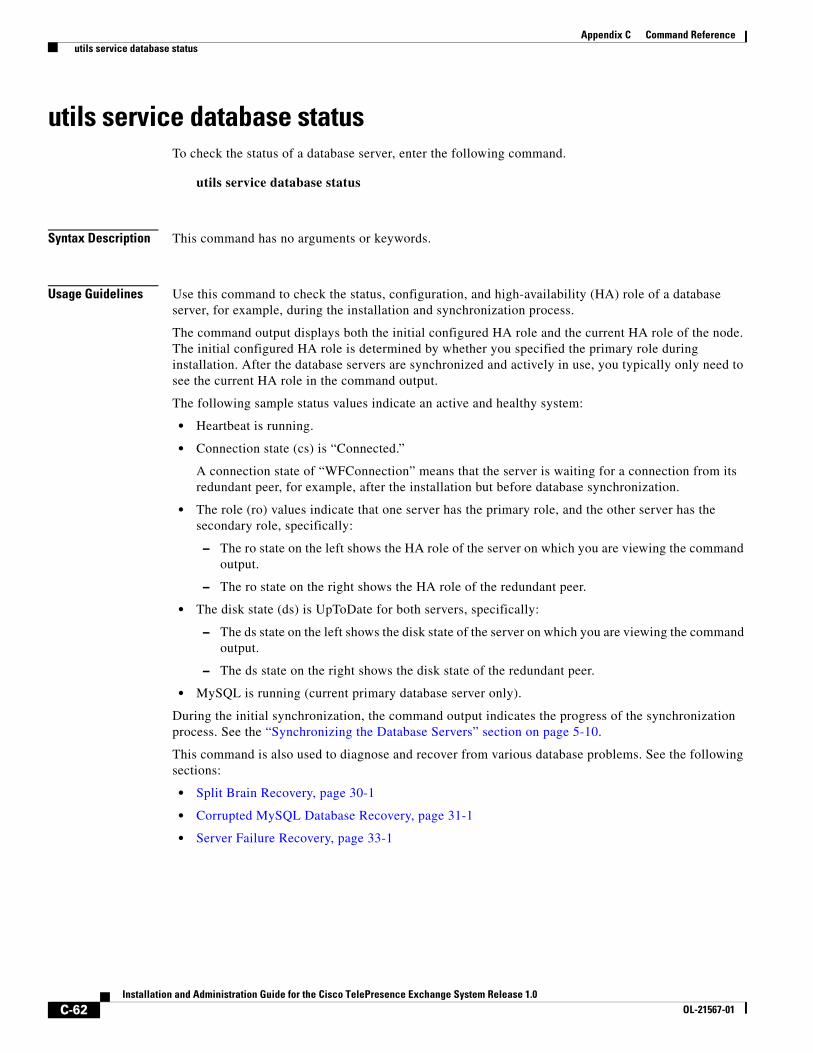
C-62Installation and Administration Guide for the Cisco TelePresence Exchange System Release 1.0
OL-21567-01
Appendix C Command Reference utils service database status
utils service database statusTo check the status of a database server, enter the following command.
utils service database status
Syntax Description This command has no arguments or keywords.
Usage Guidelines Use this command to check the status, configuration, and high-availability (HA) role of a database server, for example, during the installation and synchronization process.
The command output displays both the initial configured HA role and the current HA role of the node. The initial configured HA role is determined by whether you specified the primary role during installation. After the database servers are synchronized and actively in use, you typically only need to see the current HA role in the command output.
The following sample status values indicate an active and healthy system:
• Heartbeat is running.
• Connection state (cs) is “Connected.”
A connection state of “WFConnection” means that the server is waiting for a connection from its redundant peer, for example, after the installation but before database synchronization.
• The role (ro) values indicate that one server has the primary role, and the other server has the secondary role, specifically:
– The ro state on the left shows the HA role of the server on which you are viewing the command output.
– The ro state on the right shows the HA role of the redundant peer.
• The disk state (ds) is UpToDate for both servers, specifically:
– The ds state on the left shows the disk state of the server on which you are viewing the command output.
– The ds state on the right shows the disk state of the redundant peer.
• MySQL is running (current primary database server only).
During the initial synchronization, the command output indicates the progress of the synchronization process. See the “Synchronizing the Database Servers” section on page 5-10.
This command is also used to diagnose and recover from various database problems. See the following sections:
• Split Brain Recovery, page 30-1
• Corrupted MySQL Database Recovery, page 31-1
• Server Failure Recovery, page 33-1
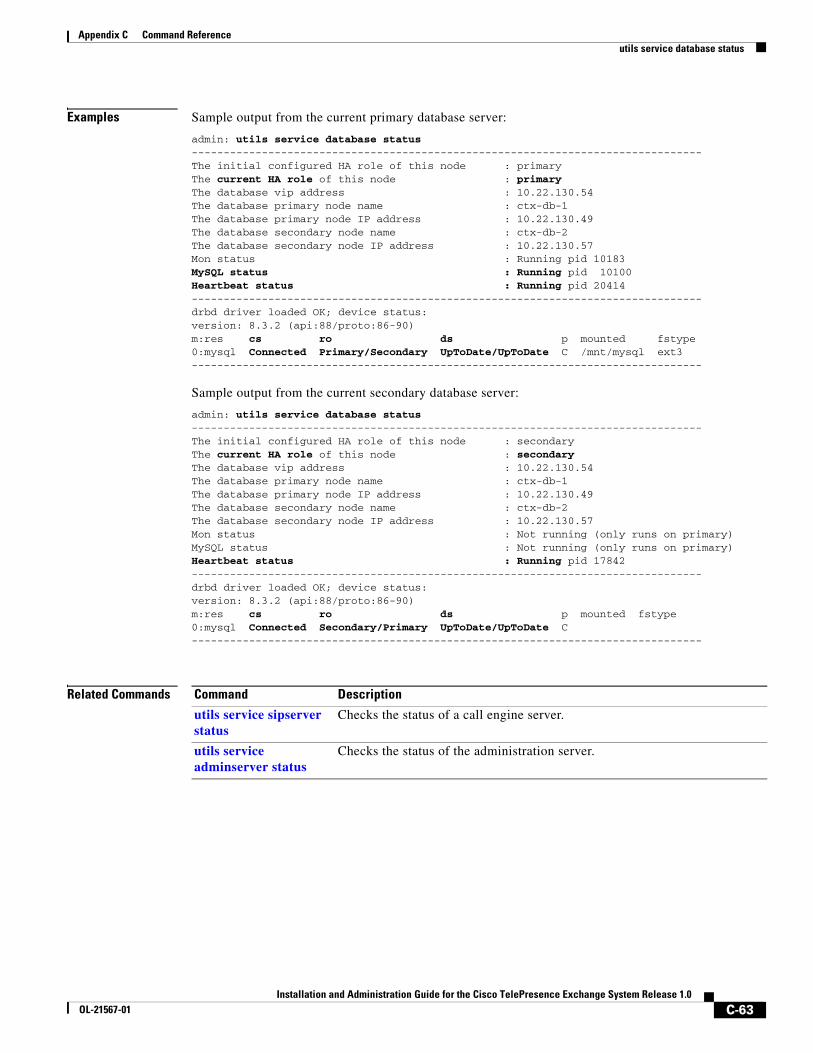
C-63Installation and Administration Guide for the Cisco TelePresence Exchange System Release 1.0
OL-21567-01
Appendix C Command Reference utils service database status
Examples Sample output from the current primary database server:
admin: utils service database status --------------------------------------------------------------------------------The initial configured HA role of this node : primaryThe current HA role of this node : primary The database vip address : 10.22.130.54The database primary node name : ctx-db-1The database primary node IP address : 10.22.130.49The database secondary node name : ctx-db-2The database secondary node IP address : 10.22.130.57Mon status : Running pid 10183MySQL status : Running pid 10100Heartbeat status : Running pid 20414--------------------------------------------------------------------------------drbd driver loaded OK; device status:version: 8.3.2 (api:88/proto:86-90)m:res cs ro ds p mounted fstype0:mysql Connected Primary/Secondary UpToDate/UpToDate C /mnt/mysql ext3--------------------------------------------------------------------------------
Sample output from the current secondary database server:
admin: utils service database status --------------------------------------------------------------------------------The initial configured HA role of this node : secondaryThe current HA role of this node : secondary The database vip address : 10.22.130.54The database primary node name : ctx-db-1The database primary node IP address : 10.22.130.49The database secondary node name : ctx-db-2The database secondary node IP address : 10.22.130.57Mon status : Not running (only runs on primary)MySQL status : Not running (only runs on primary)Heartbeat status : Running pid 17842--------------------------------------------------------------------------------drbd driver loaded OK; device status:version: 8.3.2 (api:88/proto:86-90)m:res cs ro ds p mounted fstype0:mysql Connected Secondary/Primary UpToDate/UpToDate C--------------------------------------------------------------------------------
Related Commands Command Description
utils service sipserver status
Checks the status of a call engine server.
utils service adminserver status
Checks the status of the administration server.
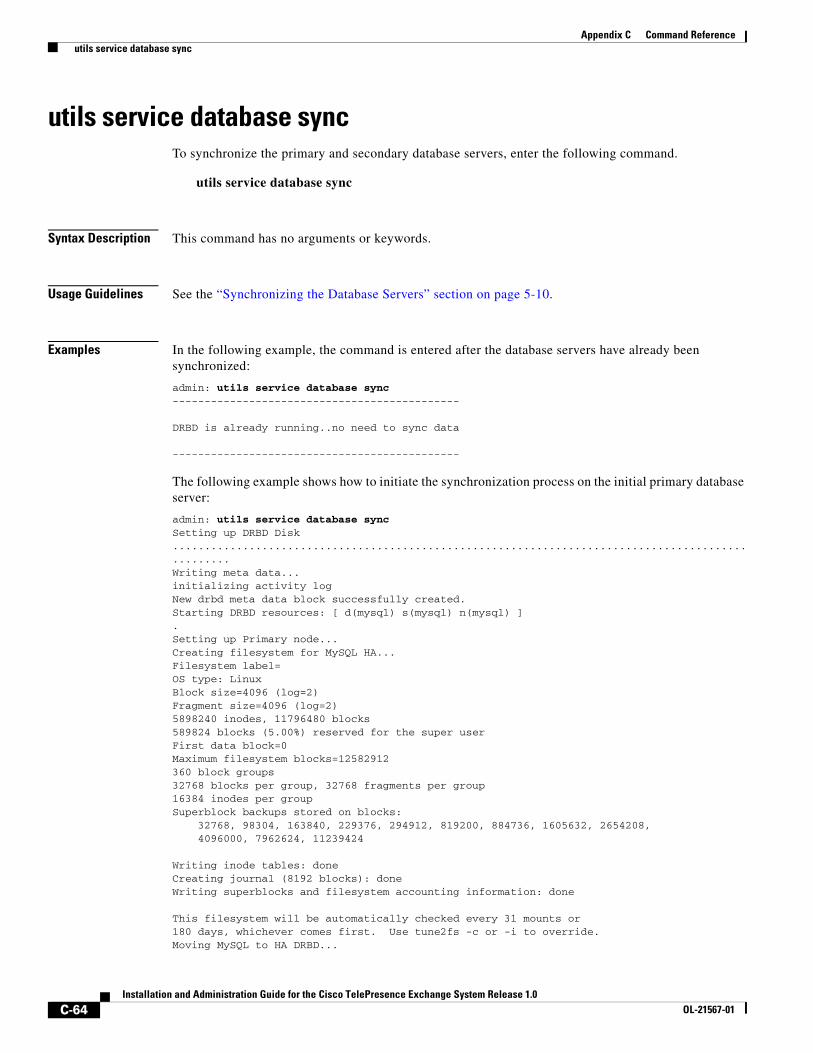
C-64Installation and Administration Guide for the Cisco TelePresence Exchange System Release 1.0
OL-21567-01
Appendix C Command Reference utils service database sync
utils service database syncTo synchronize the primary and secondary database servers, enter the following command.
utils service database sync
Syntax Description This command has no arguments or keywords.
Usage Guidelines See the “Synchronizing the Database Servers” section on page 5-10.
Examples In the following example, the command is entered after the database servers have already been synchronized:
admin: utils service database sync ---------------------------------------------
DRBD is already running..no need to sync data
---------------------------------------------
The following example shows how to initiate the synchronization process on the initial primary database server:
admin: utils service database sync Setting up DRBD Disk ...................................................................................................Writing meta data...initializing activity logNew drbd meta data block successfully created.Starting DRBD resources: [ d(mysql) s(mysql) n(mysql) ].Setting up Primary node...Creating filesystem for MySQL HA...Filesystem label=OS type: LinuxBlock size=4096 (log=2)Fragment size=4096 (log=2)5898240 inodes, 11796480 blocks589824 blocks (5.00%) reserved for the super userFirst data block=0Maximum filesystem blocks=12582912360 block groups32768 blocks per group, 32768 fragments per group16384 inodes per groupSuperblock backups stored on blocks: 32768, 98304, 163840, 229376, 294912, 819200, 884736, 1605632, 2654208, 4096000, 7962624, 11239424
Writing inode tables: done Creating journal (8192 blocks): doneWriting superblocks and filesystem accounting information: done
This filesystem will be automatically checked every 31 mounts or180 days, whichever comes first. Use tune2fs -c or -i to override.Moving MySQL to HA DRBD...
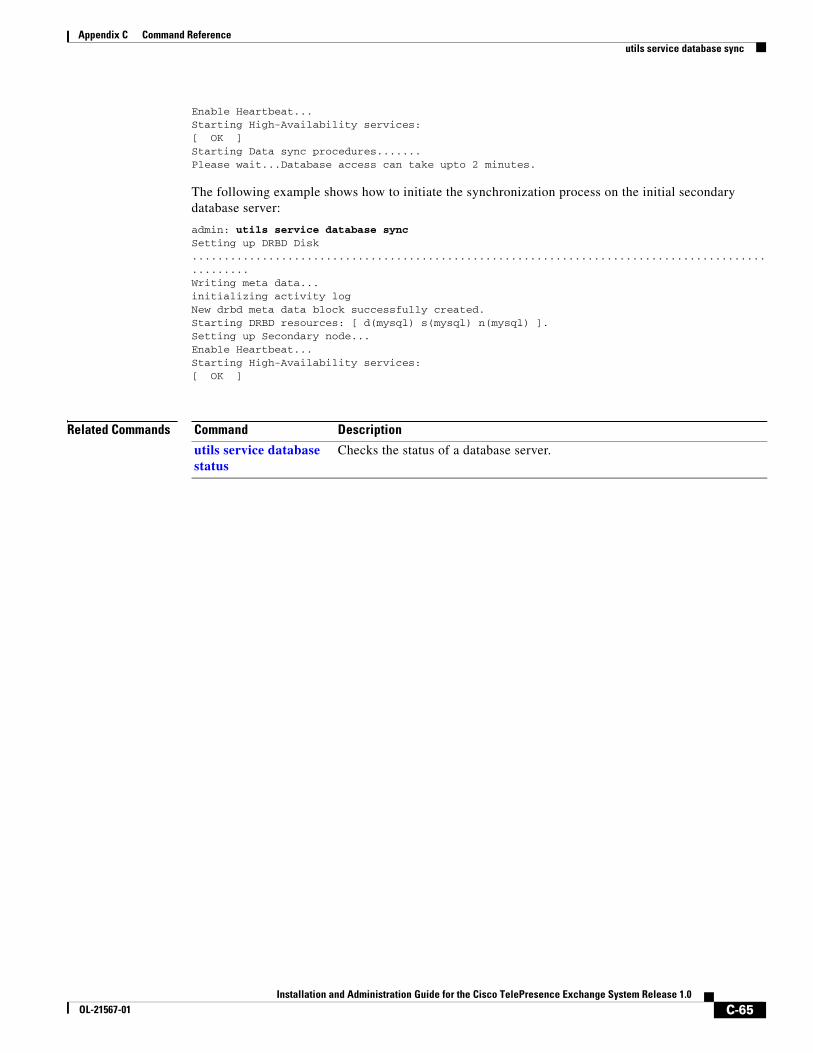
C-65Installation and Administration Guide for the Cisco TelePresence Exchange System Release 1.0
OL-21567-01
Appendix C Command Reference utils service database sync
Enable Heartbeat...Starting High-Availability services: [ OK ]Starting Data sync procedures.......Please wait...Database access can take upto 2 minutes.
The following example shows how to initiate the synchronization process on the initial secondary database server:
admin: utils service database sync Setting up DRBD Disk ...................................................................................................Writing meta data...initializing activity logNew drbd meta data block successfully created.Starting DRBD resources: [ d(mysql) s(mysql) n(mysql) ].Setting up Secondary node...Enable Heartbeat...Starting High-Availability services: [ OK ]
Related Commands Command Description
utils service database status
Checks the status of a database server.
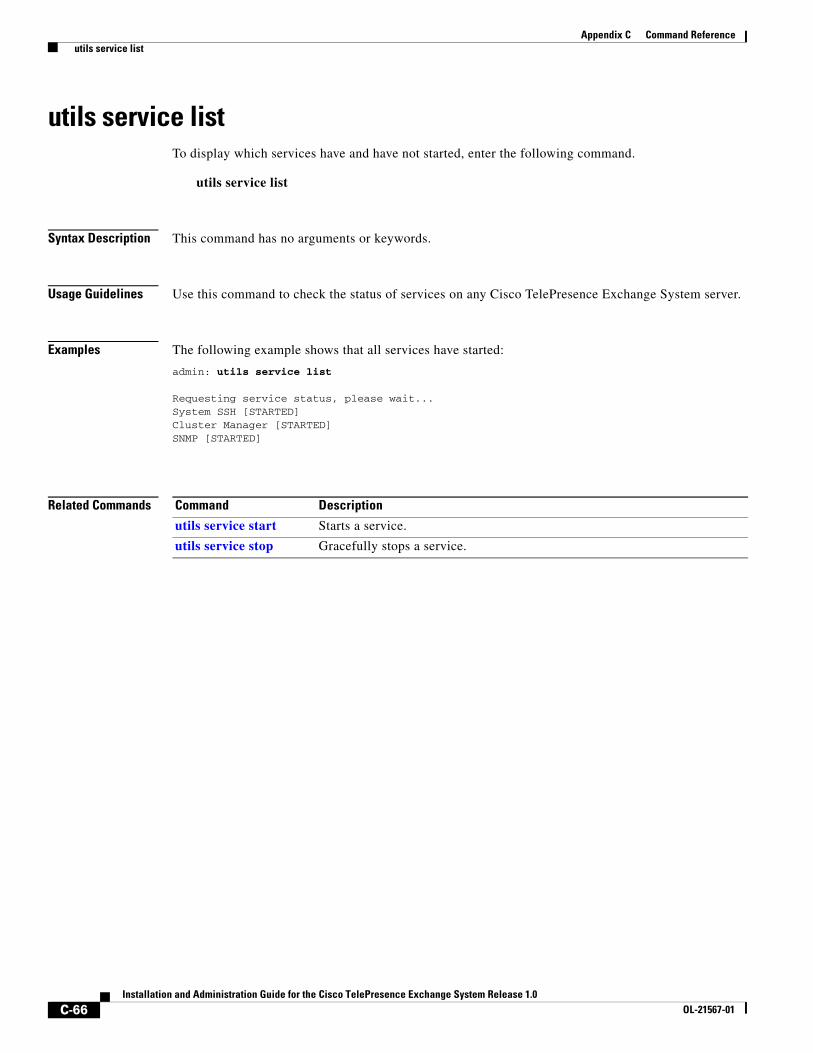
C-66Installation and Administration Guide for the Cisco TelePresence Exchange System Release 1.0
OL-21567-01
Appendix C Command Reference utils service list
utils service listTo display which services have and have not started, enter the following command.
utils service list
Syntax Description This command has no arguments or keywords.
Usage Guidelines Use this command to check the status of services on any Cisco TelePresence Exchange System server.
Examples The following example shows that all services have started:
admin: utils service list
Requesting service status, please wait...System SSH [STARTED]Cluster Manager [STARTED]SNMP [STARTED]
Related Commands Command Description
utils service start Starts a service.
utils service stop Gracefully stops a service.
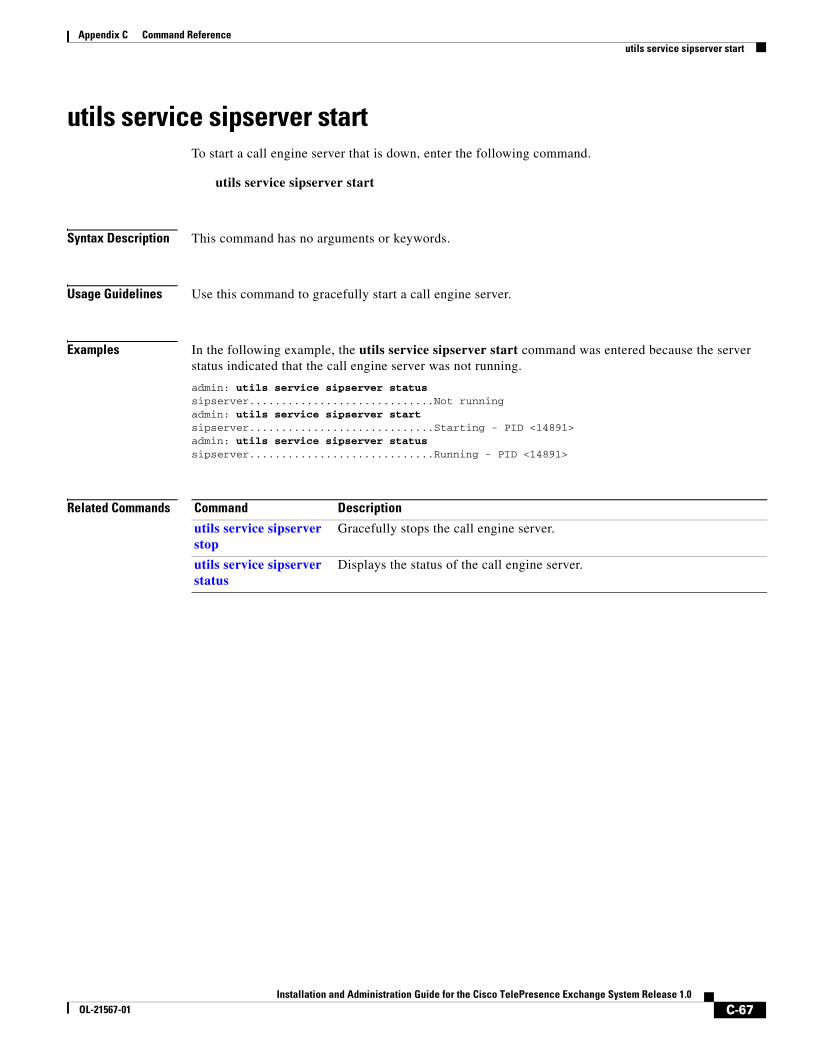
C-67Installation and Administration Guide for the Cisco TelePresence Exchange System Release 1.0
OL-21567-01
Appendix C Command Reference utils service sipserver start
utils service sipserver startTo start a call engine server that is down, enter the following command.
utils service sipserver start
Syntax Description This command has no arguments or keywords.
Usage Guidelines Use this command to gracefully start a call engine server.
Examples In the following example, the utils service sipserver start command was entered because the server status indicated that the call engine server was not running.
admin: utils service sipserver status sipserver.............................Not running admin: utils service sipserver start sipserver.............................Starting - PID <14891>admin: utils service sipserver status sipserver.............................Running - PID <14891>
Related Commands Command Description
utils service sipserver stop
Gracefully stops the call engine server.
utils service sipserver status
Displays the status of the call engine server.
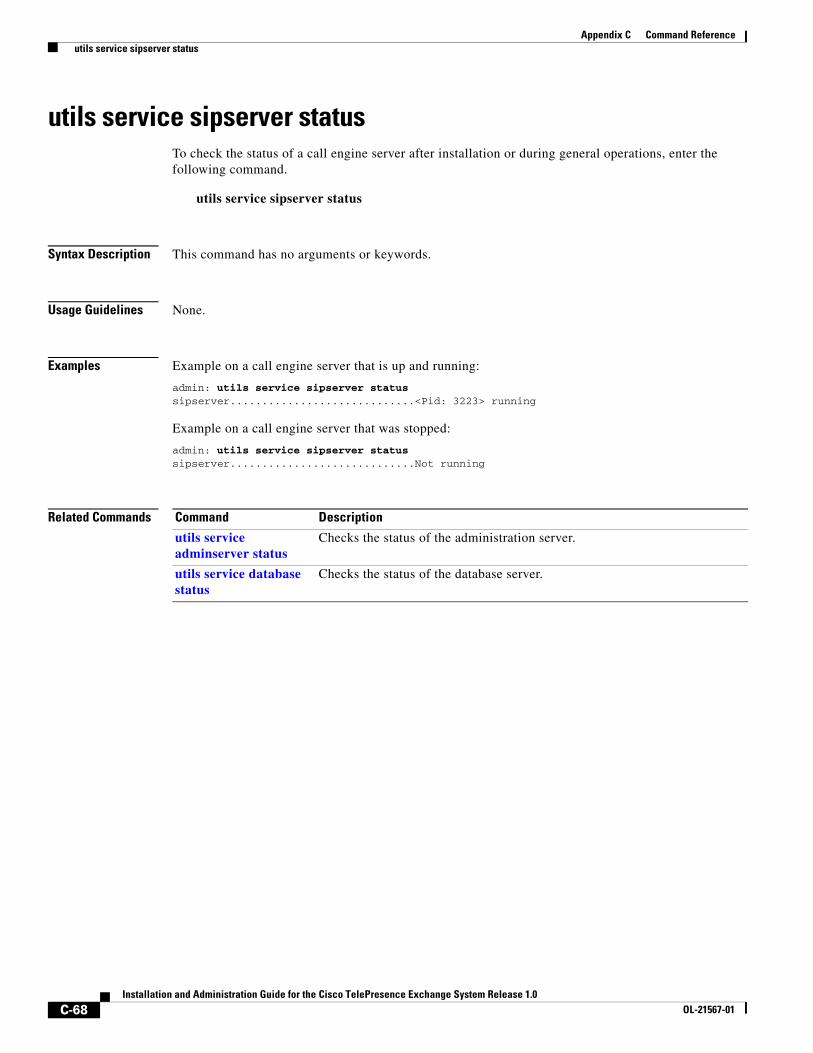
C-68Installation and Administration Guide for the Cisco TelePresence Exchange System Release 1.0
OL-21567-01
Appendix C Command Reference utils service sipserver status
utils service sipserver statusTo check the status of a call engine server after installation or during general operations, enter the following command.
utils service sipserver status
Syntax Description This command has no arguments or keywords.
Usage Guidelines None.
Examples Example on a call engine server that is up and running:
admin: utils service sipserver statussipserver.............................<Pid: 3223> running
Example on a call engine server that was stopped:
admin: utils service sipserver statussipserver.............................Not running
Related Commands Command Description
utils service adminserver status
Checks the status of the administration server.
utils service database status
Checks the status of the database server.
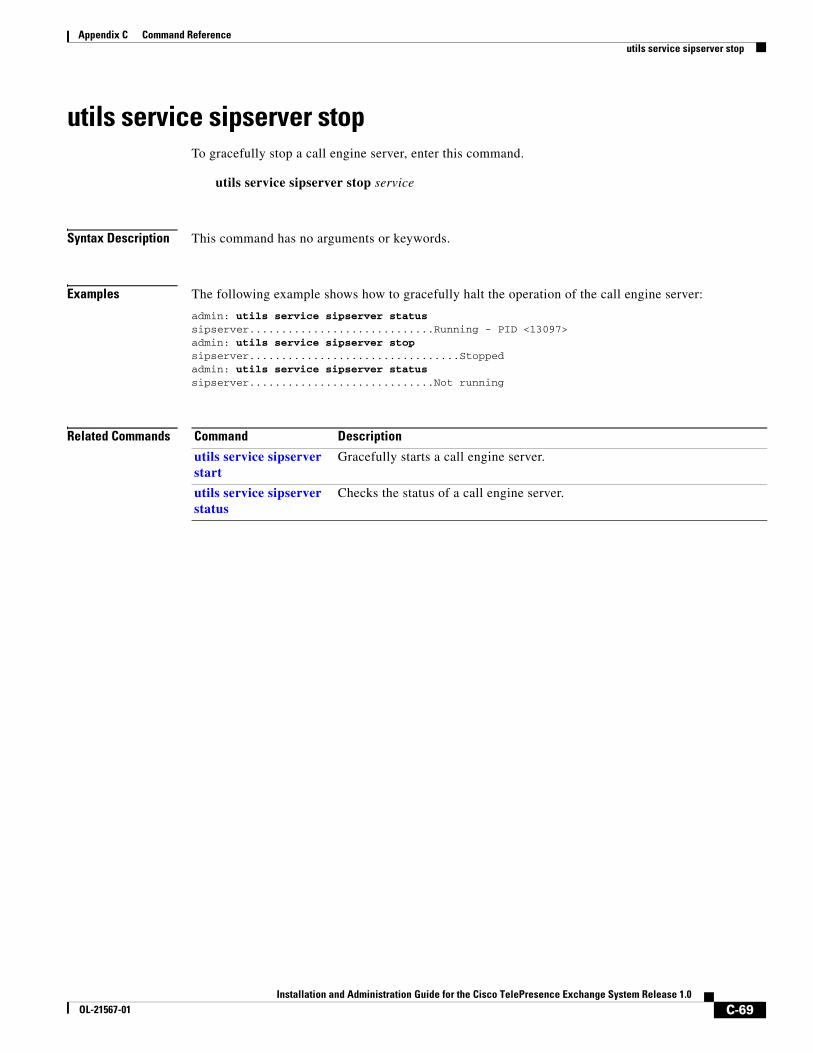
C-69Installation and Administration Guide for the Cisco TelePresence Exchange System Release 1.0
OL-21567-01
Appendix C Command Reference utils service sipserver stop
utils service sipserver stopTo gracefully stop a call engine server, enter this command.
utils service sipserver stop service
Syntax Description This command has no arguments or keywords.
Examples The following example shows how to gracefully halt the operation of the call engine server:
admin: utils service sipserver status sipserver.............................Running - PID <13097>admin: utils service sipserver stop sipserver.................................Stoppedadmin: utils service sipserver status sipserver.............................Not running
Related Commands Command Description
utils service sipserver start
Gracefully starts a call engine server.
utils service sipserver status
Checks the status of a call engine server.
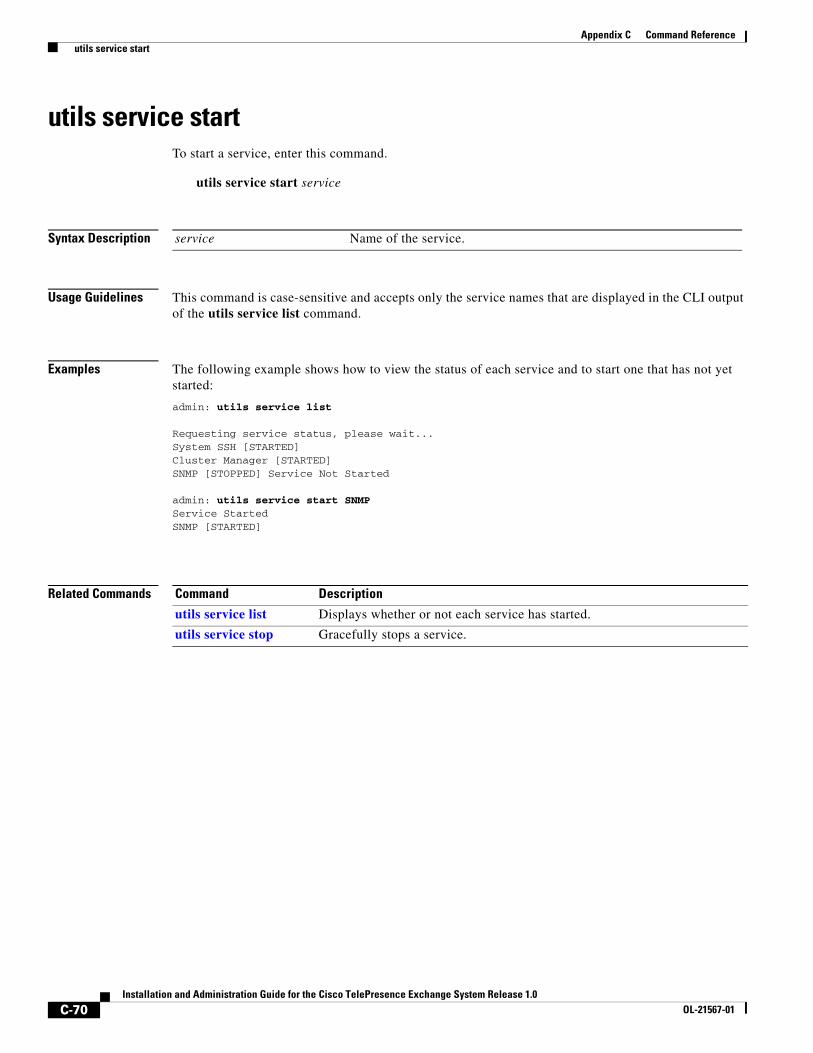
C-70Installation and Administration Guide for the Cisco TelePresence Exchange System Release 1.0
OL-21567-01
Appendix C Command Reference utils service start
utils service startTo start a service, enter this command.
utils service start service
Syntax Description
Usage Guidelines This command is case-sensitive and accepts only the service names that are displayed in the CLI output of the utils service list command.
Examples The following example shows how to view the status of each service and to start one that has not yet started:
admin: utils service list
Requesting service status, please wait...System SSH [STARTED]Cluster Manager [STARTED]SNMP [STOPPED] Service Not Started
admin: utils service start SNMP Service StartedSNMP [STARTED]
Related Commands
service Name of the service.
Command Description
utils service list Displays whether or not each service has started.
utils service stop Gracefully stops a service.
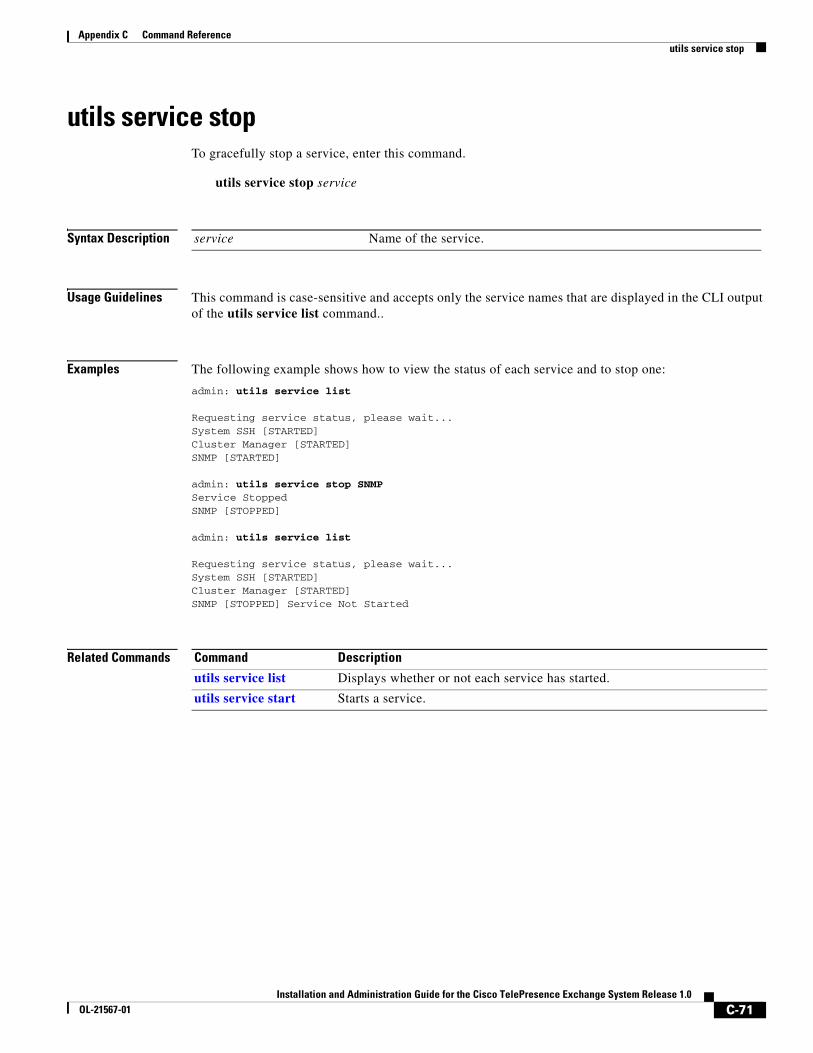
C-71Installation and Administration Guide for the Cisco TelePresence Exchange System Release 1.0
OL-21567-01
Appendix C Command Reference utils service stop
utils service stopTo gracefully stop a service, enter this command.
utils service stop service
Syntax Description
Usage Guidelines This command is case-sensitive and accepts only the service names that are displayed in the CLI output of the utils service list command..
Examples The following example shows how to view the status of each service and to stop one:
admin: utils service list
Requesting service status, please wait...System SSH [STARTED]Cluster Manager [STARTED]SNMP [STARTED]
admin: utils service stop SNMP Service StoppedSNMP [STOPPED]
admin: utils service list
Requesting service status, please wait...System SSH [STARTED]Cluster Manager [STARTED]SNMP [STOPPED] Service Not Started
Related Commands
service Name of the service.
Command Description
utils service list Displays whether or not each service has started.
utils service start Starts a service.
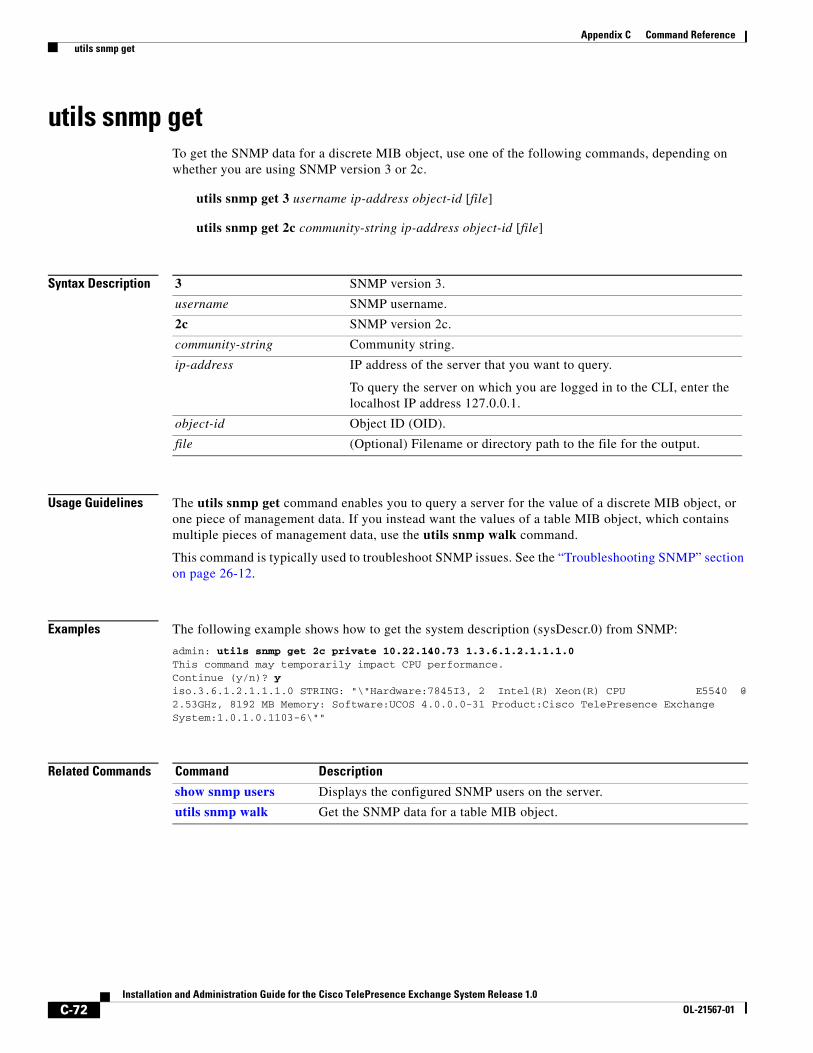
C-72Installation and Administration Guide for the Cisco TelePresence Exchange System Release 1.0
OL-21567-01
Appendix C Command Reference utils snmp get
utils snmp getTo get the SNMP data for a discrete MIB object, use one of the following commands, depending on whether you are using SNMP version 3 or 2c.
utils snmp get 3 username ip-address object-id [file]
utils snmp get 2c community-string ip-address object-id [file]
Syntax Description
Usage Guidelines The utils snmp get command enables you to query a server for the value of a discrete MIB object, or one piece of management data. If you instead want the values of a table MIB object, which contains multiple pieces of management data, use the utils snmp walk command.
This command is typically used to troubleshoot SNMP issues. See the “Troubleshooting SNMP” section on page 26-12.
Examples The following example shows how to get the system description (sysDescr.0) from SNMP:
admin: utils snmp get 2c private 10.22.140.73 1.3.6.1.2.1.1.1.0 This command may temporarily impact CPU performance.Continue (y/n)? y iso.3.6.1.2.1.1.1.0 STRING: "\"Hardware:7845I3, 2 Intel(R) Xeon(R) CPU E5540 @2.53GHz, 8192 MB Memory: Software:UCOS 4.0.0.0-31 Product:Cisco TelePresence ExchangeSystem:1.0.1.0.1103-6\""
Related Commands
3 SNMP version 3.
username SNMP username.
2c SNMP version 2c.
community-string Community string.
ip-address IP address of the server that you want to query.
To query the server on which you are logged in to the CLI, enter the localhost IP address 127.0.0.1.
object-id Object ID (OID).
file (Optional) Filename or directory path to the file for the output.
Command Description
show snmp users Displays the configured SNMP users on the server.
utils snmp walk Get the SNMP data for a table MIB object.

C-73Installation and Administration Guide for the Cisco TelePresence Exchange System Release 1.0
OL-21567-01
Appendix C Command Reference utils snmp hardware-agents restart
utils snmp hardware-agents restartTo restart the hardware agent for an IBM server, use the following command.
utils snmp hardware-agents restart
Syntax Description This command has no arguments or keywords.
Usage Guidelines Use this command to restart the hardware agent for an IBM server without rebooting the server.
Typically, this command is used only if the hardware agent on the server fails, that is, when IBM MIBs do not respond while the CISCO-TELEPRESENCE-EXCHANGE-SYSTEM-MIB and other MIBs continue to work.
Examples The following example shows how to restart the hardware agent for an IBM server:
admin: utils snmp hardware-agents restart Stopping SNMP agents ...SNMP agents stoppedStarting SNMP agents ...SNMP agents started
Related Commands None.
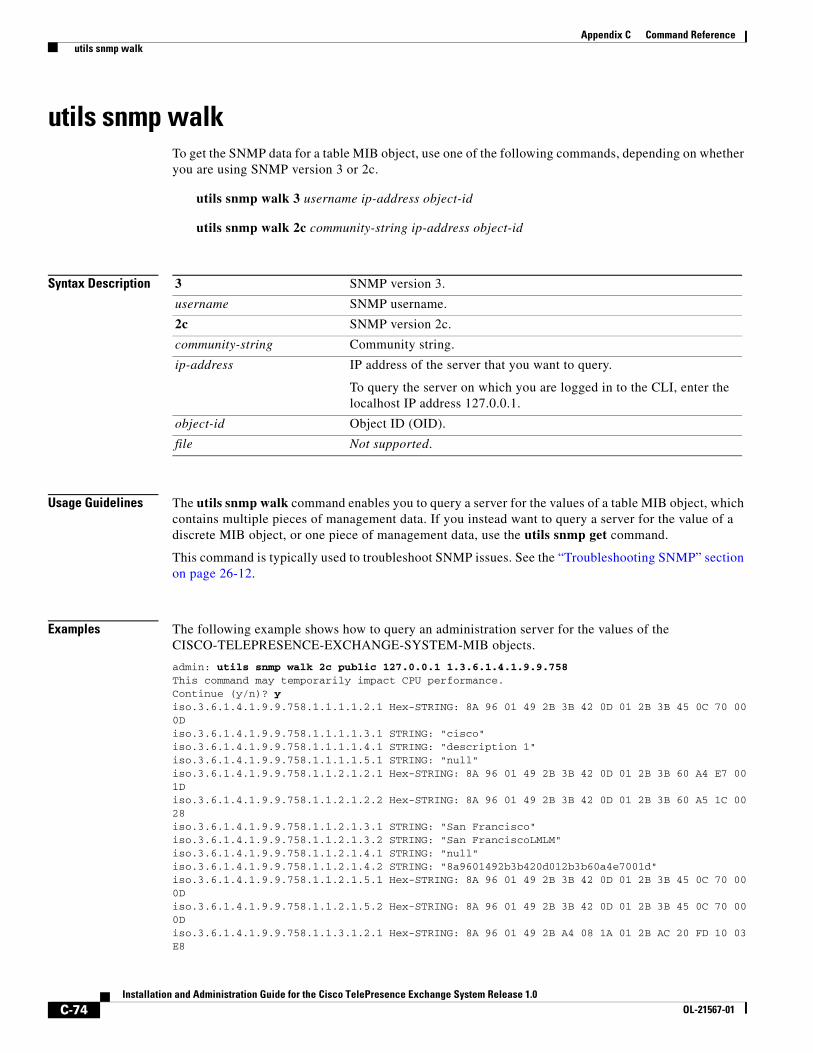
C-74Installation and Administration Guide for the Cisco TelePresence Exchange System Release 1.0
OL-21567-01
Appendix C Command Reference utils snmp walk
utils snmp walkTo get the SNMP data for a table MIB object, use one of the following commands, depending on whether you are using SNMP version 3 or 2c.
utils snmp walk 3 username ip-address object-id
utils snmp walk 2c community-string ip-address object-id
Syntax Description
Usage Guidelines The utils snmp walk command enables you to query a server for the values of a table MIB object, which contains multiple pieces of management data. If you instead want to query a server for the value of a discrete MIB object, or one piece of management data, use the utils snmp get command.
This command is typically used to troubleshoot SNMP issues. See the “Troubleshooting SNMP” section on page 26-12.
Examples The following example shows how to query an administration server for the values of the CISCO-TELEPRESENCE-EXCHANGE-SYSTEM-MIB objects.
admin: utils snmp walk 2c public 127.0.0.1 1.3.6.1.4.1.9.9.758 This command may temporarily impact CPU performance.Continue (y/n)? y iso.3.6.1.4.1.9.9.758.1.1.1.1.2.1 Hex-STRING: 8A 96 01 49 2B 3B 42 0D 01 2B 3B 45 0C 70 000D iso.3.6.1.4.1.9.9.758.1.1.1.1.3.1 STRING: "cisco"iso.3.6.1.4.1.9.9.758.1.1.1.1.4.1 STRING: "description 1"iso.3.6.1.4.1.9.9.758.1.1.1.1.5.1 STRING: "null"iso.3.6.1.4.1.9.9.758.1.1.2.1.2.1 Hex-STRING: 8A 96 01 49 2B 3B 42 0D 01 2B 3B 60 A4 E7 001D iso.3.6.1.4.1.9.9.758.1.1.2.1.2.2 Hex-STRING: 8A 96 01 49 2B 3B 42 0D 01 2B 3B 60 A5 1C 0028 iso.3.6.1.4.1.9.9.758.1.1.2.1.3.1 STRING: "San Francisco"iso.3.6.1.4.1.9.9.758.1.1.2.1.3.2 STRING: "San FranciscoLMLM"iso.3.6.1.4.1.9.9.758.1.1.2.1.4.1 STRING: "null"iso.3.6.1.4.1.9.9.758.1.1.2.1.4.2 STRING: "8a9601492b3b420d012b3b60a4e7001d"iso.3.6.1.4.1.9.9.758.1.1.2.1.5.1 Hex-STRING: 8A 96 01 49 2B 3B 42 0D 01 2B 3B 45 0C 70 000D iso.3.6.1.4.1.9.9.758.1.1.2.1.5.2 Hex-STRING: 8A 96 01 49 2B 3B 42 0D 01 2B 3B 45 0C 70 000D iso.3.6.1.4.1.9.9.758.1.1.3.1.2.1 Hex-STRING: 8A 96 01 49 2B A4 08 1A 01 2B AC 20 FD 10 03E8
3 SNMP version 3.
username SNMP username.
2c SNMP version 2c.
community-string Community string.
ip-address IP address of the server that you want to query.
To query the server on which you are logged in to the CLI, enter the localhost IP address 127.0.0.1.
object-id Object ID (OID).
file Not supported.
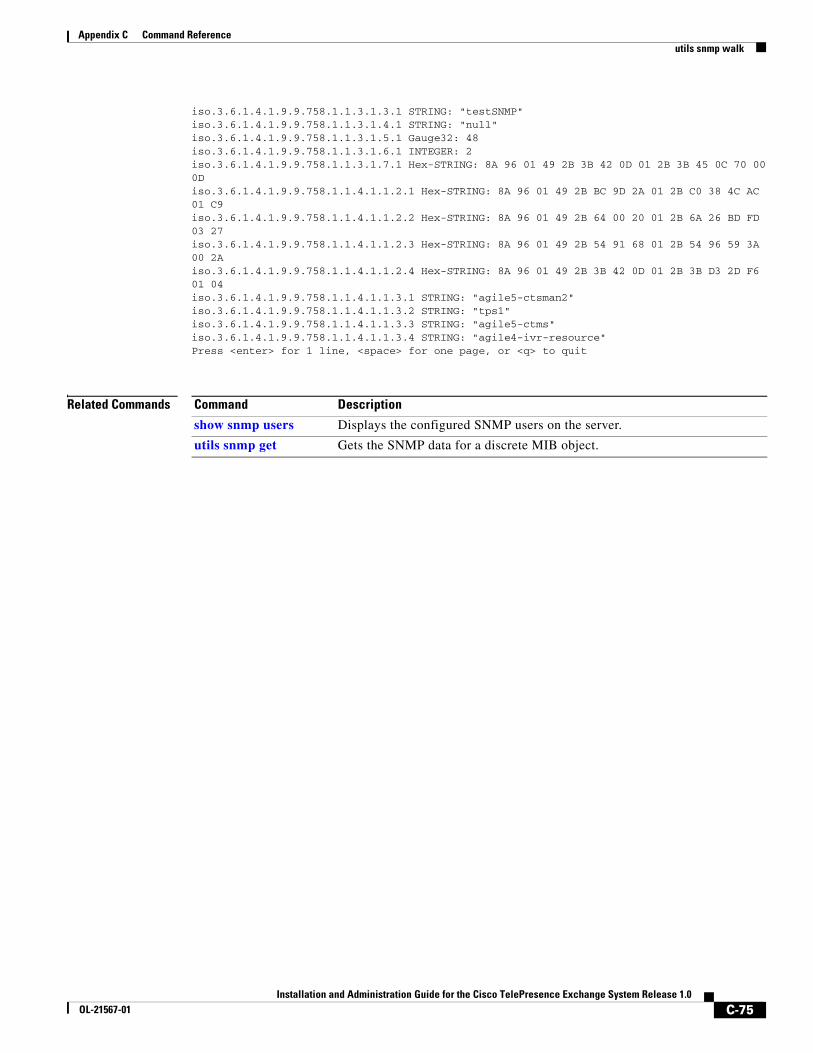
C-75Installation and Administration Guide for the Cisco TelePresence Exchange System Release 1.0
OL-21567-01
Appendix C Command Reference utils snmp walk
iso.3.6.1.4.1.9.9.758.1.1.3.1.3.1 STRING: "testSNMP"iso.3.6.1.4.1.9.9.758.1.1.3.1.4.1 STRING: "null"iso.3.6.1.4.1.9.9.758.1.1.3.1.5.1 Gauge32: 48iso.3.6.1.4.1.9.9.758.1.1.3.1.6.1 INTEGER: 2iso.3.6.1.4.1.9.9.758.1.1.3.1.7.1 Hex-STRING: 8A 96 01 49 2B 3B 42 0D 01 2B 3B 45 0C 70 000D iso.3.6.1.4.1.9.9.758.1.1.4.1.1.2.1 Hex-STRING: 8A 96 01 49 2B BC 9D 2A 01 2B C0 38 4C AC01 C9 iso.3.6.1.4.1.9.9.758.1.1.4.1.1.2.2 Hex-STRING: 8A 96 01 49 2B 64 00 20 01 2B 6A 26 BD FD03 27 iso.3.6.1.4.1.9.9.758.1.1.4.1.1.2.3 Hex-STRING: 8A 96 01 49 2B 54 91 68 01 2B 54 96 59 3A00 2A iso.3.6.1.4.1.9.9.758.1.1.4.1.1.2.4 Hex-STRING: 8A 96 01 49 2B 3B 42 0D 01 2B 3B D3 2D F601 04 iso.3.6.1.4.1.9.9.758.1.1.4.1.1.3.1 STRING: "agile5-ctsman2"iso.3.6.1.4.1.9.9.758.1.1.4.1.1.3.2 STRING: "tps1"iso.3.6.1.4.1.9.9.758.1.1.4.1.1.3.3 STRING: "agile5-ctms"iso.3.6.1.4.1.9.9.758.1.1.4.1.1.3.4 STRING: "agile4-ivr-resource"Press <enter> for 1 line, <space> for one page, or <q> to quit
Related Commands Command Description
show snmp users Displays the configured SNMP users on the server.
utils snmp get Gets the SNMP data for a discrete MIB object.

C-76Installation and Administration Guide for the Cisco TelePresence Exchange System Release 1.0
OL-21567-01
Appendix C Command Reference utils system restart
utils system restartTo restart a database, administration, or call engine server, enter this command:
utils system restart
Syntax Description This command has no arguments or keywords.
Usage Guidelines If you restart the server over SSH, you will lose your connection while the server restarts.
Examples The following example shows how to restart a database server:
admin: utils system restart
Do you really want to restart ?
Enter (yes/no)? yes Current DRBD state is Connected. OK to proceed with restart.
Appliance is being Restarted ...Shutting down Service Manager will take some time.. \ Service Manager shutting down services... Please Wait DONE!!!!
Broadcast message from root (Thu Feb 10 04:55:47 2011):
The system is going down for reboot NOW!Waiting .
Operation succeeded
restart now.
Related Commands Command Description
utils system shutdown Shuts down a Cisco TelePresence Exchange System server.
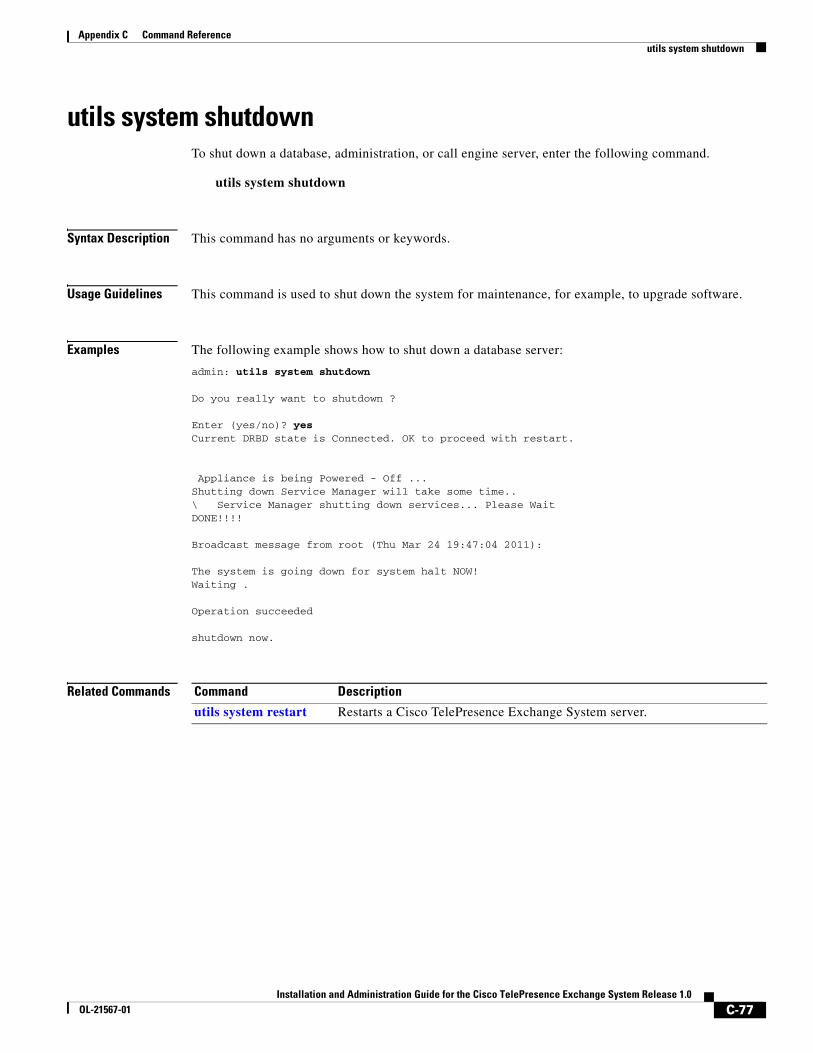
C-77Installation and Administration Guide for the Cisco TelePresence Exchange System Release 1.0
OL-21567-01
Appendix C Command Reference utils system shutdown
utils system shutdownTo shut down a database, administration, or call engine server, enter the following command.
utils system shutdown
Syntax Description This command has no arguments or keywords.
Usage Guidelines This command is used to shut down the system for maintenance, for example, to upgrade software.
Examples The following example shows how to shut down a database server:
admin: utils system shutdown
Do you really want to shutdown ?
Enter (yes/no)? yes Current DRBD state is Connected. OK to proceed with restart.
Appliance is being Powered - Off ...Shutting down Service Manager will take some time.. \ Service Manager shutting down services... Please Wait DONE!!!!
Broadcast message from root (Thu Mar 24 19:47:04 2011):
The system is going down for system halt NOW!Waiting .
Operation succeeded
shutdown now.
Related Commands Command Description
utils system restart Restarts a Cisco TelePresence Exchange System server.

C-78Installation and Administration Guide for the Cisco TelePresence Exchange System Release 1.0
OL-21567-01
Appendix C Command Reference utils system shutdown


![ESC/POS Command Manual - Support Technique AURES ESCPOS.pdf · ESC/POS Command Manual 3 Command Descriptions Command Notation [Name] The name of the control command. [Format] The](https://static.fdocuments.in/doc/165x107/5a9d989d7f8b9a21688cc662/escpos-command-manual-support-technique-escpospdfescpos-command-manual-3-command.jpg)