Cohesive Networks Support Docs: VNS3 Administration
33
© 2016 VNS3 3.5+ Administration Instructions VNS3:vpn VNS3:net and VNS3:turret 2016
-
Upload
cohesive-networks -
Category
Technology
-
view
174 -
download
0
Transcript of Cohesive Networks Support Docs: VNS3 Administration

© 2016
VNS3 3.5+ Administration InstructionsVNS3:vpn VNS3:net and VNS3:turret 2016

© 2016
Table of Contents
2
Introduction 3Change Username and Password 9VNS3 Firewall 11VNS3 Snapshots 20Upgrade License 24Other Routes 27SNMP Support 29Reset Factory Defaults 31

© 2016
Introductions
3

© 2016
VNS3 Products
4
Management System
Free, self-service cloud connectivityvpn
Security and connectivity networkingnet
scalable VPN
end-to-end encryption
multi-cloud, multi-region
monitor & manage
automatic failover
secure app isolation
High Availability
Application Security Controllerturret
ADD-ONs ms ha

© 2016
Getting Help with VNS3
5
This document assumes you have a VNS3 Controller instance launched and running in a security group, network or similar that has the appropriate access rules included for normal VNS3 operations.
See the specific instructions for your cloud setup and instance launch on our Product Resources page.
Please review the VNS3 Support Plans and Contacts before sending support inquiries. If you need specific help with project planning, POCs, or audits, contact our professional services team via [email protected] for details.

© 2016
Requirements
6
•You have a cloud account that Cohesive can use for enabling your access to the VNS3 Controller images.
•Ability to configure a client (whether desktop based or cloud based) to use OpenVPN client software.
•You have a compliant IPsec firewall/router networking device:
Preferred Most models from Cisco Systems*, Juniper, Watchguard, Dell SONICWALL, Netgear, Fortinet, Barracuda Networks, Check Point*, Zyxel USA, McAfee Retail, Citrix Systems, Hewlett Packard, D-Link, WatchGuard, Palo Alto Networks, OpenSwan, pfSense, and Vyatta. Best Effort Any IPsec device that supports: IKE1 or IKE2, AES256 or AES128 or 3DES, SHA1 or MD5. *Known Exclusions Checkpoint R65+ requires native IPSec connections as Checkpoint does not conform to NAT-Traversal Standards and Cisco ASA 8.4(2)-8.4(4) bugs prevent a stable connection from being maintained.

© 2016
Firewall Considerations
7
VNS3 Controller instances use the following TCP and UDP ports.
• UDP port 1194 For client VPN connections; must be accessible from all servers that will join VNS3 topology as clients.
• UDP 1195-1203*For tunnels between Controller peers; must be accessible from all peers in a given topology.
• TCP port 8000 HTTPS admin interface; must be accessible from hosts where you will want to obtain runtime status or configure peering, also needs to be open to and from the Controllers at least for the peering process, and needs to be accessible when downloading credentials for installation on overlay network clients.
• UDP port 500UDP port 500 is used the phase 1 or IKE (Internet Key Exchange) component of an IPsec VPN connection.
• UDP port 4500 or Protocol 50 (ESP)Protocol 50 is used for phase 2 or ESP (Encapsulated Security Payload) component of an IPsec VPN connection only when negotiating with native IPsec. UDP port 4500 is used for the phase 2 or ESP (Encapsulated Security Payload) component of an IPsec VPN connection when using NAT-Traversal Encapsulation.
*VNS3:vpn and VNS3:net Lite Edition will not require UDP ports 1195-1197 access as it is not licensed for Controller Peering. ** Some public cloud providers require IPsec connections to use NAT-Traversal encapsulation on UDP port 4500

© 2016
Remote Support
8
Note that TCP 22 (ssh) is not required for normal operations.
Each VNS3 Controller is running a restricted SSH daemon, with access limited only to Cohesive for debugging purposes controlled by the user via the Remote Support toggle and key exchange generation.
In the event Cohesive needs to observe runtime state of a VNS3 Controller in response to a tech support request, we will ask you to open Security Group access to SSH from our support IP range and Enable Remote Support via the Web UI.
Cohesive will send you an encrypted passphrase to generate a private key used by Cohesive Support staff to access your Controller. Access to the restricted SSH daemon is completely controlled by the user. Once the support ticket has been closed you can disable remote support access and invalidate the access key.

© 2016
Change Username and Password
9

© 2016
Change Username and Password
10
At the bottom of the left column menu, under Admin > Admin Username you can edit your Username and Password.

© 2016
VNS3 Firewall
11

© 2016
VNS3 Firewall - Overview
12
The VNS3 Firewall adds a layer of security and control for cloud-based deployments.
VNS3 Firewall features are controlled using IPTables syntax. For more information see - http://linux.die.net/man/8/iptables and look for the PARAMETERS section. Another useful guide is available here: http://www.thegeekstuff.com/2011/06/iptables-rules-examples/
In general, you write a specification of a packet to match and then specify what to do with this packet. These are referred to as “customer” rules and are applied as appropriate in the overall firewall rule structure on the Controller. This means in addition to the standard security and firewall features of VNS3, you can create your own rules to restrict traffic to and through the VNS3 Controller.The order of rules matter - rules are applied from top to bottom until the first match. If no match is found, the packet is allowed to continue on. Important note: If your customer rules don't reject a packet, it will be allowed by default.
However, this “default” is fairly restrictive. Traffic is allowed from “known” VLANS. Known VLANs are VLANS that are listed in IPSec tunnel rules, and the VNS3 virtual VLAN. Allowing traffic from other sources requires adding firewall rules to accept that traffic.
© 2016
VNS3 Firewall - Basic Syntax
13
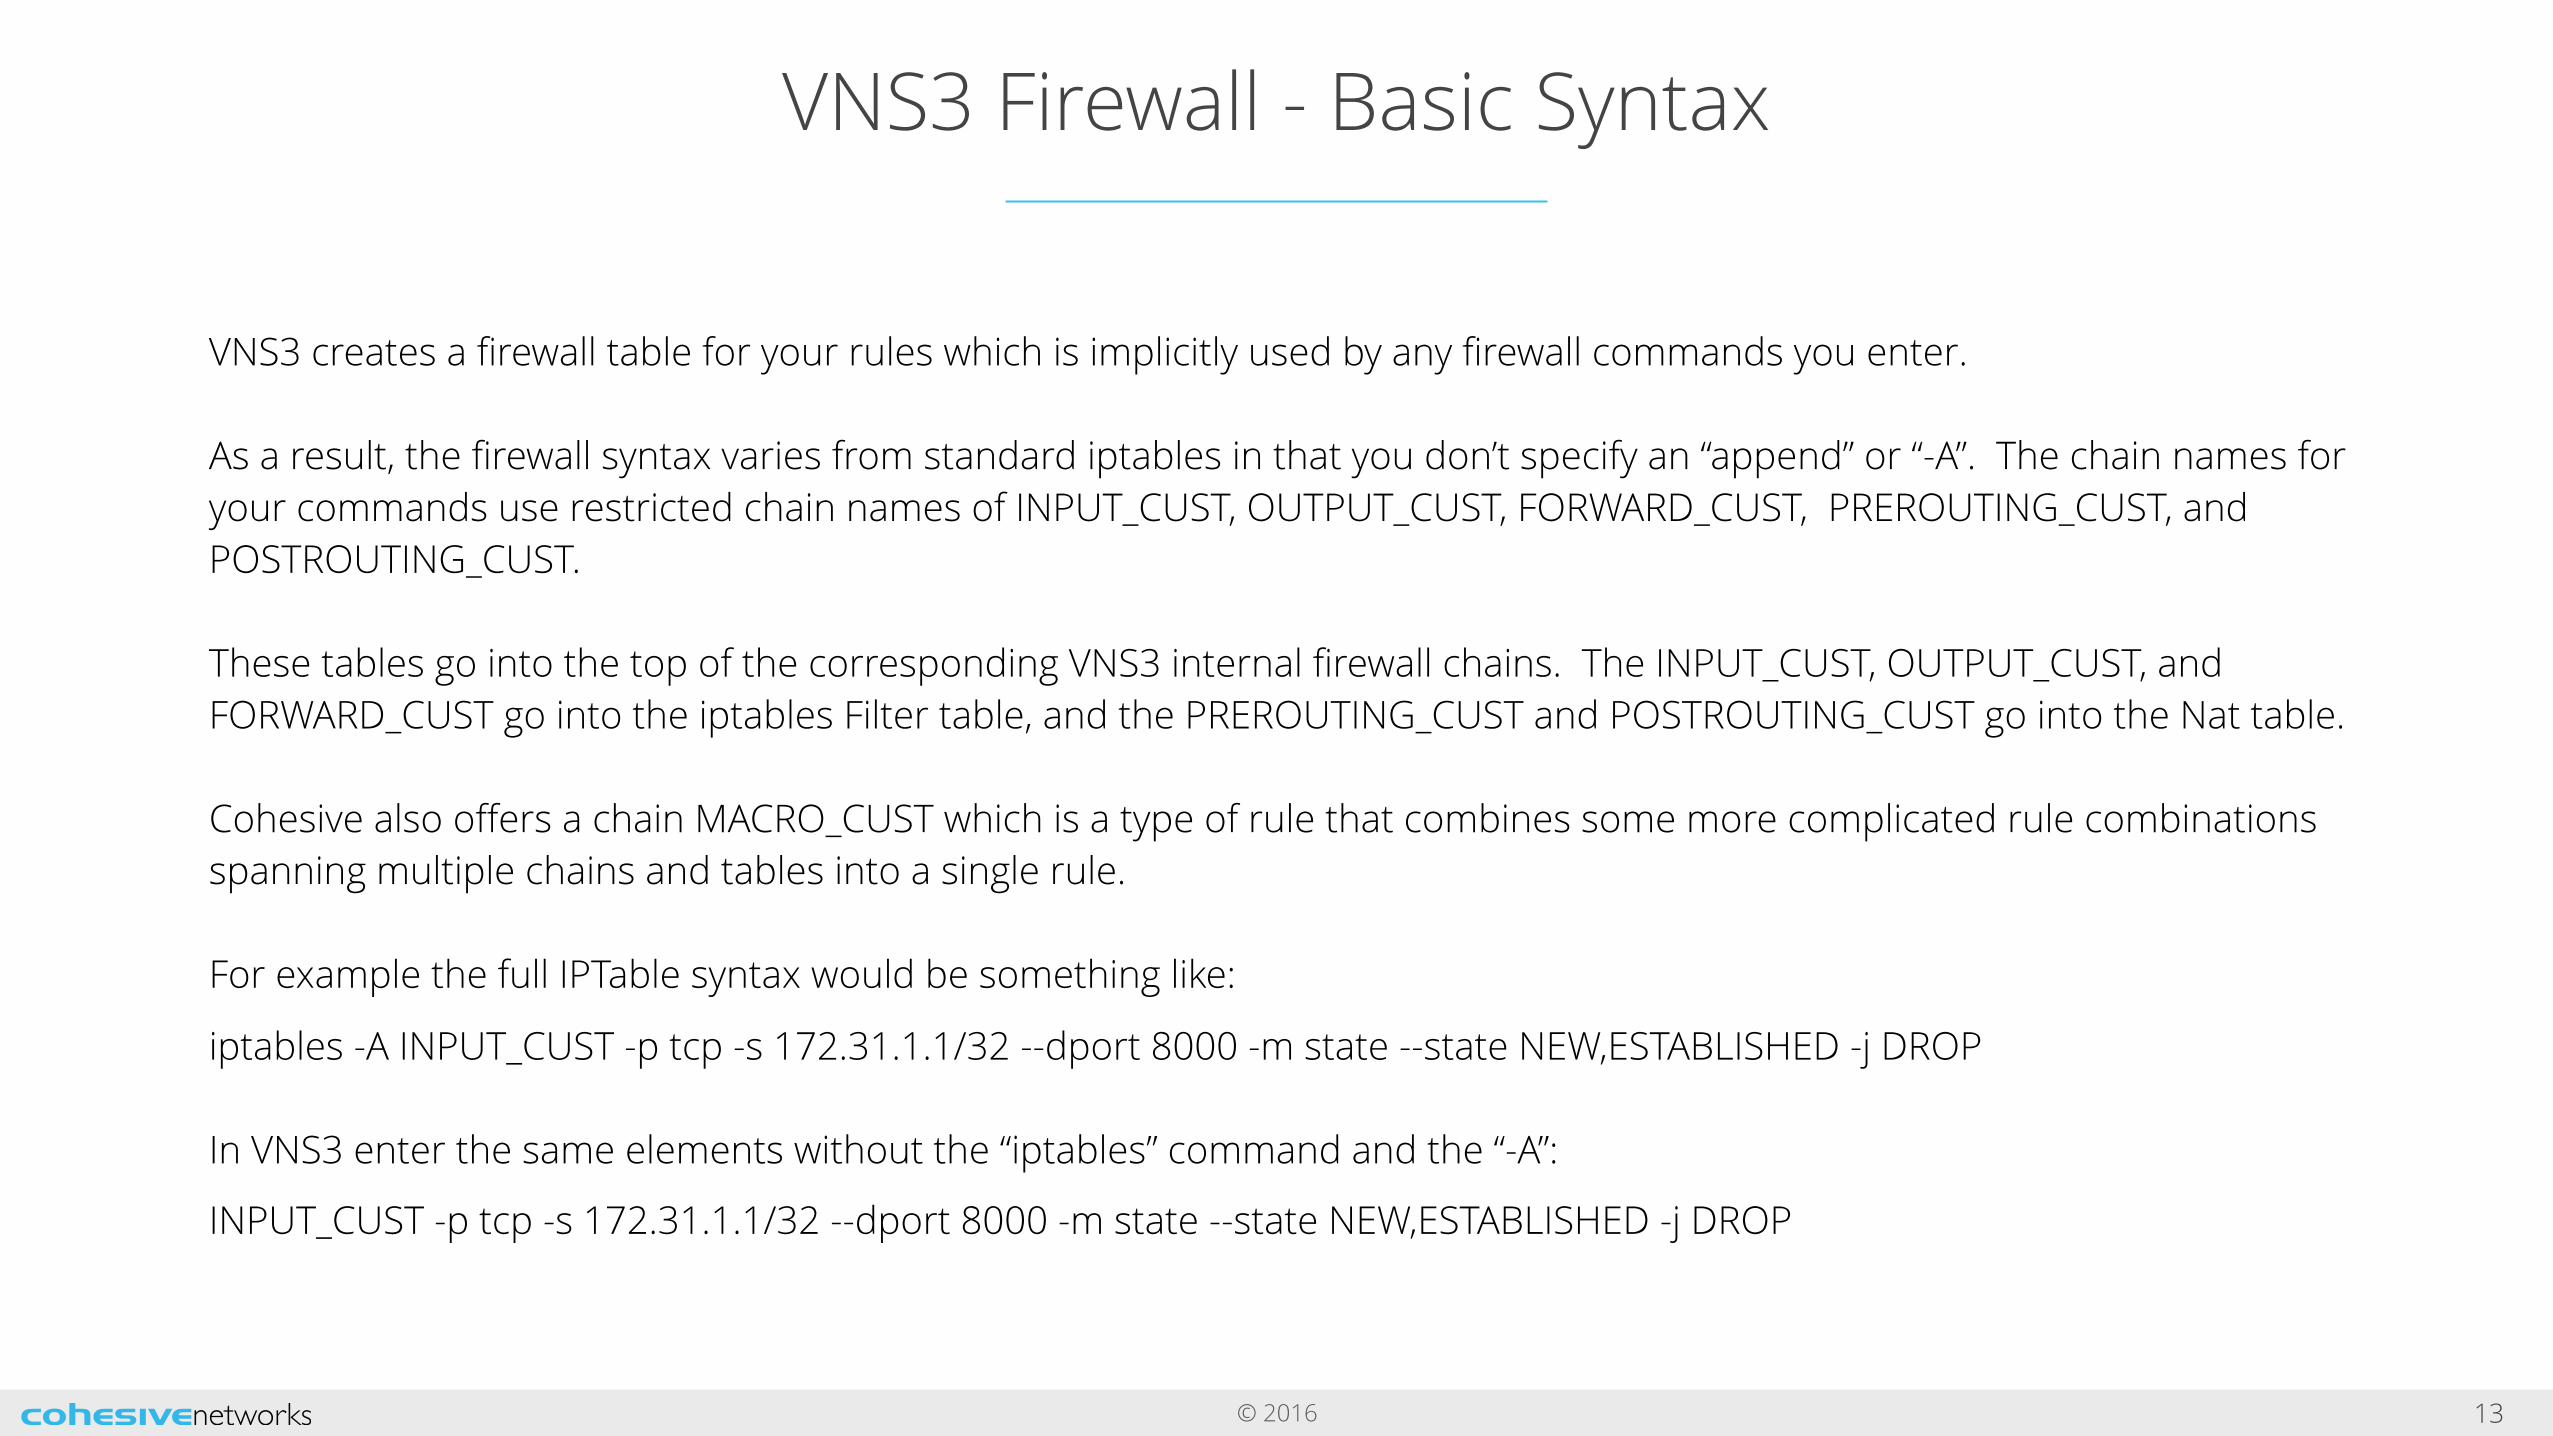
VNS3 creates a firewall table for your rules which is implicitly used by any firewall commands you enter. As a result, the firewall syntax varies from standard iptables in that you don’t specify an “append” or “-A”. The chain names for your commands use restricted chain names of INPUT_CUST, OUTPUT_CUST, FORWARD_CUST, PREROUTING_CUST, and POSTROUTING_CUST.These tables go into the top of the corresponding VNS3 internal firewall chains. The INPUT_CUST, OUTPUT_CUST, and FORWARD_CUST go into the iptables Filter table, and the PREROUTING_CUST and POSTROUTING_CUST go into the Nat table. Cohesive also offers a chain MACRO_CUST which is a type of rule that combines some more complicated rule combinations spanning multiple chains and tables into a single rule. For example the full IPTable syntax would be something like:
iptables -A INPUT_CUST -p tcp -s 172.31.1.1/32 --dport 8000 -m state --state NEW,ESTABLISHED -j DROPIn VNS3 enter the same elements without the “iptables” command and the “-A”:
INPUT_CUST -p tcp -s 172.31.1.1/32 --dport 8000 -m state --state NEW,ESTABLISHED -j DROP

© 2016
VNS3 Firewall - Examples
14
"-j ACCEPT" allows a packet. "-j DROP" drops a packet. "-j REJECT" sends an appropriate notification to sender saying such and such packet was rejected (depends on protocol).
Some Basic examples:
* Drop all packets from 1.1.1.1 to 2.2.2.2 INPUT_CUST -s 1.1.1.1 -d 2.2.2.2 -j DROP
* Drop all traffic from 192.168.3.0/24 (entire subnet) except 192.168.3.11: INPUT_CUST -s 192.168.3.11/32 -j ACCEPT INPUT_CUST -s 192.168.3.0/24 -j DROP
* Drop tcp traffic from 172.31.1.1 on port 8000 (Stop overlay clients from using the overlay IP of 172.31.1.1 with port 8000).
INPUT_CUST -p tcp -s 172.31.1.1/32 --dport 8000 -m state --state NEW,ESTABLISHED -j DROP
INPUT_CUST -p tcp --sport 8000 -m state --state ESTABLISHED -j DROP
© 2016
VNS3 Firewall - NATing (network address translation)
15
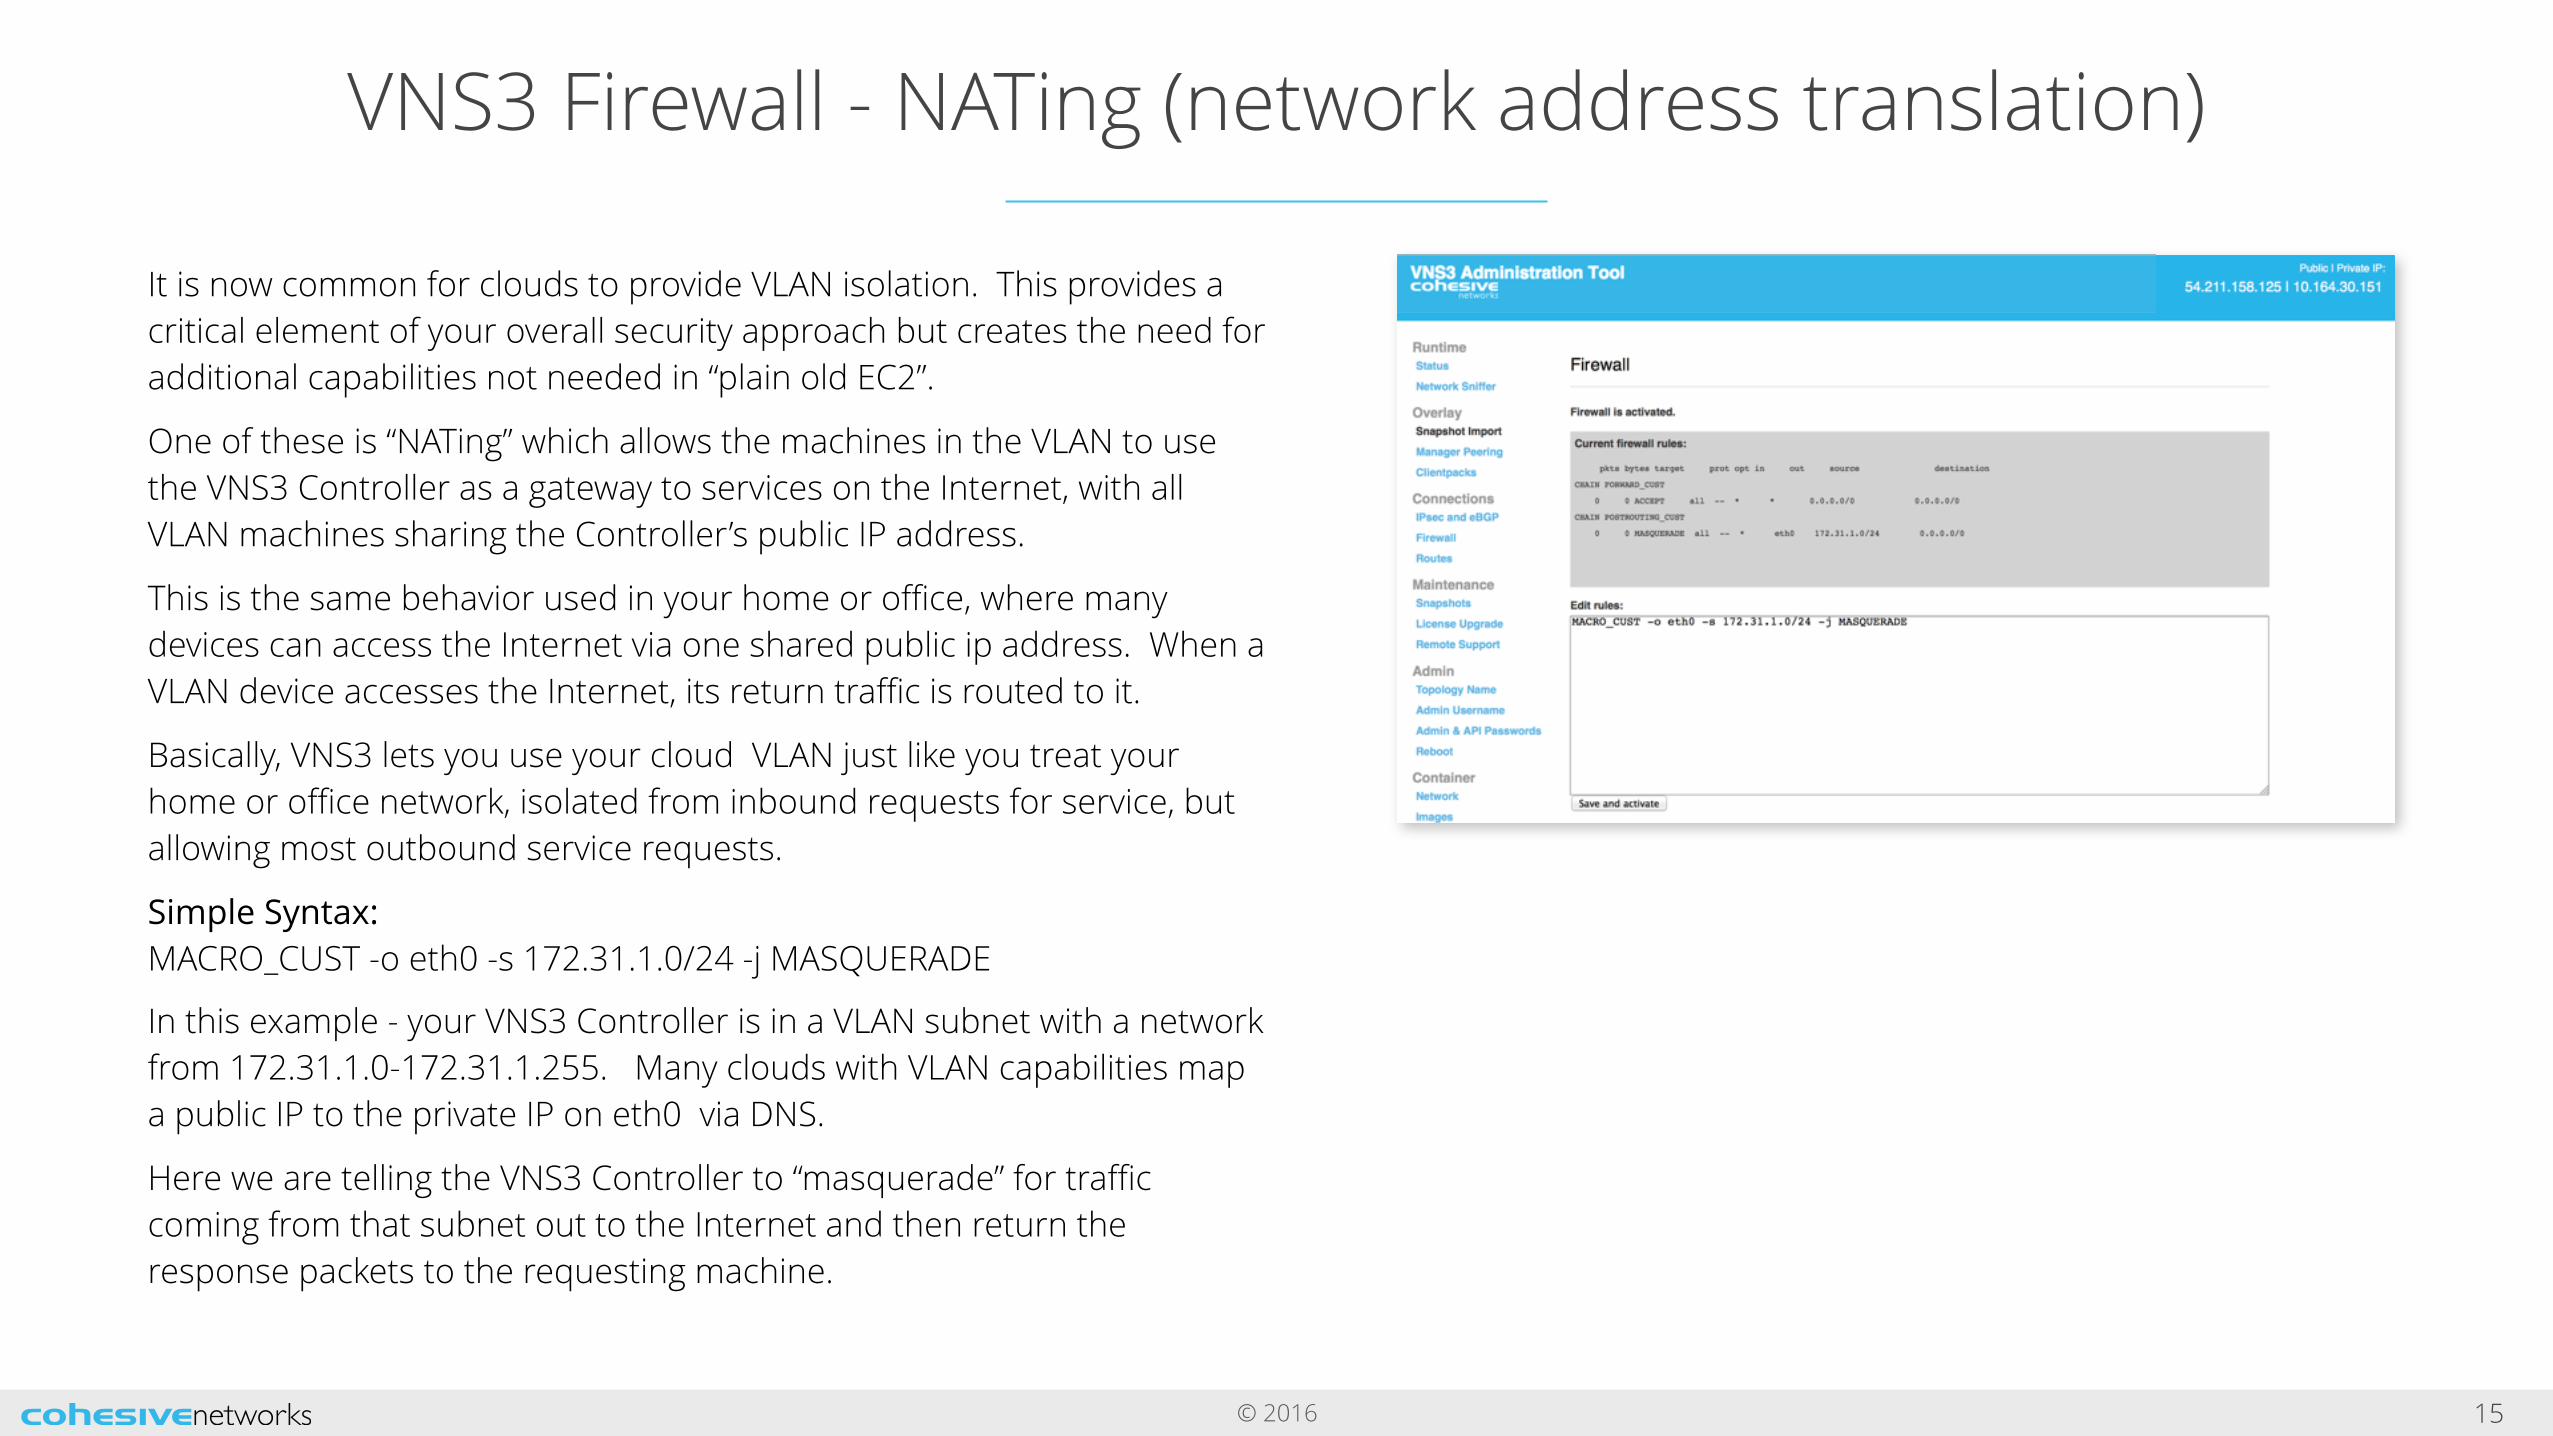
It is now common for clouds to provide VLAN isolation. This provides a critical element of your overall security approach but creates the need for additional capabilities not needed in “plain old EC2”.
One of these is “NATing” which allows the machines in the VLAN to use the VNS3 Controller as a gateway to services on the Internet, with all VLAN machines sharing the Controller’s public IP address.
This is the same behavior used in your home or office, where many devices can access the Internet via one shared public ip address. When a VLAN device accesses the Internet, its return traffic is routed to it.
Basically, VNS3 lets you use your cloud VLAN just like you treat your home or office network, isolated from inbound requests for service, but allowing most outbound service requests.
Simple Syntax: MACRO_CUST -o eth0 -s 172.31.1.0/24 -j MASQUERADE
In this example - your VNS3 Controller is in a VLAN subnet with a network from 172.31.1.0-172.31.1.255. Many clouds with VLAN capabilities map a public IP to the private IP on eth0 via DNS.
Here we are telling the VNS3 Controller to “masquerade” for traffic coming from that subnet out to the Internet and then return the response packets to the requesting machine.
© 2016
VNS3 Firewall - Port Forwarding
16
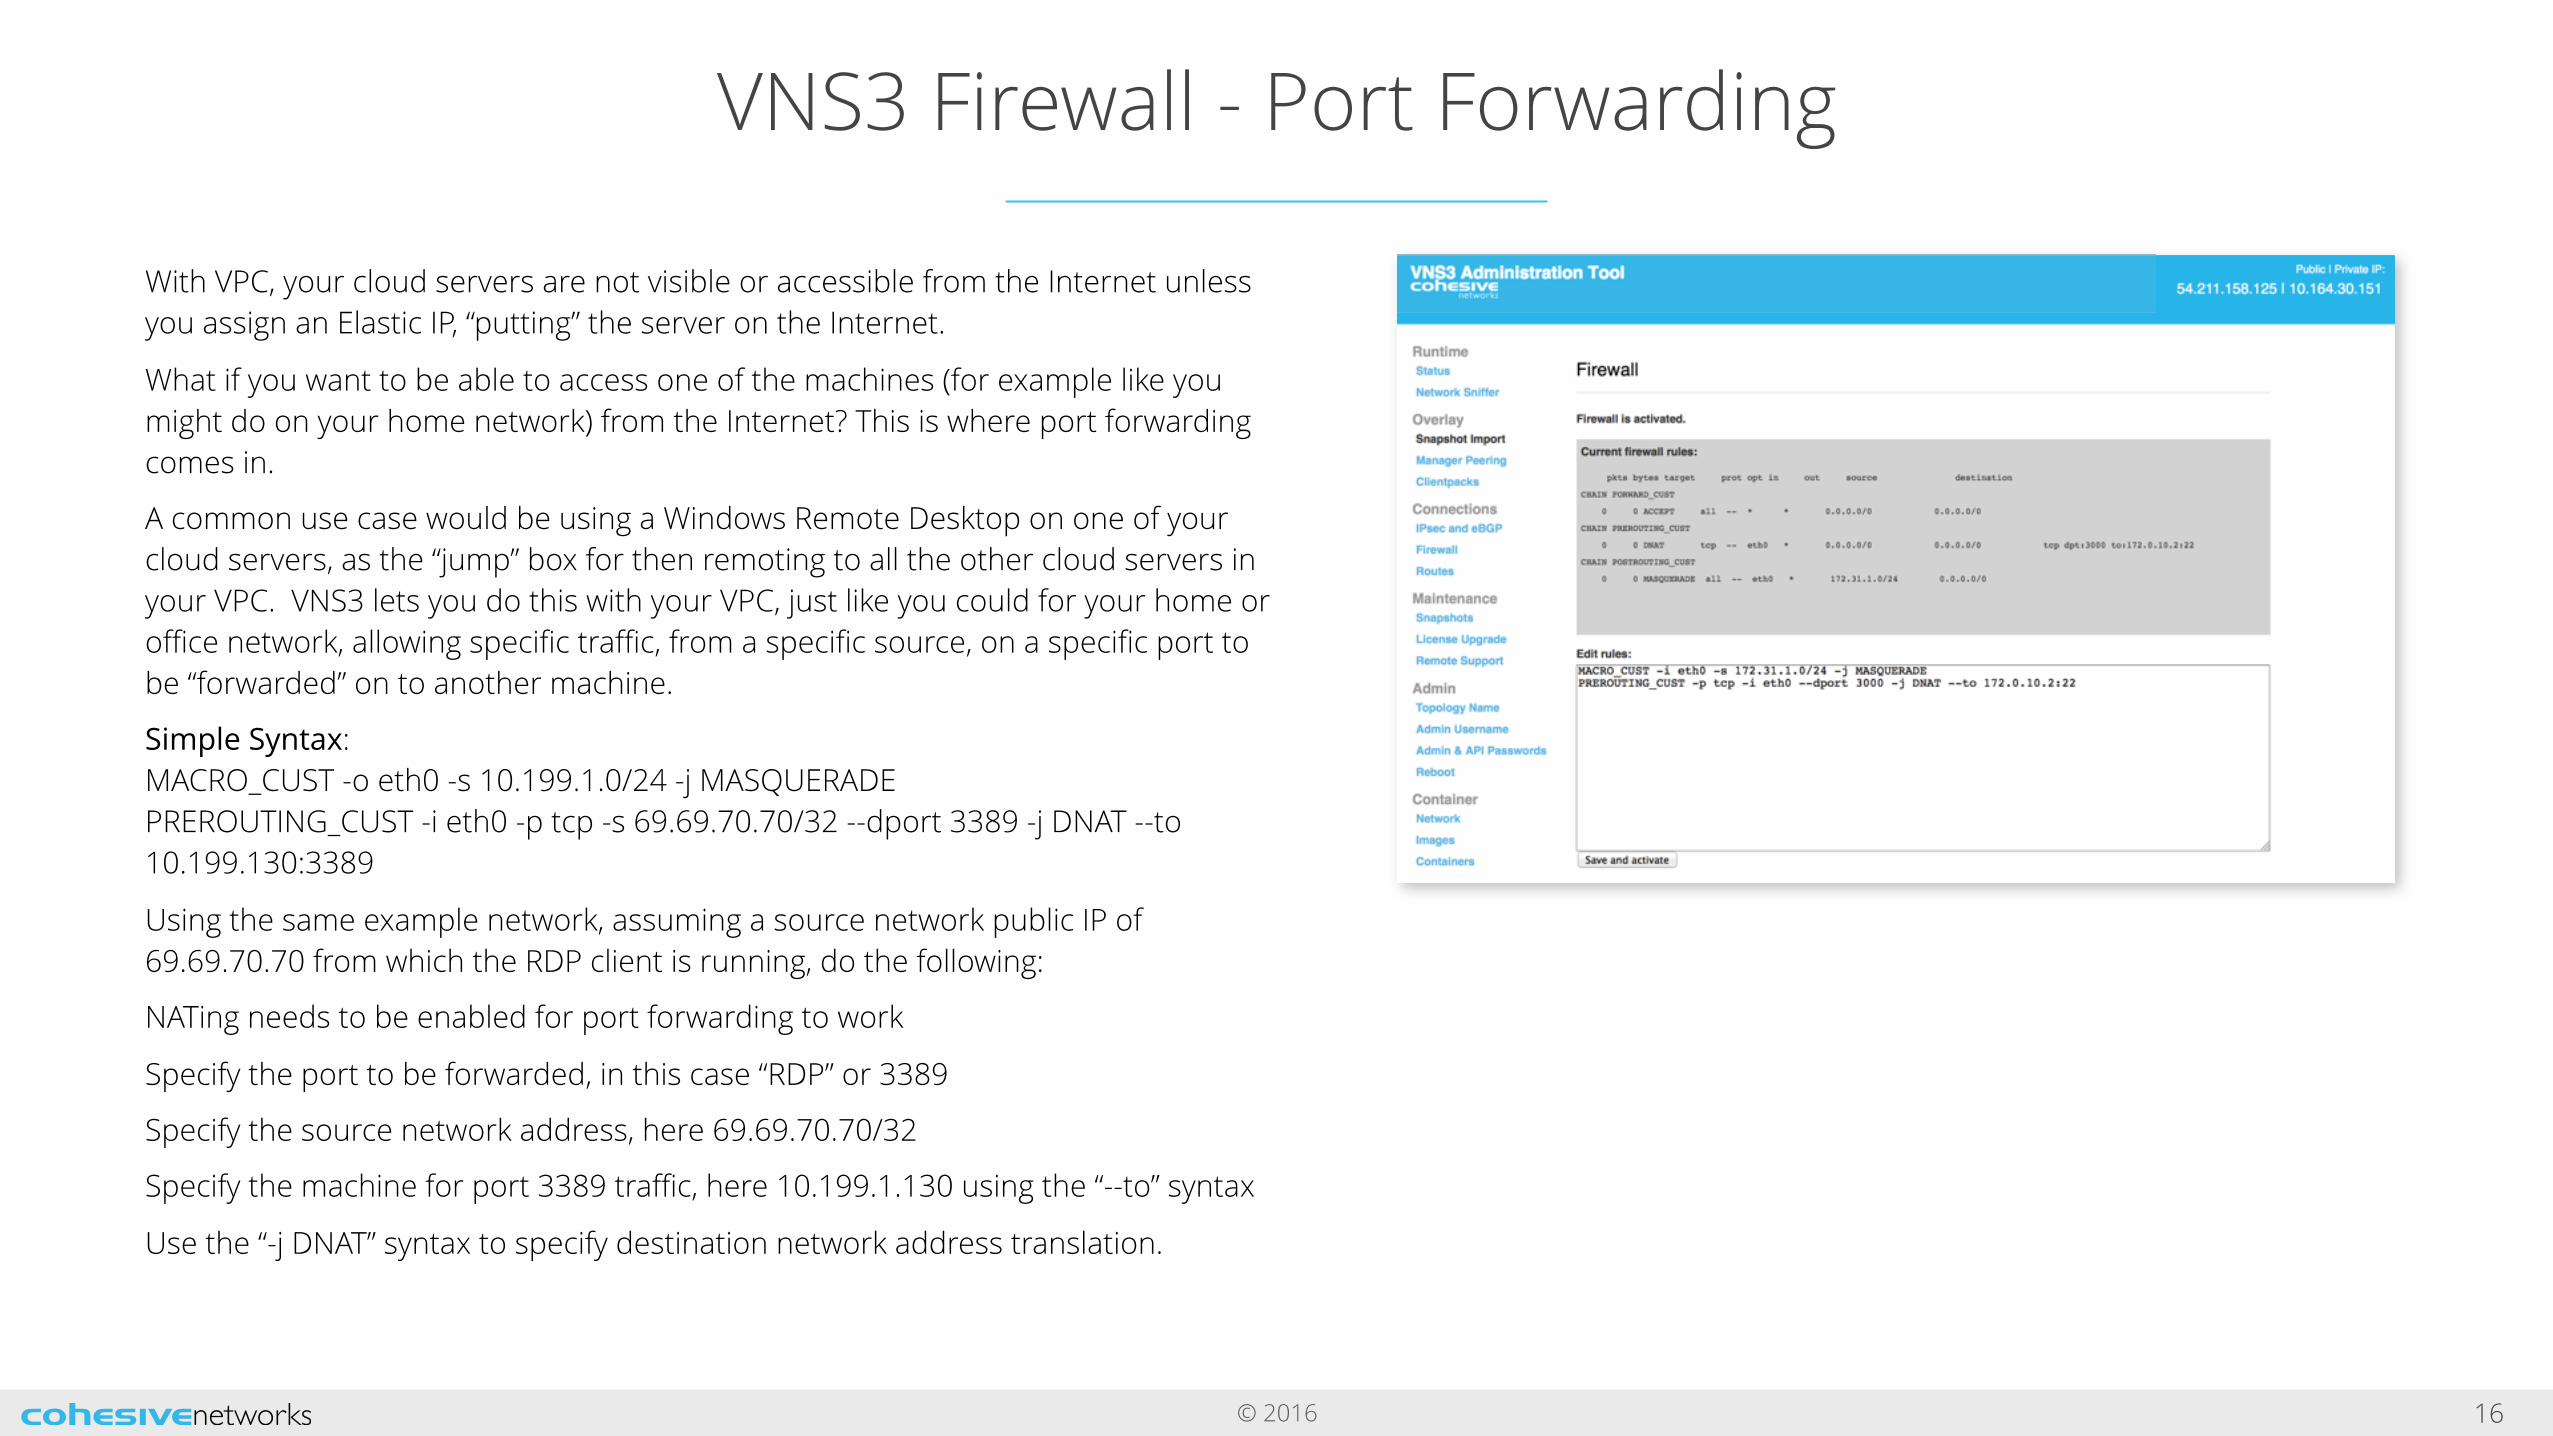
With VPC, your cloud servers are not visible or accessible from the Internet unless you assign an Elastic IP, “putting” the server on the Internet.
What if you want to be able to access one of the machines (for example like you might do on your home network) from the Internet? This is where port forwarding comes in.
A common use case would be using a Windows Remote Desktop on one of your cloud servers, as the “jump” box for then remoting to all the other cloud servers in your VPC. VNS3 lets you do this with your VPC, just like you could for your home or office network, allowing specific traffic, from a specific source, on a specific port to be “forwarded” on to another machine.
Simple Syntax: MACRO_CUST -o eth0 -s 10.199.1.0/24 -j MASQUERADEPREROUTING_CUST -i eth0 -p tcp -s 69.69.70.70/32 --dport 3389 -j DNAT --to 10.199.130:3389
Using the same example network, assuming a source network public IP of 69.69.70.70 from which the RDP client is running, do the following:
NATing needs to be enabled for port forwarding to work
Specify the port to be forwarded, in this case “RDP” or 3389
Specify the source network address, here 69.69.70.70/32
Specify the machine for port 3389 traffic, here 10.199.1.130 using the “--to” syntax
Use the “-j DNAT” syntax to specify destination network address translation.

© 2016
VNS3 Firewall - Netmapping
17
Netmapping allows you to create IPsec tunnels to imaginary IPs on the VNS3 side of the connection and use the VNS3 firewall to map all traffic to/from the imaginary IP, to the actual host on your cloud side. This is extremely useful in situations where a connecting party has an address overlap with your Overlay or VLAN subnet.
ExampleRemote subnet 10.10.10.0/24VNS3 Overlay (clientpack network): 172.31.10.0/24Local Server the Remote wants to access: 172.31.10.50Customer will not connect their LAN (10.10.10.0/24) to a private network Allocate an EIP to your account but DON'T associate: 23.23.23.23.Build an IPsec the tunnel from 23.23.23.23/32 to 10.10.10.0/24
Simple Syntax: PREROUTING_CUST -i eth0 -s 10.10.10.0/24 -d 23.23.23.23/32 -j NETMAP --to 172.31.10.50/32POSTROUTING_CUST -o eth0 -s 172.31.10.50/32 -d 10.10.10.0/24 -j NETMAP --to 23.23.23.23/32
If the Local Subnet is a VLAN and not the Overlay Subnet add the following forward rule: FORWARD_CUST -j ACCEPT

© 2016
VNS3 Firewall - Copy Traffic to a Device
18
With the addition of the Docker-powered application container system there are scenarios where you might want to push a copy of the traffic from the eth0 or tun0 VNS3 interface to a particular IP. The obvious use-case is copying traffic to the Cohesive Utilities Container where you can do things like run tcpdump or iftop.
Example:I want to copy all tun0 (Overlay Network) traffic to my Network Utils Container running on the VNS3 Controller on the Docker network at 172.0.10.2.
Simple Syntax: MACRO_CUST -j COPY —from tun0 —to172.0.10.2 —bidirectional

© 2016
VNS3 Firewall Warning
19
The VNS3 firewall allows customers complete control of the INPUT, OUTPUT, FORWARDING, PREROUTING and POSTROUTING behavior of traffic as it first enters the VNS3 Controller and as it exits the VNS3 Controller.
The VNS3 internal firewall is still there to “protect” the internal mechanisms of VNS3, however, customer rules can be created that have undesirable effects. Essentially rules that ACCEPT or REJECT/DROP all traffic are likely to create a device that is un-reachable or one that is too permissive in accepting traffic.
Customer rules are evaluated and if there is not a match in the _CUST chains, then they flow through into the interior VNS3 chains which are quite restrictive. Accepting all traffic prevents most of the interior rules from being evaluated which might block unsafe traffic. Blocking all traffic prevents most of the interior rules from being evaluated which accept necessary traffic such as the API and WebUI management utilities. (Blocking port 8000 from all traffic will make the VNS3 instance un-manageable.)
Do not have rules of either of the following forms:
INPUT_CUST --dport 8000 -j REJECT
INPUT_CUST -j REJECT
INPUT_CUST -j ACCEPT
© 2016
VNS3 Snapshots
20
© 2016
Runtime Snapshots save the Controller Configuration
21
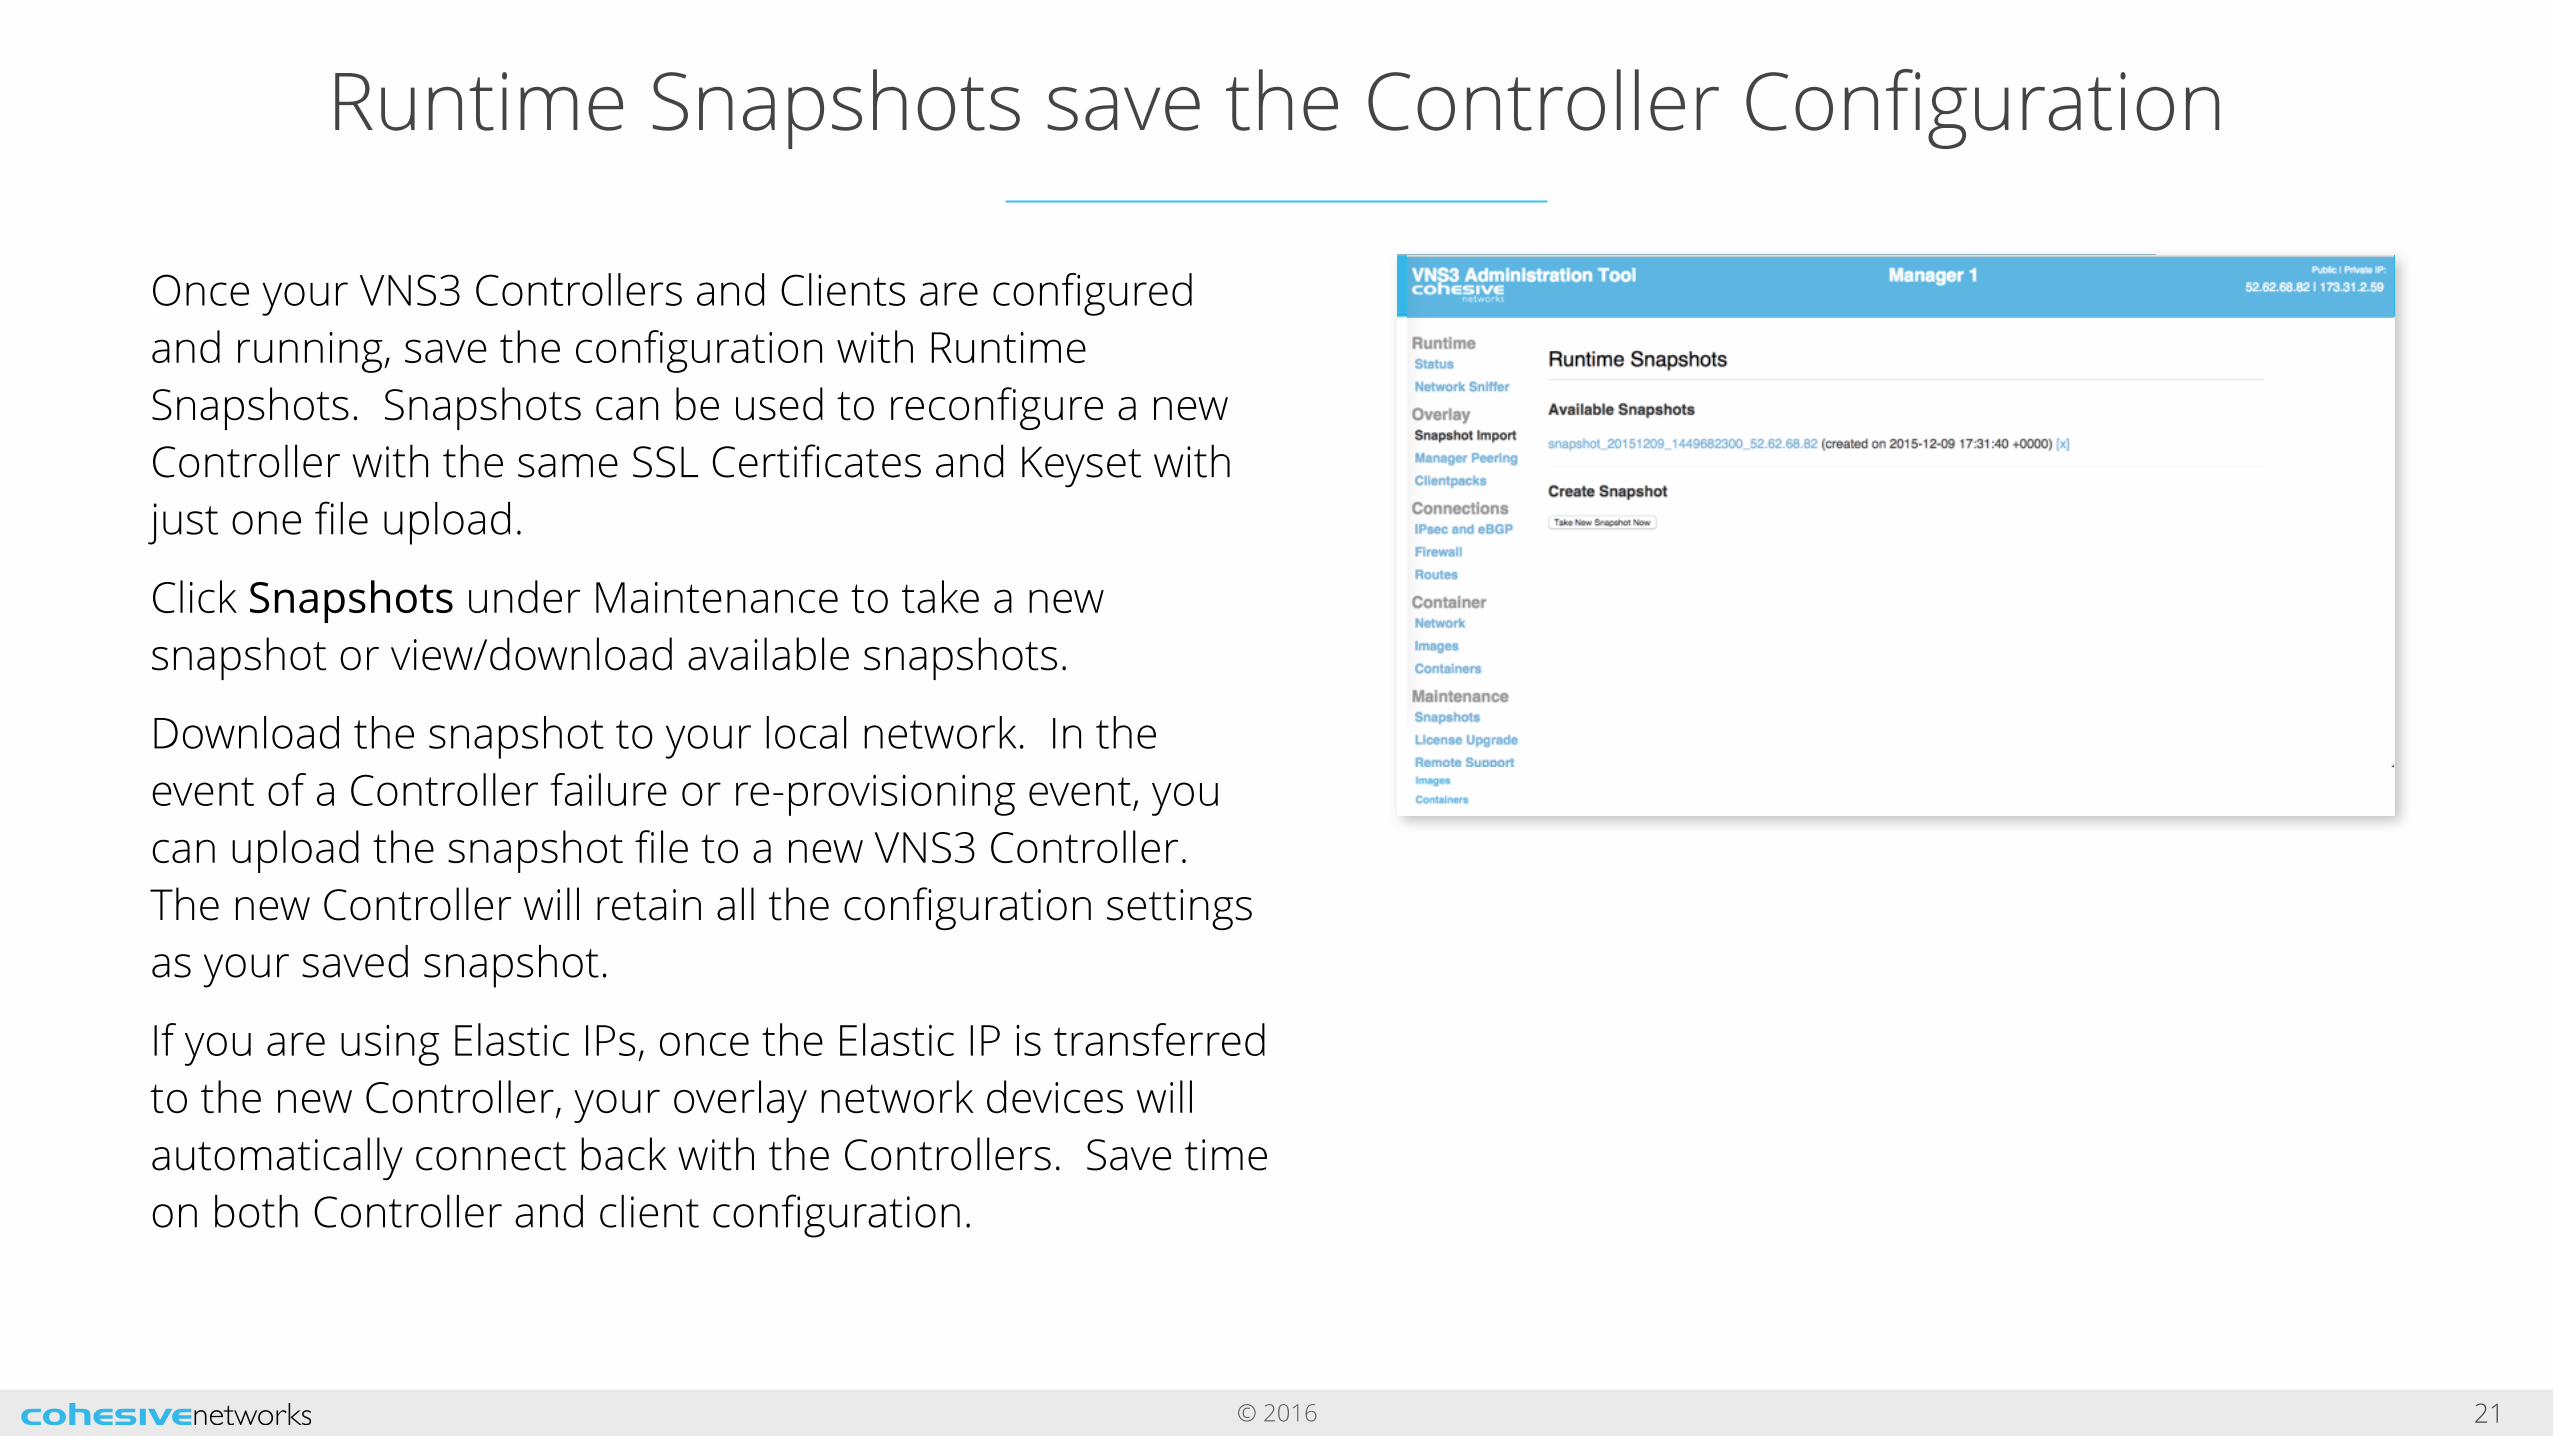
Once your VNS3 Controllers and Clients are configured and running, save the configuration with Runtime Snapshots. Snapshots can be used to reconfigure a new Controller with the same SSL Certificates and Keyset with just one file upload.
Click Snapshots under Maintenance to take a new snapshot or view/download available snapshots.
Download the snapshot to your local network. In the event of a Controller failure or re-provisioning event, you can upload the snapshot file to a new VNS3 Controller. The new Controller will retain all the configuration settings as your saved snapshot.
If you are using Elastic IPs, once the Elastic IP is transferred to the new Controller, your overlay network devices will automatically connect back with the Controllers. Save time on both Controller and client configuration.
© 2016
Save and Download a Snapshot
22
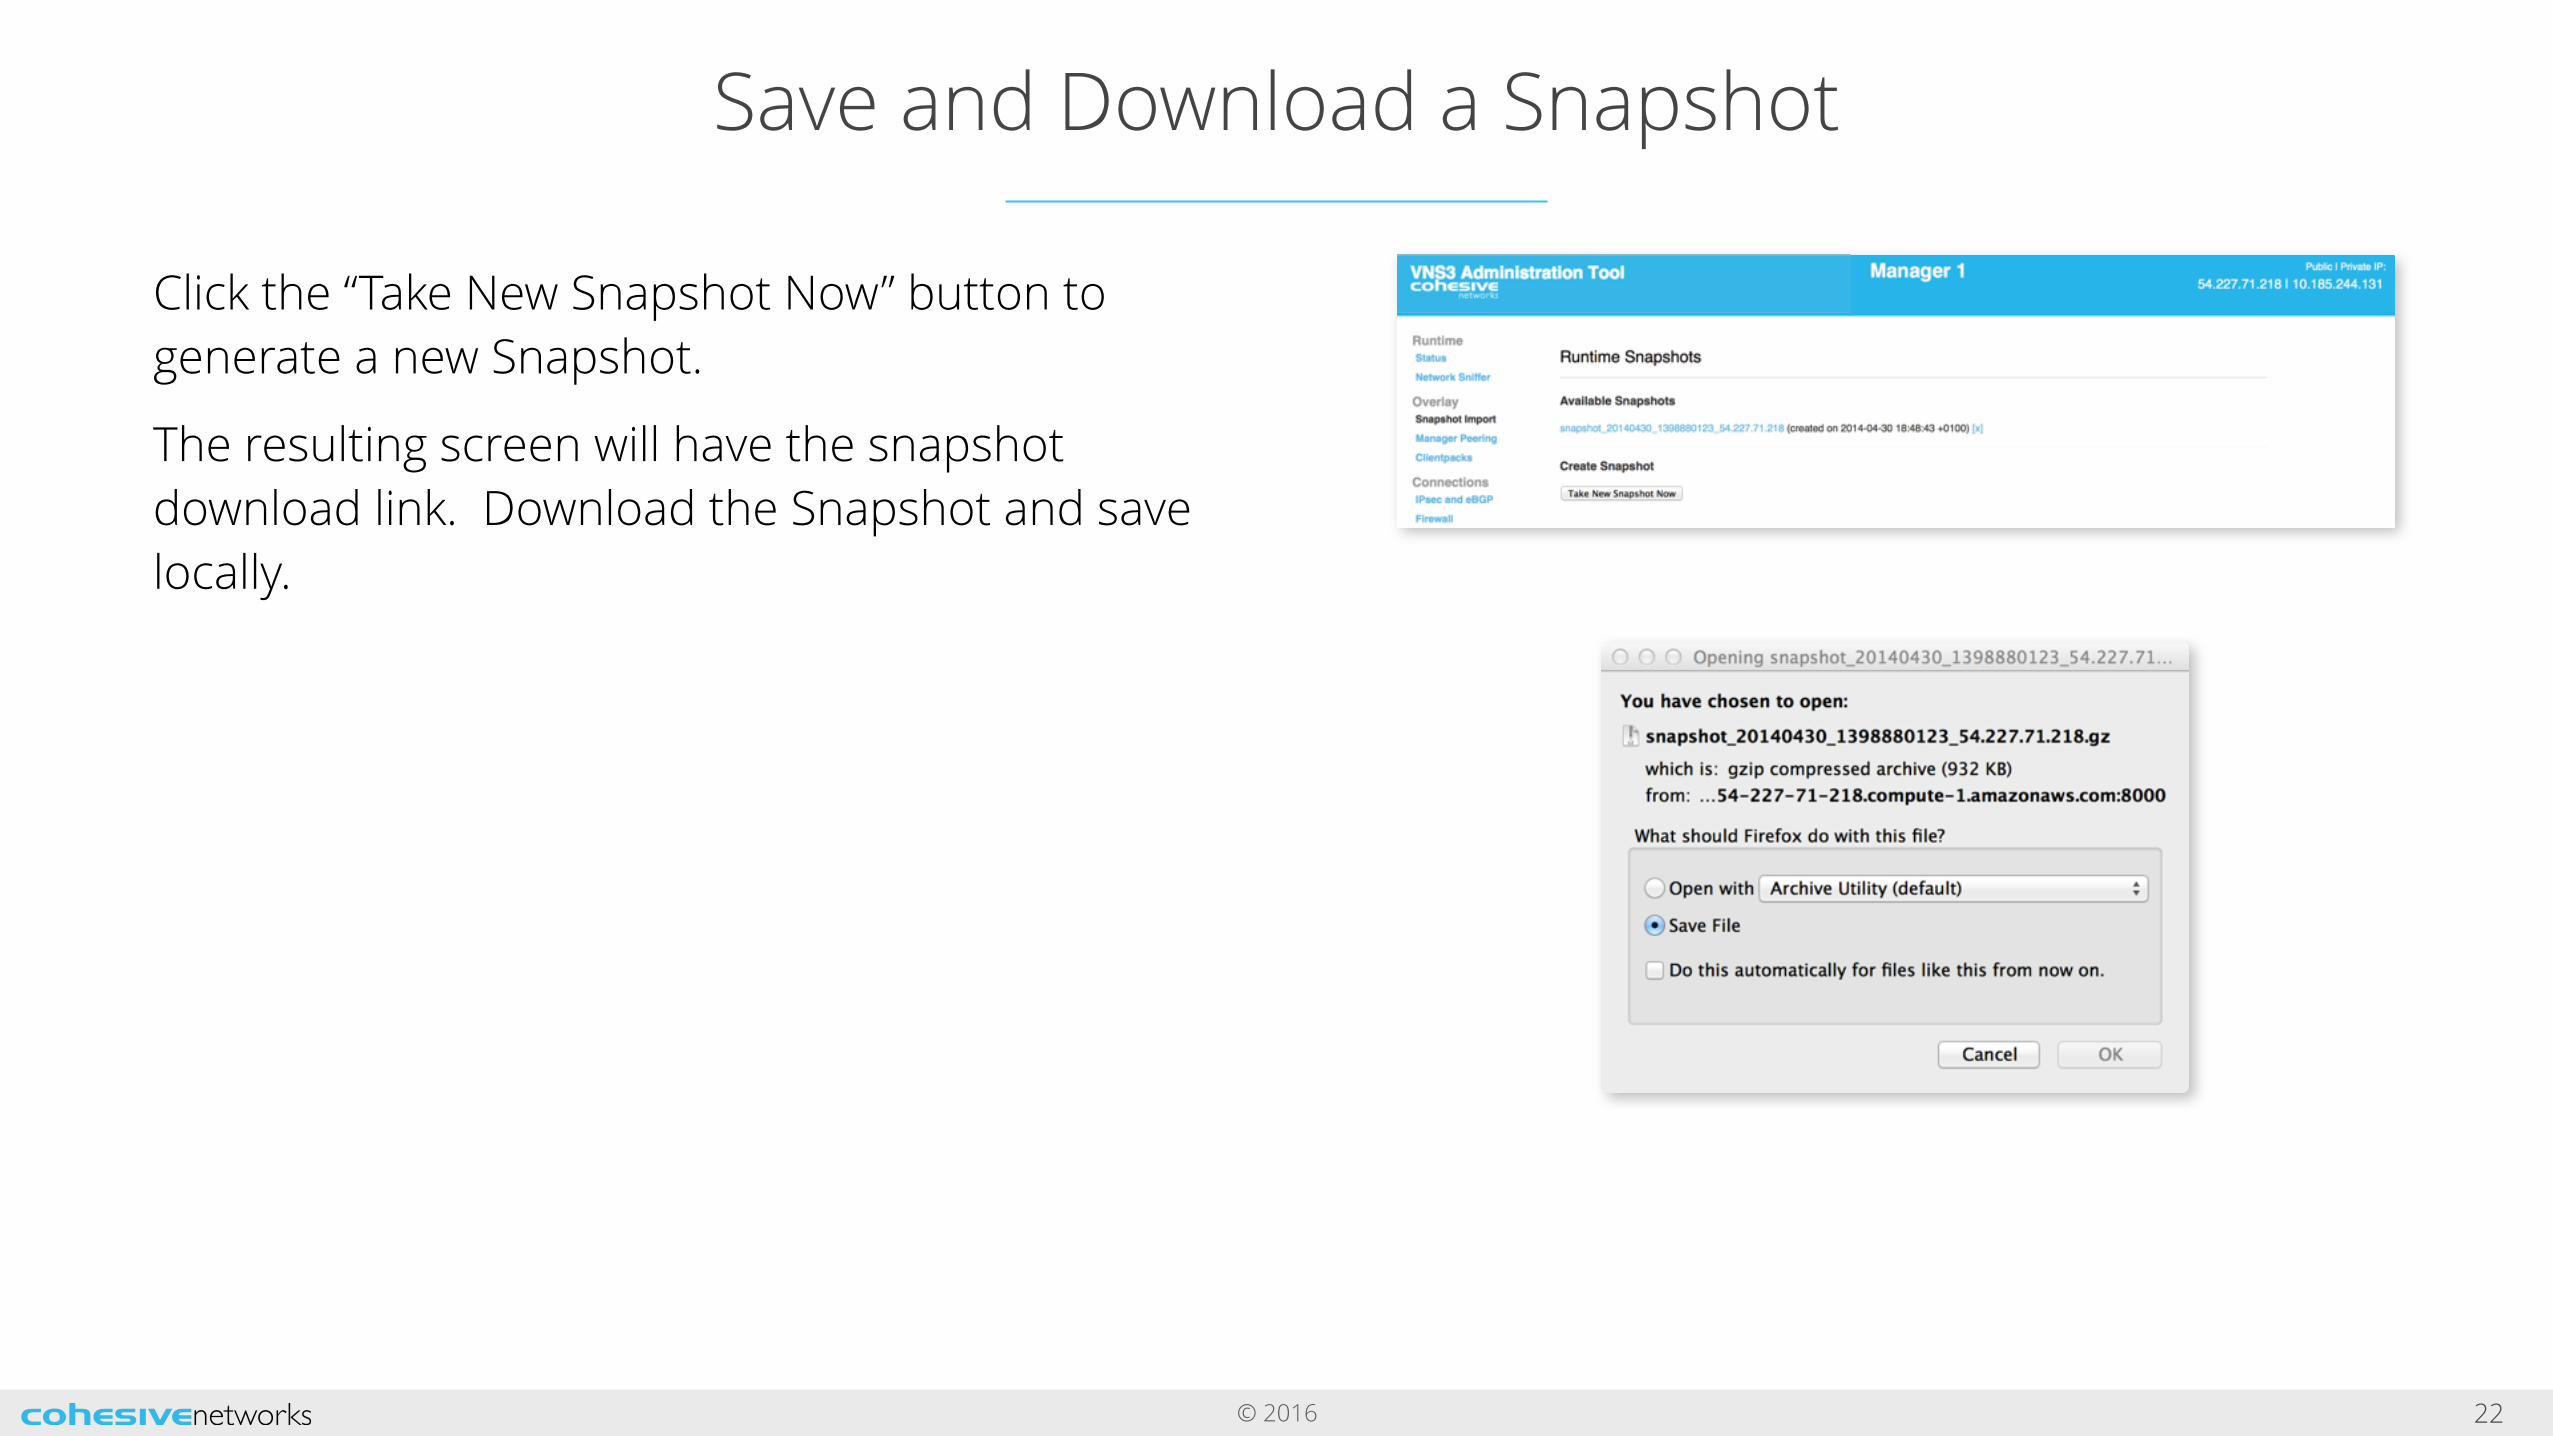
Click the “Take New Snapshot Now” button to generate a new Snapshot.
The resulting screen will have the snapshot download link. Download the Snapshot and save locally.

© 2016
Save and Download a Snapshot
23
To use a Snapshot to configure a Controller click the Import Runtime Snapshot link.
Browse for your saved Snapshot and upload. The Controller will reboot with the updated configuration. The same Clientpacks will be available in the Controller, so redistribution to each server on the virtual network is not necessary.
A slight configuration change on each server on the virtual network is necessary if you have not assigned Elastic IPs to your Controller. The OpenVPN configuration file (vnscubed.<conf ovpn>) on each server needs the new IP of the new Controller referenced in the remote commands section.
To automate this step, you can assign an Elastic IP (see AWS billing for rates) to the Controller and reference the Elastic IP in each server’s OpenVPN configuration file.

© 2016
Upgrade License
24

© 2016
Upgrading Licenses
25
To upgrade a license click on the “License Upgrade” link in the left column of the Web User Interface.
A license upgrade needs to be deployed to all of the Controllers of a peered VNS3 topology.
In order to upgrade you will need the upgrade keyset ID which is shown in bold in the image displayed here. Provide that license keyset to Cohesive Support and they will use it to generate your upgrade license.
In order to apply the new license click “Import a new license upgrade”, and paste the contents of the license you received, and click “Submit”.

© 2016
Confirming the successful license upgrade
26
Along with the license upgrade key you will have received with the key a “License Upgrade ID”.
After clicking “Submit” your License Upgrade ID is displayed on the user interface. It should be the same as the one you received with your license upgrade.
If your license upgrade requires any new data such as IP Addresses to use for new Clientpacks, there will be an opportunity to enter it on the screen, and then you “finalize” the upgrade by hitting “Submit again.
You will then see the contents of the license displayed, and should confirm that your new license contents has the parameters you expected.
In this example case the license upgrade added the ability to have 2 more remote endpoint definitions for use with IPsec tunnels. Looking at the previous picture you will see the total of “ipsec_max_endpoints” was 50, and after the upgrade is increased to 52.

© 2016
Other Routes
27

© 2016
Other Routes
28
VNS3 allows you to configure Interface Routes and Route Advertisements to allow the Controller to point to subnets not explicitly included in the IPsec or Overlay configurations. These routes are automatically shared between other Controllers included in the topology via the Peering mechanism.
Interface RouteThis is used to surface VLAN segments connected to the Controller via it’s virtual interfaces that you want to advertise with other VNS3 Controllers in a topology. This is useful when Controllers are Peered across regions or cloud providers.
Route Advertisement Used in situation where you know you have access to a subnet but you aren’t directly connected to that subnet. Example use-case is an AWS direct access connection.

© 2016
SNMP Support
29

© 2016
SNMP Support - Beta
30
VNS3 now supports a number of industry standard MIBs for use from a monitoring system doing SNMP polling. We do not currently support any SNMP traps.
VNS3 SNMP support is enabled through the firewall. In the future we will provide API calls and user interface to provide more control of the SNMP experience.
To enable access to the SNMP information add the following rule to your firewall using a source address from your network (either your public IP, or an internal IP available to the Controller via IPsec or Clientpack). There is no SNMP authentication in this beta. An example rule would be “INPUT_CUST -p udp -s 69.69.70.70/32 --dport snmp -j ACCEPT” (where 69.69.70.70 is your network’s public IP address).
On your SNMP monitoring system:
- Use SNMP v1c or v2 - Community string of “vns3public”- The access to the SNMP information is “read only”
You should then be able to use a utility like “snmpwalk” to test:snmpwalk -v 1 -c vns3public -O e <vns3_manager_public_ip>
In order to discuss additional MIBs needed please contact your Cohesive account representative or support (at) cohesive.net
snmpwalk -v 1 -c vns3public -O e <vns3_manager_public_ip> SNMPv2-MIB::sysDescr.0 = STRING: Linux vpncubed 2.6.32-344-ec2 #46-Ubuntu SMP Wed Mar 7 13:47:05 UTC 2012 x86_64 SNMPv2-MIB::sysObjectID.0 = OID: NET-SNMP-MIB::netSnmpAgentOIDs.10 DISMAN-EVENT-MIB::sysUpTimeInstance = Timeticks: (1651090) 4:35:10.90 SNMPv2-MIB::sysContact.0 = STRING: [email protected] SNMPv2-MIB::sysName.0 = STRING: VNS3 version 3.0100.7-20130322173305 SNMPv2-MIB::sysLocation.0 = STRING: VNS3 Cloud Container
Example of response from “snmpwalk”
© 2016
Reset Factory Defaults
31

© 2016
Reset Factory Defaults
32
Increasingly there is a separation of duties between staff that can start/stop/reboot/terminate cloud instances and staff that configures and administers the VNS3 Controller device.
Reset Factory Defaults removes all configurations, licensing and settings on a particular VNS3 Controller instance. The only configuration parameter that will remain is the username and password (both UI and API) set on the Controller instance at the time of the reset operation.
To Reset Factory Defaults navigate to https://<managerIP>:8000/reset_defaults. This URL is not linked anywhere in the UI to eliminate the possibility of accidentally resetting a production server.
On the resulting page enter the code displayed to validate the reset and click Reset.
After Reboot, the Controller is reset and you can choose how to configure starting with Initialization.

© 2016
VNS3 Document Links
33
VNS3 Product Resources - Documentation | Add-ons
VNS3 Configuration Document Instructions and screenshots for configuring a VNS3 Controller in a single or multiple Controller topology. Specific steps include, initializing a new Controller, generating clientpack keys, setting up peering, building IPsec tunnels, and connecting client servers to the Overlay Network.
VNS3 Docker InstructionsExplains the value of the VNS3 3.5 Docker integration and covers uploading, allocating and exporting application containers.
VNS3 Troubleshooting Troubleshooting document that provides explanation issues that are more commonly experienced with VNS3.