
CMS2000 Network Surveillance Client User Manual - … Microsoft Word - CMS2000 Network Surveillance...
18
Transcript of CMS2000 Network Surveillance Client User Manual - … Microsoft Word - CMS2000 Network Surveillance...
CMS2000 Network Surveillance Client User Manual
CMS2000 Network Surveillance ClientUser Manual
CMS2000 Network Surveillance Client User Manual
Index1. WELCOME TO CMS2000.................................................................................... 4
1.1 Overview ....................................................................................................................................................4
1.2 Computer Disposition Request ................................................................................................................4
2. LOGIN .................................................................................................................. 5
3. DEVICE MANAGEMENT ..................................................................................... 7
4.1 Add Device .................................................................................................................................................7
4.2 Group Configuration ................................................................................................................................94.2.1. Group .................................................................................................................................................94.2.2. Channel ...........................................................................................................................................10
4. PREVIEW............................................................................................................11
5.1. Start and Stop Preview............................................................................................................................12
5.2. Start and Stop Audio Preview ................................................................................................................12
5.3. Recording & Capture .............................................................................................................................13
5.4. Alarm Output Control ............................................................................................................................13
5.5. PTZ Control.............................................................................................................................................135.6.1. Direction Control.............................................................................................................................135.6.2. Preset...............................................................................................................................................145.6.3. Cruise...............................................................................................................................................14
5.6. Video Parameters Configuration ...........................................................................................................14
5. PLAYBACK AND DOWNLOAD......................................................................... 15
6.1. Remote VOD............................................................................................................................................156.1.1. Remote VOD Query.......................................................................................................................166.1.2. Playback Control ............................................................................................................................16
6.2. Download .................................................................................................................................................16
6.3. Local Playback ........................................................................................................................................17

CMS2000 Network Surveillance Client User Manual
6. REMOTE CONFIGURATION ............................................................................. 18

CMS2000 Network Surveillance Client User Manual
1.Welcome to CMS2000
1.1 Overview CMS2000 is the application specially developed for embedded DVR. It is applicable to DVR, NVR,
IP Camera, and Hybrid DVR. There may be technical inaccuracies, or typographical errors in the
manual. The contents including description of products and program will be updated without
notice.
1.2 Computer Disposition Request Operating System: Microsoft Windows XP or versions above.
CPU: Intel Pentium IV 2.4 GHz or models above.
RAM: 1G or above.
Display: 1024×768 resolution or above.

CMS2000 Network Surveillance Client User Manual
2. Login
2.1 Enable password and loginBy default, CMS2000 doesn’t enable password, so you don’t need to input your user name and password to login. For security reason, we recommend you to enable and modify the password.To enable the password, you should:
Step1 Click to enter the configure mode, and then click .
Step2 Select to enable password.The default password is “12345”
Step3 Exit CMS2000 and run it again, the login dialog box will pop up. Input user name and password, then click “Login” to start using the client software. In this dialog box, you can enable auto login.
Step4 If you want to disable auto-login, you should go to local settings dialog to disable it.
2.2 Modify the passwordBy default, the password is “12345”. For security reason, we recommend you to change your

CMS2000 Network Surveillance Client User Manual
password. To change your password, you should Click to enter the configure mode,
and then click to change your password.
CMS2000 Network Surveillance Client User Manual
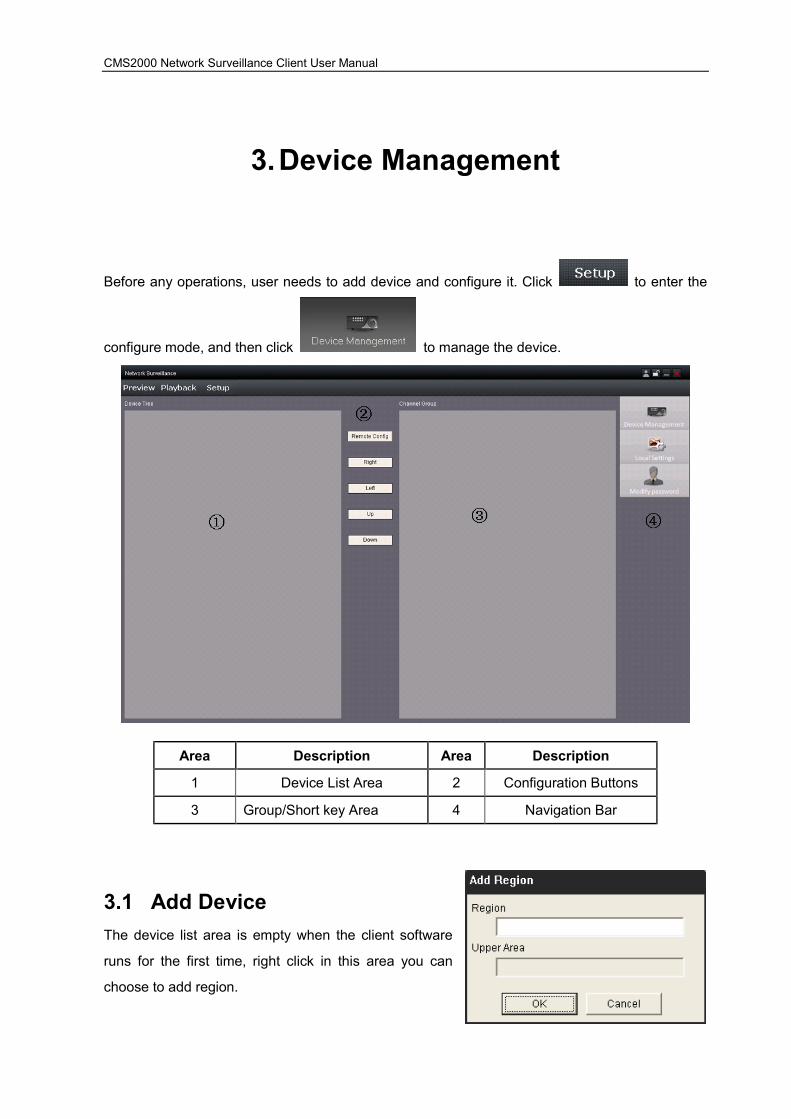
3.Device Management
Before any operations, user needs to add device and configure it. Click to enter the
configure mode, and then click to manage the device.
Area Description Area Description
1 Device List Area 2 Configuration Buttons
3 Group/Short key Area 4 Navigation Bar
3.1 Add DeviceThe device list area is empty when the client software
runs for the first time, right click in this area you can
choose to add region.

CMS2000 Network Surveillance Client User Manual
Input a name in the blank of Area Name; if there
is no upper area, the blank of Upper Area Name
is not enabled. After area added, right click the
area name and the sub menu will pop up, �
shown as figure below. Select “Add Area”, you
can add sub area, select “Delete Nod”, you can
delete the area.
Right click the area and select “Add Device”; the sub menu will pop up. Fill in these fields and Click
OK to finish adding device.
Options Description
Device Name User defined
Register Mode IP Address, Domain Name
IP/Domain Name IP address or domain name of the device
User Name User name of the device (default: admin)

CMS2000 Network Surveillance Client User Manual
Password Password of the device (default: 12345)
Network Type WAN or LAN
Port Device port (default:9000)
After you add a device successfully, the device list area will add an item for this device.
Note: 64 devices can be added here at most.
3.2 Group Configuration
Click the button to enter group area management window
3.2.1. GroupIf there is not any nod in this area, then first you need
to add group. Right click in the empty area and you
will see sub menu as shown on the right. Select “Add
Group”.

CMS2000 Network Surveillance Client User Manual
Input the group name and click “OK”.
Right click the group name and you can select to delete
or modify the selected group.
3.2.2. ChannelAfter adding the group, the channels in the list area can be moved to selected group.
Select the channel from the list area, and click key and move it to the group. The
type of channel name in the group area is as “region name_device name_channel name of the
device list area”.
Select the device in the device list area and click key and all the channels of the
device can be moved to the selected group.
Using and keys to adjust the channel sequence in the group list.
Using key to delete the channel or group in the group area

CMS2000 Network Surveillance Client User Manual
4.Preview
After configuring the device, click the key to return to the preview interface. Click
the “Device” and “Group” keys to switch between two modes. Play windows support up to 25
window divisions.
Area Description
1 Device list 2 PTZ control
3 Preview Panel 4 Alarm information output
5 Video play windows
Preview Panel Buttons Descriptions:
Area Description Area Description
Play Record
Capture Window division
CMS2000 Network Surveillance Client User Manual
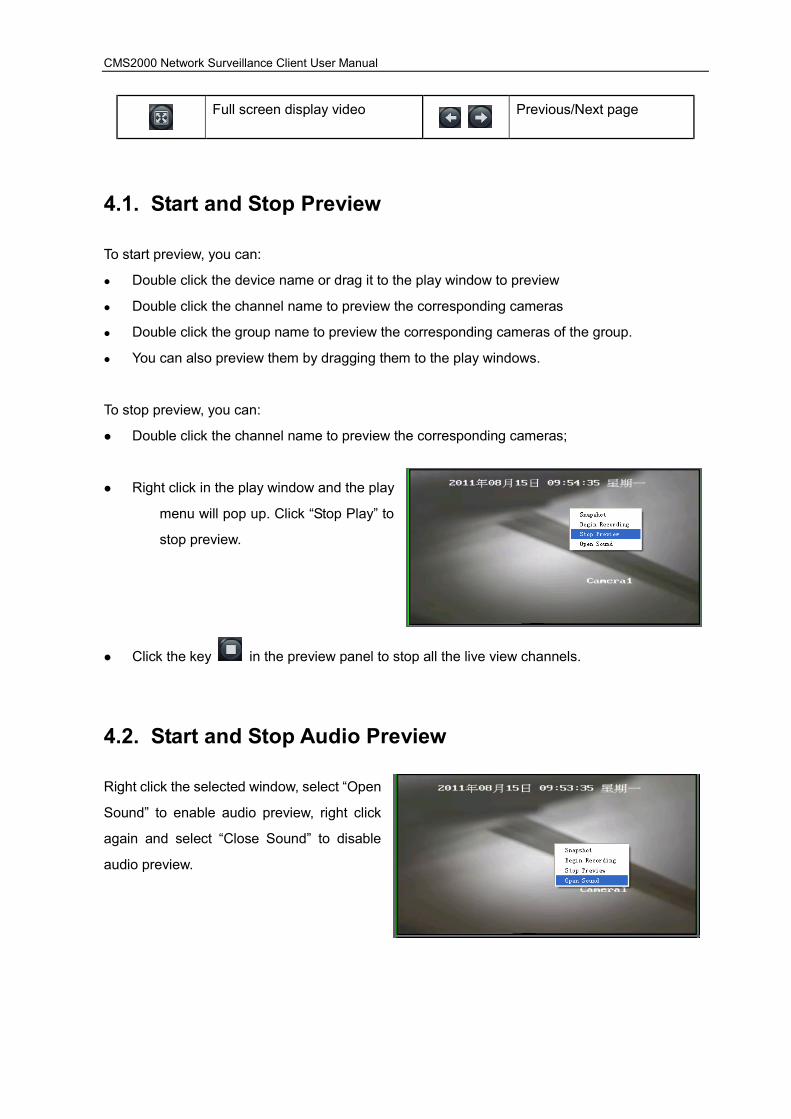
Full screen display video Previous/Next page
4.1. Start and Stop Preview
To start preview, you can:
� Double click the device name or drag it to the play window to preview
� Double click the channel name to preview the corresponding cameras
� Double click the group name to preview the corresponding cameras of the group.
� You can also preview them by dragging them to the play windows.
To stop preview, you can:
� Double click the channel name to preview the corresponding cameras;
� Right click in the play window and the play
menu will pop up. Click “Stop Play” to
stop preview.
� Click the key in the preview panel to stop all the live view channels.
4.2. Start and Stop Audio Preview
Right click the selected window, select “Open
Sound” to enable audio preview, right click
again and select “Close Sound” to disable
audio preview.

CMS2000 Network Surveillance Client User Manual
4.3. Recording & Capture
When previewing, click key to start recording, and the icon becomes as . The channel
icon becomes as . Re-click to stop recording. The recorded files are saved in C:\ RecordFile.
When previewing, click key to start capture. By default, recorded files are saved in C:\Capture.
You can modify the directory in Setup -> Local Settings. -> .
4.4. Alarm Output Control
Right click the device name and the sub menu will
pop up. Select “Arm” or “Disarm” to turn on or off
detection of alarm information from devices.
The icon of is used to clear all the alarm output information.
4.5. PTZ Control
4.5.1. Direction Control
There are 8 keys to control PTZ directions, and the active bar to
change PTZ speed, which is adjustable from 1 to 7, and default
speed is 4.
Click key to start auto scan.
CMS2000 Network Surveillance Client User Manual
4.5.2. Preset
Click the key on the PTZ control panel and enter preset edit window. Select one play
window and you can add, delete and call the preset of this channel.
4.5.3. Cruise
Click the key on the PTZ control panel and enter cruise edit window. Select one play
window and you can start, stop and edit the cruise path of this channel.
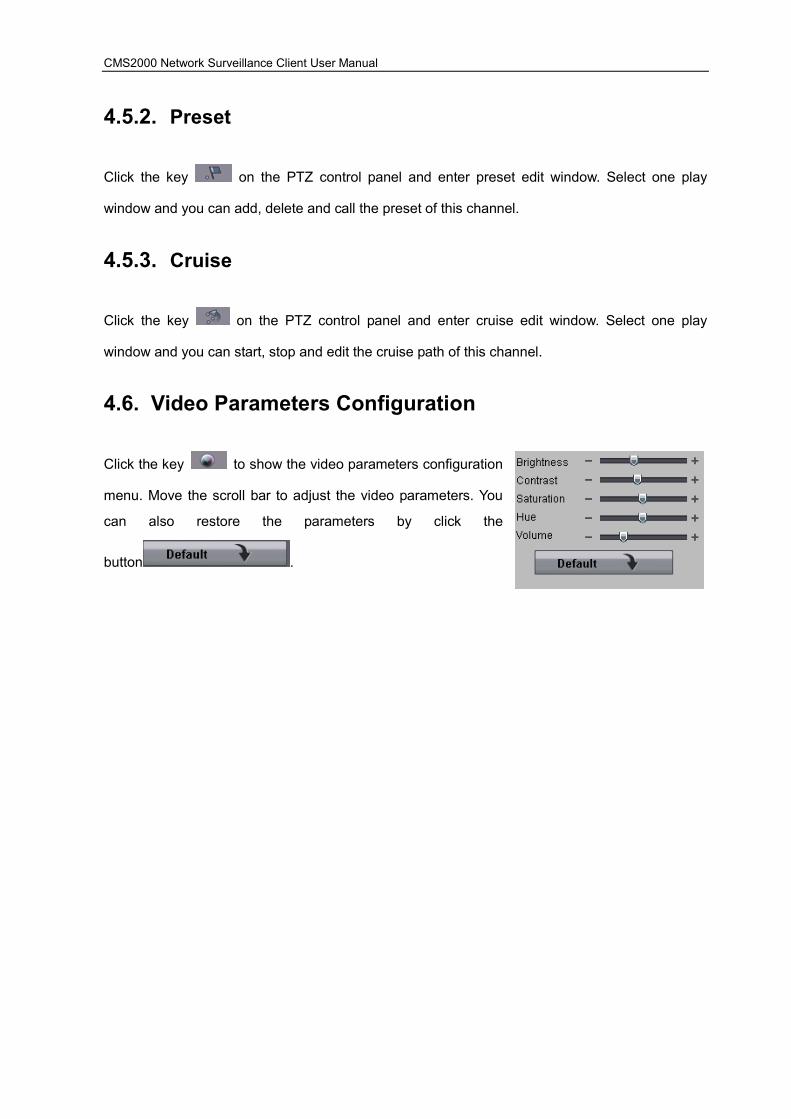
4.6. Video Parameters Configuration
Click the key to show the video parameters configuration
menu. Move the scroll bar to adjust the video parameters. You
can also restore the parameters by click the
button .
CMS2000 Network Surveillance Client User Manual
5.Playback and Download
There are 2 options for playback, one is local playback and the other is remote VOD, which can be
chosen by clicking key .
� Local Playback: Searching the recorded files from hard disk of PC.
� Remote VOD: Searching the recorded files from hard disk of DVR or storage server.
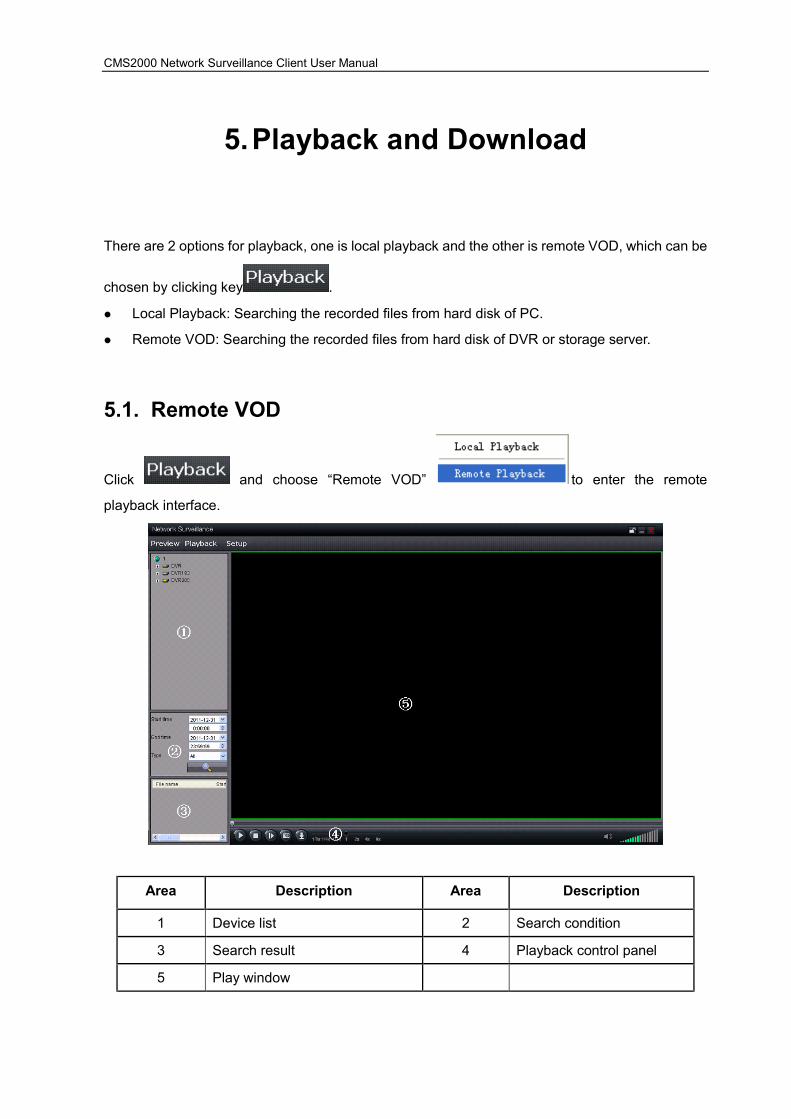
5.1. Remote VOD
Click and choose “Remote VOD” to enter the remote
playback interface.
Area Description Area Description
1 Device list 2 Search condition
3 Search result 4 Playback control panel
5 Play window

CMS2000 Network Surveillance Client User Manual
5.1.1. Remote VOD Query
Step1 Select the playback channel and window.
Step2 Select recorded files type and query time.
Step3 Click key to search the matched recorded files, if there are, the files will
shows in the area 3.
Step4 Select a file from area 3, and click key to start playback.
5.1.2. Playback Control
When playback has succeeded, you can control the playback:
1) Play / Pause.
2) Stop.
3) Single frame forward.
4) Snap shot.
5) Download the recording file. The default directory for the downloaded file is C:\
DownloadFile. You can modify the directory in Setup -> Local Settings page.
6) Playback speed control.
7) Play position scroll bar.
8) Mute / Unmute.
9) Volume control.
5.2. DownloadStep1 Select the playback channel and window.
Step2 Select recorded files type and query time.
Step3 Click key to search the matched recorded files, if there are, the files will
shows in the area 3.
Step4 Select a file from area 3, and click key to download this file. By default, the recording

CMS2000 Network Surveillance Client User Manual
file is saved as the format of .h264, if you want to convert it to AVI format automatically, you
can go to -> and enable the transformation. Then recording file will be converted to AVI format automatically when you download it.
5.3. Local Playback
Click and choose “Local Playback” to enter the playback
interface. The operation of local playback is the same with that of remote playback.
CMS2000 Network Surveillance Client User Manual
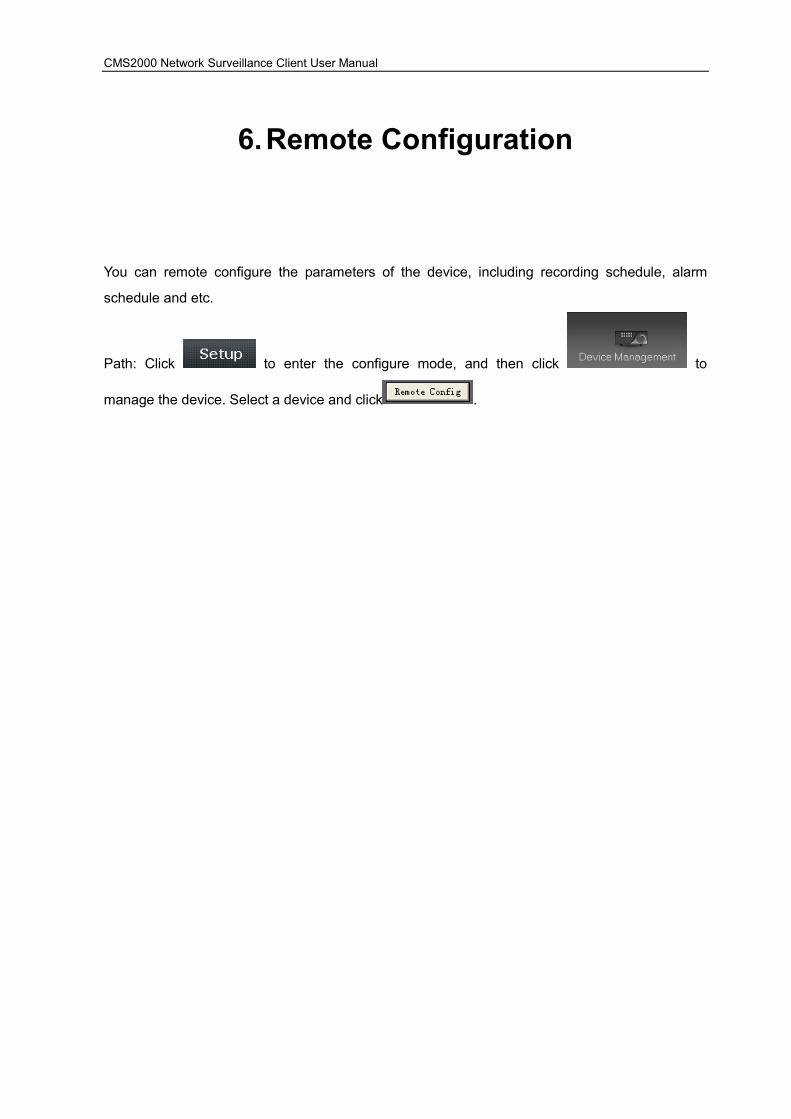
6.Remote Configuration
You can remote configure the parameters of the device, including recording schedule, alarm
schedule and etc.
Path: Click to enter the configure mode, and then click to
manage the device. Select a device and click .


