
CMA Game Manual 1
198
Combat Mission: Afghanistan Game Manual (c) 2009-2010 battlefront.com, inc. all rights reserved. v1.00
-
Upload
graeme-matier -
Category
Documents
-
view
224 -
download
0
Transcript of CMA Game Manual 1

7/28/2019 CMA Game Manual 1
http://slidepdf.com/reader/full/cma-game-manual-1 1/197
Afghanistan 1
Combat Mission: Afghanistan
Game Manual
(c) 2009-2010 battlefront.com, inc.all rights reserved. v1.00

7/28/2019 CMA Game Manual 1
http://slidepdf.com/reader/full/cma-game-manual-1 2/197

7/28/2019 CMA Game Manual 1
http://slidepdf.com/reader/full/cma-game-manual-1 3/197
Afghanistan 3
Introduction
Welcome to Combat Mission: Afghanistan – a new game in
the Combat Mission series. Built on the Combat MissionShock Force game engine, this game will transfer you aquarter of the century into the past – to the battlefieldsof the bloodiest war of the Soviet Union since the end of World War II.
Like Combat Mission Shock Force, the Afghanistan gamesimulates asymmetric conflict. All through 10 years of the war, the Soviets had vastly superior weapons andfirepower – yet their opponents have managed to playby their own rules. The 40th Afghanistan armies only keptcontrol of the areas directly deployed to. Illicit mujahidinfighters attacked again and again, satisfied with evensmall victories, then disappearing among the generalpopulation. Such unique battle tactics make game sce-nario design difficult, but the game’s flexible scoringsystem allows us to realistically portray each side’s in-
tentions.
During game development, we have studied a great deal of memoirs and historic documents. Most of the scenariosare based on real events described in tactical manualsissued by the Soviet Defence Ministry. In building sce-nario maps, we used air reconnaissance photographs andSoviet military topographical maps for Afghanistan. TheTable Of Organization and Equipment (TO&E) was based
on historical documents of the 40th army. However,sometimes we had to compromise in certain aspects of map scaling and campaign development because, afterall, this is a game and not a strict historical documen-tary. And while our scenarios and campaigns reflect theinvolvement of the Soviet Army in the conflict, the game’stimeline covers the entire period of the Democratic Re-public of Afghanistan (DRA), from the April Revolution
in 1978 until the fall of the Najibullah government inMarch 1992.
The Soviet War in Afghanistan featured only few large scalebattles and operations. Its history is a story of platoons,companies and battalions, day after day performing theirtough duties, clearing villages and guerrilla hideouts,

7/28/2019 CMA Game Manual 1
http://slidepdf.com/reader/full/cma-game-manual-1 4/197
4 Combat Mission
protecting transport convoys and ambushing enemycaravans. The war heroes are not the power-hungrygenerals but the solders and commanders on the battle-field. This game is dedicated to all the people who losttheir lives in that war.

7/28/2019 CMA Game Manual 1
http://slidepdf.com/reader/full/cma-game-manual-1 5/197
Afghanistan 5
Table of contentsLicense ..................................... 2Limited warranty ........................ 2
Limitation of liability ................... 2Introduction .............................. 3
Table of contents ....................... 5
CM:A Background ...................... 8History of the conflict .................... 8
Republic of Afghanistan ............... 8Saur Revolution ......................... 9Soviet Invasion .......................... 9Soviet Withdrawal ..................... 10The Aftermath .......................... 11
Installation & Licensing ............13Installation from disc ................... 13Installation for Download version ... 13License Overview ........................ 13
Licensing .................................. 14Un-Licensing ............................. 15
E-license support ........................ 17
Keyboard & mouse Controls .....18Camera Navigation ...................... 18
(Mouse) ................................ 18(Keyboard - defaults) .............. 18
Unit Selection ............................. 18Commands ................................. 19Command Keys (defaults) ............ 19Number Pad ............................... 19Editor ........................................ 20
3D Map Preview ........................ 20Flavor Objects ........................ 20
2D Map Editor ........................... 20Options ...................................... 20Customizing hotkeys .................... 21
Options .....................................23
Battles & Campaigns .................26Battles ....................................... 26
How to start ............................. 27Select Combat Force ............... 28Select Game Options ............... 28Mission Briefing ...................... 28
Setup Phase ............................. 29Victory conditions ...................... 30
Terrain based objectives .......... 31Unit based objectives .............. 31Force wide objectives .............. 31
Campaigns ................................. 32Playing A Campaign ................... 33
QuickBattles ............................... 36Quick Battle Options .................. 36
Environmental Options ............ 36Units options .......................... 36
Launch the QB .......................... 37
Setup Positions ......................... 37Victory conditions ...................... 37
Gameplay Styles ....................... 38Single Player .............................. 38
Real-time ................................. 39Turn-based ............................... 39
Two-player ................................. 40Real-time ................................. 40LAN/Internet ............................ 40
Turn-based ................................. 42Hotseat .................................... 42Email ....................................... 42
Multi-player ................................ 43
Skill Levels ...............................44Scenario Author Test .................... 44Basic Training ............................. 44Veteran ..................................... 45Elite .......................................... 45Iron .......................................... 46
Basic Screen Layout .................. 47Game User Interface (GUI) ........... 48
Unit Info Panel .......................... 48Team Info Panel ........................ 50Details Panel ............................. 53Detail Panel Components ............ 53
Profile ................................... 53Stats .................................... 54Reports ................................. 54
Command Panel .......................... 57Menu Options ............................. 58Command Interface ..................... 59
Number Pad ............................. 59Keyboard ................................. 60Mouse ..................................... 60On-screen menu ....................... 60
Playback Interface ....................... 61
Spotting & Floating Icons .........61
Commands ................................64Move Commands ......................... 66
Move ....................................... 67Quick ...................................... 68Fast ......................................... 68Slow ........................................ 69Hunt........................................ 70Assault .................................... 70
Blast ....................................... 71Mark Mines............................... 72Reverse ................................... 72
Combat Commands ..................... 73Target ...................................... 73Target Light .............................. 74Target Arc ................................ 75Clear Target ............................. 76

7/28/2019 CMA Game Manual 1
http://slidepdf.com/reader/full/cma-game-manual-1 6/197
6 Combat Mission
Face ........................................ 76Target Smoke ........................... 77
Special Commands ...................... 77Hide ........................................ 78Deploy Weapon ......................... 78Dismount ................................. 80Bail Out ................................... 80
Acquire .................................... 81Pop Smoke ............................... 81Pause ...................................... 82Open Up .................................. 83
Administrative Commands ............ 84Split Teams .............................. 84Assault Team ............................ 85Anti-Tank Team ......................... 85Scout Team .............................. 85
Instant Commands ...................... 86
Command & Control (C2) ..........87
Maintaining C2 Links .................... 88Information Sharing .................... 88Leaders ..................................... 90
Air & Artillery Support ..............92Requesting Support ..................... 92Selecting a Spotter ...................... 93Support Roster ........................... 94Support Panel ............................. 95Adjusting or Canceling Support ..... 97Air Mission Parameters ................. 98Artillery Mission Parameters .......... 98
Air Assets ...............................100Munitions, Spotters and Equipment102
Unconventional Warfare .........103Unconventional Forces ............... 105Specialists ................................ 106Using IEDs ............................... 107
The Editor ...............................108Basic screen layout .................... 108
File Menu ............................... 109Editor Selector ........................ 109
Mission Editor ........................... 111Description ............................. 111
Battle Type .......................... 111Environment ........................ 111Daylight .............................. 112Battle Size ........................... 112Title .................................... 112Description .......................... 112Image ................................. 112
Data ...................................... 113Mission (Blue and Red) ............. 114
Parameters (Blue and Red) ....... 115Terrain Objectives (Blue and Red)116Unit Objectives (Blue and Red) .. 117
Map Editor ............................... 118Map Editor Options .................. 118
Ground #1 .......................... 118Ground #2 .......................... 118
Brush .................................. 118Foliage ................................ 119Roads ................................. 119Walls/Fences/Trenches .......... 119Buildings ............................. 119Flavor Objects ..................... 119Craters ............................... 119
Elevation ................................ 120Landmarks ............................. 121Setup Zones ........................... 122Map Toolbar ............................ 122
Object Rotation .................... 123Paintbrush ........................... 123Map Zoom ........................... 123Map width & depth ................ 123
Units Editor............................. 124Purchase Units .......................... 125Soft factors .............................. 127
typical Setting ......................... 128Purchasing equipment ................ 129
Mujahideen and Tribal Militia ..... 130Soviet Army ........................... 130DRA Army .............................. 131Reinforcements ....................... 131
Earliest Arrival Time .............. 132Arrival Span ......................... 132
Deploy Units ........................... 132Deployment Commands ......... 133
Artificial Intelligence (AI) Editor133AI Elements .............................. 134
Groups .................................. 135Map Zone ............................... 136Orders ................................... 136
Order type ........................... 137Setup Orders ....................... 138
Occupy buildings ..................... 138Stance ................................... 138Passenger status ..................... 139
Plans ....................................... 139Exit Before / Exit After ............. 140
Support Targets (Blue or Red) ..... 141
3D Preview ............................. 142Editing Buildings ....................... 142
Single Wall ............................. 143Single Side ............................. 143Entire Building ........................ 143
Editing Flavor Objects ................ 143
Baking Scenarios ....................144
Making Campaigns ..................145Core Units File .......................... 146
Scenarios (Battles) .................... 147Campaign Script File .................. 148Compiling a Campaign ............... 151
Creating Quick Battle Maps .....152Setup Zones ........................... 152AI Plans ................................. 152Victory conditions .................... 153

7/28/2019 CMA Game Manual 1
http://slidepdf.com/reader/full/cma-game-manual-1 7/197
Afghanistan 7
Red and Blue .......................... 153Units on the map..................... 153Terrain ................................... 153Battle Type ............................. 153
Mods ....................................... 153Loading order ........................... 154Rezexplode .............................. 155Repack .................................... 155Mods in Action .......................... 155Important ................................ 156
Tips for using the Editor .........157Getting to know the terrain ......... 157
Water .................................... 158Climate .................................. 158
Realistic maps ........................... 160Tactical considerations ............... 163Towns and cities ........................ 164
Flavor Objects .......................... 165Keep game performance in mind . 166Working with Objectives ............. 168Creating Phase Lines ................. 169 “Secret” Missions ...................... 169Programming the AI .................. 170
Plan for the Plans .................... 170Start simple ........................... 171What would you do? ................ 171Do something else ................... 172The devil is in the details .......... 172
Encyclopedia ...........................174Soviet Army ............................. 174Afghanistan Rebels .................... 175Weapons .................................. 176
Tanks .................................... 176T-54B ................................. 176T-55 (1970) ......................... 176T-55 (1974) ......................... 176T-55M ................................. 177T-55AD ............................... 177T-62 (1972) ......................... 177
T-62 (1975) ......................... 178T-62M ................................. 178T-62D ................................. 178
Armoured Fighting Vehicles ....... 179BMP-1/BMP-1P ..................... 179BMP-2 ................................. 179BMP-1D/BMP-2D .................. 179BMP-1K/ BMP-1PK/BMP-2K .... 180BMD-1/BMD-2 ...................... 180
Armored Personnel Carriers ...... 181BTR-60PB ............................ 181BTR-70 ............................... 181BTR-80 ............................... 181
Other vehicles ........................ 182BRDM-2 .............................. 182ZSU-23-4 “Shilka” ................ 182UAZ-469 ............................. 183Ural-375/KamAZ-4310 .......... 183
Small arms ............................... 183
Artillery ................................... 187Air Support .............................. 190
Icons ......................................191Specialty (MOS) ........................ 191Threat ..................................... 191Defensive equipment ................. 191Ammo ..................................... 191Comms .................................... 192Special Equipment ..................... 192Branches ................................. 193
DRA ...................................... 193Mujahedeen ........................... 193Soviet Army ........................... 193
Troubleshooting ........................ 194Tech Support ............................ 195
Bugs ..................................... 195Patches .................................. 195Licensing ................................ 195
Military Terms Glossary ..........196
Credits .................................... 197

7/28/2019 CMA Game Manual 1
http://slidepdf.com/reader/full/cma-game-manual-1 8/197
8 Combat Mission
CM:A Background
O ld e r m e n d ec la r e w a r . B u t i t i s t h e y o u t h t h a t
m u s t f i g h t a n d d i e . - H e r b e r t H o o v e r
History of the conflict
Republic of AfghanistanAfghanistan gained its independence from Great Britain in
1919. While the first 15 years of independence were
marked by multiple coups and a civil war, Afghanistaneventually entered into relatively calm and stable stage,governed by the King Mohammed Zahir Shah. Zahir Shahmaintained neutral position during the World War II andafter the war maintained friendly relationships with bothUnited States and Soviet Union. However in 1973 thepeace ended – the king’s cousin, a former Prime Minis-ter Mohammed Daoud Khan launched a military coup and
overthrew Zahir Shah who was in Italy at the time.Daoud Khan proclaimed himself a President of the newly
formed Republic of Afghanistan and started to modern-ize the country and establish closer relationships withthe West. The first initiative upset Islamic traditional-ists; which led to their armed uprisings starting 1975,which were brutally suppressed. The latter initiativeupset the Soviet Union and Afghan Communists – the
People’s Democratic Party of Afghanistan (PDPA) thatbecame Daoud’s main opponent.
PDPA was founded in 1965 and immediately split in twogroups – radical “Khalq (meaning “People”) and mod-erate “Parcham” meaning “Flag”. Fights between thesetwo groups continued until 1977 when Soviet Unionmanaged to bring both sides to peace. By this timeDaoud’s regime has discredited itself by brutal repres-
sions, in particular against PDPA leaders, who had muchinfluence in the armed forces. PDPA leaders started plan-ning a military coup.

7/28/2019 CMA Game Manual 1
http://slidepdf.com/reader/full/cma-game-manual-1 9/197
Afghanistan 9
Saur RevolutionOn April 17, 1978 a prominent Parcham leader Mir Akbar
Khyber was killed near his house. The killers were neverfound however many people were blamed, from Khalq’sleader Hafisullah Amin to Hezb-e-Islami leaderGulbuddin Hekmatyar, but most often the name of DaudKhan was mentioned. Two days later leaders of PDPDwere arrested during Khyber’s funeral. This was the lastdrop. Early in the morning of April 28 the army elementsstationed in Afghanistan that were loyal to Khalq stormedand captured the presidential palace. Daud Khan andmost of his family were executed the next day.
As a result of this April Revolution (also called Saur Revo-lution after the month’s name in Dari language) thecountry was renamed to Democratic Republic of Afghani-stan and Khalq came in power. Nur Muhammad Tarakibecame the president and prime minister whileHafisullah Amin and Barbak Karmal, the leader of Parcham, became Taraki’s assistants. Communists im-mediately started to push reforms upon traditionalAfghan society that were met with great resistance. So-
cial modernization, oppression of the religion causedarmed riots all over the country. Along with these eventsa new conflict has started between Parcham and Khalqand many Parcham leaders fled the country while oth-ers were arrested. Unable to control the Islamic uprisingsTaraki started to request help from the Soviet Unionhowever Soviet head of state Leonid Brezhnev initiallyonly provided economic and financial help. Soon, how-
ever, Soviet military advisors started to arrive inAfghanistan.
By the summer 1979 a new conflict arose now within Khalq.When Amin assumed the Prime Minister’s role he andTaraki started open confrontation. A civil war started allover the country and the Soviet Union sent a battalionto help protect the government and key airports. Lastlyin September 1979 in response to attempted assassina-
tion by Taraki Amin took the power and killed Taraki.
Soviet InvasionOnce Amin came into power oppressions against Parcham
members increased even more and his attempts to findcompromises with mujahidin had no results. Worse, he

7/28/2019 CMA Game Manual 1
http://slidepdf.com/reader/full/cma-game-manual-1 10/197
10 Combat Mission
has lost the trust of Soviet Union. Soviet governmentdecided to eliminate Amin and transfer the power in Af-ghanistan to Parcham leaders.
By that time, USSR’s opponents, mostly the United Statessaw in Afghanistan’s civil war an opportunity to createanother Vietnam for the “Russian Bear”. President Carterdirected the CIA to initiate “Operation Cyclone” – a com-prehensive military aid program for mujahidin. Weapons,ammunition and supplies started flowing into Afghani-stan though Pakistan border where US instructorsorganized a net of training camps for mujahidin fight-ers.
On December 17, 1979 Amin once again issued a requestfor military help to the Soviet Union – and this time itwas fulfilled. The elements of 40th army deployed alongthe border and on December 25 crossed the border intoAfghanistan. At the same time airborne troops wereswiftly transported to Bagram airbase. However, onDecember 27 Soviet special forces stormed and capturedAmin’s residence – the Tajbeg palace and Amin waseliminated during the battle. Barbak Karmal was offered
the presidency of the DRA which he accepted.
The initial plan of Soviet military presence did not call foractive military operations. It was planned that 40th armyforces would take control of major cities and road net-work thus leaving DRA forces free to fight with guerrillafighters. However the DRA army’s quality and moraleturned out extremely low and soon 40th army had tostart active involvement with counter-insurgency opera-
tions. Mujahidin refused any compromises, theirnumbers kept increasing, losses on both sides were in-creasing and the DRA government was becoming weakerwith every passing year.
Soviet Withdrawal By 1985 it became apparent that Soviet involvement in Af-
ghanistan had no future. Soviet government initiated
new rounds of political compromise attempts withmujahidin, however it did not receive needed supportwithin DRA government. As a result Barbak Karmal wasrelieved from his President’s role and MohammadNajibullah, a former head of Afghanistan State SecurityDepartment became a new DRA President. In the mean-

7/28/2019 CMA Game Manual 1
http://slidepdf.com/reader/full/cma-game-manual-1 11/197
Afghanistan 11
time Michael Gorbachev, a new Soviet General Secre-tary declared a plan to withdraw Soviet troops fromAfghanistan while Najibullah declared a “national peace”political campaign, which was ignored by the opposi-tion. 40th army again tried to limit its involvement in
active operations, relying on DRA forces and only help-ing with artillery and air support however this strategyhad limited success.
Nevertheless withdrawal could not be postponed for muchlonger and after successful end to “Operation Magistral”Soviet troops started to leave Afghanistan. The forcesthat occupied the whole country within two days tookover 9 month to withdraw. The last solders crossed the
Soviet-Afghan border on February 15, 1989.
The AftermathDuring its presence in Afghanistan the Soviet army lost al-
most 15 thousand killed and 50 thousand wounded. Theeconomic burden upon the Soviet Union due to the warefforts caused a severe blow to the already weakenedSoviet economy and 2 years after the withdrawal the
USSR ceased to exist. “Operation Cyclone” had biggersuccess than any of its creators could have ever envi-sioned.
In spite of everyone’s expectations the withdrawal of theSoviet army marked a beginning of a new and relativelysuccessful period in DRA’s existence. Left one-on-onewith numerous and strong opposition the DRA govern-ment did not cave in, but instead pulled together and
united. With absence of Soviet troops the oppositiondecided to start transitioning to conventional battle tac-tics and as a result it suffered several severe defeats onthe battlefields.
Nevertheless the Najibullah government could not survivethe death of Soviet Union. After economic help from USSR was stopped Afghanistan entered in severe crisis – thearmy was starving, there were no supplies or fuel. When
powerful pro-government group led by Abdul-RashidDustum changed sides and joined the opposition thecommunist government of the DRA was doomed. OnMarch 18, 1922 Najibullah resigned from his presidencyand Democratic Republic of Afghanistan became a his-tory.

7/28/2019 CMA Game Manual 1
http://slidepdf.com/reader/full/cma-game-manual-1 12/197
12 Combat Mission
Almost immediately the country entered into a civil warstate when multiple mujahidin groups began to fight forpower. The former allies against Soviet Union started tokill each other. This lasted until 1996 when a new forceappeared on the map – the radical group calling itself
“Taliban” that promised to put an end to the civil warand bring peace. Very soon Taliban gained widespreadpopularity among people, and quickly became a strongpower that assumed a government role. It lasted in thisrole until 2001 when NATO troops entered Afghanistan.But this is another story, for another time…

7/28/2019 CMA Game Manual 1
http://slidepdf.com/reader/full/cma-game-manual-1 13/197
Afghanistan 13
Installation & Licensing
Installation from discIn order to install the game, insert the game disc. The Com-bat Mission: Afghanistan Installation Menu shouldappear if you have CD Autostart enabled on your com-puter. Click on the “Install Game” option to begin theinstallation process. If you have CD Autostart disabled,or if the Installation Menu does not appear, pleasebrowse the contents of the disc and simply double-click
on the file called “CMA_Setup.exe”. That will manuallylaunch the game installer.
Installation for Download versionAfter you have successfully downloaded the Combat Mis-
sion: Afghanistan download file (filenameCMA_Setup.exe), copy this file to a temporary folder andthen double-click on it to launch the installer.
License OverviewCombat Mission: Afghanistan is protected by an online ac-
tivation system called “eLicense”. eLicense is a tool torestrict the illegal distribution of the software withoutbeing annoying or intrusive to the legitimate customer.

7/28/2019 CMA Game Manual 1
http://slidepdf.com/reader/full/cma-game-manual-1 14/197
14 Combat Mission
Unlike so many other activation systems, eLicense requiresyou to register only once and does not mess with yourhardware or OS settings. Yet it does prevent illegal useof the game and therefore ensures that Battlefront.comwill be around for a long time to come. That means more
games for you to enjoy in the future!
LicensingWhen you first run CM:A, after initial install, you will be
prompted to license it . In most cases all you need to dois:
a ) m a k e su r e t h e co m p u t e r o n w h i ch y o u h a v e
i n s t a l l ed t h e g am e h a s a n a c t i v e o n l i n e
c o n n e c t i o n t o t h e in t e r n e t
b ) i f y o u h a v e W i n d o w s V i s t a o r W i n d o w s 7 ,
m a k e su r e y o u l a u n ch t h e g a m e w i t h f u l l
a dm i n i s t r a t o r p r i v i l eg e s . T h i s i s u s u a l l y a c h i e v e d
b y r i g h t - c l i c k i n g o n t h e e x e c u t a b l e f i l e , s e le c t i n g
“ Pr o p e r t i e s” f r o m t h e p o p - u p m e n u , a n d m a k i n g
s u r e t h a t “ R u n a s adm i n i s t r a t o r ” i s c h e ck e d
c ) e n t e r y o u r l i ce n s e k e y i n t o t h e c o r r e c t f i e l d i n
t h e p o p - u p w i n d o w
d ) h i t t h e “ l i ce n s e” b u t t o n a n d w a i t a f e w
s ec o n d s w h i l e y o u r l ic en s e a u t h o r i z es .
If you wish to install the game on a computer which has nointernet connection, you must perform what is called an“Offline License Request”. As above, when you firstlaunch the game, after initial install, you will need to dothe following when the License Screen appears:
a ) c l i ck o n t h e “ o f f - l i n e l i ce n s e ” b u t t o n a n d
g e n e r a t e t h e o f f - l i n e l i c en s e r e q u e s t
b ) s a v e t h e EN T I R E r e q u e s t f i l e ( i n c lu d i n g t h e
i n s t r u c t i o n s o n t o p a l l t h e w a y d o w n t o t h e
e n c r y p t e d p o r t i o n o f t h e f i l e ) t o a d i sc o r o t h e r
r e m o v a b l e m e d i a ( U SB d r i v e , f lo p p y e t c .. . )
c ) t r a n s f e r t h e f i l e y o u s a v e d in s t e p B t o a
c om p u t e r w h i ch h a s i n t e r n e t a cce ss
d ) O n a co m p u t e r t h a t i s co n n e c t ed t o t h e
i n t e r n e t , g o t o h t t p : / / w w w . l i c e n se .n e t a n d p a st e
t h e EN T I R E c o n t e n t s o f t h e f i le i n t o t h e
c o r r e s p o n d i n g w i n d o w

7/28/2019 CMA Game Manual 1
http://slidepdf.com/reader/full/cma-game-manual-1 15/197
Afghanistan 15
e ) g e n e r a t e t h e l i ce n s e f i l e an d c o p y i t t o a d i s k
o r o t h e r r e m o v a b l e m e d ia ( U SB D r i v e , f l o p p y
e t c . . . )
f ) t r a n s f e r t h e f i l e f r o m s t e p E, b a c k t o t h e
co m p u t e r w h e r e t h e g am e w a s i n s t a l l ed a n d
p r o c e e d w i t h t h e o f f - l i n e l i ce n s in g p r o c e d u r e b y
p a s t i n g t h e e n t i r e c o n t e n t s o f t h e l i c en s e f i le i n t o
y o u r l ic e n s in g w i n d o w
Off-line licensing is also a good workaround for online com-puters which experience problems with a firewall orproxy settings since, unlike the direct online activation,off-line licensing only requires a simple non-encryptedinternet connection. If you do experience firewall or
proxy problems, simply follow the off-line licensing stepson the same computer that is having the problem.
eLicense allows you to license, un-license and re-licensethe game as often as you wish. This allows you to useCM:A on several computers if you like (up to two at thesame time) without reinstallation, and gives you the rightto re-sell the game after you’ve had your fun with it (aslong as you un-license your copy).
Un-LicensingOne of the neat features of eLicense is that your license
never expires and is never used up, unlike so many otherprotection systems out there. If you buy a new com-puter, replace a hard drive, or even give the game to afriend, you can simply un-license the current activation.This frees up your license key to be re-used elsewhere.
There is no limit to how often you are allowed to do this,as long as you un-license first before attempting to re-license elsewhere.

7/28/2019 CMA Game Manual 1
http://slidepdf.com/reader/full/cma-game-manual-1 16/197
16 Combat Mission
If you want to use the game on your desktop and a laptop,that’s possible without having to unlicense a copy, be-cause each license key allows you two concurrentactivations. However, if you already have two activa-tions, and would like to run the game on a third computer,you must first un-license one of the active copies beforeyou can activate the game on a third machine.
To activate a third computer, without un-installing from anexisting computer, you have to manually un-license it.There are several ways to un-license a copy:
a ) v i a p r o g r a m g r o u p s h o r t c u t . Th e a c t u a l
s h o r t c u t d e p e n d s o n h o w y o u i n s t a l l ed t h e g a m e ,
b u t t h e d e f au l t i s :
St a r t - > P r o g r a m s - > B a t t l e f r o n t - > Co m b a t M i ss i o n
A f g h a n i s t a n - > U n l i c en s e CMA
b ) r i g h t c l i ck o n t h e f i l e y o u ’ r e u s in g t o s t a r t u p
t h e g am e . T h i s c an b e a d e s k t o p i c o n o r a n e n t r y
i n y o u r p r o g r a m m e n u . Se le c t “ u n - l i c en s e ” f r o m
t h e p o p - u p m e n u .

7/28/2019 CMA Game Manual 1
http://slidepdf.com/reader/full/cma-game-manual-1 17/197
Afghanistan 17
c ) O p en t h e W i n d o w s Sy s t e m T r a y a n d o p en t h e
e L ic e n s e Co n t r o l Ce n t e r . Se l e ct t h e g am e y o u
w a n t t o u n - l i ce n s e a n d r i g h t - c l ic k o n i t . Se le c t
u n - l i c en s e f r o m t h e p o p - u p m e n u .
Other ways on how to un-license, as well as solutions to
potential problems are explained in the F.A.Q.:
h t t p : / / w w w .b a t t l e f r o n t .c o m / h e l p d es k
After the Un-license window opens, you must enter yourlicense key and click the Un-license button while yourcomputer is connected to the internet. Un-licensing onlyworks online and is not possible if your computer is notconnected to the internet. When unlicensing, make sure
that you see a Success message at the end of the pro-cess. If you don’t, then your game was not properlyunlicensed, and your license might still be “in use”.
E-license supportBattlefront.com prides itself on customer service, and this
continues with the implementation of the eLicense sys-tem. Please check out our F.A.Q. section which explains
how eLicense works, how to license and un-licensegames, and what to do if you ever run into issues, suchas firewall configuration, proxy settings or if you simplylost your license key:
h t t p : / / w w w .b a t t l e f r o n t .c o m / h e l p d es k
If you ever need specific assistance, or have lost your li-cense key (we recommend printing it and not only savingit electronically), do not hesitate to contact us with a
description of your problem at www.battlefront.com/helpdesk. We usually respond within 1 working day.

7/28/2019 CMA Game Manual 1
http://slidepdf.com/reader/full/cma-game-manual-1 18/197
18 Combat Mission
Keyboard & mouse Controls
Camera Navigation(Mouse)Cursor at screen edges .........MoveCursor in upper corners ........RotateLeft-click and drag ...............Move cameraRight-click and drag ............. Pivot cameraRight-click and hold(when unit selected) ............ Pivot around unit
Mouse wheel .......................ElevateMouse wheel + SHIFT ..........Elevate + PitchMouse Wheel + CTRL ...........PitchCTRL + Left-click ................. Jump to Map Location
(Keyboard - defaults)W or Up Arrow ........ Move ForwardA or Left Arrow ........ Move LeftD or Right Arrow...... Move Right
S or Down Arrow ..... Move BackQ........................... Rotate LeftE ........................... Rotate RightV ........................... Reverse ViewR ........................... Raise cameraF ........................... Lower cameraZ ........................... Zoom outX ........................... Zoom in
C ........................... Wide Angle View1 - 9 ...................... Preset Camera PositionsArrow Keys ............. Fine Movement
Unit SelectionLeft-click on Unit ................. Selects UnitRight-click on Map ...............Deselects UnitDouble-click on Unit .............Group-select formation
SHIFT+Left-click ..................Adds additional units to groupSHIFT+Left-click & Drag ....... Drag selection rectangle
................................................around multiple units
( N o t e : + a n d - k e y s a r e r es t r i c t e d t o “ n e x t ” u n i t w i t h i n t h e g r o u p
w h e n a g r o u p i s se l e c t e d )

7/28/2019 CMA Game Manual 1
http://slidepdf.com/reader/full/cma-game-manual-1 19/197
Afghanistan 19
CommandsESC ....................... Pause GameTAB ....................... Lock Camera to Unit- ........................... Select Previous Unit
+ .......................... Select Next UnitF12........................ Select Last Unit{ and } .................. Adjust 3D Model Quality` ........................... Talk to Internet Opponent
Command Keys (defaults)U I O ..................... Top Row of Commands
J K L ...................... Middle RowM , . ...................... Bottom Row
B ........................... Move Fast CommandN ........................... Move Command............................. Reverse CommandH ........................... Target CommandY ........................... Target Light CommandG........................... Face Command
/ ........................... Deploy CommandP ........................... Pause CommandH ........................... Hide Command[ ........................... Dismount Command] ........................... Vehicle Open Up Command; ........................... Pop Smoke Command
F5 ......................... Movement Command PanelF6 ......................... Combat Command PanelF7 ......................... Special Command PanelF8 ......................... Admin Command Panel
DEL ....................... Clear Unit TargetBACKSPACE ............ Delete Last Waypoint
Number Pad
/ ........................... Previous Command Panel* ........................... Next Command Panel7 8 9 ..................... Top Row of Commands4 5 6 ..................... Middle Row1 2 3 ..................... Bottom Row- ........................... Select Previous Unit+ .......................... Select Next Unit

7/28/2019 CMA Game Manual 1
http://slidepdf.com/reader/full/cma-game-manual-1 20/197
20 Combat Mission
Editor
3D Map Previewbuildings
CTRL+Left-click on wall ........................................ changes windows/doors layout
ALT+CTRL+Left-click on wall.................................... changes windows/doors layout for.................................... WHOLE side of building (all floors)
CTRL+Left-click on roof ........................................ changes shape/type of roof
SHIFT+Left-click on building.................................... changes “Facade” (texture) of the.................................... whole building
CTRL+SHIFT+Left-click ........................................ cycles through balcony types for.................................... selected floor
CTRL+SHIFT+Left-click on ground floor.................................... cycles through balcony types for the.................................... WHOLE side of the building (all floors)
ALT+Left-Click ...... changes building details
Flavor ObjectsLEFT CLICK ......................... rotate objectSHIFT+LEFT CLICK ..............nudge object in the direction
................................................ the camera is facingCTRL+LEFT CLICK ...............delete object
2D Map EditorCTRL+Right-click ..... changes current tile rotationLeft-click ................ place tile/objectLeft-click & hold....... “paint” tile/object (not all tiles/obj.)Right-click .............. delete tile/object (of the same type as
.................................... currently selected)
OptionsAlt-S ...................... Toggle Sound
Alt-W ..................... Toggle ShadowsAlt-K ...................... Toggle SmokeAlt-T ...................... Toggle Tree DisplayAlt-C ...................... Toggle Camera ShakeAlt-I ....................... Toggle Floating IconsAlt-J ....................... Toggle Show Objectives

7/28/2019 CMA Game Manual 1
http://slidepdf.com/reader/full/cma-game-manual-1 21/197
Afghanistan 21
Alt-L ...................... Toggle Show LandmarksAlt-P ...................... Toggle Show All Move PathsAlt-Q...................... Quit
Customizing hotkeysCM:A allows you to customize the hotkeys to your liking.
In order to do so, browse into your game directory andopen the „Data” folder. You will find a file there called„hotkeys.txt”. Open this file in a text editor program.
You will see entries for Camera controls, the base Com-mand keys, and various other controls there. Eachlanguage has a different default. A tag indicates the lan-
guage, e.g. <E> for English, <F> for French, <G> forGerman etc.
In order to change the default hotkey, simply edit this fileand save it in the same location. You might want to keepa few things in mind however:
- It might be a good idea to save the original defaults firstbefore making any changes. For example, rename the
original hotkeys.txt file to hotkeys_original.txt.- When you change a hotkey, make sure that the same
key is not already used / assigned to a different func-tion. The program does not check fordouble-assignments, and will perform one function, butnot both. The game may crash if you assign the variousfunctions to the same key.
- If you’re not using other languages, feel free to removeall other entries. This will help in editing the file. If nolanguage specific entry is found, the <E> keys are usedby default.
Here are some further useful tips to keep in mind whencustomizing your key layout: Combat Mission has twodistinctly different approaches for using unit Commandsvia the keyboard; Relative and Direct.
The Relative system involves a set of 9 keys centeredaround three rows of three consecutive keys each. These9 keys match the 9 Command Buttons in the userinterface's Command Panel. Each hotkey controls thecommands RELATIVE to the position on the screen. Forexample, by default the U key activates the Top Row

7/28/2019 CMA Game Manual 1
http://slidepdf.com/reader/full/cma-game-manual-1 22/197
22 Combat Mission
Left-Most key which would be FAST, TARGET, and SPLITdepending on which Command Group is visible (Move-ment, Combat, and Special respectively).
The Direct system, on the other hand, assigns a uniquehotkey for DIRECT access to each Command. No atten-tion is paid to the graphical representation on the screen.For example, if so assigned, F would issue the FAST com-mand. T would issue the TARGET command, H wouldcontrol the HIDE command etc... no matter which Com-mand Group is visible on the screen.
There are pros and cons to each system. The Relative sys-tem allows the player to keep one hand stationary on
the keyboard and does not require any "hunting andpecking" to find the right hotkey. The downside is thatwhen you wish to use two Commands in a row that arein different Command Groups you have to first switchthe proper Command Group (now done using the F5-F8keys).
The Direct system allows you to string Commands togetherwithout concern for which Command Group they are in,
but does have the drawback of requiring the hand tomove and locate a specific key, which may or may notbe easily memorized. Which is "better" comes down topersonal player preference, therefore both are provided.
Whenever possible, the order buttons under the variousCommand Panels will display the assigned "direct" keyin highlighted green text.
Note, we recommend that you decide which system you
prefer and then assign the keys as you wish by editingthe hotkeys.txt file. The default key assignments haveall 9 Relative keys assigned (UIOJKLM,.) as well as aselection of the most commonly used commands mappedto new Direct keys (Move Fast, Move Normal, Reverse,Target, Target Light, Face, Deploy, Pause, Hide, Dis-mount, Vehicle Open Up and Pop Smoke) to give you anidea of how the two systems work. We have found that
using one or the other systems exclusively seems to havethe best results and do not recommend mixing the twosystems together. While it's possible to do, it could meangetting the worst of both systems and not really gettingthe benefits. Therefore, if you wish to use the Directsystem we advise that you edit the hotkeys.txt file to

7/28/2019 CMA Game Manual 1
http://slidepdf.com/reader/full/cma-game-manual-1 23/197
Afghanistan 23
unassign the 9 Relative hotkeys. Also, be aware to notdouble assign any keys to multiple functions.
Options
The Options menu allows various global game options,mainly with regard to visual and audio quality, to be setprior to playing a game. For the most part these set-tings require infrequent resetting. Features that needmore frequent customization are set within the gameusing Hotkeys.
The Options are:
- Sound: Toggles all in-game sounds on or off.
- Display Size: you can select the game to run at the follow-ing resolutions: Desktop (the game will run at whateverresolution your desktop is set to), 1024x768, 1152x864,1280x960
Note: I f y o u w a n t t o r u n t h e g a m e in a r e so l u t i o n a n d r e f r e sh r a t e
n o t l is t e d , y o u c a n m a n u a l ly c o n f i g u r e t h e s e s e t t i n g s b y
e d i t i n g t h e " d i sp l a y s iz e .t x t " f i le l o ca t e d i n y o u r g am e
d i r ec t o r y . S i m p l y ch a n g e t h e n u m b e r s t h a t y o u s ee t h e r e
w i t h t h e w i d t h ( i n p i x e ls ) a n d h e i g h t ( i n p i x e l s) a n d
r e f r e sh r a t e ( i n H e r t z ) y o u w i sh t o r u n t h e g a m e .

7/28/2019 CMA Game Manual 1
http://slidepdf.com/reader/full/cma-game-manual-1 24/197
24 Combat Mission
Example: Fo r 1 4 4 0 x 9 0 0 a t 7 5 H z r e f r e sh r a t e , y o u w o u l d
d e l e t e t h e n u m b e r s i n t h a t f i l e a n d r e p l ac e w i t h " 1 4 4 0 9 0 0
7 5 " ( w i t h o u t q u o t es ) .
I f y o u p u t i n a l l ze r o e s - e x a m p l e : 0 0 0 - t h e g a m e w i l l
r e v e r t t o u s in g y o u r d e s k t o p r e so l u t i o n a n d r e f r e s h r a t e .
Ex e r c i se c a u t i o n a n d o n l y u s e a r e so l u t i o n a n d r e f r e s h r a t e
s u p p o r t e d b y y o u r m o n i t o r as d am a g e t o y o u r m o n i t o r o r
d i sp l a y a d a p t o r c o u l d o c cu r , e s p e c i a l l y i f y o u u s e t o o h i g h a
s e t t i n g .
- Vertical Synchronization: this option optimizes image qual-ity based on your monitor refresh rate. This setting may
reduce your framerate, however.- 3D Model Quality: Offers several settings for balancing
model details with speed. The choices range from “Fast-est” (lowest quality, highest game speed) to “Best” (bestvisual quality but possibly lower game speed). “Bal-anced” offers a good compromise between model qualityand frame rate speed.
- 3D Texture Quality: Same as above, except it balances thequality of the graphics. For computers with video cardswith less than 64 MB memory, the Fast and Fastest set-tings are recommended.
- Antialias / Multisample: Allows you to toggle Anti-Alias andMultisample on or off. If switched on, this option im-proves visual quality but may cost game performance.
- High Priority Process: This option instructs Windows to as-
sign "normal" application priority or "high" applicationpriority to the game when it is run. The "normal" set-ting can fix lagging mouse and/or keyboard input issuesfor some systems. The "high" setting is recommendedif you have not experienced any input lag problems. The"high" priority option allows Combat Mission to use moresystem resources and may result in better performance.
- Language: CM:A comes in a multi-language configuration.
It defaults to the language that your desktop is set to. If you would like to switch to a different language, youcan make the choice here. You must exit the game afterchanging languages, in order to access the correct lan-guage scenario folders.

7/28/2019 CMA Game Manual 1
http://slidepdf.com/reader/full/cma-game-manual-1 25/197
Afghanistan 25
Note: I f y o u w o u l d l ik e t o d i s ab l e t h e in t r o v i d eo p l a y in g a t g a m e
l au n c h , h o l d d o w n t h e “ V ” k e y a t g a m e s t a r t u p . T h e v id e o
w i l l n o lo n g e r p l a y w h e n t h e g a m e l o a d s a n d t h e se t t i n g
w i l l b e s a v e d i n t h e p r e f e r e n c e s f i l e . O n s u b s e q u e n t
s t a r t u p s y o u c a n p r e s s “ V ” ag a i n t o b r i n g t h e v i d e o b a c k .

7/28/2019 CMA Game Manual 1
http://slidepdf.com/reader/full/cma-game-manual-1 26/197
26 Combat Mission
Battles & Campaigns
CM:A offers three basic types of scenarios to play: Cam-
paigns, Battles, and QuickBattles.
BattlesAs the game title “Combat Mission” implies, the actual Battle
Mission is at the core of the game. This is where playerand/or computer-controlled forces clash and their fateis decided. Battles constitute the base for the Campaignsand QuickBattle systems, explained further below. Anumber of pre-designed and tested battles and cam-paigns are available with the game, and by using thepowerful Editor tools, players can also create an unlim-ited number of new battles.
Battles are missions pre-designed by a scenario designer,and include the map, objectives, forces, reinforcementsand AI scripting. As such, Battles can depict a nearly
unlimited number of combat situations, forces, and mis-sion types. The Editor section of the Game Manualexplains in detail how Battles can be created.

7/28/2019 CMA Game Manual 1
http://slidepdf.com/reader/full/cma-game-manual-1 27/197
Afghanistan 27
How to startTo start a Battle, click on the Battle button on the main
menu screen. The battle window opens, listing all avail-able battles from the game’s “Scenarios” folder. Clickingon the title of each battle provides additional informa-tion to give the player a quick idea of what the Battle isabout.
- Image: an optional image associated with the Battle. Couldbe an in-game shot, or map overview, or anything elsethat the scenario designer deems worthy of showing. If no image is provided, this area remains black.
- Parameter icons: four icons that show the most importantparameters for the battle:
- Environment: the general type of map the battle takesplace on. Options include City, town, village, open, rough,hills, etc.
- Weather: the weather setting for the battle. Optionsinclude clear, overcast, rain, etc.
- Battle Type: the type of battle and which side is the at-tacker or defender. Options include Assault, Attack,Probe and Meeting Engagement.
- Battle Size: indication for the battle size, i.e. the amountof units, size of map, and duration. Options range fromTiny all the way to Huge as shown the by number of soldiers depicted in the icon.

7/28/2019 CMA Game Manual 1
http://slidepdf.com/reader/full/cma-game-manual-1 28/197
28 Combat Mission
- Time of battle: the time of day when the battle starts
- Temperature: the air temperature during the battle
- Description: a short one-line description entered by thescenario author to describe what the mission is about
The player has the option to click OK or to Cancel. The lat-ter brings the player back to the Battle selection screen.Hitting OK opens the next screen:
Select Combat ForceThe player now chooses the side he would like to play -
Blue (Mujahedeen) or Red (Soviet)
Select Game OptionsIn the next screen, the Style of play and number of playersis set, as well as the difficulty level for the mission.
Players - options range from single play in real-time or turn-based, or various 2 player options (LAN/Internet,Hotseat and Email)
Skill - the difficulty setting including Scenario Author, Ba-sic Training, Veteran and Elite settings.
Click OK to load the scenario.
Mission BriefingThe mission-briefing screen opens when first entering a
battle. The briefing screen shows:
- Strategic Map (e.g. the map of Afghanistan or the geographi-cal location of the battle). Uploaded by scenario authorand empty if not provided.
- Operational Map (e.g. a city map of the neighborhood wherethe battle takes place). Uploaded by scenario author andempty if not provided.
- Briefing Text. Describes the mission orders to the playerusing a common format.

7/28/2019 CMA Game Manual 1
http://slidepdf.com/reader/full/cma-game-manual-1 29/197
Afghanistan 29
- Button for Tactical Map. Toggles map or briefing view andshows a tactical map to the player, e.g. a bird’s eye viewof the battlefield. Empty if not provided by scenario au-thor.
Hitting OK takes the player directly to the 3D battlefield.
Setup PhaseWhen you first enter the 3D battlefield you start out in the
Setup Phase. Gameplay is paused and both sides are ableto move their units within the available Setup Zones.
The Setup Zones are visible as colored areas (in shades of red for the Mujahedeen player, and shades of blue forthe Soviet player) overlaid on the terrain. Each side canhave up to three different colored Zones in any configu-ration (including non-contiguous). Units may be movedwithin the same colored Zones they start out with, never
any place else.Almost all of the regular Commands available to a particu-
lar unit while in battle are available during the SetupPhase. However, some Commands only activate oncethe battle starts. For example, any Combat Command

7/28/2019 CMA Game Manual 1
http://slidepdf.com/reader/full/cma-game-manual-1 30/197
30 Combat Mission
issued to a unit during Setup Phase won’t do anythinguntil the combat starts. Movement Commands given toa unit within its Setup Zone will move it there immedi-ately and without any game effect, such as Fatigue.Movement Commands which are placed outside of a Zone
instruct the unit to move to that location as soon as thebattle starts, but not before. Other Commands, such asButton/Unbutton, Acquire, Split, have an immediate ef-fect and can be done or undone instantly and withouttheir typical game costs (time delays, Fatigue, etc.).
N o t e : t h e Ta r g e t c om m a n d i s a v a i la b l e d u r i n g t h e Se t u p P h a se ,
b u t O N L Y t o b e a b l e t o c h e c k l i n e s o f s ig h t a n d d i s t a n c e s .
N o t a r g e t i n g o r d e r s a r e a c t u a l ly s a v e d d u r i n g t h e Se t u p
P h a s e !
Once you have positioned your units to your liking and areready to start the battle, click on the red blinking buttonin the lower right hand corner of the screen. This is the“End Phase” button which quits the Setup Phase andlaunches the actual battle. The game clock will start tick-ing and will continue to do so until you pause (RealTime)or until the 60 seconds of the first Action Phase are com-pleted (WeGo). More about this in the following chapterabout “Gameplay Styles”.
Victory conditionsScenario designers can set a number of specific victory
conditions for battles, and mix different objectives andobjective types. Each objective can have a different vic-
tory point value associated with it. The objectives of theopposing sides do not have to match. In fact, one sidecan have totally different goals than the other side. Also,objectives are not automatically known to both sides: amission goal is only known to the side that has to achieveit; or only the other side; or both; or none.
The Editor chapter explains objectives in more detail. Hereare the basics for the player:
For each scenario, there are three main types of objectivesfor each side: terrain-based objectives, unit-based ob- jectives, and force-wide objectives.

7/28/2019 CMA Game Manual 1
http://slidepdf.com/reader/full/cma-game-manual-1 31/197
Afghanistan 31
Terrain based objectivesThe scenario designer can set any number of terrain-based
objectives, i.e. areas on the map of some importance tothe mission. The available objective types include:
- Occupy: player needs to occupy an area, clear it completelyof enemy troops, and keep some forces there (until theend of the battle) to gain points
- Destroy: player needs to destroy an area (e.g. a building)
- Preserve: the opposite of Destroy; the player needs to en-sure that an area remains undamaged
- Touch: player needs to reach the objective area to gain
points, but does not have to remain in position there
Unit based objectivesThere can be any number of unit-based objectives in a sce-
nario. The objective can be tied to one single unit (suchas a tank or an HQ unit) or to entire formations (such asa platoon or even a company), or to a mix of variousunits. Unit-based objective options include:
- Destroy: you must destroy the designated units. The moredamage you cause to those units, the more points youearn.
- Destroy all: you must destroy the designated units in or-der to earn any points. Points are not awarded fordamaged units.
- Spot: you earn points by spotting and identifying the des-ignated units.
Force wide objectivesThese are the main victory parameters for a scenario. The
scenario designer assigns victory points to each objec-tive individually. Options include:
- Casualties (friendly and enemy): if the player keeps hisown casualties under this percentage (relative to theentire force in the scenario) and pushes the enemy above
another percentage, he is awarded the respective vic-tory points
- Condition (friendly and enemy): if the player keeps hispercentage of wounded, incapacitated and routed sol-diers below this percentage and pushes the enemy above

7/28/2019 CMA Game Manual 1
http://slidepdf.com/reader/full/cma-game-manual-1 32/197
32 Combat Mission
another percentage, he is awarded the respective vic-tory points
- Ammo (friendly and enemy): if the player retains morethan this percentage of ammo and pushes the enemy toexpend more than another percentage, he is awardedthe respective victory points
- Friendly bonus: onetime bonus to the side. A quick “fix” tobalance uneven battles, which can be fun at times.
The full range of Victory objectives is available for Battlesand Campaigns. QuickBattles use a simplified auto-gen-erated system, which is explained at the end of thischapter.
CampaignsA Campaign is a single player game that progresses through
a series of interconnected Battles stretching over manysimulated hours, days, weeks, or even months. Aftercompleting a Battle, Combat Mission selects the nextBattle based on the results of the one just completed.The Battles within a Campaign are all premade, but areadjusted to reflect combat results from the previousBattle. Combat Mission campaigns are what we call“semi-dynamic”: this means there are some predeter-

7/28/2019 CMA Game Manual 1
http://slidepdf.com/reader/full/cma-game-manual-1 33/197
Afghanistan 33
mined elements, as well as some based on the player’sactions.
Certain units have their casualties, changes in leadership,ammo usage, damage, and other factors carried over tothe next Battle they appear in. Such units are calledCore Units and constitute the bulk of the player’s avail-able force for the Campaign. This does not mean,however, that every Core Unit appears in every battle.On the contrary, very often units seen in one battle mightnot appear again until several battles later. Some unitsmay only appear a couple of times, while others appearnearly every battle. However, Core Units are always seenat least two times, unlike Auxiliary Units which are seen
only once for the whole Campaign. Combat Missionmakes no attempt to inform the player about which unitsare Core or , in order to remove the temptation for play-ers to abuse of Auxiliaries (i.e. treating Auxiliary unitsas “disposable”).
Depending on conditions before each new Battle, CombatMission may replace fallen soldiers, repair damaged ve-hicles, replenish ammo, etc. However, as with any
real-life military campaign, replacement, repair, and re-plenishment are not guaranteed events. A wise playerwill keep this in mind and avoid wearing out his forcestrying to achieve something that, in the larger contextof the campaign, is relatively unimportant.
Combat Mission chooses which Battle comes next basedon the score from the previous Battle. However, theevaluation is based on expectations about how well the
player should do. Sometimes expectations are high andsometimes not. This could mean a high score for oneBattle keeps the player on the optimal path to victory,while the same exact score for another Battle may meana detour before getting back on the straight path to theCampaign’s end. Generally, however, better results leadto a more direct path to the final Battle.
Playing A CampaignFrom the Main Screen, click on the Campaign button to viewall available Campaigns. CM:A includes two Campaigns,both played from Russian side; “1980 - Invasion” and“1985 - The Bloody Days”.

7/28/2019 CMA Game Manual 1
http://slidepdf.com/reader/full/cma-game-manual-1 34/197
34 Combat Mission
N o t e : Ca m p a i g n p l a y e r s h a v e a n o p t i o n t o s w i t ch b e t w e e n
R ea l Ti m e a n d W eGo M o d e s i n b e t w e e n b a t t l e s . T o d o t h i s
s av e t h e g a m e i n b e t w e e n b a t t l e s, e x i t t o t h e m a in s c r e e n ,
t h e n s t a r t u p y o u r Cam p a i g n sa v e g a m e n o r m a l l y . B e f o r e
t h e b a t t l e s t a r t s a n o p t i o n i s p r e s e n t e d t o s w i t ch M o d e s .
T h i s i s u s e f u l f o r t h o s e p e o p l e w h o p r e f e r t o p l a y i n
R ea l Ti m e f o r s m a l le r b a t t l e s a n d W eGo i n l a r g e r b a t t l e s .
Once a Campaign is selected, the player receives a specialone-time-only Campaign Briefing. It describes the “big
picture” of what is expected of the player and whichforces are available to achieve the objective. After ab-sorbing this information, the player moves onto theMission Briefing to find out the specific details of thecoming Battle. At the end of each Battle, the player viewsan After Action Report (AAR) that scores the player’s

7/28/2019 CMA Game Manual 1
http://slidepdf.com/reader/full/cma-game-manual-1 35/197
Afghanistan 35
performance for that battle. After viewing the AAR, thenext Battle’s Mission Briefing comes up and the wholeprocess is repeated until the end of the Campaign.
N o t e : Cam p a i g n s s t a r t e d u s in g a n e a r l i e r v e r s i o n o f a Cam p a i g n
ca n b e c o n t i n u e d w i t h n e w e r v e r s i o n s o n c e t h e cu r r e n t b a t t l e b e i n g p la y e d h a s b e e n co m p l e t ed . Th e w a y t o d o
t h i s i s :
a . Sa v e y o u r c u r r e n t c am p a i g n i n b e t w e e n b a t t l e s j u s t
a f t e r y o u d i sm i ss t h e A f t e r A c t io n Re p o r t a n d e x i t t o t h e
m a in s cr e e n .
b . Fr o m t h e m a in s c r e e n s e l ec t t h e N e w Cam p a i g n
o p t i o n a n d t h e n h i g h l ig h t t h e u p d a t e d Cam p a i g n y o u w i sh
t o p l a y . H o l d d o w n t h e SH I FT k e y a n d t h e n c l ic k t h e OK
b u t t o n .
c . A n " I m p o r t " s cr e e n w i l l a p p e ar a n d y o u ' l l se e y o u r s a v e g am e i n t h e l is t o f f i le s . Se l e c t i t , c l i ck O K , a n d t h e
Cam p a i g n w i l l s t a r t u p a g a in n o r m a l l y . Th e g a m e d o e s i t s
b e s t t o r e c o n c i le c h a n g e s t o s u c h t h i n g s a s Co r e U n i t s , b u t
t h e r e i s o n l y so m u c h t h e g am e c a n d o su c ce s sf u l l y . I n t h e
e v e n t i t ca n ' t m a k e se n s e o f n e w a n d o l d i t s i m p l y d e f au l t s
t o t h e n e w i n f o r m a t i o n , w h i ch m a y ca u se so m e o f t h e
b a t t l e h i s t o r y t o c h a n g e . T h e r e f o r e , t h i s n e w f e a t u r e
w o r k s b es t w h e n t h e Cam p a i g n d e si g n e r is m a k i n g m i n o r
c o r r e c t i o n s in s t e a d o f m a j o r o v e r h a u l s .
After the last Battle, the player sees the Campaign AAR.Unlike previous AARs, which showed results for the just-completed Battle, the Campaign AAR details how theplayer performed over the entire Campaign. This signi-fies the end of the Campaign.
The individual campaign missions make full use of all Vic-tory Options available for Battles.
N o t e : P la y e r s ca n c r e a t e t h e i r o w n c am p a i g n s . P le a se r e a d t h e
“ Ed i t o r ” Ch a p t e r f o r d e t a i ls o n h o w t o l i n k b a t t l e s .

7/28/2019 CMA Game Manual 1
http://slidepdf.com/reader/full/cma-game-manual-1 36/197
36 Combat Mission
QuickBattlesQuickBattles offer unlimited replayability in CMA, and are
also a quick way to “generate” a new battle. Units forboth sides, and the map to be played on, are randomly
chosen according to a number of parameters set by theplayer.
Quick Battle OptionsEnvironmental Options
These correspond to the options available for regular sce-narios, and define the general setting for the QuickBattle. These options also determine which Map is ran-
domly loaded for the QB from the pool of available mapsin the Quick Battle Maps folder. For example, if you setthe Environment to “Open”, only Quick Battle Maps withan “Open” Environment setting will be considered whenchoosing which map to load. If more than one map isavailable, then the choice is made randomly. If no eli-gible map is available, the QB will be aborted and youwill be redirected to the Main Menu screen instead.
Battle Type – Meeting Engagement, Probe, Attack, Assault,or Random. This setting has an impact of what type of Quick Battle Map will be loaded – if you select MeetingEngagement, only maps defined as Meeting Engagementwill be considered for loading. If you choose any of theother Battle Types, then only maps which are NOT aMeeting Engagement are considered.
Environment – sets the general type of terrain to be played
on. This setting has a direct impact on what type of QuickBattle Map will be loaded.
Battle Size – ranging from Tiny to Huge. This has an impacton how many units will be available to both sides.
Region & Month – sets the date for the scenario
Daylight – sets the time for the scenario
Weather – sets the current weather for the scenario
Units optionsThese options define the units that both sides will be play-
ing with. Units are assigned randomly based on theparameters chosen by the player.

7/28/2019 CMA Game Manual 1
http://slidepdf.com/reader/full/cma-game-manual-1 37/197
Afghanistan 37
Service – choices include: Soviet Army, D.R.A. Army,Mujahideen, Tribal Militia, Random, Random Blue andRandom Red. This defines the base pool of units forthat side for the QB.
Branch – depending on the chosen Service, the appropriateBranch can be selected here, e.g. Mech Infantry, or Ar-mor.
Type – this defines the rough composition of the unit basedon the previous choices. For example, for an InfantryBranch, the choice could be Heavy Infantry, MediumInfantry or Light Infantry, defining the TO&E as well asavailable weapons and formations.
Quality – ranging from Poor to Excellent, this defines theequipment used as well as “soft” factors such as mo-rale, leadership etc.
Condition – sets the physical condition for the side’s units
Force Adjustment – allows playing an unbalanced QB. If setto the default “no change”, both sides will be roughlyequally strong based on abstract “purchase points”. The
options allow you to give the Blue Force an extra 150%of units, or to deduct 60% from the Blue pool.
Launch the QBAfter setting the parameters, and if an eligible QB Map is
found in the QB Map folder, the player will be asked toselect which side they want to play and which style of play they prefer (Real Time, WeGo, 1 player or 2 etc.) just as for a regular scenario. If no eligible map is found,you will simply be returned to the Main Menu screen.
Setup PositionsThe randomly purchased units are located in the predeter-
mined setup areas at the beginning of the QB.
N o t e : S o ld i e r s a r e a u t o m a t i ca l ly b o a r d e d o n t o t h e i r v e h i c l e s , b y
d e f a u l t , b u t y o u m a y u n l o a d a n d r e l o a d i n t h e S e t u p P h a se
( a n d l a t e r ) a s u su a l .
Victory conditionsVictory conditions for QuickBattles are much more limited
than for Campaigns and Battles. Only two types of vic-tory conditions are available:

7/28/2019 CMA Game Manual 1
http://slidepdf.com/reader/full/cma-game-manual-1 38/197
38 Combat Mission
1 - Terrain objective zones. These are always consideredas OCCUPY zones.
2 - An enemy-casualty threshold victory goal for each sideis added automatically, which is lowest for meeting en-gagements, and highest for assaults.
Gameplay Styles
Combat Mission: Afghanistan can be played in a number of ways. At its core, it’s a simultaneous-time ground com-bat simulation where one second of playing time equals
one second of real time. In other words, a 30 minuteengagement will also take 30 minutes to play out. Sincenot everybody has time to play real-time, a number of alternative playing styles are supported.
No matter which playing style you choose for a given battle,the underlying simulation engine always runs in real-time. In other words, as far as the game is concerned,turn-based play is nothing else than a game played in
60 second increments of real-time, in between whichgameplay is paused to await player input. It doesn’t haveany effect on the simulation itself.
Single PlayerSingle-player mode allows one player to fight against the
Computer Opponent (often also referred to as ArtificialIntelligence, or AI).
The Computer opponent consists of three main sub-ele-ments:
- the customizable “Scenario AI” which can be “pro-grammed” by the Scenario Designer who determines theoverall strategic goals as well as possible avenues of approach and is able to “script” certain behavior;
- the hard-coded Operational AI (OpsAI) that coordinates
and assigns the orders to sub-units;
- and the hard-coded Tactical AI (TacAI) that controls theindividual behavior of units and soldiers based on theassigned orders and the situation that develops afterthe shooting starts.

7/28/2019 CMA Game Manual 1
http://slidepdf.com/reader/full/cma-game-manual-1 39/197
Afghanistan 39
Real-timeThe Real-time Single Player mode starts with the player
entering the battlefield in the Setup Phase. Time ispaused, and the player is able to get to know the battle-field, study his orders and units, and place his troopswithin the designated setup zones. During the setupphase, it is possible to issue orders which will be ex-ecuted immediately when the battle starts.
With setup completed, the player launches the battle, start-ing the clock. The clock ticks in true real-time (1 secondof game time equals 1 second in the real world) andonly stops if the game is paused. All actions happen si-
multaneously. After the allotted Scenario Time expires,the battle ends, and the results screen is shown.
Turn-basedThe turn-based single-player mode begins again with the
Setup Phase, which works just like for Real-Time play:both players are able to change the deployment of theirunits, and issue orders which will be executed duringthe first turn.
After the Setup Phase ends, the first game Turn begins.For the first turn (only), the turn begins with the ActionPhase, during which the units execute the commandsgiven to them during the Setup Phase. After the ActionPhase ends, players can rewind and replay the Action(without being able to issue commands) as often as theylike during the Replay Phase.
Each following Turn is divided into three phases: a Com-mand Phase during which the player is able to issueorders to his units for the upcoming turn, an ActionPhase, during which the units execute these orders, anda Replay Phase, during which the player is able to re-wind and watch the action as often as he likes.
The Action Phase runs in real-time for 60 seconds and au-tomatically ends after that time. The Player is not able
to issue further orders during the Action and ReplayPhases but can move the camera freely around thebattlefield.

7/28/2019 CMA Game Manual 1
http://slidepdf.com/reader/full/cma-game-manual-1 40/197
40 Combat Mission
Two-playerThe Computer Opponent can be quite formidable when you
are just starting to play CM:A, but it is no match for anexperienced human player, because, unlike a human,
the AI is not capable of learning from its mistakes oradapting its gameplay to its opponent(s). Although a lotcan be done by the Scenario Designer to increase thedifficulty of winning against the Computer Opponent bycarefully scripting the Scenario AI, sooner or later multi-player games against other humans will provide the onlyreal challenge.
Playing against other human players is possible using a
variety of methods.
Real-timeTwo player Real-time play is possible via two modes: a lo-
cal area network (LAN) where two computers areconnected to each other locally, and internet play wherethe two players can be anywhere in the world and con-nect via the internet. Both types of play use the TCP/IP
protocol for connection, therefore the steps to set upand play a game are basically identical.
LAN/InternetCM:A uses a peer-to-peer connection between the two play-
ers. One player assumes the role of the host, while theother player joins as client. The host first creates a newBattle by choosing which scenario he wants to play, andfrom the Game Start window selects the appropriategame type: “2 Player Internet/LAN”. On the next screen,CM:A automatically detects and lists all IP numbers as-sociated with the host computer, as well as which portwill be used for the connection. It then waits for theclient player to join.

7/28/2019 CMA Game Manual 1
http://slidepdf.com/reader/full/cma-game-manual-1 41/197
Afghanistan 41
Note: Com b a t M i ss io n A f g h a n i s t a n u s e s t h e U D P a n d T CP p o r t
7 0 2 3 f o r a l l m u l t i p la y e r g a m e s . I f y o u a r e t r y i n g t o H O ST a TCP- I P g a m e m a k e su r e a n d o p e n p o r t 7 0 2 3 f o r b o t h U D P
a n d TCP t r a f f i c .
The host now has to communicate this information to theclient player by email or chat. The client launches thegame and chooses “Join Game” from the main gamemenu. Here, he enters the correct IP address and portgiven to him by the host. After clicking “Join”, the game
will attempt to connect with the host computer and, if the connection was successful, the game will launch.From here on, gameplay resolves exactly the same as inthe 1 player Real-Time game mode for each player.
N o t e t h a t CM : A l i s t s A LL t h e I P a d d r e s se s a ss ig n e d t o a s y s t e m .
I f y o u h a v e m u l t i p le m o d e m s o r n e t w o r k c a r d s , i t w i l l l i s t
a l l I P a d d r e s se s a ss o c i a t e d w i t h t h o s e d e v i c es . W h a t i t
c an ’ t d o i s t e l l y o u w h i c h o n e i s t h e c o r r e c t I P a d d r e s s,
b e ca u s e t h a t d e p e n d s o n h o w y o u r s y s t em i s c on f i g u r e d . I f
y o u d o n o t k n o w t h e c o r r e ct I P ad d r e s s y o u r s e l f , y o u r
o p p o n e n t w i l l h a v e t o t r y a l l o f t h e m t o f i n d t h e c o r r e c t o n e . M a k e a n o t e o f i t s p l a ce i n t h e l i s t , b e c a u s e e v e n i f t h e
I P ad d r e s s i t se l f m i g h t c h a n g e , t h e o r d e r i n w h i ch t h e I P s
a r e l is t e d s h o u l d n o t .

7/28/2019 CMA Game Manual 1
http://slidepdf.com/reader/full/cma-game-manual-1 42/197
42 Combat Mission
If either player is behind a firewall (hacker protection) oris using a proxy system, you may need to reconfigureyour system by manually opening the necessary port forincoming and outgoing transmissions. You might haveto uninstall some firewalls completely (software-based)
or disable them (hardware-based). Some firewalls mighthave to be uninstalled completely. Users with routersneed to add the TCP port to the routers forwarding tableand match it to the internal IP address of the computerthat hosts the game, then use the router’s control panelto get the external IP address given out by your ISP.This external IP address is what your opponent will needin order to connect to you as host.
People using Internet Connection Sharing on their homeLANs cannot host Internet games. They can, however,host locally to systems that are connected on the samehome LAN. They can join other hosted games normally,via Internet or LAN. This limitation on hosting affectssystems that gain their access to the Internet SOLELYon ICS connection.
Turn-basedTwo player turn-based play is possible via two modes -Hotseat, where the two players play on the same com-puter and take turns plotting their orders for each turn,and Play By Email (PBEM), where the two players saveand swap their turn files via email.
Hotseat
Hotseat play is very similar to Turn-Based Single Playergames. Each player plots his commands and actions ashe would in a Single-Player game and, once done, ex-changes the seat in front of the computer with hisopponent (hence the term “hotseat”), who now doesthe same. This is repeated for each turn.
Play by Email works exactly like Single-Player Turn-basedplay, except that once a player completes their com-mands and actions, a special save game file is generated.The player emails this file to their opponent who loads iton their end, executes their commands, watches the

7/28/2019 CMA Game Manual 1
http://slidepdf.com/reader/full/cma-game-manual-1 43/197
Afghanistan 43
results of the previous turn, then saves a file and re-turns it to the first player.
Here is a more detailed explanation of the process:
1. You pick a Game and are prompted to create a pass-
word. This creates Game file 01 which is stored as anOutgoing file. You will find this file in CMA/Games File/Outgoing Email. You send this to your partner
2. Your Partner gets the 01 file and saves it in his Incom-ing Email Folder.
3. He starts game and finds file 01 the Saved Game portionof the Opening menu.
4. Partner puts in password and a new file 02 will be gen-erated to be sent to you.
By saving and swapping these files via email, the playersadvance the game from turn to turn at a pace that theplayers can adjust to their liking. The gameplay itself,i.e. the Action Phase, still takes place in real-time - justlike in Turn-Based Single Player mode.
Multi-playerFor future modules of Combat Mission, additional multi-
player features (i.e. more than 2 players) are already inthe works, including co-op play (i.e. several players can join the same side and re-enact a real chain of command).

7/28/2019 CMA Game Manual 1
http://slidepdf.com/reader/full/cma-game-manual-1 44/197
44 Combat Mission
Skill Levels
When you launch a new battle, you can set the skill level,
which adjusts the overall difficulty of the game. Unlikeother games, the skill level does not simply give an arti-ficial bonus to the computer opponent, but instead hasan influence on core game mechanics. The followingsection describes the differences between the differentlevels. Only the differences from the previous lower levelare described.
Scenario Author Test"Scenario Author Test" may be selected as a Skill Mode in
1-player games only. It is intended to be used by Sce-nario Authors only when testing their creations, and isnot intended for “live” play. This setting will cause allenemy units to be fully displayed to the player, but notadditionally "known" to player's troops.
Basic TrainingThis is the easiest setting. The following special rules ap-
ply:
- Fr i e n d l y u n i t s a r e a l w a y s sp o t t e d
- Sp o t t i n g i n f o r m a t i o n i s in s t a n t l y s h a r ed a m o n g
t e a m s ( a k a “ B o r g Sp o t t i n g ” )
- T r o o p s s u f f e r s l i g h t l y f e w e r c a su a l t i e s a n d a r e
l e ss l i k e l y t o p a n i c
- T r e a t m e n t o f w o u n d e d s o ld i e r s ( “ b u d d y a i d ” ) i s
e x t r e m e ly f a s t
- A r t i l le r y a n d a i r su p p o r t a r r i v e s e x t r e m e l y f a s t
- En em y u n i t s , o n c e sp o t t e d , a r e a lw a y s f u l l y
i d e n t i f i e d
- T h e l i f e / d e a t h s t a t u s o f e n e m y v e h i c l es i s
d i sp l a y e d i m m e d ia t e l y
- En em y w e a p o n s a n d s u p p r e s s io n a r e d i sp l a y e d
- Y o u ca n h e a r t h e v o i ce s o f u n s p o t t e d e n em i es

7/28/2019 CMA Game Manual 1
http://slidepdf.com/reader/full/cma-game-manual-1 45/197
Afghanistan 45
VeteranMost people familiar with the Combat Mission game sys-
tem will prefer this setting. It is a fair balance betweenrealism and fun, that does not burden the player with
unnecessary details or long waiting times. The follow-ing special rules apply:
- Fr i e n d l y u n i t s a r e a lw a y s sp o t t e d
- En em i e s, o n c e sp o t t e d , a r e n o t a l w a y s
i m m e d i a t e l y i d e n t i f i e d a n d c a n a p p e a r a s g e n e r i c
“ En em y c o n t a c t s ” ( b u t l e s s o f t e n t h a n a t El i t e
l e v e l )
- Sp o t t i n g i n f o r m a t i o n i s d i s t r i b u t e d a m o n g t e a m s u s in g t h e s t an d a r d Com m a n d & Co n t r o l
r u l e s ( Se e Com m a n d & Co n t r o l c h a p t e r )
- T r ea t m e n t o f w o u n d e d s o ld i e r s i s f as t e r t h a n i n
r e a l l i f e
- A r t i l l e r y a n d a i r s u p p o r t a r r i v e s f a s t e r t h a n i n
r e a l l i f e
- Th e l i f e / d e a t h s t a t u s o f e n em y v e h i c l e s is
h i d d e n u n t i l t h e cr e w b a i ls o u t o r t h e v e h i c l e
s t a r t s t o b u r n
- En e m y w e ap o n s a n d s u p p r e s s i o n a r e n o t
d i s p l a y e d
- Y o u ca n n o t h e a r u n s p o t t e d e n e m i es
Elite
Elite is similar to the Veteran setting but introduces morerealistic time delays for a number of tasks and events.Hardcore players will favor this setting. The followingspecial rules apply:
- En em i es a p p e a r a s g e n e r i c “ En em y c o n t a c t s ”
u n t i l t h e y a r e p o s i t i v e l y i d e n t i f i e d b y y o u r f o r c e s
o n t h e b a t t l e f ie l d
- T r e a t i n g w o u n d e d s o l d i e r s t a k e s a r e a l i s t i c
a m o u n t o f t im e
- A r t i l l e r y a n d a i r s u p p o r t t a k e a r e a l i s t i c a m o u n t
o f t im e t o a r r i v e

7/28/2019 CMA Game Manual 1
http://slidepdf.com/reader/full/cma-game-manual-1 46/197
46 Combat Mission
IronIron is an optional setting that goes even one step further
than Elite, and introduces special restrictions on whatthe player can do and when. While even more realistic
than the other settings, this option introduces a numberof interface limitations which might put off the casualplayer, so it is strictly an optional choice.
- Fr i e n d l y u n i t s n e ed t o b e sp o t t e d j u s t l ik e
e n e m y u n i t s . I f y o u h a v e a f r i e n d l y u n i t n o t i n
l in e o f s i g h t o r i n c o n t a c t w i t h a n o t h e r f r i e n d l y
u n i t , t h e n t h e o n l y w a y t o f i n d t h i s u n i t i s b y
e i t h e r r e - e st a b l is h in g c on t a c t w i t h a n o t h e r
f r i en d l y u n i t o r b y c l i ck i n g t h r o u g h t h e c h a in o f c o m m a n d i n t h e g a m e i n t e r f a c e , j u m p i n g f r o m
u n i t t o u n i t .

7/28/2019 CMA Game Manual 1
http://slidepdf.com/reader/full/cma-game-manual-1 47/197
Afghanistan 47
Basic Screen Layout
The main screen layout breaks down as follows:
1. Top Navigation/Info Bar - the info bar at the top of thescreen provides information about friendly and enemyunits located within the viewing cone, even if the unitsare hidden or obscured by an obstacle. Clicking on oneof the triangle-shaped icons instantly switches the playerto that unit.
2. Game Area - this is the central display area where all theaction takes place. Using mouse and keyboard controlsthe player can move the camera around the map, as wellas access units and info by clicking on them directly and/or on their floating information icons (if enabled).
3. Game User Interface (GUI) - the main interface bar at thebottom of the screen presents the player with all theinformation and controls necessary to interact with units.
Note: This screen layout is used for all instances where the playerinteracts with the 3D game world. 2D game elements suchas menu screens and the editor use a different GUI layout.

7/28/2019 CMA Game Manual 1
http://slidepdf.com/reader/full/cma-game-manual-1 48/197
48 Combat Mission
Game User Interface (GUI)As soon as you enter the 3D game world of CM:A, the GUI
appears at the bottom of the screen. It always consistsof the same three main parts, even though some may be
empty or unavailable at times.
1. Unit Info Panel2. Team Info Panel3. Command Panel
Unit Info Panel The Unit Info Panel displays the most important informa-
tion for the currently selected unit. It breaks down asfollows:
1. Unit name - standard or customized unit description
2. Unit type - describes the type of unit, such as “BTR Squad”
3. Portrait - a picture that represents the current unit type
4. Unit attributes - the central characteristics affecting theunit’s ability to perform:
a) leader name (leadership modifier)b) experience level (no modifier)c) physical condition (physical fitness modifier)d) morale (motivational modifier)
Modifiers determine, for better or worse, how the unit be-haves during the game. Each modifier can have a positiveor negative value, as follows:

7/28/2019 CMA Game Manual 1
http://slidepdf.com/reader/full/cma-game-manual-1 49/197
Afghanistan 49
+2 - excellent+1 - good+0 - average-1 - below average-2 - poor
5. Rank - the rank insignia of the highest-ranking leader of the unit. This does not change within a battle - even if the leader becomes a casualty and the next highest rank-ing member assumes the leadership role.
6. Branch of Service - shows which Branch of Service theunit belongs to.
7. Chain of Command - displays the parent formations of the unit. A green icon indicates that the unit is currentlyin contact, while a red icon indicates that the unit is out
of contact.
8. Ammo panel - the ammo panel displays the availableand remaining amount of ammunition that the unit hasat its disposal. The display is broken down into fourgroups: small arms ammunition, MG ammunition, handgrenades, and rifle grenades.
9. C2 Link - the Command and Control (C2) link shows the
available means of communication for the selected unit.Up to three of the most effective methods are shown.
10. Suppression Indicator - an inverted color-coded pyra-mid indicates the amount of suppression the selectedunit is enduring at any given time. It also gives the playera rough measurement of the total volume of incomingenemy fire. As the color moves from green to yellow toorange to red, the amount of suppression increases, and
the unit will be more likely to go to ground, panic, orbreak. When units are pinned (i.e. they can shoot but donot respond to movement orders) the word “Pinned” isshown in the suppression meter display.

7/28/2019 CMA Game Manual 1
http://slidepdf.com/reader/full/cma-game-manual-1 50/197
50 Combat Mission
11. Artillery and Air Support buttons - allows access to theArtillery and Air Support screen (if such support is avail-able and if the currently selected unit is allowed torequest support).
12. Special Equipment - this area consists of 12 slots whichdisplay various types of special equipment that a squad,team, or vehicle might be equipped with (e.g. RPG gre-nades, demo charges, extra ammo etc.).
N o t e : k e e p a n e y e o u t f o r k n o c k e d - o u t b u r n i n g v e h i c l e s t h a t
co n t a i n e x t r a a m m o a n d o t h e r s p ec i a l e q u i p m e n t . CM : A i s
s im u l a t i n g “ c o o k - o f f s ” , i .e . e x p l o d i n g am m o i n s id e a
b u r n i n g v e h i c le . A f t e r e a c h e x p l o s io n am m o i s c r o ss ed o f f
t h e l i s t , b u t r e m a in i n g a m m o m a y s t i l l e x p l o d e la t e r o n .
Y o u sh o u l d k e e p y o u r i n f a n t r y a w a y f r o m b u r n i n g v e h i c l es
o r t h e y c o u ld s u f f e r d a m a g e .
Team Info Panel The Team Info Panel shows all Soldiers assigned to the
unit. Depending on the type of unit and the nationality,the Team Info is further subdivided into Teams. Squadsshow two columns representing up to two Fire Teams,designated A, and B. Some Soviet squads have two FireTeams whereas DRA and opposing forces have none.

7/28/2019 CMA Game Manual 1
http://slidepdf.com/reader/full/cma-game-manual-1 51/197
Afghanistan 51
Each Soldier is represented by his Weapon, his Wounds,and his Speciality. Behind the scenes, the rank, indi-vidual ammo count, type of body armor (if any), numberand type of grenades, Special Equipment, and spareammo are also tracked for each Soldier.
N o t e : Com m a n d i n g O f f ic e r s ( CO ) a n d Ex e c u t i v e O f f i c e r s ( X O ) a r e
n o w r e p r e se n t e d b y l a r g e s t a r i c o n s
The Unit Info Panel displays cumulative ammo counts andany Special Equipment. The total weight of everything aSoldier carries is also tracked and has an impact on fa-tigue from movement. In order to prevent unnecessaryinformation overload, these details are not available tothe player.
There is a large number of Weapons available, and they
generally fall into one of four basic categories: rifle,squad automatic weapon (SAW), sniper rifle, or heavyweapon. CM:A uses real-world statistics for these Weap-ons, such as caliber and type of ammo, rate of fire,reloading requirements, chance of jamming, inherentaccuracy, weight, etc. The Encyclopedia chapter coversthis in detail. In the Game Area, each weapon is accu-rately and individually represented for each Soldier.
The color of the Weapon icon in the panel denotes the gen-eral health of the Soldier. Green means the Soldier is ingood shape, though perhaps a little banged up. Yellowmeans that the soldier has sustained a significant wouldthat is likely to impair his ability to fight. Seriouslywounded Soldiers are dropped from the Team Info Panel

7/28/2019 CMA Game Manual 1
http://slidepdf.com/reader/full/cma-game-manual-1 52/197
52 Combat Mission
completely. The Soldier’s bases within the Game Areaalso show Green, Yellow, Red (seriously wounded) andBrown (dead) to reflect their Wound status. If you pointthe cursor at a weapon, the name of the weapon is dis-played and that soldier’s base is subtly highlighted in
the main 3D display.
Seriously wounded players (red soldier base) can be givenfirst-aid by their comrades, which is called “Buddy Aid”.There is no Command for this action, rather it happensautomatically when a friendly soldier (regardless if heis from the same squad or not) is moved close to thelocation of an incapacitated comrade. Depending on thesituation (incoming fire etc.) the soldier may decide to
treat the wounded man. The word “medic” is displayedin the status field. The player can abort the treatment atany time by giving the parent unit that the medic be-longs to any kind of Command. The medic may decide toabort the treatment himself as well if there is signifi-cant incoming fire.
N o t e : Se r i o u s ly - w o u n d e d ( r e d b a se ) s o l d ie r s w h o h a v e n o t
r e c e i v e d “ b u d d y a i d ” ( i .e . d i s ap p e a r e d ) b y t h e e n d o f t h e
g a m e h a v e a 2 5 % ch a n c e o f b ec o m i n g K I A i n t h e f i n a l
t a l l y .
Dead soldiers (brown soldier base) can also receive “BuddyAid” (by moving a friendly soldier close to the location),but all it does is reclaim their ammo and weapons, if possible. “Aid” to dead soldiers is pretty quick.
Many Soldiers have a special ability due to training and/or
weapon assignment. These Specialties (MOS in US Mili-tary language) are represented in iconic form next tothe Soldier’s Weapon (see the “Icons” chapter). Themain purpose of this icon is to inform the player whatthe particular Soldier is specifically supposed to do. Forexample, drive a vehicle, command a Team, use AT weap-ons, etc. If a soldier without a specific MOS tries toperform the same task, he is generally worse at doing
it. This is especially true for (but not limited to) firingantitank rockets and missiles because soldiers who arenot antitank specialists receive an accuracy or guidancepenalty (exception: “secondary” launchers like the RPG-18 can be fired by anyone without penalty).

7/28/2019 CMA Game Manual 1
http://slidepdf.com/reader/full/cma-game-manual-1 53/197
Afghanistan 53
Details Panel All units that are not Squads are simply referred to as Teams
and have up to seven Soldiers in the Team A column. Inplace of columns B and C is the Details Panel, which iswhere special information about the Team is shown.There are three different types of Details Panels basedon Team type: Vehicle, HQ, and Heavy Weapon.
The layout for each Detail Panel is essentially the samewith Profile, Stats, and Reports sub sections. The Pro-file shows a silhouette unique to that unit, the Stats givesome indication as to what the unit is capable of, andReports give details relevant to the Team’s specialized
purpose. Reports are “tabbed” and can be accessed oneat a time. CM:A remembers which Report was last in viewso the next time you select a unit of that type, the sameReport shows up by default. The following sections brieflydescribe the unique features shown for each unit type.
Detail Panel ComponentsThe Details Panel is divided up into three conceptual pieces:
Profile, Statistics, and Reports. The information for eachvaries a little depending on if the unit is a Vehicle, HQ,or Heavy Weapon (HW).
Profile
Designation - lower left. Military designation for Vehicles andHW (e.g. BMP-2D, etc.). For HW, it is usually a genericname describing the type or function, such as MMG,Sniper, etc. For HQs, it is usually the Formation Name(e.g. 1st PLT, B CO, etc.)

7/28/2019 CMA Game Manual 1
http://slidepdf.com/reader/full/cma-game-manual-1 54/197
54 Combat Mission
Purpose - lower right. Shows the player the purpose of thatparticular unit. Commonly used designations include IFV,ATGM, MMG, etc. For HQs, it’s “PLT HQ”, “CO HQ”, etc.
HQ Button - when a Vehicle or HW is also a HQ, a buttonappears which toggles the HQ Reports on or off insteadof the unit’s Vehicle or HQ Reports.
Silhouette - an illustration of what the unit is. For HW thisimage will change depending on if it is Deployed or not.
Crew Positions - a grey dot for each designated crew posi-tion, a blue dot for each occupied position, and a graydot with a black center for WIA.
Passenger Positions - works the same as Crew Positions, butuses a green dot instead of blue to represent an occu-pied position.
Vehicle Name - lower left. The common name of the vehicle,if any (e.g. Shilka, etc.). Left blank for HQs and HWs.
StatsVehicles - Weight, Speed, Power-to-weight ratio, Offroad
ability, Turning ability
Heavy Weapons - Caliber, Setup Time, Speed, Minimum and/or Maximum ranges
HQs - Personnel, Experience, Condition, Morale, Suppres-sion
ReportsAmmo Report - available for Vehicles, HQs, and HWs. Dis-
plays the amount of ammo of each type assigned to thatunit.

7/28/2019 CMA Game Manual 1
http://slidepdf.com/reader/full/cma-game-manual-1 55/197
Afghanistan 55
Defenses Report - available for Vehicles only. Shows thevehicle’s ability to defend against ATGM, Large Caliber,Medium Caliber, and Small Caliber munitions against theFront, Sides, Rear, and Top. The amount of threat posedby the various munitions is shown graphically as Bad(large red X), Poor (small red x), Average (yellow • ),Good (thin green +), and Excellent (thick green +).
Damage Report - available for Vehicles only. Shows howwell each system of the vehicle is functioning. The iconsshow Excellent (thick green +), Average (yellow • ), andBad (large red X).
Note: Th e g am e t r a c k s a n d a p p l ie s l im i t a t i o n s t o w h a t a v e h i c le
ca n o r c a n ’ t d o * p r e c i se l y * a s s h o w n h e r e , s o k e ep a n e y e
o n t h e d a m a g e r ep o r t d u r i n g c o m b a t ! I f t h e e n g i n e is
d e s t r o y e d t h e n y o u r v e h i c l e w o n ’ t b e a b le t o m o v e . I f i t s
e n g i n e o r r u n n i n g g e a r a r e d a m a g e d i t m a y b e a b le t o
m o v e b u t o n l y s lo w l y , a n d e v e n m o r e s o a cr o s s d i f f i c u l t
t e r r a i n o r u p s t e e p s lo p e s . I f t h e r a d i o is d e s t r o y e d o r
d am a g e d , i t m a y l o se co n n e c t i o n t o h i g h e r u p , r e s u l t i n g i n
l o ss o f Com m a n d & Co n t r o l , a n d s o f o r t h .

7/28/2019 CMA Game Manual 1
http://slidepdf.com/reader/full/cma-game-manual-1 56/197
56 Combat Mission
Unit Report - available for HQs only. Shows up to nine units
directly attached to the HQ and if they are in C2 contact(thick green +) or out of contact (large red X). Clickingon an entry switches the player to that unit.
Formation Report - Identical to Unit Report, but showing upto nine Formations attached to the HQ (if any).

7/28/2019 CMA Game Manual 1
http://slidepdf.com/reader/full/cma-game-manual-1 57/197
Afghanistan 57
Command Panel The Command Panel is a highly interactive area that al-
lows the player to issue Commands to units, to selectfrom various Menu options, and to control the speed of
the game. The various component pieces are broken uplogically so they can be accessed quickly. The compo-nents are numbered according to this picture of theCommand Panel:
1. Instant Commands - allow one click change in unit be-havior. The left button tells the unit to HALT and retainits Commands. Clicking on the button again tells theunit to RESUME. The middle button instructs the unit to
CANCEL all its Commands and to do nothing for the mo-ment. The right button tells the unit to EVADE byabandoning its current Commands and seeking immedi-ate cover and perhaps popping smoke. Although unitscan Evade on their own initiative, sometimes they trytoo hard to stick to their Commands and need to be re-directed without further delay. Instant Commands workin both Real-Time and We-Go styles of play.
2. Command Modes - determines which type of Commandsare being used; Movement, Combat, Special and Admin-istrative. When selected, the name of the CommandMode is displayed along the bottom and the appropriateCommand Buttons are shown in the Button Screen.
3. Button Interface - shows either Command or Menu But-tons, depending on which is currently selected.

7/28/2019 CMA Game Manual 1
http://slidepdf.com/reader/full/cma-game-manual-1 58/197
58 Combat Mission
Command Buttons display their assigned hotkey and arecolor-coded to match the Command Lines shown in theGame Area. See section [Commands] for more detailsabout Commands
4. Menu Mode - by clicking on the Button “Menu”, the Screendisplays various special Options the player can use.These Options are detailed below. Clicking again on the“Menu” button quits the Menu Mode.
5. Playback Interface - used mainly for We-Go style play,this interface allows you to replay, rewind and fast for-ward through each game turn and phase. The large redbutton in the middle is used to End Turn (We-Go style)
or End Phase (Real-Time and We-Go). The elapsed gametime is shown at the bottom.
Menu OptionsThe Menu Options Panel contains a total of seven buttons,
explained below. The Panel is accessed by clicking onthe “Menu” button. Clicking again exits Menu Mode andresumes regular Command Mode for the Panel.
1. Save - opens the Save Game screen, allowing you to savea game in progress.
2. Conditions - opens a pop-up window listing the environ-mental conditions for the current battle, including:
- Weather (e.g. Clear, Overcast, Rain...)- Temperature- Ground Conditions (e.g. Dry, Wet...)

7/28/2019 CMA Game Manual 1
http://slidepdf.com/reader/full/cma-game-manual-1 59/197
Afghanistan 59
- Wind Strength and Direction- Civilian Population Density
3. Briefing - opens the Briefings Panel with the current Mis-sion Briefings
4. Hotkeys - opens the Hotkeys Panel listing all importantin-game hotkeys
5. Cease fire - toggles the call for a Cease Fire on and off. If the opponent selects this option as well, the game endswith a mutually agreed to Cease Fire
6. Surrender - immediately surrenders the battle to theopponent
7. Quit - aborts the current mission immediately, withoutcalculating results
Command InterfaceUnits are controlled by issuing Commands. The Command
Panel is the primary method for viewing and issuingCommands. All Commands are grouped into one of four
conceptually similar Command Modes:
Movement: Commands to get units from waypoint A to B
Combat: Commands to engage enemy targets
Special: various special Commands that complement Move-ment and Combat Commands
Administrative: Commands that affect a unit’s basic organi-zation
There are several ways to issue a Command during thegame, so you can choose whichever suits your style of playing best.
Number PadEach key on the Number Pad is “hard-wired” to the Com-
mand Button that is in the same relative position in the
currently active Command Panel. For example, with theMove Command Panel open, the top row of Commands(from left to right - Fast, Quick, Move) corresponds tothe keys 7, 8, and 9. You can switch Command Panels toaccess other Commands with the / and * buttons.

7/28/2019 CMA Game Manual 1
http://slidepdf.com/reader/full/cma-game-manual-1 60/197
60 Combat Mission
KeyboardYou can use the keyboard to issue Commands via Hotkeys.
You can customize the hotkeys to your liking and eitheruse a hotkey for each individual command (Direct ac-cess) which eliminates the need to bring up the requiredCommand Panel first, or use the Default Keys (Relativeaccess). You can access Command Panels directly withthe F5-F8 function keys.
MouseYou can use your mouse to operate the Command Panel in
the Game Interface directly. Simply click on the corre-sponding buttons to switch Panels and issue Commands.
On-screen menu
A selectable Command Menu popup in the 3D area is alsoavailable. The onscreen list of available commands canbe viewed by selecting a unit and pressing the SPACEBAR. Simply click on the desired Command and thenfollow normal procedures for that Command (e.g. click-ing a Waypoint or selecting an enemy unit to Target).The menu can be dismissed with another press of thespace bar or clicking the mouse anywhere outside themenu.
Some Commands are “modal”, such as Deploy Weapon forHeavy Weapons. These Commands remain lit up to show

7/28/2019 CMA Game Manual 1
http://slidepdf.com/reader/full/cma-game-manual-1 61/197
Afghanistan 61
that the unit is already performing that particular Com-mand. Issuing the Command again has the effect of telling the unit to cease that action.
Units whose Morale State is Panic, Broken, or Routed arenot capable of receiving any Commands. Units that areheavily Suppressed (“Pinned”) may accept Commandsbut may not necessarily act upon them right away.
Playback InterfaceFor Turn-based We-Go play, this interface is used to play-
back each turn’s action. For other play styles such asReal Time, this panel is only used to conclude the Setup
Phase at the beginning of each battle and launch thebattle. The controls resemble those of a regular VCR orCD player, and include:
-play/pause (toggle)
-skip to end
-rewind
-fast forward
The large red button in the middle of the Playback Inter-face is used to advance from one phase to the next, i.e.ending the Setup Phase and starting the game in RealTime mode, or ending the Playback phase and startingthe Command Phase of the next turn. Below this is theelapsed game time expressed in minutes.
Spotting & Floating IconsOne of the center pieces of the new CM:A game engine is
the concept of “relative spotting”, where a number of game elements - from command & control, to skill lev-els, to individual unit abilities - all come together. Atypical battlefield is full of chaos by its very nature: com-
batants worldwide call this chaos the “Fog of War”,where no two soldiers “see” the same thing. To simu-late this, CM:A employs complex calculations and aunique spotting concept which only shows to the playerwhat his currently selected unit can see.

7/28/2019 CMA Game Manual 1
http://slidepdf.com/reader/full/cma-game-manual-1 62/197
62 Combat Mission
This is computed for each unit individually, and is not onlybased on actual lines of sight, but includes many otherfactors such as: what the spotter and target are doing,the equipment they have available (day/night scopes,binoculars, thermal imaging sensors), skill levels, vis-
ibility based on climatic effects, even sounds and so forth.
N o t e : M u z z l e f la m e , s m o k e , d u s t , a n d o t h e r e f f e c t s d i r e c t l y
a t t a ch e d t o e n e m y u n i t b e h a v i o r a r e n o t s h o w n u n l es s t h e
u n i t i t s e l f i s a l r e a d y s p o t t e d b y a t l e a st o n e f r i e n d l y
s o l d i e r .
On top of that, information about spotted units does notpass immediately to other friendly units, but is trans-
mitted using the usual Command & Control channels,and is subject to the same restrictions.
N o t e : R e la t i v e Sp o t t i n g i s t u r n e d o f f f o r B a s i c T r a in i n g a s w e l l a s ,
o b v i o u s l y , f o r S c e n a r i o A u t h o r T e s t Sk i l l le v e l s
Ex a m p l e : On e s q u a d m i g h t s e e a n e n e m y u n i t t h a t a f r i en d l y
s q u a d , c l o se t o t h e f i r s t , d o e s n o t s e e . I t o n l y t a k e s a f e w
s e co n d s b e f o r e t h e f i r s t s q u a d i s a l e r t e d a b o u t t h e e n em y
p r e s e n c e b y v i s u a l s i g n a l s ( e .g . h a n d s ig n a l s ) , b u t i t t a k e s m u c h l o n g e r t o p a ss t h i s i n f o r m a t i o n t o o t h e r u n i t s i n t h e
Ch a i n o f Co m m a n d . U n i t s o u t o f c o n t a c t m i g h t n o t r e c e iv e
t h i s in f o r m a t i o n u n t i l t h e y a r e i n c o n t a c t a g a in .
The game portrays the effects of relative spottingby usingthe units’ Floating Icons, which appear above each vis-ible unit on the battlefield (unless disabled by its hotkey).The floating icons have three states: regular, dimmed
and highlighted.
N o t e : F lo a t i n g i co n s f o r f r i e n d l y u n i t s b r i e f ly b l in k a f t e r s u s t a i n -
i n g a c a su a l t y .
With no unit selected, all icons are in their regular state.This shows the player the combined information fromall his units as passed up the Chain of Command. Byclicking on a friendly unit, the following happens:

7/28/2019 CMA Game Manual 1
http://slidepdf.com/reader/full/cma-game-manual-1 63/197
Afghanistan 63
- the selected unit is highlighted in a bright unique color- all friendly units within the same formation (e.g. units from
the same platoon) are highlighted- enemy units which the selected unit can see are highlighted- all other icons are dimmed
When an enemy unit is selected, the following happens:
- the enemy unit is highlighted in a bright unique color- friendly units within LOS of the enemy unit are highlighted- all other icons are dimmed
Some of the most immediate effects of this system are thatunits with dimmed icons cannot be directly targeted by
the selected unit. The unit TacAI will continue to behaveas if no enemy unit was present. It will, for example,continue walking down a road into a possible ambush,unaware of the threat.
The icons displayed are nation-specific and unit-type spe-cific. Normally, it is red diamonds for Russians, bluecircles for Insurgents. The unit representations showthe main type, such as tank, infantry, vehicle, etc., us-
ing the silhouette of the most common unit for thatnation. If play is Red on Red or Blue on Blue, the colorsand shapes remain the same but the black unit repre-sentations on the icons change because they are specificto one nation’s equipment.
Most actions which are possible for the player to do by click-ing on a unit are also possible when clicking on the unit’sicon instead. This is often easier since the unit icons are
“stacked” automatically for easier access. For example,when embarking a vehicle you can click on the vehicleor on its icon.

7/28/2019 CMA Game Manual 1
http://slidepdf.com/reader/full/cma-game-manual-1 64/197
64 Combat Mission
Commands
At the very core of the CM:A tactical game lies its system of
Commands. Commands are the primary form of interac-tion between the player and his virtual soldiers on thebattlefield. CM:A uses a structured Commands systemwhich emulates most of the typical orders a squad of soldiers would give or receive on a real battlefield.
Similar Commands are categorized into specific CommandGroups. The four main Command Groups are:
Move Commands - move units from A to B using variousmethods
Combat Commands - instructs the unit to use its weaponsin some controlled fashion
Special Commands - specific instructions that are nestledin between Move Commands
Admin Commands - similar to Specials, except specific to
unit organization
This structure is more than just for ease of reference. Eachunit is able to combine one command from each groupand perform it simultaneously. For example, a unit canconduct a Move and Combat Command at the same time,while another might perform a Move and Special com-mand. Not all commands can be combined like this, butmany can. Some commands, especially certain Special
and Admin Commands, might require full focus by theunit until completed, while everything else is put on hold.
Which commands are available to which unit, and at whichtime, is highly dynamic. Suppression, fitness, unit cohe-sion, location, the unit’s equipment, and the time of thebattle can all have an effect on what types of commandsare available at which time. Some commands might begrayed out, indicating that they’re temporarily unavail-
able, while others might not appear at all because they’reonly available to a specific type of unit, or only if a spe-cific type of equipment is carried.
Just as in real life, your virtual soldiers are not robots andtherefore will not mindlessly execute each and every or-

7/28/2019 CMA Game Manual 1
http://slidepdf.com/reader/full/cma-game-manual-1 65/197
Afghanistan 65
der from you. There are many situations - usually underheavy enemy fire - in which soldiers may simply refuseto execute a Command you have given them, or mayreplace it with what they consider more suitable. Forexample, you may give a unit a Fast Move Command only
to see it changed instantly to a Slow Move Commandbecause the soldiers feel hugging the ground is the bet-ter way to stay alive. Units with or without orders willalso usually initiate evasive action on their own in theface of extreme danger - for infantry this may includingcrawling to cover, for vehicles it could mean poppingsmoke, rotating to face the threat and retreating awayfrom threats. This can happen if you ordered it or not, if you want it or not, as the unit is simply concerned aboutits own survival at that moment. Keep this in mind whenyou see that your Commands are not exactly workingout as you think they should...
The following is a list of ALL available commands. Certainrestrictions are mentioned, but not ALL possible combi-nations are listed.
In addition to the above, a special category, “Instant Com-
mands”, is available. Instant commands do not appearin the usual Commands Panel, but have their own but-tons at the left top of the Commands Panel interface.These Instant Commands are “emergency” commands,allowing a player to quickly instruct a unit to PAUSE,CANCEL ALL, and EVADE. Obviously, this is mainly use-ful for Real-Time play. Instant Commands are explainedin more detail at the end of this chapter.

7/28/2019 CMA Game Manual 1
http://slidepdf.com/reader/full/cma-game-manual-1 66/197
66 Combat Mission
Move CommandsMove Commands include orders that usually have to do with
getting a unit from point A to point B in a certain fash-ion. Movement commands are generally issued by
selecting the desired type of movement and then click-ing on the map with the mouse, thus placing a waypoint.A Command Line extends from the unit’s current posi-tion to the waypoint.
Additionally, when an infantry unit is moving and the way-point is placed over ground terrain (i.e. not a building orvehicle), the destination “action spot” is highlighted inyellow. Teams B and C (if any) also have their adjacent
destinations highlighted when plotting moves and whengiving facing orders attached to a final waypoint. Notethat the final facing is important for positioning “wingman” teams, so you should attach facing orders to finalwaypoints as needed.
N o t e : i f y o u n e e d e v en m o r e g r a n u l a r c o n t r o l o v e r e ac h o f y o u r
t e am s , i t ’ s a g o o d i d e a t o s p l i t t h e m a n d i s su e i n d i v i d u a l
m o v em e n t co m m a n d s.
Infantry soldiers/units automatically try to position them-selves “smartly” around and along buildings, walls,ridgelines and other terrain which provides cover andconcealment. When targets present themselves soldierswill try to gain line of fire by repositioning themselves.However, as in real life soldiers are reluctant to reposi-tion themselves in exposed positions when they are
currently in good cover.Units do not always follow the exact Command Line drawn
on the map, but will choose their movement path inde-pendently based on the terrain between the start andend points, including finding their way around impass-able obstacles. The chosen route depends on the type of movement command issued, as well as if the unit is be-ing fired on or not. Keep in mind that the longer the
distance between the start and ending points, the morethe route the unit chooses might deviate from what youhad in mind when you gave the order to move out.
Note: o n e c o m m o n m i st a k e b y n e w p l a y e r s i s t o u n d e r e st i m a t e
t h e sp a c e t h a t a v e h i c le n e e d s t o m a n e u v e r . T r y i n g t o

7/28/2019 CMA Game Manual 1
http://slidepdf.com/reader/full/cma-game-manual-1 67/197
Afghanistan 67
m o v e a w i d e v eh i c l e d o w n a n a r r ow s t r e e t m a y n o t w o r k a t
a l l o r r e s u l t i n t h e v e h i c l e b e in g u n a b l e t o t u r n t o f a ce a
t h r e a t . . . Sl o w M o v e m e n t Co m m a n d s u s u a l l y l ea d t o b e t t e r
r e su l t s w h e n m a n e u v e r i n g in d i f f i cu l t t e r r a in w i t h m a n y
o b s t a c le s ( s u c h a s d e n s l y p a ck e d u r b a n a r e a s w i t h n a r r o w
s t r e e t s e t c . )
You can issue several Move Commands (from the same type,e.g. Move + Move; or different types, e.g. Move + Fast)one after the other, generating a string of waypointsthat the unit will pass through one by one. There is nolimit as to how many waypoints you can place, thoughmore than a handful is hardly practical.
Infantry units will usually halt at each waypoint for a few
seconds and regroup, maintaining formation etc. Ve-hicles will simply pass through waypoints if it’s a stringof the same movement types and if they can do so with-out having to slow down for a hard turn.
When you issue a Move Command with the cursor placedover a vehicle capable of transporting soldiers (or overits icon), the unit that is given the Move Command willautomatically embark onto the transport vehicle, either
as passengers or in some cases as crew.
While moving, soldiers will sometimes stop and take a quickshot at nearby/exposed enemy troops, then resumemoving. This depends on the Movement Command is-sued, and is more likely for enemies in front of the unit,and less to the sides and rear.
Moving troops that come under heavy fire usually try to
move FASTer, except when they are so tired that theycould only use walking speed (i.e. not even QUICK). Inthat case they will switch to SLOW (i.e. crawling), andsometimes they cancel their move altogether to seeknearby cover.
Move
Infantry - This is the standard “move from A to B” com-mand usually used in situations where enemy contact isnot expected or is unlikely. It is fairly slow, maintainsunit cohesion, pretty good all-round awareness (but noanticipation of imminent contact), and is not tiring toinfantry. Usually units that come under fire while ex-

7/28/2019 CMA Game Manual 1
http://slidepdf.com/reader/full/cma-game-manual-1 68/197
68 Combat Mission
ecuting a Move Command stop or change their move-ment order and take evasive action, and there is a highchance that they will return fire and look for cover.
Vehicles - this command means slow to medium speed andusually instructs the crew to unbutton to maintain goodall-round observation.
Restrictions - Move is not available when a vehicle has beenknocked out or immobilized (usually by a track, wheelor engine hit, but also if the crew has been incapaci-tated). For infantry, move might not be availabletemporarily due to wounded and incapacitated soldiersas well as excessive fatigue (in which case you have to
let the soldiers rest a little)Example - use Move to change floors in a friendly occupied
and previously cleared building when speed is not im-portant. Use Move to drive down a road not expectingenemy contact.
Quick
Infantry - soldiers move at a jog. This movement typeslightly emphasizes speed over cover, cohesion andawareness, but is not a full-out run. It may lead to somebunching up, as it’s more difficult for soldiers to remainin formation. More tiring than Move but still sustainablefor longer periods, at least for fit soldiers.
Vehicles - this command means medium to fast speeds,and emphasizes arriving at the waypoint quickly over
returning fire.
Restrictions - same as for Move, but fitness and fatigueplay a bigger role.
Example - this command is best used to shift positionsquickly when speed is important but when the area tomove through is covered and not under immediate en-emy view and fire
Fast
Infantry - Fast Movement maximizes speed to get from oneplace to another at the cost of fatigue, and also decreasesawareness and spotting ability, especially to the sides

7/28/2019 CMA Game Manual 1
http://slidepdf.com/reader/full/cma-game-manual-1 69/197
Afghanistan 69
and rear (relative to the unit’s movement direction). Fastmakes the unit less likely to return fire or to stop orchange its movement direction and objective. Keep inmind that this means that a soldier running FAST willNOT stop to reload, either.
Vehicles - Fast means movement near the maximum speedpossible for the terrain, and a decreased awareness of what is happening around the vehicle.
Restrictions - Fast has the same availability restrictions asMove (immobilization, fatigue, etc.), and, additionally,might be unavailable when certain components of a ve-hicle are damaged (even if not fully destroyed), or for
infantry units, when combat/equipment loads are ex-cessive.
Example - use Fast to have a squad sprint across an openroad from one building to another, making sure that theydo not slow down to return fire. Use Fast to cross astretch of open ground with a vehicle in order to reducethe time of exposure to enemy tanks.
SlowInfantry - Slow is the equivalent of a Crawl command. Sol-
diers move forward in the prone position, maximizingcover and concealment at the cost of speed and fatigue.Crawling is extremely slow and very tiring and shouldonly be used to move short distances. Crawling soldiersare generally hard for the enemy to spot (depending on
terrain). Crawling soldiers tend to pause and return fireat nearby/exposed enemy troops often, then resumemoving. After reaching the destination, soldiers whomove SLOW (i.e. crawl) will tend to keep their headsdown for a little while even if there is no incoming fireand no enemies are spotted.
Vehicles - instructs the vehicle to move slowly, at walkingspeed. Useful when coordinating vehicle movements with
infantry.Restrictions - same as for all Movement commands.
Example - crawling up the last meters towards a crest oredge of a tree line helps maintain concealment. Slow

7/28/2019 CMA Game Manual 1
http://slidepdf.com/reader/full/cma-game-manual-1 70/197
70 Combat Mission
vehicle movement makes the vehicle less likely to ap-pear as a sound contact to the enemy.
Hunt
Infantry - this command maximizes the unit’s awarenessfor possible enemy contact. Soldiers advance slowly,weapons ready. Upon seeing an enemy unit, the unitstops immediately. This is a good command to use whenenemy contact is imminent. In combination with a Tar-get Arc command, Hunt is restricted to only the areawithin the arc, and ignores enemy units outside the arc.
N o t e : w h e n s o l d i e r s u s i n g H UN T g e t t o o t i r e d , t h e y s t o p a n d p a u s e f o r 9 0 s e c o n d s b e f o r e co n t i n u i n g t o H UN T .
Vehicles - orders vehicles to advance slowly and observethe battlefield for enemy contacts. Upon spotting athreat, such as another enemy vehicle or tank, the ve-hicle stops immediately. In combination with a TargetArc command, Hunt is restricted to only the area withinthe arc, and ignores enemy units outside the arc.
Restrictions - same as all other Movement commands.
Example - Hunt is very useful for cleaning out houses whichare suspected to have enemy hiding inside.
Assault
This command is available for infantry squads only, and
requires a certain minimum headcount (in other words,you cannot use assault if you only have two or threepeople active). It instructs the squad to conduct a socalled “leapfrog” movement, which is executed by split-ting the squad into a movement element and a firingelement. The moving element advances at FAST speed(the same limitations apply as with the FAST command)while the firing element remains stationary and provides
covering fire. After the movement element stops (end-ing the first “leap”), the roles switch, and the movementelement (now the firing element) provides covering firewhile the firing element (now the moving element) ad-vances, reaches and overtakes the firing element, and

7/28/2019 CMA Game Manual 1
http://slidepdf.com/reader/full/cma-game-manual-1 71/197
Afghanistan 71
arrives at the next “leap”. This procedure repeats untilthe squad has reached its designated objective location.
Assault is usually executed in the face of enemy fire (usu-ally from the front) and is a good compromise of securityand forward movement while maintaining unit cohesionand limiting fatigue. The disadvantages are that it is afairly slow form of advance, and that it requires a cer-tain minimum unit experience to implement.
Restrictions - Since “leapfrogging” does not make muchsense with only a handful of soldiers, it requires a cer-tain minimum headcount.
Example - use Assault to cover open ground over long dis-
tance while under enemy fire. Use Assault to clean outbuildings (only the assault team is exposed to ambushes)
Blast
This command enables an infantry unit with demo chargesto blast a manhole through a building wall, exterior orinterior, as well as through tall stone or brick walls, al-
lowing units to pass through the wall. The time it takesto conduct this command varies based on unit experi-ence, and can range from one minute to several minutesper wall.
The Blast Command instructs the unit where to move. Thismakes it no different from any other Movement Com-mand, except that the unit attempts to blow up a sectionof (nearby!) wall along its path.
N o t e : I t i s a g o o d i d ea t o p l a ce t h e B l as t Co m m a n d o n t h e
o p p o s i t e s id e o f t h e w a l l y o u w a n t b r e a ch e d . Th i s e n s u r e s
t h a t t h e c o r r e c t se c t i o n o f w a l l i s b r e a c h e d a n d t h a t t h e
u n i t m o v e s t h r o u g h t h e o p e n in g .
Restrictions - only available for infantry units carrying democharges.
Example - moving in a city down an open street can belethal - especially when the enemy has a few well posi-tion machineguns in place. A much safer, but more timeconsuming method, is to blow holes in adjoining build-ings, avoiding the open street entirely. Another good

7/28/2019 CMA Game Manual 1
http://slidepdf.com/reader/full/cma-game-manual-1 72/197
72 Combat Mission
use for this command is to enter and storm a buildingfrom an angle the enemy isn’t expecting.
Mark Mines
This command enables engineer units to detect and markhidden minefields so that other units are aware of them.Other units can then move through the marked minefield,albeit slowly. Mark Mines is a very slow movement com-mand that takes the unit’s full attention and reducesawareness and returning fire.
Restrictions - only Engineers can mark mines.
Example - Marking mines under fire is suicidal unless youhave other forces suppressing the enemy or call for alarge scale smoke screen.
Reverse
Simple “back up” command, available only to vehicles. In-structs the vehicle to drive backwards without changing
its facing (e.g. keeping its gun and stronger front armorforward towards the enemy while retreating).
Restrictions - same as for all Movement commands.
Example - use Reverse to back up into cover while keepinga tank’s front armor directed at the enemy.

7/28/2019 CMA Game Manual 1
http://slidepdf.com/reader/full/cma-game-manual-1 73/197
Afghanistan 73
Combat CommandsCombat Commands usually have to do with firing one’s
weapons at a designated target, be it an enemy unit or ageneral area on the battlefield where enemy units are
suspected or known to hide (or to move to). Only oneCombat Command can be active at any one time, but itcan be combined with commands from other Groups (e.g.movement).
N o t e : I n g e n e r a l , t h e p l a y e r ca n n o t d e t e r m i n e w h i ch w e a p o n s
e x a c t l y a r e u s e d . T h i s c h o i ce i s m a d e b y t h e sq u a d / u n i t
l ea d e r b as ed o n t h e c i r cu m s t an c e s ( r a n g e t o t a r g e t , a m m o
s i t u a t i o n , su p p r e s s io n a n d s o f o r t h ) .
Target
This is the standard fire command, instructing a unit touse all of its available weapons to fire at the designatedtarget. The target can be an enemy unit or a piece of terrain (area fire).
If the target is an enemy unit, the firing unit will fire onlywhen the enemy target is visible and hold fire (but main-tain the target) when it is not. If the target is an area,the firing unit will maintain a constant stream of outgo-ing fire at the selected area.
N o t e : A r e a t a r g e t s a lw a y s “s n a p ” t o t h e u n d e r l y i n g a c t i o n g r i d in
CM :A
How much and what type of fire (small arms, main gun,anti-tank missile, grenades) is outgoing depends on anumber of factors, including the type of firing unit, thedistance to the target, target type, and the availableammunition. For smaller targets further away, the fir-ing unit will use aimed fire and single shots or shortbursts while it might switch to full auto at targets atclose range and when it has enough ammunition avail-
able.Targets out of sight are usually displayed to the player
through a note hovering near the target mouse cursor.Notes can include a plain “out of sight” message, or moredetailed explanations such as “reverse slope - no targetpoint”. Usually, the target will still be designated even if

7/28/2019 CMA Game Manual 1
http://slidepdf.com/reader/full/cma-game-manual-1 74/197
74 Combat Mission
out of sight, but the unit will hold fire until the targetcomes into sight.
Additionally, while the target command is being issued, thecommand line extending from the firing unit to the mousecursor assumes the function of a Line-of-Sight tool. Dif-ferent shades of blue and red indicate if a line of sight isfree, obscured, or blocked, and where it is blocked (thearea out of sight is marked with red). When placing atarget command the color denotes how strong the LOSis to the target. If the line to the target is light blue theLOS is clear, part dark blue and part magenta if it’sblocked, and gray if it’s mostly clear but not for everysoldier in the squad/team.
Note: V i r t u a l ly e a c h b u l le t i n CM A i s t r a ck e d f r o m m u z z le t o
t a r g e t . T h i s a p p l i e s t o b o t h s m a l l a r m s a s w e l l a s h e a v y
c a l ib e r s . T h e p r i n c ip l e o f “ w h a t y o u s ee i s w h a t y o u g e t ”
a p p l i e s: i f o n l y p a r t o f a v e h i c l e is v i s i b l e ( e . g . b e h i n d a
w a l l o r p a r t i a l l y co n c e a l ed b y a s lo p e i n t h e t e r r a i n ) t h e n
o n l y t h a t p a r t c a n b e h i t b y d i r e c t f i r e . T h e o n l y e x c e p t i o n
t o t h i s i s t h a t v e h i c le s a r e NO T s h i e ld e d b y h i d i n g b e h i n d
k n o c k e d - o u t a r m o r e d v e h i c l e s ( h o w e v e r , i n f an t r y d o e s
g a i n c o v e r i n t h i s s i t u a t i o n ) .
Restrictions - Target is not available if the unit has no ammo.
Example - enemy snipers are firing from a building. In-stead of targeting the enemy unit, the player calls forarea fire from a tank, which uses high-explosive ammofrom its main gun to blow up the whole building.
Target LightThis is a variation of the Target command and works very
much the same, but at a reduced fire output. Usually itlimits the firing unit to use small arms and MG fire, whilelarger calibers, rockets and heavier weapons hold fire.Target Light is useful when you want to put a few MGrounds into a suspected enemy location but not waste atank’s main gun round, or if you want to take a few aimedshots at a far away infantry target without wasting toomuch ammo. Target light does not prevent the use of hand and rifle grenades, though, at the appropriateranges.
Restrictions - same as for Target

7/28/2019 CMA Game Manual 1
http://slidepdf.com/reader/full/cma-game-manual-1 75/197
Afghanistan 75
Example - for firing at long distances, the game itself al-ready reduces fire output even if you use the Targetcommand, so Target Light is most useful as an ammopreservation tool for targets at medium and close ranges.
Target ArcThe Target Arc command orders the unit to only fire at en-
emies within a certain target area. After selecting thiscommand, the player has to click on two points on thegame map, and the cone-shaped area between thosetwo points represents the designated target area. Anyvisible enemy units that are located inside this area, or
that move into this area, will be fired upon. Any enemyunits outside of this target arc will be ignored (until self-preservation takes over and the Tactical AI decides tooverride player orders; e.g. if an enemy unit suddenlypops up at extremely short range).
When placing a target arc, the distance in meters is dis-played.
This Command is also useful to keep a unit’s “attention”focused on a specific part of the game map while itmoves. If, for example, you want to keep a close eye ona bunch of buildings (where you suspect enemy activ-ity) while driving down a road, you could assign a targetarc to several units covering this area. The target arcincreases the chances that units will recognize and en-gage an enemy threat within the target area quickly.
After placing an arc, the unit will rotate its main gun turret- if available - to face the center of the designated tar-get arc, to minimize acquisition delays and maximizespotting abilities. Infantry units will shift their facingaccordingly.
Restrictions - You cannot mix Target/Target Light and Tar-get Arc commands. The AI will sometimes overrideTarget Arcs in self-defense, when, for example, an en-
emy unit suddenly appears at close range.Example - an unidentified enemy vehicle contact is reported
near a building. We give a target arc command to one of our Abrams tanks to make sure they engage the enemyvehicle as soon as it pops up from behind cover.

7/28/2019 CMA Game Manual 1
http://slidepdf.com/reader/full/cma-game-manual-1 76/197
76 Combat Mission
N o t e : Ta r g e t A r c s p l a cem e n t i s “ r e l a t i v e ” , i .e . i n r e l a t i o n t o t h e
u n i t ’ s p o s i t i o n a n d f a c in g , a n d n o t t i e d t o a n a b s o lu t e
l o ca t i o n o n t h e g a m e m a p . I n o t h e r w o r d s , i f y o u m o v e a
u n i t w i t h a d e s i g n a t e d Ta r g e t A r c , t h a t a r c w i l l m o v e a n d
t u r n t o g e t h e r w i t h t h e u n i t . I n t h i s w a y , y o u c an o r d e r a
u n i t t o “ c o v e r t h e t h r e e o ’ c l o ck p o s i t i o n ” . Yo u c an n o t u s e a T a r g e t A r c t o “ s t i ck ” t o a p a r t i cu l a r s p o t o n t h e m a p . So , i f
t h a t ’ s w h a t y o u w a n t , y o u h a v e t o k e e p t h e t a r g e t i n g u n i t
s t a t i o n a r y o r a d j u s t t h e a r c a cc o r d i n g l y d u r i n g t h e u n i t ’ s
m o v e m e n t .
Clear Target
Instructs the currently selected unit to stop focusing on itsdesignated target. A unit without a designated target isthen free to engage targets at will, or will follow otherplayer-specified commands.
Restrictions - Clear Target is grayed out if the selected unithas not currently designated a target.
Example - after area firing at a building and blowing a holein the wall, no further enemy contact is reported. We
abort the area fire command to allow the unit to focuson other targets at will.
Face
Infantry - issuing a Face command will cause the soldiersof the unit to re-evaluate the cover provided by the sur-rounding terrain in relation to the facing the player has
indicated, and, if better cover is available, to move tothat cover. For example, the unit might move around awall, or house corner, to face the new direction whilemaximizing cover against fire coming from that direc-tion. You can issue a Face Command to a unit in motionas well. If you do so, then the last waypoint will be au-tomatically highlighted so the Face Command will applyto that last waypoint, not the current position. You are
also able to manually select a waypoint (any waypoint,not just the last one) and issue a Face order from therehowever.
Note: the Face command is “absolute” to the point you clickon the map, not “relative” to the position of the unit atthe time that you click. An example: You issue a Face

7/28/2019 CMA Game Manual 1
http://slidepdf.com/reader/full/cma-game-manual-1 77/197
Afghanistan 77
command to a moving unit by clicking on a house in thedistance. When the unit reaches its final waypoint, itwill turn to face the house.
Vehicles - The unit will rotate its hull and turret (if appli-cable) to face the direction the player has designated.
Restrictions - vehicles cannot rotate if immobilized.
Example - an RPG team is spotted on the flank. We changethe facing of our T-62 tank to rotate its stronger fronthull towards the threat.
Target Smoke
Infantry - not applicable. Use Pop Smoke instead.
Vehicles - The unit will fire a smoke shell at the designatedtarget or location.
Restrictions - Units need to be able of firing smoke shells,and ammunition needs to be available.
Example - a major threat appears in front of your tank. The
tank commander orders smoke to be fired in front of theenemy to blind it, gaining valuable time for a retreat.
Special Commands
Special Commands include various special tasks not directlyrelated to movement or firing weapons. Many SpecialCommands deal with specific situations or specific equip-ment, and therefore are only available to a unit if those

7/28/2019 CMA Game Manual 1
http://slidepdf.com/reader/full/cma-game-manual-1 78/197
78 Combat Mission
conditions are met or if the equipment is available. Pop-ping Smoke, for example, is only possible if the unit hassmoke grenades available. Likewise, Deploy Weapon isonly an option if the unit carries a heavy weapon whichcan (or has to be) deployed before firing. Most Special
Commands are exclusive, meaning that they are the onlycommand that can be executed at a given time, and can-not be combined with other Command Groups.
Hide
Infantry - soldiers will generally go prone and hold fire andlook for nearby terrain offering good concealment, try-
ing hard not to get spotted.Vehicles - vehicles will hold fire and not move, trying to
keep a low noise profile. Hiding vehicles that are struckby a projectile, or that spot an enemy vehicle targetingthem, will automatically un-hide.
N o t e : H i d i n g w h i l e f a c i n g a n e n e m y t a k e s a lo t o f n e r v e , a n d
u n i t s m i g h t d e c id e t o s t o p h i d in g i f f i r e d u p o n o r i f t h e
e n e m y a p p r o a c h e s ex t r e m e ly c l o se , d e p e n d i n g o n t h a t u n i t ’ s e x p e r i e n c e , m o r a l e a n d l e a d e r s h i p .
Restrictions - hiding is no good if the enemy is already fir-ing at you, or if you are trying to hide in open ground infull view of the enemy.
Note: is su i n g a H i d e c om m a n d t o a m o v i n g u n i t i s p o s s ib l e . T h e
u n i t w i l l co n t i n u e m o v i n g a n d w i l l a u t o m a t i ca l l y h i d e a f t e r
r e ac h i n g t h e F I N A L w a y p o in t . I f y o u w a n t a u n i t t o h i d e
i m m e d i a t e l y y o u h a v e t o f i r s t i ss u e a CANCEL A LL I n s t a n t
Co m m a n d t o c le a r a l l w a y p o i n t s , an d t h e n i ss u e t h e H i d e
C o m m a n d .
Example - we hide a Mujahedeen RPG team to let the firstfew vehicles and US infantry pass by before un-hidingand launching an RPG at the side of an enemy tank
Deploy WeaponCertain heavy weapons can be deployed before firing to
increase their chance of hitting or to increase their fireoutput, while others cannot be fired at all before beingproperly deployed. Deploy Weapon instructs the gunner

7/28/2019 CMA Game Manual 1
http://slidepdf.com/reader/full/cma-game-manual-1 79/197
Afghanistan 79
of a heavy weapon (such as a medium or heavy machine-gun, a mortar, a recoilless rifle, an ATGM, or other heavyequipment) to deploy his weapon on the appropriatemount, while one or more other soldiers of the sameunit are designated as loaders and/or security or look-
outs.
Some weapons, such as, for example, medium machine-guns, can be fired without first being deployed, but willsuffer from decreased accuracy and a lower fire output.Other weapons, such as mortars, cannot be fired at all if not properly deployed
Deployment takes a specific amount of time for each type
of weapon, and also depends on various other factors,such as the unit’s experience and current condition.
If you order a unit with a currently active Deploy Weaponcommand to move, it will automatically first de-activatethe Deploy Weapon command, and then execute themovement command. There is a longer command delayin such case.
Restrictions - If you issue the Deploy Weapon command to
an already moving team, it will deploy its weapon at theend of the movement command. If the movement com-mand consists of several waypoints, the weapon will bedeployed after the last waypoint has been reached. If you want the team to deploy immediately, you need tofirst clear the movement command(s).
N o t e : D e p en d i n g o n t h e w e a p o n s y s t e m , ce r t a in r e s t r i c t i o n s m a y
a p p l y a s t o w h e r e a w e a p o n c an b e d e p l o y e d o r n o t . Fo r e x a m p l e , s o m e w e a p o n s m a y n o t b e d e p l o y ed i n s i d e
b u i l d i n g s o r o n b a l co n i e s o r r o o f s . O t h e r s m a y b e d e p l o y e d ,
b u t t h e Se t u p T im e i s i n c r e as e d : fo r e x am p l e , h e a v y M Gs
m a y d e p l o y i n s i d e b u i l d i n g s , t h o u g h a s sem b l y t i m e is 2 +
m i n u t e s .
Example - we want to use a heavy machinegun to providecovering fire for an infantry assault. Finding a good po-sition with good field of view and field of fire, we issue
the Deploy command to maximize that guns accuracyand fire output.
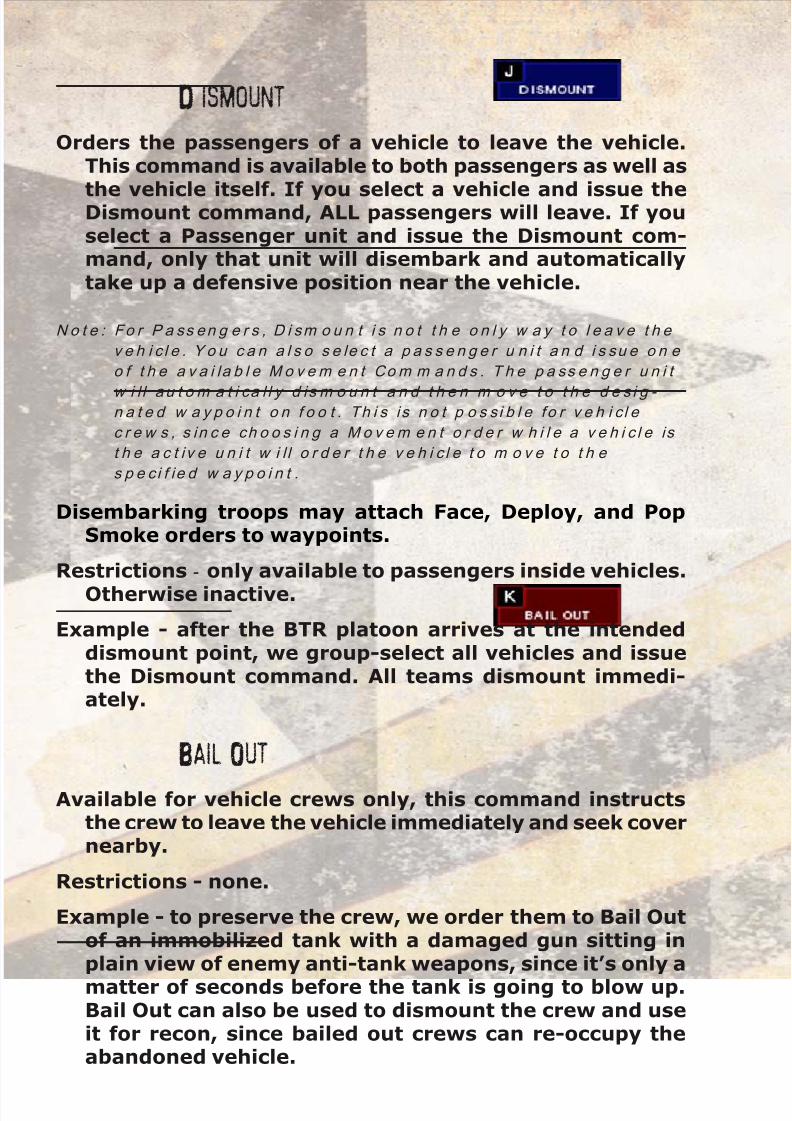
7/28/2019 CMA Game Manual 1
http://slidepdf.com/reader/full/cma-game-manual-1 80/197
80 Combat Mission
Dismount
Orders the passengers of a vehicle to leave the vehicle.This command is available to both passengers as well as
the vehicle itself. If you select a vehicle and issue theDismount command, ALL passengers will leave. If youselect a Passenger unit and issue the Dismount com-mand, only that unit will disembark and automaticallytake up a defensive position near the vehicle.
N o t e : Fo r P a ss en g e r s , D i sm o u n t i s n o t t h e o n l y w a y t o l e a v e t h e
v e h i c l e . Y o u c a n a l s o s e le c t a p a s s e n g e r u n i t a n d i s su e o n e
o f t h e a v a i la b l e M o v em e n t Com m a n d s . T h e p a ss e n g e r u n i t
w i l l au t o m a t i ca l l y d is m o u n t a n d t h e n m o v e t o t h e d e s i g - n a t e d w a y p o i n t o n f o o t . Th i s is n o t p o s s i b l e fo r v e h i c l e
c r e w s , s in c e ch o o s i n g a M o v em e n t o r d e r w h i l e a v e h i c l e is
t h e a c t i v e u n i t w i l l o r d e r t h e v e h i c l e t o m o v e t o t h e
s p e c i f ie d w a y p o i n t .
Disembarking troops may attach Face, Deploy, and PopSmoke orders to waypoints.
Restrictions - only available to passengers inside vehicles.
Otherwise inactive.
Example - after the BTR platoon arrives at the intendeddismount point, we group-select all vehicles and issuethe Dismount command. All teams dismount immedi-ately.
Bail Out
Available for vehicle crews only, this command instructsthe crew to leave the vehicle immediately and seek covernearby.
Restrictions - none.
Example - to preserve the crew, we order them to Bail Outof an immobilized tank with a damaged gun sitting inplain view of enemy anti-tank weapons, since it’s only a
matter of seconds before the tank is going to blow up.Bail Out can also be used to dismount the crew and useit for recon, since bailed out crews can re-occupy theabandoned vehicle.

7/28/2019 CMA Game Manual 1
http://slidepdf.com/reader/full/cma-game-manual-1 81/197
Afghanistan 81
Acquire
The Acquire command allows an infantry unit to pick upequipment, weapons and ammunition from points where
such goodies are available. In CM:A, this usually meansfrom infantry carriers such as the BTR-70 and BMP-1,for example, which carry additional equipment in stor-age compartments.
In order to use Acquire, the infantry unit has to enter thevehicle first. A pop-up window lists all available equip-ment that the unit is eligible to choose from. Clicking onan entry removes the equipment or ammo from the list
and places it into the inventory of the passenger unit.
Restrictions - only active when the infantry unit is inside avalid pickup area, such as inside a BMP-1.
Example - after nearly an hour of continuous combat, theinfantry platoon is running out of ammo. We split thesquads into teams and order them into the BMD one byone to grab fresh ammo.
Pop Smoke
This order is available for both infantry equipped withsmoke hand grenades as well as for vehicles equippedwith smoke generators or smoke launchers. Pop Smokeinstructs such units to place a smoke screen around itscurrent position. Pop Smoke is used usually as a defen-sive command when the unit runs into overwhelmingresistance and is useful to spoil the enemy’s aim (evenif only for a few seconds) and therefore gain time to getinto a better and more secure position (or out of an am-bush, for instance).
The duration and placement of the smoke screen dependson the unit that is executing this order, as well as theweather and wind conditions. Keep in mind that smokedrifts and dissipates rather quickly under certain condi-tions, and can often become as much of an obstacle toyour own forces as to the enemy. Offensive use of smoke(e.g. covering an advance) is usually left to supportingartillery or air assets and not to the individual groundunit.

7/28/2019 CMA Game Manual 1
http://slidepdf.com/reader/full/cma-game-manual-1 82/197
82 Combat Mission
N o t e : " P o p Sm o k e " c an b e a i m e d u s in g t h e Fa ce Com m a n d o r
c u r r e n t u n i t f a c i n g . T h e s m o k e w i l l n o t f i r e u n t i l a n
e x i s t i n g Fa c e Com m a n d i s e x e c u t e d .
Restrictions - available only as long as unit has smoke gre-
nades available and the smoke launchers are notdamaged.
Example - a BTR platoon needs to dismount under fire. Thevehicles are ordered to pop a defensive smoke screenaround the dismount point, allowing the infantry to dis-mount and head for cover, while spoiling the enemy aim.
PauseAvailable for all unit types, this command instructs a unit
to wait before carrying on with further orders. Pausecan have different states, and each click on the PauseCommand Button scrolls through the list of availableoptions.
Timed Pause - when you first select the Pause Command,an info text appears next to the selected unit icon, say-ing “Pause 00:15”. This means that the unit is going towait in place (but will continue firing, if applicable) for15 seconds before continuing with any other orders. Eachfurther click adds 15 seconds to the timed pause, for amaximum amount of 1:30 min (the longest selectabletime for timed pause).
Pause - The next click sets the Pause Command to a “Pausefor further orders” status. This is identical to the “Pause”used for Instant Commands, and is additionally indicatedby an activated “Instant Pause” button. The unit willstay in place until the player clicks the Instant Command“Pause” button again, after which the unit will resumeany pending commands.
Un-Pause - The next click resets the cycle and clears thePause command. At this setting, the unit is not going to
pause.Restrictions - none.
Example - if you want to time it so that one squad crossesa road, using FAST, at a time, you can issue FAST com-mands to all squads in the platoon in advance, and assign

7/28/2019 CMA Game Manual 1
http://slidepdf.com/reader/full/cma-game-manual-1 83/197
Afghanistan 83
each a different time delay using the Pause command.So, you could have 1st Squad break and cross the streetimmediately, then Squad 2 thirty seconds later, thenSquad 3 after 1 minute, for example.
Open UpAvailable for both vehicles and passengers. Open-up is a
toggle. When activated (highlighted), it instructs thevehicle passengers or crew to open all available hatches.If the vehicle has none available, nothing happens. Whende-activated, it tells the crew or passengers to close allhatches.
Restrictions - available only for vehicles and passengers.
Example - fighting from an open hatch increases the fieldof view and battlefield awareness of a vehicle crew tre-mendously, and even allows passengers to use personalweapons, but it can be very dangerous and lead to casu-alties, especially if the enemy returns fire from closedistance. Use this command to switch between situ-ational awareness and added protection, as the situationdemands.

7/28/2019 CMA Game Manual 1
http://slidepdf.com/reader/full/cma-game-manual-1 84/197
84 Combat Mission
Administrative CommandsAdministrative commands deal with the organization of
squads, teams and crews.
Split Teams
Evenly (more or less) splits a squad into two teams. The
Tactical AI tries to keep both teams at roughly the samestrength and also distribute special weapons evenly,thereby effectively creating two independent maneuverelements. Splitting teams is often advisable when fight-ing in urban terrain so as to avoid bunching up of soldiersinto too small of an area, where they all can be takenout by a single well-placed hand grenade.
Split teams (including the assault and anti-tank detach-
ments created by the two commands explained furtherbelow) belonging to the same parent squad automati-cally re-join when stationary within a few meters nextto each other, and form a single squad-sized unit againwithout requiring the player to give another order. So if you want to split a squad into teams, make sure thatyou separate the teams shortly after splitting them, orthey will reform into a single unit.
Restrictions - not available if the headcount of a given squadis too small.
Example - we want to enter a building suspected to con-tain light enemy forces from two sides at the same time.We use the Split Teams command to split a Squad in

7/28/2019 CMA Game Manual 1
http://slidepdf.com/reader/full/cma-game-manual-1 85/197
Afghanistan 85
two, and send the teams to doors on opposite sides of the building, timing their entry to happen simulta-neously.
Assault TeamSplits a squad into two independent teams - a heavily armed
security element that usually retains all heavy weapons(such as machineguns and rockets), and a maneuverelement with small arms and automatic weapons,handgrenades and other equipment useful for close quar-ters battle. The game automatically tries to include thesoldiers with applicable Specialties (MOS) - such as
Machinegunner or Sniper - into the correct Teams fortheir task.
Restrictions - same as for Split Teams.
Example - we want to clean out a building suspected to beoccupied by the enemy. Sending forward the maneuverelement with light automatic weapons, while keepingthe heavy equipment back with the security element,reduces possible casualties from first contact and pro-vides security for the moving team.
Anti-Tank Team
Orders the squad to detach an Anti-Tank element, usuallyconsisting of two or more soldiers (including any sol-diers with an Anti-Tank Specialty, if available) armedwith the best anti-tank weapon(s) that the unit has atits disposal.
Restrictions - only available if the squad/unit has anti-tankweaponry available.
Example - we split out a two-man RPG team from the mainsquad and place it in a different location, issuing a Hidecommand to them to wait for a good shot, while the restof the squad engages and distracts the enemy by fire.
Scout TeamSplits a squad into two teams - a team consisting of a few
solders with light automatic weapons (if possible) thatare sectioned off to act as light recon for the Squad orPlatoon. The game automatically tries to put solders in

7/28/2019 CMA Game Manual 1
http://slidepdf.com/reader/full/cma-game-manual-1 86/197
86 Combat Mission
a scout team that do not have other responsibilities suchas AT Expert, Radioman or Leader. In other words sol-ders that should be able to fight their way out of a badsituation, but that are not as critical (if lost) than othersin the Squad.
Restrictions - same as for Split Teams.
Example - we want to send a recon element forward to seeif there is an enemy ambush. Splitting off a scout teamminimizes casualties from first contact.
Instant CommandsInstant commands are mainly used for emergencies, when
you need to quickly intervene to prevent a unit fromgetting into trouble (or to get out of trouble quickly).These commands allow the player to initiate three pre-defined “procedures” with one click, which, duringemergencies, is often about all the time one has. Thesecommands simulate actions soldiers would normally takeby themselves on the battlefield when finding themselvesin a tight situation.
PAUSE - instructs the unit to temporarily halt all active or-ders and wait. This is the equivalent of yelling “Halt”.This button is a toggle, and by pressing it again, the unitis ordered to resume what it was doing. This is the
equivalent of yelling “Carry on!”CANCEL ALL - deletes ALL active commands for the unit
instantly. If you have plotted a long chain of waypoints,this command allows you to delete all of them with oneclick without having to delete each waypoint one by one.This is the equivalent of yelling “Stop” over the radio.
EVADE - deletes all active commands and instructs the unitto take immediate evasive action. This may include mov-ing to cover as well as popping smoke, if available. Thisis the equivalent of yelling “take cover” over radio.

7/28/2019 CMA Game Manual 1
http://slidepdf.com/reader/full/cma-game-manual-1 87/197
Afghanistan 87
Command & Control (C2)
The concept of moving and acting on information is called
Command and Control, or “C2” for short (or, “C4ISR” incontemporary US specific terminology). Arguably, C2 isthe single most important aspect of a combined armsforce operating in the field. Its ability to pass informa-tion up and down the Chain of Command largelydetermines that force’s opportunities and the optionsavailable to it.
N o t e : t h e C2 r u l e s a p p l ie d i n CM : A v a r y s l ig h t l y d e p e n d i n g o n w h i c h Sk i l l l e v e l y o u ’ r e p l a y in g . T h i s c h a p t e r a s s um e s t h e
h i g h e s t , o r El i t e , s k i l l , w i t h a l l t h e r u l e s i n f u l l e f f e ct . A t
V e t e r a n l e v e l , s om e o f t h e r e s t r i c t i o n s i m p o s e d b y t h e C2
r u l e s a r e l i f t e d o r a t l e a s t n o t a s s t r i c t , w h i l e p l a y in g a t
B a s ic Tr a i n i n g l e v e l e s se n t i a l ly m e a n s C2 i s n o t a c t i v e a t
a l l .
There are two primary components of C2: communicationmethods and control procedures. Each is enhanced bythe other, and each is degraded by the other. In practi-cal terms, this means a break in communications reducesthe ability for the force to function properly, but goodcommunications don’t matter if the commanders can’tleverage the information to achieve an advantage.
C2 methods are divided up into three different groups anddisplayed in the Unit Info Panel:
The methods, from left to right, are:
Visual - Eye Contact (LOS, short- and long-distance)Audio - Voice Contact, Radio Contact (differentiated by type)
Like any sort of chain, the Chain of Command is only asstrong as its weakest C2 link. Having all three methodsavailable to a unit at the same time allows for the bestpossible results, while having none at all means a breakin the Chain of Command. A break means the higherand lower parts of the chain are no longer connected

7/28/2019 CMA Game Manual 1
http://slidepdf.com/reader/full/cma-game-manual-1 88/197
88 Combat Mission
and therefore unable to communicate with each other.This can have disastrous game results.
Maintaining C2 Links
The more types of C2 links units have, the better chancethey have of maintaining connections. Just rememberthat not all C2 methods are of equal quality. Range isquite important because the farther away units are fromeach other the greater the chance they will experiencebreaks in communications. The inherent fragility of themethod is also important since some are inherently morerobust.
All units have the opportunity to establish Eye and VoiceContact, but to do so means keeping units fairly closeand in plain sight (LOS) of each other. These are themost reliable, robust forms of C2 possible. Unfortunately,from a tactical standpoint, having units bunched up isgenerally not a good idea, nor is it even necessarily physi-cally possible. Radio Contact is the most basictechnological means of overcoming these problems,however, radios are tricky things to operate effectively
as distances increase, and good radios are quite expen-sive.
Information SharingThe better organized and connected a force is, the better
able it is to communicate critical pieces of informationbetween units. Though it is not obvious to the playerthat the information itself is moved around, the resultsof it are. There are three primary benefits of good orga-
nization and communication; spotting of enemy units,calling for support, and maintaining discipline.
One of the most important aspects of Combat Mission is itssystem of revealing information about enemy units, suchas position, type, and actions. Unlike most other games,

7/28/2019 CMA Game Manual 1
http://slidepdf.com/reader/full/cma-game-manual-1 89/197
Afghanistan 89
CM:A uses what we call Relative Spotting instead of Ab-solute Spotting. In an Absolute Spotting system, whenan individual friendly unit “senses” something, that in-formation is instantly, and perfectly, available to all unitson its side. It doesn’t matter where the other units are
or what sorts of communications capabilities they have.Relative Spotting, on the other hand, keeps the unit’s“sensed” information from moving to other units unlessthere is some way of communicating it to them. In otherwords, when you click on a unit in CM:A you get to seewhat it sees relative to what it knows. If the unit isisolated from the Chain of Command it wouldn’t be ableto target something it didn’t spot itself, for example.
Good quality C2 between the right units becomes of para-mount importance when Air or Artillery Support arerequired. Not all units are equally capable, or even able,to direct such fire missions. Picture that critical unit,with the ability to possibly change the course of thebattle, cut off from the Chain of Command. How can itcall in Support if it can’t communicate with anybody?Well, it can’t! For the Soviet units, this is a particularly
serious concern since the centralized nature of their Ar-tillery Support means very few units are allowed to evenrequest Artillery in the first place. Unit placement andmaintenance of C2, therefore, becomes an overridingpriority when such assets are available for use.
Lastly, maintaining C2 is important for keeping unit cohe-sion intact. Units tend to get jumpy when they don’tknow what the friendly units around them are up to, or
where their superiors are, or what the enemy might betrying to do at that moment. Without C2, the imagina-tion can run a bit wild, so to speak, and the unit may beimagining the worst scenario. Perhaps all its buddieswithdrew and forgot to tell it to pull back? Maybe theHQ was wiped out and nobody higher up knows aboutthose tanks coming down the road, and therefore no helpis on the way? Well-disciplined units hold up better un-der these circumstances, of course, but every unit has
its breaking point. If it has contact with its fellow forcesand feels supported, things are less stressful.
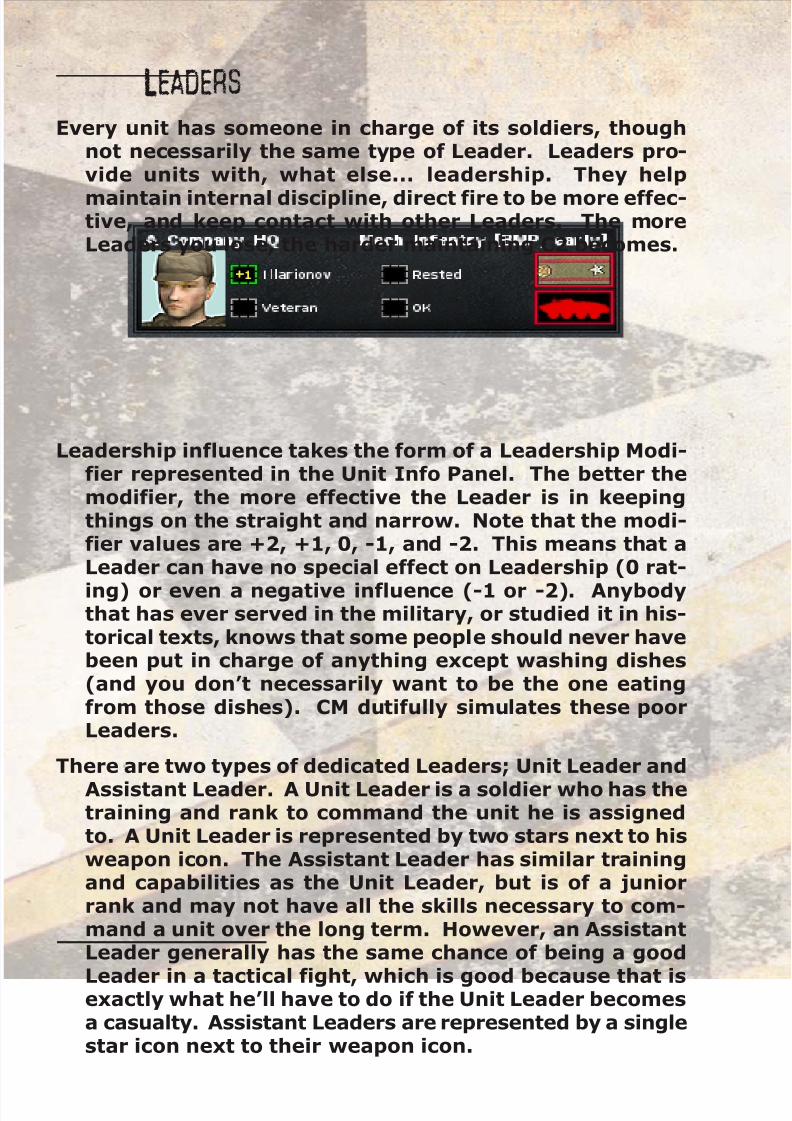
7/28/2019 CMA Game Manual 1
http://slidepdf.com/reader/full/cma-game-manual-1 90/197
90 Combat Mission
LeadersEvery unit has someone in charge of its soldiers, though
not necessarily the same type of Leader. Leaders pro-vide units with, what else... leadership. They help
maintain internal discipline, direct fire to be more effec-tive, and keep contact with other Leaders. The moreLeaders you lose, the harder maintaining C2 becomes.
Leadership influence takes the form of a Leadership Modi-fier represented in the Unit Info Panel. The better themodifier, the more effective the Leader is in keepingthings on the straight and narrow. Note that the modi-fier values are +2, +1, 0, -1, and -2. This means that aLeader can have no special effect on Leadership (0 rat-
ing) or even a negative influence (-1 or -2). Anybodythat has ever served in the military, or studied it in his-torical texts, knows that some people should never havebeen put in charge of anything except washing dishes(and you don’t necessarily want to be the one eatingfrom those dishes). CM dutifully simulates these poorLeaders.
There are two types of dedicated Leaders; Unit Leader and
Assistant Leader. A Unit Leader is a soldier who has thetraining and rank to command the unit he is assignedto. A Unit Leader is represented by two stars next to hisweapon icon. The Assistant Leader has similar trainingand capabilities as the Unit Leader, but is of a juniorrank and may not have all the skills necessary to com-mand a unit over the long term. However, an AssistantLeader generally has the same chance of being a good
Leader in a tactical fight, which is good because that isexactly what he’ll have to do if the Unit Leader becomesa casualty. Assistant Leaders are represented by a singlestar icon next to their weapon icon.

7/28/2019 CMA Game Manual 1
http://slidepdf.com/reader/full/cma-game-manual-1 91/197
Afghanistan 91
Squad-type units usually have a Squad Leader (Unit Leader)in charge of Team A, and an Assistant Squad Leader (As-sistant Leader) in charge of Team B. When Squads aresplit up, like Weapons Squads normally are, this effec-tively means that the command responsibilities are split
up. If one Leader falls to fire, the other one will not takeover his responsibilities, because they are assumed tobe physically separate units when split off as Teams.
When a battle starts, the name and rank displayed are thatof the unit’s current senior Leader. Should that Leaderfall in battle the name and rank will change as the re-placement assumes command.

7/28/2019 CMA Game Manual 1
http://slidepdf.com/reader/full/cma-game-manual-1 92/197
92 Combat Mission
Air & Artillery Support
When the going gets tough, the tough call for Support!
Combat Mission offers players unprecedented access tothis all-important aspect of modern warfare in a waythat is both realistic and simple to use. Although Air andArtillery produce quite different results, CM:A for themost part uses the same interface for both forms of Sup-port. Better still, CM:A helps walk the player throughthe various steps needed to complete a Support Requestwithout requiring months of military training.
To see if Support is available, and what types, all the playerhas to do is look at the Support Buttons in the Unit InfoPanel, just above the Special Equipment area. If a but-ton is lit up, then Support available; otherwise the buttonis dimmed and there is no support available for that type(air or artillery). These buttons not only inform the playerabout availability, but also act as the means of creatingnew Requests (the act of “asking” for Support) or view-
ing existing Missions (a Support Request put into action).A button will also blink when the Mission starts to de-liver its munitions, thereby giving the player somewarning that something is going to go “boom” very soon.
Sometimes lots of Support is available, other times none.The availability of Support is always force wide and de-termined by the designer of the Battle.
Requesting Support
The first step in making a Support Request is to select aunit to be a Spotter, then clicking on either the Air orArtillery Support button in the Unit Info Panel (keepingin mind that if a button is dim Support is not available).Instantly the user interface changes to include two newelements; the Support Roster and Support Panel. The

7/28/2019 CMA Game Manual 1
http://slidepdf.com/reader/full/cma-game-manual-1 93/197
Afghanistan 93
Support Roster shows all available Assets while the Sup-port Panel presents options for making a support firerequest.
The following sections explain how to use this new inter-face to create a Support Request and turn it into aSupport Mission.
Selecting a SpotterThe player’s first task is to identify which unit to give re-
sponsibility of both creating a Support Request andmanaging the resulting Support Mission. Since not allunits are equal in this regard, here are some things tokeep in mind when selecting a Spotter:
Line of Sight (LOS) - quality LOS to the target area alwaysmakes for more accurate and effective results
N o t e : Sp o t t e r s f o r i n d i r e c t s u p p o r t w e a p o n s ( a s w e l l a s o n - m a p
m o r t a r s ) a r e n o w a b l e t o t a r g e t a r e a s s l i g h t l y o u t s i d e o f
d i r e c t L O S u n d e r c e r t a i n c i r cu m s t a n c e s, su c h a s w h e n
f i r in g i n d i r e c t l y o v e r a t a l l w a l l o r j u s t b e h i n d t h e c r e s t o f a
h i l l .
Unit Type - specialized observer teams and HQs are betterthan the average combat unit
C2 Links - ideally the Spotter should show green connec-tions to all superior units
Stress Level - suppressed or shaky units don’t make the bestSpotters

7/28/2019 CMA Game Manual 1
http://slidepdf.com/reader/full/cma-game-manual-1 94/197
94 Combat Mission
As a general rule, only a few specialized Forward Observerunits can call in Artillery for the Soviet, DRA and insur-gent sides.
Remember, if the Spotter doesn’t appear to be up to thetask, another Spotter can be selected. To do this, eitherdeselect the current unit or click on the “X” in the upperleft hand corner of the Support Roster. There are no gamepenalties for checking out how various units pair up withdifferent Assets.
Support RosterThe Support Roster displays all Support Assets available
for the current Battle, though only one type (Air or Artil-lery) at a time. Each Asset is represented by a coloredsquare with these pieces of information:
Silhouette - an image of the piece of equipment
Number of Tubes - count of how many guns are assigned(aircraft are always “1” per Asset)
Matchup - directly above the designation (to the right of the
number of tubes, if applicable) is a symbol representinghow well the Spotter and Support Asset are matched foreach other. There are five states with a thick green “+”as the best match, thick red “x” for the worst. The bet-ter the match the more efficient and effective the resultswill be.
Overheating - green/red dots are indicating how hot theartillery barrels are getting. When all dots go red, the
battery has to hold down its rate of fire to no greaterthan its "sustainable" ROF. Otherwise it is free to use"maximum" ROF (if the mission wants it).
Designation - military designation, two lines
Main Weapon - primary weapons, two lines

7/28/2019 CMA Game Manual 1
http://slidepdf.com/reader/full/cma-game-manual-1 95/197
Afghanistan 95
Mission Status - when an Asset is being used a line of textappears at the bottom of the Asset display. “Receiving”and “Preparing” indicate the Asset has what it needs tofulfill the mission and is setting up to carry it out. Artil-lery show “Spotting” when firing spotting rounds,
“Firing” when firing for effect, and “Empty” when allammo has been expended. Aircraft display “Attacking”when actively engaging targets, “Can’t Locate” when it’sfailed to find the target, “Coming Around” when it is pre-paring for another run, and “Landed” when it is no longeravailable. If you see “Busy” the Asset is being used byanother Spotter and can’t be interfered with by the cur-rent unit. Use the “Go To Spotter” button to switch tothe unit directing that Asset to make changes to the Mis-sion.
Up to 5 Support Assets can be shown at one time, which isusually more than enough! However, if more than 5 As-sets are available in the Battle, then Left and Right“shuffle” buttons are displayed to shuffle between theprevious or next batch of 1-5 Assets. Clicking on an As-set in the Roster selects it and makes it activate the
Support Panel where some additional information aboutthe Asset is shown. To see another Asset simply click onit and it will swap in for the previous one. At this pointthe player is not committed to do anything with the As-set thereby allowing “browsing” without any sort of penalty.
Support Panel
Once a Spotter and an Asset are selected, the Support Panelis activated and ready to turn a request for Support intoreality:

7/28/2019 CMA Game Manual 1
http://slidepdf.com/reader/full/cma-game-manual-1 96/197
96 Combat Mission
The selected Asset is shown on the right side of the Sup-port Panel and contains the same information as in theSupport Roster. Below it, however, is new informationwhich shows the munition types and quantities avail-able to that particular Asset. The combination of the
Asset Panel and the Ammo Panel represents all the in-formation there is to see for that particular Asset.
The column of labeled buttons in the middle part of theSupport Panel are the means of communicating with theAsset. From top to bottom the player clicks on a button,follows the instructions to make a selection, then moveson to the next button. As Parameters are chosen theyare displayed to the left in the Parameters Screen. When
the last Parameter is set the player is prompted to “Con-firm” the Support Request. This is the player’s last chanceto back out of a Request without penalty, for once Con-firmed the Request is off to the Asset for processing.
Depending on conditions, it can take a few minutes or manyminutes for the resulting Support Mission to commence.If the C2 Link is broken at the wrong time during thisprocess it can temporarily delay the Mission from con-
tinuing. If there is an extended lack of communicationbetween Spotter and Asset the Mission will probably becancelled.
The estimated delivery time in the Fire Support MissionRequest display initially shows the best possible time(usually what you'd get with a “standard” mission). If a mission type other than "standard" is selected, theestimated delivery changes accordingly.
Starting from the point of Confirmation, the Spotter andAsset communicate with each other to keep the missionon track. These communications are heard by the playerin the form of radio traffic between the two. The exactthings said depend on if the Support Mission involves anAir or Artillery Asset, the type of Mission, and what pointthe Mission is at. The most important thing for the playerto keep in mind is that each one of these communica-tions marks the start of the next phase of the Mission’sexecution. In this way the player can keep track of howthe Mission is progressing and what stage is next.

7/28/2019 CMA Game Manual 1
http://slidepdf.com/reader/full/cma-game-manual-1 97/197
Afghanistan 97
Adjusting or Canceling SupportSometimes it is necessary to change a Support Mission’s
target or to cancel it entirely. All modifications to a Sup-port mission must be made via the Spotting unit, since
Spotter and Asset are linked until the Mission is over.The easiest way to find the Spotter is to select any unit,click the Support Button for the type of Asset you’re look-ing for, then select the Asset of interest. Assets whichare engaged in a support mission are listed as “Busy”.In the Support Panel the top Parameter button for a busyasset says “Goto Spotter”. Click on that button and theSpotter instantly becomes the currently selected unit,
complete with the Target line/s shown.Now that the Spotter is selected the Mission can be Ad-
justed or Cancelled in the Support Panel as long as theC2 link to the Asset is still intact! Yes, that’s correct... if you have artillery raining down on your own troops andyou want to cancel the mission, but suddenly find theSpotter has no C2, you’re in trouble. There is no way tomanually Adjust or Cancel the mission at this point.
Which is yet another example of why it is so very impor-tant to select a good Spotter!
Note: Su p p o r t u n i t s ( n o t o n l y a r t i l l e r y b u t a l so a i r a n d o t h e r
a s se t s ! ) i n t h e p r o c es s o f r e c e iv i n g a c e a se f i r e c om m a n d
c an n o t b e g i v e n f u r t h e r o r d e r s u n t i l t h e c ea s e f i r e o cc u r s .
A l so , n o t e t h a t m i ss io n s ca n n o t b e “ a d j u s t e d ” w h i l e t h e y
a r e s t i l l b e i n g “ r e c e i v e d ” !
It may turn out to be too little too late, but there are tworeasons that CM will abort a Support mission on its own.The first happens if friendly fire is encountered and thefriendlies have good C2 to the Asset doing the firing.Basically, they will try to get the Asset to cease fire evenif the Spotter can not. The second reason is if the Spot-ter is out of C2 long enough that the Asset wonders if the Spotter is still able to direct fire. In that case it mightcease fire on its own simply because it’s a bad idea to
fire blind with no feedback. However, in both cases theplayer is at the mercy of variables falling into place, soneither should be counted on in place of using a Spotterto cease fire when possible.

7/28/2019 CMA Game Manual 1
http://slidepdf.com/reader/full/cma-game-manual-1 98/197
98 Combat Mission
Clicking on the Adjust button allows the player to redesig-nate the Target portion of the Support Mission whileleaving the rest of the Mission as originally specified.Shifting fire like this is very useful if the target unitshave moved or more important targets have presented
themselves within close proximity to the original Targetarea. Observed fire should not require Adjustment tostay on Target. That is handled automatically by theSpotter to the degree it can see the Target and has C2 tothe Asset.
Air Mission ParametersThese are the Parameters for all Air Missions:
T a r g e t - sets the size and shape of the area to hit:
P o i n t - focuses on a single Action Spot or unitA r e a - one click for center and another for perimeter
M i s s i o n - responsible for establishing the scope of the at-tack:
L i g h t - lighter MunitionsMe d i u m - mix of lighter and medium MunitionsHe a v y - medium Munitions with a smattering of lighter
T y p e - sets the munition mix based on the target type:
Ge n e r a l - favors unguided HE munitionsP e r s o n n e l - favors HE munitions
De l a y - establishes when to start the support, prep timeinclusive. The options are:
N o n e - no extra delay5 M i n - sets for 5 minutes min1 0 M i n - sets for 10 minutes min1 5 M i n - sets for 15 minutes min
ArtilleArtilleArtilleArtilleArtillery Mission Pry Mission Pry Mission Pry Mission Pry Mission ParametearametearametearametearametersrsrsrsrsThese are the Parameters for all Artillery Missions:
T a r g e t - sets the size and shape of the area to hit:

7/28/2019 CMA Game Manual 1
http://slidepdf.com/reader/full/cma-game-manual-1 99/197
Afghanistan 99
Po i n t F i r e - focuses on a single Action Spot or unitA r e a -one click for the center and one for the perim-
eterL i n e - requires two clicks, one for each end of the line
N u m b e r - sets the portion of the Asset to use from 1 to thetotal number in Asset (usually 2 or 3)
M i s s i o n - responsible for establishing initial Rate of Fire(ROF) and sustained ROF:
Em e r g e n c y - no spotting rounds, otherwise like Heavy(not available for pre-planned artillery strikes)
H a r r a s s - very low RoF, significantly lower than Light
missions.L i g h t - slow ROF, remaining at slow ROFMe d i u m - medium ROF, then going to sustained ROFH e a v y - max ROF, then going to heavy sustained ROFS m o k e - medium ROF, firing smoke ammunition to
create a smoke screen rather than explosive ammo to dam-age or destroy the target
D u r a t i o n - determines number of rounds to use per mis-
sion:
Qu i c k - 2-4 roundsS h o r t - 6-12 roundsMe d i u m - 12-18 roundsL o n g - 20-28 roundsM a x i m u m - exhausts ammo supply
T y p e - sets the munition mix based on the target type:
Ge n e r a l - generic settingA r m o r - weights towards anti-armor roundsP e r s o n n e l - weights in favor of airburst antipersonnel
rounds
De l a y - establishes when to start the support, prep timeinclusive. The options are:
N o n e - no extra delay5 M i n - sets for 5 minutes min1 0 M i n - sets for 10 minutes min1 5 M i n - sets for 15 minutes min

7/28/2019 CMA Game Manual 1
http://slidepdf.com/reader/full/cma-game-manual-1 100/197
100 Combat Mission
Air Assets
The player’s interaction with Air Assets is similar to Artil-
lery. The differences between the two are explainedbelow, otherwise it should be assumed the same.
Since Mujahideen did not have Air Assets the air support isonly available to Soviet and DRA sides.
The player brings up the Air Support Roster by clicking onthe Air Support Button in the Interface.
Like Artillery, each Air Asset has specific Munitions in spe-cific quantities to use. Unlike Artillery, these dramaticallyaffect the kinds of missions the Air Asset can perform.An Su-25 Frogfoot, for example, can be setup to do asmall number of specialized bomb missions (like bunkerbusting) or outfitted with rockets to engage infantry intrenches. Same plane, entirely different capabilities. Atwo word description found in the Air Asset Pane helpsidentify what its best use is:
The two word description represents the hardcoded ar-rangement of Munitions. For a given type of plane theremight be a half dozen such configurations. The ScenarioDesigner simply selects the one(s) he wants for the givenScenario and that is what the player has to deal with.Also, unlike Artillery Assets, the number of planes is al-ways 1 per Asset.
When the player selects an Air Asset in the Support Roster,it appears in the Support Panel like so:

7/28/2019 CMA Game Manual 1
http://slidepdf.com/reader/full/cma-game-manual-1 101/197
Afghanistan 101
The Mission Parameters and Support Buttons reflect theAir Asset options. Setting up a Mission is identical toArtillery, from a user interface standpoint, but differentin terms of what options are available and how the Mis-sion is actually carried out. Air Missions require LOS fromthe plane to the target, possibly the identification of thetarget, estimate of the target size, and possiblecustomization of the Mission for the scope of the strike.These factors determine if the Mission can be performed
at all, how many Attack Runs are made, and which Mu-nitions are used. Su-25 wouldn’t drop a FAB-500 bombbuster on a Squad or truck, nor would it make threepasses dropping a FAB-250 bombs each time.
If the Spotter has LOS to the target and is in communica-tion with the Air Asset, it can confirm the targetdestroyed, or request that more runs are made if it isn’t.If there is no communications link, or no LOS, then theAir Asset will have to make this decision on its own.
Accuracy is determined in part by the type and quality of the Spotter and his directions to the air unit. Basicallythe Spotter increases the chance that a target will beseen and also hit. This is particularly important at night.For example, a dedicated FO with LOS to the target willmore than likely get the Air Asset to find and hit theright thing. An HQ unit without LOS to the target willhave to rely on the Air Asset finding the right target onits own.
Like Artillery, Air Assets have a chance of Auto Cancellinga Mission based on friendly fire risk. Unlike Artillery, thiscan sometimes happen before even firing a shot. The
7/28/2019 CMA Game Manual 1
http://slidepdf.com/reader/full/cma-game-manual-1 102/197
102 Combat Mission
chance of a “scrubbed” Mission depends on the Spottertype, the quality of LOS between Spotter and Target, aswell as proximity to friendly units.
Munitions, Spotters and EquipmentSimulating the intricacies of air power was quite a chal-
lenge for us. The coordination of ground and air assetsis extraordinarily complex and error prone in real life.It is also extremely important to understand those dif-ferent types of Munitions (the ordinance carried by theAir Asset) and what the limitations are. During the Af-ghanistan War Soviet Air Force used mostly unguidedmunitions: bombs, rockets, autocannons and machine-
guns. Although Soviet army did have guided bombs andmissiles in service in the 1980-th such ordinance wasexpensive and reserved for a true Soviet-NATO conflictwhere the targets would be of greater value. In Afghani-stan the enemy did not have armored vehicles hencethere was no need for guided missiles. Laser guidedbombs also were used very sporadically due to FO unitsgenerally lacking laser designators. Very few dedicatedvehicles with laser designators such as BTR-70 based
“Boman” did take part in that war however their usewas very sporadic hence we found it unnecessary to in-clude them in the game.

7/28/2019 CMA Game Manual 1
http://slidepdf.com/reader/full/cma-game-manual-1 103/197
Afghanistan 103
Unconventional Warfare
Combat Mission: Afghanistan mostly simulates unconven-
tional warfare. Due to Soviet and DRA armies havingtanks, APC’s, artillery and air support, the oppositioncould not possibly fight against them on the same terms.Instead it used tried and true guerilla warfare tactics.There were no set front lines, no uniformed solders andno armored vehicles.
Simulating unconventional forces (called Uncons for short)themselves is not very difficult for us to do as game de-signers. A Human with a weapon is pretty much justlike all other Humans with weapons. However, compli-cations arise from specific types of Uncons that areneither armed nor visibly different from an average ci-vilian.
Uncon Specialists (civilian dressed Uncons with no outwardappearance of being armed) in real life blend in with thenon-combatants civilians until they are ready to strike.In a sense this gives them a “stealth” capability thatarmed forces don’t have. Yet a direct portrayal of a ci-vilian environment for them to blend into requires
simulating such things as cultural habits, economic ac-tivity, traffic patterns, daily civilian activities, thousandsof autonomous “entities” (i.e. people), etc. You don’thave to be a game designer grasp that this is actuallymore work than the military side of the simulation! Evenif it could be coded, most gamers we know don’t have

7/28/2019 CMA Game Manual 1
http://slidepdf.com/reader/full/cma-game-manual-1 104/197
104 Combat Mission
super computers so they wouldn’t be able to run it any-way.
So what to do? The answer is simple – abstraction! In-stead of attempting to simulate and display every detailof a Central Asian village, town, or city, Combat Missioninstead just simulates the ability for Uncon Specialiststo avoid detection. Since the effect is what matters in agame, an abstraction that produces the correct feel andoutcome is good enough.
At the beginning of a battle all Uncon Specialist units aresimulated as civilians to the Red player. Meaning, theBlue player can theoretically move them about without
the Red player being able to spot them, even when inline of sight of Red units, since the Uncon Specialistslook just like any other civilian. The key part of thisstatement is “in theory”.
In the real world a civilian must act like a civilian in orderto be perceived as a civilian. When a civilian ceases tobehave like a civilian the opposing force might noticethis and grow suspicious that all is not as it appears to
be. Once the suspicion level gets high enough the coveris blown and now the Uncon is no longer protected bycivilian anonymity. In game terms this means the UnconSpecialist is now revealed to the Red player as an en-emy unit and is treated just like any other military target.In other words, the Red player will get the green light to“fire at will” against Uncon Specialists.
As in real life, the activities that raise suspicions most are
movement and proximity to military forces. The moreout of character the movement is, and the closer it is,the greater the chance that more suspicions are raised.The crucial game factors are the terrain the Uncon Spe-cialist moves over, the type of Movement Command used,and the proximity to Red units. For example, an UnconSpecialist crawling across the desert is highly suspiciouswhile one walking right down a densely populated citystreet probably will go unspotted.
Obviously the more civilians present, the more difficult itis for the other side to spot suspicious activity. CombatMission simulates this by allowing scenario designers tospecify the Civilian Density to simulate how much coverthe Uncon Specialists should have. The Civilian Density

7/28/2019 CMA Game Manual 1
http://slidepdf.com/reader/full/cma-game-manual-1 105/197
Afghanistan 105
is set by the scenario designer and shown as part of theConditions Menu, accessible during gameplay by click-ing on the Menu button at the bottom of the Commandpanel. The higher the density setting the less likely theunit will be spotted before it’s too late. The type of ter-
rain is also important since civilians are only expectedin large numbers in urban type terrain. In fact, a largecongregation of people out in the middle of nowherewould be suspicious all on its own!
The closer an Uncon unit comes to Red troops, the higherthe chances of being revealed. “Normal” civilians usu-ally try to avoid combatant forces during battle, soanyone milling around close to the soldiers will invari-
ably make himself suspicious. Therefore, the closer anUncon Specialist gets to a Red unit, the more “normal”it’s behavior needs to be to avoid detection.
N o t e : W e d o n o t p u b l i s h t h e e x a ct p a r a m e t e r s o f w h a t b e h a v i o u r
i n c r e as e s t h e ch a n c es t o r e m a i n u n s p o t t e d o n p u r p o s e .
T h e r e i s a l so q u i t e a b i t o f r a n d om n e s s a n d v a r i a b i l i t y
b a s e d o n a n u m b e r o f f a c t o r s . B y k e e p in g t h e d e s cr i p t i o n s
so m e w h a t v a g u e t h e c h a n ce s t h a t t h i s f e a t u r e w i l l b eco m e
“ g am e y ” ( u n r e a l i s t i c a l ly u s e d ) a r e r e d u c e d . P lu s , i n r e a l l i f e a l l o f t h i s is a n a r t , n o t a s c i e n c e .
Unconventional ForcesFighters are regular soldiers, mercenaries and other types
of irregular military personnel who operate in smallgroups and use guerrilla tactics instead of conventionalmilitary method. They can be well trained and motivated
and occasionally have access to fairly sophisticated andadvanced equipment. Some heavy weapons are mountedon civilian vehicles, otherwise known as Technicals.Since they are armed and wear distinctive clothing, theStealth rules do not apply to Fighters.
Specialists include several groups of special unconventionalunits with unique features and tasks: Spies, Transports,and IEDs (improvised explosive devices aka bombs).These are discussed in more detail below.

7/28/2019 CMA Game Manual 1
http://slidepdf.com/reader/full/cma-game-manual-1 106/197
106 Combat Mission
SpecialistsSpies: instead of using weapons, Spies use their eyes and
ears to pick up information about enemy units and thenrelay it to armed Uncons. Their primary goal is to re-
main undetected, therefore remain largely stationary andin good cover. Once revealed, a Spy simply disappearsbecause he is no longer of any use.
Transports: pickup trucks are used to quickly relocate un-conventional units.
Technicals: the same type of pickup used as a Transportwith a full time heavy weapon mounted in back. Combat
Mission includes pickups armed with medium machine-guns (PK/PKM), heavy machineguns (DShK), andrecoilless rifles (SPG-9). Although very fast and mobile,Technicals have no armor protection at all. Once spot-ted and taken under fire they are easily put out of action.
IEDs: Improvised Explosive Devices (i.e. bombs). Three dif-ferent types, in various sizes, are simulated in the game.The size determines the strength of the explosion and
therefore ability to cause damage and casualties. Thedifferent types determine reliability as well as the dis-tance at which the triggerman can be positioned.
Wire – shortest distance (about 100m), 10% failure chanceRadio – medium distance (about 300m), requires line of sight, 20% failure rate
IEDs typically consist of the bomb itself and the triggerman.
The bomb is placed during the setup phase like any otherunit. Once placed, it cannot be moved again. Thetriggerman, however, can be relocated.

7/28/2019 CMA Game Manual 1
http://slidepdf.com/reader/full/cma-game-manual-1 107/197
Afghanistan 107
Using IEDsIn order for an IED to detonate it must first be activated,
otherwise it remains inert. To activate an IED, select itand choose the Target command from the Combat panel,then click on the map to arm it. If you want the IED totarget the first unit that comes near it, click anywhere
on the map. If you instead want to target a specificenemy unit, click on that unit and the IED will ignoreother possible targets. You can re-designate the targetat any time by repeating these steps.
Activation is not just a matter of specifying a target, how-ever. For activation to occur the triggerman, at the timethe Target command is used, must be in good shape (e.g.not panicked), have an undamaged trigger device in its
inventory, be within the maximum range (and/or LOS if required) of the IED, and pass a reliability check. Thereliability check determines if the IED itself, or the abil-ity to detonate it, has failed. IEDs that malfunction can’tbe made to detonate no matter what. If there is a changeto one of these factors, such as the triggerman beingeliminated, then the IED remains activated but will notdetonate until all requirements are fulfilled again.

7/28/2019 CMA Game Manual 1
http://slidepdf.com/reader/full/cma-game-manual-1 108/197
108 Combat Mission
The Editor
CM:A provides players with the same tools that were used
to create the stock battles and campaign, and allowsthem to create their own maps and missions fromscratch.
The Editor really combines four separate editors in one:
Mission Editor - settings needed to make a scenario, such asweather variables, briefings, victory conditions and more
Map Editor - creates realistic 3D combat maps from scratch
Unit Editor - purchase, organize, and deploy units
AI Editor - tailors higher level parameters for the computeropponent to follow, such as unit behaviour, movementpaths, and more
Basic screen layout
The picture below shows the basic layout for the Editor.1. File Menu - buttons to Save, Load, and create a New
scenario or Exit to the main screen.
2. Editor Selector - a pop-up menu to choose the Editor youwant to work with. The popup menu also lists three ad-ditional important features - 3D Preview, Bake and MakeCampaign, explained later in this section.
3. Mode Selector – a list of buttons showing the main Modesof each selected Editor.
4. Option Palette - graphical button palette which showsOptions specific to the selected Mode
5. Settings List - displays values for the selected Option (if any), some of which may be editable (depending onOption).
6. Toolbar - tool icons for Map Editor
7. Display Area - this is where the 2D overview map is dis-played for certain combinations of Editor, Mode andOptions.

7/28/2019 CMA Game Manual 1
http://slidepdf.com/reader/full/cma-game-manual-1 109/197
Afghanistan 109
File Menu
Displays buttons for:
LOAD - opens dialogue to load an existing scenario file (fromthe Scenario folder)
SAVE - opens dialogue to name and save the currently ac-tive scenario to disc. If the scenario has already beensaved before, the current name and save location areloaded as default.
NEW - erases all settings and creates a “blank” new sce-nario file with all settings reset to their default entries.Don’t forget to first save any existing scenario you’vebeen working on!
EXIT - exits the Editor and jumps back to Main Screen
Editor SelectorThis pop-up menu displays all available Editors and main
functions. The selection made here has direct influence

7/28/2019 CMA Game Manual 1
http://slidepdf.com/reader/full/cma-game-manual-1 110/197
110 Combat Mission
on which Options and Settings are shown, as well as theoptions available in the Toolbar and Display areas.
MISSION - used for editing mission parameters such asbriefings, objectives, time and date, weather and more.
MAP - used to edit terrain features
UNITS - used to organize and deploy Blue and Red forces
A.I. - used to “program” custom computer player AI
3D PREVIEW - used to jump to a 3D view of the currentgame map
BAKE - creates a special type of scenario that has pre-pro-
grammed Commands “baked” into it. For example,starting the game off with an artillery barrage, having acolumn of vehicles snake their way down a road, infan-try dashing into new positions, etc. The downside of this process is that the scenario file changes to that of asave game. Meaning, there is no way to edit a “baked”scenario file directly, making it a good idea to keep theoriginal scenario file to make changes to if needed. Baked
scenarios are incompatible with Campaigns.MAKE CAMPAIGN – The creation of a campaign file requires
several ingredients:
(1) The currently loaded scenario will provide the “core”troops, the mission briefings, and the snapshot data forthe scenario choice screen.
(2) A campaign “script” text file that designates the pa-
rameters and battle .btt scenario files (not baked) byname.
(3) The .btt scenario files for campaigns are created justlike any other standalone scenario, but additionally the

7/28/2019 CMA Game Manual 1
http://slidepdf.com/reader/full/cma-game-manual-1 111/197
Afghanistan 111
player imports the “core” troops from the base scenariomentioned under (1) above.
(4) The battle files named in the script must be in the samedirectory as the script file or the Scenarios directory.The finished campaign “.cam” file will be saved in theCampaign directory, overwriting any previous file.
Mission EditorThe Mission Editor defines the basic parameters and set-
tings for a given scenario. The various components are:
DescriptionData
Mission (Blue and Red)Parameters (Blue and Red)Terrain Objectives (Blue and Red)Unit Objectives (Blue and Red)
DescriptionWhen choosing which scenario to play the player can click
on it in the scenario list and see a brief overview to theright of the screen. These details help the player deter-mine which scenario to play without needing to load it.None of these settings have any impact on the scenarioitself. Just like any product sitting on the shelf, the pack-aging simply informs the person what is inside, nothingmore than that.
Battle Type
Specifies the general nature of the battle and who is theattacker. Depending on the nature of the scenario’sstoryline you may wish to be “vague”, or even inaccu-rate, so you don’t give away surprises.
Assault, Attack, Probe, Meeting Engagement
EnvironmentThis setting gives the player a rough idea of the nature of
the area being fought over. People specifically seekingan urban battle, for example, will know right away thatthey want to skip over a scenario that is taking place ina Forest.
City, Town, Village, Open, Rough, Forest, Hills

7/28/2019 CMA Game Manual 1
http://slidepdf.com/reader/full/cma-game-manual-1 112/197
112 Combat Mission
DaylightCharacterizes the average natural lighting conditions. The
actual lighting is determined by the time & day settingsin the Data section.
Dawn, Day, Dusk, Night
Battle SizeThe scenario’s approximate size, from Tiny to Huge, gives
players an idea of the overall scope of the battle. Eachscenario author probably has a different idea of whatTiny or Huge is, but as a guideline the amount of unitsinvolved as well as map size and battle duration shouldbe factored into the setting here. As a general guide-
line, a Tiny battle involves platoon sized forces, orsmaller, for each side and a very small map. A Hugeinvolves a force of several companies on each side and avery large map. The rest fall somewhere in between.
Tine, Small, Medium, Large, Huge
TitleThe scenario list is listing scenarios by the text entered
here (i.e. the scenario title). Titles should be short andto the point, but catchy, too. When you playtest yourgame make sure the title looks good in the list.
DescriptionA short one-line description of what players can expect to
find when they decide to play the battle. Be mindful thatthere is no way to customize the text to match a par-ticular side’s perspective, so keep it generic. When you
play your scenario you should double check that all yourtext fits in the box.
ImageEach scenario can have, and should have, a small image
file associated with it. Think of this as the slick market-ing image found on a packaged product. Make somethingexciting and dramatic, if possible, that gives the player
a small idea of the nature of the battle they’re contem-plating to play. The file has to be in BMP format and amaximum of 170 x 170 pixels in size. Three buttons al-low the scenario designer to:

7/28/2019 CMA Game Manual 1
http://slidepdf.com/reader/full/cma-game-manual-1 113/197
Afghanistan 113
Import a new image fileExport the existing image fileClear the existing image file
DataThe Data section defines a number of parameters which,
unlike the Description section, do affect the inner work-ings of the scenario. These settings control:
LENGTH OF BATTLE - the maximum duration of the sce-nario (in minutes)
VARIABLE LENGTH – sets a variable (random) ending timefor the battle
REGION & MONTH - sets the month and year in which thebattle takes place.DAY - the day on which the battle takes placeHOUR - at which hour the battle startsMINUTE - minute when the battle startsWEATHER - sets the current weather for the battle to Clear,
Hazy, Thick Haze, Overcast etc.WIND STRENGTH - sets the wind strength as none, gentle,
light, medium or heavy.
WIND SOURCE - the direction from which the wind is origi-nating
TEMPERATURE - the temperature during the battleGROUND CONDITION - sets the general ground condi-
tion. Options include Very Dry, Dry, Damp, Wet, Muddy etc.CIVILIAN DENSITY – abstractly represents the amount of
non-combatant population as None, Sparse, Light, Moderate,Heavy and Very Heavy.
BLUE FRIENDLY DIRECTION - sets the direction into whichBlue units would withdraw to join their linesRED FRIENDLY DIRECTION - sets the direction into which
Red units would withdraw to join their linesEARLY INTEL - can be set to None, Red Force or Blue Force.INTEL STRENGTH - can be set between No Intel (0%) to
Full Intel (100%) and any step between in 10% steps.Force vs Force - this setting allows you to create Blue on
Blue and Red on Red missions in addition to the standard Blue vsRed. This setting defines what units are available for purchaseand deployment in the Units Editor. You may even mix and matchforces in this way.

7/28/2019 CMA Game Manual 1
http://slidepdf.com/reader/full/cma-game-manual-1 114/197
114 Combat Mission
Mission (Blue and Red)The Mission Briefings seen by the Blue and Red players at
the beginning of the battle are determined/created here.Each sides’ set is unique to itself, but the method forcreating them is identical for both. A full Mission Brief-ing set consists of a strategic overview map, anoperational overview map, a tactical overview map, andthe text for the briefing itself.
All four files (three image files for the maps and one textfile for the briefing text) have to be imported into thescenario file.
N o t e : O n c e i m p o r t e d y o u d o n o t n e e d t o i n c lu d e t h e o r i g i n a l f i le s a n y m o r e .
The three map images all have to be in BMP (Bitmap) for-mat, but each can have a different maximum size:
Strategic Map: 224 x 224 pixelsOperational Map: 702 x 224 pixelsTactical Map: 952 x 350 pixels
N o t e : Yo u c a n o f c o u r s e s i m p l y d r a w a t a c t i ca l m a p b y h a n d , b u t
a n o t h e r g o o d a p p r o a ch i s t o t a k e a t o p - d o w n s c r e e n sh o t o f
t h e a c t u a l m a p a t l e as t a s t h e b a s e ; o r e v e n a s c r e en
ca p t u r e f r o m t h e 2 D e d i t o r m a p . I f y o u d e c id e t o u s e r ea l
m a p s , p le a se k e e p i n m i n d a n y p o t e n t i a l co p y r i g h t i n - f r i n g e m e n t s ( m a p s a r e u s u a l l y co p y r i g h t e d j u s t l i k e b o o k s
o r p h o t o s ) .
The briefing text itself is a simple text (.txt) file. A tem-plate is used as default for the briefing text when you

7/28/2019 CMA Game Manual 1
http://slidepdf.com/reader/full/cma-game-manual-1 115/197
Afghanistan 115
create a new mission from scratch. It might be a goodidea to export the template first, fill in your orders intothe template, and then import the completed text.
N o t e : Th e ̂ t a g s in d i ca t e t h e e n d o f a s ec t i o n , a n d s h o u l d n o t b e
r e m o v e d .
The options for the images and briefings are:
Import a new file,export an existing fileclear (delete) an existing file
Parameters (Blue and Red)Unlike most wargames, Combat Mission allows “asymmet-
ric” victory conditions where each side has its ownunique parameters and is judged based on how well itachieves them. The side that best achieves its goals isdeclared the winner, even if technically both sides werewithin specified parameters. This is critically importantfor simulating asymmetric warfare since rarely are bothsides operating under the same or even similar param-
eters. You can specify the following conditions for eachside:
CASUALTIES - the number of casualties the side is allowedto endure.
CONDITION - the number of units allowed to be panicked,routed, tired, or wounded.
AMMO - the amount of total ammunition that side is al-lowed to expend.
For each parameter the scenario designer determines thethreshold in % (from 0% to 100%) and the amount of victory points associated with each once the thresholdis reached. Specifically, you get the points if:
Enemy Casualties > X% Enemy Condition < X%
Enemy Ammo < X% Friendly Casualties < X%
Friendly Condition > X% Friendly Ammo > X%
Casualties is casualties s u f f e r e d , e.g. 100% means thewhole force was wiped out. Both soldiers and vehiclesare factored into this and you get partial credit for im-mobilizing a vehicle.

7/28/2019 CMA Game Manual 1
http://slidepdf.com/reader/full/cma-game-manual-1 116/197
116 Combat Mission
Condition is a combination of (from most important to least)morale, fatigue, suppression, and light wounds (moreserious wounds or death are part of casualties, not con-dition).
Terrain Objectives (Blue and Red)Each side can be assigned up to 8 terrain basedobjectives. This involves defining where the ob- jective is, what the player is supposed to dowith it, and various other details. These pa-rameters allow the designer to simulate a widerange of missions instead of just the usual “cap-ture the flag” and “king of the hill” objectives
commonly found in wargames. To start off, clickon the corresponding button labelled Obj 1 - 8, and“paint” the objective area onto the 2D map.
N o t e : t h e r e a r e n o l im i t a t io n s i n h o w y o u “ p a i n t ” t h e o b j e c t i v e
a r e a . Y o u c a n c r e a t e a s in g l e l a r g e a r e a , t w o o r m o r e
i n d e p e n d e n t o n e s , o r e v e n s p r i n k l e sm a l l s p o t s a l l o v e r t h e
m a p . K e e p in m i n d t h a t p o i n t s fo r a s p e c i f ic o b j e c t i v e a r e
o n l y a w a r d e d o n c e a n d t h a t 1 0 s ep a r a t e sp o t s f o r a s in g l e
o b j e c t i v e m e a n s t h a t t h e p l a y e r m u s t p a y a t t e n t i o n t o A L L
1 0 s p o t s , n o t j u s t o n e . I f t h e m i ss io n i s t o d e s t r o y t h e se
a r e a s, fo r e x a m p l e , t h a t m e a n s a l l 3 m u s t b e d e s t r o y e d i n
o r d e r f o r t h e p l a y e r t o g e t p o i n t s . T h i s c a n b e d i f f i cu l t t o
e f f e ct i v e l y com m u n i ca t e t o t h e p l a y e r , s o b e ca r e f u l w h e n
s p r e a d i n g t h i n g s o u t . T h e r e f o r e , g e n e r a l l y i t i s b e t t e r t o
m a k e s ep a r a t e o b j e c t i v e s f o r n o n - c o n t i g u o u s g o a l s .
After determining the objective area(s) you need to specifywhat the player must do with the area(s) and who knows
about it:
OCCUPY - friendly units have to move to the area, clear itcompletely of enemy troops, and remain there when the battleends
DESTROY - the terrain (e.g. building) has to be destroyed/damaged
PRESERVE - the terrain must be protected from destruc-tion/damage
TOUCH - friendly units have to reach the area and areawarded points immediately upon reaching it. They do not haveto remain in place
KNOWN TO... - player, enemy, both, none

7/28/2019 CMA Game Manual 1
http://slidepdf.com/reader/full/cma-game-manual-1 117/197
Afghanistan 117
N o t e : W i t h t h i s l a s t o p t i o n y o u c a n c r e a t e a l l s o r t s o f u n i q u e ,
d y n am i c s i t u a t i o n s b y a ss ig n i n g “ h i d d e n ” o b j e c t i v e s
w i t h o u t t e l l i n g t h e p l a y e r w h e r e t h e y a r e , o r e v e n t h a t
t h e y e x i s t ! M o r e a b o u t u s in g t h i s p o w e r f u l t o o l ca n b e
f o u n d i n t h e n e x t s ec t i o n , T ip s f o r u s i n g t h e Ed i t o r .
POINTS - assign how many points are awarded to the playerwho fulfills the objective
NAME - assign a name to the Objective for easier reference(it’s also shown to the player on the 3D map and upon comple-tion)
Unit Objectives (Blue and Red)In addition - or instead - of terrain based objec-
tives, you can also designate enemy units asobjectives. This allows for such things as “de-stroy all enemy tanks” as the mission and to judge its success based on tank destruction in-stead of other things.
To designate a unit or formation as a scenario objective,you have to first assign it to a “unit objective group” inthe Unit Editor. To do that, simply select the unit or
formation and hold down the SHIFT key while pressinga number key from F1-F7. The selected units will thenshow a [U] next to its name followed by the correspond-ing group number you pressed. In order to remove aunit that is already part of a group, select that unit andhold down SHIFT and press F8.
Once you’ve done this, go back to the Mission editor andselect the Unit Objectives Option. Click on one of the
buttons for Unit 1 through Unit 7 to set the parametersfor that group.
N o t e : k e e p i n m i n d t h a t o n l y EN EMY u n i t s ca n b e a s s ig n e d a s u n i t
o b j e c t i v e s . Fo r e x am p l e , a Re d u n i t a ss ig n e d t o Gr o u p 1
w i l l b e t i e d t o t h e B lu e s i d e ’s Gr o u p 1 o b j e c t i v e , n e v e r t o
t h e R ed s i d e ’ s Gr o u p 1 o b j e c t i v e .
Unit Objectives can be one of three types – Destroy, De-
stroy All or Spot.
DESTROY - the designated target unit has to be knockedout for full points to be awarded, and damaged for partial points.
DESTROY ALL - the designated target(s) must be com-pletely eliminated for points to be awarded.

7/28/2019 CMA Game Manual 1
http://slidepdf.com/reader/full/cma-game-manual-1 118/197
118 Combat Mission
SPOT - the designated target unit has to be spotted in orderto be awarded target points.
KNOWN TO... - player, enemy, both, or nonePOINTS - assign how many points are awarded to the player
who fulfills the objective
NAME - assign a name to the Objective for easier reference(it’s also shown in the After Action Report)
Map EditorThe Map Editor is where you design your own maps from
scratch by “painting” the landscape in a 2-dimensionaltop-down view. To see the results of your work in 3D,
click on the “Editor Selector”, and select “3D preview”from the pop-up menu. After you’ve explored the 3Dworld, hit the ESC key to bring you back to the Map Edi-tor.
The Map Editor consists of three main tools: the OptionSelector on the left allows you to choose which featuresof the map to edit; the Settings Selector allows you tochoose a specific type/feature of the selected Option;
and the Tool icons on top of the screens allow you choosefrom several editing modes and “brushes” and changethe map’s dimensions.
Map Editor OptionsOptions and Settings are as follows:
Ground 1The basic set of available ground types. Dirt, Dirt Red, Hard,
Hard Red, Grass, Yellow Grass, Tall Grass, Tall YellowGrass, Rocky, Rocky Red and Sand.
Ground 2Second set of possible ground types. Pavement 1 and 2,
Gravel, Dirt Lot, Grain, Mud, Marsh.
BrushBrush terrain.

7/28/2019 CMA Game Manual 1
http://slidepdf.com/reader/full/cma-game-manual-1 119/197
Afghanistan 119
FoliageSix types of trees and three types of large bushes.
RoadsA number of road types: Dirt Road, Gravel Road, Paved Road
1 and 2, and a multi-lane Highway.
Walls/Fences/TrenchesVarious types of walls and fences (Stone, Tall Stone, Brick,
Tall Brick and Rural Stone), as well as trench lines.
BuildingsA large selection of buildings, from 1 to 8 stories high as
well as rubbled. After selecting a type, you can thenchoose the footprint and orientation for each building
individually.
Flavor ObjectsFlavor Objects are small objects which add atmosphere and
eye candy to the scenery but have little or no impact ongameplay. Options include: Street Lights, TelephonePoles, Drums, various Road Signs, and Sacks.
Craters
Allows to place various types and patterns of craters onthe map in clusters of 3, 7 or 15 small craters (L); 1, 2 or4 medium sized craters (M); 1 or 2 large craters (H),and 1 super-size crater (S).

7/28/2019 CMA Game Manual 1
http://slidepdf.com/reader/full/cma-game-manual-1 120/197
120 Combat Mission
ElevationBy default the map is perfectly flat and all tiles are set to
elevation level 20. You can adjust elevation levels to beanywhere between 0 and 999. Each elevation changerepresents a height difference of 1 meter.
CM:A’s approach to elevations might be conceptually diffi-cult to grasp at first (especially if you worked with theearlier CM editors in the past). However, once you get afeel for it you’ll never want to use another elevation edi-tor again! Instead of setting the height of each individualtile, you simply “draw” contour lines like you see on atopographical map. CM then logically slopes the terrain
between the contours so that the transitions are smoothand natural looking.
The mechanics are quite simple. There are four differentways to change the elevation of a tile and you can setmultiple tiles to the same height by keeping the leftmouse button pressed as you move the cursor aroundthe map. No matter which method you use, or how youuse it, the results are the same. The tiles clicked on turn
black to signify that you have “locked” the particulartile to a specific height, which is displayed in white num-bers. All others remain in their natural state, showingthat they are “unlocked”. All locked tiles remain at theheight you specified, all the unlocked ones dynamicallychange their heights to conform to the placement of newlocked tiles. This way you can specify a crest of a hilland the rest of the terrain will smoothly come up to meetit instead you having to do it manually.
The four choices are in the Options panel on the left:
DIRECT- set a specific elevation with one click. First choosethe desired elevation by using the + and - keys on the
keyboard, then click on the map at the desired location.The elevation of that tile changes to the value you speci-fied.
ADJUST - decrease or increase elevations by the amountset using the + and - keys on the keyboard. The default

7/28/2019 CMA Game Manual 1
http://slidepdf.com/reader/full/cma-game-manual-1 121/197
Afghanistan 121
is 5, meaning that if you left-click on a tile with the el-evation set to 20, it will be increased to an elevation of 25. Clicking on it again sets it to 30. Left-clicking whileholding the SHIFT key decreases elevation by the setamount.
You can also set the adjustment value to 0. This locks a tileto whatever its current height is. For example, if anunlocked tile is 23 you can click on it and it will lock in at23 without having to manually set the height to 23 us-ing the Direct method. This is useful when you want toestablish a fixed base to create a steep hill or valley with-out changing the surrounding heights.
ADJUST ALL - this allows you to nudge ALL tiles up or downby one level each time you press the + or - key, respec-tively. This is useful if, for example, you reached elevation0 on the map but suddenly notice that you need a fewlower elevations to finish a canyon. Increasing all tilesby +5 height gives you the needed room while retainingall your hard work map wide.
N o t e : t h i s o p t i o n o n l y w o r k s w h e n a t l ea s t O N E e le v a t i o n h a s
b e e n s et b y y o u o n t h e m a p ( i . e . w h e n t h e r e i s a t l ea s t o n e b l ac k d o t p l a ce d o n t h e m a p ) .
CLEAR – unlocks a locked tile and adjusts nearby eleva-tions automatically. For example, say you decided toflatten out a section of map that you had previously madehilly. Just clear the locked tiles and it will settle to what-ever the surrounding terrain is set to.
Elevation numbers are by default only visible in this mode.If you want to see elevations in other map editing modesyou can press the “E” key on your keyboard, which placesan elevation overlay over the current 2D map display.Pressing E again removes the overlay.
LandmarksIdentifying key terrain features in the Briefing helps the
player associate what he is tasked to do with where heis supposed to do it. To help tie these things togetheryou can place text “landmarks” to indicate, specifically,where something is. For example, identifying a promi-nent hill as “Hill 586” and noting in the Briefing whatthe player is supposed to do with “Hill 586”. To place a

7/28/2019 CMA Game Manual 1
http://slidepdf.com/reader/full/cma-game-manual-1 122/197
122 Combat Mission
landmark, first click on the tile you want to label. A pop-up window opens with a text field to enter the name of the landmark. Note that this name is visible to both play-ers, so it is generally a bad idea to make the landmarkstoo side specific if you intend on the scenario being play-
able from both sides. If you find you don’t like thelandmark you put down, or see that it is in the wrongplace, click on it in the 2D map to select it and then chooseDelete.
N o t e : i f y o u w a n t o n l y o n e s i d e t o s e e a m a p l a b e l , u s e O b j e c -
t i v e s i n s t e a d ( s e e M i ss io n E d i t o r a s w e l l a s t h e T i p s & T r i c k s
s e c t i o n )
Setup ZonesAllows “painting” of up to three setup zones per nation,
labeled Blue 1, 2, 3 and Red 1, 2, 3 respectively. Zonesare used to restrict how much the player can customizehis starting locations. For example, allowing the attack-ing player to set up in the same spot as the defenderwould not be a good idea. Likewise, allowing the de-fender to put some snipers or AT teams in the middle of
the attacker’s assembly area isn’t likely to win you anyfriends from people who play as the attacker!
Setup zones do not have to be adjacent, meaning that youcan create one large zone, two or more independentzones, or even sprinkle spots all over the map. Unitslocated within a specific zone during the Setup Phase of a battle can be moved to all spots of that same zonenumber, no matter where they are. So if you create two
Zone 1 spots on the opposite ends of the map, a unit can jump from one spot to the other without restrictions, aslong as it is placed on a spot with the same zone num-ber.
N o t e : u n i t s p l a ce d b y t h e s ce n a r i o d e s i g n e r o u t s i d e o f a Se t u p
Z o n e d u r i n g d e p l o y m e n t c an n o t b e m o v e d a t a l l b y t h e
p l a y e r d u r i n g t h e Se t u p P h a se .
Map ToolbarThe Map toolbar at the top of the screen is always visible
when the 2D overview map is shown. The tools containedin the bar allow you to quickly access four functions:

7/28/2019 CMA Game Manual 1
http://slidepdf.com/reader/full/cma-game-manual-1 123/197
Afghanistan 123
Object RotationMost objects which can be placed on the map, such as build-
ings, road tiles, walls etc. can be rotated in one of fourdirections before placing them on the map. The four ar-row buttons indicate the currently selected direction.
You can also change the rotation by holding the CTRL keyand right-clicking (it doesn’t matter where you click).Repeat this until the rotation direction you want is se-lected (the current selection is always indicated by adepressed button)
PaintbrushThe “brush” with which you can “paint” terrain/objects on
the 2D map is set to one of four sizes. The smallest sizepaints only one terrain tile per click, while the biggestlevel paints a rectangle of 15 by 15 tiles per click. Left-click applies the currently selected terrain to the areacovered by the brush, right-click removes it.
N o t e : n o t a l l o b j e c t s a r e e l i g i b l e f o r d i f f e r e n t b r u s h s i z e s. M o s t
t e r r a i n t y p e s a r e , b u t f o r e x am p l e B u i ld i n g s o r F la v o r
O b j e c t s a r e n o t . Fl a v o r O b j e c t s a d d i t i o n a l l y c an o n l y b e
p l a ce d i n 2 D v i e w b u t n o t d e l e t e d b y r i g h t - c l i c k i n g ( s in c e
t h e y a r e n o t v i s ib l e in 2 D v i ew ) . Yo u h a v e t o g o t o t h e 3 D
p r e v i e w t o d e l e t e d F l a v o r O b j e c t s .
Map ZoomThe 2D map can be set to any one of five different levels of
magnification by clicking on the corresponding button.The left most button is max zoom in, the right max zoomout. The middle zoom level is the default. If the mapview is zoomed in, then the view will scroll when youmove the cursor to the screen edge.
Map width & depthSets the dimensions for the playable area of the current
map. Two “boxes” are available, one for setting the widthand the other for setting the height.
In order to adjust map sizes, you use one of the four but-tons available per “box”. Obviously the + buttons

7/28/2019 CMA Game Manual 1
http://slidepdf.com/reader/full/cma-game-manual-1 124/197
124 Combat Mission
increase the size, while the - buttons decrease map size.Each click increases the map by 32 meters.
N o t e : b y p r e ss in g a n d h o l d i n g t h e S H I FT k e y w h i l e c l i ck i n g o n
o n e o f t h e b u t t o n s , t h e in c r e a s e ( o r d e c r e a se ) i s 1 6 0
m e t e r s .
What might be less obvious, but is logical once you thinkabout it, is that the placement of the buttons also indi-cates the direction into which (or from which) the mapis increased (or decreased).
You just have to consider which axis is being lengthenedor shortened, and the +/- pairs are then formed to af-fect each end of that axis.
The plus and minus on the left affect the west side of themap. So pressing the plus on the left adds space to west.Similarly the minus on the right removes space from east.
Here the plus and minus on top affect the northern borderof the map, while the plus and minus in the bottom do itfor the southern border.
Units Editor
The Units editor provides all the tools to create Order of Battles for both Blue and Red sides. On the left is a listof options arranged logically, from top to bottom, in theorder generally used to create an Order of Battle. Firstyou purchase units for a side, then you assign reinforce-ments, and lastly you deploy those units in the 3Denvironment.
The main screen layout consists of two columns in the maindisplay area. On the left is a list of all the AvailableTroops that can be purchased for a specific “Branch”

7/28/2019 CMA Game Manual 1
http://slidepdf.com/reader/full/cma-game-manual-1 125/197
Afghanistan 125
(sub category of a side’s units). On the right is the Acti-vated Troops display that shows all the units you’ve“purchased” for inclusion in your battle. At the bottomof the screen are various options to tweak the data for awhole formation or a specific unit. The buttons off to
the lower right side are the most important since theycontrol Purchase, Delete or Rename functions.PurchaseUnits
Formations are a very important concept to both gameplay(which is not directly relevant here) and scenario mak-ing. Most of Combat Mission’s formations are based onauthentic Tables of Organization and Equipment (TO&E)for the various forces used in the game. Some, like
Uncons, aren’t organized so explicitly in real life so we’vesimply made approximations of what one might find onthe battlefield. No matter what, though, every singleindividual unit belongs to a single formation, which inturn may (or may not) be a part of another formation. Aformation isn’t a unit itself, rather just a container foreither units or other formations. For example a RifleSquad is a unit that is typically found in a Platoon for-
mation, which itself usually belongs to a Companyformation.
When you purchase units for the first time you’ll quicklydiscover you are only allowed to purchase formations,generally quite large ones at that. After you purchase aformation you then “delete” the specific units/forma-tions you don’t want. This might seem a backwards wayto do things, but really it is quite necessary. If you
bought units on their own they would have no forma-tional context. Since such context is very important togameplay and realism you’d then have to go through acomplicated process of attaching units to each other,possibly in ways they never would be in real life. There-fore, it is much easier to start with the correct formationsattached to each other and simply toss aside the unitsand formations you don’t want.
Purchase UnitsAll units are organized by Force type (e.g. Soviet Army,
DRA Army, Mujahideen, etc.) and then secondarily to aspecific Branch of that Force (e.g. Mech Infantry, Spe-cial Forces, etc.). Force options for a particular side are

7/28/2019 CMA Game Manual 1
http://slidepdf.com/reader/full/cma-game-manual-1 126/197
126 Combat Mission
presented in icon form in the middle of the left portionof the user interface. When you select a Force a list of the available Branches appears below. Selecting one of these shows what the Available Troops are for that par-ticular Branch. You are allowed to mix and match units
from Forces and Branches as much as you like, no mat-ter how unrealistic it may be in real life.
Each line in the Available Forces represents a unique, pur-chasable formation. At first glance there doesn’t appearto be many choices since you initially see just the tip of the iceberg. Next to every formation name is a small +icon which allows you to “expand” it to show attachedformations and units. By default all formations start out
“collapsed” in order to minimize the amount of space ituses in the display. To expand a formation all you haveto do is click on the + icon. One expanded the icon turnsto a – icon which, when clicked on, collapses the forma-tion again. Collapsing is rather important since thedisplay can not be scrolled, therefore you can only seeone screen height’s worth of units at a time. Therefore,if you should find yourself out of room just collapse some
of the formations you aren’t interested in and you’ll beall set.
To “purchase” a unit, doubleclick on it or, alternatively,single-click to highlight the formation, then click on thePurchase button in the lower right hand corner. Eitherway, once a formation is purchased it moves to the Acti-vated Troops column and is immediately available foruse in the scenario. However, it is highly unlikely you’ll
need all the units of the formations you purchased.Therefore, you’ll want to remove formations and unitsthat aren’t necessary for your battle.
Removing units is very easy. In the Activated Troops listsimply select the formation or individual unit to removeand then click on the Delete button in the lower rightcorner of the screen. The unit’s name grays out show-ing that it is no longer available for your battle. If at
any time you change your mind, not a problem. Simplyhighlight the formation or unit and hit the Delete buttonto reset them.

7/28/2019 CMA Game Manual 1
http://slidepdf.com/reader/full/cma-game-manual-1 127/197
Afghanistan 127
Soft factorsEach unit has certain “soft” data that can be adjusted if
desired. Soft factors are those elements that are, moreor less, variable from unit to unit regardless of type. Most
of these are related to the soldiers themselves, not theequipment they have assigned to them. You can see whatthe soft factors are by clicking on a unit or formationand looking at the popup options at the bottom sectionof the screen.
When adjusting these factors try to put yourself into theboots of the soldiers in the unit within the context of your scenario’s setting. For example, is the unit sup-
posed to represent a dispirited bunch of farmers roundedup one day, given a gun the next, and put in the frontthe day after? Or is the unit a highly trained, physicallyfit, ready for just about anything? Your battles can gofrom boring to intensely interesting simply by tweakingsome of these settings so that they match a story of what the battle is about.
EXPERIENCE – determines the experience and training level
of the soldiers of the formation. Options include:
- Conscript: draftees with little training and no combatexperience whatsoever.
- Green: draftees with little training and some combat ex-perience or reservists with some training and no combatexperience. Green can also represent professional sol-diers whose training is substandard in comparison to
another force.
- Regular: professional soldiers who went through exten-sive, quality training programs, but lack combatexperience. Or Regular can represent troops that re-ceived mediocre training that have a fair amount of combat experience.
- Veteran: professional soldiers with standard militarytraining and first hand combat experience. Alternatively,it can be professional soldiers who have trained to aslightly higher standard than Regulars, yet lack combatexperience.
- Crack: exceptional soldiers with more than the averagetraining and plenty of combat experience.

7/28/2019 CMA Game Manual 1
http://slidepdf.com/reader/full/cma-game-manual-1 128/197
128 Combat Mission
- Elite: the best of the best. Superb training, frequent com-bat experience, and generally all around tough guys.
MOTIVATION – determines the soldiers’ will to fight. Optionsrange from Fanatic (soldier will never give up and fighteven when facing certain death) all the way to Poor (sol-dier has little desire to fight and will take the first chanceto rout).
FITNESS – determines the inherent degree of physical readi-ness of the unit’s soldiers. This influences on how quicklysoldiers tire and recover from physical tasks, such asrunning or being bombarded by enemy fire. Options in-clude: Fit, Weakened, and Unfit.
LEADERSHIP – the capability and experience of the unitleader does not always correspond with the quality of the unit. This rating allows a unit to range from greatsoldiers and terrible leaders, or terrible soldiers and greatleaders. The values are from -2 to +2, indicating theleader’s influence on the unit cohesion and various othercapabilities.
SUPPLY – determines the amount of ammunition and equip-
ment available to the unit at the start of the game.Options include Severe, Scarce, Limited, Adequate andFull.
EQUIPMENT – the quality of the equipment available to theunit can vary even within a formation. This option isunique in that it behaves differently depending on whenyou set it. If you set this option for “activated” units(i.e. already purchased and in the right-hand activated
column), the available equipment is simply adjusted inits performance (accuracy, jams etc.). If you set thisoption BEFORE purchasing a unit, this setting determineswhat type of weapon or equipment the unit will beequipped with. This is explained in more detailed under“Purchasing Equipment” below.
VEHICLE STATUS – changes a Vehicle to be immobilized,knocked out, or burning from the very start of the game.
typical SettingFor all of the above settings except Vehicle Status, the op-
tion “Typical” is also available. This choice randomly setsthe value to be a typical value for the selected forma-

7/28/2019 CMA Game Manual 1
http://slidepdf.com/reader/full/cma-game-manual-1 129/197
Afghanistan 129
tion. When you select a DRA Sarandoy unit, you gener-ally get different results (often only conscripts and greenunits with low leadership values) compared to a TypicalSoviet Spetsnaz Unit (mostly Regulars and Veterans withhigh Motivation). Typical is the default setting for all
options and is a good way for the scenario designer toget some variety for his scenario without having to ad- just each and every unit individually.
Purchasing equipmentMost of the units in CM:A have very specific equipment as-
signed to them because, in real life, there isn’t significantvariation to speak of. However, some types of equip-
ment are more variable and therefore are assigned tounits semi-randomly. This section explains how you canexercise some control over CM choices for those par-ticular units.
BEFORE you purchase a formation you can change theEquipment settings for either entire formations or forspecific units. This gives you some influence, more orless, over what CM picks for the units that have variable
equipment options (all others will ignore your Equip-ment setting and go with their assigned equipment). Bydesign your choice is still somewhat randomized so asto ensure a greater variety of equipment is used insteadof the same few things being used time after time. There-fore, instead of specifying a particular piece of equipmentyou generally influence what CM picks to equip the unitswith. Sometimes, however, there are so few choices for
a particular unit type that you actually do have fairlyprecise control.
The Equipment’s top two picks (Excellent and Good) al-ways choose “good” equipment, the bottom two choices(Poor and Fair) only choose “bad” equipment. The choicein the middle (Normal) picks from either list randomly.The chance of selection varies depending what is avail-able for that unit. The fewer items in the list, the more
control you have. Also, the better the setting the morelikely it is to pick from the first type available, the lowerthe setting the more likely the pick will come from thelast available.

7/28/2019 CMA Game Manual 1
http://slidepdf.com/reader/full/cma-game-manual-1 130/197
130 Combat Mission
Mujahideen and Tribal MilitiaSniper TeamGOOD .......................... BAD- SVD ........................... – SMLE MkIII
RPG Team
GOOD .......................... BAD- RPG-7V ..................... - RPG-2
Machinegun TeamGOOD ........................... BAD- PKM.......................... - RP-46
Infantry Squad- GOOD ......................... BAD- AK-74 ....................... - PPSh- Type 56 ..................... - SMLE MkIII- RPG-7V ..................... - RPG-2
- AR-10 ....................... - FN-FAL- RPK .......................... - Bren L4
Antitank Team- GOOD ......................... BAD- RPG-7V ..................... - SPG-9- Carl Gustav
Heavy Machinegun TeamGOOD ........................... BAD- DShK ........................ - SGM
Soviet ArmyMech Infantry Battalion (BTR)- GOOD .......................... BAD- BTR-70 ...................... - BTR-60PB- BTR-80
Antitank Platoon (BTR)- GOOD .......................... BAD- AT-4A ........................ - AT-3B- BTR-70 ...................... - BTR-60PB
Guards Tank Company- GOOD .......................... BAD- T-62 (1975) ................ - T-62 (1972)- T-62D ........................ - T-55(1974)- T-55AD ...................... - T-55(1974)
Tank Company- GOOD .......................... BAD- T-62 (1975) ................ - T-54B- T-55M ........................ - T-55(1974)- T-62 (1972)
Special Forces Company- GOOD .......................... BAD- BMP-2D...................... - BMP-1D
Air Assault Recon Company- GOOD .......................... BAD- BMP-2 ........................ - BMP-1

7/28/2019 CMA Game Manual 1
http://slidepdf.com/reader/full/cma-game-manual-1 131/197
Afghanistan 131
DRA ArmyInfantry Battalion (BTR)- GOOD .......................... BAD- RPG-7V ...................... - RPG-2- AT-3B
Mech Infantry Battalion (BMP)- GOOD .......................... BAD- BMP-1D...................... - BMP-1
Mech Infantry Battalion (BMP)- GOOD .......................... BAD- BMP-1D...................... - BMP-1
Mech Infantry Battalion (BTR)- GOOD .......................... BAD- BTR-70 ...................... - BTR-60PB
Tank Company
- GOOD ......................... BAD- T-62 (1975) ................ - T-54B- T-55M- T-62 (1972)
ReinforcementsUp to seven groups of units per side can be designated as
Reinforcements from the Available Units list, irrespec-
tive of their parent formation. This allows the scenariodesigner to have units enter the battle at some later(more or less) random point in time. The units of eachGroup enter the map at the same time, but the entrylocation is set individually for each unit using the De-ploy function. Staggering units can help with early gameunit congestion, enhance the plot of the scenario, or sim-ply space things out for variety’s sake.
The first step is to assign units to one or more Groups byhighlighting them in the Available Units column andpressing a key on your keyboard from 1 to 7 (not on aNumPad!). This assigns the unit(s) to the respectiveReinforcement Group, and a small [R] followed by thenumber of the assigned Group appears next to its name.For example, [R1] means the unit is assigned to Rein-forcement Group #1. To remove a unit from a Groupsimply highlight it and press the 8 key and you’ll see thedesignation go away.
Once you have at least one unit assigned to one Group youcan specify when it comes into the game. To do thisclick on the Group you want in the list on the left side of the screen. For each group, you can set the time of the

7/28/2019 CMA Game Manual 1
http://slidepdf.com/reader/full/cma-game-manual-1 132/197
132 Combat Mission
earliest arrival, and determine a random time span withinwhich the arrival time might deviate.
Earliest Arrival TimeCan be set from 5 minutes after the beginning of the battle
up to 60 minutes after the beginning. This specifies thesoonest a Group comes into the battle.
Arrival SpanCan be set to be Exact (no deviation, i.e. the unit will al-
ways arrive exactly on the time set above) or a valuebetween 5 and 30 minutes in 5 minute intervals. Speci-fying a time determines a +/- range modification of Earliest Arrival Time.
N o t e : b e c a r e f u l o f w h a t y o u d o h e r e s i n c e t h e r e i s a ch a n c e fo r
s ig n i f ic an t u n i n t e n d e d c o n s e q u e n c e s . Fo r e x am p l e , i f a 6 0
m i n u t e b a t t l e h a s Ea r l i e s t A r r i v a l T im e se t t o 3 0 m i n u t e s
a n d t h e A r r i v a l Sp a n t o 3 0 m i n u t e s , t h e r e i n f o r ce m e n t
g r o u p m i g h t a r r i v e an y t i m e b e t w e e n o n e se co n d a f t e r t h e
b e g i n n i n g o f t h e b a t t l e a n d o n e s eco n d b e f o r e i t s e n d . I f
y o u s e t Ea r l i e s t A r r i v a l T i m e t o 6 0 m i n u t e s a n d t h e A r r i v a l
Sp a n t o 1 0 m i n u t e s , t h e n t h e r e i n f o r ce m e n t g r o u p m i g h t
a r r i v e 1 0 m i n u t e s b e f o r e t h e e n d o f t h e b a t t l e , an d t h e r e i s a 5 0% ch a n c e t h a t i t w i l l n e v e r a r r i v e ( b e ca u s e t h e b a t t l e
m i g h t e n d b e f o r e t h e a r r i v a l t i m e ) .
Deploy UnitsThis feature switches you from the 2D Unit Editor to the 3D
preview map so you can position the Available Units inthe exact spot, orientation, and stance you want. Thisapplies to Reinforcements as well, no matter when they
come into the game. This allows you to do all sorts of things, such as putting units into vehicles, deployingheavy weapons so they can fire immediately, etc.
N o t e : S o ld i e r s a r e a u t o m a t i ca l ly b o a r d e d o n t o t h e i r v e h i c le s
w h e n f i r s t p u r c h a s ed . I n t h e D e p lo y U n i t s ( Ed i t o r ) m o d e
y o u m a y u n l o a d a n d r e l o a d a s b e f o r e , o f co u r s e .
If you created Setup Zones they are shown on the map. A
unit in a Setup Zone can be moved freely within thatparticular Zone during a game’s Setup phase. Unitsplaced outside of a Setup Zone can not be moved at bythe player until after the game starts.

7/28/2019 CMA Game Manual 1
http://slidepdf.com/reader/full/cma-game-manual-1 133/197
Afghanistan 133
N o t e : p a y e x t r a a t t e n t i o n t o w h e r e R e i n f o r ce m e n t s a r e p l ace i n
o r d e r t o a v o i d u n r e a l i s t i c s i t u a t i o n s , su c h a s u n i t s s u d -
d e n l y a p p e a r i n g i n t h e m i d d l e o f a f i e l d o r a sp o t t h a t i s
l ik e l y t o b e o c cu p i e d b y t h e o t h e r s i d e . I t m i g h t b e a g o o d
i d e a t o h a v e R e in f o r c e m e n t s a p p e a r i n a p l a ce o u t o f s ig h t
o f e n e m y t r o o p s i n o r d e r t o a l l o w t h e o t h e r p l a y e r a c h a n ce t o m o v e t h e m b e f o r e g e t t i n g s h o t a t .
Deployment CommandsDuring Deployment mode a limited number of Commands
are available for each unit type, mainly related to ad-ministrative tasks, such as:
MOVE, FACE, HIDE, BAILOUT, ACQUIRE, DISMOUNT, DE-
PLOY WEAPON, SPLIT TEAM, ASSAULT TEAM, ANTITANKTEAM
N o t e : Th e Co m m a n d s w o r k t h e s am e w a y t h e y d o d u r i n g a b a t t l e .
Se e t h e Com m a n d s se c t i o n o f t h e m a n u a l f o r m o r e d e t a i ls .
Artificial Intelligence (AI) Editor
Most game Artificial Intelligence (Computer Player) sys-tems are based on highly scripted, reactive behavior.The scenario designers program very specific instruc-tions for even the most basic behavior, often to the pointof “if the enemy moves here, attack, otherwise don’t doanything”. The game play tends to be quite predictableover time and potentially easy to fight against because
the designer has to correctly anticipate what the playerwill do.
Other game AIs, including the one in the previous CombatMission series, are dynamic AIs that act and react onthe fly. Since its behavior patterns are more generic, itis more flexible when playing a specific mission/battle.Unfortunately, the same generic attributes preclude theComputer Player from taking advantages peculiar to the
battle being fought. The designer can set up a perfectdouble pincer envelopment and watch the AI decide toconduct a frontal assault instead.
CM:A’s Computer Player is a sort of hybrid of scripted anddynamic systems. The scenario designer has the ability

7/28/2019 CMA Game Manual 1
http://slidepdf.com/reader/full/cma-game-manual-1 134/197
134 Combat Mission
to customize the higher level, and to some extent lowerlevel, behavior specific to the tactical considerations of the battle. However, the AI can improvise, to some ex-tent, within the designer’s parameters. This greatlyreduces predictability over time, but more importantly
it allows the AI to conform to the story of the battle. If the battle’s story revolves around an ambush or a con-voy to move along a certain road, such crucial elementscan be coded into the scenario to make sure they hap-pen.
The scripting aspect of CM:A is also critical for coachingthe Computer Player on how to win. For example, if thedefending Computer Player needs to defend a set of
buildings inside a city, the designer can specify whichkey spots should be manned in order to ensure the suc-cess of a more abstract victory condition. No matterhow good a dynamic AI may be, practically speaking itwill never equal the insight the designer has withoutsome very specific help. Therefore, think of the script-ing as the designer helping the AI understand what itneeds to do, where, and how.
AI ElementsThere are four distinctly different concepts that create a
decent Computer Player.
Groups - a collection of units (up to 8 Groups per side)
Map Zones - areas of the map for Groups to focus on (up to16 per Plan)
Orders - basic instruction sets for a Group (up to 16 perPlan)
Plans - overall coordination of Groups, Orders, and Zones(up to 5 Plans per side)
Units are assigned to Groups to concentrate on geographi-cal Map Zones using various Orders to direct theirbehavior. Plans specify which Groups use what Map
Zones with which Orders. The Computer Player only everuses one AI Plan for a scenario, however it can use dif-ferent Plans (if they exist) each time the scenario isplayed.

7/28/2019 CMA Game Manual 1
http://slidepdf.com/reader/full/cma-game-manual-1 135/197
Afghanistan 135
Once a Computer Player’s Group reaches an Order’s MapZone, it begins to look at the next Order (and associatedMap Zone) if one exists. The computer player decideswhen to “move on” to the next Order by looking at twotime points set by the author, and the condition of its
troops.
These concepts are identical for both Blue and Red sides,however the elements can be used in different ways inorder to simulate the different behavior patterns, doc-trinal approaches to combat, etc. of each side’s simulatedforce. The importance of each specific element variesfrom scenario to scenario, side to side. However, gen-erally a good Computer Player comes from equal
attention paid to all four elements.
A scenario can have a Computer Player for either or bothRed and Blue sides. However, if the designer did notspecifically create a Computer Player for a side the unitsfor that side will simply sit wherever they start out anddo nothing. Therefore, the scenario designer shouldmake sure to mention in the briefing that a scenario issupposed to be played from a specific side only.
GroupsA Group is a collection of units (squads, teams, and ve-
hicles) assigned to perform tasks together. Each Groupacts independently of other Groups using Orders it re-ceives from a Plan. Because only there is only one Planin use during a scenario there is no risk of Groups get-ting contradictory instructions. This means the designer
must be quite sure of why various units are in one Groupand not another, because if there assignments aren’tsensible then the Orders are less likely to produce de-sirable results.
All units are assigned to Group 1 unless specifically as-signed to Groups 2 through 8. To assign a unit to a Groupsimply go to the Unit Editor’s Purchase Units option,select the unit or formation by clicking on it, then use
F2-F8 keys to set the Group number to 2-8. Units as-signed to Groups 2-8 have their Group number appearto the right of their name as [A2] through [A8]. To re-assign a unit to a different Group, simply repeat theprocess with a different numbered F key. To have an

7/28/2019 CMA Game Manual 1
http://slidepdf.com/reader/full/cma-game-manual-1 136/197
136 Combat Mission
assigned unit return to Group 1, simply highlight it andhit F1.
Map ZoneMap Zones are “painted” on the map, much like a Setup
Zone or a victory Objective area. Each Order can haveone, and only one, Map Zone assigned to it. The shapeand size can be as regular or irregular, small or large,and you can even generate separate discontinuous ar-eas, but they are still considered part of the same mapzone. That doesn’t mean it is necessarily a good idea tomake huge, crazy shaped Map Zones, just that it is pos-sible. Generally the more “creative” the Map Zones are,
the less likely Groups will behave as desired. Therefore,it is usually better to break up larger concepts intosmaller pieces and assign different Groups to each withtheir own Orders and Map Zones.
N o t e : O r d e r s d o NO T h a v e t o h a v e M a p Z o n e s as s i g n e d w i t h
t h e m . I f n o M a p Z o n e i s d e f i n e d , t h e u n i t w i l l s i m p l y
r e m a in s t a t i o n a r y w h i l e e x e cu t i n g t h e o t h e r o p t i o n s o f an
o r d e r ( c h a n g e i n s t a n c e , c h a n g e f l o o r s , d i s m o u n t ) .
The composition of the Current Group should be kept firmlyin mind to make sure that the Map Zone isn’t too smallor too big for the number of units, the distance too great,the type of terrain unfavorable, etc.
It is very important to keep in mind that the Map Zone isthe desired END ZONE and NOT the path. The TacAI de-termines, based on Plan’s Orders and tactical Commands,
how to get from one Map Zone to another. A Group willNOT follow a long and skinny Map Zone; it will simplymove all its units onto it and stop before moving ontothe next Order’s Map Zone. If you want to influence thepath a group of units takes, issue several orders as youwould waypoints.
OrdersEach Order consists of a single instruction for a specific
Group to follow. The specified Map Zone is the destina-tion and the Order represents the method to get there.This is an important thing to fully grasp since doing theopposite, treating the Map Zone as the start of the Or-der, will likely doom a Plan to failure. There are a total

7/28/2019 CMA Game Manual 1
http://slidepdf.com/reader/full/cma-game-manual-1 137/197
Afghanistan 137
of four pieces to each Order (not including the Map Zone),except the first Setup Order, which only has three (ex-plained further below).
Order type
Dash – basically this is an “everyone run for the hills” op-tion that should be used very rarely. Make sure that thedistances are fairly short or the units are vehicle only,otherwise they will likely exhaust themselves beforereaching the specified Map Zone. It is also wise to makesure the Group isn’t likely to fight along the way sincethe units won’t be predisposed to doing that. Use Dashfor things like getting units to move quickly from onemajor source of cover to another at maximum speed,
such as across a dangerously exposed road or field.
Quick – emphasizes speed over combat, but to a lesser ex-tent than dash. Units will attempt to get from A to B asquickly as possible but not at all cost, and not at maxi-mum speed. Units may stop and return fire occasionally,but are generally unlikely to do so. Quick is useful whencovering medium distances that you want to crossquickly but without completely tiring out the units, andwhen enemy contact is unlikely but not impossible.
Advance – this is the “happy medium” between Dash andMax Assault. This is generally the best Order to use whenmoving from place to place and not specifically antici-pating a big fight. Units instructed to Advance decidewhat they should do, but generally it is to keep movingafter taking some shots at spotted enemy units.
Assault – this order emphasizes combat over movement.Units ordered to assault will generally interrupt theirmovement when facing the opportunity to engage theenemy, but will not remain stationary for too long. Thisis the best order to use for advancing while in contactwith the enemy at medium to longer distances.
Max Assault – the opposite of Dash, Max Assault tells theGroup to stop and engage with maximum firepower
whenever each unit sees an opportunity to do so. Thisis generally a poor choice for getting a Group to stay onthe move if a lot of enemy is expected in the vicinity. Itcan also be a bad idea if the area being moved over is apoor place to stop for a firefight. The best use is for short

7/28/2019 CMA Game Manual 1
http://slidepdf.com/reader/full/cma-game-manual-1 138/197
138 Combat Mission
moves where there is good cover and enemy activity isexpected.
Setup OrdersThe very first order of each plan is a Setup Order. It works
exactly as other orders with one big exception: the MapZone for the Setup Order defines the area where unitsbegin the game, not where they need to move to. Assuch, the Map Zone is NOT the End Zone as for all otherregular orders. Therefore, Setup Orders have no optionfor “Order Type” since the units do not have to moveanywhere.
N o t e : t h e A I d o e s n o t b r e a k t h e r u l es . I f y o u p a i n t a M a p Z o n e
f o r a S e t u p O r d e r o u t s id e o f a v a l i d R ed o r B l u e Se t u p Z o n e ( a s d e f i n e d i n t h e M a p Ed i t o r ) , t h e A I w i l l n e v e r se t u p
t h e r e . T h e r e f o r e , m a k e s u r e t h a t y o u r M a p Z o n e f o r S e t u p
O r d e r s f o r t h e A I p l a n m a t ch e s a v a l i d Se t u p Z o n e i n t h e
M a p E d i t o r . T o m a k e t h i s e a s i e r , Se t u p Z o n e s a r e a l w a y s
s h o w n o n t h e 2 D m a p w h e n y o u s e le c t a Se t u p O r d e r i n t h e
p l a n .
N o t e : l an d m i n e s as s i g n ed t o A I u n i t n u m b e r 2 a n d h i g h e r m o v e
i n t o t h e A I u n i t ’ s p a i n t e d s et u p z o n e .
Occupy buildingsThis option tells the unit which floor to occupy if it enters a
building. If a unit is not inside a building, this option hasno effect.
Stance
This option defines the basic behavior and combat postureof a unit for a given Order.
Cautious – shoot only when a clear target presents itself and don’t get too worked up when one does. This helpsconserve ammo and limits how much the Group makesits presence known to the enemy.
Active – shoot early and shoot often. This is generally the
best option when the Group is being tasked with assault-ing a known enemy position.
Ambush – instructs the units to only open fire if the enemycloses within a specific distance. Several distance op-tions are available, from 75m to 1000m.

7/28/2019 CMA Game Manual 1
http://slidepdf.com/reader/full/cma-game-manual-1 139/197
Afghanistan 139
Hide – just as it sounds! This instructs the Group to avoiddoing anything that might attract attention, such asmoving or shooting. Units that get shot may return fire,but other units in the Group will try to remain hidden.
Passenger statusThis option tells passengers on vehicles to Dismount orremain Mounted after reaching the designated Map zone.
N o t e : Th e r e i s n o w a y t o i n s t r u c t t h e A I t o M o u n t u n i t s o n c e
D i s m o u n t e d d u e t o t h e c o m p l ic a t i o n s o f co o r d i n a t i n g
v e h i c le s a n d i n f a n t r y ( r e a l l i f e m i l i t a r y u n i t s t r a i n f o r
m o n t h s t o g e t t h i s r i g h t ! ) . P r a c t i c a l l y sp e a k i n g , i t w o u l d
b e r a r e t o s e e i n f a n t r y u n i t s g e t i n t o a n d o u t o f v e h i c le s
m u l t i p le t i m e s w i t h i n t h e s co p e o f a Com b a t M i s si o n b a t t l e ,s o i t i s le s s o f l im i t a t i o n t h a n i t m a y i n i t i a l l y a p p e a r t o b e .
PlansPlans are the glue that holds together Groups, Map Zones,
and Orders. They act as “scripts” for the AI to follow,but not in the traditional FPS/RTS sense in which tacti-cal behavior is tied to trigger points, patrol routes, etc.
Instead it is a set of behavioral instructions just like in areal military formation. For example, the “script” doesn’tsay “Tank 231 goes from this point to this point andthen tries to shoot here”, rather it says “Tank 231 willtry to move through this area and shoot at any threats itsees”. The actual tactical moves and decisions the unitmakes are left up to the TacAI, which means they arecontext sensitive decisions.
When the player starts to play a scenario Combat Missionselects one semi-randomly chosen Plan to be used forthe duration of the battle. This allows the ComputerPlayer to be unpredictable each time a scenario is re-played, yet still follow specific instructions made by thescenario designer. Or not! The Scenario designer maychoose to make only a single Plan for a particular side,thereby guaranteeing that one Plan is always the one
used. The designer can also skew the chances a Plan isselected, or not.
To create a Plan, and the component pieces, select one of the five possible Plans from the list in the user interfaceto the left. The first popup menu controls how likely the

7/28/2019 CMA Game Manual 1
http://slidepdf.com/reader/full/cma-game-manual-1 140/197
140 Combat Mission
selected Plan is used by CM. The second popup menudesignates which Group is considered the “CurrentGroup”. When selected, existing Orders assigned to thatGroup can be seen and manipulated, new ones created.The third popup controls the Current Order for the Cur-
rent Group. The first of the 16 possible Orders is alwaysSetup. New orders can be added by clicking on the Addbutton, existing orders can be deleted by clicking onDelete.
N o t e : P l an s n e e d t o b e t e s t e d b y t h e d e s ig n e r i n o r d e r t o m a k e
s u r e t h e y w o r k a s e x p e c t e d . H o w e v e r , s in c e CM r a n d o m l y
c h o o s e s a P la n i t i s d i f f i c u l t f o r t h e d e s ig n e r t o b e s u r e o f
d e b u g g i n g a s p e c i f ic P la n i f t h e r e is m o r e t h a n o n e . T o
o v e r c om e t h i s , s im p l y c h a n g e t h e ch a n c e o f t h e d e s ir e d P l an h a p p e n i n g t o “ U se d Fr e q u e n t l y ” a n d t h e o t h e r s d o w n
t o “ N o t U s e d ” . Ju s t r e m em b e r t o c h a n g e t h e v a l u e s b a c k t o
w h a t e v e r i t is y o u w a n t b e f o r e se n d i n g t h e b a t t l e o f f t o b e
p l a y ed b y o t h e r s !
Exit Before / Exit AfterThe “Exit Before” option causes the Group to try very hard
to get to the next Order before the specified time isreached. This does not mean the Group will do it, justthat it will try. If it has taken excessive casualties, isimmobilized or heavily engaged it may blow the set “ExitBefore” time.
The “Exit After” option does the opposite by telling theGroup to stay at the current Map Zone until the speci-fied time is reached. With this setting a Group nevermoves on to the next Order before the “Exit After” timeis reached. These two options allow for some reason-able level of coordination between Groups.
You can increase the “jumps” for the above settings byholding the SHIFT key while you click on the + or - but-tons.
N o t e : a l l o f a P l a n ’ s O r d e r s a r e sa v e d i n t o t h e s c e n a r i o f i l e e v e n
i f t h e r e a r e n o Gr o u p s a ss ig n e d t o i t . T h i s a l lo w s t h e
d e s i g n e r t o m o v e , r e m o v e , r e d o , a n d o t h e r w i se m a n i p u l a t e
u n i t s a n d Gr o u p s w i t h o u t w o r r y i n g a b o u t w i p in g o u t w o r k
d o n e o n a Pl a n p r i o r t o t h e c h a n g e s . O b v i o u s l y , i f n o
Gr o u p s a r e a ss ig n e d t o a n O r d e r n o n e o f t h e O r d e r ’ s
a c t i o n s a r e ca r r i e d o u t i n t h e g am e , s o t h e r e i sn ’ t a n y p o i n t
o f c r e a t i n g O r d e r s t h a t h a v e n o Gr o u p s , t h o u g h t h e r e i s

7/28/2019 CMA Game Manual 1
http://slidepdf.com/reader/full/cma-game-manual-1 141/197
Afghanistan 141
a l so n o p r o b l e m i f u n a s s i g n e d O r d e r s a r e le f t i n t h e f i le
s in c e t h e Com p u t e r P la y e r s i m p l y ig n o r e s t h em .
Support Targets (Blue or Red)
The scenario designer can specify Support Targets for theComputer Player’s artillery to use at the beginning of the scenario. Such artillery strikes represent preplannedbombardments for a side controlled by a ComputerPlayer. If a Human player is in control of a side thedesigner’s assigned Support Targets are simply ignored.
When Support Targets are specified, all Artillery and AirSupport Assets allocated to that side’s force are consid-
ered available for the AI to use. The only requirement isthat a valid spotter have line of sight (LOS) to the desig-nated target(s) in order to initiate the strike. All normalsupport rules apply such as C2 links, delay times, etc.Artillery and Air Support Assets not used against theSupport Targets are available for the AI to use duringthe regular course of the battle.
Up to 20 independent Support Targets can be designated.
Simply select a target number and paint the zone to befired at in the 2D map. Zones can be any size, contigu-ous or disjointed, though practically speaking it is bestto keep in mind the actual amount of assets available. If one target zone covers half of the map, but the side onlyhas a battery of two measly 82mm mortars availablethat are low on ammo, don’t expect an earth shatteringmap-covering artillery strike. Instead, it is more likelythat the AI spotter will randomly pick one place out of the entire zone and pound it until the mortars are empty.That’s probably not a good thing for that side!
Each target can be assigned one of three possible missions.These determine the intensity and duration of the strike:
Destroy – heavy intensity, long duration. Issue this type tocause maximum damage. Available assets, ammo, andsize of the target area are especially critical here. A
couple of 60mm mortars aren’t going to level a city block,for example, but 4 batteries of 155mm Howitzers cer-tainly can!

7/28/2019 CMA Game Manual 1
http://slidepdf.com/reader/full/cma-game-manual-1 142/197
142 Combat Mission
Damage – medium intensity, medium duration. Good for aquick, devastating shock to a particular area. Good bal-ance between ammo conservation and damage.
Suppress – low intensity, short duration. This is best usedfor harassing fire or to pin an enemy force down to al-low friendly on map units take advantage of the situation.
Preplanned strikes arrive at the beginning of a scenario,but not always immediately in the first few seconds.Normal C2 delays apply. Each target is attacked in or-der, and if multiple assets are available, several targetscan be attacked simultaneously.
Any support assets that are not used up for the pre-planned
bombardments are available for the AI Player to usedynamically during the battle as long as it has what itneeds to call in a strike (e.g. proper spotter, adequatecommunications links, etc.). In other words, the AIPlayer is bound by the same rules as the Human Player,as explained in various sections of this manual.
3D PreviewThe 3D Preview previews the battle in 3D mode, which can
be useful for spotting possible issues with terrain, el-evations, or the overall look of the map. It is also goodfor getting a feel for how to set up the AI’s Orders andPlans. Additionally, Preview mode allows the direct ma-nipulation and fine-tuning of certain map aspects which
cannot be accessed from the 2D Map Editor. This appliesmainly to buildings and Flavor Objects.
Editing BuildingsIn 2D mode you choose the basic building types and deter-
mine their placement on the map. The actual look of thebuilding is determined randomly from a number of op-tions specific to each type of building. However, these
automatically assigned attributes can be overridden andcustomized if desired.
For each side and each floor of each building the texture,number of doors, and number of windows can be set. If the wall is exposed it can have a balcony of one sort or

7/28/2019 CMA Game Manual 1
http://slidepdf.com/reader/full/cma-game-manual-1 143/197
Afghanistan 143
another. The type of roof can be changed as well, whichnot only changes the look of the building quite dramati-cally, but it also determines how much cover there is forsoldiers occupying the roof.
One of the more interesting, and powerful, features is theability to completely remove walls by toggling throughthe “window/door layouts” until the wall disappears.This allows adjacent buildings to be combined into largerstructures, such as a massive warehouse or L shapedhouse. Since individual walls on individual floors can beremoved, it is possible to have a building complex thatis open on some levels and closed on others, or 3 storiesin one section and only 2 in another section. The tacti-
cal possibilities created by this feature should not beoverlooked!
In general, each of the following clicks and key+click com-binations toggles through the available options for eachbuilding in succession.
Single Wall CTRL-CLICK on a side changes window/door layout for floor
CTRL-SHIFT-CLICK on a side adds balconies for that floor
Single SideALT-CTRL-CLICK on a side changes window/door layoutCTRL-SHIFT-CLICK on ground floor adds balconies
Entire Building
ALT-CLICK changes window/door frames for all four sidesSHIFT-CLICK changes the buildings texture for all four sidesCTRL-CLICK on roof changes shape/type of roof
Editing Flavor ObjectsThe placement and rotation of Flavor Objects can be
finetuned in 3D Preview mode. After placing a Flavor
Object in regular 2D mode in the general area whereyou would like to have it, you can now “nudge” it intoposition and also rotate it to achieve realistic placement.
This is done through a combination of keys and mouseclicks, as follows:

7/28/2019 CMA Game Manual 1
http://slidepdf.com/reader/full/cma-game-manual-1 144/197
144 Combat Mission
LEFT CLICK - rotate objectSHIFT+LEFT CLICK:- nudge object in the direction the camera is facingCTRL+LEFT CLICK - delete object
Baking ScenariosThe scenario designer can save his scenario file in a spe-
cial format (.btb) that enables units to have pre-assignedCommands, which normally is not possible to do. Thisfeature allows a battle to start up right in middle of afirefight, for example, or to have a column of vehicles
begin the scenario already in motion. Thus the com-mands are “baked” into the file itself.
It is very important to note that Baked scenarios use a spe-cial file format that can not be edited again. Therefore,it is advisable to bake a scenario only after all edits arecomplete and to always keep an “un-baked” (normal)version so you can make changes to it later if need be.It’s a good idea to give the un-baked version a different
filename to avoid possible confusion since file exten-sions are not always shown in Windows.
To Bake a file go to the Editor, then select “Bake” from theEditor menu to select the scenario file to Bake. After avalid file is selected CM automatically switches the Edi-tor to Bake Mode, which is similar to the 3D Previewmode. Unlike the normal 3D Preview, Bake Mode showsboth sides’ forces at the same time and activates the
Command menus. These are the same menus availableduring Setup Phase when playing a scenario (except thathere you can do it for both sides simultaneously). Com-mands issued in Bake Mode are executed immediatelyat the start of the game.
After issuing all commands the Baked file must be saved todisk or the commands will be lost. Changes are saved inthe same way that you would create a save game in a
regular scenario – call up the game Menu by clicking onthe Menu button in the Command panel and choose Save.When saved the file automatically appears in the “Baked”directory in Game Files folder.

7/28/2019 CMA Game Manual 1
http://slidepdf.com/reader/full/cma-game-manual-1 145/197
Afghanistan 145
Hit the ESC key to leave Bake Mode and return to the Edi-tor.
Baked scenarios can be extra fun and exiting when theplayer starts out a battle in the thick of things, such as aprepared ambush or moving in a convoy. Baked scenariosare also useful if you want to prevent other people fromediting your scenario (e.g. for tournaments or simply toprotect your own work). The disadvantage of Baked sce-narios is that they cannot be edited and can not be usedas part of a campaign.
Making Campaigns
New Campaigns for Combat Mission are technically quiteeasy to make, however since they require many custommade battles it can be somewhat time consuming to puttogether because each battle takes a fair amount of ef-fort to make.
A Campaign is a semi-dynamic string of individual battles
linked together. Each battle for a Campaign is just likeevery other scenario made in the Editor, save one majorfeature; a common pool of units imported from a central“core units” file. This allows Combat Mission to trackindividual units from battle to battle, which in turn al-lows the results of a previous battle to have a directeffect on those that come later.
At the heart of a Campaign are two sorts of battles; pri-
mary and branches. Primary battles are those thatrepresent the optimal path from start to finish. If a playerwins each battle these are the only ones that are played.Branches are those battles that the player is diverted toafter failing to win the previous battle. There is a greatdeal of flexibility as to how these features are used, en-abling campaign designers to customize the structureof a Campaign to conform to a particular “plot”. In fact,
the campaign doesn’t have to branch at all if that is whatthe designer wishes to do.
N o t e : i n t h e o r y y o u c a n c r e a t e l o o p s i n t h e b r a n c h i n g s t r u c t u r e ,
b y d i r e c t i n g t h e p l a y e r t o a s c en a r i o h e p l a y e d p r e v i o u s l y ,
e .g . a f t e r a l o s s . W h i l e t h i s i s p o s s i b l e , p l e a s e k e e p i n m i n d
t h a t a n y d a m a g e s a n d ch a n g e s t o t h e m a p f r om t h e

7/28/2019 CMA Game Manual 1
http://slidepdf.com/reader/full/cma-game-manual-1 146/197
146 Combat Mission
p r e v i o u s f i g h t a r e n o t s a v e d . T h i s m e a n s d e s t r o y e d
b u i l d i n g s f r o m t h e f i r s t t i m e t h r o u g h a r e m a g i ca l l y r e b u i l t ,
c r a t e r s f i l l e d i n , b u r n i n g v e h i c l e s r em o v e d , e t c . T h e r e f o r e i t
m i g h t b e a g o o d i d e a t o a v o id s u ch l o o p s f o r t h e m o s t p a r t .
It is possible to have units tracked from battle to battle on
both sides. However, this is not recommended in gen-eral since it means the same two forces face each otherbattle after battle. That’s not very interesting! Plus,with the high casualty rate for the Mujahedeen side, it isunlikely that a significant portion of the Core Units wouldsurvive more than a few battles. Still, it’s a feature andplayers are welcome to experiment with it if they want.
It is also possible to have a Campaign played from the Red
player’s perspective. Again, there is a problem with highcasualty rates, even for good troops, and the lack of re-alism since it is likely that once engaged a Mujahedeenunit would be hit where it was until destroyed. In otherwords, Red forces make excellent subjects for a realis-tic Campaign, Blue forces much less so. Again, the toolis there to be used as the player sees fit. There is norule that says a Campaign has to be realistic, after all!
Core Units FileThis is a scenario file, just like any other, that does nothing
more than provide a common pool of units to draw fromand certain elements needed to present the Campaignto the player. It’s as simple as purchasing some unitsand setting up the mission information (briefings, title,etc.). Combat Mission ignores everything else so don’t
worry about the map, unit placement, etc.
Battles within a Campaign can use units that are not in theCore Units File, therefore it is only important to put unitsin here that are central to the story. For example, if theCampaign revolves around a single Rifle Company and aTank Platoon, you don’t need to put in an Engineer Pla-toon or a Scout Platoon that are only used once. Suchauxiliary units which don’t make an appearance in more
than one battle can be added into any scenario normallyusing the Unit Editor as one would for a stand alonebattle.
One very important thing to keep in mind is how CM tracksunits from battle to battle. When a formation is put into

7/28/2019 CMA Game Manual 1
http://slidepdf.com/reader/full/cma-game-manual-1 147/197
Afghanistan 147
the Activated Units column of the Unit Editor (i.e. pur-chased) unique identification numbers are assigned toall the units within it. This allows CM to know that Tank1234 in Battle #1 is the same Tank 1234 in Battle #2.After a units appear in the Activated Units column it can
be manipulated, such as having a unit’s Experiencechanged or deleting a formation so it isn’t available, justlike in a normal scenario. These changes can be undoneor redone as often as desired. However, these changesare not automatically incorporated into existing battlesfor the Campaign. To have such changes registered eachexisting scenario file must be “synchronized” with theCore Units File in order to bring those changes into ex-isting battles (see below).
Scenarios (Battles)There is nothing inherently different between scenarios
made for a Campaign and those made for stand aloneuse. Maps, AIs, Mission Parameters, etc. all have to becreated just like any other stand alone battle. The onlysignificant difference is that some (or all) of the units
from one (or both) sides can be imported into a sce-nario so that they carry through from battle to battle.Also, it isn’t necessary to make the small 170x170 pic-ture that represents the scenario in the Battle selectiondialog because it is ignored.
Importing units is quite easy. Create a new scenario in theEditor, choose the Units Editor, and then select the “Im-port Campaign Units” option. An open dialog appears
so the Core Units File can be located and selected. Onceconfirmed all the units in the Core Units File are importedinto the current scenario file.
The next step is to whittle down the Core Units to thoseneeded for the current battle only. Often this is a smallsubset of the total units found in the Core Units File.Select the Purchase Units option and look in the Acti-vated Units column. All Core Units are there with a
notation that they are, indeed, Core Units. To removeunwanted units simply do what is done for any otherscenario; select the unit, or formation, and select theDelete button in the lower left corner. This toggles theunit “off” so it won’t appear in the battle at all. It can betoggled back “on” at any time, like a normal scenario,

7/28/2019 CMA Game Manual 1
http://slidepdf.com/reader/full/cma-game-manual-1 148/197
148 Combat Mission
by repeating these steps. Additional, non-core, unitscan be purchases at any time as in any other scenario.
From time to time changes may be made to the Core UnitsFile that require synchronization with existing Campaignbattles. This is generally an extremely easy and pain-less thing to do. Just open up the scenario file and ImportCampaign Units again. Core Units already in the sce-nario retain almost all of their customization, such asplacement, Group assignments, Orders, etc. Therefore,synchronizing with the Core Units File does not wipe outhard work! What it does do is remove units no longer inthe Core Units File, imports newly added units, and up-dates attributes (such as names, experience, etc.). The
latter is probably the only potential drawback of syn-chronizing since customized settings like that must beredone.
N o t e : a n y f o r m a t i o n s co m p l e t e l y r e m o v e d f r o m t h e A ct i v a t e d
T r o o p s l i s t i n t h e sc en a r i o w i l l r e a p p e a r a n d m u s t b e
d e l e t e d a g a i n ( i f t h a t i s s t i l l d e s i r e d ) . T h i s i s t o m a k e s u r e
d e l e t e d f o r m a t i o n s ca n b e b r o u g h t b a ck i n i f t h e d e s ig n e r
ch a n g e s h i s m i n d a f t e r r e m o v i n g t h e m . I t ’ s v e r y i m p o r t a n t
t o k n o w t h i s s i n ce r e i n t r o d u c ed f o r m a t i o n s a p p e a r i n d e f a u l t p o s i t i o n s i n t h e 3 D e n v i r o n m e n t a u t o m a t i ca l l y ,
w h i ch c a n c r e a t e a r a t h e r i n t e r e s t i n g g a m e e x p e r i en c e
u n t i l i t i s f i x e d i n t h e Ed i t o r .
Campaign Script FileA group of completed scenarios are just that until you use
the Compile Campaign feature. In order to do that,
though, a Campaign Script File must exist. This is a TXTfile which Combat Mission uses to understand whichbattles are fought when, what the conditions are forgoing to the next one, and how much the units shouldbe refreshed between battles.
The script is quite simple. The first part is the CampaignHeader to help CM set up the Campaign as a whole. Thefirst variable specifies which side the Campaign is played
from (Blue or Red), if a Human Opponent is allowed (Noor Yes), the text shown to the Blue player after the lastbattle (Victory and Defeat), and the text shown to theRed player after the last battle (Victory and Defeat).

7/28/2019 CMA Game Manual 1
http://slidepdf.com/reader/full/cma-game-manual-1 149/197
Afghanistan 149
What follows are a variable number of Battle Entries, onefor each Battle in the Campaign. Within the first sectionof the Battle Entry is the scenario file name, the mini-mum victory level needed to win, the scenario file nameto go to after a win (blank signals end of Campaign),
and the scenario file name to go to after a loss (blanksignals end of Campaign).
N o t e : Ca m p a i g n s c r i p t s c an s p e c i f y a m i n im u m a n d m a x i m um
o v e r a l l c am p a i g n v i c t o r y l e v e l b a s e d f o r a n y b a t t l e t h a t
e n d s t h e c am p a i g n . N o r m a l ly , t o s i g n a l t h e e n d o f a
ca m p a i g n , t h e [ N EX T B A TT LE I F W I N ] a n d / o r t h e [ N EX T
B A TT LE I F LO SE] f i e l d s a r e l e f t e m p t y . H o w e v e r , a n y o f t h e
f o l l o w i n g l i s t o f k e y w o r d s ca n o p t i o n a l l y b e e n t e r e d t h e r e
i n s t e a d , s ig n a l l i n g b o t h t h e e n d o f t h e c am p a i g n a n d e i t h e r a m i n im u m r e q u i r e d o v e r a l l c am p a i g n v i c t o r y ( i f f o l l o w i n g
[ N EX T B ATTL E I F W I N ] ) o r a m a x im u m a l l ow e d v i c t o r y ( i f
f o l l o w i n g [ N EX T BA TT LE I F LOSE] ) . T h i s i s m o s t u s e f u l f o r
" e a r ly e n d s " t o c a m p a i g n s w h e r e y o u w a n t t h e f i n a l s co r e
t o r e f l e c t t h e f a ct t h e e a r ly e n d o f t h e ca m p a i g n m o r e t h a n
t h e su c c es s o r f a i l u r e o f e a c h b a t t l e a l o n g t h e w a y . N o t e
t h a t e a ch k e y w o r d m u s t s t a r t w i t h a n u n d e r s co r e .
_ t o t a l d e f e a t
_ m a j o r d e f e a t
_ t a c t i c a l d e f e a t _ m i n o r d e f e a t
_ d r a w
_ m i n o r v i c t o r y
_ t a c t i c a l v i c t o r y
_ m a j o r v i c t o r y
_ t o t a l v i c t o r y
The next section in the Battle Entry is the percentage chance
an individual unit has of being completely replaced if lost, repaired if damaged (vehicle only), topped off withfull ammo, and brought back to a fully rested sate. If the Campaign contains no Core Units for a particular side,there is no need to fill in that side’s variables.
N o t e : t h e v e r y b e g i n n i n g o f a Cam p a i g n s t a r t s o u t w i t h a s p e ci a l
o n e t i m e Cam p a i g n B r i e f i n g . T h i s i s i d e n t i c a l t o a n o r m a l
b a t t l e ’s b r i e f i n g , c om p l e t e w i t h O p e r a t i o n a l Or d e r
( O PORD ) a n d m a p s . CM lo o k s f o r t h i s i n f o r m a t i o n in t h e Co r e U n i t s Fi le , w h i c h s h o u l d b e l o a d e d w h e n t h e Cam -
p a i g n i s c om p i l ed ( s ee n e x t s e c t i o n ) .
Here is a sample of a two battle Campaign Script withdummy values inserted:

7/28/2019 CMA Game Manual 1
http://slidepdf.com/reader/full/cma-game-manual-1 150/197
150 Combat Mission
/*Note the characters before and after this text. They allow designer to put in comments,
or notes, such as why something was done a certain way. Anything between thesecharacters is ignored by Combat Mission. Otherwise an error will occur when theCampaign is compiled.
*/
// Alternatively two back slashes can be entered to create a comment. There’s nofunctional difference between this method and the previous mentioned method.
/* Campaign Header*/[PLAYER FORCE] blue // options are: blue/red[HUMAN OPPONENT ALLOWED] no // no/yes
[BLUE VICTORY TEXT] You won![BLUE DEFEAT TEXT] You lost!
[RED VICTORY TEXT] You won!
[RED DEFEAT TEXT] You lost!
/*Battle #1*/[BATTLE NAME] My First Little Battle // note, do not include “.btt”, just the
file name[WIN THRESHOLD] tactical victory // total defeat, major defeat, tactical
defeat, minor defeat, draw, minor vic-tory, tactical victory, major victory, to-tal victory
[NEXT BATTLE IF WIN] My Second Little Battle[NEXT BATTLE IF LOSE] // a blank signals an end of the cam-
paign
[BLUE REFIT %] 20 //always express this a number be-tween 0 and 100
[BLUE REPAIR VEHICLE %] 40[BLUE RESUPPLY %] 70[BLUE REST %] 80
[RED REFIT %] 10[RED REPAIR VEHICLE %] 10[RED RESUPPLY %] 50[RED REST %] 60
/*Battle #2*/[BATTLE NAME] My Second Little Battle[WIN THRESHOLD] minor defeat[NEXT BATTLE IF WIN] // end campaign[NEXT BATTLE IF LOSE] // end campaign
[BLUE REFIT %] 20[BLUE REPAIR VEHICLE %] 40[BLUE RESUPPLY %] 70[BLUE REST %] 80
[RED REFIT %] 10[RED REPAIR VEHICLE %] 10[RED RESUPPLY %] 50[RED REST %] 60

7/28/2019 CMA Game Manual 1
http://slidepdf.com/reader/full/cma-game-manual-1 151/197
Afghanistan 151
Compiling a CampaignUnlike some games, a Combat Mission Campaign consists
of a single file (with the extension .CAM) that containsall the information the game needs to play a Campaign
from start to finish. The single file format ensures thatit can be transported from person to person withoutmissing pieces. It also ensures that players can’t cheatby opening up individual battles in the Editor to peek oralter elements to make it easier to win. This means theperson making the Campaign must keep the individualbattles or forever lose the ability to make changes tothe Campaign.
Compiling a Campaign is technically quite easy, howevermistakes made in the Script File are easy to make andthat probably means a couple of failed attempts arelikely. Not to worry, though, since Combat Mission givesuseful feedback about what the mistake is that is pre-venting a compile from happening.
Before starting, put all the files for the Campaign into asingle directory. The Core Units File doesn’t have to be
in the same directory, though it does help keep thingstidy. Once this is done, do the following things in thisorder:
1. Enter the Editor
2. Load the Core Units File
3. Click on the Editor selection popup menu and choose“Make Campaign”, which is the last option
4. A dialog comes up that gives some reminders of what isabout to happen.
5. When you click on Make Campaign an Open Dialog comesup and asks for the Campaign Script File
6. Select the Campaign Script File and click “Open”.
7. If the Script File contains no errors a new file, with the
.CAM, extension appears in the Campaigns directory. Thefile name is taken from the currently open scenario,which should be the Core Units File.
N o t e : i f t h e r e a r e e r r o r s a d i a lo g p o p s u p a n d s ay s w h a t t h e
p r o b l e m i s . S i m p l y m a k e t h e co r r e c t i o n n e e d e d an d r e p e a t

7/28/2019 CMA Game Manual 1
http://slidepdf.com/reader/full/cma-game-manual-1 152/197
152 Combat Mission
t h e s t e p s a b o v e . S i n c e CM s t o p s a n d r e p o r t s t h e v e r y f i r s t
e r r o r i t d e t e c t s , e a ch e r r o r r e q u i r e s a f i x a n d a n o t h e r
co m p i le a t t e m p t .
Once a Campaign is successfully compiled it must be lo-cated in the Campaign directory, in the Game Files folder,in order for Combat Mission to offer it as a choice in theCampaign option within the game. Campaign files re-ceived from other people also need to go into theCampaign directory in order to be available for play. Thesize of a Campaign file is directly related to the size of the combined scenario files that are compiled. There-fore, Campaigns tend to be several megabytes in size.
Creating Quick Battle MapsAny regular scenario can be turned into a Quick Battle Map.
In order to be picked for a Quick Battle, the .btt file needsto be placed in the Quick Battle Maps folder in the gamedirectory. Theoretically you can simply copy an existingscenario into that folder and see what happens. Unused
settings or features (such as any units on the map) aresimply ignored. Practically there are a number of addi-tional points to consider when copying maps or whencreating them from scratch.
Setup ZonesQuick Battle Maps MUST have valid Setup Zones for Red
and Blue sides. Without valid Setup Zones units of both
sides will probably end up right on top of each other.Not fun!
AI PlansQuick Battle Maps MUST have an AI plan for BOTH sides.
You can use more than one plan and you can use as manygroups in each plan as you like. The AI player will ran-domly assign units into groups.
N o t e : Si n ce n o b o d y k n o w s w h i ch u n i t s w i l l b e t ak i n g p a r t i n a
g i v e n Q u i ck B a t t l e i t m a k e s se n s e t o c r e a t e A I p l a n s in a
m u c h m o r e g e n e r i c w a y t h a n f o r r e g u l a r s ce n a r i o s .

7/28/2019 CMA Game Manual 1
http://slidepdf.com/reader/full/cma-game-manual-1 153/197
Afghanistan 153
Victory conditionsOnly terrain objectives are considered for determining vic-
tory conditions in a QB. All other objective types andparameters are ignored. All terrain objectives are con-verted to OCCUPY objectives automatically. The codeautomatically adds an enemy-casualty threshold victorygoal for each side is added automatically, which is low-est for meeting engagements, and highest for assaults.
Red and BlueSides are interchangeable in QBs. A Red Attack scenario
can be picked for a Blue attack QB, and the game willautomatically switch sides for the players.
Units on the mapAny units placed on a QB map are simply ignored and de-
leted, and will not appear in the QB.
TerrainThe type of terrain you set for a map determines when it
will be available for a QB. If a player wants to play a city
map QB, only maps defined as city maps will be avail-able for him.
Battle TypeProbe, Attack and Assault maps are selected for either of
these options is selected for a QB. Meeting Engagementmaps are only selected when the player chooses to playa Meeting Engagement scenario.
Mods
Two new Mod Tools (RezExplode and RezPack) are includedin the Mod Tools directory. Both programs work with".brz" files, which are "packed" data files containing theindividual sounds and graphics used by Combat Mission.
For simplicity we'll refer to the contents of a ".brz" file -the sounds and graphics - as "resources". These con-tents are not normally visible, but can be extracted usingRezExplode.

7/28/2019 CMA Game Manual 1
http://slidepdf.com/reader/full/cma-game-manual-1 154/197
154 Combat Mission
RezExplode takes a ".brz" file and "explodes" it into itsindividual resources (like ".wav" files for sounds and".bmp" for graphics). These individual resources canthen be edited or replaced by you.
RezPack takes the resources that you have modded, and"packs" them back into a single ".brz" file. This is notonly convenient, but allows users to (de)activate a "modpack" easily by moving a single ".brz" file into or out of the CMA "Data" folder.
In the main Combat Mission Afghanistan folder is a foldercalled "Data". Here is where all the sounds and graph-ics for the game are stored. You'll see files with names
like "Version 100.brz", "Version 101.brz" and possiblyothers. To mod CMA, you'll use RezExplode to accessthe contents (resources) of the ".brz" files that ship withthe game (like "Version 100.brz"), then edit the onesyou want, and then use RezPack to recombine yourmodded versions of the sounds and graphics into a new".brz" file that you will name.
Loading orderWhen Combat Mission starts up, it loads all the .brz files it
finds in the Data folder. However, it's possible that agiven sound or graphic (say, "tank texture.bmp") mightbe contained in more than one .brz file, and the two filesmight be different despite having the same name.
Combat Mission has a method to ensure that the "latest"version of a sound or graphic is always the one used by
the game: the .brz file name that is LATER in alphabeti-cal order is given priority. For example, if "tanktexture.jpg" is contained in both "A.brz" and "B.brz",the version contained in "B.brz" will be used, and theone inside "A.brz" will be ignored. Similarly, "Version101.brz" takes priority over "Version 100.brz" becauseit comes later alphabetically.
As you explode the .brz files that come with the game, you'll
notice some duplicates of various texture graphics andsuch. The reverse-alphabetical loading order allowslater-version .brz files to take priority over the earlierones. This is important because you want to make surethat your mods get priority over the sounds and graph-ics that ship with the game. See below for details.

7/28/2019 CMA Game Manual 1
http://slidepdf.com/reader/full/cma-game-manual-1 155/197
Afghanistan 155
RezexplodeTo access the contents of a .brz file, COPY it into the "in-
put" folder inside the RezExplode folder. Now runRezExplode by double-clicking it.
There is no user interface. Just wait a few moments untilan "exploded" folder appears. Inside there you'll findthe contents of the .brz file you just exploded. The filesinside the "exploded" folder are the ones you'll want toconsider modding, and later repacking using RezPack.
Repack
When you've finished modding the sounds or graphics youwant, you can package them back up as a new .brz file.Copy your modded files into the "input" folder insidethe RezPack folder. It's OK to copy nested folders here- RezPack will dig down into the folder hierarchy to findall your modded files.
Run RezPack. There is no user interface. Wait a few mo-ments until a "packed.brz" file appears. You should
rename this file as you wish. It is ready to be movedinto Combat Mission's "Data" folder (see section belowfor details).
RezPack also creates a file called "log.txt" or "log error.txt".Inside this file you'll see some useful information. If the file is called "log error.txt" it means that you acci-dentally packed two or more resource files with the samename (inside different nested folders) and the log file
will list these "conflicts" at the top of the file. You willlikely want to remove all but one of the conflicting filesand run RezPack again. Also contained in the log.txt fileis a list of all the resource files you packed, and thenested folder hierarchy (if any) they came from.
Mods in ActionNow that you've created your mods as .brz file(s), it's time
to see them work inside Combat Mission. Here is theeasiest way to be sure that your mod files get loadingpriority over the files that ship standard with CombatMission.
7/28/2019 CMA Game Manual 1
http://slidepdf.com/reader/full/cma-game-manual-1 156/197
156 Combat Mission
First, note that any enclosing folder names are includedwith file names in the alphabetical priority comparisonfor loading. Now go inside the Data folder and create anew folder called "Z". Because "Z" comes after thenames of the standard game files ("Version XXX") you
are guaranteed that any mods you put into the "Z" folderwill be loaded and used by Combat Mission.
Second, note that among the .brz mod files you create andput into this "Z" folder, the alphabetical rule still applieswithin that folder. So if you have "MyMod1.brz" and"MyMod2.brz" files both inside the "Z" folder, data from"MyMod2.brz" will take priority over "MyMod1.brz" forany duplicate contents.
You may also place single *non-brz* files into the Datafolder (like individual WAV or BMP files). Combat Mis-sion can recognize individual BMP or WAV files even whennot packed into a BRZ file. This is not recommendedwhen creating a "mod pack" for use by others becausedozens or hundreds of individual files are difficult tomanage, but it can be useful while you are creating yourmod, and want to test out small edits. Individual files
are given loading priority over ALL .brz files regardlessof how they are named.
ImportantDon't remove the "Version XXX.brz" files from the Data
folder. The loading-priority system will ensure that yourmods are used when present.
Don't monkey with the contents of Combat Mission's Datafolder while Combat Mission is running. To get a "clean"reload of mods, quit Combat Mission, move the .brz filesaround as you wish, then restart Combat Mission.
Mods you create and pack as .brz files do NOT have to re-place (or include) all the contents of whatever .brz filesyou originally "exploded". You should RezPack ONLYthe resources you modded, and Combat Mission will lo-
cate the others in their original .brz files.
7/28/2019 CMA Game Manual 1
http://slidepdf.com/reader/full/cma-game-manual-1 157/197
Afghanistan 157
Tips for using the Editor
The Editor included with CM:A represents extremely pow-
erful tools, which you rarely see included in other games,that allow players to extend their enjoyment of the gamealmost indefinitely. While the basic concept of how theEditor works is easy to understand, the difference be-tween making a good scenario and a great one requiressome experience.
This section of the manual presents a number of tips col-lected from the team that created the stock maps andscenarios. These tips should help get you up to speedquickly... or if you are already an experienced mapmaker, simply provide a few fresh ideas.
Getting to know the terrainTo make a map that fits in with the character of the CM:A
setting it is quite helpful to know a little bit about the
topography, vegetation, and climate of Afghanistan.Afghanistan’s rugged terrain and seasonally harsh climate
have not deterred foreign invaders who coveted this landor sought to cross it on the road to further conquests.The history of Afghanistan is replete with tales of inva-sion. Yet the rugged landscape combined with thefiercely independent spirit of the Afghan people haveseriously impeded and often repulsed would-be conquer-
ors.Afghanistan resembles an irregularly shaped hanging leaf
with the Wakhan Corridor and the Pamir Knot as its stemin the northeast. Situated between 29 35' and 38 40'north latitude and 60 31' and 75 00' east latitude, it en-compasses approximately 652,290 square kilometers,roughly the size of Texas, stretching 1,240 kilometersfrom east to west and 565 kilometers from north to
south. Afghanistan is completely landlocked, borderedby Iran to the west (925 kilometers), by the Central AsianStates of Turkmenistan, Uzbekistan, and Tajikistan tothe north and northeast (2,380 kilometers), by China atthe easternmost top of the Wakhan Corridor (96 kilo-

7/28/2019 CMA Game Manual 1
http://slidepdf.com/reader/full/cma-game-manual-1 158/197
158 Combat Mission
meters), and by Pakistan to the east and south (2,432kilometers).
WaterIn addition to its mountains, the country possesses many
rivers, river basins, lakes and desert areas. The fourmajor river systems are the Amu Darya, the Oxus of antiquity, (boundary with Central Asia, 1,100 kilome-ters in Afghanistan); the Helmand (1,300 kilometers);the Harirud (650 kilometers in Afghanistan); and theKabul (460 kilometers). Only the Kabul River, joiningthe Indus system in Pakistan, leads to the sea. Manyrivers and streams simply empty into arid portions of
the country, spending themselves through evaporationwithout replenishing the four major systems; others flowonly seasonally.
Three major dams harness these rivers for land reclama-tion and hydro-electric purposes: the Arghandab Damabove Kandahar, completed in 1952, is 145-feet-highand 1,740-feet-long and has a storage capacity of 388,000 acre-feet of water; the Kajakai Dam on the
Helmand River, completed in 1953, is 300-feet-high and887-feet-long, with a storage capacity of 1,495,000 acre-feet of water; the Naglu Dam on the Kabul River west of Jalalabad, completed in the 1960s, is 361-feet-high and919-feet-long, stores 304,000 acre-feet of water. Theselarge dams were not destroyed by war, but because of lack of maintenance, looted cables and major silting inthe reservoirs, none are functioning to full capacity.
ClimateThe climate is typical of an arid or semi-arid steppe, with
cold winters and dry summers. The mountain regions of the northeast are sub-arctic with dry and cold winters.In the mountains bordering Pakistan, a divergent fringeeffect of the monsoon, generally coming from the south-east, brings tropical air masses that determine theclimate between July and September. At times, these
air masses advance into central and southern Afghani-stan, bringing increased humidity and some rain.
On the intermountain plateaus the winds do not blow verystrongly, but in the Sistan Basin there are severe bliz-zards that occur during the winter, generally December

7/28/2019 CMA Game Manual 1
http://slidepdf.com/reader/full/cma-game-manual-1 159/197
Afghanistan 159
through February. In the western and southern regionsa northerly wind, known as the “wind of 120 days,” blowsduring the summer months of June to September. Thiswind is usually accompanied by intense heat, drought,and sand storms, bringing much hardship to the inhab-
itants of the desert and steppe lands. Dust andwhirlwinds frequently occur during the summer monthson the flats in the southern part of the country. Rising atmidday or in the early afternoon, these “dust winds”advance at velocities ranging between 97 and 177 kilo-meters per hour, raising high clouds of dust.
Temperature and precipitation are controlled by the ex-change of air masses. The highest temperatures and the
lowest precipitation prevail in the drought-ridden, poorlywatered southern plateau region, which extends overthe boundaries with Iran and Pakistan.
The Central Mountains, with higher peaks ascending to-ward the Pamir Knot, represent another distinct climaticregion. From the Koh-e Baba Range to the Pamir Knot,January temperatures may drop to -15 C or lower in thehighest mountain areas; July temperatures vary between
0 and 26 C depending on altitude. In the mountains theannual mean precipitation, much of which is snowfall,increases eastward and is highest in the Koh-e BabaRange, the western part of the Pamir Knot, and the East-ern Hindukush. Precipitation in these regions and theeastern monsoon area is about forty centimeters peryear. The eastern monsoon area encompasses patchesin the eastern border area with Pakistan, in irregular
areas in eastern Afghanistan from north of Asmar to justnorth of Darkh-e Yahya, and occasionally as far west asthe Kabul Valley. The Wakhan Corridor, however, whichhas temperatures ranging from 9 C in the summer tobelow -21 C in the winter, receives fewer than ten cen-timeters of rainfall annually. Permanent snow covers thehighest mountain peaks. In the mountainous region ad- jacent to northern Pakistan, the snow is often more thantwo meters deep during the winter months. Valleys of-
ten become snow traps as the high winds sweep muchof the snow from mountain peaks and ridges.
Precipitation generally fluctuates greatly during the courseof the year in all parts of the country. Surprise rainstormsoften transform the episodically flowing rivers and

7/28/2019 CMA Game Manual 1
http://slidepdf.com/reader/full/cma-game-manual-1 160/197
160 Combat Mission
streams from puddles to torrents; unwary invadingarmies have been trapped in such flooding more thanonce in Afghanistan’s history. Nomadic and seminomadicAfghans have also succumbed to the sudden flooding of their camps.
The climate of the Turkistan Plains, which extend north-ward from the Northern Foothills, represents a transitionbetween mountain and steppe climates. Aridity increasesand temperatures rise with descending altitudes, becom-ing the highest along the lower Amu Darya and in thewestern parts of the plains.
N o t e : T h i s a r t i c le c o n t a i n s m a t e r i a l f r o m t h e L ib r a r y o f Co n g r e s s
Co u n t r y S t u d i e s , w h i c h a r e U n i t e d St a t e s g o v e r n m e n t p u b l i ca t i o n s i n t h e p u b l i c d om a i n . T h i s a r t i c le c o n t a i n s
m a t e r i a l f r o m t h e CI A W o r l d Fa c t b o o k w h i c h , a s a U .S .
g o v e r n m e n t p u b l i ca t i o n , i s i n t h e p u b l i c domain.
Realistic mapsThe highly detailed environment simulated in CM:A is only
as good as the terrain played on. An eye for detail, and
a bit of creativity, can make all the difference between aboring engagement and an exciting battle. Of course it’seasy to simply put a few map features here and thereand use a large brush to “mass-paint” some underlyingground types, but the result will most likely feel emptyand unrealistic. To avoid this, our testers have come upwith a bunch of hints to help ensure that your maps lookand play like real terrain.
1. Do your homework! Taking a little bit of time to researchthe area you’re simulating can make the process go alot easier and the end product much better than it oth-erwise would have been. If you have topographic mapsof the area that’s perfect, but even a quick look on GoogleEarth (and other similar tools freely available online) isa great help to familiarize yourself with the surroundingterrain, the lay of the land, the size and structure of
settlements, roadnets and so forth. Even if you do notplan to base your map on any particular real world loca-tion a look at areas with the general type of climate andtopography can lead to some great ideas, and help im-prove your mapmaking skills a great deal.

7/28/2019 CMA Game Manual 1
http://slidepdf.com/reader/full/cma-game-manual-1 161/197
Afghanistan 161
Try to get an idea of the terrain you want to depict and seehow the people living there use it (if at all). This con-ceptual walk through before you start making your mapcan generate countless ideas about basic topography,where to place man made objects, which terrain types
are found near each other, etc. Ask yourself, “is that biggrassy field there farmland or unattended pasture?” If it is farmland, perhaps there is a shack to store farmequipment nearby and a dirt road connecting it to a largerroad. Or if it is just unattended land, is there a hardman made divider (like a wall or road) between it andsomething that is actively used by people? If you de-cide there is a small village near by, remind yourself thatthe people living there need to shop, work, relax, etc.Ask yourself what type of village is this, rural or a moredense town? How do people get from here to there? Thereare countless questions to ask yourself and at least asmany answers. Few geographic areas in the world arecompletely untouched by Humans, as even the most re-mote locations usually serve one purpose or another.Trying to figure out what an area is like before makingyour map is a big help towards creating a realistic envi-
ronment.
2. Don’t get lazy! Just because you put down a bunch of elevation contour lines, nicely spaced out terrain fea-tures, and a nice little village… don’t assume every bitof it is exactly as you expect it to be in the 3D environ-ment. Instead, assume the opposite since you’re boundto make some mistakes or be surprised how CombatMission handles a particular request of yours.
Doublecheck your topography (elevation, hills, ravines,roads) in 3D preview mode to make sure that it makessense. Roads in real life rarely lead up steep slopes orcliffs and tend to be relatively flat (paved roads are usu-ally perfectly flat) so that vehicles can actually travel onthem. Make sure yours are the same. Nature is less sym-metric and predictable, so make sure your hills are rarelyhave irregular shapes and that ravines don’t travel per-
fectly straight for too long at a stretch. Settlements tendto be built on fairly even ground or, at most, on a gentlysloping hillside. Farmland and fields tend to be locatedon flat terrain to allow for easier harvesting. If you feelan are is too open, don’t hesitate to put in some terrainundulations. The “Adjust” tool is perfect for this, as with

7/28/2019 CMA Game Manual 1
http://slidepdf.com/reader/full/cma-game-manual-1 162/197
162 Combat Mission
a few clicks (a few with the Shift key press which casesthe adjustment to be negative) you can create somevariation in elevation height. But don’t be afraid to goextreme sometimes – a steep difference in tile elevationof several levels creates the impression of large stones
or boulders for example. In short, use the 3D previewoption extensively, and from view levels 1 or 2 to get agood idea of the land and spot any problematic areasearly.
3. Don’t be boring! If you make a large grass field, don’t just use the big brush and paint the same grass typeacross half of the map. The editor gives you dozens of different terrain combinations to work with – use them!
A simple grass field can still have different types of grass(yellow, tall, short, green), different types of soil, per-haps some brush, a smattering of trees, or a stretch of bare dirt. The same is true when creating a desert envi-ronment. Even a sand desert does not contain sand alone.Sprinkle some regular dirt or rocky tiles here and there.The subtle variation creates a much more natural look,as well as an interesting one. Moreover, when adding
things like trenches and vegetation, keep in mind thatthese types of terrain are rarely found in sand, so picksome sort of dirt terrain for them to go with. If you docreate large stretches of sand terrain, use elevations tocreate some sand dunes and avoid a billiard table lookfor your map. Variety is key to creating a natural look-ing and interesting environments to battle in.
4. Urban areas need a plan! Making a town or village is
much more than simply plunking down a few buildings.CM:A gives you the ability to customize each building bychoosing different textures, layouts, building details,roofs, and balconies. Think for a second about what abuilding is supposed to be – a hotel, hospital, govern-ment building, what? If it is a hotel, it should probablyhave a lot of balconies and not be adjacent to other tallbuildings. Perhaps you want a building with a large foot-print but not much in the way of height, so what would
that building likely be? A hospital might work, and per-haps it was built over many years by adding additionafter addition. So don’t make it too uniform looking. Ormaybe it is a warehouse complex, in which case the build-

7/28/2019 CMA Game Manual 1
http://slidepdf.com/reader/full/cma-game-manual-1 163/197
Afghanistan 163
ings should be very uniform in shape and have few inte-rior walls.
5. Where there are people, there is clutter! You can popu-late a street with roadsigns, streetlights, traffic lightsand many other “flavor objects” which are found in ev-ery city of the world. Take the time to properly positionthem. A flavor object partially sticking through a wallmight not cause the game any problems, but trust us…it detracts from the player’s emersion in the battle, whichis never a good thing. Keep in mind that street lights areusually placed in a spot to provide light for cars or pe-destrians. They should point in useful directions and tendto be grouped around intersections. If you place junk
objects, keep in mind that people tend leave such thingsin areas that they don’t move through or live in. On theother hand, things like storage boxes or sacks wouldrarely be left out in the open where they could be dam-aged by weather or stolen. Instead they should be instorage areas, warehouses, or other controlled environ-ments. Since you know what the function is of thebuildings you’ve put down (right?), you should know
exactly where these things should or shouldn’t be.6. It’s all in the details! Take the time to get the little de-
tails right and you’ll be rewarded with an environmentwhich is as fun to play in as the battle itself.
Tactical considerationsRealistic looking terrain alone does not necessarily make
for an interesting battle. Terrain details that presentthe player with intriguing tactical challenges is crucial.This should be kept in mind when creating maps sinceeven small features can have a big impact on how a sce-nario plays out. There is plenty of room for creativityeven when recreating a real place, but there is obviouslyfar more freedom when creating a fictional map fromscratch. Through clever placement of hills, ravines, for-ests, impassable terrain such as marshes, towns and
other terrain features you can purposefully determinethe best places to advance, ambush, snipe, etc. Thesedecisions, in turn, present the players on both sides withtactical problems to solve.

7/28/2019 CMA Game Manual 1
http://slidepdf.com/reader/full/cma-game-manual-1 164/197
164 Combat Mission
What you have to do is imagine how each player sees themap from his perspective given the mission you intendto give each side. Generally players should have at leasttwo options to choose from and still wind up winning.Leaving no choice makes the player feel like he’s follow-
ing a script, and that isn’t very fun.
On the other hand, on some maps you may want to restrictcertain options and/or throw some additional obstaclesinto the path of the player. Impassable terrain can makethe direct approach to an objective difficult or even im-possible. This forces the player to adapt and look foralternatives.
For a largely open map, with little to break up line of sight,you can add subtle elevation changes and undulationsto turn even the most open map into tactically interest-ing terrain. A whole infantry battalion can literallydisappear in the desert in a few gullies and behind someflat slopes. All it takes are a meter or two in elevationchange at just the right place. Sometimes you canachieve this by pure coincidence when creating a map,but a good map designer will deliberately add such fea-
tures to make a battle into something memorable.
Towns and citiesWhen creating towns and cities, do some research first;
browse the internet for pictures, tourist maps, etc. Townsin Central Asia are often very old and grown over centu-ries, resulting in a much less “tidy” look of straightstreets and carefully arranged building blocks than manyWestern towns. Buildings are often aligned inconsis-tently even on one street, tiny alleys might lead tonowhere, and roof tops can be so jumbled together thatit seems no two buildings are the same height. Tall stone-walls are very often used to create enclosed spaces andpaths between buildings. Roads are often not paved atall but rather hardpacked dirt.
On the other hand, many areas were created fairly recentlyand are exactly the opposite as the older sections. Inthe bigger cities, or more recently settled suburbs, therecan be a lot more uniformity and planning. The samewide multi-lane highways, commercial buildings, shop-ping areas and wealthy suburbs found in the West can

7/28/2019 CMA Game Manual 1
http://slidepdf.com/reader/full/cma-game-manual-1 165/197
Afghanistan 165
be found in Central Asia. Cultivated parks and large pavedmarketplaces here, a big villa surrounded by high wallsthere, a major commercial section abutting both, etc.The more attention you pay to what it is that you’re try-ing to represent on the map, the more your map is going
to look like Central Asia and the less like downtown Man-hattan.
Flavor ObjectsFlavor objects are the key to turning a map into a work of
art. It does take some time to get used to how to handlethem, but the time spent figuring out how to best usethem is time well spent. Some objects are easier to place
randomly here and there (rocks, stumps, etc.), manyothers call for precise spacing on their own (traffic lights,road signs, etc.) or in relation to each other (telephonepoles, street lamps, etc.). Others are also important toposition exactly in relation to other types of terrain (ATMsnext to walls, air conditioners on roofs, etc.).
The main point of difficulty is the fact that Flavor Objectsare not shown in the 2D map. This is because they are
too detailed to display in such a small amount of space.Therefore, when you place an object in the 2D map youget no visual reference that it is there. This can be some-what confusing if you’re trying to place a series of objectsor one in a very specific spot. And that’s why we’re let-ting you in on a couple of tricks!
Use objectives as temporary markers in both 2D and 3Dmaps. From the “mission” menu, select the “terrainobjective” tool. Click on any one “obj” button in the submenu. Make sure it’s set to “known to both”, otherwiseit won’t load on the 3D map preview. Now paint the mapwhere you want the objects to line up. When viewingthe map in 3D you’ll see the terrain you painted overhighlighted. Use it to put manipulate the objects andthen wipe the objective clean when done.
To place objects in a very specific spot, use the objectivestrick again, but in a different way. Instead of painting apath, just paint a single tile at a time. Say for exampleyou want to put a traffic light at a particular intersec-tion. Just mark that one tile and put the traffic lightobject there. Then switch over to 3D Preview and nudge

7/28/2019 CMA Game Manual 1
http://slidepdf.com/reader/full/cma-game-manual-1 166/197
166 Combat Mission
it into the exact spot. Orientate it the way you want byleft clicking on it and that’s that. When it’s where youwant it to be, go back to the 2D map and erase the ob- jective from that area so you won’t be confused by it oraccidentally leave it in your completed scenario.
Some other useful tips to get the most out of flavor ob- jects:
- try to avoid using the same object in the same locationtoo often. There is a vast variety of objects available,including various sub-types from the same category, souse them. Seeing a dozen identical drums next to eachother is going to look odd.
- If you do have to re-use the same object, make surethat you rotate the objects at various angles. Even drumscan be rotated to present a different part of its textureto the player from any given camera position, helping toavoid repetitive looks.
- Even if you spend only one second thinking about whyyou’re placing the object where you are placing it is bet-ter then spending none. Putting one cardboard box in
the middle of a road is going to look odd in most cases.What is it doing out on the street? Wouldn’t it be betterto add a few more and stack them against a buildingwall?
- Above all make use of the 3D preview as much as youcan. It will really pay off in presenting a detailed andvisually appealing environment to your players thatmakes the mission and map come alive, rather than look
like a rush job.
Keep game performance in mindAs much as we hate to say it, we have to remind you that
everything you add into your scenarios requires somesort of hardware effort. The more things you do, themore the hardware has to work. That’s a fundamentalrule of the universe that we simply can’t get aroundthrough clever programming. This is not to say youshould be stingy with features, rather you should try tobalance the “pig” features so they don’t turn an other-wise great scenario into a slideshow. Here are some tipson what to look out for:

7/28/2019 CMA Game Manual 1
http://slidepdf.com/reader/full/cma-game-manual-1 167/197
Afghanistan 167
- Trenches/Gullies. These things require an inordinatenumber of polygons to look good and there are fewer“tricks” that can be applied to them.
- Dense forests. Avoid the three-tree tiles unless theyare truly necessary.
- Avoid sharp elevation changes (a high elevation verynear a low elevation). Having some cliffs in here or there,when they add to the gameplay, shouldn’t be a problem.Adding them just because they look cool is not the bestuse of polygons.
- Unnecessary urban density. Large numbers of build-ings all clumped together can cause a moderate frame
rate issue, but it’s not too bad and generally buildingsare placed like that for a good reason (e.g. a town). Whatwould be good, though, is for scenarios that have denseurban areas you should avoid, or tone down, other pos-sible speed killers. For example, it’s not a good idea tohave a dense urban environment with lots of trenchesand thick forests. You’re just asking for a bad framer-ate if you do that!
- Variety should have a purpose. Putting in lots of varietyof units and terrain means a lot of chewing up of VRAM.The more VRAM taken up by duplicative or largely un-necessary units and/or terrain, the more likely there willbe an overall decline in visual look (depending on VRAMavailable, of course!) since CM will be forced todownsample textures in order to get them all loaded.Remember, a 1024x1024 texture takes up just as much
memory if it is used for one model or 100. So if you aregoing to use something, you might as well use it a lot.This is especially true for buildings, which have multiplechoices for textures. In a dense urban area you prob-ably do want to use most of the textures available, butfor a small village perhaps it is best to use fewer varia-tions.
Remember that there is no magic formula for keeping a
scenario’s framerate up in the playable range. Keep thisinformation in mind as you test and if you see the fram-erate drop to an unacceptable level, think of what mightbe responsible and then think of how to trim it back. Itis wise to make these changes to a copy of your currentscenario file just in case you don’t notice any improve-

7/28/2019 CMA Game Manual 1
http://slidepdf.com/reader/full/cma-game-manual-1 168/197
168 Combat Mission
ment. If that’s the case, toss out the newly created du-plicate and then try something else. If you work off of one file you will definitely regret it when you find delet-ing a whole bunch of stuff didn’t do anything and nowyou want to put it back in!
Working with ObjectivesThe ability to mix three types of objectives (Terrain, Units,
and Parameters) with three states (known to one side,both sides, or neither) and combine this with individualvictory points for each creates a staggering amount of possible combinations and scenario ideas. That’s great,of course, but it can be a bit daunting at first. This is
especially true for older CM scenario makers who areused to two types of flags and a more simplistic pointssystem.
Fear not, though, as the options are quite logical and youdo not need to use all of them at once. In fact, it isadvisable to start with relatively simple objectives. Startwith maps with one or two simple terrain objectives andvary the Parameters to get a feel for how it all balances
out. Then make a couple of missions entirely focused onUnit objectives to learn what works and what doesn’t.Only then should you consider mixing different objec-tive types within a single mission.
It might be very helpful to have a concrete idea of whatthe mission is about before you even start making themap. This helps you focus on the editor tools you needand ignore those that you don’t. Remember, there are aton of options available to you, but they are all in factoptional. Don’t feel that you have to use everything inevery scenario. In fact, that probably isn’t a good ideaanyway since the lack of design focus will likely showitself to the player.
In fact, really great missions are usually that way becausethey do focus on a few objectives and therefore give theplayer a crystal clear idea what is needed to win. If theplayer has to first spend 15 minutes just trying to un-derstand what he’s supposed to do then the player willlikely get it wrong, lose the scenario, and be frustratedby the experience.

7/28/2019 CMA Game Manual 1
http://slidepdf.com/reader/full/cma-game-manual-1 169/197
Afghanistan 169
One really good way to present the player with a simple,yet precise, idea of what is expected of him is putting ina well worded “commander’s intent” in the Briefing. Themilitary uses “commander’s intent” to explain things inplain language so that subordinate commanders can
think on their own and yet still go about things the rightway. Don’t just tell the player they have to get to xlocation by y time, tell them why. “There is an enemycolumn of tanks coming down the road and you need tobe in your ambush places on time or you‘ll be caught outin the open. If you manage to destroy some or all of theenemy armor, fantastic. However, that is of secondaryimportance to holding your positions”. In two short sen-tences the player knows he needs to get into positionquickly and to not worry so much about destroying theenemy as preventing it from advancing. With objectivesto match, everything should go well.
Adding secondary goals sparingly spices things up, sureenough. However, be careful that the total number of victory points be proportioned correctly so the main goalscommunicated to the player are the ones with the most
points assigned to them. Keep in mind also that the moregoals you assign, the less freedom of action you leavethe player. This might be desirable or even realistic insome cases, but if done too often it will make your sce-narios more work than fun.
Creating Phase LinesObjectives can be used to simulate Phase Lines (PL), Rally
Points (RP), etc. All you need to do is select one of the 8Terrain Objectives and paint the line, or point, on themap. Give the objective a name, like “Phase Line Eagle”and set the point value to zero, unless the PL, RP, etc. ispart of the mission and not just a reference point on theway to achieving the mission. Also use this technique toidentify key terrain or to supply some limited intelligenceto the player, such as marking a place where the otherside sets up as “Enemy Assembly Area”.
Secret MissionsObjectives that are unknown to one or both players should
be used sparingly. They can be fun to play, but can getfrustrating quickly if every other mission the player ex-

7/28/2019 CMA Game Manual 1
http://slidepdf.com/reader/full/cma-game-manual-1 170/197
170 Combat Mission
periences involves guessing what needs to be done andthen being punished if the guess is wrong. Having saidthat, there are many fun ideas rooted in hidden objec-tives and you should experiment with them. Just usethem sparingly.
If you base the main idea for a scenario on a hidden objec-tive, you might also reduce the replayability of thatmission. Even without cheating and looking up the otherside’s objectives in the editor (which some people willdo!), once the player finishes the scenario he will usu-ally find out what the hidden objective is... and it won’tbe a secret anymore.
Therefore, if you do choose to use a hidden objective, it isprobably a good idea to make it a secondary goal andone that is still fun even if known (through replay orpeeking). A good example for the latter is a hidden ter-ritorial objective known only to one side but explainedin the Briefing to the other side. That means the objec-tive, as a concept, is known to both sides, but only oneside knows exactly where it is. Even after the exact lo-cation is know, the mission should still be fun for both
sides.
Programming the AIThe AI Editor is an extremely powerful tool that takes some
time to understand it and be able to utilize its full power.Creating good AI plans is an art, and until you’ve learnedthe basics it is difficult to make a masterpiece. Don’t befrustrated by this fact since the strength of the systemis its complexity and variety of choices. Have faith thatthe reward for your perseverance is superior scenariofor people to play.
This manual can not possible touch upon all the intricatedetails of programming a specific scenario AI, but we’lltry to highlight a few basic concepts:
Plan for the PlansIt can be very easy to lose track of which plan is which and
what it is supposed to do, especially when working withlager scenarios. What works well is to outline, on a sheetof paper, what the missions are, which plans are assignedto them, which each AI Groups are assigned to which

7/28/2019 CMA Game Manual 1
http://slidepdf.com/reader/full/cma-game-manual-1 171/197
Afghanistan 171
plans, and roughly what is expected of them. This makesyou more sure of what you’re doing as your implement-ing your plans as well as making you less prone toaccidentally tweaking the wrong Plan after play testing.
Start simpleNo matter how much planning you do, only through care-ful and repeated playtesting will you be able to ensurethat your AI plan works as intended. There is no wayaround it. “No plan survives first contact with the en-emy” is more true than ever in this regard. Therefore itmakes sense to start with a simple plan and progres-sively add more detail, since this makes playtesting your
AI plan much easier. Starting out with a complex plan,before any play testing, is likely to make it difficult toidentify specific problem areas because everything is all jumbled together. A good approach is to first assign big-ger formations to your AI groups than you intend onusing, then break away individual units or formationsfor complimentary plans not yet made. Alternatively,don’t be afraid to simply leave some units idle and with-out any orders and focus on only part of the force during
your playtesting. As you go through rounds of testingyou can make the plans more complex by adding ordersand coordinating plans with each other.
However, don’t go too wild with the details. Unless youhave a very good reason for it, and unless you are surethat the player will be able to notice a difference, don’tsplit individual units away from larger formations. Do-ing that only multiplies your workload when creating
and testing an AI plan, while not making the AI’s over-all behavior appreciably different to the Human player.
What would you do?A good approach to creating AI plans is to ask yourself
“what would I do if I was playing the scenario”? In away this resembles the normal planning process eachplayer (and battlefield commander) goes through when
tasked with a mission. Think of what you’re expected todo, where you’re to do it, with what forces, and againstwhat likely enemy? Moreover, you need to think aboutwhat the other player might do in given situations, sinceif you anticipate the wrong enemy action your plan islikely to crumble. Therefore this approach is more likely

7/28/2019 CMA Game Manual 1
http://slidepdf.com/reader/full/cma-game-manual-1 172/197
172 Combat Mission
to produce a realistic and sensible AI strategy than wouldcome from simply winging it.
That being said, try to avoid scripting the plan too muchbecause the Human opponents can not be easily peggedto one specific approach to their mission. If you expectthe player to do things the smartest way, and rigidlyplan for that possibility, you might find that the dumb-est player out there can easily beat your scenario simplybecause he showed up in the wrong place and the righttime in a way you never expected. Then you’re carefullylaid plans fall apart, just like they would in the real world.
Try to create a tactically sound plan for the AI no matter
what the enemy player decides to do, and you will findthat your AI plan will tend to be robust regardless of what actual course of action the player takes.
Do something elseThe best scenario is going to grow boring quickly without
some variation built in. Human players tend to learn fromtheir mistakes and will adapt their course of actionquickly, and will be able to counter even the most effec-
tive AI plan after a few attempts at the latest. Luckily,you can create a number of AI plans for each scenarioand set different probabilities for the AI to pick one planor another, thereby keeping the human player off-bal-ance because he can’t assume the AI will react the sameway as the previous time. The challenge, however, is tocome up with noticeably different AI plans. Don’t hesi-tate to create some suboptimal plans with bold or even
reckless moves.Another good way to keep things unpredictable is to em-
phasize different objectives with each plan. A goodmission often has multiple goals, primary or secondary,and by creating different plans to emphasize or de-em-phasize some of the objectives you can create winningAI plans that are entirely different from each other.
The devil is in the detailsThe best plan is worth nothing if it’s not playtested thor-oughly. Often the devil is in the details… a “PassengerDismount” option set wrong and the intended lightningassault turns into a marathon. One “Exit After” or “ExitBefore” time stamp set wrong, and the entire well coor-

7/28/2019 CMA Game Manual 1
http://slidepdf.com/reader/full/cma-game-manual-1 173/197
Afghanistan 173
dinated plan is shot. Another frequent mistake is acci-dentally selecting the wrong group or even side whenmaking a plan. A plan for Red doesn’t do much good if itis assigned to the Blue side! Accidentally drawing anobjective zone somewhere on the map, or forgetting to
remove a spot from an earlier idea, can cause the AI tosend forces to a place you rather them not go. This iswhy playtesting is critical to making a good AI.
Playtesting is important not only to iron out the little er-rors, but to also finetune a plan. For example, the AIusually attempts to occupy an entire objective, so chang-ing the size and location of an objective can produceradically different outcomes even if you make no changes
to the AI.

7/28/2019 CMA Game Manual 1
http://slidepdf.com/reader/full/cma-game-manual-1 174/197
174 Combat Mission
Encyclopedia
The following section is a quick reference for the main ve-
hicles and weapon systems available in the game. It isby no means exhaustive and should only be seen as astarting point for research for interested players, whowill find countless and much more detailed materialsavailable in printed and online media.
Soviet Army
Basic TacticsIn Afghanistan, the Soviet army encountered a type of war-fare they had not seen before. With the enemycombatants blending into the civilian population, tradi-tional methods of attacking needed to be altered. It isimportant to understand that the Soviets possess sig-nificantly stronger firepower. Use this to your advantage,by taking positions with the largest field of fire possible.
With the firepower superiority that you have, this willhelp provide maximum cover while advancing, and over-sight against escaping rebel forces. Also, keep in mindthat you gain nothing from close-in fighting, and in factare negating your firepower advantage at long distance.Trust your superior equipment and use it to gain theupper hand.
Another Soviet advantage is its air support and the off board
artillery. When used properly, rebels forces can begreatly softened prior to your attack. As importantly,artillery and close air support (CAS) - when carefullytimed - can suppress the enemy, allowing greater free-dom of movement when advancing against known enemypositions.
And finally, preservation of friendly forces is critical to suc-cess in Combat Mission: Afghanistan. Use the tips
provided above as a means to inflict the highest enemycasualties while sustaining minimum friendly casualties.All attacks should be done with force preservation inmind.

7/28/2019 CMA Game Manual 1
http://slidepdf.com/reader/full/cma-game-manual-1 175/197
Afghanistan 175
Afghanistan Rebels
Basic TacticsThe rebel fighters were challenged by a different set of
obstacles which required different tactics. With inferiorweaponry and less manpower, they needed to adapt theirtactics to take make the best of their shortcomings. Sim-ply attacking or counterattacking head-on would nothave a desirable outcome.
The best way to accomplish your goals is to employ gue-rilla tactics. Stealth and surprise should be your primaryweapons. Carefully planned ambushes are a large part
of this strategy. Hit and run tactics, with a planned es-cape immediately after the ambush, is how best toexecute this plan. When possible, remain out of sight of Soviets units and be prepared to reveal yourself briefly,inflict as much damage as possible, and retreat to safety,already with your next strike in mind.
Using these tactics, it is important to inflict as much dam-age as quickly as possible on the Soviets. You should
consider achieving total victory as out of reach, but caus-ing heavy enemy casualties will more often than notsecure a victory on this unforgiving battlefield.

7/28/2019 CMA Game Manual 1
http://slidepdf.com/reader/full/cma-game-manual-1 176/197
176 Combat Mission
Weapons
TanksT-54B
An honoured veteran that went into service back in 1957. Although the Soviet armyhad more recent and better tanks available at the beginning of the Afghanistan cam-paign, the forces of the Turkestan Military District (forming the 40th army) still hadthese older machines in service. Many of them were also in service in the AfghanistanArmed Forces. This tank is armed with 100mm cannon, coaxial 7.62mm machine-gun, and flexible 12.7mm DShK machinegun.
T-55 (1970)
The improved version of the T-55, equipped with a better engine and improved 100mmcannon. The 12.7 DShK machinegun, absent on the base T-55 model, returned onthis version.
T-55 (1974)

7/28/2019 CMA Game Manual 1
http://slidepdf.com/reader/full/cma-game-manual-1 177/197
Afghanistan 177
A subsequent enhanced version of the T-55 with a new fire control system including thelaser-rangefinder KTD-2.
T-55M
Substantially improved version from 1983. The T-55M received a new fire control sys-tem “Volna”, the “Bastion” ATGM, improved engine and night-vision equipment, thesmoke discharge system “Tuchya”, additional armor to the front, and spaced armorscreens on the sides.
T-55AD
Another version from 1983.The T-55AD, with the same improvements as the T-55Mwith the exception of additional armor. Instead it uses a unique active defence sys-tem - “Drozd” - capable of destroying incoming ATGM and RPG rounds.
T-62 (1972)
The T-62 is a continuation of the T-54/55 line. It has larger size, and a new 115mmcannon. The 1972 version features an improved fire control system, gun stabilizer,and night vision equipment.

7/28/2019 CMA Game Manual 1
http://slidepdf.com/reader/full/cma-game-manual-1 178/197
178 Combat Mission
T-62 (1975)
Next version of the T-62. This model received the KTD-2 laser-rangefinder.
T-62M
Like the T-55M, this tank underwent heavy modernization in 1983. It received a newfire control system - “Volna”, the ATGM “Sheksna”, additional armor on the front andsides, as well as other improvements.
T-62D
This is the model from 1983, modernized like the T-62M with the exception of additionalarmor. Instead it uses a unique active defence system - “Drozd” - capable of destroy-ing incoming ATGM and RPG rounds.

7/28/2019 CMA Game Manual 1
http://slidepdf.com/reader/full/cma-game-manual-1 179/197
Afghanistan 179
Armoured Fighting VehiclesBMP-1/BMP-1P
The BMP-1, going into service in the early 60’s, was the first true “armored fighting
vehicle” in the world, capable of fighting on the battlefields along with infantry andtanks. Its armor can withstand high-caliber machinegun rounds while its 73mm gunand ATGM system on the turret are capable of causing severe losses to enemy infan-try and tanks. A serious deficiency of the BMP-1 that became apparent in Afghanistanwas the limited angle of elevation for its gun.
BMP-2
The BMP-2 is a modernized version of the BMP-1, created soon after the first bitter
lessons of the Afghanistan war. The older 73mm gun was replaced with a 30mmautomatic cannon that now provided for a high elevation angle. Like the BMP-1, thisvehicle was equipped with the ATGM systems “Fagot” and “Konkurs”. Due to its hullredesign, the passenger capacity was reduced to 7 passengers.
BMP-1D/BMP-2D

7/28/2019 CMA Game Manual 1
http://slidepdf.com/reader/full/cma-game-manual-1 180/197
180 Combat Mission
“Afghan” BMP versions differ from other models by their added side armor belts andstronger floor to better protect the vehicle from mines. Because of the added weight,these BMPs lost their ability to swim; however, the added protection was critical inAfghanistan. Anti-tank missiles were usually removed due to lack of appropriatetargets. Sometimes troops installed automatic grenade launchers in their place, ormortars, and other heavy weapons.
BMP-1K/ BMP-1PK/BMP-2K
The command versions of the BMP-1. They are equipped with additional radio transmit-ters, reducing their passenger capacity by 2 people. These command versions can beeasily distinguished by the additional antennas. The Mujahidin rebels learned to tar-get these vehicles first, leading Soviet troops to equip regular BMPs with dummyantennas to confuse the enemy.
BMD-1/BMD-2
These airborne infantry fighting vehicles are modifications of the BMP-1 and BMP-2,built on a smaller and lighter hull which allowed them to be airdropped using para-chutes. The total crew capacity is 1 driver, 1 gunner, 1 commander plus 4 passengers.

7/28/2019 CMA Game Manual 1
http://slidepdf.com/reader/full/cma-game-manual-1 181/197
Afghanistan 181
Armored Personnel CarriersBTR-60PB
As the first eight-wheeled APC in the Soviet Armed Forces, the BTR-60 was designed in
the late 50’s and was mass produced in the 60’s. It went through a few iterations,eventually ending at the PB variant (amphibious, with turret) with a closed hull andarmored turret, equipped with a 14.5 KPVT machinegun paired with a 7.62mm PKTmachinegun. The passenger compartment has a capacity for 8 solders. Its armor canprotect from small caliber bullets and shrapnel.
BTR-70
The BTR-70 is a modernization of the BTR-60PB produced in the 70’s, which sharesmuch in common with its predecessor. The main differences were an improved eight-
cylinder engine, uniform armor thickness (with the exception of thicker front armor)and the addition of side doors. Like its predecessor, the BTR-70 suffered from a lowmachinegun elevation angle.
BTR-80

7/28/2019 CMA Game Manual 1
http://slidepdf.com/reader/full/cma-game-manual-1 182/197
182 Combat Mission
The next version of an APC that still remains in service today. Its pair of gasolineengines was replaced with one diesel engine, side doors were improved for betterdismounting on the move, and the machinegun angle elevation increased.
Other vehicles
BRDM-2
This Armored Reconnaissance Vehicle is a small four-wheeled high-speed all-terrainvehicle used mostly found in recon platoons. It has the same armor and armament asthe BTR-60PB. The crew consists of 4 people and in combat conditions the soldersoften dismount and proceed on foot.
ZSU-23-4 Shilka
This anti-aircraft artillery (AAA) vehicle, equipped with quad 23mm cannons, appearedout of place in Afghanistan; however, it quickly became a favorite for infantry sup-port. Whereas BTRs and BMPs could not elevate their weapons to reach the enemy athigher altitudes in the mountains, the “Shilka” caused real mayhem to mujahidin intheir mountain fortifications.

7/28/2019 CMA Game Manual 1
http://slidepdf.com/reader/full/cma-game-manual-1 183/197
Afghanistan 183
UAZ-469
Despite its small size, this Soviet “jeep” can carry 9 people. It is un-armored and has noweapons, however it is often used as a transport and service vehicle.
Ural-375/KamAZ-4310
The workhorses of Soviet army, these 6x6 trucks were used for all kinds of transportmissions. To protect the transport convoys, some of these trucks were equipped withmortars, automatic grenade launchers and twin-cannon ZU-23-2 AAA guns.
Small arms
PM
The semiautomatic 9mm pistol “Makarov” was developed in the late 40’s. This is a closerange weapon not intended to be used in extended battle, and was given to vehiclecrew and officers.
SMLE Mk. III
This archaic yet still powerful weapon was in widespread use in Afghanistan – a tenround British rifle that dates back to the Anglo-Boer war. From the beginning of the
20th century, this rifle was produced in field machine shops near the Pakistan border.It had great range and precision, and sometimes was fielded with a rifle scope.
PPSh-41
The legendary Soviet submachine gun developed and mass produced during World WarII. Like many other weapons of those times it was no longer manufactured soon after

7/28/2019 CMA Game Manual 1
http://slidepdf.com/reader/full/cma-game-manual-1 184/197
184 Combat Mission
the war and giant stockpiles were given to third-world countries, Afghanistan amongthem. Many reserve Afghan troops were equipped with PPSh-41.
Type 56
A Chinese contribution to Afghanistan was, the “Type 56”, an AK-47 clone.
AKM
The AKM is a modernized version of the AK-47, for use with 7.62x39 mm bullets, builtin 1959. Improved manufacturing processes reduced production costs and the weightof this version. Like all other rifles in the AK family, this rifle is a simple and reliabledesign.
AK-74
A new model in the “Kalashnikov” family, it went into service in 1974 together with the
lighter 5.45x39mm round that it used. In comparison to the AKM, it weights less andhas a longer effective range; however, the new round provides less penetration power.Initially, its shoulder stock was made from wood but later production switched toplastic.
AKS-74
The air assault version of the AK-74, with a side-folding metal shoulder stock.
AKS-74U
This is a shortened carbine version of the AKS-74. Due to the shorter barrel its effectiverange is significantly reduced compared to the full-size model. This rifle was assignedmostly to vehicle crews.
AR-10
A predecessor of the M-16, the AR-10 assault rifle was developed in the 60’s in theUSA.
M16A1
A legendary American assault rifle that is just as famous as the AK rifle. This rifle wentinto service in 1967 and was in service until 1985. It was supplied to mujahidin rebelsby the USA as part of Operation Cyclone.
FN FAL
Belgian rifle for 7.62 NATO rounds, developed in 1953. It served in almost all conflictsof the Cold War era. Its excellent precision and penetration allowed it to be used as asniper rifle.
G3The German answer to the FN FAL, this rifle was developed by Heckler & Koch based on
the design of the Spanish rifle CETME. It remained in service until 1995 and usesNATO 7.62 rounds. The G3 stands out from its competition in that it has a simple andinexpensive design. It can be equipped with a scope.

7/28/2019 CMA Game Manual 1
http://slidepdf.com/reader/full/cma-game-manual-1 185/197
Afghanistan 185
Bren L4
In the early 1930s the British licensed the Czech ZB 26 box fed LMG for its own army in1938. Despite many improvements over the years by the 1980s established militar-ies were progressively phasing the Bren out in favor of newer belt fed LMG designs.
RPD
The RPD was developed in 1944 for use with 7.62x39 mm rounds. It feeds from 100round belts located in an attached enclosed box. Until the mid-60’s, it was the mainsupport weapon for the infantry squad and was later replaced by the RPK. It was inwide use with DRA units.
RPK
The RPK replaced the RPD as part of a program to unify infantry weapons. It is basically
an AKM with longer barrel, bipod and larger 40-round magazine (sometimes a 75-round drum cartridge was used). However, the small magazine capacity and inabilityto replace the barrel make it an inferior machinegun.
RPK-74
Analogous to the RPK but designed for 5.45x39 mm rounds, this machinegun wasdeveloped together with the AK-74. Unlike the RPK, it cannot use larger capacitydrum magazines.
RP-46
A company level machinegun form 1946, this is a modernized version of the DP ma-chinegun that went into service in 1927. Unlike the original that used 47-round disks,this machinegun feeds from 200 or 250 round belts of 7.62x54 mm rounds. In the60’s, the RP-46 was beingreplaced by the PK machinegun but it was still in wide usein the DRA.
PK
The Kalashnikov Machinegun, it entered service in 1961 and used 7.62x54 mm roundsin 100 round belts. The belts are located in a metal box attached to the machinegun.It can be used from tripod, bipod and even handheld.
PKM
An improved version of the PK, the PKM went into service in 1969. It features lowerweight and a shorter barrel.
SGM
The tripod-based machinegun developed by Gorunov in 1943 and improved soon after
World War II. It uses 7.62x54 mm rounds fed from 200 or 250 round belts. Unlike theRP-46 or PK, this machinegun can only be used from a tripod. In the 60’s, it wasreplaced by the PK but was still in use in the DRA.
DShK
A large-caliber machinegun developed by Degtyaryov and Shpagin in 1938 and built toengage aircraft and lightly armoured vehicles. It was mounted on most Soviet armoured

7/28/2019 CMA Game Manual 1
http://slidepdf.com/reader/full/cma-game-manual-1 186/197
186 Combat Mission
vehicles up until the 70’s. In spite of its heavy weight, it was also used by infantry,both DRA and mujahidin, as an infantry support weapon. It uses 12.7 mm rounds in50 round belts and can reach out to 2 kilometers.
NSV Utyos
The NSV is a large caliber machinegun developed in 1969-1972 as a replacement forthe DShK. It uses the same 12.7 mm rounds and is mounted on tanks as an airdefense weapon as well as carried by infantry for support.
SVD
The Dragunov’s Sniper Rifle for 7,62x54 mm rounds went into service in 1963. Inreality, it is not a full-featured sniper rifle but more of a platoon weapon for longdistance targets, up to 600-700m. It uses 10-round magazines and has a simple andreliable design and construction.
Type 85This is a Chinese clone of the SVD – the most advanced sniper rifle available to the
mujahidin, aside from captured Soviet SVD’s.
GP-25 Kostyor
GP-25 is an under barrel grenade launcher of 40 mm caliber that is mounted on theAKM and AK-74. It uses VOG-25 fragmentation grenades.
RPG-2
This is an old 40 mm antitank grenade launcher fielded by the Soviet Army in the 50’s.It uses PG-2V HEAT grenades and was still in use by DRA and mujahidin solders.
RPG-7
The main hand-held antitank weapon in the Soviet army, the RPG-7 went into service in1961. Despite a short effective range (500m) and difficulty of aimed fire in windyconditions, this weapon can cause serious damage to all kinds of armored vehicles.In the Afghanistan War, the RPG-7 was armed with anti-tank rounds PG-7V and PG-7VL, even though since then newer rounds came into service. Airborne troops use aspecial modification RPG-7D that can be disassembled into parts for ease of carrying.
RPG-16 Udar
The 58mm caliber anti-tank grenade launcher RPG-16 was developed in the 60’s for airassault troops. It is equipped with a bi-pod and scope and can be disassembled in twoparts for ease of carrying. It has greater range and precision than the RPG-7, how-ever it only has one type of round – the PG-16V grenade with poor armor penetrationcapability. Therefore, by the 90’s, the RPG-7 overshadowed the RPG-16 as a pre-ferred anti-tank weapon.
RPG-18 Mukha
A one-shot disposable anti-tank weapon, the RPG-18 went into service in 1972. Thelaunch tube is extended before launch and cannot be retracted back. In spite of itslow range (200 m), the round is very powerful. Towards the end of the AfghanistanWar, the RPG-18 was distributed in increased quantities to troops in order to improveinfantry firepower.

7/28/2019 CMA Game Manual 1
http://slidepdf.com/reader/full/cma-game-manual-1 187/197
Afghanistan 187
AGS-17 Plamya
This automatic grenade launcher of 30 mm calibre went into service in 1971. It was inwide use as an infantry support weapon both from tri-pods and mounted on APCs,trucks and even transport helicopters. It feeds from 30 round belts, has a rate of fireof 350-400 rounds per minute and a range up to 1200 m.
SPG-9 Kopye
This is a 73mm recoilless anti-tank gun that went into service in 1963. It uses anti-tankgrenades, PG-9V, and anti-personnel grenades, OG-9V. It is capable of reaching tar-gets at 1300 m and can fire 6 rounds per minute.
Carl Gustaf 2
This is a Swedish recoilless antitank gun of 84 mm calibre. Its effective range, armor
penetration and weight places it between the RPG-7 and SPG-9. It is usually mannedby a crew of two.
9K14 Malyutka
The 9K14 is an anti-tank guided missile system (ATGM) that uses a wire-guided missile9M14 (or AT-3 Sagger according to NATO classification). It entered service in 1963and was used both mounted on vehicles such as BMP-1 and BRDM-2, as well as bydedicated infantry teams. The missile can reach out to 3 km, however it cannotattack targets closer than 500 m. Precise missile guidance is very hard and is onlypossible by a trained crew.
9K111 Fagot
The Fagot, the next generation of ATGM, entered service in 1970, designated AT-4Spigot by NATO classification. Like Malyutka, this system uses wire-guided missiles,however it uses a semi-automatic guidance principle that greatly increases precision.The missile can attack targets at ranges between 70 and 2000 m.
9K115 Metis
The Metis (or AT-7 Saxhorn by NATO classification) – is a lighter version of the Fagot; itentered service in 1979. The missile carries less fuel and hence features a shortermaximum range of about 1000 m.
Artillery
M2
This is the American 60 mm light mortar developed at the beginning of World War II.After it was replaced with the M224, the M2 was supplied to allied countries includingthe mujahidin. Its maximum range is about 2 km and it can fire 30 rounds perminute.

7/28/2019 CMA Game Manual 1
http://slidepdf.com/reader/full/cma-game-manual-1 188/197
188 Combat Mission
M1937
This is a medium 82 mm mortar that was developed even before World War II, and after
the war it went into service in all pro-soviet armies around the world. Its effectiverange is 3 km and an experienced crew can fire up to 25 rounds per minute. By thetime the Afghanistan War had begun, the M1937 was no longer in widespread use inthe Soviet Army, however it was still in wide use in the DRA army.
2B9 Vasilyok
This automatic 82 mm mortar entered service in 1970. It can reach out to 4 km and fire170 rounds per minute, however its size and weight make it difficult to be used by
infantry. In Afghanistan, it was usually mounted on a wide range of vehicles, fromtrucks to BMPs.
2B14 Podnos
A portable version of the medium 82 mm mortar that uses the same ammo as theVasilyok but weights only 42 kg. It can fire from 15 to 22 rounds per minute andreach out to 4 km. It entered service in 1983.
M1943
This 120 mm heavy mortar, introduced in 1943, was the main regimental supportweapon at the end of World War II. Like its “younger brother”, the M1937, thismortar spread out to many armies around the world after the war. In the SovietArmy, it was replaced by the 2B11, however the DRA army still used it. It can fire upto 9 rounds per minute.
2B11
A heavy 120 mm mortar that replaced the M1943 in the 60’s. It is mounted on a two-wheel chassis for ease of transport. This mortar can reach out to 7 km.
GP
The Soviet 76mm gun also known as M-1966. Its maximum range is 10 km, it weighsless than 800 kg and can be disassembled and carried by a few mules. The lattercharacteristic ironically was used by the mujahidin who captured these guns andthen used them against the Soviet and DRA troops.

7/28/2019 CMA Game Manual 1
http://slidepdf.com/reader/full/cma-game-manual-1 189/197
Afghanistan 189
2S1 Gvozdika
The Gvozdika is a 122 mm self-propelled howitzer that entered service in 1972. Its
maximum range is 15 km and the rate of fire is 4-5 rounds per minute.
2S3 Akatsya
The Akatsya is a heavy 152 mm self-propelled howitzer that has been in service since1971. Its maximum range is 17 km.
2S5 Giatsint-S
This is an improved heavy self-propelled gun that entered service in 1981. Its range isup to 28 km (33 km with special rocket propelled rounds). Rate of fire is 5 rounds perminute.
BM-21 Grad
A multiple launch rocket system that entered service in 1963. It has 40 launch tubes of 122 mm caliber, mounted on a truck. Firing range is up to 40 km depending on therocket type.
D-30
A stationary medium 122 mm howitzer that was a prototype of the Gvozdika system. Itwas rarely used in the Soviet army, however it was in widespread use in the DRA
army. Rate of fire is 8 rounds per minute.
M-46
A 130 mm field gun that entered service in the early 50’s. It can reach out to 27 km andcan fire 8 rounds per minute. It was replaced by the 2S3 and 2S5 in the Soviet army,however remained in wide use in the DRA army.

7/28/2019 CMA Game Manual 1
http://slidepdf.com/reader/full/cma-game-manual-1 190/197
190 Combat Mission
Air SupportMi-4D/ Mi-24V
The Soviet army’s main attack helicopter which the mujahidin rebels called “Shaitan-Arba”, meaning “Devil’s Chariot”. It is armed with quad 12.7 mm machinegun (laterversion Mi-24V was armed with a dual 30 mm cannon) and can also carry S-5 and S-8 rockets, Falanga or Shturm ATGMs and bombs.
Su-25
The Su-25 “Grach” was the main Soviet close air support aircraft that entered servicein the late 70’s and is still in use today. This subsonic machine is armed with a dual30mm cannon and has 11 hardpoints that can carry up to 4.5 tons of bombs, rocketsor guided missiles.
Su-17M/Su-22M
The Su-17 is a fighter-bomber that entered service in 1970. Even though the Afghani-stan theater did not fit well for the use of super-sonic jets, the strikes of Su-17 andSu-22 aircraft could change the outcome of entire battles. They are armed with twina 30mm cannon and have 10 hardpoints with a total carrying capacity of 4 tons of bombs or rockets.
MiG-21BIS/MiG-23
Although these frontline fighters were not intended to be used against ground targets,sometimes they still had to serve in such a role. These MiGs are armed with twin23mm cannons and can carry up to 2 tons of payload on 4 hardpoints.

7/28/2019 CMA Game Manual 1
http://slidepdf.com/reader/full/cma-game-manual-1 191/197
Afghanistan 191
Icons
CM:A is making extensive use of various Icons to allow the
player to spot vital information in the game user inter-face at a glance. Below is a list of the most importanticons used in the game and their description.
Defensiveequipment
Slat armor
Smoke Launcher
Active Defense
Ammo
Hand grenades
Small arms ammo
MG ammo
Rifle Grenades
Specialty (MOS)
Air Controller
Antitank
Artillery Controller
Commander
Assistant Leader
Driver
Engineer
Forward Observer
Gunner
Loader
Designated Marksman
Radioman
ThreatAnti-tank missile
Small caliberMedium caliberLarge caliber

7/28/2019 CMA Game Manual 1
http://slidepdf.com/reader/full/cma-game-manual-1 192/197
192 Combat Mission
Comms
Radio
Visual (Close)
Visual (Distant)
Voice
Special EquipmentBinoculars
Nightvision Goggles
Demo Charge
IED detonator
RPG 7
RPG 18
RPG rocket
/anti-tank
./anti-personnel
./thermobaric

7/28/2019 CMA Game Manual 1
http://slidepdf.com/reader/full/cma-game-manual-1 193/197
Afghanistan 193
Branches
DRA
DRA Infantry
DRA Mech Infantry
Mujahedeen
Mujahedeen Infantry
Mujahedeen Specialists
Soviet Army
Armor
Infantry
Mech Infantry
Special Forces

7/28/2019 CMA Game Manual 1
http://slidepdf.com/reader/full/cma-game-manual-1 194/197
194 Combat Mission
TroubleshootingWhile we’re taking utmost care in preparation of this software to avoid bugs, today’s
myriad of available systems, software and hardware configurations makes it impos-sible to guarantee 100% compatibility. Below you will find a few known issues as wellas a list of contacts available to help out.
An up-to-date Troubleshooting Guide is also available at our webpage:http://www.battlefront.com/helpdesk
Multi-GPUOn certain systems with multiple video cards a known bug prevents players to select
units occasionally. Turn off the additional video card(s) to solve this problem.
Intro videoIf you have a problem with launching the game, try disabling the intro video. You can do
this by holding down the “V” key while the game launches. This setting is remem-bered, so you won’t have to hold down the key on subsequent launches.
Multiple Video Cards (SLI) very SlowIf you are running multiple nVidia video cards running in SLI mode, download the latest
Forceware drivers (169.21 at least).
Units disappear with Shadows onThis problem seems to affect people with certain combination of newer (8000 series)
GeForce cards and various OS and video driver combinations. Until Nvidia releases anew set of Forceware drivers that specifically address this problem, simply play thegame with shadows disabled (use Alt-W to toggle shadows on or off).
Level of detail CM:A tries hard to keep up framerates and will automatically downsample textures, and
adjust model quality, and level of detail calculations if it detects performance limits(VRAM used up etc.) This may lead to a subpar graphics quality during gameplay.Often it is a better idea to manually adjust the model and textures quality downward
in the Game Options Menu, leading to better overall look and faster framerates.

7/28/2019 CMA Game Manual 1
http://slidepdf.com/reader/full/cma-game-manual-1 195/197
Afghanistan 195
Tech Support
BugsIf you run into a bug, or have problems in running or installing the game, please visit
our Tech Support forum at:
.............. http://www.battlefront.com/community
If you do not find a solution to your problem there, please post a support ticket at.............. http://www.battlefront.com/helpdesk
PatchesPlease also do not forget to check regularly for the latest patches to the game at:.............. http://www.battlefront.com/patches
Your can also do an auto-check to find out if your version of the game is up to date. In
your Start>Program Group you will find a link within the Combat Mission Afghanistansub-group called “Check for latest version”. Clicking the link will automatically com-pare your currently installed version of the game with the latest version available fordownload, and the results will be displayed in your browser.
LicensingFor problems with licensing or unlicensing the game, please refer first to the Knowledge
Base at:.............. http://www.battlefront.com/helpdesk
If you do not find a solution to your problem there, please post a support ticket at.............. http://www.battlefront.com/helpdesk

7/28/2019 CMA Game Manual 1
http://slidepdf.com/reader/full/cma-game-manual-1 196/197
196 Combat Mission
AFV .......................... Armored Fighting VehicleAT ............................ Anti-Tank
ATGM ....................... Anti-Tank Guided MissileBN ........................... BattalionC&C ......................... see C2C2 ........................... Command & ControlC4ISR ...................... Command, Control, Communications,
............................ Computers, Intelligence, Surveillance
............................ and ReconnaissanceCO ........................... Company, and also: Commanding OfficerCPL .......................... CorporalECM ......................... Electronic Counter MeasuresETD.......................... Estimated Time of DeliveryFO ........................... Forward ObserverHE ........................... High ExplosiveHMG......................... Heavy MachinegunHQ ........................... HeadquartersHW .......................... Heavy WeaponsIED .......................... Improvised Explosive DeviceIFV .......................... Infantry Fighting VehicleKIA .......................... Killed in ActionLOS.......................... Line of SightMBT ......................... Main Battle TankMCLOS ..................... Manual Command Line of Sight............................... (First-generation missile guidance system)
MMG ........................ Medium MachinegunMOS ......................... Military Operation SpecialtiesMOUT ....................... Military Operations in Urban TerrainOOB ......................... Order of BattlePLT .......................... PlatoonROF ......................... Rate of FireRPG ......................... Rocket Propelled GrenadeSACLOS .................... Semi-Automatic Command Line of Sight............................... (Second-generation missile guidance system)
SGT ......................... SergeantTO&E........................ Table of Organization & Equipment
TRP .......................... Target Reference PointWIA ......................... Wounded in ActionWP ........................... White PhosphorusXO ........................... Executive Officer
Military Terms Glossary

7/28/2019 CMA Game Manual 1
http://slidepdf.com/reader/full/cma-game-manual-1 197/197
The Battlefront Team
Game Design
Charles MoylanStephen GrammontDan OldingCassio LimaFernando J. Carrera BuilTim OroszMartin van Balkom
ProgrammingCharles Moylan
User Interface Design
Stephen GrammontCharles MoylanJean-Vincent Roy
Character AnimationBil Hardenberger
Martin van BalkomBlaine WhitneyDmytro Stepanchuk
Scenario DesignChristopher NelsonMike DuplessisMark EzraJurrie van der Zwaan
Tips & GlossaryMark GibsonGeorge McEwanJean-Vincent RoyJon SowdenMartin van Balkom
Translations
Dmytro StepanchukApeiron games
Executive directorPavel Golubev
Credits Snowball Studios
TranslationAlexandr Radkevich
Editor
Katerina RybalkoLocalization codingMike Bruhanov
QANikita PavlutinVictor Chaschin
MasteringVitaliy Klimov
Voice authorsAlexandr Dzuba
Alexands KomlevValery StorozhkinFedor Sukhov
Sound directorAnna Kastalskaya