ClearClick® Photo and Document Scanner Start: How To Scan Without Your Computer To start scanning...
14
ClearClick® Photo and Document Scanner Quick Start Guide & User’s Manual www.ClearClickSoftware.com
Transcript of ClearClick® Photo and Document Scanner Start: How To Scan Without Your Computer To start scanning...

ClearClick® Photo and Document Scanner
Quick Start Guide & User’s Manual
www.ClearClickSoftware.com

Quick Start: How To Scan Without Your Computer To start scanning your photos and documents using the scanner as a standalone portable device, please follow the directions below.
1. First, load 3x AA batteries into the device. (We highly
recommend “Energizer Ultimate Lithium” batteries. These batteries will allow you to make hundreds of scans per set of batteries.) Also, ensure that the memory card (included) is pre-
inserted into the small slot located in the back of the device.
2. Turn on the scanner by holding down the power (middle) button.
3. If desired, set the scanning resolution and file type. For the
highest resolution images, set the DPI to 1200. To do this, press the DPI (up) button until the screen reads “1200 DPI.” To change the file type, press the JPG/PDF (down) button until the screen reads your desired file format.
4. Now, you can start scanning! First, adjust the size of the paper
tray. Then, simply insert a photo or document into the feeder, and the device will automatically feed it through the scanner and save the image onto the included memory card.
5. To preview the images that you have scanned, simply press the
play (left) button while the scanner is on. You can use the up and down (top and bottom) buttons to scroll through the images.
6. To transfer your scanned images to your computer, simply
follow these directions.
a. Ensure that the scanner is turned on.
b. Connect the scanner to your PC or Mac using the included USB cable.
c. The scanner will show up as a new drive on your computer.
d. Browse the folders on your PC or Mac and navigate to the new drive.
e. Double-click on the “DCIM” folder and then double-click on the “100MEDIA” folder.
f. You’ll now be able to view your scanned images! You can transfer them to your computer by dragging them into any folder on your computer.

Quick Start: Scanning Images Directly To Your Windows PC
You can scan photos and documents directly to your computer PC without using batteries or a memory card in the device. (Note: direct-to-PC scanning is Windows-only compatible. Mac users, please use the instructions on the previous page.) Here is how to directly scan your images.
1. Insert the included CD into your PC and install the DirectScan Pro software.
2. Turn on the scanner by holding down the power (middle) button.
3. Connect the scanner to your computer using the included USB
cable. Wait a minute for your computer to install it automatically.
4. Open the DirectScan Pro software on your computer.
5. Adjust the size of the paper tray on the scanner with the slider.
6. To scan a photo or to scan a document as an image, click the first
(leftmost) button in the software: “Picture Direct”
a. After your document or photo scans, it will be placed on your computer’s clipboard.
b. To save your image, simply open a software program such as Microsoft Word or your email software, and click “Paste” to paste in your scanned image.
7. To scan a document and have DirectScan turn it into text
automatically, click the second button in the software: “OCR Direct”
a. After your document scans, the text will be placed on your computer’s clipboard.
b. To save your text, simply open a software program such as Microsoft Word or your email software, and click “Paste” to paste in your scanned text.
8. To scan and organize business cards using DirectScan, click the
third button in the software: “BCR Direct”
9. For a more features of the software, click the last button: “Scan and OCR.” For more details on this program, please see the “Using the DirectScan Software” section.

Need Some Help?
Open a support ticket in the support center at
http://support.clearclicksoftware.com/
Or email us at [email protected] with a
detailed description of your issue
We’ll get back to you within 24-48 hours during normal
business hours.
Register Your Product
Make sure you register your product at
http://www.clearclicksoftware.com/Register/

Frequently Asked Questions
1. My scanned images have white lines in them.
This usually occurs when dust gets into the scanner.
Use a can of compressed air to clear the scanning
area.
If this does not work, please contact us at
[email protected]. We will diagnose the
issue and replace your unit, if necessary.
2. What type of batteries work best with the scanner?
We highly recommend Energizer Ultimate Lithium
batteries. You will get hundreds of scans out of each
set of batteries.
3. The DirectScan OCR software is not recognizing
my text correctly.
Please make sure you are scanning your document
upright (so that you can read it as you are putting it in
the scanner). The software will not be able to read the
document if it is inserted sideways or upside down.

Diagram of Scanner
# Button What Does It Do?
1 Enter Preview the scanning image
2 Up /
Resolution In scanning mode, chooses the resolution
In menu mode, goes “up”
3 Power/Scan Pressing 2 seconds turns on or off the scanner
In menu mode, works as an “OK” button
4 SD Card
Slot The place to insert the Micro SD memory card
5 Down / File
Format
In scanning mode, chooses the scanned image file format
In menu mode, goes “down”
6 Menu Open or close the options menu
7 USB Port The place to plug in the USB cable. You can use it to power the scanner and scan directly
to your PC.
8 Adjustable
Slider To set the width of the document that you are
scanning
9 TFT Screen Shows scanning information and shows
scanned images

Diagram of LCD Screen
# Name What It Shows
1 Time Shows the current time
2 Images on
Card Shows how many images are currently
saved on the memory card
3 Encryption
Status Encrypting scanned images
Not encrypting scanned images
4 Memory Card
Status
Shows if a memory card is currently inserted
Shows if the memory card is full
5 Resolution Displays the chosen resolution in DPI
6 Format Select Shows what file format the scanned images
are being saved in
7 Color or B&W Shows if the scans are being saved in color
or black & white
8 Battery Status Shows the level of the batteries
9 Status Display
Shows “Scan” if device is scanning or shows if it is connected to a computer

How Many Images Can I Store On The Scanner? Using the pre-inserted 4 GB MicroSD card, you can store approximately the following number of photos/documents on the
scanner. You can use up to a 32 GB MicroSD card with the scanner. Of course, you can transfer the scanned images to your computer, and then erase the card and start over.
At 300 dpi: At 600 dpi: At 1200 dpi:
Color 3200 images 1200 images 240 images
B&W 4000 images 1600 images 240 images
How To Open The Options Menu Turn on the scanner and press the menu (right) button. Scroll through the menu options to find the one you desire. To open a setting, select it and press the middle (power) button. Choose the desired setting and press the middle (power) button again. To close the options menu, press the menu (right) button again.
How To Set The Scanner To Color or B&W Open the options menu and select the color/B&W option. Press the middle (OK/power) button to open the color/B&W menu. Choose the desired option and press the OK (middle) button.
How To Set The Scanning Resolution With the scanner at the main screen, press the “DPI” (up/top) button, until the desired screen resolution shows in the right corner of the screen.
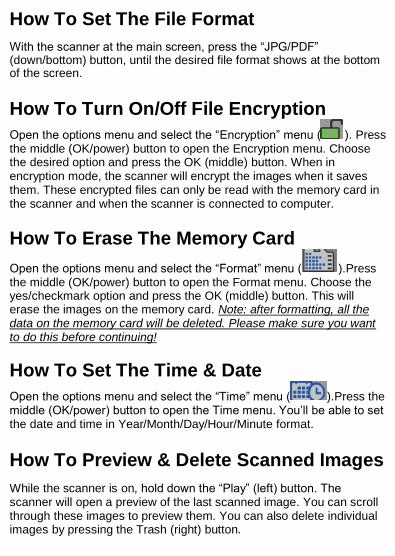
How To Set The File Format
With the scanner at the main screen, press the “JPG/PDF” (down/bottom) button, until the desired file format shows at the bottom of the screen.
How To Turn On/Off File Encryption
Open the options menu and select the “Encryption” menu ( ). Press the middle (OK/power) button to open the Encryption menu. Choose the desired option and press the OK (middle) button. When in encryption mode, the scanner will encrypt the images when it saves them. These encrypted files can only be read with the memory card in the scanner and when the scanner is connected to computer.
How To Erase The Memory Card
Open the options menu and select the “Format” menu ( ).Press the middle (OK/power) button to open the Format menu. Choose the yes/checkmark option and press the OK (middle) button. This will erase the images on the memory card. Note: after formatting, all the data on the memory card will be deleted. Please make sure you want to do this before continuing!
How To Set The Time & Date
Open the options menu and select the “Time” menu ( ).Press the middle (OK/power) button to open the Time menu. You’ll be able to set the date and time in Year/Month/Day/Hour/Minute format.
How To Preview & Delete Scanned Images
While the scanner is on, hold down the “Play” (left) button. The scanner will open a preview of the last scanned image. You can scroll through these images to preview them. You can also delete individual images by pressing the Trash (right) button.

Installing The DirectScan Pro Software Insert the CD into your computer. If the setup does not open, browse the CD and double-click on the “setup” file. Click “Next” until the installation completes. Note: the DirectScan Pro software is only compatible with Windows.
Using The DirectScan Pro Software After the software has installed, double-click on the DirectScan Pro icon on your desktop. You will see that the software is split into four sections:
Button 1: “Picture Direct” This program allows you to scan a photo or a document (as an image). To use the program, click the button, and then insert a photo or document into the scanner. The scanned image will be placed on your computer’s clipboard. To access the image, open a program like Microsoft Word or your email client and click “Paste” to insert the image into your document or email.

Button 2: OCR Direct This program will allow you to scan a document and then will convert it into text, so that you can edit it, save it, or send it in an email. To use this program, click the button, and insert a document into the scanner. After the program scans the image, it will automatically convert it into text. The text will be placed on your computer’s clipboard. To access the text, open a program like Microsoft Word or your email client and click “Paste.” The text will be inserted into your document or email. Button 3: BCR Direct This program will allow you to scan and organize business cards. The program can detect up to 3 languages at once. Click on this button and a new window will open, where you can start scanning your business cards. Button 4: Scan and OCR This program will allow you to scan a photo or document. This program has more features than the “Picture Direct” and “OCR Direct” scanning programs. You can crop and flip images, and also import existing images to turn them into text. Click the “Scan and OCR” button to open this program.

Technical Specifications Product Size(LxWxH) 285 mm x 50 mm x 43 mm
Weight 350g
Color type CIS (Contact image sensor)
Resolution 300DPI (default) , 600DPI , 1200DPI
Scanning speed
A4 paper size: 1200DPI with color: ≤ 8s
1200DPI with mono: ≤ 5s
600DPI with color: ≤ 5s
600DPI with mono: ≤ 5s
300DPI with color: ≤ 5s
300DPI with mono: ≤ 5s
Maximum scan width 216mm
Scan length 300DPI: ≤ 1200mm 600DPI: ≤ 1200mm
1200DPI: ≤1200mm
External memory card Micro SD card (TF Card) up to 32GB
Output file format JPEG/PDF
Display Panel 1.45” Color LCD (480*320)
Focus range Contact, ±0.3mm
USB Port USB 2.0 high Speed
Power source 3 x AA batteries or USB
Computer requirements to transfer images to computer Windows Vista/7/8/10 or above
Mac 10.4/OS X/or above
Computer requirements for DirectScan Pro software Operation system: Vista/7/8/10 or above
CPU: Pentium III or above
RAM: At least 256MB
CD ROM: 4x speed CD ROM or above

Important Safety Instructions
Please read these safety instructions before use and follow them: 1. The maximum temperature should not exceed 104 degrees Fahrenheit when using this device. 2. The battery (battery or batteries or battery pack) shall not be exposed to excessive heat such as sunshine, fire or the like. 3. The apparatus shall not be exposed to dripping or splashing, and no objects filled with liquids, such as vases, shall be placed on the apparatus. 4. Children should be supervised to ensure that they do not play with the appliance. 5. The scanner is used for office machines and data processing appliances. lt is certified according to the relevant safety standard EN 60950-1. Correct Disposal of this product. This marking indicates that this product should not be disposed with other household wastes throughout the USA and EU. To prevent possible harm to the environment or human health from uncontrolled wash disposal, recycle it responsibly to promote the sustainable reuse of material resources. Warning: Changes or modification to this unit not expressly approved by the party responsible for compliance could void the user’s authority to operate the equipment.

Statement
This equipment has been tested and found to comply with the limits for a Class B digital device, pursuant to Part 15 of the FCC Rules. These limits are designed to provide reasonable protection against harmful interference in a residential installation. This equipment generates, uses and can radiate radio frequency energy and, if not installed and usedin accordance with the instructions, may cause harmful interference to radio communications. However, there is no guarantee that interference will not occur in a particular installation. lf this equipment does cause harmful interference to radio or television reception, which can be determined by turning the equipment off and on, the user is encouraged to try to correct the interference by one or more of the following measures:
Reorient or relocate the receiving antenna. lncrease the separation between the equipment and receiver. Connect the equipment into an outlet on a circuit different
from that to which the receiver is connected. Consult the dealer or an experienced radio/TV technician for
help. Length of the shielded USB cable is 1m.This cable must be used with this unit to ensure compliance with the Class B FCC limits. This device complies with Part 15 of the FCC Rules. Operation is subject to the following two conditions:
(1) this device may not cause harmful interference, and (2) this device must accept any interference received,
including interference that may cause undesired operation.