Cisco IP Phone 6921 and 6941 - Idaho State...
37
Cisco IP Phone 6921 and 6941 The Cisco Telephone System- The Cisco Unified Communications System is widely known in the Information Technology (IT) industry as a Voice-over-IP (VoIP) Telephone System. Combined with the Cisco Unity Voice Mail System it provides a seamless integration into ISU’s computer network. In other words, our voice and data communications networks are converged. This is also true of the University’s video distance learning network; voice, video and data are all transported over the IP network making our network a truly converged network. To request installation, repair or service to a Cisco Telephone and/or Cisco Unity Voice Mail, call the NetCom Business Office at extension 4541 or enter an on-line Work Order at http:// www.isu.edu/netel/workorder.html Quick Start User Guide- The instructions contained in this document are intended as a Quick Start User Guide of the most commonly used basic telephone features. User Guide
Transcript of Cisco IP Phone 6921 and 6941 - Idaho State...

Cisco IP Phone 6921 and 6941
The Cisco Telephone System- The Cisco Unified Communications System is widely known in the Information Technology (IT) industry as a Voice-over-IP (VoIP) Telephone System. Combined with the Cisco Unity Voice Mail System it provides a seamless integration into ISU’s computer network. In other words, our voice and data communications networks are converged. This is also true of the University’s video distance learning network; voice, video and data are all transported over the IP network making our network a truly converged network.
To request installation, repair or service to a Cisco Telephone and/or Cisco Unity Voice Mail, call the NetCom Business Office at extension 4541 or enter an on-line Work Order at http://www.isu.edu/netel/workorder.html
Quick Start User Guide- The instructions contained in this document are intended as a Quick Start User Guide of the most commonly used basic telephone features.
User Guide

Your Phone
Cisco Unified IP Phone 6921The Cisco Unified IP Phone 6921 provides these features:
• Phone connections
• Buttons and hardware
• Phone screen
• Footstand
• Handset rest
Phone Connections for 6921 & 6941 PhoneFor your phone to work, it must be connected to the corporate IP telephony network. Your system
administrator can help you connect your phone.
1 2
4
3
1
PC access port.2
Handset connection.
3 Analog headset connection (optional).
4
Network port connection.

Buttons and Hardware 6921
1 Handset light strip Indicates an incoming call (flashing red) or new voice message (steady red).
2 Phone screen Shows information about your phone such as directory number, active call and line status, softkey options, speed dials, placed calls, and phone menu listings.
3 Softkey buttons Depending on how your system administrator sets up the phone, enable softkey options displayed on your phone screen.
2ABC
1 /.@
3DEF
7PQRS
4GHI
5JKL
6MNO
8TUV
9WXYZ
0
1
219
2525
1 2
13
17
14
15
16
1112
3
6
4
5
8
9
10
7

4 Transfer button Transfers a call.
5 Conference button Creates a conference call.
6 Hold button Places an active call on hold.
7 Navigation bar and Select button
The Navigation bar allows you to scroll through menus and highlight items. When phone is on-hook, displays phone numbers from your Placed Call listing (up arrow) or your speed dials (down arrow).
The Select button (in the middle of the Navigation bar) allows you to select a highlighted item.
8 Line 1 and Line 2 buttons
Line 1 selects the primary phone line.
Depending on how your system administrator sets up the phone, Line 2 may provide access to:
• Secondary phone line
• Speed-dial number (speed-dial button)
• Web-based service (for example, a Personal Address Book button)
Buttons illuminate to indicate status:
• Green, steady—Active call
• Green, flashing—Held call
• Amber, flashing—Incoming call or reverting call
• Red, steady—Remote line in use (shared line)
• Red, flashing—Remote line on hold
9 Headset button Toggles the headset on or off. When the headset is on, the button is lit.
10 Speakerphone button Toggles the speakerphone on or off. When the speakerphone is on, the button is lit.
11 Keypad Allows you to dial phone numbers, enter letters, and select menu items (by entering the item number).
12 Mute button Toggles the microphone on or off. When the microphone is muted, the button is lit.
1
2

Phone Screen 6921
13 Volume button Controls the handset, headset, and speakerphone volume (off-hook) and the ringer volume (on-hook).
14 Messages button Auto-dials your voicemail system (varies by system).
15 Applications button Opens/closes the Applications menu. Use it to access call history, user preferences, phone settings, and phone model information.
16 Contacts button Opens/closes the Directories menu. Use it to access personal and corporate directories.
17 Handset Phone handset.
1 Header Displays date, time, and directory number.
2 Line details and other phone information
During a call, displays details for the active line. If not on a call, displays line text label and other information such as placed calls, speed dials, and phone menu listings.
3 Softkey labels Display softkeys for available features or actions.

1 Footstand slots for a higher viewing angle 2 Footstand slots for a lower viewing angle
1
2
1944
07
Footstand 6921 & 6941If your phone is placed on a table or desk, the footstand can be connected to the back of the phone for
a higher or lower viewing angle, depending on your preference.

Higher Viewing Angle
Lower Viewing Angle

1 Remove the handset from the cradle and pull the plastic tab from the handset rest.
2 Rotate the tab 180 degrees.
3 Hold the tab between two fingers, with the corner notches facing you. Make sure the tab lines up evenly with the slot in the handset cradle.
4 Press the tab evenly into the slot. An extension protrudes from the top of the rotated tab. Return the handset to the handset rest.
21 3
1928
97
4
Handset Rest 6921 & 6941Your system administrator may have mounted your phone on a wall. With a wall-mounted phone, you
might need to adjust the handset rest to ensure that the receiver will not slip out of the cradle.

Cisco Unified IP Phone 6941The Cisco Unified IP Phone 6941 provides these features:
• Phone connections
• Buttons and hardware
• Phone screen
• Footstand
• Handset rest
Buttons and Hardware 6941
1 2 3
13
17
14
15
1112
4
7
5
8
6
9
10
16

1 Handset light strip Indicates an incoming call (flashing red) or new voice message (steady red).
2 Phone screen Shows information about your phone such as directory number, active call and line status, softkey options, speed dials, placed calls, and phone menu listings.
3 Programmable feature buttons
Depending on how your system administrator sets up the phone, programmable feature buttons (on each side of the phone screen) provide access to:
• Phone lines and intercom lines
• Speed-dial numbers (speed-dial buttons, including the Line Statusspeed-dial features)
• Web-based services (for example, a Personal Address Bookbutton)
• Call features (for example, a Privacy button)
Buttons illuminate to indicate status:
• Green, steady—Active call or two-way intercom call
• Green, flashing—Held call
• Amber, steady—Privacy in use, one-way intercom call, DNDactive, or logged into Hunt Group
• Amber, flashing—Incoming call or reverting call
• Red, steady—Remote line in use (shared line or Line Status)
• Red, flashing—Remote line on hold
4 Softkey buttons Depending on how your system administrator sets up the phone, enable softkey options displayed on your phone screen.
5 Transfer button Transfers a call.
6 Conference button Creates a conference call.
7 Hold button Places an active call on hold.

8 Navigation bar and Select button
The Navigation bar allows you to scroll through menus and highlight items. When phone is on-hook, displays phone numbers from your Placed Call listing (up arrow) or your speed dials (down arrow).
The Select button (in the middle of the Navigation bar) allows you to select a highlighted item.
9 Headset button Toggles the headset on or off. When the headset is on, the button is lit.
10 Speakerphone button Toggles the speakerphone on or off. When the speakerphone is on, the button is lit.
11 Keypad Allows you to dial phone numbers, enter letters, and select menu items (by entering the item number).
12 Mute button Toggles the microphone on or off. When the microphone is muted, the button is lit.
13 Volume button Controls the handset, headset, and speakerphone volume (off-hook) and the ringer volume (on-hook).
14 Messages button Auto-dials your voice messaging system (varies by system).
15 Applications button Opens/closes the Applications menu. Use it to access call history, user preferences, phone settings, and phone model information.
16 Contacts button Opens/closes the Directories menu. Use it to access personal and corporate directories.
17 Handset Phone handset.

Phone Screen 6941
1 Header Displays date, time, and directory number.
2 Line text label with icon Displays text label and icon for phone or intercom line, speed-dial numbers, or services, depending on your configuration.
3 Primary line details and other phone information
Displays line label and call details for the primary line, and other phone information such as placed calls, speed dials, and phone menu listings.
4 Secondary line details and other phone information
Displays line label and call details for the secondary line, and other phone information such as placed calls, speed dials, and phone menu listings.
5 Softkey labels Display softkeys for available features or actions.

Place a CallUse one of the following methods to place a call:• Lift the han dset and dial the number.
Dial the number, and then lift the handset.
Dial the number, and then press the Dial soft key.
Press the Line button for your extension, and then dial.
Press the Speaker button , and then dia l.
Press the New Call soft key, and then dial.
If you are using a headset, press the Headset button, and then dial. (only available when using an integrated
headset) Dial the number, and then press the Headset button. (only available when using an integrated headset)
Note Use the ba ckspa ce (<<) soft key to erase digits that you enter incorrectly.
Dialing Instructions: Dialing On-Campus Numbers From On-Campus. Simply dial the four digit extension number of the person you are calling. (Nxxx) ISU extension numbers fall between 1000 and 7999.
• For Pocatello Campus: extension numbers fall between 1000 thru 1099 and 2000 thru 7699.• For Idaho Falls University Place Campus: extension numbers fall between 7700 and 7999.• For Idaho Falls Heath Science Education Bldg: extension numbers fall between 1100 and 1125.• For Twin Falls Campus: extension numbers fall between 1200 and 1299.• For Meridian Campus: extension numbers fall between 1700 and 1999.
Dialing On-Campus Numbers From Off-Campus. Dialing Pocatello Campus Numbers from the Pocatello Calling Area. • Dial 282 + the extension number.
Dialing Idaho Falls Campus Numbers from the Pocatello or Idaho Falls Calling Area. • Dial 282 + the extension number.
Dialing Meridian Campus Numbers from the Pocatello Calling Area. • Dial 282 + the extension number.
Dialing Meridian Campus Numbers from the Boise Calling Area. • Dial 373 + the extension number.
ISU Phone System Specific Instructions
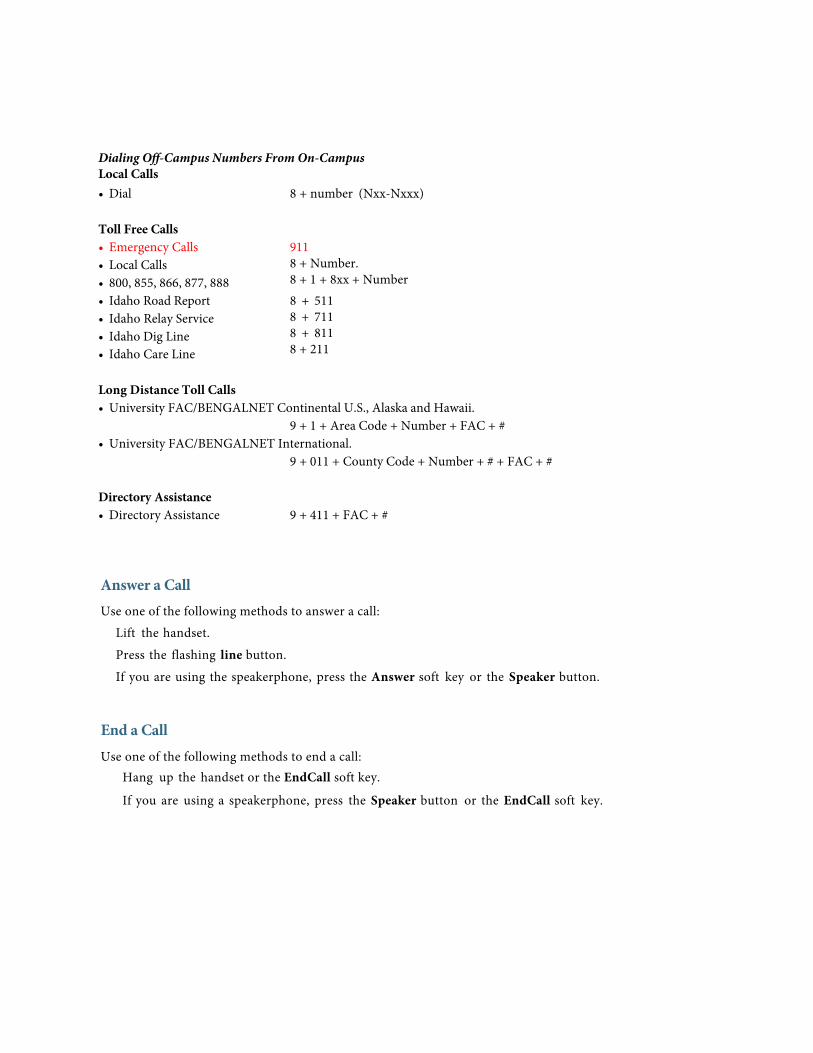
Answer a Call Use one of the following methods to answer a call:
Lift the handset.
Press the flashing line button.
If you are using the speakerphone, press the Answer soft key or the Speaker button.
End a Call Use one of the following methods to end a call:
Hang up the handset or the EndCall soft key.
If you are using a speakerphone, press the Speaker button or the EndCall soft key.
Dialing Off-Campus Numbers From On-Campus Local Calls • Dial 8 + number (Nxx-Nxxx)
Toll Free Calls • Emergency Calls• Local Calls• 800, 855, 866, 877, 888
911 8 + Number. 8 + 1 + 8xx + Number
• Idaho Road Report• Idaho Relay Service• Idaho Dig Line• Idaho Care Line
8 + 511 8 + 711 8 + 811 8 + 211
Long Distance Toll Calls • University FAC/BENGALNET Continental U.S., Alaska and Hawaii.
9 + 1 + Area Code + Number + FAC + # • University FAC/BENGALNET International.
9 + 011 + County Code + Number + # + FAC + #
Directory Assistance • Directory Assistance 9 + 411 + FAC + #

Hold a Call
all
.
To place a call on hold while on a call:
Press the Hold soft key To retrieve a held call:
Press the Resume soft key– If multiple calls are on hold, on the same line, use the Navigation button to select the desired call before you press
Resume.– If multiple calls on multiple lines are on hold, press the line button for the line that you want to pick up. The active c
on the other line is automatically put on hol d.
Note Because the hold feature can generate music or tones, avoid using hold when dialed into a remote conference systemConferences that are created locally on your phone can safely be pla ced on hold without introducing music or tones into the conference.
Mute a CallTo mute a call:
While on a call, press the Mute button. The Mute button lights, indicating that the other party cannot hear you. To deactivate the mute function , do one of the following:
Press the Mute button ag ain.
Lift the handset if you are using mute with your speakerphone.
Note The Mute feature does not generate music or a tone.
Manage Call Waiting
If you are on a call when a second call comes in, to answer the new call on the same line:
1. Use the Navigation button to select the call2. Press the Answer soft key to answer the call. The call on the other line is automatically put on hold.
To return to the original cal l: 1. Use the Navigation button to reselect the call.2. Press the Resume soft key to reconnect to the call.
For calls on a separate line:Press the Line button for the incoming call. The call on the other line is automatically put on hold.
To return to the original call:
To Park a Call Allows you to put a call on hold at a predefined location for later retrieval by anyone in the system. While on an active call, press the More soft key then Press Park.
Watch your display; “Call Park At 15xx” (1500-1519) will show momentarily on your display.
To Retrieve a Parked Call To retrieve a Parked Call, pick up any phone and dial the 15xx number that was displayed on your phone when you parked the call.
Note: If you, or someone else, does not pick up the parked call it will return to the phone that Parked the call in (2) minutes.
Press the Line button associated with the original call.

Call Pick UpCall Pick Up is used when a group of users are all in the same Pickup Group. You hear a phone ringing in your group and you press PickUp to retrieve the call.
To pick up a call that is ringing at another phone line in your group:
Forward All CallsTo forward all incoming calls to another number:1. Press the CFwdALL soft key. You hear a confirmation beep.2. Dial the number to which you want to forward all your calls. Dial the number exactly as if you w ere placing a call to tha t
number. Remember to include locally required prefix numbers. The phone display is updated toshow that calls will be forwarded.
3. Press the EndCall soft key.
Note To forw ard calls to voice mail, press the CFwdALL soft key plus the Messages button followed by the EndCall soft key.When Call Forward is set, the display shows the Call Forward Icon.
Press the CFwdALL soft key.
Using the Do Not Disturb (DND) Soft Key to forward calls:Depending on how your phone is configured, pressing the DND soft key will either silence your phone or immediatly forward all calls to a pre-determined destination configured in the Cisco Call Manager.
Blind Transfer
Immediately redirects the call wi thout speaking to the transfer recipient (the person to whom you are transferring the call). To make a blind transfer call :
1. During a call, press the Trnsfer soft key. The call is pla ced on hol d.
Transfer a CallTo transfer a selected cal l to another number, you can use blind transfer or consultative transfer:
To Cancel Call Forwarding:
1.
1. Pick up the handset2. Press PickUp.3. The call will be re-directed to your phone and will start ringing.4. Press Answer to retrieve the call.
Group Pickup Group Pickup is used when you know the phone number OR the Pickup Group number (1520-1599) of another Pickup Group, and you want to retrieve the call. 1. Pick up the handset.2. Press the GPickUp soft key and the phone number or Pickup Group number of the phone that youwant to retrieve. 3. The call will be re-directed to your phone and will start ringing. Press Answer to retrieve the call.
Note Unless you are a member of a Group, you cannot use the PickUp or GPickUp keys on your phone.
2. Dial the number to which you want to transfer the call , press the Trnsfer soft key to release the call to the recipient.

t.
Cancel Transfer1. To cancel your consultative call-transfer attempt:
– Press the EndCall soft key.2. To reconnect to the original caller:
– Press the Resume soft key.
Place and Establish a Conference CallTo create a conference call: (the system supports up to eight participants, including yourself, in an ad hoc conference call)1. During a call, press the more soft key and then the Confrn soft key to open a new line and put the first party on hold.2. Plac e a call to another number.3. When the call connects, press Confrn again to add the new party to the call.
To add more parties to the conference call, repeat the above steps until you have everyone in the conference.
End a Conference CallTo exit the conference call:
Hang up the handset, or press the EndCall soft key.
Note When the conference call initiator hangs up, the remaining conference call participants remain connected.To drop individual participants from the conference, press the more soft key until ConfList is displayed, press ConfList. Use the Navigation button to highlight which particiapant(s) you want to drop from the call. Press the Remove soft key.
To Transfer a Caller to Another Persons Voice Mail Greeting 1. Press the Transfer soft key.2. Dial 6991 + the Extension Number of the Voice Mail Greeting you want the call to go to.3. As soon as the Greeting begins, press Transfer, or hang up.
To Send a Ringing Call to your Voice Mail Greeting While your phone is ringing, press the iDivert soft key.
To Forward All Calls to your Voice Mail Greeting 1. With your phone on-hook, press the CFwdALL soft key, then press the Messages feature key.
To cancel forwarding of calls to Voice Mail, with phone on-hook, press the CFwdALL soft key–
Consultative TransferRedirects the call after first allowing you to speak to the transfer recipient. To make a consultative transfer:
1. During a call, press the Trnsfer soft key. The call is placed on hold.2. Dial the number to which you want to transfer the call.3. Wait for the call to be answered. Speak to the transfer recipient. Then press the Trnsfer button or hang up the handse4. If the transfer fails, (if no one answers, or call goes to voice mail, press the Resume soft key to return to the
original call.

Retrieve Voice Messages
To retrieve voice messages:1.
2. Press the Messages button, and follow the voice instructions.
Note When you have one or more new messages, the message-waiting indicator (MWI) on your handset will be lit.
Select an available line by lifting the handset, pressing the speakerphone button, or pressing a linebutton. Listen for dial tone. Press the Messages button, and follow the voice prompts. OR
It will turn off when you have listened to new messages. You can turn the MSGWT lamp on or off manually. To turn on your MSGWT lamp: 1. Pick up the handset.2. Dial 6998To turn off your MSGWT lamp: 1. Pick up the handset.2. Dial 6999

Applications
Phone ApplicationsPhone applications allow you to access the following:
• Services
• Call History
• Preferences
ServicesPhone services can include special phone features, network data, and web-based information (such as stock quotes and movie listings). The services available for your phone depend on the phone system configuration and the services you are subscribed to. For more information, see your system administrator.
Access Services
1. Press the Applications button .
2. Select the service you want to access. (Use the Navigation bar and button to scroll and select.)
3. Press the Select softkey, or press the Exit softkey to return to the Applications screen.
Call HistoryCall History allows you to view information about the last 150 calls on your phone. A call icon is displayed to indicate the type of call:
• Received
• Placed
• Missed

The caller ID is displayed with the call icon. If the caller ID is unavailable, then the phone number is displayed. If the phone number is unavailable, then “Unknown” is displayed. All Call History items are integrated into one list and are ordered by time (latest to oldest). There is 150 call limit per phone and not per line. For example, if a phone has multiple lines, the 150 call limit is for all lines combined.
You can sort the Call History list by all lines, each line, or by missed calls. You can also dial a number directly from the Call History list.
View Call History
1. Press the Applications button .
2. Select Call History. (Use the Navigation bar and button to scroll and select.)
3. Select All Lines or the line that you want to view.
4. Press the softkey to return to the Call History screen.
View Call Record Details
1. Press the Applications button .
2. Select Call History. (Use the Navigation bar and button to scroll and select.)
3. Select All Lines or the line that you want to view.
4. Select a call record and press the Details softkey (you may need to press the more softkey first).
5. Press the softkey to return to the Call History list.
Filter Call History
1. Press the Applications button .
2. Select Call History. (Use the Navigation bar and button to scroll and select.)
3. Select All Lines or the line that you want to view.
4. The Call History list displays only the missed calls on the selected line.
5. To view all calls in the Call History list, press the All Calls softkey.
6. Press the softkey to return to the Call History screen.
Dial From Call History
1. Press the Applications button .
2. Select Call History. (Use the Navigation bar and button to scroll and select.)
3. Select All Lines or the line that you want to view.
4. From the Call History list, select the call you want to dial and do one of the following:
– Press the Call softkey.
– Press the line key.

– Pick up the handset.
– Press the speakerphone or headset button.
Edit Number From Call History
1. Press the Applications button .
2. Select Call History. (Use the Navigation bar and button to scroll and select.)
3. Select All Lines or the line that you want to view.
4. Select the call you want to edit.
5. Press the EditDial softkey (you may need to press the more softkey first).
6. Press the >> softkey to move the cursor to the right and press the << softkey to move the cursorto the left.
7. Press the softkey to delete numbers.
8. Press the Dial softkey to dial the edited number (you may need to press the more softkey first).
9. Press the softkey to return to the Call History list.
Clear Call History
1. Press the Applications button .
2. Select Call History. (Use the Navigation bar and button to scroll and select.)
3. Select All Lines or the line that you want to view.
4. Press the Clear softkey (you may need to press the more softkey first).
5. Press the Delete softkey to delete the Call History list, or press the Cancel softkey to go back tothe Call History screen.
Delete Call Record From Call History
1. Press the Applications button .
2. Select Call History. (Use the Navigation bar and button to scroll and select.)
3. Select All Lines or the line that you want to view.
4. Select the call you want to delete.
5. Press the Del Call softkey (you may need to press the more softkey first).
6. Press the Delete softkey to delete the call, or press the Cancel softkey to go back to the Call Historyscreen.

PreferencesPreferences allows you to set these user preferences:
• Ring Tone
• Contrast
Ring Tones
You can customize how your phone indicates an incoming call and a new voice mail message. You can also adjust the ringer volume for your phone.
Change Ringtone for a Line
1. Press the Applications button .
2. Select Preferences. (Use the Navigation bar and button to scroll and select.)
3. Select Ringtone.
4. Select a ringtone.
5. Press the Play softkey to play a sample.
6. Press the Set softkey to select the ringtone.
7. Press the Apply softkey to confirm your selection, or press the Cancel softkey to go back to theRingtone screen.
8. Press the softkey to return to the Preferences screen.
Contrast
You can adjust your phone screen contrast level. The default contrast level setting is 50%.
Adjust the Contrast
1. Press the Applications button .
2. Select Preferences. (Use the Navigation bar and button to scroll and select.)
3. Select Contrast.
4. To increase contrast, press the up arrow on the Navigation bar. To decrease contrast, press thedown arrow.
5. Press the Save softkey to set the contrast level, or press the Cancel softkey to exit.

Voice Messages
Voice messages are stored on your voicemail system. Your company determines the voicemail system your phone uses.
You can:
• Personalize your voicemail
• Check for voice messages
• Listen to voice messages
Personalize Your VoicemailPress the Messages button , then follow the voice prompts.
Check for Voice MessagesCheck for voice messages in any of these ways:
• Look at the visual message indicator lamp on your handset.
You can configure the visual message indicator lamp using your User Options web pages.
• Look for:
– (For Cisco Unified IP Phone 6941 only.) A message waiting icon .
– (For Cisco Unified IP Phones 6921 and 6961 only.) A text message.
• Listen for a stutter tone from your handset, headset, or speakerphone when you place a call.
The stutter tone is line-specific. You hear it only when using the line that has a waiting message.
You can configure the audible message indicator using your User Options web pages.
Listen to Voice MessagesThere are two ways you can listen to voice messages:
• Press the Messages button to listen to voice messages left on any line.
• Press a line button, then press Messages to hear only the voice messages for that line.

Feature Buttons and Softkeys
Depending upon how your system administrator sets up your phone, some features included in this guide might not be available to you.
This table provides information about some of the features that are available on dedicated feature buttons, and some of the features that are set up by your system administrator either on programmable feature buttons or softkeys.
Feature NameDedicated Feature Button
Programmable Feature Button Softkey
Call Back X X
Call Forward All X X
Call Park X X
Call Park Line Status X
Call Pickup X X
Call Pickup Line Status X
Conference X X
Directed Call Park X
Divert X
Do Not Disturb (DND) X
Group Pickup X X
Hold X
Hunt Groups X
Intercom X
Malicious Call Identification (MCID)
X
Meet Me X X
Mobile Connect X
Mute X
Other Pickup X X
Privacy X
Quality Reporting Tool (QRT) X
Redial X X
Speed Dial X X
Speed Dial Line Status X
Transfer X X

Auto AnswerAuto Answer prompts your phone to automatically answer incoming calls after one ring.
Your system administrator sets up Auto Answer to work with either your speakerphone or headset.
Auto Answer with Your HeadsetKeep the headset button illuminated when the phone is idle. Otherwise, calls ring normally and you must manually answer them.
To keep the headset button illuminated, use a line button or softkeys (instead of the headset button) to go off-hook and on-hook, and to place and end calls.
Auto Answer with Your SpeakerphoneKeep the handset in the cradle and the headset button unlit. Otherwise, calls ring normally and you must manually answer them.
Call BackCall Back allows you to receive an audio and visual notification on your phone when a busy or unavailable party becomes available.
Set up a Call Back Notification1. Press the Callback softkey while listening to the busy tone or ring sound.
A confirmation screen displays on the phone.
2. Press the Exit softkey to return to the main screen, if desired.
Your phone alerts you when the line is free.
3. Press the Dial softkey to place the call again, if desired.

Call Forward AllCall Forward All allows you to forward calls on your phone to another number.
For your primary line, you can set up Call Forward All directly on your phone. For all other lines—or to access Call Forward All remotely—go to your User Options web pages.
There are two types of call forwarding features that your system administrator might set up on your phone:
• Unconditional call forwarding (Call Forward All)—Applies to all calls that you receive.
• Conditional call forwarding (Call Forward No Answer, Call Forward Busy, Call Forward NoCoverage)—Applies to certain calls that you receive, according to conditions, and is accessibleonly from your User Options web pages.
When forwarding calls from your phone:
• Enter the call forward target number exactly as you would dial it from your phone. For example,enter an access code or the area code, if necessary.
• Call forwarding is phone-line specific. If a call reaches you on a line where call forwarding is notenabled, the call will ring as usual.
• Your system administrator can set up other call forward options that:
– Allow calls placed from the call forward target number to your phone to ring through, ratherthan be forwarded.
– Prevent you from creating a call forward loop or exceeding the maximum number of links ina call forwarding chain.
Forward Calls on a Primary Line1. Press the Fwd All softkey.
2. Enter the target phone number. (Depending on how your voicemail system is set up, you may beable to press the Messages button to forward all calls to voicemail.)
Visual confirmation displays on your screen for as long as the feature is enabled.
3. To cancel call forwarding, press Fwd OFF.
To forward calls on other lines, go to your User Options Web pages.

Call ParkCall Park allows you to park (temporarily store) a call you receive on your phone, and which you can then retrieve from another phone (for example, a phone at a co-worker’s desk or in a conference room).
There are two ways you can park a call:
• Park—Allows you to park an active call that you answered on your phone, and retrieve it usinganother phone in the Cisco Unified Communications Manager system.
• Directed Call Park—Allows you to park and retrieve an active call in two different ways:
– Assisted Directed Call Park—Allows you to park an active call by pressing a line button,which your system administrator sets up as a speed dial line.
With this type of directed call, you can monitor the status of the line (in-use, idle, or in DoNot Disturb state) using Line Status indicators.
– Manual Directed Call Park—Allows you to park an active call by transferring it to a DirectedCall number, which your system administrator sets up.
You retrieve the call at another phone by dialing a park retrieval prefix number (provided byyour system administrator), then dialing the Directed Call number you used to park the call.
Your system administrator sets up either the Directed Call Park or Park feature on your phone, but not both.
Park and Retrieve a Call Using Park1. During a call, press the Park softkey.
Your phone displays the call park number where the system stored your call.
2. Note the call park number displayed on your phone screen.
You will use the number to retrieve the call.
3. Hang up.
You have a limited time to retrieve a parked call before it reverts to ringing at the original number.
4. From any other Cisco Unified IP Phone in your network, enter the call park number to retrieve thecall.

Park and Retrieve a Call Using Assisted Directed Call Park1. During a call, press a Directed Call Park button displaying an idle Line Status indicator.
You have a limited time to retrieve the parked call before it reverts to ringing at the originalnumber.
2. Retrieve the call, from any other Cisco Unified IP Phone in your network as follows:
a. Enter the park retrieval prefix.
b. Dial the Directed Call number.
For example, if the park retrieval prefix is “99” and the Directed Call number is “1234”, enter 991234.
Park and Retrieve a Call Using Manual Directed Call Park1. During a call, press the Transfer button .
2. Enter the Directed Call number where you will park the call.
3. Press Transfer again to finish parking the call, then hang up.
You have a limited time to retrieve a parked call before it reverts to ringing at the original number.
4. Retrieve the call, from any other Cisco Unified IP Phone in your network as follows:
a. Enter the park retrieval prefix.
b. Dial the Directed Call number.
For example, if the park retrieval prefix is “99” and the Directed Call number is “1234”, enter 991234.
Call WaitingCall Waiting provides cues to notify you that a new call is ringing on your phone when you are talking on another call, including:
• A call waiting tone (single beep)
• An amber flashing line button
Respond to a Call Waiting Notification(Your system administrator must set up multiple lines on your phone before you can use this feature.)
To answer the ringing call, press the flashing amber line button. Your phone puts the original call on hold automatically and connects the ringing call.

Call PickupCall Pickup allows you to answer a call that is ringing on a co-worker’s phone by redirecting the call to your phone.
You might use Call Pickup if you share call-handling tasks with co-workers.
There are three ways you can pick up a call:
• Pickup—Allows you to answer a call that is ringing on another phone within your call pickupgroup.
If multiple calls are available for pick up, your phone picks up the oldest call first (the call thathas been ringing for the longest time).
• Group Pickup—Allows you to answer a call on a phone that is outside your call pickup group by:
– Using a group pickup number (provided by your system administrator).
– Dialing the ringing phone’s number.
• Other Pickup—Allows you to answer a call that is ringing on another phone within in your callpickup group or in an associated call pickup group.
Your system administrator sets up the call pickup group you are in, and the call pickup softkeys depending on your call-handling needs and work environment.
You can also monitor and pick up ringing calls using Line Status indicators if your system administrator has set up Line Status indicators on speed-dial buttons for you. Line Status indicators allow you to see if a line associated with a speed-dial button is idle, in-use, in a Do Not Disturb state, or ringing.
Answer a Call Using Pickup1. Press the PickUp softkey to transfer a ringing call within your pickup group to your phone.
If you have multiple lines and want to pick up the call on a non-primary line, first press the desiredline button, then press PickUp.
If your phone supports auto-pickup, you are connected to the call.
2. If the call rings, press the Answer softkey to connect to the call.
Answer a Call Using Group Pickup and a Group Pickup Number1. Press the GPickup softkey to answer a call on a phone outside your pickup group.
If you have multiple lines and want to pick up the call on another line, first press the desired linebutton, then press GPickup.
2. Enter the group pickup number.
If your phone supports auto-pickup, you are now connected to the call.
3. If the call rings, press the Answer softkey to connect to the call.

Answer a Call Using Group Pickup and a Phone Number1. Press the GPickup softkey.
If you have multiple lines and want to pick up the call on a non-primary line, first press the desiredline button, then press GPickup.
2. Enter the number of the phone line with the call that you want to pick up. For example, if the callis ringing on line 12345, enter 12345.
If your phone supports auto-pickup, you are now connected to the call.
3. If the call rings, press the Answer softkey to connect to the call.
Answer a Call Using Other Pickup1. Press the OPickup softkey to transfer a call in your pickup group or in an associated group to your
phone.
If your phone supports auto-pickup, you are now connected to the call.
2. If the call rings, press the Answer softkey to connect to the call.
Place a Call Using a Forced Authorization Code1. Dial a number.
2. After the tone, enter a forced authorization code (FAC).
ConferenceConference allows you to talk simultaneously with multiple parties.
When you are talking on a call, use Conference to dial another party and add them to the call.
If you have multiple phone lines, you can alternately use Conference to combine two calls across two lines. For example, if you have a call on Line 1 and a call on Line 2, you can combine the calls into a conference.
Before completing a conference procedure, you can press the Cancel softkey to cancel the procedure or you can press the Swap softkey to toggle between calls, allowing you to speak privately with each party.
As the conference host, you can remove individual participants from the conference.
The conference ends when all the participants hang up.

Add Another Party to Your Call to Create a Conference1. Verify that you are on an active call (not on hold).
2. Press the Conference button .
3. Enter the phone number for the party you want to add (or press a speed-dial button).
4. Wait for the party to answer (or skip to step 5 while the call is ringing).
5. Press the Conference button again.
The conference begins.
Repeat these steps to add more parties, if desired.
Combine Calls Across Lines to Create a ConferenceThis task requires multiple phone lines.
1. Verify that you have two connected calls and that one of the calls is active (not on hold).
2. Press the Conference button .
3. Press the line button for the other (held) call.
The conference begins. (The conference is established on the line with the active call.)
Swap Between Calls Before Completing a ConferenceAfter calling a new conference participant, but before adding the participant to the conference, press the Swap softkey to toggle between the two calls. This allows you to consult privately with the party or parties on each call before combining the calls into a conference.
End a ConferenceThe conference ends when all participants hang up.
View Conference ParticipantsWhile in a conference, press the Details softkey to view a list of participants.
Remove Conference Participants1. While in a conference, press the Details softkey to view a list of participants.
2. Highlight the participant that you want to remove, then press the Remove softkey.

DivertDivert allows you to send an active or ringing call to your voicemail system or to a predetermined phone number (set up by your system administrator).
Divert a CallPress the Divert softkey to send an active, ringing, or held call to your voicemail system or to a predetermined phone number (set up by your system administrator).
Do Not Disturb Do Not Disturb (DND) allows you to turn off either the ringer on your phone, or the ringer and any other audible or visual notification that you have an incoming call.
When the ringer and notifications are turned off, the call is sent directly to your voicemail system.
Your system administrator sets up a line button on your phone for DND, but you can change your DND options from your User Options web pages.
DND interacts with other types of calls:
• If both DND and Call Forward All are enabled, calls are forwarded without any visual or audibleconfirmation.
• DND does not affect intercom calls or non-intercom priority calls.
• If both DND and auto-answer are enabled, only intercom calls are auto-answered.
Turn DND On and Off1. Press the DND button to turn on DND.
Visual confirmation displays briefly.
2. Press the button again to turn off DND.
Visual confirmation displays briefly.

HoldHold allows you to put an active call into a held state.
Hold and Resume a Call1. To put a call on hold, press the Hold button .
The Hold icon displays and the line button flashes green.
2. To resume the call, press the Resume softkey or the flashing green line button.
Swap Between Held and Active Calls on Multiple LinesIf your phone supports multiple lines, use line buttons to swap between held and active calls.
For example, if you have a held call on Line 1 and an active call on Line 2, press the Line 1 button to make the Line 1 call active (resume it from hold) and to automatically put the Line 2 call on hold.
Put a Call on Hold by Answering a New Call on Another LineIf your phone supports multiple lines, and you are already on a call when a new call rings, answering the new call puts the first call on hold automatically.
To answer the new call in this case, press the flashing amber line button or the Answer softkey.
Determine if a Shared Line is on HoldLook for a flashing red line button and the hold icon . When these indicators display, a call on the shared line has been put on hold remotely by the other user.
Hold ReversionHold Reversion notifies you when a call is left on hold.
A Hold Reversion notification is similar to a new call notification and includes these cues:
• Single ring, repeating at intervals
• Flashing amber line button
• Flashing message indicator on the handset
• Visual notification on the phone screen
Respond to a Hold Reversion NotificationPress the flashing amber line button or the Answer softkey to resume the call from hold.

Line StatusLine Status indicators allow you to view the state of a phone line that is associated with a speed-dial button.
Your system administrator sets up Line Status indicators on your phone.
Line Status IndicatorsLine Status indicators show the state of a line.
Line Status indicators can be set up on speed dial buttons by your system administrator, and can be used with these features:
• Speed Dial—Allows you to monitor the status of (and dial) a specific number on a speed-dialbutton.
• Call Park—Allows you to monitor the line status of (and dial) an Assisted Directed Call Parknumber on a speed-dial button.
• Call Pickup—Allows you to monitor the line status of (and pick up a ringing call on) a speed-dialbutton.
Your system administrator can also set up your phone to play an audible alert when a call isringing on the monitored line
Icon Indicator
Line is in use.
Line is idle.
Line is in Do Not Disturb (DND) state.
Line is ringing. (Only for Call Pickup.)

MuteMute allows you to block audio input for your handset, headset, and speakerphone, so that you can hear other parties on the call but they cannot hear you.
Mute Your Phone1. to turn Mute on. Press the Mute button
Visual confirmation displays.
2. Press the Mute button again to turn Mute off.
On-hook DialingOn-hook dialing allows you to enter a phone number before getting a dial tone and to complete the call by going off-hook.
Dial a Number On-hook1. Enter or speed-dial a phone number.
2. Go off-hook.
RedialRedial allows you to call the most recently dialed phone number by pressing a button.
Redial a NumberPress the Redial softkey.
To place the call on a particular phone line, get a dial tone on that line, then press the Redial softkey.

TransferTransfer allows you to redirect a connected call from your phone to another number.
You can use Transfer or Direct Transfer:
• Transfer allows you to redirect a single call to another number that you specify.
• Direct Transfer allows you to connect two calls on two different lines to each other (withoutremaining on the line yourself).
Before completing a transfer procedure, you can press the Cancel softkey to cancel the procedure or you can press the Swap softkey to toggle between calls, allowing you to speak privately with each party.
Transfer a Call to Another Number1. Verify that you are on an active call (not on hold).
2. Press the Transfer button .
3. Enter the transfer recipient’s phone number (or press a speed dial button).
4. Wait for the recipient to answer. (Or, skip to Step 5 while the call is ringing.)
5. Press the Transfer button again.
The transfer is complete.
Use Direct Transfer to Connect Calls Across LinesThis task requires multiple phone lines.
1. Verify that you have two connected calls and that one of the calls is active (not on hold).
2. Press the Transfer button .
3. Press the line button for the other (held) call.
The transfer completes (the two calls are connected to each other).
Swap Between Calls Before Completing a TransferAfter you connect to the transfer recipient—but before you transfer a call to this party—you can press the Swap softkey to toggle between the two calls. This allows you to consult privately with the party on each call before you complete the transfer.

Line SettingsLine settings affect a specific phone line (directory number) on your phone. Line settings can include call forwarding, visual and audio message-waiting indicators, voice-message indicators, ring patterns, and other line-specific settings.
You can set up other line settings directly on your phone:
• Set up call forwarding for your primary phone line
• Change rings, display, and other phone-model specific settings
Set Up Call Forwarding Per Line
1. Sign in to your User Options web page.
2. Select User Options > Device.
3. Select a phone from the Name drop-down menu.
4. Select Line Settings.
5. If you have more than one directory number (line) assigned to your phone, select a line from theLine drop-down menu.
6. In the Incoming Call Forwarding area, select call forwarding settings for various conditions.
7. Select Save.
Change the Ring Settings Per Line
1. Sign in to your User Options web page.
2. Select User Options > Device.
3. Select a phone from the Name drop-down menu.
4. Select Line Settings.
5. If you have more than one directory number (line) assigned to your phone, select a line from theLine drop-down menu.
6. In the Ring Settings area, set the option for Ring Setting (Phone Idle) and Ring Setting (PhoneActive) from the drop-down menus. The options are:
– Use System Default
– Disable
– Flash Only
– Ring Once
– Ring
– Beep Only [this option is only available for Ring Setting (Phone Active)]
7. Select Save.