Christie Vive Audio SKA-3D · The SKA-3D is a professional audio and video processor and video...
40
Christie Vive Audio SKA-3D Quick Start Guide 020-101241-01
Transcript of Christie Vive Audio SKA-3D · The SKA-3D is a professional audio and video processor and video...

Christie Vive Audio SKA-3D
Q u i c k S t a r t G u i d e
020-101241-01


Christie Vive Audio SKA-3D
Q u i c k S t a r t G u i d e
020-101241-01

NOTICES COPYRIGHT AND TRADEMARKS © 2013 Christie Digital Systems, Inc. All rights reserved.All brand names and product names are trademarks, registered trademarks or trade names of their respective holders.
REGULATORYThe product has been tested and found to comply with the limits for a Class A digital device, pursuant to Part 15 of the FCC Rules. These limits are designed to provide reasonable protection against harmful interference when the product is operated in a commercial environment. The product generates, uses, and can radiate radio frequency energy and, if not installed and used in accordance with the instruction manual, may cause harmful interference to radio communications. Operation of the product in a residential area is likely to cause harmful interference in which case the user will be required to correct the interference at the user’s own expense.CAN ICES-3 (A) / NMB-3 (A)이 기기는 업무용 (A급 )으로 전자파적합등록을 한 기기이오니 판매자 또는 사용자는 이점을 주의하시기 바라며 , 가정 외의 지역에서 사용하는 것을 목적으로 합니다 .
GENERALEvery effort has been made to ensure accuracy, however in some cases changes in the products or availability could occur which may not be reflected in this document. Christie reserves the right to make changes to specifications at any time without notice. Performance specifications are typical, but may vary depending on conditions beyond Christie's control such as maintenance of the product in proper working conditions. Performance specifications are based on information available at the time of printing. Christie makes no warranty of any kind with regard to this material, including, but not limited to, implied warranties of fitness for a particular purpose. Christie will not be liable for errors contained herein or for incidental or consequential damages in connection with the performance or use of this material.The product is designed and manufactured with high-quality materials and components that can be recycled and reused. This symbol
means that electrical and electronic equipment, at their end-of-life, should be disposed of separately from regular waste. Please dispose of the product appropriately and according to local regulations. In the European Union, there are separate collection systems for used electrical and electronic products. Please help us to conserve the environment we live in.Canadian manufacturing facility is ISO 9001 and 14001 certified.
GENERAL WARRANTY STATEMENTSFor complete information about Christie’s limited warranty, see the Christie website (www.christiedigital.com) or contact your Christie dealer. In addition to the limitations that may be specified in Christie’s limited warranty, the warranty does not cover:
a. Problems or damage occurring during shipment, in either direction.b. Projector lamps (See Christie’s separate lamp program policy).c. Problems or damage caused by use of a projector lamp beyond the recommended lamp life, or use of a lamp supplied by a
supplier other than Christie or an authorized distributor of Christie lamps.d. Problems or damage caused by combination of a Product with non-Christie equipment, such as distribution systems, cameras,
DVD players, etc., or use of a Product with any non-Christie interface device.e. Problems or damage caused by the use of any lamp, replacement part or component purchased or obtained from an
unauthorized distributor of Christie lamps, replacement parts or components including, without limitation, any distributor offering Christie lamps, replacement parts or components through the internet (confirmation of authorized distributors may be obtained from Christie).
f. Problems or damage caused by misuse, improper power source, accident, fire, flood, lightening, earthquake or other natural disaster.
g. Problems or damage caused by improper installation/alignment, or by equipment modification, if by other than Christie service personnel or a Christie authorized repair service provider.
h. Problems or damage caused by use of a Product on a motion platform or other movable device where such Product has not been designed, modified or approved by Christie for such use.
i. Problems or damage caused by use of a projector in the presence of an oil-based fog machine or laser-based lighting that is unrelated to the projector.
j. For LCD projectors, the warranty period applies only where the LCD projector is in “normal use.” “Normal use” means the LCD projector is not used more than 8 hours a day, 5 days a week.
k. Except where the Product is designed for outdoor use, problems or damage caused by use of the Product outdoors unless (i) such Product is protected from precipitation or other adverse weather or environmental conditions and the ambient temperature is within the recommended ambient temperature set forth in the specifications for such Product and (ii) if the Product is an LCD flat panel, such LCD flat panel is not exposed to direct sunlight.
l. Image retention on LCD flat panels.m.Defects caused by normal wear and tear or otherwise due to normal aging of a Product.n. Products where the serial number has been removed or obliterated. o. Products sold by a Reseller to an End User outside of the country where the Reseller is located unless (i) Christie has an office in
the country where the End User is located or (ii) the required international warranty fee has been paid. p. Products when there is failure to perform maintenance as required and in accordance with the maintenance schedule.q. This warranty does not obligate Christie to provide any on site warranty service at the Product site location.
PREVENTATIVE MAINTENANCEPreventative maintenance is an important part of the continued and proper operation of your product. Please see the Maintenance section for specific maintenance items as they relate to your product. Failure to perform maintenance as required, and in accordance with the maintenance schedule specified by Christie, will void the warranty.

AddendumThe CD included with this printed manual contains an electronic copy in English. Please read all instructions before using or servicing this product.
手册中包含的光盘,带有着中文的电子副本,使用或维修本产品前,请仔细查阅所有的指示。
手冊中包含的光盤,帶有着中文繁體的電子副本,使用或維修本產品前,請仔細查閲所有的指示。
Le DC fourni avec ce manuel imprimé contient une copie électronique en français. S'il vous plaît lire toutes les instructions avant d'utiliser ou de réparer ce produit.
Das CD, das mit diesem gedruckten Handbuch eingeschlossen ist, enthält eine elektronische Kopie auf in deutscher Sprache. Vor der Anwendung oder der Instandhaltung dieses Produktes lesen Sie bitte alle Anweisungen.
Il CD fornito con il manuale stampato contiene una copia elettronica in lingua italiano. Si prega di leggere tutte le istruzioni prima di utilizzare o riparare questo prodotto.
この印刷されたマニュアルに同梱されております CD には、日本語での説明書が入っております。この製品を使用あるいは修理点検される際に、ご参照下さい。
매뉴얼과 함께 포함되어 있는 CD 에는 한글로 된 전자사본을 포함하고 있습니다 . 본 제품을 사용 혹은 서비스하기 전에 모든 지침 사항들을 읽어 보시기 바랍니다 .
O CD incluído com o impresso livro contém um eletrônico cópia em Português. Por favor lido todas as instruções antes de usar ou prestando serviço esse resultado.
Поставляемый в комплекте с документацией компакт-диск (CD) содержит электронную копию руководства пользователя на русском языке. Перед началом использования изделия или проведения сервиса пожалуйста прочтите все инструкции изложенные в руководстве.
El DC incluido con este manual impreso contiene una copia electrónica en español. Por favor, lea todas las instrucciones antes de usar o dar servicio a este producto.
Компакт диск, що постачається з цим друковане керівництво містить електронну копію українською мовою. Будь ласка, прочитайте всі інструкції перед використанням або обслуговуванням цього продукту.


Table of Contents
Important Safety Information . . . . . . . . . . . . . . . . . . . . . . . . . . . . . . . . . . . . . . . 1
Introduction . . . . . . . . . . . . . . . . . . . . . . . . . . . . . . . . . . . . . . . . . . . . . . . . . . . . . 3What’s in the Box? . . . . . . . . . . . . . . . . . . . . . . . . . . . . . . . . . . . . . . . . . . . . . . . 3
Controls . . . . . . . . . . . . . . . . . . . . . . . . . . . . . . . . . . . . . . . . . . . . . . . . . . . . . . 4
Front Panel . . . . . . . . . . . . . . . . . . . . . . . . . . . . . . . . . . . . . . . . . . . . . . . . . . . 4
Rear Panel . . . . . . . . . . . . . . . . . . . . . . . . . . . . . . . . . . . . . . . . . . . . . . . . . . . 5
Indicators . . . . . . . . . . . . . . . . . . . . . . . . . . . . . . . . . . . . . . . . . . . . . . . . . . . . . 5
Connections . . . . . . . . . . . . . . . . . . . . . . . . . . . . . . . . . . . . . . . . . . . . . . . . . . . . 6
Front Panel . . . . . . . . . . . . . . . . . . . . . . . . . . . . . . . . . . . . . . . . . . . . . . . . . . 6
Rear Panel . . . . . . . . . . . . . . . . . . . . . . . . . . . . . . . . . . . . . . . . . . . . . . . . . . . 7
Installation . . . . . . . . . . . . . . . . . . . . . . . . . . . . . . . . . . . . . . . . . . . . . . . . . . . . . . 9
Operation . . . . . . . . . . . . . . . . . . . . . . . . . . . . . . . . . . . . . . . . . . . . . . . . . . . . . . 11Turn the Power On . . . . . . . . . . . . . . . . . . . . . . . . . . . . . . . . . . . . . . . . . . . . . . .11
Turn the Power Off . . . . . . . . . . . . . . . . . . . . . . . . . . . . . . . . . . . . . . . . . . . . . . .11
Access the SKA-3D Web Interface . . . . . . . . . . . . . . . . . . . . . . . . . . . . . . . . . . . . .11
Manage Presets . . . . . . . . . . . . . . . . . . . . . . . . . . . . . . . . . . . . . . . . . . . . . . . . .12
Configure Presets . . . . . . . . . . . . . . . . . . . . . . . . . . . . . . . . . . . . . . . . . . . . . .12
Import Presets from a File . . . . . . . . . . . . . . . . . . . . . . . . . . . . . . . . . . . . . . . .13
Manually Apply a Configured Preset . . . . . . . . . . . . . . . . . . . . . . . . . . . . . . . . . .13
Manage Trigger Inputs . . . . . . . . . . . . . . . . . . . . . . . . . . . . . . . . . . . . . . . . . . . . .14
Configure Trigger Inputs . . . . . . . . . . . . . . . . . . . . . . . . . . . . . . . . . . . . . . . . .14
Import Trigger Inputs from a File . . . . . . . . . . . . . . . . . . . . . . . . . . . . . . . . . . .15
Manage Trigger Outputs . . . . . . . . . . . . . . . . . . . . . . . . . . . . . . . . . . . . . . . . . . .15
Configure Trigger Outputs . . . . . . . . . . . . . . . . . . . . . . . . . . . . . . . . . . . . . . . .15
Import Trigger Outputs from a File . . . . . . . . . . . . . . . . . . . . . . . . . . . . . . . . . .16
Manage Firmware . . . . . . . . . . . . . . . . . . . . . . . . . . . . . . . . . . . . . . . . . . . . . . . .16
Display the Firmware Version . . . . . . . . . . . . . . . . . . . . . . . . . . . . . . . . . . . . . .16
Update the Firmware . . . . . . . . . . . . . . . . . . . . . . . . . . . . . . . . . . . . . . . . . . . .17
Troubleshooting . . . . . . . . . . . . . . . . . . . . . . . . . . . . . . . . . . . . . . . . . . . . . . . . 19
Specifications . . . . . . . . . . . . . . . . . . . . . . . . . . . . . . . . . . . . . . . . . . . . . . . . . . 21Supported Video Formats . . . . . . . . . . . . . . . . . . . . . . . . . . . . . . . . . . . . . . . . . . .21
Supported Audio Formats . . . . . . . . . . . . . . . . . . . . . . . . . . . . . . . . . . . . . . . . . . .22
Christie Vive Audio SKA-3D Quick Start Guide i020-101241-01 Rev. 1 (10-2013)

Power . . . . . . . . . . . . . . . . . . . . . . . . . . . . . . . . . . . . . . . . . . . . . . . . . . . . . . . . 22
Control and Network Ports . . . . . . . . . . . . . . . . . . . . . . . . . . . . . . . . . . . . . . . . . . 22
Connections . . . . . . . . . . . . . . . . . . . . . . . . . . . . . . . . . . . . . . . . . . . . . . . . . . . 23
Physical . . . . . . . . . . . . . . . . . . . . . . . . . . . . . . . . . . . . . . . . . . . . . . . . . . . . . . 24
Channel Mapping . . . . . . . . . . . . . . . . . . . . . . . . . . . . . . . . . . . . . . . . . . . . . . . . 24
3 Screen Channels and 2 Surround Channels . . . . . . . . . . . . . . . . . . . . . . . . . . . 24
3 Screen Channels and 4 Surround Channels . . . . . . . . . . . . . . . . . . . . . . . . . . . 26
5 Screen Channels and 2 Surround Channels . . . . . . . . . . . . . . . . . . . . . . . . . . . 28
5 Screen Channels and 4 Surround Channels . . . . . . . . . . . . . . . . . . . . . . . . . . . 29
ii Christie Vive Audio SKA-3D Quick Start Guide020-101241-01 Rev. 1 (10-2013)

Important Safety InformationRead this information thoroughly and completely before installing, or operating the SKA-3D.
• Read these instructions.
• Keep these instructions.
• Heed all warnings.
• Follow all instructions.
• Do not use this apparatus near water.
• Clean only with dry cloth.
• Do not block any ventilation openings. Install in accordance with the manufacturer’s instructions.
• Do not install near any heat sources such as radiators, heat registers, stoves, or other apparatus (including amplifiers) that produce heat.
• Do not defeat the safety purpose of the polarized or grounding-type plug. A polarized plug has two blades with one wider than the other. A grounding type plug has two blades and a third grounding prong. The wide blade or the third prong are provided for your safety. If the provided plug does not fit into your outlet, consult an electrician for replacement of the obsolete outlet.
• Protect the power cord from being walked on or pinched particularly at plugs, convenience receptacles, and the point where they exit from the apparatus.
• Only use attachments/accessories specified by the manufacturer.
• Use only with the cart, stand, tripod, bracket, or table specified by the manufacturer, or sold with the apparatus. When a cart is used, use caution when moving the cart/apparatus combination to avoid injury from tip-over.
• Unplug this apparatus during lightning storms or when unused for long periods of time.
• To reduce the risk of electric shock, disconnect AC power cord to completely remove power from the unit before repair or maintenance.
• Refer all servicing to qualified service personnel. Servicing is required when the apparatus has been damaged in any way, such as power-supply cord or plug is damaged, liquid has been spilled or objects have fallen into the apparatus, the apparatus has been exposed to rain or moisture, does not operate normally, or has been dropped.
• Utstyr som er koplet til beskyttelsesjord via nettplugg og/eller via annet jordtilkoplet utstyr og er tilkoplet et kabel-TV nett, kan forårsake brannfare. For å unngå dette skal det ved tilkopling av utstyret til kabel-TV nettet installeres en galvanisk isolator mellom utstyret og kabel-TV nettet.
• Laite on liitettävä suojamaadoituskoskettimilla varustettuun pistorasiaan.
• Utrustning som är kopplad till skyddsjord via jordat vägguttag och/eller via annan utrustning och samtidigt är kopplad till kabel-TV nät kan i vissa fall medfőra risk főr brand. Főr att undvika detta skall vid anslutning av utrustningen till kabel-TV nät galvanisk isolator finnas mellan utrustningen och kabel-TV nätet.
Christie Vive Audio SKA-3D Quick Start Guide 1020-101241-01 Rev. 1 (10-2013)


IntroductionThe SKA-3D is a professional audio and video processor and video scaler. It accepts audio and video signals on multiple inputs and in multiple formats and outputs a selected combination of audio and video.
This user manual provides information about SKA-3D controls, installation, operation, troubleshooting, and specifications.
What’s in the Box?
Quantity Description Part Number
1 SKA-3D 108-446105-XX
1 Region-specific power cord N/A
1 Pair of rack ears N/A
2 Rack ear screws N/A
1 16-pin Phoenix connector N/A
1 8-pin Phoenix connector N/A
7 3-pin Phoenix connectors N/A
Christie Vive Audio SKA-3D Quick Start Guide 3020-101241-01 Rev. 1 (10-2013)

Introduction
ControlsThis section describes the SKA-3D controls.
Front Panel
Ref. Item Description
A Headphone level Adjusts the headphone volume.
B Source select Adjusts the audio source for headphone monitoring.
C Mic level Adjusts the microphone listening level. This control does not change the main output amplitude.
D Navigation buttons Provides left, right, up, and down buttons for menu system navigation.
E Enter Saves menu system changes.
F Mic mix select Selects between Mute, Booth+Auditorium, and Booth.
G Mute Mutes the master volume.
H Lock Locks the front-panel controls to prevent accidental changes.
I Menu Accesses the menu.
J Video select Selects the input video source.
K Audio select Selects the audio input source.
L Exit Exits the menu.
M Main volume Adjusts the main output volume level.
4 Christie Vive Audio SKA-3D Quick Start Guide020-101241-01 Rev. 1 (10-2013)

Introduction
Rear Panel
IndicatorsThis section describes the SKA-3D indicators.
Ref. Item Description
A AC power switch Turns the power on and off.
Ref. Item Description
A Mic level Indicates the microphone input level. From left to right, the LED lights represent these input levels:• Green - -40 dB• Green - -30 dB• Green - -20 dB• Green - -10 dB• Yellow - -5 dB• Red - Clip
Christie Vive Audio SKA-3D Quick Start Guide 5020-101241-01 Rev. 1 (10-2013)

Introduction
ConnectionsThis section describes the SKA-3D front and rear connections.
Front Panel
B Liquid crystal matrix (LCM) display
Indicates the status of the scaler. The display provides a 19-character, two-line display in this display format:[VIDEO_INPUT] [AUDIO_FORMAT] [AUDIO_INPUT][3D_FORMAT] [OUTPUT_RESOLUTION] [MASTER_VOLUME_IN_DB]To change the settings:• VIDEO_INPUT - the current video input. • AUDIO_FORMAT - the current audio format.• AUDIO_INPUT - the current audio input. • 3D_FORMAT - the current 3D format. • OUTPUT_RESOLUTION - the current output resolution. • MASTER_VOLUME - the current master volume level (dB). To change the
volume, adjust the Main Volume or press Mute.
Ref. Item Description
A Analog 2 Accepts 2-channel analog audio using one pair of RCA-type connectors.
B Analog 3 Accepts 2-channel analog audio using one pair of RCA-type connectors.
C Coax 2 Accepts multichannel digital audio (DTS® and Dolby® Digital) and two-channel Linear PCM using a cable with an RCA-type connector.
D Opt 2 Accepts multichannel digital audio (DTS® and Dolby® Digital) and two-channel Linear PCM using a cable with an optical cable with a TOSLINK connector.
E Coax 3 Accepts multichannel digital audio (DTS® and Dolby® Digital) and two-channel Linear PCM using a cable with an RCA-type connector.
F Opt 3 Accepts multichannel digital audio (DTS® and Dolby® Digital) and two-channel Linear PCM using a cable with an optical cable with a TOSLINK connector.
Ref. Item Description
6 Christie Vive Audio SKA-3D Quick Start Guide020-101241-01 Rev. 1 (10-2013)

Introduction
Rear Panel
G Headphone out Accepts a pair of stereo headphones using a 1/4” TRS jack.
H Mic Accepts a microphone using a balanced XLR connector.
I Comp 2 Accepts three Component (YPbPr) video cables from the source to these RCA-type connectors.
J VGA 1 Accepts an a VGA (RGBHV) cable from the source to this HD-15 connector.
K HDMI 2 Accepts an HDMI cable from the source to this HDMI connector.
L HDMI 4 / DVI-D Accepts a DVI-D or HDMI-to-DVI cable from the source to this DVI connector. This input also accepts HDMI audio.
Ref. Item Description
A Analog 1 Accepts 2-channel analog audio using one pair of RCA-type connectors.
B Balanced Analog In (8 ch)
Accepts a DB-25 type connector and up to eight channels of multichannel analog audio.
C Coax 1 Accepts multichannel digital audio (DTS® and Dolby® Digital) and two-channel Linear PCM using a cable with an RCA-type connector.
D Opt 1 Accepts multichannel digital audio (DTS® and Dolby® Digital) and two-channel Linear PCM using a cable with an optical cable with a TOSLINK connector.
E Alt 1 Accepts the RJ-45 connector from a DB-25-to-RJ-45 cable that carries digital audio. This input receives the first eight channels (1 - 8) of digital audio.
F DCI-AES Digital In (16 ch)
Accepts a DB-25 type connector for up to 16 channels of multichannel digital audio.
G Alt 2 Accepts the RJ-45 connector from a DB-25-to-RJ-45 cable that carries digital audio. This input receives the second eight channels (9 - 16) of digital audio.
H Balanced Analog Out (8 ch)
Accepts a DB-25 type connector and handle up to eight channels of multichannel analog audio
Ref. Item Description
Christie Vive Audio SKA-3D Quick Start Guide 7020-101241-01 Rev. 1 (10-2013)

Introduction
I Phoenix connectors (Audio Out)
Accepts single audio channel outputs: L Low, C Low, R Low, Aux 1 LS Low, Aux 2 RS Low, HI, VI / N. These can be configured using the web interface or serial control commands.
J Booth Monitor (Fixed)
Accepts an L/R RCA-type cable for the projection booth monitors output. The audio output level is fixed and is controlled by the external amplification device / monitors.
K AC power inlet Accepts an AC power cord.
L Contact Closure Inputs (1-8)
Accepts up to eight inputs for control of devices using contact closure.
M Relay Outputs (1-4)
Accepts up to four controlled device inputs to these trigger outputs to control screens, drapes, lights, or other devices. Connect trigger wires to removable terminal block plugs.
N RS-232 Accepts an RS-232 serial connector to control other devices.
O Ethernet Accepts an Ethernet connection, to connect the A/V Cinema Scaler 3D to a network in order to use IP control.
P HDMI 1 Accepts an HDMI cable from the source to this HDMI connector.
Q HDMI 3 / DVI-I Accepts a DVI (analog or digital) cable from the source to this DVI connector. This input also accepts HDMI audio.
R Comp 1 Accepts three Component (YPbPr) video cables from the source to these RCA-type connectors.
S HDMI L / DVI-D Outputs the left-eye video signal from a 3D source.
T HDMI R / DVI-D Outputs the right-eye video signal from a 3D source.
Ref. Item Description
8 Christie Vive Audio SKA-3D Quick Start Guide020-101241-01 Rev. 1 (10-2013)

Installation
1. Slide the SKA-3D into your rack.
Provide 1U of space above and below the SKA-3D. Do not place the SKA-3D directly above or below a heat source such as a power amplifier or server. If the SKA-3D is not rack-mounted, never place another piece of equipment (or heat source) above or below the SKA-3D.
2. Install the SKA-3D rack ears.
3. While holding the SKA-3D in position, insert a screw through each of the rack mounting ears.
4. Tighten the screws to secure the SKA-3D to the rack.
5. Connect one end of the power cord to the AC power inlet and the other end to a power outlet.
6. Connect the output and input connections.
See Connections on page 6 for connection locations.
An incorrect power setup creates a fire and shock hazard. Do not operate the SKA-3D unless the power cord, power socket, and power plug meet the appropriate local rating standards. Have a certified electrician install a permanent single-phase connection from the amplifier to the AC supply for correct installation. Failure to comply could result in death or serious injury.
Make sure the SKA-3D is properly ventilated. Provide 1U of space above and below the SKA-3D. Make sure that vents are not blocked and that air can flow freely through the unit. Do not place the SKA-3D directly above or below a heat source such as a power amplifier or server. If the SKA-3D is not rack-mounted, never place another piece of equipment (or heat source) on top or below the SKA-3D.
Christie Vive Audio SKA-3D Quick Start Guide 9020-101241-01 Rev. 1 (10-2013)

Installation
For example,
7. Turn the power on.
See Turn the Power On on page 11.
A Computer D Automation Controller
B SKA-3D E Projector
C Blue Ray Player Ethernet, General-purpose input/output (GPIO), or RS-232
VGA or HDMI Ethernet or GPIO
HDMI, or an optical/audio connection and component
DVI-D
10 Christie Vive Audio SKA-3D Quick Start Guide020-101241-01 Rev. 1 (10-2013)

OperationThis section provides procedures and information for operating the SKA-3D. Most operations can be completed using the web interface, SKA-3D controls, or RS-232 commands.
See the SKA-3D User Manual (P/N: 020-101056-XX) for a complete list of RS-232 commands.
Turn the Power On
1. Make sure the power cord is connected.
2. Move the AC power switch to the on position.
Turn the Power OffMove the AC power switch to the off position.
Access the SKA-3D Web Interface1. Open a web browser.
2. Type the SKA-3D IP address in the navigation bar.
For example,
http://192.168.206.100
3. Press Enter.
An incorrect power setup creates a fire and shock hazard. Do not operate the SKA-3D unless the power cord, power socket, and power plug meet the appropriate local rating standards. Have a certified electrician install a permanent single-phase connection from the amplifier to the AC supply for correct installation. Failure to comply could result in death or serious injury.
Never try to hold the AC power switch in the on position if it does not stay there itself. Failure to comply may result in equipment or property damage.
Christie Vive Audio SKA-3D Quick Start Guide 11020-101241-01 Rev. 1 (10-2013)

Operation
Manage PresetsPresets allow you to save configured settings for audio inputs, video inputs, audio modes, and master volume levels. The SKA-3D has 10 presets that can be applied manually or triggered with an event. Event-triggered presets require an automation controller.
Configure PresetsTen preset are available on the SKA-3D. Configure presets using the web interface or the SKA-3D controls. It is useful to use the web interface when multiple presets are set at one time. Use the SKA-3D controls to change individual preset settings. On the controls, presets are numbered 1-9 and the 10th preset is represented by the letter A.
Configure Presets using the Web Interface
1. Open the SKA-3D web interface.
See Access the SKA-3D Web Interface on page 11.
2. Click the Automation tab.
3. Click the Presets tab.
4. Enter a name for the preset under Preset Name.
5. Select the Switch to Video Input from the list.
6. Select the Switch to Audio Input from the list.
7. Select the Switch to Audio Mode from the list.
Options change depending on the selected audio input.
8. Select the volume setting from the list. If Custom is selected, move the slider to the required volume.
9. If required, repeat steps 4 to 8 for the remaining presets.
For example,
10. Click Save, and save the presets as an XML file.
Configure Presets using the SKA-3D Controls
1. Press Menu on the front of the SKA-3D.
2. Press the left or right navigation button to display Automation Settings.
12 Christie Vive Audio SKA-3D Quick Start Guide020-101241-01 Rev. 1 (10-2013)

Operation
3. Press Enter.
4. Press the up or down navigation button to display Preset Settings.
5. Press the left or right navigation button and select the automation preset to configure.
6. Press Enter.
7. Press the left or right navigation button and select the required video input.
8. Press the down navigation button to display SWITCH TO AUDIO.
9. Press the left or right navigation button and select the required audio input.
10. Press the down navigation button to display SWITCH TO AUDIO Mode.
11. Press the left or right navigation button and select the required mode.
12. Press the down navigation button and display MASTER VOL LEVEL.
13. Press the left or right navigation button to select the required volume setting.
14. If required, press the down navigation button to adjust the CUSTOM volume.
15. Press Exit until you return to the status screen.
Import Presets from a File
1. Open the SKA-3D web interface.
See Access the SKA-3D Web Interface on page 11.
2. Click the Automation tab.
3. Click the Presets tab.
4. Click Browse, and select the preset XML file to import.
5. Click Load.
Manually Apply a Configured Preset
1. Open the SKA-3D web interface.
See Access the SKA-3D Web Interface on page 11.
2. Click the Input/Output tab.
3. Click Apply beside the automation preset that you want to apply.
Christie Vive Audio SKA-3D Quick Start Guide 13020-101241-01 Rev. 1 (10-2013)

Operation
Manage Trigger InputsTrigger inputs provide communication with automation devices. The SKA-3D has 8 trigger inputs.
Configure Trigger InputsConfigure trigger inputs using the web interface or the SKA-3D controls. It is useful to use the web interface when multiple trigger inputs are set at one time. Use the SKA-3D controls to change individual configuration settings.
Configure Trigger Inputs using the Web Interface
1. Open the SKA-3D web interface.
See Access the SKA-3D Web Interface on page 11.
2. Click the Automation tab.
3. Click the Trigger Inputs tab.
4. Select the Trigger Input from the list.
5. Select the Switch to Preset from the list.
6. Click Test to test the trigger input.
7. Repeat steps 4 to 6 for the remaining trigger inputs.
8. Click Save, and save the trigger inputs as an XML file.
Configure Trigger Inputs using the SKA-3D Controls
1. Press Menu on the front of the SKA-3D.
2. Press the left or right navigation button to display Automation Settings.
3. Press Enter.
4. Press the up or down navigation button to display Trigger Inputs.
5. Press the left or right navigation button and select the automation trigger input to configure.
6. Press Enter.
7. Press the up or down navigation button to display SWTICH TO PRESET.
8. Press the left or right navigation button to select the preset to use when the trigger event is called.
9. Press Exit until you return to the status screen.
14 Christie Vive Audio SKA-3D Quick Start Guide020-101241-01 Rev. 1 (10-2013)

Operation
Import Trigger Inputs from a File
1. Open the SKA-3D web interface.
See Access the SKA-3D Web Interface on page 11.
2. Click the Automation tab.
3. Click the Trigger Inputs tab.
4. Click Browse, and select the trigger inputs XML file to import.
5. Click Load.
Manage Trigger OutputsTrigger outputs provide control of automation devices such as lighting systems, curtains, or motorized screens. The SKA-3D has 4 available trigger outputs.
Configure Trigger Outputs
Configure trigger outputs using the web interface or the SKA-3D controls. It is useful to use the web interface when multiple trigger outputs are set at one time. Use the SKA-3D controls to change individual configuration settings.
Configure Trigger Outputs with the Web Interface
1. Open the SKA-3D web interface.
See Access the SKA-3D Web Interface on page 11.
2. Click the Automation tab.
3. Click the Trigger Outputs tab.
4. Select the Event Trigger from the list.
5. Select the Output State from the list.
6. Select the Action from the list. If Pulse is selected, complete the Pulse Duration field.
7. Repeat steps 4 to 6 for the remaining trigger outputs.
8. Click Save, and save the trigger outputs as an XML file.
Configure Trigger Outputs with the SKA-3D Controls
1. Press Menu on the front of the SKA-3D.
2. Press the left or right navigation button to display Automation Settings.
3. Press Enter.
4. Press the up or down navigation button to display Trigger Outputs.
Christie Vive Audio SKA-3D Quick Start Guide 15020-101241-01 Rev. 1 (10-2013)

Operation
5. Press the left or right navigation button and select the automation trigger output to configure.
6. Press Enter.
7. Press the up or down navigation button to display TRIGGER TYPE.
8. Press the left or right navigation button to select the trigger type.
9. Press the up or down navigation button to display EVENT TRIGGER.
10. Press the left or right navigation button and select the trigger event.
11. Press the up or down navigation button to display TRIGGER SIGNAL.
12. Press the left or right navigation button to select the trigger signal.
13. If required, press the up or down navigation button to display PULSE LENGTH; otherwise, skip to step 15.
Pulse adjustments are not required for levels.
14. Press the left or right navigation button to select the pulse length.
15. Press Exit until you return to the status screen
Import Trigger Outputs from a File
1. Open the SKA-3D web interface.
See Access the SKA-3D Web Interface on page 11.
2. Click the Automation tab.
3. Click the Trigger Outputs tab.
4. Click Browse, and select the trigger outputs XML file to import.
5. Click Load.
Manage FirmwareThe SKA-3D ships with the latest firmware. This section describes how to view the current firmware version and how to update the firmware.
Display the Firmware Version
1. Press the up or down navigation button to display Christie Digital SKA-3D.
2. Press the right navigation button to display the current firmware and boot code.
3. Press Exit to return the status screen.
16 Christie Vive Audio SKA-3D Quick Start Guide020-101241-01 Rev. 1 (10-2013)

Operation
Update the Firmware
1. Turn the SKA-3D power on.
See Turn the Power On on page 11.
2. Connect one end of the Ethernet cable to the Ethernet port on the SKA-3D and then connect the other end of the cable to the Ethernet port on the computer running the web interface.
See Access the SKA-3D Web Interface on page 11.
3. Click the System Configuration tab.
4. Click Browse in the Firmware Upgrade pane.
5. Click OK when the LCM prompts you to verify that you want to overwrite the current firmware.
The web interface is disabled during the firmware upgrade.
6. Wait for the SKA-3D to reboot or press Lock to bypass the reboot countdown.
The SKA-3D reboots.
7. If required, click Reset to reset the SKA-3D to its default settings.
8. If required, click Restore to load the system settings file.
Save the current system settings before updating the firmware. From the web interface, open the System Configuration screen and click Backup in the System Settings pane.
Christie Vive Audio SKA-3D Quick Start Guide 17020-101241-01 Rev. 1 (10-2013)

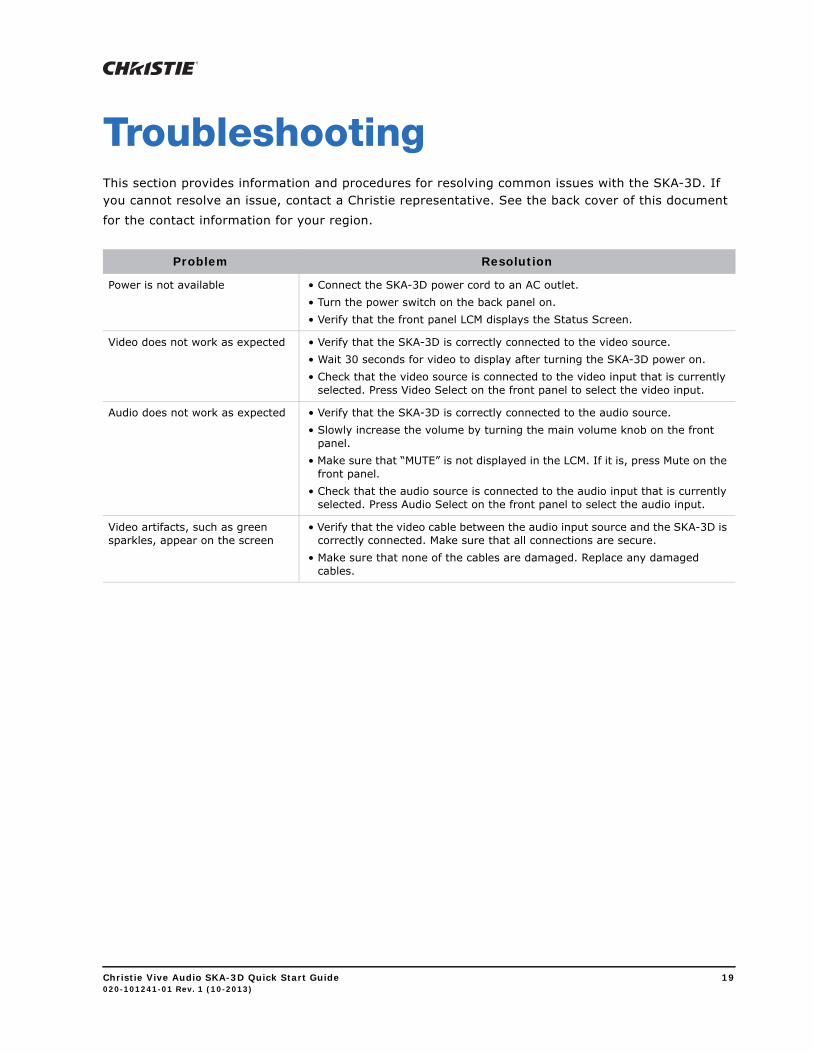
TroubleshootingThis section provides information and procedures for resolving common issues with the SKA-3D. If you cannot resolve an issue, contact a Christie representative. See the back cover of this document for the contact information for your region.
Problem Resolution
Power is not available • Connect the SKA-3D power cord to an AC outlet.• Turn the power switch on the back panel on.• Verify that the front panel LCM displays the Status Screen.
Video does not work as expected • Verify that the SKA-3D is correctly connected to the video source.• Wait 30 seconds for video to display after turning the SKA-3D power on.• Check that the video source is connected to the video input that is currently
selected. Press Video Select on the front panel to select the video input.
Audio does not work as expected • Verify that the SKA-3D is correctly connected to the audio source.• Slowly increase the volume by turning the main volume knob on the front
panel.• Make sure that “MUTE” is not displayed in the LCM. If it is, press Mute on the
front panel.• Check that the audio source is connected to the audio input that is currently
selected. Press Audio Select on the front panel to select the audio input.
Video artifacts, such as green sparkles, appear on the screen
• Verify that the video cable between the audio input source and the SKA-3D is correctly connected. Make sure that all connections are secure.
• Make sure that none of the cables are damaged. Replace any damaged cables.
Christie Vive Audio SKA-3D Quick Start Guide 19020-101241-01 Rev. 1 (10-2013)


SpecificationsThis section provides the specifications for the SKA-3D.
Supported Video FormatsThe SKA-3D supports up to 1080p / 2k 60 Hz video formats.
Format VGA / DVI-A
Component HDMI DVI (Digital)
640 x 480 / 60 Hz
800 x 600 / 60 Hz
1024 x 768 / 60 Hz
1152 x 864 / 60 Hz
1360 x 768 / 60 Hz
1280 x 960 / 60 Hz
1280 x 1024 / 60 Hz
1600 x 1200 / 60 Hz
1280 x 800 / 60 Hz
1920 x 1200 / 60 Hz
1680 x 1050 / 60 Hz
1400 x 1050 / 60 Hz
1440 x 900 / 60 Hz
720 x 480i / 60 Hz
720 x 576i / 50 Hz
720 x 480p / 60 Hz
720 x 576p / 50 Hz
1280 x 720p / 60 Hz
1280 x 720p / 50 Hz
1920 x 1080i / 60 Hz
1920 x 1080i / 60 Hz
1920 x 1080i / 50 Hz
1920 x 1080p / 60 Hz
1920 x 10809 / 50 Hz
1920 x 1080p / 24 Hz
1920 x 1080p / 25 Hz
Christie Vive Audio SKA-3D Quick Start Guide 21020-101241-01 Rev. 1 (10-2013)

Specifications
Supported Audio Formats
Power
Control and Network Ports
1920 x 1080p / 30 Hz
2048 x 1080p / 24 Hz Bypass Only Bypass Only
2048 x 1080p / 25 Hz Bypass Only Bypass Only
2048 x 1080p / 30 Hz Bypass Only Bypass Only
2048 x 1080p / 48 Hz Bypass Only Bypass Only
2048 x 1080p / 50 Hz Bypass Only Bypass Only
2048 x 1080p / 60 Hz Bypass Only Bypass Only
Specification Value
Audio • Digital PCM, up to 16 channels• Balanced analog + 4 dB, up to 8 channels• Dolby Digital• Dolby Digital Plus• Dolby TrueHD• DTS• DTS-HD• DTS-HD Master Audio• Dolby Pro Logic II• Unbalanced analog -10 dB, stereo• Microphone, balanced
Specification Value
Input 100-240VAC, (50/60 Hz), 100W, 0.6A
Specification Value
Ethernet RJ-45
RS-232 DB-9
8 Contact Closure Inputs 16-Pin Phoenix
4 Dry Relay Outputs 8-Pin Phoenix
Format VGA / DVI-A
Component HDMI DVI (Digital)
22 Christie Vive Audio SKA-3D Quick Start Guide020-101241-01 Rev. 1 (10-2013)

Specifications
Connections
Specification
Outputs Video • HDMI L / DVI-D (left eye in dual stream 3D mode; active output in sequential 3D mode
• HDMI R / DVI-D (right eye in dual stream 3D mode)
Audio • 8 x Balanced Analog (DB-25)• L (left) Low, Balanced Analog (3-Pin Phoenix)• C (center) Low, Balanced Analog (3-Pin Phoenix)• R (right) Low, Balanced Analog (3-Pin Phoenix)• Aux 1 / LS (left surround) Low, Balanced Analog (3-Pin
Phoenix)• Aux 2 / RS (right surround) Low, Balanced Analog (3-
Pin Phoenix)• HI (hearing impaired), Balanced Analog (3-Pin Phoenix)• VI/N (visually impaired / Narrative)• Booth Monitor, Unbalanced Analog (RCA)• Headphone (TRS)
Inputs Video • 2 x HDMI (support for embedded audio)• 1 x DVI-D (support for embedded audio)• 1 x DVI-I (does not support audio in analog mode)• 2 x Component (3 x RCA)• VGA (HD15)
Audio • 16 x DCI-AES Digital, 8 Pairs (DB-25)• DCI-AES ALT 1 Pairs 1-4 (RJ-45)• DCI-AES ALT2 Pairs 5-8 (RJ-45)• 8 x Balanced Analog (DB-25)• 3 x Analog (RCA)• 3 x Coax SPDIF (RCA)• 3 x Optical SPDIF (Toslink)• 2 x HDMI/DVI (support for embedded audio)• Microphone (XLR)
DB-25, Female, Balanced Analog In
• Reference level: 300 mV (rms)• Maximum input level before clipping: 4 V (rms)• Input impedance: 25 kΩ• Frequency response: ±0.5 dB @20 to 20 kHz
±3.0 dB @ 10 to 38 kHz• THD: <0.001% @ 1 kHz 3 V (rms)• SNR: 110 dB, A-weight, 20 to 20 kHz• Balanced input can be used with unbalanced or
balanced sources
Analog Microphone input (XLR) • Input gain range (control knob): 9 dB to 60 dB• Phantom power support
Christie Vive Audio SKA-3D Quick Start Guide 23020-101241-01 Rev. 1 (10-2013)

Specifications
Physical
Channel MappingThis section describes channel mapping in relation to the SKA-3D audio input signal.
3 Screen Channels and 2 Surround Channels
DB-25, Male, Balanced Analog out • Reference level: 300 mV (rms), 0 dBFS output = 3 V (rms)
• Output impedance: <100 Ω• Frequency response: ±0.5 dB @ 20 to 20 kHz
±3.0 dB @ 10 to 38 kHz• THD: <0.001% @ 1 kHz 3 V (rms)• SNR: 110 dB, A-weight, 20 to 20 kHz
Analog Balanced Secondary Output, Phoenix Connector (HI, VI/N)
• Reference level: 150 mV• Frequency response: ±0.5 dB @ 20 to 20 kHz• THD: <0.001% @ 1 kHz 2 V (rms)• SNR: 100 dB, A-weight, 20 to 20 kHz
Analog Unbalanced Variable Level Output (Booth Monitor Headphone)
• Volume control range: -60 dB to 0 dB; 0 dBFS @ 0 dB user-adjustment = 500 mV (rms)
• Minimum load: 10 Ω• Frequency response: ±0.5 dB @ 20 to 20 kHz• THD: <0.01% @ 1 kHz 2V (rms)• SNR: 90 dB, A-weight, 20 to 20 kHz (at max. setting)
Specification Value
Dimension (W x H x D) 19 in. x 3.5 in.* x 12 in. (48.3 cm x 30.5 cm* x 8.9 cm)*Height with feet is 4 in. (10.2 cm)
Net Weight 21.7 lb (9.8 Kg)
Specification
24 Christie Vive Audio SKA-3D Quick Start Guide020-101241-01 Rev. 1 (10-2013)

Specifications
DCI 6-Channel or Dolby Digital 5.11
DCI 8-Channel or SDDS 7.1
Dolby Surround 7.1
Channel Input Output
Left (L)
Right (R)
Center (C)
Left surround (LS)
Right surround (RS)
Bottom left side (BLS)
Bottom right side (BRS)
Left center (LC)
Right center (RC)
Low frequency effects (LFE)
1. Straight-through channel mapping.
Channel Input Output
Left (L)
Right (R)
Center (C)
Left surround (LS)
Right surround (RS)
Bottom left side (BLS)
Bottom right side (BRS)
Left center (LC) a
a. Not used.
Right center (RC) a
Low frequency effects (LFE)
Channel Input Output
Left (L)
Right (R)
Center (C)
Christie Vive Audio SKA-3D Quick Start Guide 25020-101241-01 Rev. 1 (10-2013)

Specifications
3 Screen Channels and 4 Surround Channels
DCI 6-Channel or Dolby Digital 5.1
Left surround (LS) + BLS
Right surround (RS) + BRS
Bottom left side (BLS) a
Bottom right side (BRS) b
Left center (LC)
Right center (RC)
Low frequency effects (LFE)
a. Down-mixed to LS.b. Down-mixed to RS.
Channel Input Output
Left (L)
Right (R)
Center (C)
Left surround (LS)
Right surround (RS)
Bottom left side (BLS) a
a. LS is duplicated on BLS.
Bottom right side (BRS) b
b. RS is duplicated on BRS.
Left center (LC)
Right center (RC)
Low frequency effects (LFE)
Channel Input Output
26 Christie Vive Audio SKA-3D Quick Start Guide020-101241-01 Rev. 1 (10-2013)

Specifications
DCI 8-Channel or SDDS 7.1
Dolby Surround 7.11
Channel Input Output
Left (L)
Right (R)
Center (C)
Left surround (LS)
Right surround (RS)
Bottom left side (BLS) a
a. LS is duplicated on BLS.
Bottom right side (BRS) b
b. RS is duplicated on BRS.
Left center (LC) c
c. Not used.
Right center (RC) C
Low frequency effects (LFE)
Channel Input Output
Left (L)
Right (R)
Center (C)
Left surround (LS)
Right surround (RS)
Bottom left side (BLS)
Bottom right side (BRS)
Left center (LC)
Right center (RC)
Low frequency effects (LFE)
1. Straight-through channel mapping.
Christie Vive Audio SKA-3D Quick Start Guide 27020-101241-01 Rev. 1 (10-2013)

Specifications
5 Screen Channels and 2 Surround Channels
DCI 6-Channel or Dolby Digital 5.1
DCI 8-Channel or SDDS 7.11
Channel Input Output
Left (L)
Right (R)
Center (C)
Left surround (LS)
Right surround (RS)
Bottom left side (BLS)
Bottom right side (BRS)
Left center (LC) a
a. Not used.
Right center (RC) a
Low frequency effects (LFE)
Channel Input Output
Left (L)
Right (R)
Center (C)
Left surround (LS)
Right surround (RS)
Bottom left side (BLS)
Bottom right side (BRS)
Left center (LC)
Right center (RC)
Low frequency effects (LFE)
1. Straight-through channel mapping.
28 Christie Vive Audio SKA-3D Quick Start Guide020-101241-01 Rev. 1 (10-2013)

Specifications
Dolby Surround 7.1
5 Screen Channels and 4 Surround Channels
DCI 6-Channel or Dolby Digital 5.1
Channel Input Output
Left (L)
Right (R)
Center (C)
Left surround (LS) + BLS
Right surround (RS) + BRS
Bottom left side (BLS) a
a. Down-mixed to LS.
Bottom right side (BRS) b
b. Down-mixed to RS.
Left center (LC) c
c. Not used.
Right center (RC) c
Low frequency effects (LFE)
Channel Input Output
Left (L)
Right (R)
Center (C)
Left surround (LS)
Right surround (RS)
Bottom left side (BLS) a
Bottom right side (BRS) a
Left center (LC) a
Christie Vive Audio SKA-3D Quick Start Guide 29020-101241-01 Rev. 1 (10-2013)

Specifications
DCI 8-Channel or SDDS 7.1
Dolby Surround 7.1
Right center (RC) a
Low frequency effects (LFE)
a. Not used.
Channel Input Output
Left (L)
Right (R)
Center (C)
Left surround (LS)
Right surround (RS)
Bottom left side (BLS) a
a. LS is duplicated on BLS.
Bottom right side (BRS) b
b. RS is duplicated on BRS.
Left center (LC)
Right center (RC)
Low frequency effects (LFE)
Channel Input Output
Left (L)
Right (R)
Center (C)
Left surround (LS)
Right surround (RS)
Bottom left side (BLS)
Bottom right side (BRS)
Left center (LC) a
a. Not used.
Right center (RC) a
Low frequency effects (LFE)
Channel Input Output
30 Christie Vive Audio SKA-3D Quick Start Guide020-101241-01 Rev. 1 (10-2013)

*000-103554-01*ASSY TECH DOCS SKA-3D

For th
USA – Cph: 71
Canadaph: 519
Corp
Japanph: 81-3-3599-7481
South Koreaph: +82 2 702 1601
ypress4-236-8610
– Kitchener-744-8005
United Kingdomph: +44 118 977 8000
Franceph: +33 (0) 1 41 21 00 36
Germanyph: +49 2161 664540
Eastern Europeph: +36 (0) 1 47 48 100
Middle Eastph: +971 (0) 4 299 7575
Spainph: + 34 91 633 9990
Singaporeph: +65 6877-8737
Beijingph: +86 10 6561 0240
Shanghaiph: +86 21 6278 7708
orate offi ces Worldwide offi ces
e most current technical documentation, please visit www.christiedigital.com