CGI PROGRAMMING 101 - University of Wisconsin–Superiormcs.uwsuper.edu/sb/250/Perl/CGI101.pdf ·...
78
CGI PROGRAMMING 101 Perl for the World Wide Web 2nd Edition © 2004 by JACQUELINE D. HAMILTON The following material is excerpted from “CGI Programming 101” (2nd edition) by Jacqueline D. Hamilton. It is copyrighted and may not be redistributed. You may make one printed copy for your own personal use; any other reproduction or retransmission of this document is prohibited.
Transcript of CGI PROGRAMMING 101 - University of Wisconsin–Superiormcs.uwsuper.edu/sb/250/Perl/CGI101.pdf ·...
CGI PROGRAMMING 101Perl for the World Wide Web
2nd Edition
© 2004 by JACQUELINE D. HAMILTON
The following material is excerpted from “CGI Programming 101” (2nd edition) by Jacqueline D. Hamilton. It is copyrighted and may not be redistributed. You may make one printed copy for your own personal use; any other reproduction or retransmission of this document is prohibited.
Introduction
This book is intended for web designers, entrepreneurs, students, teachers, and anyone who is interested in learning CGI programming. You do not need any programming experience to get started; if you can write HTML, you can write CGI programs. If you have a website, and want to add guestbook forms, counters, shopping carts, or other interactive elements to your site, then this book is for you.
What is CGI? “CGI” stands for “Common Gateway Interface.” CGI is one method by which a web server can obtain data from (or send data to) databases, documents, and other programs, and present that data to viewers via the web. More simply, a CGI is a program intended to be run on the web. A CGI program can be written in any programming language, but Perl is one of the most popular, and for this book, Perl is the language we’ll be using.
Why learn CGI? If you’re going to create web pages, then at some point you’ll want to add a counter, a form to let visitors send you mail or place an order, or something similar. CGI enables you to do that and much more. From mail-forms and counter programs, to the most complex database programs that generate entire websites on-the-fly, CGI programs deliver a broad spectrum of content on the web today.
Why use this book?This book will get you up and running in as little as a day, teaching you the basics of CGI programs, the fundamentals of Perl, and the basics of processing forms and writing simple programs. Then we’ll move on to advanced topics, such as reading and writing data files, searching for data in files, writing advanced, multi-part forms like order forms and shopping carts, using randomness to spice up your pages, using server-side includes, cookies, and other useful CGI tricks. Things that you’ve probably thought beyond your reach, things you thought you had to pay a programmer to do . . . all of these are things you can easily write yourself, and this book will show you how.
You can also try it out before buying the book; the first six chapters are available online, free of charge, at http://www.cgi101.com/book/.
iii
What do you need to get started?You should already have some experience building web pages and writing HTML. You’ll also need Perl and a web server (such as Apache) that is configured to allow you to run your own CGI programs.
The book is written towards CGI programming on Unix, but you can also set up Apache and Perl on Mac OS X and Windows. I’ve written several online tutorials that will show you how to get started:
Windows: http://www.cgi101.com/book/connect/windows.html How to set up Apache and Perl; how to configure Apache; where to write your
programs; differences between CGI programs on Windows and UnixMac OS X: http://www.cgi101.com/book/connect/mac.html How to configure Apache (which you already have installed); where to write
your programsUnix: http://www.cgi101.com/book/connect/unix.html How to upload programs to your Unix-based server; Unix tutorial; where to
write your programs; Unix permissions.
If you need an ISP that offers CGI hosting, visit http://www.cgi101.com/hosting. CGI101 offers Unix shell access, CGI programming, a MySQL database, and all of the Perl modules used in this book. It’s an easy, hassle-free way to get started writing your own CGI programs.
Working CodeAll of the code examples in this book are available on the web at http://www.cgi101.com/book/. You can download any or all of them from there, but do try writing the programs yourself first; you’ll learn faster that way.
Conventions Used in this BookPerl code will be set apart from the text by indenting and use of a fixed-width font:
print "This is a print statement.\n";
Unix shell commands are shown in a bold font: chmod 755 filename
Each program in the book is followed by a link to its source code:
2 Source code: http://www.cgi101.com/book/chX/program-cgi.html
In most cases, a link to a working example is also included:
iv
➮ Working example: http://www.cgi101.com/book/chX/demo.html
Each chapter has its own web page at http://www.cgi101.com/book/chX, where X is the chapter number. The full text of chapters 1-6 are online; other chapters include an index of the CGI programs and HTML forms from that chapter, links to online resources mentioned in that chapter, questions and answers relating to the chapter material, plus any chapter errata.
What’s New In This Edition?The 2nd edition of CGI Programming 101 has been substantially revised from the first edition. You’ll learn about Perl modules from the beginning, and work with modules (including the CGI.pm module, which offers many great features for writing CGI programs) throughout the book. You’ll learn how to password protect an area on your website, how to build an online catalog with a shopping cart, how to work with cookies, how to protect your site from spammers, and much more.
So turn to Chapter 1, and let’s get started.
Our programming language of choice for this book is Perl. Perl is a simple, easy to learn language, yet powerful enough to accomplish very difficult and complex tasks. It is widely available, and is probably already installed on your Unix server. You don’t need to compile your Perl programs; you simply write your code, save the file, and run it (or have the web server run it). The program itself is a simple text file; the Perl interpreter does all the work. The advantage to this is you can move your program with little or no changes to any machine with a Perl interpreter. The disadvantage is you won’t discover any bugs in your program until you run it.
You can write and edit your CGI programs (which are often called scripts) either on your local machine or in the Unix shell. If you’re using Unix, try pico – it’s a very simple, easy to use text editor. Just type pico filename to create or edit a file. Type man pico for more information and help using pico. If you’re not familiar with the Unix shell, see Appendix A for a Unix tutorial and command reference.
You can also use a text editor on your local machine and upload the finished programs to the web server. You should either use a plain text editor, such as Notepad (PC) or BBEdit (Mac), or a programming-specific editor that provides some error- and syntax-checking for you. Visit http://www.cgi101.com/book/editors.html for a list of some editors you can use to write your CGI programs.
If you use a text editor, be sure to turn off special characters such as “smartquotes.” CGI files must be ordinary text.
Once you’ve written your program, you’ll need to upload it to the web server (unless you’re using pico and writing it on the server already). You can use any FTP or SCP (secure copy) program to upload your files; a list of some popular FTP and SCP programs can be found at http://www.cgi101.com/book/connect/.
1 Getting Started
2 Chapter One Getting Started
It is imperative that you upload your CGI programs as plain text (ASCII) files, and not binary. If you upload your program as a binary file, it may come across with a lot of control characters at the end of the lines, and these will cause errors in your program. You can save yourself a lot of time and grief by just uploading everything as text (unless you’re uploading pictures – for example, GIFs or JPEGs – or other true binary data). HTML and Perl CGI programs are not binary, they are plain text.
Once your program is uploaded to the web server, you’ll want to be sure to move it to your cgi-bin (or public_html directory – wherever your ISP has told you to put your CGI programs). Then you’ll also need to change the permissions on the file so that it is “executable” (or runnable) by the system. The Unix shell command for this is:
chmod 755 filename
This sets the file permissions so that you can read, write, and execute the file, and all other users (including the webserver) can read and execute it. See Appendix A for a full description of chmod and its options.
Most FTP and SCP programs allow you to change file permissions; if you use your FTP client to do this, you’ll want to be sure that the file is readable and executable by everyone, and writable only by the owner (you).
One final note: Perl code is case-sensitive, as are Unix commands and filenames. Please keep this in mind as you write your first programs, because in Unix “perl” is not the same as “PERL”.
What Is This Unix Shell?
It’s a command-line interface to the Unix machine – somewhat like DOS. You have to use a Telnet or SSH (secure shell) program to connect to the shell; see http://www.cgi101.com/class/connect.html for a list of some Telnet and SSH programs you can download. Once you’re logged in, you can use shell commands to move around, change file permissions, edit files, create directories, move files, and much more.
If you’re using a Unix system to learn CGI, you may want to stop here and look at Appendix A to familiarize yourself with the various shell commands. Download a Telnet or SSH program and login to your shell account, then try out some of the commands so you feel comfortable navigating in the shell.
Throughout the rest of this book you’ll see Unix shell commands listed in bold to set them apart from HTML and CGI code. If you’re using a Windows server, you can ignore most of the shell commands, as they don’t apply.
3 Chapter One Getting Started
Basics of a Perl Program
You should already be familiar with HTML, and so you know that certain things are necessary in the structure of an HTML document, such as the <head> and <body> tags, and that other tags like links and images have a certain allowed syntax. Perl is very similar; it has a clearly defined syntax, and if you follow those syntax rules, you can write Perl as easily as you do HTML.
The first line of your program should look like this:
#!/usr/bin/perl -wT
The first part of this line, #!, indicates that this is a script. The next part, /usr/bin/perl, is the location (or path) of the Perl interpreter. If you aren’t sure where Perl lives on your system, try typing which perl or whereis perl in the shell. If the system can find it, it will tell you the full path name to the Perl interpreter. That path is what you should put in the above statement. (If you’re using ActivePerl on Windows, the path should be /perl/bin/perl instead.)
The final part contains optional flags for the Perl interpreter. Warnings are enabled by the -w flag. Special user input taint checking is enabled by the -T flag. We’ll go into taint checks and program security later, but for now it’s good to get in the habit of using both of these flags in all of your programs.
You’ll put the text of your program after the above line.
Basics of a CGI Program
A CGI is simply a program that is called by the webserver, in response to some action by a web visitor. This might be something simple like a page counter, or a complex form-handler. Shopping carts and e-commerce sites are driven by CGI programs. So are ad banners; they keep track of who has seen and clicked on an ad.
CGI programs may be written in any programming language; we’re just using Perl because it’s fairly easy to learn. If you’re already an expert in some other language and are just reading to get the basics, here it is: if you’re writing a CGI that’s going to generate an HTML page, you must include this statement somewhere in the program before you print out anything else:
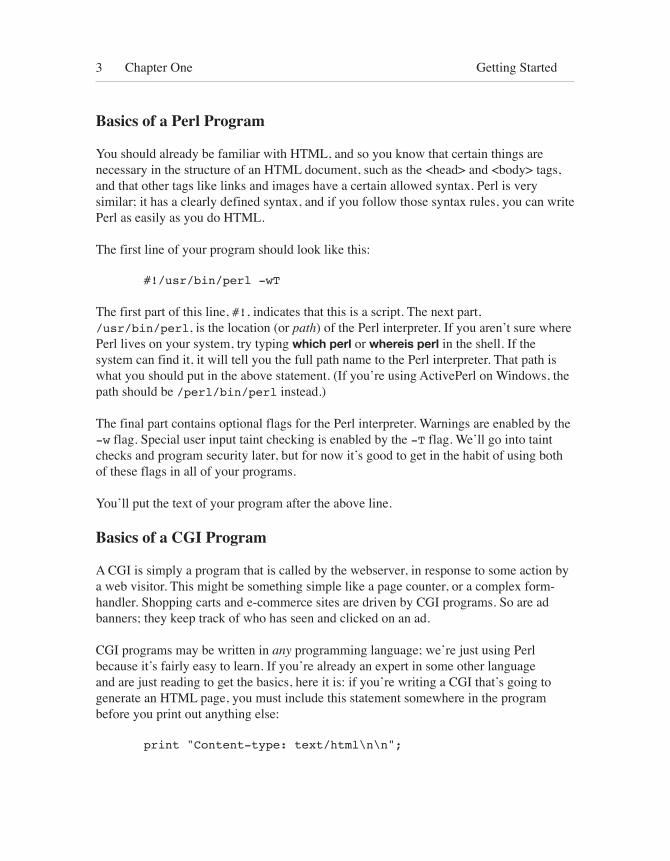
print "Content-type: text/html\n\n";
4 Chapter One Getting Started
This is a content-type header that tells the receiving web browser what sort of data it is about to receive – in this case, an HTML document. If you forget to include it, or if you print something else before printing this header, you’ll get an “Internal Server Error” when you try to access the CGI program.
Your First CGI Program
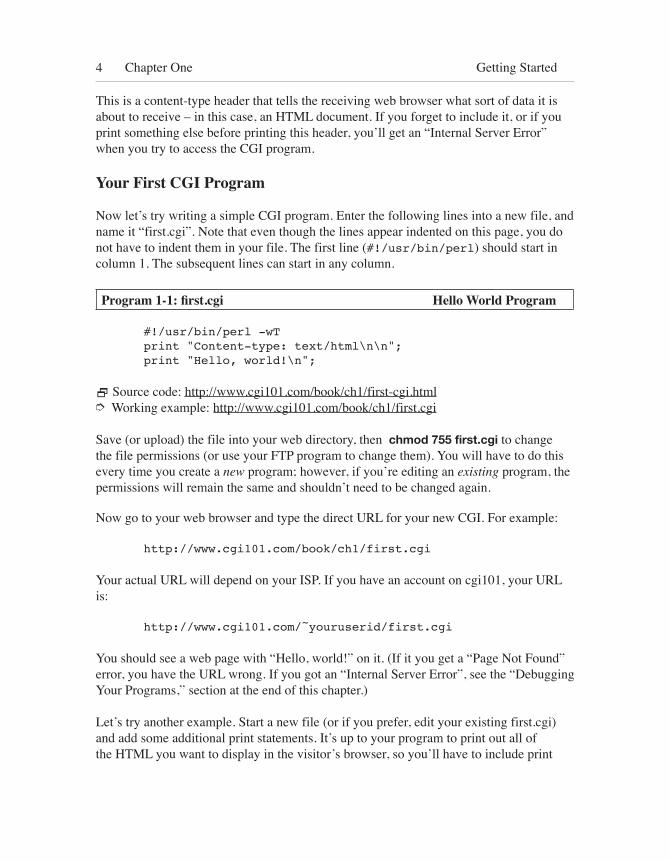
Now let’s try writing a simple CGI program. Enter the following lines into a new file, and name it “first.cgi”. Note that even though the lines appear indented on this page, you do not have to indent them in your file. The first line (#!/usr/bin/perl) should start in column 1. The subsequent lines can start in any column.
Program 1-1: first.cgi Hello World Program
#!/usr/bin/perl -wTprint "Content-type: text/html\n\n";print "Hello, world!\n";
2 Source code: http://www.cgi101.com/book/ch1/first-cgi.html➮ Working example: http://www.cgi101.com/book/ch1/first.cgi
Save (or upload) the file into your web directory, then chmod 755 first.cgi to change the file permissions (or use your FTP program to change them). You will have to do this every time you create a new program; however, if you’re editing an existing program, the permissions will remain the same and shouldn’t need to be changed again.
Now go to your web browser and type the direct URL for your new CGI. For example:
http://www.cgi101.com/book/ch1/first.cgi
Your actual URL will depend on your ISP. If you have an account on cgi101, your URL is:
http://www.cgi101.com/~youruserid/first.cgi
You should see a web page with “Hello, world!” on it. (If it you get a “Page Not Found” error, you have the URL wrong. If you got an “Internal Server Error”, see the “Debugging Your Programs,” section at the end of this chapter.)
Let’s try another example. Start a new file (or if you prefer, edit your existing first.cgi) and add some additional print statements. It’s up to your program to print out all of the HTML you want to display in the visitor’s browser, so you’ll have to include print
5 Chapter One Getting Started
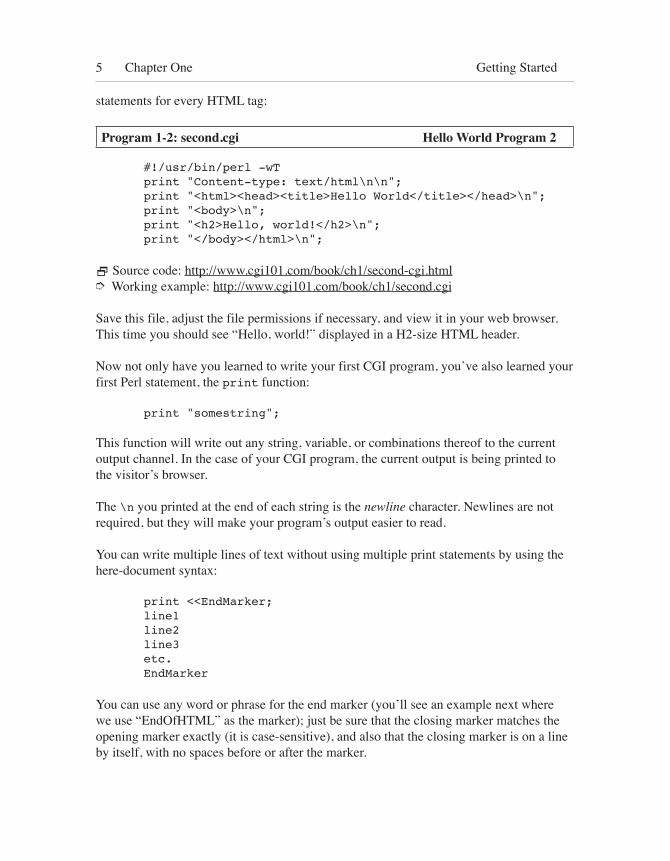
statements for every HTML tag:
Program 1-2: second.cgi Hello World Program 2
#!/usr/bin/perl -wTprint "Content-type: text/html\n\n";print "<html><head><title>Hello World</title></head>\n";print "<body>\n";print "<h2>Hello, world!</h2>\n";print "</body></html>\n";
2 Source code: http://www.cgi101.com/book/ch1/second-cgi.html➮ Working example: http://www.cgi101.com/book/ch1/second.cgi
Save this file, adjust the file permissions if necessary, and view it in your web browser. This time you should see “Hello, world!” displayed in a H2-size HTML header.
Now not only have you learned to write your first CGI program, you’ve also learned your first Perl statement, the print function:
print "somestring";
This function will write out any string, variable, or combinations thereof to the current output channel. In the case of your CGI program, the current output is being printed to the visitor’s browser.
The \n you printed at the end of each string is the newline character. Newlines are not required, but they will make your program’s output easier to read.
You can write multiple lines of text without using multiple print statements by using the here-document syntax:
print <<EndMarker;line1line2line3etc.EndMarker
You can use any word or phrase for the end marker (you’ll see an example next where we use “EndOfHTML” as the marker); just be sure that the closing marker matches the opening marker exactly (it is case-sensitive), and also that the closing marker is on a line by itself, with no spaces before or after the marker.
6 Chapter One Getting Started
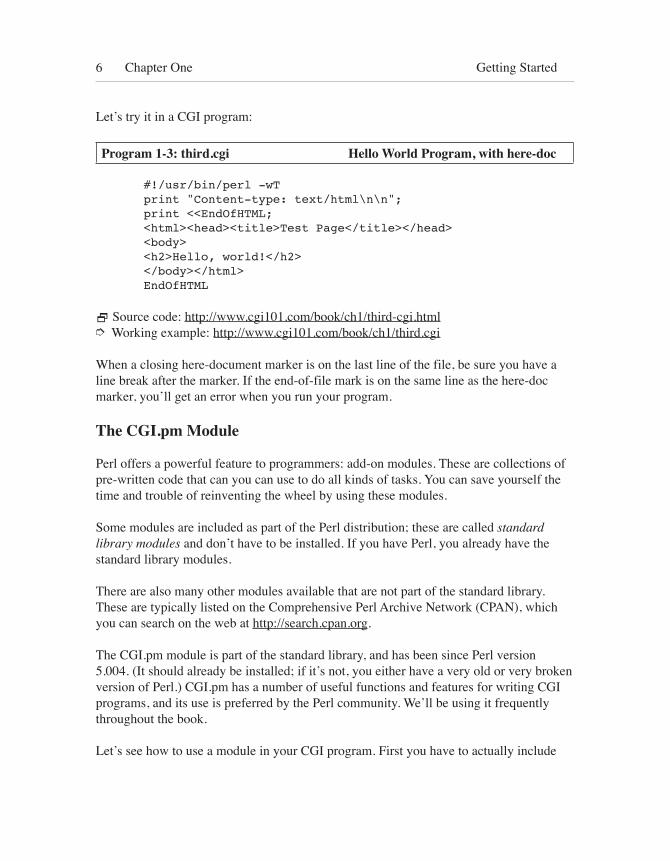
Let’s try it in a CGI program:
Program 1-3: third.cgi Hello World Program, with here-doc
#!/usr/bin/perl -wTprint "Content-type: text/html\n\n";print <<EndOfHTML;<html><head><title>Test Page</title></head><body><h2>Hello, world!</h2></body></html>EndOfHTML
2 Source code: http://www.cgi101.com/book/ch1/third-cgi.html➮ Working example: http://www.cgi101.com/book/ch1/third.cgi
When a closing here-document marker is on the last line of the file, be sure you have a line break after the marker. If the end-of-file mark is on the same line as the here-doc marker, you’ll get an error when you run your program.
The CGI.pm Module
Perl offers a powerful feature to programmers: add-on modules. These are collections of pre-written code that can you can use to do all kinds of tasks. You can save yourself the time and trouble of reinventing the wheel by using these modules.
Some modules are included as part of the Perl distribution; these are called standard library modules and don’t have to be installed. If you have Perl, you already have the standard library modules.
There are also many other modules available that are not part of the standard library. These are typically listed on the Comprehensive Perl Archive Network (CPAN), which you can search on the web at http://search.cpan.org.
The CGI.pm module is part of the standard library, and has been since Perl version 5.004. (It should already be installed; if it’s not, you either have a very old or very broken version of Perl.) CGI.pm has a number of useful functions and features for writing CGI programs, and its use is preferred by the Perl community. We’ll be using it frequently throughout the book.
Let’s see how to use a module in your CGI program. First you have to actually include
7 Chapter One Getting Started
the module via the use command. This goes after the #!/usr/bin/perl line and before any other code:
use CGI qw(:standard); Note we’re not doing use CGI.pm but rather use CGI. The .pm is implied in the use statement. The qw(:standard) part of this line indicates that we’re importing the “standard” set of functions from CGI.pm.
Now you can call the various module functions by typing the function name followed by any arguments:
functionname(arguments)
If you aren’t passing any arguments to the function, you can omit the parentheses.
A function is a piece of code that performs a specific task; it may also be called a subroutine or a method. Functions may accept optional arguments (also called parameters), which are values (strings, numbers, and other variables) passed into the function for it to use. The CGI.pm module has many functions; for now we’ll start by using these three:
header;start_html;end_html;
The header function prints out the “Content-type” header. With no arguments, the type is assumed to be “text/html”. start_html prints out the <html>, <head>, <title> and <body> tags. It also accepts optional arguments. If you call start_html with only a single string argument, it’s assumed to be the page title. For example:
print start_html("Hello World");
will print out the following*:
<html><head><title>Hello World</title><head><body>
* Actually start_html prints out a full XML header, complete with XML and DOCTYPE tags. In other words, it creates a proper HTML header for your page.
8 Chapter One Getting Started
You can also set the page colors and background image with start_html:
print start_html(-title=>"Hello World", -bgcolor=>"#cccccc", -text=>"#999999", -background=>"bgimage.jpg");
Notice that with multiple arguments, you have to specify the name of each argument with -title=>, -bgcolor=>, etc. This example generates the same HTML as above, only the body tag indicates the page colors and background image:
<body bgcolor="#cccccc" text="#999999" background="bgimg.jpg">
The end_html function prints out the closing HTML tags:
</body></html>
The Other Way To Use CGI.pmor “There’s More Than One Way To Do Things In Perl”
As you learn Perl you’ll discover there are often many different ways to accomplish the same task. CGI.pm exemplifies this; it can be used in two different ways. The first way you’ve learned already: function-oriented style. Here you must specify qw(:standard) in the use line, but thereafter you can just call the functions directly:
use CGI qw(:standard);print header;print start_html("Hello World");
The other way is object-oriented style, where you create an object (or instance of the module) and use that to call the various functions of CGI.pm:
use CGI; # don't need qw(:standard)$cgi = CGI->new; # ($cgi is now the object)print $cgi->header; # function call: $obj->functionprint $cgi->start_html("Hello World");
Which style you use is up to you. The examples in this book use the function-oriented style, but feel free to use whichever style you’re comfortable with.
9 Chapter One Getting Started
So, as you can see, using CGI.pm in your CGI programs will save you some typing. (It also has more important uses, which we’ll get into later on.)
Let’s try using CGI.pm in an actual program now. Start a new file and enter these lines:
Program 1-4: fourth.cgi Hello World Program, using CGI.pm
#!/usr/bin/perl -wTuse CGI qw(:standard);print header;print start_html("Hello World");print "<h2>Hello, world!</h2>\n";print end_html;
2 Source code: http://www.cgi101.com/book/ch1/fourth-cgi.html➮ Working example: http://www.cgi101.com/book/ch1/fourth.cgi
Be sure to change the file permissions (chmod 755 fourth.cgi), then test it out in your browser.
CGI.pm also has a number of functions that serve as HTML shortcuts. For instance:
print h2("Hello, world!");
Will print an H2-sized header tag. You can find a list of all the CGI.pm functions by typing perldoc CGI in the shell, or visiting http://www.perldoc.com/ and entering “CGI.pm” in the search box.
Documenting Your Programs
Documentation can be embedded in a program using comments. A comment in Perl is preceded by the # sign; anything appearing after the # is a comment:
Program 1-5: fifth.cgi Hello World Program, with Comments
#!/usr/bin/perl -wTuse CGI qw(:standard);# This is a comment# So is this## Comments are useful for telling the reader# what's happening. This is important if you
10 Chapter One Getting Started
# write code that someone else will have to# maintain later.print header; # here's a comment. print the headerprint start_html("Hello World");print "<h2>Hello, world!</h2>\n";print end_html; # print the footer# the end.
2 Source code: http://www.cgi101.com/book/ch1/fifth-cgi.html➮ Working example: http://www.cgi101.com/book/ch1/fifth.cgi
You’ll notice the first line (#!/usr/bin/perl) is a comment, but it’s a special kind of comment. On Unix, it indicates what program to use to run the rest of the script.
There are several situations in Perl where an #-sign is not treated as a comment. These depend on specific syntax, and we’ll look at them later in the book.
Any line that starts with an #-sign is a comment, and you can also put comments at the end of a line of Perl code (as we did in the above example on the header and end_html lines). Even though comments will only be seen by someone reading the source code of your program, it’s a good idea to add comments to your code explaining what’s going on. Well-documented programs are much easier to understand and maintain than programs with no documentation.
Debugging Your Programs
A number of problems can happen with your CGI programs, and unfortunately the default response of the webserver when it encounters an error (the “Internal Server Error”) is not very useful for figuring out what happened.
If you see the code for the actual Perl program instead of the desired output page from your program, this probably means that your web server isn’t properly configured to run CGI programs. You’ll need to ask your webmaster how to run CGI programs on your server. And if you ARE the webmaster, check your server’s documentation to see how to enable CGI programs.
If you get an Internal Server Error, there’s either a permissions problem with the file (did you remember to chmod 755 the file?) or a bug in your program. A good first step in debugging is to use the CGI::Carp module in your program:
use CGI::Carp qw(warningsToBrowser fatalsToBrowser);
11 Chapter One Getting Started
This causes all warnings and fatal error messages to be echoed in your browser window. You’ll want to remove this line after you’re finished developing and debugging your programs, because Carp errors can give away important security info to potential hackers.
If you’re using the Carp module and are still seeing the “Internal Server Error”, you can further test your program from the command line in the Unix shell. This will check the syntax of your program without actually running it:
perl -cwT fourth.cgi
If there are errors, it will report any syntax errors in your program:
% perl -cwT fourth.cgisyntax error at fourth.cgi line 5, near “print”fourth.cgi had compilation errors.
This tells you there’s a problem on or around line 5; make sure you didn’t forget a closing semicolon on the previous line, and check for any other typos. Also be sure you saved and uploaded the file as text; hidden control characters or smartquotes can cause syntax errors, too.
Another way to get more info about the error is to look at the webserver log files. Usually this will show you the same information that the CGI::Carp module does, but it’s good to know where the server logs are located, and how to look at them. Some usual locations are /usr/local/etc/httpd/logs/error_log, or /var/log/httpd/error_log. Ask your ISP if you aren’t sure of the location. In the Unix shell, you can use the tail command to view the end of the log file:
tail /var/log/apache/error_log
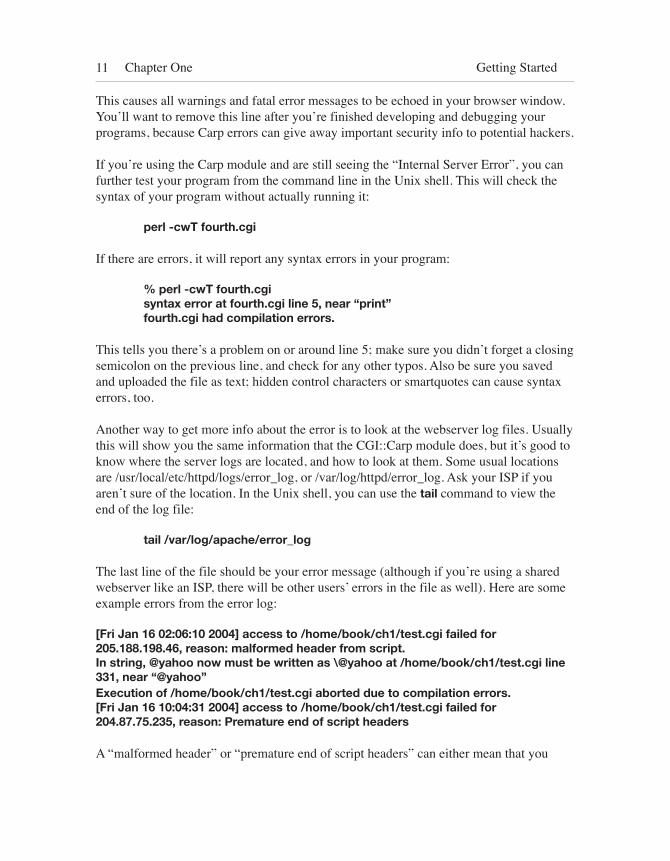
The last line of the file should be your error message (although if you’re using a shared webserver like an ISP, there will be other users’ errors in the file as well). Here are some example errors from the error log:
[Fri Jan 16 02:06:10 2004] access to /home/book/ch1/test.cgi failed for 205.188.198.46, reason: malformed header from script.In string, @yahoo now must be written as \@yahoo at /home/book/ch1/test.cgi line 331, near “@yahoo”Execution of /home/book/ch1/test.cgi aborted due to compilation errors.[Fri Jan 16 10:04:31 2004] access to /home/book/ch1/test.cgi failed for 204.87.75.235, reason: Premature end of script headers
A “malformed header” or “premature end of script headers” can either mean that you
12 Chapter One Getting Started
printed something before printing the “Content-type: text/html” line, or your program died. An error usually appears in the log indicating where the program died, as well.
Resources
The CGI.pm module: http://stein.cshl.org/WWW/software/CGI/
The Official Guide to Programming with CGI.pm, by Lincoln Stein
Visit http://www.cgi101.com/book/ch1/ for source code and links from this chapter.
Before you can proceed much further with CGI programming, you’ll need some understanding of Perl variables and data types. A variable is a place to store a value, so you can refer to it or manipulate it throughout your program. Perl has three types of variables: scalars, arrays, and hashes.
Scalars
A scalar variable stores a single (scalar) value. Perl scalar names are prefixed with a dollar sign ($), so for example, $x, $y, $z, $username, and $url are all examples of scalar variable names. Here’s how variables are set:
$foo = 1;$name = "Fred";$pi = 3.141592;
In this example $foo, $name, and $pi are scalars. You do not have to declare a variable before using it, but its considered good programming style to do so. There are several different ways to declare variables, but the most common way is with the my function:
my $foo = 1;my ($name) = "Fred";my ($pi) = 3.141592;
my simultaneously declares the variables and limits their scope (the area of code that can see these variables) to the enclosing code block. (We’ll talk more about scope later.) You can declare a variable without giving it a value:
my $foo;
2 Perl Variables
14 Chapter Two Perl Variables
You can also declare several variables with the same my statement:
my ($foo, $bar, $blee);
You can omit the parentheses if you are declaring a single variable, however a list of variables must be enclosed in parentheses.
A scalar can hold data of any type, be it a string, a number, or whatnot. You can also use scalars in double-quoted strings:
my $fnord = 23;my $blee = "The magic number is $fnord.";
Now if you print $blee, you will get “The magic number is 23.” Perl interpolates the variables in the string, replacing the variable name with the value of that variable.
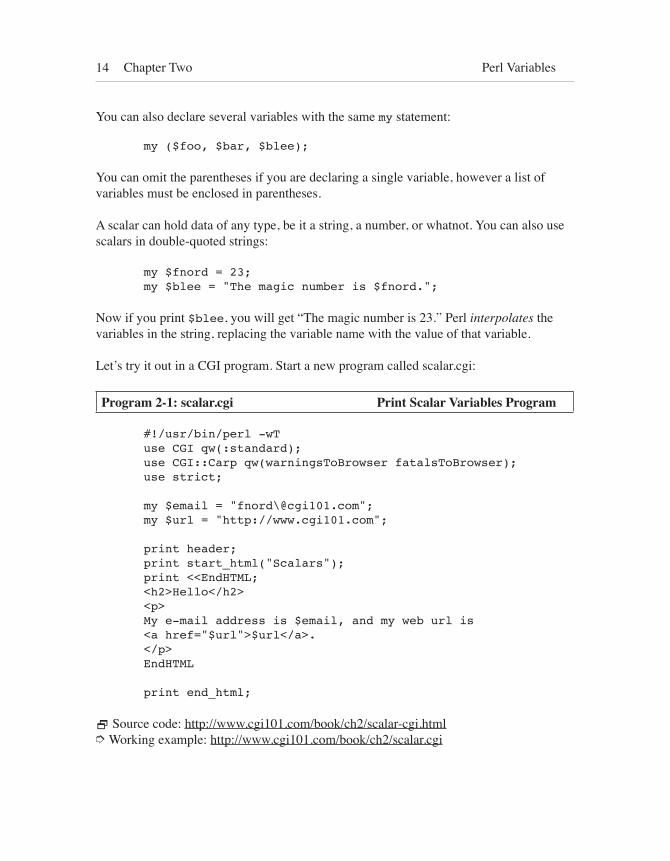
Let’s try it out in a CGI program. Start a new program called scalar.cgi:
Program 2-1: scalar.cgi Print Scalar Variables Program
#!/usr/bin/perl -wTuse CGI qw(:standard);use CGI::Carp qw(warningsToBrowser fatalsToBrowser);use strict;
my $email = "fnord\@cgi101.com";my $url = "http://www.cgi101.com";
print header;print start_html("Scalars");print <<EndHTML;<h2>Hello</h2><p>My e-mail address is $email, and my web url is<a href="$url">$url</a>.</p>EndHTML
print end_html;
2 Source code: http://www.cgi101.com/book/ch2/scalar-cgi.html➮ Working example: http://www.cgi101.com/book/ch2/scalar.cgi
15 Chapter Two Perl Variables
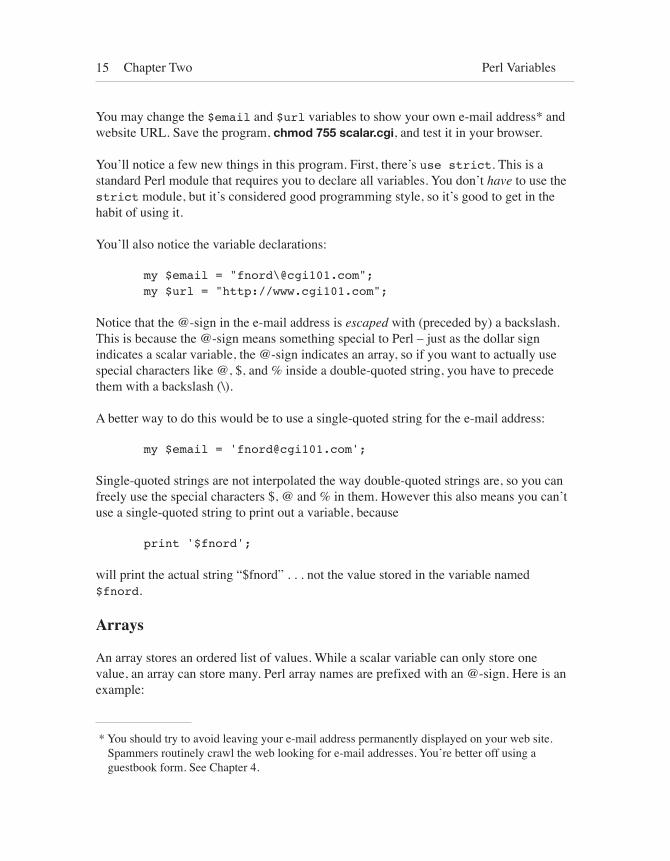
You may change the $email and $url variables to show your own e-mail address* and website URL. Save the program, chmod 755 scalar.cgi, and test it in your browser.
You’ll notice a few new things in this program. First, there’s use strict. This is a standard Perl module that requires you to declare all variables. You don’t have to use the strict module, but it’s considered good programming style, so it’s good to get in the habit of using it.
You’ll also notice the variable declarations:
my $email = "fnord\@cgi101.com";my $url = "http://www.cgi101.com";
Notice that the @-sign in the e-mail address is escaped with (preceded by) a backslash. This is because the @-sign means something special to Perl – just as the dollar sign indicates a scalar variable, the @-sign indicates an array, so if you want to actually use special characters like @, $, and % inside a double-quoted string, you have to precede them with a backslash (\).
A better way to do this would be to use a single-quoted string for the e-mail address:
my $email = '[email protected]';
Single-quoted strings are not interpolated the way double-quoted strings are, so you can freely use the special characters $, @ and % in them. However this also means you can’t use a single-quoted string to print out a variable, because
print '$fnord';
will print the actual string “$fnord” . . . not the value stored in the variable named $fnord.
Arrays
An array stores an ordered list of values. While a scalar variable can only store one value, an array can store many. Perl array names are prefixed with an @-sign. Here is an example:
* You should try to avoid leaving your e-mail address permanently displayed on your web site. Spammers routinely crawl the web looking for e-mail addresses. You’re better off using a guestbook form. See Chapter 4.
16 Chapter Two Perl Variables
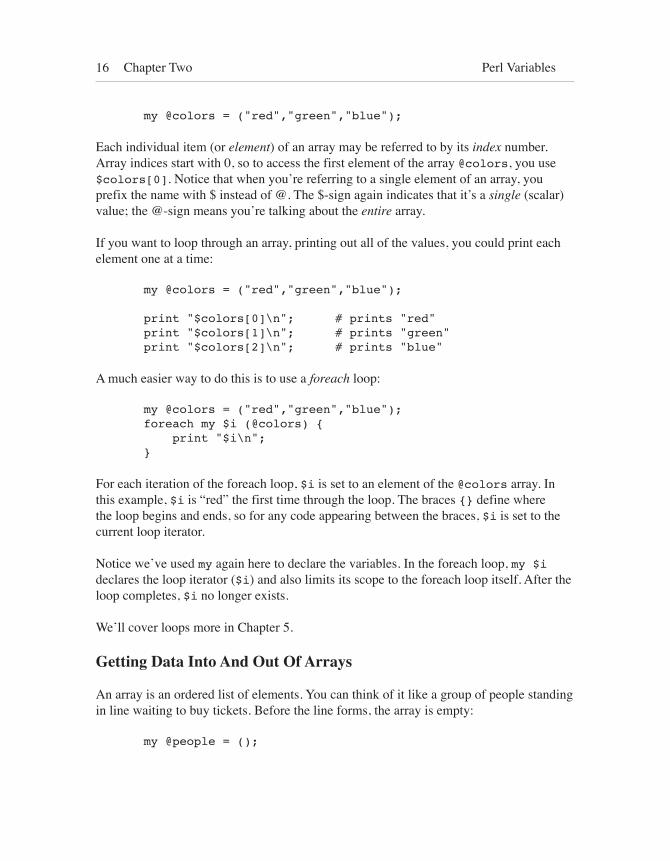
my @colors = ("red","green","blue");
Each individual item (or element) of an array may be referred to by its index number. Array indices start with 0, so to access the first element of the array @colors, you use $colors[0]. Notice that when you’re referring to a single element of an array, you prefix the name with $ instead of @. The $-sign again indicates that it’s a single (scalar) value; the @-sign means you’re talking about the entire array.
If you want to loop through an array, printing out all of the values, you could print each element one at a time:
my @colors = ("red","green","blue"); print "$colors[0]\n"; # prints "red" print "$colors[1]\n"; # prints "green"print "$colors[2]\n"; # prints "blue"
A much easier way to do this is to use a foreach loop:
my @colors = ("red","green","blue");foreach my $i (@colors) { print "$i\n";}
For each iteration of the foreach loop, $i is set to an element of the @colors array. In this example, $i is “red” the first time through the loop. The braces {} define where the loop begins and ends, so for any code appearing between the braces, $i is set to the current loop iterator.
Notice we’ve used my again here to declare the variables. In the foreach loop, my $i declares the loop iterator ($i) and also limits its scope to the foreach loop itself. After the loop completes, $i no longer exists.
We’ll cover loops more in Chapter 5.
Getting Data Into And Out Of Arrays
An array is an ordered list of elements. You can think of it like a group of people standing in line waiting to buy tickets. Before the line forms, the array is empty:
my @people = ();
17 Chapter Two Perl Variables
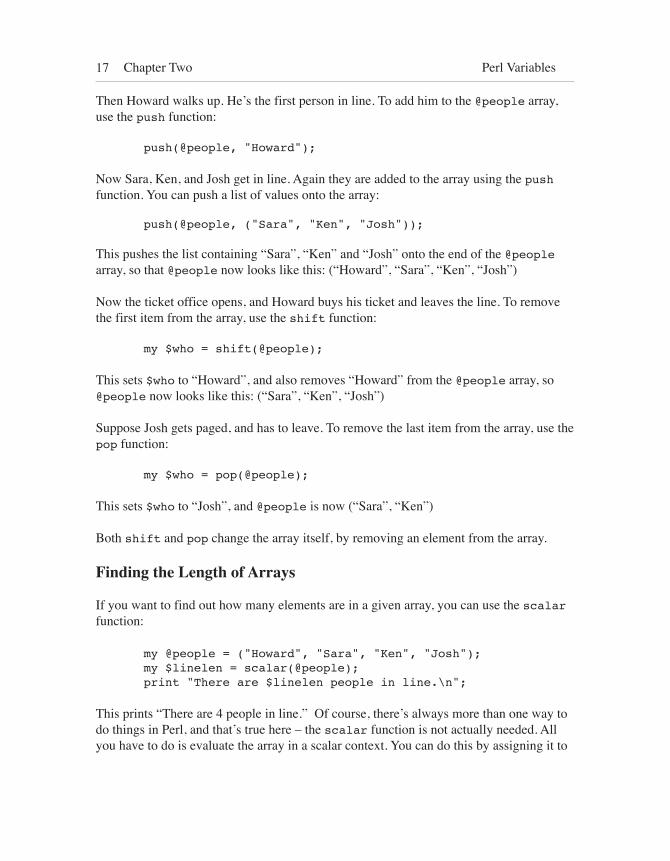
Then Howard walks up. He’s the first person in line. To add him to the @people array, use the push function:
push(@people, "Howard");
Now Sara, Ken, and Josh get in line. Again they are added to the array using the push function. You can push a list of values onto the array:
push(@people, ("Sara", "Ken", "Josh"));
This pushes the list containing “Sara”, “Ken” and “Josh” onto the end of the @people array, so that @people now looks like this: (“Howard”, “Sara”, “Ken”, “Josh”)
Now the ticket office opens, and Howard buys his ticket and leaves the line. To remove the first item from the array, use the shift function:
my $who = shift(@people);
This sets $who to “Howard”, and also removes “Howard” from the @people array, so @people now looks like this: (“Sara”, “Ken”, “Josh”)
Suppose Josh gets paged, and has to leave. To remove the last item from the array, use the pop function:
my $who = pop(@people);
This sets $who to “Josh”, and @people is now (“Sara”, “Ken”)
Both shift and pop change the array itself, by removing an element from the array.
Finding the Length of Arrays
If you want to find out how many elements are in a given array, you can use the scalar function:
my @people = ("Howard", "Sara", "Ken", "Josh");my $linelen = scalar(@people);print "There are $linelen people in line.\n";
This prints “There are 4 people in line.” Of course, there’s always more than one way to do things in Perl, and that’s true here – the scalar function is not actually needed. All you have to do is evaluate the array in a scalar context. You can do this by assigning it to
18 Chapter Two Perl Variables
a scalar variable:
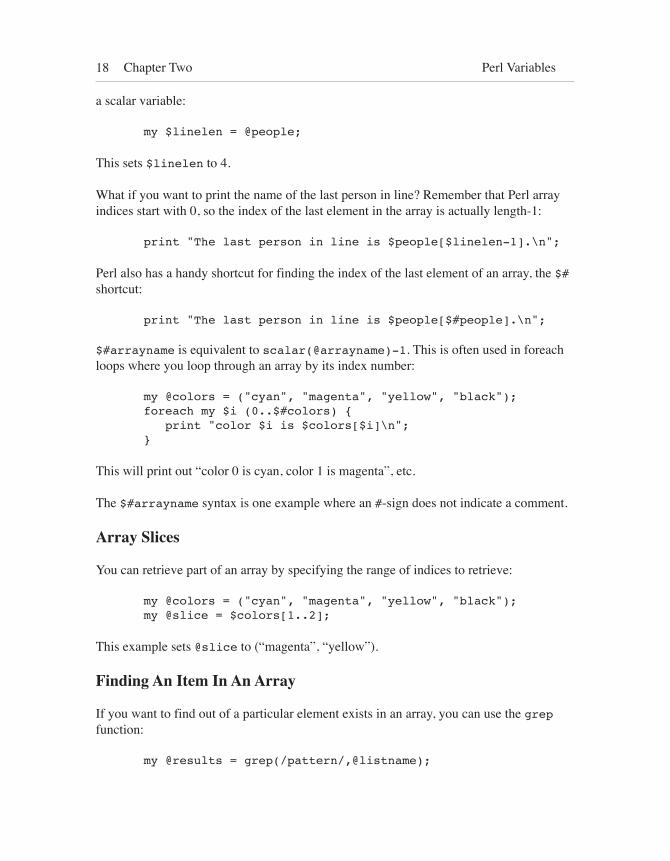
my $linelen = @people;
This sets $linelen to 4.
What if you want to print the name of the last person in line? Remember that Perl array indices start with 0, so the index of the last element in the array is actually length-1:
print "The last person in line is $people[$linelen-1].\n";
Perl also has a handy shortcut for finding the index of the last element of an array, the $# shortcut:
print "The last person in line is $people[$#people].\n";
$#arrayname is equivalent to scalar(@arrayname)-1. This is often used in foreach loops where you loop through an array by its index number:
my @colors = ("cyan", "magenta", "yellow", "black");foreach my $i (0..$#colors) { print "color $i is $colors[$i]\n";}
This will print out “color 0 is cyan, color 1 is magenta”, etc.
The $#arrayname syntax is one example where an #-sign does not indicate a comment.
Array Slices
You can retrieve part of an array by specifying the range of indices to retrieve:
my @colors = ("cyan", "magenta", "yellow", "black");my @slice = $colors[1..2];
This example sets @slice to (“magenta”, “yellow”).
Finding An Item In An Array
If you want to find out of a particular element exists in an array, you can use the grep function:
my @results = grep(/pattern/,@listname);
19 Chapter Two Perl Variables
/pattern/ is a regular expression for the pattern you’re looking for. It can be a plain string, such as /Box kite/, or a complex regular expression pattern.
/pattern/ will match partial strings inside each array element. To match the entire array element, use /^pattern$/, which anchors the pattern match to the beginning (^) and end ($) of the string. We’ll look more at regular expressions in Chapter 13.
grep returns a list of the elements that matched the pattern.
Sorting Arrays
You can do an alphabetical (ASCII) sort on an array of strings using the sort function:
my @colors = ("cyan", "magenta", "yellow", "black");my @colors2 = sort(@colors);
@colors2 becomes the @colors array in alphabetically sorted order (“black”, “cyan”, “magenta”, “yellow” ). Note that the sort function, unlike push and pop, does not change the original array. If you want to save the sorted array, you have to assign it to a variable. If you want to save it back to the original array variable, you’d do:
@colors = sort @colors;
You can invert the order of the array with the reverse function:
my @colors = ("cyan", "magenta", "yellow", "black");@colors = reverse(@colors);
@colors is now (“black”, “yellow”, “magenta”, “cyan”).
To do a reverse sort, use both functions:
my @colors = ("cyan", "magenta", "yellow", "black");@colors = reverse(sort(@colors));
@colors is now (“yellow”, “magenta”, “cyan”, “black”).
The sort function, by default, compares the ASCII values of the array elements (see http://www.cgi101.com/book/ch2/ascii.html for the chart of ASCII values). This means if you try to sort a list of numbers, you get “12” before “2”. You can do a true numeric sort like so:
20 Chapter Two Perl Variables
my @numberlist = (8, 4, 3, 12, 7, 15, 5);my @sortednumberlist = sort( {$a <=> $b;} @numberlist);
{ $a <=> $b; } is actually a small subroutine, embedded right in your code, that gets called for each pair of items in the array. It compares the first number ($a) to the second number ($b) and returns a number indicating whether $a is greater than, equal to, or less than $b. This is done repeatedly with all the numbers in the array until the array is completely sorted.
We’ll talk more about custom sorting subroutines in Chapter 12.
Joining Array Elements Into A String
You can merge an array into a single string using the join function:
my @colors = ("cyan", "magenta", "yellow", "black");my $colorstring = join(", ",@colors);
This joins @colors into a single string variable ($colorstring), with each element of the @colors array combined and separated by a comma and a space. In this example $colorstring becomes “cyan, magenta, yellow, black”.
You can use any string (including the empty string) as the separator. The separator is the first argument to the join function:
join(separator, list);
The opposite of join is split, which splits a string into a list of values. See Chapter 7 for more on split.
Array or List?
In general, any function or syntax that works for arrays will also work for a list of values:
my $color = ("red", "green", "blue")[1]; # $color is "green"
my $colorstring = join(", ", ("red", "green", "blue"));# $colorstring is now "red, green, blue"
my ($first, $second, $third) = sort("red", "green", "blue");# $first is "blue", $second is "green", $third is "red"
21 Chapter Two Perl Variables
Hashes
A hash is a special kind of array – an associative array, or paired list of elements. Each pair consists of a string key and a data value.
Perl hash names are prefixed with a percent sign (%). Here’s how they’re defined:
Hash Name key value
my %colors = ( "red", "#ff0000", "green", "#00ff00", "blue", "#0000ff", "black", "#000000", "white", "#ffffff" );
This particular example creates a hash named %colors which stores the RGB HEX values for the named colors. The color names are the hash keys; the hex codes are the hash values.
Remember that there’s more than one way to do things in Perl, and here’s the other way to define the same hash:
my %colors = ( red => "#ff0000", green => "#00ff00", blue => "#0000ff", black => "#000000", white => "#ffffff" );
The => operator automatically quotes the left side of the argument, so enclosing quotes around the key names are not needed. To refer to the individual elements of the hash, you’ll do:
$colors{'red'}
Here, "red" is the key, and $colors{'red'} is the value associated with that key. In this case, the value is "#ff0000".
You don’t usually need the enclosing quotes around the value, either; $colors{red} also works if the key name doesn’t contain characters that are also Perl operators (things like +, -, =, * and /).
To print out all the values in a hash, you can use a foreach loop:
22 Chapter Two Perl Variables
foreach my $color (keys %colors) { print "$colors{$color}=$color\n"; }
This example uses the keys function, which returns a list of the keys of the named hash. One drawback is that keys %hashname will return the keys in unpredictable order – in this example, keys %colors could return (“red”, “blue”, “green”, “black”, “white”) or (“red”, “white”, “green”, “black”, “blue”) or any combination thereof. If you want to print out the hash in exact order, you have to specify the keys in the foreach loop:
foreach my $color ("red","green","blue","black","white") { print "$colors{$color}=$color\n"; }
Let’s write a CGI program using the colors hash. Start a new file called colors.cgi:
Program 2-2: colors.cgi Print Hash Variables Program
#!/usr/bin/perl -wTuse CGI qw(:standard);use CGI::Carp qw(warningsToBrowser fatalsToBrowser);use strict;
# declare the colors hash:my %colors = ( red => "#ff0000", green=> "#00ff00", blue => "#0000ff", black => "#000000", white => "#ffffff" );
# print the html headersprint header;print start_html("Colors");
foreach my $color (keys %colors) { print "<font color=\"$colors{$color}\">$color</font>\n"; }print end_html;
2 Source code: http://www.cgi101.com/book/ch2/colors-cgi.html➮ Working example: http://www.cgi101.com/book/ch2/colors.cgi
Save it and chmod 755 colors.cgi, then test it in your web browser.
Notice we’ve had to add backslashes to escape the quotes in this double-quoted string:
23 Chapter Two Perl Variables
print "<font color=\"$colors{$color}\">$color</font>\n";
A better way to do this is to use Perl’s qq operator:
print qq(<font color="$colors{$colors}">$color</font>\n);
qq creates a double-quoted string for you. And it’s much easier to read without all those backslashes in there.
Adding Items to a Hash
To add a new value to a hash, you simply do:
$hashname{newkey} = newvalue;
Using our colors example again, here’s how to add a new value with the key “purple”:
$colors{purple} = "#ff00ff";
If the named key already exists in the hash, then an assignment like this overwrites the previous value associated with that key.
Determining Whether an Item Exists in a Hash
You can use the exists function to see if a particular key/value pair exists in the hash:
exists $hashname{key}
This returns a true or false value. Here’s an example of it in use:
if (exists $colors{purple}) { print "Sorry, the color purple is already in the hash.<br>\n";} else { $colors{purple} = "#ff00ff";}
This checks to see if the key “purple” is already in the hash; if not, it adds it.
24 Chapter Two Perl Variables
Deleting Items From a Hash
You can delete an individual key/value pair from a hash with the delete function:
delete $hashname{key};
If you want to empty out the entire hash, do:
%hashname = ();
Values
We’ve already seen that the keys function returns a list of the keys of a given hash. Similarly, the values function returns a list of the hash values:
my %colors = (red => "#ff0000", green=> "#00ff00", blue => "#0000ff", black => "#000000", white => "#ffffff" );
my @keyslice = keys %colors;# @keyslice now equals a randomly ordered list of# the hash keys:# ("red", "green", "blue", "black", "white")
my @valueslice = values %colors; # @valueslice now equals a randomly ordered list of# the hash values:# ("ff0000", "#00ff00", "#0000ff", "#000000", "#ffffff")
As with keys, values returns the values in unpredictable order.
Determining Whether a Hash is Empty
You can use the scalar function on hashes as well:
scalar($hashname);
This returns true or false value – true if the hash contains any key/value pairs. The value returned does not indicate how many pairs are in the hash, however. If you want to find that number, use:
scalar keys(%hashname);
25 Chapter Two Perl Variables
Here’s an example:
my %colors = (red => "#ff0000", green=> "#00ff00", blue => "#0000ff", black => "#000000", white => "#ffffff" );
my $numcolors = scalar(keys(%colors));print "There are $numcolors in this hash.\n";
This will print out “There are 5 colors in this hash.”
Resources
Visit http://www.cgi101.com/book/ch2/ for source code and links from this chapter.
26
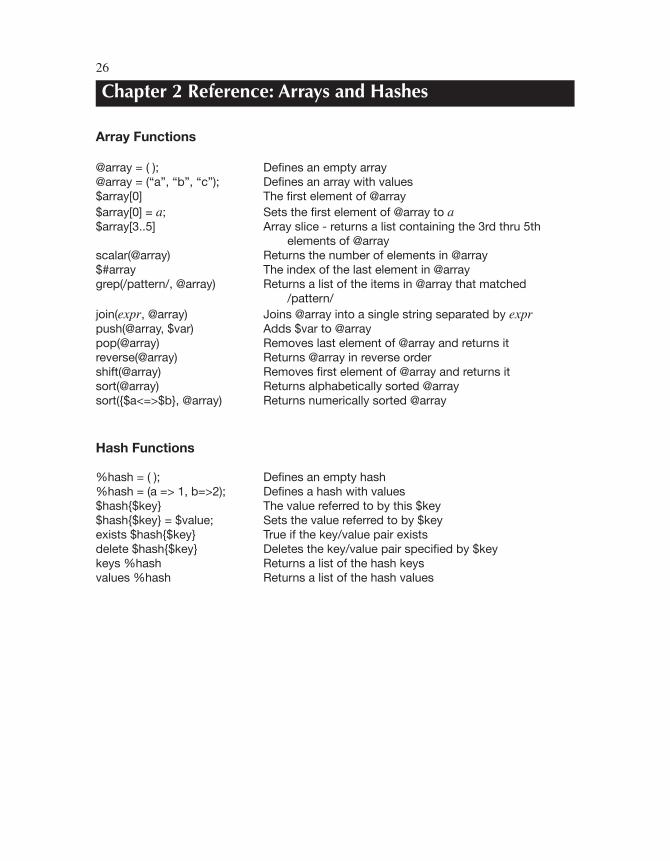
Chapter 2 Reference: Arrays and Hashes
Array Functions
@array = ( ); Defines an empty array@array = (“a”, “b”, “c”); Defines an array with values$array[0] The first element of @array$array[0] = a; Sets the first element of @array to a$array[3..5] Array slice - returns a list containing the 3rd thru 5th elements of @arrayscalar(@array) Returns the number of elements in @array$#array The index of the last element in @arraygrep(/pattern/, @array) Returns a list of the items in @array that matched /pattern/join(expr, @array) Joins @array into a single string separated by exprpush(@array, $var) Adds $var to @arraypop(@array) Removes last element of @array and returns itreverse(@array) Returns @array in reverse ordershift(@array) Removes first element of @array and returns itsort(@array) Returns alphabetically sorted @arraysort({$a<=>$b}, @array) Returns numerically sorted @array
Hash Functions
%hash = ( ); Defines an empty hash%hash = (a => 1, b=>2); Defines a hash with values$hash{$key} The value referred to by this $key$hash{$key} = $value; Sets the value referred to by $keyexists $hash{$key} True if the key/value pair existsdelete $hash{$key} Deletes the key/value pair specified by $keykeys %hash Returns a list of the hash keysvalues %hash Returns a list of the hash values

3 CGI Environment Variables
Environment variables are a series of hidden values that the web server sends to every CGI program you run. Your program can parse them and use the data they send. Environment variables are stored in a hash named %ENV:
Key Value DOCUMENT_ROOT The root directory of your serverHTTP_COOKIE The visitor’s cookie, if one is setHTTP_HOST The hostname of the page being attemptedHTTP_REFERER The URL of the page that called your programHTTP_USER_AGENT The browser type of the visitorHTTPS “on” if the program is being called through a secure serverPATH The system path your server is running underQUERY_STRING The query string (see GET, below)REMOTE_ADDR The IP address of the visitorREMOTE_HOST The hostname of the visitor (if your server has reverse- name-lookups on; otherwise this is the IP address again)REMOTE_PORT The port the visitor is connected to on the web serverREMOTE_USER The visitor’s username (for .htaccess-protected pages)REQUEST_METHOD GET or POSTREQUEST_URI The interpreted pathname of the requested document or CGI (relative to the document root)SCRIPT_FILENAME The full pathname of the current CGISCRIPT_NAME The interpreted pathname of the current CGI (relative to the document root)SERVER_ADMIN The email address for your server’s webmasterSERVER_NAME Your server’s fully qualified domain name (e.g. www.cgi101.com) SERVER_PORT The port number your server is listening onSERVER_SOFTWARE The server software you’re using (e.g. Apache 1.3)
28 Chapter Three CGI Environment Variables
Some servers set other environment variables as well; check your server documentation for more information. Notice that some environment variables give information about your server, and will never change (such as SERVER_NAME and SERVER_ADMIN), while others give information about the visitor, and will be different every time someone accesses the program.
Not all environment variables get set. REMOTE_USER is only set for pages in a directory or subdirectory that’s password-protected via a .htaccess file. (See Chapter 20 to learn how to password protect a directory.) And even then, REMOTE_USER will be the username as it appears in the .htaccess file; it’s not the person’s email address. There is no reliable way to get a person’s email address, short of asking them for it with a web form.
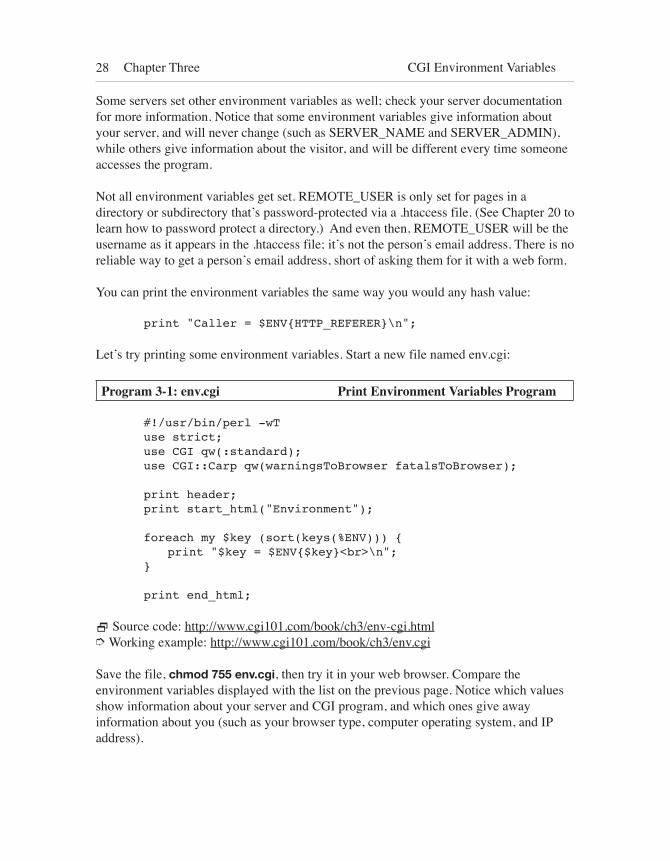
You can print the environment variables the same way you would any hash value:
print "Caller = $ENV{HTTP_REFERER}\n";
Let’s try printing some environment variables. Start a new file named env.cgi:
Program 3-1: env.cgi Print Environment Variables Program
#!/usr/bin/perl -wTuse strict;use CGI qw(:standard);use CGI::Carp qw(warningsToBrowser fatalsToBrowser);
print header;print start_html("Environment");
foreach my $key (sort(keys(%ENV))) { print "$key = $ENV{$key}<br>\n";}
print end_html;
2 Source code: http://www.cgi101.com/book/ch3/env-cgi.html➮ Working example: http://www.cgi101.com/book/ch3/env.cgi
Save the file, chmod 755 env.cgi, then try it in your web browser. Compare the environment variables displayed with the list on the previous page. Notice which values show information about your server and CGI program, and which ones give away information about you (such as your browser type, computer operating system, and IP address).
29 Chapter Three CGI Environment Variables
Let’s look at several ways to use some of this data.
Referring Page
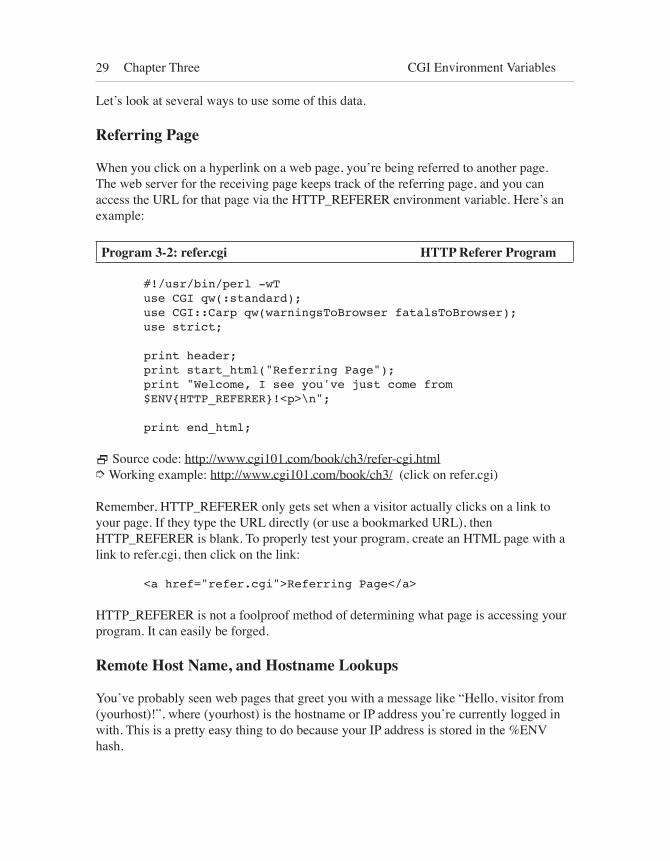
When you click on a hyperlink on a web page, you’re being referred to another page. The web server for the receiving page keeps track of the referring page, and you can access the URL for that page via the HTTP_REFERER environment variable. Here’s an example:
Program 3-2: refer.cgi HTTP Referer Program
#!/usr/bin/perl -wTuse CGI qw(:standard);use CGI::Carp qw(warningsToBrowser fatalsToBrowser);use strict;
print header;print start_html("Referring Page");print "Welcome, I see you've just come from $ENV{HTTP_REFERER}!<p>\n";
print end_html;
2 Source code: http://www.cgi101.com/book/ch3/refer-cgi.html➮ Working example: http://www.cgi101.com/book/ch3/ (click on refer.cgi)
Remember, HTTP_REFERER only gets set when a visitor actually clicks on a link to your page. If they type the URL directly (or use a bookmarked URL), then HTTP_REFERER is blank. To properly test your program, create an HTML page with a link to refer.cgi, then click on the link:
<a href="refer.cgi">Referring Page</a>
HTTP_REFERER is not a foolproof method of determining what page is accessing your program. It can easily be forged.
Remote Host Name, and Hostname Lookups
You’ve probably seen web pages that greet you with a message like “Hello, visitor from (yourhost)!”, where (yourhost) is the hostname or IP address you’re currently logged in with. This is a pretty easy thing to do because your IP address is stored in the %ENV hash.
30 Chapter Three CGI Environment Variables
If your web server is configured to do hostname lookups, then you can access the visitor’s actual hostname from the $ENV{REMOTE_HOST} value. Servers often don’t do hostname lookups automatically, though, because it slows down the server. Since $ENV{REMOTE_ADDR} contains the visitor’s IP address, you can reverse-lookup the hostname from the IP address using the Socket module in Perl. As with CGI.pm, you have to use the Socket module:
use Socket;
(There is no need to add qw(:standard) for the Socket module.)
The Socket module offers numerous functions for socket programming (most of which are beyond the scope of this book). We’re only interested in the reverse-IP lookup for now, though. Here’s how to do the reverse lookup:
my $ip = "209.189.198.102";my $hostname = gethostbyaddr(inet_aton($ip), AF_INET);
There are actually two functions being called here: gethostbyaddr and inet_aton. gethostbyaddr is a built-in Perl function that returns the hostname for a particular IP address. However, it requires the IP address be passed to it in a packed 4-byte format. The Socket module’s inet_aton function does this for you.
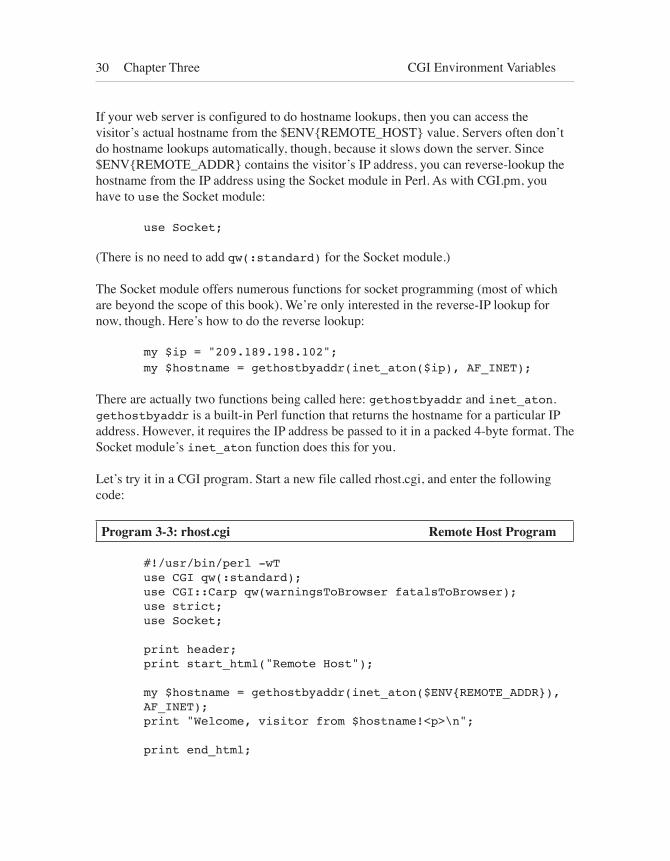
Let’s try it in a CGI program. Start a new file called rhost.cgi, and enter the following code:
Program 3-3: rhost.cgi Remote Host Program
#!/usr/bin/perl -wTuse CGI qw(:standard);use CGI::Carp qw(warningsToBrowser fatalsToBrowser);use strict;use Socket;
print header;print start_html("Remote Host");
my $hostname = gethostbyaddr(inet_aton($ENV{REMOTE_ADDR}), AF_INET);print "Welcome, visitor from $hostname!<p>\n";
print end_html;
31 Chapter Three CGI Environment Variables
2 Source code: http://www.cgi101.com/book/ch3/rhost-cgi.html➮ Working example: http://www.cgi101.com/book/ch3/rhost.cgi
Detecting Browser Type
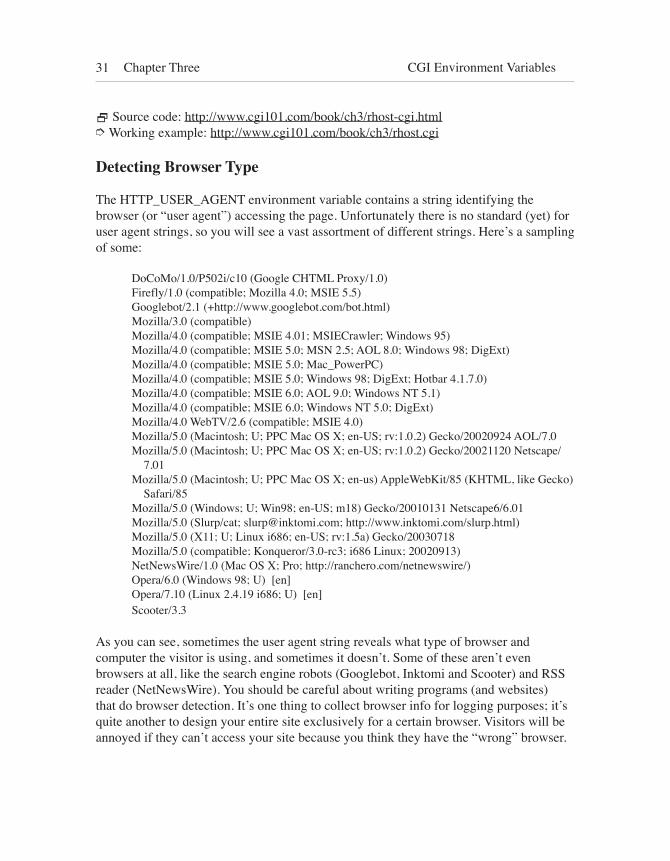
The HTTP_USER_AGENT environment variable contains a string identifying the browser (or “user agent”) accessing the page. Unfortunately there is no standard (yet) for user agent strings, so you will see a vast assortment of different strings. Here’s a sampling of some:
DoCoMo/1.0/P502i/c10 (Google CHTML Proxy/1.0)Firefly/1.0 (compatible; Mozilla 4.0; MSIE 5.5)Googlebot/2.1 (+http://www.googlebot.com/bot.html)Mozilla/3.0 (compatible)Mozilla/4.0 (compatible; MSIE 4.01; MSIECrawler; Windows 95)Mozilla/4.0 (compatible; MSIE 5.0; MSN 2.5; AOL 8.0; Windows 98; DigExt)Mozilla/4.0 (compatible; MSIE 5.0; Mac_PowerPC)Mozilla/4.0 (compatible; MSIE 5.0; Windows 98; DigExt; Hotbar 4.1.7.0)Mozilla/4.0 (compatible; MSIE 6.0; AOL 9.0; Windows NT 5.1)Mozilla/4.0 (compatible; MSIE 6.0; Windows NT 5.0; DigExt)Mozilla/4.0 WebTV/2.6 (compatible; MSIE 4.0)Mozilla/5.0 (Macintosh; U; PPC Mac OS X; en-US; rv:1.0.2) Gecko/20020924 AOL/7.0Mozilla/5.0 (Macintosh; U; PPC Mac OS X; en-US; rv:1.0.2) Gecko/20021120 Netscape/
7.01Mozilla/5.0 (Macintosh; U; PPC Mac OS X; en-us) AppleWebKit/85 (KHTML, like Gecko)
Safari/85Mozilla/5.0 (Windows; U; Win98; en-US; m18) Gecko/20010131 Netscape6/6.01Mozilla/5.0 (Slurp/cat; [email protected]; http://www.inktomi.com/slurp.html)Mozilla/5.0 (X11; U; Linux i686; en-US; rv:1.5a) Gecko/20030718Mozilla/5.0 (compatible; Konqueror/3.0-rc3; i686 Linux; 20020913)NetNewsWire/1.0 (Mac OS X; Pro; http://ranchero.com/netnewswire/)Opera/6.0 (Windows 98; U) [en]Opera/7.10 (Linux 2.4.19 i686; U) [en]Scooter/3.3
As you can see, sometimes the user agent string reveals what type of browser and computer the visitor is using, and sometimes it doesn’t. Some of these aren’t even browsers at all, like the search engine robots (Googlebot, Inktomi and Scooter) and RSS reader (NetNewsWire). You should be careful about writing programs (and websites) that do browser detection. It’s one thing to collect browser info for logging purposes; it’s quite another to design your entire site exclusively for a certain browser. Visitors will be annoyed if they can’t access your site because you think they have the “wrong” browser.
32 Chapter Three CGI Environment Variables
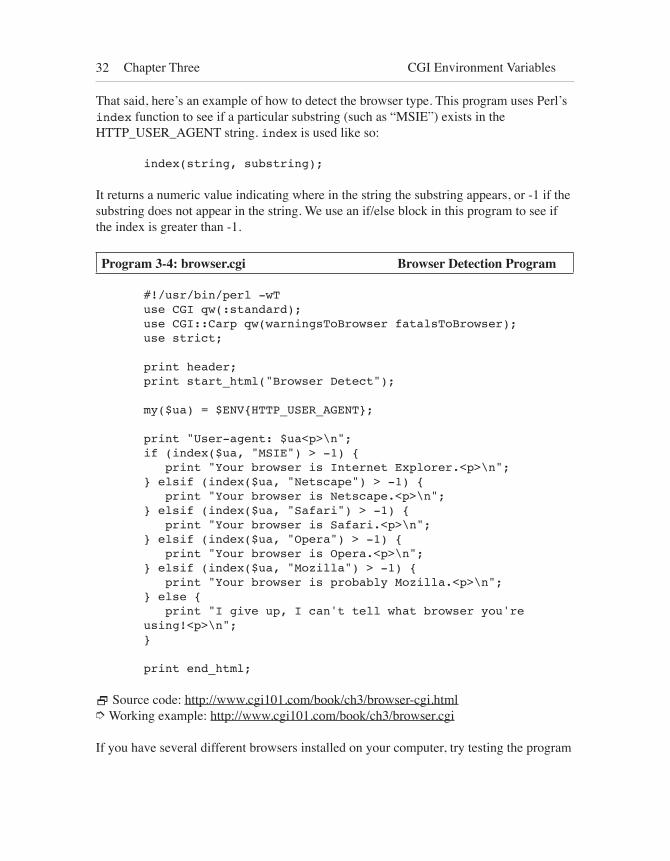
That said, here’s an example of how to detect the browser type. This program uses Perl’s index function to see if a particular substring (such as “MSIE”) exists in the HTTP_USER_AGENT string. index is used like so:
index(string, substring);
It returns a numeric value indicating where in the string the substring appears, or -1 if the substring does not appear in the string. We use an if/else block in this program to see if the index is greater than -1.
Program 3-4: browser.cgi Browser Detection Program
#!/usr/bin/perl -wTuse CGI qw(:standard);use CGI::Carp qw(warningsToBrowser fatalsToBrowser);use strict;
print header;print start_html("Browser Detect");
my($ua) = $ENV{HTTP_USER_AGENT};
print "User-agent: $ua<p>\n";if (index($ua, "MSIE") > -1) { print "Your browser is Internet Explorer.<p>\n";} elsif (index($ua, "Netscape") > -1) { print "Your browser is Netscape.<p>\n";} elsif (index($ua, "Safari") > -1) { print "Your browser is Safari.<p>\n";} elsif (index($ua, "Opera") > -1) { print "Your browser is Opera.<p>\n";} elsif (index($ua, "Mozilla") > -1) { print "Your browser is probably Mozilla.<p>\n";} else { print "I give up, I can't tell what browser you're using!<p>\n";}
print end_html;
2 Source code: http://www.cgi101.com/book/ch3/browser-cgi.html➮ Working example: http://www.cgi101.com/book/ch3/browser.cgi
If you have several different browsers installed on your computer, try testing the program
33 Chapter Three CGI Environment Variables
with each of them.
We’ll look more at if/else blocks in Chapter 5.
A Simple Form Using GET
There are two ways to send data from a web form to a CGI program: GET and POST. These methods determine how the form data is sent to the server.
With the GET method, the input values from the form are sent as part of the URL and saved in the QUERY_STRING environment variable. With the POST method, data is sent as an input stream to the program. We’ll cover POST in the next chapter, but for now, let’s look at GET.
You can set the QUERY_STRING value in a number of ways. For example, here are a number of direct links to the env.cgi program:
http://www.cgi101.com/book/ch3/env.cgi?test1http://www.cgi101.com/book/ch3/env.cgi?test2http://www.cgi101.com/book/ch3/env.cgi?test3
Try opening each of these in your web browser. Notice that the value for QUERY_STRING is set to whatever appears after the question mark in the URL itself. In the above examples, it’s set to “test1”, “test2”, and “test3” respectively.
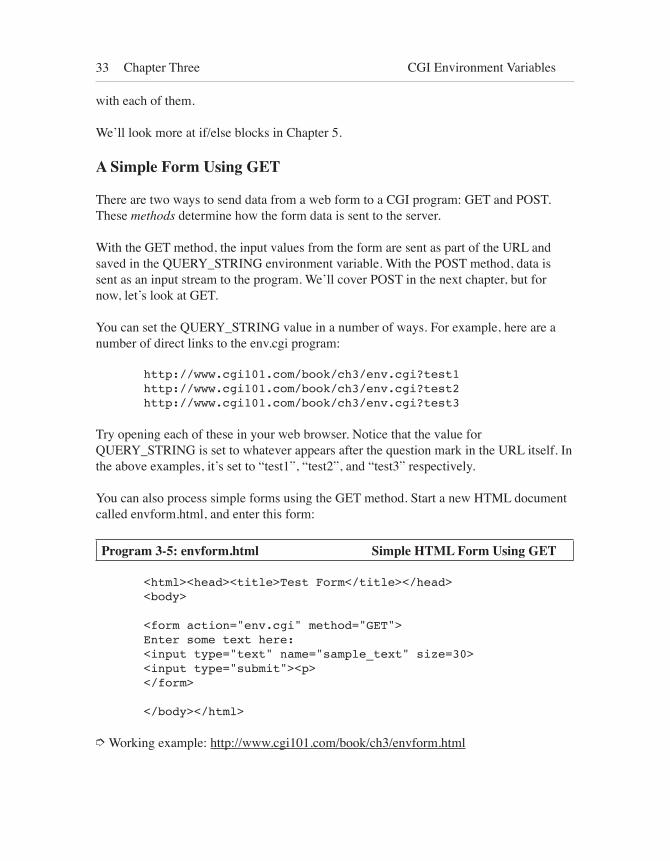
You can also process simple forms using the GET method. Start a new HTML document called envform.html, and enter this form:
Program 3-5: envform.html Simple HTML Form Using GET
<html><head><title>Test Form</title></head><body>
<form action="env.cgi" method="GET"> Enter some text here: <input type="text" name="sample_text" size=30><input type="submit"><p></form>
</body></html>
➮ Working example: http://www.cgi101.com/book/ch3/envform.html
34 Chapter Three CGI Environment Variables
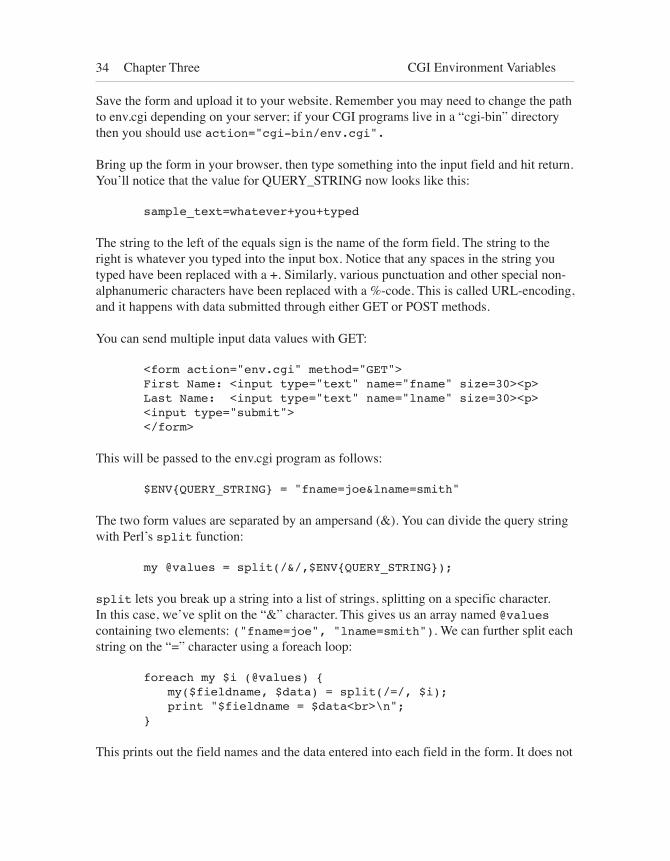
Save the form and upload it to your website. Remember you may need to change the path to env.cgi depending on your server; if your CGI programs live in a “cgi-bin” directory then you should use action="cgi-bin/env.cgi". Bring up the form in your browser, then type something into the input field and hit return. You’ll notice that the value for QUERY_STRING now looks like this:
sample_text=whatever+you+typed
The string to the left of the equals sign is the name of the form field. The string to the right is whatever you typed into the input box. Notice that any spaces in the string you typed have been replaced with a +. Similarly, various punctuation and other special non-alphanumeric characters have been replaced with a %-code. This is called URL-encoding, and it happens with data submitted through either GET or POST methods.
You can send multiple input data values with GET:
<form action="env.cgi" method="GET"> First Name: <input type="text" name="fname" size=30><p>Last Name: <input type="text" name="lname" size=30><p><input type="submit"></form>
This will be passed to the env.cgi program as follows:
$ENV{QUERY_STRING} = "fname=joe&lname=smith"
The two form values are separated by an ampersand (&). You can divide the query string with Perl’s split function:
my @values = split(/&/,$ENV{QUERY_STRING});
split lets you break up a string into a list of strings, splitting on a specific character. In this case, we’ve split on the “&” character. This gives us an array named @values containing two elements: ("fname=joe", "lname=smith"). We can further split each string on the “=” character using a foreach loop:
foreach my $i (@values) { my($fieldname, $data) = split(/=/, $i); print "$fieldname = $data<br>\n";}
This prints out the field names and the data entered into each field in the form. It does not
35 Chapter Three CGI Environment Variables
do URL-decoding, however. A better way to parse QUERY_STRING variables is with CGI.pm.
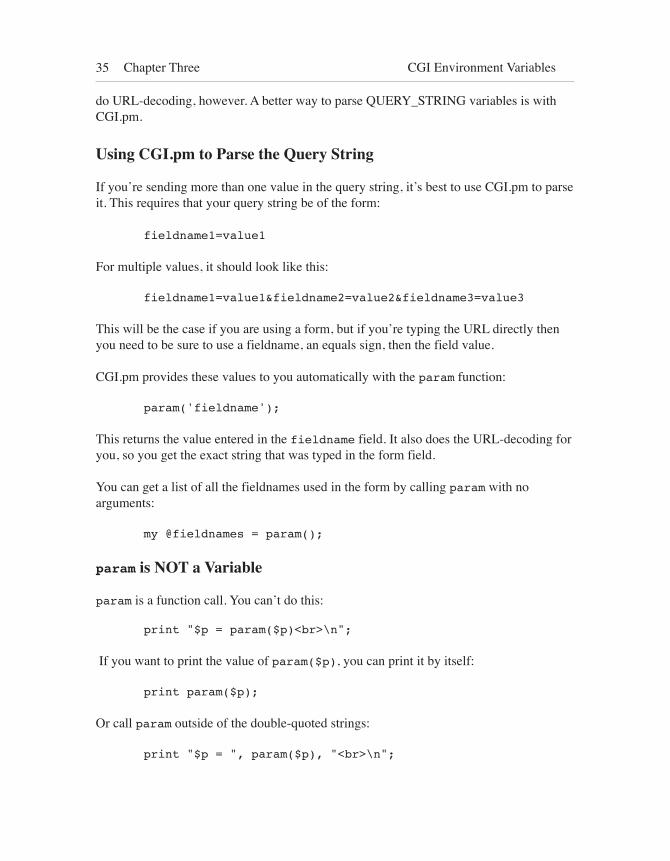
Using CGI.pm to Parse the Query String
If you’re sending more than one value in the query string, it’s best to use CGI.pm to parse it. This requires that your query string be of the form:
fieldname1=value1
For multiple values, it should look like this:
fieldname1=value1&fieldname2=value2&fieldname3=value3
This will be the case if you are using a form, but if you’re typing the URL directly then you need to be sure to use a fieldname, an equals sign, then the field value.
CGI.pm provides these values to you automatically with the param function:
param('fieldname');
This returns the value entered in the fieldname field. It also does the URL-decoding for you, so you get the exact string that was typed in the form field.
You can get a list of all the fieldnames used in the form by calling param with no arguments:
my @fieldnames = param();
param is NOT a Variable
param is a function call. You can’t do this:
print "$p = param($p)<br>\n";
If you want to print the value of param($p), you can print it by itself:
print param($p);
Or call param outside of the double-quoted strings:
print "$p = ", param($p), "<br>\n";
36 Chapter Three CGI Environment Variables
You won’t be able to use param('fieldname') inside a here-document. You may find it easier to assign the form values to individual variables:
my $firstname = param('firstname');my $lastname = param('lastname');
Another way would be to assign every form value to a hash:
my(%form);foreach my $p (param()) { $form{$p} = param($p);}
You can achieve the same result by using CGI.pm’s Vars function:
use CGI qw(:standard Vars);my %form = Vars();
The Vars function is not part of the “standard” set of CGI.pm functions, so it must be included specifically in the use statement.
Either way, after storing the field values in the %form hash, you can refer to the individual field names by using $form{'fieldname'}. (This will not work if you have a form with multiple fields having the same field name.)
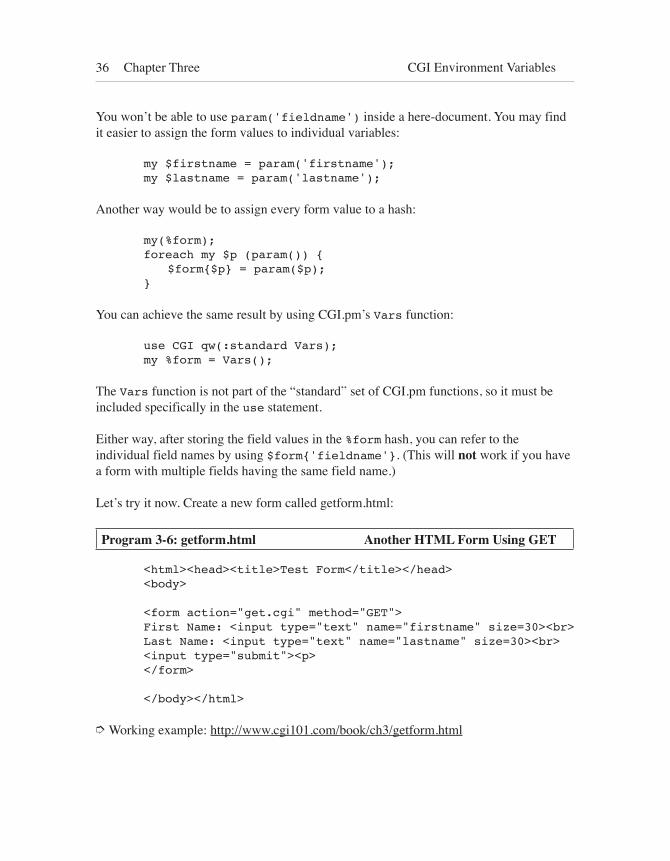
Let’s try it now. Create a new form called getform.html:
Program 3-6: getform.html Another HTML Form Using GET
<html><head><title>Test Form</title></head><body>
<form action="get.cgi" method="GET"> First Name: <input type="text" name="firstname" size=30><br>Last Name: <input type="text" name="lastname" size=30><br><input type="submit"><p></form>
</body></html>
➮ Working example: http://www.cgi101.com/book/ch3/getform.html
37 Chapter Three CGI Environment Variables
Save and upload it to your webserver, then bring up the form in your web browser.
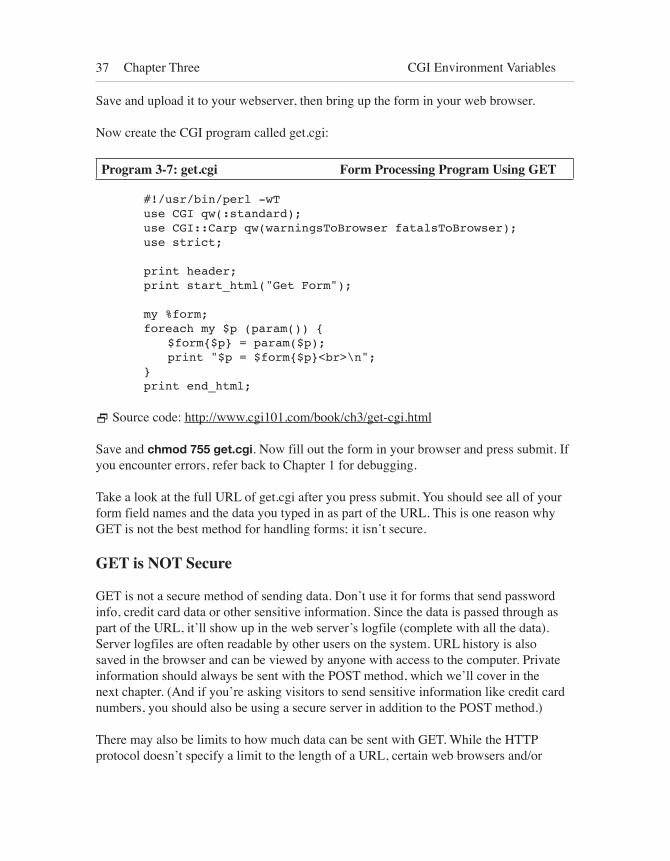
Now create the CGI program called get.cgi:
Program 3-7: get.cgi Form Processing Program Using GET
#!/usr/bin/perl -wTuse CGI qw(:standard);use CGI::Carp qw(warningsToBrowser fatalsToBrowser);use strict;
print header;print start_html("Get Form");
my %form;foreach my $p (param()) { $form{$p} = param($p); print "$p = $form{$p}<br>\n";}print end_html;
2 Source code: http://www.cgi101.com/book/ch3/get-cgi.html
Save and chmod 755 get.cgi. Now fill out the form in your browser and press submit. If you encounter errors, refer back to Chapter 1 for debugging.
Take a look at the full URL of get.cgi after you press submit. You should see all of your form field names and the data you typed in as part of the URL. This is one reason why GET is not the best method for handling forms; it isn’t secure.
GET is NOT Secure
GET is not a secure method of sending data. Don’t use it for forms that send password info, credit card data or other sensitive information. Since the data is passed through as part of the URL, it’ll show up in the web server’s logfile (complete with all the data). Server logfiles are often readable by other users on the system. URL history is also saved in the browser and can be viewed by anyone with access to the computer. Private information should always be sent with the POST method, which we’ll cover in the next chapter. (And if you’re asking visitors to send sensitive information like credit card numbers, you should also be using a secure server in addition to the POST method.)
There may also be limits to how much data can be sent with GET. While the HTTP protocol doesn’t specify a limit to the length of a URL, certain web browsers and/or
38 Chapter Three CGI Environment Variables
servers may.
Despite this, the GET method is often the best choice for certain types of applications. For example, if you have a database of articles, each with a unique article ID, you would probably want a single article.cgi program to serve up the articles. With the article ID passed in by the GET method, the program would simply look at the query string to figure out which article to display:
<a href="article.cgi?id=22">Article Name</a>
We’ll be revisiting that idea later in the book. For now, let’s move on to Chapter 4 where we’ll see how to process forms using the POST method.
Resources
Visit http://www.cgi101.com/book/ch3/ for source code and links from this chapter.
4 Processing Formsand Sending Mail
Most forms you create will send their data using the POST method. POST is more secure than GET, since the data isn’t sent as part of the URL, and you can send more data with POST. Also, your browser, web server, or proxy server may cache GET queries, but posted data is resent each time.
Your web browser, when sending form data, encodes the data being sent. Alphanumeric characters are sent as themselves; spaces are converted to plus signs (+); other characters – like tabs, quotes, etc. – are converted to “%HH” – a percent sign and two hexadecimal digits representing the ASCII code of the character. This is called URL encoding.
In order to do anything useful with the data, your program must decode these. Fortunately the CGI.pm module does this work for you. You access the decoded form values the same way you did with GET:
$value = param('fieldname');
So you already know how to process forms! You can try it now by changing your getform.html form to method=“POST” (rather than method=“GET”). You’ll see that it works identically whether you use GET or POST. Even though the data is sent differently, CGI.pm handles it for you automatically.
The Old Way of Decoding Form Data
Before CGI.pm was bundled with Perl, CGI programmers had to write their own form-parsing code. If you read some older CGI books (including the first edition of this book), or if you’re debugging old code, you’ll probably encounter the old way of decoding form data. Here’s what it looks like:
40 Chapter Four Processing Forms
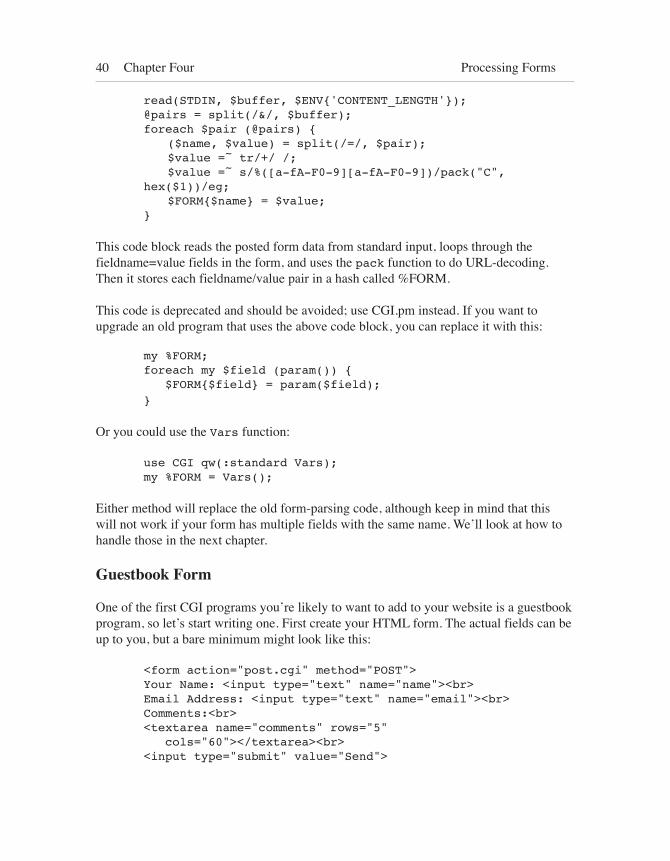
read(STDIN, $buffer, $ENV{'CONTENT_LENGTH'});@pairs = split(/&/, $buffer);foreach $pair (@pairs) { ($name, $value) = split(/=/, $pair); $value =~ tr/+/ /; $value =~ s/%([a-fA-F0-9][a-fA-F0-9])/pack("C", hex($1))/eg; $FORM{$name} = $value;}
This code block reads the posted form data from standard input, loops through the fieldname=value fields in the form, and uses the pack function to do URL-decoding. Then it stores each fieldname/value pair in a hash called %FORM.
This code is deprecated and should be avoided; use CGI.pm instead. If you want to upgrade an old program that uses the above code block, you can replace it with this:
my %FORM;foreach my $field (param()) { $FORM{$field} = param($field);}
Or you could use the Vars function:
use CGI qw(:standard Vars);my %FORM = Vars();
Either method will replace the old form-parsing code, although keep in mind that this will not work if your form has multiple fields with the same name. We’ll look at how to handle those in the next chapter.
Guestbook Form
One of the first CGI programs you’re likely to want to add to your website is a guestbook program, so let’s start writing one. First create your HTML form. The actual fields can be up to you, but a bare minimum might look like this:
<form action="post.cgi" method="POST">Your Name: <input type="text" name="name"><br>Email Address: <input type="text" name="email"><br>Comments:<br><textarea name="comments" rows="5" cols="60"></textarea><br><input type="submit" value="Send">
41 Chapter Four Processing Forms
</form>
2 Source code: http://www.cgi101.com/book/ch4/guestbook1.html
(Stylistically it’s better NOT to include a “reset” button on forms like this. It’s unlikely the visitor will want to erase what they’ve typed, and more likely they’ll accidentally hit “reset” instead of “send”, which can be an aggravating experience. They may not bother to re-fill the form in such cases.)
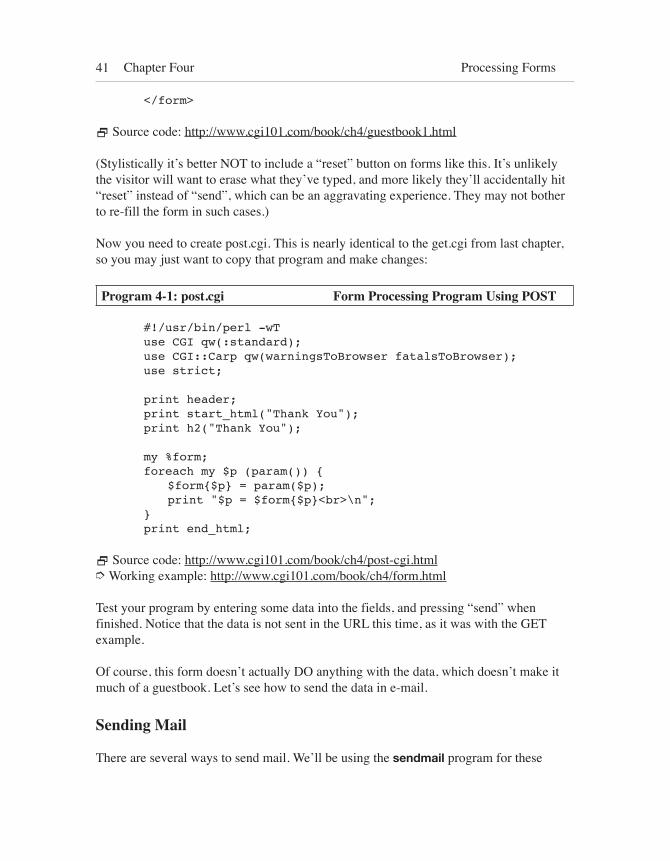
Now you need to create post.cgi. This is nearly identical to the get.cgi from last chapter, so you may just want to copy that program and make changes:
Program 4-1: post.cgi Form Processing Program Using POST
#!/usr/bin/perl -wTuse CGI qw(:standard);use CGI::Carp qw(warningsToBrowser fatalsToBrowser);use strict;
print header;print start_html("Thank You");print h2("Thank You");
my %form;foreach my $p (param()) { $form{$p} = param($p); print "$p = $form{$p}<br>\n";}print end_html;
2 Source code: http://www.cgi101.com/book/ch4/post-cgi.html➮ Working example: http://www.cgi101.com/book/ch4/form.html
Test your program by entering some data into the fields, and pressing “send” when finished. Notice that the data is not sent in the URL this time, as it was with the GET example.
Of course, this form doesn’t actually DO anything with the data, which doesn’t make it much of a guestbook. Let’s see how to send the data in e-mail.
Sending Mail
There are several ways to send mail. We’ll be using the sendmail program for these
42 Chapter Four Processing Forms
examples. If you’re using a non-Unix system (or a Unix without sendmail installed), there are a number of third-party Perl modules that you can use to achieve the same effect. See http://search.cpan.org/ (search for “sendmail”) for a list of platform-independent mailers, and Chapter 14 for examples of how to install third-party modules. If you’re using ActivePerl on Windows, visit http://www.cgi101.com/book/ch4/ for a link to more information about sending mail from Windows.
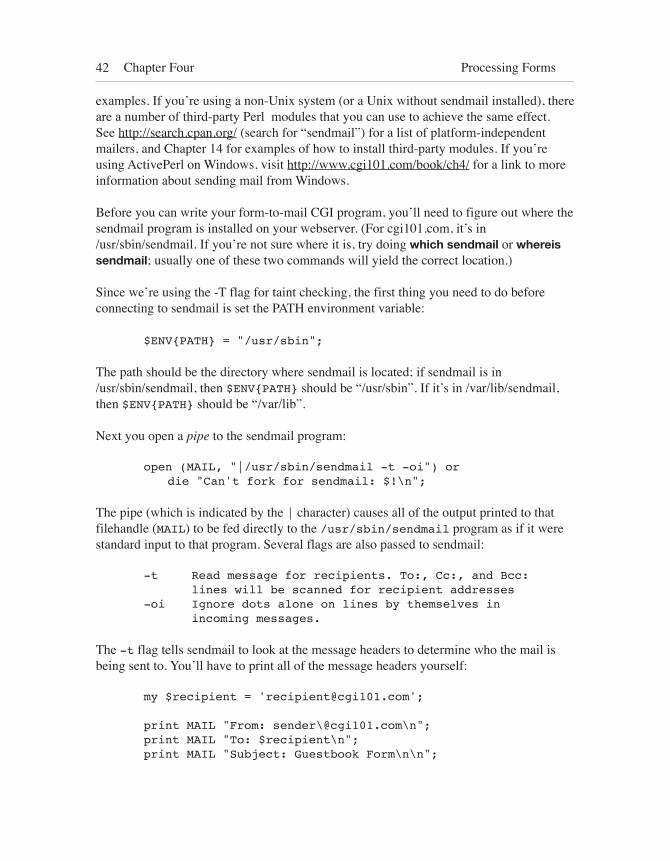
Before you can write your form-to-mail CGI program, you’ll need to figure out where the sendmail program is installed on your webserver. (For cgi101.com, it’s in /usr/sbin/sendmail. If you’re not sure where it is, try doing which sendmail or whereis sendmail; usually one of these two commands will yield the correct location.) Since we’re using the -T flag for taint checking, the first thing you need to do before connecting to sendmail is set the PATH environment variable:
$ENV{PATH} = "/usr/sbin";
The path should be the directory where sendmail is located; if sendmail is in /usr/sbin/sendmail, then $ENV{PATH} should be “/usr/sbin”. If it’s in /var/lib/sendmail, then $ENV{PATH} should be “/var/lib”.
Next you open a pipe to the sendmail program:
open (MAIL, "|/usr/sbin/sendmail -t -oi") or die "Can't fork for sendmail: $!\n";
The pipe (which is indicated by the | character) causes all of the output printed to that filehandle (MAIL) to be fed directly to the /usr/sbin/sendmail program as if it were standard input to that program. Several flags are also passed to sendmail:
-t Read message for recipients. To:, Cc:, and Bcc: lines will be scanned for recipient addresses-oi Ignore dots alone on lines by themselves in incoming messages.
The -t flag tells sendmail to look at the message headers to determine who the mail is being sent to. You’ll have to print all of the message headers yourself:
my $recipient = '[email protected]';
print MAIL "From: sender\@cgi101.com\n";print MAIL "To: $recipient\n";print MAIL "Subject: Guestbook Form\n\n";
43 Chapter Four Processing Forms
Remember that you can safely put an @-sign inside a single-quoted string, like ‘[email protected]’, or you can escape the @-sign in double-quoted strings by using a backslash (“sender\@cgi101.com”).
The message headers are complete when you print a single blank line following the header lines. We’ve accomplished this by printing two newlines at the end of the subject header:
print MAIL "Subject: Guestbook Form\n\n";
After that, you can print the body of your message.
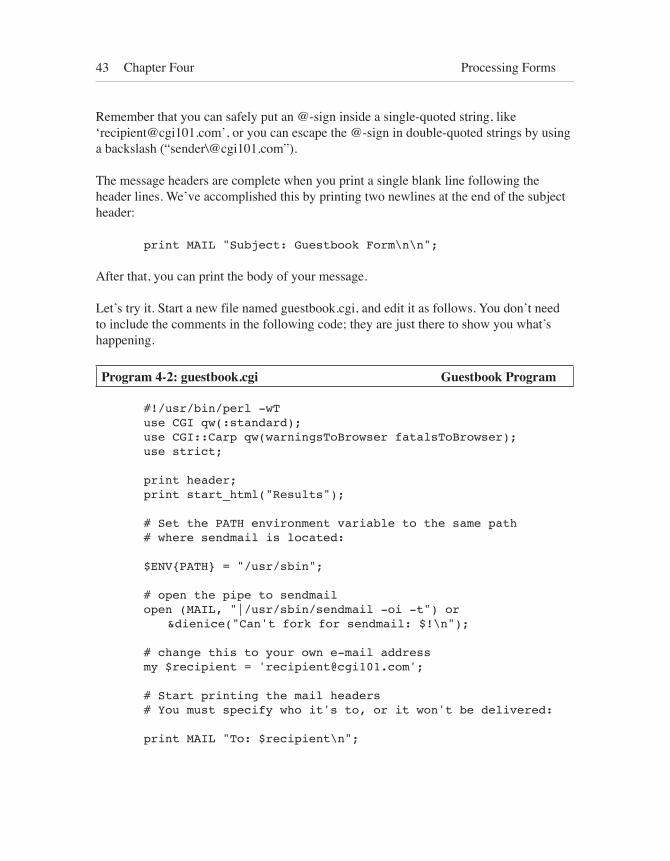
Let’s try it. Start a new file named guestbook.cgi, and edit it as follows. You don’t need to include the comments in the following code; they are just there to show you what’s happening.
Program 4-2: guestbook.cgi Guestbook Program
#!/usr/bin/perl -wTuse CGI qw(:standard);use CGI::Carp qw(warningsToBrowser fatalsToBrowser);use strict;
print header;print start_html("Results");
# Set the PATH environment variable to the same path# where sendmail is located:
$ENV{PATH} = "/usr/sbin";
# open the pipe to sendmailopen (MAIL, "|/usr/sbin/sendmail -oi -t") or &dienice("Can't fork for sendmail: $!\n");
# change this to your own e-mail addressmy $recipient = '[email protected]';
# Start printing the mail headers# You must specify who it's to, or it won't be delivered:
print MAIL "To: $recipient\n";

44 Chapter Four Processing Forms
# From should probably be the webserver.
print MAIL "From: nobody\@cgi101.com\n";
# print a subject line so you know it's from your form cgi.
print MAIL "Subject: Form Data\n\n";
# Now print the body of your mail message.foreach my $p (param()) { print MAIL "$p = ", param($p), "\n";}
# Be sure to close the MAIL input stream so that the# message actually gets mailed.
close(MAIL);
# Now print a thank-you page
print <<EndHTML;<h2>Thank You</h2><p>Thank you for writing!</p><p>Return to our <a href="index.html">home page</a>.</p>EndHTML
print end_html;
# The dienice subroutine handles errors.
sub dienice { my($errmsg) = @_; print "<h2>Error</h2>\n"; print "<p>$errmsg</p>\n"; print end_html; exit;}
2 Source code: http://www.cgi101.com/book/ch4/guestbook-cgi.html
Save and chmod the file, then modify your guestbook.html form so that the action points to guestbook.cgi:
<form action="guestbook.cgi" method="POST">
Try testing the form. If the program runs successfully, you’ll get e-mail in a few moments
45 Chapter Four Processing Forms
with the results of your post. (Remember to change $recipient to your email address!)
Subroutines
In the guestbook program we used a new structure: a subroutine called “dienice.” A subroutine is a user-defined function. You’ve already used functions like param and start_html from the CGI.pm module, and built-in functions like shift and pop. You can also define your own custom functions.
In the mail program, the dienice subroutine is only called if the program can’t open the pipe to sendmail. Rather than aborting and giving you a server error (or worse, NO error), you want your program to give you some useful data about what went wrong; dienice does that, by printing the error message and closing HTML tags, and exiting the program. We’ll be using the dienice subroutine throughout the rest of the book, as a generic catch-all error-handler.
Subroutines are useful for isolating blocks of code that are reused frequently in your program. The structure of a subroutine is as follows:
sub subname { # your code here}
The subroutine block starts with the word sub, followed by the name of the subroutine. The code for the subroutine is then enclosed in curly braces { }.
Subroutines can be placed anywhere in your program, though for readability it’s usually best to put them at the end, after the main program code.
To invoke a subroutine, enter the subroutine name and an optional list of arguments:
subname;subname(arguments);
You may prefix the subroutine name with an &-sign:
&subname;&subname(arguments);
The &-sign is optional. However, we’ll be using this syntax throughout the book to differentiate calls to subroutines we’ve written ourselves. Calls to built-in functions or functions provided by external modules will not have this sign.
46 Chapter Four Processing Forms
Here is an example of a call to a subroutine named “mysub” with three arguments:
&mysub($arg1, "whatever", 23);
The arguments are passed to the subroutine in the special Perl array @_. You can then assign the elements of that array to special temporary variables, like so:
sub mysub { my($arg1, $arg2, $arg3) = @_; # your code here}
In this example, the my function limits the scope of $arg1, $arg2 and $arg3 to the mysub subroutine. This keeps your temporary variables visible only to the subroutine itself (where they’re actually needed and used), rather than to the entire program (where they’re not needed). This also means if you change one of the variables inside your subroutine, the value of the original variable won’t change (unless it’s a reference, which we’ll look at next).
Passing Arrays and Hashes to Subroutines
When passing an array (or a hash) to a subroutine, the array is expanded into a list of its values. This might be okay if the array is the only argument:
&subname(@array1);
However if you have multiple arguments, you’re going to run into problems:
&subname(@array1, $item2, $item3);
sub subname { my(@ary, $arg2, $arg3) = @_;}
In this example, all of the arguments (including $item2 and $item3) are stored in @ary, and $arg2 and $arg3 are undefined. In order to pass the array or hash properly to the subroutine, you need to pass it as a reference, by prefixing the @ (or %) by a backslash:
&subname(\@array1, $item2, \%hash1);
sub subname {
47 Chapter Four Processing Forms
my($arrayref, $arg2, $hashref) = @_;}
Now $arrayref is a reference to @array1, $arg2 is whatever the value of $item2 is, and $hashref is a reference to %hash1. To access individual elements of an array reference, instead of using $arrayref[1], you use $arrayref->[1]. Similarly with a hash reference you use $hashref->{key} instead of $hashref{key}.
A reference is a pointer to the original variable. If you change the value of an element of an array reference, you’re changing the original array’s values.
Optionally you could dereference the array inside your subroutine by doing:
my @localary = @{$arrayref};
A hash is dereferenced like so:
my %localhash = %{$hashref};
A dereferenced array (or hash) is localized to your subroutine, so you can change the values of @newarray or %newhash without altering the original variables.
You can find out a lot more about references by reading perldoc perlref and perldoc perlreftut (the Perl reference tutorial).
Subroutine Return Values
Subroutines can return a value:
sub subname { # your code here return $somevalue;}
If you omit the return statement, then the value returned by the subroutine is the value of the last expression executed in that routine.
If you want to save the return value, be sure to assign it to a variable:
my $result = &subname(arguments);
Subroutines can also return a list:
48 Chapter Four Processing Forms
sub subname { # your code here return $value1, $value2, 'foo';}
Which can then be assigned to a list of variables:
my ($x, $y, $z) = &subname(arguments);
Or an array:
my @x = &subname(arguments);
Return vs. Exit
You’ll notice that our dienice subroutine does not return a value at all, but rather calls the exit function. exit causes the entire program to terminate immediately.
Sendmail Subroutine
Here is an example of the mail-sending code in a compact subroutine:
sub sendmail { my ($from, $to, $subject, $message) = @_; $ENV{PATH} = "/usr/sbin"; open (MAIL, "|/usr/sbin/sendmail -oi -t") or &dienice("Can't fork for sendmail: $!\n"); print MAIL "To: $to\n"; print MAIL "From: $from\n"; print MAIL "Subject: $subject\n\n"; print MAIL "$message\n"; close(MAIL);}
Sending Mail to More Than One Recipient
If you want to send mail to more than one email address, just add the desired addresses to the $recipient line, separated by commas:
my $recipient = '[email protected], [email protected], [email protected]';
49 Chapter Four Processing Forms
Defending Against Spammers
When building form-to-mail programs, you need to take precautions to prevent spammers from hijacking your programs to send unwanted e-mail to other recipients. They can do this by writing their own form (or program) to send data to your CGI. If your program prints any of the form fields as mail headers without checking them first, the spammer can insert their own mail headers (and even their own message). The end result: your program becomes a relay for spammers.
The primary defense against this is to not allow the form to specify ANY of the mail headers (such as the From, To, or Subject headers). Note that in our guestbook program, the From, To and Subject headers were all hardcoded in the program.
Of course, it would be nice to have the “From” header show the poster’s e-mail address. You could allow this if you validate it first, verifying that it’s really an e-mail address and doesn’t contain any extra headers. You can validate e-mail addresses by using a regular expression pattern match, which we’ll cover in Chapter 13, or by using the Email::Valid module, which we'll look at in Chapter 14.
Resources
Visit http://www.cgi101.com/book/ch4/ for source code and links from this chapter.
5 Advanced Formsand Perl Control Structures
In the last chapter you learned how to decode form data, and mail it to yourself. However, one problem with the guestbook program is that it didn’t do any error-checking or specialized processing. You might not want to get blank forms, or you may want to require certain fields to be filled out. You might also want to write a quiz or questionnaire, and have your program take different actions depending on the answers. All of these things require some more advanced processing of the form data, and that will usually involve using control structures in your Perl code.
Control structures include conditional statements, such as if/elsif/else blocks, as well as loops like foreach, for and while.
If Conditions
You’ve already seen if/elsif in action. The structure is always started by the word if, followed by a condition to be evaluated, then a pair of braces indicating the beginning and end of the code to be executed if the condition is true. The condition is enclosed in parentheses:
if (condition) { code to be executed}
The condition statement can be anything that evaluates to true or false. In Perl, any string is true except the empty string and 0. Any number is true except 0. An undefined value (or undef) is false.You can also test whether a certain value equals something, or doesn’t equal something, or is greater than or less than something. There are different conditional test operators, depending on whether the variable you want to test is a string or a number:
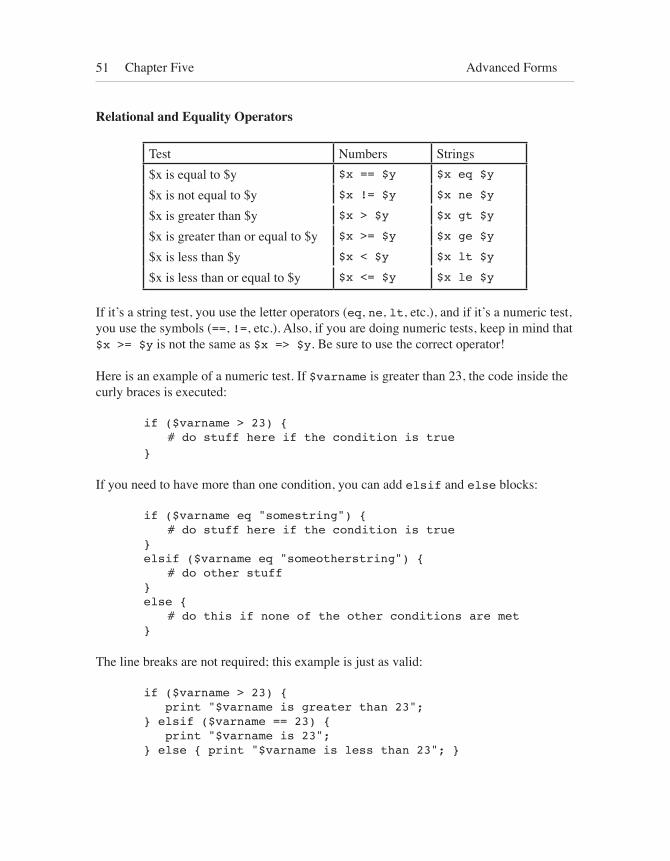
51 Chapter Five Advanced Forms
Relational and Equality Operators
Test Numbers Strings$x is equal to $y $x == $y $x eq $y
$x is not equal to $y $x != $y $x ne $y
$x is greater than $y $x > $y $x gt $y
$x is greater than or equal to $y $x >= $y $x ge $y
$x is less than $y $x < $y $x lt $y
$x is less than or equal to $y $x <= $y $x le $y
If it’s a string test, you use the letter operators (eq, ne, lt, etc.), and if it’s a numeric test, you use the symbols (==, !=, etc.). Also, if you are doing numeric tests, keep in mind that $x >= $y is not the same as $x => $y. Be sure to use the correct operator!
Here is an example of a numeric test. If $varname is greater than 23, the code inside the curly braces is executed:
if ($varname > 23) { # do stuff here if the condition is true}
If you need to have more than one condition, you can add elsif and else blocks:
if ($varname eq "somestring") { # do stuff here if the condition is true}elsif ($varname eq "someotherstring") { # do other stuff} else { # do this if none of the other conditions are met}
The line breaks are not required; this example is just as valid:
if ($varname > 23) { print "$varname is greater than 23";} elsif ($varname == 23) { print "$varname is 23";} else { print "$varname is less than 23"; }
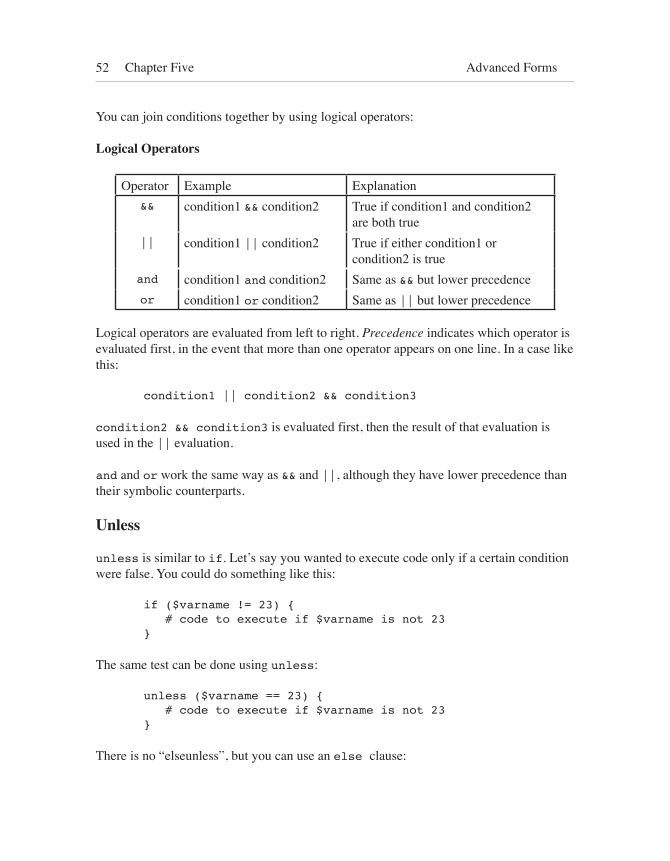
52 Chapter Five Advanced Forms
You can join conditions together by using logical operators:
Logical Operators
Operator Example Explanation&& condition1 && condition2 True if condition1 and condition2
are both true|| condition1 || condition2 True if either condition1 or
condition2 is trueand condition1 and condition2 Same as && but lower precedenceor condition1 or condition2 Same as || but lower precedence
Logical operators are evaluated from left to right. Precedence indicates which operator is evaluated first, in the event that more than one operator appears on one line. In a case like this:
condition1 || condition2 && condition3
condition2 && condition3 is evaluated first, then the result of that evaluation is used in the || evaluation.
and and or work the same way as && and ||, although they have lower precedence than their symbolic counterparts.
Unless
unless is similar to if. Let’s say you wanted to execute code only if a certain condition were false. You could do something like this:
if ($varname != 23) { # code to execute if $varname is not 23}
The same test can be done using unless:
unless ($varname == 23) { # code to execute if $varname is not 23}
There is no “elseunless”, but you can use an else clause:
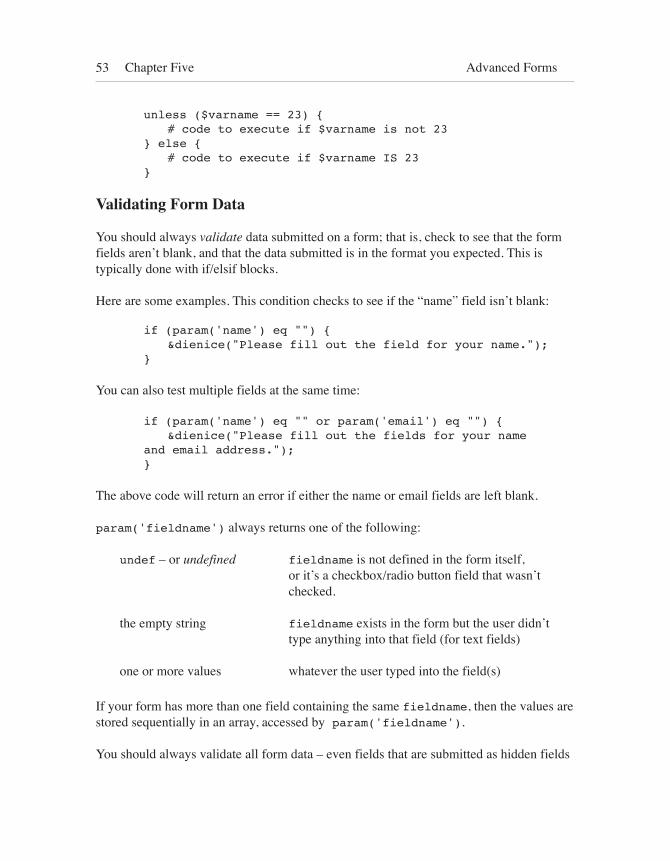
53 Chapter Five Advanced Forms
unless ($varname == 23) { # code to execute if $varname is not 23} else { # code to execute if $varname IS 23}
Validating Form Data
You should always validate data submitted on a form; that is, check to see that the form fields aren’t blank, and that the data submitted is in the format you expected. This is typically done with if/elsif blocks.
Here are some examples. This condition checks to see if the “name” field isn’t blank:
if (param('name') eq "") { &dienice("Please fill out the field for your name.");}
You can also test multiple fields at the same time:
if (param('name') eq "" or param('email') eq "") { &dienice("Please fill out the fields for your name and email address.");}
The above code will return an error if either the name or email fields are left blank.
param('fieldname') always returns one of the following:
undef – or undefined fieldname is not defined in the form itself, or it’s a checkbox/radio button field that wasn’t checked.
the empty string fieldname exists in the form but the user didn’t type anything into that field (for text fields)
one or more values whatever the user typed into the field(s)
If your form has more than one field containing the same fieldname, then the values are stored sequentially in an array, accessed by param('fieldname').
You should always validate all form data – even fields that are submitted as hidden fields
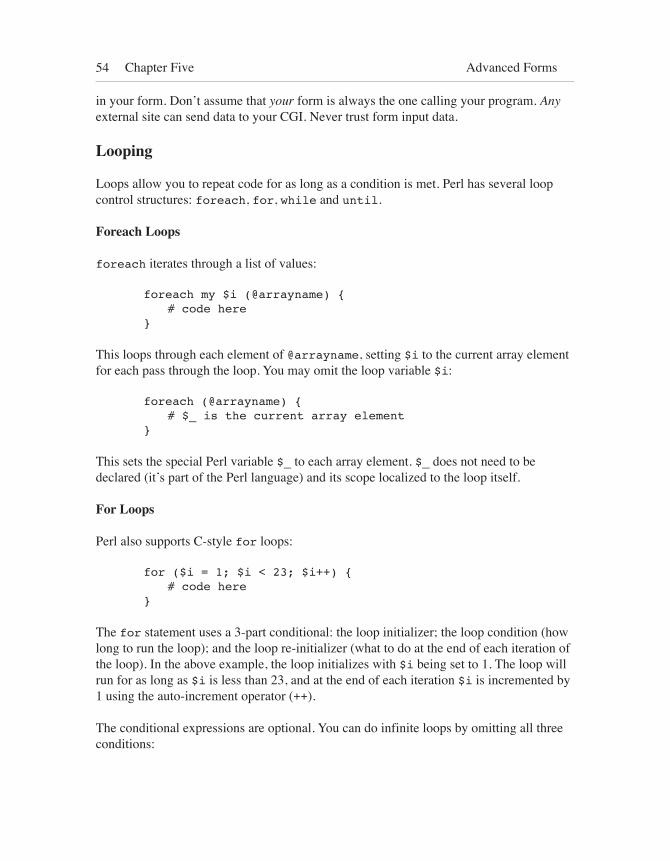
54 Chapter Five Advanced Forms
in your form. Don’t assume that your form is always the one calling your program. Any external site can send data to your CGI. Never trust form input data.
Looping
Loops allow you to repeat code for as long as a condition is met. Perl has several loop control structures: foreach, for, while and until.
Foreach Loops
foreach iterates through a list of values:
foreach my $i (@arrayname) { # code here}
This loops through each element of @arrayname, setting $i to the current array element for each pass through the loop. You may omit the loop variable $i:
foreach (@arrayname) { # $_ is the current array element}
This sets the special Perl variable $_ to each array element. $_ does not need to be declared (it’s part of the Perl language) and its scope localized to the loop itself.
For Loops
Perl also supports C-style for loops:
for ($i = 1; $i < 23; $i++) { # code here}
The for statement uses a 3-part conditional: the loop initializer; the loop condition (how long to run the loop); and the loop re-initializer (what to do at the end of each iteration of the loop). In the above example, the loop initializes with $i being set to 1. The loop will run for as long as $i is less than 23, and at the end of each iteration $i is incremented by 1 using the auto-increment operator (++).
The conditional expressions are optional. You can do infinite loops by omitting all three conditions:

55 Chapter Five Advanced Forms
for (;;) { # code here}
You can also write infinite loops with while.
While Loops
A while loop executes as long as particular condition is true:
while (condition) { # code to run as long as condition is true}
Until Loops
until is the reverse of while. It executes as long as a particular condition is NOT true:
until (condition) { # code to run as long as condition is not true}
Infinite Loops
An infinite loop is usually written like so:
while (1) { # code here}
Obviously unless you want your program to run forever, you’ll need some way to break out of these infinite loops. We’ll look at breaking next.
Breaking from Loops
There are several ways to break from a loop. To stop the current loop iteration (and move on to the next one), use the next command:
foreach my $i (1..20) { if ($i == 13) { next; } print "$i\n";
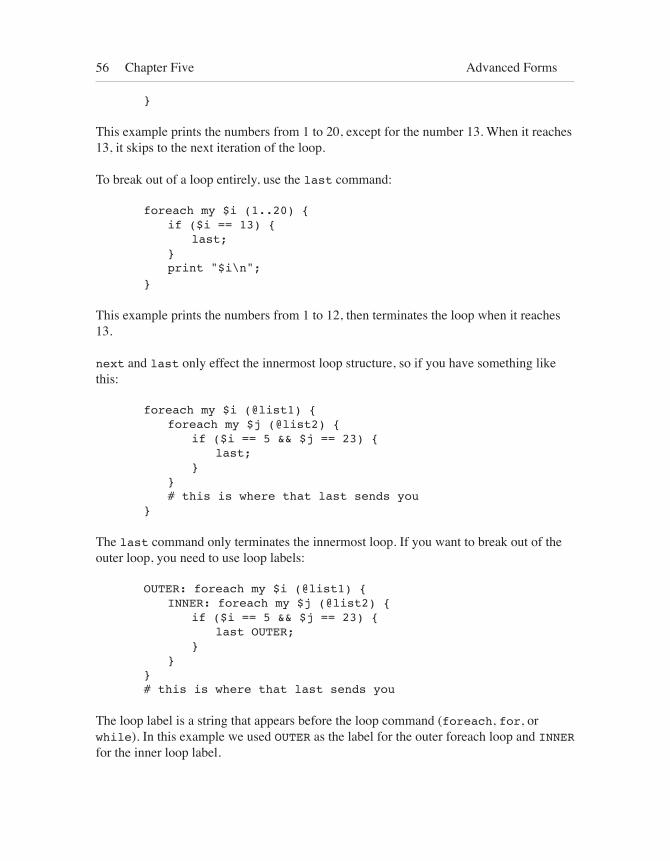
56 Chapter Five Advanced Forms
}
This example prints the numbers from 1 to 20, except for the number 13. When it reaches 13, it skips to the next iteration of the loop.
To break out of a loop entirely, use the last command:
foreach my $i (1..20) { if ($i == 13) { last; } print "$i\n";}
This example prints the numbers from 1 to 12, then terminates the loop when it reaches 13.
next and last only effect the innermost loop structure, so if you have something like this:
foreach my $i (@list1) { foreach my $j (@list2) { if ($i == 5 && $j == 23) { last; } } # this is where that last sends you}
The last command only terminates the innermost loop. If you want to break out of the outer loop, you need to use loop labels:
OUTER: foreach my $i (@list1) { INNER: foreach my $j (@list2) { if ($i == 5 && $j == 23) { last OUTER; } }}# this is where that last sends you
The loop label is a string that appears before the loop command (foreach, for, or while). In this example we used OUTER as the label for the outer foreach loop and INNER for the inner loop label.
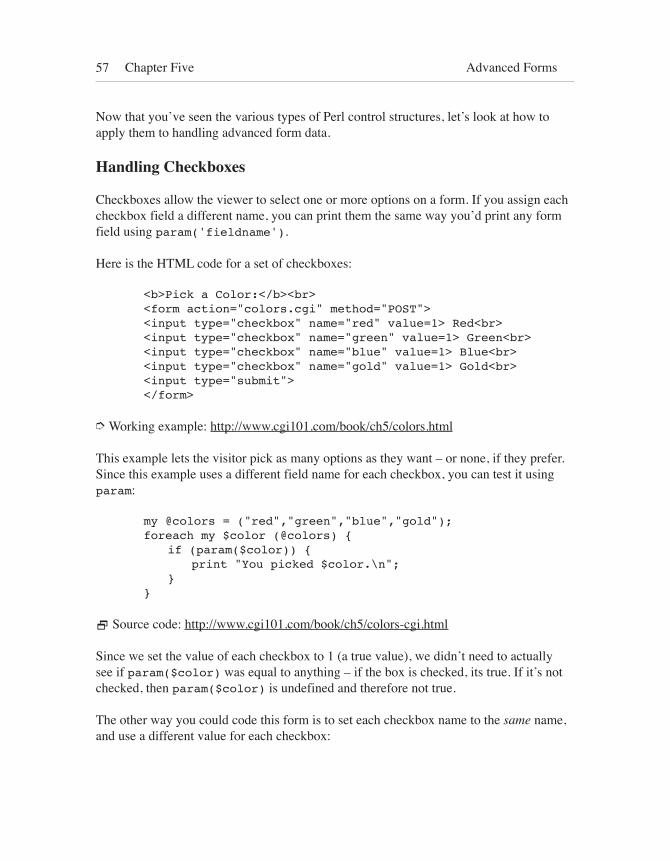
57 Chapter Five Advanced Forms
Now that you’ve seen the various types of Perl control structures, let’s look at how to apply them to handling advanced form data.
Handling Checkboxes
Checkboxes allow the viewer to select one or more options on a form. If you assign each checkbox field a different name, you can print them the same way you’d print any form field using param('fieldname').
Here is the HTML code for a set of checkboxes:
<b>Pick a Color:</b><br><form action="colors.cgi" method="POST"><input type="checkbox" name="red" value=1> Red<br><input type="checkbox" name="green" value=1> Green<br><input type="checkbox" name="blue" value=1> Blue<br><input type="checkbox" name="gold" value=1> Gold<br><input type="submit"></form>
➮ Working example: http://www.cgi101.com/book/ch5/colors.html
This example lets the visitor pick as many options as they want – or none, if they prefer. Since this example uses a different field name for each checkbox, you can test it using param:
my @colors = ("red","green","blue","gold");foreach my $color (@colors) { if (param($color)) { print "You picked $color.\n"; }}
2 Source code: http://www.cgi101.com/book/ch5/colors-cgi.html
Since we set the value of each checkbox to 1 (a true value), we didn’t need to actually see if param($color) was equal to anything – if the box is checked, its true. If it’s not checked, then param($color) is undefined and therefore not true.
The other way you could code this form is to set each checkbox name to the same name, and use a different value for each checkbox:
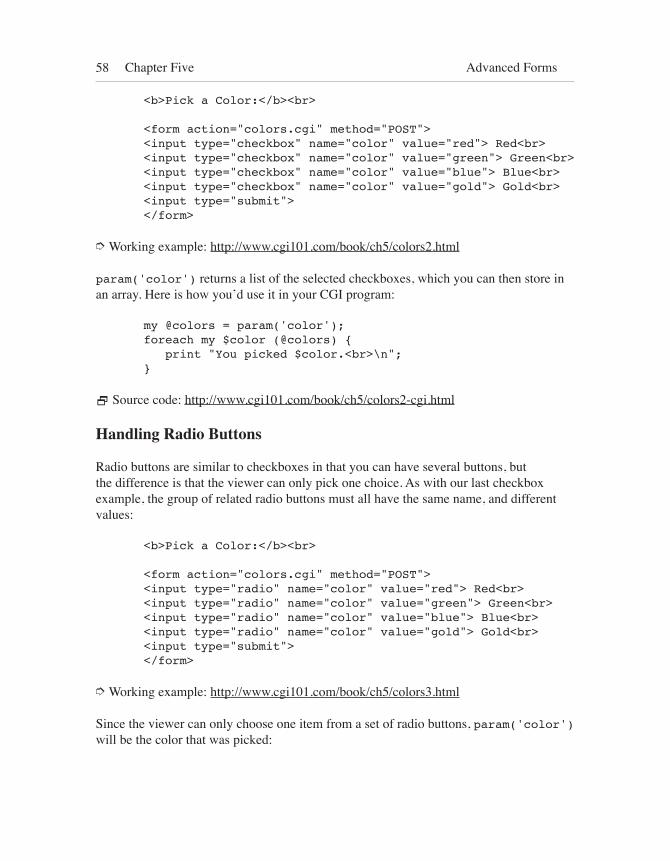
58 Chapter Five Advanced Forms
<b>Pick a Color:</b><br>
<form action="colors.cgi" method="POST"><input type="checkbox" name="color" value="red"> Red<br><input type="checkbox" name="color" value="green"> Green<br><input type="checkbox" name="color" value="blue"> Blue<br><input type="checkbox" name="color" value="gold"> Gold<br><input type="submit"></form>
➮ Working example: http://www.cgi101.com/book/ch5/colors2.html
param('color') returns a list of the selected checkboxes, which you can then store in an array. Here is how you’d use it in your CGI program:
my @colors = param('color');foreach my $color (@colors) { print "You picked $color.<br>\n";}
2 Source code: http://www.cgi101.com/book/ch5/colors2-cgi.html
Handling Radio Buttons
Radio buttons are similar to checkboxes in that you can have several buttons, but the difference is that the viewer can only pick one choice. As with our last checkbox example, the group of related radio buttons must all have the same name, and different values:
<b>Pick a Color:</b><br>
<form action="colors.cgi" method="POST"><input type="radio" name="color" value="red"> Red<br><input type="radio" name="color" value="green"> Green<br><input type="radio" name="color" value="blue"> Blue<br><input type="radio" name="color" value="gold"> Gold<br><input type="submit"></form>
➮ Working example: http://www.cgi101.com/book/ch5/colors3.html
Since the viewer can only choose one item from a set of radio buttons, param('color') will be the color that was picked:

59 Chapter Five Advanced Forms
my $color = param('color');print "You picked $color.<br>\n";
2 Source code: http://www.cgi101.com/book/ch5/colors3-cgi.html
It’s usually best to set the values of radio buttons to something meaningful; this allows you to print out the button name and its value, without having to store another list inside your CGI program. But if your buttons have lengthy values, or values unsuitable for storing in the value field, you can set each value to an abbreviation, then define a hash in your CGI program where the hash keys correspond to the abbreviations. The hash values can then contain longer data.
Let’s try it. Create a new HTML form called colors4.html:
Program 5-1: colors4.html Favorite Colors HTML Form
<html><head><title>Pick a Color</title></head><body><b>Pick a Color:</b><br>
<form action="colors4.cgi" method="POST"><input type="radio" name="color" value="red"> Red<br><input type="radio" name="color" value="green"> Green<br><input type="radio" name="color" value="blue"> Blue<br><input type="radio" name="color" value="gold"> Gold<br><input type="submit"></form></body> </html>
➮ Working example: http://www.cgi101.com/book/ch5/colors4.html
Next create colors4.cgi. This example not only prints out the color you picked, but also sets the page background to that color. The %colors hash stores the various RGB hex values for each color. The hex value for the selected color is then passed to CGI.pm’s start_html function as the bgcolor (background color) parameter.
Program 5-2: colors4.cgi Favorite Colors Program
#!/usr/bin/perl -wTuse strict;use CGI qw(:standard);use CGI::Carp qw(warningsToBrowser fatalsToBrowser);
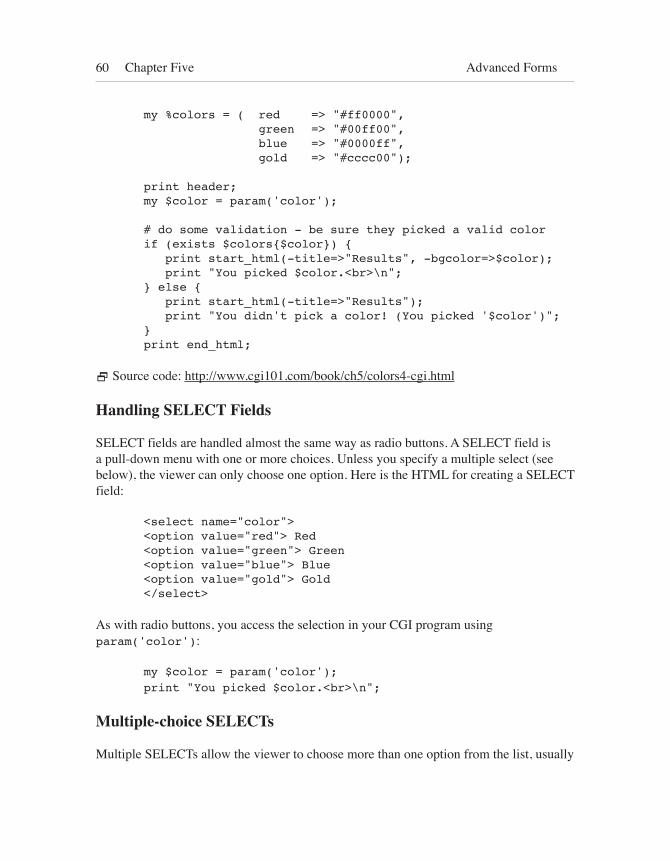
60 Chapter Five Advanced Forms
my %colors = ( red => "#ff0000", green => "#00ff00", blue => "#0000ff", gold => "#cccc00");
print header;my $color = param('color');
# do some validation - be sure they picked a valid colorif (exists $colors{$color}) { print start_html(-title=>"Results", -bgcolor=>$color); print "You picked $color.<br>\n";} else { print start_html(-title=>"Results"); print "You didn't pick a color! (You picked '$color')";}print end_html;
2 Source code: http://www.cgi101.com/book/ch5/colors4-cgi.html
Handling SELECT Fields
SELECT fields are handled almost the same way as radio buttons. A SELECT field is a pull-down menu with one or more choices. Unless you specify a multiple select (see below), the viewer can only choose one option. Here is the HTML for creating a SELECT field:
<select name="color"> <option value="red"> Red<option value="green"> Green<option value="blue"> Blue<option value="gold"> Gold</select>
As with radio buttons, you access the selection in your CGI program using param('color'):
my $color = param('color');print "You picked $color.<br>\n";
Multiple-choice SELECTs
Multiple SELECTs allow the viewer to choose more than one option from the list, usually
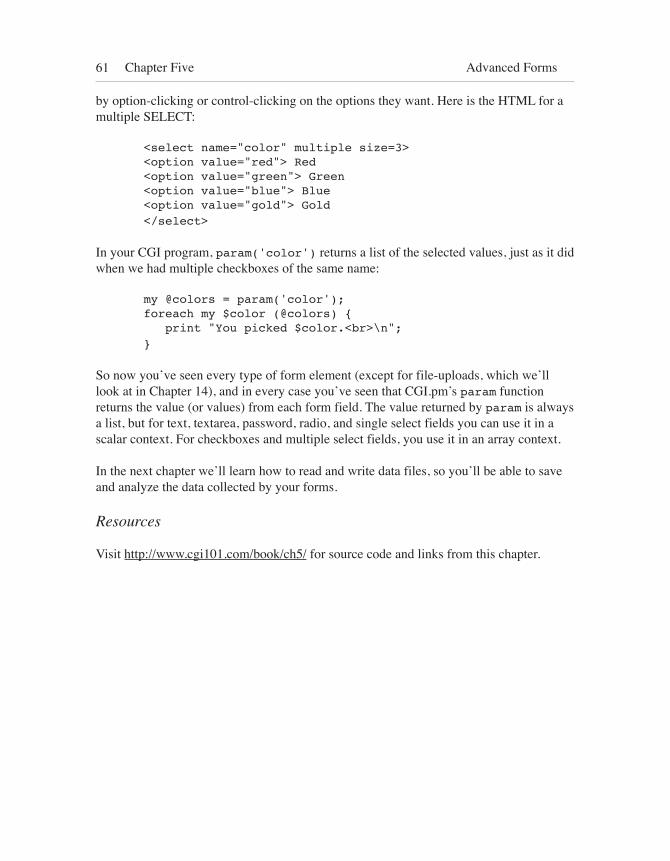
61 Chapter Five Advanced Forms
by option-clicking or control-clicking on the options they want. Here is the HTML for a multiple SELECT:
<select name="color" multiple size=3> <option value="red"> Red<option value="green"> Green<option value="blue"> Blue<option value="gold"> Gold</select>
In your CGI program, param('color') returns a list of the selected values, just as it did when we had multiple checkboxes of the same name:
my @colors = param('color');foreach my $color (@colors) { print "You picked $color.<br>\n";}
So now you’ve seen every type of form element (except for file-uploads, which we’ll look at in Chapter 14), and in every case you’ve seen that CGI.pm’s param function returns the value (or values) from each form field. The value returned by param is always a list, but for text, textarea, password, radio, and single select fields you can use it in a scalar context. For checkboxes and multiple select fields, you use it in an array context.
In the next chapter we’ll learn how to read and write data files, so you’ll be able to save and analyze the data collected by your forms.
Resources
Visit http://www.cgi101.com/book/ch5/ for source code and links from this chapter.
6 Reading and WritingData Files
As you start to program more advanced CGI applications, you’ll want to store data so you can use it later. Maybe you have a guestbook program and want to keep a log of the names and email addresses of visitors, or a page counter that must update a counter file, or a program that scans a flat-file database and draws info from it to generate a page. You can do this by reading and writing data files (often called file I/O).
File Permissions
Most web servers run with very limited permissions; this protects the server (and the system it’s running on) from malicious attacks by users or web visitors. On Unix systems, the web process runs under its own userid, typically the “web” or “nobody” user. Unfortunately this means the server doesn’t have permission to create files in your directory. In order to write to a data file, you must usually make the file (or the directory where the file will be created) world-writable – or at least writable by the web process userid. In Unix a file can be made world-writable using the chmod command:
chmod 666 myfile.dat
To set a directory world-writable, you’d do:
chmod 777 directoryname
See Appendix A for a chart of the various chmod permissions.
Unfortunately, if the file is world-writable, it can be written to (or even deleted) by other users on the system. You should be very cautious about creating world-writable files in your web space, and you should never create a world-writable directory there. (An attacker could use this to install their own CGI programs there.) If you must have a world-writable directory, either use /tmp (on Unix), or a directory outside of your web
63 Chapter Six Reading and Writing Data Files
space. For example if your web pages are in /home/you/public_html, set up your writable files and directories in /home/you. A much better solution is to configure the server to run your programs with your userid. Some examples of this are CGIwrap (platform independent) and suEXEC (for Apache/Unix). Both of these force CGI programs on the web server to run under the program owner’s userid and permissions. Obviously if your CGI program is running with your userid, it will be able to create, read and write files in your directory without needing the files to be world-writable.
The Apache web server also allows the webmaster to define what user and group the server runs under. If you have your own domain, ask your webmaster to set up your domain to run under your own userid and group permissions.
Permissions are less of a problem if you only want to read a file. If you set the file permissions so that it is group- and world-readable, your CGI programs can then safely read from that file. Use caution, though; if your program can read the file, so can the webserver, and if the file is in your webspace, someone can type the direct URL and view the contents of the file. Be sure not to put sensitive data in a publicly readable file.
Opening Files
Reading and writing files is done by opening a file and associating it with a filehandle. This is done with the statement:
open(filehandle,filename);
The filename may be prefixed with a >, which means to overwrite anything that’s in the file now, or with a >>, which means to append to the bottom of the existing file. If both > and >> are omitted, the file is opened for reading only. Here are some examples:
open(INF,"out.txt"); # opens mydata.txt for readingopen(OUTF,">out.txt"); # opens out.txt for overwritingopen(OUTF,">>out.txt"); # opens out.txt for appendingopen(FH, "+<out.txt"); # opens existing file out.txt for # reading AND writing
The filehandles in these cases are INF, OUTF and FH. You can use just about any name for the filehandle.
Also, a warning: your web server might do strange things with the path your programs run under, so it’s possible you’ll have to use the full path to the file (such as
64 Chapter Six Reading and Writing Data Files
/home/you/public_html/somedata.txt), rather than just the filename. This is generally not the case with the Apache web server, but some other servers behave differently. Try opening files with just the filename first (provided the file is in the same directory as your CGI program), and if it doesn’t work, then use the full path.
One problem with the above code is that it doesn’t check the return value of open to ensure the file was really opened. open returns nonzero upon success, or undef (which is a false value) otherwise. The safe way to open a file is as follows:
open(OUTF,">outdata.txt") or &dienice("Can't open outdata.txt for writing: $!");
This uses the “dienice” subroutine we wrote in Chapter 4 to display an error message and exit if the file can’t be opened. You should do this for all file opens, because if you don’t, your CGI program will continue running even if the file isn’t open, and you could end up losing data. It can be quite frustrating to realize you’ve had a survey running for several weeks while no data was being saved to the output file.
The $! in the above example is a special Perl variable that stores the error code returned by the failed open statement. Printing it may help you figure out why the open failed.
Guestbook Form with File Write
Let’s try this by modifying the guestbook program you wrote in Chapter 4. The program already sends you e-mail with the information; we’re going to have it write its data to a file as well.
First you’ll need to create the output file and make it writable, because your CGI program probably can’t create new files in your directory. If you’re using Unix, log into the Unix shell, cd to the directory where your guestbook program is located, and type the following:
touch guestbook.txtchmod 622 guestbook.txt
The Unix touch command, in this case, creates a new, empty file called “guestbook.txt”. (If the file already exists, touch simply updates the last-modified timestamp of the file.) The chmod 622 command makes the file read/write for you (the owner), and write-only for everyone else. If you don’t have Unix shell access (or you aren’t using a Unix system), you should create or upload an empty file called guestbook.txt in the directory where your
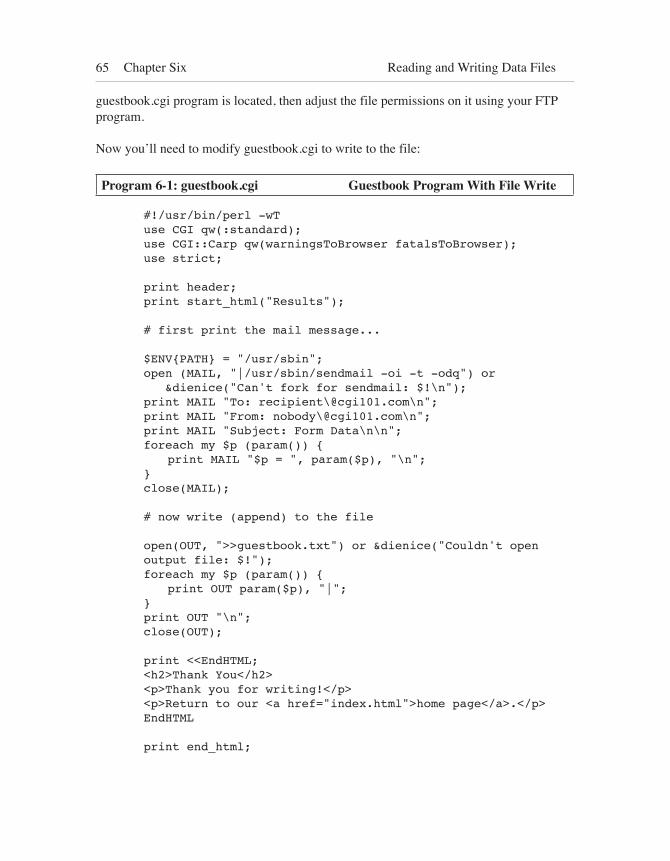
65 Chapter Six Reading and Writing Data Files
guestbook.cgi program is located, then adjust the file permissions on it using your FTP program.
Now you’ll need to modify guestbook.cgi to write to the file:
Program 6-1: guestbook.cgi Guestbook Program With File Write
#!/usr/bin/perl -wTuse CGI qw(:standard);use CGI::Carp qw(warningsToBrowser fatalsToBrowser);use strict;
print header;print start_html("Results");
# first print the mail message...
$ENV{PATH} = "/usr/sbin";open (MAIL, "|/usr/sbin/sendmail -oi -t -odq") or &dienice("Can't fork for sendmail: $!\n");print MAIL "To: recipient\@cgi101.com\n";print MAIL "From: nobody\@cgi101.com\n";print MAIL "Subject: Form Data\n\n";foreach my $p (param()) { print MAIL "$p = ", param($p), "\n";}close(MAIL);
# now write (append) to the file
open(OUT, ">>guestbook.txt") or &dienice("Couldn't open output file: $!");foreach my $p (param()) { print OUT param($p), "|";}print OUT "\n";close(OUT);
print <<EndHTML;<h2>Thank You</h2><p>Thank you for writing!</p><p>Return to our <a href="index.html">home page</a>.</p>EndHTML
print end_html;
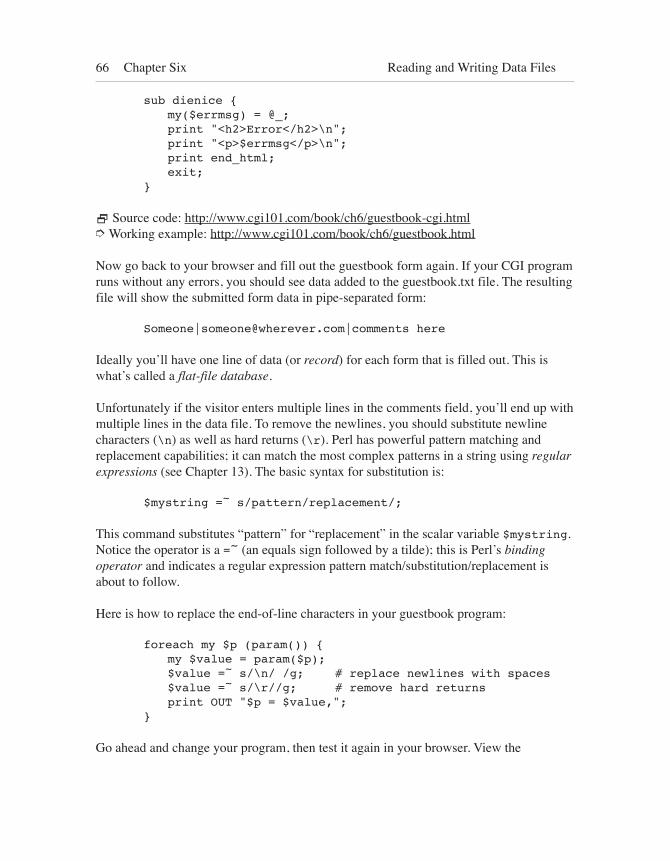
66 Chapter Six Reading and Writing Data Files
sub dienice { my($errmsg) = @_; print "<h2>Error</h2>\n"; print "<p>$errmsg</p>\n"; print end_html; exit;}
2 Source code: http://www.cgi101.com/book/ch6/guestbook-cgi.html➮ Working example: http://www.cgi101.com/book/ch6/guestbook.html
Now go back to your browser and fill out the guestbook form again. If your CGI program runs without any errors, you should see data added to the guestbook.txt file. The resulting file will show the submitted form data in pipe-separated form:
Someone|[email protected]|comments here
Ideally you’ll have one line of data (or record) for each form that is filled out. This is what’s called a flat-file database.
Unfortunately if the visitor enters multiple lines in the comments field, you’ll end up with multiple lines in the data file. To remove the newlines, you should substitute newline characters (\n) as well as hard returns (\r). Perl has powerful pattern matching and replacement capabilities; it can match the most complex patterns in a string using regular expressions (see Chapter 13). The basic syntax for substitution is:
$mystring =~ s/pattern/replacement/;
This command substitutes “pattern” for “replacement” in the scalar variable $mystring. Notice the operator is a =~ (an equals sign followed by a tilde); this is Perl’s binding operator and indicates a regular expression pattern match/substitution/replacement is about to follow.
Here is how to replace the end-of-line characters in your guestbook program:
foreach my $p (param()) { my $value = param($p); $value =~ s/\n/ /g; # replace newlines with spaces $value =~ s/\r//g; # remove hard returns print OUT "$p = $value,";}
Go ahead and change your program, then test it again in your browser. View the
67 Chapter Six Reading and Writing Data Files
guestbook.txt file in your browser or in a text editor and observe the results.
File Locking
CGI processes on a Unix web server can run simultaneously, and if two programs try to open and write the same file at the same time, the file may be erased, and you’ll lose all of your data. To prevent this, you need to lock the files you are writing to. There are two types of file locks:
• A shared lock allows more than one program (or other process) to access the file at the same time. A program should use a shared lock when reading from a file.• An exclusive lock allows only one program or process to access the file while the lock is held. A program should use an exclusive lock when writing to a file.
File locking is accomplished in Perl using the Fcntl module (which is part of the standard library), and the flock function. The use statement is like CGI.pm’s:
use Fcntl qw(:flock);
The Fcntl module provides symbolic values (like abbreviations) representing the correct lock numbers for the flock function, but you must specify :flock in the use statement in order for Fctnl to export those values. The values are as follows:
LOCK_SH shared lockLOCK_EX exclusive lockLOCK_NB non-blocking lockLOCK_UN unlock
These abbreviations can then be passed to flock. The flock function takes two arguments: the filehandle and the lock type, which is typically a number. The number may vary depending on what operating system you are using, so it’s best to use the symbolic values provided by Fcntl. A file is locked after you open it (because the filehandle doesn’t exist before you open the file):
open(FH, "filename") or &dienice("Can"t open file: $!");flock(FH, LOCK_SH);
The lock will be released automatically when you close the file or when the program finishes.
Keep in mind that file locking is only effective if all of the programs that read and write
68 Chapter Six Reading and Writing Data Files
to that file also use flock. Programs that don’t will ignore the locks held by other processes.
Since flock may force your CGI program to wait for another process to finish writing to a file, you should also reset the file pointer, using the seek function:
seek(filehandle, offset, whence);
offset is the number of bytes to move the pointer, relative to whence, which is one of the following:
0 beginning of file 1 current file position 2 end of file
So seek(OUTF,0,2) repositions the pointer to the end of the file. If you were reading the file instead of writing to it, you’d want to do seek(OUTF,0,0) to reset the pointer to the beginning of the file.
The Fcntl module also provides symbolic values for the seek pointers:
SEEK_SET beginning of file SEEK_CUR current file position SEEK_END end of file
To use these, add :seek to the use Fcntl statement:
use Fcntl qw(:flock :seek);
Now you can use seek(OUTF,0,SEEK_END) to reset the file pointer to the end of the file, or seek(OUTF,0,SEEK_SET) to reset it to the beginning of the file.
Closing Files
When you’re finished writing to a file, it’s best to close the file, like so:
close(filehandle);
Files are automatically closed when your program ends. File locks are released when the file is closed, so it is not necessary to actually unlock the file before closing it. (In fact, releasing the lock before the file is closed can be dangerous and cause you to lose data.)
69 Chapter Six Reading and Writing Data Files
Reading Files
There are two ways you can handle reading data from a file: you can either read one line at a time, or read the entire file into an array. Here’s an example:
open(FH,"guestbook.txt") or &dienice("Can't open guestbook.txt: $!");
my $a = <FH>; # reads one line from the file into # the scalar $amy @b = <FH>; # reads the ENTIRE FILE into array @b
close(FH); # closes the file
If you were to use this code in your program, you’d end up with the first line of guestbook.txt being stored in $a, and the remainder of the file in array @b (with each element of @b containing one line of data from the file). The actual read occurs with <filehandle>; the amount of data read depends on the type of variable you save it into.
The following section of code shows how to read the entire file into an array, then loop through each element of the array to print out each line:
open(FH,"guestbook.txt") or &dienice("Can"t open guestbook.txt: $!");my @ary = <FH>;close(FH);
foreach my $line (@ary) { print $line;}
This code minimizes the amount of time the file is actually open. The drawback is it causes your CGI program to consume as much memory as the size of the file. Obviously for very large files that’s not a good idea; if your program consumes more memory than the machine has available, it could crash the whole machine (or at the very least make things extremely slow). To process data from a very large file, it’s better to use a while loop to read one line at a time:
open(FH,"guestbook.txt") or &dienice("Can"t open guestbook.txt: $!");while (my $line = <FH>) { print $line;}close(FH);
70 Chapter Six Reading and Writing Data Files
Poll Program
Let’s try another example: a web poll. You’ve probably seen them on various news sites. A basic poll consists of one question and several potential answers (as radio buttons); you pick one of the answers, vote, then see the poll results on the next page.
Start by creating the poll HTML form. Use whatever question and answer set you wish.
Program 6-2: poll.html Poll HTML Form
<form action="poll.cgi" method="POST">Which was your favorite <i>Lord of the Rings</i> film?<br><input type="radio" name="pick" value="fotr">The Fellowship of the Ring<br><input type="radio" name="pick" value="ttt">The Two Towers<br><input type="radio" name="pick" value="rotk">Return of the King<br><input type="radio" name="pick" value="none">I didn't watch them<br><input type="submit" value="Vote"></form><a href="results.cgi">View Results</a><br>
➮ Working example: http://www.cgi101.com/book/ch6/poll.html
In this example we’re using abbreviations for the radio button values. Our CGI program will translate the abbreviations appropriately.
Now the voting CGI program will write the result to a file. Rather than having this program analyze the results, we’ll simply use a redirect to bounce the viewer to a third program (results.cgi). That way you won’t need to write the results code twice.
Here is how the voting program (poll.cgi) should look:
Program 6-3: poll.cgi Poll Program
#!/usr/bin/perl -wTuse CGI qw(:standard);use CGI::Carp qw(warningsToBrowser fatalsToBrowser);use strict;use Fcntl qw(:flock :seek);

71 Chapter Six Reading and Writing Data Files
my $outfile = "poll.out";
# only record the vote if they actually picked somethingif (param('pick')) { open(OUT, ">>$outfile") or &dienice("Couldn't open $outfile: $!"); flock(OUT, LOCK_EX); # set an exclusive lock seek(OUT, 0, SEEK_END); # then seek the end of file print OUT param('pick'),"\n"; close(OUT);} else {# this is optional, but if they didn't vote, you might # want to tell them about it... &dienice("You didn't pick anything!");}
# redirect to the results.cgi. # (Change to your own URL...)print redirect("http://cgi101.com/book/ch6/results.cgi");
sub dienice { my($msg) = @_; print header; print start_html("Error"); print h2("Error"); print $msg; print end_html; exit;}
2 Source code: http://www.cgi101.com/book/ch6/poll-cgi.html
Finally results.cgi reads the file where the votes are stored, totals the overall votes as well as the votes for each choice, and displays them in table format.
Program 6-4: results.cgi Poll Results Program
#!/usr/bin/perl -wTuse CGI qw(:standard);use CGI::Carp qw(warningsToBrowser fatalsToBrowser);use strict;use Fcntl qw(:flock :seek);
my $outfile = "poll.out";

72 Chapter Six Reading and Writing Data Files
print header;print start_html("Results");
# open the file for readingopen(IN, "$outfile") or &dienice("Couldn't open $outfile: $!");# set a shared lockflock(IN, LOCK_SH); # then seek the beginning of the fileseek(IN, 0, SEEK_SET);
# declare the totals variablesmy($total_votes, %results);# initialize all of the counts to zero:foreach my $i ("fotr", "ttt", "rotk", "none") { $results{$i} = 0;}
# now read the file one line at a time:while (my $rec = <IN>) { chomp($rec); $total_votes = $total_votes + 1; $results{$rec} = $results{$rec} + 1;}close(IN);
# now display a summary:print <<End;<b>Which was your favorite <i>Lord of the Rings</i> film?</b><br><table border=0 width=50%><tr> <td>The Fellowship of the Ring</td> <td>$results{fotr} votes</td></tr><tr> <td>The Two Towers</td> <td>$results{ttt} votes</td></tr><tr> <td>Return of the King</td> <td>$results{rotk} votes</td></tr><tr> <td>didn't watch them</td> <td>$results{none} votes</td></tr>
73 Chapter Six Reading and Writing Data Files
</table><p>$total_votes votes total</p>End
print end_html;
sub dienice { my($msg) = @_; print h2("Error"); print $msg; print end_html; exit;}
2 Source code: http://www.cgi101.com/book/ch6/results-cgi.html
The results program only shows the total number of votes. You may also want to calculate the percentages and display a bar-graph for each vote relative to the overall total. We’ll look at how to calculate percentages in the next chapter.
Resources
CGIwrap: http://sourceforge.net/projects/cgiwrap
Visit http://www.cgi101.com/book/ch6/ for source code and links from this chapter.
Order CGI Programming 101 Today!
The rest of the book is packed with more great CGI programming information and examples:
Chapter 7: Working With Strings: Comparing, replacing, reversing, and splitting strings; changing caseChapter 8: Server-Side Includes: a complete list of Apache SSI directives; how to include files and execute CGI programs using SSIsChapter 9: Working with Numbers: Numeric functions and operators, random numbers, a random image program, a banner ad programChapter 10: Redirection: Counting clicks from banner ads; redirection based on referring page or visitor’s country; multi-site redirectorChapter 11: Multi-Script Forms: build an online catalog and order form systemChapter 12: Searching and Sorting: Searching with grep; searching for multiple keywords; custom sorting subroutinesChapter 13: Regular Expressions: Pattern matching and replacementChapter 14: Perl Modules: How to find and install modules (for both Unix and Windows), validating e-mail addresses with Email::Valid; uploading files from a form; a graphical counter program; e-mailing attachments with MIME::LiteChapter 15: Date and Time: Calculating and formatting dates and times; a countdown clock programChapter 16: Database Programming: Working with MySQL and the Perl DBI (database independent) module.Chapter 17: HTTP Cookies: How to set, read, delete and track cookies; develop a cookie-based shopping cartChapter 18: Writing Your Own Modules: How to write a module for sharing common code.Chapter 19: CGI Security: Protecting your site from hackers and spammersChapter 20: Password Protection: HTTP-authentication and cookie-based authentication; user registration program; password change programs; logout programAppendix A: Unix Tutorial and Command Reference
A full-length PDF of CGI Programming 101 is available from e23 (http://e23.sjgames.com/item.html?id=cgi101)
The printed book can be ordered from Amazon.com, or directly from the author at http://www.cgi101.com/book/order.html