Cat Bordhi 1 - img2.timg.co.ilimg2.timg.co.il/CommunaFiles/39729614.pdf · 4 Chapter Four –...
26
1 by Cat Bordhi by Cat Bordhi
-
Upload
truongliem -
Category
Documents
-
view
220 -
download
7
Transcript of Cat Bordhi 1 - img2.timg.co.ilimg2.timg.co.il/CommunaFiles/39729614.pdf · 4 Chapter Four –...
1
by
Cat Bordhi by
Cat Bordhi

2
Complimentary Sample of Cat Bordhi’s New Knitting Book
The chapters in the sampler are incomplete.
To see the entire book, visit your local yarn shop or bookstore.
3
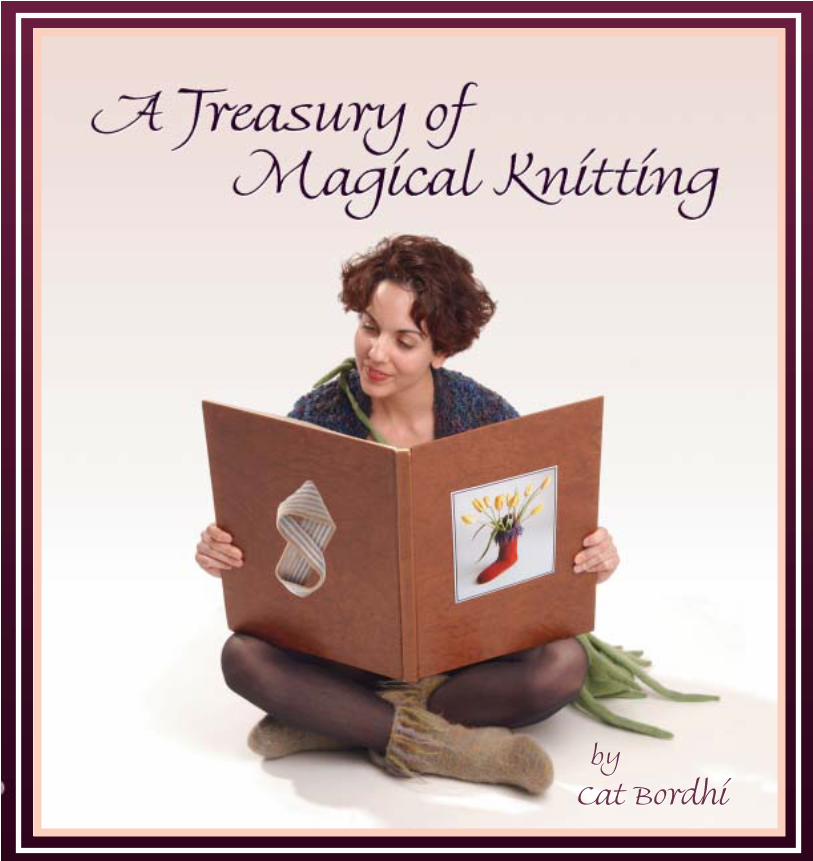
Introduction - page 8
Exploration with paper, pencil, scissors and tapeAugust Ferdinand Moebius, and Helga
Chapter One – Techniques, and One Tool - page 12
Shattering a mythOne tool
Techniques
Moebius Cast-On (MCO) – the fastest in the world; counting MCO stitches,knitting through the front or back loop, marker position
Chapter Two – Simplest-of-All Moebius Scarf - page 18
Patterns
Simplest-of-All Moebius Scarf – Basic Version, The Snuggler,Fringed Cedar Bark, Swinging Mikado
Techniques
Bipolar stockinette, yarn choices, number of stitches to cast on,yardage calculations, elastic bind-off, blocking a Moebius
Chapter Three – The Purl Ridge Scarf - page 26
Patterns
Moebius Purl Ridge Scarf – Basic Version, Merging Stripes, Color Shift Moebius,Honey Lane Alpaca, Hay Bale Moebius, Moguls Moebius,Cloud Stream Edged in Blue Sky, Sandstone and Sky Felted Stripes
Techniques
Applied I-cord, grafting I-cord ends, color transitions,purl ridge variations and sequences, light felting
Table of Contents

4
Chapter Four – Mercurial Shapes - page 39
Patterns
Moth-Eaten Moebius, Mohair Moebius Scarf-Shawl, Mercurial Moebius Wraps, Scottish Wave Scarf
Techniques
Shaping a Moebius, making two Moebii with mirror reflection
Chapter Five – Mirrored Diagonals - page 48
Patterns
Arrow Lace Pathways – Basic Version, Mulberry Silk Pathways Scarf, Beaded Tresses Arrow Scarf
Techniques
Diagonals that become arrows, working a circular gauge swatch in rows
Chapter Six – Lace Reflections - page 54
Patterns
Sage Rhythm Wrap, White Lacy Shoulder Wrap
Technique
Needle-wrapping
Chapter Seven – Moebius-Banded Hats - page 59
Patterns
Reversible Lotus Blossom Hat, Jeweled Merino Cap,Beaded Tresses Hat
Techniques
Turning a Moebius band into a simple circle,knitting on two circular needles, making beaded tresses
Chapter Eight – Mischievous Feet - page 68
Patterns
Felted Moebius Boots - Basic Version, Sophie’s Mermaid Feet, Enchanted Forest ChristmasStocking, Buckskin Boot, Child’s Woodland Boots, Seven Socklings Necklace
Techniques
Felting fringe, felting and fitting, blocking a foot, waste yarn openings, sock-knitting

5
Chapter Nine – Swirling Capes - page 84
Patterns
Rimrock Cape, Lost Trail Cape
Techniques
Growing a cape from a Moebius scarf, facing
Chapter Ten – Undulating Adventures - page 92
Patterns
Windy Blue Sky Scarf, Undulating Autumn Scarf
Techniques
Working short row undulations and variations,working the MCO in segments
Chapter Eleven - Questions Answered & a Few Magic Tricks - page 98
Have a problem? Look here.
Preview of The Second Treasury of Magical Knitting - page 104
About Socks Soar on Two Circular Needles - page 106
About Treasure Forest - page 107
About Vanessa Rose Ament - page 108
Sources - page 109
Abbreviations - page 111

6
Introduction
W elcome to the world of magical knitting, where graceful shapesflow from your needles – even if you’re not quite sure how
you got here from there.
I first encountered the form that inspired magicalknitting while teaching elementary school,searching for ways to engage my youngsters with thebeauty of mathematical shapes.
Once I brought this mysterious form into the classroom, itenchanted us all, and we spent hours exploring its nature. But wecould only go so far, because we were making models with paper,pencils, scissors, and tape. It was not until years later, when Iexperimented with knitting this form, that it stretched and swayed andtruly came to life, inviting me to enter its delightful dimensions with allmy senses alert. After several years of playing with it, I can tell you it ismysterious and above all else, simple.
I’m going to introduce you step by step to this magical form as if youwere one of my students. Later I’ll tell you a story about the Germanman who discovered it over a century ago, and then you’ll be ready to start knitting your first one.
Please find a pencil or pen, scissors, tape, and a sheet of blank paper.
Cut a long, narrow rectangle of paper.
In magical knitting, thinking relaxes into ”seeing”. You allow yourselfto be carried forward, one stitch at a time, with no effort or worry.
Magical Knitting Workshop student, Seattle, WA

7
The strip’s two originalsides have merged tobecome one side (onesurface) and the two longedges are now one twice-as-long edge. Like magic!
Just for fun, try this: Can you color the paperblue on the outside and red on the inside? If yousucceed, let me know, and I’ll send you a prize.
Just wait until we apply these mysterious qualitiesto knitting. In the first Treasury of MagicalKnitting, we’ll knit scarves from the center out inone fell swoop, capes with transforming collars,hats with endless beginnings, and felted bootswith no inside or outside, although your feetwon’t know it.
The Second Treasury of Magical Knitting expandson what you learn in this book, and is filled withfelted and unfelted bags, baskets, bowls, and catbeds, which I’m sorry to say, also have no insideor outside, but your cat will not fall out of them.
Hold the ends ofthe strip togetherso they resemblea ring.
Carefully turn oneend over so thatthe “wrong side”meets the “rightside.” Tape theends together.
Now finish writing your sentence about why youlove to knit, staying right along the bottom edge.Keep adding reasons you love to knit untilsomething stops you.
Can you figure out what happened?
How many sides are there on what only momentsago was an ordinary, two-sided strip of paper?
Now examine the edge of the twisted ring. Whatdoes your long “I love to knit because . . .”sentence reveal? How many edges are there?
Write “I love to knit because . . .” starting atthe bottom left corner of the strip, along the
bottom edge.
8
Chapter One — Techniques, and One Tool
This is what I’ve been waiting for! A way to knit a real Moebius that works!Magical Knitting Workshop student, Gig Harbor, WA
What’s the big deal about Moebius knitting? You just knit a long rectangle,twist one end, and graft them together. Or is there something I don’t know?
an uninitiated knitter
In 1858, when Helga knit her Moebius scarves, she had tonot only invent circular needles, but invent one with a
long enough string, or cable, to make it possible to knit aMoebius in the magical way. She only grafted one Moebiusscarf in her life – the one with August’s formula on it. Afterthat, she used her cello-string device to knit Moebius scarvesin one fell swoop, just as we are going to. Something as flowingand graceful as a Moebius ought not to be interrupted by a seam.
I’d like to dispel a myth believed by many knitters somewhatfamiliar with Moebius scarves, who think they have knittedthem on needles as short as sixteen inches.
Circular knitting instructions usually warn against twistingthe stitches when joining. But if this dreaded twistingoccurs, the curled piece of knitting you end up with is nota Moebius. If you’ve done the paper and tape exercises inthe introduction, you may understand why this cannotbe true.
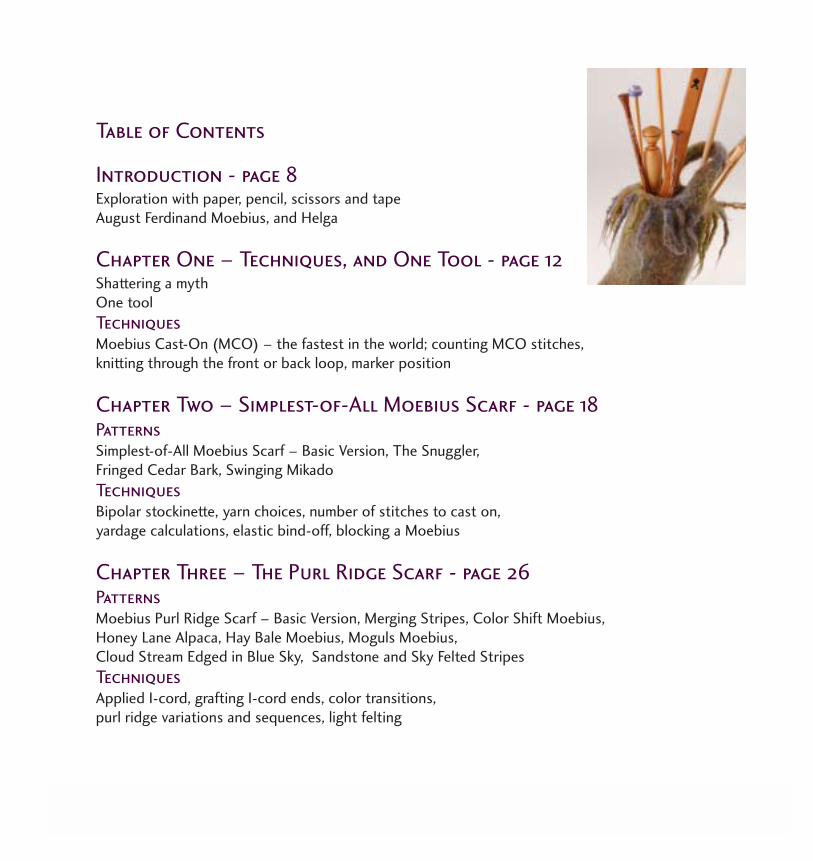
A twisted line of stitches, joined and knit upward, hastwo separate edges – one cast-on (the bottom) andone bound-off (the top). It cannot be a Moebius,which has only one edge. In addition, this sorry
Moguls Moebius Scarf, page 35

9
piece of knitting will be found to have two sides,twice as many as the mysterious Moebius. It alsohas a 360˚ (full) twist instead of a 180˚ (half )twist. And it will not fall very gracefully, withsuch a lot of twist.
Elizabeth Zimmerman was the first person tointroduce the charm and wonders of the Moebiusto knitters, in her book, Knitting Around, in1989. If you read her narrative, you’ll feel herexcitement, and see that she, too, quickly deter-mined that this form could not be knit by simplytwisting a join. Instead, she grafted a rectangularstrip with a half-twist, thereby eliminating onesurface and one edge. Her beautiful scarf hasinspired thousands of knitters, and her graft is nodoubt impossible to find. However, this practicalmethod does not lead to the delightful knitter’splayground of our magical one-fell-swoopMoebius.
When you knit a Moebius in one continuousflow of stitches, you find beautiful patternsemerging naturally and symmetrically from thecenter out, with very little effort or attention onyour part. Since you have only one edge to finish,you’ll never have a bound-off side tighter than thecast-on. And you’ll never find your cast-on at all,because it’s swallowed up in the center of thescarf. Beginning and end are swallowed upas well.
But most of all, and this is hard to explain, thereis simply a joy and peacefulness in allowing thetrue Moebius to do all the work for you. You’llhave to find this out for yourself, by knitting one.
One Edge, One Surface, & One Tool
A long circular needle between 47” and 60” longis probably the only tool you need to buy forknitting the designs in this book. Addi Turboneedles, both metal and bamboo, are available inthese lengths, Crystal Palace bamboo needlescome in a 55” length, and you can purchase aDenise Needle Kit with additional longer cableswhich will give you all the sizes you need to kniteverything in both Treasuries. Your knitting willbe a little slower with the Denise needles becausethe cable is thicker, and you will have to fre-quently push your stitches around the long paththey follow.
Why do you need sucha long needle? Becauseit will work in a coiledposition, like so:
The needle tips mustto be able to worktogether, and shorterneedles simply do notoffer enough cable lengthto permit them to work together. It is possibleto use a 36” or 40” length to knit a Moebius,although they will push back against you, and ifyou have joint problems or arthritis, you shoulddefinitely not attempt a Moebius with this shorterlength. I recommend them only for the hats,which are best done on a 40” needle. If youalready have a 60” needle, you’ll find it will workfine for everything in this book except for thehats and the felted boots.
There’s enoughcable on this 47”needle to allow the
tips to interacteasily.

10
It’s a miracle that simply knitting along, la-dee-dah, turns into thisbeautiful Moebius. Magical Workshop student, Menlo Park, CA
Chapter Two — Simplest-of-All Moebius Scarf
It wasn’t until this book was almost finished that I decided I’d better check that something I’d beentelling my Magical Knitting Workshop students was actually true. You see, if you just knit every stitch
of a Moebius as it rotates into place between your needles, which every stitch will do without any efforton your part, it ends up as something that one of my students, Morgan Hicks of Seattle,cheerfully labeled “Bipolar Stockinette”: all stitches to the right of theMoebius spine will look knit (right side stockinette) and thoseto the left will look purled (reverse stockinette).
I didn’t think that sounded very appealing, so I’dalways steered students to the Purl Ridge Scarfwhich you’ll find in Chapter Two.
But when I actually tried knitting a “BipolarMoebius,” to my surprise I discovered it wasblessed with a special grace. And to think Ihad rejected it sight unseen! It makes mewonder what else I’ve missed out on.
And so I encourage you to try the newlychristened “Simplest-of-AllMoebius Scarves.” I show it inthree very different yarnsto give you some senseof its range.

11
Choosing yarns for moebius scarves
If you’d like alively scarf thatsways as youmove, look foryarns that havesome weight tothem, likealpaca, rayon,silk, linen,lustrous wools,and somesynthetics. Youcan also use twostrands of yarn,one of themwith gooddrape, the other
one less so. When you knit your swatch, keepgoing up needle sizes until your fabric is as drapeyas you wish. If you’d like your scarf to nestleagainst you, and stay put, try yarns that arebulkier, fluffier, or a little firmer. When in doubt,go up a needle size, since in general a scarf oughtto be loose enough to have some movement.
In the yarn information for each pattern, Iinclude the “wraps per inch” (wpi) of the yarn soyou can compare the diameter with other yarns.To measure the wpi of any yarn, simply wrap itaround a ruler and gently push the strandstogether until they cover one inch. The numberof wraps in one inch is your wpi. Wrapping athick rubber band around the ruler at each side ofone inch will help make your count moreaccurate, so that you are sure you are coveringexactly one inch.
I recommend you make a gauge swatchapproximately 6” wide and 4” inches high. Yourswatch will tell you if your fabric feels right, andalso give you the number of stitches-per-inch ofknitting so you can determine how many tocast on.How many stitches should you cast on?
I’ve provided a table on page 20 so you needn’tcalculate the number of stitches to cast on forknitting a Simplest-of-All Scarf, but it’s verysimple to do yourself. Just hang a tape measure

12
Magical knitting lies somewhere between Star Trek andThe X-Files – keep knitting, Scully, all will be revealed!
Magical Knitting Workshop student, Anacortes, WA
Chapter Three – Purl Ridge Moebius Scarf
A Moebius scarf will stay put in a windstorm, and alwaysdrape beautifully, flowing around your neck with the sort
of graceful curves we normally associate with a stream of wateror honey. So here’s another basic design for you to try.The Purl Ridge Scarf is nearly as mindless as the Simplest-of-All Scarf, and so beautiful that I happily knit a dozen in avariety of sensual yarns before it occurred to me to exploreother designs. One day I was wearing my own favorite, donein Mountain Colors Moguls, when a businessman passed mein a bakery doorway, then wheeled around. “That’s a fantasticscarf!” he shouted, and set out into the rainstorm.
Here are the basic directions:
Step 1: Do a Moebius Cast-on.
Step 2: Knit for 1, 2, or 3 rounds.
Step 3: Purl the same number ofrounds as above.
Step 4: Repeat steps 2 and 3 untilyour scarf is wide enough.
Step 5: Bind off.
13
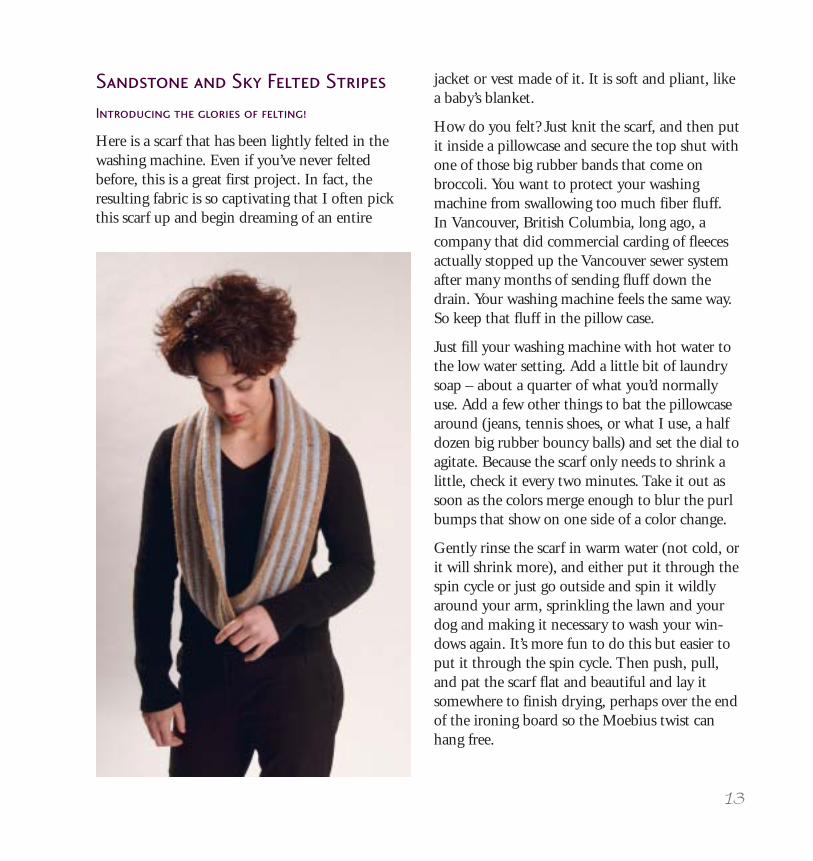
jacket or vest made of it. It is soft and pliant, likea baby’s blanket.
How do you felt? Just knit the scarf, and then putit inside a pillowcase and secure the top shut withone of those big rubber bands that come onbroccoli. You want to protect your washingmachine from swallowing too much fiber fluff.In Vancouver, British Columbia, long ago, acompany that did commercial carding of fleecesactually stopped up the Vancouver sewer systemafter many months of sending fluff down thedrain. Your washing machine feels the same way.So keep that fluff in the pillow case.
Just fill your washing machine with hot water tothe low water setting. Add a little bit of laundrysoap – about a quarter of what you’d normallyuse. Add a few other things to bat the pillowcasearound (jeans, tennis shoes, or what I use, a halfdozen big rubber bouncy balls) and set the dial toagitate. Because the scarf only needs to shrink alittle, check it every two minutes. Take it out assoon as the colors merge enough to blur the purlbumps that show on one side of a color change.
Gently rinse the scarf in warm water (not cold, orit will shrink more), and either put it through thespin cycle or just go outside and spin it wildlyaround your arm, sprinkling the lawn and yourdog and making it necessary to wash your win-dows again. It’s more fun to do this but easier toput it through the spin cycle. Then push, pull,and pat the scarf flat and beautiful and lay itsomewhere to finish drying, perhaps over the endof the ironing board so the Moebius twist canhang free.
Sandstone and Sky Felted Stripes
Introducing the glories of felting!
Here is a scarf that has been lightly felted in thewashing machine. Even if you’ve never feltedbefore, this is a great first project. In fact, theresulting fabric is so captivating that I often pickthis scarf up and begin dreaming of an entire

14
I don’t know what it is about the knitted Moebius, but it keeps recreatingitself – there’s definitely on-going energy – in perpetual motion. artist viewing the Magical Knitting collection, Vancouver, British Columbia
Among the greatest joys of designing are those suddenEureka! moments when a window swings open to reveal a
whole new realm of possibility. One day a window blew open toshow me that the Moebius scarves wanted to leap out of the straightsides I’d kept them in so far, and swell and curve and swim. It’s just amatter of sequencing increases on one side of the spine anddecreases on the other.
The first “Shaped Moebius” I made was so mesmerizingthat I vowed I’d never make a straight one again. Well, Iwas wrong – but as you will see, these shaped Moebii areabsolutely enchanting and they fall in the mostunpredictable ways.
I actually came up with the name of the second wrap inthis chapter – the Mercurial Moebius – very late one nightin December while staying in West Seattle with VirginiaBowen, owner of the Seattle Yarn Gallery, where I wasteaching workshops. My students had been urging me towrite a book about the magical knitting they were learning,and that night I decided that indeed I would write thisbook.
I actually had an Ott light beside my bed (such luxury!)and until the wee hours I kept having to hop up and turn iton and write down or draw the designs that were floodingthrough my head. It was like one of those newsreels of the
Chapter Four – Mercurial Shapes

15
There’s linear logic in straight needles, and circular logic in circular needles, but this issomething different. It’s getting your mind to dance in space, and it feels fantastic.
Magical Knitting Workshop student, Anacortes, Washington
Chapter Five – Mirrored Diagonals
You’re about to “double your money” as you knit thedesigns in this chapter. For the “price” of knitting a simple
diagonal line of yarn-overs, you’ll create a mirror reflection ofthat diagonal line – and it will become an arrow design,growing from the spine of your Moebius. Yet this intricate-looking scarf has only two pattern rounds to repeat!
It’s essential to start with an exact stitch count for the designsin this chapter, so turn off the phone while you cast on andestablish the first round. Many of my workshop studentshave found it helpful to place a marker between eachpattern repeat until they become more obvious.
Before beginning this scarf, make a paper Moebius (seepage 7) and draw a line around the spine (the midlinelengthwise). Now draw diagonal lines from the spine outto the right edge and continue around until you meetyour first line again. Examine the other side of thepaper, where your diagonal reverses all by itself (if youhold the paper up to the light, you can see the arrowpattern better). This reveals how your arrow willmagically appear. The Moebius form is very generouswith its gifts, and this is one of them.

16
Edging
Continue working with coral.
Yarn and design suggestions
If you wish to make the scarf longer or shorter,add or subtract 28 stitches from the MCO at atime. This is because the Moebius nature of thescarf requires an odd number of repeats forcorrect placement along the spine, and a singlerepeat is 14 stitches. If you were to add 14 sts,the odd number I have established would thenbe even, so you have to add 2 repeats at a timeinstead, which is 28 sts. You could make a lovelyshorter Moebius – something that would liearound your neck like a loose, lacey collar –on 98 stitches (which is 7 repeats).
Choose yarns which allow you to show off theArrow Lace pattern – in other words, fairlysmooth and not wildly variegated yarns, whichmay obscure stitch patterns. I plan to try one inEuroflax linen, another in a cotton-rayon blend,and maybe someday, Qiviut!
You could also make the scarf wider so that it ismore of a shawl-wrap, or add beads to the littlefingertips. I’ve often thought of running severalstrands of complementary yarn through the yarn-over holes and knotting the ends into fringeinstead of knitting the little fingers. This is aplayful scarf – have fun being creative withthe basic design.
If you want more mirroring diagonals, there’s oneappearing as the scarf-collar of the Rimrock Capein Chapter Nine. Feel free to simply knit the scarfand complete the edging, ignoring the capedirections.
A note for the inquisitive knitter: It is possible toknit a diagonal line which remains diagonalalmost all the way around the Moebius, notbecoming an arrow – until it inevitablycollides with itself to make a series ofstacking arrowheads!
17
I love how the lace motifs arrange themselves perfectly around theMoebius. Somehow it reminds me of birds flying in formation.
Magical Knitting Workshop student, Friday Harbor, WA
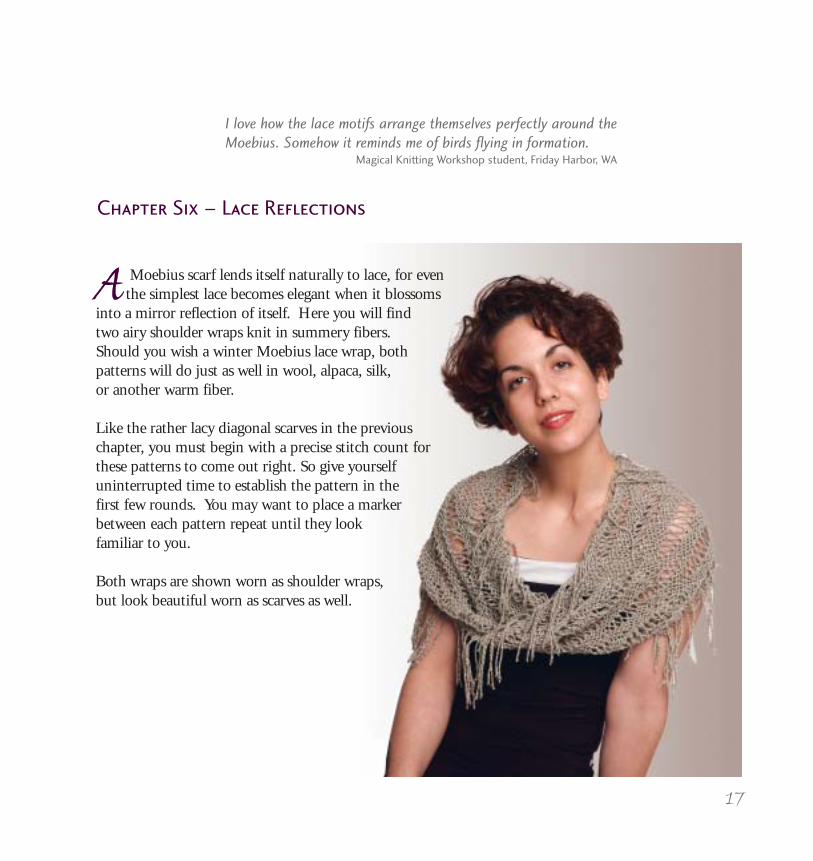
Chapter Six – Lace Reflections
A Moebius scarf lends itself naturally to lace, for eventhe simplest lace becomes elegant when it blossoms
into a mirror reflection of itself. Here you will findtwo airy shoulder wraps knit in summery fibers.Should you wish a winter Moebius lace wrap, bothpatterns will do just as well in wool, alpaca, silk,or another warm fiber.
Like the rather lacy diagonal scarves in the previouschapter, you must begin with a precise stitch count forthese patterns to come out right. So give yourselfuninterrupted time to establish the pattern in thefirst few rounds. You may want to place a markerbetween each pattern repeat until they lookfamiliar to you.
Both wraps are shown worn as shoulder wraps,but look beautiful worn as scarves as well.

18
Reversible Lotus Blossom
This richly textured hat seems almost sculpted, although ittruly is not difficult to make. It is completely reversible, withthe design different on each side. Both designs have a lotus-like quality to them. The alpaca yarn comes from HoneyLane Farms on San Juan Island, Washington.
Materials: Honey Lane Farms Alpaca(100% Alpaca, 50 g/ 110 yds, 13 wpi)cinnamon or heathered lilac, 3 skeinsNeedles: (you may require a differentsize to get correct gauge) circular size 9(5.5 mm), 40” length, plus 16” circularor a set of double-pointed needles insame sizeNotions: tapestry needle, 2 stitchmarkers in contrasting colorsGauge: 13 sts = 4” (10 cm) with 2strands of yarn held together, inslightly stretched stockinetteFinished size: adult - headcircumference 20-23”Stitch guide: See page 111 forabbreviations. See page 60 for howto work with two circular needles.
Beginning – Moebius hat-band
MCO 60. Place marker. Knit 3 rounds.Purl 3 rounds. Knit 3 rounds.Finishing Moebius hat-band
Loosely bind off 60 sts, or use the elasticbind-off: Knit 2, * replace 2 sts on leftneedle and knit them together fromright to left through back loops, k1,repeat from *. Bring needle endstogether with band pushed below, soneedle tips join in a simple circle asshown on page 60.Begin crown
With 16” circular needle (or set ofdouble-pointeds) and with 3 k rowsfacing you, p 1 round (use 16” needleto p sts from 40” needle, then put 40”

19
*Knit 6, k2tog, repeat from * 10 more times. (77sts) Knit 3 rounds.*Knit 5, k2tog, repeat from * 10 times. (66 sts)Knit 2 rounds.*Knit 4, k2tog, repeat from * 10 more times. (55sts) Knit 3 rounds.*Knit 3, k2tog, repeat from * 10 more times. (44sts) Knit 2 rounds.*Knit 2, k2tog, repeat from * 10 more times. (33sts) Knit 3 rounds.*Knit 1, k2tog, repeat from * 10 more times. (22sts) Knit 2 rounds.*Knit 2tog 11 times. (11 sts)Knit 1, k2tog, k4, k2tog, k2. Cut yarn and threadthrough final sts, then weave in ends.Make and attach 15 beaded tresses
With sandstone and 16” circular or 1 double-pointed needle, cast on 3 sts, leaving 8” tail.Work free I-cord: *Slide 3 sts to top of needle, soworking yarn comes from bottom of 3rd st. Knit3. Repeat from * until 7” long. Cut 8” tail, usecrochet hook to draw tail through 3 remainingsts. Use crochet hook to draw same tailthrough a bead, then through bottom ofI-cord, through bead again, then weavetail up and down through center of I-cord. Attach beaded tresses: Useremaining tail to sew first beaded tress toinside of hat-band, 4” from center oftwist. Sew second beaded tress 4” toother side of center. Sew remainingbeaded tresses evenly distributed betweenthe first two.Yarn and design suggestions
The Incanto yarn which inspired this hatshimmers with glints of light. As you
ponder other yarn choices, consider doing the hatin one variegated colorway with contrasting-colored beads – perhaps a lavender-huedcolorway with snow white beads? Experiment! Awinter version could be done in fine wool. Thebeaded tresses may also be knit shorter or longer,as you wish. You might also layer the tresses,make them a lot longer, then pull them into twobraids. Have fun with your hand-knit hair!
In The Second Treasury of Magical Knitting, thetechniques from this chapter evolve into feltedbowls and feline bliss beds, like the one shownbelow. Here’s Shey, a fine fellow from BritishColumbia, demonstrating correct paw placement(right on the Moebius twist).
Shey is having happy dreams in a feline bliss bed knitof Philosopher’s Wool, ringed with Cat’s Paw Fair Isle

20
Sophie’s Mermaid Feet
I think these boots would look so natural on amermaid, with their undersea colors and seaweedyfringe. The first pair of felted Moebius boots I made,they are utterly enchanting. Right now I have one onmy table holding a bouquet of yellow tulips streakedin pink. The exquisite, hand-painted yarn comesfrom two magical women in Pennsylvannia,who offer this particular yarn only in“Lottery” colorways, allowingthemselves to create new colorcombinations at whim. But Isuspect they’d be willing to makemore of something similar tothis colorway if enoughyarn shops ask for it.
Yarn: Wool in the WoodsSophie (50% wool, 50%llama, 200 yards, 9 wpi), 2skeins for small and medium, 3skeins for large, in Lottery colorway darkbrown, olive, mummy, dark green, brightgreen. Less than 1 yard smooth waste yarn ina contrasting color.
Follow the Felted Moebius Boots, Basic Version
on page 72, and make the size you wish.
Boots shown are size medium.
21
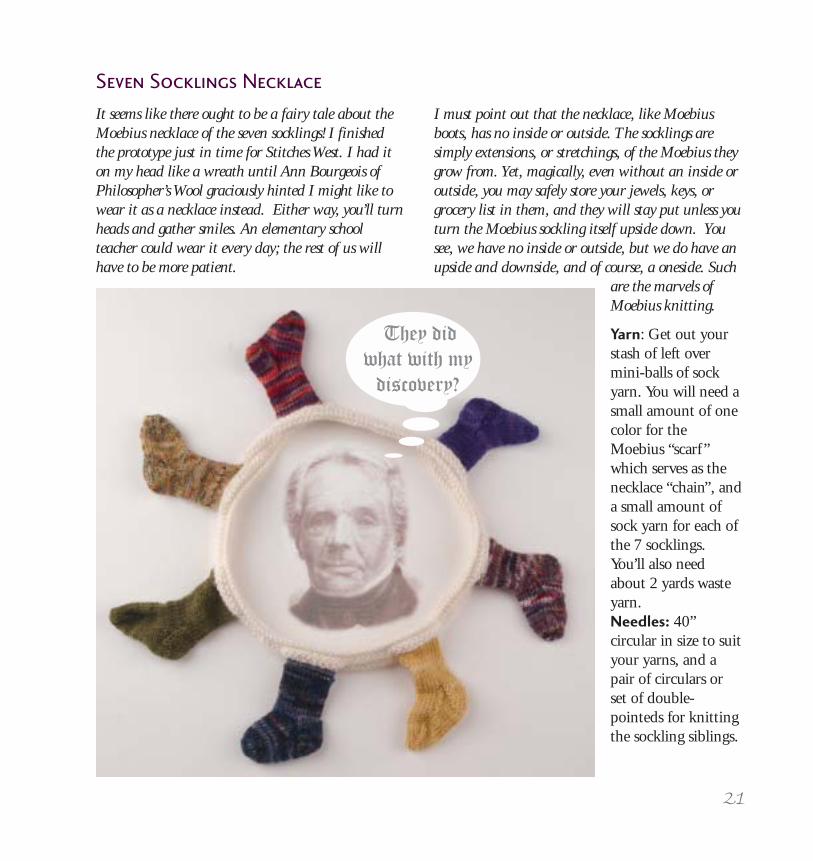
Seven Socklings Necklace
It seems like there ought to be a fairy tale about theMoebius necklace of the seven socklings! I finishedthe prototype just in time for Stitches West. I had iton my head like a wreath until Ann Bourgeois ofPhilosopher’s Wool graciously hinted I might like towear it as a necklace instead. Either way, you’ll turnheads and gather smiles. An elementary schoolteacher could wear it every day; the rest of us willhave to be more patient.
I must point out that the necklace, like Moebiusboots, has no inside or outside. The socklings aresimply extensions, or stretchings, of the Moebius theygrow from. Yet, magically, even without an inside oroutside, you may safely store your jewels, keys, orgrocery list in them, and they will stay put unless youturn the Moebius sockling itself upside down. Yousee, we have no inside or outside, but we do have anupside and downside, and of course, a oneside. Such
are the marvels ofMoebius knitting.
Yarn: Get out yourstash of left overmini-balls of sockyarn. You will need asmall amount of onecolor for theMoebius “scarf ”which serves as thenecklace “chain”, anda small amount ofsock yarn for each ofthe 7 socklings.You’ll also needabout 2 yards wasteyarn.Needles: 40”circular in size to suityour yarns, and apair of circulars orset of double-pointeds for knittingthe sockling siblings.
They did
what with my
discovery?
22
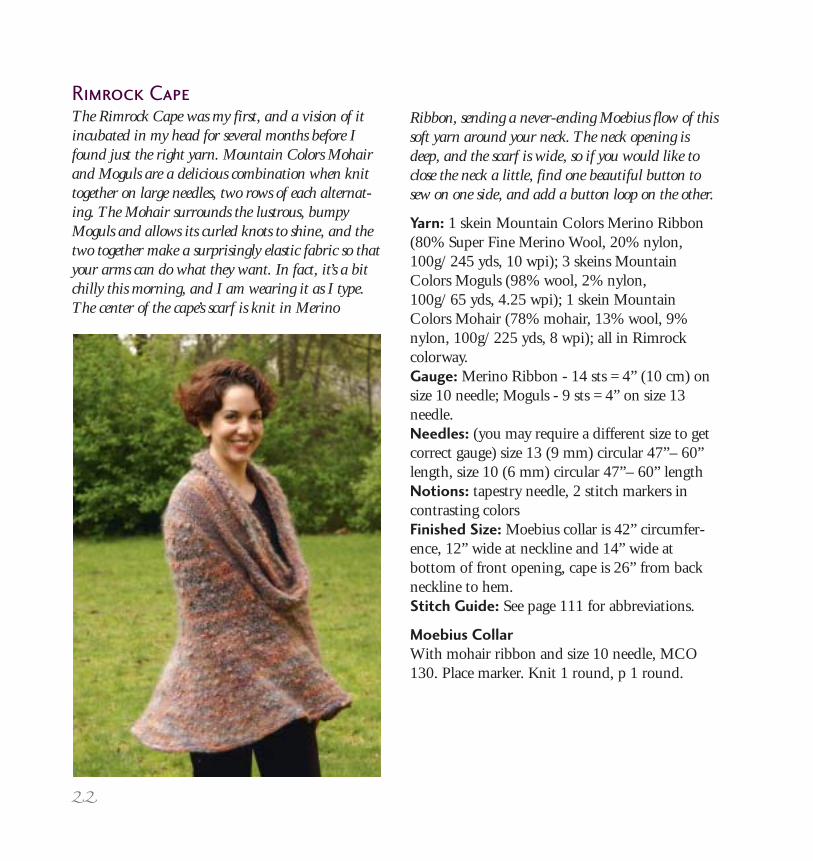
Rimrock Cape
The Rimrock Cape was my first, and a vision of itincubated in my head for several months before Ifound just the right yarn. Mountain Colors Mohairand Moguls are a delicious combination when knittogether on large needles, two rows of each alternat-ing. The Mohair surrounds the lustrous, bumpyMoguls and allows its curled knots to shine, and thetwo together make a surprisingly elastic fabric so thatyour arms can do what they want. In fact, it’s a bitchilly this morning, and I am wearing it as I type.The center of the cape’s scarf is knit in Merino
Ribbon, sending a never-ending Moebius flow of thissoft yarn around your neck. The neck opening isdeep, and the scarf is wide, so if you would like toclose the neck a little, find one beautiful button tosew on one side, and add a button loop on the other.
Yarn: 1 skein Mountain Colors Merino Ribbon(80% Super Fine Merino Wool, 20% nylon,100g/ 245 yds, 10 wpi); 3 skeins MountainColors Moguls (98% wool, 2% nylon,100g/ 65 yds, 4.25 wpi); 1 skein MountainColors Mohair (78% mohair, 13% wool, 9%nylon, 100g/ 225 yds, 8 wpi); all in Rimrockcolorway.Gauge: Merino Ribbon - 14 sts = 4” (10 cm) onsize 10 needle; Moguls - 9 sts = 4” on size 13needle.Needles: (you may require a different size to getcorrect gauge) size 13 (9 mm) circular 47”– 60”length, size 10 (6 mm) circular 47”– 60” lengthNotions: tapestry needle, 2 stitch markers incontrasting colorsFinished Size: Moebius collar is 42” circumfer-ence, 12” wide at neckline and 14” wide atbottom of front opening, cape is 26” from backneckline to hem.Stitch Guide: See page 111 for abbreviations.
Moebius Collar
With mohair ribbon and size 10 needle, MCO130. Place marker. Knit 1 round, p 1 round.

23
My whole take on knitting is completely transformed.I don’t usually think of it as being this creative and playful.
West Coast Knitters Guild member, Vancouver, British Columbia
Chapter Ten – Undulating Adventures
This chapter welcomes the kind of knitter who might gobungee jumping in her spare time. It contains two beautiful
scarves which can never be reproduced – any more than a streamof water can hold the same rivulets and waves twice. But you willlearn to swim, I mean knit, your own Moebius stream, and it isremarkably easy.
These scarves are not designed to be knit by the perfectionist,unless you are a liberated perfectionist who knows that the mostexquisite beauty comes from allowing nature to take its course.
I am not going to give you stitch by stitch instructions,because to do so would be not only laborious for both ofus, but the result would be static instead of as exuberantand alive as a raven playing in billows of invisible air.
The scarves in this chapter are knit using a series ofshortening and lengthening rows. I will teach you thetechnique of building swells and crossing narrows,and then abandon you to knit your own uniquesequence of stream-like shapes as you slowly workyour way back and forth, yet around and around, theMoebius spine of your own one-of-a-kind scarf.

24
Rolling along
If you feel moved to do another round of knitand purl just to remember what it was like to bea normal knitter, go ahead. Then keep makingone never-before-seen shape after another, andwhen you have enough scarf to make your neckhappy, bind off. If you want to do some decreasesin the dips and increases in the humps toaccentuate their contours, just bind off ststogether for decreases or bind off things thataren’t even sts for increases. Or inventanother way.
I think you’re done.
Yarn and design suggestions
This also looks glorious in a lush single-coloryarn. But a hand-paint with colors that changeseveral times every yard give you trulymesmerizing results. I’m still dreaming of findingjust the right yarn to knit my original undulatingvision: a rippling stream of hand-painted yarn inthe myriad colors of running water, with rocks ofmossy granite-colored yarn double-knit here andthere in the stream, lightly stuffed with wool, sothat they rise above the water rushing past them.Maybe a few fern fronds drifting along the edge .. . possibly a half-visible fish somewhere . . . Ihope to have the yarns and time to sit andmidwife this into being one day.

25
Here are answers to some of the questions I hearfrom my inquisitive and clever workshop
students. If you don’t find your own burningquestion down below, check www.catbordhi.com,where I’ll post new questions and answers.
I dropped a few stitches of the MCO. Do I have
to start over again?
No, you don’t. Just look at the MCO stitches that arestill on your left needle, then slowly lift the droppedstitches back onto the left needle one at a time, sothey are leaning the same way. Each time you lift adropped stitch back onto the left needle, thematching stitch will appear on the cable below.They are very cooperative.
I’m a really tight knitter and the first few rounds
are a struggle.
Here is where the Denise Needle Kit can help. Justuse the correct needle size on the right, because theright needle is the one that determines gauge. Use aneedle tip several sizes smaller on the left. This willallow your stitches to slide right along the left needlewithout any struggle, and your gauge ought to remainconsistent. You can go down as many sizes on the left
Seeing your Moebius experiment that didn’t work freed me to trust my own mistakes. The wayyour messiest mistake of all turned out to lead you to so many new discoveries and designs . . .I’m no longer afraid of making mistakes. Magic Knitting Workshop student, Friday Harbor, WA
Chapter Eleven - Questions Answered, & Magic Tricks
This magical being isa cria (baby llama).
26
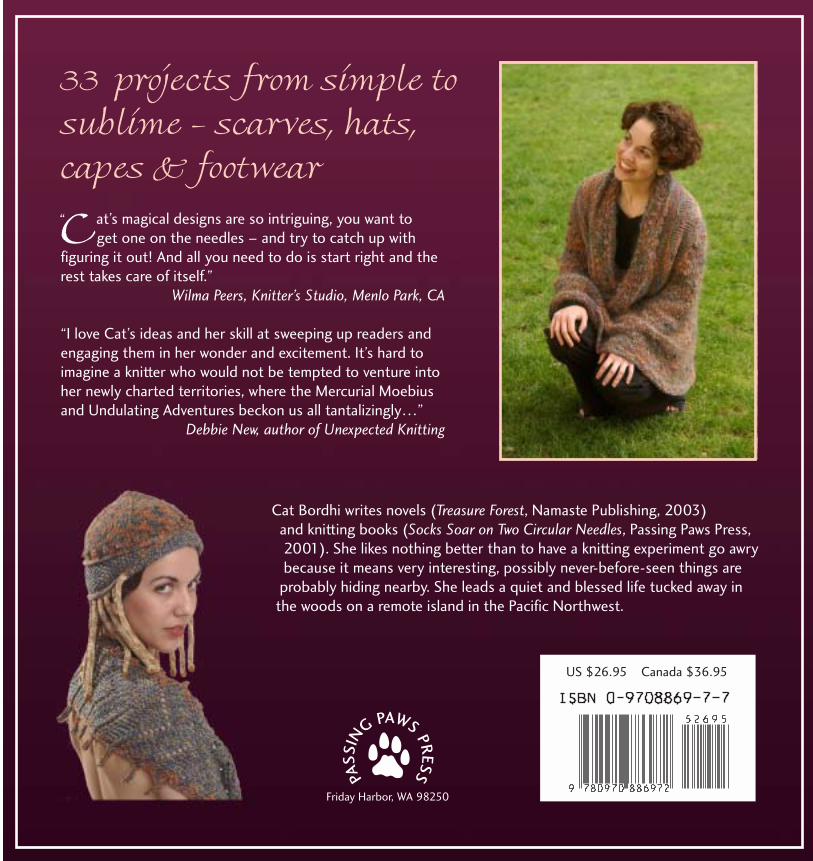
33 projects from simple tosublime - scarves, hats,capes & footwear
Cat’s magical designs are so intriguing, you want toget one on the needles – and try to catch up with
figuring it out! And all you need to do is start right and therest takes care of itself.”
Wilma Peers, Knitter’s Studio, Menlo Park, CA
“I love Cat’s ideas and her skill at sweeping up readers andengaging them in her wonder and excitement. It’s hard toimagine a knitter who would not be tempted to venture intoher newly charted territories, where the Mercurial Moebiusand Undulating Adventures beckon us all tantalizingly…”
Debbie New, author of Unexpected Knitting
Cat Bordhi writes novels (Treasure Forest, Namaste Publishing, 2003) and knitting books (Socks Soar on Two Circular Needles, Passing Paws Press, 2001). She likes nothing better than to have a knitting experiment go awry because it means very interesting, possibly never-before-seen things are probably hiding nearby. She leads a quiet and blessed life tucked away in the woods on a remote island in the Pacific Northwest.
PASSIN
GPAWS
PRESS
Friday Harbor, WA 98250
US $26.95 Canada $36.95
“