care and maintenance of surgical and prosthetic instruments
24
Straumann ® Dental Implant System CARE AND MAINTENANCE OF SURGICAL AND PROSTHETIC INSTRUMENTS
Transcript of care and maintenance of surgical and prosthetic instruments

Straumann® Dental Implant System
CARE AND MAINTENANCEOF SURGICAL AND
PROSTHETIC INSTRUMENTS


CONTENTS
1. General principles 21.1 Material groups and their resistance 31.2 Reusability 5
2. How not to do it! 7
3. Before and during the surgery 8
4. Cleaning and disinfection 94.1 Principles 94.2 Pretreatment 94.3 Cleaning 11
4.3.1 Mechanical cleaning and disinfection 114.3.2 Manual cleaning and disinfection 12
5. Inspection, maintenance, functional test and packaging 165.1 Inspection 165.2 Maintenance 165.3 Functional test 165.4 Packaging 17
6. Sterilization 18
7. Storage 19
Important Guidelines 20

2
1. GENERAL PRINCIPLES
An implantation can only be carried out successfully if the instruments are precise and have been cared for properly. Straumann manufactures its instru-ments from high-quality materials and with high precision. Keeping surgical and prosthetic instruments clean and fit for use lies with you. Avoiding contamination from patient to patient is essential and important for treatment practices.
All instruments must be cleaned, disinfected and sterilized before every use. This also applies for first-time use after delivery, as well as for single-use devices that are delivered non-sterile and have to be sterilized prior to use (exception: instruments delivered sterile that are intended for one-time use (e.g. one-patient drills)). Cleaning and disinfection are performed after removal of the protective transport packaging. Sterilize according to sterilization instructions in the pack-age insert (see “5. Inspection, maintenance, functional test and packaging”). Effective cleaning and disinfection are indispensable requirements for efficient sterilization.
Surgical and prosthetic parts (e.g. closing screws and healing caps) that remain in the oral cavity directly after the surgery must be sterilized following the ster-ilization instructions in the package insert.
It is the responsibility of the user to ensure the following: p Only procedures sufficiently validated specifically for the equipment or de-
vice are used for cleaning, disinfection and sterilization. p The equipment used (disinfector, sterilizer) is regularly maintained, checked
and calibrated.
In addition to these instructions, please observe the legal regulations valid in your country as well as the hygiene regulations of the dental practice or of the hospital.
NoteMaintain and clean your instruments according to recommended instructions.Each instrument must only be used for its intended purpose.
3
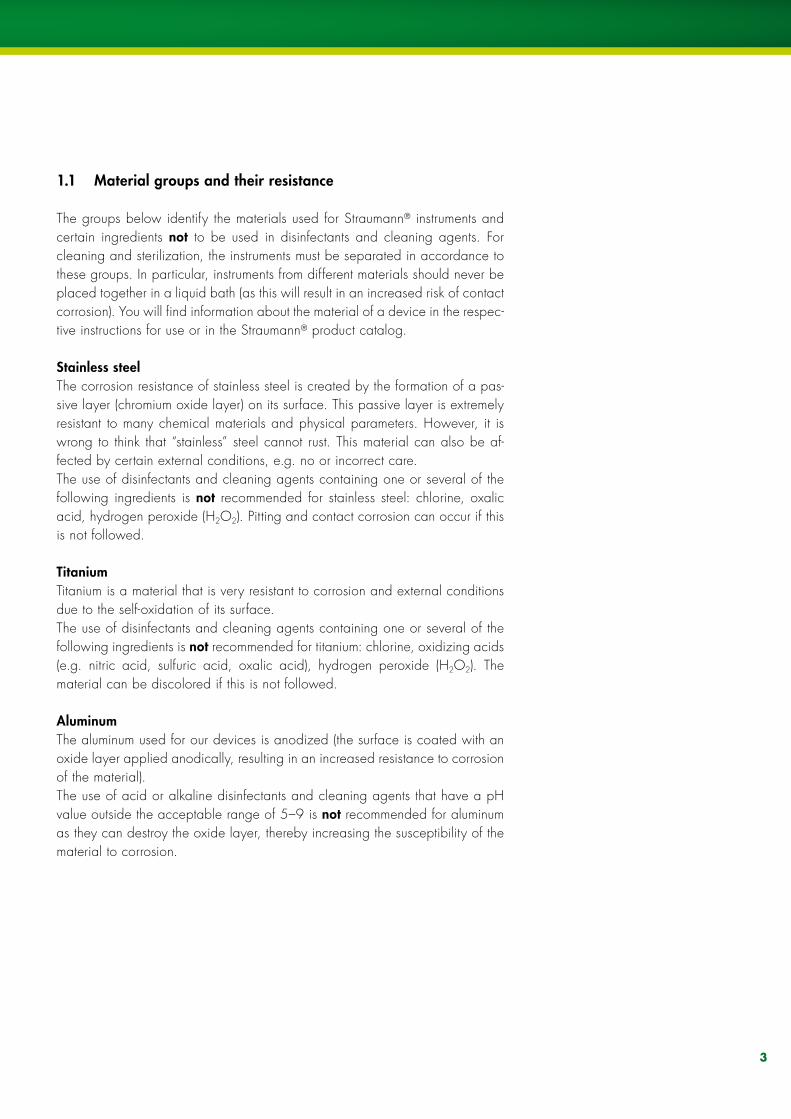
1.1 Material groups and their resistance
The groups below identify the materials used for Straumann® instruments and certain ingredients not to be used in disinfectants and cleaning agents. For cleaning and sterilization, the instruments must be separated in accordance to these groups. In particular, instruments from different materials should never be placed together in a liquid bath (as this will result in an increased risk of contact corrosion). You will find information about the material of a device in the respec-tive instructions for use or in the Straumann® product catalog.
Stainless steelThe corrosion resistance of stainless steel is created by the formation of a pas-sive layer (chromium oxide layer) on its surface. This passive layer is extremely resistant to many chemical materials and physical parameters. However, it is wrong to think that “stainless” steel cannot rust. This material can also be af-fected by certain external conditions, e.g. no or incorrect care.The use of disinfectants and cleaning agents containing one or several of the following ingredients is not recommended for stainless steel: chlorine, oxalic acid, hydrogen peroxide (H2O2). Pitting and contact corrosion can occur if this is not followed.
Titanium Titanium is a material that is very resistant to corrosion and external conditions due to the self-oxidation of its surface.The use of disinfectants and cleaning agents containing one or several of the following ingredients is not recommended for titanium: chlorine, oxidizing acids (e.g. nitric acid, sulfuric acid, oxalic acid), hydrogen peroxide (H2O2). The material can be discolored if this is not followed.
AluminumThe aluminum used for our devices is anodized (the surface is coated with an oxide layer applied anodically, resulting in an increased resistance to corrosion of the material).The use of acid or alkaline disinfectants and cleaning agents that have a pH value outside the acceptable range of 5–9 is not recommended for aluminum as they can destroy the oxide layer, thereby increasing the susceptibility of the material to corrosion.

4
CautionNever clean instruments and sterilization cassettes with metal brushes or steel wool. All instruments and sterilization cassettes may not be exposed to tempera-tures higher than 134 °C (273 °F).
In summary
When selecting the cleaning agents and disinfectants, please make sure that they do not contain the following ingredients:
p organic, mineral and oxidizing acids (minimum permissible pH value 5) p strong alkalis (maximum permissible pH value 9, mildly alkaline cleaners recommended)
p organic solvents (e.g. alcohols, ethers, ketones, benzines) p oxidation agents (e.g. hydrogen peroxide) p halogens (chlorine, iodine, bromine) p aromatic/halogenized hydrocarbons p salts of heavy metals p aldehydes
PlasticThe plastics used for Straumann devices are very resistant and can be sterilized at temperatures up to 134 °C (273 °F).The use of disinfectants and cleaning agents that contain one or several of the following ingredients is not recommended for plastics: organic solvents (alcohols, ethers, ketones and benzines), hydrogen peroxide (H2O2), aldehyde, halogens (chlorine, iodine, bromine). The plastic can be deformed and de-stroyed if this is not followed.

5
1.2 Reusability
Frequent processing has minor effects on the instruments. The end of the product life is normally determined by wear and damage during use (cutting instruments are an exception; see below). Therefore, instruments can be reused with ap-propriate care, provided they are undamaged and not contaminated. Do not use instruments beyond the effective product life cycle nor use damaged and/or contaminated instruments.
Cutting instrumentsIf appropriately cared for, and provided they are undamaged and not contami-nated, the cutting instruments can be reused up to a maximum of 10 times (1 time use = placement of 1 implant); any further use extending beyond this num-ber or the use of damaged and/or contaminated instruments is not allowed. Maintain a checklist for these instruments recording the number of uses. The Straumann Surgery Tracking Sheet (Art. No. 152.755) is available for this purpose.

6
Note Because Straumann drills and taps are precisely manufactured and made of high quality material, they can be used in up to 10 surgical procedures. However, careful handling and cleaning techniques are essential to maintain correct function (refer to “Care and maintenance of surgical and prosthetic instruments”). For additional information visit www.straumann.com
Article Art. No. Dimensions Number of surgical procedures
1 2 3 4 5 6 7 8 9 10
Round bur 044.022 Ø 1.4 mm
Round bur 044.003 Ø 2.3 mm
Round bur 044.004 Ø 3.1 mm
Pilot drill 1 044.210 Ø 2.2 mm, short
Pilot drill 1 044.211 Ø 2.2 mm, long
Pilot drill 2 044.214 Ø 2.8 mm, short
Pilot drill 2 044.215 Ø 2.8 mm, long
Twist drill PRO 044.250 Ø 3.5 mm, short
Twist drill PRO 044.251 Ø 3.5 mm, long
Twist drill PRO 044.254 Ø 4.2 mm, short
Twist drill PRO 044.255 Ø 4.2 mm, long
SP Profile drill, RN 044.086 Ø 2.8 mm, short
SP Profile drill, RN 044.087 Ø 2.8 mm, long
SP Profile drill, RN 044.088 Ø 3.5 mm, short
SP Profile drill, RN 044.089 Ø 3.5 mm, long
SP Profile drill, WN 044.084 Ø 4.2 mm, short
SP Profile drill, WN 044.085 Ø 4.2 mm, long
TE Profile drill, RN 044.701 Ø 2.8 mm, short
TE Profile drill, RN 044.708 Ø 2.8 mm, long
TE Profile drill, RN 044.705 Ø 3.5 mm, short
TE Profile drill, RN 044.712 Ø 3.5 mm, long
TE Profile drill, WN 044.703 Ø 4.2 mm, short
TE Profile drill, WN 044.710 Ø 4.2 mm, long
BL/NNC Profile drill 026.2303 Ø 3.3 mm, short
BL/NNC Profile drill 026.2306 Ø 3.3 mm, long
BL Profile drill 026.4303 Ø 4.1 mm, short
BL Profile drill 026.4306 Ø 4.1 mm, long
BL Profile drill 026.6303 Ø 4.8 mm, short
BL Profile drill 026.6306 Ø 4.8 mm, long
S/SP Tap for ratchet 044.590 Ø 3.3 mm, short
S/SP Tap for ratchet 044.591 Ø 3.3 mm, long
S/SP Tap for adapter 044.575 Ø 3.3 mm
S/SP Tap for ratchet 044.592 Ø 4.1 mm, short
S/SP Tap for ratchet 044.593 Ø 4.1 mm, long
S/SP Tap for adapter 044.577 Ø 4.1 mm
S/SP Tap for ratchet 044.594 Ø 4.8 mm, short
S/SP Tap for ratchet 044.595 Ø 4.8 mm, long
S/SP Tap for adapter 044.579 Ø 4.8 mm
BL/TE/NNC Tap for adapter 026.2310 Ø 3.3 mm
BL/TE Tap for adapter 026.4310 Ø 4.1 mm
BL/TE Tap for adapter 026.6310 Ø 4.8 mm
Surgery tracking sheet for Straumann® cutting instruments (Art. No. 152.755)

7
2. HOW NOT TO DO IT!
All surgical residues that stick to and dry on the instruments (incrustations) lead to corrosion. Exposing instruments to moisture for large amounts of time also leads to damage!
Possible initial and further damages and their causes:
Cause Damage occurring
Blood, pus, secretion, tissue residues, bone residues Corrosion, rusting
Saline solution, iodine tinctures, unsuitable water, unsuitable and/or incorrectly used cleaning agents and disinfectants
Pitting, discoloration
Steel wool, steel brushes Contact corrosion, destruction of the material surface, removal of oxide layer p increased susceptibility to corrosion
Contact between instruments of different metallic materials Contact corrosion
Overloading the instruments Cutting surfaces become blunt, are damaged p increased susceptibility to corrosion
Mutual contact of the instruments Damage of the instruments, especially of cutting surfaces p increased susceptibility to corrosion
Impurities in the sterilizer, e.g. due to already corroded instruments, or improper maintenance of the sterilizer
Initial rust: contaminating intact instruments with rust
Insufficient drying of the instruments Corrosion, rust
7 measures that help to avoid greater problems:
1. Use each instrument only for its intended purpose.2. Never let surgical residues (blood, secretion, tissue residues) dry on an
instrument; clean immediately after surgery.3. Thoroughly clean off incrustations with soft brushes only. Disassemble instru-
ments, clean cavities especially well.4. Never disinfect, clean (also ultrasound) or sterilize instruments made of dif-
ferent materials together.5. Use only cleaning agents and disinfectants intended for the material and
follow the instructions for use of the manufacturers.6. Rinse disinfectants and cleaning agents very thoroughly with water.7. Never leave or store instruments moist or wet.

8
3. BEFORE AND DURING THE SURGERY
Basic principle: Use each instrument only for its intended purpose.
Make sure that all contaminated instruments are collected separately. Do not place them back in the instrument cassette to avoid contamination of the filled instrument cassette.
Contaminated instruments can be placed carefully on the lid of the Ultrasonic Cleaning Cassette (Art. No. 040.175) or a similar container. The instruments can be damaged by incorrect handling, such as throwing them into the con-tainer.
However, the lid of the Ultrasonic Cleaning Cassette is not suitable as a holder for instruments required during the operation, since the lid cannot be sterilized and therefore could lead to contamination of sterilized instruments.
Damaged and/or blunt instruments must be sorted out and disinfected, cleaned and disposed of separately. Process contaminated instruments as quickly as possible for cleaning (within two (2) hours at the most).

9
4. CLEANING AND DISINFECTION
4.1 Principles
If possible, a mechanical method (disinfector) should be used for cleaning and disinfection. A manual method should be used only if a mechanical method is not available, because of its clearly lower effectiveness and reproducibility. This also applies when using an ultrasonic bath.
Perform pretreatment both in manual and in mechanical cleaning!
It is important to use protective clothing while cleaning contaminated instru-ments. Always wear protective glasses, face mask, gloves, etc. for your own safety during all activities.
4.2 Pretreatment
Coarse impurities must be removed from the instruments directly after use (within two (2) hours at the most).
Sort the instruments according to material groups (see “1.1 Material groups and their resistance”) and clean, disinfect and sterilize these groups separately.
p Disassemble multi-piece instruments into their single parts (e.g. ratchet). p Place the instruments in a water bath or a disinfectant solution; the disin-
fectant should be aldehyde-free (otherwise fixation of blood contamination may occur), should have tested effectiveness (e.g. VAH¹/DGHM²), should be suitable for disinfection of the instruments and be compatible with the instruments (see “1.1 Material groups and their resistance”).
p Never place instruments from different materials together. p Use only a soft brush or a clean soft cloth that is used only for this purpose. p Never use metal brushes or steel wool for the manual removal of impurities. p Rinse out all cavities of the instruments five times (5x) using a disposable
syringe (minimum volume 20 ml). p Shift movable parts forwards and backwards several times during pre-clean-
ing.
Please observe that the disinfectant used in pretreatment serves only for your own protection and cannot replace the disinfection step to be performed later after cleaning!
¹ VAH – „Verbund für Angewandte Hygiene E.V“ http://www.vah-online.de/ "Association for Applied Hygiene"² DGHM – „Deutsche Gesellschaft für Hygiene und Mikrobiologie“ http://www.dghm.org/ "German Association
for Hygiene and Microbiology"

1
2
3
10
Disassembly of the ratchet (Art. No. 046.119)For proper function, the ratchet must be disassembled immediately after every use and, if possible, should be cleaned immediately. To disassemble the ratch-et, loosen the cover screw with the service instrument for ratchet (Art. No. 046.108) and unscrew the ratchet bolt.

11
4.3 Cleaning
4.3.1 Mechanical cleaning and disinfectionCleaning and disinfection using a disinfector/CDU (cleaning and disinfection unit).
When selecting the disinfector, ensure the following: p The disinfector has been tested for its effectiveness (e.g. DGHM¹). p If possible, a tested program for thermal disinfection (A0 value > 3000 or –
for older units – at least 5 min at 90 °C) is used (risk of disinfectant residues on the instruments in chemical disinfection).
p The program used for the instruments is suitable and contains sufficient rins-ing cycles.
p Only sterile or low-germ content (max. 10 germs/ml) as well as low-endotox-in content (max. 0.25 endotoxin units/ml) water (e.g. purified water/highly purified water) is used.
p The air used for drying is filtered. p The disinfector is regularly maintained and checked.
When selecting the cleaning agent system, ensure the following: p It is basically suitable for cleaning metal and plastic instruments. p Unless the disinfection is thermal, a disinfectant with tested effectiveness
(e.g. DGHM1/VAH2) is used. The disinfectant must be compatible with the cleaning agents.
p The chemicals used are compatible with the instruments (see “1.1 Material groups and their resistance”).
NoteAlways follow the instructions stated by the manufacturer of the cleaning agent, disinfectant and disinfector.
¹ DGHM – „Deutsche Gesellschaft für Hygiene und Mikrobiologie“ http://www.dghm.org/ “German Association for Hygiene and Microbiology”
² VAH – „Verbund für Angewandte Hygiene E.V“ http://www.vah-online.de/ “Association for Applied Hygiene”
12
4.3.2 Manual cleaning and disinfectionWhen selecting the cleaning agents and disinfectants, ensure the following:
p They are suitable for cleaning metal and plastic instruments. p The cleaning agent (if used) is suitable for ultrasonic cleaning (no develop-
ment of foam). p A disinfectant with tested effectiveness (e.g. VAH1/DGHM2) is used. The
disinfectant is compatible with the cleaning agents. p The chemicals used are compatible with the instruments (see “1.1 Material
groups and their resistance”).
NoteCombined cleaning agents/disinfectants should not be used.
The concentrations and action times stated by the manufacturer of the clean-ing agent and disinfectant must be strictly adhered to. Use only freshly made solutions, only sterile or low-germ content (max. 10 germs/ml) as well as low-endotoxin content (max. 0.25 endotoxin units/ml) water (e.g. purified water/highly purified water) or only filtered air for drying.
NoteAlways follow the instructions for use of the manufacturers of cleaning agents and disinfectants.
¹ VAH – „Verbund für Angewandte Hygiene E.V“ http://www.vah-online.de/ "Association for Applied Hygiene"² DGHM – „Deutsche Gesellschaft für Hygiene und Mikrobiologie“ http://www.dghm.org/ "German Association
for Hygiene and Microbiology"
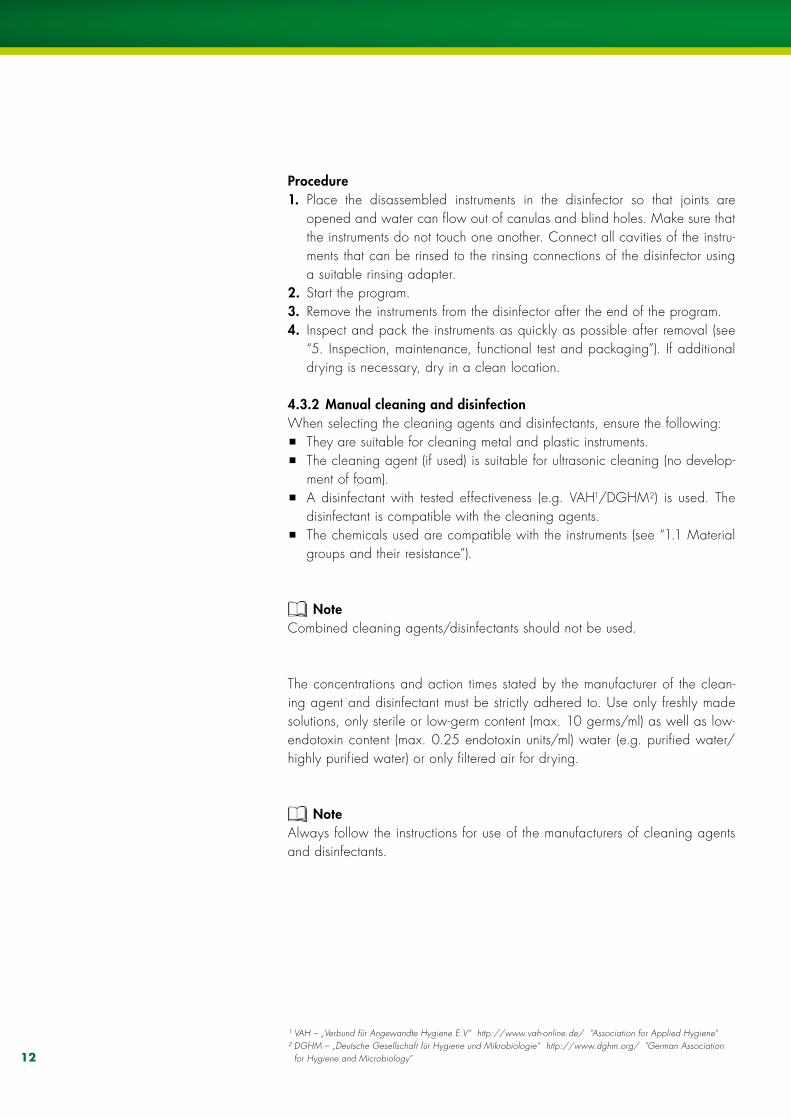
Procedure1. Place the disassembled instruments in the disinfector so that joints are
opened and water can flow out of canulas and blind holes. Make sure that the instruments do not touch one another. Connect all cavities of the instru-ments that can be rinsed to the rinsing connections of the disinfector using a suitable rinsing adapter.
2. Start the program.3. Remove the instruments from the disinfector after the end of the program.4. Inspect and pack the instruments as quickly as possible after removal (see
“5. Inspection, maintenance, functional test and packaging”). If additional drying is necessary, dry in a clean location.

13
Procedure A: Cleaning in the ultrasonic bath with the Ultrasonic Cleaning Cassette1. Place the disassembled instruments in the Ultrasonic Cleaning Cassette (Art.
No. 040.175). Make sure that the instruments do not touch one another. The instruments may not consist of different materials in this case. To improve the cleaning effect in the ultrasonic bath, cleaning without the lid is recom-mended.
2. Remove the instruments from the Ultrasonic Cleaning Cassette after cleaning and rinse thoroughly at least three times (3x) with water. Rinse out all cavi-ties of the instruments three times (3x) using a disposable syringe (minimum volume 20 ml).
3. Inspect the instruments (see “5. Inspection, maintenance, functional test and packaging”).
Disinfection:4. Place the disassembled, cleaned and inspected instruments for the specified
action time in the disinfection bath. Ensure that the instruments are sufficiently covered by the disinfection solution and that the instruments do not touch each other. Rinse out all cavities of the instruments three times (3x) at the beginning or at the end of the action time using a disposable syringe (minimum volume 20 ml).
5. Then remove the instruments from the disinfection bath and rinse them thor-oughly with water at least five times (5x).Rinse out all cavities of the instruments five times (5x) using a disposable syringe (minimum volume 20 ml).
6. Dry the instruments inside/out with filtered compressed air.7. Pack the instruments as quickly as possible after removal (see “5 Inspection,
maintenance, functional test and packaging”). If additional drying is neces-sary, dry in a clean location.

14
Use of the Ultrasonic Cleaning CassetteThe used surgical instruments can be placed in the ultrasonic bath in the Ultra-sonic Cleaning Cassette (Art. No. 040.175, see below).
p Clean the Ultrasonic Cleaning Cassette manually with water before first-time use.
p The used surgical instruments must be pretreated by removing coarse im-purities before cleaning in the ultrasonic bath (see “4.2 Pretreatment”), es-pecially if blood residues have already dried in. Proper cleaning can be performed only in this way.
p To improve the cleaning effect, cleaning without the lid is recommended. p Sterilizing instruments in the ultrasonic cassette is not allowed.

15
Procedure B: Cleaning without ultrasonic support1. Place the disassembled instruments in the cleaning bath for the specified ac-
tion time so that the instruments are sufficiently covered (if necessary, brush carefully with a soft brush). Make sure that the instruments do not touch each other.Rinse out all cavities of the instruments three times (3x) at the beginning or at the end of the action time using a disposable syringe (minimum volume 20 ml).
2. Then remove the instruments from the cleaning bath and rinse them thor-oughly with water at least three times (3x). Rinse out all cavities of the instruments three times (3x) using a disposable syringe (minimum volume 20 ml).
3. Inspect the instruments (see “5 Inspection, maintenance, functional test and packaging”).
Disinfection:4. Place the disassembled, cleaned and inspected instruments for the specified
action time in the disinfection bath. Ensure that the instruments are sufficiently covered by the disinfection solution and that the instruments do not touch each other. Rinse out all cavities of the instruments three times (3x) at the beginning or at the end of the action time using a disposable syringe (minimum volume 20 ml).
5. Then remove the instruments from the disinfection bath and rinse them thor-oughly with water at least five times (5x). Rinse out all cavities of the instruments five times (5x) using a disposable syringe (minimum volume 20 ml).
6. Dry the instruments inside/out with filtered compressed air.7. Pack the instruments as quickly as possible after removal (see “5 Inspection,
maintenance, functional test and packaging”). If additional drying is neces-sary, dry in a clean location.
16
5. INSPECTION, MAINTENANCE, FUNCTIONAL TEST AND PACKAGING
5.1 Inspection
Check all instruments after cleaning or cleaning/disinfection for corrosion, dam-aged surfaces, chipping and contamination and sort out damaged instruments (for the numerical restriction of reuse, see “1.2 Reusability”). Critical areas such as handle structures, joints or blind holes, in particular, must be inspected care-fully. You can use a magnifying glass and direct lighting for better visibility. Instruments with illegible markings/labeling must also be replaced.
Instruments which are still contaminated must be cleaned and disinfected anew. Damaged, corroded or worn instruments should not come into contact with intact instruments to avoid contact corrosion.
5.2 Maintenance
Reassemble the disassembled instruments (see specific instructions).
Assembly of the ratchetInsert ratchet bolt and tighten it by hand. Tighten the cover screw with the guide key. Optional: assembling of distance indicator
Instrument oils should not be used. In the event that oil is needed, only instru-ment oils (white oil) which are approved for steam sterilization and have tested biocompatibility should be used (taking into account the maximum applied sterilization temperature).
5.3 Functional test
The instruments must be subjected to a functional test. Multi-piece instruments are assembled for this purpose. Further contamination must be absolutely avoid-ed in assembly.
Functional test of the ratchet (Art. No. 046.119)The functional test of the ratchet is performed with a screwdriver with ratchet head, for example. The screwdriver is inserted in the ratchet. The ratchet can be turned by holding the screwdriver. It can only be turned opposite to the di-rection of the arrow on the knob. Clearly audible clicking noises can be heard in this case. The screwdriver must also move in the direction of the arrow. This inspection is performed for both arrow positions of the knob.
17
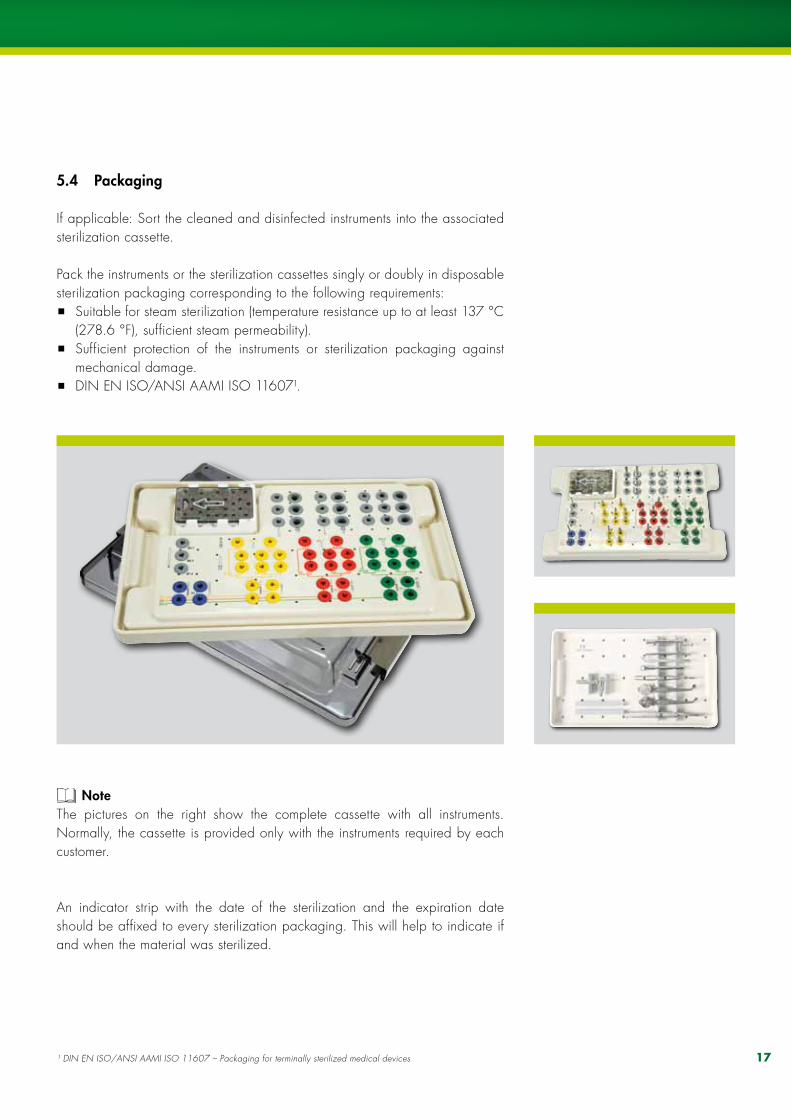
5.4 Packaging
If applicable: Sort the cleaned and disinfected instruments into the associated sterilization cassette.
Pack the instruments or the sterilization cassettes singly or doubly in disposable sterilization packaging corresponding to the following requirements:
p Suitable for steam sterilization (temperature resistance up to at least 137 °C (278.6 °F), sufficient steam permeability).
p Sufficient protection of the instruments or sterilization packaging against mechanical damage.
p DIN EN ISO/ANSI AAMI ISO 11607¹.
¹ DIN EN ISO/ANSI AAMI ISO 11607 – Packaging for terminally sterilized medical devices
NoteThe pictures on the right show the complete cassette with all instruments. Normally, the cassette is provided only with the instruments required by each customer.
An indicator strip with the date of the sterilization and the expiration date should be affixed to every sterilization packaging. This will help to indicate if and when the material was sterilized.

18
6. STERILIzATION
Only the sterilization methods listed below may be used for sterilization; other sterilization methods are not permissible.
Steam sterilization p Fractionated vacuum method or gravitation method1 (with sufficient device
drying) p Steam sterilizer corresponding to DIN EN 13060² or DIN EN 285³ p Validated corresponding to DIN EN ISO 176654 (previously: DIN EN 554/
ANSI AAMI ISO 11134) (valid IQ/OQ5 (commissioning) and product-spe-cific performance assessment (PQ))
p Maximum sterilization temperature 134 °C (273 °F; plus tolerance cor-responding to DIN EN ISO 17665 (previously: DIN EN 554/ANSI AAMI ISO 11134))
p Sterilization time (exposure time at the sterilization temperature): p Fractionated vacuum method
at least 20 min. at 121 °C (250 °F) or at least 3 min.6 at 132 °C (270 °F) up to 134 °C (273°F)
p Gravitation methodat least 5 min. at 132 °C (270 °F) up to 134 °C (273 °F)
NoteAlways observe the operating instructions of the manufacturer for your sterilizer, especially with regard to the loading weight, the operating time and functional testing.
Corroded and rusty instruments can contaminate the water circuit of the steril-izer with rust particles. These rust particles will cause initial rust on intact instru-ments in all future sterilization cycles. It is important to regularly inspect and clean the unit!
The instruments must be stored dry after sterilization.
CautionFlash sterilization method is not permissible. Also, do not use hot air steriliza-tion, radiation sterilization, plasma sterilization, formaldehyde or ethylene oxide sterilization.
1 Use of the less effective gravitation method is permissible only if the fractionated vacuum method is not available.² DIN EN 13060: Test method to demonstrate the suitability of a medical device simulator during steam sterilisation –
Medical device simulator testing ³ DIN EN 285 Sterilization – Steam sterilizers – Large sterilizers; German version 4 DIN EN ISO 17665, Sterilization of health care products – Moist heat – Part 1: Requirements for the development,
validation and routine control of a sterilization process for medical devices5 IQ/OQ Installation qualification/Operational qualification 6 18 min for prion inactivation

19
7. STORAGE
The instruments must be stored dry and free of dust in the sterilization packag-ing after sterilization.

20
IMPORTANT GUIDELINES
Please notePractitioners must have appropriate knowledge and instruction in the handling of the Straumann CADCAM products or other Straumann products (“Straumann Products”) for using the Straumann Products safely and properly in accordance with the instructions for use.
The Straumann Product must be used in accordance with the instructions for use provided by the manufacturer. It is the practitioner’s responsibility to use the device in accordance with these instructions for use and to determine, if the device fits to the individual patient situation.
The Straumann Products are part of an overall concept and must be used only in conjunction with the corresponding original components and instruments distributed by Institut Straumann AG, its ultimate parent company and all affiliates or subsidiaries of such parent company (“Straumann”), except if stated otherwise in this document or in the instructions for use for the respective Straumann Product. If use of products made by third parties is not recommended by Straumann in this document or in the respective instructions for use, any such use will void any warranty or other obligation, express or implied, of Straumann.
AvailabilitySome of the Straumann Products listed in this document may not be available in all countries.
Caution In addition to the caution notes in this document, our products must be secured against aspiration when used intraorally.
ValidityUpon publication of this document, all previous versions are superseded.
Documentation For detailed instructions on the Straumann Products contact your Straumann representative.
Copyright and trademarksStraumann® documents may not be reprinted or published, in whole or in part, without the written authorization of Straumann. Straumann® and/or other trademarks and logos from Straumann® mentioned herein are the trademarks or registered trademarks of Straumann Holding AG and/or its affiliates.
Explanation of the symbols on labels and instruction leaflets
Batch code
Catalogue number
Sterilized using irradiation
…min. Lower limit of temperature
…max.
Upper limit of temperature
…max.
…min. Temperature limitation
Caution: U.S. Federal law restricts this device to sale by or on the order of a licensed dentist.
Do not re-use
Non-sterile
Caution, consult accompanying documents
Use by
Keep away from sunlight
Straumann Products with the CE mark fulfill the requirements of the Medical Devices Directive 93/42 EEC
0123
Consult operating instructions
Colored warning labels
YELLOW = CAUTION Indicates hazards or unsafe handling which might cause minor injury or damage to property
ORANGE = WARNING Indicates hazards which might cause serious or fatal injury
RED = DANGER Indicates hazards which might cause immediate serious or fatal injury
IMPORTANT GUIDELINES
Please notePractitioners must have appropriate knowledge and instruction in the handling of the Straumann CADCAM products or other Straumann products (“Straumann Products”) for using the Straumann Products safely and properly in accordance with the instructions for use.
The Straumann Product must be used in accordance with the instructions for use provided by the manufacturer. It is the practitioner’s responsibility to use the device in accordance with these instructions for use and to determine, if the device fits to the individual patient situation.
The Straumann Products are part of an overall concept and must be used only in conjunction with the corresponding original components and instruments distributed by Institut Straumann AG, its ultimate parent company and all affiliates or subsidiaries of such parent company (“Straumann”), except if stated otherwise in this document or in the instructions for use for the respective Straumann Product. If use of products made by third parties is not recommended by Straumann in this document or in the respective instructions for use, any such use will void any warranty or other obligation, express or implied, of Straumann.
AvailabilitySome of the Straumann Products listed in this document may not be available in all countries.
Caution In addition to the caution notes in this document, our products must be secured against aspiration when used intraorally.
ValidityUpon publication of this document, all previous versions are superseded.
Documentation For detailed instructions on the Straumann Products contact your Straumann representative.
Copyright and trademarksStraumann® documents may not be reprinted or published, in whole or in part, without the written authorization of Straumann. Straumann® and/or other trademarks and logos from Straumann® mentioned herein are the trademarks or registered trademarks of Straumann Holding AG and/or its affiliates.
Explanation of the symbols on labels and instruction leaflets
IMPorTAnT GUIDELInES
Batch code
Catalogue number
Sterilized using irradiation
…min.
Lower limit of temperature
…max.
Upper limit of temperature
…max.
…min.
Temperature limitation
Caution: Federal law restricts this device to sale by or on the order of a dental professional.
Do not re-use
non-sterile
Caution, consult accompanying documents
Use by
Keep away from sunlight
Straumann Products with the CE mark fulfill the requirements of the Medical Devices Directive 93/42 EEC
0123
Consult instructions for use
Please notePractitioners must have appropriate knowledge and instruction in the handling of the Straumann CADCAM products or other Straumann products (“Straumann Products”) for using the Straumann Products safely and properly in accordance with the instructions for use.
The Straumann Product must be used in accordance with the instructions for use provided by the manufacturer. It is the practitioner’s responsibility to use the device in accordance with these instructions for use and to determine, if the device fits to the individual patient situation.
The Straumann Products are part of an overall concept and must be used only in conjunction with the corresponding original components and instruments distributed by Institut Straumann AG, its ultimate parent company and all affiliates or subsidiaries of such parent company (“Straumann”), except if stated otherwise in this document or in the instructions for use for the respective Straumann Product. If use of products made by third parties is not recommended by Straumann in this document or in the respective instructions for use, any such use will void any warranty or other obligation, express or implied, of Straumann.
AvailabilitySome of the Straumann Products listed in this document may not be available in all countries.
Caution In addition to the caution notes in this document, our products must be secured against aspiration when used intraorally.
ValidityUpon publication of this document, all previous versions are superseded.
Documentation For detailed instructions on the Straumann Products contact your Straumann representative.
Copyright and trademarksStraumann® documents may not be reprinted or published, in whole or in part, without the written authorization of Straumann. Straumann® and/or other trademarks and logos from Straumann® mentioned herein are the trademarks or registered trademarks of Straumann Holding AG and/or its affiliates.
Explanation of the symbols on labels and instruction leaflets
Batch code
Catalogue number
Sterilized using irradiation
…min. Lower limit of temperature
…max.
Upper limit of temperature
…max.
…min. Temperature limitation
Caution: U.S. Federal law restricts this device to sale by or on the order of a licensed dentist.
Do not re-use
Non-sterile
Caution, consult accompanying documents
Use by
Keep away from sunlight
Straumann Products with the CE mark fulfill the requirements of the Medical Devices Directive 93/42 EEC
0123
Consult operating instructions
Colored warning labels
YELLOW = CAUTION Indicates hazards or unsafe handling which might cause minor injury or damage to property
ORANGE = WARNING Indicates hazards which might cause serious or fatal injury
RED = DANGER Indicates hazards which might cause immediate serious or fatal injury
IMPORTANT GUIDELINES


International HeadquartersInstitut Straumann AG Peter Merian-Weg 12CH-4002 Basel, SwitzerlandPhone +41 (0)61 965 11 11Fax +41 (0)61 965 11 01
www.s t raumann.com
Stra
uman
n pr
oduc
ts ar
e C
E m
arke
d
10/
11 1
52.0
08/
en
BG
2101
1
© Institut Straumann AG, 2011. All rights reserved. Straumann® and/or other trademarks and logos from Straumann® mentioned herein are the trademarks or registered trademarks of Straumann Holding AG and/or its affiliates. All rights reserved.