Calor Cylinder Connection & Disconnection.2of3.ppt · Calor Cylinder Connection & Disconnection...
13
Calor Cylinder Connection & Disconnection This module will aid you on how to connect and disconnect a range of Calor Cylinders with the exception of multi cylinder installations which are detailed in module 3. The regulators shown in the presentation are only an example of those available on the market. Module 2 of 3
Transcript of Calor Cylinder Connection & Disconnection.2of3.ppt · Calor Cylinder Connection & Disconnection...

Calor Cylinder Connection & Disconnection
This module will aid you on how to connect and disconnect a range of Calor Cylinders
with the exception of multi cylinder installations which are detailed in module 3.
The regulators shown in the presentation are only an example of those available on the
market.
Module 2 of 3

Cylinder Exchange• Before you exchange a cylinder
– Ensure that access and egress is suitable– You have correct PPE – You have been trained in the manual handling of cylinders – Before connecting or disconnecting a cylinder ensure there are no
sources of ignition including mobile phones & the gas supply has been shut off
Butane Cylinders

Butane 4.5kg Cylinder• Butane 4.5kg Cylinder
– A 4.5 butane cylinder takes a regulator that screws on to the valve outlet
– The regulator has a connecting nut that incorporates a black sealing washer
– Do not use the red rubber washer from the black cap as a sealing washer
• Disconnecting a Butane 4.5kg Cylinder– Never disconnect the regulator (or connecting nut) with the
valve open– Turn the valve hand wheel off (clockwise rotation)– Wait until the burner and pilot lights have gone out. If the flame
does not go out, turn the valve hand wheel anticlockwise back to on; leave the appliance alight and call your gas supplier
– Disconnect the regulator (left hand thread) with a suitable spanner
– Screw the protective black cap onto the cylinder valve
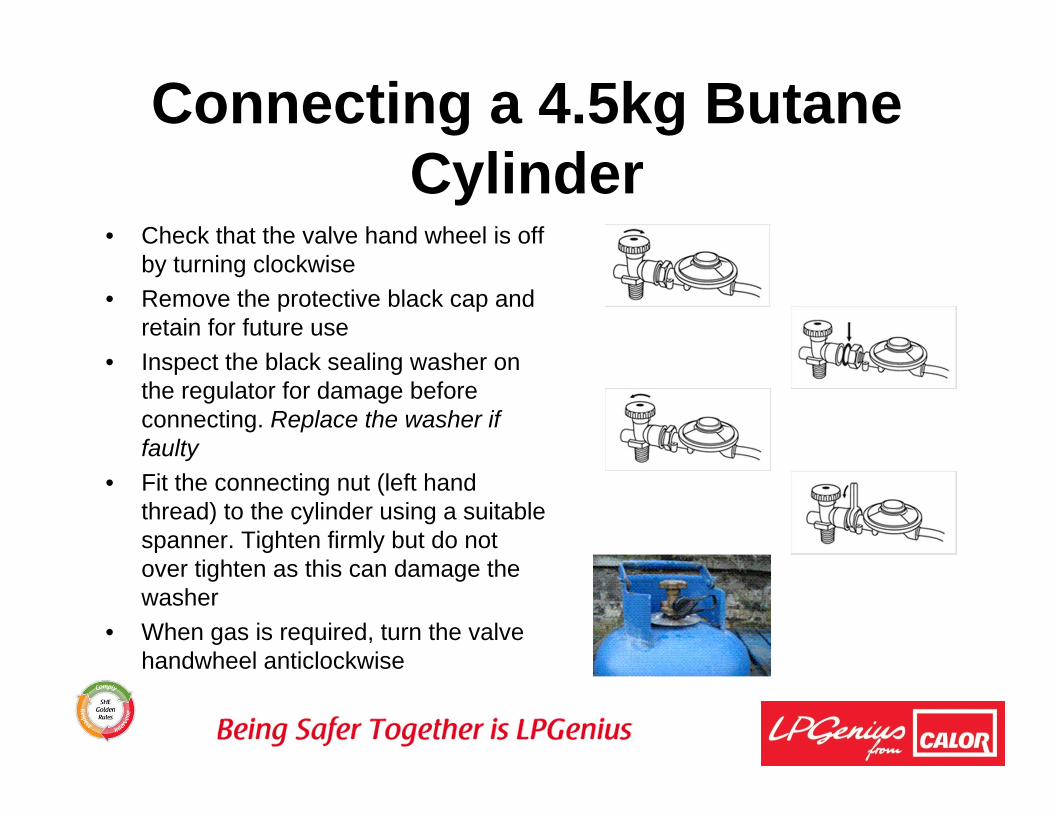
Connecting a 4.5kg Butane Cylinder
• Check that the valve hand wheel is off by turning clockwise
• Remove the protective black cap and retain for future use
• Inspect the black sealing washer on the regulator for damage before connecting. Replace the washer if faulty
• Fit the connecting nut (left hand thread) to the cylinder using a suitable spanner. Tighten firmly but do not over tighten as this can damage the washer
• When gas is required, turn the valve handwheel anticlockwise

7kg, 12kg and 15kg Butane Cylinders• These cylinders have a 21mm valve and must only be used with
a 21mm regulator• Disconnection 7kg, 12kg and 15kg Butane Cylinders
– Never disconnect the Regulator (or connecting nut) with the valve open) – Turn the regulator switch to the off position Wait until the burner and pilot
lights have gone out. If the flame does not go out, turn the switch back to on; leave the appliance alight and call you gas supplier
• For the:– COMAP 1590 regulator press the push button on the lower part and lift the
regulator from the valve – SRG 541 regulator lift up the lever at the base of the regulator and lift the
regulator from the valve – RECA Compact Quick-On regulator press horizontally on the regulator on/off
switch and pull upwards at the same time – TPA clip on regulator - lift the red tag on the on/off switch and turn clockwise
at the same time
• Replace the orange safety cap onto the empty cylinder valve of the empty or part full cylinder, when not in use

Connecting 7kg, 12kg and 15kg Butane Cylinders
• Turn the orange cap so that the arrow is pointing to the gap in the shroud
• Remove the orange safety cap by pulling the lanyard out, then up. Do not use tools and leave the cap hanging
• Check the black sealing washer is fitted inside the cylinder valve
• Ensure the regulator switch is on the disconnect position (3 o'clock position)
• Fit the 21mm regulator as per the manufacturers instructions
• When gas is required, turn the switch to the vertical on position
If the regulator on/off switch gets stuck when turning the supply on, it means that the regulator has been connected incorrectly. In this event, the regulator must be disconnected and the correct steps to reconnect repeated from the beginning

Propane Cylinders
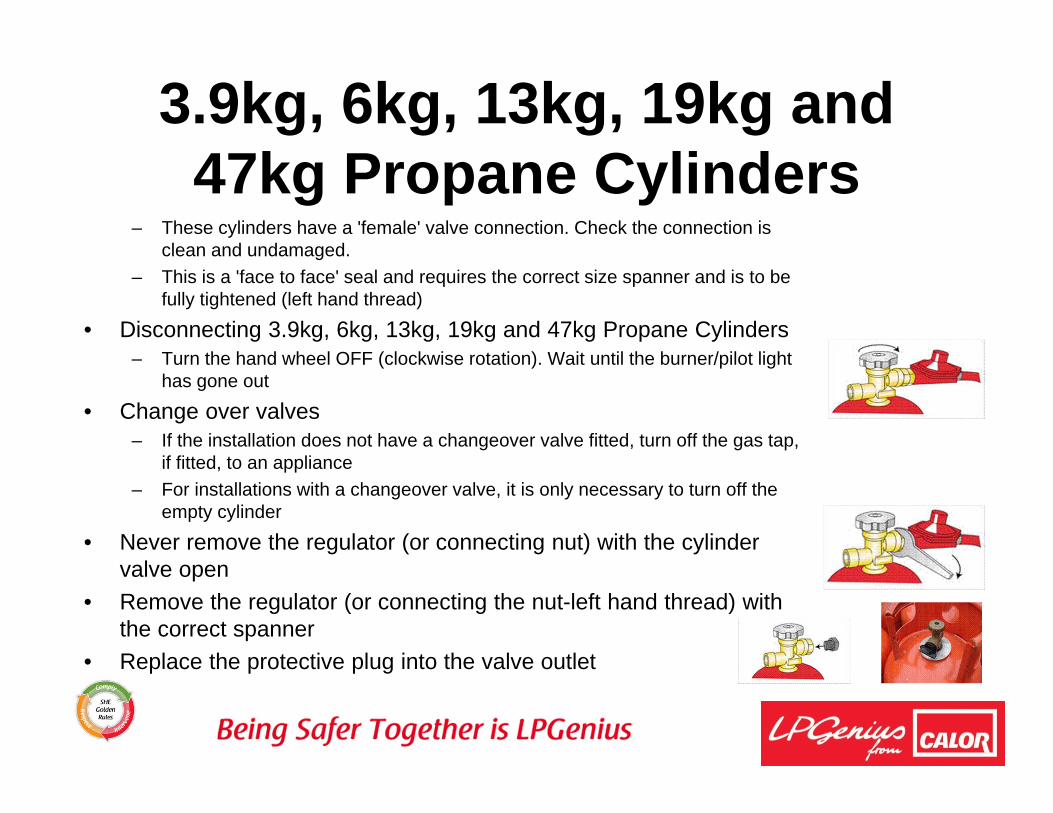
3.9kg, 6kg, 13kg, 19kg and 47kg Propane Cylinders
– These cylinders have a 'female' valve connection. Check the connection is clean and undamaged.
– This is a 'face to face' seal and requires the correct size spanner and is to be fully tightened (left hand thread)
• Disconnecting 3.9kg, 6kg, 13kg, 19kg and 47kg Propane Cylinders– Turn the hand wheel OFF (clockwise rotation). Wait until the burner/pilot light
has gone out
• Change over valves– If the installation does not have a changeover valve fitted, turn off the gas tap,
if fitted, to an appliance – For installations with a changeover valve, it is only necessary to turn off the
empty cylinder
• Never remove the regulator (or connecting nut) with the cylinder valve open
• Remove the regulator (or connecting the nut-left hand thread) with the correct spanner
• Replace the protective plug into the valve outlet

Connecting 3.9kg, 6kg, 13kg, 19kg and 47kg Propane Cylinders• Check that the valve hand wheel is OFF by turning clockwise• Remove the protective plug and leave hanging to replace later• Inspect the bullnose connection of the regulator for damage
before connecting– NOTE: A gas tight seal is created by face to face connection between the
bullnose and cylinder valve
• Fit the connecting nut (left hand thread) to the cylinder, using the correct spanner. Note: propane cylinder connections must be tight
• Ensure appliances are turned off• When gas is required turn the valve hand wheel anti-clockwise• Check for gas soundness of the cylinder connection using leak
detection solution

5kg & 13kg Patio Gas Cylinders• Patio Gas cylinders use 27mm clip on valves and clip on
regulators. Unlike other propane cylinder you do not need a spanner to connect the regulator
• Disconnecting a Patio Cylinder• Make sure the regulator is turned to the 'off' position and that
the appliance flame is extinguished • Push the on/off switch according to manufacturers instructions
and then pull upwards– For COMPAQ 1580 regulator press the push button on the lower part and
lift the regulator from the valve – For the RECA "Quick on" 634PR regulator press horizontally on the handle
pull upwards – For the SRG 547 regulator lift the horizontal lever extending from the
regulator and remove the regulator from the valve
• REMEMBER: do not attempt to disconnect the cylinder of the regulator is in the on/open position

Connecting a Patio Cylinder• Make sure that you are using an easy clip-on regulator• If the cylinder has a yellow tamper evidence cap, please
remove and discard• Make sure that
– the regulator is switched to the 'off' or disconnect position– all taps on the appliance are closed– the connecting pipe to the appliance is correctly fitted – the valve is clean and free from debris
• Put the regulator on top of the cylinder valve. Place your hand on top of the regulator and push down firmly and vertically until you hear a click
• Once the regulator is correctly fitted, switch to 'on' position as directed by the manufacturers instructions on the regulator
• ALWAYS turn the switch to the OFF position after use

Produced by Calor SHE department – Dealer Version November 2011
The information in this document is intended to give guidance and believed to be accurate and represent good practice at the time of publication. It does not replace the need to consult other formal documents where further information may be required.
No responsibility or liability is accepted by Calor Gas Limited for any loss or damage arising out of the information given. It is important that users of this publication adhere to all legal requirements, Regulations, CoP’s and Standards, particularly, those relating to gas safety.
All rights reserved. No part of this publication may be reproduced, stored in a retrieval system or transmitted in any form, or by any means, electronic, electrostatic, magnetic tape, mechanical, photocopying, recording, or otherwise, without permission in writing from Calor Gas Ltd.
For more information, contact your Manager or Supervisor.
Thank you for taking the time to view this training advice.