CaliberRM Installation Guide - NTNU CaliberRM Installation Guide Default Installation Settings...
44
CaliberRM ™ Installation Guide
Transcript of CaliberRM Installation Guide - NTNU CaliberRM Installation Guide Default Installation Settings...

CaliberRM™
Installation Guide

Borland Software Corporation100 Enterprise WayScotts Valley, California 95066-3249www.borland.com
Made in Borland® Copyright © 2004 Borland Software Corporation. All rights reserved. All Borlandbrand and product names are trademarks or registered trademarks of Borland Software Corporationin the United States and other countries. Microsoft, Windows, and other Microsoft product names aretrademarks or registered trademarks of Microsoft Corporation in the U.S. and other countries. Linuxis a registered trademark of Linus Torvalds. All other marks are the property of their respectiveowners. Corporate Headquarters: 100 Enterprise Way, Scotts Valley, CA 95066-3249 o 831-431-1000 o www.borland.com o Offices in: Australia, Brazil, Canada, China, Czech Republic, France,Germany, Hong Kong, Hungary, India, Ireland, Italy, Japan, Korea, the Netherlands, New Zealand,Russia, Singapore, Spain, Sweden, Taiwan, the United Kingdom, and the United States.

1
Table of Contents
Chapter 1Introduction 1Borland Support . . . . . . . . . . . . . . . . . . . 1System Requirements . . . . . . . . . . . . . . . . 1
CaliberRM Server* . . . . . . . . . . . . . . . . . 2CaliberRM Windows and Web Client . . . . . . . 2Japanese Operating System Requirements . . . . 2CaliberRM Datamart & Datamart Explorer . . . . 2CaliberRM Datamart Extractor Server . . . . . . . 3Database Server (MS Access or MS SQL Server) 3CaliberRM Datamart Extractor Server and
Database . . . . . . . . . . . . . . . . . . . . . 3CaliberRM Datamart Explorer . . . . . . . . . . . 3
Default Installation Settings . . . . . . . . . . . . . . 4CaliberRM . . . . . . . . . . . . . . . . . . . . . 4CaliberRM Datamart& Datamart Explorer . . . . . 4
Chapter 2Installing Administrative Components 5Installing the CaliberRM Server . . . . . . . . . . . . 5
Installing the Client and Server . . . . . . . . . . 7Installing the Server Only . . . . . . . . . . . . . 9
Program Maintenance For CaliberRM . . . . . . . . 11Installing CaliberRM Web and WebView . . . . . . . 11Program Maintenance For CaliberRM Web. . . . . . 13
Repairing Your Web Installation . . . . . . . . . . 13Removing CaliberRM Web . . . . . . . . . . . . 14
Network Install and Upgrade . . . . . . . . . . . . . 14Modifying Your Network Install
Settings . . . . . . . . . . . . . . . . . . . . . . . 17Modifying Your Download Options . . . . . . . . . 17Modifying Your Custom HTML Page. . . . . . . . 17Modifying Your URL Location . . . . . . . . . . . 18
Modifying At Each Client . . . . . . . . . . . . 18Modifying From a Central Location Using
Email . . . . . . . . . . . . . . . . . . . . . 18Installation on a Machine That Does Not Have
a Web Server. . . . . . . . . . . . . . . . . . . 18Program Maintenance For Network Install and
Upgrade . . . . . . . . . . . . . . . . . . . . . . . 19Modifying Your Network Install and Upgrade
Installation . . . . . . . . . . . . . . . . . . . . 19Repairing Your Network Install and Upgrade
Installation . . . . . . . . . . . . . . . . . . . . 19Removing Your Network Install and Upgrade
Installation . . . . . . . . . . . . . . . . . . . . 20Installing The StarTeam Message
Broker (MPX Server) . . . . . . . . . . . . . . . . 20Enabling MPX Post Installation . . . . . . . . . . . . 21Reconnecting MPX if the Server Loses the
Connection . . . . . . . . . . . . . . . . . . . . . 21
Chapter 3Installing User Components 23Installing the CaliberRM Client . . . . . . . . . . . . 23
Installing the Typical or Full Client . . . . . . . . . 24
Custom Installation . . . . . . . . . . . . . . . . 25Performing an Upgrade . . . . . . . . . . . . . . . 27Program Maintenance for CaliberRM . . . . . . . . 28
Modifying Your Installation . . . . . . . . . . . . 28Repairing Your Installation . . . . . . . . . . . . 28Removing CaliberRM. . . . . . . . . . . . . . . 29Using the Windows Add/Remove Program to
Remove CaliberRM . . . . . . . . . . . . . . . 29Silent Installation For Clients . . . . . . . . . . . . 29Installing the Visual Studio .NET
Integration . . . . . . . . . . . . . . . . . . . . . 30Program Maintenance For Visual Studio .NET . . . 32
Repairing Your Visual Studio .NET Integration. . . . . . . . . . . . . . . . . . . . 32
Removing Your Visual Studio .NET Integration. . . . . . . . . . . . . . . . . . . . 32
Chapter 4CaliberRM Datamart & Datamart Explorer Installation 33
Installing CaliberRM Datamart & Datamart Explorer . . . . . . . . . . . . . . . . . 33
Custom Installation . . . . . . . . . . . . . . . . . 35Performing an Upgrade . . . . . . . . . . . . . . . 36Post Installation . . . . . . . . . . . . . . . . . . . 36Program Maintenance . . . . . . . . . . . . . . . . 37
Modifying Your Installation . . . . . . . . . . . . 37Repairing Your Installation . . . . . . . . . . . . 37Removing CaliberRM Datamart & Datamart
Explorer . . . . . . . . . . . . . . . . . . . . . 37
Index 39

2
Chapter 1: Introduct ion 1
C h a p t e r
Chapter 1IntroductionWelcome to CaliberRM, Borland’s requirements management system. Please take a moment to review the release notes for the latest information.
Borland SupportBorland offers a variety of support options. These include free services on the Internet, where you can search our extensive information base and connect with other users of Borland products. In addition, you can choose from several categories of support, ranging from installation support to fee-based consultant-level support and extensive assistance.
For more information about Borland’s support services, see our web site at http://www.borland.com/devsupport/.
From the Web site, you can access many newsgroups where CaliberRM users exchange information, tips and techniques.
Refer also to the Borland Community site at http://community.borland.com. It provides access to lots of information, articles, code examples, and upcoming news about CaliberRM.
When contacting support, be prepared to provide complete information about your environment, the version of the product you are using, and a detailed description of the problem.
For support on third-party tools or documentation, please contact the vendor of the tool.
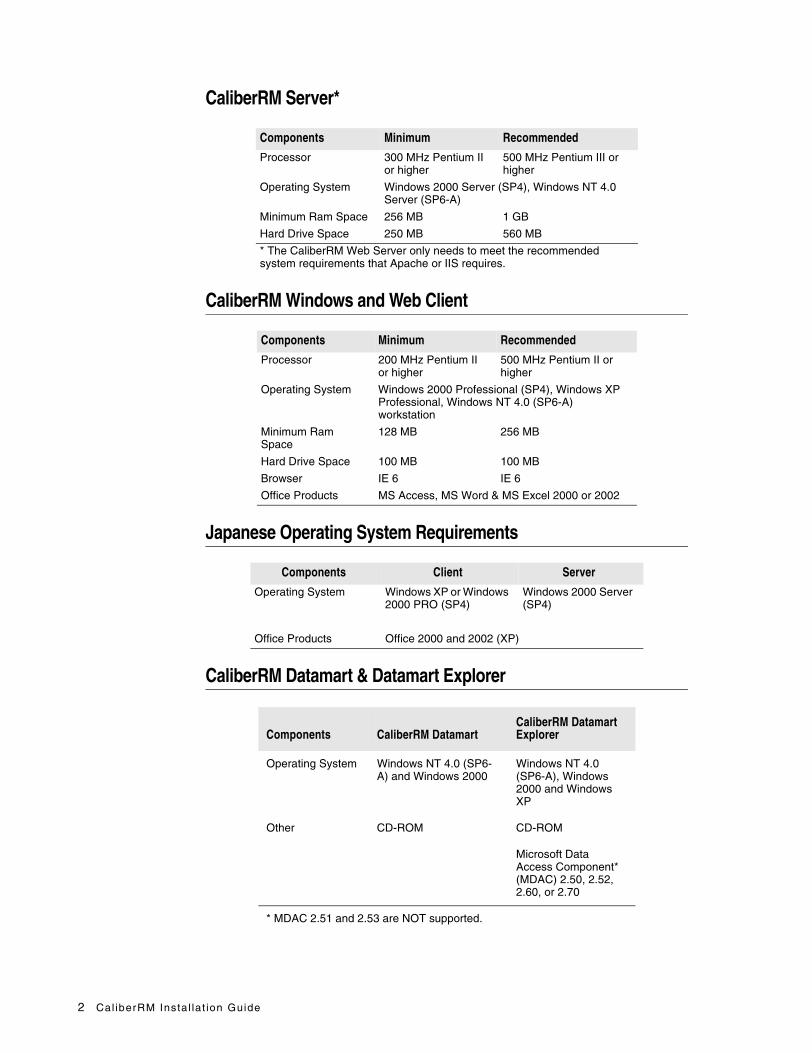
System RequirementsBefore installing CaliberRM, make sure that your computer meets the following system requirements. If you attempt to install CaliberRM on an operating system that is not supported, you will get a warning message. Please ensure your operating system is listed in the following tables.
2 Cal iberRM Insta l lat ion Guide
CaliberRM Server*
CaliberRM Windows and Web Client
Japanese Operating System Requirements
CaliberRM Datamart & Datamart Explorer
Components Minimum Recommended
Processor 300 MHz Pentium II or higher
500 MHz Pentium III or higher
Operating System Windows 2000 Server (SP4), Windows NT 4.0 Server (SP6-A)
Minimum Ram Space 256 MB 1 GB
Hard Drive Space 250 MB 560 MB
* The CaliberRM Web Server only needs to meet the recommended system requirements that Apache or IIS requires.
Components Minimum Recommended
Processor 200 MHz Pentium II or higher
500 MHz Pentium II or higher
Operating System Windows 2000 Professional (SP4), Windows XP Professional, Windows NT 4.0 (SP6-A) workstation
Minimum Ram Space
128 MB 256 MB
Hard Drive Space 100 MB 100 MB
Browser IE 6 IE 6
Office Products MS Access, MS Word & MS Excel 2000 or 2002
Components Client Server
Operating System Windows XP or Windows 2000 PRO (SP4)
Windows 2000 Server (SP4)
Office Products Office 2000 and 2002 (XP)
Components CaliberRM DatamartCaliberRM Datamart Explorer
Operating System Windows NT 4.0 (SP6-A) and Windows 2000
Windows NT 4.0 (SP6-A), Windows 2000 and Windows XP
Other CD-ROM CD-ROM
Microsoft Data Access Component* (MDAC) 2.50, 2.52, 2.60, or 2.70
* MDAC 2.51 and 2.53 are NOT supported.

Chapter 1: Introduct ion 3
CaliberRM Datamart Extractor Server
If CaliberRM Datamart Extractor is installed alone and the database is installed on another machine:
Database Server (MS Access or MS SQL Server)
If the database is installed alone and the CaliberRM Datamart Extractor is installed on another machine:
CaliberRM Datamart Extractor Server and Database
If CaliberRM Datamart Extractor and the database are installed on the same machine:
CaliberRM Datamart Explorer
Components Minimum Recommended
CPU PIII 500MHz PIII 800MHz
RAM 256MB 512MB
Hard Drive N/A 125MB
Components Minimum Recommended
CPU PII 233MHz PIII 500MHz
RAM 256 MB 512 MB
Hard Drive N/A Depends on database size
Components Minimum Recommended
CPU PIII 800MHz Dual PIII 500MHz
RAM 512 MB 1 GB
Hard Drive N/A Depends on database size
Components Recommended
CPU 200 MHz Pentium or higher
RAM 128 MB
Hard Drive 150 MB
Other Drives CD-ROM
4 Cal iberRM Insta l lat ion Guide
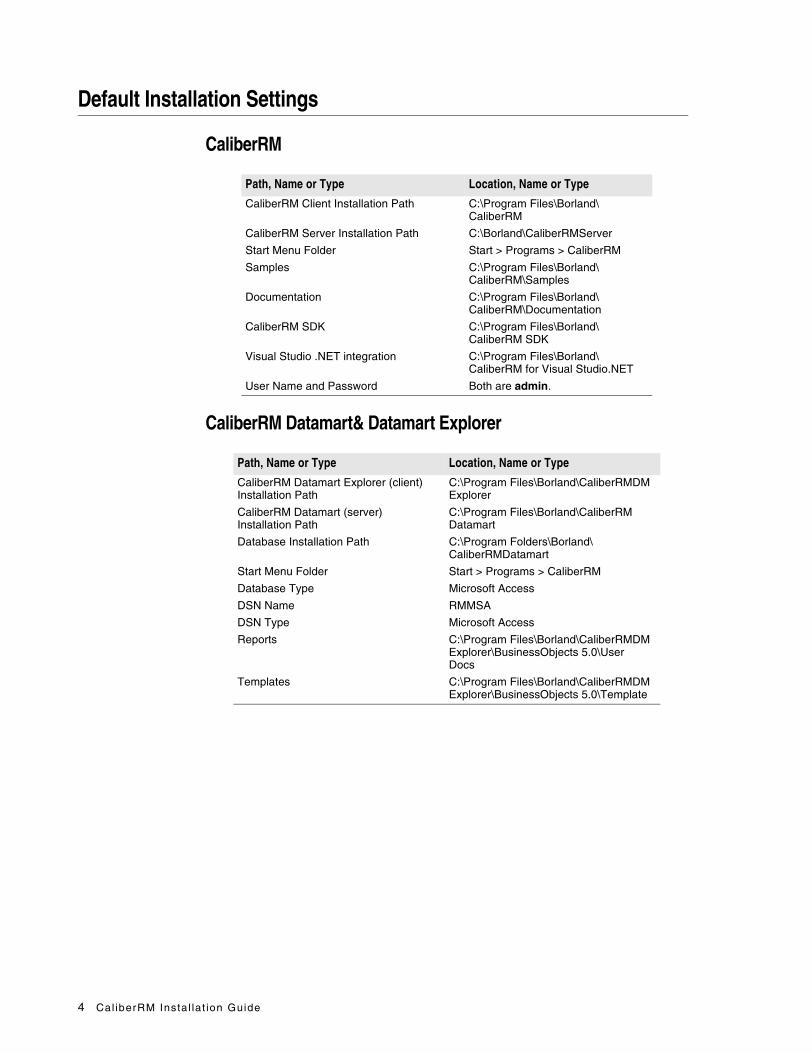
Default Installation Settings
CaliberRM
CaliberRM Datamart& Datamart Explorer
Path, Name or Type Location, Name or Type
CaliberRM Client Installation Path C:\Program Files\Borland\CaliberRM
CaliberRM Server Installation Path C:\Borland\CaliberRMServer
Start Menu Folder Start > Programs > CaliberRM
Samples C:\Program Files\Borland\CaliberRM\Samples
Documentation C:\Program Files\Borland\CaliberRM\Documentation
CaliberRM SDK C:\Program Files\Borland\CaliberRM SDK
Visual Studio .NET integration C:\Program Files\Borland\CaliberRM for Visual Studio.NET
User Name and Password Both are admin.
Path, Name or Type Location, Name or Type
CaliberRM Datamart Explorer (client) Installation Path
C:\Program Files\Borland\CaliberRMDMExplorer
CaliberRM Datamart (server) Installation Path
C:\Program Files\Borland\CaliberRMDatamart
Database Installation Path C:\Program Folders\Borland\ CaliberRMDatamart
Start Menu Folder Start > Programs > CaliberRM
Database Type Microsoft Access
DSN Name RMMSA
DSN Type Microsoft Access
Reports C:\Program Files\Borland\CaliberRMDMExplorer\BusinessObjects 5.0\User Docs
Templates C:\Program Files\Borland\CaliberRMDMExplorer\BusinessObjects 5.0\Template

Chapter 2: Instal l ing Administrat ive Components 5
C h a p t e r
Chapter 2Installing AdministrativeComponents
This chapter details how to install the Administrative Components of CaliberRM, including:
■ the CaliberRM server
■ CaliberRM Web and WebView
■ Network Install and Upgrade
■ MPX server
Note: You can also install the CaliberRM Datamart, but that is not covered in this chapter. See “Chapter 4: CaliberRM Datamart & Datamart Explorer Installation.”
Installing the CaliberRM ServerThere are two ways you can install the CaliberRM server: with the client (below) or alone (page 9).
Warning Terminal Services must be disabled on the CaliberRM Server machine. If not, the CaliberRM Installation Wizard prompts you to disable it and will not continue unless you disable Terminal Services.
Note: The installer checks the length of the currently logged in user name and does not allow the server install to continue if the length is greater than 15 characters or contains spaces.
To install the CaliberRM server with the client:
1 Close all Windows programs before proceeding with the installation.
2 Insert the CaliberRM CD into the CD-ROM drive.

6 Cal iberRM Insta l lat ion Guide
Note: The CD browser should start automatically if autorun is enabled. If it is not enabled, click Run from the Windows Start menu. Windows displays the Run dialog box.
In the Open field, enter e:\setup, where e is the letter of your CD-ROM drive. Click OK.
3 Select Install CaliberRM Admin Components.
4 Select Install CaliberRM Client & Server. The CaliberRM Install Wizard starts and the Welcome screen is displayed.
Note: You can only upgrade to CaliberRM 6.5 from CaliberRM 6.0 or 5.1. If you attempt to upgrade from CaliberRM version 5.0 or older, the upgrade displays a warning message and discontinues.
5 Click Next. The License Agreement screen is displayed.
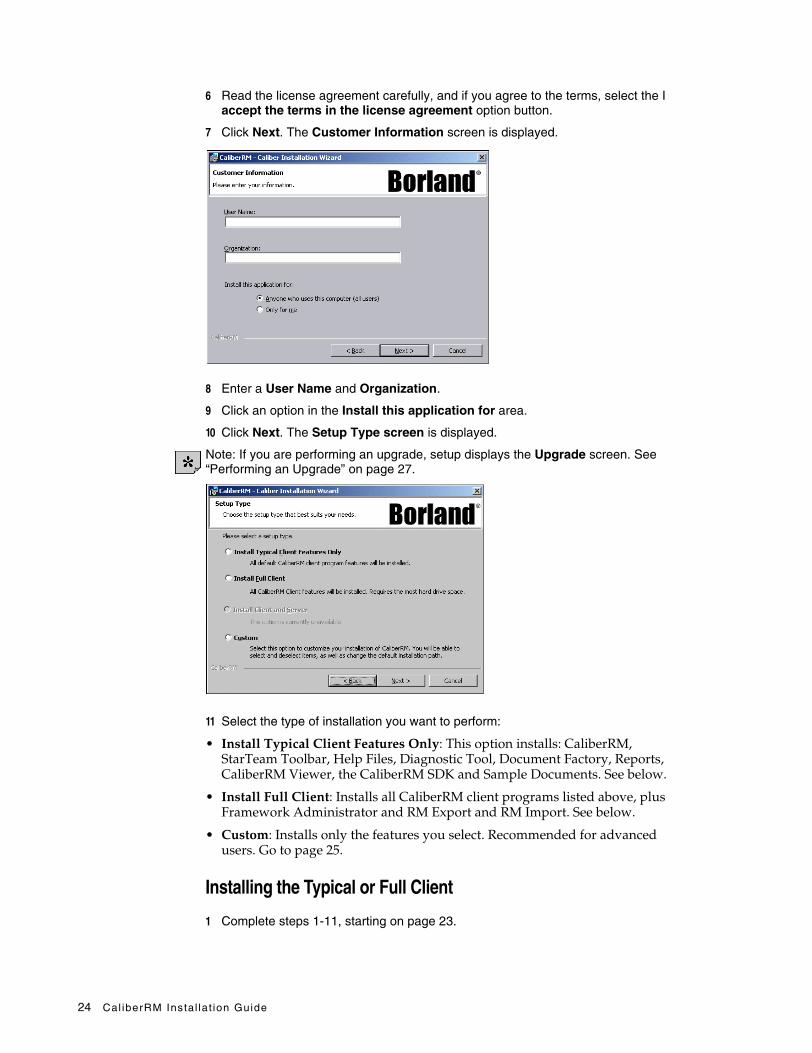
6 Read the license agreement carefully, and if you agree to the terms, select the I accept the terms in the license agreement option button.
7 Click Next. The Customer Information screen is displayed.
8 Enter a User Name and Organization.
9 Select an option in the Install this application for area.
10 Click Next. The Setup Type screen is displayed as shown on the following page.

Chapter 2: Instal l ing Administrat ive Components 7
Note: If you are performing an upgrade, setup displays the Upgrade screen. See page 27 for upgrade information.
11 Select the type of installation you want to perform:
■ Install Typical Client Features Only: Installs the client only. Go to page 24.
■ Install Full Client: Installs the client only. Go to page 24.
■ Install Client and Server: Installs both the CaliberRM client and the CaliberRM server. See below.
■ Custom: Installs only the features you select. Recommended for advanced users. Select this option if you want to install the server only. Go to page 9.
Installing the Client and Server
Warning! Terminal Services must be disabled on the CaliberRM server machine. If not, the CaliberRM Installation Wizard prompts you to disable it and will not continue unless you disable Terminal Services.
Note: The installer checks the length of the currently logged in user name and does not allow the server install to continue if the length is greater than 15 characters or contains spaces.
1 Complete steps 1-11, starting on page 5.
2 Click Next. The License Keys screen is displayed.
3 If you are installing an evaluation copy of CaliberRM, click Next and go to Step 5.
If you are installing a purchased copy of CaliberRM, click Edit next to the CaliberRM License Key text box.
4 Enter in your license key and click Validate Key.
5 Click Next.
8 Cal iberRM Insta l lat ion Guide
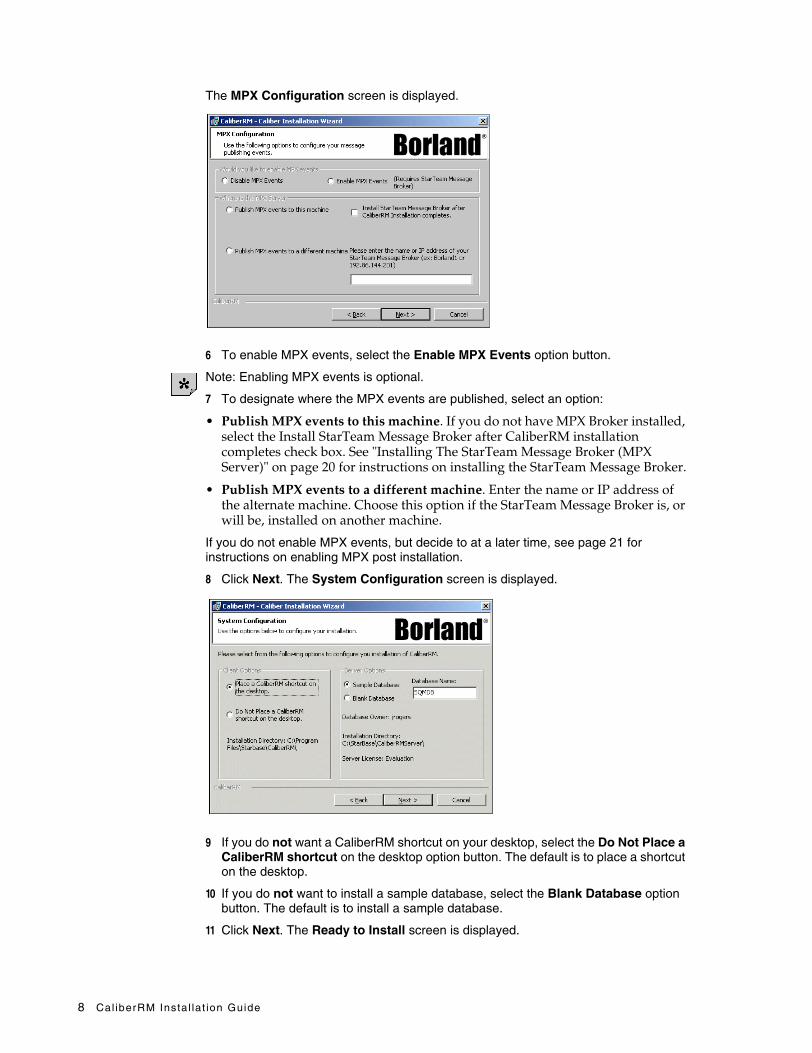
The MPX Configuration screen is displayed.
6 To enable MPX events, select the Enable MPX Events option button.
Note: Enabling MPX events is optional.
7 To designate where the MPX events are published, select an option:
• Publish MPX events to this machine. If you do not have MPX Broker installed, select the Install StarTeam Message Broker after CaliberRM installation completes check box. See "Installing The StarTeam Message Broker (MPX Server)" on page 20 for instructions on installing the StarTeam Message Broker.
• Publish MPX events to a different machine. Enter the name or IP address of the alternate machine. Choose this option if the StarTeam Message Broker is, or will be, installed on another machine.
If you do not enable MPX events, but decide to at a later time, see page 21 for instructions on enabling MPX post installation.
8 Click Next. The System Configuration screen is displayed.
9 If you do not want a CaliberRM shortcut on your desktop, select the Do Not Place a CaliberRM shortcut on the desktop option button. The default is to place a shortcut on the desktop.
10 If you do not want to install a sample database, select the Blank Database option button. The default is to install a sample database.
11 Click Next. The Ready to Install screen is displayed.

Chapter 2: Instal l ing Administrat ive Components 9
Note: If you are attempting to install CaliberRM on a machine that has Terminal Services enabled, a warning message is displayed. You must select the check box to disable Terminal Services before you can proceed with the installation.
Note: If you are attempting to install CaliberRM on an unsupported or non-server operating system, a warning message is displayed. Before you can proceed, you must select the check box indicating you are aware that your installation is not supported. Please review the system requirements for CaliberRM on page 1.
12 Click Install. Setup begins installing files and displays a status bar to show progress. Click Cancel to cancel the installation at any time.
13 Click Finish to exit the Install Wizard. Setup displays the CaliberRM Client Installer Information screen.
14 Click Yes to restart your system immediately, or No to restart later.
Note: You must restart your machine for the changes to take effect. Logging off and on again is insufficient.
Once you reboot, the CaliberRM server attempts startup. If Terminal Services is enabled, an error message is written to the SQM Monitor log and the server will not start.
Installing the Server Only
Warning! Terminal Services must be disabled on the CaliberRM Server machine. If not, the CaliberRM Installation Wizard prompts you to disable it and will not continue unless you disable Terminal Services.
Note: The installer checks the length of the currently logged in user name and does not allow you to continue if the length is greater than 15 characters or contains spaces.
1 Complete steps 1-11, starting on page 5.
2 Click Next. The Custom Setup screen is displayed.
3 Click the install state icon to select the CaliberRM Client component.
4 Select the This feature will not be available option.
5 Click the install state icon to select the StarTeam Toolbar component.
6 Select the This feature will not be available option.
7 Click the install state icon to select the CaliberRM SDK component.
8 Select the This feature will not be available option.
9 Click the install state icon to select the CaliberRM Server component.
10 Cal iberRM Instal lat ion Guide
10 Select the This feature, and all subfeatures, will be installed on local hard drive option.
11 Click the Help button for information about each install state.
Click the Space button to see a list of the disk space requirements for each component.
Click the Change button if you want to change the location where the component is installed. The default install location for the server is C:\Borland\CaliberRMServer.
12 Click Next. The License Keys screen is displayed.
13 If you are installing an evaluation copy of CaliberRM, go to step 15.
If you are installing a purchased copy of CaliberRM, click Edit next to the CaliberRM License Key text box.
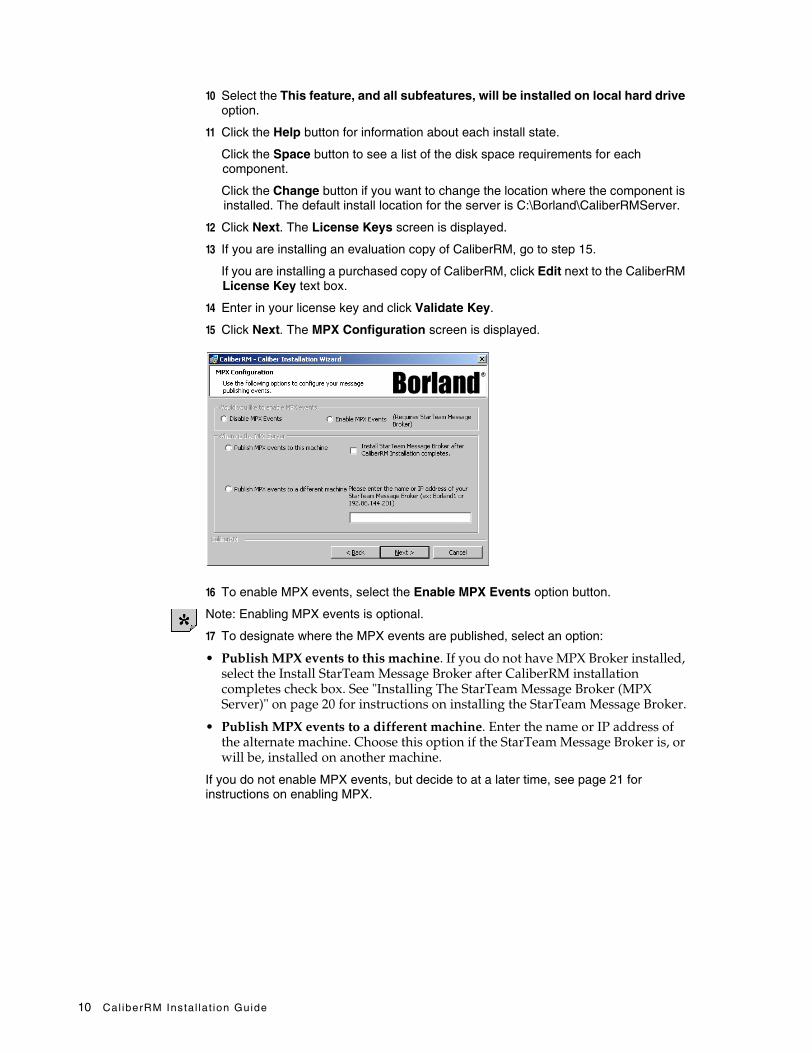
14 Enter in your license key and click Validate Key.
15 Click Next. The MPX Configuration screen is displayed.
16 To enable MPX events, select the Enable MPX Events option button.
Note: Enabling MPX events is optional.
17 To designate where the MPX events are published, select an option:
• Publish MPX events to this machine. If you do not have MPX Broker installed, select the Install StarTeam Message Broker after CaliberRM installation completes check box. See "Installing The StarTeam Message Broker (MPX Server)" on page 20 for instructions on installing the StarTeam Message Broker.
• Publish MPX events to a different machine. Enter the name or IP address of the alternate machine. Choose this option if the StarTeam Message Broker is, or will be, installed on another machine.
If you do not enable MPX events, but decide to at a later time, see page 21 for instructions on enabling MPX.

Chapter 2: Instal l ing Administrat ive Components 11
18 Click Next. The System Configuration screen is displayed.
19 If you do not want to install a sample database, select the Blank Database option button. The default is to install a sample database.
20 Click Next. The Ready to Install screen is displayed.
Note: If you are attempting to install CaliberRM on a machine that has Terminal Services enabled, a warning message is displayed. You must select the check box to disable Terminal Services before you can proceed with the installation.
Note: If you are attempting to install CaliberRM on an unsupported or non-server operating system, a warning message is displayed. Before you can proceed, you must select the check box indicating you are aware that your installation is not supported. Please review the system requirements for CaliberRM on page 1.
21 Click Install. Setup begins installing files and displays a status bar to show progress. Click Cancel to cancel installation at any time.
22 Click Finish to exit the Install Wizard. Setup displays the CaliberRM Client Installer Information screen.
23 Click Yes to restart your system immediately, or No to restart later.
Note: You must restart your machine for the changes to take effect. Logging off and on again is insufficient.
Once you reboot, the CaliberRM server attempts startup. If Terminal Services is enabled, an error message is written to the SQM Monitor log and the server will not start.
Program Maintenance For CaliberRM The CaliberRM Install Wizard allows you to perform program maintenance on your CaliberRM installation. See "Program Maintenance for CaliberRM" on page 28.
Installing CaliberRM Web and WebViewTo install the CaliberRM Web View and CaliberRM Web:
1 Close all Windows programs before proceeding with the installation.
2 Insert the CD into the CD-ROM drive.

12 Cal iberRM Instal lat ion Guide
Note: The CD browser should start automatically if autorun is enabled. If it is not, click Run from the Windows Start menu. Windows displays the Run dialog box.
In the Open field, enter e:\setup, where e is the letter of your CD-ROM drive. Click OK.
3 Click Install Admin Components.
4 Click Install CaliberRM Web & WebView. The CaliberRM Install Wizard starts and the Welcome screen is displayed.
5 Click Next. The License Agreement screen is displayed.
6 Read the license agreement carefully and if you agree to the terms, click the I accept the terms in the license agreement option button.
7 Click Next. Setup displays the Customer Information screen.
8 Enter your User Name and Organization
9 Select an option in the Install this application for area.
10 Click Next. Setup displays the Web Server screen.
11 Select an installation option button:

Chapter 2: Instal l ing Administrat ive Components 13
• Install both, CaliberRM Web and CaliberRM Web Viewer
• Install CaliberRM Web Client
• Install CaliberRM Web Viewer
12 Select the web server option you would like:
• If you want to use Apache as your web server, select the Use Apache as my Web Server option button.
• If you want to use Microsoft IIS as your web server, select the Use Microsoft IIS as my Web Server option button.
• If f you want to configure your web server manually, select the I’ll configure my web server manually option button.
13 Click Next. Setup displays the Ready To Install screen.
14 If you want to change the install location, click the Change button. The default path is C:\Borland\CaliberRMServer.
15 Click Install to begin installation. Setup displays the Installing the CaliberRM Web screen. Click Cancel to cancel the installation at any time.
When the installation is complete, setup displays the CaliberRM Installation Wizard Completed screen.
16 Click Finish to exit the Install Wizard. Setup displays the CaliberRM Web Installer Information screen.
17 Click Yes to restart your system immediately, or No to restart later.
Note: You must restart your machine for the changes to take effect. Logging off and on again is insufficient.
Program Maintenance For CaliberRM WebThe CaliberRM Install Wizard allows you to perform program maintenance on your CaliberRM Web installation.
To perform program maintenance:
1 Complete steps 1-4, starting on page 11. When CaliberRM Web is detected, Setup displays the program maintenance Welcome screen.
2 Click Next. Setup displays the Program Maintenance screen.
3 Select the type of program maintenance you want to perform: Repair or Remove.
See the following sections for each option.
Repairing Your Web Installation
If you have accidentally deleted or overwritten a file, you can repair your installation.
To repair your CaliberRM Web installation:
1 Select the Repair option button from the Program Maintenance screen and click Next. Setup displays the Ready to Repair the Program screen.
2 Click Install to complete the repair. Setup checks for missing or corrupted files and re-installs them.
3 When installation is complete, Setup displays the CaliberRM Installation Wizard Completed screen.

14 Cal iberRM Instal lat ion Guide
4 Click Finish to exit the Install Wizard. Setup displays the CaliberRM Web Installer Information screen.
5 Click Yes to restart your system immediately, or No to restart later.
Note: You must restart your machine for the changes to take effect. Logging off and on again is insufficient.
Removing CaliberRM Web
To remove CaliberRM Web from your system:
1 Select the Remove option button from the Program Maintenance screen and click Next. Setup displays the Remove the Program screen.
2 Click Remove and the uninstall procedure completes.
3 Click Finish to exit the Install Wizard. Setup displays the CaliberRM Web Installer Information screen.
4 Click Yes to restart your system immediately, or No to restart later.
Note: You must restart your machine for the changes to take effect. Logging off and on again is insufficient.
You can also use the standard Windows Add/Remove Programs procedure to remove CaliberRM Web. To use this procedure, see page 29.
Network Install and UpgradeThe Network Install and Upgrade feature allows an administrator to install a one-click, self-extracting CaliberRM installation or upgrade package. The package uses a default CaliberRM .html page for users to receive available download updates. As new releases are delivered, administrators can install the new product in one place. Users are notified at login that there is a new release available and are guided through the install/upgrade process.
Note: Before installing this feature you should:
■ have administrator privileges on the machine on which you are performing the install.
■ have IIS or Apache running on the machine on which you are performing the install. You can have both installed on the machine, but only one running at a time. You do not need to have both installed. If you are installing on a machine that does not have IIS or Apache, refer to page 18 for more information on configuring your installation.
To install Network Install and Upgrade:
1 Close all Windows programs before proceeding with the installation.
2 Insert the CaliberRM CD into the CD-ROM drive.
Note: The CD browser should start automatically if autorun is enabled. If it is not enabled, click Run from the Windows Start menu. Windows displays the Run dialog box.

Chapter 2: Instal l ing Administrat ive Components 15
In the Open field, enter e:\setup, where e is the letter of your CD-ROM drive. Click OK.
3 Select Install CaliberRM Admin Components.
4 Select Install CaliberRM Network Install and Upgrade. The CaliberRM Install Wizard starts and the Welcome screen is displayed.
5 Click Next. The License Agreement screen is displayed.
6 Read the license agreement carefully, and if you agree to the terms, select the I accept the terms in the license agreement option button.
7 Click Next. The Customer Information screen is displayed.
8 Enter a User Name and Organization.
9 To have CaliberRM clients check for upgrades, select the CaliberRM Clients will automatically detect new versions from the following URL check box. You can use the default URL, or enter a different URL in the text box.
10 Make a selection using the option buttons regarding how the upgrades will be downloaded:
• Automatically download and start the upgrade
• Direct the user to the above URL to start the upgrade manually (see below for details about the URL).
Note: To change these options later, see page 17.
When users are prompted to visit the URL, the following screen (index.htm) is displayed.
This pane can be modified.
Do not modify this pane.

16 Cal iberRM Instal lat ion Guide
The page consists of two panes. The upper pane contains the file RMINSTALL2.htm, and can be modified with any text editor. You can include links, images and any other information. This enables you to customize the page according to your organization’s needs.
The lower pane contains the file RmInstallxx.htm (xx representing the release number), which should not be modified. However, if after the installation, you need to change the URL for the Install or Upgrade to CaliberRM v.x link, you can edit it. See “Modifying Your URL Location” on page 18 for more information.
11 Click Next. The Setup Type screen is displayed.
12 Select the type of installation you want:
• Automatic Configuration: Installs the product using the client URL settings you chose in step 9. Select this option if you are installing this feature on a machine that has an IIS or Apache web server.
• Custom Configuration: Allows you to change the Client URL for installing updates. Select this option if your web server is something other than Apache or IIS, or if you want to install this feature on a machine that is not running a web server.
Note: If you select Custom, you may have to open your web service and create a virtual directory. See page 18 for more information.
13 Click Next. For Automatic Configuration, go to step 17.
The Custom Setup screen is displayed.
14 Select a component to install by clicking on the install state icon.
• The CaliberRM Installation: installs the Network Install and Upgrade feature.
Chapter 2: Instal l ing Administrat ive Components 17
• The Default HTML page: installs the index.htm, the RMINSTALL2.htm, and RmInstallxx.htm (xx representing the release number) files.
15 Choose the installation option for each component.
16 Click the Help button for information about each install state.
Click the Space button to see a list of the disk space requirements for each component.
Click the Change button if you want to change the location where the component is installed. The default path is: C:\Borland\CaliberRMServer\WebAccess\CaliberRM_Network_Install.
17 The Ready to Install screen is displayed. Click Install to begin the installation. Setup begins installing files and displays a status bar to show progress. Click Cancel to cancel the installation at any time.
18 Click Finish.
Modifying Your Network Install Settings
You can modify the download options, a section of the index.htm page, and the URL from which CaliberRM users download the product and available upgrades.
Modifying Your Download Options
You can modify the download option you selected for your clients during installation.
To modify your option:
1 Navigate to the version.ini file.
The file resides in the default installation folder for the Network Install and Upgrade: C:\Borland\CaliberRMServer\WebAccess\HTDocs\CaliberRM_Network_Install.
2 Right-click the file, select Open with and select Notepad from the list.
3 Locate the line:
autodownload =n
4 If you want CaliberRM clients to automatically download and start the upgrade, replace n with a 1.
If you want CaliberRM clients to direct the user to the specified URL to start the upgrade, replace n with a 0.
5 Select File > Save from the menu, then close the file.
Modifying Your Custom HTML Page
To modify your HTML page:
1 Navigate the RMINSTALL2.htm file.
The file resides in the default installation folder for the Network Install and Upgrade: C:\Borland\CaliberRMServer\WebAccess\HTDocs\CaliberRM_Network_Install\RMINSTALL2.htm.
2 Right-click the file, select Open with and select Notepad from the list.
3 Modify as necessary/desired.

18 Cal iberRM Instal lat ion Guide
Modifying Your URL Location
You can modify the download URL location two ways:
■ at each client, or
■ from a central location using a simple email process.
Before modifying your URL location using either method, you must perform the following steps:
1 Open the file RmInstallxx.htm (“xx” representing the release number) with Notepad.
2 Find the statement:
URL = http://server name/CaliberRM_Network_Install
3 Modify the statement with the new or renamed virtual path.
Modifying At Each ClientTo modify the URL download location by client:
1 In CaliberRM, select Tools > Options from the menu.
2 On the General tab, in the URL text box, enter the new URL.
3 Click OK.
Modifying From a Central Location Using EmailTo modify the URL download location using email:
1 Using your web browser, open the new CaliberRM Default Webpage using the new path.
2 Copy and email the new link to each user.
When the user clicks the link, the CaliberRM Default Webpage opens, and the URL directory is automatically reconfigured within CaliberRM.
Installation on a Machine That Does Not Have a Web Server
Email the URL to the CaliberRM Network Install & Upgrade’s URL to the client machines.
Example URL to email: http://Server1/Admin/CaliberRM_Network_Install
Each machine is able to download and begin the CaliberRM installation or upgrade.
Once the product is installed, the client machines automatically check for a new version of CaliberRM available. If there is a newer version available, the CaliberRM client downloads the upgrade.

Chapter 2: Instal l ing Administrat ive Components 19
See the figure below for clarification.
Program Maintenance For Network Install and UpgradeThe CaliberRM Install Wizard allows you to perform program maintenance on your Network Install and Upgrade installation.
To perform program maintenance:
1 Complete steps 1-4, starting on page 14. When Network Install and Upgrade is detected, Setup displays the program maintenance Welcome screen.
2 Click Next. Setup displays the Program Maintenance screen.
3 Select the type of program maintenance you want to perform: Modify, Repair or Remove.
See the following sections for each option.
Modifying Your Network Install and Upgrade Installation
If you want to add or remove a feature from your installation, you can modify your installation.
To modify your installation:
1 Click the Modify option from the Program Maintenance screen and click Next. Setup displays the Custom Setup screen.
2 Complete steps 14-20, starting on page 16.
Repairing Your Network Install and Upgrade Installation
If you have accidentally deleted or overwritten a file, you can repair your installation.
To repair your Network Install and Upgrade installation:

20 Cal iberRM Instal lat ion Guide
1 Select the Repair option button from the Program Maintenance screen and click Next. Setup displays the Ready to Repair the Program screen.
2 Click Install to complete the repair. Setup checks for missing or corrupted files and re-installs them.
3 When installation is complete, Setup displays the CaliberRM Installation Wizard Completed screen.
4 Click Finish to exit the Install Wizard. Setup displays the CaliberRM Network Install and Upgrade Installer Information screen.
5 Click Yes to restart your system immediately, or No to restart later.
Note: You must restart your machine for the changes to take effect. Logging off and on again is insufficient.
Removing Your Network Install and Upgrade Installation
To remove Network Install and Upgrade from your system:
1 Select the Remove option button from the Program Maintenance screen.
2 Click Next. Setup displays the Remove the Program screen.
3 Click Remove and the uninstall procedure completes.
Note: You must restart your machine for the changes to take effect. Logging off and on again is insufficient.
You can also use the standard Windows Add/Remove Programs procedure to remove Network Install and Upgrade. To use this procedure, go to page 29.
Installing The StarTeam Message Broker (MPX Server)
To install the MPX server:
1 Close all Windows programs before proceeding with the installation.
2 Insert the CaliberRM CD into the CD-ROM drive.
Note: The CD browser should start automatically if autorun is enabled. If it is not enabled, click Run from the Windows Start menu. Windows displays the Run dialog box.
In the Open field, enter e:\setup, where e is the letter of your CD-ROM drive. Click OK.
3 Select Install CaliberRM Admin Components.
4 Select Install MPX Server. The StarTeam Message Broker Install Wizard starts and the Welcome screen is displayed.
5 Click Next. The License Agreement screen is displayed.
6 Read the license agreement carefully, and if you agree to the terms, click Yes. The Message Broker Service Type screen is displayed.

Chapter 2: Instal l ing Administrat ive Components 21
7 Select the type of service you want: Automatic or Manual.
8 Click Next. The Destination Location screen is displayed.
9 Click Browse to change the location for install or click Next. The Folder Selection screen is displayed for determining where product icons will be located.
10 Click Next. The Setup Complete screen is displayed.
11 Click Finish to exit the wizard.
Enabling MPX Post InstallationYou can enable MPX events after performing an install.
Note: These steps should only be performed by an administrator.
To enable MPX events:
1 On the machine where the CaliberRM server is installed, select Start > Run.
2 In the Open area, enter regedit and click OK.
3 Under HKEY_LOCAL_MACHINE, navigate to Software\Borland\CaliberRM\6.5\Server\MPX.
4 Double-click Broker. In the Value data area, enter the name or IP address of the machine where MPX is installed and click OK.
5 Double-click Server. In the Value data area, enter the name or IP address of the machine where MPX is installed and click OK.
6 Double-click Enable. In the Value data area, enter a 1 to turn on MPX events and click OK.
7 Close the Registry Editor.
Note: You must stop and restart the server before MPX is active.
Reconnecting MPX if the Server Loses the ConnectionIf the connection is lost on the CaliberRM server side, and you receive an error message from the CaliberRM server, you must restart the CaliberRM server.
If the connection is lost on the MPX side, you must restart the MPX server, then the CaliberRM server.

22 Cal iberRM Instal lat ion Guide

Chapter 3: Instal l ing User Components 23
C h a p t e r
Chapter3Installing User ComponentsThis chapter details how to install the User Components of CaliberRM, including:
■ the CaliberRM client
■ User Integrations
Note: You can also install the CaliberRM Datamart Explorer, but that is not covered in this chapter. See “Chapter 4: CaliberRM Datamart & Datamart Explorer Installation.”
Installing the CaliberRM ClientTo install CaliberRM:
1 Close all Windows programs before proceeding with the installation.
2 Insert the CaliberRM CD into the CD-ROM drive.
Note: The CD browser should start automatically if autorun is enabled. If it is not enabled, click Run from the Windows Start menu. Windows displays the Run dialog box.
In the Open field, enter e:\setup, where e is the letter of your CD-ROM drive. Click OK.
3 Click Install User Components.
4 Click Install CaliberRM Client. The CaliberRM Install Wizard starts and the Welcome screen is displayed.
Note: You can only upgrade to CaliberRM 6.0 from CaliberRM 5.0 or 5.1. If you attempt to upgrade from a CaliberRM version 4.2 or older, the upgrade displays a warning message and discontinues.
5 Click Next. The License Agreement screen is displayed.
24 Cal iberRM Instal lat ion Guide
6 Read the license agreement carefully, and if you agree to the terms, select the I accept the terms in the license agreement option button.
7 Click Next. The Customer Information screen is displayed.
8 Enter a User Name and Organization.
9 Click an option in the Install this application for area.
10 Click Next. The Setup Type screen is displayed.
Note: If you are performing an upgrade, setup displays the Upgrade screen. See “Performing an Upgrade” on page 27.
11 Select the type of installation you want to perform:
• Install Typical Client Features Only: This option installs: CaliberRM, StarTeam Toolbar, Help Files, Diagnostic Tool, Document Factory, Reports, CaliberRM Viewer, the CaliberRM SDK and Sample Documents. See below.
• Install Full Client: Installs all CaliberRM client programs listed above, plus Framework Administrator and RM Export and RM Import. See below.
• Custom: Installs only the features you select. Recommended for advanced users. Go to page 25.
Installing the Typical or Full Client
1 Complete steps 1-11, starting on page 23.

Chapter 3: Instal l ing User Components 25
2 Click Next. The System Configuration screen is displayed.
3 If you do not want a CaliberRM shortcut on your desktop, select the Do Not Place a CaliberRM shortcut on the desktop option button. The default is to place a shortcut on the desktop.
4 Click Next. The Ready to Install screen is displayed.
Note: If you are attempting to install CaliberRM on an unsupported operating system, a warning message is displayed. Before you can proceed, you must select the check box indicating you are aware that your installation is not supported. Please review the system requirements for CaliberRM on page 1.
5 Click Install. Setup begins installing files and displays a status bar to show progress. Click Cancel to cancel installation at any time.
6 Click Finish to exit the Install Wizard. Setup displays the CaliberRM Client Installer Information screen.
7 Click Yes to restart your system immediately, or No to restart later.
Note: You must restart your machine for the changes to take effect. Logging off and on again is insufficient.
Custom Installation
Note: The default custom install is the same as a typical install (does not have the server enabled).
1 Complete steps 1-11, starting on page 23.

26 Cal iberRM Instal lat ion Guide
2 Click Next. The Custom Setup screen is displayed.
3 Click on the install state icon for a component.
4 Choose the installation option for each component.
5 Click the Help button for information about each install state.
Click the Space button to see a list of the disk space requirements for each component.
Click the Change button if you want to change the location where the component is installed. The default install location for the client is C:\Program Files\Borland\CaliberRM.
6 Click Next. The System Configuration screen is displayed.
7 If you do not want a CaliberRM shortcut on your desktop, select the Do Not Place a CaliberRM shortcut on the desktop option button. The default is to place a shortcut on the desktop.
8 Click Next. The Ready to Install screen is displayed.
9 Click Install. Setup begins installing files and displays a status bar to show progress. Click Cancel at any time to cancel the installation.
Note: If you are attempting to install CaliberRM on an unsupported operating system, a warning message is displayed. Before you can proceed, you must select the check box indicating you are aware that your installation is not supported. Please review the system requirements for CaliberRM on page 1.
10 Click Finish to exit the Install Wizard. Setup displays the CaliberRM Client Installer Information screen.

Chapter 3: Instal l ing User Components 27
11 Click Yes to restart your system immediately, or No to restart later.
Note: You must restart your machine for the changes to take effect. Logging off and on again is insufficient.
Performing an UpgradeNote: You can only upgrade to CaliberRM 6.0 from CaliberRM 5.0 or 5.1. If you attempt to upgrade from a CaliberRM version 4.2 or older, the upgrade displays a warning message and discontinues.
1 Complete steps 1-10, starting on page 23. Setup displays the Setup Type screen.
2 Select the type of upgrade you want to perform:
• Upgrade features currently installed: Upgrades all of the features that are currently installed.
• Custom: Installs only the features you select. Recommended for advanced users. See page 25 for instructions on performing a custom installation.
3 Click Next. The System Configuration screen is displayed.
4 If you do not want a CaliberRM shortcut on your desktop, select the Do Not Place a CaliberRM shortcut on the desktop option button. The default is to place a shortcut on the desktop.
5 Click Next. The Ready to Install screen is displayed.
Note: If you are attempting to install CaliberRM on an unsupported operating system, a warning message is displayed. Before you can proceed, you must select the check box
28 Cal iberRM Instal lat ion Guide
indicating you are aware that your installation is not supported. Please review the system requirements for CaliberRM on page 1.
6 Click Install. Setup begins installing files and displays a status bar to show progress. Click Cancel to cancel installation at any time.
7 Click Finish to exit the Install Wizard. Setup displays the CaliberRM Client Installer Information screen.
8 Click Yes to restart your system immediately, or No to restart later.
Note: You must restart your machine for the changes to take effect. Logging off and on again is insufficient.
Program Maintenance for CaliberRMThe CaliberRM Installation Wizard allows you to modify, repair or remove your CaliberRM installation.
To perform program maintenance:
1 Complete steps 1-4 starting on page 23. Setup displays the Program Maintenance screen.
2 Select the type of program maintenance you want to perform: Modify, Repair or Remove.
See the following sections for each option.
Modifying Your Installation
If you want to add or remove a feature from your installation, you can modify your installation.
To modify your installation:
1 Click the Modify option from the Program Maintenance screen and click Next. Setup displays the Custom Setup screen.
2 Complete steps 3-11, starting on page 26.
Note: You do not have access to the Server Options while modifying your installation.
Repairing Your Installation
If you have accidentally deleted or overwritten a file, you can repair your installation.
To repair the CaliberRM installation:
1 Click the Repair option from the Program Maintenance screen.
2 Click Next. Setup displays the Program Repair screen.
3 Click Install to complete the repair. Setup installs the required files. Click Cancel to cancel installation at any time.
4 Click Finish to exit the Install Wizard. Setup displays the CaliberRM Client Installer Information screen.
5 Click Yes to restart your system immediately, or No to restart later.
Note: You must restart your machine for the changes to take effect. Logging off and on again is insufficient.

Chapter 3: Instal l ing User Components 29
Removing CaliberRM
To remove the CaliberRM from your system:
1 Click Remove from the Program Maintenance screen.
2 Click Next. Setup displays the Remove the Program screen.
3 Click Remove.The uninstall procedure completes.
Using the Windows Add/Remove Program to Remove CaliberRM
You can also use the standard Windows Add/Remove Programs procedure to remove CaliberRM.
To uninstall CaliberRM using the Windows Add/Remove Programs procedure:
1 Click the Windows Start button and click Settings > Control Panel.
2 When the control panel appears, double-click the Add/Remove Programs icon.
3 Select the program you want to remove from the program list.
4 Click Add/Remove. The InstallShield window opens.
5 Click Next, then Remove. InstallShield removes CaliberRM from your system.
6 When the InstallShield program is complete, click Finish.
7 If prompted, you must restart your machine for the changes to take effect. Logging off and on again is insufficient.
Silent Installation For ClientsYou can install or upgrade a CaliberRM client using a silent installation process that uses command line options to run the installation.
Note: The silent install feature cannot be used to install the CaliberRM server.
To use the silent installation option, you must be at a command prompt in the folder where CaliberRM.msi resides, or enter the full path to that folder.
A typical silent installation command with full path to the folder on a local CD-ROM drive would be:
Setup.exe /S /V“/qn+”
The minimum required command to accomplish a command line install is Setup.exe /V“/qn”. However, this command is not completely silent; you will see a brief splash screen advising that CaliberRM setup is preparing the InstallShield Wizard. The /S eliminates this splash screen.
A + following /qn causes a confirmation dialog box to appear upon completion. This dialog box confirms completion or advises of failure in the event the install failed.
Command Description
Setup.exe /S /V“/qn+” Installs or upgrades the CaliberRM client silently. A confirmation dialog box appears upon completion if you include the plus (+) sign. The /S, /V, and /qn modifiers are case sensitive.
Setup.exe /S /V“/qn+ ALLCLIENT=YES”
Enables all features when installing CaliberRM. Note that the ALLCLIENT option is case sensitive.
30 Cal iberRM Instal lat ion Guide
Accepted command line options are:
The No options are the equivalent of deselecting options in a custom install.
Multiple command line options are acceptable. For example, to install CaliberRM without the Framework Administrator and without a confirmation dialog box appearing upon completion:
Setup.exe /S /V“/qn NOFRAMEWORK=YES ALLCLIENT=YES”
Or, to install CaliberRM without the Framework Administrator but with a confirmation dialog box appearing upon completion:
Setup.exe /S /V“/qn+ NOFRAMEWORK=YES ALLCLIENT=YES”
In the event of an upgrade, the modifiers take precedence over the default option to upgrade existing components.
Installing the Visual Studio .NET Integration
Note: The Visual Studio .NET integration requires that the CaliberRM SDK be installed. The integration installation wizard automatically installs the CaliberRM SDK if it is not already installed.
To install the integration:
1 Close all Windows programs before proceeding with the installation.
2 Insert the CaliberRM CD into the CD-ROM drive.
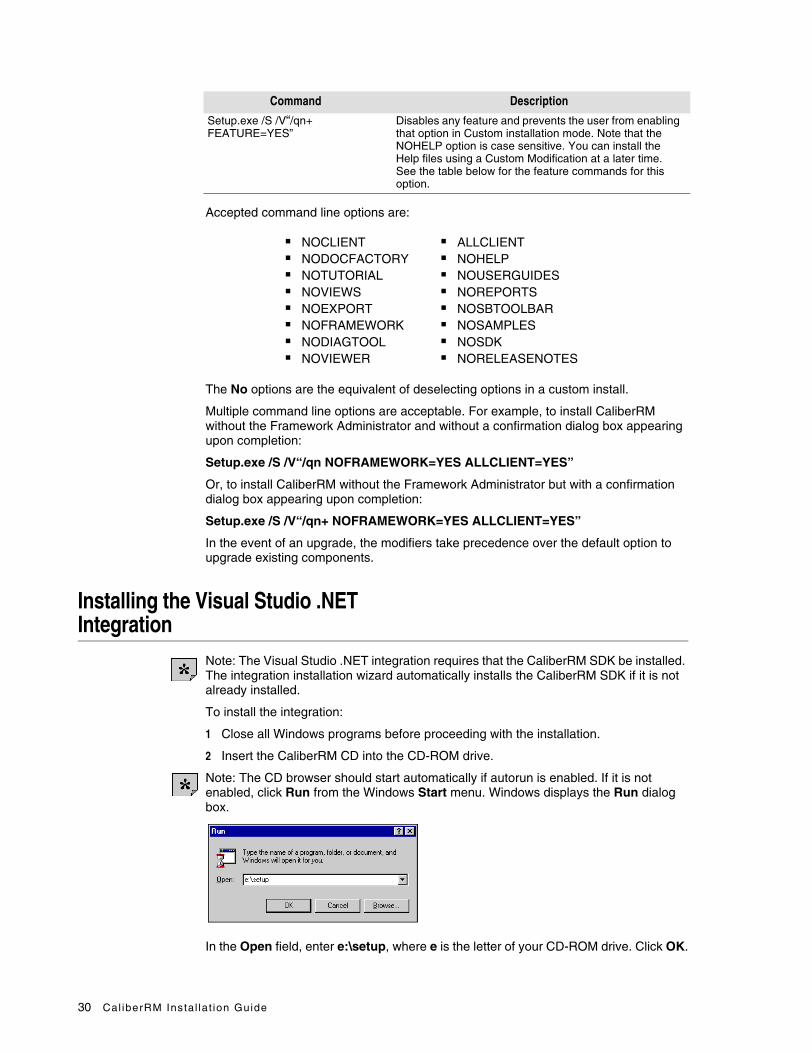
Note: The CD browser should start automatically if autorun is enabled. If it is not enabled, click Run from the Windows Start menu. Windows displays the Run dialog box.
In the Open field, enter e:\setup, where e is the letter of your CD-ROM drive. Click OK.
Command Description
Setup.exe /S /V“/qn+ FEATURE=YES”
Disables any feature and prevents the user from enabling that option in Custom installation mode. Note that the NOHELP option is case sensitive. You can install the Help files using a Custom Modification at a later time. See the table below for the feature commands for this option.
■ NOCLIENT ■ ALLCLIENT■ NODOCFACTORY ■ NOHELP■ NOTUTORIAL ■ NOUSERGUIDES■ NOVIEWS ■ NOREPORTS■ NOEXPORT ■ NOSBTOOLBAR■ NOFRAMEWORK ■ NOSAMPLES■ NODIAGTOOL ■ NOSDK■ NOVIEWER ■ NORELEASENOTES
Chapter 3: Instal l ing User Components 31
3 Click Install User Components.
4 Click Install User Integrations.
5 Click Install Visual Studio .NET integration for CaliberRM. The CaliberRM Install Wizard starts and the Welcome screen is displayed.
6 Click Next. The License Agreement screen is displayed.
7 Read the license agreement carefully, and if you agree to the terms, select the I accept the terms in the license agreement option button.
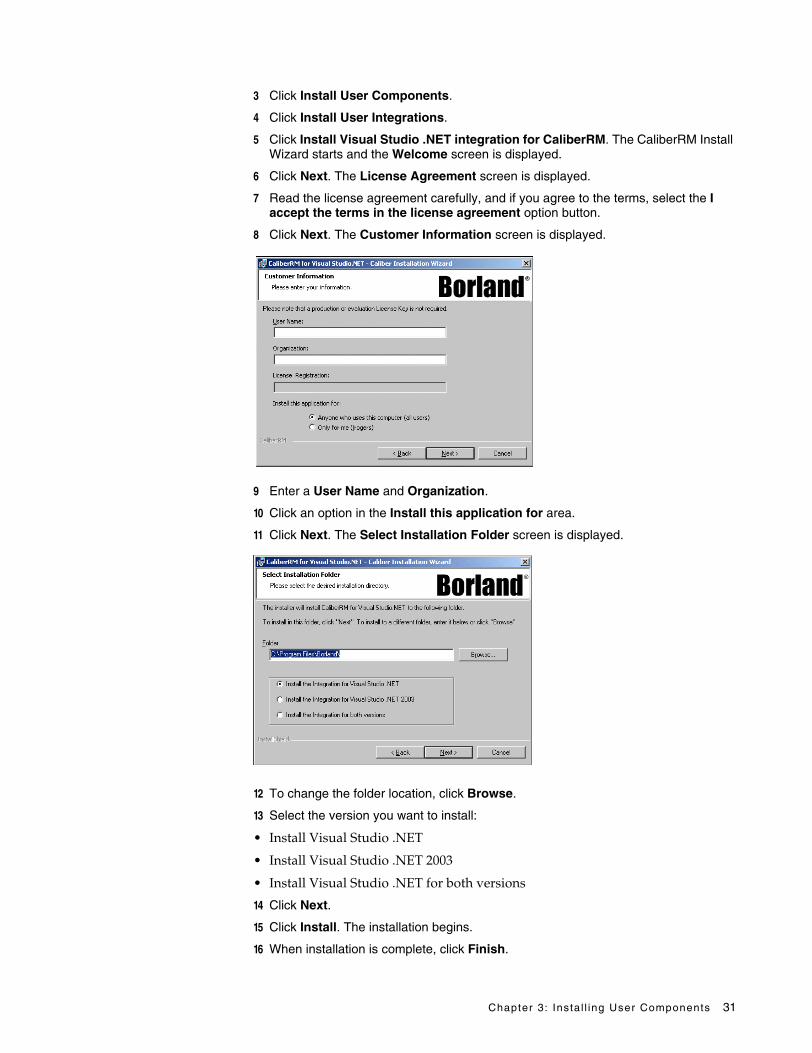
8 Click Next. The Customer Information screen is displayed.
9 Enter a User Name and Organization.
10 Click an option in the Install this application for area.
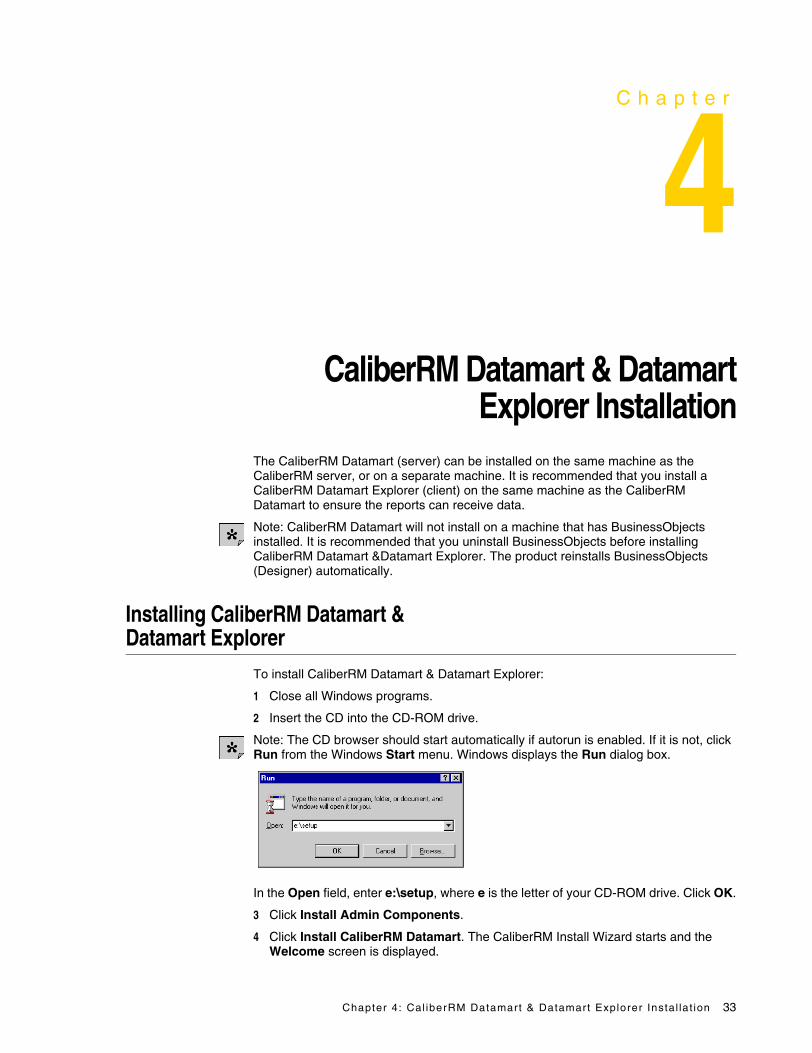
11 Click Next. The Select Installation Folder screen is displayed.
12 To change the folder location, click Browse.
13 Select the version you want to install:
• Install Visual Studio .NET
• Install Visual Studio .NET 2003
• Install Visual Studio .NET for both versions
14 Click Next.
15 Click Install. The installation begins.
16 When installation is complete, click Finish.

32 Cal iberRM Instal lat ion Guide
Program Maintenance For Visual Studio .NETThe CaliberRM Install Wizard allows you to perform program maintenance on your CaliberRM/Visual Studio .NET integration.
To perform program maintenance:
1 Complete steps 1-4, starting on page 30. When the CaliberRM/Visual Studio . NET integration is detected, Setup displays the program maintenance Welcome screen.
2 Click Next. Setup displays the Program Maintenance screen.
3 Select the type of program maintenance you want to perform: Repair or Remove.
See the following sections for each option.
Repairing Your Visual Studio .NET Integration
If you have accidentally deleted or overwritten a file, you can repair your installation.
To repair your CaliberRM/Visual Studio .NET integration:
1 Select the Repair option button from the Program Maintenance screen and click Next. Setup displays the Ready to Repair the Program screen.
2 Click Install to complete the repair. Setup checks for missing or corrupted files and re-installs them.
3 When installation is complete, Setup displays the CaliberRM Installation Wizard Completed screen.
4 Click Finish to exit the Install Wizard.
Removing Your Visual Studio .NET Integration
To remove your CaliberRM/Visual Studio .NET integration:
1 Select the Remove option button from the Program Maintenance screen and click Next. Setup displays the Remove the Program screen.
2 Click Remove and the uninstall procedure completes.
You can also use the standard Windows Add/Remove Programs procedure to remove your CaliberRM/Visual Studio .NET integration. To use this procedure, go to page 29.
Chapter 4: Cal iberRM Datamart & Datamart Explorer Instal la t ion 33
C h a p t e r
Chapter4CaliberRM Datamart & DatamartExplorer Installation
The CaliberRM Datamart (server) can be installed on the same machine as the CaliberRM server, or on a separate machine. It is recommended that you install a CaliberRM Datamart Explorer (client) on the same machine as the CaliberRM Datamart to ensure the reports can receive data.
Note: CaliberRM Datamart will not install on a machine that has BusinessObjects installed. It is recommended that you uninstall BusinessObjects before installing CaliberRM Datamart &Datamart Explorer. The product reinstalls BusinessObjects (Designer) automatically.
Installing CaliberRM Datamart & Datamart Explorer
To install CaliberRM Datamart & Datamart Explorer:
1 Close all Windows programs.
2 Insert the CD into the CD-ROM drive.
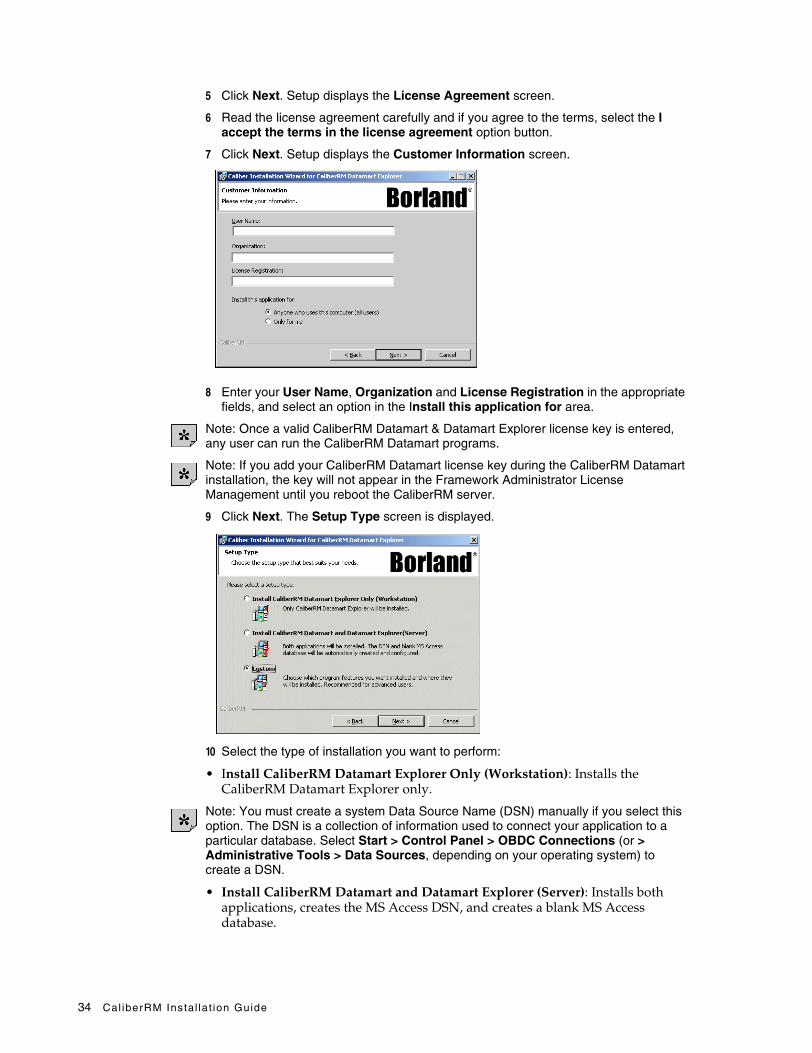
Note: The CD browser should start automatically if autorun is enabled. If it is not, click Run from the Windows Start menu. Windows displays the Run dialog box.
In the Open field, enter e:\setup, where e is the letter of your CD-ROM drive. Click OK.
3 Click Install Admin Components.
4 Click Install CaliberRM Datamart. The CaliberRM Install Wizard starts and the Welcome screen is displayed.
34 Cal iberRM Instal lat ion Guide
5 Click Next. Setup displays the License Agreement screen.
6 Read the license agreement carefully and if you agree to the terms, select the I accept the terms in the license agreement option button.
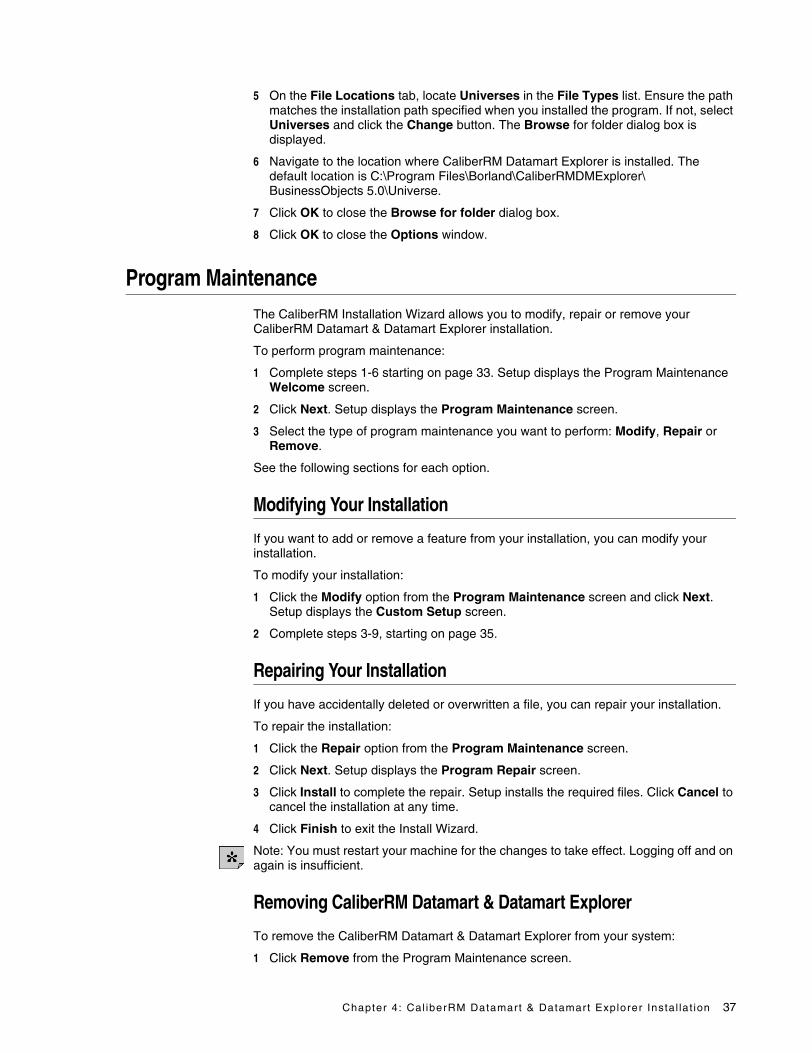
7 Click Next. Setup displays the Customer Information screen.
8 Enter your User Name, Organization and License Registration in the appropriate fields, and select an option in the Install this application for area.
Note: Once a valid CaliberRM Datamart & Datamart Explorer license key is entered, any user can run the CaliberRM Datamart programs.
Note: If you add your CaliberRM Datamart license key during the CaliberRM Datamart installation, the key will not appear in the Framework Administrator License Management until you reboot the CaliberRM server.
9 Click Next. The Setup Type screen is displayed.
10 Select the type of installation you want to perform:
• Install CaliberRM Datamart Explorer Only (Workstation): Installs the CaliberRM Datamart Explorer only.
Note: You must create a system Data Source Name (DSN) manually if you select this option. The DSN is a collection of information used to connect your application to a particular database. Select Start > Control Panel > OBDC Connections (or > Administrative Tools > Data Sources, depending on your operating system) to create a DSN.
• Install CaliberRM Datamart and Datamart Explorer (Server): Installs both applications, creates the MS Access DSN, and creates a blank MS Access database.

Chapter 4: Cal iberRM Datamart & Datamart Explorer Instal la t ion 35
Note: The program also installs Microsoft Data Access Component (MDAC) if the workstation does not have one installed already. Follow the instructions on the MDAC installation screens. You do not have to reboot your machine.
Note: To set up the MS SQL Server extraction, see the CaliberRM Datamart & Datamart Explorer User Guide, located at C:\Program Files\Borland\CaliberRMDMExplorer\Online Guides (or wherever you install CaliberRM Datamart Explorer).
• Custom: Installs only the features you select. Recommended for advanced users. Go to page 35.
11 Click Next. Setup displays the Ready to Install the Program screen.
12 Click Install to begin the installation. The CaliberRM Datamart Explorer Read Me report is displayed.
13 Select File > Exit to return the CaliberRM Installation Wizard.
14 Click Finish to exit the CaliberRM Installation Wizard.
Note: If you install CaliberRM Datamart, then add a license key afterwards, the key will not appear in the Framework Administrator License Management until you reboot the server.
Custom Installation1 Complete steps 1-11 starting on page 33.
2 Click Next. The Custom Setup screen is displayed.
3 Click on a component’s install state icon.
4 Choose the installation option for each component.
Note: If you choose to create an RMMSA DSN, you must click the Change button and navigate to the Microsoft .mdb file you want to use.
5 Click the Help button for information about each install state.
Click the Space button to see a list of the disk space requirements for each component.
Click the Change button if you want to change the location where the component is installed. The default install location and database installation path is C:\Program Files\Borland\CaliberRMDatamart for the CaliberRM Datamart (server) and C:\Borland\CaliberRMDMExplorer for the CaliberRM Datamart Explorer (client).

36 Cal iberRM Instal lat ion Guide
6 Click Next. Setup displays the Ready to Install the Program screen.
7 Click Install to begin the installation.The CaliberRM Datamart Explorer Read Me report is displayed.
8 Select File > Exit to return the CaliberRM Installation Wizard.
9 Click Finish to exit the CaliberRM Installation Wizard.
Performing an UpgradeTo upgrade CaliberRM Datamart & Datamart Explorer:
1 Complete steps 1- 10 starting on page 33. The Setup Type screen is displayed.
2 Select an option for upgrading:
• Upgrade Features Currently Installed: Upgrades your existing installation.
• Custom: Allows you to install only the features you want. See page 35 for performing a custom installation.
3 Click Next. Setup displays the Ready to Install the Program screen.
4 Click Install to begin the installation. The CaliberRM Datamart Explorer Read Me report is displayed.
5 Select File > Exit to return the CaliberRM Installation Wizard.
6 Click Finish to exit the CaliberRM Installation Wizard.
Post InstallationAfter completing CaliberRM Datamart Explorer installation, you must perform the following steps.
1 Selecting Programs > CaliberRM > CaliberRM Datamart Explorer from the Windows Start menu.
2 Once the CaliberRM Datamart Explorer Remote Control is launched, click the Open Reports button. The Open dialog box is displayed and directs you to the location of the sample reports installed with the product.
3 Select any report and click Open. Minimize the Remote Control.
4 Select Tools > Options from the menu.
Chapter 4: Cal iberRM Datamart & Datamart Explorer Instal la t ion 37
5 On the File Locations tab, locate Universes in the File Types list. Ensure the path matches the installation path specified when you installed the program. If not, select Universes and click the Change button. The Browse for folder dialog box is displayed.
6 Navigate to the location where CaliberRM Datamart Explorer is installed. The default location is C:\Program Files\Borland\CaliberRMDMExplorer\BusinessObjects 5.0\Universe.
7 Click OK to close the Browse for folder dialog box.
8 Click OK to close the Options window.
Program MaintenanceThe CaliberRM Installation Wizard allows you to modify, repair or remove your CaliberRM Datamart & Datamart Explorer installation.
To perform program maintenance:
1 Complete steps 1-6 starting on page 33. Setup displays the Program Maintenance Welcome screen.
2 Click Next. Setup displays the Program Maintenance screen.
3 Select the type of program maintenance you want to perform: Modify, Repair or Remove.
See the following sections for each option.
Modifying Your Installation
If you want to add or remove a feature from your installation, you can modify your installation.
To modify your installation:
1 Click the Modify option from the Program Maintenance screen and click Next. Setup displays the Custom Setup screen.
2 Complete steps 3-9, starting on page 35.
Repairing Your Installation
If you have accidentally deleted or overwritten a file, you can repair your installation.
To repair the installation:
1 Click the Repair option from the Program Maintenance screen.
2 Click Next. Setup displays the Program Repair screen.
3 Click Install to complete the repair. Setup installs the required files. Click Cancel to cancel the installation at any time.
4 Click Finish to exit the Install Wizard.
Note: You must restart your machine for the changes to take effect. Logging off and on again is insufficient.
Removing CaliberRM Datamart & Datamart Explorer
To remove the CaliberRM Datamart & Datamart Explorer from your system:
1 Click Remove from the Program Maintenance screen.

38 Cal iberRM Instal lat ion Guide
2 Click Next. Setup displays the Remove the Program screen.
3 Click Remove.The uninstall procedure completes.
You can also use the standard Windows Add/Remove Programs procedure to remove your CaliberRM Datamart and Datamart Explorer integration. To use this procedure, see page 29.
Index 39
Aadministrative components, installing 5-21
CCaliberRM
custom client installation 25custom server installation 9default install paths 4program maintenance 28removing 29repairing 28
CaliberRM Datamart & Datamart Explorercustom installation 35installing 33-38modifying 37post installation 36program maintenance 37removing 37repairing 37
CaliberRM SDK, default install paths 4CaliberRM server, installing 5CaliberRM Web
installing 11removing 14
custom installationCaliberRM client 25CaliberRM Datamart & Datamart Explorer 35CaliberRM server only 9
Ddefault paths
CaliberRM 4CaliberRM SDK 4
Eenabling MPX events 8, 10
Iinstallation, silent 29installing
administrative components 5-21CaliberRM client 23CaliberRM Datamart & Datamart Explorer 33-38CaliberRM server 5CaliberRM Web 11MPX server 20Network Install and Upgrade 14user components 23-32Visual Studio .NET integration 30
introduction 1-4
Mmodifying
CaliberRM Datamart & Datamart Explorer installation 37
CaliberRM installation 28Network Install and Upgrade 19
download options 17
HTML page 17URL location 18
Network Install and Upgrade settings 17MPX
events, enabling 8, 10reconnecting 21server, installing 20
NNetwork Install and Upgrade
installation without a web server 18installing 14modifying 17, 19
download options 17HTML page 17URL location 18
program maintenance 19removing 20
Pperforming an upgrade
CaliberRM 27CaliberRM Datamart & Datamart Explorer 36
post installation, CaliberRM Datamart & Datamart Explorer 36
product support 1program maintenance
CaliberRM 28CaliberRM Datamart & Datamart Explorer 37Network Install and Upgrade 19Visual Studio .NET integration 32
Rreconnecting MPX 21removing
CaliberRM 29CaliberRM Datamart & Datamart Explorer 37CaliberRM Web 14Network Install and Upgrade 20Visual Studio .NET integration 32
repairingCaliberRM Datamart & Datamart Explorer
installation 37CaliberRM installation 28CaliberRM Web 13Network Install and Upgrade 19Visual Studio .NET integration 32
Ssilent installation 29StarTeam Message Broker 8, 10support 1system requirements
CaliberRM Datamart 2CaliberRM Datamart Explorer 2
Ttechnical support 1
Index
40 Cal iberRM Instal lat ion Guide
Uuninstall
CaliberRM 29CaliberRM Datamart & Datamart Explorer 37CaliberRM Web 14Network Install and Upgrade 20Visual Studio .NET integration 32
upgradeCaliberRM 27CaliberRM Datamart & Datamart Explorer 36
user components, installing 23-32
VVisual Studio .NET integration
installing 30program maintenance 32removing 32