by Carol Ingram - Sulky...few stitches along the band seam allowances where the fabrics are...
7
Love & Hugs Pillowcase by Carol Ingram Original Design for Sulky of America
Transcript of by Carol Ingram - Sulky...few stitches along the band seam allowances where the fabrics are...

Love & Hugs Pillowcaseby Carol Ingram
Original Design for Sulky of America

Love & Hugs Pillowcase– 2 –
Gather Supplies
Purchase the kit containing the fabric, thread, and needles you need to create this project.
• Sulky 60 Wt. PolyLite™ #5008 Strawberry Shortcake• Rotary Cutter, Mat & Ruler
• Size 75/11 Embroidery Needle
• Size 75/11 or 80/12 Universal Needle• Chalk Marker• 1/4” Presser Foot (optional)• Open-Toe Appliqué Foot (optional)• Stitch-in-the-Ditch Foot (optional)
Fabrics:• 27” x WOF (width of fabric) rectangle of Light Ribbons fabric• 9” x WOF rectangle of Dark Ribbons fabric (band)• One 1 1/2” x WOF strip of Black Floral print (trim)
General Directions:Please read through all the directions prior to starting the project.
Step 1 - Prepare FabricWash, dry and press the fabrics.Cut off the selvage edges (if any) from the dark and light ribbon fabrics. Trim the light ribbon fabric to a 27” x 43” rectangle. Trim the dark ribbon fabric to a 43” x 9” rectangle.
Step 2Lay the light ribbon fabric RIGHT SIDE DOWN. Lay the dark ribbon fabric RIGHT SIDE DOWN on top of it matching the long edges.
Love & Hugs Pillowcase– 3 –
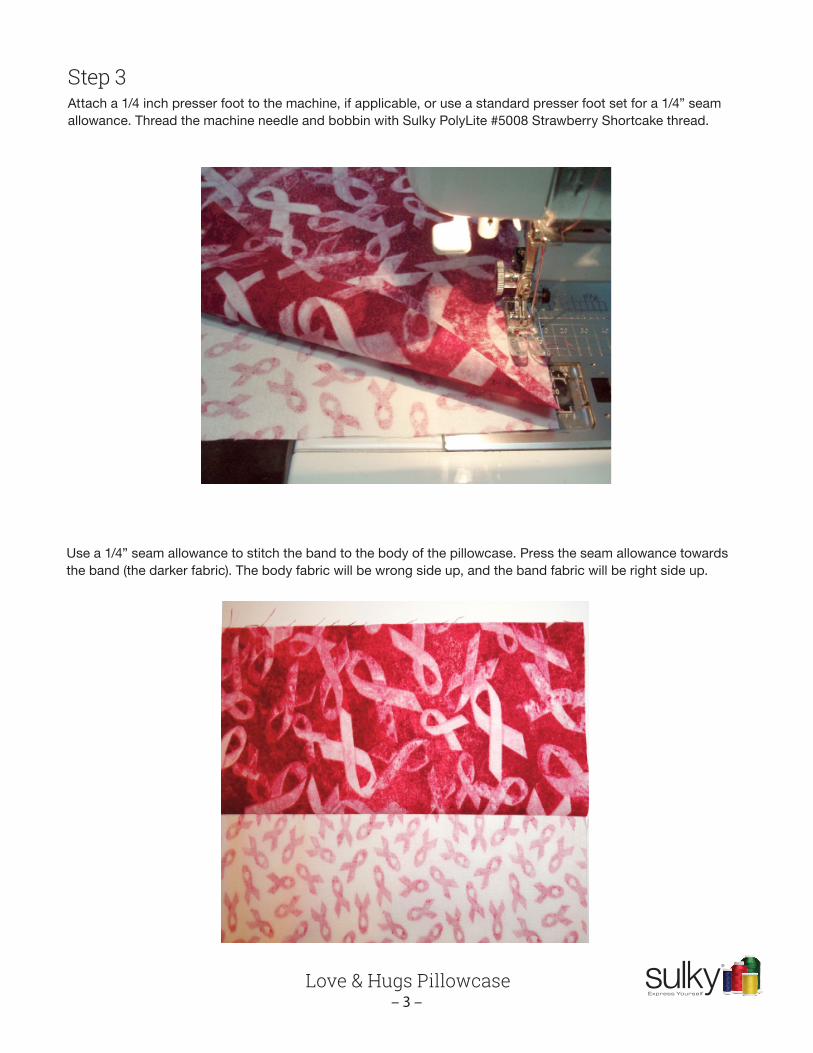
Step 3Attach a 1/4 inch presser foot to the machine, if applicable, or use a standard presser foot set for a 1/4” seam allowance. Thread the machine needle and bobbin with Sulky PolyLite #5008 Strawberry Shortcake thread.
Use a 1/4” seam allowance to stitch the band to the body of the pillowcase. Press the seam allowance towards the band (the darker fabric). The body fabric will be wrong side up, and the band fabric will be right side up.
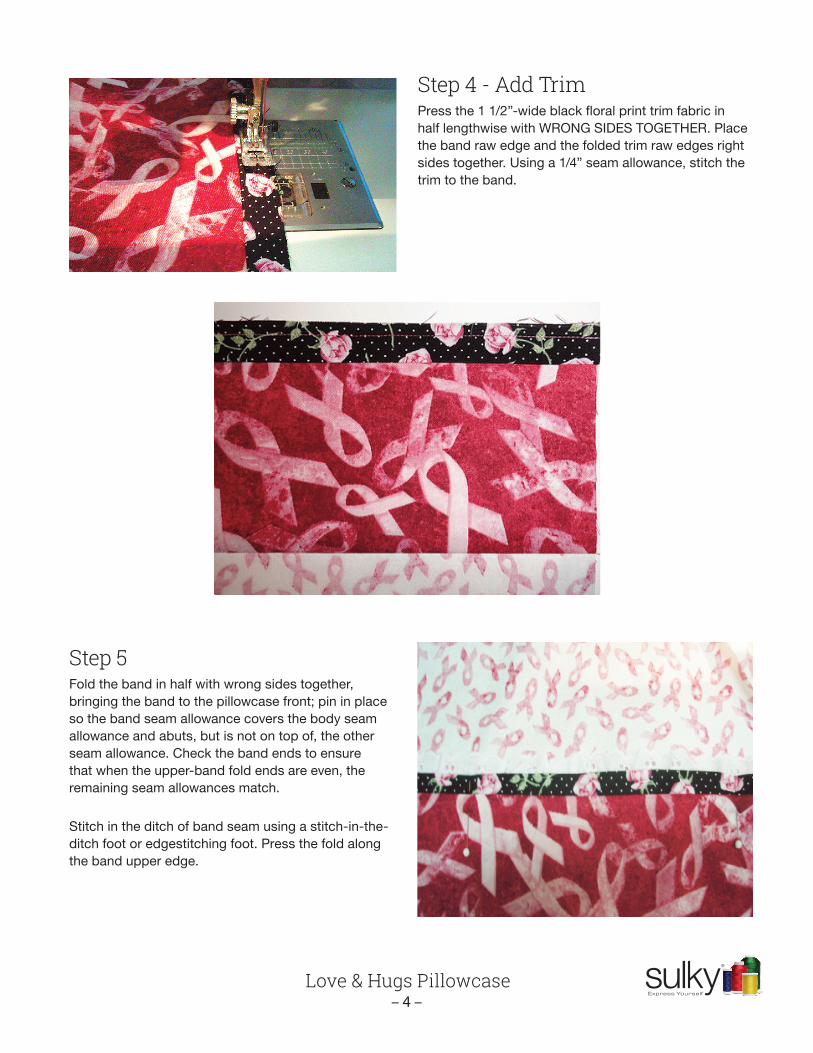
Step 4 - Add TrimPress the 1 1/2”-wide black floral print trim fabric in half lengthwise with WRONG SIDES TOGETHER. Place the band raw edge and the folded trim raw edges right sides together. Using a 1/4” seam allowance, stitch the trim to the band.
Love & Hugs Pillowcase– 4 –
Step 5 Fold the band in half with wrong sides together, bringing the band to the pillowcase front; pin in place so the band seam allowance covers the body seam allowance and abuts, but is not on top of, the other seam allowance. Check the band ends to ensure that when the upper-band fold ends are even, the remaining seam allowances match.
Stitch in the ditch of band seam using a stitch-in-the-ditch foot or edgestitching foot. Press the fold along the band upper edge.

Love & Hugs Pillowcase– 5 –
Step 6 - Optional EmbellishmentTo add some pretty yet subtle threadwork to the pillowcase, stitch around some of the ribbons on the dark fabric using the Strawberry Shortcake thread. Or add a row or two of decorative stitches to the band.
Note: There are many layers to stitch through, so use the hand wheel to sew through the few stitches along the band seam allowances where the fabrics are thickest.
Step 7 - French SeamsWatch this quick how-to video on French Seams here.With wrong sides together, match and pin the side edges. Attach a standard presser foot. Set the needle as far right as possible so it creates a seam allowance slightly less than 1/4”. Begin with a secure backstitch, and then stitch from the band upper edge down the side, and across the pillowcase lower edge. Backstitch at the beginning and ending of each seam.
Note:Slide a layer of Sulky Tear-Easy or Sulky Solvy beneath the band before stitching to stabilize the fabric and make it easier to move under the presser foot.
Step 8Press the seams flat to set the stitching. Fold the seam to one side; press again.

Love & Hugs Pillowcase– 6 –
Turn the pillowcase wrong side out. Press the seam again, making sure that the fabric lays flat along the seamline. Fold the pillowcase with wrong sides together along the seam; press again so the stitching line is flat and the raw edges are encased. Stitch a 3/8” seam to secure the seam allowance.
Pillowcase wrong side:
Side view of finished French seam inside the pillowcase.
Step 9

Love & Hugs Pillowcase– 7 –
Step 10Turn the pillowcase right side out; press.