
Bushwacker Jeep Flat Style Fender Flares Front Pair · Bushwacker Jeep Flat Style Fender Flares...
28
Bushwacker Jeep Flat Style Fender Flares Front Pair Note: These instructions involve cutting parts of your vehicle. Please read all instructions prior to starting. Installation Time: 3-4 Hours Tools Required: Phillips Screwdriver Drill ¼” Drill bit Socket Wrench 8” socket extension ½”, 11/32”, and 10mm sockets ½” wrench Needle nose pliers Scratch awl (optional) Grease Pencil, or pencil Pry bar Sawzall, jigsaw, or some sort of cutting tool Angle grinder, dremmel, or sander Scissors Wire cutter & stripper 22-18 Guage wire crimp Pry bar /claw hammer Heat gun (or hair dryer) Before Pictures:
Transcript of Bushwacker Jeep Flat Style Fender Flares Front Pair · Bushwacker Jeep Flat Style Fender Flares...

Bushwacker Jeep Flat Style Fender Flares Front Pair
Note: These instructions involve cutting parts of your vehicle. Please read all instructions prior to starting.
Installation Time: 3-4 Hours
Tools Required:
Phillips Screwdriver
Drill
¼” Drill bit
Socket Wrench
8” socket extension
½”, 11/32”, and 10mm sockets
½” wrench
Needle nose pliers
Scratch awl (optional)
Grease Pencil, or pencil
Pry bar
Sawzall, jigsaw, or some sort of cutting tool
Angle grinder, dremmel, or sander
Scissors
Wire cutter & stripper
22-18 Guage wire crimp
Pry bar /claw hammer
Heat gun (or hair dryer)
Before Pictures:

Installation Instructions:
1. First unwrap the rubber edge trim. Start by peeling about 2 inches of the inner red strip. Leave the outer red
strip along for now.

2. Starting at the tube feature with the end you peeled the tape from, put the edge trim on the outer edge of the
flare as shown below. Leave the 2 inches of red tape hanging out the inside for now.
3. After putting the trim along the entire top of the flare (from tube feature to tube feature) you can start slowly
peeling out the red tape. When you get a few inches from the end you can use scissors to cut the trim so it ends
right at the tube feature. Then peel the last of the red tape. Now you have the sticky side of the trim touching
the inside of the fender plastic so you can run your finger along the inside of the trim pressing it against the
plastic for good adhesion. Now do the same thing on the other fender then set the fenders aside.

4. I started on the right side, but you can do either first. Using a 10mm socket remove the 4 factory bolts inside
the wheel well. Save bolts for reinstall.

5. Using the 10mm socket also remove these 2 bolts in the rear portion of the wheel well. Save for reinstall. Note:
2007-2010 models have a plastic thread engager in the hole pictured on the left.
6. Remove the light receptacle from the light housing inside the fender.

7. Starting from the front working your way to the back, pull the flare firmly to release the flare from the vehicle.
You will hear popping as the plastic clips release, this is normal. Don’t worry about breaking the plastic clips,
they will be discarded.
8. Once the flare is free, disconnect the light wiring harness, this will allow the fender to pull free.
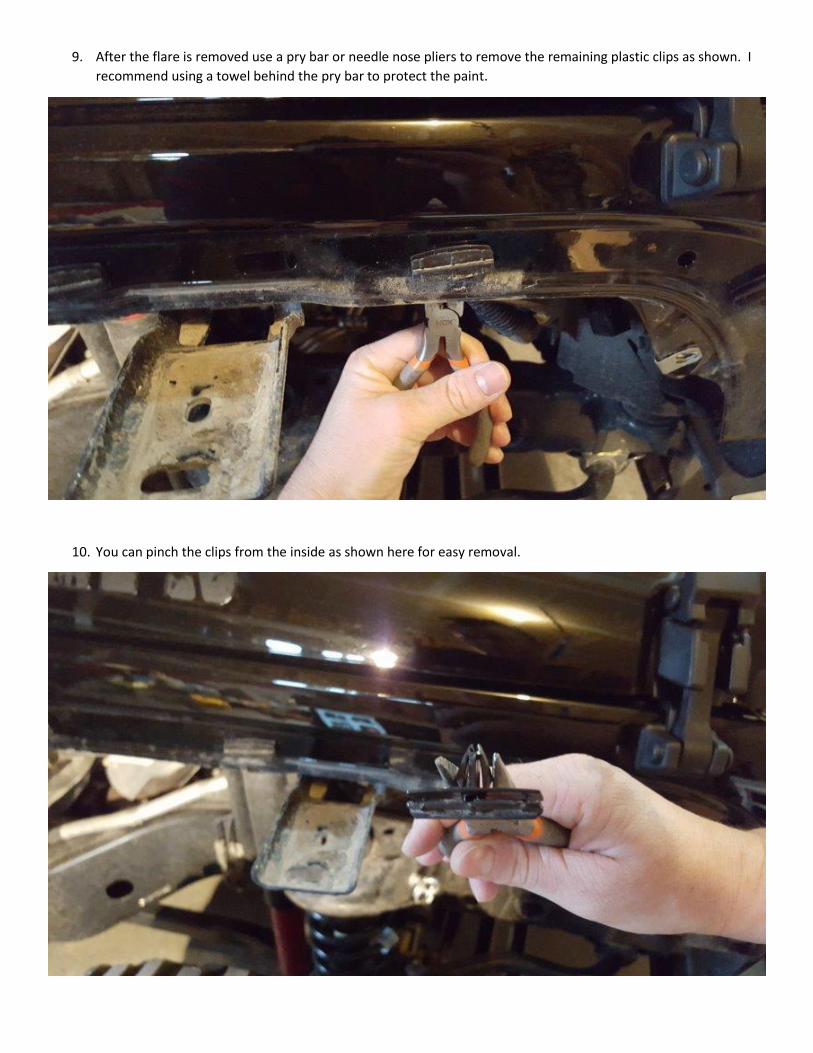
9. After the flare is removed use a pry bar or needle nose pliers to remove the remaining plastic clips as shown. I
recommend using a towel behind the pry bar to protect the paint.
10. You can pinch the clips from the inside as shown here for easy removal.

11. Using a pry tool remove the plastic fasteners
12. Using a drill with a ¼” drill bit, drill out the center of the plastic rivets that hold the outer flare to the splash
guard. You only need to drill about ¼” deep for the rivets to release. Drill through all 6 rivets and remove the
frame and splash guard from the outer flare.

13. Re-insert the splash guard and using the supplied 1.25” washer on factory bolt/washer (2 locations)
14. Using a grease pencil (regular pencil will also work, but the lines are just harder to see) trace along the edge of
the metal onto the outside of the splash guard. This is the line you will be cutting along so make sure it’s clean
and visible. When you are finished the splash shield should end up flush with the metal. If you trim too much
the splash guard won’t stay behind the flare, and if trimmed too little the flare will not fit.

15. Next, remove the splash shield for cutting. I used a jigsaw, and it worked decent. The cut doesn’t need to be
perfect, it will be hidden. Cut along your line to create the desired shape on the splash guard. Tip: start small,
you can always trim more, but once it’s cut you can’t put it back together.
16. Clean off the area with soap and water to prepare for flare install.

17. Hold the splash shield up to make sure the cut edges line up with the edge of the metal. If need, trim any areas
that need it.
18. Locate the inner flare pieces. The Passenger side pieces are labeled P1, P2, and P7. Drivers side are D1, D2 and
D7.
19. Install a speed clip at each clip location on the inner pieces. Center them over the predrilled holes with the
threaded portion on the inside. If they seem loose you may need to pinch them tight with pliers so they stay in
position.
20. The inner pieces should look like this, with all speed slips fully seated.

21. Next, align the front piece P1 (D1 for the Driver side) with the factory holes using the supplied .700” washer
onto 5/16” hex head bolt. Insert through the inner flare piece and fender and secure with 5/16” lock nut. Start
bolts but do not tighten.
22. Align the edge of the plastic with the upper style line as shown, then tighten the bolts using ½” socket wrench
and ½” wrench. Tighten bolts until inner piece is snug against fender and washers do not spin. Do not
overtighten!

23. Repeat steps for Piece P2 (D2 for driver side) which is the rear piece shown with the arrow. Be sure to align the
edge with the upper style line. The plastic should rest on and not be tucked under the upper style line as shown
above.
24. Using 2 plastic retainers, attach piece P7 (D7 for driver side) as shown. Again, make sure plastic lines up with
upper style line. I found it easier if you insert the retainers both through P7 first, then align and insert into the
pieces already installed.

25. For all bolts do not overtighten, if you do, the flares will not fit correctly. The plastic below the bolt should stay
straight as shown below. If it starts to bulge down below the bolt, it’s too tight.
26. Here is an example of proper alignment with the upper style line.

27. Here is an example or improper install. The plastic is tucked under the upper style line. In this case the flare
would not fit correctly.
28. Reinstall the light connector removed in step 8.

29. Next, reinstall the trimmed splash guard making sure the side marker wires are outside as shown.
30. Start by placing a supplied plastic push retainer through the mounting hole in the sheet metal, with the splash
shield on the inside as shown.

31. Install a supplied 1.25” washer on factory bolt/washer as shown.
32. Reinstall these through factory holes.

33. Reinstall factory fastener removed in step 5. 2007-2010 models it is a plastic thread engager. 2011-newer
models it is a 10mm bolt.
34. Using wire cutters, cut the 2 wires at the base of the factory side marker lamp.
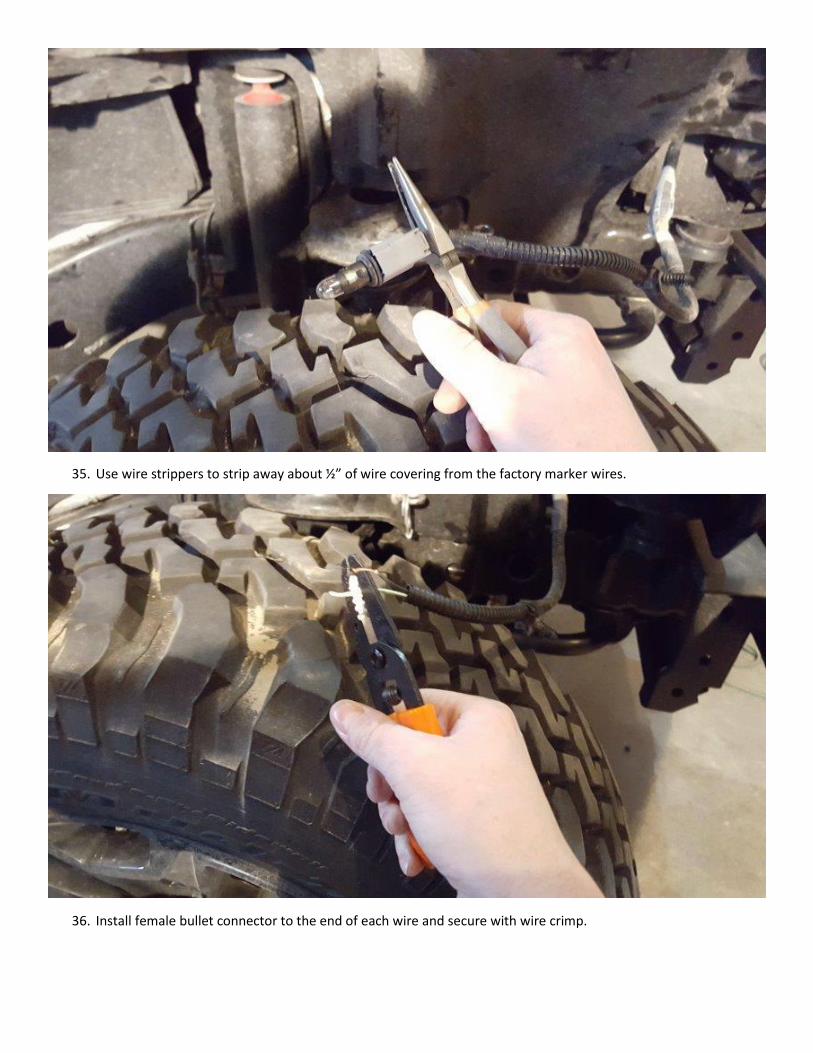
35. Use wire strippers to strip away about ½” of wire covering from the factory marker wires.
36. Install female bullet connector to the end of each wire and secure with wire crimp.

37. Using heat gun (hair dryer works also but takes longer) seal the heat shrink tubing around each wire.
38. Position the supplied side marker light onto the outer flare piece threading the wires through the center hole.

39. Bolt on the marker light with 8-32 screw, 8-32 nut, and washer using Philips head and 11/32” socket on 8”
extension. You could also use a long screwdriver with socket attachment.
40. Install speed clip on metal frame bracket as shown. Make sure it is centered over factory slot with threaded
portion facing up.

41. Before installing outer flare, make sure all speed clips are centered over predrilled holes.
42. Using supplied alcohol wipe, clean the metal as shown all the way around the flare.
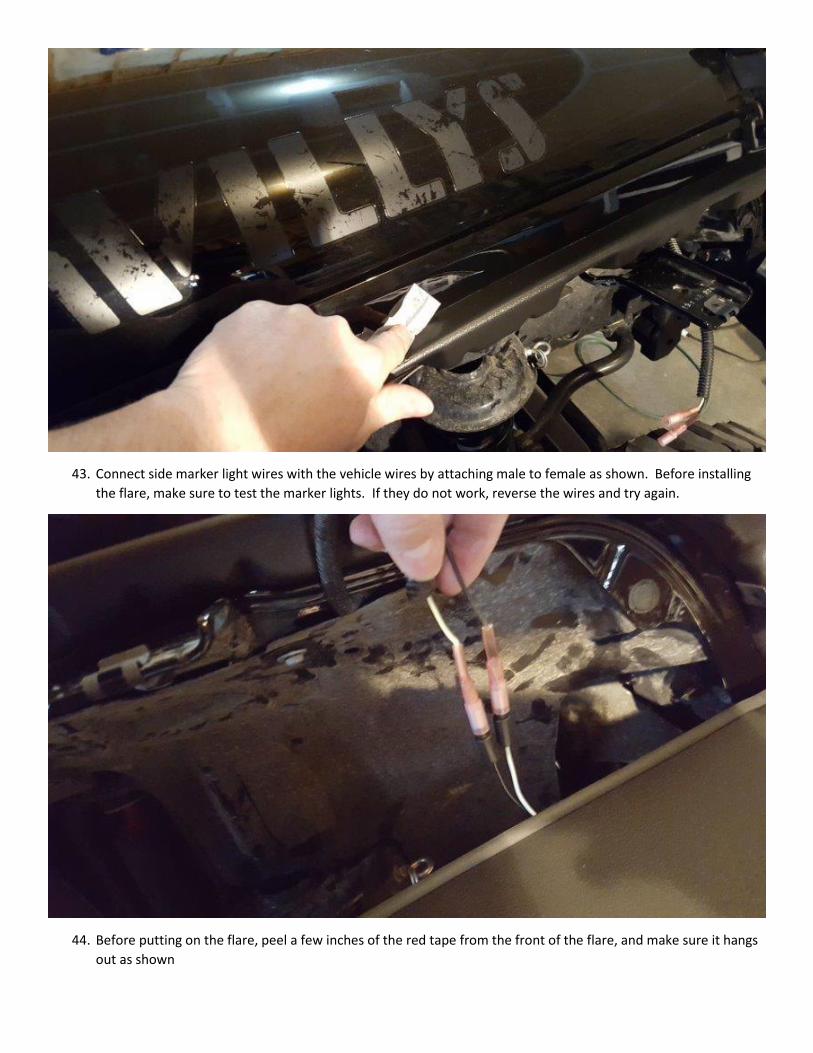
43. Connect side marker light wires with the vehicle wires by attaching male to female as shown. Before installing
the flare, make sure to test the marker lights. If they do not work, reverse the wires and try again.
44. Before putting on the flare, peel a few inches of the red tape from the front of the flare, and make sure it hangs
out as shown

45. Using a scratch awl or small screwdriver, ensure all the speed clips on the inner flare pieces line up with the
predrilled holes in the underside of the flare. You may need to remove the flare and reposition some of the
clips. They do not need to line up perfectly, just good enough to get a screw into it.
46. Using a Philips head screwdriver, start but do not tighten 6 supplied pan head screws through the predrilled
fender holes into the speed clips

47. After all screws have been started, start from the front and tighten each screw while holding the flare tight to
the body. Be careful not to overtighten the speed clips inside can strip easily.
48. Next, slowly peel the red tape all the way around. Be careful not to rip the tape, it could be very difficult to get
it out if it breaks underneath the rubber trim.

49. Firmly push in and hold each section of the flare for at least 10 seconds to adhere the trim to the fender.
50. Insert the trim tool as shown under the lip of the trim. Work your way around the fender pressing inn on the
tool for any spots that need to stick to the fender. Again, hold tight for at least 10 seconds.

51. Repeat steps 1-50 on the Driver side of the vehicle.
52. All done! Take pictures and enjoy!
After Pictures:

Installation Instructions Written by ExtremeTerrain Customer John Parker 08/09/2016


