
Building a gaming computer 5137
19
Building a Gaming Computer Published by Bellerophon08 at Smashwords Copyright 2013 Bellerophon08 http://www.building-a-gaming-computer.com
-
Upload
sumit-saini -
Category
Engineering
-
view
53 -
download
3
Transcript of Building a gaming computer 5137

Building a Gaming Computer
Published by Bellerophon08 at Smashwords
Copyright 2013 Bellerophon08
http://www.building-a-gaming-computer.com

Introduction
Because the latest computer games on the market feature exceptional visual details and sounds, the average run of the mill desktop computer will not be able to play these games as intended. This is where a gaming computer separates itself from the rest of the pack. There are three major components of a gaming computer that dictate it's performance and ability to play the latest games at high frame rates. They are the central processing unit (CPU), also called a processor, the video card and memory (RAM). Please note that while these three are the most important, there are other determining factors to the computer's overall performance as well. This eBook will provide the key terms and instructions needed to build your own gaming computer.
CPU
Without a doubt, the computer's processor is the most important component of a gaming computer. Having an outdated processor will render any new game unplayable because it cannot handle all the calculations required to play without slowdown. Even paired with a top of the line video card and lots of memory, an older CPU will have your gaming computer running at a snail's pace. With that in mind, let's take a closer look at the computer's processor and the top CPU manufacturers.
There are two main competitors in the computer processor world: Advanced Micro Devices (AMD) and Intel. When it comes to selecting a processor for a gaming computer, price and performance should be the top two considerations. You could spend a fair chunk of money on a processor and not have any left for the other components in the build, which is why it is important to plan ahead and set aside the right amount for each.
Typically, Intel CPU's are more expensive than their AMD counterparts. However, associated with this extra cost are some high rewards. Intel processors use less power during operation which in turn leads to a decrease in heat production. Excessive heat is never good when it comes to electronics. You don't want your expensive computer parts over heating and malfunctioning or, worse yet, burning up and being rendered useless.
However, for the budget minded gamer, an AMD processor is the way to go. With their lower price, you can put the extra money saved toward a nice CPU fan to help combat the heat production. Please note that the lower cost associated with an AMD CPU does not translate to an inferior product. AMD CPUs are just as powerful as an Intel processor and they can handle the latest games with ease. An AMD CPU provides a solid foundation for any gaming computer build.
If you have some extra money to spare, you can't go wrong putting it towards an Intel processor. Their

extra cost is justified by their reduced heat production and lower power consumption. With one of the latest Intel CPUs installed in your gaming computer the latest games will run easily with extremely high frame rates making for an incredible gaming experience.
The computer processor decision should be made carefully because this choice heavily dictates the other components in the build, especially the motherboard.
Motherboard
A gaming computer motherboard provides the foundation for all of the components. Without it, the computer would not function. The motherboard must provide a stable environment for the processor and a means for it to communicate with the other devices. This task must also be accomplished in a timely manner for an enjoyable gaming experience. Needless to say, the motherboard has a very high responsibility to the function of a gaming computer.
The first (and most important term) when searching for a gaming computer motherboard is socket type. Many years ago, when the rivalry between AMD and Intel was in full swing, the competitors decided to produce their CPU's with a different number of pins located on the bottom of the processor. As a result, a motherboard must have the correct number of available pin slots in its socket to physically accommodate the processor. The motherboard sockets are designed to not be interchangeable. Therefore, if you decide to use an Intel CPU, you must find a motherboard with an Intel CPU socket type because an AMD socket type motherboard will not work.
Other important features of a gaming computer motherboard include the video card slot as well as the supported memory (RAM) speed. We will go into more detail with both video cards and memory later but now note that a motherboard must support the latest video card technology in order to achieve the fastest speeds possible. At the time of this writing, the PCI Express 3.0 slot (often abbreviated as PCIe 3.0) is the latest technology available on the market. Be sure to look for a motherboard that features a PCIe 3.0 slot so you can utilize this technology in your gaming computer build.
The supported memory speed is also an important feature to consider when you shop for a motherboard. This is measured in megahertz (abbreviated as MHz) with the higher speed correlating to a better performing motherboard. We recommend using a motherboard that supports memory with a speed of 1333 MHz for a gaming computer build. Using memory with a speed slower than 1333 MHz could result in poor performance.

Video Card
Now we turn our attention to the video card. Video cards deliver all the exceptional visual details found in the latest computer games. Having an outdated video card will cause computer slowdown during intense on-screen action, detracting from the gaming experience.
There are many features to look for when shopping for a video card. First and foremost, the amount of memory (RAM) on the video card is a major determining factor in the card's overall gaming performance. At the time of this writing, one gigabyte (abbreviated as GB) of memory is the minimum amount of memory you'll want for a gaming computer video card. Any less will put you at risk for slowdown and sluggish frame rates with the newest games.
Another video card feature to consider is called Scalable Link Interface (SLI) or Crossfire. Essentially, this is the practice of combining the graphical power of two video cards to one unified output. This is accomplished by purchasing two cards with the same GPU (Graphics Processing Unit) and placing them in a motherboard that supports SLI or Crossfire technology. This is discussed in more depth later. Typically, a motherboard package will advertise whether it supports SLI or Crossfire mode. Please note that SLI and Crossfire are essentially the same but are named differently because SLI is the NVIDIA brand while Crossfire is the propriety name of the AMD technology (sometimes called ATI because AMD bought ATI a few years back).
Combining the power of two video cards is a great way to save some money. Consider the following scenario: the latest generation of video cards is released with a cost of $400 dollars for a top end model. If you have a budget of only $300, you will not be able to purchase the newest model but you can purchase two cards of the previous generation and combine their graphical power using the SLI or Crossfire technology, with the result being very similar to a top of the line new generation card.
As mentioned earlier, when using an SLI or Crossfire setup the video card GPU's must match in order for the configuration to work properly. For example, if you currently own an NVIDIA GeForce GTX 460, you will need the other card to be a GTX 460 GPU or the setup will not work. They can, however, be of different brands and will still work just fine. In other words, one card can be an Asus GTX 460 with the other is a PNY GTX 460. This rule also applies when using the Crossfire setup as well.
SLI and Crossfire modes present a great way to receive exceptional visual details with older video cards. However, there is another requirement that must be satisfied in order to use SLI or Crossfire setup. Using the two video card setup will require more power than a typical single video card configuration. If you decide to use the dual video card setup be sure your power supply can handle the task since both video cards must receive power in SLI and Crossfire configuration. This is discussed

later in the Power Supply section.
Hard Drive
Next we come to the hard drive. The hard drive is the primary storage device of the computer and keeps all of your favorite game files stored for safe keeping. Unlike RAM, hard drives retain their information after the computer is powered off. Selecting a hard drive for a gaming computer may seem to present many choices but a solid state drive (SSD) is the way to go.
Solid state drives arrived on the market a few years back but their prices were quite high and are finally beginning to drop making them much more affordable. At the minimum, a 128 GB solid state hard drive will perform very nicely for a gaming computer build. By storing the Operating System files on the SSD, the load times decrease substantially compared to their older magnetic counterparts. When you make the switch from the older magnetic style hard drive you will be amazed by the speed and overall silent operation of a solid state drive. With no moving parts, a solid state hard drive offers the best performance and reliability on the market. Additionally, if more storage space is needed, a magnetic drive with 500 GB of storage space (or larger) can be added to house music, video, and photos. This drive can be used solely for storage while the solid state drive contains all of your computer game files.
One of the ways to gauge a hard drive's speed is determined by the SATA specification the drive supports. The latest on the market is SATA III (Roman Numeral three) and when shopping for a hard drive, don't bother with the older SATA II (two) or SATA I (one) specifications. As with video cards, be sure the motherboard you select for your gaming computer build supports SATA III technology so you can truly unleash the power of a solid state hard drive.
Optical Drive
No gaming computer is complete without some form of optical drive. The optical drive has replaced

the much older floppy discs as the primary form of transportable storage for many large computer files including games and movies. There are three types of optical drives in use today. They are: Compact Discs (CD), Digital Versatile Discs (DVD) and Blu-Ray discs.
Compact Discs were widely used in computers for many years until computer games and other large files created the necessity for a larger storage medium. This ultimately gave rise to the DVD. Capable of storing much more information than a CD, DVDs also maintained the same physical dimensions as a CD. Until recently, DVDs were exclusively used to store the latest computer games files. However, more detail was being implemented into modern computer games and a DVD would no longer suffice to store all the information required. For this reason, Blu-Ray technology has taken over. Capable of storing up to 25 GB for a single layer disc, the Blu-Ray drive is essential to a gaming computer build.
Similar to CDs and DVDs, Blu-Ray discs can also be have files written to them in a process called burning. Some discs can have data written, erased, and then rewritten again. These are known as rewritable discs. Although not essential for a gaming computer, if you plan on storing and moving lots of data, purchasing a Blu-Ray burner can be a valuable asset. This provides the flexibility of being able to both read Blu-Ray discs and to write data on them.
Memory
A computer's memory is used to retrieve information from the hard drive so the CPU can read it and perform the required actions to make the computer function. All programs and files, such as computer games and photos, are stored on some type of hard drive. Have you ever noticed the longer time it takes to open a program for the first time after restarting your computer than the a second or third time after the computer has already been on? This is because the files associated with that program have been stored in the computer's memory.
Unlike a hard drive's storage ability, computer memory is said to be volatile. This means the information being stored in it is lost whenever the computer is powered off. This reinforces the point made earlier about opening a program for the first time after powering up the computer.
There are two main features to consider when assessing computer memory performance. First is the size of the memory, which is measured in gigabytes (GB). Modern day gaming computers need at least 4 GB of computer memory in order to effectively handle the newest games. The computer's memory must be able to deliver information to the CPU quickly so that the latest computer games run at a smooth pace This brings us to the next important feature, the memory's speed. Like processors, memory is rated by the speed at which it functions and is measured in units of Megahertz (MHz). The higher the number indicates the faster the speed, and ultimately, better performance.
When selecting computer memory you must be sure that your motherboard is compatible with the memory you intend on installing. Trying to install memory that is rated at too high of speed can cause

issues and even prevent the computer from booting up properly. Thankfully, if you install memory that has a slower speed than the motherboard rating the motherboard will simply use the memory at the highest speed it can. However, your best bet is to just match the memory speed to the supported memory speed of the motherboard and avoid the issue altogether.
As you search for the right memory for your gaming computer build you'll undoubtedly notice DDR2 or DDR3 used to describe the memory type. This is also important because the physical characteristic of the memory module must be able to fit in the motherboard. In other words, DDR2 type memory will not fit in a motherboard designed for DDR3 type memory. DDR3 type memory is the latest on the market and should be your first choice (assuming your motherboard supports it) when building a gaming computer.
Cases
A computer case provides the housing for all the components of a gaming computer while maintaining good airflow and circulation, which keeps your parts from overheating.
They are several important features to consider when shopping for a gaming computer case. Above all else, plenty of room to install the components and multiple locations for fans should be top priorities. The last thing you want is a very tiny space in which to work to try and install your motherboard, video card, and other components.
Having plenty of case fans can really reduce excessive heat especially during times of peak gaming operation. Newer computer cases will provide room for 120 mm case fans and you'll ultimately want at least three of these for a gaming computer build (unless you plan on liquid cooling the computer).
Another important feature of a computer case are the front panel connectors. Many cases feature several USB ports which are ideal for plugging in digital cameras, a joystick or charging a cell phone. If you plan on using many external devices, be sure to look for a case with plenty of USB ports located at the front of the case for easy access.

Mouse
Of course no gaming computer is complete without a quality gaming mouse. There are many choices and features to choose from when it comes to selecting a gaming computer mouse.
One of the most distinguishing features of computer mice is the wired or wireless types. Many hard core gamers prefer the wired type simply because it allows for more precise and accurate movements. However, the wireless type is preferred by others because it can reduce the amount of cable clutter on your computer desk. It ultimately comes down to personal preference and we don't want to steer you in either direction.
Many gaming computer mice also feature extra customizable buttons. These are ideal for use with first person shooter and role playing games. The extra buttons on the mouse can be assigned commonly used functions which saves time by avoiding the keyboard. In the computer gaming world, even a few seconds can mean the difference between victory and defeat.
Keyboard
A gaming computer keyboard goes together with the mouse. They comprise the two primary input devices for the computer.
Like mice, keyboards also come in the wired and wireless variety. Personal preference also comes into play when selecting a gaming computer keyboard. Many gamers use a wireless keyboard to reduce excess cables around the computer desk while others insist on a wired keyboard for the super quick

response time.
Like mice, keyboards can also have customizable buttons. This is the ideal solution for gamers who like to bind several important in-game functions to their keyboards.
Ergonomics should also be considered when selecting a keyboard for a gaming computer. You’ll want to be as comfortable as possible as you game so be sure to check for proper wrist support and an overall comfortable feel to the keyboard. Checking user reviews at online retailers is a great way to see how other people think about a product.
Power Supply
The power supply is very important to the overall function of the computer. It is responsible for taking the alternating current (AC) from the power outlet and converting it to direct current (DC) so that the computer can use it to power all the components inside.
The most important aspect of a power supply is the maximum power (measured in Watts, written as just W) it can produce. For a modern day gaming computer, the minimum amount of power needed is 600 W. Less than 600 W can result in devices, such as the video card or motherboard, not functioning properly.
There are also several connectors to be aware of as you shop for a power supply for your gaming computer. The most important is the 24 pin (sometimes called 20+4 pin) connector that attaches to the motherboard. Older power supplies used a 20 pin connector as this was all that was needed to power the motherboard. However, with the several advancements made to computer technology, the need for higher wattage power supplies was clearly evident.
Today, video cards require more power than ever. There are special connectors from the power supply specifically designed to be used with the video card. They are called PCIe connectors and have a distinct 6 pin configuration. If you plan on using multiple video cards in a SLI or Crossfire setup, you'll want a power supply in the 800 W range and one with several PCIe connectors. It is important to plan out your entire build before purchasing a power supply. This will help avoid complications later on such as discovering that your power supply can't provide enough juice to power all of the components.

Operating Systems
A computer's operating system provides the user interface to easily communicate with all of the computer's hardware components. The operating system stores all of your games, songs, and hardware drivers in an organized fashion so you can focus on more important things, such as a long uninterrupted gaming session.
There are three primary sources of computer operating systems. They are Apple, Microsoft, and the free, open-source option of Linux. By far the most popular are the Windows operating systems with the latest incarnation being Windows 8. Windows 8 is a superb choice for a gaming computer operating system. It features the latest software and the overall system is very efficient at using memory and other valuable resources required by the newest computer games. This allows the computer to dedicate valuable resources to the gaming experience by not wasting them elsewhere.
Not only is a Windows Operating System very efficient, it is also supported by nearly every new computer game that comes on the market. For this reason, we highly recommend using a Windows based operating system (either Windows 7 or Windows 8) for a gaming computer build.
Installation and Assembly
Now that you have selected all of the components of a gaming computer, it's time to assemble it. We will provide a brief summary of the proper order in which to assemble the computer but should you need further insight, please see our installation guides found at http://www.building-a-gaming-computer.com/guides-to-building-a-computer.html. You will find step-by-step instructions and even some videos to assist you in assembling the parts during your build.
Preparing the Case
Before we begin, an important note about safety is needed. Computer parts are prone to electrical shock. This is caused by a transfer of static electricity from you to the device and can cause serious damage. To prevent static electricity, an anti static wrist band is highly recommended. You simply wear it around your wrist and attach the alligator clip to a good ground connection, such as the metal frame of the computer case. Another easy way to prevent static electricity is by using a standard claw hammer. If you touch the top metal part of the hammer before handling the computer parts, this can

help discharge the static electricity and prevent a potential electrical shock.
Electrical Hazard Warning on a Power Supply
Always use caution when handling devices that use a high level of electrical power, namely the power supply. Always unplug the computer when opening up the case to install or remove parts. With that said, lets begin building a gaming computer!
Motherboard Installation
Motherboard Standouts are used to create separation between the motherboard and the computer case
The first step is to prepare the case so we can install the motherboard. Begin by installing the motherboard standouts (shown in the image above) into the computer case. This provides a physical layer of separation between the case and motherboard. Under no circumstances should you install the motherboard flat against the case! Doing so can cause the motherboard to be shorted out when you power up the computer and it will most certainly ruin the board. Install plenty of standouts to provide a solid foundation for the motherboard in the case, and then secure the motherboard to the standouts using screws, being careful not to over tighten them.
CPU/ Processor Installation
With the motherboard installed in the case, it’s time to install the processor. Place the processor into the socket located on the motherboard. There will be a small gold triangle located on the processor that lines up with a gold triangle located in the CPU socket. This is designed to fit in only one orientation. Do not force the CPU into the socket! If oriented correctly, the processor will easily slide down into place. Slide the CPU socket arm over the CPU, securing it into the socket.
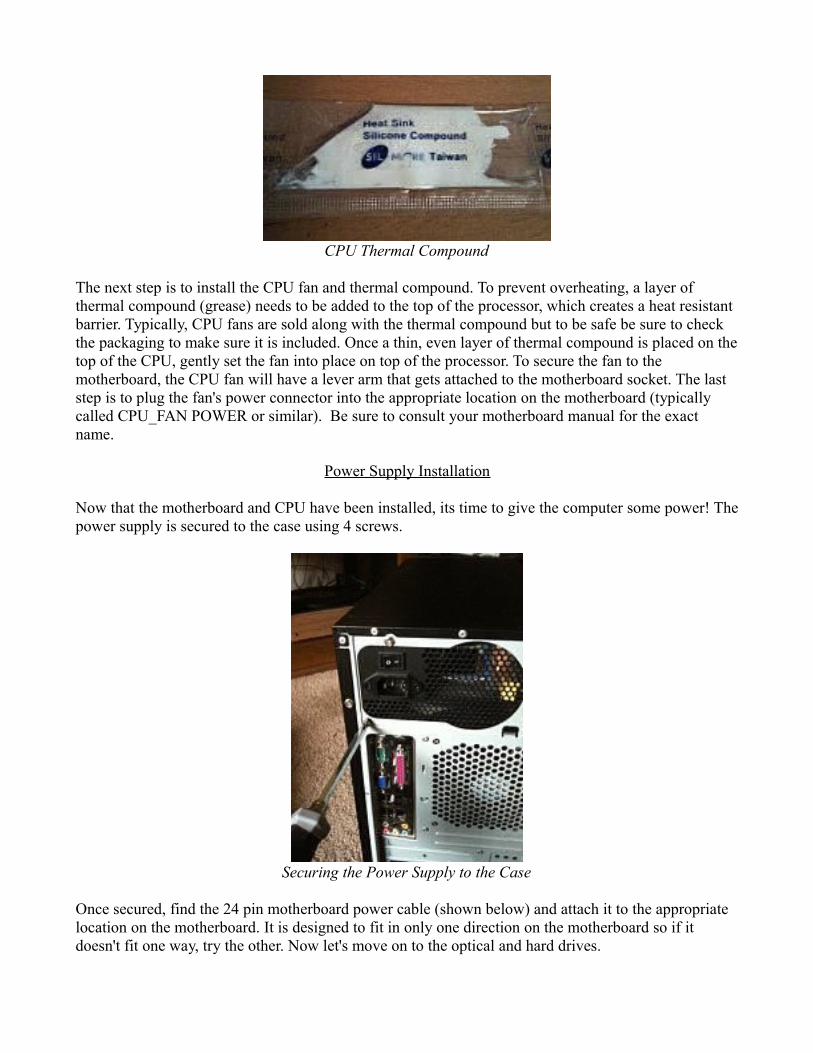
CPU Thermal Compound
The next step is to install the CPU fan and thermal compound. To prevent overheating, a layer of thermal compound (grease) needs to be added to the top of the processor, which creates a heat resistant barrier. Typically, CPU fans are sold along with the thermal compound but to be safe be sure to check the packaging to make sure it is included. Once a thin, even layer of thermal compound is placed on the top of the CPU, gently set the fan into place on top of the processor. To secure the fan to the motherboard, the CPU fan will have a lever arm that gets attached to the motherboard socket. The last step is to plug the fan's power connector into the appropriate location on the motherboard (typically called CPU_FAN POWER or similar). Be sure to consult your motherboard manual for the exact name.
Power Supply Installation
Now that the motherboard and CPU have been installed, its time to give the computer some power! The power supply is secured to the case using 4 screws.
Securing the Power Supply to the Case
Once secured, find the 24 pin motherboard power cable (shown below) and attach it to the appropriate location on the motherboard. It is designed to fit in only one direction on the motherboard so if it doesn't fit one way, try the other. Now let's move on to the optical and hard drives.

24 pin motherboard power cable
Optical/ Hard Drive Installation
Installing an optical drive
Optical and hard drives slide into position at the front of the case and are secured to the side of the case using screws. We highly recommend using all four screws to secure the drive on both sides of the case and not just putting two screws on one side to hold it in place. This helps firmly seat the drive, which is ideal for optical drives so when a disc is placed inside, it will spin evenly.

SATA power cable
Connect the SATA power connectors (shown above) and SATA data cable for each drive. Note that you can connect the SATA cables to any available slot on the motherboard as there is no master/slave configuration as seen with the older Parallel ATA drive technology.
Video Card Installation
Next up is the video card installation. Begin by locating an available PCI Express slot on the motherboard. The PCI Express slot is generally a light blue color, which makes it easy to locate. The video card slides into the slot and if properly installed, the gold leads located at the bottom of the card will no longer be visible. The card is fastened to the rear of the case with a screw (shown below).
Securing the Video Card to the rear of the Case

The six pin PCIe Power Cable
Newer video cards require the use of a PCIe power cable (shown above). These connectors contain 6 pins that are arranged in a 2 row by 3 column orientation and attach to the top of the video card. Failure to connect these power cables will result in a warning message when you power on the computer. The message generally says that additional power is needed to fully use the card. Once these power cables are connected, you have finished installing a video card!
Memory Installation
Computer Memory – Notice the Notch in the gold leads at the bottom of the module
Installing memory into the computer is the next step in the process. If you hold the memory module in your hand, you will notice there is a small notch located in the bottom gold leads that fit into the motherboard's memory slot. It is designed to fit in only one direction so if it doesn't fit in one direction, reverse the module and try again. Also note that the latest memory specification is DDR3 and the physical layout is not compatible with the older DDR2 model. In other words, if you have a motherboard that supports DDR2 memory modules, you will not be able to install DDR3 modules and

vice-versa. Once the memory modules are pushed into place, the clips on the side of the motherboard memory slot will lock into place, securing the modules into place.
Case Installation
It is now time to wire up the case's connectors. Typically, the case will have the following wires that need to be connected to the motherboard: power button, hard drive activity, reset button, and power LED. Please note that this is a typical setup and your case may have more connectors. Be sure to check your motherboard manual for all the wire details. These connectors generally have two pins each and they get plugged into the lower right portion of the motherboard. Consult your motherboard manual for the exact wire locations. There is no risk of damaging the wires/LEDs if they get plugged in the reverse order; they just simply won't work. Just reverse the orientation and try again.
Front Panel USB Connector
Motherboard Connector for the case's front USB ports
If your case includes front USB ports, the cables get plugged into a specific location on the motherboard, generally labeled as F_USB (see above). As before, be sure to consult your motherboard manual for the proper name and location.

Case fan and Lighting Installation
Molex Power Cable
The final step is the installation of case fans or lighting accessories. Case fans include four screws and their power connectors generally require a Molex power adapter (shown in the image above). Assuming you have a Molex power cable to spare, go ahead and plug those fans in! The lighting accessories, including cold cathode lights, typically occupy an available PCI slot for the power switch and also use a Molex connector to receive power. Be sure you have an available PCI slot if you plan on incorporating additional lighting modules in your computer build.
Final Preparations
Now that all the components are installed and they have power cables attached, it is time to do some last minute checks before powering up the computer for the first time. First and foremost, make sure the CPU fan is plugged into the CPU fan power slot on the motherboard. The last thing you want is the processor to overheat and risk damage because you forgot to plug in the fan. Next, ensure the power supply's 24 pin connector is plugged into the motherboard. You will know immediately if it isn't; when you push the power button to turn on the computer, nothing will happen. The last check is to ensure the memory modules and the video card are firmly seated in their respective slots. You should not be able to see any of the gold leads located at the bottom of either the memory or the video card if they are properly installed.
Video Card Properly Installed (gold leads fully inserted into slot)

Once these checks are performed, plug in the IEC cable (photo below) to the back of the power supply and attach a monitor, keyboard, and mouse. Only the essential components are needed as we want to make sure the computer boots up and is ready to have an operating system installed. Press the power button and have your fingers crossed!
Standard IEC Cable showing male and female ends
The BIOS Screen
If all goes well, the computer will boot up and the Basic Input/ Output Services (BIOS) screen will appear on the monitor. If this is the case for your computer, insert an operating system disc in the optical drive and begin the operating system installation process. For more details about installing an operating system, please see our article at http://www.building-a-gaming-computer.com/install-operating-system.html.
If the monitor remains blank (indicating the computer did not boot up properly), it is time to do some troubleshooting. Having some extra computer parts readily available can be a big help when troubleshooting a malfunctioning computer. Before removing any parts, look over the cables inside the computer and try to narrow your focus to a particular part that might be causing the problem. For example, if the fans are spinning when you push the power button, you can almost certainly rule out the power supply being the culprit.
For more information and advice about troubleshooting, please see our article at http://www.building-a-gaming-computer.com/troubleshooting-computer-problems.html.
We hope this eBook has provided an easy to read guide about building a gaming computer. Our aim was to not bombard the reader with unnecessary information but rather provide a clear and concise

focus on what matters most for a gaming computer build.
Pictured above - Author's Gaming Computer. Now stop reading this and go enjoy your own gaming computer!
-Bellerophon


