Breadboarding and Electronic Components. What is a Breadboard? Sometimes called a proto-board...
21
Breadboarding and Electronic Components
-
Upload
malik-romney -
Category
Documents
-
view
223 -
download
0
Transcript of Breadboarding and Electronic Components. What is a Breadboard? Sometimes called a proto-board...

Breadboarding andElectronic Components

What is a Breadboard?
• Sometimes called a proto-board• Reusable platform for temporarily built electronic
circuits

Why Breadboard?
• It takes less time (and money) to breadboard a circuit than to design and fabricate a printed circuit board (PCB).
• Because of the cost, a PCB should be reserved for the final working design.
• As a complement to circuit simulation, breadboarding allows designers to observe how, and if, the actual circuit functions.

Why Breadboard?
• Breadboards give designers the ability to quickly change components during development and testing, such as swapping resistors or capacitors of different values.
• Breadboards allow designers to easily modify a circuit to facilitate measurements of voltage, current, or resistance.
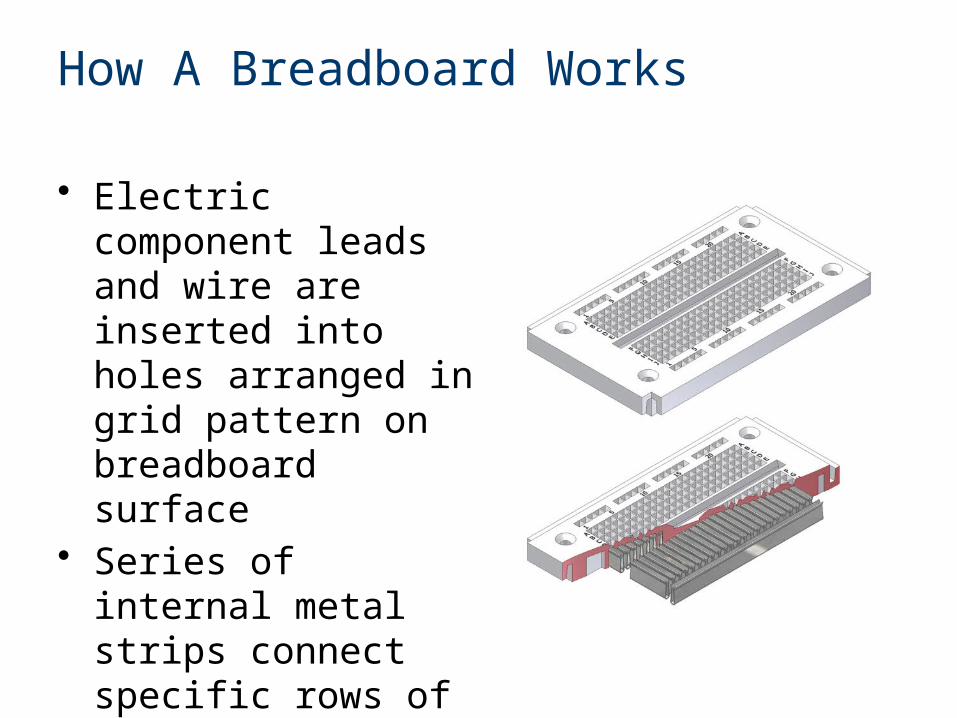
How A Breadboard Works
• Electric component leads and wire are inserted into holes arranged in grid pattern on breadboard surface
• Series of internal metal strips connect specific rows of holes

Breadboard Connections
• Columns and rows connected
Holes toinsert wires

Breadboard: Guidelines and Tips
• Use as few jumper wires as possible. Internal breadboard strips should make the majority of connections
• Keep jumper wires as short as possible to avoid jumbled wires which are difficult to troubleshoot
Good Bad

Breadboard: Guidelines and Tips
• Breadboard circuit closely to layout of the schematic circuit to aid troubleshooting
• Use schematic and check off component and wires as added to breadboard
• Cut component leads to short lengths to avoid contact and shorts
• Have someone check the circuit for errors

Diode
• Allows current to flow in only one direction
Larger metal componentinside of case or case flat spot is cathode or negative (-) lead
Shorter wire is cathode or negative (-) lead
Schematic Symbol
Negative ( - ) lead

Resistors
• A resistor is an electronic component that resists the flow of electrical current.
• A resistor is typically used to control the amount of current that is flowing in a circuit.
• Resistance is measured in units of ohms () and named after George Ohm, whose law (Ohm’s Law) defines the fundamental relationship between voltage, current, and resistance. 10
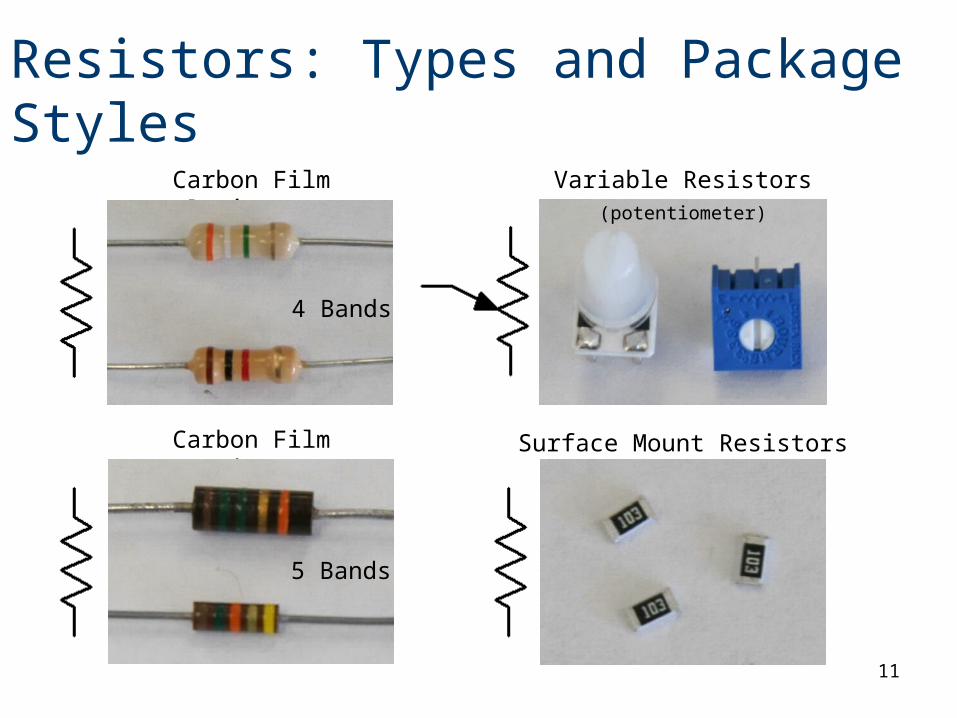
Resistors: Types and Package Styles
11
Surface Mount Resistors
Variable Resistors(potentiometer)
Carbon Film Resistors
5 Bands
Carbon Film Resistors
4 Bands

Resistors: Size Comparison
12

Determining A Resistor’s Value
Color Code• Resistors are labeled with
color bands that specify the resistor’s nominal value.
• The nominal value is the resistor’s face value.
Measured Value• A digital multimeter can
measure the resistor’s actual resistance value.
13

How To Read A Resistor’s Value
14
Resistor Color Code

Resistor Value: Example #1
Example:Determine the nominal value for the resistor shown.
15

Resistor Value: Example #1
Example:Determine the nominal value for the resistor shown.
16
Solution:
10 x 100 5%
1000 5%
1 K 5%

Resistor Value: Example #2
Example:Determine the nominal value for the resistor shown.
17

Resistor Value: Example #2
Example:Determine the nominal value for the resistor shown.
18
Solution:
39 x 100K 5%
3900000 5%
3.9 M 5%

Resistor Value: Example #3
Example:Determine the color bands for a 1.5 K 5% resistor.
19
?? ??

Resistor Value: Example #3
Example:Determine the color bands for a 1.5 K 5% resistor.
20
Solution:1.5 K 5%
1500 5%
15 x 100 5%
1: Brown
5: Green
100: Red
5%: Gold
?? ??

Measured Value
Use a digital multimeter (DMM) to measure resistance.
21