Bowhunting Tips, Tricks & Techniques - Red Hawk Archeryredhawk-archery.com/Tips-Tricks.pdf ·...
19
Bowhunting Tips, Tricks & Techniques© by Terry Whitford 2/15/08 The following pages reflect ideas, theories, methods, and whatever else I have gleaned from various sources and my own first hand knowledge over the past 30 years of bowhunting. There are many ways to approach solving problems encountered while striving to tweak your bowhunting set up to perfection. Undoubtedly, there is more than one “best” way! I know that what I have for you in this publication will work. Thank you. Table of contents: P2: Broadhead Tuning P5: Making the Shot P6: The Grip P7: The Stance P8: Follow Through P9: Creep Tuning P10: Walkback Tuning P12: Fletching P13: Scent Killer Formula P14: General Tuning Info P15: Sight leveling P16: Muscle memory P17: KE chart P18: 5 grains per pound theory P19: Disclaimer 1
Transcript of Bowhunting Tips, Tricks & Techniques - Red Hawk Archeryredhawk-archery.com/Tips-Tricks.pdf ·...

Bowhunting Tips, Tricks & Techniques©by
Terry Whitford 2/15/08
The following pages reflect ideas, theories, methods, and whatever else I have gleaned from various sources and my own first hand knowledge over the past 30 years of bowhunting.
There are many ways to approach solving problems encountered while striving to tweak your bowhunting set up to perfection. Undoubtedly, there is more than one “best” way!
I know that what I have for you in this publication will work.
Thank you.
Table of contents:
P2: Broadhead TuningP5: Making the ShotP6: The GripP7: The StanceP8: Follow ThroughP9: Creep TuningP10: Walkback TuningP12: FletchingP13: Scent Killer FormulaP14: General Tuning InfoP15: Sight levelingP16: Muscle memoryP17: KE chartP18: 5 grains per pound theoryP19: Disclaimer
1

Broadhead TuningIt is imperative that the draw length is correct for you. 90% of all bowhunters have a draw length of 29 inches or shorter!
I always tune my bows while wearing a cotton jersey glove on my bow hand. I always hunt with a glove on my bow hand so that’s the way I tune my bow. The cotton glove is a fantastic method to eliminate excessive hand torque and makes it much easier for you to repeat the same hand placement on the bow.The first thing to do is to make sure: 1. all arrows are straight (within .001) With the new generation of carbon arrows that most bowhunters now use there is no way to straighten the shaft. Some arrows are advertised with a straightness of .006!!!! Personally, I wouldn’t touch these with a 10ft pole. If you are going to scrimp monetarily on any item of equipment it MUST NOT be your arrows!!!!! Buy a cheaper bow and spend the extra cash on the best arrows available. I think that the Easton ACC is a great shaft. 2. all nocks are on exactly the same rotation and perfectly straight 3. that your field point arrows are leaving the bow without deflecting off of the restIf your fletching or the back end of the shaft is touching the rest as it leaves, you have to fix this problem first. You are wasting time doing anything else.Coat the fletch, nock, and the last 12 inches of the arrow with spray foot powder. Thsi will leave a fine white coat of powder on the surfaces. Shoot an arrow into a bale (not thru paper). Carefully remove the arrow so not to touch any of the area that is coated with the powder. Inspect for any areas that has the powder removed. This will tell you if there is any rest and/or cable/riser contact. You must fix this before going any further!!
I prefer as much helical as possible and at least a 3 inch fletch to provide maximum spin to the arrow for ultimate accuracy. However, this increases the chance for fletch/shaft interference with the arrow rest.Next make sure the broadhead is on absolutely straight with the shaft. Do the spin test on the palm of your hand. If the arrow appears to wobble where the shaft and BH meet, the BH is not straight. Heat the insert and re-align. Unfortunately, most carbon shafts are assembled using an epoxy/super glue type adhesive and heating the point to a temperature that would allow realignment will damage the carbon shaft. An alternative is to buy some small ‘wavy” washers and install them between the BH and the insert. This helps sometimes but not always. I can guarantee that if the BH “wobbles during the spin test, it will not shoot with acceptable accuracyHere is a crude drawing of a 'spin tester" made with a 2X4 and 4 nails.
Rest Position:The arrow rest should be aligned vertically so that the arrow is in the center of the rest attachment (plunger) hole.Horizontal placement has a lot of debate. My opinion is that very few, if any, compound bows have the string in the physical center of the bow. Most are offset to the left of center for right hand shooters. Whatever distance this happens to be is the distance that the rest should be offset to the left. Matthews and PSE have this dimension marked on the grip or riser on some models of bows. Why all manufacturers don’t do this is beyond understanding.One reason to move the rest from the proper/perfect position is in the case of excessive hand torque. Torque is usually caused by gripping (“strangling”) the riser, grabbing the bow at the moment of the shot or having the bow hand too deep. (outside the “lifeline” in the hand).
FOC = Front of CenterThis is a highly overrated area of concern for most bowhunting shots (10-25yds). IMO
2

You can find many “expert” websites that give theformula for finding out your particular FOC value. Most have erroneous info. The length of the point does NOT figure into the FOC. The Easton Tuning Guide on p32 specifically emphasizes this.Easton does suggest that a 10-15% FOC is bestfor broadhead tipped arrows. Even more for arrows shorter than 26-27 inches.
Fletch, Broadhead AlignmentIn my book it doesn’t make any difference. However, if you believe that it does then by all means do what you need to do!!OK, we are ready to start shooting.I am a proponent of paper tuning. Start at 10ft. Always correct the up/down tear first. If the nock is high move the nocking point down. If this does not correct the problem try reducing the tension on the support arm(s).Usually, right hand shooters have broadheads that impact low, right of their field points.Next, correct the left/right problem. Ideally this should be done by adjusting the draw weight and/or the point weight and or the length of the arrow. A nock left tear (right hander) indicates a weak shaft. Try lowering the draw weight or reducing the tip weight. I suggest making BIG changes. Lower/raise the draw weight by 6#’s or change the tip weight by at least 25grains. Shorten the arrow by 1 inch. Make the changes one at a time.Somewhere along the line, you should be getting a decent tear/hole in the paper. The BIGGEST detriment to having a well tuned bow is PUNCHING the release. It is very difficult to tune the equipment if the shooter is HAMMERING the trigger.
Let’s shoot a broadhead!!!Start at 15 yards for safety reasons. First shoot a broadhead. Then shoot a field point. Hopefully they will hit in the same spot.???No? If the BH impacts lower than the field point we need to move the nocking point down (small increments). Or we can weaken the support arm tension more. Remember to fix the up/down problem first.Shoot both again and make corrections. A left and right problem is fixed the same way that we paper tuned.If the BH hits right of the FP reduce the bow weight, reduce the tip weight or possibly cut the arrow shorter.If you cannot get the BH & FP to hit together you may want to try a different shaft size. If the BH continually impacts to the right of the FP you will need a stiffer spined arrow.After your BH/FP hit the exact same space at 15yds, mover to a longer distance and continue to fine tune.
3

Make sure that the broadhead equipped shaft/s used for testing remain straight and that he BH’s are perfectly straight for the entire tuning process. I do not use a bow quiver. I feel that their use makes it more difficult to tune my bow. If you choose to use one, test the BH/FP impact difference with the quiver on and off. I have seen as much as a 12” difference at 20 yards. It’s worth checking out!! Good Luck and Great Hunting
4

Making the ShotThe worst possible position for the release trigger is on the tip of your finger!! Photo (“I”)
This is where you have the most nerve endings and the finger is most sensitive which will quickly lead you to the dreaded …….“TARGET PANIC/BUCK FEVER”
Get a good deep grip on the trigger to enable you to make a good, slow squeeze. If you cannot get a deep grip on the trigger without it “shooting” then the trigger is set too sensitive.Don’t be afraid of the trigger. Before you ever thing about making the shot you should have “half” of the pressure needed on the trigger to make the shot. This will help you make a great shot when the time arrives.
Leaning against the string.
Photo “L” is an example of many archers habit of pushing their face into the bow string. What happens upon the shot is that the string and arrow have to “bend around” their face to achieve clearance. This usually results in a bow that is impossible to tune for perfect arrow flight because the string is oscillating left and right as it moves forward.The bow string should be lightly touching your face (“K”) at full draw.
5

The GripOr should I say “The NON-GRIP”?
The worst possible thing that you can do with your bow is to put a death grip on the riser! (see “F”)Why?........... Because it is so difficult to repeat shot after shot.
Photo “H” shows a better effort however too much of the hand on the outside of your hands “lifeline” is putting pressure against the riser.
The grip in “F & G” both lead to hand torque of the rise which leads to erratic accuracy and great difficulty in tuning your bow to achieve good accurate broadhead flight.
Photo “E” illustrates pressure on the “pad” of the thumb with no part of the hand outside of the lifeline touching the riser.The hand should be relaxed to enable the bow to do what it wants upon the execution of the shot.This form necessitates the use of a bow sling.
6

The StanceThere’s a lot to be learned from a bowhunter’s stance.
Photo “A” is a great example of a correct draw length and a steady foundation for accuracy.Both forearms are parallel (or very similar) to the arrow. The release wrist is straight and the draw elbow is slightly higher than the shooters nose. Note that the left shoulder is in the “down” position. The feet are approximately shoulder width (“D”) and with an open stance.This type of shooting form will allow the archer to achieve his maximum level of accuracy.
Photo “B” is an all too familiar example of an archer with a draw length that is way too long.The torso is leaning away from the bow, the draw elbow is down, the draw forearm is pointing up and the head is tilted forward. The left shoulder is also in the up position.There is no possible way for a shooter with this form to achieve his maximum potential. While some days he may shoot quite well, he will have days when he cannot come close to hitting where he wants.Imagine trying to “bend at the waist” to shoot from an elevated position with this form! “IMPOSSIBLE”
7

Follow ThoughHere’s where it is easily determined whether the shooter is “punching” the release or executing a good “surprise” release.
Photos “P & O” depict the archer that is telling himself ………
……………“NOW”
to make the shot. What happens at this instant is that all aiming ceases and the release hand moves out and away from the anchor point. This motion cannot be successfully repeated from shot to shot.
Conversely, upon executing a surprise release the hand and arm cannot do anything but move directly away (“M & N”) from the anchor point.This is a highly repeatable motion and leads to extreme accuracy.
8

Creep TuningThis is a simple test and method to have your 2 cam bow perform it's best when you are not at your best.
Start off with you bow tuned as good as possible (perfect?) with both of your cams perfectly timed or the best that you can determine.
When you are shooting your best you are probably pulling hard into the cams as you should be. It's when you are in an awkward position or begin to tire that you will run into the problem of unexplained high or low shots.
Put a one inch piece of masking tape (doesn't matter what kind of tape) on a piece of carboard and attach to the bale.
This can be done at any distance you desire. IMO the farther the better.
Shoot 3 shots pulled hard into the cam stops.Creep forward 1/8th (or whatever) inch and shoot three more shots. Disregard any "flyers".
Figure #1
Shorten the cable that connects to the TOP cam in half turn increments. Repeat until both groups are at the same height.
Figure #2
Shorten the cable that attaches to the BOTTOM cam in half turn increments. Repeat until both groups are at the same height.
9

Walk Back Tuning
The walkback method is pretty straight forward.
Something that you rarely hear discussed about the walkback method is that the shooter MUST hold the bow in the same vertical plane for all distances!!!If you have a level on your sight and it is set up correctly......use it or the results can give you a false reading
Your 20yd pin must be set PERFECTLY !!! If it is not perfect your arrows will progressively hit farther to one side as you increase the distance giving a false centershot reading.
There are some opinions that the w/b method is a waste of time. I say try it and see if your scores improve. What do you have to lose????
You'll need a target butt that will give you 3-5 feet of vertical drop.Shoot a group of 5-6 arrows at a dot 2 inches in diameter at 20 yds. Adjust your sight until you are hitting dead center. Disregard any erratic shots. Shoot again to check your sight. Don't forget to use your level!! Use a plumb line (homemade is OK) and draw a line down the target/butt that corresponds to the plumb line from the center of your group.Walkback 10 yards and use your 20yd pin, aim at the center of the bullseye and shoot 5-6 good shots. Shoot again if you need to get a better group. DO NOT ADJUST YOUR SIGHT. Mark the center of your group.
Repeat this at 10 yards farther back and repeat until you reach a distance where you can no longer shoot a good group (3-5 inches).
It is possible that you will see a pattern represented by one of the colored star patterns on the below diagram.Follow the instructions on the diagram. You should repeat this procedure periodically to ensure maximum accuracy.
For a pattern similar to the green stars (next page below) move your rest slightly to the right.
For a pattern similar to the brown stars move your rest slightly to the left.
Repeat until you have a pattern matching the arrows going straight up/down(black stars).
10

11

FletchingThere are many great vanes on the market. The real trick is to clean them well or they will not stick to the shaft.
For me, the following method works and you will not be able to pull a vane off with a pair of pliers.
Do not clean the base of Blazer Vanes. They are pre-treated.
1. Put all the vanes you are going to work with in a large bowl filled with HOT water.2. Add a small amount of liquid dishwashing soap. Unscented dawn would be the best for hunting vanes or some unscented laundry liquid.3. Slosh them around thoroughly in the bowl using your hand to "mix" them up to make sure all vane bases come in contact with the water.4. Pour the vanes and water into a colander (bowl with all the little holes in it).5. Use the "sprayer" attachment on your sink and rinse the vanes repeatedly with the hottest water that the faucet/sprayer can provide. Mix them up a lot to rinse all surfaces.6. Shake the excess water from the colander.7. Pour/spread the vanes out on a clean cloth/towel/paper towel. Don't let any vanes overlap.8. Blot dry with a clean cloth/paper towel.9. Allow to air dry until you are positive they are dry. This won't take long because the hot water will want to evaporate quickly.This also cleans excess oils from your hands.10. Clean the base of the vane with Acetone/MEK/ or a good brand of lacquer thinner. Avoid contact with the base with your fingers.11. You are ready to fletch.12. I recommend using Saunders NPV (a good thickened super glue will work also)13. The glue will stick to the vane as well as any other method that I have used.14. The arrow shaft must be cleaned thoroughly. 15. Use acetone/MEK/lacquer thinner and "scrub" each shaft with a paper towel until there is no black residue left on the paper towel. Use a different section/place of paper towel for each shaft.16. Shafts being fletched with Blazer vanes require a water wash only. (Follow manufacturers instructions)17. If you are fletching carbon shafts use a 400/600 grit sand paper/emory cloth to roughen the surface a bit.
12

Cover Scent Formula1.5 qt Hydrogen Peroxide (3% Formula) This is not the stuff in the brown bottles bought at the drug store/supermarket. You need to go to a swimming pool supply store and buy a gallon of “Shock & Oxidizer” (S & O). This is a 27% solution. (You can also get H202 at beautician supply stores. This may not be 27%. It may be weaker or stronger. Use caution when handling the concentrated product and make sure that you have the dilution correct!!) Be very careful not to get any full strength solution on you or anything else you don’t want burned/ruined/whatever. Dilute with distilled water (5oz S&O to 43oz distilled water. Again, BE VERY CAREFUL WITH THE FULL STRENGTH PRODUCT!!!!! Rubber gloves and eye protection would be a good idea.
Diluted S&O mixture 2 qts distilled water ½ cup of baking soda 1/4oz of unscented laundry detergent Mix in a large container Pour into an opaque (can’t see thru) 1 gal container. Leave uncapped for several days to let the gases produced to vent off. Store the “big batch” in a dark place as hydrogen peroxide (H2O2) changes to water when exposed to sunlight. Fill smaller opaque bottles to use in the field.
Or, you can use the drug store stuff with the realization that there is a stabilizer chemical added which has a faint odor that will dissipate quickly and you do not have to hassle with diluting the concentrate.
1 qt Drug Store Hydrogen Peroxide 2 qts distilled water ½ cup of baking soda 1/4oz of unscented laundry detergent Mix in a large container Pour into an opaque (can’t see thru) 1 gal container. Leave uncapped for several days to let the gases produced to vent off. Store the “big batch” in a dark place as hydrogen peroxide (H2O2) changes to water when exposed to sunlight. Fill smaller opaque bottles to use in the field.Oh yes, you can expect a white residue after using this recipe. It’s merely baking soda.
If we use hyd/oxi won't it bleach our camo and other gear? There may be some minor/insignificant bleaching. We are essentially using less than 1% H2O2.The 27% formula will damage most anything it comes into contact with (not glass or plastic).
What about Triclosan?
Triclosan has been determined (by some scientists) to be a hazardous material. I don’t want to spray that on my skin. Good luck this year fellow bowhunters.
Use this formula at your own risk.
13
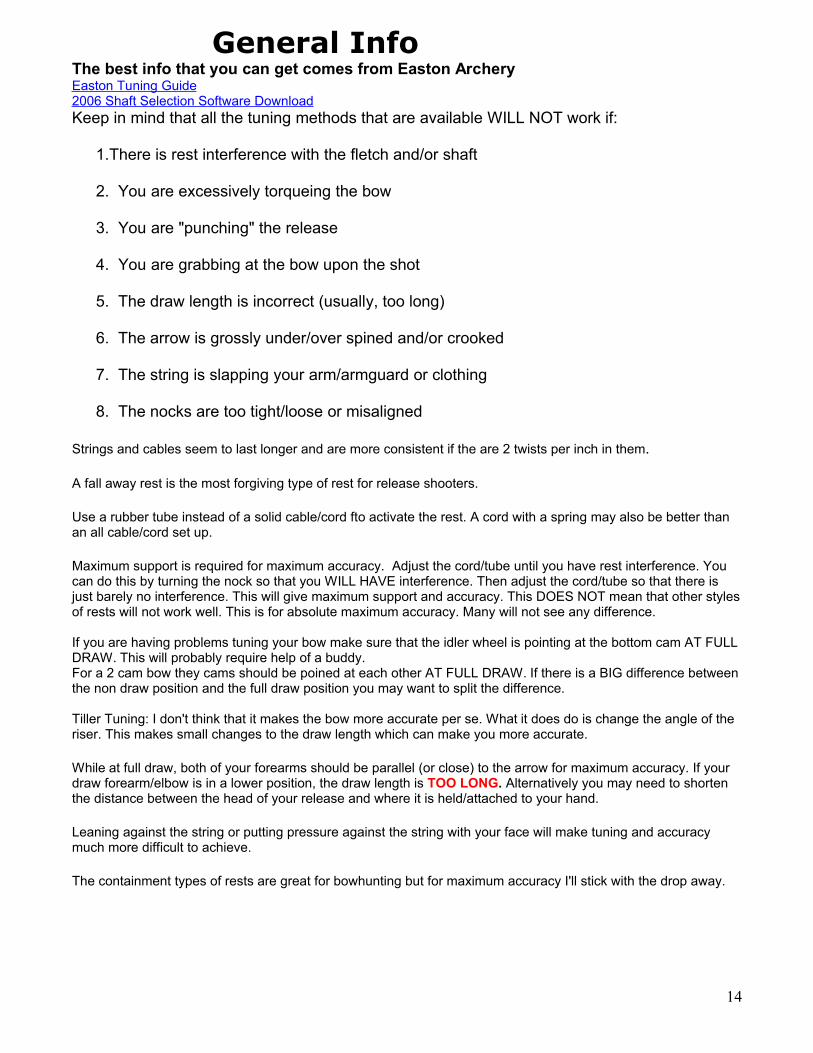
General InfoThe best info that you can get comes from Easton ArcheryEaston Tuning Guide2006 Shaft Selection Software DownloadKeep in mind that all the tuning methods that are available WILL NOT work if:
1.There is rest interference with the fletch and/or shaft
2. You are excessively torqueing the bow
3. You are "punching" the release
4. You are grabbing at the bow upon the shot
5. The draw length is incorrect (usually, too long)
6. The arrow is grossly under/over spined and/or crooked
7. The string is slapping your arm/armguard or clothing
8. The nocks are too tight/loose or misaligned
Strings and cables seem to last longer and are more consistent if the are 2 twists per inch in them.
A fall away rest is the most forgiving type of rest for release shooters.
Use a rubber tube instead of a solid cable/cord fto activate the rest. A cord with a spring may also be better than an all cable/cord set up.
Maximum support is required for maximum accuracy. Adjust the cord/tube until you have rest interference. You can do this by turning the nock so that you WILL HAVE interference. Then adjust the cord/tube so that there is just barely no interference. This will give maximum support and accuracy. This DOES NOT mean that other styles of rests will not work well. This is for absolute maximum accuracy. Many will not see any difference.
If you are having problems tuning your bow make sure that the idler wheel is pointing at the bottom cam AT FULL DRAW. This will probably require help of a buddy.For a 2 cam bow they cams should be poined at each other AT FULL DRAW. If there is a BIG difference between the non draw position and the full draw position you may want to split the difference.
Tiller Tuning: I don't think that it makes the bow more accurate per se. What it does do is change the angle of the riser. This makes small changes to the draw length which can make you more accurate.
While at full draw, both of your forearms should be parallel (or close) to the arrow for maximum accuracy. If your draw forearm/elbow is in a lower position, the draw length is TOO LONG. Alternatively you may need to shorten the distance between the head of your release and where it is held/attached to your hand.
Leaning against the string or putting pressure against the string with your face will make tuning and accuracy much more difficult to achieve.
The containment types of rests are great for bowhunting but for maximum accuracy I'll stick with the drop away.
14

Sight Leveling There are lots of opinions on this subject. I'll give you my take on the subjectIf you are using a sight that has a seperate adjustment for the vertical portion of the sight you do not need to level to the bowstring or riser. The only important item is that the level is perpendicular to the vertical postion of the sight. This usually occurs using a target type sight.
With most bowhunting sights it is far easier to have the level perpendicular to the riser because there is no adjustment on the vertical component. Many sights do not have individual adjustment for pins in the horizontal plane (left/right).
Generally you can just bolt on the sight and go with it. It is a good idea to check the level against the riser to make sure that it is correct. Depending on the sight you may be able to adjust the level bubble. If not, you are pretty much stuck with what you have.The third axis is the most troublesome adjustment.
If this is not correct you will have "mysterious" left and right misses shooting uphill and downhill.The easy way to keep your bow level while shooting on side hills is to overcorrect on the uphill side and then let gravity bring your bow down the hill until it is level. This is of course while using your level
15

Muscle Memory ??Muscle memory is a common term for the process of the brain/muscle system memorizing motor skills When an active person trains movement , often of the same activity, in an effort to stimulate the mind’s adaptation process, the end result is to induce a physiological change such as increased levels of accuracy through repetition. Even though the process is really brain-muscle memory or what some call motor memory, the nickname muscle memory is commonly used.Individuals rely upon the mind’s ability to assimilate a given activity and adapt to the training. As the brain and muscle adapts to training, the subsequent changes are a form or representation of its muscle memory.There are two types of motor skills involved in muscle memory, fine and gross. Fine motor skills are small skills we perform with our hands such as brushing the teeth, combing the hair, using a pencil or pen to write, and playing video games. Gross motor skills are those actions that require large body parts and large body movements like throwing sports (bowling , American football , baseball , golfing, swimming, tennis, driving a car, and archery.Gross motor skills are generally employed in activities, such as driving, while fine motor skills are generally used in activities, such as writing and sewing.Muscle memory is fashioned over time through repetition of a given motor skill and the ability through brain activity to remember it. Activities such as brushing the teeth, combing the hair, or even driving a vehicle are not as easy as they look to the beginner. As one reinforces those movements day after day after day, the neural system learns those fine and gross motor skills to the degree that one no longer needs to think about them, but merely to react and to perform.Essentially, when we don't practice, our brain forgets to tell the muscles what we want them to do.
16

KE Chart
SPEED 210 220 230 240 250 260 270 280 290 300 310 320 330 340 350WEIGHT
250 0 24.5 26.9 29.4 32 34.7 37.5 40.5 43.5 46.7 50 53.3 56.8 60.4 64.2 68260 0 25.5 27.9 30.5 33.2 36.1 39 42.1 45.3 48.5 51.9 55.5 59.1 62.9 66.7 70.7270 0 26.4 29 31.7 34.5 37.5 40.5 43.7 47 50.4 53.9 57.6 61.4 65.3 69.3 73.4280 0 27.4 30.1 32.9 35.8 38.9 42 45.3 48.7 52.3 55.9 59.7 63.7 67.7 71.9 76.1290 0 28.4 31.2 34.1 37.1 40.2 43.5 46.9 50.5 54.1 57.9 61.9 65.9 70.1 74.4 78.9300 0 29.4 32.2 35.2 38.4 41.6 45 48.6 52.2 56 59.9 64 68.2 72.5 77 81.6310 0 30.4 33.3 36.4 39.6 43 46.5 50.2 54 57.9 61.9 66.1 70.5 74.9 79.6 84.3320 0 31.3 34.4 37.6 40.9 44.4 48 51.8 55.7 59.7 63.9 68.3 72.7 77.4 82.1 87330 0 32.3 35.5 38.8 42.2 45.8 49.5 53.4 57.4 61.6 65.9 70.4 75 79.8 84.7 89.7340 0 33.3 36.5 39.9 43.5 47.2 51 55 59.2 63.5 67.9 72.5 77.3 82.2 87.3 92.5350 0 34.3 37.6 41.1 44.8 48.6 52.5 56.6 60.9 65.3 69.9 74.7 79.6 84.6 89.8 95.2360 0 35.2 38.7 42.3 46 50 54 58.3 62.7 67.2 71.9 76.8 81.8 87 92.4 97.9370 0 36.2 39.8 43.5 47.3 51.3 55.5 59.9 64.4 69.1 73.9 78.9 84.1 89.5 95 101380 0 37.2 40.8 44.6 48.6 52.7 57 61.5 66.1 70.9 75.9 81.1 86.4 91.9 97.5 103390 0 38.2 41.9 45.8 49.9 54.1 58.5 63.1 67.9 72.8 77.9 83.2 88.7 94.3 100 106400 0 39.2 43 47 51.2 55.5 60 64.7 69.6 74.7 79.9 85.3 90.9 96.7 103 109410 0 40.1 44.1 48.2 52.4 56.9 61.5 66.4 71.4 76.6 81.9 87.5 93.2 99.1 105 112420 0 41.1 45.1 49.3 53.7 58.3 63 68 73.1 78.4 83.9 89.6 95.5 102 108 114430 0 42.1 46.2 50.5 55 59.7 64.5 69.6 74.8 80.3 85.9 91.7 97.8 104 110 117440 0 43.1 47.3 51.7 56.3 61.1 66 71.2 76.6 82.2 87.9 93.9 100 106 113 120450 0 44.1 48.4 52.8 57.5 62.4 67.5 72.8 78.3 84 89.9 96 102 109 115 122460 0 45 49.4 54 58.8 63.8 69 74.4 80.1 85.9 91.9 98.1 105 111 118 125470 0 46 50.5 55.2 60.1 65.2 70.5 76.1 81.8 87.8 93.9 100 107 114 121 128480 0 47 51.6 56.4 61.4 66.6 72 77.7 83.5 89.6 95.9 102 109 116 123 131490 0 48 52.7 57.5 62.7 68 73.5 79.3 85.3 91.5 97.9 105 111 118 126 133500 0 49 53.7 58.7 63.9 69.4 75 80.9 87 93.4 99.9 107 114 121 128 136510 0 49.9 54.8 59.9 65.2 70.8 76.5 82.5 88.8 95.2 102 109 116 123 131 139520 0 50.9 55.9 61.1 66.5 72.2 78 84.2 90.5 97.1 104 111 118 126 133 141530 0 51.9 56.9 62.2 67.8 73.5 79.5 85.8 92.2 99 106 113 120 128 136 144540 0 52.9 58 63.4 69.1 74.9 81 87.4 94 101 108 115 123 131 139 147550 0 53.8 59.1 64.6 70.3 76.3 82.5 89 95.7 103 110 117 125 133 141 150560 0 54.8 60.2 65.8 71.6 77.7 84 90.6 97.5 105 112 119 127 135 144 152570 0 55.8 61.2 66.9 72.9 79.1 85.5 92.3 99.2 106 114 122 130 138 146 155580 0 56.8 62.3 68.1 74.2 80.5 87 93.9 101 108 116 124 132 140 149 158590 0 57.8 63.4 69.3 75.4 81.9 88.5 95.5 103 110 118 126 134 143 151 160600 0 58.7 64.5 70.5 76.7 83.3 90 97.1 104 112 120 128 136 145 154 163
WEIGHT Speed 210 220 230 240 250 260 270 280 290 300 310 320 330 340 350
17

5 grains per pound theory
Bows with a draw length shorter than 29” can go somewhat lighter on the arrow weight without problems.
Your buddies bow @ 70#/27” will shoot an arrow 15-20 fps slower than a 29" draw bow with the same arrow weight and same ###'s.
It's force draw curve is much shorter therefore a lighter arrow will work OK.
Brace height (b/h) enters into the equation also. Some of the speedburners with a sub 6" b/h would need something different that an 8"+ b/h bow. Then we can talk about cam design. A radical cam with a valley of 1/8th" sure slams the arrow a lot harder than one with some plain old round wheels.
Just repeating time after time " FIVE GRAINS PER POUND!!!!" without considering draw length is misinformed.
Would a 32" and a 24" bow shoot a 5gr/# ?Nope, you would probably rip the limbs right off the 32" bow. Although, I'm sure that folks do that regularly without any catastrophic failures.
The 24" bow can shoot a much lighter arrow than 5gr/#?A while back (15-20 yrs) I had a PSE Fire Flight that I shot @ 96#, 29"draw, with an overdraw. I shot 1714's with cut down target points. 338fps....sure, I had to replace the axles every week or so and had to invest in several pair of earplugs. This would shoot an arrow pretty durn flat. The limbs never went bad.
There are a bunch of factors involved when deciding what arrow to shoot without damaging your equipment.
Manufacturers want you to shoot at least 6gr/# !!!! That makes for fewer warranty returns.
Thank you for downloading BTTT’s. I hope that you like and can use the information.
18

Disclaimer
Sorry, but in today’s litigious society we have to protect ourselves from claim happy folks and lawyers.
By downloading “Bowhunting Tips, Tricks & Techniques” you release Red Hawk Archery, et al, from all claims of liability.
All text, photos, content are property of Red Hawk, Inc. and may not be copied
19