BMW 3Series (E46) Installation Guide -...
14
BMW 3Series (E46) Installation Guide StealthOne Version 1.6 Copyright © Fontana Enterprises, 2008 All rights reserved.
Transcript of BMW 3Series (E46) Installation Guide -...
BMW 3Series (E46) Installation Guide
StealthOne Version 1.6
Copyright © Fontana Enterprises, 2008 All rights reserved.

Product Information
Copyright
Copyright © Fontana Enterprises, 2008
All rights reserved.
Trademarks
BMW is a registered trademark of Bayerische Motoren Werke AG.
Valentine One® is a registered trademark of Valentine Research, Inc.
Customer Service
If you have problems with StealthOne and would like to inquire about a refund or the repair or replacement of the product, send an email message to [email protected]
Revision 2008.1
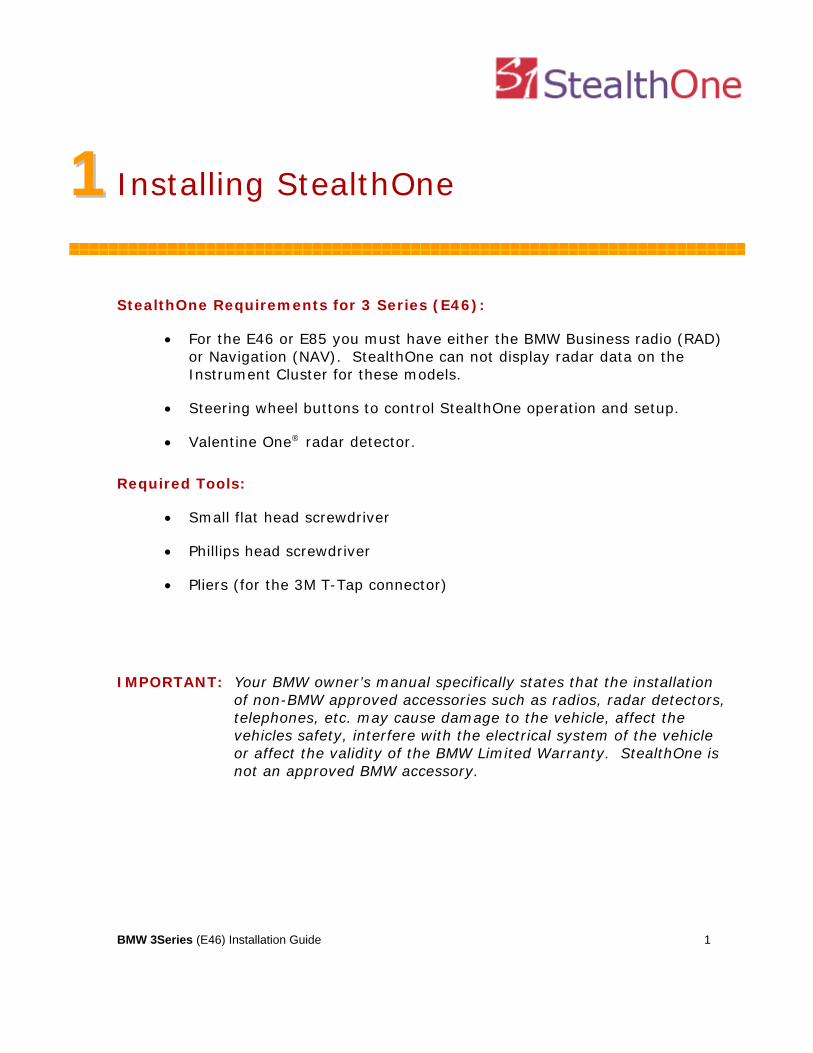
11 Installing StealthOne
StealthOne Requirements for 3 Series (E46):
• For the E46 or E85 you must have either the BMW Business radio (RAD) or Navigation (NAV). StealthOne can not display radar data on the Instrument Cluster for these models.
• Steering wheel buttons to control StealthOne operation and setup.
• Valentine One® radar detector.
Required Tools:
• Small flat head screwdriver
• Phillips head screwdriver
• Pliers (for the 3M T-Tap connector)
IMPORTANT: Your BMW owner’s manual specifically states that the installation of non-BMW approved accessories such as radios, radar detectors, telephones, etc. may cause damage to the vehicle, affect the vehicles safety, interfere with the electrical system of the vehicle or affect the validity of the BMW Limited Warranty. StealthOne is not an approved BMW accessory.
BMW 3Series (E46) Installation Guide 1
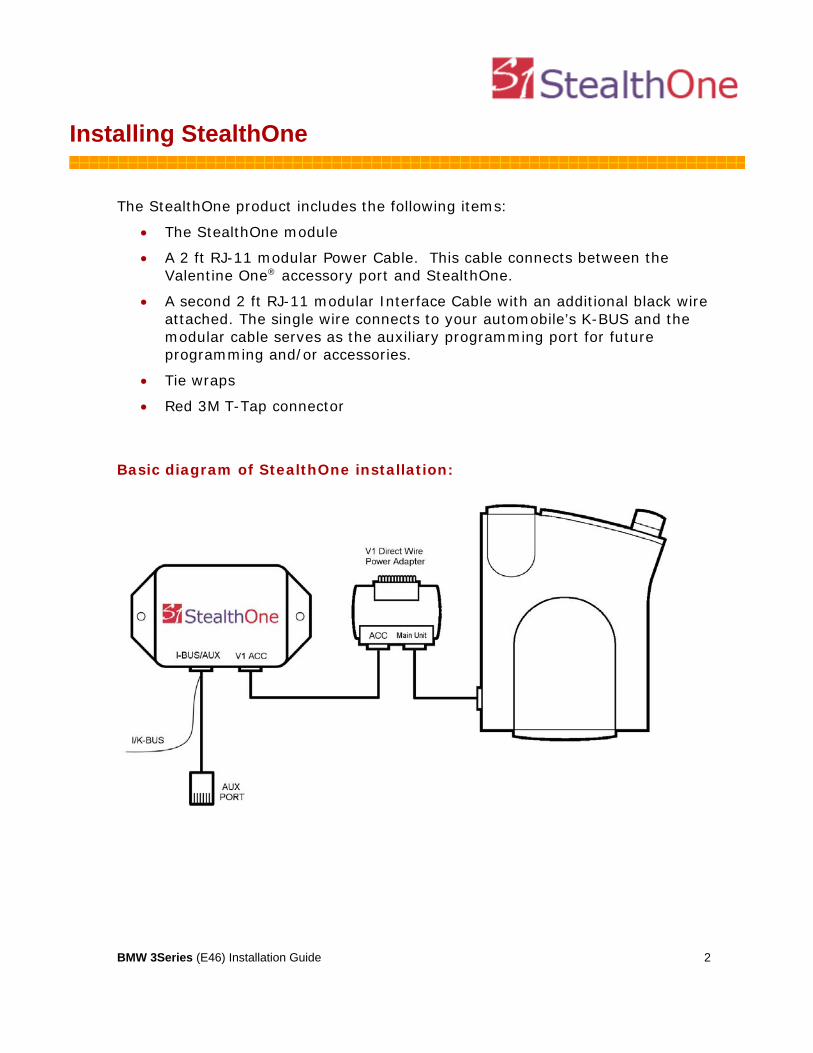
Installing StealthOne
The StealthOne product includes the following items:
• The StealthOne module
• A 2 ft RJ-11 modular Power Cable. This cable connects between the Valentine One® accessory port and StealthOne.
• A second 2 ft RJ-11 modular Interface Cable with an additional black wire attached. The single wire connects to your automobile’s K-BUS and the modular cable serves as the auxiliary programming port for future programming and/or accessories.
• Tie wraps
• Red 3M T-Tap connector
Basic diagram of StealthOne installation:
BMW 3Series (E46) Installation Guide 2
BMW 3Series (E46) Installation Guide 3
IMPORTANT: If you are unfamiliar with automotive electrical systems, see a mechanic or car-stereo installer. Some knowledge of automotive electrical systems and of interior trim removal is necessary to do it yourself.
IMPORTANT: The instructions below assume that you already have your Valentine One® hard-wired into the overhead console. The installation of your Valentine One® is not covered in this installation guide.
IMPORTANT: The instructions below are for an E46 without sunroof. You will not be able to place the StealthOne above the headliner in an E46 with the sunroof. Instead you will need to install StealthOne behind the glove box and run a longer power cable to the V1 Accessory port.
To Install StealthOne:
1 Select an appropriate location to install your Valentine One® using any of the methods described in the owner’s manual. We recommend that you use the direct wire power adapter provided with your Valentine One® and tap into a switched 12v wire in the overhead console. This will allow you to place the Valentine One® at the top of the front windshield to give it the best unobstructed front and rear view.
NOTE: You can get an excellent detailed Valentine One® installation guide from http://www.bmw330ci.com/DIY_V1.htm.
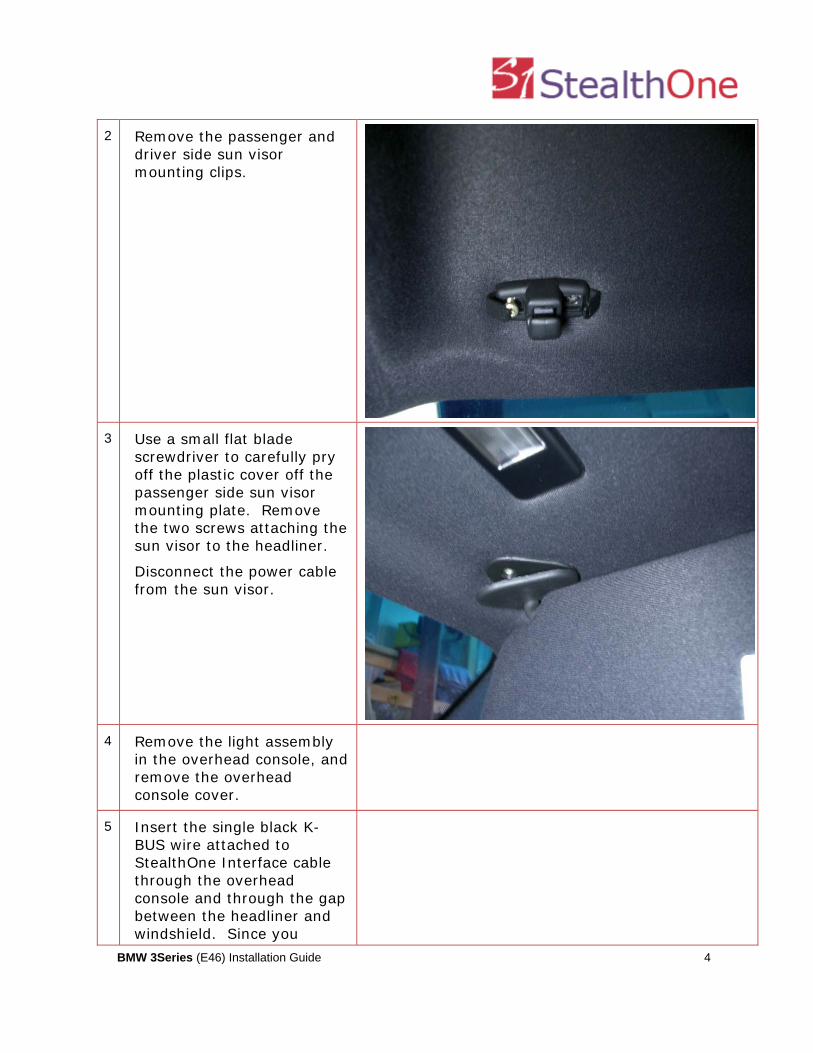
2 Remove the passenger and driver side sun visor mounting clips.
3 Use a small flat blade screwdriver to carefully pry off the plastic cover off the passenger side sun visor mounting plate. Remove the two screws attaching the sun visor to the headliner.
Disconnect the power cable from the sun visor.
4 Remove the light assembly in the overhead console, and remove the overhead console cover.
5 Insert the single black K-BUS wire attached to StealthOne Interface cable through the overhead console and through the gap between the headliner and windshield. Since you
BMW 3Series (E46) Installation Guide 4
BMW 3Series (E46) Installation Guide 5
removed the sun visor clips you will be able to pull down the headliner a little to pass the wire through.
Pull all the wire through the gap leaving about a 12” length in the overhead console.
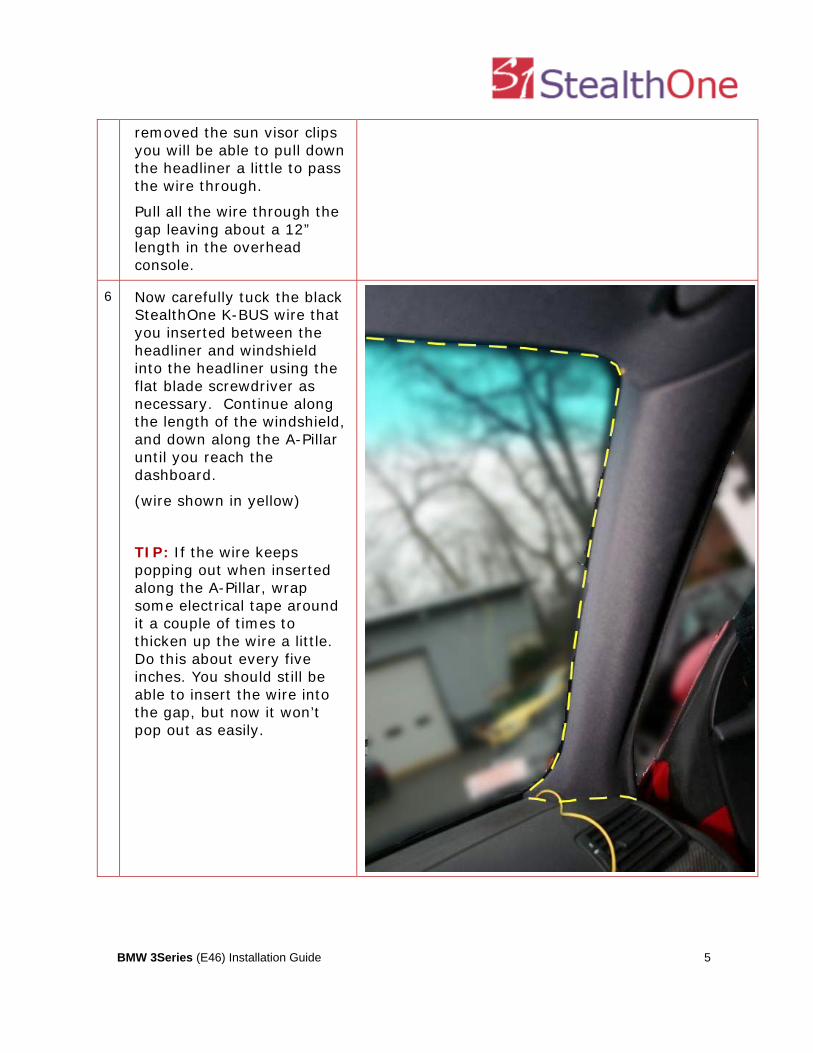
6 Now carefully tuck the black StealthOne K-BUS wire that you inserted between the headliner and windshield into the headliner using the flat blade screwdriver as necessary. Continue along the length of the windshield, and down along the A-Pillar until you reach the dashboard.
(wire shown in yellow)
TIP: If the wire keeps popping out when inserted along the A-Pillar, wrap some electrical tape around it a couple of times to thicken up the wire a little. Do this about every five inches. You should still be able to insert the wire into the gap, but now it won’t pop out as easily.
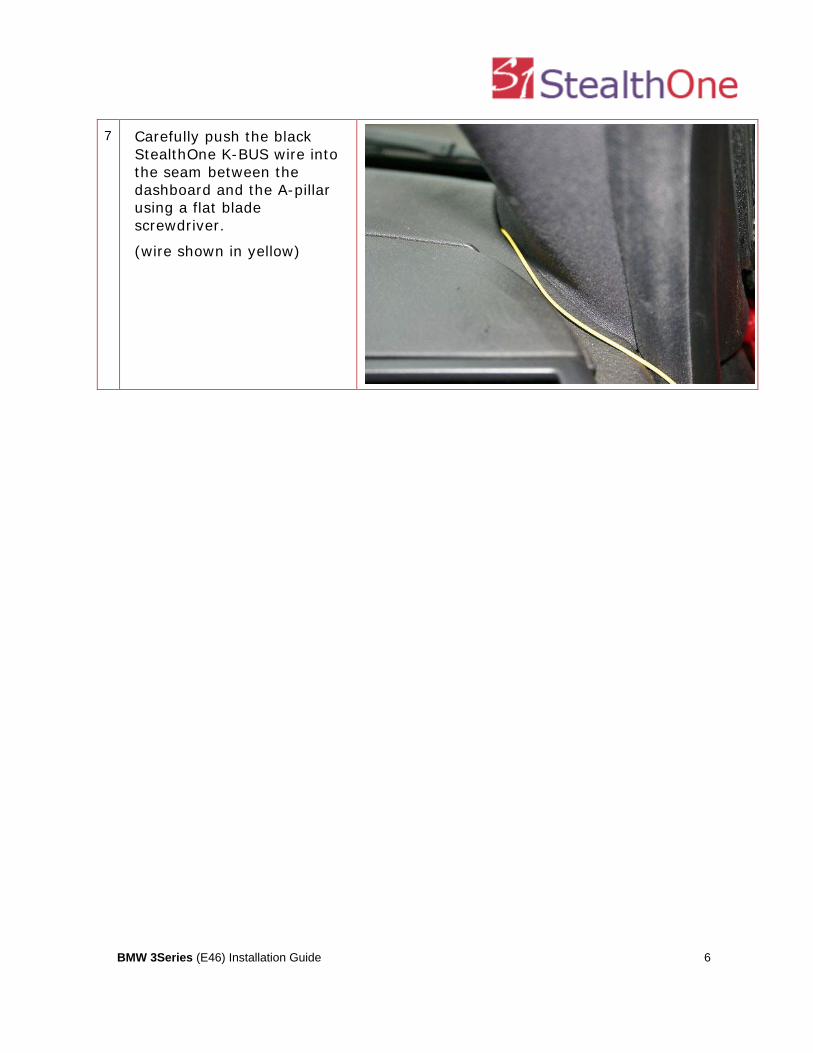
7 Carefully push the black StealthOne K-BUS wire into the seam between the dashboard and the A-pillar using a flat blade screwdriver.
(wire shown in yellow)
BMW 3Series (E46) Installation Guide 6
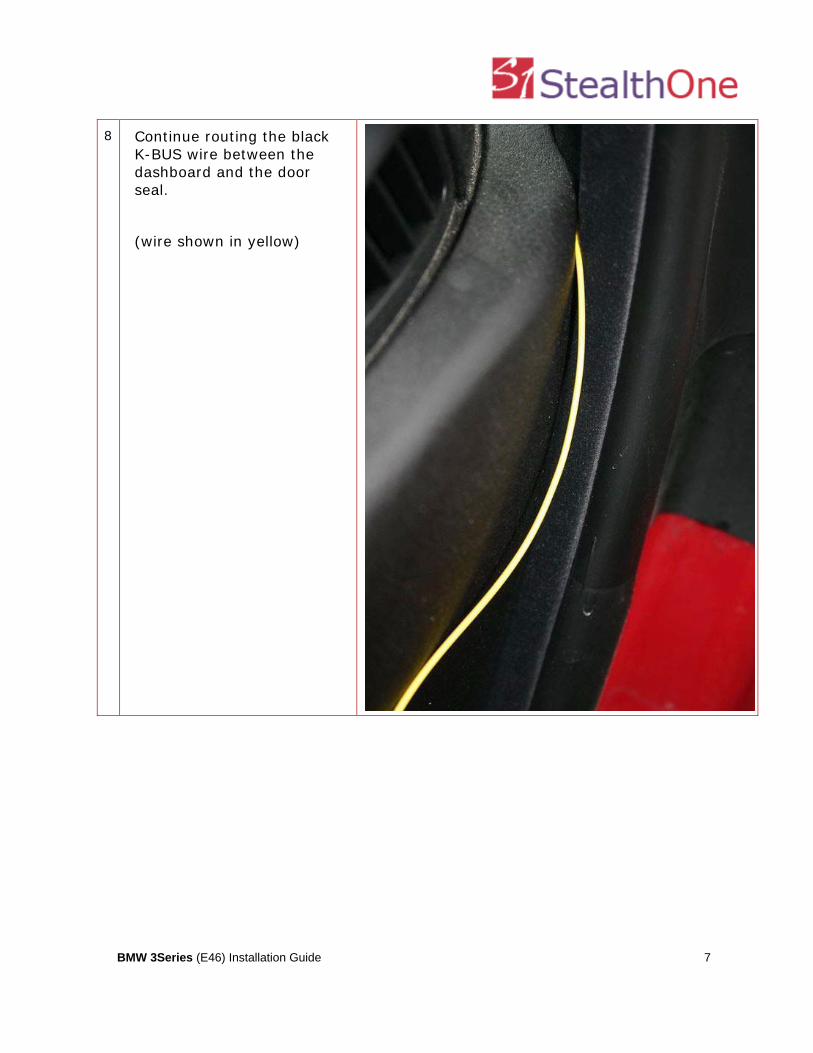
8 Continue routing the black K-BUS wire between the dashboard and the door seal.
(wire shown in yellow)
BMW 3Series (E46) Installation Guide 7
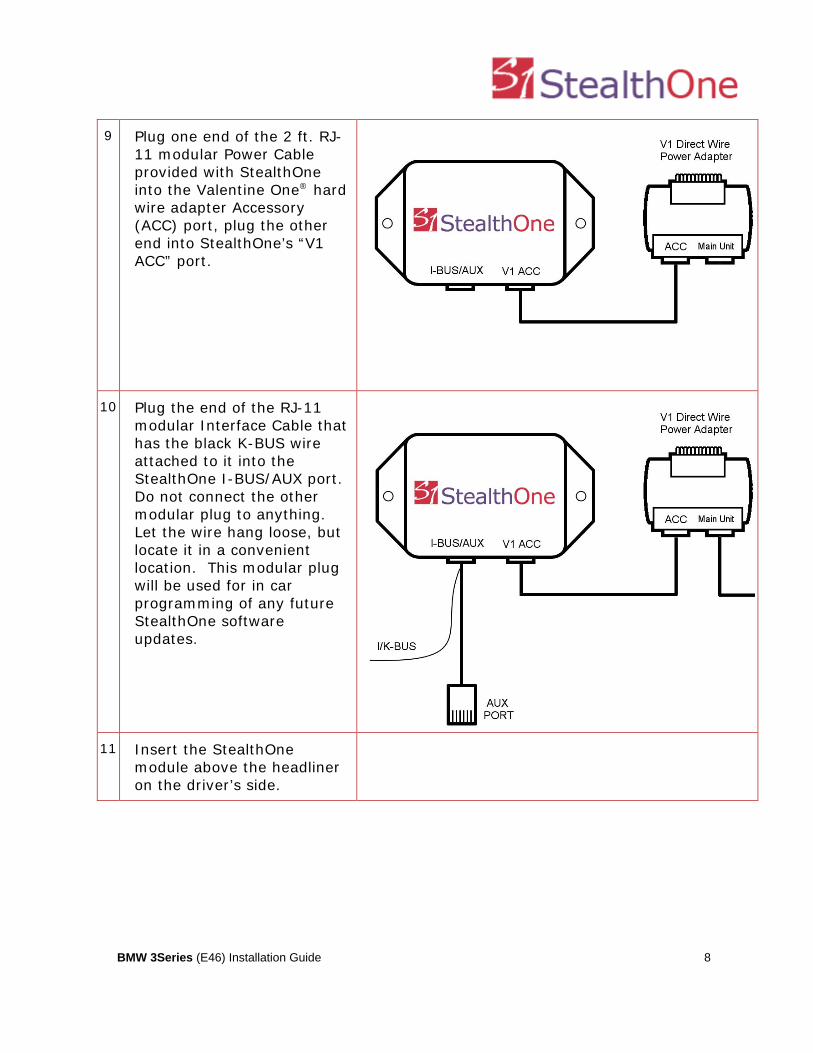
9 Plug one end of the 2 ft. RJ-11 modular Power Cable provided with StealthOne into the Valentine One® hard wire adapter Accessory (ACC) port, plug the other end into StealthOne’s “V1 ACC” port.
10 Plug the end of the RJ-11 modular Interface Cable that has the black K-BUS wire attached to it into the StealthOne I-BUS/AUX port. Do not connect the other modular plug to anything. Let the wire hang loose, but locate it in a convenient location. This modular plug will be used for in car programming of any future StealthOne software updates.
11 Insert the StealthOne module above the headliner on the driver’s side.
BMW 3Series (E46) Installation Guide 8
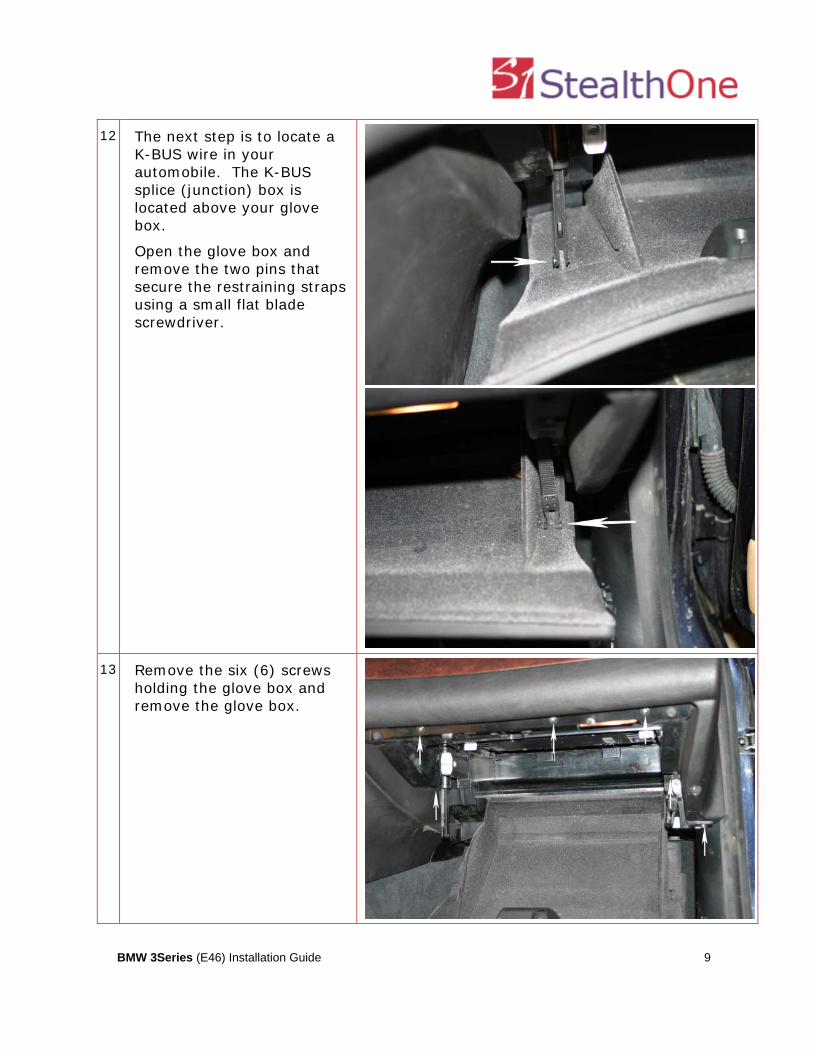
12 The next step is to locate a K-BUS wire in your automobile. The K-BUS splice (junction) box is located above your glove box.
Open the glove box and remove the two pins that secure the restraining straps using a small flat blade screwdriver.
13 Remove the six (6) screws holding the glove box and remove the glove box.
BMW 3Series (E46) Installation Guide 9
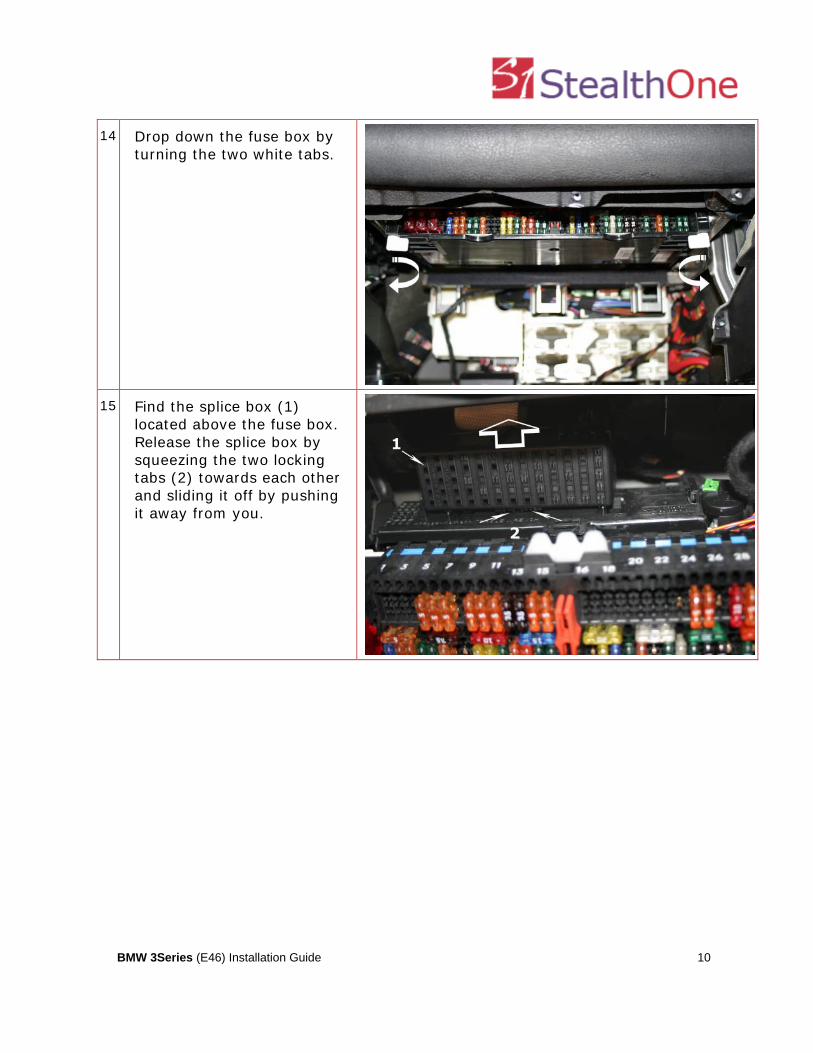
14 Drop down the fuse box by turning the two white tabs.
15 Find the splice box (1) located above the fuse box. Release the splice box by squeezing the two locking tabs (2) towards each other and sliding it off by pushing it away from you.
BMW 3Series (E46) Installation Guide 10
BMW 3Series (E46) Installation Guide 11
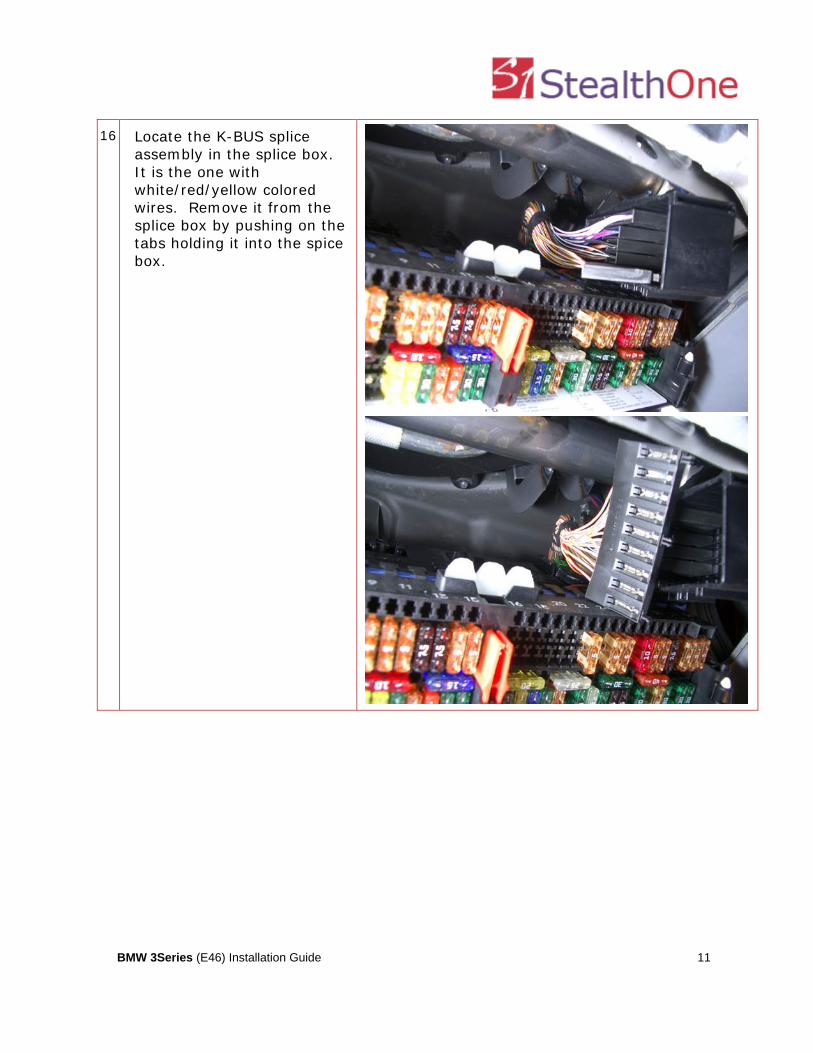
16 Locate the K-BUS splice assembly in the splice box. It is the one with white/red/yellow colored wires. Remove it from the splice box by pushing on the tabs holding it into the spice box.
BMW 3Series (E46) Installation Guide 12
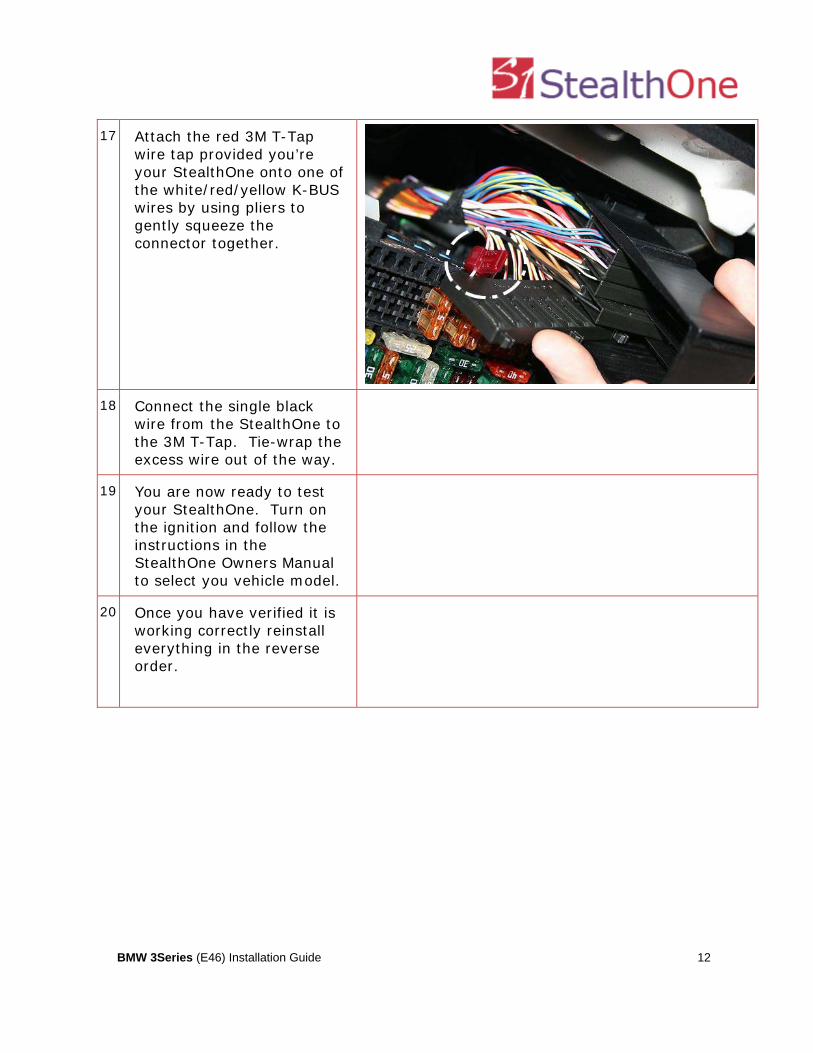
17 Attach the red 3M T-Tap wire tap provided you’re your StealthOne onto one of the white/red/yellow K-BUS wires by using pliers to gently squeeze the connector together.
18 Connect the single black wire from the StealthOne to the 3M T-Tap. Tie-wrap the excess wire out of the way.
19 You are now ready to test your StealthOne. Turn on the ignition and follow the instructions in the StealthOne Owners Manual to select you vehicle model.
20 Once you have verified it is working correctly reinstall everything in the reverse order.