Bluespier Training - LeedsNeurosurgery.com€¦ · Web viewBluespier Training. ... (as...
15
BLUESPIER TRAINING I. Anderson & S. Thomson, Version 1.3, March 2011 Getting Started: Step 1: Click on the “CIS Production v7” icon (circled above) on the desktop on your login. Please note that some computers do not have Bluespier on, furthermore, nor do some ward-based logins, but there are computers that can log on to Bluespier on each ward and in the seminar room, as well as in theatre.
-
Upload
vuongthien -
Category
Documents
-
view
218 -
download
2
Transcript of Bluespier Training - LeedsNeurosurgery.com€¦ · Web viewBluespier Training. ... (as...

BLUESPIER TRAININGI. Anderson & S. Thomson, Version 1.3, March 2011
Getting Started:
Step 1: Click on the “CIS Production v7” icon (circled above) on the desktop on your login. Please note that some computers do not have Bluespier on, furthermore, nor do some ward-based logins, but there are computers that can log on to Bluespier on each ward and in the seminar room, as well as in theatre.
Step 2: If you are logged on by a generic login or someone who does not have Bluespier, you may be asked to connect to the software as a remote application, if this

screen (see above) appears, you should enter your Trust computer login details: (LTH\username) and then your password.
Step 3: The Bluespier login page will appear (as above), this is where you enter your Bluepsier login details.
Step 4: Once logged in, you will be taken to the outpatients screen of Bluespier (as above), click on the cross in the popup box (circled in red) to close this popup window.

Creating an Admission:
Step 1: Once logged on (as per previous section), select the Patient Search tab (red box) to search for your patient (this function can search for any patient)
Step 2: Enter the patient’s name and date of birth (DD/MM/YYYY) into the appropriate boxes (see above) and click “Find”. Please note that the “number” used by Bluespier is not necessarily the patient’s unit number!
Step 3: The patient should appear below the search criteria in the yellow results box, highlighted in blue (as above). Double click on the patient’s name in this section to select the appropriate patient.

Step 4: Clicking on the patient’s name in step 3 will open a new view of all the patient’s admissions across various specialities. Select the correct admission (as in the red box in the image above) and double click this to select the admission.
Step 5: Once in the admission mode, the button on the left hand menu (red box above) allows you to add diagnoses to the patient for this episode.
It is vitally important that you add the current diagnosis and past medical history here as it affects the way that the admissions are coded.
Step 6: Once you click “New Diagnosis” the diagnosis decision tree will appear as a popup (as displayed on the right here). You can go through by expanding the fields or enter keywords in the search box at the top of the window. Once this has been completed, click OK in the subsequent box to add the diagnosis.
Step 7: Once coded the diagnosis will appear on the patient’s screen for this episode (see red box above)
Step 8: Once you have entered all of the diagnoses for the patient, you can create the admission by clicking on the “Inpatient Episode” tab on the left (as shown above).

Step 9: The Inpatient Episode wizard will then open, as above. Click on the source of admission and click “Next Screen”.
Step 10: Input the medical history (a few lines on presentation, a few on examination and a few on PMHx) in this popup box and click next. If you are clerking the patient in, you should stop here and click on the “Save and Close” button at the top of the screen. If you are doing the entire admission summary (e.g for discharge) you should continue to complete the other fields as required.

Discharge / Transfer Letters:
Step 1: Complete the various steps from the previous sections. Once the whole admission has been typed and saved, click on the “PROV Discharge Letter” button on the left (as highlighted) and this will automatically build a Word document that can be used as a discharge letter or transfer letter.
For discharges, please print and sign three copies of this letter (patient/GP/notes)

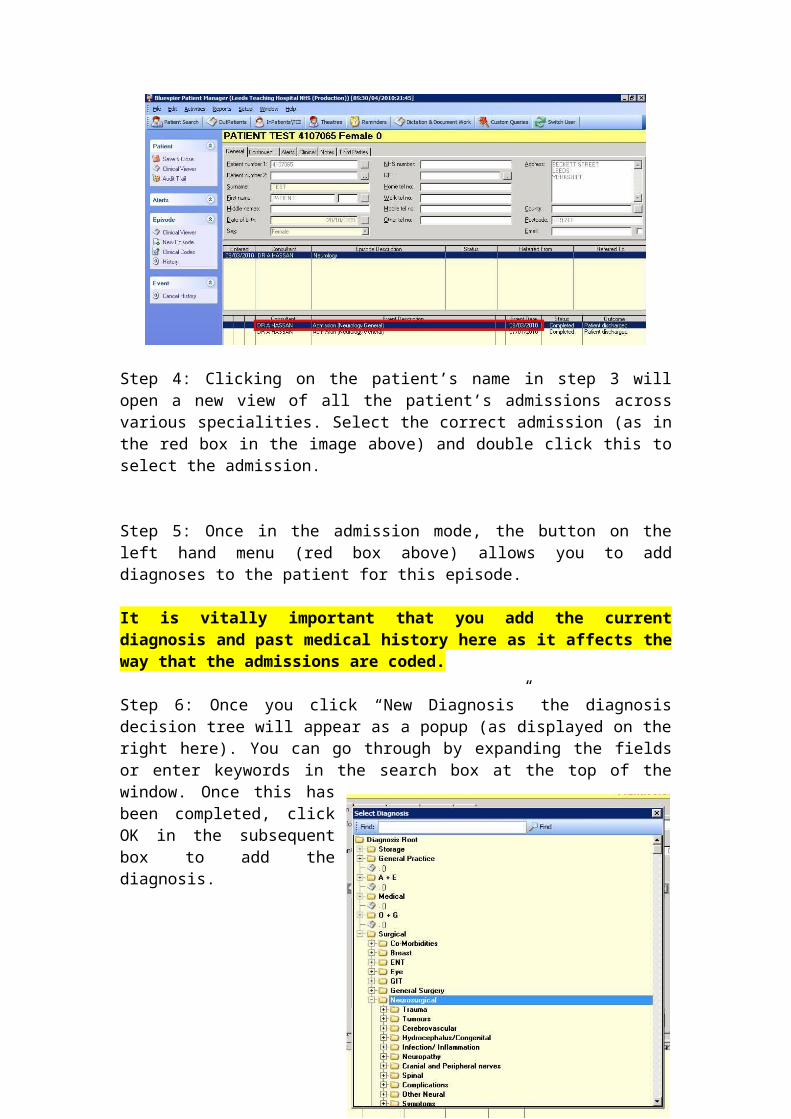
Inpatient Handover Notes:
Step 1: Complete the various steps from the getting started section to log on to Bluespier. Once logged on, select the “InPatients\TCI” tab as displayed above.
Step 2: Click the “Select Ward” button, as demonstrated above in the red box.
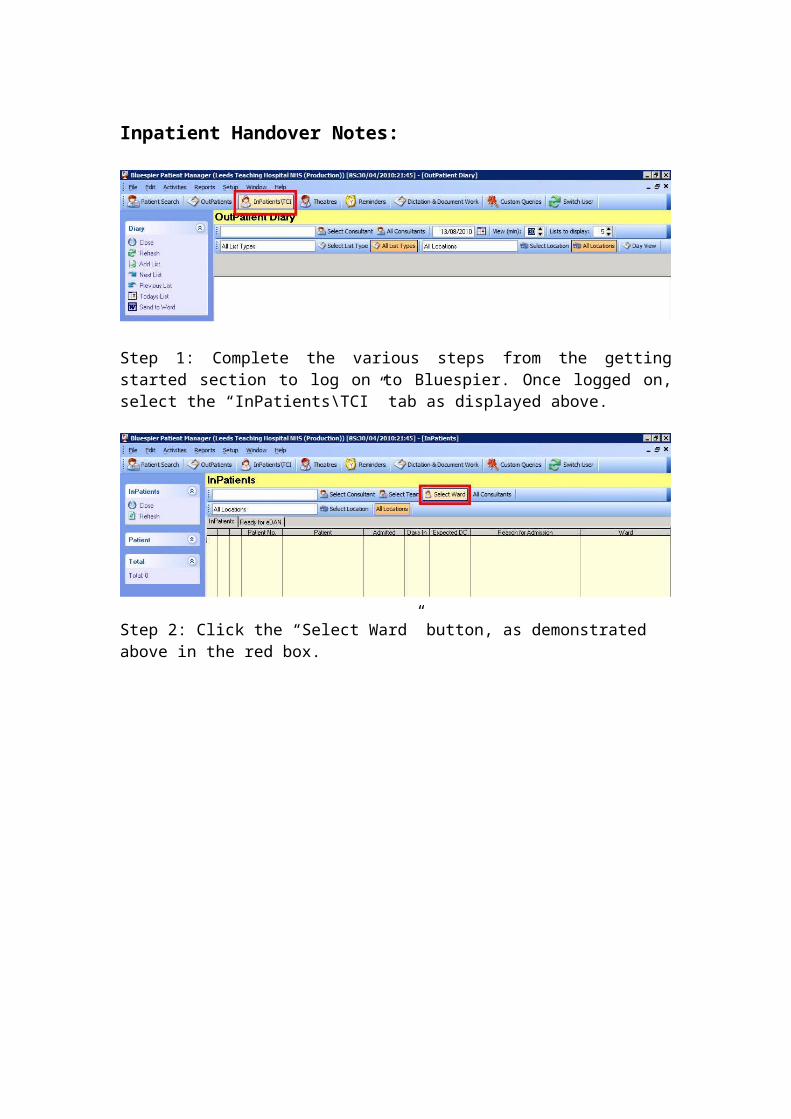
Step 3: Select your hospital (single click) from the dropdown menu that appears (as above), followed by the ward (wards are prefixed with “L” so ward 23 is L23 on the list) with a double click.
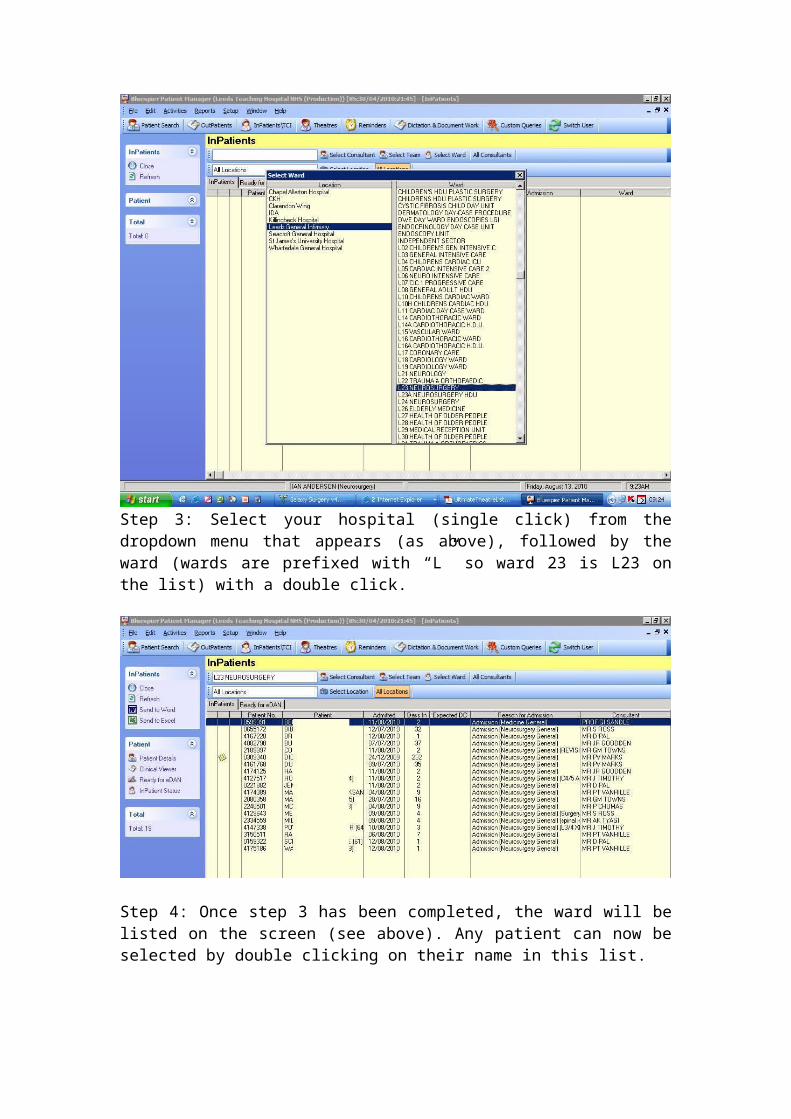
Step 4: Once step 3 has been completed, the ward will be listed on the screen (see above). Any patient can now be selected by double clicking on their name in this list.
Step 5: If you double click on a patient, this will open their data for this admission. Click on the “notes” tab (see red box above) to see their inpatient notes that will be on the handover sheet.
Step 6: You will now be in the notes section, Right click in the left hand of the two yellow columns as is displayed above and select “New Note” from the list of options to add your notes. Once finished, click “Save and Close” on the left hand side of the whole window. Repeat for each patient daily.
Step 7: Once you have finished adding notes and clicked “Save and Close” you will be back on the ward list, from here click the “Send to Word” option to build your printable patient list.
It is worth noting that you should not edit anything on the Word version of the ward list, as it will not be logged on Bluespier, always add details via the notes function as above and print off a fresh handover daily from Bluespier.

Ward Attenders: (Page Copied From Wd 45 Crib Sheet)
How to create Ward Attendance episode
1. Find patient using Patent Search as normal2. Click on New Episode
3. On Episode screen complete Consultant and Site fields by using the buttons at the right hand side
4. In the description field, overtype the default description with Ward Attendance. 5. Change the date if necessary.6. Click on OK to close.
How to create the assessment
1. Highlight the Ward Attendance episode2. Click on Clinical Viewer from Episode menu
3. Click on New Assessment from the assessments menu
4. From the Select Assessment Template screen click on Specialty - Neurosurgery, Folder – Assessments – Ward Attender and double click on Assessment - 150: Ward attender assessment to select.
5. Complete assessment in the usual way.
How to create the document
1. Click on New Document from Documents menu
2. From the Select Document Template screen click on Specialty - Neurosurgery, Folder – Live Documents - Other and double click on Document - 150: Ward Attender to select.
3. Select date4. Document will build as normal.

Clinical Viewer:
Clinical viewer can be used to view previous discharge letters, operation notes and clinic letters.
Step 1: Identify a patient, as per the Patient Search method described in the “Creating An Admission” section
Step 2: There are two options to click on Clinical viewer, see above. The top option will let you view ALL letters and notes for the patient The lower option will let you see only documents relating to the admission
highlighted
Step 3: Double click on any of the documents to open them as a Word document in a new window. You can print from here, should you need to.