
Bloomery Construction - Lee Sauder construction.pdf · design and clay materials, ... You also need...
13
Bloomery Construction Here's the way I currently do it, step by step. Bloomery furnaces through the ages have taken on so many forms that it would be hard to call any furnace typical. Each local furnace shape arose from the peculiar demands of the local ore, fuel supply, the clay or stone available for furnace construction, and the whim of the furnace builder. But I think it would be fair to say that the furnace we’re going to build here is pretty similar to a wide array of early bloomeries in the ancient Mediteranean cultures, pre-medieval Europe, or a large swath of Africa. My friends and I have built a pretty dizzying array of furnaces over the years. Most of my early work used modern commercial refractories in steel skins. These furnaces were extremely durable and robust, and allowed me years of work as I figured out parts of the smelting process. But they were also extremely expensive and rather difficult to alter. I’m not going to say they were a mistake, because these furnaces really did allow us to concentrate on the smelting procedure, and figure out a lot of difficult questions. But now that we have learned those lessons, and learned a lot about furnace design and clay materials, I think a good clay furnace is the easiest, and certainly the cheapest, way to smelt a good iron bloom. Details matter here, both in design and especially in clay composition. The furnace has to walk a fine line during the smelt. She has to insulate well enough to keep the fire rippin’ hot, but shed enough heat to keep the clay from melting, and all the while maintain adequate strength to stand up. Over time, she will usually burn herself to a state of equilibrium that fulfills those requirements, but the closer you get to the correct shape to begin with, the less fuel and ore you’ll waste and the less stress and heartache you’ll suffer. I especially encourage you to start with the exact commercially available clays in the following recipe. Clays vary hugely in their behavior at these temperatures; while the right clay will just stand there strong and proud, the wrong clay will melt, swell, slump or crumble. Ground dry clay is very inexpensive and convenient to use. You may want to just dig clay from the bank behind your shop, and you can surely find a way to make that work, but you probably ought to save that experiment for later. Even just a few smelts with this recipe will arm you with some good experience about what you’re asking the clay to do, before you start experimenting with your own recipe. That’s my advice. Don’t make me say “ I told you so”! Alrighty then, it’s time to build a furnace. Pick your site. Outdoors, of course. You should be aware that you’re going to be pumping out a whole lot of carbon monoxide from this little furnace. I have some friends that have done this indoors in a well ventilated, high-ceilinged shop. If they weren’t already extremely odd fellows, they are now! In my opinion it’s better to suffer the rain,
Transcript of Bloomery Construction - Lee Sauder construction.pdf · design and clay materials, ... You also need...

Bloomery Construction
Here's the way I currently do it, step by step.
Bloomery furnaces through the ages have taken on so many forms that it would be
hard to call any furnace typical. Each local furnace shape arose from the peculiar
demands of the local ore, fuel supply, the clay or stone available for furnace construction,
and the whim of the furnace builder. But I think it would be fair to say that the furnace
we’re going to build here is pretty similar to a wide array of early bloomeries in the
ancient Mediteranean cultures, pre-medieval Europe, or a large swath of Africa.
My friends and I have built a pretty dizzying array of furnaces over the years.
Most of my early work used modern commercial refractories in steel skins. These
furnaces were extremely durable and robust, and allowed me years of work as I figured
out parts of the smelting process. But they were also extremely expensive and rather
difficult to alter. I’m not going to say they were a mistake, because these furnaces really
did allow us to concentrate on the smelting procedure, and figure out a lot of difficult
questions. But now that we have learned those lessons, and learned a lot about furnace
design and clay materials, I think a good clay furnace is the easiest, and certainly the
cheapest, way to smelt a good iron bloom.
Details matter here, both in design and especially in clay composition. The
furnace has to walk a fine line during the smelt. She has to insulate well enough to keep
the fire rippin’ hot, but shed enough heat to keep the clay from melting, and all the while
maintain adequate strength to stand up. Over time, she will usually burn herself to a state
of equilibrium that fulfills those requirements, but the closer you get to the correct shape
to begin with, the less fuel and ore you’ll waste and the less stress and heartache you’ll
suffer.
I especially encourage you to start with the exact commercially available clays in
the following recipe. Clays vary hugely in their behavior at these temperatures; while the
right clay will just stand there strong and proud, the wrong clay will melt, swell, slump or
crumble. Ground dry clay is very inexpensive and convenient to use. You may want to
just dig clay from the bank behind your shop, and you can surely find a way to make that
work, but you probably ought to save that experiment for later. Even just a few smelts
with this recipe will arm you with some good experience about what you’re asking the
clay to do, before you start experimenting with your own recipe. That’s my advice. Don’t
make me say “ I told you so”! Alrighty then, it’s time to build a furnace.
Pick your site. Outdoors, of course. You should be aware that you’re going to be
pumping out a whole lot of carbon monoxide from this little furnace. I have some friends
that have done this indoors in a well ventilated, high-ceilinged shop. If they weren’t
already extremely odd fellows, they are now! In my opinion it’s better to suffer the rain,

snow, sun, heat, or cold than to stop breathing oxygen. Most ideal though, is an open-
sided, high- roofed pavilion.
For the furnace itself, you need a nice clear area with maybe an 8 foot radius of
working room around it. You’ll have lots of charcoal sparks coming out the top of the
furnace, not to mention a decent plume of flame, so obviously you should be a reasonable
distance from any tindery sorts of flammables. If you have a reasonably consistent
prevailing breeze, it would be nice to have that at your back as you stand facing the tap
arch of the furnace, to keep said sparks and flame out of your face. A little afternoon
shade would be ideal, if you can get it.
You also need room for your charcoal pile, near enough to the furnace so
you don’t have to go too far to get each charge of charcoal, but far enough from the
furnace that a stray spark or splash of slag doesn’t set your whole pile on fire. 4 or 5
steps away from the furnace should do it.
Gather Materials. The only things on the following materials list that are at all
tricky to come by is the powdered clay. The clay is plenty cheap, it’s the shipping that
starts to cost a little money. Any good ceramics supply can get these for you (in the North
America, anyway). Talk to a local potter, and find out where s/he gets he/r clay, and
maybe you can even piggyback on his/her clay order. One good company to deal with is
Highwater Clays in Asheville, North Carolina.
The main clay here is called EPK, which stands for Edgar Plastic Kaolin. Kaolin
is what they used to call “china clay”. We have used some other kaolins with good
success, but the EPK is the best we’ve found for our purposes, because of the “plastic”
part- it’s very workable, and it really holds stands up to all the thermal and physical
abuse.
This recipe also calls for a little Foundry Hill Cream, which is a “ball clay”, a
term potters use for really fine-grained, sticky stuff. Potters add this to their clay mix to
increase its plasticity. Some other ball clays can be pretty disastrous in this application, so
don’t substitute here. The EPK will work fine by itself if you can’t get the Foundry Hill.
The peat moss is a convenient substitution for a more traditional fiber: horse
manure. The horse manure will work great if you’d rather use it. Just gather some nice
aged horse-apples, dry them out good, and crumble them fine.
Gather up:
4 dozen bricks (any old brick, firebrick is not necessary)
Charcoal fines (that you saved from charcoal breaking)
2 50 lb. bags of EPK
1 50 lb. bag of Foundry Hill Cream
300 lbs. of dry masonry sand.
1 bale of peat moss (aka sphagnum moss, from any garden center)
water
twine

wood for for form
a big ol’ pile of kindling
Tools: wheelbarrow or mortar pan, shovel, hoe, big nasty knife, maybe a
masonry trowel
I probably just made you get more stuff than you need. You’ll be glad I did.
The plinth. I like to build the furnace on a raised platform. This keeps us away
from ground moisture, and allows more convenient access to the bottom of the furnace
for slag-tapping and bloom removal.
The shape and depth of the plinth are not terribly critical, and you could use stone,
or cinderblock, or a ring of clay, or a box of metal or even wood in place of the brick. But
brick is nice since it stacks easily, and is easy to remove from in front of the tap arch
during slag tapping or bloom removal. If you substitute something else for the brick, just
make sure you can remove the front quarter of it to get access to the bottom of the
furnace.
Here’s my favorite plinth. Make a firm, level surface about 3 feet in diameter.
Drive a pin in the center, and use a string to mark out an 18" circle for the interior
diameter of your plinth. Lay out one course of brick, on the flat, around that circle, and
fill in the joints with clay or tamped dirt. (here’s where you can use that clay from the
bank behind the shop). You can even mortar this together if you like, just leave a few
bricks loose at the front where your tap arch will be.
Then lay another course with the bricks on edge, so now you have something that
looks like this:

I’ve left the last few bricks out here for the sake of a clear photo, but that’s about
the space you’ll want to be able to free under your tap arch. Now clay, mortar or tamp the
second course in place too, and you’ll end up with a nice ring about like this:

Now you can let that clay dry, or build a little kindling fire in and around it to dry
it.
We’re going to fill this plinth with a nice bed of pounded charcoal or wood ash,
but before we do, this is a terrific opportunity for a ritual offering to be placed down here.
And, come to think of it, this right here is a terrific opportunity for:
A Digression on Ritual: Any day of iron-smelting that I’m involved in is constantly
punctuated by little rituals, prayers, and sacrifices. I might bury a little medicine bundle
under the furnace. At the first charge of ore, I say a prayer and scatter ore to the four
directions. Also at first charge, each participant in the smelt eats half a pickled hot
pepper, feeding the other half to the furnace, and this ritual gets repeated often during the
day. The furnace gets a little bit of anything I eat or drink during the day. My buddy
Michael usually makes a little bowl of clay with ore and charcoal in it, and sits it atop the
tuyere. Darrell makes Jiffy Pop on the flames.
All these things are done in a kind of lighthearted way, but that doesn’t mean
they’re not serious.
I think all these little rituals serve important functions. They make you slow
down, and take stock of what’s happening, even if only for a minute. These little
moments also bond the workers, get them all together and focused on the job at hand.

Prayer and sacrifice remind you that this is a magical event, that things are
happening here beyond your understanding and control. This promotes an attitude of
humility. I think humility is the proper attitude to create good art from, but especially so
in this particular art form. One lesson we learned early is that hubris or competitiveness
in this endeavour is often punished by failure.
So pick a deity, say a prayer, share with your furnace and your team members,
and put on some humble. If you get a nice bloom you can strut and crow all you like, but
now is not the time.
OK, so where was I? Oh yeah, so you might want to bury a little gift in the center
of this plinth, and then take some of your charcoal screenings and fill the plinth level to
the top, adding a bit at a time, and tamping the charcoal fines firm as you go.
Another method I have used very successfully of late is to fill the plinth with
slightly dampened and well pounded wood ash. This makes a nice firm base, but can
easily be scooped out of the bottom if need be, and had the advantage of being
impervious to slag dripping from above.
The Clay Recipe. Put 50 lbs. of sand in your wheelbarrow, and pull it to one side
in a nice tidy pile. Crumble and fluff up your peat moss on the other side of the barrow
until you have a pile of about equal volume to the sand. Mix that well.
Now mix in 5 heaping shovelsful of the EPK, and one shovelful of the
Foundry Hill Cream. If you cheaped out on the ball clay, of course, just use 6 shovels
EPK. Mix this well with the hoe. A dust mask is a good idea during this stage, that clay
dust ain’t good for you
.
Now add some water, a little at a time. Mix and chop it well, and give each
addition of water a few minutes to migrate into the clay before adding more, and be really
stingy at the end, as it’s easy to overshoot and make it mucky.
Your goal is a dryish but reasonably plastic consistency. The only analogy I’ve
been able to come up with is that it should be like a graham cracker crust, or the crust of a
cheesecake. It’s plastic and sticky, but when you deform it severely it will crack on the
edges a bit.
Grab up a big double handful, and knead and squish it for a few minutes. You’ll
feel the consistency and plasticity of the clay improve pretty dramatically while you do
this. Make a little loaf from it, and start a pile of these little loaves on a tarp. Knead up
the entire batch into loaves and pile ‘em up.
In the picture/thousand words department, here’s a photo showing the clay
consistency:

Work up 6 batches of this clay, and pile it up on the tarp. Cover it loosely with
another tarp, and let it sit overnight before you start on the actual building of the furnace.
If you don’t have time to let it sit overnight, at least give it a few hours- you’ll find the
plasticity of the clay will really improve from this rest.
If you’re giving this adequate attention and kneading, this mixing job might take 4
hours with two of you working on it. Don’t wimp out on the kneading, the more you
work it the less trouble you’ll have with your furnace cracking and crumbling. And to
give you a handle on the scale of your endeavor, your pile of clay will amount to
something about like this:

While you’re clay’s resting, it would be a good time to make. …
The furnace form: Rather than building this whole deal freehand, it will be much faster,
more stable, and more accurate to work against a form that creates the interior of the
furnace. We want a cylinder about 10 inches in diameter, and at least 3 feet long.
I have used stovepipe for this, but it’s not an optimal solution. It will not allow the
clay to shrink, so it has to be removed while the clay is wet, which is trickier than it
sounds, even if you’ve remembered to oil the form first.
A bundle of combustible material works better. It can be removed a bit at a time
as the clay dries, allowing the whole thing to shrink without cracking, and then the
remains can be burnt out as you dry the furnace. Another advantage is that you can build
a little taper into the stack, so that it’s a bit wider at tuyere level and narrower at the top,
which of course is not possible with a solid form.
I have a friend who runs a molding mill, and one of his byproducts are long wood
strips from straightening the board for the first cut. That’s what I’ll use here both for the
form and for the kindling to dry the furnace, but you could use many things here- straight
limbs and twigs, split lumber, dry reeds, or a bundle of hay are all options that spring to
mind.

Make a nice tight bundle, 10” diameter, about 4’ long, and lash it nice and tight
with twine. Stand that bundle in the center of the plinth and plumb it up. You might need
to dig into your charcoal fines, or drive a center stake, to get the whole thing to stand up.
Now build her: Break handfuls of clay off your loaf, knead them a bit more, form them
into little bricky lumps, and start laying them up against the form. Work each brick
carefully into the adjacent bricks to make a continuous clay tube. You’re shooting for a
wall thickness of about 2 ½”. That’ll look something like this:
As you’re working you way up the form, you’ll notice that the clay below where
you’re working start to bulge and slump. To prevent this from getting out of hand, bind
her up with a string every 3” or 4”, cinching the string up tight enough to pull into the
clay a bit. You’ll probably find that you’ll want to take a nice long break every once in a
while, to let the clay set up a bit before you continue.
If you’ve got a partner the best division of labor is for one of you to knead and
make bricks, and the other to form it up. This way the clay gets worked better, and the
tube will end up with a more consistent construction from a single hand.
Check your form every once in a while to make sure you’re staying plumb.
Proceed until the furnace is 36” tall, or an inch or two higher if you feel like it.

Now go back to the bottom, and add a big buttress all around the bottom of the
furnace. It’s nice if you can make this wide enough that it catches the edge of the plinth,
but if you plinth is bigger or a different shape, no big deal, you can just rely on the width
of the buttress for stability. Leave off the buttress for 10” where you want your tap arch
to be. Scribe your tap arch onto the wet clay, a nice arch about 10” wide and maybe 8 or
9” tall. Mark where your tuyere is going to go, 90 degrees around from the tap arch and
9” above the plinth. If you’re right-handed, you’ll find it most convenient for the tuyere
to be on your right as you’re facing the tap arch.
When you’re all done, she’ll look something like this:

Notice the little hole near the top of the stack. When I was in West Africa, all the
furnaces had this. When I asked what it was for, they said it was so God could see. It was
unclear to me whether it was so God can see in or out. Either way, I’m damn sure putting
that hole in!

Now, of course is the time to add any other sculptural or decorative details you
desire, before you . …
Fire the clay: Oh boy, we get to build another fire! Just lay a ring of kindling and
faggots around the furnace, leaning them gently against the wall of the furnace, and light
it of on the windward side, and let the fire burn all the way around. Your goal here is not
serious drying yet, you just want to firm up a skin all the way around.
Once you have a leather-hard skin, rake back the coals. Using your big nasty
knife, cut a hole for your tuyere. The tuyere hole needs to angle down about 17 to 22,
and allow the tuyere to protrude into the furnace about 2 ½”. Of course, you can’t check
this yet, ‘cause the form is in the way, but that’s your approximate goal. Leave it a little
undersized, you’ll still be able to carve the clay after it dries.
Cut the tap arch all the way through, Then rake the fire back to the tap arch to
skin over the arch before it slumps
.
Build your fire back all around the furnace, and continue drying. Go nice and
slow and gentle, the slower you go, the less it will crack.
As the clay dries, it will be shrinking significantly, as much as 10%. So after it’s
firmed up a bit, you’ll need to start pulling some sticks out of the center of the form to
give the whole thing room to shrink without cracking. Once you’ve pulled enough sticks
from the form to let some air flow begin from the tap arch through to the top, you can
start a fire inside the furnace as well, and allow the rest of the form to burn out. After a
while, I usually let the outside fire die down, and just dry from the inside.
Do all this nice and slow, letting the temperature come up gradually, for a couple
or three hours, until there’s no steam coming from the clay. A handy way to slow the fire,
and keep the heat in the furnace, is to lay a bit of sheet metal on top the furnace to restrict
the draft as necessary. After a while, you can open the damper and let the temperature go
as high as it wants to by natural draft, in hopes of firing the interior nice and hard.
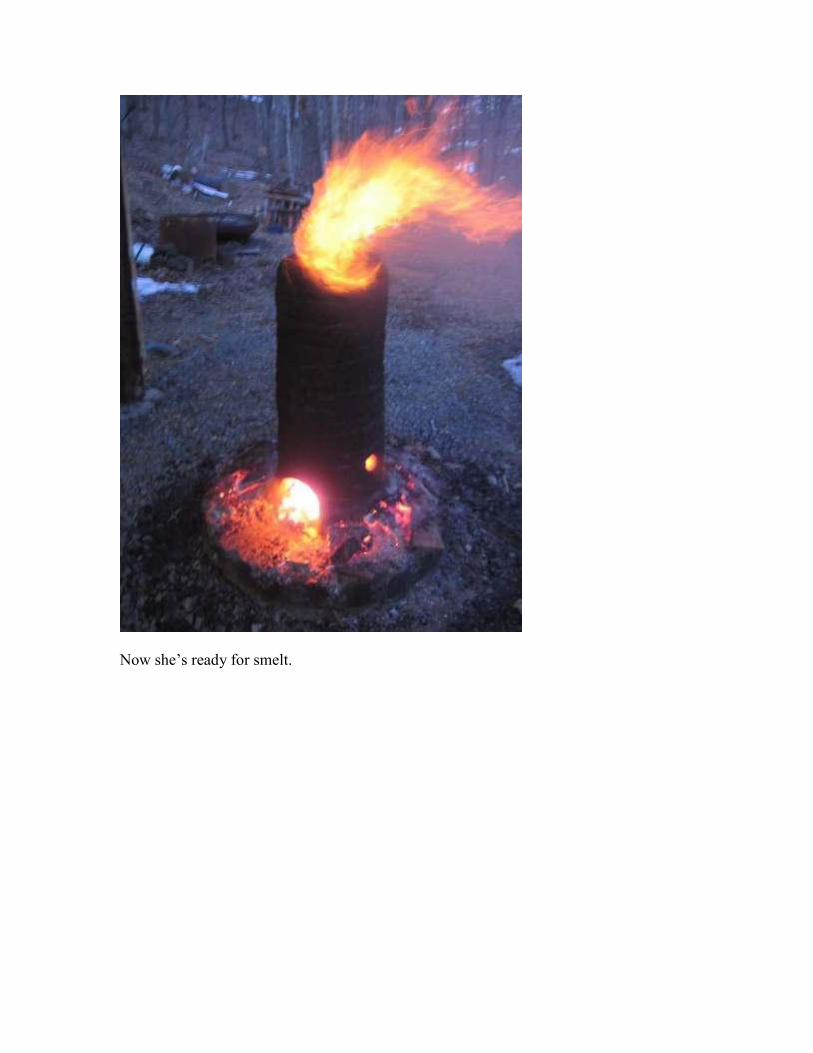
Now she’s ready for smelt.