BIPLACE - Chars à voile Seagull · Couchez votre char à voile, défaites le nœud de têtièe en...
9
BIPLACE Notice d’assemblage Assembly Instruction
Transcript of BIPLACE - Chars à voile Seagull · Couchez votre char à voile, défaites le nœud de têtièe en...

BIPLACE
Notice d’assemblage Assembly Instruction

1
1. Montage de votre Biplce ………………………………..…………………………2 Assemblage of your Biplace
2. Gréer votre voile………………………………………………………………………..3 How to rig your sail
3. Entretien……………………………………….…………………………………….……..4
Maintenance
4. Comment prendre un ris ?……………………………………………….…………6 How to reef the sail
Sommaire
Summary
2
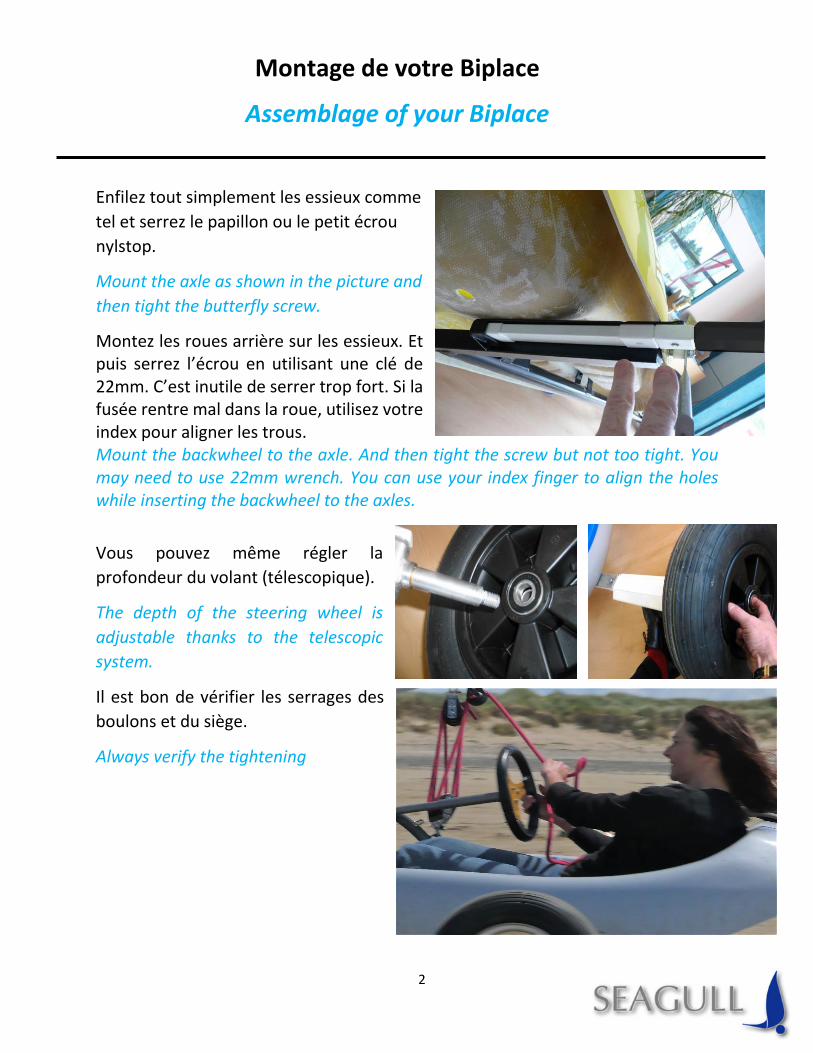
Enfilez tout simplement les essieux comme
tel et serrez le papillon ou le petit écrou
nylstop.
Mount the axle as shown in the picture and
then tight the butterfly screw.
Montez les roues arrière sur les essieux. Et puis serrez l’écrou en utilisant une clé de 22mm. C’est inutile de serrer trop fort. Si la fusée rentre mal dans la roue, utilisez votre index pour aligner les trous. Mount the backwheel to the axle. And then tight the screw but not too tight. You may need to use 22mm wrench. You can use your index finger to align the holes while inserting the backwheel to the axles.
Vous pouvez même régler la
profondeur du volant (télescopique).
The depth of the steering wheel is
adjustable thanks to the telescopic
system.
Il est bon de vérifier les serrages des
boulons et du siège.
Always verify the tightening
Montage de votre Biplace
Assemblage of your Biplace

3
Assemblez les parties de mât par emboîtement : les 2 longues parties simplement
emboitées, et le haut /rallonge avec la lamelle d’emboîtement en plastique rouge.
Assemble the mast sections by stacking them into one another. Interlock the 2
long sections and for the top part, use the red strip.
Enfilez le mât dans le fourreau de voile et
redressez le tout pour planter le
gréement dans le châssis. N’oubliez pas le
petit cordage autour du mât.
Thread the sail sleeve with the mast and
then plant the mast on the frame. Don’t
forget to tie the boom to the mast.
Gréer votre voile
How to rig your sail
4
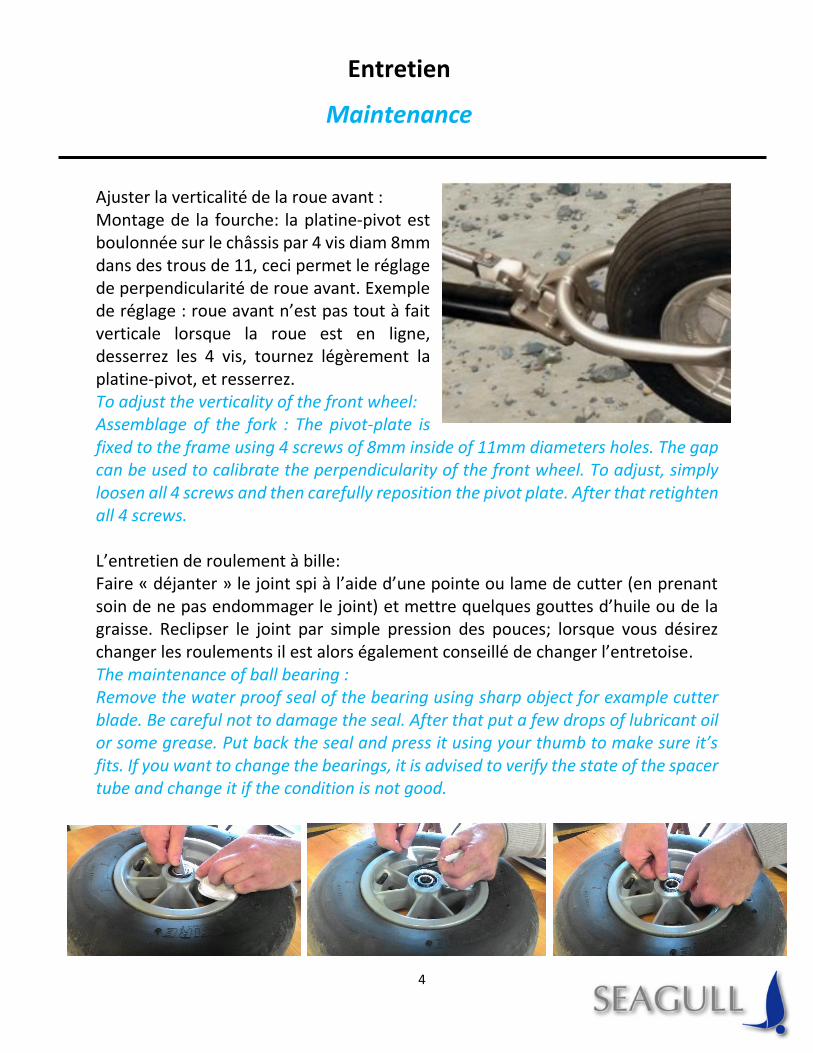
Ajuster la verticalité de la roue avant : Montage de la fourche: la platine-pivot est boulonnée sur le châssis par 4 vis diam 8mm dans des trous de 11, ceci permet le réglage de perpendicularité de roue avant. Exemple de réglage : roue avant n’est pas tout à fait verticale lorsque la roue est en ligne, desserrez les 4 vis, tournez légèrement la platine-pivot, et resserrez. To adjust the verticality of the front wheel: Assemblage of the fork : The pivot-plate is fixed to the frame using 4 screws of 8mm inside of 11mm diameters holes. The gap can be used to calibrate the perpendicularity of the front wheel. To adjust, simply loosen all 4 screws and then carefully reposition the pivot plate. After that retighten all 4 screws. L’entretien de roulement à bille: Faire « déjanter » le joint spi à l’aide d’une pointe ou lame de cutter (en prenant soin de ne pas endommager le joint) et mettre quelques gouttes d’huile ou de la graisse. Reclipser le joint par simple pression des pouces; lorsque vous désirez changer les roulements il est alors également conseillé de changer l’entretoise. The maintenance of ball bearing : Remove the water proof seal of the bearing using sharp object for example cutter blade. Be careful not to damage the seal. After that put a few drops of lubricant oil or some grease. Put back the seal and press it using your thumb to make sure it’s fits. If you want to change the bearings, it is advised to verify the state of the spacer tube and change it if the condition is not good.
Entretien
Maintenance

5
Après le long de stockage, il arrive que le roulement soit bloqué. Si le roulement est bloqué, mettez du dégrippant et débloquez le noyau pour remettre le roulement en rotation. Ensuite, remplissez le de graisse remettez de joint de spi. After a long time, it happens sometimes that the bearing is completely blocked. If the bearing is blocked, use some penetrating oil for example WD 40. After that try to unjam by forcing the inner ring to rotate. Put some grease inside the ball chamber and put back the seal. L’entretien de la coque en polyester : Pour les grosses rayures, il existe le pinceau de vernis au rayon auto. Cela fait disparaitre des rayures blanchâtres. Pour les zones légèrement griffé et mattes. Un simple polish auto mobile permettra de retrouver la brillante origine. Pour les accrochages opté plutôt pour les réparations mastique et peinture en bombe auto plutôt que du gelcoat. En effet le gelcoat est plus difficile à mettre en neuf pour une réparation. The maintenance of the polyester hull: For big scratches, you can use some varnish brush can be bought at auto shops. This brush helps to cover and make the scratches invisible. For the zone which is slightly scratched and mattes, car polish liquid can help to make it shiny. For the confusion between spray paint and gelcoat, which one is better for mastic repair? Indeed gelcoat is much harder process. But it is up to you.
6
Voile à ris = surface réductible par vent fort Reefing = Reducing the surface area of the sail for strong wind
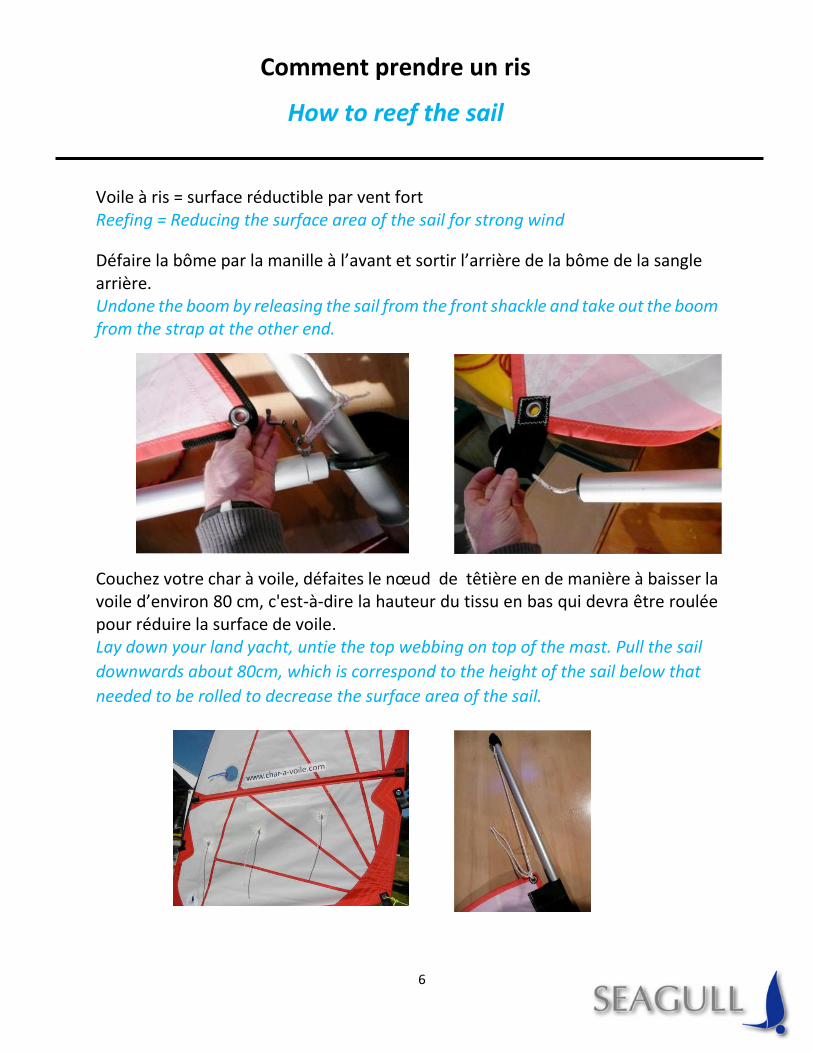
Défaire la bôme par la manille à l’avant et sortir l’arrière de la bôme de la sangle arrière. Undone the boom by releasing the sail from the front shackle and take out the boom from the strap at the other end.
Couchez votre char à voile, défaites le nœud de têtière en de manière à baisser la voile d’environ 80 cm, c'est-à-dire la hauteur du tissu en bas qui devra être roulée pour réduire la surface de voile. Lay down your land yacht, untie the top webbing on top of the mast. Pull the sail
downwards about 80cm, which is correspond to the height of the sail below that
needed to be rolled to decrease the surface area of the sail.
Comment prendre un ris
How to reef the sail

7
Maintenant, roulez les 80 cm de tissu du bas. Suivez les instruction suivantes. Now, roll the 80cm of the sail at the bottom. Please follow the instruction below.
Remettez la bôme dans la sangle arrière (qui se trouve environ 80 cm plus haut) et rattacher la manille à l’avant, (environ 80 cm plus haut). Re-insert the boom in the back strap which is now 80cm higher than the original position. Reattach the shackle in the front same 80 cm higher than the original position.
« Repliez » le coin avant perpendiculaire à la bordure (la bordure c’est le bas de la voile). Fold inwards the front corner of the sail, as shown in the photo on the right.

8
Ensuite roulez le tissu jusqu’à la bôme, le plus
serré possible.
Next, you need to roll the sail as tight as possible until it reach the boom.
Serrez les 3 sandows (les élastiques), uniquement autour du tissu, sans même y inclure la bôme. Tie the 3 sandows around the rolled sail and not including the boom.
Ça y est, vous êtes mieux équipé pour sortir par vent frais… mais restez vigilant, une plus petite voile reste une voile rapide !!
Ok now you are well equipped for land yachting… But always be vigilant because with small sail, it’s still go very fast!!
Sandow