Bike Rodeo 101
12
Rodeo 101 Bike and Pedestrian Safety Education and Celebration
Transcript of Bike Rodeo 101
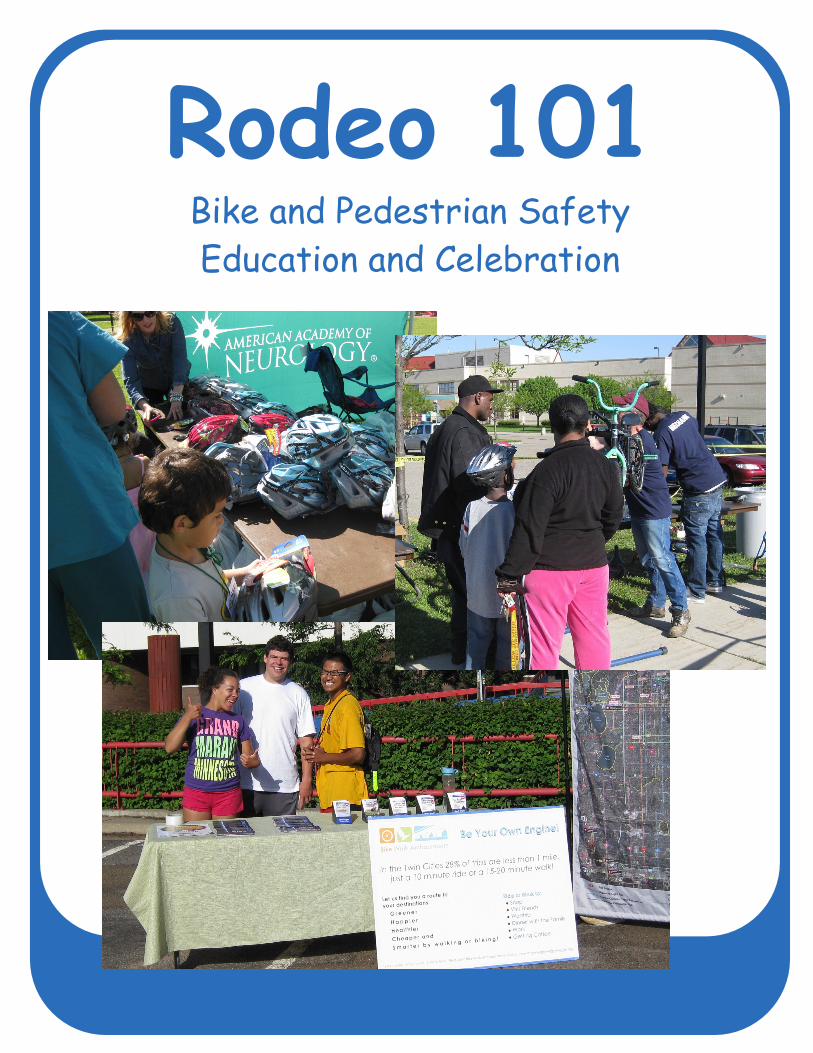
Rodeo 101 Bike and Pedestrian Safety
Education and Celebration
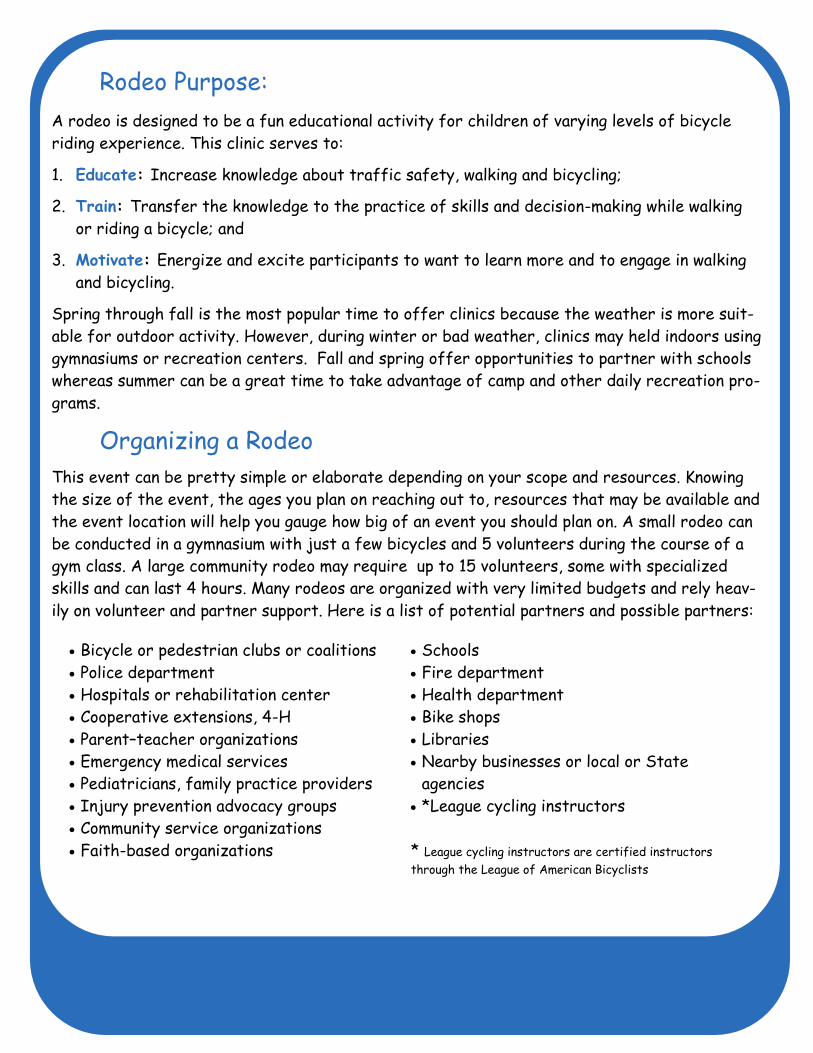
Rodeo Purpose:
A rodeo is designed to be a fun educational activity for children of varying levels of bicycle
riding experience. This clinic serves to:
1. Educate: Increase knowledge about traffic safety, walking and bicycling;
2. Train: Transfer the knowledge to the practice of skills and decision-making while walking
or riding a bicycle; and
3. Motivate: Energize and excite participants to want to learn more and to engage in walking
and bicycling.
Spring through fall is the most popular time to offer clinics because the weather is more suit-
able for outdoor activity. However, during winter or bad weather, clinics may held indoors using
gymnasiums or recreation centers. Fall and spring offer opportunities to partner with schools
whereas summer can be a great time to take advantage of camp and other daily recreation pro-
grams.
Organizing a Rodeo
This event can be pretty simple or elaborate depending on your scope and resources. Knowing
the size of the event, the ages you plan on reaching out to, resources that may be available and
the event location will help you gauge how big of an event you should plan on. A small rodeo can
be conducted in a gymnasium with just a few bicycles and 5 volunteers during the course of a
gym class. A large community rodeo may require up to 15 volunteers, some with specialized
skills and can last 4 hours. Many rodeos are organized with very limited budgets and rely heav-
ily on volunteer and partner support. Here is a list of potential partners and possible partners:
Bicycle or pedestrian clubs or coalitions
Police department
Hospitals or rehabilitation center
Cooperative extensions, 4-H
Parent–teacher organizations
Emergency medical services
Pediatricians, family practice providers
Injury prevention advocacy groups
Community service organizations
Faith-based organizations
Schools
Fire department
Health department
Bike shops
Libraries
Nearby businesses or local or State
agencies
*League cycling instructors
* League cycling instructors are certified instructors
through the League of American Bicyclists
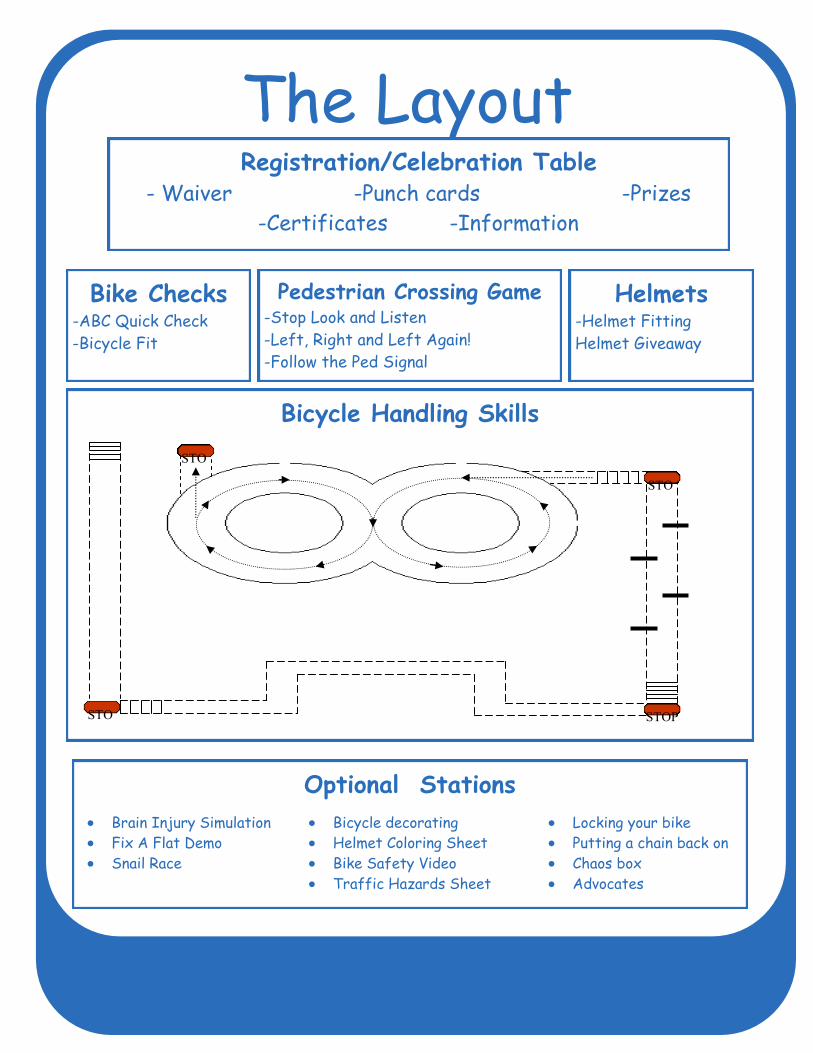
The Layout Registration/Celebration Table
- Waiver -Punch cards -Prizes
-Certificates -Information
Helmets -Helmet Fitting
Helmet Giveaway
Bike Checks -ABC Quick Check
-Bicycle Fit
Bicycle Handling Skills
Optional Stations
STO STOP
STO
STO
Brain Injury Simulation
Fix A Flat Demo
Snail Race
Locking your bike
Putting a chain back on
Chaos box
Advocates
Bicycle decorating
Helmet Coloring Sheet
Bike Safety Video
Traffic Hazards Sheet
Pedestrian Crossing Game -Stop Look and Listen
-Left, Right and Left Again!
-Follow the Ped Signal
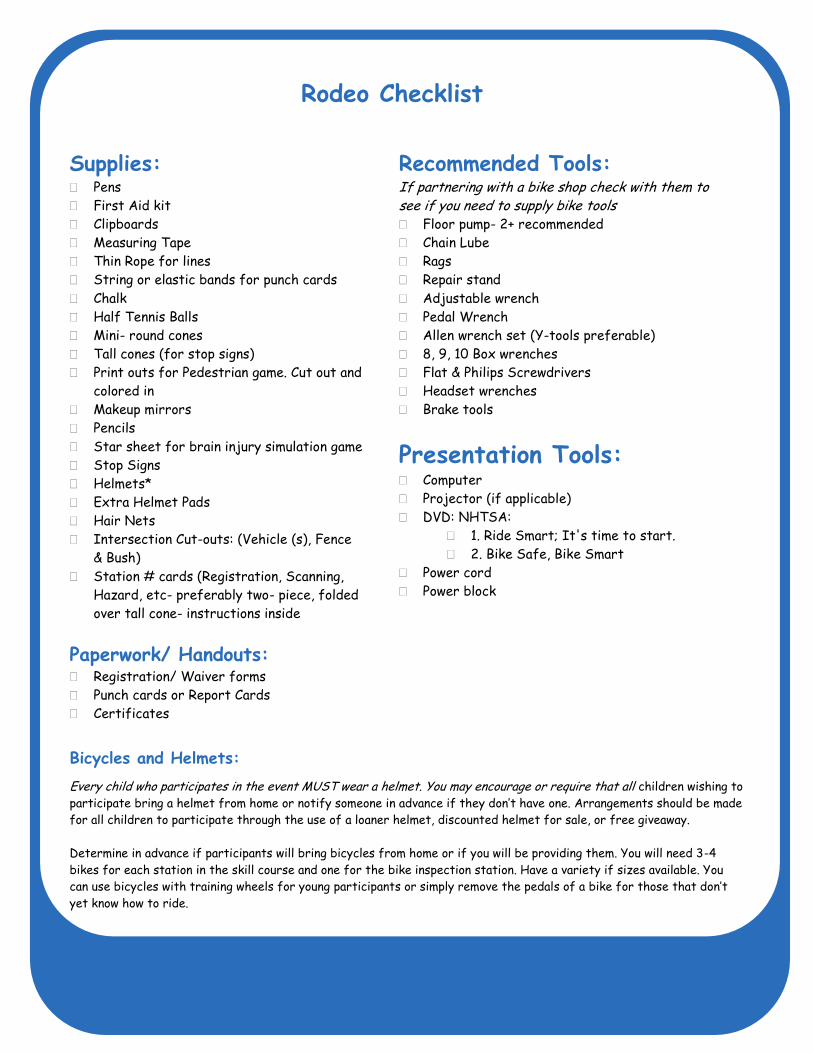
Recommended Tools: If partnering with a bike shop check with them to see if you need to supply bike tools Floor pump- 2+ recommended
Chain Lube
Rags
Repair stand
Adjustable wrench
Pedal Wrench
Allen wrench set (Y-tools preferable)
8, 9, 10 Box wrenches
Flat & Philips Screwdrivers
Headset wrenches
Brake tools
Presentation Tools: Computer
Projector (if applicable)
DVD: NHTSA:
1. Ride Smart; It's time to start.
2. Bike Safe, Bike Smart
Power cord
Power block
Rodeo Checklist
Supplies: Pens
First Aid kit
Clipboards
Measuring Tape
Thin Rope for lines
String or elastic bands for punch cards
Chalk
Half Tennis Balls
Mini- round cones
Tall cones (for stop signs)
Print outs for Pedestrian game. Cut out and
colored in
Makeup mirrors
Pencils
Star sheet for brain injury simulation game
Stop Signs
Helmets*
Extra Helmet Pads
Hair Nets
Intersection Cut-outs: (Vehicle (s), Fence
& Bush)
Station # cards (Registration, Scanning,
Hazard, etc- preferably two- piece, folded
over tall cone- instructions inside
Paperwork/ Handouts: Registration/ Waiver forms
Punch cards or Report Cards
Certificates
Bicycles and Helmets:
Every child who participates in the event MUST wear a helmet. You may encourage or require that all children wishing to
participate bring a helmet from home or notify someone in advance if they don’t have one. Arrangements should be made
for all children to participate through the use of a loaner helmet, discounted helmet for sale, or free giveaway.
Determine in advance if participants will bring bicycles from home or if you will be providing them. You will need 3-4
bikes for each station in the skill course and one for the bike inspection station. Have a variety if sizes available. You
can use bicycles with training wheels for young participants or simply remove the pedals of a bike for those that don’t
yet know how to ride.
The Stations
Registration Place your station in a visible area clearly marked as the start of the event. You will need a long table and
some chairs for volunteers and parents. See that there will be some natural flow to the table and partici-
pants are easily directed to the next station.
Parents and/or guardians will need to fill out the registration/waiver form. Staff will need to
check them over to make sure it is properly filled out. Consider adding a photo waiver if you plan to take
pictures.
Hand out punch cards or report cards to each participant. The punch card will ensure participation
at each station. A report card will provide parents with feedback on their child’s skill level. Write the
participant’s name on the punch card or report card. You can fasten the card to their bikes or tie a string
around it for a necklace. Explain to participants how the punch card works. Let both the parent and the
participant know that after the completion of each station they will receive a check mark or punch. When
they complete each station, they should bring it to the celebration station.
Helmet Station This station will teach how to properly fit a helmet and reinforce the importance of wearing one. Volun-
teers at this station should be instructed to continually ask participants about helmets. Why do people
wear them? Why are they important? Why is it so important to protect your head? Why do you think
people don’t wear them, etc. The importance of helmets should be repeated over and over!
If participants are bringing their own helmet it is important to check the age and condition as
well as the fit. Helmets should be replaced every 3-4 years or after any crash, regardless of visible dam-
age. If participants are not bringing helmets and are not receiving helmets this station can be used to
both teach proper fit, reinforce the importance of wearing a helmet and get participants ready for the
on-bike stations. Plan to have 15-30 helmets in various sizes available to loan out so that one group can
move over to the on bike station while another is engaged at this station. Special consideration needs to
be given when sharing helmets to prevent lice. You can use surgical caps under the helmet or spray hel-
mets between uses.
A helmet should sit level and straight on the head. The edge of the helmet should be visible to the
person wearing it. It should sit about two fingers above the eyes. The straps should come down just be-
low the ear lobes in a V shape. The strap should buckle with enough room for a finger or two between the
chin and the strap. Helmets must be buckled to work!
Eyes – I can see the edge of my helmet
Ears - The straps make a V just below my ears
Mouth– I can feel my helmet when I open my mouth
Bike Checks Ideally a bicycle mechanic or a volunteer with some bike mechanic experience would staff this station.
Bikes are checked to make sure they are safe to ride and to identify any possible repairs that may be
needed. Make sure bikes have working brakes, that the seat and handlebars do not move and that
there is proper air pressure in the tires. See that the bike properly fits the rider. The bicycle should
be easily mounted, there should be standing room over the top tube. Younger riders may feel more
comfortable to have their seats lower to be able to touch while on the seat. Encourage people to
slowly raise their seats to the right height. Sitting on the saddle, with one pedal in its lowest position,
the rider should have a slight bend at the knee. The rider should not be reaching for the handlebars.
There should be a slight bend in the elbows. Engage the parents and the participants so they are also
taught how to check their own fit and bikes with a ABC Quick Check. Explain what the ABC Quick
Check stands for as you look over each bike. If people are not bringing their bikes, this station can be
used to teach proper bike fit and how to do an ABC Quick Check.
A=Air. Tires lose air over time. Check to make sure both tires have enough air in them. The
recommended pressure for each wheel is printed on the sidewall of the tire. Check the
general condition of the tire as a worn out tire could burst and cause a crash.
B=Brakes. Spin the back wheel and then pedal backwards to check coaster brakes. If the bike
has hand brakes roll the bike forwards and backwards to test them. Check to see that the
brake levers do not touch the handlebars. Check to make sure the brake pads are clean,
aligned, and makes contact with the rim and only the rim.
C=Cranks, Chain, and Cogs. Grasp the crank arms and try to wiggle from side to side. You should
not feel any looseness or movement. Pedal to see that the chain is running smoothly. Check
the chain to make sure there it is not rusty or full of debris and that it is not too loose.
When a chain falls off a bicycle with coaster brakes, the brakes no longer function! If the
bike has gears make sure they are shifting smoothly by pedaling the bike while you are
shifting.
Quick=Quick Release. Children’s bikes will typically not have quick release wheels, but many will
have quick release seats. You want to make sure that all quick releases are in the closed
position. When closing, the QR is tight enough when it leaves an imprint on your hand. For
good measure check that the wheels are fully secured even if they do not have quick re-
lease.
Check= Have participants ride around a small area to make sure everything is working properly
and they are comfortable on their bicycles.
Handling Skills Course (see course diagram)
This course tests the child’s ability to control their bike. You will ask the child to start/stop, scan,
signal turns, avoid hazards, and yield. These are important things to learn so they can become more
predictable on the road, and less likely to be involved in a crash. Participants can mount their bikes
and wait their turns in the designated waiting zones. Instruct the participants they can ride only
after you touch their helmets. Release them one at a time.
Handling Skills Course cont. Stopping: At each “stop sign” on your obstacle course participants will need to come to a
complete stop placing at least one foot on the ground. Watch that riders are not skidding or using
their feet to stop.
Starting/scanning: Ask participants to start in the power Pedal Position. One pedal in an
upright position (approximately 2 o’clock). Tell the group you will be yelling ’SCAN’ while they ride
the first stretch. They must turn their heads and scan while keeping their bicycles moving in a
straight line. You may have them look to see if you are raising one arm, two arms or no arms or you
may set up cut-outs or signs at the side of the course for them to identify.
Signal: Remind them to “Power Pedal Up”. Instruct the participants to bike though the
turns; scanning and signaling before they make each one. Remind them to signal their stop as well.
Avoiding Hazards: During the last stretch of the course place chalk lines as shown in the
diagram. Participants will need to weave though avoiding these lines. They will need to avoid the
hazards the without weaving outside of the course lines. You can adjust the distance between the
hazards to make this easier or more difficult.
Yield: Participants can ride the figure eight a few times. You want to have multiple riders
in the course at the same time. You can send riders one at a time by taping their helmets, until
there are 4 students in the figure eight. Riders will to yield to other riders as they cross each
other on the track.
Pedestrian Crossing Game Pedestrian injury remains one of the highest causes of unintentional injury-related
death among children ages 5 to 14. Children in this age group are old enough to learn safe pedes-
trian practices and follow basic safety rules, but are easily distracted and can be unpredictable.
They understand that traffic is dangerous, and are learning to identify safe and unsafe crossings.
Consistent safety messages and practice are important. At this station basic safety messages are
reinforced and participants are taught to read the pedestrian signal at intersections. The two key
messages are “ Stop Look and Listen before you cross the street” and “Look left, right and left
again”. Stop at the curb- at the edge of the corner. Look for cars- look left then right then left
again! Look over your shoulder for cars that may be turning. Listen for traffic. Watch the other
signs and symbols on the streetscape. Cross when it is clear. A crossing game is played in which
participants are taught to follow the pedestrian signal instead of the light meant for vehicle traf-
fic. Have students line up. Play same as you would the game Red Light/Green Light, but instead of
calling out the color of the light, show students flashcards. See resources pages for a flashcard
template.
Optional Stations Chaos Box– The purpose of this activity is to teach participants the importance of traffic rules. Mark
of a 30’x30’ box. Tell students that inside the box there are no rules. Send participants into the box
one at a time. One of two things should happen; all the riders will ride in the same direction or there
will be gridlock. When either occurs, stop the rides and ask them what happened. Stress the impor-
tance of cooperation and traffic rules.
Snail Race-Going fast on your bike is actually easier than going slow. This is a slow race to test partici-
pants balance. Mark off a short race track, about 15’ long with four 4’ lanes. Racers can not weave out
of their own lane and cannot touch the ground with their feet. The winner is the last one to reach the
finish line.
Lock a Bike– Many bikes are stolen because they are not locked securely. Show students how to use
different types of locks and where they can safely and legally lock up. Check the rules in your city to
see what makes for legal bike parking.
Unique Bike Show-Ask owners of different types of bike to come and show off! Let kids try out a hand
cycle or recumbent bicycle. Find the collector in your area and give participants the opportunity top sit
on a High Wheel Bicycle.
Brain Injury Simulation-This activity gives participants a chance to feel what it might be like to have a
brain injury and will reinforce the importance of wearing a helmet. Often times a therapist will use a
mirror if a person’s their visual center in their brain has been damaged. Position a paper with an image
of a double lined star on the table with a mirror at the top. Ask the participant to tip the mirror so
they can see the star’s reflection. Have them place a pen/pencil at anywhere between the 2 lines of
the star. After they find their starting point, have another participant or volunteer hold a sheet of
paper over their paper so they can not look down, but only at the image in the mirror. Point out that
when you have a brain injury there are not short cuts or cheating. They will come to a point where they
cannot move any further. Ask how it feels to not be able to do something they know to be easy. Ask how
they would feel if they were being tested or judged on this activity.
Celebration Certificates should be handed out to the children. For many children, the certificate is the big-
gest reward of the day. The certificates also provide an opportunity to recognize your sponsors. Use
the punch card or report card to write the participants name on a certificate. It is fun to create a
ceremony for the presentation of the certificates, making the acknowledgment of their achievements
all the more special. If you have additional handouts, information for parents or small prizes this is
when you can pass them out. Punch cards can be handed in and used as raffle tickets for larger or lim-
ited prizes.
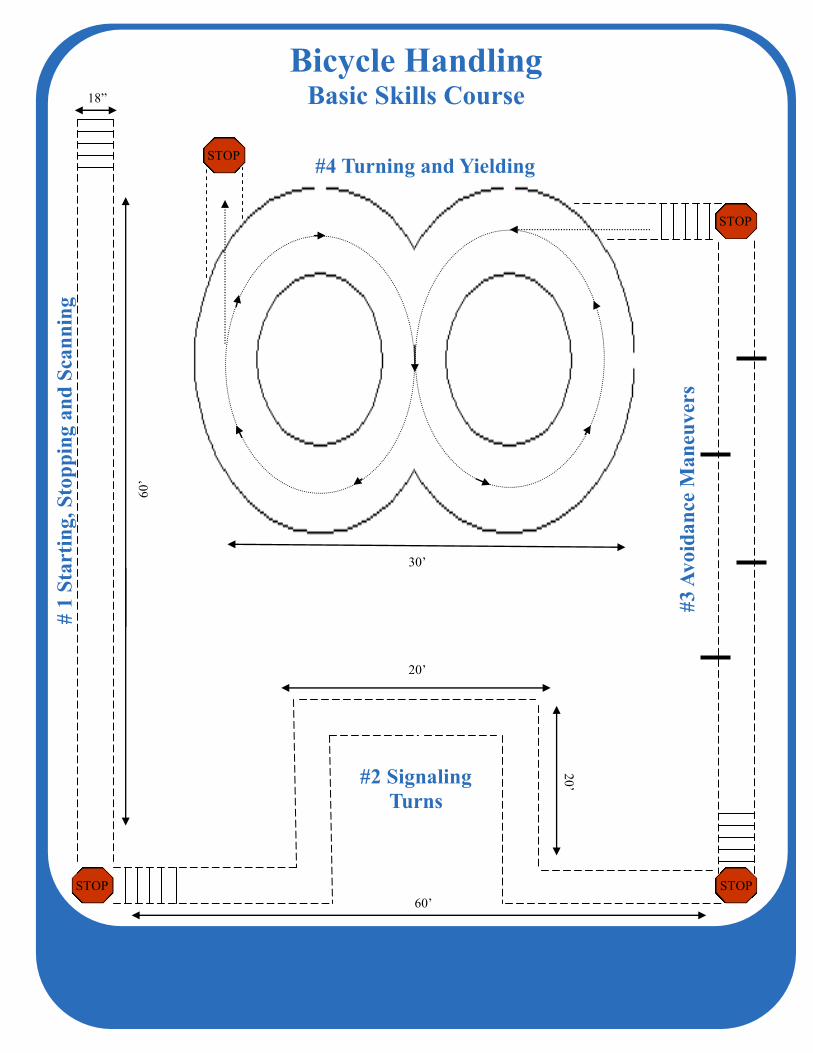
Bicycle Handling Basic Skills Course
# 1
Sta
rtin
g,
Sto
pp
ing
an
d S
can
nin
g
#2 Signaling
Turns
STOP STOP
#3
Av
oid
an
ce M
an
euv
ers
STOP
18”
60’
20’
STOP
30’
#4 Turning and Yielding
60’
20’
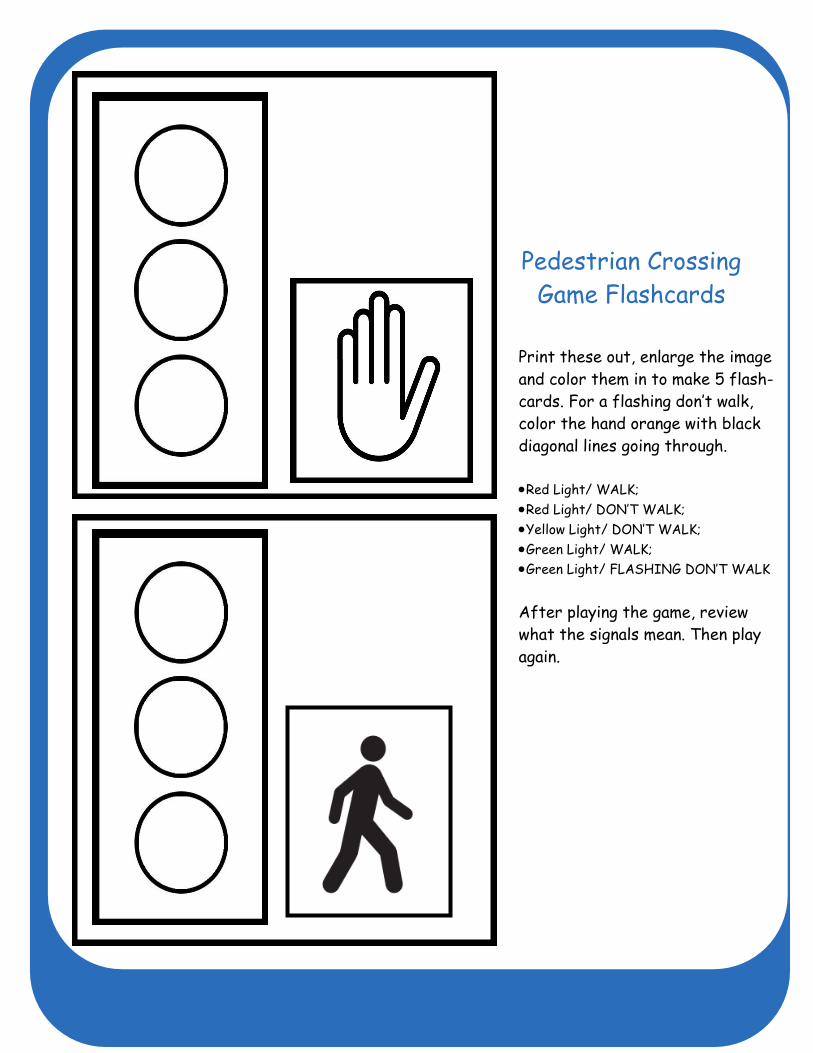
Print these out, enlarge the image
and color them in to make 5 flash-
cards. For a flashing don’t walk,
color the hand orange with black
diagonal lines going through.
Red Light/ WALK;
Red Light/ DON’T WALK;
Yellow Light/ DON’T WALK;
Green Light/ WALK;
Green Light/ FLASHING DON’T WALK
After playing the game, review
what the signals mean. Then play
again.
Pedestrian Crossing
Game Flashcards
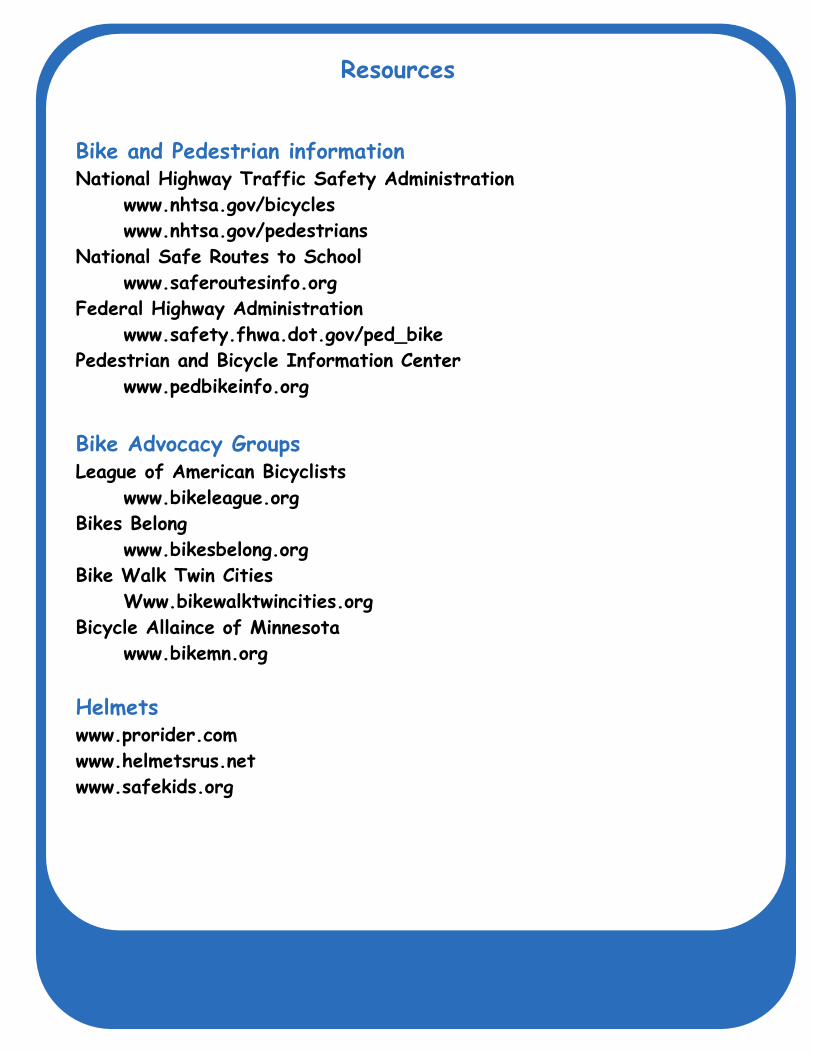
Resources
Bike and Pedestrian information National Highway Traffic Safety Administration
www.nhtsa.gov/bicycles
www.nhtsa.gov/pedestrians
National Safe Routes to School
www.saferoutesinfo.org
Federal Highway Administration
www.safety.fhwa.dot.gov/ped_bike
Pedestrian and Bicycle Information Center
www.pedbikeinfo.org
Bike Advocacy Groups League of American Bicyclists
www.bikeleague.org
Bikes Belong
www.bikesbelong.org
Bike Walk Twin Cities
Www.bikewalktwincities.org
Bicycle Allaince of Minnesota
www.bikemn.org
Helmets www.prorider.com
www.helmetsrus.net
www.safekids.org
www.bikemn.org
Written by Rebecca Gomez , City of Minneapolis Bike Walk Ambassador Program,
Department of Public Works and Nick Mason, Bicycle Alliance of Minnesota
2011 v 1.2.0