BGP - cisco.com · BGP routers do not send periodic routing updates, and BGP routing updates...
36
CHAPTER 22-1 Cisco ASA Series General Operations CLI Configuration Guide 22 BGP This chapter describes how to configure the Cisco ASA to route data, perform authentication, and redistribute routing information using the Border Gateway Protocol (BGP). • About BGP, page 22-1 • Guidelines for BGP, page 22-3 • Configure BGP, page 22-4 • Monitoring BGP, page 22-30 • Configuration Example for BGP, page 22-32 • History for BGP, page 22-34 About BGP BGP is an inter autonomous system routing protocol. An autonomous system is a network or group of networks under a common administration and with common routing policies. BGP is used to exchange routing information for the Internet and is the protocol used between Internet service providers (ISP). • When to Use BGP, page 22-1 • Routing Table Changes, page 22-2 When to Use BGP Customer networks, such as universities and corporations, usually employ an Interior Gateway Protocol (IGP) such as OSPF for the exchange of routing information within their networks. Customers connect to ISPs, and ISPs use BGP to exchange customer and ISP routes. When BGP is used between autonomous systems (AS), the protocol is referred to as External BGP (EBGP). If a service provider is using BGP to exchange routes within an AS, then the protocol is referred to as Interior BGP (IBGP). Note BGP can now be used for carrying routing information for IPv6 prefix over IPv6 networks. When a BGPv6 ASA joins the cluster, it generates a soft traceback when logging level 7 is enabled.
Transcript of BGP - cisco.com · BGP routers do not send periodic routing updates, and BGP routing updates...

Cisco ASA
C H A P T E R 22
BGPThis chapter describes how to configure the Cisco ASA to route data, perform authentication, and redistribute routing information using the Border Gateway Protocol (BGP).
• About BGP, page 22-1
• Guidelines for BGP, page 22-3
• Configure BGP, page 22-4
• Monitoring BGP, page 22-30
• Configuration Example for BGP, page 22-32
• History for BGP, page 22-34
About BGPBGP is an inter autonomous system routing protocol. An autonomous system is a network or group of networks under a common administration and with common routing policies. BGP is used to exchange routing information for the Internet and is the protocol used between Internet service providers (ISP).
• When to Use BGP, page 22-1
• Routing Table Changes, page 22-2
When to Use BGPCustomer networks, such as universities and corporations, usually employ an Interior Gateway Protocol (IGP) such as OSPF for the exchange of routing information within their networks. Customers connect to ISPs, and ISPs use BGP to exchange customer and ISP routes. When BGP is used between autonomous systems (AS), the protocol is referred to as External BGP (EBGP). If a service provider is using BGP to exchange routes within an AS, then the protocol is referred to as Interior BGP (IBGP).
Note BGP can now be used for carrying routing information for IPv6 prefix over IPv6 networks. When a BGPv6 ASA joins the cluster, it generates a soft traceback when logging level 7 is enabled.
22-1 Series General Operations CLI Configuration Guide
Chapter 22 BGP About BGP
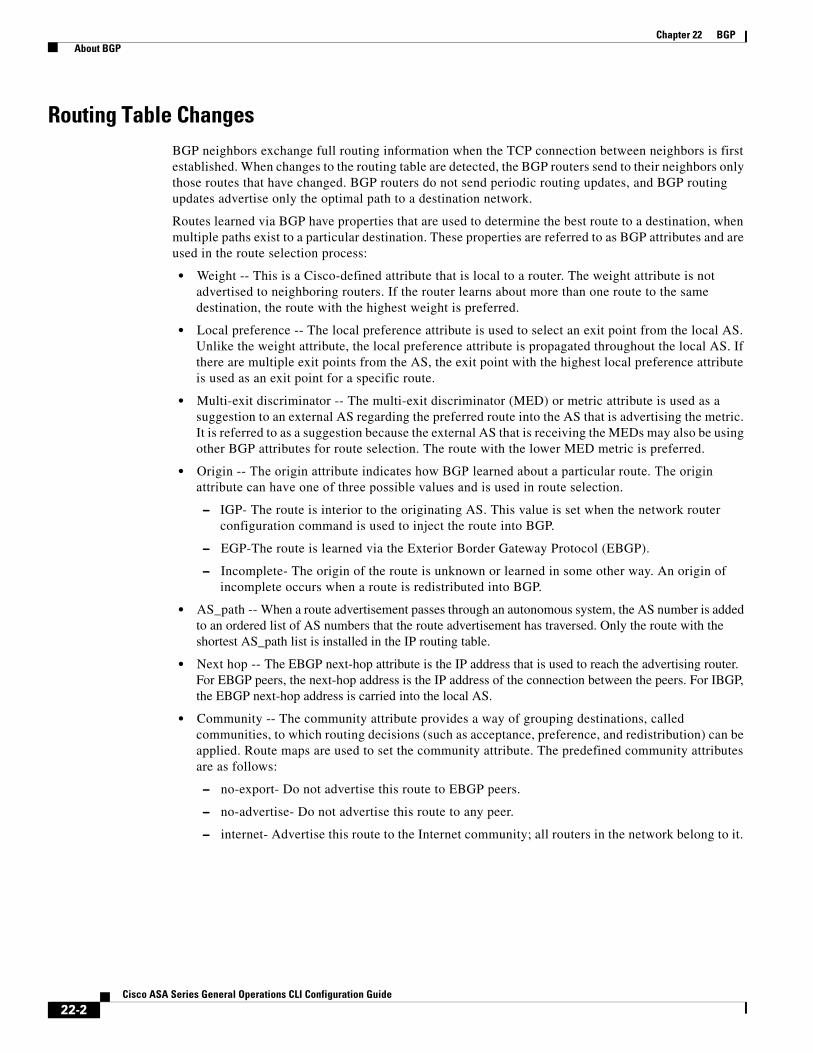
Routing Table ChangesBGP neighbors exchange full routing information when the TCP connection between neighbors is first established. When changes to the routing table are detected, the BGP routers send to their neighbors only those routes that have changed. BGP routers do not send periodic routing updates, and BGP routing updates advertise only the optimal path to a destination network.
Routes learned via BGP have properties that are used to determine the best route to a destination, when multiple paths exist to a particular destination. These properties are referred to as BGP attributes and are used in the route selection process:
• Weight -- This is a Cisco-defined attribute that is local to a router. The weight attribute is not advertised to neighboring routers. If the router learns about more than one route to the same destination, the route with the highest weight is preferred.
• Local preference -- The local preference attribute is used to select an exit point from the local AS. Unlike the weight attribute, the local preference attribute is propagated throughout the local AS. If there are multiple exit points from the AS, the exit point with the highest local preference attribute is used as an exit point for a specific route.
• Multi-exit discriminator -- The multi-exit discriminator (MED) or metric attribute is used as a suggestion to an external AS regarding the preferred route into the AS that is advertising the metric. It is referred to as a suggestion because the external AS that is receiving the MEDs may also be using other BGP attributes for route selection. The route with the lower MED metric is preferred.
• Origin -- The origin attribute indicates how BGP learned about a particular route. The origin attribute can have one of three possible values and is used in route selection.
– IGP- The route is interior to the originating AS. This value is set when the network router configuration command is used to inject the route into BGP.
– EGP-The route is learned via the Exterior Border Gateway Protocol (EBGP).
– Incomplete- The origin of the route is unknown or learned in some other way. An origin of incomplete occurs when a route is redistributed into BGP.
• AS_path -- When a route advertisement passes through an autonomous system, the AS number is added to an ordered list of AS numbers that the route advertisement has traversed. Only the route with the shortest AS_path list is installed in the IP routing table.
• Next hop -- The EBGP next-hop attribute is the IP address that is used to reach the advertising router. For EBGP peers, the next-hop address is the IP address of the connection between the peers. For IBGP, the EBGP next-hop address is carried into the local AS.
• Community -- The community attribute provides a way of grouping destinations, called communities, to which routing decisions (such as acceptance, preference, and redistribution) can be applied. Route maps are used to set the community attribute. The predefined community attributes are as follows:
– no-export- Do not advertise this route to EBGP peers.
– no-advertise- Do not advertise this route to any peer.
– internet- Advertise this route to the Internet community; all routers in the network belong to it.
22-2Cisco ASA Series General Operations CLI Configuration Guide

Chapter 22 BGP Guidelines for BGP
BGP Path SelectionBGP may receive multiple advertisements for the same route from different sources. BGP selects only one path as the best path. When this path is selected, BGP puts the selected path in the IP routing table and propagates the path to its neighbors. BGP uses the following criteria, in the order presented, to select a path for a destination:
• If the path specifies a next hop that is inaccessible, drop the update.
• Prefer the path with the largest weight.
• If the weights are the same, prefer the path with the largest local preference.
• If the local preferences are the same, prefer the path that was originated by BGP running on this router.
• If no route was originated, prefer the route that has the shortest AS_path.
• If all paths have the same AS_path length, prefer the path with the lowest origin type (where IGP is lower than EGP, and EGP is lower than incomplete).
• If the origin codes are the same, prefer the path with the lowest MED attribute.
• If the paths have the same MED, prefer the external path over the internal path.
• If the paths are still the same, prefer the path through the closest IGP neighbor.
• If both paths are external, prefer the path that was received first (the oldest one).
• Prefer the path with the lowest IP address, as specified by the BGP router ID.
• If the originator or router ID is the same for multiple paths, prefer the path with the minimum cluster list length.
• Prefer the path that comes from the lowest neighbor address.
Guidelines for BGPContext Mode Guidelines
Supported in single and multiple context mode.
Firewall Mode Guidelines
Does not support transparent firewall mode. BGP is supported only in router mode.
Failover Guidelines
Supports Stateful Failover in single and multiple context mode.
Note When clustering is enabled, failover is not supported.
Clustering Guidelines
BGP is supported only in L2 (EtherChannel Type) and L3 (Individual Interface Type) clustering modes.
Note When you delete and reapply the BGP configuration in the user context allow a delay of 60 seconds, to enable the slave/ standby ASA unit to sync.
22-3Cisco ASA Series General Operations CLI Configuration Guide

Chapter 22 BGP Configure BGP
IPv6 Guidelines
Supports IPv6. Graceful restart is not supported for IPv6 address family.
Configure BGPThis section describes how to enable and configure the BGP process on your system.
Procedure
Step 1 In the CLI, enable BGP, and configure general BGP parameters.
Step 2 Define the best path for the BGP routing process and configure the best path configuration parameters.
Step 3 Add and configure policy lists.
Step 4 Add and configure AS path filters.
Step 5 Add and configure Community Rules.
Step 6 Configure IPv4 Address Family settings.
Enable BGPThis section describes the steps required to enable BGP routing, establish a BGP routing process and configure general BGP parameters.
Procedure
Step 1 Enable a BGP routing process, which places the ASA in router configuration mode:
router bgp autonomous-num
Example:
ciscoasa(config)# router bgp 2
Valid values for autonomous-num are from 1-4294967295 and 1.0-XX.YY.
Step 2 Discard routes that have as-path segments that exceed a specified value:
bgp maxas-limit number
Example:
ciscoasa(config-router)# bgp maxas-limit 15
The number argument specifies the maximum number of autonomous system segments, allowed. Valid values are from 1 to 254.
Step 3 Log BGP neighbor resets:
bgp log-neighbor-changes
Step 4 Enable BGP to automatically discover the best TCP path MTU for each BGP session:
bgp transport path-mtu-discovery
22-4Cisco ASA Series General Operations CLI Configuration Guide
Chapter 22 BGP Configure BGP
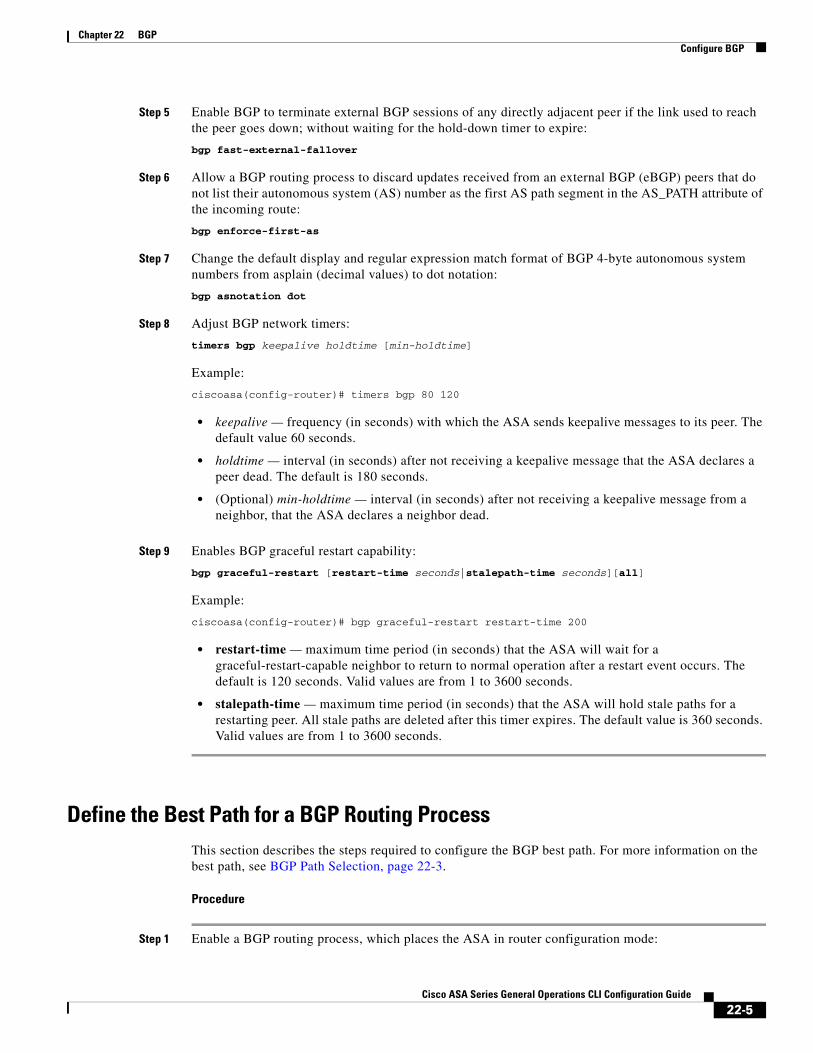
Step 5 Enable BGP to terminate external BGP sessions of any directly adjacent peer if the link used to reach the peer goes down; without waiting for the hold-down timer to expire:
bgp fast-external-fallover
Step 6 Allow a BGP routing process to discard updates received from an external BGP (eBGP) peers that do not list their autonomous system (AS) number as the first AS path segment in the AS_PATH attribute of the incoming route:
bgp enforce-first-as
Step 7 Change the default display and regular expression match format of BGP 4-byte autonomous system numbers from asplain (decimal values) to dot notation:
bgp asnotation dot
Step 8 Adjust BGP network timers:
timers bgp keepalive holdtime [min-holdtime]
Example:
ciscoasa(config-router)# timers bgp 80 120
• keepalive — frequency (in seconds) with which the ASA sends keepalive messages to its peer. The default value 60 seconds.
• holdtime — interval (in seconds) after not receiving a keepalive message that the ASA declares a peer dead. The default is 180 seconds.
• (Optional) min-holdtime — interval (in seconds) after not receiving a keepalive message from a neighbor, that the ASA declares a neighbor dead.
Step 9 Enables BGP graceful restart capability:
bgp graceful-restart [restart-time seconds|stalepath-time seconds][all]
Example:
ciscoasa(config-router)# bgp graceful-restart restart-time 200
• restart-time — maximum time period (in seconds) that the ASA will wait for a graceful-restart-capable neighbor to return to normal operation after a restart event occurs. The default is 120 seconds. Valid values are from 1 to 3600 seconds.
• stalepath-time — maximum time period (in seconds) that the ASA will hold stale paths for a restarting peer. All stale paths are deleted after this timer expires. The default value is 360 seconds. Valid values are from 1 to 3600 seconds.
Define the Best Path for a BGP Routing ProcessThis section describes the steps required to configure the BGP best path. For more information on the best path, see BGP Path Selection, page 22-3.
Procedure
Step 1 Enable a BGP routing process, which places the ASA in router configuration mode:
22-5Cisco ASA Series General Operations CLI Configuration Guide
Chapter 22 BGP Configure BGP
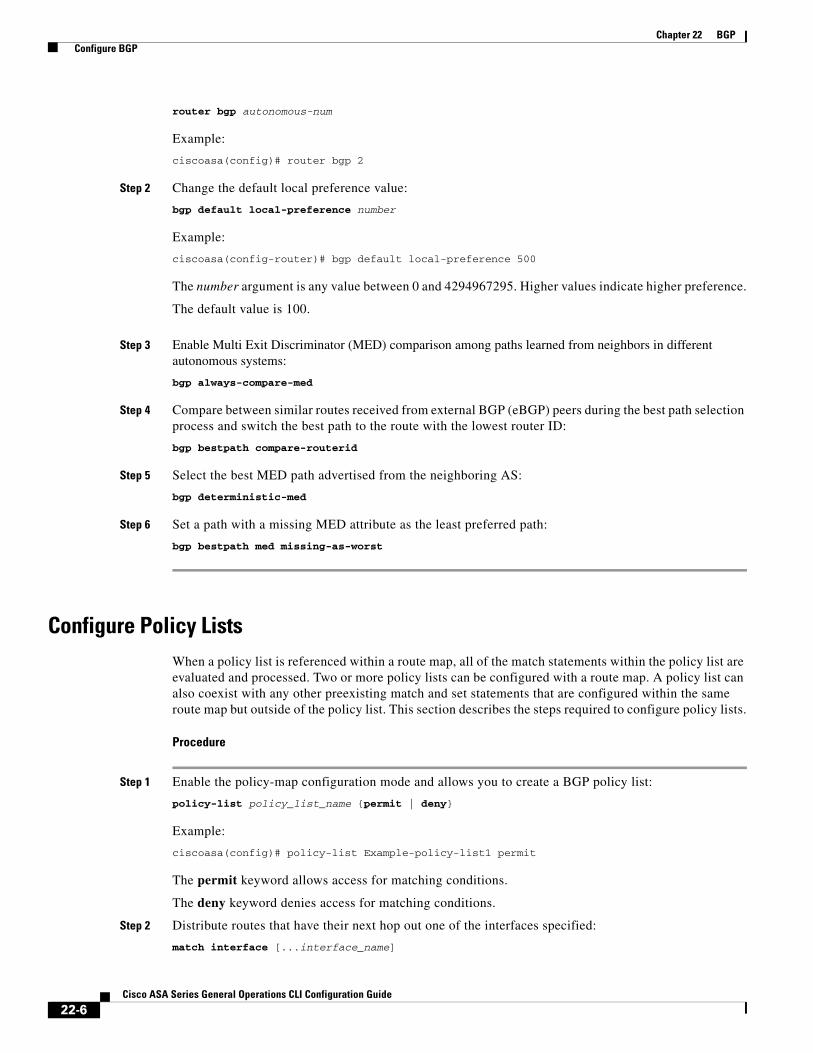
router bgp autonomous-num
Example:
ciscoasa(config)# router bgp 2
Step 2 Change the default local preference value:
bgp default local-preference number
Example:
ciscoasa(config-router)# bgp default local-preference 500
The number argument is any value between 0 and 4294967295. Higher values indicate higher preference.
The default value is 100.
Step 3 Enable Multi Exit Discriminator (MED) comparison among paths learned from neighbors in different autonomous systems:
bgp always-compare-med
Step 4 Compare between similar routes received from external BGP (eBGP) peers during the best path selection process and switch the best path to the route with the lowest router ID:
bgp bestpath compare-routerid
Step 5 Select the best MED path advertised from the neighboring AS:
bgp deterministic-med
Step 6 Set a path with a missing MED attribute as the least preferred path:
bgp bestpath med missing-as-worst
Configure Policy ListsWhen a policy list is referenced within a route map, all of the match statements within the policy list are evaluated and processed. Two or more policy lists can be configured with a route map. A policy list can also coexist with any other preexisting match and set statements that are configured within the same route map but outside of the policy list. This section describes the steps required to configure policy lists.
Procedure
Step 1 Enable the policy-map configuration mode and allows you to create a BGP policy list:
policy-list policy_list_name {permit | deny}
Example:
ciscoasa(config)# policy-list Example-policy-list1 permit
The permit keyword allows access for matching conditions.
The deny keyword denies access for matching conditions.
Step 2 Distribute routes that have their next hop out one of the interfaces specified:
match interface [...interface_name]
22-6Cisco ASA Series General Operations CLI Configuration Guide

Chapter 22 BGP Configure BGP
Example:
ciscoasa(config-policy-list)# match interface outside
Step 3 Redistribute routes by matching either or all of the following: the destination address, next hop router address, and router/access server source:
match ip {address | next-hop | route-source}
Step 4 Match a BGP autonomous system path:
match as-path
Step 5 Match a BGP community:
match community {community-list_name | exact-match}
Example:
ciscoasa(config-policy-list)# match community ExampleCommunity1
• community-list_name — one or more community lists.
• exact-match — indicates that an exact match is required. All of the communities and only those communities specified must be present.
Step 6 Redistribute routes with the metric specified:
match metric
Step 7 Redistribute routes in the routing table that match the specified tags:
match tag
Configure AS Path FiltersAn AS path filter allows you to filter the routing update message by using access lists and look at the individual prefixes within an update message. If a prefix within the update message matches the filter criteria then that individual prefix is filtered out or accepted depending on what action the filter entry has been configured to carry out. This section describes the steps required to configure AS path filters.
Note The as-path access-lists are not the same as the regular firewall ACLs.
Procedure
Step 1 Configure an autonomous system path filter using a regular expression in the global configuration mode:
as-path access-list acl-number {permit|deny} regexp
Example:
ciscoasa(config)# as-path access-list 35 permit testaspath
• acl-number — AS-path access-list number. Valid values are from 1 to 500.
22-7Cisco ASA Series General Operations CLI Configuration Guide

Chapter 22 BGP Configure BGP
• regexp — regular expression that defines the AS-path filter. The autonomous system number is expressed in the range from 1 to 65535.
Configure Community RulesA community is a group of destinations that share some common attribute. You can use community lists to create groups of communities to use in a match clause of a route map. Just like an access list, a series of community lists can be created. Statements are checked until a match is found. As soon as one statement is satisfied, the test is concluded. This section describes the steps required to configure community rules.
Procedure
Step 1 Create or configure a BGP community list and control access to it:
community-list {standard| community list-name {deny|permit} [community-number] [AA:NN] [internet] [no-advertise][no-export]}| {expanded|expanded list-name {deny| permit}regexp}
Example:
ciscoasa(config)# community-list standard excomm1 permit 100 internet no-advertise no-export
• standard — configures a standard community list using a number from 1 to 99 to identify one or more permit or deny groups of communities.
• (Optional) community-number — community as a 32-bit number from 1 to 4294967200. A single community can be entered or multiple communities can be entered, each separated by a space.
• AA:NN — an autonomous system number and network number entered in the 4-byte new community format. This value is configured with two 2-byte numbers separated by a colon. A number from 1 to 65535 can be entered for each 2-byte number. A single community can be entered or multiple communities can be entered, each separated by a space.
• (Optional) internet — specifies the Internet community. Routes with this community are advertised to all peers (internal and external).
• (Optional) no-advertise — specifies the no-advertise community. Routes with this community are not advertised to any peer (internal or external).
• (Optional) no-export — specifies the no-export community. Routes with this community are advertised to only peers in the same autonomous system or to only other subautonomous systems within a confederation. These routes are not advertised to external peers.
• (Optional) expanded— configures an expanded community list number from 100 to 500 to identify one or more permit or deny groups of communities.
• regexp — regular expression that defines the AS-path filter. The autonomous system number is expressed in the range from 1 to 65535.
Note Regular expressions can be used only with expanded community lists.
22-8Cisco ASA Series General Operations CLI Configuration Guide
Chapter 22 BGP Configure BGP
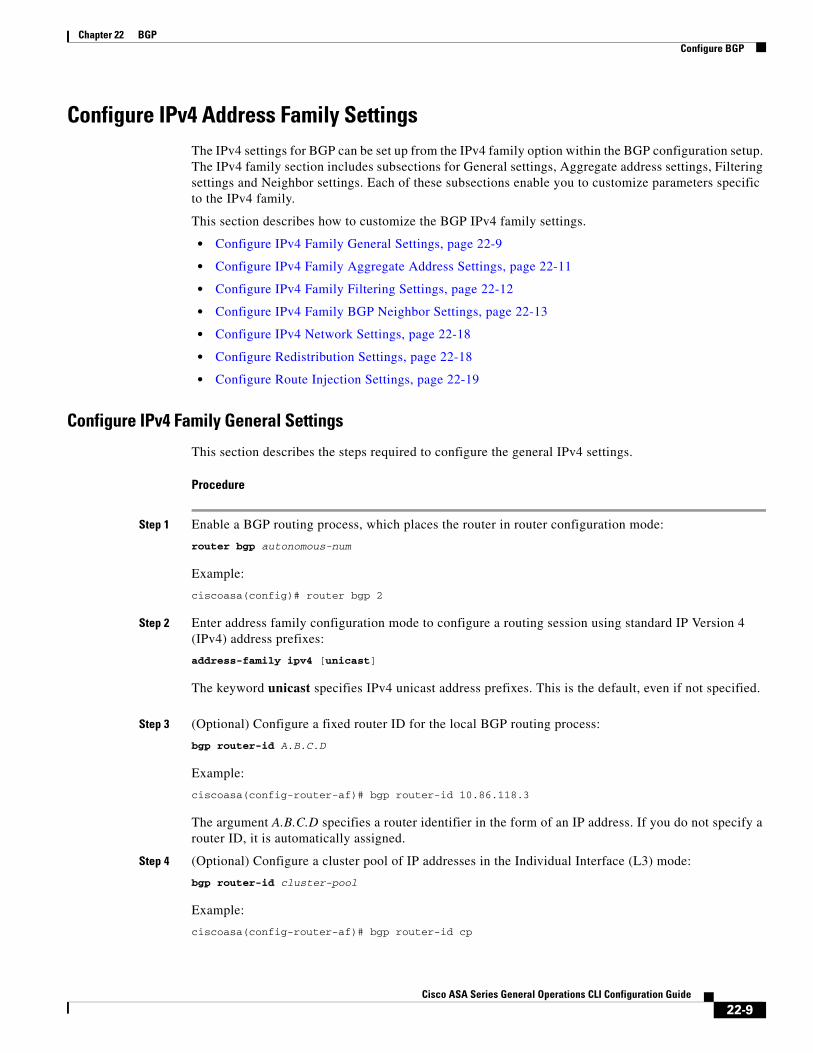
Configure IPv4 Address Family Settings The IPv4 settings for BGP can be set up from the IPv4 family option within the BGP configuration setup. The IPv4 family section includes subsections for General settings, Aggregate address settings, Filtering settings and Neighbor settings. Each of these subsections enable you to customize parameters specific to the IPv4 family.
This section describes how to customize the BGP IPv4 family settings.
• Configure IPv4 Family General Settings, page 22-9
• Configure IPv4 Family Aggregate Address Settings, page 22-11
• Configure IPv4 Family Filtering Settings, page 22-12
• Configure IPv4 Family BGP Neighbor Settings, page 22-13
• Configure IPv4 Network Settings, page 22-18
• Configure Redistribution Settings, page 22-18
• Configure Route Injection Settings, page 22-19
Configure IPv4 Family General Settings
This section describes the steps required to configure the general IPv4 settings.
Procedure
Step 1 Enable a BGP routing process, which places the router in router configuration mode:
router bgp autonomous-num
Example:
ciscoasa(config)# router bgp 2
Step 2 Enter address family configuration mode to configure a routing session using standard IP Version 4 (IPv4) address prefixes:
address-family ipv4 [unicast]
The keyword unicast specifies IPv4 unicast address prefixes. This is the default, even if not specified.
Step 3 (Optional) Configure a fixed router ID for the local BGP routing process:
bgp router-id A.B.C.D
Example:
ciscoasa(config-router-af)# bgp router-id 10.86.118.3
The argument A.B.C.D specifies a router identifier in the form of an IP address. If you do not specify a router ID, it is automatically assigned.
Step 4 (Optional) Configure a cluster pool of IP addresses in the Individual Interface (L3) mode:
bgp router-id cluster-pool
Example:
ciscoasa(config-router-af)# bgp router-id cp
22-9Cisco ASA Series General Operations CLI Configuration Guide

Chapter 22 BGP Configure BGP
Note In an L3 cluster, you cannot define a BGP neighbor as one of the cluster pool IP addresses.
Step 5 Configure the administrative distance for BGP routes:
distance bgp external-distance internal-distance local-distance
Example:
ciscoasa(config-router-af)# distance bgp 80 180 180
• external-distance — administrative distance for external BGP routes. Routes are external when learned from an external autonomous system. The range of values for this argument are from 1 to 255.
• internal-distance — administrative distance for internal BGP routes. Routes are internal when learned from peer in the local autonomous system. The range of values for this argument are from 1 to 255.
• local-distance — administrative distance for local BGP routes. Local routes are those networks listed with a network router configuration command, often as back doors, for the router or for the networks that is being redistributed from another process. The range of values for this argument are from 1 to 255.
Step 6 Modify metric and tag values when the IP routing table is updated with BGP learned routes:
table-map {WORD|route-map_name}
Example:
ciscoasa(config-router-af)# table-map example1
The argument route-map_name specifies the route map name from the route-map command.
Step 7 Configure a BGP routing process to distribute a default route (network 0.0.0.0):
default-information originate
Step 8 Configure automatic summarization of subnet routes into network-level routes:
auto-summary
Step 9 Suppress the advertisement of routes that are not installed in the routing information base (RIB):
bgp suppress-inactive
Step 10 Synchronize between BGP and your Interior Gateway Protocol (IGP) system:
synchronization
Step 11 Configure iBGP redistribution into an IGP, such as OSPF:
bgp redistribute-internal
Step 12 Configure scanning intervals of BGP routers for next hop validation:
bgp scan-time scanner-interval
Example:
ciscoasa(config-router-af)# bgp scan-time 15
22-10Cisco ASA Series General Operations CLI Configuration Guide

Chapter 22 BGP Configure BGP
The argument scanner-interval specifies scanning interval of BGP routing information. Valid values are from 5 to 60 seconds. The default is 60 seconds.
Step 13 Configure BGP next-hop address tracking:
bgp nexthop trigger {delay seconds|enable}
Example:
ciscoasa(config-router-af)# bgp nexthop trigger delay 15
• trigger — specifies the use of BGP next-hop address tracking. Use this keyword with the delay keyword to change the next-hop tracking delay. Use this keyword with the enable keyword to enable next-hop address tracking.
• delay — changes the delay interval between checks on updated next-hop routes installed in the routing table.
• seconds — specifies the delay in seconds. Range is from 0 to 100. Default is 5.
• enable — enables BGP next-hop address tracking immediately.
Step 14 Control the maximum number of parallel iBGP routes that can be installed in a routing table:
maximum-paths {number_of_paths|ibgp number_of_paths}
Example:
ciscoasa(config-router-af)# maximum-paths ibgp 2
The number_of_paths argument specifies the number of routes to install to the routing table. In ASA 9.3(1), valid values are between 1 and 3. In ASA 9.3(2) and later, valid values are between 1 and 8.
Note If the ibgp keyword is not used, then the number_of_paths argument controls the maximum number of parallel EBGP routes.
Configure IPv4 Family Aggregate Address Settings
This section describes the steps required to define the aggregation of specific routes into one route.
Procedure
Step 1 Enable a BGP routing process, which places the ASA in router configuration mode:
router bgp autonomous-num
Example:
ciscoasa(config)# router bgp 2
Step 2 Enter address family configuration mode to configure a routing session using standard IP Version 4 (IPv4) address prefixes:
address-family ipv4 [unicast]
The keyword unicast specifies IPv4 unicast address prefixes. This is the default, even if not specified.
22-11Cisco ASA Series General Operations CLI Configuration Guide
Chapter 22 BGP Configure BGP
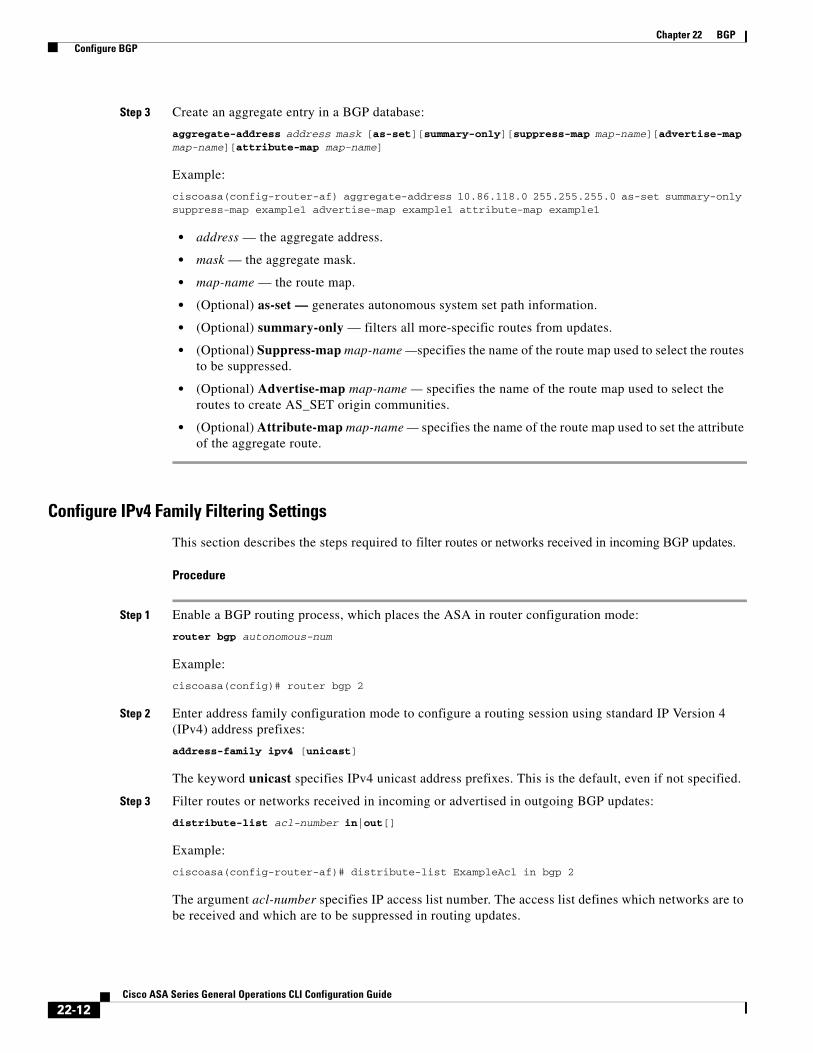
Step 3 Create an aggregate entry in a BGP database:
aggregate-address address mask [as-set][summary-only][suppress-map map-name][advertise-map map-name][attribute-map map-name]
Example:
ciscoasa(config-router-af) aggregate-address 10.86.118.0 255.255.255.0 as-set summary-only suppress-map example1 advertise-map example1 attribute-map example1
• address — the aggregate address.
• mask — the aggregate mask.
• map-name — the route map.
• (Optional) as-set — generates autonomous system set path information.
• (Optional) summary-only — filters all more-specific routes from updates.
• (Optional) Suppress-map map-name —specifies the name of the route map used to select the routes to be suppressed.
• (Optional) Advertise-map map-name — specifies the name of the route map used to select the routes to create AS_SET origin communities.
• (Optional) Attribute-map map-name — specifies the name of the route map used to set the attribute of the aggregate route.
Configure IPv4 Family Filtering Settings
This section describes the steps required to filter routes or networks received in incoming BGP updates.
Procedure
Step 1 Enable a BGP routing process, which places the ASA in router configuration mode:
router bgp autonomous-num
Example:
ciscoasa(config)# router bgp 2
Step 2 Enter address family configuration mode to configure a routing session using standard IP Version 4 (IPv4) address prefixes:
address-family ipv4 [unicast]
The keyword unicast specifies IPv4 unicast address prefixes. This is the default, even if not specified.
Step 3 Filter routes or networks received in incoming or advertised in outgoing BGP updates:
distribute-list acl-number in|out[]
Example:
ciscoasa(config-router-af)# distribute-list ExampleAcl in bgp 2
The argument acl-number specifies IP access list number. The access list defines which networks are to be received and which are to be suppressed in routing updates.
22-12Cisco ASA Series General Operations CLI Configuration Guide

Chapter 22 BGP Configure BGP
The keyword in specifies that the filter must be applied to incoming BGP updates and out specifies that the filter must be applied to outgoing BGP updates.
Configure IPv4 Family BGP Neighbor Settings
This section describes the steps required to define BGP neighbors and neighbor settings.
Procedure
Step 1 Enable a BGP routing process, which places the router in router configuration mode:
router bgp autonomous-num
Example:
ciscoasa(config)# router bgp 2
Step 2 Enter address family configuration mode to configure a routing session using standard IP Version 4 (IPv4) address prefixes:
address-family ipv4 [unicast]
The keyword unicast specifies IPv4 unicast address prefixes. This is the default, even if not specified.
Step 3 Add an entry to the BGP neighbor table:
neighbor ip-address remote-as autonomous-number
Example:
ciscoasa(config-router-af)# neighbor 10.86.118.12 remote-as 3
Step 4 (Optional) Disable a neighbor or peer group:
neighbor ip-address shutdown
Example:
ciscoasa(config-router-af)# neighbor 10.86.118.12 shutdown 3
Step 5 Exchange information with a BGP neighbor:
neighbor ip-address activate
Example:
ciscoasa(config-router-af)# neighbor 10.86.118.12 activate
Step 6 Enable or disable the Border Gateway Protocol (BGP) graceful restart capability for a BGP neighbor:
neighbor ip-address ha-mode graceful-restart [disable]
Example:
ciscoasa(config-router-af)# neighbor 10.86.118.12 ha-mode graceful-restart
(Optional) The disable keyword disables BGP graceful restart capability for a neighbor.
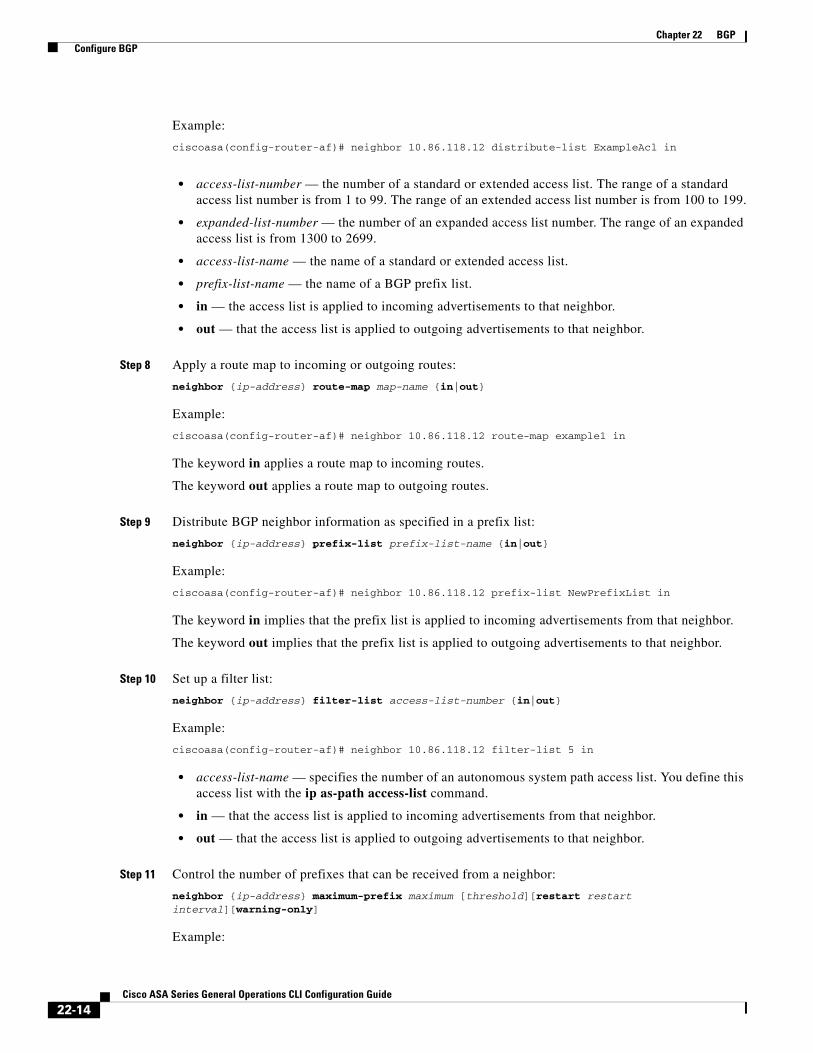
Step 7 Distribute BGP neighbor information as specified in an access list:
neighbor {ip-address} distribute-list {access-list-name}{in|out}
22-13Cisco ASA Series General Operations CLI Configuration Guide
Chapter 22 BGP Configure BGP
Example:
ciscoasa(config-router-af)# neighbor 10.86.118.12 distribute-list ExampleAcl in
• access-list-number — the number of a standard or extended access list. The range of a standard access list number is from 1 to 99. The range of an extended access list number is from 100 to 199.
• expanded-list-number — the number of an expanded access list number. The range of an expanded access list is from 1300 to 2699.
• access-list-name — the name of a standard or extended access list.
• prefix-list-name — the name of a BGP prefix list.
• in — the access list is applied to incoming advertisements to that neighbor.
• out — that the access list is applied to outgoing advertisements to that neighbor.
Step 8 Apply a route map to incoming or outgoing routes:
neighbor {ip-address} route-map map-name {in|out}
Example:
ciscoasa(config-router-af)# neighbor 10.86.118.12 route-map example1 in
The keyword in applies a route map to incoming routes.
The keyword out applies a route map to outgoing routes.
Step 9 Distribute BGP neighbor information as specified in a prefix list:
neighbor {ip-address} prefix-list prefix-list-name {in|out}
Example:
ciscoasa(config-router-af)# neighbor 10.86.118.12 prefix-list NewPrefixList in
The keyword in implies that the prefix list is applied to incoming advertisements from that neighbor.
The keyword out implies that the prefix list is applied to outgoing advertisements to that neighbor.
Step 10 Set up a filter list:
neighbor {ip-address} filter-list access-list-number {in|out}
Example:
ciscoasa(config-router-af)# neighbor 10.86.118.12 filter-list 5 in
• access-list-name — specifies the number of an autonomous system path access list. You define this access list with the ip as-path access-list command.
• in — that the access list is applied to incoming advertisements from that neighbor.
• out — that the access list is applied to outgoing advertisements to that neighbor.
Step 11 Control the number of prefixes that can be received from a neighbor:
neighbor {ip-address} maximum-prefix maximum [threshold][restart restart interval][warning-only]
Example:
22-14Cisco ASA Series General Operations CLI Configuration Guide

Chapter 22 BGP Configure BGP
ciscoasa(config-router-af)# neighbor 10.86.118.12 maximum-prefix 7 75 restart 12
• maximum — the maximum number of prefixes allowed from this neighbor.
• (Optional) threshold — integer specifying at what percentage of maximum the router starts to generate a warning message. The range is from 1 to 100; the default is 75 (percent).
• (Optional) restart interval — integer value (in minutes) that specifies the time interval after which the BGP neighbor restarts.
• (Optional) warning-only — allows the router to generate a log message when the maximum number of prefixes is exceeded, instead of terminating the peering.
Step 12 Allow a BGP speaker (the local router) to send the default route 0.0.0.0 to a neighbor for use as a default route:
neighbor {ip-address} default-originate [route-map map-name]
Example:
ciscoasa(config-router-af)# neighbor 10.86.118.12 default-originate route-map example1
The argument map-name is the name of the route-map.The route map allows route 0.0.0.0 to be injected conditionally.
Step 13 Set the minimum interval between the sending of BGP routing updates:
neighbor {ip-address} advertisement-interval seconds
Example:
ciscoasa(config-router-af)# neighbor 10.86.118.12 advertisement-interval 15
The argument seconds is the time (in seconds). Valid values are from 0 to 600.
Step 14 Advertise the routes in the BGP table that matches the configured route-map:
neighbor {ip-address} advertise-map map-name {exist-map map-name |non-exist-map map-name}[check-all-paths]
Example:
ciscoasa(config-router-af)# neighbor 10.2.1.1 advertise-map MAP1 exist-map MAP2
• advertise-map map name — the name of the route map that will be advertised if the conditions of the exist map or non-exist map are met.
• exist-map map name — the name of the exist-map that is compared with the routes in the BGP table to determine whether the advertise-map route is advertised or not.
• non-exist-map map name — the name of the non-exist-map that is compared with the routes in the BGP table to determine whether the advertise-map route is advertised or not.
• (Optional) check all paths — enables checking of all paths by the exist-map with a prefix in the BGP table.
Step 15 Remove private autonomous system numbers from outbound routing updates:
neighbor {ip-address} remove-private-as
Example:
ciscoasa(config-router-af)# neighbor 10.86.118.12 remove-private-as
Step 16 Sets the timers for a specific BGP peer or peer group.
neighbor {ip-address} timers keepalive holdtime min holdtime
22-15Cisco ASA Series General Operations CLI Configuration Guide

Chapter 22 BGP Configure BGP
Example:
ciscoasa(config-router-af)# neighbor 10.86.118.12 timers 15 20 12
• keepalive — the frequency (in seconds) with which the ASA sends keepalive messages to its peer. The default is 60 seconds. Valid values are from 0 to 65535.
• holdtime — the interval (in seconds) after not receiving a keepalive message that the ASA declares a peer dead. The default is 180 seconds.
• min holdtime — the minimum interval (in seconds) after not receiving a keepalive message that the ASA declares a peer dead.
Step 17 Enable Message Digest 5 (MD5) authentication on a TCP connection between two BGP peers:
neighbor {ip-address} password string
Example:
ciscoasa(config-router-af)# neighbor 10.86.118.12 password test
The argument string is a case-sensitive password of up to 25 characters when the service password-encryption command is enabled and up to 81 characters when the service password-encryption command is not enabled. The string can contain any alphanumeric characters, including spaces.
Note The first character cannot be a number. You cannot specify a password in the format number-space-anything. The space after the number can cause authentication to fail.
Step 18 Specify that communities attributes should be sent to a BGP neighbor:
neighbor {ip-address} send-community[both|standard|extended]
Example:
ciscoasa(config-router-af)# neighbor 10.86.118.12 send-community
• (Optional) both keyword — both standard and extended communities will be sent.
• (Optional) standard keyword — only standard communities will be sent.
• (Optional) extended keyword — only extended communities will be sent.
Step 19 Configure the router as the next hop for a BGP-speaking neighbor or peer group:
neighbor {ip-address}next-hop-self
Example:
ciscoasa(config-router-af)# neighbor 10.86.118.12 next-hop-self
Step 20 Accept and attempt BGP connections to external peers residing on networks that are not directly connected:
neighbor {ip-address} ebgp-multihop [ttl]
Example:
ciscoasa(config-router-af)# neighbor 10.86.118.12 ebgp-multihop 5
The argument ttl specifies time-to-live in the range from 1 to 255 hops.
22-16Cisco ASA Series General Operations CLI Configuration Guide

Chapter 22 BGP Configure BGP
Step 21 Disable connection verification to establish an eBGP peering session with a single-hop peer that uses a loopback interface:
neighbor {ip-address} disable-connected-check
Example:
ciscoasa(config-router-af)# neighbor 10.86.118.12 disable-connected-check
Step 22 Secure a BGP peering session and configures the maximum number of hops that separate two external BGP (eBGP) peers:
neighbor {ip-address} ttl-security hops hop-count
Example:
ciscoasa(config-router-af)# neighbor 10.86.118.12 ttl-security hops 15
The argument hop-count is the number of hops that separate the eBGP peers. The TTL value is calculated by the router from the configured hop-count argument. Valid values are from 1 to 254.
Step 23 Assign a weight to a neighbor connection:
neighbor {ip-address} weight number
Example:
ciscoasa(config-router-af)# neighbor 10.86.118.12 weight 30
The argument number is the weight to assign to a neighbor connection. Valid values are from 0 to 65535.
Step 24 Configure the ASA to accept only a particular BGP version:
neighbor {ip-address} version number
Example:
ciscoasa(config-router-af)# neighbor 10.86.118.12 version 4
The argument number specifies the BGP version number. The version can be set to 2 to force the software to use only Version 2 with the specified neighbor. The default is to use Version 4 and dynamically negotiate down to Version 2 if requested.
Step 25 Enable a TCP transport session option for a BGP session:
neighbor {ip-address} transport {connection-mode{active|passive}| path-mtu-discovery[disable]}
Example:
ciscoasa(config-router-af)# neighbor 10.86.118.12 transport path-mtu-discovery
• connection-mode — the type of connection (active or passive).
• path-mtu-discovery — enables TCP transport path maximum transmission unit (MTU) discovery. TCP path MTU discovery is enabled by default.
• (Optional) disable — disables TCP path MTU discovery.
Step 26 Customize the AS_PATH attribute for routes received from an external Border Gateway Protocol (eBGP) neighbor:
neighbor {ip-address} local-as [autonomous-system-number[no-prepend]]
Example:
ciscoasa(config-router-af)# neighbor 10.86.118.12 local-as 5 no-prepend replace-as
22-17Cisco ASA Series General Operations CLI Configuration Guide

Chapter 22 BGP Configure BGP
• (Optional) autonomous-system-number — the number of an autonomous system to prepend to the AS_PATH attribute. The range of values for this argument is any valid autonomous system number from 1 to 4294967295 or 1.0 to XX.YY.
• (Optional) no-prepend — does not prepend the local autonomous system number to any routes received from the eBGP neighbor.
Configure IPv4 Network Settings
This section describes the steps required to define the networks to be advertised by the BGP routing process.
Procedure
Step 1 Enable a BGP routing process, which places the ASA in router configuration mode:
router bgp autonomous-num
Example:
ciscoasa(config)# router bgp 2
Step 2 Enter address family configuration mode to configure a routing session using standard IP Version 4 (IPv4) address prefixes:
address-family ipv4 [unicast]
The keyword unicast specifies IPv4 unicast address prefixes. This is the default, even if not specified.
Step 3 Specify the networks to be advertised by the BGP routing processes:
network {network-number [mask network-mask]}[route-map map-tag]
Example:
ciscoasa(config-router-af)# network 10.86.118.13 mask 255.255.255.255 route-map example1
• network-number — the network that BGP will advertise.
• (Optional) network-mask — the network or subnetwork mask with mask address.
• (Optional) map-tag — the identifier of a configured route map. The route map should be examined to filter the networks to be advertised. If not specified, all networks are advertised.
Configure Redistribution Settings
This section describes the steps required to define the conditions for redistributing routes from another routing domain into BGP.
Procedure
Step 1 Enable a BGP routing process, which places the ASA in router configuration mode:
router bgp autonomous-num
Example:
22-18Cisco ASA Series General Operations CLI Configuration Guide

Chapter 22 BGP Configure BGP
ciscoasa(config)# router bgp 2
Step 2 Enter address family configuration mode to configure a routing session using standard IP Version 4 (IPv4) address prefixes:
address-family ipv4 [unicast]
Example:
ciscoasa(config-router)# address-family ipv4[unicast]
The keyword unicast specifies IPv4 unicast address prefixes. This is the default, even if not specified.
Step 3 Redistribute routes from another routing domain into a BGP autonomous system:
redistribute protocol [process-id] [metric] [route-map [map-tag]]
Example:
ciscoasa(config-router-af)# redistribute ospf 2 route-map example1 match external
• protocol — the source protocol from which routes are being redistributed. It can be one of the following: Connected, EIGRP, OSPF, RIP or Static.
• (Optional) process-id — a name for the specific routing process.
• (Optional) metric — the metric for the redistributed route.
• (Optional) map-tag — the identifier of a configured route map.
Note The route map should be examined to filter the networks to be redistributed. If not specified, all networks are redistributed.
Configure Route Injection Settings
This section describes the steps required to define the routes to be conditionally injected into the BGP routing table.
Procedure
Step 1 Enable a BGP routing process, which places the ASA in router configuration mode:
router bgp autonomous-num
Example:
ciscoasa(config)# router bgp 2
Step 2 Enter address family configuration mode to configure a routing session using standard IP Version 4 (IPv4) address prefixes:
address-family ipv4 [unicast]
Example:
ciscoasa(config-router)# address-family ipv4[unicast]
The keyword unicast specifies IPv4 unicast address prefixes. This is the default, even if not specified.
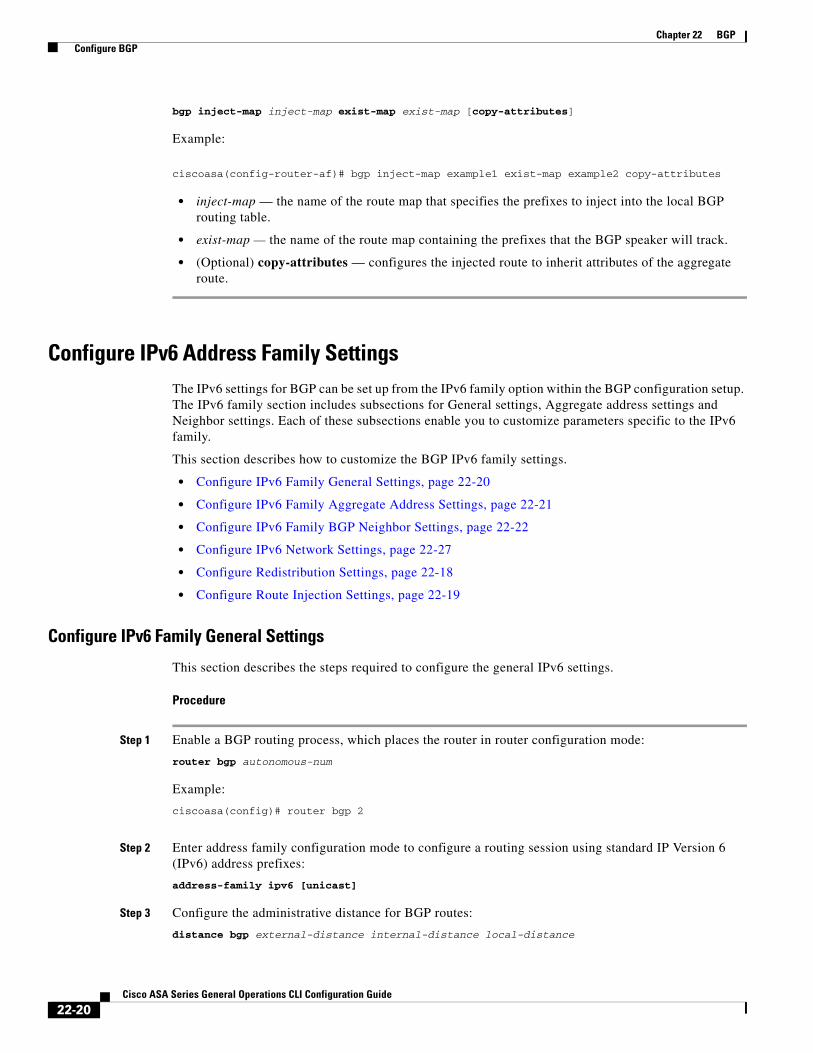
Step 3 Configure conditional route injection to inject more specific routes into a BGP routing table:
22-19Cisco ASA Series General Operations CLI Configuration Guide
Chapter 22 BGP Configure BGP
bgp inject-map inject-map exist-map exist-map [copy-attributes]
Example:
ciscoasa(config-router-af)# bgp inject-map example1 exist-map example2 copy-attributes
• inject-map — the name of the route map that specifies the prefixes to inject into the local BGP routing table.
• exist-map — the name of the route map containing the prefixes that the BGP speaker will track.
• (Optional) copy-attributes — configures the injected route to inherit attributes of the aggregate route.
Configure IPv6 Address Family Settings The IPv6 settings for BGP can be set up from the IPv6 family option within the BGP configuration setup. The IPv6 family section includes subsections for General settings, Aggregate address settings and Neighbor settings. Each of these subsections enable you to customize parameters specific to the IPv6 family.
This section describes how to customize the BGP IPv6 family settings.
• Configure IPv6 Family General Settings, page 22-20
• Configure IPv6 Family Aggregate Address Settings, page 22-21
• Configure IPv6 Family BGP Neighbor Settings, page 22-22
• Configure IPv6 Network Settings, page 22-27
• Configure Redistribution Settings, page 22-18
• Configure Route Injection Settings, page 22-19
Configure IPv6 Family General Settings
This section describes the steps required to configure the general IPv6 settings.
Procedure
Step 1 Enable a BGP routing process, which places the router in router configuration mode:
router bgp autonomous-num
Example:
ciscoasa(config)# router bgp 2
Step 2 Enter address family configuration mode to configure a routing session using standard IP Version 6 (IPv6) address prefixes:
address-family ipv6 [unicast]
Step 3 Configure the administrative distance for BGP routes:
distance bgp external-distance internal-distance local-distance
22-20Cisco ASA Series General Operations CLI Configuration Guide

Chapter 22 BGP Configure BGP
Example:
ciscoasa(config-router-af)# distance bgp 80 180 180
• external-distance — administrative distance for external BGP routes. Routes are external when learned from an external autonomous system. The range of values for this argument are from 1 to 255.
• internal-distance — administrative distance for internal BGP routes. Routes are internal when learned from peer in the local autonomous system. The range of values for this argument are from 1 to 255.
• local-distance — administrative distance for local BGP routes. Local routes are those networks listed with a network router configuration command, often as back doors, for the router or for the networks that is being redistributed from another process. The range of values for this argument are from 1 to 255.
Step 4 (Optional) Configure a BGP routing process to distribute a default route (network 0.0.0.0):
default-information originate
Step 5 (Optional) Suppress the advertisement of routes that are not installed in the routing information base (RIB):
bgp suppress-inactive
Step 6 Synchronize between BGP and your Interior Gateway Protocol (IGP) system:
synchronization
Step 7 Configure iBGP redistribution into an IGP, such as OSPF:
bgp redistribute-internal
Step 8 Configure scanning intervals of BGP routers for next hop validation:
bgp scan-time scanner-interval
Example:
ciscoasa(config-router-af)# bgp scan-time 15
Valid values for the scanner-interval argument from 5 to 60 seconds. The default is 60 seconds.
Step 9 Control the maximum number of parallel iBGP routes that can be installed in a routing table:
maximum-paths {number_of_paths|ibgp number_of_paths}
Example:
ciscoasa(config-router-af)# maximum-paths ibgp 2
Valid values for the number_of_paths argument is between 1 and 8.
If the ibgp keyword is not used, then the number_of_paths argument controls the maximum number of parallel EBGP routes.
Configure IPv6 Family Aggregate Address Settings
This section describes the steps required to define the aggregation of specific routes into one route.
22-21Cisco ASA Series General Operations CLI Configuration Guide
Chapter 22 BGP Configure BGP
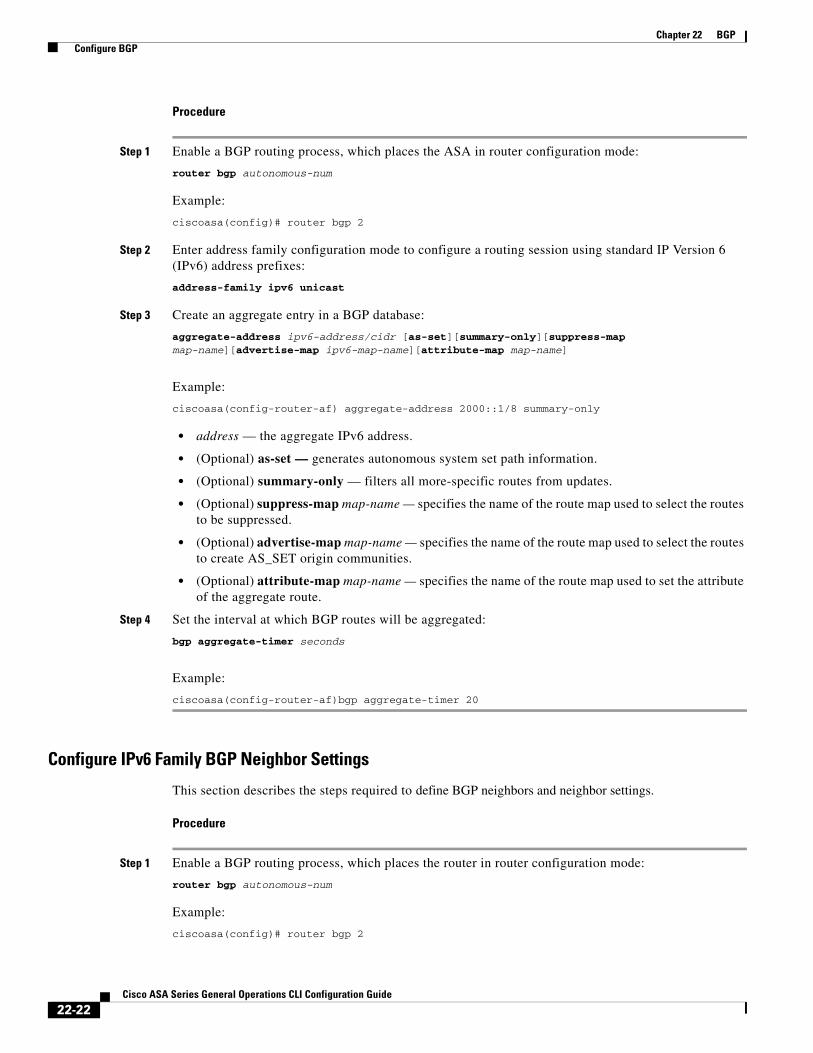
Procedure
Step 1 Enable a BGP routing process, which places the ASA in router configuration mode:
router bgp autonomous-num
Example:
ciscoasa(config)# router bgp 2
Step 2 Enter address family configuration mode to configure a routing session using standard IP Version 6 (IPv6) address prefixes:
address-family ipv6 unicast
Step 3 Create an aggregate entry in a BGP database:
aggregate-address ipv6-address/cidr [as-set][summary-only][suppress-map map-name][advertise-map ipv6-map-name][attribute-map map-name]
Example:
ciscoasa(config-router-af) aggregate-address 2000::1/8 summary-only
• address — the aggregate IPv6 address.
• (Optional) as-set — generates autonomous system set path information.
• (Optional) summary-only — filters all more-specific routes from updates.
• (Optional) suppress-map map-name — specifies the name of the route map used to select the routes to be suppressed.
• (Optional) advertise-map map-name — specifies the name of the route map used to select the routes to create AS_SET origin communities.
• (Optional) attribute-map map-name — specifies the name of the route map used to set the attribute of the aggregate route.
Step 4 Set the interval at which BGP routes will be aggregated:
bgp aggregate-timer seconds
Example:
ciscoasa(config-router-af)bgp aggregate-timer 20
Configure IPv6 Family BGP Neighbor Settings
This section describes the steps required to define BGP neighbors and neighbor settings.
Procedure
Step 1 Enable a BGP routing process, which places the router in router configuration mode:
router bgp autonomous-num
Example:
ciscoasa(config)# router bgp 2
22-22Cisco ASA Series General Operations CLI Configuration Guide

Chapter 22 BGP Configure BGP
Step 2 Enter address family configuration mode to configure a routing session using standard IP Version 6 (IPv6) address prefixes:
address-family ipv6 [unicast]
Step 3 Add an entry to the BGP neighbor table:
neighbor ipv6-address remote-as autonomous-number
Example:
ciscoasa(config-router-af)# neighbor 2000::1/8 remote-as 3
The argument ipv6-address specifies the IPv6 address of the next hop that can be used to reach the specified network.TheIPv6 address of the next hop need not be directly connected; recursion is done to find the IPv6 address of the directly connected next hop.When an interface type and interface number are specified, you can optionally specify the IPv6 address of the next hop to which packets are output.You must specify an interface type and an interface number when using a link-local address as the next hop (the link-local next hop must also be an adjacent device).
Note This argument must be in the form documented in RFC 2373 where the address is specified in hexadecimal using 16-bit values between colons.
Step 4 (Optional) Disable a neighbor or peer group:
neighbor ipv6-address shutdown
Example:
ciscoasa(config-router-af)# neighbor 2000::1/8 shutdown 3
Step 5 Exchange information with a BGP neighbor:
neighbor ipv6-address activate
Example:
ciscoasa(config-router-af)# neighbor 2000::1/8 activate
Step 6 Apply a route map to incoming or outgoing routes:
neighbor {ipv6-address} route-map map-name {in|out}
Example:
ciscoasa(config-router-af)# neighbor 2000::1 route-map example1 in
The keyword in applies a route map to incoming routes.
The keyword out applies a route map to outgoing routes.
Step 7 Distribute BGP neighbor information as specified in a prefix list:
neighbor {ipv6-address} prefix-list prefix-list-name {in|out}
Example:
ciscoasa(config-router-af)# neighbor 2000::1 prefix-list NewPrefixList in
The keyword in implies that the prefix list is applied to incoming advertisements from that neighbor.
The keyword out implies that the prefix list is applied to outgoing advertisements to that neighbor.
22-23Cisco ASA Series General Operations CLI Configuration Guide

Chapter 22 BGP Configure BGP
Step 8 Set up a filter list:
neighbor {ipv6-address} filter-list access-list-name {in|out}
Example:
ciscoasa(config-router-af)# neighbor 2000::1 filter-list 5 in
• access-list-name — specifies the number of an autonomous system path access list. You define this access list with the ip as-path access-list command.
• in — that the access list is applied to incoming advertisements from that neighbor.
• out — that the access list is applied to outgoing advertisements to that neighbor.
Step 9 Control the number of prefixes that can be received from a neighbor:
neighbor {ipv6-address} maximum-prefix maximum [threshold][restart restart interval][warning-only]
Example:
ciscoasa(config-router-af)# neighbor 2000::1 maximum-prefix 7 75 restart 12
• maximum — the maximum number of prefixes allowed from this neighbor.
• (Optional) threshold — integer specifying at what percentage of maximum the router starts to generate a warning message. The range is from 1 to 100; the default is 75 (percent).
• (Optional) restart interval — integer value (in minutes) that specifies the time interval after which the BGP neighbor restarts.
• (Optional) warning-only — allows the router to generate a log message when the maximum number of prefixes is exceeded, instead of terminating the peering.
Step 10 Allow a BGP speaker (the local router) to send the default route 0.0.0.0 to a neighbor for use as a default route:
neighbor {ipv6-address} default-originate [route-map map-name]
Example:
ciscoasa(config-router-af)# neighbor 2000::1 default-originate route-map example1
The argument map-name is the name of the route-map.The route map allows route 0.0.0.0 to be injected conditionally.
Step 11 Set the minimum interval between the sending of BGP routing updates:
neighbor {ipv6-address} advertisement-interval seconds
Example:
ciscoasa(config-router-af)# neighbor 2000::1 advertisement-interval 15
The argument seconds is the time (in seconds). Valid values are from 0 to 600.
Step 12 Remove private autonomous system numbers from outbound routing updates:
neighbor {ipv6-address} remove-private-as
Example:
ciscoasa(config-router-af)# neighbor 2000::1 remove-private-as
Step 13 Advertise the routes in the BGP table that matches the configured route-map:
neighbor {ipv6-address} advertise-map map-name {exist-map map-name |non-exist-map map-name}[check-all-paths]
22-24Cisco ASA Series General Operations CLI Configuration Guide

Chapter 22 BGP Configure BGP
Example:
ciscoasa(config-router-af)# neighbor 2000::1 advertise-map MAP1 exist-map MAP2
• advertise-map map name — the name of the route map that will be advertised if the conditions of the exist map or non-exist map are met.
• exist-map map name — the name of the exist-map that is compared with the routes in the BGP table to determine whether the advertise-map route is advertised or not.
• non-exist-map map name — the name of the non-exist-map that is compared with the routes in the BGP table to determine whether the advertise-map route is advertised or not.
• (Optional) check all paths — enables checking of all paths by the exist-map with a prefix in the BGP table.
Step 14 Sets the timers for a specific BGP peer or peer group.
neighbor {ipv6-address} timers keepalive holdtime min holdtime
Example:
ciscoasa(config-router-af)# neighbor 2000::1 timers 15 20 12
• keepalive — the frequency (in seconds) with which the ASA sends keepalive messages to its peer. The default is 60 seconds. Valid values are from 0 to 65535.
• holdtime — the interval (in seconds) after not receiving a keepalive message that the ASA declares a peer dead. The default is 180 seconds.
• min holdtime — the minimum interval (in seconds) after not receiving a keepalive message that the ASA declares a peer dead.
Step 15 Enable Message Digest 5 (MD5) authentication on a TCP connection between two BGP peers:
neighbor {ipv6-address} password string
Example:
ciscoasa(config-router-af)# neighbor 2000::1 password test
The argument string is a case-sensitive password of up to 25 characters when the service password-encryption command is enabled and up to 81 characters when the service password-encryption command is not enabled. The string can contain any alphanumeric characters, including spaces.
Note The first character cannot be a number. You cannot specify a password in the format number-space-anything. The space after the number can cause authentication to fail.
Step 16 Specify that communities attributes should be sent to a BGP neighbor:
neighbor {ipv6-address} send-community [standard]
Example:
ciscoasa(config-router-af)# neighbor 2000::1 send-community
• (Optional) standard keyword — only standard communities will be sent.
Step 17 Configure the router as the next hop for a BGP-speaking neighbor or peer group:
neighbor {ipv6-address}next-hop-self
22-25Cisco ASA Series General Operations CLI Configuration Guide

Chapter 22 BGP Configure BGP
Example:
ciscoasa(config-router-af)# neighbor 2000::1 next-hop-self
Step 18 Accept and attempt BGP connections to external peers residing on networks that are not directly connected:
neighbor {ipv6-address} ebgp-multihop [ttl]
Example:
ciscoasa(config-router-af)# neighbor 2000::1 ebgp-multihop 5
The argument ttl specifies time-to-live in the range from 1 to 255 hops.
Step 19 Disable connection verification to establish an eBGP peering session with a single-hop peer that uses a loopback interface:
neighbor {ipv6-address} disable-connected-check
Example:
ciscoasa(config-router-af)# neighbor 2000::1 disable-connected-check
Step 20 Secure a BGP peering session and configures the maximum number of hops that separate two external BGP (eBGP) peers:
neighbor {ipv6-address} ttl-security hops hop-count
Example:
ciscoasa(config-router-af)# neighbor 10.86.118.12 ttl-security hops 15
The argument hop-count is the number of hops that separate the eBGP peers. The TTL value is calculated by the router from the configured hop-count argument. Valid values are from 1 to 254.
Step 21 Assign a weight to a neighbor connection:
neighbor {ipv6-address} weight number
Example:
ciscoasa(config-router-af)# neighbor 2000::1 weight 30
The argument number is the weight to assign to a neighbor connection. Valid values are from 0 to 65535.
Step 22 Configure the ASA to accept only a particular BGP version:
neighbor {ipv6-address} version number
Example:
ciscoasa(config-router-af)# neighbor 2000::1 version 4
The argument number specifies the BGP version number. The default is Version 4. Currently only BGP version 4 is supported.
Step 23 Enable a TCP transport session option for a BGP session:
neighbor {ipv6-address} transport {connection-mode{active|passive}| path-mtu-discovery[disable]}
Example:
ciscoasa(config-router-af)# neighbor 2000::1 transport connection-mode active
• connection-mode — the type of connection (active or passive).
22-26Cisco ASA Series General Operations CLI Configuration Guide

Chapter 22 BGP Configure BGP
• path-mtu-discovery — enables TCP transport path maximum transmission unit (MTU) discovery. TCP path MTU discovery is enabled by default.
• (Optional) disable — disables TCP path MTU discovery.
Step 24 Customize the AS_PATH attribute for routes received from an external Border Gateway Protocol (eBGP) neighbor:
neighbor {ipv6-address} local-as [autonomous-system-number[no-prepend]]
Example:
ciscoasa(config-router-af)# neighbor 10.86.118.12 local-as 5 no-prepend replace-as
• (Optional) autonomous-system-number — the number of an autonomous system to prepend to the AS_PATH attribute. The range of values for this argument is any valid autonomous system number from 1 to 4294967295 or 1.0 to XX.YY.
• (Optional) no-prepend — does not prepend the local autonomous system number to any routes received from the eBGP neighbor.
Caution BGP prepends the autonomous system number from each BGP network that a route traverses to maintain network reachability information and to prevent routing loops. This command should be configured only for autonomous system migration, and should be removed after the transition has been completed. This procedure should be attempted only by an experienced network operator. Routing loops can be created through improper configuration.
Configure IPv6 Network Settings
This section describes the steps required to define the networks to be advertised by the BGP routing process.
Procedure
Step 1 Enable a BGP routing process, which places the ASA in router configuration mode:
router bgp autonomous-num
Example:
ciscoasa(config)# router bgp 2
Step 2 Enter address family configuration mode to configure a routing session using standard IP Version 6 (IPv6) address prefixes:
address-family ipv6 [unicast]
Step 3 Specify the networks to be advertised by the BGP routing processes:
network {ipv6 network/ prefix length} [route-map route-map name]
Example:
ciscoasa(config-router-af)# network 2001:1/64 route-map test_route_map
• ipv6 network/prefix length— the network that BGP will advertise.
22-27Cisco ASA Series General Operations CLI Configuration Guide

Chapter 22 BGP Configure BGP
• (Optional) route-map name— the identifier of a configured route map. The route map should be examined to filter the networks to be advertised. If not specified, all networks are advertised.
Configure Redistribution Settings
This section describes the steps required to define the conditions for redistributing routes from another routing domain into BGP.
Procedure
Step 1 Enable a BGP routing process, which places the ASA in router configuration mode:
router bgp autonomous-num
Example:
ciscoasa(config)# router bgp 2
Step 2 Enter address family configuration mode to configure a routing session using standard IP Version 6 (IPv6) address prefixes:
address-family ipv6 [unicast]
Example:
ciscoasa(config-router)# address-family ipv6[unicast]
Step 3 Redistribute routes from another routing domain into a BGP autonomous system:
redistribute protocol [process-id][autonomous-num][metric metric value][match{internal| external1|external2|NSSA external 1|NSSA external 2}][route-map [map-tag]][subnets]
Example:
ciscoasa(config-router-af)# redistribute ospf 2 route-map example1 match external
• protocol — the source protocol from which routes are being redistributed. It can be one of the following: Connected, EIGRP, OSPF, RIP or Static.
• (Optional) process-id — For the ospf protocol, this is an appropriate OSPF process ID from which routes are to be redistributed. This identifies the routing process. This value takes the form of a nonzero decimal number.
Note This value is auto-populated for the other protocols.
• (Optional) metric metric value — When redistributing from one OSPF process to another OSPF process on the same router, the metric will be carried through from one process to the other if no metric value is specified. When redistributing other processes to an OSPF process, the default metric is 20 when no metric value is specified. The default value is 0.
• (Optional) match internal | external1 | external2 | NSSA external 1 | NSSA external 2 — For the criteria by which OSPF routes are redistributed into other routing domains. It can be one of the following:
– internal — Routes that are internal to a specific autonomous system.
– external 1 — Routes that are external to the autonomous system, but are imported into BGP as OSPF Type 1 external route.
22-28Cisco ASA Series General Operations CLI Configuration Guide

Chapter 22 BGP Configure BGP
– external 2 — Routes that are external to the autonomous system, but are imported into BGP as OSPF Type 2 external route.
– NSSA external 1 — Routes that are external to the autonomous system, but are imported into BGP as OSPF NSSA Type 1 external route.
– NSSA external 2 — Routes that are external to the autonomous system, but are imported into BGP as OSPF NSSA Type 2 external route.
• (Optional) map-tag — the identifier of a configured route map.
Note The route map should be examined to filter the networks to be redistributed. If not specified, all networks are redistributed
Configure Route Injection Settings
This section describes the steps required to define the routes to be conditionally injected into the BGP routing table.
Procedure
Step 1 Enable a BGP routing process, which places the ASA in router configuration mode:
router bgp autonomous-num
Example:
ciscoasa(config)# router bgp 2
Step 2 Enter address family configuration mode to configure a routing session using standard IP Version 6 (IPv6) address prefixes:
address-family ipv6 [unicast]
Example:
ciscoasa(config-router)# address-family ipv6 [unicast]
Step 3 Configure conditional route injection to inject more specific routes into a BGP routing table:
bgp inject-map inject-map exist-map exist-map [copy-attributes]
Example:
ciscoasa(config-router-af)# bgp inject-map example1 exist-map example2 copy-attributes
• inject-map — the name of the route map that specifies the prefixes to inject into the local BGP routing table.
• exist-map — the name of the route map containing the prefixes that the BGP speaker will track.
• (Optional) copy-attributes — configures the injected route to inherit attributes of the aggregate route.
22-29Cisco ASA Series General Operations CLI Configuration Guide
Chapter 22 BGP Monitoring BGP
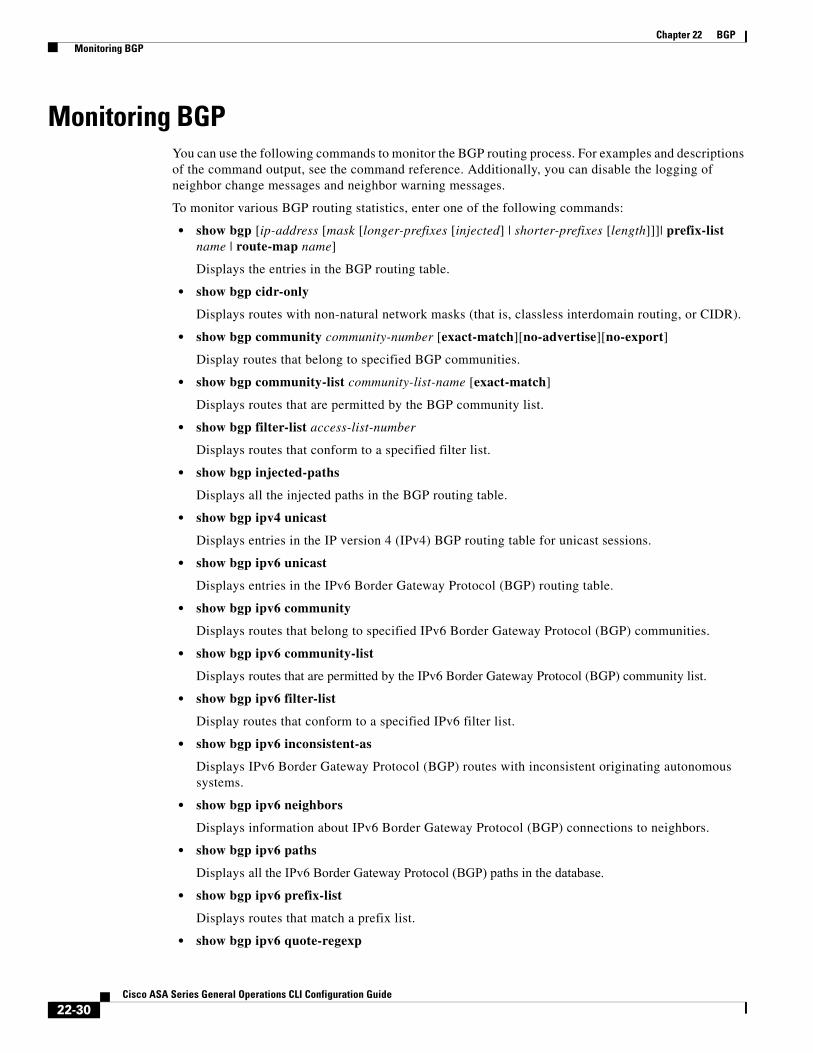
Monitoring BGPYou can use the following commands to monitor the BGP routing process. For examples and descriptions of the command output, see the command reference. Additionally, you can disable the logging of neighbor change messages and neighbor warning messages.
To monitor various BGP routing statistics, enter one of the following commands:
• show bgp [ip-address [mask [longer-prefixes [injected] | shorter-prefixes [length]]]| prefix-list name | route-map name]
Displays the entries in the BGP routing table.
• show bgp cidr-only
Displays routes with non-natural network masks (that is, classless interdomain routing, or CIDR).
• show bgp community community-number [exact-match][no-advertise][no-export]
Display routes that belong to specified BGP communities.
• show bgp community-list community-list-name [exact-match]
Displays routes that are permitted by the BGP community list.
• show bgp filter-list access-list-number
Displays routes that conform to a specified filter list.
• show bgp injected-paths
Displays all the injected paths in the BGP routing table.
• show bgp ipv4 unicast
Displays entries in the IP version 4 (IPv4) BGP routing table for unicast sessions.
• show bgp ipv6 unicast
Displays entries in the IPv6 Border Gateway Protocol (BGP) routing table.
• show bgp ipv6 community
Displays routes that belong to specified IPv6 Border Gateway Protocol (BGP) communities.
• show bgp ipv6 community-list
Displays routes that are permitted by the IPv6 Border Gateway Protocol (BGP) community list.
• show bgp ipv6 filter-list
Display routes that conform to a specified IPv6 filter list.
• show bgp ipv6 inconsistent-as
Displays IPv6 Border Gateway Protocol (BGP) routes with inconsistent originating autonomous systems.
• show bgp ipv6 neighbors
Displays information about IPv6 Border Gateway Protocol (BGP) connections to neighbors.
• show bgp ipv6 paths
Displays all the IPv6 Border Gateway Protocol (BGP) paths in the database.
• show bgp ipv6 prefix-list
Displays routes that match a prefix list.
• show bgp ipv6 quote-regexp
22-30Cisco ASA Series General Operations CLI Configuration Guide

Chapter 22 BGP Monitoring BGP
Displays IPv6 Border Gateway Protocol (BGP) routes matching the autonomous system path regular expression as a quoted string of characters.
• show bgp ipv6 regexp
Displays IPv6 Border Gateway Protocol (BGP) routes matching the autonomous system path regular expression.
• show bgp ipv6 route-map
Displays IPv6 Border Gateway Protocol (BGP) routes that failed to install in the routing table.
• show bgp ipv6 summary
Displays the status of all IPv6 Border Gateway Protocol (BGP) connections.
• show bgp neighbors ip_address
Displays information about BGP and TCP connections to neighbors.
• show bgp paths [LINE]
Displays all the BGP paths in the database.
• show bgp pending-prefixes
Displays prefixes that are pending deletion.
• show bgp prefix-list prefix_list_name [WORD]
Displays routes that match a specified prefix list.
• show bgp regexp regexp
Displays routes that match the autonomous system path regular expression.
• show bgp replication [index-group | ip-address]
Displays update replication statistics for BGP update groups.
• show bgp rib-failure
Displays BGP routes that failed to install in the Routing Information Base (RIB) table.
• show bgp route-map map-name
Displays entries in the BGP routing table, based on the route map specified.
• show bgp summary
Display the status of all BGP connections.
• show bgp system-config
Display the system context specific BGP configuration in multi-context mode.
This command is available in all user contexts in multi-context mode.
• show bgp update-group
Display information about the BGP update groups.
Note To disable BGP Log messages, enter the no bgp log-neighbor-changes command in the router configuration mode. This disables the logging of neighbor change messages. Enter this command in router configuration mode for the BGP routing process.By default, neighbor changes are logged.
22-31Cisco ASA Series General Operations CLI Configuration Guide

Chapter 22 BGP Configuration Example for BGP
Configuration Example for BGPThis example shows how to enable and configure BGPv4 with various optional processes.
Step 1 Define the conditions for redistributing routes from one routing protocol into another, or enable policy routing:
ciscoasa(config)# route-map mymap2 permit 10
Step 2 Redistribute any routes that have a route address or match packet that is passed by one of the access lists specified:
ciscoasa(config-route-map)# match ip address acl_dmz1 acl_dmz2
Step 3 Indicate where to output packets that pass a match clause of a route map for policy routing:
ciscoasa(config-route-map)# set ip next-hop peer address
Step 4 Enable a BGP routing process from the global configuration mode:
ciscoasa(config)# router bgp 2
Step 5 Configure a fixed router ID for the local Border Gateway Protocol (BGP) routing process in the address family configuration mode:
ciscoasa(config)# address-family ipv4ciscoasa(config-router-af)# bgp router-id 19.168.254.254
Step 6 Add an entry to the BGP neighbor table:
ciscoasa(config-router-af)# neighbor 10.108.0.0 remote-as 65
Step 7 Apply a route map to incoming or outgoing routes:
ciscoasa(config-router-af)# neighbor 10.108.0.0 route-map mymap2 in
This example shows how to enable and configure BGPv6 with various optional processes.
Step 1 Define the conditions for redistributing routes from one routing protocol into another, or enable policy routing:
ciscoasa(config)# route-map mymap1 permit 10
Step 2 Redistribute any routes that have a route address or match packet that is passed by one of the access lists specified:
ciscoasa(config-route-map)# match ipv6 address acl_dmz1 acl_dmz2
Step 3 Indicate where to output packets that pass a match clause of a route map for policy routing:
ciscoasa(config-route-map)# set ipv6 next-hop peer address
Step 4 Enable a BGP routing process from the global configuration mode:
ciscoasa(config)# router bgp 2
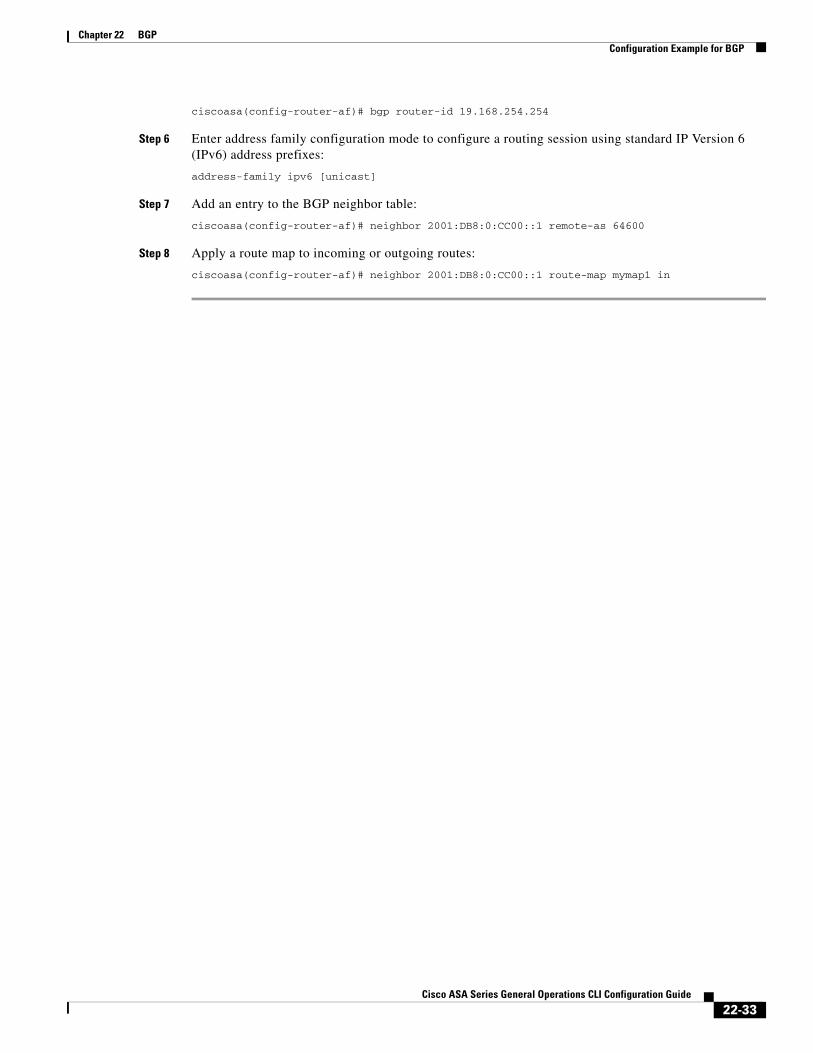
Step 5 Configure a fixed router ID for the local Border Gateway Protocol (BGP) routing process in the address family configuration mode:
ciscoasa(config)# address-family ipv4
22-32Cisco ASA Series General Operations CLI Configuration Guide
Chapter 22 BGP Configuration Example for BGP
ciscoasa(config-router-af)# bgp router-id 19.168.254.254
Step 6 Enter address family configuration mode to configure a routing session using standard IP Version 6 (IPv6) address prefixes:
address-family ipv6 [unicast]
Step 7 Add an entry to the BGP neighbor table:
ciscoasa(config-router-af)# neighbor 2001:DB8:0:CC00::1 remote-as 64600
Step 8 Apply a route map to incoming or outgoing routes:
ciscoasa(config-router-af)# neighbor 2001:DB8:0:CC00::1 route-map mymap1 in
22-33Cisco ASA Series General Operations CLI Configuration Guide

Chapter 22 BGP History for BGP
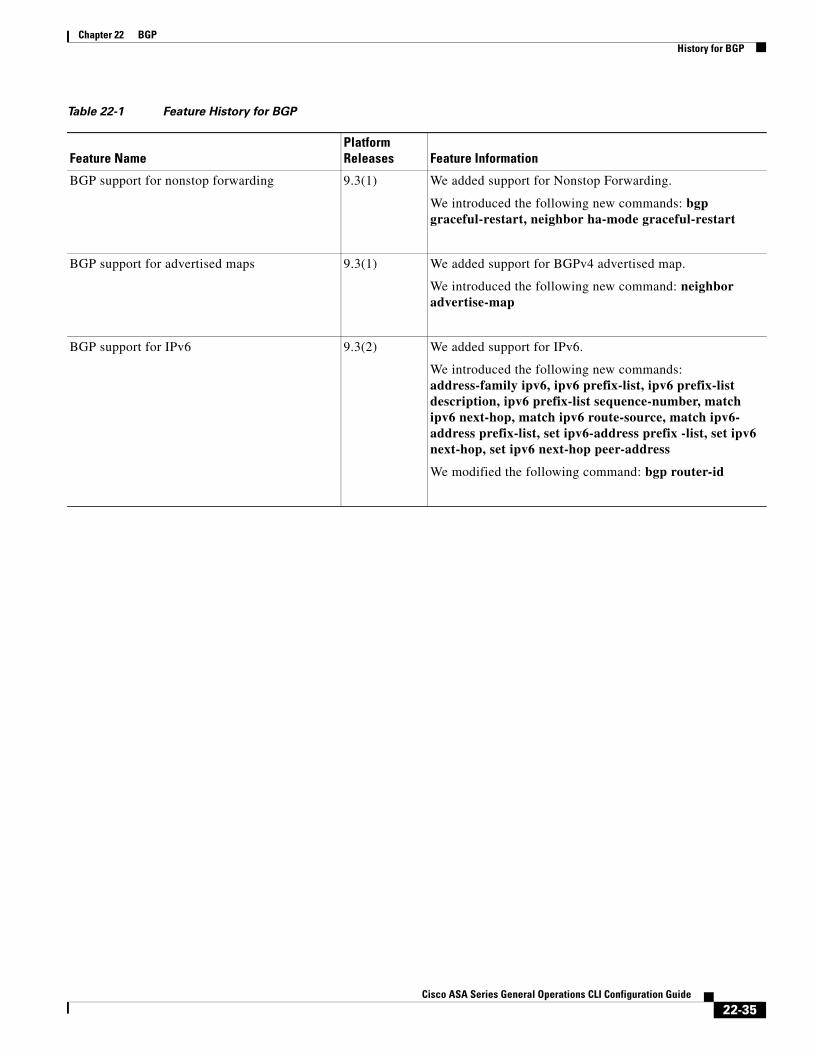
History for BGPTable 22-1 lists each feature change and the platform release in which it was implemented.
Table 22-1 Feature History for BGP
Feature NamePlatform Releases Feature Information
BGP Support 9.2(1) Support was added for routing data, performing authentication, and redistributing and monitoring routing information using the Border Gateway Protocol.
We introduced the following commands: router bgp, bgp maxas-limit, bgp log-neighbor-changes, bgp transport path-mtu-discovery, bgp fast-external-fallover, bgp enforce-first-as, bgp asnotation dot, timers bgp, bgp default local-preference, bgp always-compare-med, bgp bestpath compare-routerid, bgp deterministic-med, bgp bestpath med missing-as-worst, policy-list, match as-path, match community, match metric, match tag, as-path access-list, community-list, address-family ipv4, bgp router-id, distance bgp, table-map, bgp suppress-inactive, bgp redistribute-internal, bgp scan-time, bgp nexthop, aggregate-address, neighbor, bgp inject-map, show bgp, show bgp cidr-only, show bgp all community, show bgp all neighbors, show bgp community, show bgp community-list, show bgp filter-list, show bgp injected-paths, show bgp ipv4 unicast, show bgp neighbors, show bgp paths, show bgp pending-prefixes, show bgp prefix-list, show bgp regexp, show bgp replication, show bgp rib-failure, show bgp route-map, show bgp summary, show bgp system-config, show bgp update-group, clear route network, maximum-path, network.
We modified the following commands: show route, show route summary, show running-config router, clear config router, clear route all, timers lsa arrival, timers pacing, timers throttle, redistribute bgp.
BGP support for ASA clustering 9.3(1) We added support for L2 and L3 clustering.
We introduced the following new command: bgp router-id clusterpool
22-34Cisco ASA Series General Operations CLI Configuration Guide
Chapter 22 BGP History for BGP
BGP support for nonstop forwarding 9.3(1) We added support for Nonstop Forwarding.
We introduced the following new commands: bgp graceful-restart, neighbor ha-mode graceful-restart
BGP support for advertised maps 9.3(1) We added support for BGPv4 advertised map.
We introduced the following new command: neighbor advertise-map
BGP support for IPv6 9.3(2) We added support for IPv6.
We introduced the following new commands: address-family ipv6, ipv6 prefix-list, ipv6 prefix-list description, ipv6 prefix-list sequence-number, match ipv6 next-hop, match ipv6 route-source, match ipv6- address prefix-list, set ipv6-address prefix -list, set ipv6 next-hop, set ipv6 next-hop peer-address
We modified the following command: bgp router-id
Table 22-1 Feature History for BGP
Feature NamePlatform Releases Feature Information
22-35Cisco ASA Series General Operations CLI Configuration Guide

Chapter 22 BGP History for BGP
22-36Cisco ASA Series General Operations CLI Configuration Guide