BF-7312 USB 2.0 File Transfer Cable User's Manual _English
17
BF-7312 USB 2.0 File Transfer Cable User’s Manual 1 USER’S MANUAL BF-7312 USB 2.0 File Transfer Cable 1. Introduction Congratulations on your purchase of BF-7312 USB 2.0 File Transfer Cable! The PCLinq2 cable provides true plug-n-play capability while transferring files at greater speed than traditional USB or other legacy port file transfer products. Hi-Speed USB 2.0 solutions offer up to 40 times the speed compared to normal full-speed USB 1.1 products. PCLinq2 also provides a File Transfer program that is similar to Windows Program Manager so you can easily drag-and-drop files or create folders in your local computer or in the linked remote PC. Just plug in the cable, run the PCLinq2 program and instantly transfer or copy files at high speed. The PCLinq2 Hi-Speed USB Bridge Cable is highly suitable for mobile computer use and SOHO environment. 2. Package Content Hardware: USB 2.0 File Transfer Cable Software: Driver software on CD 3. Product Features Suitable for Mobile PC and SOHO environment Single chip ASIC Hi-Speed USB host to host communication Dual data buffer supports two-way data transfer Hi-Speed Performance with data transfer rate of over 15Mbytes/sec Full Compliance with the Universal Serial Bus Specification v1.1 and v2.0 Bus Powered from either USB port– no separate power required Advanced Power Management Mechanism includes Suspend-Resume and Remote Wake0up Functions. 4. System Requirements PC IBM ® PC Pentium 133 or higher or compatible system Available USB 2.0 port or available USB1.1 port CD-ROM drive Windows ® 98, Windows ® ME, Windows ® 2000 and Windows ® XP
-
Upload
radithbangke -
Category
Documents
-
view
33 -
download
0
description
cable user
Transcript of BF-7312 USB 2.0 File Transfer Cable User's Manual _English
BF-7312 USB 2.0 File Transfer Cable User’s Manual 1
USER’S MANUAL
BF-7312 USB 2.0 File Transfer Cable 1. Introduction
Congratulations on your purchase of BF-7312 USB 2.0 File Transfer Cable! The PCLinq2 cable provides true plug-n-play capability while transferring files at greater speed than traditional USB or other legacy port file transfer products. Hi-Speed USB 2.0 solutions offer up to 40 times the speed compared to normal full-speed USB 1.1 products. PCLinq2 also provides a File Transfer program that is similar to Windows Program Manager so you can easily drag-and-drop files or create folders in your local computer or in the linked remote PC. Just plug in the cable, run the PCLinq2 program and instantly transfer or copy files at high speed.
The PCLinq2 Hi-Speed USB Bridge Cable is highly suitable for mobile computer use and SOHO environment.
2. Package Content
� Hardware: USB 2.0 File Transfer Cable � Software: Driver software on CD
3. Product Features
� Suitable for Mobile PC and SOHO environment � Single chip ASIC Hi-Speed USB host to host communication � Dual data buffer supports two-way data transfer � Hi-Speed Performance with data transfer rate of over 15Mbytes/sec � Full Compliance with the Universal Serial Bus Specification v1.1 and v2.0 � Bus Powered from either USB port– no separate power required � Advanced Power Management Mechanism includes Suspend-Resume and
Remote Wake0up Functions.
4. System Requirements
PC � IBM® PC Pentium 133 or higher or compatible system � Available USB 2.0 port or available USB1.1 port � CD-ROM drive � Windows® 98, Windows® ME, Windows® 2000 and Windows® XP

BF-7312 USB 2.0 File Transfer Cable User’s Manual 2
5. Driver Installation (PC to PC File Transfer) Note:
If you plug the cable on a non-Hi-Speed USB port, Windows will show an alert message telling you that it is plugged into a non-Hi-Speed USB hub. You can still continue to use the BF-7312 USB 2.0 File Transfer Cable but it will run at a reduced speed. Windows will recommend you to add a Hi-Speed USB host controller to your computer to obtain maximum performance.
5.1 Windows® 98 Driver Installation
5.1.1 Power on both computers and make sure USB port is enabled and working properly.
5.1.2 Insert the driver of BF-7312 USB 2.0 File Transfer Cable into the CD-
ROM drive. Select “Install Products - BF-7312 USB 2.0 File Transfer Cable - Install”.
Attention: Don’t plug BF-7312 USB 2.0 File Transfer Cable into PC’s USB Port when installing driver.
5.1.3 Click “Next” to continue.

BF-7312 USB 2.0 File Transfer Cable User’s Manual 3
5.1.4 Click “Finish” to end installation.
5.1.5 After installation, there will have a new “PClinq2 (ANSI)” icon at desktop.
5.1.6 Please restart your computer. 5.1.7 When system operation success, you needed to be plug the BF-7312
USB 2.0 File Transfer Cable into USB Port of PC. Windows® will detect an USB Device. Your new hardware is installed and ready to use.

BF-7312 USB 2.0 File Transfer Cable User’s Manual 4
5.2 Windows® 98 Driver Un-Installation
If you don’t want to use this cable and want to eternally delete this driver from the PC then just follow the un-install procedure as following. Attention: Before you go through the un-installation procedure, please make sure that the BF-7312 USB 2.0 File Transfer Cable has been plug-off from PC.
5.2.1 Insert the driver of BF-7312 USB 2.0 File Transfer Cable into the CD-ROM drive. Select “Install Products - BF-7312 USB 2.0 File Transfer Cable - Install”.
5.2.2 Select the “OK” to uninstall.
5.2.3 Select the “Yes, I want to restart my computer now.” to uninstall, then Click “OK” to end this un-installation procedure.

BF-7312 USB 2.0 File Transfer Cable User’s Manual 5
5.3 Windows® ME Driver Installation
5.3.1 Power on both computers and make sure USB port is enabled and working properly.
5.3.2 Insert the driver of BF-7312 USB 2.0 File Transfer Cable into the CD-
ROM drive. Select “Install Products - BF-7312 USB 2.0 File Transfer Cable - Install”. Attention: Don’t plug BF-7312 USB 2.0 File Transfer Cable into PC’s USB Port when installing driver.
5.3.3 Click “Next” to continue.
5.3.4 Click “Finish” to end installation.

BF-7312 USB 2.0 File Transfer Cable User’s Manual 6
5.3.5 After installation, there will have a new “PClinq2 (ANSI)” icon at
desktop.
5.3.6 Plug the BF-7312 USB 2.0 File Transfer Cable into USB Port of PC. Windows® will detect an USB Device. Your new hardware is installed and ready to use.

BF-7312 USB 2.0 File Transfer Cable User’s Manual 7
5.4 Windows® ME Driver Un-Installation
If you don’t want to use this cable and want to eternally delete this driver from the PC then just follow the un-install procedure as following. Before you go through the un-installation procedure, please make sure that the BF-7312 USB 2.0 File Transfer Cable has been plug-off from PC.
5.4.1 Insert the driver of BF-7312 USB 2.0 File Transfer Cable into the CD-ROM drive. Select “Install Products - BF-7312 USB 2.0 File Transfer Cable - Install”.
5.4.2 Select the “OK” to uninstall.
5.4.3 Select the “Yes, I want to restart my computer now.” to uninstall, then Click “OK” to end this un-installation procedure.
BF-7312 USB 2.0 File Transfer Cable User’s Manual 8
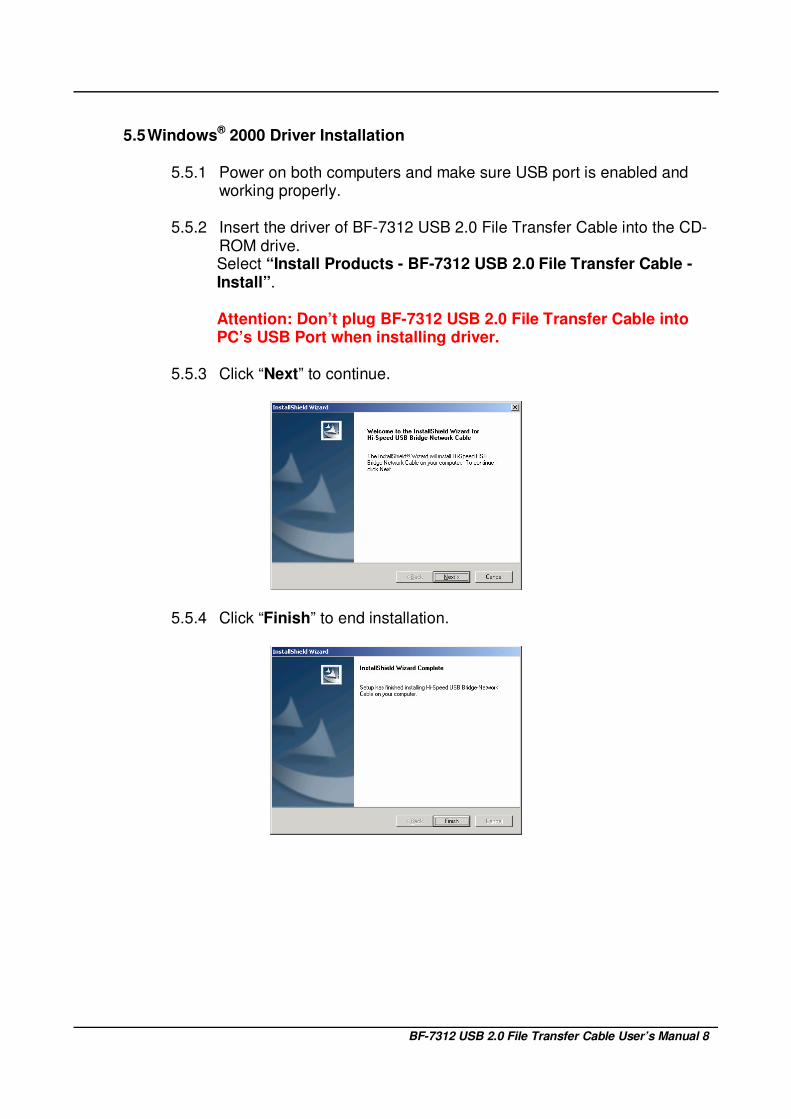
5.5 Windows® 2000 Driver Installation
5.5.1 Power on both computers and make sure USB port is enabled and working properly.
5.5.2 Insert the driver of BF-7312 USB 2.0 File Transfer Cable into the CD-
ROM drive. Select “Install Products - BF-7312 USB 2.0 File Transfer Cable - Install”. Attention: Don’t plug BF-7312 USB 2.0 File Transfer Cable into PC’s USB Port when installing driver.
5.5.3 Click “Next” to continue.
5.5.4 Click “Finish” to end installation.

BF-7312 USB 2.0 File Transfer Cable User’s Manual 9
5.5.5 After installation, there will have a new “PClinq2 (ANSI)” “PClinq2
(Unicode)” icon at desktop.
5.5.6 Plug the BF-7312 USB 2.0 File Transfer Cable into USB Port of PC. Windows® will detect an USB Device and your new hardware is installed and ready to use.

BF-7312 USB 2.0 File Transfer Cable User’s Manual 10
5.6 Windows® 2000 Driver Un-Installation
If you don’t want to use this cable and want to eternally delete this driver from the PC then just follow the un-install procedure as following.
Before you go through the un-installation procedure, please make sure
that the BF-7312 USB 2.0 File Transfer Cable has been plug-off from PC.
5.6.1 Insert the driver of BF-7312 USB 2.0 File Transfer Cable into the CD-ROM drive. Select “Install Products - BF-7312 USB 2.0 File Transfer Cable - Install”.
5.6.2 Select the “OK” to uninstall.
5.6.3 Select the “Yes, I want to restart my computer now.” to uninstall, then Click “OK” to end this un-installation procedure.

BF-7312 USB 2.0 File Transfer Cable User’s Manual 11
5.7 Windows® XP Driver Installation
5.7.1 Power on both computers and make sure USB port is enabled and working properly.
5.7.2 Insert the driver of BF-7312 USB 2.0 File Transfer Cable into the CD-
ROM drive. Select “Install Products - BF-7312 USB 2.0 File Transfer Cable - Install”. Attention: Don’t plug BF-7312 USB 2.0 File Transfer Cable into PC’s USB Port when installing driver.
5.7.3 Click “Next” to continue.
5.7.4 Click “Finish” to end installation.

BF-7312 USB 2.0 File Transfer Cable User’s Manual 12
5.7.5 After installation, there will have a new “PClinq2 (ANSI)” “PClinq2
(Unicode)” icon at desktop.
5.7.6 Plug the BF-7312 USB 2.0 File Transfer Cable into USB Port of PC. Windows® will detect an USB Device. Your new hardware is installed and ready to use.

BF-7312 USB 2.0 File Transfer Cable User’s Manual 13
5.8 Windows® XP Driver Un-Installation
If you don’t want to use this cable and want to eternally delete this driver from the PC then just follow the un-install procedure as following.
Before you go through the un-installation procedure, please make sure
that the BF-7312 USB 2.0 File Transfer Cable has been plug-off from PC.
5.8.1 Insert the driver of BF-7312 USB 2.0 File Transfer Cable into the CD-ROM drive. Select “Install Products - BF-7312 USB 2.0 File Transfer Cable - Install”.
5.8.2 Select the “OK” to uninstall.
5.8.3 Select the “Yes, I want to restart my computer now.” to uninstall, then Click “OK” to end this un-installation procedure.

BF-7312 USB 2.0 File Transfer Cable User’s Manual 14
6. Running the PClinq2 (ANSI) Application Program (PC to PC File Transfer)
Note: The Unicode program is only supported in Windows 2000 and Windows XP. The ANSI program is available for all Windows OS versions. Use the PCLinq2 Unicode version if both PCs have Windows 2000 or Windows XP.
6.1 Windows 98, ME, Windows 2000 & Windows XP
Follow the steps below on how to run the PClinq2 (ANSI) application program:
The step of use the application program are similar for four kinds of OS, we just use Windows® 2000 for an example.
6.1.1 Run Setup program on both (local and remote) computers. 6.1.2 Plug the one end of the PCLinq2 Hi-Speed USB Bridge cable into the
USB port of one computer and the other end into the USB port of the other computer.
6.1.3 Wait for Windows to detect the cable on each computer and check if it
is properly installed.

BF-7312 USB 2.0 File Transfer Cable User’s Manual 15
6.1.4 Double-click on the PCLinq2 program. You can also click Start-
Programs-PCLinq2 High-Speed USB Bridge Cable to access the PCLinq2 programs. It is important that you use the same program mode for each computer. If you are using ANSI mode, then both computers should be running the ANSI mode program. Check the Status LED on the bottom right of the program dialog box if it is ready or not. A green LED signifies a ready status while a red LED means not ready or not found. Make sure that the program shows two green LEDs to indicate a linked connection.
6.1.5 Once a connection has been established, you simply drag-and-drop
the files or folders you want to transfer to the other computer. You can change disk drives or directories but clicking on the pull-down directory menu. Use the File menu for other functions of the program.

BF-7312 USB 2.0 File Transfer Cable User’s Manual 16
6.1.6 You can cut, copy, paste, or drag files and folders between two computers just like Windows® Explorer file manager.
7. FAQ
Q: How can I know two PC are successfully connected? A: The bottom of the screen will show “Remote Connected” at both computers. Q: Should I un-install the driver each time when the cable been plugged-off? A: You don’t have to un-install driver each time when you plug this cable off.
Unless you don’t want to use this cable any more, then you could un-install it and remove driver from your PC.

BF-7312 USB 2.0 File Transfer Cable User’s Manual 17
8. Disclaimer
Information in this document is subject to change without notice. The manufacturer does not make any representations or warranties (implied or otherwise) regarding the accuracy and completeness of this document and shall in no event be liable for any loss of profit or any other commercial damage, including but not limited to special, incidental, consequential, or other damages. No part of this document may be reproduced or transmitted in any form by any means, electronic or mechanical, including photocopying, recording or information recording and retrieval systems without the express written permission of the manufacturer. All brand names and product names used in this document are trademarks, or registered trademarks of their respective holders.
9. FCC Statement
This device generates and uses radio frequency and may cause interference to radio and television reception if not installed and used properly. This has been tested and found to comply with the limits of a Class B computing device in accordance with the specifications in Part 15 of FCC Rules. These specifications are designed to provide reasonable protection against such interference in a residential installation. However, there is no guarantee that interference will not occur in a particular installation. If this device does cause harmful interference to radio or television reception, which can be determined by plugging the device in and out, the user can try to correct the interference by one or more of the followings: � Reorient or relocate the receiving antenna. � Increase the separation between the device and receiver. � Connect the computer into an outlet on a circuit different from that to which the
receiver is connected. � Consult the dealer or an experienced radio/TV technician for help.