bestanden/Flying the C-47v3vintage... · Web viewLANDING GEAR The gear, flaps, and emergency...
32
Transcript of bestanden/Flying the C-47v3vintage... · Web viewLANDING GEAR The gear, flaps, and emergency...


OPERATION MANUAL
CONTENTS
A Introduction
B The Cockpit C Control Panels 1 Weight and Fuel Status Panel 2 Control Status Panel 3 Monitor Panel 4 Audible Checklist Panel D Getting Started 1 Taxi 2 Take-Off 3 Cruise 4 Descent 5 Approach and Landing Appendix A: Systems Description B: Limits C: Tips and Tricks D: Checklists

CREDITS This C-47v3 (DC-3) is an FSX/P3D project by: Jan Visser (VVC models and textures) Manfred Jahn (external models. additional coding. bug fixing. checklist and Monitor Panel) Ted "Tufun" Wolfgang (Pratt & Whitney R -1830 Twin Wasp external and internal sound suite)
Alexander M. Metzger (flight dynamics. documentation. photos and info) Hansjörg Nägele (main programming) Daniel Gauthier (cockpit sounds. F/O communication and audio checklist) Robert Kerr (AN/ARN-6 Radio model) Tim Scharnhop (bump and specular maps) Mike Cyul. Warwick "Wozza" Carter. and Hans Hartmann (additional coding)
Dave Kingshott. Ian Warren. Jakob Andreas Nielsen (photos and other valuable information) Ton Harnish (Copilot's voice. documentation. beta tester)
Skip King (Captain's voice) Kate Lister (Stewardess ' voice) Phil Hopkins (documentation, beta tester) Nick Cooper. Ralf Scholten. Gordon Madison. Alen G. Ampolsk, Scott Harmes. Oleg_Tr. Tom Earl (Beta testers)

INTRODUCTION
Welcome to this basic guide on how to fly the C-47/DC-3. There are a number of new additions to systems and features in this wonderful freeware aircraft, and this guide will familiarize you with both normal operations and these unique features. This version offers a faithfully modeled virtual cockpit: various external model upgrades including new 3D engine models: a new flight model; new, accurate and distinct sounds for most cockpit switches and controls: a fabulous new engine sound set which includes new ability to model low throttle but constant prop sounds: and a new interactive checklist with optional copilot callouts. Numerous wonderful resources for C-47/DC-3 flight simulation are available on the web, including DC-3 Airways Virtal Airline (www.dc3airways.com) and The DC-3 Hangar (www.douglasdc3.com)
Here is a brief history of the DC-3 from The DC-3 Hangar: The 17th of December 1935 was a day that made history. It was the day when the first DC-3 Airliner took its maiden flight, thus inaugurating aircraft operations that made a profit simply by carrying nothing but passengers from one place to another.
American Airlines was the first to use the DC-3 commercially and on June 25t 1936 the first regular profit-making route from New York to Chicago was established.
With the advent of WW2 orders came pouring in both from the military and from commercial airlines leading Douglas to ramp up production to almost 600 DC-3/C-47’ a month. Between 1935 and 1947 Douglas built a total of 10,654 of the type and over 65 years later there are still almost 1,000 in flying ondition. Because of its continuing role in aviation, and its unique qualities, it is still competitive in specialized operations even in the modern jet era. The DC-3 still has no true replacement, and it has become an iconic aircraft in the history of modern aviation.
Today, the DC-3 is still finding its greatest use in specialized roles within some third-world military forces and is commercially useful in some back country and bush areas, particularly because of its economic operating costs and its ability to operate from rough fields with low maintenance. These are virtues that make it competitive with modern

designs. So long as the airframes remain strong- and the DC-3 has never been faulted for its structural integrity-there is no reason why this bird will not continue to fly well into the 21st Century.
* Adapted with permission
"The only replacement for a DC-3 is another DC-3"
THE COCKPIT
Most instruments on the main panels should be familiar to the steam- gauge-era pilot. A few instruments specific to this C-47/DC-3 are detailed below. The overhead panel has two subsections:
Pilot (Left): Light switches/ Anti-icing Copilot (Right): Start switches/ Electrical/ Fuel pumps
Controls for propeller feathering are separated on each panel (left prop on left panel, right prop on right panel). Most, but not all, switches are operable. A few switches can be operated but are not presently functional.
PILOT OVERHEAD PANEL

NOTE: In general, dials and switches that can be clicked,tank selectors and cowl switches, will operate logically with a right click. counter-clockwise with a left click – and may also be operated by scrolling the middle mouse wheel. Cockpit lighting (FSX) planned for future update. In the meantime, this C-47 is certified for daytime operations only in FSX.
COPILOT OVERHEAD PANEL
The checklist will call for the the ignition master switch to be pushed in. It is located above the magneto switches. The battery is selected with a tree-way switch:
Top = External Power Middle = Off Bottom = Battery Power
The battery has sufficient charge for starting the aircraft without ground power.
WINDOWS

The front windows may be opened as can the more typical side windows. Wipers work nicely. Take a moment to appreciate the wonderful bump mapping for the rivets on the nose cowling.
RADIO ALTIMETER
The aircraft has an operating radio altimeter. You turn it on or off with the bottom left knob and select range with the top right knob. The dial to the right allows the pilot to set the altitude at which he wants to be alerted between O-300 feet or O-3000 feet depending on the range selected on the radio altimeter.

FUEL QUANTITY
Selecting each of the four fuel tanks with the switch will provide a read out for each tank selected on the quantity gauge.
COWL FLAPS
Cowl flaps, on the copilot's side panel, should be set to full open during ground operation. They can be controlled manually, or set to trail (automatic) by middle clicking each switch, whereupon they will be adjusted as necessary to control temps automatically.
INTERCOM

The intercom and radio tone switches are on the left side, by the pilot. The intercom switch should be on in order to hear the Copilot and Stewardess voices.
FLAPS
The flap indicator is also on the left front by the pilot.

THROTTLE QUADRANT
The throttle quadrant is crowded with important controls. In addition to the usual mixture, throttle, and propeller controls, the following controls are also located on the quadrant pedestal:
There is also an aileron trim crank on the far side of the quadrant.

NOTE: For a less obstructed view of the pedestal, click the armsets to stow them.
AUTOPILOT
There is no vintage autopilot (so far). Switching on the autopilot with the pedestal switch will allow the user to set altitude and compass hold via the usual simulator controls. Autopilot functions are available as well in the Autopilot section of the Monitor Panel (see below).
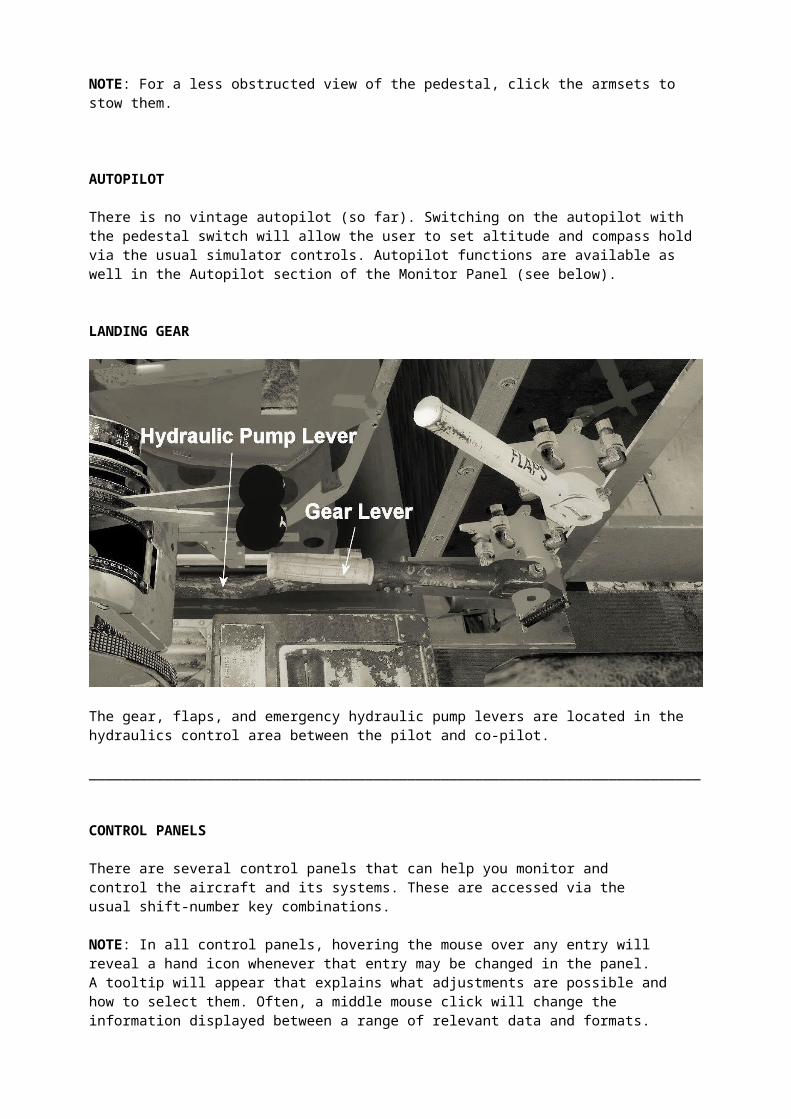
LANDING GEAR
The gear, flaps, and emergency hydraulic pump levers are located in the hydraulics control area between the pilot and co-pilot.
_________________________________________________________________________
CONTROL PANELS
There are several control panels that can help you monitor and control the aircraft and its systems. These are accessed via the usual shift-number key combinations.
NOTE: In all control panels, hovering the mouse over any entry will reveal a hand icon whenever that entry may be changed in the panel. A tooltip will appear that explains what adjustments are possible and how to select them. Often, a middle mouse click will change the information displayed between a range of relevant data and formats.
WEIGHT AND FUEL STATUS PANEL is displayed by hitting SHIFT+2. Middle clicking the mouse over any fuel tank entry in this panel will switch between showing fuel weight, gallons, percentage of tank, or miles possible to fly on current fuel in tank. Trim may be adjustedwith left and right clicks. or zeroed with a middle mouse click. The clock in both the Weight and Fuel and the Control Status panel can be changed to a timer with a middle mouse click, and started and stopped or zeroed with regular mouse clicks.
With aircraft stopped on ground (parking brake set), it is possible to change the fuel and payload weights by left/right-clicking into the weight numbers (in 50 lb increments). The pilot’s weight cannot be changed, but the copilot can be removed completely by clicking on his weight.

While it is possible to change the content of each tank separately by clicking into the fuel quantity, it also is possible to apply predefined fuel configurations by repeatedly clicking with left mouse button into the "Total fuel" field. When clicked. the field temporarily changes to "Select fuel" in blue and allows selecting one of the following four predefined fuel configurations (displayed on the right):
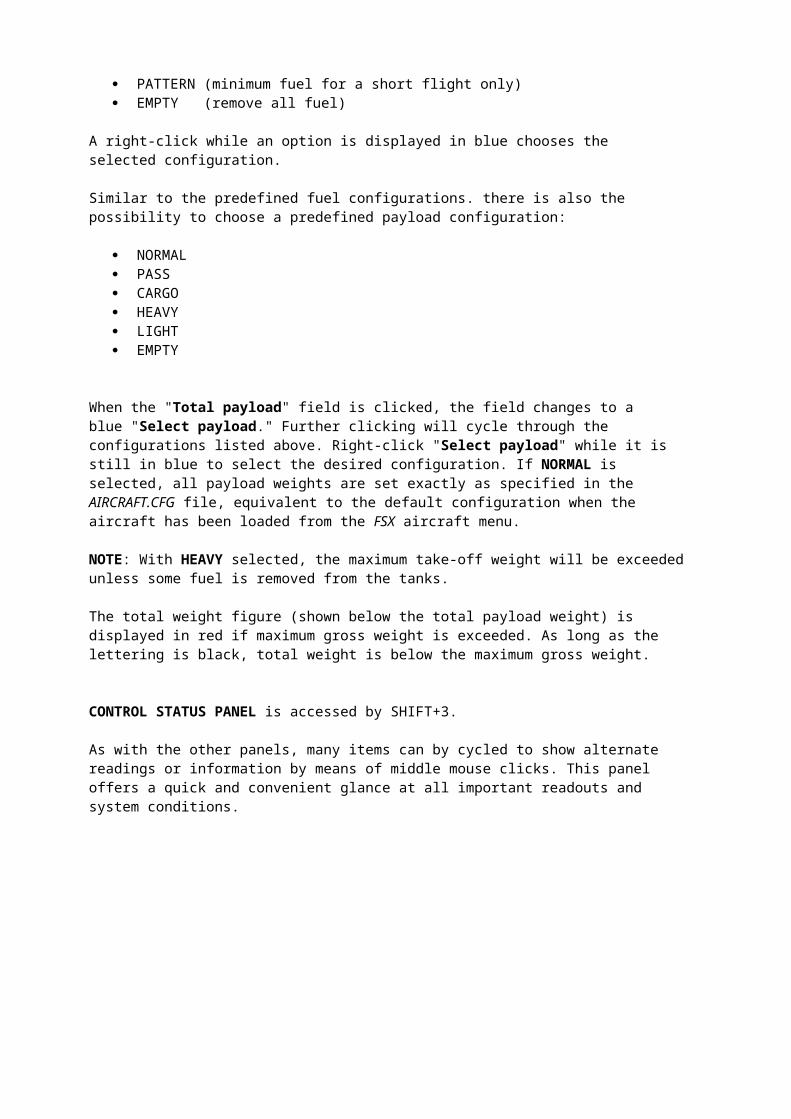
NORMAL (medium fuel load for more payload capacity) MAX (all tanks filled 100%) PATTERN (minimum fuel for a short flight only) EMPTY (remove all fuel)
A right-click while an option is displayed in blue chooses the selected configuration.
Similar to the predefined fuel configurations. there is also the possibility to choose a predefined payload configuration:
NORMAL PASS CARGO HEAVY LIGHT EMPTY
When the "Total payload" field is clicked, the field changes to a blue "Select payload." Further clicking will cycle through the configurations listed above. Right-click "Select payload" while it is still in blue to select the desired configuration. If NORMAL is selected, all payload weights are set exactly as specified in the AIRCRAFT.CFG file, equivalent to the default configuration when the aircraft has been loaded from the FSX aircraft menu. NOTE: With HEAVY selected, the maximum take-off weight will be exceeded unless some fuel is removed from the tanks. The total weight figure (shown below the total payload weight) is displayed in red if maximum gross weight is exceeded. As long as the lettering is black, total weight is below the maximum gross weight.
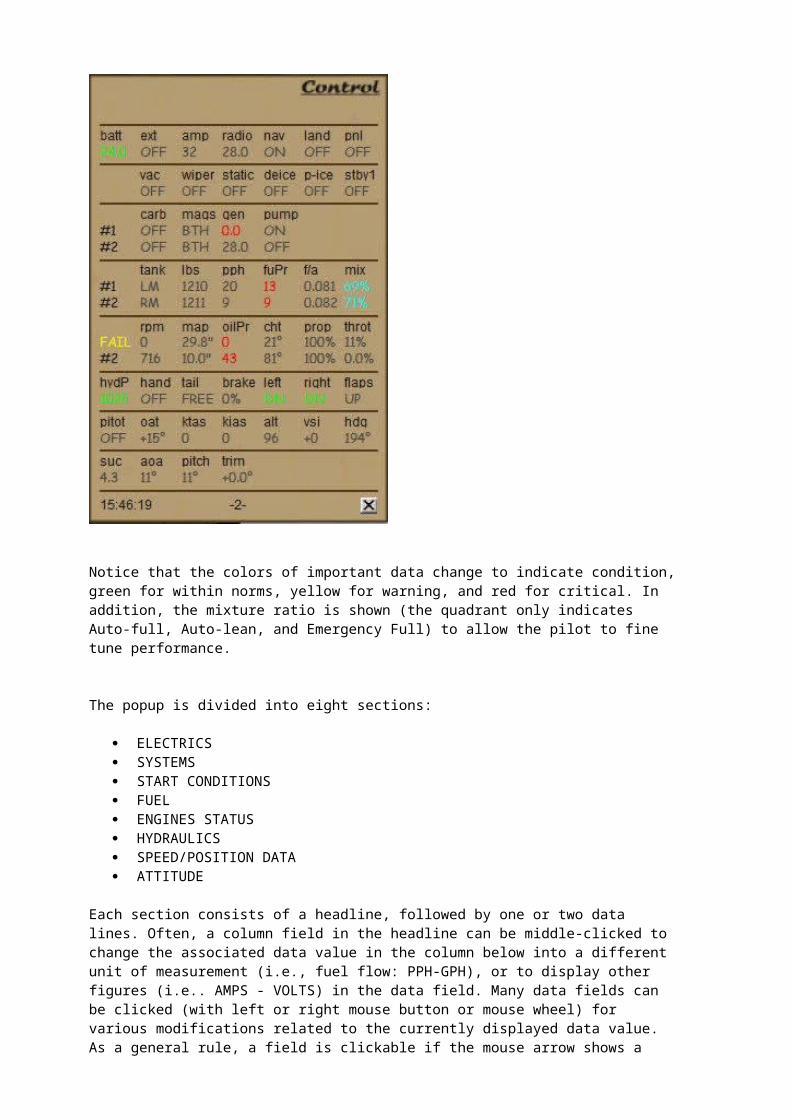
CONTROL STATUS PANEL is accessed by SHIFT+3. As with the other panels, many items can by cycled to show alternate readings or information by means of middle mouse clicks. This panel offers a quick and convenient glance at all important readouts and system conditions.
Notice that the colors of important data change to indicate condition, green for within norms, yellow for warning, and red for critical. In addition, the mixture ratio is shown (the quadrant only indicates Auto-full, Auto-lean, and Emergency Full) to allow the pilot to fine tune performance.
The popup is divided into eight sections:
ELECTRICS SYSTEMS START CONDITIONS FUEL ENGINES STATUS HYDRAULICS SPEED/POSITION DATA ATTITUDE
Each section consists of a headline, followed by one or two data lines. Often, a column field in the headline can be middle-clicked to change the associated data value in the column below into a different unit of measurement (i.e., fuel flow: PPH-GPH), or to display other figures (i.e.. AMPS - VOLTS) in the data field. Many data fields can be clicked (with left or right mouse button or mouse wheel) forvarious modifications related to the currently displayed data value. As a general rule, a field is clickable if the mouse arrow shows a tooltip when pointing into that field. Usually, the action initiated by a click is similar to operating the corresponding switch or handle in the VC (i.e.,left-click = move switch down, right-click = move up.
MONITOR PANEL is opened with SHIFT+4.
This panel has too many features to fully 1ist, and it is recommended that pilots explore it thoroughly on their own. In general, when hovering the mouse over each item tool tips appear that explain the use and the justment of that item. Settings can be changed up and down with left and right mouse clicks. Some items can be engaged with middle mouse clicks. FOR EXAMPLE: When the "Cowls" (cowl flap) setting is e licked with the middle mouse wheel, or when the green ascending aircraft icon is clicked, the current cowl setting will appear brighter to indicate it is in auto mode and can no longer be adjusted with left and right clicks. Clicking on the bright icon with the middle mouse wheel will return to manual mode. Many features of the Monitor Panel work in this fashion.
You will note that on the FLIGHT sub-panel, you can call up a speed limit placard, set takeoff trim, toggle the copilot callouts (he will read checklists and advise on conditions during flight), and increase (*) or reduce ([X]) the number of panels showing. On the ENGINES panel, you can select and control individual engines, show a power settings placard, set cruise power (60% power / 80% prop = ~32" MAP/ ~2400 RPM), and set cowl flaps for takeoff. On the AUTOPILOT panel, you can set the usual autopilot controls, such as Altitude hold, Heading hold, or NAV/GPS navigation hold. On the MISC panel, you can call up ATC, a GPS, the map, checklist and other items, and set lights, chocks, doors and steps. Each panel can be hidden individually.

AUDIBLE CHECKLIST PANEL is opened with SHIFT+7
This new feature allows the user to select or deselect Captain, Copilot and Stewardess voices. The Checklist may be started from "Cold and Dark" or at any point in the flight by simply left-clicking on the desired checklist. Once clicked. the prior checklists will be marked "Done."
If for any reason the checklist stalls. the user can click on "SKIP ITEM" to get it going again. Normally, once the operator performs the action called for on the checklist, the copilot will recognize that it is done and call out the next item. If you do not wish to perform the action, simply click "SKIP ITEM" to proceed. If you do not understand the call out, you may click "REPEAT" as many times as desired. Clicking "H" in the top right corner pulls up the help menu for this panel, as shown above, with instructions for how to use it.


Getting started The default load is a crew of two pilots, a maximum of 15 troops (21 day passenger seats are standard and 1020 lbs of cargo/luggage. The total payload is then calculated as 3670 lbs. With a full load of fuel in the main tanks (202 gallons each) and auxiliary tanks (200 gallons each) tanks you will have 804 gallons total, which will put you are right at MTOW of 26.200 pounds. Passenger and baggage weight can be adjusted in the normal FSX payload and fuel window or through the Shift-2 Control Panel while on the ground with parking brake Set.
Engine Start Procedure We assume you have done your proper flight planning, filled the tanks with the required fuel quantities, have passengers and cargo secured, and all doors are closed. Engine Start procedure: (a more detailed checklist is available in the Appendix)
Set parking brakes Battery ON NAV lights and Beacon ON Ignition Master ON (pushed in) Mixture IDLE/CUT-OFF Throttle cracked 10% Propellers FULL FORWARD Check area clear Generator ON Fuel pump ON Engage STARTER Count through at least 9-15 blades and then set magnetos to BOTH Advance Mixture to 50+ % Prime repeatedly or keep pressed until engine starts Mixture to AUTO RICH
After the engine has started, stabilize the RPM at about 1000 for warming up. Once warmed up, throttles can be left at idle. Repeat procedure for second engine. (Engines can also be started with the Monitor Panel and with Autostart = CTRL+E. )


Taxi The C-47 does not have a steerable tailwheel. Turning is accomplished with differential braking and differential power. Make sure that the tail wheel is unlocked before you start taxiing. Advance the throttles slowly and let the aircraft start rolling before applying left or right brakes for initiating turns. At low speed (<40 KIAS) the rudder is not sufficient to control direction. Do not exceed 10 knots on taxiways as it will be difficult to control the aircraft, especially in crosswind conditions. Note: if you prefer steering the plane via rudder you will have to edit the aircraft.cfg file and activate this option in section (contact points), entry point .O. To do this, add hash marks " // " to the beginning of the first entry point. O line and remove the hash marks from the second entry point. O line. Execute the “Taxi Checks”. Remember to check brakes upon start of roll, and keep an eye on the oil pressure and temps (everything in the green range).
Take-off After proper alignment with the runway, lock the tail wheel and after assurance that you are "ready-to-go" advance power slowly with the brakes still firmly engaged. Only when the engines are running evenly at 30" MAP release the brakes and control initial steering with differential braking. Push the power levers slowly forward to above 42" but not beyond the red line on manifold pressure. At about 40 KIAS the rudder will assist directional control. At about 60 KIAS depending on load the tail will come up (you may push the nose forward above 40 KIAS to assist) but keep the wheels on the runway to accelerate to 85 KIAS. At rotation speed, pull lightly on the yoke so that the aircraft becomes airborne. With positive rate of climb, raise the gear while maintaining a bit of back pressure on the yoke and once the gear is retracted let the aircraft accelerate to 95 KIAS and then retract the flaps (if used). Maintain 1000 feet/min climbrate to accelerate further and once you exceed 115 KIAS maintain speed, pulling back power to between 36-42" MAP and 2400 RPM max. Maintain 115 to 120 KIAS for initial climb. Now it is time to do the "After Take-off Checks." Fuel pumps may be turned off. Typical extended climb settings = 36” MAP/2350 RPM.
Continue monitoring engine gauges to ensure operation within the green range. Adjust cowl flaps as necessary (or set to trail/automatic). Continuous climb out at high power settings will require higher cowl flap settings to ensure sufficient cooling. Switch off landing lights when leaving airport area or when passing 10.000 ft.
Cruise The C-47 does not have a pressurized cabin. This limits the flight altitude to 10.000 feet without using oxygen. Although the C-47 is capable Of flying higher, higher than 15.000 feet is not recommended. Watch the distribution of fuel in the tanks during cruise and switch fuel tanks to maintain balance. In general, take off on the main tanks. switch to auxiliary tanks until empty and then fly on the main tanks. If you planned your fuel correctly, when you start your descent the main tanks should be the fullest tanks.

The C-47 has a wide range of power settings available for cruise, and she can fly fast as long as attention is paid to cowl flaps and controlling heat. Typical economy cruise power setting is 30"/ 2050 RPM, which should give you a speed between 140-150 KIAS. Cowl flaps may be closed or mostly closed, or set into the trail/automatic condition.
Descent Calculate your Top of Descent (TOD) with about - 1000 feet/min vertical speed. Assuming 180 KIAS as average during the descent, you fly about 3 Nm/min. So you need to calculate 3 Nm distance for your TOD for every 1000 feet of altitude plus about 5 Nm for deceleration to 100 KIAS entry speed when reaching the airport proximity. Typical descent power setting is 20" / 2000 RPM. Never fly with RPM lower than MP except in the landing flare otherwise the props will drive the engine which puts high inertial loads on the master rod bearings. Switch on your landing lights upon approaching the airport. Do not forget to adjust your barometric pressure on the altimeters.
Approach and Landing Reduce altitude and speed as you approach the airport. Set mixture to AUTO-RICH as you approach the airport or pattern.
Once below 130 KIAS and on extended approach or downwind in the pattern. lower landing gear. Once below 120 KIAS, add in one notch of flaps. Then maintain 100 until you start your final descent and set flaps ½ to keep speed constant. Having the runway in sight, slow down by setting flaps full and maintain 85 KIAS as your final approach speed. You need to quickly add some power to compensate for the flaps drag and increase RPM to maximum (this is needed in the event you have to abort your approach).
You should fly your approach pattern with about 100 KIAS and your final approach speed at about 1.3x stall speed. 80-90 KIAS is a good general target figure, depending on load and wind conditions go slower or faster than that, the copilot will warn you.
Now it is time to do the "Landing Checks"
Gear DOWN - 2 lights Flaps FULL (or as desired below 95 KIAS) Engines Final Power (maintain speed With pitch and descent rate with throttle) Descent rate / speed Normal (700 ft/min @ 85 KIAS) Instruments in the green Landing lights ON
Typically you need some throttle to maintain a stable approach down to the runway. Once you are over the fence, pull the throttles to idle and flare the aircraft to a horizontal attitude for touch down on the main wheels. Pull back on the yoke and brake gently.

Once down, raise flaps, unlock the tall wheel and taxi to your parking position and shut down the engines. Job well done. Captain!

Appendix A: C-47 Systems Description Electrical System The electrical system is of four-bus type (left and right generator, main and avionics bus). Ship battery voltage is 24V. Setting the external power switch to position ON connects the aircraft to a ground power source, but only if the parking brake is set. NOTE (FSX) : External power is only available with installed FSX Acceleration Pack or FSX Gold Edition. With any other installation (FSX RTM, FSX SP1. or FSX SP2), the external power switch will have no effect. In the case where electrics are on battery power only (without generators or ground power), the battery is discharging at least 70% slower than the FSX default effect. Therefore it is no problem to start the engines with a fully charged battery without ground power.
However, a discharged battery can be charged at any clicking the battery switch.
Hydraulic System Hydraulic pressure is supplied by two engine-driven variable displacement pumps. Normal System pressure is 900 psi. A minimum pressure of 600 psi is needed for successful operation of gear, wing flaps, and brakes. In case of failure of both engine-driven hydraulic pumps, a hand pump is used to provide emergency pressure for the hydraulic system, i.e. for lowering flaps, gear extension or braking).
Emergency extension of the landing gear
Even with failed engine pumps, gear may still be pumped down using the hydraulic hand pump. For this to work, the gear lever must be in DOWN position. The hand pump must be moved (left-click on the lever to activate, click again to stop) until the gear lights turn on indicating that the gear is fully down and locked. NOTE: Do not extend gear above 141 KIAS.
Wing flaps
Wing flaps are hydraulically actuated and can be lowered and raised in steps: UP. 25%. 50%. 75%, and DOWN.
NOTE: Do not extend flaps above 122 KIAS. otherwise they may be Damaged.
NOTE (FSX): In case FSX toggles a complete hydraulic failure event, the emergency hand pump will have no effect except that the gear may still be lowered with the emergency procedure described above (this will then take several minutes). However, without hydraulic failure event, but low hydraulic pressure, the emergency hand pump allows operation of flaps, brakes and also gear retraction.

Fuel Distribution The C-47 is equipped with four standard fuel tanks for a maximum fuel capacity of 804 gal (5387 lbs. 1 gallon = 6.7 pounds):
(2) Main. 202 gal (1353 lbs) ea. (2) Inboard auxiliary, 200 gal (1340 lbs) ea. There are four electrical fuel pumps: (2) left and right main and (2) left and right standby. The main fuel pumps should be on during takeoff and landing, and during engine start up. The standby fuel pumps are used in case of one or both main pumps have these switches are switchable. but non-functional at present.
De-Icing Equipment The C-47 has a propeller and engine air inlet de-icing systems as well as pitot heat system. De-icing switches for propellers, engine anti-ice, and pitot heat are located on the left front overhead panel. These systems are switchable, but non-functional at present.
Appendix B: Limits
Max Gross Weight 26.200 lbsMax Landing Weight 25.346 lbs
VNE 228 KIAS VNO 180 KIASVLE 166 KIASVLO 141 KIASVFE 122 KIAS (ASI)V SKI DOWN 105 KIASV2 100 KIAS (@ MTOW)VR 87 KIAS (@ MTOW)V1 75 KIAS (@ MTOW)VREF 80 KIAS (@ 25.000 lbs)
Propeller 2700 RPM (max take-off)Fuel pressure psi 1 (min), 19 (max)Oil pressure psi 60 (min), 100 (max) Oil temperature 115 gr C (max)Hydraulic pressure psi 600 (min),1000(max)Starter Motor 20V (min)Fuel Pumps 20V (min)Avionics 22V (min)
Appendix C: Tips and Tricks 1) The VC throttle, propeller, and mixture levers can be linked and unlinked by middle-clicking any one of them. When linked, each pair of
levers will move simultaneously. 2) A depleted battery can be charged at any time by middle-clicking the battery tab in the CONTROL STATUS PANEL (SHIFT+3) 3) External power is available only on ground with aircraft stopped and parking brake set.4) Fuel and payload weight changes from within the WEIGHT & FUEL STATUS PANEL are only possible on the ground with the aircraft stopped (parking brake must be activated).

5) The dedicated paratrooper version of the C-47 is capable of paratrooper operations in FSX ONLY.
RESTRICTED The C-47 is equipped to carry 28 paratroops, including the jumpmaster. However, the number of paratroops can vary, depending upon type and length of mission, equipment carried, gliders in tow (one or two) and the number Of paratroops carried in gliders. Normally paratroopers jump at an altitude of 800 feet. Again, this altitude can vary, depending upon terrain, weather and combat conditions. Except for procedures detailed in this section, operation with paratroops is the sane as normal operational technique.
Airplane Check in Paratroop Operation Besides the normal checks, outlined here, the pilot makes additional checks when operating with paratroops. These additional checks are made together by pilot and jump master. But bear in mind that, as commander of your airplane, you as well as the jumpmaster are responsible for seeing that paratroop equipment is in order. Outside Check 1 Aircraft fittings and external projections in the vicinity of the exit (cargo) door are completely masked.
Inside Check
1) The red (caution) and green (jump) lights are in working order. 2) Emergency bell is in working order. 3) The static line is not frayed or defective in any way. 4) Matting around the exit (cargo) door is unwrinkled and fastened securely to the floor. 5) All loose equipment is stowed so that it does not interfere with paratroops during the jump. 6) Each seat and safety belt is in correct working order. (Pilot's responsibility alone) 5) Sufficient buckets are in the aircraft.
Procedure Before Paratroop Drop Before paratroop drop, you must: 1) Alert the jumpmaster 10 minutes before arrival at drop zone by ringing
a predetermined signal on the alert (emergency) bell. 2. Flash red caution light ("Stand to the door" signal)approximately 2 minutes before reaching drop zone. 3. Flash green jump light ("Go" signal) when the airplane is at the proper speed and proper altitude, on the prescribed course, and over the assigned drop zone.
Procedure During Drop
During paratroop drop. you must: 1. Maintain an indicated airspeed of 110 mph. with wheels and flaps up. 2. Maintain airplane in jumping attitude (level to slightly tail-low position) and take particular care to maintain a constant altitude and

gyro heading. 3. Throttle back left engine to approximately 12” to 13” MP in order to avoid severe shock to jumpers from propeller blast. 4. Advance right engine throttle to maintain jump attitude. Note: During combined operations with paratroops and glider tow, drop the
tow line before paratroops jump.
To enable paratroop operation in FSX: 1) Open Paratroop door (Door 04) while on the ground (from Monitor Panel or with keyboard) and leave it open the entire flight.2) Leave Paratrooper lights OFF. These replace the "Seat Belt" and "NO Smokingn lights in the special Paratrooper model with a Red Light and Green Light. 3) Climb to a minimum Of 800ft above ground. 4) About 2 minutes before arriving at drop area, turn Light ON. You will hear the Paratroop leader shouting "Red light! Stand up. " The troop will respond “Stand up…..” then you will hear "l minute!" 5) After 1 minute or so, turn Green Light ON. You'll hear the Paratroopers exiting the plane. 6) You cannot re-start this sequence again in the air. You must land before each new drop.
Starting Problems: If starting from the cockpit (or any other method) and you find yourself unable to start an engine, you can open the CONTROL STATUS PANEL ( SHIFT+3 ) to check engine status. If you note that an engine is listed with a yellow "FAIL," you can reset engines by briefly switching the Battery OFF and then ON again.
The key to good starts is proper use of primer. Once all conditions for starting are met (throttle cracked at 10%, props full forward mixture at 50% +, fuel pump on, MAG on and Ignition switch pushed in, starter engaged), then applying sufficient primer for conditions will get the engine to turn over and start.
7) To get the full effect of flying with copilot, follow these steps:
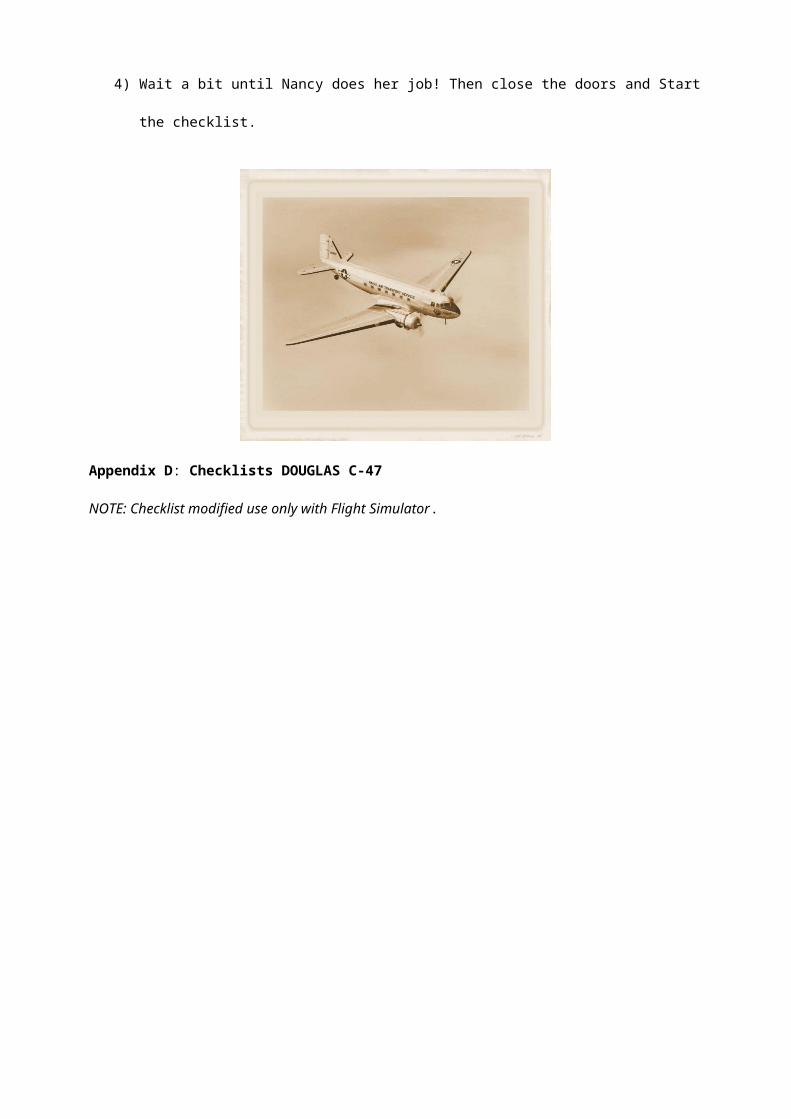
1) Start a new cold dark flight. 2) Open Checklist panel (SHIFT+7), Select voices you wish to hear. (At this point you will be prompted to "Turn Interphone ON" and "Open doors") 3) Turn ON the Interphone (and hear the greeting), and open doors 01 and 02. 4) Wait a bit until Nancy does her job! Then close the doors and Start
the checklist.

Appendix D: Checklists DOUGLAS C-47
NOTE: Checklist modified use only with Flight Simulator.