Basic Configuration Commands - FS Fiberstore · are more than 20 commands executed, all historical...
88
- I - Basic Configuration Commands
Transcript of Basic Configuration Commands - FS Fiberstore · are more than 20 commands executed, all historical...

- I -
Basic Configuration Commands

Table of Contents
- I -
Table of Contents
Basic Configuration Commands ...........................................................................................................................I
Table of Contents.....................................................................................................................................................I
Chapter 1 System Management Commands ...................................................................................................1
1.1 Configuring File Management Commands............................................................................... 1
1.1.1 copy ....................................................................................................................................... 1
1.1.2 delete..................................................................................................................................... 2
1.1.3 dir ........................................................................................................................................... 3
1.1.4 ip address............................................................................................................................. 3
1.1.5 ip route .................................................................................................................................. 4
1.1.6 show configuration ............................................................................................................. 5
1.1.7 format .................................................................................................................................... 5
1.1.8 more ...................................................................................................................................... 6
1.2 Basic System Management Commands................................................................................... 6
1.2.1 boot flash .............................................................................................................................. 7
1.2.2 cd............................................................................................................................................ 8
1.2.3 chinese.................................................................................................................................. 8
1.2.4 date ........................................................................................................................................ 9
1.2.5 debug job............................................................................................................................ 10
1.2.6 english................................................................................................................................. 10
1.2.7 md ........................................................................................................................................ 11
1.2.8 pwd ...................................................................................................................................... 11
1.2.9 rd .......................................................................................................................................... 12
1.2.10 rename.............................................................................................................................. 12
1.2.11 reboot ................................................................................................................................ 13
1.2.12 alias ................................................................................................................................... 14
1.2.13 boot system flash ........................................................................................................... 15
1.2.14 help.................................................................................................................................... 16
1.2.15 history ............................................................................................................................... 16
1.1.1 show .................................................................................................................................... 18
1.2.16 show job ........................................................................................................................... 19
1.2.17 show break ...................................................................................................................... 21
Table of Contents
Table of Contents
- II -
Chapter 2 Terminal Service Configuration Command ................................................................................ 22
2.1 Telnet Configuration Command ................................................................................................ 22
2.1.1 telnet.................................................................................................................................... 22
2.1.2 ip telnet ............................................................................................................................... 24
2.1.3 ctrl-shift-6+x (the current connection is mounted)..................................................... 26
2.1.4 where................................................................................................................................... 27
2.1.5 resume ................................................................................................................................ 28
2.1.6 disconnect .......................................................................................................................... 30
2.1.7 clear telnet.......................................................................................................................... 31
2.1.8 show telnet ......................................................................................................................... 32
2.1.9 debug telnet ....................................................................................................................... 32
2.2 Terminal Configuration Command............................................................................................ 33
2.2.1 attach-port .......................................................................................................................... 34
2.2.2 autocommand.................................................................................................................... 35
2.2.3 clear line ............................................................................................................................. 35
2.2.4 connect ............................................................................................................................... 35
2.2.5 disconnect .......................................................................................................................... 36
2.2.6 exec-timeout ...................................................................................................................... 37
2.2.7 length................................................................................................................................... 37
2.2.8 line ....................................................................................................................................... 38
2.2.9 location................................................................................................................................ 38
2.2.10 login authentication........................................................................................................ 39
2.2.11 monitor .............................................................................................................................. 39
2.2.12 no debug all ..................................................................................................................... 39
2.2.13 password .......................................................................................................................... 40
2.2.14 resume.............................................................................................................................. 41
2.2.15 show debug ..................................................................................................................... 41
2.2.16 show line .......................................................................................................................... 42
2.2.17 terminal length ................................................................................................................ 42
2.2.18 terminal monitor.............................................................................................................. 43
2.2.19 terminal width .................................................................................................................. 43
2.2.20 terminal-type.................................................................................................................... 44
2.2.21 where ................................................................................................................................ 45
2.2.22 width .................................................................................................................................. 45

Table of Contents
- III -
Chapter 3 Maintenance and Debugging Tool Commands ......................................................................... 47
3.1 Network Testing Tool Commands ............................................................................................. 47
3.1.1 ping ...................................................................................................................................... 47
3.1.2 traceroute ........................................................................................................................... 50
3.2 Fault Diagnosis Commands....................................................................................................... 52
3.2.1 logging................................................................................................................................. 52
3.2.2 logging buffered ................................................................................................................ 53
3.2.3 logging console ................................................................................................................. 55
3.2.4 logging facility.................................................................................................................... 56
3.2.5 logging monitor ................................................................................................................. 58
3.2.6 logging on........................................................................................................................... 59
3.2.7 logging trap ........................................................................................................................ 61
3.2.8 logging command ............................................................................................................. 62
3.2.9 logging source-interface ................................................................................................. 63
3.2.10 logging history alerts ..................................................................................................... 63
3.2.11 logging history critical .................................................................................................... 64
3.2.12 logging history debugging ............................................................................................ 64
3.2.13 logging history emergencies........................................................................................ 65
3.2.14 logging history errors..................................................................................................... 65
3.2.15 logging history informational........................................................................................ 66
3.2.16 logging history notifications.......................................................................................... 66
3.2.17 logging history warnings ............................................................................................... 67
3.2.18 logging history rate-limit................................................................................................ 67
3.2.19 logging history size ........................................................................................................ 68
3.2.20 service timestamps ........................................................................................................ 69
3.2.21 clear logging .................................................................................................................... 70
3.2.22 show break ...................................................................................................................... 70
3.2.23 show debug ..................................................................................................................... 72
3.2.24 show logging ................................................................................................................... 72
Chapter 4 SSH Configuration Commands ..................................................................................................... 74
4.1.1 ip sshd enable ................................................................................................................... 74
4.1.2 ip sshd timeout .................................................................................................................. 74
4.1.3 ip sshd auth-method ........................................................................................................ 75
4.1.4 ip sshd access-class........................................................................................................ 76

Table of Contents
- IV -
4.1.5 ip sshd auth-retries........................................................................................................... 77
4.1.6 ip sshd clear....................................................................................................................... 77
4.1.7 ip sshd silence-period...................................................................................................... 78
4.1.8 ip sshd sftp ......................................................................................................................... 79
4.1.9 ip sshd save....................................................................................................................... 79
4.1.10 ip sshd disable-aes ........................................................................................................ 80
4.1.11 ssh ..................................................................................................................................... 81
4.1.12 show ssh .......................................................................................................................... 82
4.1.13 show ip sshd.................................................................................................................... 83

- 1 -
Chapter 1 System Management Commands
1.1 Configuring File Management Commands
copy delete dir ip address ip route show configuration format more
1.1.1 copy
To read a file from the tftp server to a switch, use the copy command. copy tftp<:filename> {flash<:filename>|rom} [ip_addr]
Parameter
noitpircseD retemaraP
tftp<:filename> Read a file from the tftp server. Filename indicates the relevant
filename. If not specified the filename, the system will prompt
user to input the filename after executing the copy command.
flash <:filename> Write a file to the flash memory of the switch. Filename indicates
the relevant filename. If not specified the filename, the system
will prompt user to input the filename after executing the copy
command.
rom Updates bootrom for the switch.
ip_addr Specifies the IP address of tftp srever. If not specified, the
system will prompt user to input the IP address after executing
the copy command.
Default
None
Basic Configuration Commands

- 2 -
Command mode
monitor mode
Instrution
None
Example
monitor#copy tftp:switch.bin flash:switch.bin 192.2.2.1
The example shows how to read the switch.bin from the tftp server to the flash memory of the switch:
Related commands
None
1.1.2 delete
To delete a file, use the delete command. delete file-name
Parameter
noitpircseD retemaraP
file-name Specifies the filename (maximum 20 characters)
Default
If not specified the file-name, the system will delete startup-config by default.
Command mode
monitor mode
Instruction
None
Related commands
None
Basic Configuration Commands

- 3 -
1.1.3 dir
To display filename, use the dir command.
dir file-name
Parameter
noitpircseD retemaraP
file-name Specifies the filename (maximum 20 characters)
Default
None
Command mode
monitor mode
Instruction
None
Related commands
None
1.1.4 ip address
To set an IP address for an Ethernet interface, use the ip addresscommand.ip address ip-address mask
Parameter
noitpircseD retemaraP
ip-address IP address
mask IP network mask
Default
None
Basic Configuration Commands

- 4 -
Command mode
monitor mode
Instruction
None
Example
monitor#ip address 192.168.1.1 255.255.255.0
Related commands
ip route ping
1.1.5 ip route
To specify a default gateway, use the ip route default command. ip route default gw_ip_addr
Parameter
noitpircseD retemaraP
gw_ip_addr Default gateway address
Default
None
Command mode
Monitor mode
Instrution
None
Example
monitor#ip route default 192.168.1.3
Related commands
ip address
Basic Configuration Commands

- 5 -
1.1.6 show configuration
To display the running configuration file, use the show configurationcommand.show configuration
Parameter
None
Default
None
Command mode
monitor mode
Instrution
None
Related commands
None
1.1.7 format
To format file system, use the format command. format
Parameter
None
Default
None
Command mode
EXEC
Instrution
All files in the file system will de deleted after executing the format command.
Basic Configuration Commands

- 6 -
Related commands
None
1.1.8 more
To display the contents of a file, use the more command.more file-name
Parameter
noitpircseD retemaraP
file-name Specifies the name of a file (maximum 20 characters)
Default
None
Command mode
EXEC
Instrution
If all files are displayable characters, they will be displayed in ASCII format, or they will be displayed binary format.
Related commands
None
1.2 Basic System Management Commands
bootflash cd chinese english chram date debub job md pwd rd rename
Basic Configuration Commands

- 7 -
reboot show break show memory alias boot system flash help history job jobd show alias show job
1.2.1 boot flash
To enable the system from the specified file in monitor mode, use the boot flash command. boot flash filename
Parameter
noitpircseD retemaraP
filename Specified file name.
Default
None
Command mode
monitor mode
Command mode
Use the boot flash command to enable the device after user entering the monitor mode.
Example
monitor#boot flash switch.bin
Related commands
None
Basic Configuration Commands

- 8 -
1.2.2 cd
To change the current directory, use the cd command. cd directory|..
Parameter:
noitpircseD retemaraP
directory Name of the directory. (maximum 20 characters)
.. Upper directory.
Default
None
Command mode
Monitor mode
Command mode
None
Example
monitor#cd my_dir
Related commands
pwd
1.2.3 chinese
To switch command prompt to chinese mode, use the chinesecommand.
Parameter
None
Default
None
Basic Configuration Commands

- 9 -
Command mode
monitor mode
Command mode
None
Example
None
Related commands
None
1.2.4 date
To set the absolute time, use the date command.
Parameter
None
Default
None
Command mode
Monitor mode
Command mode
This command is used to set the abslute time for the system. For the switch with a battery-powered clock, the clock will be powered by the battery. If the clock doesn’t keep good time, you need to change the battery.
For the swich without a battery-powered clock, the system date is configured to July 1st, 1970 after the reboot of the switch, and user needs to set the current time each time when starting the switch.
Example
monitor#date
The current date is 2000-7-27 21:17:24
Basic Configuration Commands

- 10 -
Enter the new date(yyyy-mm-dd):2000-7-27
Enter the new time(hh:mm:ss):21:17:00
Related commands
1.2.5 debug job
To track the debug condition of the job, run debug job.
Parameter
None
Command mode
EXEC
Instrution
Output the debug and execution condition of the job after turn on the debug switch of the job.
Example
config#debug job
JOB: <showver> fired
JOB: job <showver>, cmd "show ver" is parsing
Related commands
jobjobdshow job
1.2.6 english
To switch the command prompt to english mode, use the englishcommand.
Parameter
None
Default
None
Basic Configuration Commands

- 11 -
Command mode
monitor
Instruction
None
Example
None
Related commands
None
1.2.7 md
md directory
Parameter
noitpircseD retemaraP
directory Name of directory (maximum 20 characters)
Default
None
Command mode
monitor
Instruction
To set a directory, use the md command
Related commands
None
1.2.8 pwd
Parameter
None
Basic Configuration Commands

- 12 -
Default
None
Command mode
monitor mode
Instruction
To display the current directory, use the pwd command
Related commands
None
1.2.9 rd
rd directory
Parameter
noitpircseD retemaraP
directory Name of the directory( maximum 20 characters)
Default
None
Command mode
monitor mode
Instruction
The system prompts if the directory is not empty. The system prompts if the directory doesn’t exist. To delete a command, use the rd command.
Related commands
None
1.2.10 rename
To rename a file in a file system, use the rename command.
Basic Configuration Commands

- 13 -
rename old_file_name new_file_name
Parameter
noitpircseD retemaraP
old_file_name The original filename.
new_file_name The new filename.
Default
None
Command mode
monitor mode
Instruction
None
Related commands
None
1.2.11 reboot
To reboot a switch, use the reboot command.
Parameter
None
Default
None
Command mode
monitor mode
Instruction
None
Basic Configuration Commands

- 14 -
Related commands
None
1.2.12 alias
[no] history [ + <count> | - <count> | clear]
Parameter
noitpircseD retemaraP
+ <count> To display the count<1-20> historial command from the
beginning to the end
- <count> To display the count<1-20> historial command from the end to
the beginning
Default
If there are no more than 20 commands executed, all historical command lines will be displayed from the beginning to the end. If there are more than 20 commands executed, all historical command lines will be displayed from the beginning to the end.
Comand mode
Random command mode
Explanation
The modularized switch can save up to 20 historical commands. You can invoke these commands with the "up" or “down” key or directly use it after edition. The command is used to browse the history command. You can run the [no] history command to delete the historycommand.
Example
The following example shows the latest five historical commands from the end to the beginning: switch#history - 5
config
int e0/1
no ip addr
Basic Configuration Commands

- 15 -
ip addr 192.2.2.49 255.255.255.0
exit
Related command
None
1.2.13 boot system flash
Run the boot system flash command to specify the systematic mirroring files when the system is started up. Run the no boot system flash command to delete the previous configuration. boot system flash filenameno boot system flash filename
Parameter
noitpircseD retemaraP
filenameIt is the specified filename, which contains no more than 20
characters.
Default
None
Command mode
Global configuration mode
Instruction
If you have not configured the command, the system will execute the first systematic mirroring file in the flash file system. If you have configured multiple commands, the system will execute the mirroring files one by one. If the file does not exist or the check sum is wrong, the system will execute the next file. If both fail, the system will run at the monitoring state.
Example
config#boot system flash switch.bin
Related command
None
Basic Configuration Commands

- 16 -
1.2.14 help
help
Parameter
None
Default
None
Command mode
Management mode
Instruction
The command is used to display the help system of the switch.
Example
After you enter the command, the help system of the switch is displayed.switch# help
Help may be requested at any point in a command by entering a question mark
'?',If nothing matches, the help list will be empty and you must backup until
entering a '?' shows the available options.
Two styles of help are provided:
1. Full help is available when you are ready to enter a command argument
(e.g.'show ?') and describes each possible argument.
2. Partial help is provided when an abbreviated argument is entered and you want
to know what arguments match the input (e.g. 'interface e?'.)
Related command
None
1.2.15 history
The command is used to check the historical commands. Run the [no]history command to delete the historical commands. [no] history [ + <count> | - <count> | clear]
Basic Configuration Commands

- 17 -
Parameter
noitpircseD retemaraP
+ <count> Displays the count<1-20> historial command from the beginning
to the end.
- <count> Displays the count<1-20> historial command from the end to the
beginning.
Default
If there are no more than 20 commands executed, all historical command lines will be displayed from the beginning to the end. If there are more than 20 commands executed, all historical command lines will be displayed from the beginning to the end.
Command mode
Abandom command mode
Instruction
The modularized switch can save up to 20 historical commands. You can invoke these commands with the "up" or “down” key or directly use it after edition.
Example
The following example shows the latest five commands from the end to the beginning: switch#history - 5
config
int e1/1
no ip addr
ip addr 192.2.2.49 255.255.255.0
exit
Related command
N/A
Basic Configuration Commands

- 18 -
1.1.1 show
To display the relevant information of the system, which or specific ones of which can be filtered through the filter, run the following command:show <sub-command> [ | <begin | include | exclude | redirect> <WORD> [SEPARATOR WORD]]
Parameter
noitpircseD retemaraP
sub-command Stands for a child command.
| Uses the output filter.
begin Means to show the result of the show command starting with
a specific word.
include Means to show the sentences of the result of the show
command containing a specific word.
exclude Means not to show the lines of the result of the show command
containing a specific word.
redirect Redirects the result of the show command to the file in the
designated file system.
WORD Stands for a designated word, which is the designated
filename as to the redirect command.
SEPARATOR WORD Stands for the designated separator, which is space by
default to separate the words.
Default value
N/A
Command mode
the EXEC mode or the configuration mode
Explanation
This command can be used to filter the useless information in the
Basic Configuration Commands

- 19 -
result of the show command, especially when the result is too much to read. For example, if you want to browse a designated MAC address in an MAC address table, which contains a lot of MAC addresses, this command will give you convenience for you.
Example
The following example shows how to display the lines, in which the word “interface” is contained, in the result of show running-config.Switch#show running-config | include interface
Building configuration...
Current configuration:
!
interface GigaEthernet0/1
interface GigaEthernet0/2
interface GigaEthernet0/3
interface GigaEthernet0/4
interface GigaEthernet0/5
interface GigaEthernet0/6
interface GigaEthernet0/7
interface GigaEthernet0/8
Related command
N/A
1.2.16 show job
It is used to display the parameters of the job and the information about job execution: show job {paramter | status}
Parameter
noitpircseD retemaraP
paramter Displays the parameters of the job.
status Displays the execution state of the job.
Default
None
Basic Configuration Commands

- 20 -
Command mode
Management mode or configuration mode
Instruction
Run the show job command to browse the defined parameters and the dynamic execution state of the job.
Example
The following example shows how to display the parameters of the job: switch_config#show job parameter
<showver> fires interval, first at 5, re-fires per 5 secs, on error stop
will do "show ver"
The following example shows how to display the dynamic execution state of the job: Jobd disabled at 245218 seconds
Name: job's name
Type: None - Not scheduled, interval - Fire interval, one-shot - Fire once
Status: null - Not scheduled, idle - To fire first
started - Fired ever, to fire again, stopped - Can't fire
First: first time to fire
Last: last time of firing or restarting
Next-due: next time to fire(after now)
Times: times fired ever
Cause: auto - Automatic, error - Error meeting, command - By command
Job's status and statistics
===========================
Name Type State First Last Next-due Times Cause
------------------------------------------------------------------------------
showver interval idle 5 * * 2 auto
------------------------------------------------------------------------------
Total 1 jobs, 0 null, 1 idle, 0 started, 0 stopped
Related command
debug job jobjobd
Basic Configuration Commands

- 21 -
1.2.17 show break
It is used to display the abnormal information of the system. The system stores all abnormal information in the latest running. The abnormal information contains the times of abnormity, the stack content and the invoked functions when abnormity occurs.
Parameter
None
Default
None
Command mode
Monitoring state
Instruction
The command is only used for debugging.
Related command
None
Basic Configuration Commands

- 22 -
Chapter 2 Terminal Service Configuration Command
2.1 Telnet Configuration Command
The chapter describes telnet and related commands. The telnetcommand is used to establish a session with the remote server. The telnet command is always working at the UNIX operating systems. Option negotiation is required. Telnet does not provide itself the login authentication. Telnet is different from Rlogin because telnet does not provide itself password check. The following are telnet configuration commands: telnet ip telnet where disconnect resume switchkey switchmsg sequence-char clear Telnet show Telnet debug Telnet
2.1.1 telnet
The following is a command sentence for establishing a telnet session: telnet server-ip-addr/server-host-name [/port port][/source-interface interface]
[/local local-ip-addr] [/debug][echo/noecho] [/script scriptname]
Parameter
noitpircseD retemaraP
server-ip-addr Dotted-decimal IP address of the remote server
server-host-name Name of the remote server, which is configured by the ip host
command
Basic Configuration Commands

- 23 -
port Telnet port of the remote server
interface Local interface where the telnet connection is originated
local-ip-addr Local IP address where the telnet connection is originated
/debugA negotiation process for openning the debug at the client side
and printing the connection
echo/noecho Enable or disable the local echo. The default value is noecho.
scriptname A script name used for auto login
Default
The default port number is 23. The interface has no default number.
Command mode
Management mode
Instruction
You can use one of the following command lines to establish a remote login. telnet server-ip-addr/server-host-name
In this case, the application program directly sends the telnet login request to port 23 of the remote server. The local IP address is the IP address which is nearest to the peer and found by the routing table. telnet server-ip-addr/server-host-name /port port
In this case, the application program sends a telnet login request to the port of the peer. telnet server-ip-addr/server-host-name /source-interface interface
In this case, the application program uses the IP address on the interface ass the local IP address. telnet server-ip-addr/server-host-name /debug
In this case, the application program opens the debug and exports the connection at the client side. telnet server-ip-addr/server-host-name echo/noecho
In this case, the application program enables or disables the local echo. The local echo is disabled by default. The echo is completed at the server side. Only when the server is not in charge of echo is the local echo enabled.
Basic Configuration Commands

- 24 -
telnet server-ip-addr/server-host-name /script scriptname
Before executing the automatic login command of the script, run the command ip telnet script to configure the script. The previous commands can be used together. During the session with the remote server, you can press the Q button to exit the session. If the session is not manually closed, the session will be complete after a 10-second timeout.
Example
Suppose you want to telnet server 192.168.20.124, the telnet port of the server is port 23 and port 2323, and the local two interfaces are e1/1(192.168.20.240) and s1/0(202.96.124.240). You can run the following operations to complete the remote login. 1 telnet 192.168.20.124 /port 2323 In this case, the telnet connection with port 2323 of the peer is to be established. The local IP address of the peer is 192.168.20.240. 2 telnet 192.168.20.124 /source-interface s1/0
In this case, the telnet connection with port 23 of the peer is to be established. The local IP address of the peer is 202.96.124.240. 3 telnet 192.168.20.124 /local 192.168.20.240
In this case, the telnet connection with port 23 of the peer is to be established. The local IP address of the peer is 192.168.20.240. 4 telnet 192.168.20.124 /debug
In this case, the telnet connection negotiation with port 23 of the peer will be printed out. 5 telnet 192.168.20.124 /echo
In this case, the local echo is enabled. If the echo is also enabled at the server side, all input will be echoed twice. 6 telnet 192.168.20.124 /script s1
Use login script S1 for automatic login.
2.1.2 ip telnet
The following are the configuration command formats of the telnet session:ip telnet source-interface vlan value
ip telnet access-class accesslist
ip telnet listen-port start-port [end-port]
ip telnet script scriptname ‘user_prompt’ user_answer ‘pwd_prompt’ pwd_answer
Basic Configuration Commands

- 25 -
Parameter
noitpircseD retemaraP
value Local interface where the telnet request is originated
accesslist Access list name to limit the source address when the local
client receives the connection
start-port Starting port number designated at the listening port area
end-port End port number designated at the listening port area
scriptname Name of the login script
user_prompt Username prompt returned by the telnet server
user_answer Username response information from the client side
pwd_prompt Password prompt returned by the telnet server
pwd_answer Password response information submitted by the client side
Default
None
Command mode
Global configuration
Instruction
Run the following command to configure the local interface for originating the telnet connection: ip telnet source-interface interface
In this case, all telnet connections originated afterwards are through the interface. The configuration command is similar to the command telnet source-interface interface. However, the telnet command has no interface parameters followed. When the interface is configured and the telnet command has interface parameters, the interface followed the telnet command is used.
Run the following command to configure the name of the access list which performs limitation on local telnet connection reception. ip telnet access-class accesslist
Basic Configuration Commands

- 26 -
In this case, the access list will be checked when the server accepts all telnet connections.
Run the following command to configure a port, except the default port 23, to receive the telnet service. ip telnet listen-port start-port [end-port]
Explanation: If the end port number is not designated, the listening will be executed at a specific port. The number of the designated ports cannot be bigger than 16 and the port number ranges between 3001 and 3999.
Run the following command to configure the telnet login script. ip telnet script s1 ‘login:’ switch ‘Password:’ test
Explanation: When the script is configured, the username prompt and password prompt and their answers must be correctly matched, especially the prompt information is capital sensitive and has inverted comma (‘’). If one of them is wrongly configured, the automatic login cannot be performed.
Note:You can add the NO prefix on the above four commands and then run them to cancel previous configuration.
Example
1 ip telnet source-interface s1/0 In this case, the s1/0 interface will be adopted to originate all telnet connections afterwards. 2 ip telnet access-class abc In this case, all the received telnet connections use access list abc to perform the access list check. 3 ip telnet listen-port 3001 3010 Except port 23, all ports from port 3001 to port 3010 can receive the telnet connection. 4 ip telnet script s1 ‘login:’ switch ‘Password:’ test The login script s1 is configured. The username prompt is login: and the answer is switch. The password prompt is Password: and the answer is test.
2.1.3 ctrl-shift-6+x (the current connection is mounted)
Run the following command to mount the current telnet connection: ctrl-shift-6+x
Basic Configuration Commands

- 27 -
Parameter
None
Default
None
Command mode
Any moment in the current telnet session
Instruction
You can use the shortcut key to mount the current telnet connection at the client side.
Example
switchA>telnet 192.168.20.1
Welcome to Multi-Protocol 2000 Series switch
switchB>ena
switchB#(press ctrl-shift-6+x)
switchA>
You press ctrl-shift-6+x to mount the telnet connection to switch B and return to the current state of switch A.
2.1.4 where
Run the following command to check the currently mounted telnet session: where
Parameter
None
Default
None
Command mode
Global configuration
Basic Configuration Commands

- 28 -
Instruction
You can use the command to check the mounted outward telnet connection at the client side. The displayed information contains the serial number, peer address, local address and local port. Note:The where command is different from the show telnet command. The former is used at the client side and the displayed information is the outward telnet connection. The latter is used at the server and the displayed information is the inward telnet connection.
Example
switchA>telnet 192.168.20.1
Welcome to Multi-Protocol 2000 Series switch
switchB>ena
switchB#(Press ctrl-shift-6+x)
switchA> telnet 192.168.20.2
Welcome to Multi-Protocol 2000 Series switch
switchC>ena
switchC#(Press ctrl-shift-6+x)
switchA>where
NO. Remote Addr Remote Port Local Addr Local
Port
1 192.168.20.1 23 192.168.20.180
20034
2 192.168.20.2 23 192.168.20.180
20035
Enter where at switch A. The mounted outward connection is displayed.
2.1.5 resume
It is used to resume the currently mounted outward telnet connection: resume no
Parameter
noitpircseD retemaraP
no Number of the currently mounted telnet session that is checked
Basic Configuration Commands

- 29 -
through the where command
Default
None
Command mode
Global configuration
Instruction
The command can be used to resume the currently mounted outward telnet connection at the client side.
Example
switchA>telnet 192.168.20.1
Welcome to Multi-Protocol 2000 Series switch
switchB>ena
switchB#( press ctrl-shift-6+x)
switchA> telnet 192.168.20.2
Welcome to Multi-Protocol 2000 Series switch
switchC>ena
switchC#( press ctrl-shift-6+x)
switchA>where
NO. Remote Addr Remote Port Local Addr Local
Port
1 192.168.20.1 23 192.168.20.180
20034
2 192.168.20.2 23 192.168.20.180
20035
switchA>Resume 1
[Resuming connection 1 to 192.168.20.73 . . . ]
(enter)
switchB#
After you enter where at switch A and the mounted outward connection of switch A is displayed, enter Resume1. You will be prompted that connection 1 is resumed. The command prompts of switch B are displayed after the Enter key is pressed.
Basic Configuration Commands

- 30 -
2.1.6 disconnect
The following command is used to clear the currently mounted outward telnet session: disconnect no
Parameter
noitpircseD retemaraP
NoNumber of the currently mounted telnet session that is checked
through the where command
Default
None
Command mode
Global configuration
Instruction
The command can be used to clear the currently mounted outward telnet connection at the client side. Note:
The disconnect command is different from the clear telnetcommand. The former is used at the client side and clears the outward telnet connection. The latter is used at the server and clears the inward telnet connection.
Example
switchA>telnet 192.168.20.1
Welcome to Multi-Protocol 2000 Series switch
switchB>ena
switchB#(press ctrl-shift-6+x)
switchA> telnet 192.168.20.2
Welcome to Multi-Protocol 2000 Series switch
switchC>ena
switchC#(press ctrl-shift-6+x)
switchA>where
NO. Remote Addr Remote Port Local Addr Local
Port
Basic Configuration Commands
- 31 -
1 192.168.20.1 23 192.168.20.180
20034
2 192.168.20.2 23 192.168.20.180
20035
switchA>disconnect 1
<Closing connection to 192.168.20.1> <y/n>y
Connection closed by remote host.
switchA>
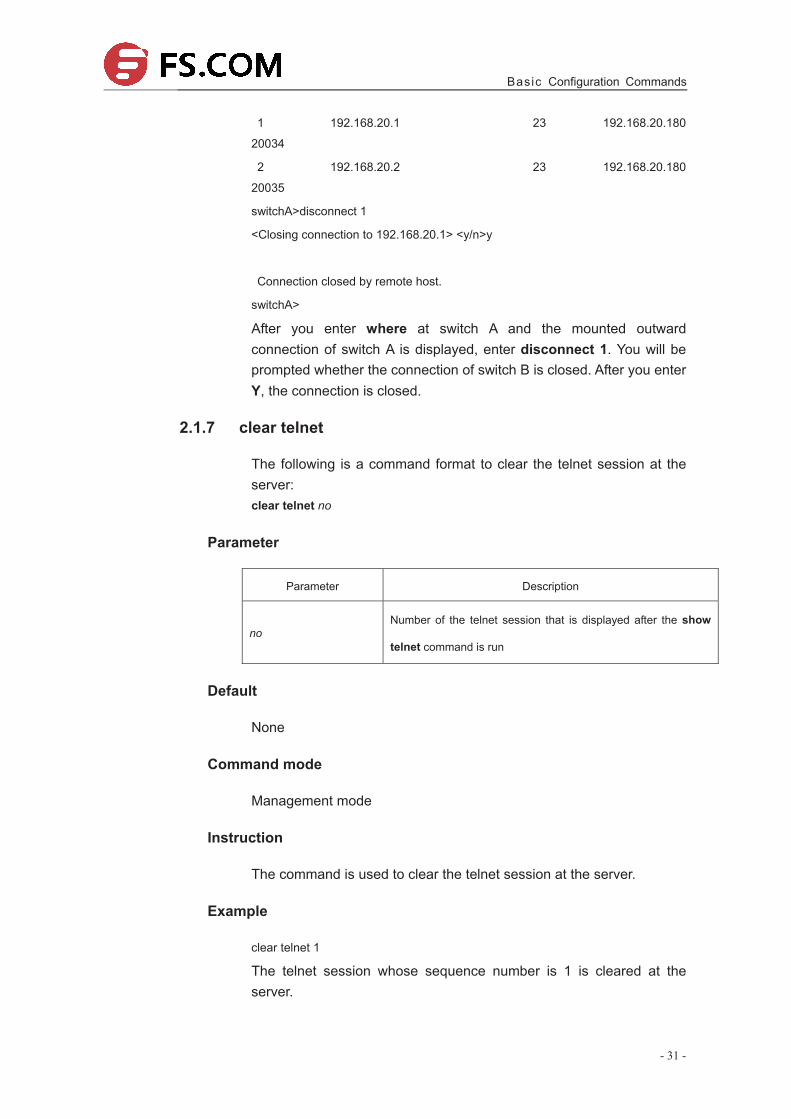
After you enter where at switch A and the mounted outward connection of switch A is displayed, enter disconnect 1. You will be prompted whether the connection of switch B is closed. After you enter Y, the connection is closed.
2.1.7 clear telnet
The following is a command format to clear the telnet session at the server: clear telnet no
Parameter
noitpircseD retemaraP
noNumber of the telnet session that is displayed after the show
telnet command is run
Default
None
Command mode
Management mode
Instruction
The command is used to clear the telnet session at the server.
Example
clear telnet 1
The telnet session whose sequence number is 1 is cleared at the server.
Basic Configuration Commands

- 32 -
2.1.8 show telnet
The following is a command format to display the telnet session at the server: show telnet
Parameter
None
Default
None
Command mode
All command modes except the user mode
Instruction
The command is used to display the telnet session at the server. The displayed information includes the sequence number, peer address, peer port, local address and local port.
Example
Switch# show telnet
If you run the previous command, the result is shown as follows: NO. Remote Addr Remote Port Local Addr Local
Port
1 192.168.20.220 1097 192.168.20.240
23
2 192.168.20.180 14034 192.168.20.240
23
2.1.9 debug telnet
The following is a format of the debug command for the telnet session: debug telnet
Parameter
None
Basic Configuration Commands

- 33 -
Default
None
Command mode
Management mode
Instruction
The command is used to open the switch of the telnet debug. If the switch of the telnet debug is opened, the negotiation processes of all the incoming telnet sessions are printed on the window that the debug command invokes. The debug telnet command is different from the telnet debug command. The former is to export the debug information of the telnet session connected to the server. The latter is to export the debug information of the telnet session that the client originates.
Example
debug telnet
The debug information of the telnet session that is connected to the server is displayed.
2.2 Terminal Configuration Command
The following are terminal configuration commands: attach-port autocommand clear line connect disconnect exec-timeout length line location login authentication monitor no debug all password printer enable printer start printer stop
Basic Configuration Commands

- 34 -
resume script activation script callback script connection script dialer script reset script startup sequence-char show debug show line show tty-status switchkey switchmsg terminal-type terminal monitor terminal width terminal length where width
2.2.1 attach-port
The following command is to bind the telnet listening port to the linevty number and enable the telnet connection at a specific port generates vty according to the designated sequence number. [no] attach-port PORT
Parameter
noitpircseD retemaraP
port Listening port of the telnet server (3001-3999)
Default
None
Command mode
Line configuration mode
Example
Bind listening port 3001 to line vty 2 3. switch_config# line vty 2 3
Basic Configuration Commands

- 35 -
switch_config_line#attach-port 3001
2.2.2 autocommand
It is used to set the automatically-run command when user logs in to the terminal. The connection is cut off after the command is executed. autocommand LINE
no autocommand
Parameter
noitpircseD retemaraP
LINE Command to be executed
Command mode
Line configuration mode
Example
switch_conf#line vty 1
switch_conf_line#autocommand pad 123456
After you successfully log in, the host whose X.121 address is 123456 will be automatically padded.
2.2.3 clear line
It is to clear the designated line. clear line [aux | tty | vty] [number]
Parameter
Similar to the line command
Command mode
Management mode
Example
switch#clear line vty 0
2.2.4 connect
It is to connect the telnet server.
Basic Configuration Commands

- 36 -
connect server-ip-addr/server-host-name {[/port port][/source-interface interface]
[/local local-ip-addr]}
Parameter
noitpircseD retemaraP
server-ip-addr/server-ho
st-nameIP address of the server or the host name of the server
port Port number
interface Name of the interface where the connection is originated
local-ip-addr Local IP address where the connection is originated
Command mode
All configuration modes
Example
switch# connect 192.168.20.1
2.2.5 disconnect
It is used to delete the mounted telnet session. disconnect N
Parameter
noitpircseD retemaraP
N Number of the mounted telnet session
Command mode
All configuration modes
Example
switch#disconnect 1
Basic Configuration Commands

- 37 -
2.2.6 exec-timeout
It is to set the maximum spare time for the terminal. [no] exec-timeout [time]
Parameter
noitpircseD retemaraP
time Spare time whose unit is second
Default
0 (No time-out limitation)
Command mode
Line configuration mode
Example
Set the spare time of the line to one hour. switch_config_line#exec-timeout 3600
2.2.7 length
It is used to set the line number on the screen of the terminal. [no] length [value]
Parameter
noitpircseD retemaraP
valueA value between 0 and 512
The value 0 means there is no pause.
Default
24
Command mode
Line configuration mode
Basic Configuration Commands

- 38 -
2.2.8 line
It is used to enter the line configuration mode. line [aux | console | tty | vty] [number]
Parameter
noitpircseD retemaraP
aux Auxiliary line, which has only one number 0
console Monitoring line, which has only one number 0
tty Asynchronous line
vty Virtual lines such as Telnet, PAD and Rlogin
number Number in the line of the type
Command mode
Global configuration
Example
The following example shows how to enter the line configuration mode of VTY 0 to 10. switch_config#line vty 0 10
2.2.9 location
It is used to recoded the description of the current line.
location [LINE]
no location
Parameter
noitpircseD retemaraP
LINE Description of the current line
Command mode
Line configuration mode
Basic Configuration Commands

- 39 -
2.2.10 login authentication
It is used to set line login authentication: [no] line login authentication [default | WORD]
Parameter
noitpircseD retemaraP
Default Default authentication mode
WORD Name of the authentication list
Command mode
Line configuration mode
Example
switch_conf_line#login authentication test
In the example, the authentication list of the line is set to test.
2.2.11 monitor
It is used to export the log and debugging information to the line: [no] monitor
Parameter
None
Command mode
Line configuration mode
Example
switch_config_line#monitor
2.2.12 no debug all
It is used to shut down all debugging output of the current VTY: no debug all
Parameter
None
Basic Configuration Commands

- 40 -
Command mode
Management mode
Example
switch#no debug all
2.2.13 password
It is used to set the password for the terminal: password {password | [encryption-type] encrypted-password }
no password
Parameter
noitpircseD retemaraP
password Password configured on the line, which is entered in the
plaintext form and whose maximum length is 30 bits.
[encryption-type]
encrypted-password
encryption-type means the encryption type of the password.
Currently, MY COMPANY products only support two encryption
modes: 0 and 7. The number 0 means the password is not
encrypted and the plaintext of password is directly entered. It is
the same as the way of directly entering the password. The
number 7 means the password is encrypted through an
algorithm defined by MY COMPANY. You need to enter the
encryption text for the encrypted password. The encryption text
can be copied from the configuration files of other switches.
For password encryption, refer to the explanation of the commands service password-encryption and enable password.
Command mode
Line configuration mode
Example
switch_conf#line vty 1
switch_conf_line#password test
The previous example shows the login password of VTY1 is set to
Basic Configuration Commands

- 41 -
test.
2.2.14 resume
It is used to resume the mounted telnet session:
resume N
Parameter
noitpircseD retemaraP
N Number of the mounted telnet session
Command mode
All configuration modes
Example
switch#resume 1
2.2.15 show debug
It is used to display all debugging information of the current VTY: show debug
Parameter
None
Command mode
Management mode or global configuration mode
Example
Switch# show debug
http authentication debug is on
http cli debug is on
http request debug is on
http response debug is on
http session debug is on
http erro debug is on
http file debug is on
Basic Configuration Commands

- 42 -
TELNET:
Incoming Telnet debugging is on
2.2.16 show line
It is used to display the status of the current effective line: show line {[console | aux | tty | vty] [number]}
Parameter
If there is no parameter followed, the status of all effective lines will be displayed.The definition of other parameters is similar to that of the linecommand.
Command mode
All configuration modes except the user mode
2.2.17 terminal length
It is used to change the line number on the current terminal screen. The parameter can be obtained by the remote host. The rlogin protocol uses the parameter to notify the remote UNIX host. Run the no terminal length command to resume the default value: terminal length length
no terminal length
Parameter
noitpircseD retemaraP
Length Line number displayed on each screen
Default
Pause when 24 lines are displayed on the screen.
Command mode
Global configuration
Instruction
The command is effective only to the current terminal. When the session is complete, the terminal attribute is invalid.
Basic Configuration Commands

- 43 -
Example
switch#terminal length 40
Related command
line
2.2.18 terminal monitor
It is used to display the debugging output information and system faulty information at the current terminal. The negative form of the command is used to disable the monitoring: terminal monitor no terminal monitor
Parameter
None
Default
The system monitoring port (console) is open by default. Other terminals are closed by default.
Command mode
Global configuration
Instruction
The command is effective only to the current terminal. When the session is complete, the terminal attribute is invalid.
Example
switch#terminal monitor
Related command
linedebug
2.2.19 terminal width
In default settings, the switch is to export 80 characters in each line. If the default settings cannot meet your requirements, you can reset it.
Basic Configuration Commands

- 44 -
The parameter can be obtained by the remote host. Run the terminalwidth command to set the character number in each line. Run the no terminal width command to resume to the default value.
terminal width number
no terminal width
Parameter
noitpircseD retemaraP
number Character number of each line
Default
80 characters in each line
Command mode
Global configuration
Instruction
The command is effective only to the current terminal. When the session is complete, the terminal attribute is invalid.
Example
switch#terminal width 40
Related command
line
2.2.20 terminal-type
It is used to set the terminal type: [no] terminal-type [name]
Parameter
noitpircseD retemaraP
NameTerminal name
Terminal types currently supported are VT100, ANSI and
Basic Configuration Commands

- 45 -
VT100J.
Default
ANSI
Command mode
Line configuration mode
2.2.21 where
It is used to check the currently mounted outward telnet session at the client side: where
Parameter
None
Command mode
All configuration modes
Example
switch#where
2.2.22 width
It is used to set the terminal width of the line: [no] width [value]
Parameter
noitpircseD retemaraP
ValueA value between 0 and 512
The value 0 means no execution.
Default
80
Basic Configuration Commands

- 46 -
Command mode
Line configuration mode
Basic Configuration Commands

- 47 -
Chapter 3 Maintenance and Debugging Tool Commands
3.1 Network Testing Tool Commands
3.1.1 ping
It is used to test host accessibility and network connectivity. After the ping command is run, an ICMP request message is sent to the destination host, and then the destination host returns an ICMP response message. ping [-f] [-i {source-ip-address | source-interface}] [-j host1 [host2 host3 …]] [–k host1 [host2, host3 …]] [-l length] [-n number] [-rhops] [-s tos] [-t ttl] [-v] [-w waittime] host
Parameter
noitpircseD retemaraP
-f Sets the DF digit (message is not segmented).
If the message required to be sent is larger than the MTU of the
path, the message will be dropped by the routing switch on the
path and the routing switch will then return an ICMP error
message to the source host. If network performance has
problems, one node in the network may be configured to a small
MTU. You can use the –f option to decide the smallest MTU on
the path.
Default value: No resetting
-i Sets the source IP address of the message or the IP address of
an interface.
Default value: Main IP address of the message-sending
interface
source-ip-address Source IP address adopted by the message
Basic Configuration Commands

- 48 -
source-interface Message takes the IP address of the source-interface interface
as the source address.
-j host1 [host2 host3…] Sets the relaxation source route.
Default: Not set
-k host1 [host2 host3…] Sets the strict source route
Default: Not set
-l length Sets the length of ICMP data in the message.
Default: 56 bytes
-n number Sets the total number of messages.
Default: 5 messages
-r hops Records routes.
Up to hops routes are recorded.
Default: not record
-s tos Sets IP TOS of the message to tos.
Default: 0
-t ttl Sets IP TTL of the message to ttl.
Default: 255
-v Detailed output
Default: simple output
-w waittime Time for each message to wait for response
Default: 2 seconds
host Destination host
Command mode
Management mode, global configuration mode and interface configuration mode
Basic Configuration Commands

- 49 -
Instruction
The command supports that the destination address is the broadcast address or the multicast address. If the destination address is the broadcast address (255.255.255.255) or the multicast address, the ICMP request message is sent on all interfaces that support broadcast or multicast. The routing switch is to export the addresses of all response hosts. By pinging multicast address 224.0.0.1, you can obtain the information about all hosts in directly-connected network segment that support multicast transmission. Press the Q key to stop the ping command. Simple output is adopted by default.
noitpircseD retemaraP
.deviecer si egassem esnopser A !
.emit tuoemit eht ni deviecer ton si egassem esnopseR .
si dehcaer eb tonnac noitanitsed PMCI eht taht egassem ehT U
received.
.deviecer si egassem lortnoc ecruos PMCI ehT Q
.deviecer si egassem noitcerider PMCI ehT R
.deviecer si egassem tuoemit PMCI ehT T
.deviecer si egassem melborp retemarap PMCI ehT P
The statistics information is exported:
noitpircseD retemaraP
packets transmitted Number of transmitted messages
packets received Number of received response messages, excluding other ICMP
messages
packet loss Rate of messages that are not responded to
round-trip min/avg/max Minimum/average/maximum time of a round trip (ms)
Example
switch#ping -l 10000 -n 30 192.168.20.125
PING 192.168.20.125 (192.168.20.125): 10000 data bytes
Basic Configuration Commands

- 50 -
!!!!!!!!!!!!!!!!!!!!!!!!!!!!!!
--- 192.168.20.125 ping statistics ---
30 packets transmitted, 30 packets received, 0% packet loss
round-trip min/avg/max = 50/64/110 ms
3.1.2 traceroute
It is used to detect which routes have already reached the destination. You can transmit to the destination the UDP packets (or ICMP ECHO packets) of different TTLs to confirm which routes have come to the destination. Each router on this path has to deduct 1 from the TTL value before forwarding ICMP ECHO packets. Speaking from this aspect, TTL is an effective hop count. When the TTL value of a packet is deducted to zero, the router sends back to the source system the ICMP timeout message. By checking the ICMP timetout message sent back by intermedial routers, you can confirm the routers. At the arrival of the destination, the traceroute sends a UPD packet whose port ID is larger than 30000; the destination node hence can only transmit back a Port Unreachable ICMP message. This reception of this message means the arrival of destination.
traceroute [-i source-ip-address ] [-m source-interface}] [-j host1 [host2 host3 …]]
[–k host1 [host2, host3 …]] [-p port-number] [-q probe-count] [-r hops] [-t ttl] [-w waittime]
[-x icmp] host
Parameter
noitpircseD retemaraP
-i source-ip-address Sets the source IP address of packet.
-m source-interface Sets the packet-transmitted port.
-j host1 [host2 host3…] Sets the loose source route.Default: Not set
-k host1 [host2 host3…] Sets the strict source route.
Default: Not set
-p port-number Sets the ID of destination port that transmits UDP packets. Default value:
33434
Basic Configuration Commands

- 51 -
-q probe-count Sets the number of packets that you detect each time.
Default: 3 packets
-r hops Records the routes (at most hops routes can be recorded).
Default: The routes are not recorded.
-t ttl Sets the IP TTL of packets as TTL.
Default: the minimum and maximum TTLs are 1 and 30 respectively.
-w waittime Means the time that each packet waits for echo.
Default value: 3 seconds
-x icmp Sets the detection packet to be the ICMP ECHO packet.
Default: UDP packet
host Means the destination host.
Command mode
EXEC or global configuration mode
Explanation
The UDP packet is used for detection by default, but you can run –x icmp to replace it with ICMP ECHO for detection. If you want to stop traceroute, press q or Q.By default, the simple output information is as follows.
noitpircseD retemaraP
!N Receives an ICMP-route unreachable packet.
!H Receives an ICMP-host unreachable packet.
!P Receives an ICMP-protocol unreachable packet.
!F Receives an ICMP unreachable (need to be fragmented) packet.
!S Receive an ICMP unreachable (failing to detect the
source-station route) packet.
The exported statistics information is as follows:
noitpircseD retemaraP
Basic Configuration Commands

- 52 -
hops max Means the maximum detection hops (the threshold of ICMP).
byte packets Stands for the size of each detection packet.
Example
switch#traceroute 90.1.1.10
traceroute to 90.1.1.10 (90.1.1.10), 30 hops max, 36 byte packets
1 90.2.2.1 0 ms 0 ms 0 ms
2 90.1.1.10 0 ms 0 ms 0 ms
3.2 Fault Diagnosis Commands
The chapter describes the commands used for fault diagnosis. All the following commands are used to detect the reason of the fault. You can use other commands to remove the fault, such as the debugcommand.
The following are fault diagnosis commands: logging logging buffered logging console logging facility logging monitor logging on logging trap service timestamps clear logging show break show controller show debug show logging
3.2.1 logging
It is used to record the log information to the syslog server. logging A.B.C.D no logging A.B.C.D
Basic Configuration Commands

- 53 -
Parameter
noitpircseD retemaraP
A.B.C.D IP address of the syslog server
Default:
The log information is not recorded to the server.
Command mode
Global configuration
Instruction
It is used to record the log information to the designated syslog server. It can be used for many times to designate multiple syslog servers.
Example
logging 192.168.1.1
Related command
logging trap
3.2.2 logging buffered
It is used to record the log information to the memory of the switch. logging buffered [size | level | dump ]
no logging buffered
Parameter
noitpircseD retemaraP
size Size of memory cache
Value range: 4096-2147483647
Unit: byte
level Information level of the log recorded to memory cache
Refer to table 1.
Basic Configuration Commands

- 54 -
dump When the system has abnormality, the information in the current
memory is currently recorded to the flash and the information is
resumed after the system is restarted.
Default
The information is not recorded to the memory cache.
Command mode
Global configuration
Instruction
The command records the log information to the memory cache of the switch. The memory cache is circularly used. After the memory cache is fully occupied, the latter information will cover the previous information.You can use the show logging command to display the log information recorded in the memory cache of the switch. Do not use big memory for it causes the shortage of memory.
Table 1 Level of log recording
Prompt Level Description Syslog Definition
emergencies 0 System unusable LOG_EMERG
alerts 1 Immediate action
needed
LOG_ALERT
critical 2 Critical conditions LOG_CRIT
errors 3 Error conditions LOG_ERR
warnings 4 Warning conditions LOG_WARNING
notifications 5 Normal but significant
condition
LOG_NOTICE
informational 6 Informational
messages only
LOG_INFO
debugging 7 Debugging messages LOG_DEBUG
Basic Configuration Commands

- 55 -
Related command
clear logging show loggin
3.2.3 logging console
Run the command logging console to control the information volume displayed on the console. Run the command no logging console to forbid the log information to be displayed on the console: logging console levelno logging console
Parameter
noitpircseD retemaraP
level Information level of the logs displayed on the console
Refer to table 2.
Default
None
Command mode
Global configuration
Instruction
After the information level is specified, information of this level or the lower level will be displayed on the console. Run the command show logging to display the currently configured level and the statistics information recorded in the log.
Table 2 Level of log recording
Prompt Level Description Syslog Definition
emergencies 0 System unusable LOG_EMERG
alerts 1 Immediate action
needed
LOG_ALERT
critical 2 Critical conditions LOG_CRIT
Basic Configuration Commands

- 56 -
errors 3 Error conditions LOG_ERR
warnings 4 Warning conditions LOG_WARNING
notifications 5 Normal but significant
condition
LOG_NOTICE
informational 6 Informational
messages only
LOG_INFO
debugging 7 Debugging messages LOG_DEBUG
Example
logging console alerts
Related command
logging facility show logging
3.2.4 logging facility
Run the command logging facility to configure to record specified error information. To restore to local7, run the command no logging facility.logging facility facility-typeno logging facility
Parameter
noitpircseD retemaraP
facility-typeFacility type
Refer to table 3.
Default
local7
Command mode
Global configuration
Basic Configuration Commands

- 57 -
Instruction
Table 3 Facility type
Type Description
auth Authorization system
cron Cron facility
daemon System daemon
kern Kernel
local0-7 Reserved for locally defined messages
lpr Line printer system
mail Mail system
news USENET news
sys9 System use
sys10 System use
sys11 System use
sys12 System use
sys13 System use
sys14 System use
syslog System log
user User process
uucp UNIX-to-UNIX copy system
Example
logging facility kern
Related command
logging console
Basic Configuration Commands

- 58 -
3.2.5 logging monitor
Run the command logging monitor to control the information volume displayed on the terminal line. Run the command no logging monitor to forbid the log information to be displayed on the terminal line.
logging monitor levelno logging monitor
Parameter
noitpircseD retemaraP
level Information level of the logs displayed on the terminal line
Refer to table 4.
Default
debugging
Command mode
Global configuration
Instruction
Table 4 Level of log recording
Prompt Leve
l
Description Syslog Definition
emergencies 0 System is unusable LOG_EMERG
alerts 1 Immediate action
needed
LOG_ALERT
critical 2 Critical conditions LOG_CRIT
errors 3 Error conditions LOG_ERR
warnings 4 Warning conditions LOG_WARNING
notifications 5 Normal but significant
condition
LOG_NOTICE
Basic Configuration Commands

- 59 -
informational 6 Informational
messages only
LOG_INFO
debugging 7 Debugging messages LOG_DEBUG
Example
logging monitor errors
Related command
terminal monitor
3.2.6 logging on
Run the command logging on to control the recording of error information.Run the command no logging on to forbid all records. logging onno logging on
Parameter
None
Default
logging on
Command mode
Global configuration
Example
switch_config# logging on
switch_config# ^Z
switch#
Configured from console 0 by DEFAULT
switch# ping 192.167.1.1
switch#ping 192.167.1.1
PING 192.167.1.1 (192.167.1.1): 56 data bytes
!!!!!
Basic Configuration Commands

- 60 -
--- 192.167.1.1 ping statistics ---
5 packets transmitted, 5 packets received, 0% packet loss
round-trip min/avg/max = 0/4/10 ms
switch#IP: s=192.167.1.111 (local), d=192.167.1.1 (FastEthernet0/0),
g=192.167.1.1, len=84, sending
IP: s=192.167.1.1 (FastEthernet0/0), d=192.167.1.111 (FastEthernet0/0),
len=84,rcvd
IP: s=192.167.1.111 (local), d=192.167.1.1 (FastEthernet0/0), g=192.167.1.1,
len=84, sending
IP: s=192.167.1.1 (FastEthernet0/0), d=192.167.1.111 (FastEthernet0/0),
len=84,rcvd
IP: s=192.167.1.111 (local), d=192.167.1.1 (FastEthernet0/0), g=192.167.1.1,
len=84, sending
IP: s=192.167.1.1 (FastEthernet0/0), d=192.167.1.111 (FastEthernet0/0),
len=84,rcvd
IP: s=192.167.1.111 (local), d=192.167.1.1 (FastEthernet0/0), g=192.167.1.1,
len=84, sending
IP: s=192.167.1.1 (FastEthernet0/0), d=192.167.1.111 (FastEthernet0/0),
len=84,rcvd
IP: s=192.167.1.111 (local), d=192.167.1.1 (FastEthernet0/0), g=192.167.1.1,
len=84, sending
IP: s=192.167.1.1 (FastEthernet0/0), d=192.167.1.111 (FastEthernet0/0),
len=84,rcvd
switch_config# no logging on
switch_config# ^Z
switch#
switch# ping 192.167.1.1
PING 192.167.1.1 (192.167.1.1): 56 data bytes
!!!!!
--- 192.167.1.1 ping statistics ---
5 packets transmitted, 5 packets received, 0% packet loss
round-trip min/avg/max = 0/4/10 ms
Related command
logginglogging buffered logging monitor
Basic Configuration Commands

- 61 -
logging console
3.2.7 logging trap
Run the command logging trap to control the information volume recorded to the syslog server. Run the command no logging trap to forbid the information to be recorded to the syslog server.
logging trap levelno logging trap
Parameter
noitpircseD retemaraP
level Information level of the logs displayed on the syslog server
Refer to table 5.
Default
Informational
Command mode
Global configuration
Instruction
Table 5 Level of log recording
Prompt Lev
el
Description Syslog Definition
emergencies 0 System is unusable LOG_EMERG
alerts 1 Immediate action
needed
LOG_ALERT
critical 2 Critical conditions LOG_CRIT
errors 3 Error conditions LOG_ERR
warnings 4 Warning conditions LOG_WARNING
Basic Configuration Commands

- 62 -
notifications 5 Normal but significant
condition
LOG_NOTICE
informational 6 Informational
messages only
LOG_INFO
debugging 7 Debugging messages LOG_DEBUG
Example
logging 192.168.1.1
logging trap notifications
Related command
logging
3.2.8 logging command
To enable the command execution recording, run logging command.After this function is opened, a log will be generated for each of all entered commands, in which the line to execute this command, the command line, the execution result, the login line and the login address will be recorded. You can use no logging command to disable this function.
Parameter
N/A
Default value
no logging command
Command mode
Global configuration mode
Example
Switch_config#logging command
Switch_config#Jul 11 15:26:56 %CMD-6-EXECUTE: `logging command ` return 0, switch(vty
0, 192.168.25.42).
Basic Configuration Commands

- 63 -
Related command
logging
3.2.9 logging source-interface
This command is used to set the source port of log exchange. You can use no logging source-interface to disable this function.
Parameter
N/A
Default value
no logging source-interface
Command mode
Global configuration mode
Example
Switch_config# logging source-interface vlan 1
Related command
logging
3.2.10 logging history alerts
This command is used to set the level of the historical log table to alerts (need to act immediately).
Parameter
N/A
Default value
logging history warnings
Command mode
Global configuration mode
Basic Configuration Commands

- 64 -
Example
Switch_config#logging history alerts
Related command
logging
3.2.11 logging history critical
This command is used to set the level of the historical log table tocritical.
Parameter
N/A
Default value
logging history warnings
Command mode
Global configuration mode
Example
Switch_config#logging history critical
Related command
logging
3.2.12 logging history debugging
This command is used to set the level of the historical log table todebugging.
Parameter
N/A
Default value
logging history warnings
Basic Configuration Commands

- 65 -
Command mode
Global configuration mode
Example
Switch_config#logging history debugging
Related command
logging
3.2.13 logging history emergencies
This command is used to set the level of the historical log table toemergencies.
Parameter
N/A
Default value
logging history warnings
Command mode
Global configuration mode
Example
Switch_config#logging history emergencies
Related command
logging
3.2.14 logging history errors
This command is used to set the level of the historical log table toerrors.
Parameter
N/A
Basic Configuration Commands

- 66 -
Default value
logging history warnings
Command mode
Global configuration mode
Example
Switch_config#logging history errors
Related command
logging
3.2.15 logging history informational
This command is used to set the level of the historical log table toinformational.
Parameter
N/A
Default value
logging history warnings
Command mode
Global configuration mode
Example
Switch_config#logging history informational
Related command
logging
3.2.16 logging history notifications
This command is used to set the level of the historical log table tonotifications.
Basic Configuration Commands

- 67 -
Parameter
N/A
Default value
logging history warnings
Command mode
Global configuration mode
Example
Switch_config#logging history notifications
Related command
logging
3.2.17 logging history warnings
This command is used to set the level of the historical log table towarnings.
Parameter
N/A
Default value
logging history warnings
Command mode
Global configuration mode
Example
Switch_config#logging history warnings
Related command
logging
3.2.18 logging history rate-limit
This command is used to set the log output rate.
Basic Configuration Commands

- 68 -
Parameter
noitpircseD retemaraP
<1-512> Stands for the number of logs which are exported each second.
Default value
logging history rate-limit 0
Command mode
Global configuration mode
Example
Switch_config#logging history rate-limit 256
Related command
logging
3.2.19 logging history size
This command is used to set the number of entries in the historical log table.
Parameter
noitpircseD retemaraP
<0-500> Stands for the number of historical log entries.
Default value
logging history size 0
Command mode
Global configuration mode
Example
Switch_config#logging history size 256
Basic Configuration Commands

- 69 -
Related command
logging
3.2.20 service timestamps
Run the command service timestamps to configure the time stamp that is added when the system is debugged or records the log information.Run the command no service timestamps to cancel the time stamp that is added when the system is debugged or records the log information.
service timestamps [log|debug] [uptime| datetime]no service timestamps [log|debug]
Parameter
noitpircseD retemaraP
log Adds the time stamp before the log information.
debug Adds the time stamp before the debug information.
uptime Duration between the startup of the switch and the current time
datetime Real-time clock time
Default
Service timestamps log date Service timestamps debug date
Command mode
Global configuration
Instruction
The time stamp in the uptime form is displayed like HHHH:MM:SS, meaning the duration from the start-up of the switch to the current time. The time stamp in the date form is displayed like YEAR-MON-DAY HH:MM:SS, meaning the real-time clock time.
Basic Configuration Commands

- 70 -
Example
Service timestamps debug uptime
3.2.21 clear logging
It is used to clear the log information recorded in the memory cache. clear logging
Parameter
None
Command mode
Management mode
Related command
logging buffered show logging
3.2.22 show break
It is used to display the information about abnormal breakdown of the switch. show break [map-filename]
Parameter
noitpircseD retemaraP
map-filename Specifies the filename of the function mapping table.
Default
None
Command mode
Management mode
Instruction
It is used to display the information about abnormal breakdown of the switch, helping to find the cause of the abnormality.
Basic Configuration Commands

- 71 -
Example
switch#sh break
Exception Type:1400-Data TLB error
BreakNum: 1 s date: 2000-1-1 time: 0:34:6
r0 r1 r2 r3 r4 r5 r6
00008538-01dbc970-0054ca18-00000003-80808080-fefefeff-01dbcca1-
r7 r8 r9 r10 r11 r12 r13
00000000-00009032-00000000-7ffffff0-00008588-44444444-0054c190-
r14 r15 r16 r17 r18 r19 r20
000083f4-000083f4-00000000-00000000-00000000-00000000-00000000-
r21 r22 r23 r24 r25 r26 r27
00000000-0000000a-00000001-00000000-00000000-004d6ce8-01dbd15c-
r28 r29 r30 r31 spr8 spr9 ip
00000002-00467078-00010300-00000300-00000310-00008588-00000370-
Variables :
00008538-44444444-01dbd15c-01dbcaac-00000002-00000000-004d6ce8-
01dbca18-
00008538 --- do_chram_mem_sys_addr---bspcfg.o
0001060c --- subcmd---cmdparse.o---libcmd.a
000083e4 --- do_chram_mem_sys---bspcfg.o
0000fb24 --- lookupcmd---cmdparse.o---libcmd.a
0000f05c --- cmdparse---cmdparse.o---libcmd.a
003e220c --- vty---vty.o---libvty.a
00499820 --- pSOS_qcv_broadcast---ksppc.o---os\libsys.a
The whole displayed content can be divided into six parts: 1 RROR:file function.map not found The prompt information means that the system has not been installed the software function.map, which does not affect the system running. If the version of the software function.map is not consistent with that of the switch, the system prompts that the version is not consistent.
2 Exception Type—Abnormal hex code plus abnormal name
3 BreakNumIt is the current abnormal number. It means the number of abnormalities that the system has since it is powered on in the latest time. It is followed by the time when the abnormality occurs.
4 Content of the register
Basic Configuration Commands

- 72 -
The common content of the register is listed out.
5 Variable area The content in the stack is listed out.
6 Calling relationship of the number If the map file is not installed on the system, only the function's address is displayed. If the map file is installed on the system, the corresponding function name, .o file name and .a file name are displayed. The calling relationship is from bottom to top.
3.2.23 show debug
It is used to display all the enabled debugging options of the switch. show debug
Parameter
None
Command mode
Management mode
Example
switch# show debug
Crypto Subsystem:
Crypto Ipsec debugging is on
Crypto Isakmp debugging is on
Crypto Packet debugging is on
Related command
debug
3.2.24 show logging
It is used to display the state of logging (syslog). show logging
Basic Configuration Commands

- 73 -
Parameter
None
Command mode
Management mode
Instruction
It is used to display the state of logging (syslog), including the login information about the console, monitor and syslog.
Example
switch# show logging
Syslog logging: enabled (0 messages dropped, 0 flushes, 0 overruns)
Console logging: level debugging, 12 messages logged
Monitor logging: level debugging, 0 messages logged
Buffer logging: level debugging, 4 messages logged
Trap logging: level informations, 0 message lines logged
Log Buffer (4096 bytes):
2000-1-4 00:30:11 Configured from console 0 by DEFAULT
2000-1-4 00:30:28 User DEFAULT enter privilege mode from console 0, level = 15
Related command
clear logging
Basic Configuration Commands

- 74 -
Chapter 4 SSH Configuration Commands
4.1.1 ip sshd enable
Command description
ip sshd enableno ip sshd enable
Parameter
None
Default
1024 bits
Instruction
It is used to generate the rsa encryption key and then monitor the connection to the ssh server. The process of generating encryption key is a process of consuming the calculation time. It takes one or two minutes.
Command mode
Global configuration mode
Example
In the following example, the SSH service is generated. device_config#ip sshd enable
4.1.2 ip sshd timeout
Command description
ip sshd timout time-length
no ip timeout
Parameter
noitpircseD retemaraP
Basic Configuration Commands
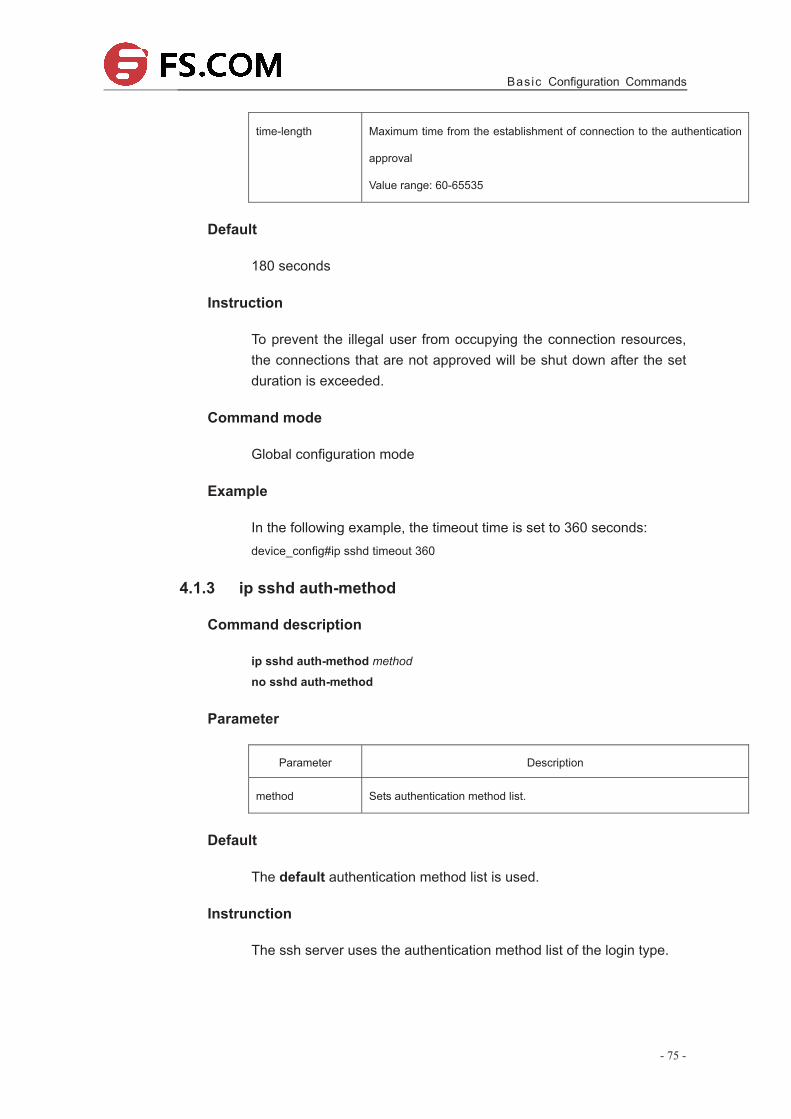
- 75 -
time-length Maximum time from the establishment of connection to the authentication
approval
Value range: 60-65535
Default
180 seconds
Instruction
To prevent the illegal user from occupying the connection resources, the connections that are not approved will be shut down after the set duration is exceeded.
Command mode
Global configuration mode
Example
In the following example, the timeout time is set to 360 seconds: device_config#ip sshd timeout 360
4.1.3 ip sshd auth-method
Command description
ip sshd auth-method method
no sshd auth-method
Parameter
noitpircseD retemaraP
method Sets authentication method list.
Default
The default authentication method list is used.
Instrunction
The ssh server uses the authentication method list of the login type.
Basic Configuration Commands

- 76 -
Command mode
Global configuration mode
Example
In the following example, an auth-ssh authentication method list is configured and it is applied to the ssh server: device_config#aaa authentication login auth-ssh local
device_config#ip sshd auth-method auth-ssh
4.1.4 ip sshd access-class
Command description
ip sshd access-class access-list no ip sshd access-class
Parameter
noitpircseD retemaraP
access-list Standard IP access list
Default
No access control list
Instrunction
It is used to configure the access control list for the ssh server. Only the connections complying with the regulations in the access control list can be approved.
Command mode
Global configuration mode
Example
In the following example, an ssh-accesslist access control list is configured and applied in the ssh server: device_config# ip access-list standard ssh-accesslist
device_config_std_nacl#deny 192.168.20.40
device_config#ip sshd access-class ssh-accesslist
Basic Configuration Commands

- 77 -
4.1.5 ip sshd auth-retries
Command description
ip sshd auth-retries timesno ip sshd auth-retries
Parameter
noitpircseD retemaraP
times Maximum re-authentication times
Value range: 0-65535
Default
3 times
Instrunction
The connection will be shut down when the re-authentication times exceeds the set times.
Command mode
Global configuration mode
Example
In the following example, the maximum re-authentication times is set to five times: device_config#ip sshd auth-retries 5
4.1.6 ip sshd clear
Command description
ip sshd clear ID
Parameter
noitpircseD retemaraP
ID Number of the SSH connection to the local device
Value range: 0-65535
Basic Configuration Commands

- 78 -
Default
N/A
Instruction
It is used to mandatorily close the incoming ssh connection with the specified number. You can run the command show ip sshd line to check the current incoming connection’s number.
Command mode
Global configuration mode
Example
In the following example, the No.0 incoming connection is mandatorily closed:device_config#ip sshd clear 0
4.1.7 ip sshd silence-period
Syntax
ip sshd silence-period time-length no ip sshd silence-period
Parameter
Parameter Description
time-length Means the time of the silence, which ranges from 0 to 3600.
Default value
60s
Remarks
This command is used to set the login silence period. After the accumulated login failures exceed a certain threshold, the system regards that there exist attacks and disables the SSH service in a period of time, that is, the system enters the login silence period. The silence period is set by the ip sshd silence-period command.The default silence period is 60 seconds. The allowable login failures are set by the ip sshd auth-retries command, whose default value is 6.
Basic Configuration Commands

- 79 -
Command mode
Global configuration mode
Example
The following example shows how to set the silence period to 200 seconds.switch_config#ip sshd silence-period 200
4.1.8 ip sshd sftp
Syntax
ip sshd sftp no ip sshd sftp
Parameter
N/A
Default value
N/A
Remarks
This command is used to enable the SFTP function. The SFTP function refers to the secure file transmission system based on SSH, of which the authentication procedure and data transmission are encrypted. Though it has low transmission efficiency, network security is highly improved.
Command mode
Global configuration mode
Example
The following example shows how to enable the SFTP function. switch_config#ip sshd sftp
4.1.9 ip sshd save
Syntax
ip sshd save
Basic Configuration Commands

- 80 -
no ip sshd save
Parameter
N/A
Default value
N/A
Remarks
This command is used to save the initial key. When the SSH server is restarted, the key will be first read from the flash; if the key reading is successful, the recalculation of key will be avoided and the startup time will be shortened.
Command mode
Global configuration mode
Example
The following example shows how to enable the key protection function.switch_config#ip sshd save
4.1.10 ip sshd disable-aes
Syntax
ip sshd disable-aes no ip sshd disable-aes
Parameter
N/A
Default value
The AES encryption algorithm is forbidden.
Remarks
This command is used to decide whether to use the AES algorithm during the encryption algorithm negotiation. The AES algorithms such as aes128-cbc and aes256-cbc are not used by default.
Basic Configuration Commands

- 81 -
Command mode
Global configuration mode
Example
The following example shows how to disable the AES encryption algorithm.switch_config#ip sshd disable-aes
4.1.11 ssh
Command description
ssh –l userid –d destIP [-c {des|3des|blowfish }] [-o numberofpasswdprompts] [-p port]
Parameter
noitpircseD retemaraP
–l userid User account on the server
–d destI Destination IP address in the dotted decimal system
-o
numberofpasswdpr
ompts
Re-authentication times after the first authentication fails
Actual re-authentication times is the set value plus the smallest value set
on the server. Its default value is three times.
Value range: 0-65535
-p port Port number that the server monitors
Its default value is 22.
Value range: 0-65535
-c
{des|3des|blowfis
h}
Encryption algorithm used during communication
The encryption algorithm is 3des by default.
Default
N/A
Basic Configuration Commands

- 82 -
Instruction
The command is used to create a connection with the remote ssh server.
Command mode
Privileged mode
Example
In the following example, a connection with the ssh server whose IP address is 192.168.20.41 is created. The account is zmz and the encryption algorithm is blowfish:device#ip ssh –l zmz –d 192.168.20.41 –c blowfish
4.1.12 show ssh
Command description
show ssh
Parameter
None
Default value
N/A
Instrunction
It is used to display the sessions on the ssh server.
Command mode
Privileged mode
Example
In the following example, the sessions on the ssh server are displayed: device#show ssh
Basic Configuration Commands

- 83 -
4.1.13 show ip sshd
Command description
show ip sshd
Parameter
None
Default value
N/A
Instrunction
It is used to display the current state of the ssh server.
Command mode
Privileged mode
Example
In the following example, the current state of the ssh server is displayed:device#show ip sshd
Basic Configuration Commands