AVSIM Commercial FS9/FSX Scenery Review E-Jets … Commercial FS9/FSX Scenery Review ... each model...
20
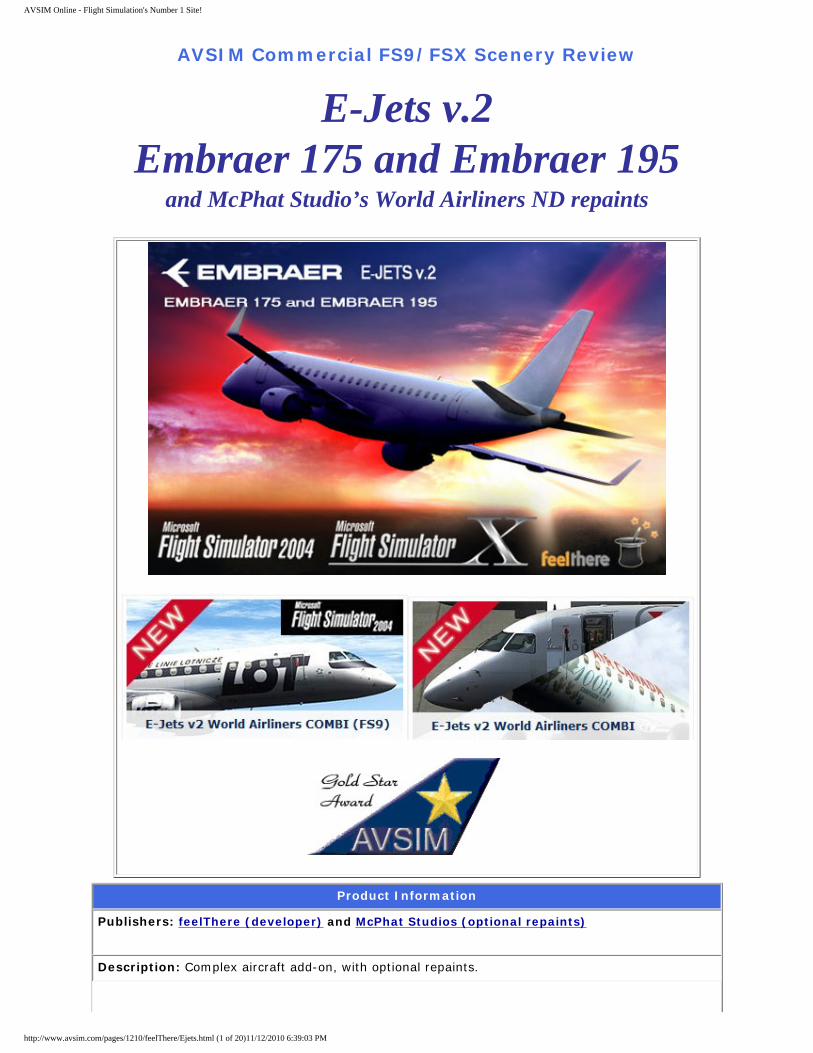
AVSIM Online - Flight Simulation's Number 1 Site! AVSIM Commercial FS9/FSX Scenery Review E-Jets v.2 Embraer 175 and Embraer 195 and McPhat Studio’s World Airliners ND repaints Product Information Publishers: feelThere (developer) and McPhat Studios (optional repaints) Description: Complex aircraft add-on, with optional repaints. http://www.avsim.com/pages/1210/feelThere/Ejets.html (1 of 20)11/12/2010 6:39:03 PM
-
Upload
truongxuyen -
Category
Documents
-
view
225 -
download
8
Transcript of AVSIM Commercial FS9/FSX Scenery Review E-Jets … Commercial FS9/FSX Scenery Review ... each model...
AVSIM Online - Flight Simulation's Number 1 Site!
AVSIM Commercial FS9/FSX Scenery Review
E-Jets v.2 Embraer 175 and Embraer 195
and McPhat Studio’s World Airliners ND repaints
Product Information
Publishers: feelThere (developer) and McPhat Studios (optional repaints)
Description: Complex aircraft add-on, with optional repaints.
http://www.avsim.com/pages/1210/feelThere/Ejets.html (1 of 20)11/12/2010 6:39:03 PM

AVSIM Online - Flight Simulation's Number 1 Site!
Download Size: feelThere: FS9 - 114 MB FSX - 132 MB McPhat: FS9 or FSX 40 MB
Format: Download
Simulation Type: FS9 & FSX
Reviewed by: Ray Marshall - AVSIM Contributing Reviewer - September 12, 2010
SO WHAT IS EMBRAER?
Rather than go through the history of Embraer, I am just going to state it is one of the largest aircraft manufacturers in the world. Focusing on specific market segments, Embraer closed out 2009 with 16,853 employees – 15,952 in Brazil and 901 abroad. The name Embraer is an acronym derived from the consortium’s name, Empresa Brasileira de Aeronautica S.A. It has produced more than 5,000 aircraft that operate in 88 countries on five continents and it is the market leader for commercial jets with up to 120 seats.
Based in São José dos Campos, Brazil, Embraer has five large and growing engineering, development and manufacturing sites within a few hours’ flight time and other facilities in Portugal, France, United States, China, and Singapore.
Phonetically, it is generally pronounced EM-BRAY-AIR in
America. You can use your search engine to hear male and female
pronunciations. This has been a hard word for me to learn.
E-Jets are not stretched from smaller airplanes or shrunken from larger
platforms.
Embraer made a significant mark on the world commercial airlines market with the introduction of the Embraer Regional Jets (ERJs) in the 1997–2004 eras. Using the experience gained and the having the necessary financial backing in place, they initiated a bold plan to fill a niche in the airline market. It seems there existed a rather large gap in seat capacity between the smaller regional turboprops used by 2nd tier air carriers and the mainstream big boys with the Airbus’, Boeings, MDs, etc.
THE PHILOSOPHY OF E – TAP THE GAP
In late 1999, Embraer announced their plan to design and build a series of airplanes to fill this known gap, dubbed the Rule of 70 – 110 for the seat capacity. With Rule 70-110 as the battle cry, and starting with a totally clean sheet of paper, the E-Jets as they are now known were born. First out the chute was the Embraer 170, next came the larger, longer Embraer 190. They were immediate hits with the regional carriers all over the world. The early days saw the World Trade Organization (WTO) setting up road blocks and making several rulings challenging the financial arrangements of the Brazilian government and Embraer. These were instigated by Canada. Seems this new Brazilian upstart ERJ was seriously affecting sales of their pet, the Canadian Bombardier regional jet (CRJ). Brazil counter sued, in effect, and the WTO then ruled against the Canadian government for its financial arrangements with Bombardier. Both eventually recovered and got back on track of building airplanes for the rapidly growing regional jet market all over the world.
LITTLE BIG JET
The results of the over-the-top success of the Embraer 170/190, brought the designers back to the drawing boards to stretch each model a little and upgrade the cockpit avionics and thus, the model Embraer 175 and 195 were born. From a distance I don’t think anyone can tell the difference between an EMB -170 and an EMB - 175, or an EMB -190 and an EMB -195. But, the financial advisors for the operators can and will tell you the difference in a heartbeat. Each model is specifically designed for a route or segment. Heck, the Embraer 170 was certified with specially designed software approaches into a single airport. But, we can discuss the steep angle decent to London City airport (LCY) some other time. Just last week number 700 E-Jet was
http://www.avsim.com/pages/1210/feelThere/Ejets.html (2 of 20)11/12/2010 6:39:03 PM

AVSIM Online - Flight Simulation's Number 1 Site!
delivered to British Airways’ CitiFlyer. My former employer took delivery of 3 Embraer 175’s a few weeks ago.
So why are we talking about real world stuff in a flight simulation review? Because, I think after reading this review many of you will immediately have a new present under the Christmas tree and others may have a couple of more add-ons in their virtual hanger. Should that be the case, you may want to have a little background on your next best add-on.
A little more than two years ago, feelThere developed the E-Jets Series for FS9 and FSX, comprised of the Embraer 170, 190 and Lineage 1000. The Lineage 1000, a corporate jet, is basically an E-190 flight deck and body, but with only 19 seats and double the fuel. This FS add-on was exclusively marketed and is supported by Wilco Publishing. David Rogers, AVSIM Staff Reviewer, authored a review dated August 22, 2008. David found this initial package lacking in some areas. He was especially annoyed with the feelThere’s history of poor presentation in the VC cockpit area when looking out the pilot’s window and some rather alarming flight characteristics with sudden loss of altitude in turns and a violent shaking yoke. He did like, very much, the balance of the flight dynamics and complex integrated navigation boxes among a lot of other new features.
Looks a lots like an Airbus. Thes models have Flt-By-Wire flight
controls, the new Honeywell Primus Eipc Flight Management System and
much more.
FOUR PLANES, ALL THE SAME, BUT DIFFERENT
Because the EMB-170 and EMB-175 are so similar, the EMB-175 being the one with the extra 8 seats, Embraer says the commonality factor is 95%. Same for the EMB-190 and EMB-195 (12 extra seats) 95%. The EMB-17x and EMB-19x models have almost 90% common parts between them. This is a big deal with the operators and flight crews. Airplanes that have that much in common do not require separate type rating for the crews and the spare parts guys and ground crews love it. The operators are already in market niche heaven. Each of the stretch models has the extra seats, longer cables and pipes to bridge the forward and aft plugs, and slightly updated flight deck electronics. The engines, wings, tail, fuel systems, hydraulics, etc. are practically identical within the two groups. All the E-Jets have winglets.
HOW MUCH, HOW FAST, HOW FAR
Variant E-170 E-175 E-190 E-195
Flight deck Crew 2
Passengers 70 – 80 78 - 88 94 - 114 106 - 122
Length 98' - 1" 103' - 11" 118' - 11" 126' - 10"
Wingspan 85' - 4" 94' - 3"
Height 32' - 4" 34' - 7"
Empty Weight 46,600 lb 48,100 lb 61,900 lb 63,900 lb
Max Takeoff Weight 79,300 lb 83,000 lb 105,400 lb 107,600 lb
Max Payload Weight 20,000 lb 22,200 lb 28,800 lb 30,100 lb
Takeoff Run (MTOW) 5,394 ft 7,362 ft 6,745 ft 7,149 ft
GE Engines2x CF34-8E turbofans 2x CF34-10E turbofans
13,800 lb thrust each 18,500 lb thrust each
Maximum Speed Mach 0.82, 553 mph
Range 1,800 nm 1,800 nm 1,400 nm
Maximum Fuel Load 20,580 lb 28,200 lb
Service Ceiling 41,000 ft
Rate of Climb Max 3,500 fpm
http://www.avsim.com/pages/1210/feelThere/Ejets.html (3 of 20)11/12/2010 6:39:03 PM

AVSIM Online - Flight Simulation's Number 1 Site!
Thrust to Weight ratio 0.42:1 0.39:1 0.41:1 0.39:1
When the current crop of Embraer commercial jets was being developed, the ‘regional’ part of the name was dropped from the designation as they were envisioned to be more than just regional jets. Thus, the name Embraer Jets was born, then shortened to simply E-Jets. (easier to pronounce, also). To date, these four models comprise the entire range of commercial airliner E-Jets. Many flight simulator enthusiasts are familiar with the Embraer 135/145 models developed by feelThere and marketed by Wilco Publishing for FS9 and FSX. That add-on, is now at ERJ v2, SP2. I mention this one just so you will not confuse it with the E-Jets. These are totally, from scratch, different airplanes, in both the real world and in the feelThere simulation. The ERJs’ look more like a DC-9 with the engines hanging on the rear fuselage and the E-Jets look more like an Airbus or a smaller version of the Boeing 737, 757, 767, 777 families with 2 massive GE engines under the wings. So we now have the A guys, the B guys, and the E guys.
WHAT’S IN A NAME
The E-jets family
feelThere, was established in 2002 with the goal to create affordable high quality add-ons for Microsoft Flight Simulator. They created many advanced simulations (probably the widest range of jet airplanes) and have won several awards. In 2006 their PIC B-737 received the "Best Commercial Airplane" award.
Victor Racz, one of the founders, tells the story of the early days, when they called themselves a “feel right there” team, hence the company name. He fondly conveyed to me his thoughts as his team was the first group to add specific sounds such as the
http://www.avsim.com/pages/1210/feelThere/Ejets.html (4 of 20)11/12/2010 6:39:03 PM

AVSIM Online - Flight Simulation's Number 1 Site!
buffeting sound when the speed brake is released. They were also one of the first, or maybe the first group, to make the airplanes used and dirty looking, as in real world airplanes. Nowadays almost all the high end developers are doing this - scratched, marred, worn knobs, panels, yokes, etc. PMDG and Captain Sims immediately come to mind.
Victor stated they never intended for feelThere to compete as a top tier FS developer. Instead, their original goal was to produce “something good enough, but with real value” that the broad spectrum of users could afford and would like to fly. It sounds to me like this may be their best product to date, as it is an outstanding example of a complex, fully integrated flight deck, superb flight characteristics, good enough external textures, including both FS9 and FSX native versions, CALL!, a first officer and flight attendant simulation, MAP!, a passenger cabin moving map with updates on altitude, remaining flight time, distance, etc. and an active support web site. All this for less than 40 dollars. If you actually purchased the included CALL! and MAP! programs separately, you would be spending almost what the entire add-on sells for. So you could look at it like this ok - I bought Call! and MAP! and got the FS9 and FSX add-ons for free. They also reduced the retail price as compared to the v.1 release.
A MOUTHFUL WITH A KICKER
This add-on is entitled E-Jets v,2 Embraer 175 and Embraer 195 for FS9 and Flight Simulator X.
Minimum Requirements for E-Jet v.2 with Map!:
Pent4 - 1.4 GHz, 2 GB RAM, Win XP, Vista, Win7, Graphics card w/ 128 MB
FSX –SP1 and SP2 or Accel and/ or FS9 (9.1)
The developer continues to state that only win 32 bit sys are supported. 64-bit users are not
reporting any problems. The supplied Configuration utility can be used to optimize
individual systems.
This is not an upgrade but a sequel to the E-Jets Series. It is simply a continuation of the E-Jets family with the introduction of the newer Embraer 175 and Embraer 195 models. When pressed about the v.2, seems it is best understood as Volume 2, not version 2 as one, including myself, might expect. Also, this time, feelThere is the developer, retailer, and support provider. Wilco Publishing is just one of several retailers.
This is not crystal clear in the flight simulator community as it is a break in the “normal” relationship between feelThere, the developer, and Wilco Publishing, the retailer. It is imperative to know that feelThere is the only developer of payware Embraer commercial airplanes. This goes back to around 2002. I think it will just take a while for the sim community to accept that it is just feelThere, not feelThere/Wilco Publishing. I know when I was searching the FS sites for background information; it was fairly common to see E-Jets v.2 erroneously referred as a feelThere/Wilco release.
I would like to go on record by stating that I purchased this add-on with my own hard earned dollars and then decided to write this AVSIM review after posting some initial thoughts and experiences at the forum. Like many simmers, I searched the AVSIM forum for information and as one might expect, started a dialog with fellow Embraer sim pilots. Two days later I was ready to buy.
Purchasing the product may be the easiest thing you do today. With credit card in hand, go to the feelThere.com site, click the big colorful screenshot of the Embraer 195, click on the BuyNow button, follow the instructions, check your email, click on the download link, depending on your OS, right click, select run as administrator for the Vista and Win7 bunch, fill in the blanks with your personal keys and codes from your email and within literally minutes, with no strain, no pain, no waiting for additional approvals or delayed emails, you are ready to – not fly, but start learning how to fly an Embraer 175 or Embraer 195. Actually, it is highly recommended that you start with the 127 page Operations Manual. I printed it out and had it spiral bound at Office Depot for a mere $2.99 and now I have some bedtime reading for quite some time. You might want to do something similar.
WHAT DO I GET FOR MY MONEY?
Well, let’s see. You get one download with an exe file for FS9 and a second exe for FSX. Some of you will be using both. I have both FS9 and FSX installed but fly in FSX almost all the time. I installed FS9 to look at a Cessna 152 from some freeware site in France because I kept reading that it was the best add-on of them all. Well, it wasn’t for me. But, I needed FS9 to review some spiffy repaints. More about that later.
http://www.avsim.com/pages/1210/feelThere/Ejets.html (5 of 20)11/12/2010 6:39:03 PM

AVSIM Online - Flight Simulation's Number 1 Site!
The download files are 114 MB (FS9) and 132 MB (FSX) and you will receive your password and key codes at the email address you used when you purchased it a few minutes earlier. The manual and configuration utility shortcut is located in a feelThere folder found using the Start button/All Programs along with some airport diagrams and STARS used with the tutorial flight. My recommendation is to print the manual or a large part of it and start your “amazement period”. Actually, I am still in my amazement period.
The configuration utility is a standalone program that must be run prior to starting your FS. This is a combination load manager, systems setup, personal preference kind of deal with two rows of tabs. Load your passengers and cargo, enable your working weather radar, (included, no extra charge), choose pounds or kilos, cold and dark or engines running. That kind of selection is done here prior to firing up your FS.
Configuration utility CALL! Spoken voice checklists included.
MAP! is included as one of the bonuses
Specifically, this V.2 brings a few totally new items to the simulation
● A very sophisticated Heads Up Display system including runway alignment.● Wide panel (16:9) screen in 2D mode with lots of supporting pop-ups.● MAP! and CALL! (both specific to this add-on) included● The two latest flight models – Embraer 175 and Embraer 195● For the FSX version only, DX10 support has been added● A lower retail price than E-Jets Series v.1
When you visit the new feelThere web site, they have a new splashy display for this latest add-on. Lots of screenshots, and text describing their masterpiece. I noticed the use of several adjectives, i.e., enhanced, photorealistic, perfect, ultra, and accurate. As an example, you will find four bullets for the overview of the Flight Management System (FMS) features.
● Ultra realistic and very complete FMS with Vertical Glide Path Mode and Coupled LNAV / VNAV ● Learn function : the FMS learns your flying habits for more accurate flight predictions ● Five different patterns simulated ● Updated airway support, waypoint sequencing, discontinuity, missed approach, hold at present
position, wind settings for waypoints, including reading current METAR for better planning, intercept, vertical direct to, direct mode, editable RTE page with waypoint input, custom waypoint support, advisory VNAV and more.
Now, if the above doesn’t appeal to those advanced tube drivers and us other wantabees I really don’t know what to say. Did you catch the 2nd one – it has a learn function. It actually learns our personal flying habits for more accurate flight predictions. I wonder if it makes coffee? One cream, one Splenda, please.
I’m not totally convinced this add-on is for everyone. I’m sure feelThere doesn’t want to hear that, but, let me explain where I’m coming from. This is a complex airplane. Maybe I should rephrase that. This is a very complex airplane. The average simmer, if there is such a thing, may be initially intimidated with the necessary programming of the MCDU prior to any flight. If you don’t know what that is, look for a box close-by for an overview. As one should expect, you cannot jump in the pilot’s seat of any modern multi-engine turbofan jet airplane and ‘go fly’.
http://www.avsim.com/pages/1210/feelThere/Ejets.html (6 of 20)11/12/2010 6:39:03 PM

AVSIM Online - Flight Simulation's Number 1 Site!
MCDU, FMS, FMC, and CDU - Modern jetliner navigation and control is achieved through the flight management system (FMS). Because of the FMS's ability to improve economics and assist the flight crew in conducting safe and comfortable flight the system is the heart of the modern electronic aircraft. The FMS technically refers to all the components that control the aircraft's automated flight. The control unit seen in the E-jet cockpit is called the Multifunction Control Display Unit (MCDU). Hidden from view is the actual Flight Management Computer (FMC) This is the actual brain (multiple redundant computers actually) running the FMS. It is often referred to as the MCDU, the FMS or the FMC. My preference is simply the CDU. (Most pilots don’t like big words like Multi-Functional, anyway)
You absolutely must use the MCDU to set the Position Init (where are you), have a flight plan either loaded or entered, then activated, a Performance Init (put in some weights and fuel numbers) activate a Departure (got to know the runway at least) and finally you will have to set the v1, v2,and vR, speeds Of course, this is the part that excites me the most, except for those other parts that excite me even more, like flying. Don’t worry, as you gain experience in these little big jets, you too will start to mumble and mix your words and actually talk in acronyms. It a whole new language.
This is a VC view when ready for takeoff. A full featured Introductory
Flight is included. The ram’s horn yoke design is an Embraer Jet
hallmark.
I know from surfing the various FS forums that many, many simmers have been eagerly awaiting the introduction of some Next Generation add-on ending with an ‘X’. I count myself as one of those simmers. However, I am here to tell you, without reservation, you really do not have to wait. Get this one and start learning the systems, make the Introductory Flight and you may find that you are no longer interested in the latest, next, or long promised A or B add-on. You may be too busy as Captain of your own Embraer 175 or Embraer 195.
My personal favorite is the Embraer 175 unless I happen to be flying the Embraer 195. Not a lot of difference unless you wander around the cabin which you can do with this one. You can also click the Cabin View and you are instantly transported (thank you, Scotty) to seat number D-16 in the passenger cabin. Here you can look around without anyone noticing that you are the Captain while the virtual copilot is up front at the controls. All those seats seem to be empty. I know I had weights for the passengers that I just programmed into the MCDU. Ever wonder why they don’t put AI passengers in these airliners? Checkout that virtual redhead. The aircraft is
most likely at cruising altitude (up to FL410) a few Flight Levels above those Boeing 737s that can’t quite get up that high. And for those select few that continue to be frustrated with the lack of the long awaited, mythical, perfect Airbus for FSX with a full working CDU with SIDS and STARS, full VNAV and LNAV. Wait no longer. Buy this one and program that MCDU until your little heart is content. This simulated edition of the Honeywell Primus Epic next-generation Flight Management System allows you to mouse click directly on the PFD and MFD and eats SIDS and STARS for breakfast. The navigation data is included, including free updates. All E-Jets feature Fly-By-Wire controls except for the ailerons.
You probably know that really active forum with those tiny images that reveals just a little tidbit of info at a time recently showed the vertical flight path that they are working on. Well, guys and girls, this one already has it, and in spades, and it is available today. Take a look at some of the screenshots further down. I remember seeing one of those tidbits for a HUGS (Heads Up Guidance System) view, with the comment “yes that is a runway depicted” and hundreds of simmers got so excited some even fell over backwards. Well, same as before, this one has a full featured, working HUD and it and may be even more elaborate. Read on. Remember, you can do full Auto land, and CAT I and CAT II landings so now you can fly in just about any weather. If you have REX or some of those other weather generators you can make it as realistic as you want.
CONFIGURATION UTILITY
http://www.avsim.com/pages/1210/feelThere/Ejets.html (7 of 20)11/12/2010 6:39:03 PM

AVSIM Online - Flight Simulation's Number 1 Site!
I assume you read at least some of the manual but let’s say you only looked at the pictures. That’s a start. The Introduction Flight starts with the Configuration utility. This is the stand alone support program found starting with the windows Start button, All Programs, then clicking on the feelThere folder and following it down to Configuration. The kicker is you must make your selections prior to starting FS. If not, you basically have to close it up, do the selections then restart the simulator.
I suppose if you make similar flights you could eventually go without this step. The selections will not vary from day to day other than the number of passengers and cargo weight. You decide whether to start as cold and dark or engines running. Of course, you can always use the Ctrl+E startup method. You select pounds vs. kilos and IN Hg pressure. The weather radar is selected with the configuration utility as is the widescreen (16:9) monitor if you use the 2D screen. With my weak eyesight, I find myself using 2D more and more, however, I use the VC almost all the time when cruising as I like to look around and enjoy the view.
Cabin, accessible in VC
This add-on allows assignable keys to the keyboard or optional hardware devices. That is always a nice option, even if you only use it occasionally. That one time you need it might be important to you. This is actually a deal breaker
in some add-ons if you are to believe the posts on the forum. More on this a little later. Last but not least, you set the passenger and cargo weights here. A slider makes quick work of it. One rainy day
you can click each of the tabs and see all those items that I failed to mention.
I’m jumping around a bit, but hang in there. The co-pilot callouts are really nifty. If you are flying the big iron right now with that silly rabbit poster and wishing you had airspeed and altitude tapes with voice callouts, wish no more. This one has that too. It even has the flight attendant welcome aboard message, and the thanks for flying with us message as you turn off the active. Did I mention the verbal checklists callouts? I like it when my co-pilot for the day has a pleasant voice. This one starts every flight with, as you may have already guessed, “Hello Captain”. After your Vr ”rotate” callout and as you are climbing out you hear, “Positive rate”, so you retract the landing gear, then comes those neat sounds of the gear coming up. Turbine Sounds Studio custom sounds included (TSS). OK, so now your speaking first officer announces “gear up”. Remember, all this neat stuff is included; it comes with the download and the initial installation.
Because you get both FS9 and FSX native versions, it really doesn’t matter which side of the fence you come down on. This one is ready to go. Those FSX simmers that seem to always be chasing a higher FPS number will be pleasantly surprised. You FS9 guys and girls are already maxed out with your sliders full right. You will be so immersed in your flying you will click that Shift+Z key and turn off all that red clutter in the upper left hand corner. You need to do that anyway, because that is where the simicon bar shows up when in the 2D mode. Oh, I don’t think I told you this comes with widescreen 2D panels with a host of resizable pop-ups. I know, just like you, I thought feelThere and widescreen would never marry. Welcome to the brave new world. FeelThere also has a new high fallutin’ modern website, none of that 2005 stuff anymore. Times they are a changing. Heck, I even heard a rumor that some of the moderators at the support site have been attending charm school
http://www.avsim.com/pages/1210/feelThere/Ejets.html (8 of 20)11/12/2010 6:39:03 PM

AVSIM Online - Flight Simulation's Number 1 Site!
This add-on makes good use of colors to portray additional information and sources. The color is an indicator of the source.
(online on a part time basis, probably). Whoa.
TWO BUTTONS AND A WHEEL
We are talking about your mouse now. You must have a wheel mouse to fly this plane. This is my first add-on that makes maximum use of the right click and center wheel. A lot more times than one would think, the only method of changing a selection is with the center mouse wheel. That is fine with me seeing as I already use one. There are many cases where using the mouse scroll wheel is just another method or option to increase or decrease a value, as on the knobs on the panel and overhead knobs. In some cases, it seems to be the only method of changing a value, like the radio frequencies when using the blue border method or changing the range of the flight plan depiction on the MFD. Changing the tilt on the weather radar is done with the scroll wheel, as is changes in the TCAS (traffic). Suffice it to say you must have a scroll wheel mouse as I counted 29 instances of ‘scroll wheel’ in the manual.
HOW DOES IT FLY?
In a word – wonderfully. The air files are by none other than Rob Young. If you just started simming yesterday and haven’t heard of Ron Young’s reputation in the FS world, let’s just say – it’s just about as good as it gets. I’m getting ahead of myself again.
If the manual falls short on details, check out this free site - they have
several more detailed files. The Automatic Flight Systems is a 52
page downloadable pdf for real world aircraft. Click on the the Embraer
190/195. www.smartcockpit.com
VC cockpit – Has that working cockpit look, see copilot’s notes and
approach plates.
Let’s go back to the manual. I’m actually new to flying feelThere planes so I had never seen a feelThere operations manual before a week or so ago. Lots of pictures, high resolution, full color screenshots, but way too many typos and misused words. Victor has lead me to believe that could be changing soon. I am so excited about this add-on that I might even edit the manual myself and not give him any excuse not to the send everyone a link for a new, near error-free pdf. If you are doing business in the United States, I personally think it makes good sense to use an editor that has English as a first language. Like I just said, that is my personal opinion. Evidently that is not feelThere’s opinion. Spell checkers only do so much, real world editors should have the last look before a manual is placed in the download box. Maybe we can change that along with all these other nice, positive changes.
Some of the errors are actually humorous – strait and level is a good one, the box with the blue boarder is another one that I actually showed my wife and we both chuckled, or the 100 degree compass arch, and the AP will level the winds. They all pass the spell checker, but are not correct words for the sentences. But folks, this is a serious add-on and it needs a serious review of that manual. Nobody ever said it was easy. I think the more technical the person the harder it is to write good manuals.
When I first looked at the index I thought, now what is missing here? It took me a little while to figure out that there are no chapters for the Systems. You know, it’s a complex turbofan twin jet with a fully integrated FMS. You got to have systems in the manual, don’t you? Maybe not.
What I thought I would find was something along the lines of Air Conditioning,
http://www.avsim.com/pages/1210/feelThere/Ejets.html (9 of 20)11/12/2010 6:39:03 PM

AVSIM Online - Flight Simulation's Number 1 Site!
Pneumatics, Autoflight, Avionics, Bleed Air, FMS, Fuel, FADEC, HUD, Weather Radar. That kind of system overview. But, it isn’t there. What is there is, well, other interesting stuff. It tells you what is and what is not simulated. Most of it is in the simulated column. It goes into fairly good detail about the Primary Flight Display (PFD), the Multi-Function Display (MFD), the Engine Indication and Crew Alerting System (EICAS). Those are the three big glass screens in front of the pilot.
Oh, I forgot to mention, unlike the latest Airbus X simulation, this one can be flown from the right seat. PFD and MFD, repeated for your first officer with the EICAS in the middle to share. Right click on any of these and they are zoomed up for us old folks with failing eyesight. Another right click to unzoom it. Next comes the Guidance Panel (GP). This is the short, wide one on the glare shield with a fair bit of confusion built-in.
The real world design of the GP is such that it is a combination of 9 or 10 knobs and a whole slew (30+) of push buttons. All those little push buttons like, FT, AP, ALT, LNAV, VNAV, have a little green indicator light that is used to alert the flight crew of the status of the button. Some of our fellow simmers that refuse to read manual were bombing the web site with irate posts about the lights not working. It turns out that – in the real world – only a small fraction of the Embraer operators elect to purchase the green light indicator option for their fleet. And as it just so happens, the model that was used for the feelThere simulation is one of those in the majority that do not have the working little green lights. Bummer.
I haven’t really counted the number of times the manual states, but it must be more than a handful, something along the lines of – “This is not a bug, the little green lights do not light when active or armed. You must review the Flight Mode Annunciation (FMA) indicators along the top of the PFD screen to confirm the autopilot modes, just like a real E-Jet pilot. I like that last part. It doesn’t take that long to get used to it, especially if you are like me, and new to Embraers anyway. The whole system is color coded, and as you learn the colors, white, green, cyan, magenta and red (danger) it only takes a glance at the FMA to know what is armed or active or should be.
Guidance Panel (GP)
2D cockpit Guidance Panel – comes in metallic grey and is resizable.
My VC mode cockpit has a bright silver finish on the Guidance Panel,
yours may not.
Let’s talk some more about the GP. Let’s also assume some of you simmer’s are from the Boeing camp. I understand. You are not serious about this new little upstart; you are just keeping up to date with the offerings. I understand. Well, all those who fly the heavies probably know about the hidden click spot or hot spot for the TO/GA switch on the PMDG B747 Queen of the Skies. This is the TakeOff/Go Around switch. For those that don’t know, it is a small Phillips screw head on the glare shield in front of the pilot. It is a convenience item for us FS enthusiasts as we can’t be bothered with trying to push a button on the side of the throttle quadrant during our takeoff run. Geez, we’re flying a 747 already. Well that very neat, inventive application has been carried to the extreme in this E-Jets v.2 Embraer 175 and Embraer 195 simulation.
I CAN’T SEE IT – WHERE IS IT?
feelThere calls them “hidden click spots” and there must be a hundred of them. They are literally everywhere on the flight panel and the Guidance Panel (GP). I might go through the manual and actually count them. It’s probably a lot less than a hundred but, I bet is more than a handful. The speed knob has one just above the knob – mine is just below the word speed. The TO/GA click spot is hidden just above the auto throttle button (blank spot). The BARO knob has one for Minimums (the word BARO). Several other instruments have these ‘convenient‘ mouse hot spots to help us flight simmers click quickly while flying.
But, seriously this add-on is feature rich - on steroids. So, I think the advanced simmers will be busy for some time learning the systems and inventing neat, new things to try. The manual states there are also some undocumented features programmed in the MCDU. Now that is exciting. The real world pilots will be logging on to the web site with their iPhones and laughing at us looking for Easter eggs. All those guys and girls flying the real world Honeywell systems already know a heck of lot more than is in this manual.
The tutorial flight called the Introduction Flight starts on Page 62 of the manual and is very detailed with lots of color images. It tells exactly which button to push or knob to turn at what time or in what order. It is a short flight from Dulles to Raleigh-Durham. Ever been there in FS? Here’s your chance. It is actually about 45 minutes flight time with about 45 minutes of pre-flight, startup and taxi time (for me). I’m a real world pilot also, just old, but not too old to fly. Remember there are old
http://www.avsim.com/pages/1210/feelThere/Ejets.html (10 of 20)11/12/2010 6:39:03 PM

AVSIM Online - Flight Simulation's Number 1 Site!
pilots, and there are bold pilots, but there are no old, bold pilots. Words of wisdom.
They give you the full treatment with this short flight. You will learn stuff that you will be using from now on. Like most things associated with a computer, there always seems to be more than one way to do anything, and I’m sure this is no exception. But, they are at least showing you one way that works. Not like several of my other high end add-ons that come with no tutorial flight at all.
LET’S FLY
Enough talking about it, let’s go fly. I suppose this included tutorial flight is as good a place to start as any. I’m a total novice with this Honeywell Primus Epic FMS so I guess the logic must make sense to someone, someplace. I can’t complain as they invented it back in the mid 1970’s. I haven’t grasped the flow as they say, just yet. These things are suppose to have some natural flow from left to right or down to up or something. I still need the manual as I fly. I have made some additional checklists for us beginners. I will post them at the website for downloading.
I know a real world ex-military pilot that signed on with Delta and was promised a Left Seat on the Connection flights in Embraers. First thing they did was send him to Orlando for Turbine School for about 3 months, I think. Think about that for a few minutes. But, he learned whatever was necessary and before you know it, he was a DC Captain. Happy as a clam.
So, we walk thru the setup, start with the default Cessna at Gate D16 at KIAD, weather, time, traffic, SET. We open up the default flight planner and create a route. Now we start the game. This MCDU will import FS flight plans, kind of, mostly just the From, To and waypoints. So we go thru that routine where you kill the engine on the Cessna, leave the master and avionics switches on then Change Planes. They use my Favorite Emb -175 rollout model and here comes your first smile – your virtual first officer says “Hello, Captain” (every time). Neat. You open the Call! Panel by clicking ! on the simicons or Shift +5 and your first officer starts the verbal Cockpit Safety Inspection checklist and Power Up checklist.
So you program your flight and whatever else they feed you and you get to the Before Start checklist, fire her up, set flaps, run thru the After Start checklist. Remember, this is all verbal from your first officer. If you fail to flip the switch or turn the knob, he (I wonder if you can select a female voice?) just patiently waits until you, Captain, are ready to continue. As you start your taxi to runway 1L, a flight attendant starts her welcome aboard message. Approaching simulated reality.
Engine Start is almost a non-event as the simulation includes FADEC for the GE engines. Open the protective cover, rotate switch to Start, watch as EICAS comes to life, close cover, Repeat for Number Two. Do this on the pedestal in VC or the Pedestal pop-up in 2D.
There are a few more necessary-for-flight items for you complete on the Before Takeoff checklist and then you are lined up and ready to go. I made a series of screenshots of the tutorial flight. I hope we have space to use many of them. I’m showing both 2D and VC panels as we fly.
Notice the different color of the Guidance Panel in 2d and VC. It
evidently varies with video cards and drivers. Not a big deal, the buttons
and knobs are the same.
“Embraer PP-XJG, fly runway heading until reaching outer marker make left turn to heading 190. Climb to flight level 220”. Time to go. Timer start. Hold brakes, advance throttles, look for an N1 of 45-50%, allow engines to stabilize, release brakes and move throttles full forward to activate auto throttle and engine FADEC logic. You will actually not touch the throttles again until you are on close-in final at KRDU.
Your virtual first officer is making speed callouts, at 80 knots, V1, Vr (also in color on your speed tape) you rotate smoothly to meet the horizontal flight director line on the PFD. When the first officer calls “positive rate” you retract the landing gear. When passing 2,000 feet AGL, in quick succession press the GP panel buttons AP, VNAV, then HDG. The FMA will now indicate these modes are active. The autopilot is now flying the plane. Check your indicators and release the yoke. This has those nice little things like flap retraction schedule (green dot) on the speed tape. Turn off APU, Listen to the verbal After Takeoff checklist, thank the flight attendant for the coffee.
OK, got a feel for the details. I’m not sure I can convey how it feels, but it is top notch flying with lots of new sensations, flight panels as sharp as a tack, lots of color, lots of information. Smooth Fly by Wire. I also can’t tell you about the smell, but the flight deck just smells right. Oh, and for David, the flight deck windows open and close in the VC and the peripheral area graphics have received the beauty treatment.
Rather, than me just tell you my impressions of flying this great add-on, I think it better to give you a little more insight into ‘how’ it is intended to be flown. After all,
http://www.avsim.com/pages/1210/feelThere/Ejets.html (11 of 20)11/12/2010 6:39:03 PM

AVSIM Online - Flight Simulation's Number 1 Site!
it is a simulation, and you might draw totally different conclusions about the flight dynamics than I did. So, let’s pick up the flight as we approach the outer marker on takeoff.
Who would like to fly from the right seat? Can you believe this is a FSX screenshot? Can you imagine what this looks like with the Orbx Pacific
North West scenery add-on package for FSX. Oh my, oh my. This VC is not quite at the level of the high end developers, but, neither is the price. I do not know of any other add-on that gives you as much bang for the buck
as this one.
VC pedestal view – it passes the fit and finish test quite handily. The big yellow & black 1 and 2 in the center are protective covers for the Engine
Start knobs.
A great night screenshot of the VC cockpit. When you wake up at 2 am, instead of worrying about those bills
to pay, get up and fly this one.
This is from page 71 of the Intro Flight in the manual.
As the aircraft climbs retract flaps as the aircraft accelerates through the PFD speed tape GREEN DOT speeds.
When you hear the outer maker beacon, and/or see the OM indication on the PFD, set the HDG knob to 190 degrees. The autopilot will begin the turn, continue the climb, and accelerate the aircraft to 240 knots indicated airspeed (KIAS).
On the overhead panel turn OFF the APU. Conduct the AFTER TAKEOFF checklist.
During initial climb the MCDU will display CHECK RESERVE FUEL in the SCRATCHPAD. This is an advisory message to confirm that there is enough fuel on-board to comply with reserve fuel requirements when arriving at the destination airport. Confirm the FMC's fuel predictions on the PERF DATA pages by checking fuel on-board one the EICAS screen. Acknowledge the message by pressing the MCDU's CLR button.
After completing the turn continue south until you see Dulles pass left of the aircraft.
“Embraer PP-XJG, fly direct to HAFNR and follow flight plan as filed.”
You are now going to command the aircraft to follow the complete lateral (LNAV) and vertical (VNAV) flight plan you entered into the FMC. On the MCDU press the LSK to the left of HAFNR. The waypoint appears in the SCRATCHPAD. Now enter HAFNR into LSK 2L (yes replace HAFNR with HAFNR). This will command the FMC to compute a new course from the aircraft's current location 'direct to' HAFNR. The modified route is displayed as a white dashed line on the MFD. Activate the modified flight plan by press the LSK to the right of ACTIVATE.
Now command the FMS to control lateral navigation (LNAV) by pressing the guidance panel NAV button (to the left of the HDG button). NOTE: check that the navigation information on the PFD compass rose are MAGENTA. If the data is GREEN you need to press the GP's FMS button before pressing the NAV button.
The FMA will replace HDG as the active lateral mode with LNAV. If LNAV only arms (white indication below HDG) the aircraft is not on the flight path to HAFNR. Use the HDG knob to set an intercept course for the path. The FMS
http://www.avsim.com/pages/1210/feelThere/Ejets.html (12 of 20)11/12/2010 6:39:03 PM

AVSIM Online - Flight Simulation's Number 1 Site!
will automatically move LNAV to active with the course is intercepted.
The E-jet is now flying the flight plan as entered into the MCDU.
It took me three times to fly the tutorial flight from start to finish without any self imposed glitches. Because this is a new type of flying for me, it takes me longer than some of you virtual hotdogs. But, the good news is, I continued to learn more about the proper sequences, the MCDU programming, actual flying, and the simulated sensations of delivering the cargo and passengers. Full auto land is an absolute blast for me, but, then so is the standard ILS, the circling visual approach, the night approach over water, and the right seat approach. Sorry, got carried away, again.
A screenshot in the 2D view showing the PFD and MFD after a right-click zoom. The Guidance Panel (GP) popup is shown along with the
standard sized MCDU popup. The bonus package, CALL!, the audio
checklist and callouts is shown in the upper right corner. The Decent
checklist would be next.
Notice the small row of simicons on the right side between the MCDU and the CALL! Box. Clickable icons are
available for the O/H panel, Pedestal, MCDU, Map, ATC, MAP! & CALL!. You can relocate this small bar of icons by
dragging with the mouse cursor. I like to place it just under the
compass.
Completing the Tutorial Flight from Dulles to Raleigh-Durham.
AUTOLAND – FULLY AUTOMATED LANDING (page 54 – 55)
This feelThere simulation is capable of fully automated landing, however, some very specific criteria must be met. The setup is a little involved so you will not be making full auto lands unless you are properly prepared and paying attention to a lot of details. Just like it should be. Assuming you have selected auto land on the MCDU and enabled the setup, both pilot and co-pilot GP minimums knobs are set to Radar (RA) with an altitude greater than 80 feet. Nav1 and Nav2 are both set to the ILS frequency, Both CRS knobs are set to the runway heading, Flaps are set to 5.
All the above will get an auto land armed indicator (white) on the FMA. As you approach the glide slope, it will move to active (Green) As you continue the approach you set auto brakes, verify both Navs are set correctly, same for the CRS knobs. Press the PREV button to arm the localizer and glide slope, move the throttle position to idle to allow the AT to retard thrust on landing.
Set speed for 160 knots, set flaps 3 when the GS starts moving, lower the gear. Reduce speed to Vapp +5, set flaps 5, auto land should go active.
There are nine more steps between the Align arm mode and exit the runway. But, if done correctly the plane with follow the GS, reduce speed, flair, touchdown, rollout and brake. The pilot’s job is steering the aircraft when the AP disengages on the runway and when the speed drops below 80 knots, pilot continues to apply brakes and exits the runway. Sounds like fun, doesn’t it.
If this fails, the fall back is the CATI and CATII ILS landings, this is where you take it down to minimums just like in auto land, except the pilot has to take the controls and complete the landing.
http://www.avsim.com/pages/1210/feelThere/Ejets.html (13 of 20)11/12/2010 6:39:03 PM

AVSIM Online - Flight Simulation's Number 1 Site!
HEADS UP DISPLAY (HUD).
The HUD display is a new introduction to the E-Jets simulation. It is accessed by pressing the W key. Much of the HUD display is identical to the PFD presentation.
Heads up Display – FSX simulation view
● Left is the speed tape● Right is the altitude tape● Bottom quarter, left to right is the radio information, compass rose, and
vertical speed.
The center ‘attitude indicator’ portion is similar to the PFDs with some added indicators.
● Flight Mode Annunciation (FMA)● Bank Angle scale● Attitude Indicator Bar● Flight path vector symbol showing actual direction of flight● Horizon line showing compass heading numbers and current magnetic heading● Flight director circle● Pitch indicator ladder● Bank Angle Indicator and slip/skid indicator
The HUD may be used in all phases of flight. For low visibility takeoffs tune both nav radios to the runways ILS frequency, set the GP heading and CRS to match the runway heading. When ready for takeoff, activate the TOGA mode using the GP hidden click spot.
An ILS landing using the HUD is similar to the PFD, except when on short final, below 1,500 feet, the display will simplify in order to clear the pilot’s field of vision and indicate only data required for a safe landing. As the approach continues, the HUD will continue to de-clutter to improve the field of vision.
Below 1,800 feet AGL, a symbolic runway display will appear to assist the pilot in aligning the aircraft for landing. This all depends on correct ILS course settings and aircraft being on course. Incorrect settings or bad aircraft orientation will result in
http://www.avsim.com/pages/1210/feelThere/Ejets.html (14 of 20)11/12/2010 6:39:03 PM

AVSIM Online - Flight Simulation's Number 1 Site!
a misaligned runway indication.
Notice Simicon bar along bottom of compass in 2D
My first night flight in the Embraer 175. Portland, OR to Victoria ,BC. (KPDX - CYYJ) using the fantastic
ORBX Pacific Northwest Scenery. It even looks good at night.
2Dd panel , VC cockpit below, Left bottom, night lighting, O/H panel
I would like to address some of the issues that David Rogers raised during his review of the Wilco released v.1. I took a near empty Embraer 175 with only about 20% fuel, no passengers, no cargo. Just me, the company’s senior test pilot, and Victor Racz in the jump seat. We climbed to FL200, cleared the area and did a DASO. This is the old military acceptance test.- Demonstration and Shakedown Operation. Without parachutes, you tend not to try to tear the wings off, but, we made a series of steep turns with and without the AP. We were looking for violent yoke shaking and rapid loss of attitude in the turns that David experienced. We brought Victor from feelThere with us so he would have firsthand knowledge of the flight experience, should something out of the ordinary happen. I suppose one could argue that Rob Young would be the better candidate but, this is, in reality, Victor’s baby. The good news is she cut thru the air like butter, left and right steep turns, she held altitude, like the Lady she is, within 80 feet in a 360 degree turn at 250 knots and the yoke never shuddered once when I had manual control. Fly by wire simulation limits the bank angle to 35 degrees, so when the AP was flying the turns it held altitude within 20 feet, generally. We repeated the steep turns at slow flight speeds – no problems here either. Case Closed. Aircraft accepted.
On the flight back to the airport, Victor was telling us that the symptoms David described were fairly common with any FSX add-on using a non-default autopilot. FeelThere has tweaked this one to smooth it out any wrinkles and think they have it solved. Using the fly-by-wire (FBW) design, we should not experience any of these unwanted symptoms. Seems like they are most likely to appear when the aircraft is pushed to extremes, very low speed turns, turbulence, etc. By definition, FBW keeps the aircraft within the design parameter at all times. David was using a non-default add-on autopilot in his test rig.
This is a commercial airliner simulation, not an F/A-18/E Hornet, so one should expect the flight dynamics to be rather docile. My impression is that Rob Young has the flight modeling right on the money. It is one of those planes that just feels right, from the first rotation to the flair at touchdown. It is even fun to taxi. I didn’t do a whole lot of manual flying as that is not why I bought the add-on and it is not what it was designed to do. I think we should concentrate on learning the FMS or if you already know the Honeywell system from other add-ons or real flying, so much the better. The turns were perfectly smooth and the AP hold was right on the money, no unexpected loss or gain in altitude.
I would like to borrow one paragraph from the v.1 review because this is exactly the same with this volume 2. This illustrates what I said earlier about more than one way to do something. As written by David Rogers.
If you’re flying this bird by the book, your climb out should be in either FLCH (flight level change mode) or VNAV. In flight level change mode, the speed selector needs to be in the manual (not FMS) position. You can then dial in a speed and the aircraft will control pitch to maintain that speed, with the engine thrust fixed at N1. The autopilot mode enunciator correctly displays “SPD-E” which means that speed is being controlled by the (E)levator (ie..pitch axis) not engine thrust. Once level, the aircraft appropriately displays “SPD-T”, indicating engine (T)hrust is now maintaining speed.
Remember that if you’re intending to use VNAV, one of the conditions is that you should have the speed selector set to “FMS”.
I decided to check my learning curve by seeing if I could plan a simple commuter flight, load the CDU, fly it and have the passengers walk away from it. The answer is Yes, I can. I even surprised myself. I chose to fly one of those spiffy McPhat liveries from New Orleans to Jackson, MS. A short flight, about two inches on the map. I selected two or three waypoints,
http://www.avsim.com/pages/1210/feelThere/Ejets.html (15 of 20)11/12/2010 6:39:03 PM

AVSIM Online - Flight Simulation's Number 1 Site!
one VOR, a departing runway and an arrival runway with an ILS approach. I loaded the plane with passengers and cargo, picked an altitude and then added a few crossing constraints. I made it through programming the CDU just fine and everything looked OK (I used the fuel short cut) until I saw the vertical profile – it looked a lot like a teepee. So I just lowered my cruising altitude and it flattened out the top of the triangle. It was an absolute pleasure to watch it happen the way I planned it. You are really going to enjoy this vertical profile and plan depiction on the MFD. Next flight I will add an alternate and change destinations mid-stream.
Zoom of Plan and Vertical Profile showing climb to TOC, cruise profile
at FL210 and TOD.
VC cockpit with MFD zoomed, preparing for an ILS approach into
Jackson, MS.
McPhat Studio’s repaint from World Airliners Collection, FSX. feelThere’s Embraer 175 simulated commuter
flight MSY – JAN.
The near-famous, multi-award winning McPhat Studios was chosen to create the included liveries for the E-Jet v.2 package. You get four for each model. The Embraer 175 and 195 rollout, Royal Jordanian Airlines for both 175 and 195, Cirrus Airlines and Trip finish off the 175 offering, and Azul and Windrose for the E-195 complete the provided liveries. None of these liveries excite me very much. Of the 6 unique ones, I think the basic home colors of rollout may be my choice.
Six unique McPhat Studios created liveries included.
As with most really full featured add-on packages, McPhat Studios was not content with just the included liveries and continued with their proven approach of providing additional optional add-on repaints for both FS9 and FSX. You will find their World Airliners packages at their site here. These are the most up-to-date, knock your socks off, repaints imaginable.
The really good part for the FSX users is that you get the specular and bump mapping in all it’s splendor without a big hit on the FPS. The combi pack for FSX only, contains 23 Normal Definition (ND) liveries. This is normal definition in the
McPhat world of normal. It is way better than anything seen to date. Imagine 90+ pixels per meter ratio without dragging down the CPU. No don’t imagine it, click on
this link to McPhat Studios and see for yourself.
Just based on their reputation, I expected the McPhat Studios’ optional repaints to look good, what I was not prepared for was how absolutely stunning they looked. The value you receive with the McPhat Studio’s World Airliners Combi package is not only do you get a hanger full of liveries for your virtual fleet, you get 23 gorgeous real world repaints, and all for less than a dollar each. The bonus is that you get to fly these McPhat Studio’s liveries with no penalty to the CPU. Let me repeat that, these repaints will not drag your FPS down one iota. Now how good is that, McPhat! Thank you.
http://www.avsim.com/pages/1210/feelThere/Ejets.html (16 of 20)11/12/2010 6:39:03 PM

AVSIM Online - Flight Simulation's Number 1 Site!
For FSX “Where the E-Jet v.1 lacked bump and specular mapping, we couldn't go without them on the
the E-Jet v.2. It are these effects that give the E-Jet the dynamica it always
deserved.” McPhat Sudios.
For FS9 “combined with our signature style, our highly acclaimed textures and our devotion to bring you the best, you may expect what you have come accustomed to from us: Textures that bring your add-on to the next level.” McPhat Studios.
CONCLUSION
Reviewers’ Ratings Commercial pilot license, Airplane single engine land and sea, Airplane multiengine land, Instrument airplane, DC-3 type rating Ground Instructor, Advanced, Instrument Expired Certified Flight Instructor’s license Avid Microsoft Flight Simulator user
Most developers would charge extra for many of the features included. You get a ton of practical features with total integration, working today and on your desktop. This makes for a most pleasing flight simulation experience. I find that when I don’t understand something fully, it doesn’t upset me as there are so many other neat features to capture my attention. Not promised, not being worked on, nothing. Delivered with your download. Some of these items will truly blow your socks off. Each day I discover something new, and it is like Christmas in November for me. What amazes me is all this comes in one easy package or two if you opt for the additional McPhat Studio’s optional repaints. It is like you get the whole feelThere store with both FS9 and FSX native add-ons, bonus MAP! and CALL!, audio callouts and flight attendant messages, full Right Seat capability, full VC cabin, includes 6 unique McPhat Studio paints, an absolutely top of line, new generation, full featured Flight Management System with a MCDU that seems to have no end of capabilities, real high end HUD, so easy to read, Speed and Altitude tapes, LNAV, VNAV, auto land, FADEC, animations galore, top notch sounds, full VC cockpit, widescreen 2D screens with pop-ups. It even has learning abilities. I’m glad WOW is an easy word to pronounce, because you will be saying it often as you learn this Embraer/Honeywell system. And let’s not forget the Turbine Sound Studios sound package. If there was ever a name dropper package, this one is it, all first class names and companies represented here.
SECOND PART - McPHAT STUDIOS optional add-on World Airliners repaints.
http://www.avsim.com/pages/1210/feelThere/Ejets.html (17 of 20)11/12/2010 6:39:03 PM

AVSIM Online - Flight Simulation's Number 1 Site!
I expected the McPhat Studios repaints to be superb just based on their reputation. What I didn’t expect was to be totally blown away by the ND textures. Gorgeous repaints, with no noticeable hit on the CPU. I was also totally surprised how good these exterior textures looked when viewed in the FS9 version of Flight Simulator. I found myself clicking the external views a lot more often when using the McPhat Studio’s optional repaints. When taxiing, I would tend to follow along behind and above the Embraer with my tongue hanging out. When I got trimmed out at cruise, same thing, switch to the spot view and observe the aircraft from the birds view. Nice. I bet those classic 737’s just a few flight levels below were asking for higher altitudes just to get closer and see if it was indeed McPhat’s work. Too bad they couldn’t keep up. With the already overachieving feelThere E-Jets v.2 Embraer 175 and Embraer 195.add-on, you can add a Combi Pack of McPhat Studio’s World Airliner liveries for about 50% more dollars. You then have a totally, top notch, hey, look at me, add-on. The sum total of the two far exceeds the value of each part. The synergy is just marvelous. It’s like burgers and fries, they just naturally go together. Because feelThere adds so many practical extras in the package and integrates them so well it makes a very pleasurable flight simulator experience. And this product is actively supported with web support on a daily basis with hot fixes and SPs as necessary. I recommend the E-Jets v.2 Embraer 175 and Embraer 195 for FSX and FS9 to receive the coveted AVSIM Gold Star award. Because of the synergy of the E-Jets v.2 and the World Airliners optional repaints, McPhat Studios and feelThere should share this AVSIM Gold Star award.
Some last minute thoughts.
Test System
Intel Pentium IV, 3.8 GHz. 4 GB RAM NVIDIA GeForce 7950 GT, 1 GB 24 IN WS Dell, 1920 X 1200 display Windows7, 32 bit OS, 1 TB HD CH USB Yoke and Pedals. Logitech 5.1 speakers, Creative 5.1 Sound card. Sennheiser headphones
Flying Time: 28 hours
I traded a few emails with feelThere and they insist the code for the color of the GP is the same for both VC and 2D and the silver or grey appearance must be the result of different graphics cards, drivers and displays. They are looking into the problem. Fixed Trim Setting. I was trying to find out why the elevator trim seems to only have the one recommended setting of +6 which makes absolutely no sense to me. It must vary with the load and CG movement. I have just about decided that I prefer a trim setting between 4.5 and 5.0. Maybe a ‘weight and balance guru’ will step up and shed some light on this. I know, it is just a game. There are several pages in the manual used for computing the Vspeeds, based on weights, temperature, and runway condition. Apparently, there are two takeoff conditions, TO1 and TO2, but the manual is totally silent on this issue. I was hoping for some description of each and when or how to choose one over the other. In the Intro Flight you are instructed to use the Takeoff_2 charts. Having assignable key commands means that you can assign features to your keyboard, or to a variety of optional hardware devices that provide switches, buttons and knobs that you use to help you fly the plane. For example, if you happen to use an add-on autopilot. You can assign modes such as NAV, VNAV, HD, etc. and using FSUIPC you can assign just about any knob to control the Speed, Heading, Altitude, etc. in these E-Jets. This can add a big boost in realism as compared to clicking with a mouse. Key assignments or lack of key assignments can make or break an add-on. I remember one of my first add-ons was a fine flying aircraft, but the developer just forgot to add a NAV/GPS switch in the VC. It was easy enough to add in the 2D panel but practically impossible in the VC. I ended up removing it from my virtual hanger. Despite this usefulness, a number of developers continue to neglect to include assignable key commands in their add-ons. One of the more vocal developers recently released a new Cessna business jet for FSX and intentionally excluded assignable key commands. They took so much flak from just a handful of hard core simmers they ended up issuing a hot fix to correct this shortcoming. So kudos to feelThere for including this feature. I hope I have conveyed to those seeking their first airliner or those looking for a more complex add-on, or those disappointed with the Lite version of whomever’s heavy iron with the crippled MCDU. This one will most like satisfy all those desires, provided you spend the necessary time learning the systems and how to properly program the CDU. One last time I am going to say – this is not a jump in and fly airplane. I sincerely believe one can fly this aircraft for years without being bored or having the urge to upgrade to a newer, faster, slicker add-on. Finally, about that doggone operations manual. I came down rather hard on the manual due to the numerous typos, misused words, and missing chapters. Rather than apologize, I would like to suggest the Moderator create a sticky on the support site where users can post errors, omissions, misprints, wishes, desires, clarifications, etc. After a given amount of time or if interest ceases then review the input and either issue an updated manual or continue with their head in the sand.
http://www.avsim.com/pages/1210/feelThere/Ejets.html (18 of 20)11/12/2010 6:39:03 PM

AVSIM Online - Flight Simulation's Number 1 Site!
All photos are from the Image Gallery at the www.embraer.com website and used with permission. All screenshots are from www.feelThere.com and used with permission, or taken by the author using the current version of the add-on in FSX.
Charts, tables, and quotes were built or taken by author using information from www.wikipedia.org, www.embraer.com, www.mcphatstudios.com and www.avsim.com
What I Like About E-Jets V2
● Absolutely everything except the missing parts of the operations manual. Here is the list:
❍ Native FSX add-on, FS9 version included❍ Flight characteristics, Fly-by-Wire simulation❍ Audio callouts and flight attendant messages❍ Full right seat capability❍ Turbine Sound Studios Embraer turbofan package❍ VC cockpit textures, super sharp glass instruments❍ VC cabin, wing views❍ Cockpit sounds, clicks, dings, dongs, hums, startup sounds❍ 2D cockpit, widescreen panel, pop-ups❍ Honeywell Primus Epic Flight Management/avionics system
simulation❍ MCDU depth and detail, SIDS, STARS, WHAT Ifs, etc.❍ Weather radar, vertical mode presentation, TCAS (traffic)❍ Heads Up Display, especially the runway alignment depiction❍ Speed and Altitude tapes, use of color and graphics for Vspeeds,
flaps, etc.❍ Full auto land capability, CAT I and CAT II approaches❍ Detailed, full featured tutorial flight❍ Navigational data can be updated free at the feelThere site❍ Assignable keystrokes from the keyboard/external devices❍ All the items that I failed to mention, i.e., FADEC, VNAV, Learning
ability
What I Don't Like About E-jets V2
● I like it all; I even like the manual, sort of. I’m sure it will eventually be spell checked and updated using good grammar.
PrintingIf you wish to print this review or read it offline at your leisure, right click on
the link below, and select "save as"
Ejets V2
(adobe acrobat required)
Comments?
http://www.avsim.com/pages/1210/feelThere/Ejets.html (19 of 20)11/12/2010 6:39:03 PM

AVSIM Online - Flight Simulation's Number 1 Site!
Standard Disclaimer The review above is a subjective assessment of the product by the author. There is no connection between the product producer and the reviewer, and we feel this review is
unbiased and truly reflects the performance of the product in the simming environment as experienced by the reviewer. This disclaimer is posted here in order to provide you with background information on the reviewer and any presumed connections that may
exist between him/her and the contributing party.
Tell A Friend About this Review!
© 2010 - AVSIM Online All Rights Reserved
http://www.avsim.com/pages/1210/feelThere/Ejets.html (20 of 20)11/12/2010 6:39:03 PM