
AVer TR320/530, PTZ310/330/N, and New TR311/TR333 amera ...
40
1 AVer Information Inc. Support Guide – AVer Pro-AV Cameras (10/26/2020) AVer TR320/530, PTZ310/330/N, and New TR311/TR333 Camera Integration with Microsoft Teams and Skype Platform Integrating the New TR, PTZ and TR Cameras with Microsoft Teams and Skype (October 2020) AVer Pro-AV has high quality image Cameras (TR310/311/311HN/313/333, TR320/530 and PTZ310/330) that will integrate with the Microsoft Teams and Skype workflows for peak performance and ease of use. We will show the configuration process for the New TR, PTZ and TR Camera lines and Microsoft Teams/Skype environment. Microsoft Teams has enterprise level security, compliance, and manageability as with Office 365, many built in apps, combines instant messaging, video conferencing, calling, and document collaboration. Skype for Business will be replaced with Teams at or around July 31, 2021. Microsoft Skype is typically used to make free video and voice one-to-one and group calls, send instant messaging and share files with other people on Skype. You can use Skype on your mobile, computer or tablet. AVer Cameras with Microsoft products The workflow from the AVer cameras is seamless; there are three main methods to configuring the capture device depending on the environment. We will discuss each environment: 1. SDI / HDMI 2. USB 3. RTSP (Streaming)
Transcript of AVer TR320/530, PTZ310/330/N, and New TR311/TR333 amera ...

1 AVer Information Inc. Support Guide – AVer Pro-AV Cameras (10/26/2020)
AVer TR320/530, PTZ310/330/N, and New TR311/TR333
Camera Integration with Microsoft Teams and Skype Platform
Integrating the New TR, PTZ and TR Cameras with Microsoft Teams and Skype (October 2020)
AVer Pro-AV has high quality image Cameras (TR310/311/311HN/313/333, TR320/530 and
PTZ310/330) that will integrate with the Microsoft Teams and Skype workflows for peak
performance and ease of use. We will show the configuration process for the New TR, PTZ and TR
Camera lines and Microsoft Teams/Skype environment.
Microsoft Teams has enterprise level security, compliance, and manageability as with Office 365,
many built in apps, combines instant messaging, video conferencing, calling, and document
collaboration. Skype for Business will be replaced with Teams at or around July 31, 2021.
Microsoft Skype is typically used to make free video and voice one-to-one and group calls, send
instant messaging and share files with other people on Skype. You can use Skype on your mobile,
computer or tablet.
AVer Cameras with Microsoft products The workflow from the AVer cameras is seamless; there are three main methods to configuring the
capture device depending on the environment. We will discuss each environment:
1. SDI / HDMI
2. USB
3. RTSP (Streaming)

2 AVer Information Inc. Support Guide – AVer Pro-AV Cameras (10/26/2020)
AVer PTZ310/330/N Camera Setup The AVer PTZ310/330(N) and TR320/530 cameras have various video output capabilities; here is a
brief overview of each.

3 AVer Information Inc. Support Guide – AVer Pro-AV Cameras (10/26/2020)
TR 320/530 Camera
TR 320/530 Camera (Device connections)

4 AVer Information Inc. Support Guide – AVer Pro-AV Cameras (10/26/2020)
TR310 / 311 / 311HN / 313 / 333 Camera

5 AVer Information Inc. Support Guide – AVer Pro-AV Cameras (10/26/2020)
AVer PTZ 310/330/N Camera integration with Microsoft Teams and Skype The following are the steps needed to configure the AVer Camera with the Microsoft platform.
The PTZ camera has various outputs for video; Microsoft can support any one of these video
connections.
They are:
• HDMI
• 3G-SDI (Coaxial connection, SMPTE 424M)
• USB (Micro USB connection on Camera)
• IP - Network - RTMP (RJ45 Gbit network connection)
We can combine the outputs into 2 main groups of emphasis:
1. HDMI/SDI/USB connection type
2. IP/Streaming (RTMP) connection type
PTZ 310/330 Camera HDMI/SDI/USB Output to Teams 1. Type the IP address of the camera in your Chrome browser (Setup on same subnet) and you
should now see the login to the PTZ310/330 camera shown below.
2. The default Username/password is “administrator” or “admin / admin”.
*Note: If this is the first time accessing the PTZ330 camera via the Web login it will ask you
to change the Username/Password.
3. Next, you should now see the main login screen with a “Live View” of the PTZ Camera.

6 AVer Information Inc. Support Guide – AVer Pro-AV Cameras (10/26/2020)
AVer PTZ 310/330/N Camera integration with Microsoft Teams and Skype
4. Next, after selecting the Video & Audio setting, verify the Video Mode you are in. In this
setup you should NOT be in NDI and Stream Only Video Mode, as it will disable the USB
output.
*Note: Some servers require a minimum bitrate of 2.5Mbps for their environment.
The PTZ Camera will have an SDI/HDMI video output in ALL modes.
Video Standard->
Stream Only
(Various)
USB Only
(Various)
USB + Streaming
(Various)
NDI
(1080p/60)
SDI Output ✓ ✓ ✓ ✓
HDMI Output ✓ ✓ ✓ ✓
USB Output ✓ ✓
RTSP Output ✓ ✓ ✓

7 AVer Information Inc. Support Guide – AVer Pro-AV Cameras (10/26/2020)
PTZ310/330 Camera HDMI/SDI/USB connection to Microsoft When connecting the camera to a Microsoft Teams/Skype platform the PTZ310/330 provides HDMI,
SDI, and USB output standards. If you are using a desktop with a video capture card, at times they
can have a direct HDMI input connection with high performance data transfer.
If you are using a laptop to capture video, you can use a direct USB connection, a portable HDMI to
USB dongle like the AVer Media BU110, or a portable SDI to USB dongle like the AVer Media BU111
which provides a high speed, high quality connection.
Two Likely Scenarios:
• HDMI or USB direct connection from PTZ camera
• HDMI / SDI connection using an AVer Media converter to USB connection
or
8 AVer Information Inc. Support Guide – AVer Pro-AV Cameras (10/26/2020)
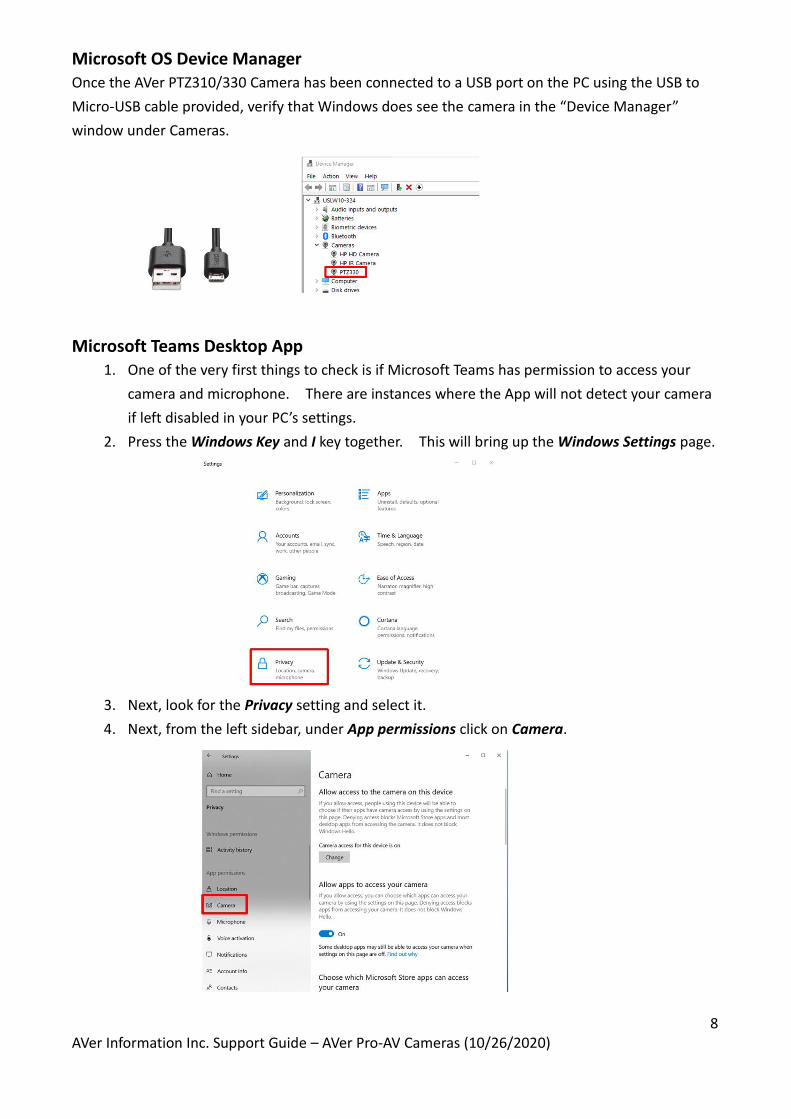
Microsoft OS Device Manager Once the AVer PTZ310/330 Camera has been connected to a USB port on the PC using the USB to
Micro-USB cable provided, verify that Windows does see the camera in the “Device Manager”
window under Cameras.
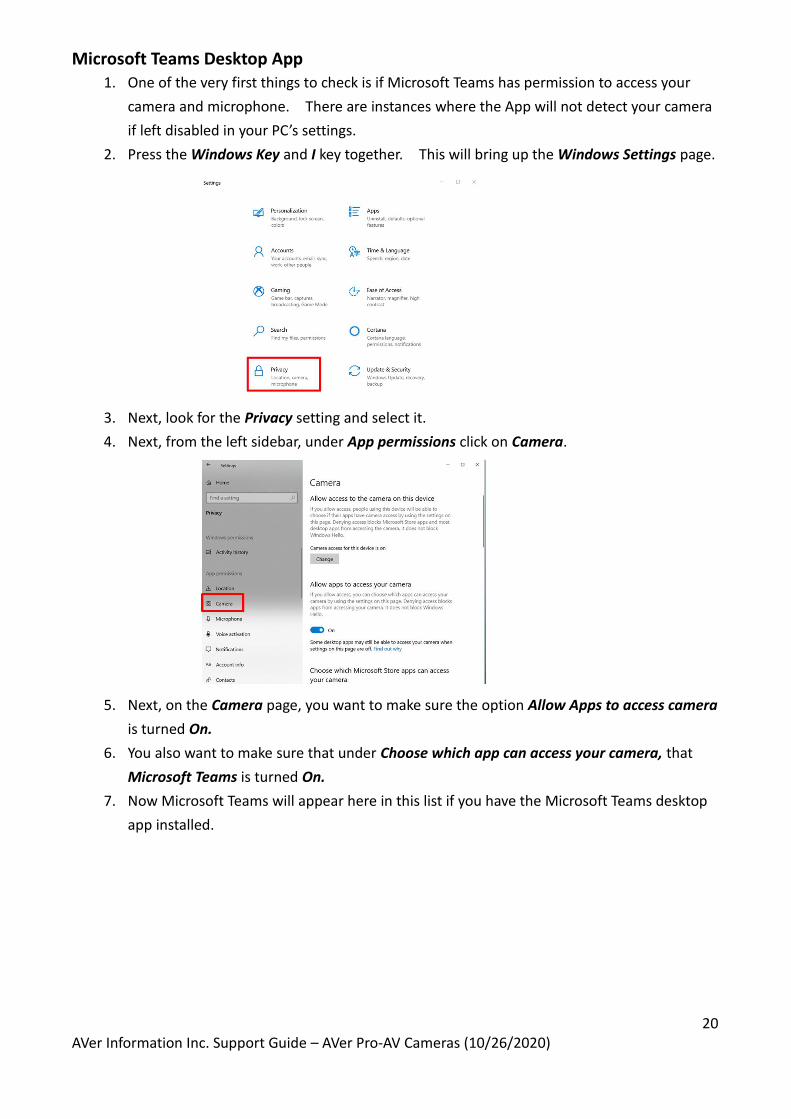
Microsoft Teams Desktop App 1. One of the very first things to check is if Microsoft Teams has permission to access your
camera and microphone. There are instances where the App will not detect your camera
if left disabled in your PC’s settings.
2. Press the Windows Key and I key together. This will bring up the Windows Settings page.
3. Next, look for the Privacy setting and select it.
4. Next, from the left sidebar, under App permissions click on Camera.

9 AVer Information Inc. Support Guide – AVer Pro-AV Cameras (10/26/2020)
Microsoft Teams Desktop App (continued)
5. Next, on the Camera page, you want to make sure the option Allow Apps to access camera
is turned On.
6. You also want to make sure that under Choose which app can access your camera, that
Microsoft Teams is turned On.
7. Now Microsoft Teams will appear here in this list if you have the Microsoft Teams desktop
app installed.
Microsoft Teams Web App If you are using your web browser instead of using Microsoft Teams Windows app, you will need to
make sure that the site has given permission to use your camera.
1. Go to Microsoft Teams using your search browser (Google Chrome or Mozilla Firefox).
2. Depending on your search browser, proceed with its appropriate steps:
Google Chrome
Click on the lock icon in the search URL box (at the top) as shown below.
3. Next, click Site Settings.

10 AVer Information Inc. Support Guide – AVer Pro-AV Cameras (10/26/2020)
Microsoft Teams Web App (continued)
4. You will be brought to your Google Chrome settings where under Permissions you will
want to make sure that Camera is set to Allow rather than Block or Ask.
Ask is a secure option if you do not want your camera turned on without being prompted
every time you access Microsoft Teams. Block prevents Microsoft Teams from accessing
or even detecting your camera.
Mozilla Firefox: Click on the Firefox menu button Mozilla Firefox menu and select Options.
1. Next, click Privacy & Security from the left menu.
2. Then scroll down to the Permissions section and click the Settings button for the Camera
option.
3. Now enter the website URL in the search field for the site that you want to access your
camera. In our case, we will need to enter https://teams.microsoft.com/ to allow
Microsoft Teams access to our camera. Hit the Enter key.
Firefox makes it a secure and straightforward way to handle the websites that you want to provide
access and the ones to not. You can remove it at any time by selecting it from the list and clicking
the Remove Website. Finally don’t forget to select the Save changes button!
4. Try testing to see if your camera works after enabling the camera access for the Microsoft
Teams web app.

11 AVer Information Inc. Support Guide – AVer Pro-AV Cameras (10/26/2020)
IP/STREAMING (RTMP)
PTZ Camera RTMP Output to Microsoft Teams using Microsoft Stream Microsoft Stream accepts live feeds from a variety of different encoders that output RTMP or
RTMPS.
Below we will cover how to configure the PTZ camera manually for a Live event.
1. Connect the PTZ330 camera via RJ45 Network Cat5E (or better) connection; verify IP
address of Camera in order to connect via Web browser. If IP address is not known, locate
the remote, select the “Menu” icon and navigate to the “Network->DHCP->” setting, verify
DHCP is set to “On” in order to grab an available IP address. If you are reserving IP
addresses, verify it is set to “OFF” and that the correct IP address has been set.
Go to Network > DHCP > On.
After turning DHCP on, go to System > Information to view the IP address.
2. Another way to find the Camera IP address (On same Subnet) is to use the AVer IPCam
Utility to find the camera. AVer software can be found here:
https://www.aver.com/download-center.

12 AVer Information Inc. Support Guide – AVer Pro-AV Cameras (10/26/2020)
3. Once you have the IP address setup, type the IP address in your Chrome browser (Setup on
same subnet) and you should now see the login to the PTZ330 camera shown below.
4. The default Username/password is “administrator” or “admin / admin”.
*Note: If this is the first time accessing the PTZ330 camera via the Web login it will ask you
to change the Username/Password.
5. Next, you should now see the main login screen with a “Live View” of the PTZ Camera.
Next, after selecting the Video & Audio setting, verify that you have either “Stream Only”
selected or “USB + Streaming” selected. Select your Stream Video Output, Bitrate,
Framerate, Encoding, etc.
*Note: Some servers require a minimum bitrate of 2.5Mbps for their environment.
13 AVer Information Inc. Support Guide – AVer Pro-AV Cameras (10/26/2020)
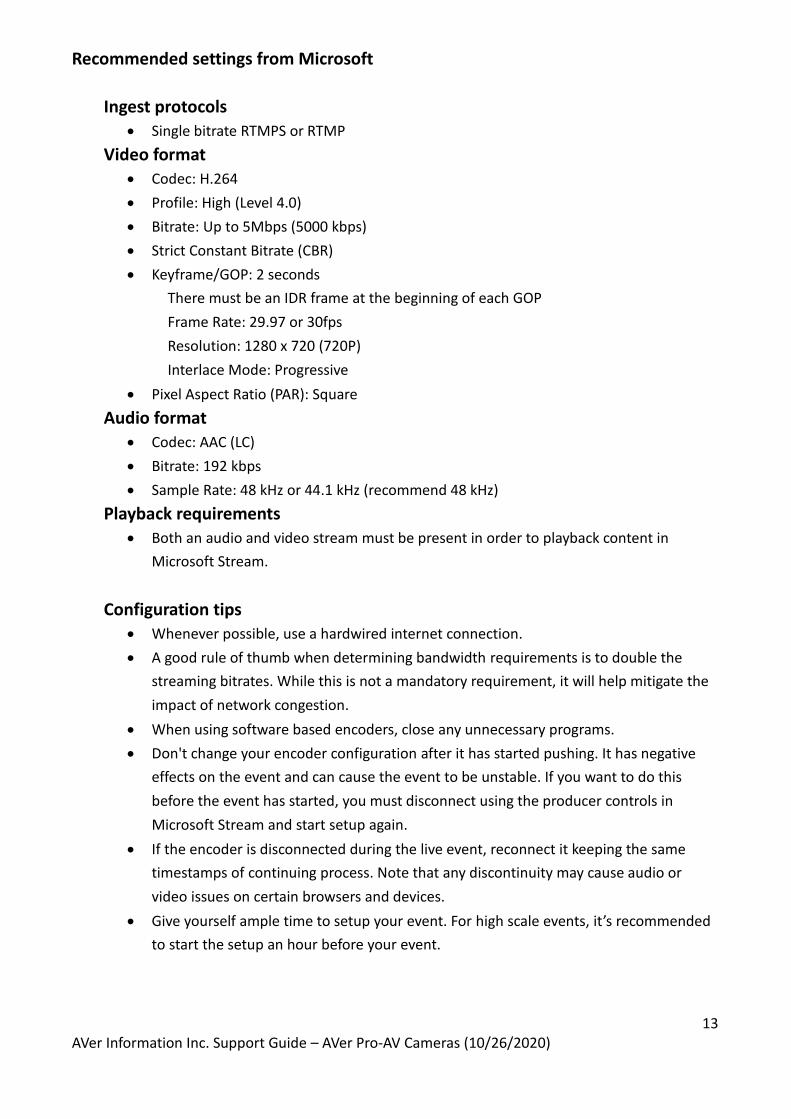
Recommended settings from Microsoft
Ingest protocols
• Single bitrate RTMPS or RTMP
Video format
• Codec: H.264
• Profile: High (Level 4.0)
• Bitrate: Up to 5Mbps (5000 kbps)
• Strict Constant Bitrate (CBR)
• Keyframe/GOP: 2 seconds
There must be an IDR frame at the beginning of each GOP
Frame Rate: 29.97 or 30fps
Resolution: 1280 x 720 (720P)
Interlace Mode: Progressive
• Pixel Aspect Ratio (PAR): Square
Audio format
• Codec: AAC (LC)
• Bitrate: 192 kbps
• Sample Rate: 48 kHz or 44.1 kHz (recommend 48 kHz)
Playback requirements
• Both an audio and video stream must be present in order to playback content in
Microsoft Stream.
Configuration tips
• Whenever possible, use a hardwired internet connection.
• A good rule of thumb when determining bandwidth requirements is to double the
streaming bitrates. While this is not a mandatory requirement, it will help mitigate the
impact of network congestion.
• When using software based encoders, close any unnecessary programs.
• Don't change your encoder configuration after it has started pushing. It has negative
effects on the event and can cause the event to be unstable. If you want to do this
before the event has started, you must disconnect using the producer controls in
Microsoft Stream and start setup again.
• If the encoder is disconnected during the live event, reconnect it keeping the same
timestamps of continuing process. Note that any discontinuity may cause audio or
video issues on certain browsers and devices.
• Give yourself ample time to setup your event. For high scale events, it’s recommended
to start the setup an hour before your event.

14 AVer Information Inc. Support Guide – AVer Pro-AV Cameras (10/26/2020)
IP/STREAMING (RTMP)
6. Next, select the Network setting; this is where you will enter the RTMP Server URL and
Stream Key. RTSP Security to either “On” or “Off” depending if you want encryption when
using RTSP.
*Note: Once streaming has started do not change the Stream Video Output on the fly, you
will need to “Stop” streaming, change the Stream Video Output, then ”Start” the stream
again.
7. Next, go to your Microsoft Stream account and login to obtain the Server URL and Stream
name/key. Once obtained, you will copy that information and paste it into the PTZ Camera
Server URL and Stream Key fields.

15 AVer Information Inc. Support Guide – AVer Pro-AV Cameras (10/26/2020)
IP/STREAMING (RTMP)
8. Next, go back to the PTZ WebLogin and select Start Stream; this will begin the stream to
Microsoft Stream. You should see a Streaming icon appear to indicate the process has
started.
9. To verify, go to Microsoft Stream and verify you are able to see the preview of the video
feed from the PTZ330 camera in Encoder preview.
10. To end the streaming feed from the PTZ camera, go to the WebLogin and select “STOP”.
11. To verify, go back to your Microsoft Stream preview, it should now be displaying “nothing”.

16 AVer Information Inc. Support Guide – AVer Pro-AV Cameras (10/26/2020)
Microsoft Teams configuration In a Teams live event, you can stream video from an external encoder to Microsoft Stream if the
encoder supports Real-Time Messaging Protocol (RTMP).
1. In Teams, select Calendar Meetings button, then your live event, and Join.
2. Until you start the event, you'll see the title, date, and time in the Encoder preview window.
3. Click Start setup. *Note: Setup may take some time to complete.
4. Once you see the message Ready to connect, go to the Settings tab and copy the Server
ingest URL into the encoder (PTZ Camera) to start ingesting.
5. Once you start streaming from the PTZ camera to Stream using the ingest URL, you should
see the preview of the video in Encoder Preview.
6. Once satisfied with the setup and video preview, click Start event. Once the live event starts,
the video from the PTZ camera is broadcast to the event.
7. To end the event, click End event. *Note: Once the live event ends, it cannot be restarted.
8. This concludes the AVer PTZ330 Camera Streaming with a Microsoft setup.
AVer TR 320/530 Camera integration with Microsoft Teams and Skype Here are the steps to configure the AVer Camera while using the Microsoft Teams platform.
The TR camera has various outputs for video and an audio Line-in; Microsoft can support any one of
these audio/video connections.
They are:
• HDMI
• 3G-SDI (x2) (Coaxial connection, SMPTE 424M)
• IP - Network - RTMP (RJ45 network connection)
• Audio Line-In (Use with Powered Mic or Audio Mixer, 1vrms)
We can combine the outputs into 2 main groups of emphasis:
1. HDMI/SDI connection type
2. IP/Streaming (RTMP) connection type

17 AVer Information Inc. Support Guide – AVer Pro-AV Cameras (10/26/2020)
TR530/320 Camera HDMI/SDI Output to Microsoft Teams If you are using a laptop to capture video, a portable HDMI to USB dongle like the AVer Media
BU110 and BU111 provides a high speed, high quality connection.
1. Connect the TR530 camera via RJ45 Network Cat5E (or better) cable; verify IP address of
Camera in order to connect via Web browser. If IP address is not known, locate the remote,
select the “Menu” icon and navigate to the “Camera->DHCP->” setting, verify DHCP is set to
“On” in order to grab an available IP address. If you are reserving IP addresses, verify it is
set to “OFF” and that the correct IP address has been set.
Go to Camera > DHCP > DHCP >On.
After turning DHCP on, go to Information to view the IP address.
2. Another way to find the Camera IP address (On same Subnet) is to use the AVer IPCam
Utility to find the camera. AVer software can be found here:
https://www.aver.com/download-center.
3. Next, type the IP address in your Chrome browser (Setup on same subnet) and you should
now see a login to the TR320/530 camera shown below.
4. The default password is “admin”.

18 AVer Information Inc. Support Guide – AVer Pro-AV Cameras (10/26/2020)
TR530/320 Camera HDMI/SDI/USB Output to Microsoft Teams
5. Next, you should now see the main login screen with a “Live View” of the TR Camera.
6. Next, select the settings gearbox , then select Video & Audio setting, this is
where you can select the Video Output of the TR320/530.
7. Next, selecting 3G-SDI / HDMI will open the following window, allowing you to choose which
video standard or the ability to set it to Auto.
*Note: Only the standards listed are currently available, no 29.97/59.94 video selection.

19 AVer Information Inc. Support Guide – AVer Pro-AV Cameras (10/26/2020)
TR320/530 Camera HDMI/SDI connection to Microsoft Teams The TR camera does not offer a direct USB output, like the PTZ camera does. If the PC you are
using happens to have an HDMI Input connection, you can direct connect to it. If there is no HDMI
Input and you are using a laptop to capture video, a portable HDMI/SDI to USB dongle like the AVer
Media BU110 and BU111 provides a high speed, high quality connection.
Likely Scenario:
• HDMI / SDI connection using an AVer Media converter to USB
or
Microsoft OS Device Manager Once the AVer TR320/530 Camera has been connected to a USB port on the PC using the HDMI to
USB converter, verify that Windows does see the camera in the “Device Manager” window under
Cameras. Depending on converter used, in this case the “AVerMedia ExtremeCap UVC”.
20 AVer Information Inc. Support Guide – AVer Pro-AV Cameras (10/26/2020)
Microsoft Teams Desktop App 1. One of the very first things to check is if Microsoft Teams has permission to access your
camera and microphone. There are instances where the App will not detect your camera
if left disabled in your PC’s settings.
2. Press the Windows Key and I key together. This will bring up the Windows Settings page.
3. Next, look for the Privacy setting and select it.
4. Next, from the left sidebar, under App permissions click on Camera.
5. Next, on the Camera page, you want to make sure the option Allow Apps to access camera
is turned On.
6. You also want to make sure that under Choose which app can access your camera, that
Microsoft Teams is turned On.
7. Now Microsoft Teams will appear here in this list if you have the Microsoft Teams desktop
app installed.

21 AVer Information Inc. Support Guide – AVer Pro-AV Cameras (10/26/2020)
Microsoft Teams Web App If you are using your web browser instead of using Microsoft Teams Windows app, you will need to
make sure that the site has given permission to use your camera.
1. Go to Microsoft Teams using your search browser (Google Chrome or Mozilla Firefox).
2. Depending on your search browser, proceed with its appropriate steps:
Google Chrome
You need to click on the lock icon in the search URL box (at the top) as shown below.
3. Next, click Site Settings.
4. You will be brought to your Google Chrome settings where under Permissions you will
want to make sure that Camera is set to Allow rather than Block or Ask.
Ask is a secure option if you do not want your camera turned on without being prompted
every time you access Microsoft Teams. Block prevents Microsoft Teams from accessing
or even detecting your camera.

22 AVer Information Inc. Support Guide – AVer Pro-AV Cameras (10/26/2020)
Microsoft Teams Web App (continued)
Mozilla Firefox
You need to click on the Firefox menu button Mozilla Firefox menu and select Options.
1. Next, click Privacy & Security from the left menu.
2. Then scroll down to the Permissions section and click the Settings… button for the Camera
option.
3. Now enter the website URL in the search field for the site that you want to access your
camera. In our case, we will need to enter https://teams.microsoft.com/ to allow
Microsoft Teams access to our camera. Hit the Enter key.
Firefox makes it a secure and straightforward way to handle the websites that you want to provide
access and the ones to not. You can remove it at any time by selecting it from the list and clicking
the Remove Website. Finally don’t forget to select the Save changes button!
4. Try testing to see if your camera works after enabling the camera access for Microsoft
Teams web app.

23 AVer Information Inc. Support Guide – AVer Pro-AV Cameras (10/26/2020)
TR320/530 Camera RTMP Output to Microsoft Teams using Microsoft Stream Microsoft Stream accepts live feeds from a variety of different encoders that output RTMP or
RTMPS.
Below we will cover how to configure the PTZ camera manually for a Live event.
1. Connect the TR530 camera via RJ45 Network Cat5E (or better) cable; verify IP address of
Camera in order to connect via Web browser. If IP address is not known, locate the remote,
select the “Menu” icon and navigate to the “Camera->DHCP->” setting, verify DHCP is set to
“On” in order to grab an available IP address. If you are reserving IP addresses, verify it is
set to “OFF” and that the correct IP address has been set.
Go to Camera > DHCP > DHCP >On.
After turning DHCP on, go to Information to view the IP address.
2. Another way to find the Camera IP address (On same Subnet) is to use the AVer IPCam
Utility to find the camera. AVer software can be found here:
https://www.aver.com/download-center.
3. Next, type the IP address in your Chrome browser (Setup on same subnet) and you should
now see a login to the TR320/530 camera shown below.
4. The default password is “admin”.

24 AVer Information Inc. Support Guide – AVer Pro-AV Cameras (10/26/2020)
TR320/530 Camera RTMP Output to Microsoft Teams using Microsoft Stream
5. Next, you should now see the main login screen with a “Live View” of the PTZ Camera.
6. Next, select the settings gearbox , then select Video & Audio setting, this is
where you can select Video Output, Audio, and the type of Streaming mode to use and
Streaming video standard. *Note: This IP Streaming Mode is used for RTSP and RTMP
Streaming.
Mode 1: You will use either the PTZ Camera OR Panoramic Camera view for your stream
with varying video selections.
Mode 2: There will be 2 simultaneous streams from PTZ and Panoramic views set to
(1080p/30) with adjustable bps (bits per second) if selected.

25 AVer Information Inc. Support Guide – AVer Pro-AV Cameras (10/26/2020)
Recommended settings from Microsoft
Ingest protocols
• Single bitrate RTMPS or RTMP
Video format
• Codec: H.264
• Profile: High (Level 4.0)
• Bitrate: Up to 5Mbps (5000 kbps)
• Strict Constant Bitrate (CBR)
• Keyframe/GOP: 2 seconds
There must be an IDR frame at the beginning of each GOP
Frame Rate: 29.97 or 30fps
Resolution: 1280 x 720 (720P)
Interlace Mode: Progressive
• Pixel Aspect Ratio (PAR): Square
Audio format
• Codec: AAC (LC)
• Bitrate: 192 kbps
• Sample Rate: 48 kHz or 44.1 kHz (recommend 48 kHz)
Playback requirements
• Both an audio and video stream must be present in order to playback content in
Microsoft Stream.
Configuration tips
• Whenever possible, use a hardwired internet connection.
• A good rule of thumb when determining bandwidth requirements is to double the
streaming bitrates. While this is not a mandatory requirement, it will help mitigate the
impact of network congestion.
• When using software based encoders, close any unnecessary programs.
• Don't change your encoder configuration after it has started pushing. It has negative
effects on the event and can cause the event to be unstable. If you want to do this
before the event has started, you must disconnect using the producer controls in
Microsoft Stream and start setup again.
• If the encoder is disconnected during the live event, reconnect it keeping the same
timestamps of continuing process. Note that any discontinuity may cause audio or
video issues on certain browsers and devices.
• Give yourself ample time to setup your event. For high scale events, it’s recommended
to start the setup an hour before your event.

26 AVer Information Inc. Support Guide – AVer Pro-AV Cameras (10/26/2020)
TR320/530 Camera RTMP Output to Microsoft Teams using Microsoft Stream
7. Next, select Network Setting. You should now see the following information displayed.
8. Next, notice the RTMP Server URL selection, this is where you will “paste” the URL string
from Microsoft Stream as well as the Stream Key from Microsoft Stream. *Note: The
RTMP Stream will use the PTZ IP Stream Mode output configuration.
9. Next, go to your Microsoft Stream account and login to obtain the Server URL and Stream
name/key. Once obtained, you will copy that information and paste it into the TR Camera
Server URL and Stream Key fields.
10. Next, to begin the Stream from the TR Camera, select Connect, you should see a red
“Streaming” text appear, to indicate you are now streaming. This is where you would also
“Disconnect” from the stream.

27 AVer Information Inc. Support Guide – AVer Pro-AV Cameras (10/26/2020)
TR320/530 Camera RTMP Output to Microsoft Teams using Microsoft Stream
11. To verify, go to Microsoft Stream and verify you can see the preview of the video feed from
the TR320/530 camera in Encoder preview.
12. To end the streaming feed from the TR camera, go to the WebLogin and select “Disconnect”.
13. To verify, go back to your Microsoft Stream preview, it should now be displaying “nothing”.
Microsoft Teams configuration In a Teams live event, you can stream video from an external encoder to Microsoft Stream if the
encoder supports Real-Time Messaging Protocol (RTMP).
1. In Teams, select Calendar Meetings button, then your live event, and Join.
2. Until you start the event, you'll see the title, date, and time in the Encoder preview window.
3. Click Start setup. *Note: Setup may take some time to complete.
4. Once you see the message Ready to connect, go to the Settings tab and copy the Server
ingest URL into the encoder (TR Camera) to start ingesting.
5. Once you start streaming from the TR camera to MS Stream using the ingest URL, you
should see the preview of the video in Encoder Preview.
6. Once satisfied with the setup and video preview, click Start event. Once the live event starts,
the video from the TR camera is broadcast to the event.
7. To end the event, click End event. *Note: Once the live event ends, it cannot be restarted.
8. This concludes the AVer TR320/530 Camera Streaming with a Microsoft setup.

28 AVer Information Inc. Support Guide – AVer Pro-AV Cameras (10/26/2020)
TR310/311/311HN/313/333 Camera integration with Microsoft Teams and Skype The following are the steps needed to configure the AVer Camera with the Microsoft platform.
The TR camera has various outputs for video; Microsoft can support any one of these video
connections.
They are:
• HDMI
• 3G-SDI (Coaxial connection, SMPTE 424M)
• USB (Micro USB connection on Camera)
• IP - Network - RTMP (RJ45 Gbit network connection)
We can combine the outputs into 2 main groups of emphasis:
1. HDMI/SDI/USB connection type
2. IP/Streaming (RTMP) connection type
TR 310/333 Camera HDMI / SDI / USB Output to Teams 1. Type the IP address of the camera in your Chrome browser (Setup on same subnet) and you
should now see the login to the TR310/333 camera shown below.
2. The default Username/password is “admin / admin”.
*Note: If this is the first time accessing the TR310/333 camera via the Web login it will ask
you to change the Username/Password.
3. Next, you should now see the main login screen with a “Live View” of the PTZ Camera.
4. Next, after selecting the Video & Audio setting, verify the Video Mode you are in. In this
setup you should NOT be in NDI and Stream Only Video Mode, as it will disable the USB
output.
*Note: Some servers require a minimum bitrate of 2.5Mbps for their environment.

29 AVer Information Inc. Support Guide – AVer Pro-AV Cameras (10/26/2020)
TR 310/333 Camera HDMI / SDI / USB Output to Teams (continued)
The PTZ Camera will have an SDI/HDMI video output in ALL modes.
Video Standard->
Stream Only
(Various)
USB Only
(Various)
USB + Streaming
(Various)
NDI
(1080p/60)
SDI Output ✓ ✓ ✓ ✓
HDMI Output ✓ ✓ ✓ ✓
USB Output ✓ ✓
RTSP Output ✓ ✓ ✓
TR310 to TR333 Camera USB connected CaptureShare Software Aver Information Inc. offers a free software for the NEW TR series of cameras, CaptureShare, that
works in Windows and MAC. It allows you to be able to configure the TR camera for Presenter and
Zone Mode Tracking, as well as some of the basic video settings such as Contrast, Saturation,
Mirroring, and video output settings while being ONLY connected to the camera via USB.
Once downloaded and installed you will have two modules:
• AverCamera Setting Tool; used if you only need control/configuration of the camera.
• CaptureShare; has additional features, like PiP, annotation, recording, streaming, etc.
For more detailed information, download the User Manual on the AVer Pro-AV website.
The following is used to setup the TR310/333 camera with CaptureShare.

30 AVer Information Inc. Support Guide – AVer Pro-AV Cameras (10/26/2020)
TR310 to TR333 Camera USB connected CaptureShare Software (continued)
1. Once CaptureShare is opened, select the Camera carrot and then select the TR313 camera
as the source.
2. Next, you should see video from the camera, and have control via the Up/Down and
Left/Right arrows.
3. Use the Up/Down and Left/Right arrows to position the camera to save Preset #1, then
select “Save”. This preset is used when in Presenter Mode tracking, if tracking is lost, the
camera will automatically go to Preset #1 after 5 seconds.
4. Next, save Presets 6, 7, 8, and 9, these presets are used when in Zone Mode tracking.
5. You can Enable/Disable Tracking via CaptureShare and the camera remote.
6. You also have the ability to record locally and “stream” out to YouTube/FB/other streaming
services once the RTMP Server / RTMP Key are configured.

31 AVer Information Inc. Support Guide – AVer Pro-AV Cameras (10/26/2020)
TR310 to TR333 Camera USB connected CaptureShare Software (continued)
7. Opening the AVerCamera Setting Tool will allow you to setup the camera without the
additional tools for Streaming, Recording, etc.
8. This concludes the brief introduction to CaptureShare and the AVerCamera Setting Tool.
TR Camera HDMI/SDI/USB connection to Microsoft When connecting the camera to a Microsoft Teams/Skype platform the TR311/333 provides HDMI,
SDI, and USB output standards. If you are using a desktop with a video capture card, at times they
can have a direct HDMI input connection with high performance data transfer.
If you are using a laptop to capture video, you can use a direct USB connection, a portable HDMI to
USB dongle like the AVer Media BU110, or a portable SDI to USB dongle like the AVer Media BU111
which provides a high speed, high quality connection.
Two Likely Scenarios:
• HDMI or USB direct connection from TR camera
• HDMI / SDI connection using an AVer Media converter to USB connection
or

32 AVer Information Inc. Support Guide – AVer Pro-AV Cameras (10/26/2020)
TR Camera HDMI/SDI/USB connection to Microsoft
Microsoft OS Device Manager Once the AVer TR310/333 Camera has been connected to a USB port on the PC using a USB-C to
USB-A cable, verify that Windows does see the camera in the “Device Manager” window under
Cameras.

33 AVer Information Inc. Support Guide – AVer Pro-AV Cameras (10/26/2020)
Microsoft Teams Desktop App 1. One of the very first things to check is if Microsoft Teams has permission to access your
camera and microphone. There are instances where the App will not detect your camera
if left disabled in your PC’s settings.
2. Press the Windows Key and I key together. This will bring up the Windows Settings page.
3. Next, look for the Privacy setting and select it.
4. Next, from the left sidebar, under App permissions click on Camera.
5. Next, on the Camera page, you want to make sure the option Allow Apps to access camera
is turned On.
6. You also want to make sure that under Choose which app can access your camera, that
Microsoft Teams is turned On.
7. Now Microsoft Teams will appear here in this list if you have the Microsoft Teams desktop
app installed.

34 AVer Information Inc. Support Guide – AVer Pro-AV Cameras (10/26/2020)
Microsoft Teams Web App If you are using your web browser instead of using Microsoft Teams Windows app, you will need to
make sure that the site has given permission to use your camera.
1. Go to Microsoft Teams using your search browser (Google Chrome or Mozilla Firefox).
2. Depending on your search browser, proceed with its appropriate steps:
Google Chrome
Click on the lock icon in the search URL box (at the top) as shown below.
3. Next, click Site Settings.
4. You will be brought to your Google Chrome settings where under Permissions you will
want to make sure that Camera is set to Allow rather than Block or Ask.

35 AVer Information Inc. Support Guide – AVer Pro-AV Cameras (10/26/2020)
Microsoft Teams Web App (continued)
Ask is a secure option if you do not want your camera turned on without being prompted
every time you access Microsoft Teams. Block prevents Microsoft Teams from accessing
or even detecting your camera.
Mozilla Firefox: Click on the Firefox menu button Mozilla Firefox menu and select Options.
5. Next, click Privacy & Security from the left menu.
6. Then scroll down to the Permissions section and click the Settings button for the Camera
option.
7. Now enter the website URL in the search field for the site that you want to access your
camera. In our case, we will need to enter https://teams.microsoft.com/ to allow
Microsoft Teams access to our camera. Hit the Enter key.
Firefox makes it a secure and straightforward way to handle the websites that you want to provide
access and the ones to not. You can remove it at any time by selecting it from the list and clicking
the Remove Website. Finally, don’t forget to select the Save changes button!
8. Try testing to see if your camera works after enabling the camera access for the Microsoft
Teams web app.

36 AVer Information Inc. Support Guide – AVer Pro-AV Cameras (10/26/2020)
IP/STREAMING (RTMP)
TR Camera RTMP Output to Microsoft Teams using Microsoft Stream Microsoft Stream accepts live feeds from a variety of different encoders that output RTMP or
RTMPS.
Below we will cover how to configure the TR camera manually for a Live event.
1. Connect the TR310/333 camera via RJ45 Network Cat5E (or better) connection; verify IP
address of Camera in order to connect via Web browser. If IP address is not known, locate
the remote, select the “Menu” icon and navigate to the “Network->DHCP->” setting, verify
DHCP is set to “On” in order to grab an available IP address. If you are reserving IP
addresses, verify it is set to “OFF” and that the correct IP address has been set.
Go to Network > DHCP > On.
After turning DHCP on, go to System > Information to view the IP address.
2. Another way to find the Camera IP address (On same Subnet) is to use the AVer IPCam
Utility to find the camera. AVer software can be found here:
https://www.aver.com/download-center.

37 AVer Information Inc. Support Guide – AVer Pro-AV Cameras (10/26/2020)
TR Camera RTMP Output to Microsoft Teams using Microsoft Stream (continued)
3. Once you have the IP address setup, type the IP address in your Chrome browser (Setup on
same subnet) and you should now see the login to the TR310/333 camera shown below.
4. The default Username/password is “admin / admin”.
*Note: If this is the first time accessing the TR310/333 camera via the Web login it will ask
you to change the Username/Password.
5. Next, you should now see the main login screen with a “Live View” of the PTZ Camera.
Next, after selecting the Video & Audio setting, verify that you have either “Stream Only”
selected or “USB + Streaming” selected. Select your Stream Video Output, Bitrate,
Framerate, Encoding, etc.
*Note: Some servers require a minimum bitrate of 2.5Mbps for their environment.
*NDI Mode: If NDI is selected, the USB output is disabled, this is by design.

38 AVer Information Inc. Support Guide – AVer Pro-AV Cameras (10/26/2020)
Recommended settings from Microsoft
Ingest protocols
• Single bitrate RTMPS or RTMP
Video format
• Codec: H.264
• Profile: High (Level 4.0)
• Bitrate: Up to 5Mbps (5000 kbps)
• Strict Constant Bitrate (CBR)
• Keyframe/GOP: 2 seconds
There must be an IDR frame at the beginning of each GOP
Frame Rate: 29.97 or 30fps
Resolution: 1280 x 720 (720P)
Interlace Mode: Progressive
• Pixel Aspect Ratio (PAR): Square
Audio format
• Codec: AAC (LC)
• Bitrate: 192 kbps
• Sample Rate: 48 kHz or 44.1 kHz (recommend 48 kHz)
Playback requirements
• Both an audio and video stream must be present in order to playback content in
Microsoft Stream.
Configuration tips
• Whenever possible, use a hardwired internet connection.
• A good rule of thumb when determining bandwidth requirements is to double the
streaming bitrates. While this is not a mandatory requirement, it will help mitigate the
impact of network congestion.
• When using software-based encoders, close any unnecessary programs.
• Don't change your encoder configuration after it has started pushing. It has negative
effects on the event and can cause the event to be unstable. If you want to do this
before the event has started, you must disconnect using the producer controls in
Microsoft Stream and start setup again.
• If the encoder is disconnected during the live event, reconnect it keeping the same
timestamps of continuing process. Note that any discontinuity may cause audio or
video issues on certain browsers and devices.
• Give yourself ample time to setup your event. For high scale events, it’s recommended
to start the setup an hour before your event.

39 AVer Information Inc. Support Guide – AVer Pro-AV Cameras (10/26/2020)
TR Camera RTMP Output to Microsoft Teams using Microsoft Stream (continued)
6. Next, select the Network setting; this is where you will enter the RTMP Server URL and
Stream Key. Set RTSP Security to either “On” or “Off” depending if you want encryption
when using RTSP (Username/Password).
*Note: Once streaming has started do not change the Stream Video Output on the fly, you
will need to “Stop” streaming, change the Stream Video Output, then ” Start” the stream
again.
7. Next, go to your Microsoft Stream account and login to obtain the Server URL and Stream
name/key. Once obtained, you will copy that information and paste it into the PTZ Camera
Server URL and Stream Key fields.
8. Next, go back to the TR WebLogin and select Start Stream; this will begin the stream to
Microsoft Stream. You should see a Streaming icon appear to indicate the process has
started.

40 AVer Information Inc. Support Guide – AVer Pro-AV Cameras (10/26/2020)
TR Camera RTMP Output to Microsoft Teams using Microsoft Stream (continued)
9. To verify, go to Microsoft Stream and verify you can see the preview of the video feed from
the TR310/333 camera in Encoder preview.
10. To end the streaming feed from the PTZ camera, go to the WebLogin and select “STOP”.
11. To verify, go back to your Microsoft Stream preview, it should now be displaying “nothing”.
Microsoft Teams configuration In a Teams live event, you can stream video from an external encoder to Microsoft Stream if the
encoder supports Real-Time Messaging Protocol (RTMP).
1. In Teams, select Calendar Meetings button, then your live event, and Join.
2. Until you start the event, you'll see the title, date, and time in the Encoder preview window.
3. Click Start setup. *Note: Setup may take some time to complete.
4. Once you see the message Ready to connect, go to the Settings tab and copy the Server
ingest URL into the encoder (TR Camera) to start ingesting.
5. Once you start streaming from the TR camera to Stream using the ingest URL, you should
see the preview of the video in Encoder Preview.
6. Once satisfied with the setup and video preview, click Start event. Once the live event starts,
the video from the TR camera is broadcast to the event.
7. To end the event, click End event. *Note: Once the live event ends, it cannot be restarted.
8. This concludes the AVer TR310/333 Camera Streaming with a Microsoft setup.


