
Audiocodes 310hd User Guide
50
AudioCodes 300HD Series of High Definition IP Phones HD VoIP 310HD IP Phone User’s Manual 310HD IP Phone Version 1.4.0
Transcript of Audiocodes 310hd User Guide

7/28/2019 Audiocodes 310hd User Guide
http://slidepdf.com/reader/full/audiocodes-310hd-user-guide 1/50
AudioCodes 300HD Series of High Definition IP Phones
HD VoIP 310HD IP Phone
User’s Manual
310HD IP Phone
Version 1.4.0

7/28/2019 Audiocodes 310hd User Guide
http://slidepdf.com/reader/full/audiocodes-310hd-user-guide 2/50
7/28/2019 Audiocodes 310hd User Guide
http://slidepdf.com/reader/full/audiocodes-310hd-user-guide 3/50
User's Manual Contents
Version 1.4 3 July 2010
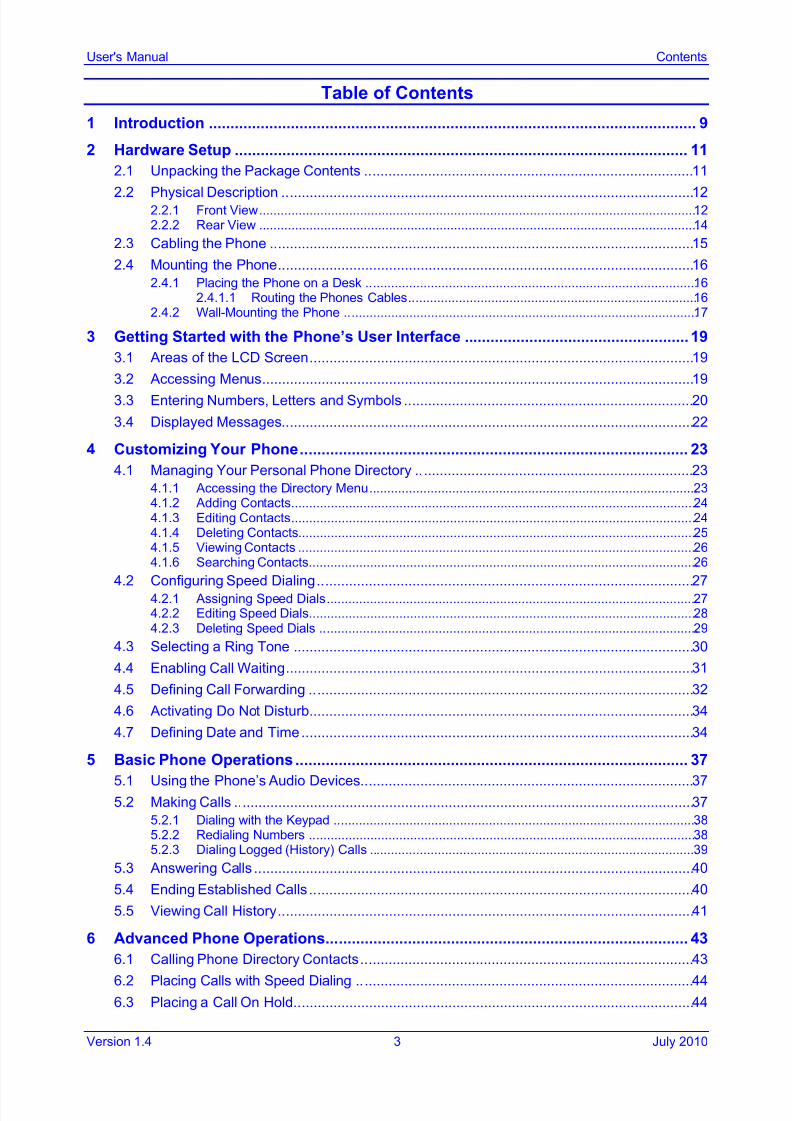
Table of Contents
1 Introduction ................................................................................................................. 9 2 Hardware Setup ......................................................................................................... 11
2.1 Unpacking the Package Contents ................................................................................... 11 2.2 Physical Description ........................................................................................................ 12
2.2.1 Front View ..........................................................................................................................12 2.2.2 Rear View ..........................................................................................................................14
2.3 Cabling the Phone ........................................................................................................... 15 2.4 Mounting the Phone ......................................................................................................... 16
2.4.1 Placing the Phone on a Desk ............................................................................................16 2.4.1.1 Routing the Phones Cables ................................................................................16
2.4.2 Wall-Mounting the Phone ..................................................................................................17 3 Getting Started with the Phone’s User Interface .................................................... 19
3.1 Areas of the LCD Screen ................................................................................................. 19 3.2 Accessing Menus ............................................................................................................. 19 3.3 Entering Numbers, Letters and Symbols ......................................................................... 20 3.4 Displayed Messages ........................................................................................................ 22
4 Customizing Your Phone .......................................................................................... 23 4.1 Managing Your Personal Phone Directory ...................................................................... 23
4.1.1 Accessing the Directory Menu ...........................................................................................23 4.1.2 Adding Contacts .................................................................................................................24 4.1.3 Editing Contacts .................................................................................................................24 4.1.4 Deleting Contacts ...............................................................................................................25 4.1.5 Viewing Contacts ...............................................................................................................26 4.1.6 Searching Contacts............................................................................................................26
4.2 Configuring Speed Dialing ............................................................................................... 27 4.2.1 Assigning Speed Dials .......................................................................................................27 4.2.2 Editing Speed Dials ............................................................................................................28 4.2.3 Deleting Speed Dials .........................................................................................................29
4.3 Selecting a Ring Tone ..................................................................................................... 30 4.4 Enabling Call Waiting....................................................................................................... 31 4.5 Defining Call Forwarding ................................................................................................. 32 4.6 Activating Do Not Disturb ................................................................................................. 34 4.7 Defining Date and Time ................................................................................................... 34
5
Basic Phone Operations ........................................................................................... 37
5.1 Using the Phone’s Audio Devices .................................................................................... 37 5.2 Making Calls .................................................................................................................... 37
5.2.1 Dialing with the Keypad .....................................................................................................38 5.2.2 Redialing Numbers ............................................................................................................38 5.2.3 Dialing Logged (History) Calls ...........................................................................................39
5.3 Answering Calls ............................................................................................................... 40 5.4 Ending Established Calls ................................................................................................. 40 5.5 Viewing Call History ......................................................................................................... 41
6 Advanced Phone Operations.................................................................................... 43 6.1 Calling Phone Directory Contacts .................................................................................... 43 6.2 Placing Calls with Speed Dialing ..................................................................................... 44 6.3 Placing a Call On Hold ..................................................................................................... 44

7/28/2019 Audiocodes 310hd User Guide
http://slidepdf.com/reader/full/audiocodes-310hd-user-guide 4/50
310HD IP Phone
User's Manual 4 Document #: LTRT-24701
6.4 Making Simultaneous Calls ............................................................................................. 45 6.5 Hosting Three‐Way Conference Calls ............................................................................. 46 6.6 Transferring Calls ............................................................................................................ 46 6.7 Muting Calls ..................................................................................................................... 48 6.8 Retrieving Voice Mail Messages ...................................................................................... 49

7/28/2019 Audiocodes 310hd User Guide
http://slidepdf.com/reader/full/audiocodes-310hd-user-guide 5/50
User's Manual Contents
Version 1.4 5 July 2010
List of FiguresFigure 2-1: Front View of IP Phone ..................................................................................................................12 Figure 2-2: Rear View of IP Phone ...................................................................................................................14 Figure 2-3: Cabling the IP Phone .....................................................................................................................15 Figure 2-4: Wall-Mounting Dimensions ............................................................................................................17 Figure 2-5: Wall-Mounting the Phone ...............................................................................................................17 Figure 3-1: Display Screen ...............................................................................................................................19 Figure 3-2: Accessing Menus on Display Screen .............................................................................................19 Figure 3-3: Entering Letters ..............................................................................................................................20 Figure 3-4: Entering Symbols ...........................................................................................................................21

7/28/2019 Audiocodes 310hd User Guide
http://slidepdf.com/reader/full/audiocodes-310hd-user-guide 6/50
310HD IP Phone
User's Manual 6 Document #: LTRT-24701
List of TablesTable 2-1: IP Phone’s Font View Descriptions .................................................................................................13 Table 2-2: IP Phone’s Rear View Descriptions ................................................................................................14 Table 3-1: In-Progress Operational Messages Displayed on LCD Screen ......................................................22

7/28/2019 Audiocodes 310hd User Guide
http://slidepdf.com/reader/full/audiocodes-310hd-user-guide 7/50
User's Manual Notices
Version 1.4 7 July 2010
Notice
This manual provides a description for operating the 310HD IP Phone.
Information contained in this document is believed to be accurate and reliable at the time of printing.However, due to ongoing product improvements and revisions, AudioCodes cannot guaranteeaccuracy of printed material after the Date Published nor can it accept responsibility for errors or omissions. Updates to this document and other documents can be viewed by registered customers athttp://www.audiocodes.com/downloads.
© Copyright 2010 AudioCodes Ltd. All rights reserved.This document is subject to change without notice.
Date Published: July-26-2010
Trademarks
AudioCodes, AC, AudioCoded, Ardito, CTI2, CTI², CTI Squared, HD VoIP, HD VoIP SoundsBetter, InTouch, IPmedia, Mediant, MediaPack, NetCoder, Netrake, Nuera, Open SolutionsNetwork, OSN, Stretto, TrunkPack, VMAS, VoicePacketizer, VoIPerfect, VoIPerfectHD, What’sInside Matters, Your Gateway To VoIP and 3GX are trademarks or registered trademarks of AudioCodes Limited. All other products or trademarks are property of their respective owners.
WEEE EU Directive
Pursuant to the WEEE EU Directive, electronic and electrical waste must not be disposed of withunsorted waste. Please contact your local recycling authority for disposal of this product.
Customer Support
Customer technical support and service are provided by AudioCodes’ Distributors, Partners, andResellers from whom the product was purchased. For Customer support for products purchaseddirectly from AudioCodes, contact [email protected].
Abbreviations and Terminology
Each abbreviation, unless widely used, is spelled out in full when first used, and only Industrystandard terms are used throughout this manual. The symbol 0x indicates hexadecimal notation.
Related Documentation
Document Name
300HD IP Phone Release Notes
310HD IP Phone Quick Guide
310HD IP Phone Administrator’s Manual
Regulatory Information
The Compliancy and Regulatory Information can be viewed at
http://www.audiocodes.com/downloads.

7/28/2019 Audiocodes 310hd User Guide
http://slidepdf.com/reader/full/audiocodes-310hd-user-guide 8/50
310HD IP Phone
User's Manual 8 Document #: LTRT-24701
Reader’s Notes

7/28/2019 Audiocodes 310hd User Guide
http://slidepdf.com/reader/full/audiocodes-310hd-user-guide 9/50
User's Manual 1. Introduction
Version 1.4 9 July 2010
1 Introduction
AudioCodes 310HD IP Phone is based on AudioCodes proprietary High Definition (HD) voicetechnology, providing clarity and a rich audio experience for its Voice-over-IP (VoIP) calls.
The 310HD IP Phone is a fully-featured telephone that provides voice communication over an IPnetwork, allowing you to place and receive phone calls, put calls on hold, transfer calls, makeconference calls, and so on.
The 310HD IP Phone provides an easy-to-use, menu-driven LCD screen for setting up andoperating the phone.
Read this manual carefully to learn how to operate this product and take advantage of itsfeatures.

7/28/2019 Audiocodes 310hd User Guide
http://slidepdf.com/reader/full/audiocodes-310hd-user-guide 10/50
310HD IP Phone
User's Manual 10 Document #: LTRT-24701
Reader’s Notes

7/28/2019 Audiocodes 310hd User Guide
http://slidepdf.com/reader/full/audiocodes-310hd-user-guide 11/50
User's Manual 2. Hardware Setup
Version 1.4 11 July 2010
2 Hardware Setup
2.1 Unpacking the Package Contents
When unpacking the IP phone, ensure that all the following items are present and undamaged:
310HD IP Phone Handset
Ethernet Cable AC Power Adapter
Wall-Mounting Screws (Two) Wall-Mounting Bracket
If anything appears to be missing or broken, contact your AudioCodes sales representative for assistance.

7/28/2019 Audiocodes 310hd User Guide
http://slidepdf.com/reader/full/audiocodes-310hd-user-guide 12/50
310HD IP Phone
User's Manual 12 Document #: LTRT-24701
2.2 Physical Description
You can use the graphics below to identify buttons and hardware on your phone. Use this sectionto familiarize yourself with the phones buttons functions.
2.2.1 Front View
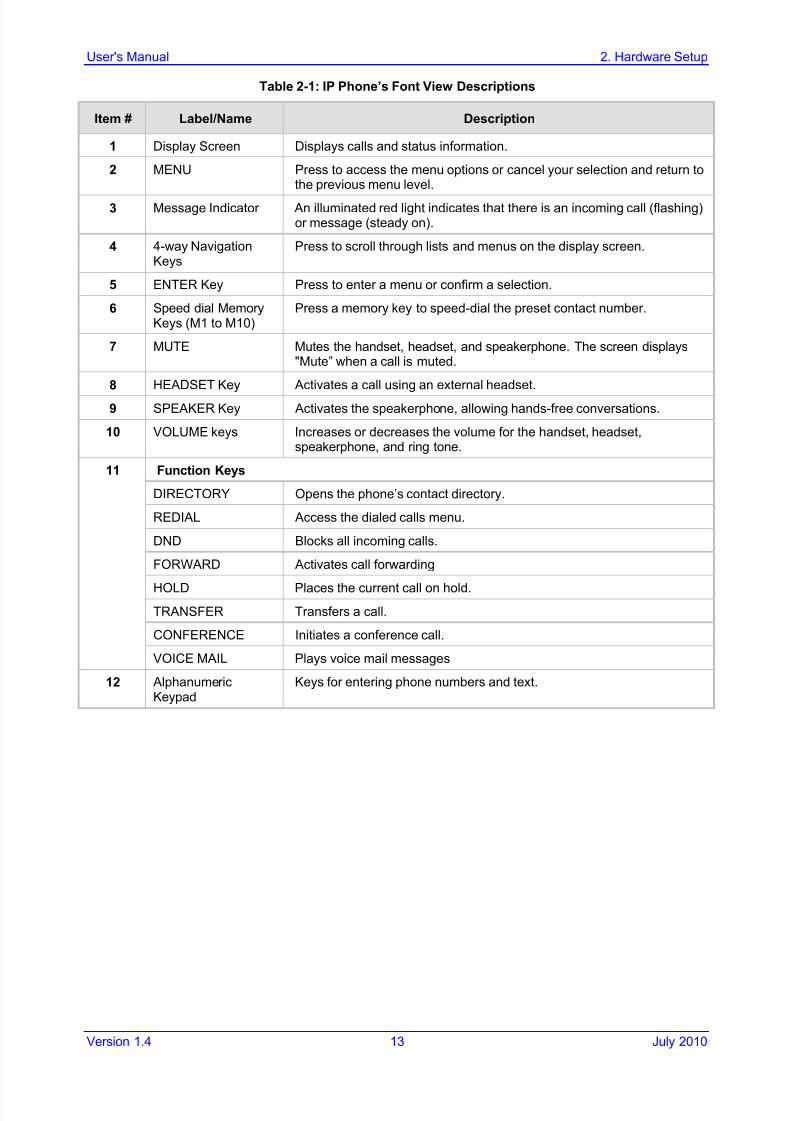
The front view of the phone is shown below and described in Table 2-1.
Figure 2-1: Front View of IP Phone
7/28/2019 Audiocodes 310hd User Guide
http://slidepdf.com/reader/full/audiocodes-310hd-user-guide 13/50

7/28/2019 Audiocodes 310hd User Guide
http://slidepdf.com/reader/full/audiocodes-310hd-user-guide 14/50
310HD IP Phone
User's Manual 14 Document #: LTRT-24701
2.2.2 Rear View
The rear view of the phone is shown in the figure below and described in Table 2-2.
Figure 2-2: Rear View of IP Phone
Table 2-2: IP Phone’s Rear View Descriptions
Item # Label/Name Description
1 LAN RJ-45 port for connecting to the Ethernet LAN cable for LAN (uplink -10/100 Mbps) connection. If you are using Power over Ethernet (PoE),the power to the phone is supplied from the Ethernet cable (drawspower from either a spare line or signal line).
2 PC RJ-45 port for connecting the phone to a PC (10/100 Mbps downlink).
3 Power Jack 12V DC power port that connects to the AC power adapter.
4 Headset Jack RJ-9 port that connects to an external headset.
5 Handset Jack (RJ-9) Connects to the handset.
7/28/2019 Audiocodes 310hd User Guide
http://slidepdf.com/reader/full/audiocodes-310hd-user-guide 15/50
User's Manual 2. Hardware Setup
Version 1.4 15 July 2010
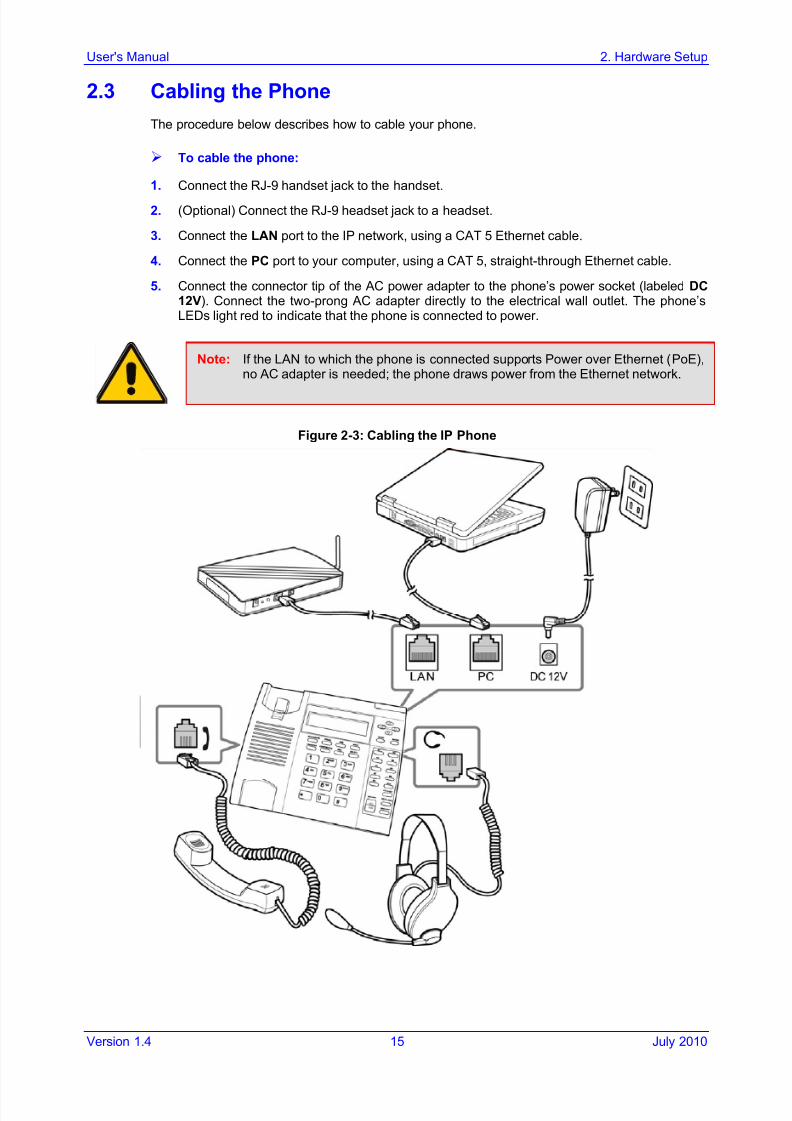
2.3 Cabling the Phone
The procedure below describes how to cable your phone.
¾ To cable the phone:
1. Connect the RJ-9 handset jack to the handset.2. (Optional) Connect the RJ-9 headset jack to a headset.
3. Connect the LAN port to the IP network, using a CAT 5 Ethernet cable.
4. Connect the PC port to your computer, using a CAT 5, straight-through Ethernet cable.
5. Connect the connector tip of the AC power adapter to the phone’s power socket (labeled DC12V). Connect the two-prong AC adapter directly to the electrical wall outlet. The phone’sLEDs light red to indicate that the phone is connected to power.
Note: If the LAN to which the phone is connected supports Power over Ethernet (PoE),no AC adapter is needed; the phone draws power from the Ethernet network.
Figure 2-3: Cabling the IP Phone

7/28/2019 Audiocodes 310hd User Guide
http://slidepdf.com/reader/full/audiocodes-310hd-user-guide 16/50
310HD IP Phone
User's Manual 16 Document #: LTRT-24701
2.4 Mounting the Phone
The phone can be mounted in one of the following ways:
Desktop mounting (refer to Section 2.4.1 below)
Wall mounting (refer to Section 2.4.2 on page 17)
2.4.1 Placing the Phone on a Desk
This section describes the procedures for placing the phone on a desk or flat surface and routingthe phone’s cables.
¾ To place the phone on a desk
1. Position the phone bracket so that the brackets attachment tabs are aligned with the lower set of attachment slots on the underside of the phone.
2. Insert the tabs into the attachment slots and slide the bracket up to secure the bracket.
3. Place the phone on the desk. When the phone bracket is correctly positioned the Displayscreen face towards you.
4. If the Display screen faces away from you, the phone bracket is positioned for mounting thephone on a wall. Detach the bracket from the phone and reattach the bracket using thealternate attachment slots.
2.4.1.1 Routing the Phones Cables
The phone provides grooves for routing the LAN, PC, and AC power cables to ensureuninterrupted connections.
¾ To route the phone’s LAN and PC cables:
1. Plug the PC cable in the PC port.
2. Insert the PC cable in the allotted slot on the bracket.
3. Plug the LAN cable in the LAN port.
4. Insert the LAN cord in the allotted slot on the bracket.
¾ To route the phone’s power adapter cord:
1. Plug the adapter into the power jack.
2. Insert the power cord in the allotted slots of the bracket.
3. Plug the AC power adapter into the power outlet.
7/28/2019 Audiocodes 310hd User Guide
http://slidepdf.com/reader/full/audiocodes-310hd-user-guide 17/50
User's Manual 2. Hardware Setup
Version 1.4 17 July 2010
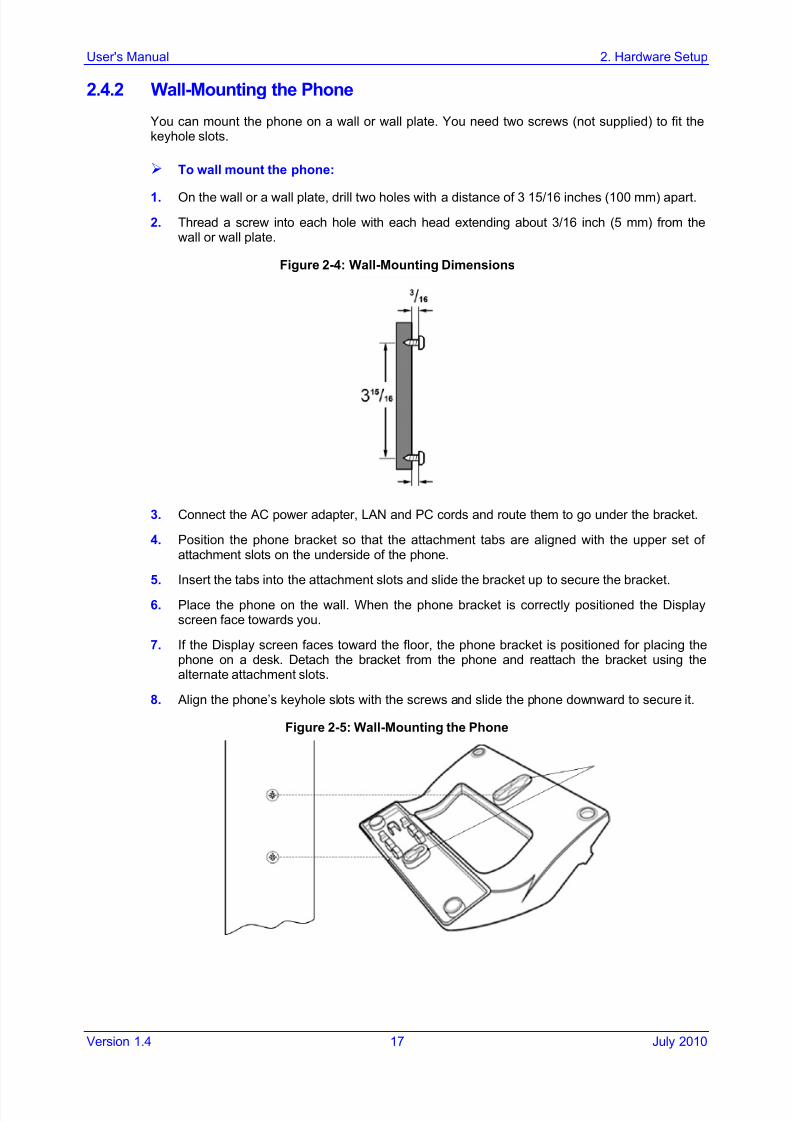
2.4.2 Wall-Mounting the Phone
You can mount the phone on a wall or wall plate. You need two screws (not supplied) to fit thekeyhole slots.
¾ To wall mount the phone:
1. On the wall or a wall plate, drill two holes with a distance of 3 15/16 inches (100 mm) apart.
2. Thread a screw into each hole with each head extending about 3/16 inch (5 mm) from thewall or wall plate.
Figure 2-4: Wall-Mounting Dimensions
3. Connect the AC power adapter, LAN and PC cords and route them to go under the bracket.
4. Position the phone bracket so that the attachment tabs are aligned with the upper set of attachment slots on the underside of the phone.
5. Insert the tabs into the attachment slots and slide the bracket up to secure the bracket.
6. Place the phone on the wall. When the phone bracket is correctly positioned the Displayscreen face towards you.
7. If the Display screen faces toward the floor, the phone bracket is positioned for placing thephone on a desk. Detach the bracket from the phone and reattach the bracket using thealternate attachment slots.
8. Align the phone’s keyhole slots with the screws and slide the phone downward to secure it.
Figure 2-5: Wall-Mounting the Phone

7/28/2019 Audiocodes 310hd User Guide
http://slidepdf.com/reader/full/audiocodes-310hd-user-guide 18/50
310HD IP Phone
User's Manual 18 Document #: LTRT-24701
Reader’s Notes

7/28/2019 Audiocodes 310hd User Guide
http://slidepdf.com/reader/full/audiocodes-310hd-user-guide 19/50
User's Manual 3. Getting Started with the Phone’s User Interface
Version 1.4 19 July 2010
3 Getting Started with the Phone’s User Interface
The 310HD IP Phone provides an LCD-based user interface screen, providing an intuitive, menu-
driven user interface for configuration and viewing various call information. This section providesan overview on using the phone’s screen.
3.1 Areas of the LCD Screen
The main areas of the phone’s LCD screen in idle display (i.e., no current calls and menu notaccessed) are shown in the figure below:
Figure 3-1: Display Screen
3.2 Accessing Menus
The phone’s menus are used for configuring the phone (e.g., adding contacts to the phonedirectory) and for viewing various information (e.g., missed calls). The phone’s main menu isaccessed using the MENU key. Drilling down to submenus is done by using the Navigation keysto select the required menu, and then pressing the ENTER key.
Figure 3-2: Accessing Menus on Display Screen
MENU Key and Navigation Keys Hierarchical Structure of Menu List
Note: The Administration menu is intended for system administrators only and ispassword protected. For detailed information regarding this menu, refer to the Administrator’s Manual .

7/28/2019 Audiocodes 310hd User Guide
http://slidepdf.com/reader/full/audiocodes-310hd-user-guide 20/50

7/28/2019 Audiocodes 310hd User Guide
http://slidepdf.com/reader/full/audiocodes-310hd-user-guide 21/50
User's Manual 3. Getting Started with the Phone’s User Interface
Version 1.4 21 July 2010
• . (period)
• _ (underscore)
• + (plus)
Figure 3-4: Entering Symbols
¾ To add a space:
Press the 0 key.
¾ To delete an entered character:
Press the left Navigation key; the character to the left of the cursor is deleted.

7/28/2019 Audiocodes 310hd User Guide
http://slidepdf.com/reader/full/audiocodes-310hd-user-guide 22/50

7/28/2019 Audiocodes 310hd User Guide
http://slidepdf.com/reader/full/audiocodes-310hd-user-guide 23/50
User's Manual 4. Customizing Your Phone
Version 1.4 23 July 2010
4 Customizing Your Phone
This chapter provides step-by-step procedures on customizing your phone.
4.1 Managing Your Personal Phone DirectoryThe phone directory feature enables you to add contacts to your phone’s local directory, and thenedit and delete them if required. Once you have added a contact, you can easily call the contactdirectly from the directory (refer to Section 6.1 on page 43). If the contact is assigned a speed dialkey, you can also call the contact by pressing its speed dial key (refer to Section 6.2 on page 44).If you receive an incoming call from someone who is listed in the directory, the phone’s screendisplays the name of the caller.
Notes:
• The maximum number of contacts that you can add to the directory is 1,000.
• Your phone’s directory may also include contacts from your corporatedirectory (set up by your system administrator). These cannot be edited or deleted. For a detailed description, refer to the Administrator’s Manual .
4.1.1 Accessing the Directory Menu
The following procedure describes how to access the phone directory. This is required for thevarious management operations required for the phone directory described in subsequentsections.
¾ To access the phone directory, perform one of the following:
From the idle screen, press the MENU key, select the Phone Settings menu, and thenselect the Directory submenu.
Press the DIRECTORY key.
The Directory screen is displayed below:
This screen contains the following options:
• View – to view contacts (refer to Section 4.1.5 on page 26)
• Search to search contacts (refer to Section 4.1.6 on page 26)
• New – to add a contact (refer to Section 4.1.2 on page 24)

7/28/2019 Audiocodes 310hd User Guide
http://slidepdf.com/reader/full/audiocodes-310hd-user-guide 24/50
310HD IP Phone
User's Manual 24 Document #: LTRT-24701
4.1.2 Adding Contacts
The procedure below describes how to add a new contact to the phone directory
¾ To add a contact to the phone directory:
1. Access the Directory screen.
2. Select the New option (using the and Navigation keys), and then press the ENTERkey.
3. Define the contact’s name:
a. Select the Name field, and then press the ENTER key.b. Enter the name of the new contact, using the phone’s keypad (as described in Section
3.3 on page 20).
c. Press the ENTER key.
4. Define the contact’s phone number. You can assign a phone number for Office, Home,
Mobile, User Define 1, or User Define 2.
a. Select the required number field (using the and Navigation keys), and then enter the number of the new contact, using the phone’s keypad.
b. Press the ENTER key.
5. Select the Save option (using the and Navigation keys), and then press the ENTERkey; the “Saving Contact” message is displayed, indicating that the new contact is saved inthe directory.
4.1.3 Editing Contacts
You can edit contacts in the phone directory, as described in the procedure below.
¾ To edit a contact:
1. Access the Directory screen.
2. Search for the directory contact that you want to edit and then press the ENTER key (refer toSection 4.1.5).
3. Select the Edit option (using the and Navigation keys), and then press the ENTER

7/28/2019 Audiocodes 310hd User Guide
http://slidepdf.com/reader/full/audiocodes-310hd-user-guide 25/50
User's Manual 4. Customizing Your Phone
Version 1.4 25 July 2010
key; the phone category list is displayed.
4. Select the required phone category (using the and Navigation keys), and then pressthe ENTER key; the phone number is displayed.
5. Modify the number as required (using the and Navigation keys), and then press the
ENTER key.
6. Select the Save option (using the and Navigation keys), and then press the ENTERkey; the “Saving Contact” message is displayed, indicating that the modified contact issaved.
4.1.4 Deleting Contacts
You can remove contacts from the phone directory, as described in the procedure below.
¾ To delete a contact:
1. Access the Directory screen.
2. Search for the directory contact that you want to delete (refer to Section 4.1.5), and thenpress the ENTER key.
3. Select the Delete option (using the and Navigation keys), and then press the ENTER
key; the phone requests confirmation.
4. Select the Yes option (using the and Navigation keys), and then press the ENTERkey; the “contact is removed from the directory.

7/28/2019 Audiocodes 310hd User Guide
http://slidepdf.com/reader/full/audiocodes-310hd-user-guide 26/50
310HD IP Phone
User's Manual 26 Document #: LTRT-24701
4.1.5 Viewing Contacts
You can view a list of contacts defined in your phone directory.
¾ To view contacts:
1. Access the Directory screen.
2. Select the View option, and then press the ENTER key; the list of directory contacts appear:
3. Scroll through the list using the and Navigation keys.
If you select a contact (by pressing the ENTER key), the following options are displayed:
Dial – to dial the contact (refer to Section 6.1 on page 43)
Detail – displays the contact’s details such as phone numbers
Edit – to modify the contact’s details (refer to Section 4.1.3)
Delete – to remove the contact from the directory (refer to Section 4.1.4)
4.1.6 Searching Contacts
Once your phone directory is defined with contacts, you can use the phone’s search feature to
quickly and easily locate the required contact.
¾ To search the directory:
1. Access the Directory screen.
2. Select the Search option, and then press the ENTER key; the Search Contact screenappears:
3. Enter the first letter or first letters of the contact’s name, and then press the ENTER key; if located, the contact name is displayed:

7/28/2019 Audiocodes 310hd User Guide
http://slidepdf.com/reader/full/audiocodes-310hd-user-guide 27/50
User's Manual 4. Customizing Your Phone
Version 1.4 27 July 2010
4. Press the ENTER key to display a list of options:
• Dial – to dial the contact (refer to Section 6.1 on page 43)
• Detail – displays the contact’s details such as phone numbers
• Edit – to modify the contact’s details (refer to Section 4.1.3)
• Delete – to remove the contact from the directory (refer to Section 4.1.4)
4.2 Configuring Speed Dialing
Speed dialing allows you to quickly place a call by simply pressing a speed dial key that has beenassigned with a phone number. You can assign up to 10 speed dial numbers. You can either assign a contact in your directory to a speed dial key or manually assign a phone number to aspeed dial key). For placing calls using speed dial keys, refer to Section 6.2 on page 44.
4.2.1 Assigning Speed Dials
Your phone’s speed dial keys are labeled M1 to M10. To assign these keys a phone number,follow the procedure below.
¾ To assign a phone number to a speed dial key:
1. From the idle screen, press the MENU key, select the Phone Settings menu, and thenselect the Speed Dial submenu.
The speed dial entries are displayed. Undefined speed dial key are displayed with “N/A”, asshown below:
2. Select a Speed Dial memory key (using the and Navigation keys) to which you want to
assign the speed dial number, and then press the ENTER key. Indices “1” to “10” correspondto the phone’s speed dial keys M1 to M10, respectively. The following screen appears for entering the phone number:
Note: Instead of performing steps 1 to 2, you can configure a speed dial key bypressing one of the phone’s speed dial keys, and then continuing with Step 3.

7/28/2019 Audiocodes 310hd User Guide
http://slidepdf.com/reader/full/audiocodes-310hd-user-guide 28/50
310HD IP Phone
User's Manual 28 Document #: LTRT-24701
3. Enter the phone number that you want to assign the speed dial key, and then press theENTER key to save your settings; the newly defined speed dial key with its phone number isdisplayed:
4.2.2 Editing Speed Dials
The procedure below describes how to modify the phone number assigned to an existing speeddial.
¾ To edit a speed dial:
1. Access the Speed Dial submenu to view the list of speed dials.
2. Select a speed dial (using the and Navigation keys) that you want to edit, and thenpress the ENTER key; the following screen appears:
Note: If you decide that you don’t want to edit the speed dial, press the leftNavigation key to return to the previous screen.
3. Enter a new number, and then press the ENTER key to save your settings.

7/28/2019 Audiocodes 310hd User Guide
http://slidepdf.com/reader/full/audiocodes-310hd-user-guide 29/50
User's Manual 4. Customizing Your Phone
Version 1.4 29 July 2010
4.2.3 Deleting Speed Dials
The procedure below describes how to delete an existing speed dial.
¾ To delete a speed dial:
1. Access the Speed Dial submenu to view the list of speed dials.
2. Select a speed dial (using the and Navigation keys) that you want to delete, and thenpress the ENTER key; the following screen appears:
Note: If you decide that you don’t want to delete the speed dial, press the leftNavigation key to return to the previous screen.
3. Press the ENTER key; the speed dial number is deleted and “N/A” is displayed instead of the
number, as shown below.

7/28/2019 Audiocodes 310hd User Guide
http://slidepdf.com/reader/full/audiocodes-310hd-user-guide 30/50
310HD IP Phone
User's Manual 30 Document #: LTRT-24701
4.3 Selecting a Ring Tone
You can select a ring tone for your phone for indicating incoming calls.
¾ To select a ring tone:
1. From the idle screen, press the MENU key, select the Phone Settings menu, and thenselect the Ring Tone submenu.
A list of ring tones are displayed:
2. Choose the desired ring tone (using the and Navigation keys). As you scroll throughthe list, a sample of the ring tone is played.
3. Select the ring tone by pressing the ENTER key; an asterisk is displayed to the left of thering tone name.
4. Press the ENTER key; a confirmation message is displayed.
5. Select the Yes option (using the and Navigation keys) to save your settings (or No todiscard your settings), and then press the ENTER key; the “Ring Tone Saved” message isdisplayed and your phone now uses this ring tone.

7/28/2019 Audiocodes 310hd User Guide
http://slidepdf.com/reader/full/audiocodes-310hd-user-guide 31/50

7/28/2019 Audiocodes 310hd User Guide
http://slidepdf.com/reader/full/audiocodes-310hd-user-guide 32/50
310HD IP Phone
User's Manual 32 Document #: LTRT-24701
4.5 Defining Call Forwarding
The Call Forward feature allows you to automatically redirect an incoming call to another phonenumber, upon a user-defined condition (e.g., when your line is busy). The configuration of the callforward feature is performed in two stages. The first stage is the actual call forward setup; the
second stage is the activation.
¾ To configure call forwarding:
1. Press the FORWARD key; the following appears:
2. Enable call forwarding:
a. Select the Switch option (using the and Navigation keys), and then press theENTER key; the following appears:
b. Select one of the following options (using the and Navigation keys):
♦ Disable: disables call forwarding♦ Enable: enables call forwarding
An asterisk appears alongside the selected option.
c. Press the ENTER key to save your settings; you are returned to the previous submenu(see Step 1).
3. Define the condition upon which you want calls to be forwarded:
a. Select the Type option (using the and Navigation keys), and then press theENTER key; the following appears:

7/28/2019 Audiocodes 310hd User Guide
http://slidepdf.com/reader/full/audiocodes-310hd-user-guide 33/50
User's Manual 4. Customizing Your Phone
Version 1.4 33 July 2010
b. Select the condition (using the and Navigation keys), and then press the ENTERkey:
♦ Busy: calls are forwarded if your phone is busy
♦ No-Reply: calls are forwarded if you do not answer within a user-defined time (seeStep 7)
♦ Unconditional: calls are always forwarded regardless of condition
c. If you selected the No-Reply option, perform the following (otherwise, skip toStep 4):
a. Select the timeout (in seconds) after which the call is forwarded; an asteriskappears alongside the selected option:
b. Press the ENTER key; you are returned to the previous menu.
4. Define the destination to where you want to forward the calls:
a. Select the Destination option, and then press the ENTER key; the following appears:
b. Enter the phone number to where you want incoming calls forwarded, and then pressthe ENTER key: you are returned to the previous menu.
5. To activate call forwarding, select the Start option, and then press the ENTER key; thefollowing appears, indicating the phone number to where calls are forwarded:
¾ To stop call forwarding:
Press the FORWARD key.
7/28/2019 Audiocodes 310hd User Guide
http://slidepdf.com/reader/full/audiocodes-310hd-user-guide 34/50
310HD IP Phone
User's Manual 34 Document #: LTRT-24701
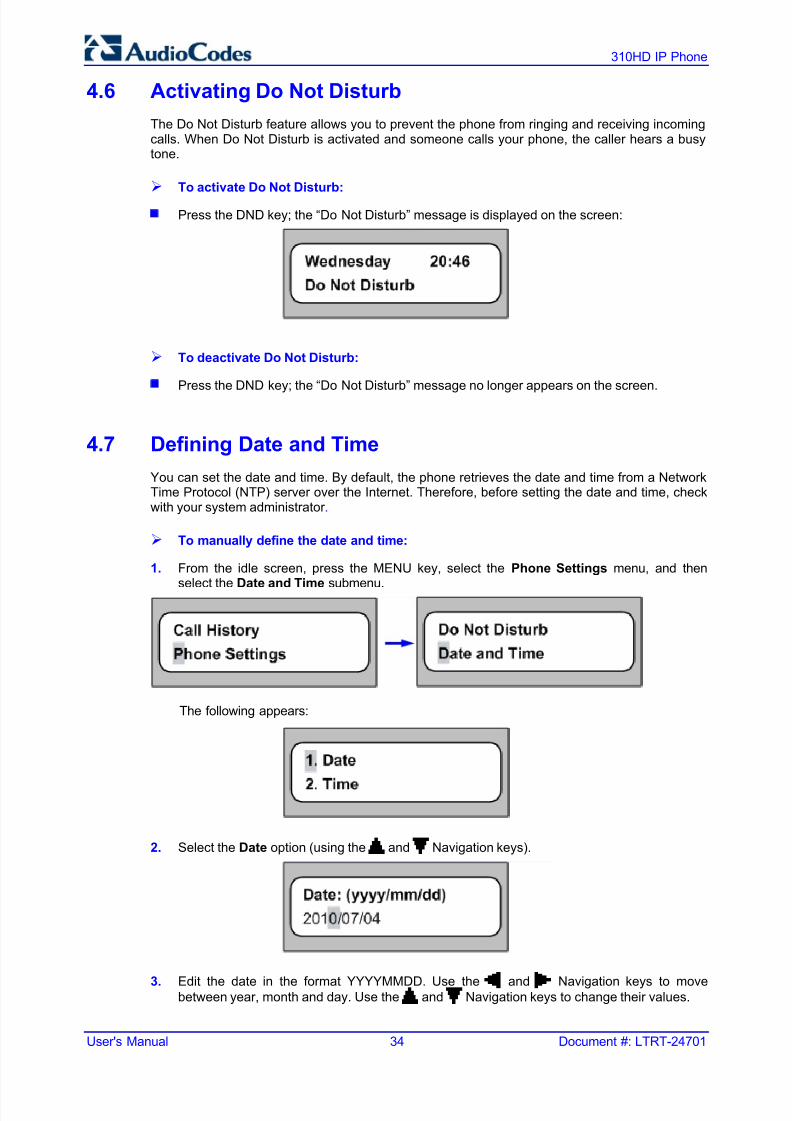
4.6 Activating Do Not Disturb
The Do Not Disturb feature allows you to prevent the phone from ringing and receiving incomingcalls. When Do Not Disturb is activated and someone calls your phone, the caller hears a busytone.
¾ To activate Do Not Disturb:
Press the DND key; the “Do Not Disturb” message is displayed on the screen:
¾ To deactivate Do Not Disturb:
Press the DND key; the “Do Not Disturb” message no longer appears on the screen.
4.7 Defining Date and Time
You can set the date and time. By default, the phone retrieves the date and time from a NetworkTime Protocol (NTP) server over the Internet. Therefore, before setting the date and time, checkwith your system administrator .
¾ To manually define the date and time:
1. From the idle screen, press the MENU key, select the Phone Settings menu, and thenselect the Date and Time submenu.
The following appears:
2. Select the Date option (using the and Navigation keys).
3. Edit the date in the format YYYYMMDD. Use the and Navigation keys to move
between year, month and day. Use the and Navigation keys to change their values.

7/28/2019 Audiocodes 310hd User Guide
http://slidepdf.com/reader/full/audiocodes-310hd-user-guide 35/50
User's Manual 4. Customizing Your Phone
Version 1.4 35 July 2010
4. Press the ENTER key to save the date settings; you are returned to the previous menu.
5. Select the Time option (using the and Navigation keys), and then press the ENTERkey.
6. Edit the time in the format hh:mm. Use the and Navigation keys to move between
digits. Use the and Navigation keys to change their values.
7. Press the ENTER key to save the time settings.

7/28/2019 Audiocodes 310hd User Guide
http://slidepdf.com/reader/full/audiocodes-310hd-user-guide 36/50
310HD IP Phone
User's Manual 36 Document #: LTRT-24701
Reader’s Notes

7/28/2019 Audiocodes 310hd User Guide
http://slidepdf.com/reader/full/audiocodes-310hd-user-guide 37/50

7/28/2019 Audiocodes 310hd User Guide
http://slidepdf.com/reader/full/audiocodes-310hd-user-guide 38/50
310HD IP Phone
User's Manual 38 Document #: LTRT-24701
¾ To end dialing of a call (before the call is answered):
Press the SPEAKER key.
5.2.1 Dialing with the Keypad
You can make calls by dialing the number directly from the phone’s keypad.
¾ To make a call using the keypad:
1. Enter the telephone number using the alphanumerical keypad.
2. Once you have completed entering the number, you can then dial the number by performingone of the following:
• Pressing the # (pound) key.
• Waiting a few seconds (without pressing anything) - the phone dials the number automatically.
5.2.2 Redialing Numbers
You can redial a number that was previously dialled.
¾ To redial a number:
1. Press the REDIAL key; the screen displays a list of recently dialled calls:
2. Select the number that you want to dial (using the and Navigation keys), and thenpress the ENTER key; the following screen appears:
3. Select the Dial option (using the and Navigation keys), and then press the ENTERkey to make the call.

7/28/2019 Audiocodes 310hd User Guide
http://slidepdf.com/reader/full/audiocodes-310hd-user-guide 39/50
User's Manual 5. Basic Phone Operations
Version 1.4 39 July 2010
5.2.3 Dialing Logged (History) Calls
The phone logs all calls (missed, received and dialled). You can easily dial a logged call, asdescribed in the procedure below.
¾ To dial a logged call:
1. From the idle screen, press the MENU key, and then select the Call History menu.
2. Select the Missed Calls, Received Calls, or Dialed Numbers option (using the andNavigation keys), and then press the ENTER key; a list of numbers or contacts are
displayed:
3. Select a logged call entry (using the and Navigation keys), and then press the ENTERkey; the following screen appears:
4. Select the Dial option (using the and Navigation keys), and then press the ENTERkey to dial the number.

7/28/2019 Audiocodes 310hd User Guide
http://slidepdf.com/reader/full/audiocodes-310hd-user-guide 40/50
310HD IP Phone
User's Manual 40 Document #: LTRT-24701
5.3 Answering Calls
The phone indicates an incoming call by the following:
Screen displays the caller’s ID and the “Calling” notification
Phone rings (ringing tone)
System Status LED flashes red
You can answer a call, by performing one of the following:
Handset: Picking up the handset
Headset: Pressing the HEADSET key
Speaker: Pressing the SPEAKER key
When you answer the call, the “Connected” message is displayed:
5.4 Ending Established Calls
Depending on the audio device used during the call, you can end an established call byperforming one of the following:
Handset: Return handset to cradle.
Headset: Press the HEADSET key.
Speaker: Press the SPEAKER key.

7/28/2019 Audiocodes 310hd User Guide
http://slidepdf.com/reader/full/audiocodes-310hd-user-guide 41/50
User's Manual 5. Basic Phone Operations
Version 1.4 41 July 2010
5.5 Viewing Call History
Your phone stores logged missed, received, and dialed calls.
In idle display, the phone indicates missed calls by displaying the “Missed Call” notification withthe number of missed calls, as shown below:
¾ To easily view missed calls from the idle display:
If the “Missed Call” notification is displayed, press the ENTER key. For a description of handling missed calls, see the procedure below for viewing all types of logged calls.
Note: After you view the details of missed calls, the “Missed Call” notification no longer appears on the screen and appears again only at another missed call event.
¾ To view logged calls:
1. From the idle screen, press the MENU key, and then select the Call History menu.
2. Select the required menu option (using the and Navigation keys):
• Missed Calls: displays a lists of calls that were not answered
• Received Calls: displays a list of the most recently answered numbers
• Dialed Numbers: displays a list of the most recently dialed numbers
3. Press the ENTER key; a list of numbers or contacts are displayed:

7/28/2019 Audiocodes 310hd User Guide
http://slidepdf.com/reader/full/audiocodes-310hd-user-guide 42/50
310HD IP Phone
User's Manual 42 Document #: LTRT-24701
4. Select a logged entry (using the and Navigation keys), and then press the ENTERkey; the following screen appears:
5. Select one of the following options (using the and Navigation keys), and then pressthe ENTER key:
• Dial: dials the number of the selected call entry.
• Detail: displays details of the call entry (phone number, caller ID, and date and time of call)
• Save: saves the related information about the call entry in the personal directory (refer to Section 4.1 on page 23)
Notes:
• The call history lists are stored from the newest to oldest entries. Themaximum number of entries for each call history type is 200. Once thismaximum is attained, the oldest entry is deleted and replaced with the newentry.
• The call history lists are saved on a daily base. In case of a power outagesome of the received information may be lost.
7/28/2019 Audiocodes 310hd User Guide
http://slidepdf.com/reader/full/audiocodes-310hd-user-guide 43/50
User's Manual 6. Advanced Phone Operations
Version 1.4 43 July 2010
6 Advanced Phone Operations
This chapter describes advanced calling features offered by your phone.
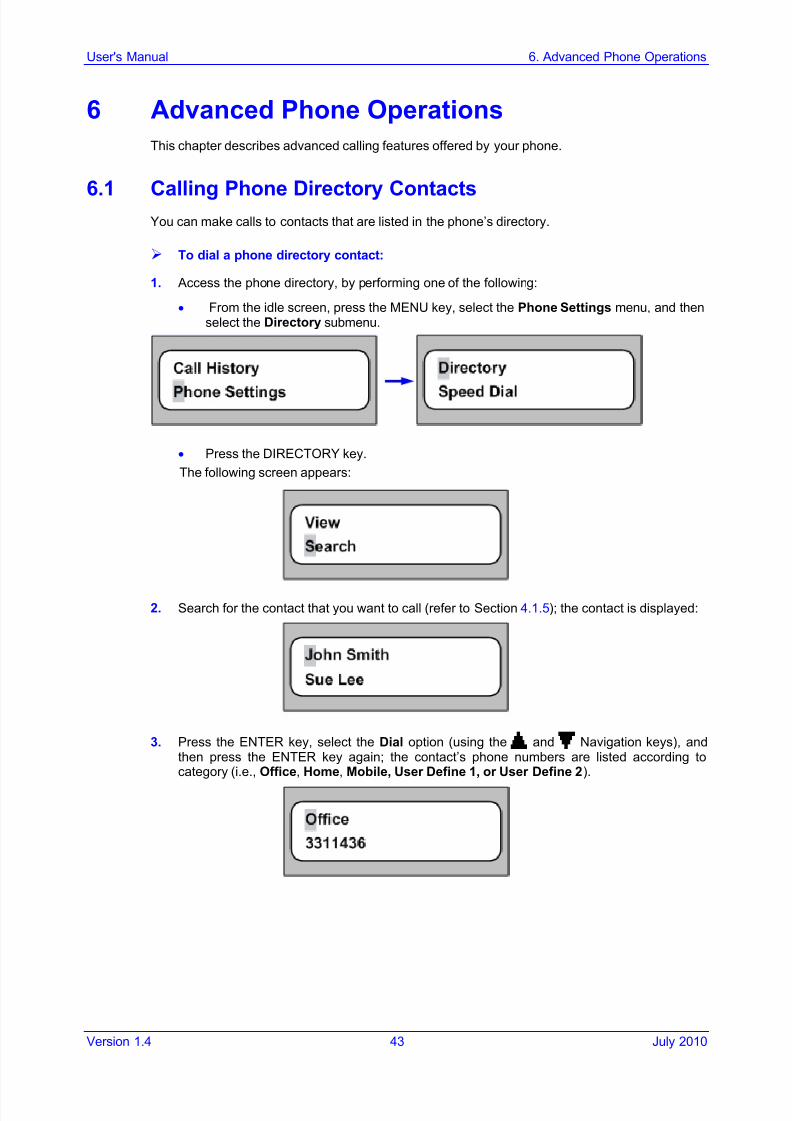
6.1 Calling Phone Directory ContactsYou can make calls to contacts that are listed in the phone’s directory.
¾ To dial a phone directory contact:
1. Access the phone directory, by performing one of the following:
• From the idle screen, press the MENU key, select the Phone Settings menu, and thenselect the Directory submenu.
• Press the DIRECTORY key.
The following screen appears:
2. Search for the contact that you want to call (refer to Section 4.1.5); the contact is displayed:
3. Press the ENTER key, select the Dial option (using the and Navigation keys), andthen press the ENTER key again; the contact’s phone numbers are listed according tocategory (i.e., Office, Home, Mobile, User Define 1, or User Define 2).

7/28/2019 Audiocodes 310hd User Guide
http://slidepdf.com/reader/full/audiocodes-310hd-user-guide 44/50
310HD IP Phone
User's Manual 44 Document #: LTRT-24701
4. Select the required number, and then press the ENTER key; the phone automatically dialsthe contact’s number and attempts to place the call, as shown below:
6.2 Placing Calls with Speed Dialing
You can use the Speed Dial keys (located on the right side of the phone) to quickly dial aconfigured speed dial number. For configuring speed dials, refer to Section 4.2 on page 27.
¾ To make a call using speed dialing:
Press the required Speed Dial Memory key (M1-M10); the phone automatically dials the
speed dial contact’s number:
Note: If you press a speed dial key that has not been assigned a phone number, thephone displays a screen allowing you to assign a number to the specific speeddial key.
6.3 Placing a Call On Hold
You can place a call on hold. This is typically used to answer a second incoming call or to makeanother call.
¾ To place a call on hold:
1. During an established call, press the HOLD key; the call is put on hold and a dial tone isheard.
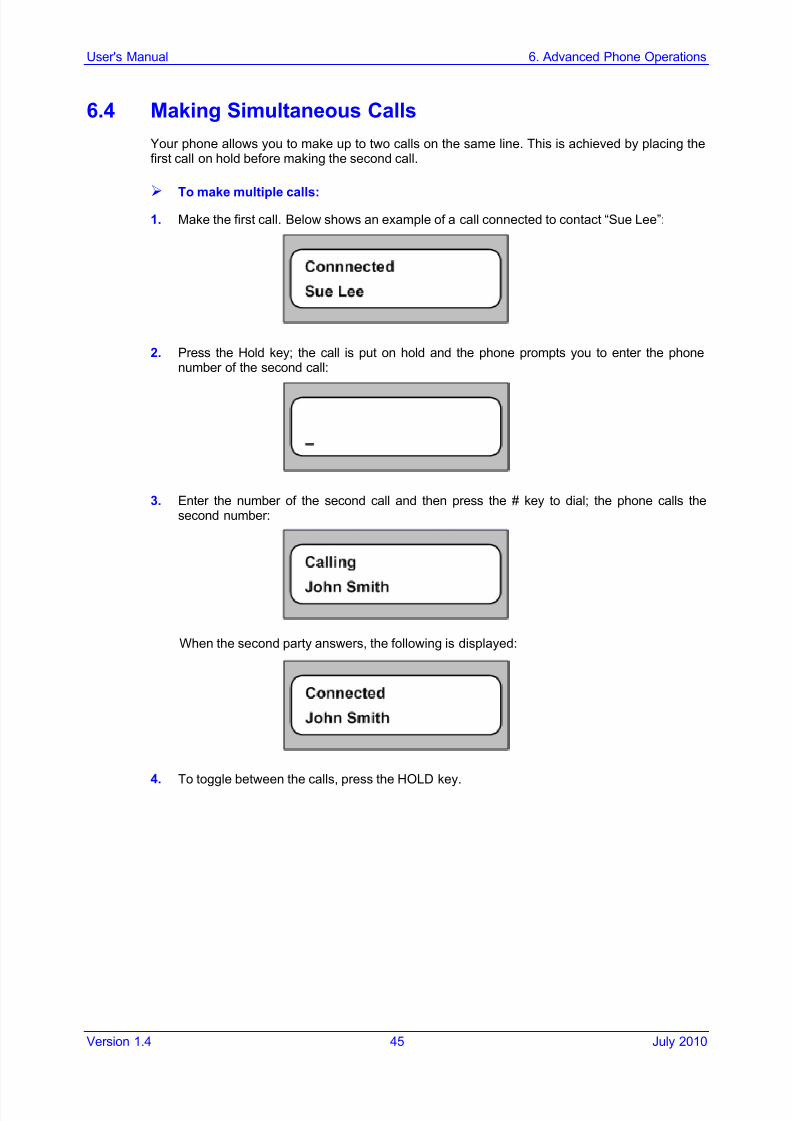
2. To resume conversation, press the HOLD key again.
7/28/2019 Audiocodes 310hd User Guide
http://slidepdf.com/reader/full/audiocodes-310hd-user-guide 45/50
7/28/2019 Audiocodes 310hd User Guide
http://slidepdf.com/reader/full/audiocodes-310hd-user-guide 46/50
310HD IP Phone
User's Manual 46 Document #: LTRT-24701
6.5 Hosting Three‐Way Conference Calls
You can make a three-way conference call between your phone and two other called parties.
¾ To make a three‐way conference call:
1. Make a call to the first participant of the conference call.2. Put the first call on hold (by pressing the HOLD key).
3. Make a call to the second call participant.
4. When the second call party answers, press the CONFERENCE key; a conference call withall parties is established.
To end the three‐way conference call, hang up the phone.
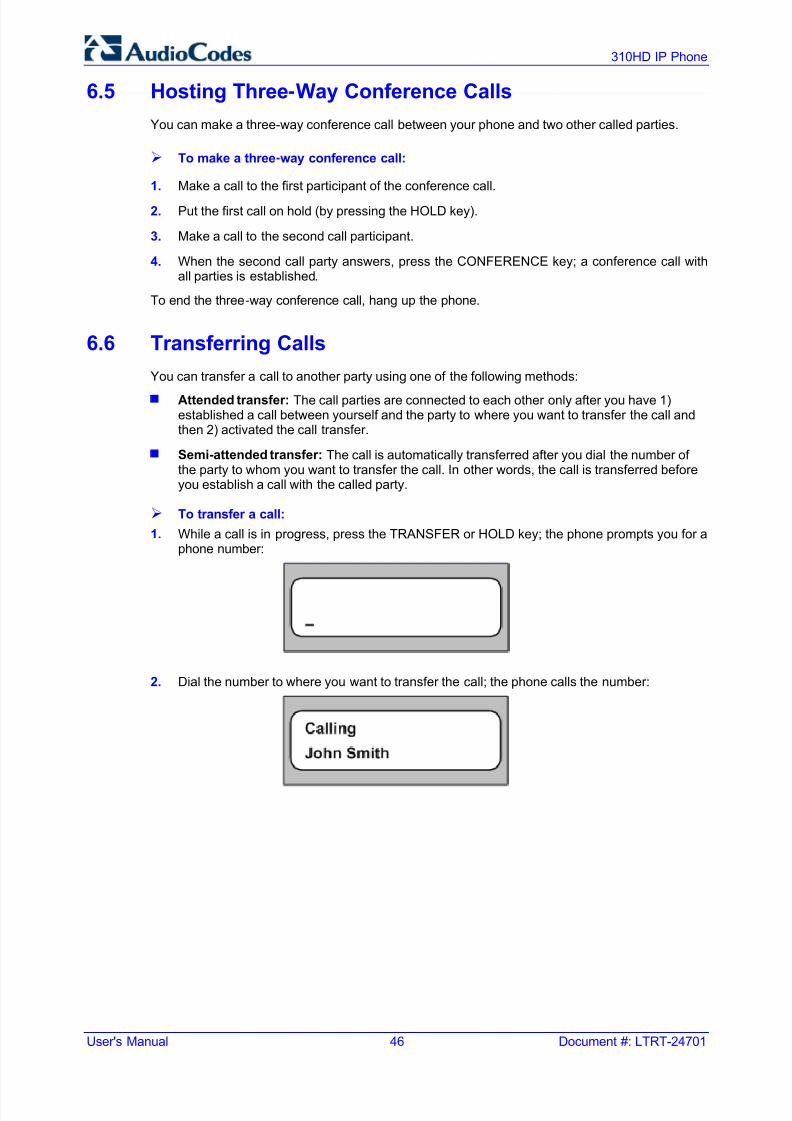
6.6 Transferring Calls
You can transfer a call to another party using one of the following methods: Attended transfer: The call parties are connected to each other only after you have 1)
established a call between yourself and the party to where you want to transfer the call andthen 2) activated the call transfer.
Semi-attended transfer: The call is automatically transferred after you dial the number of the party to whom you want to transfer the call. In other words, the call is transferred beforeyou establish a call with the called party.
¾ To transfer a call:
1. While a call is in progress, press the TRANSFER or HOLD key; the phone prompts you for aphone number:
2. Dial the number to where you want to transfer the call; the phone calls the number:

7/28/2019 Audiocodes 310hd User Guide
http://slidepdf.com/reader/full/audiocodes-310hd-user-guide 47/50
User's Manual 6. Advanced Phone Operations
Version 1.4 47 July 2010
3. Transfer the call:
• Semi-Attended Transfer: While the called party is ringing (i.e., before call isanswered), press the TRANSFER key.
• Attended Transfer: Wait until the call is answered (if necessary, speak to the calledparty), and then press the TRANSFER key.
The “Transferring” message is displayed, indicating that the phone is currently transferringthe call:
Once the call is transferred, the phone returns to idle state.

7/28/2019 Audiocodes 310hd User Guide
http://slidepdf.com/reader/full/audiocodes-310hd-user-guide 48/50
310HD IP Phone
User's Manual 48 Document #: LTRT-24701
6.7 Muting Calls
The phone allows you to mute the phone’s microphone (of the handset, headset, andspeakerphone) during a call so that the other party cannot hear you. While a call is muted, youcan still hear the other party but the other party cannot hear you. Muting calls can also be used
during conference calls.
¾ To mute/unmute a call:
1. During a call, press the MUTE key; the call is muted and the “Mute” message is displayed:
2. To resume the conversation, press the MUTE key again; the call is unmuted and the other party can now hear you:

7/28/2019 Audiocodes 310hd User Guide
http://slidepdf.com/reader/full/audiocodes-310hd-user-guide 49/50

7/28/2019 Audiocodes 310hd User Guide
http://slidepdf.com/reader/full/audiocodes-310hd-user-guide 50/50