AtSoft Inc. presents Nails 123 Full System ManualAtSoft Inc. presents… Nails 123 Full System...
74
AtSoft Inc. presents… Nails 123 Full System Manual Contact Information Address: 16531 Brookhurst St. Fountain Valley, Ca 92708 Phone: (800) 398-0525 Support: (714) 740-5266 Fax: (714)242-9950 Email: [email protected]
Transcript of AtSoft Inc. presents Nails 123 Full System ManualAtSoft Inc. presents… Nails 123 Full System...

AtSoft Inc. presents…
Nails 123 Full System Manual
Contact Information
Address: 16531 Brookhurst St. Fountain Valley, Ca 92708 Phone: (800) 398-0525 Support: (714) 740-5266
Fax: (714)242-9950 Email: [email protected]
Website: http://www.atsoft123.com ATSoft, Inc.
1
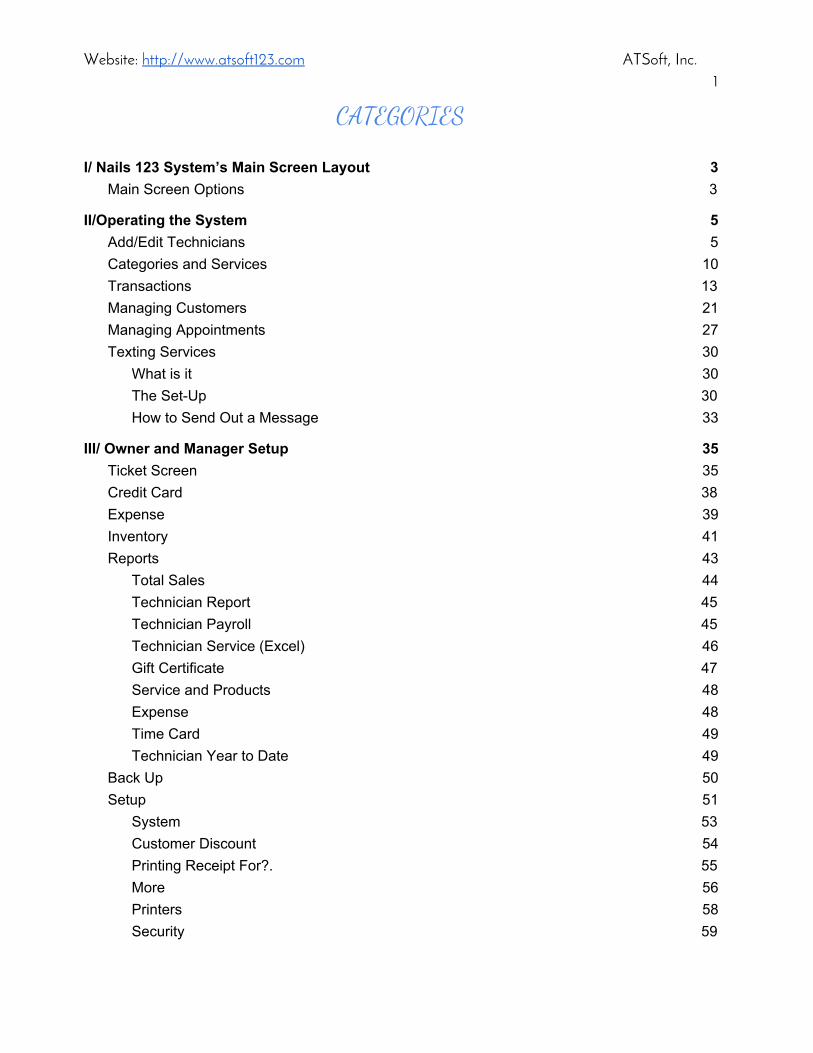
CATEGORIES
I/ Nails 123 System’s Main Screen Layout 3 Main Screen Options 3
II/Operating the System 5 Add/Edit Technicians 5 Categories and Services 10 Transactions 13 Managing Customers 21 Managing Appointments 27 Texting Services 30
What is it 30 The Set-Up 30 How to Send Out a Message 33
III/ Owner and Manager Setup 35 Ticket Screen 35 Credit Card 38 Expense 39 Inventory 41 Reports 43
Total Sales 44 Technician Report 45 Technician Payroll 45 Technician Service (Excel) 46 Gift Certificate 47 Service and Products 48 Expense 48 Time Card 49 Technician Year to Date 49
Back Up 50 Setup 51
System 53 Customer Discount 54 Printing Receipt For?. 55 More 56 Printers 58 Security 59
Website: http://www.atsoft123.com ATSoft, Inc.
2
Begin Day of the Week and Payroll Periods 60 Store Business Information 60 Open Cash Drawer 62 Misc 62 Discount Default 63 Other Selling Turn Tracker 65 Appointment Store Hours 67 Tickets 68 Timesheet 68 Credit Card Package 69 Advance Setup 70 Lottery Ticket Winner 72
Website: http://www.atsoft123.com ATSoft, Inc.
3
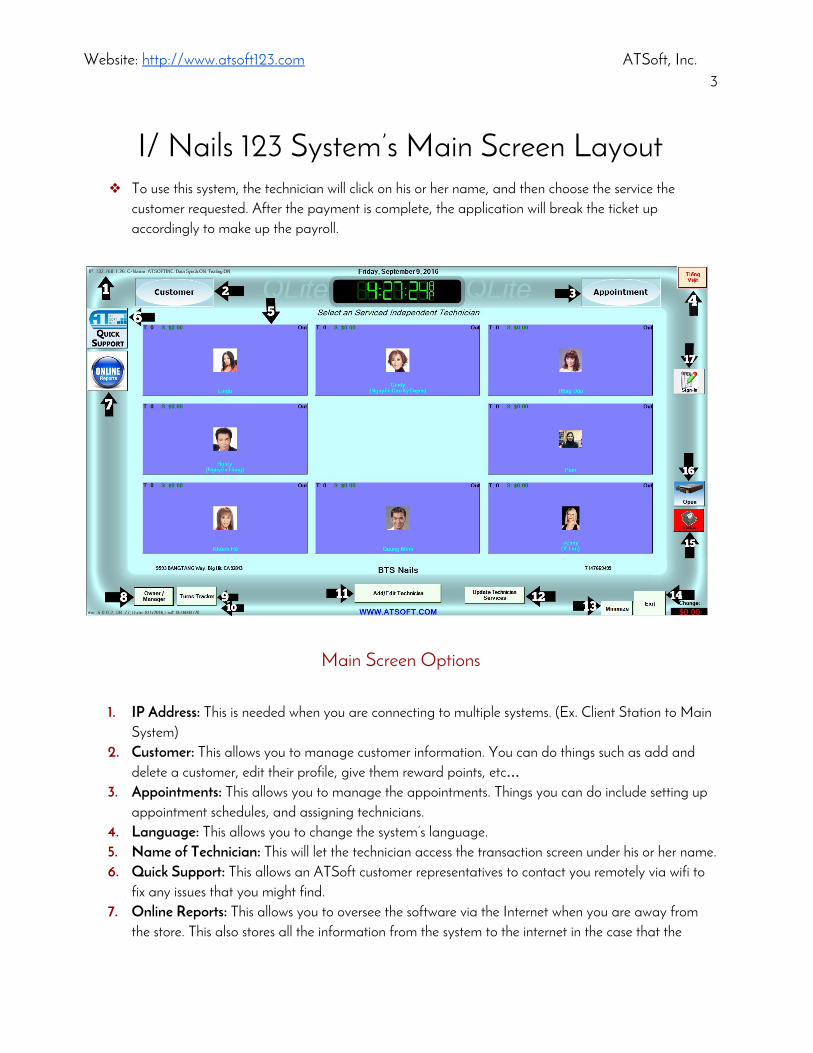
I/ Nails 123 System’s Main Screen Layout ❖ To use this system, the technician will click on his or her name, and then choose the service the
customer requested. After the payment is complete, the application will break the ticket up accordingly to make up the payroll.
Main Screen Options
1. IP Address: This is needed when you are connecting to multiple systems. (Ex. Client Station to Main
System) 2. Customer: This allows you to manage customer information. You can do things such as add and
delete a customer, edit their profile, give them reward points, etc… 3. Appointments: This allows you to manage the appointments. Things you can do include setting up
appointment schedules, and assigning technicians. 4. Language: This allows you to change the system’s language. 5. Name of Technician: This will let the technician access the transaction screen under his or her name. 6. Quick Support: This allows an ATSoft customer representatives to contact you remotely via wifi to
fix any issues that you might find. 7. Online Reports: This allows you to oversee the software via the Internet when you are away from
the store. This also stores all the information from the system to the internet in the case that the

Website: http://www.atsoft123.com ATSoft, Inc.
4
system crashes. (To have access to this extra component, a separate fee will be charge. Please contact ATSoft for more information.)
8. Owner/Manager: This is only accessible to the owner and manager (if you have one). This button is lock with a security code. Once inside the owner/manager will have access to ticket management, credit card history, store expenses, reports, and system set up. (The default code for the owner is 1234 and the manager is 0000).
9. Turns Tracker: This allows you to check the technicians’ turns. There are four options available for this.
10. System Number: This is the software’s license number. The ATSoft customer representative will need this number in order to verify your account for further support. Please keep this number for reference whenever you are calling in.
11. Add/Edit Technician: This will allow you to add, edit, delete, and set up a payroll for a technician. 12. Update Technician Services: This allows you to refresh the button’s status. 13. Minimize: This minimizes the Nails 123 software’s window to allow access to the desktop. 14. Exit: This will shut down the application. 15. Printer Status: This will turn red when there is an error. To fix this problem you can do several things:
a. Turn your printer off and then on again. b. Clearing out your printer. c. Clearing the queue.
16. Open Cash Drawer: This lets you open the cash drawer to give change. 17. Sign In: This allows customers to sign in. (This is a separate component. Please contact ATSoft for
more information.)

Website: http://www.atsoft123.com ATSoft, Inc.
5
II/Operating the System
Add/Edit Technicians
❖ To access this page, click on add/edit technician (Option 11 on the Main Screen). Then proceed to
enter the owner's security code (default is 1234) or the manager’s code (default is 0000).

Website: http://www.atsoft123.com ATSoft, Inc.
6
❖ Name: Contact Information
❖ Nickname: This will be the only name that shows up on the main screen if the display birth
name option is not selected. You must enter a nickname, however this does not necessary mean that it has to be
❖ a nickname, you can just enter your real name under this section. ❖ Birth Name: Just put your legal name here, this is in the case you have similar nicknames
and for payroll purposes. ❖ Address, City, State,Zip, and Phone: This info is optional, you do not need to input
anything in if you don’t want to. It is only for you to a have a record of your technician’s contact information. It is also used for payroll.
❖ Photo: Click on this if you would like to put a picture of your technician.If you would not like to do this just click no picture.
❖ No receipt: The selected technician will not be able to print receipts ❖ Display Birth Name: This allows you to see the legal name on the home page. ❖ Can not open cash register: This prevents the technician from opening the cash drawer
during a transaction. They must ask someone else to do it for them.

Website: http://www.atsoft123.com ATSoft, Inc.
7
❖ Work Schedule: This allows you to set up the days your employees can come in and whether or not they are taking appointments.
❖ Select the Work Day: This allows you to choose the days the technician will come in. ❖ Do not accepting appointment: This means that the technician is unable to take
appointments. It also means that this employee is the receptionist. ❖ Hair Salon Appointment View: This means that the technician also does hair, and will be
available on the hair appointment screen. ❖ Manager: Click this if the technician is also the manager. ❖ Birth: This is the employee’s birthday. ❖ Start: This shows the date the employee started working at the store. ❖ SSN: This is the technician’s social security number. ❖ Change Security Code: This allows you to change the technician’s security code. It is
recommended to use the last four digits of your ssn.

Website: http://www.atsoft123.com ATSoft, Inc.
8
❖ Work Hours: This allows you to set the employee’s hours.
❖ Set Default Hours: If they don’t have a certain number of hours they need to follow, you
can just click this to give them store hours.
❖ Contract: This allows you to set the employee’s pay agreement.
❖ 60%/40%: This is the default payment method. When you choose this contract, for every
ticket the technician will receive 60% of the payment, and you will receive 40%.For example, if the ticket is $10, you would take $4 and the technician would take $6.
❖ Other %: This similar to the 60%/40% except you would set a different percentage that the technician would get. For this one you would put the technician’s percentage down. So if you wanted 70 for the technician and 30 for you, you would put down 70.
❖ Salary or Rent Booth: This means that the technician will get paid a fixed salary or will pay to rent your booth. (Outside agreement)

Website: http://www.atsoft123.com ATSoft, Inc.
9
❖ Salary or 60%/40%: This means that if the technician makes more than the fixed salary, the whole entire pay will be split into 60%/40%. For example, if the technician’s salary is $800, and said technician made $900 then you would split the entire $900 into 60/40.
❖ Hourly Rate: This allows you to pay the employee by the hour. ❖ Salary or Other%: This is similar to the salary or 60%/40%, except you are able to choose
the percentage now. To choose the new percentage, just put down the percentage you want to give the technician. So if you want 45% you would put down 55.
❖ Product Sale Commission: This lets you choose the percent commission the technician gets if they sell a product.
❖ Payroll: This allows you to set the form of payment the employee will be receiving.
❖ By%: This type of payment is split between a check and another form of payment. The split
is based on a percentage. The percentage here represents the amount in the form of check. So you would put down the percent the technician wants as a check in here. For example, if the technician wanted to do half check and half other form of payment, you would put 50. If the employee wants 75 percent in check, then you put 75.
❖ By Fixed $: This is exactly like By%, the only difference is that you would choose the set amount in check. So instead of choosing a percentage, you would choose a monetary value. So if the technician wants to be paid $200 in check and the rest in another form, you would put 200 down.
❖ By Payment Type: This option lets you pay your technician by the payments they received. For example, if one of their customers paid by check, then you would pay them that same amount in check. If another customer paid by cash, then the technician would get paid that amount in cash and so on.
❖ Apply Credit Card Tips to Check: This lets you put the tips they earned from credit card payments onto their checks.
❖ Credit Card Tip Charge%: This allows you to take a certain percentage from tips if it was given by a credit card.
❖ Cash Borrowed: This is the amount of money the technician has borrowed from the cash drawer.

Website: http://www.atsoft123.com ATSoft, Inc.
10
Categories and Services
❖ To access the Categories and Services page, simply click on any of the technicians and it will take you to the ticket page. From there look at the bottom of the screen towards the middle and you should see Add/Edit Sales Item. Click on that button and it will direct you to the categories and services page.From there you must enter either the owner code (default:1234) or the manager code (default:0000).

Website: http://www.atsoft123.com ATSoft, Inc.
11
❖ To add a new category, simply click on button number 3 and then proceed to button number 5. To
add a new sale item/service click the on button number 4 and proceed with the following: ❖ Sale Item Display Information: This is where you will be adding your services.
❖ Name: This is where you will label your service or sale item. For example, a full set acrylic. ❖ Price: This is where you will give a price for your item. ❖ PC: Product Charge. This is where you will place the price for the products used in the set.
For example, nail polish. You will charge $2 dollars for nail polish so you’ll put a 2 in the PC box. This will make the overall price of the set $31.00 dollars. Between you and your technician, you will be splitting the $29.00 instead of $31.00 because $2.00 dollars will go towards the product charge. The customer will only know about the one price. If you choose to charge for a service, a C will show up in the corner of the service’s box.

Website: http://www.atsoft123.com ATSoft, Inc.
12
❖ Service, No Charge, Product, and Tanning: These four options allow you to decide the type of item your product is.
➢ Service: If you click on this, it means the item is a service. For example, a full set of nails. Once you click on this, the letter S will show up in the corner of the service’s box.
➢ Product: If you click on this, it means the item is a product. For example, nail polish or hair spray. Once you click this, the letter P will show up in the corner of the product box.
■ Commission Product: If the item is a product, you will also have the option of giving your employees a commission for selling it. You can only check this if the item is a product.
■ Set Inv. Product: If the item is a product, you can also click on this box so you can keep track of it in inventory.
➢ No Charge: If you click on this, it means you are not charging a price for a service/product. For example, removing nail polish. Nothing will show up in the corner of the box, showing that there’s no charge.
➢ Tanning: If you click on this, it means that the item is a tanning service. Once you click this, the letter T will show up in the corner of the product box.
❖ Work Time: This is how long the product will take. It will only show up in the turn tracker.

Website: http://www.atsoft123.com ATSoft, Inc.
13
Transactions
❖ To access the transaction screen, click on the technician that's handling the transaction.

Website: http://www.atsoft123.com ATSoft, Inc.
14
❖ How to do a Basic Transaction:
➢ Step 1 : Click on a technician that’s doing the sale to access the transaction screen. ➢ Step 2: Click on the type of service/category(Number 2) ➢ Step 3: Click on the sale item/service(Number 3) ➢ Step 4: Select Payment type(Number 4) ➢ Step 5: Complete Sale(Number 5)
❖ Selecting Payment Type: This section will show you how the different payments will work.

Website: http://www.atsoft123.com ATSoft, Inc.
15
❖ Cash: This allows you the customer to pay in cash. ❖ Credit Card: To accept credit cards, you would need a separate terminal. Here at AtSoft,
we offer integrated credit card readers. Please call to find out more. If you have your own terminal, do a separate transaction on your terminal and then proceed to enter the last four digits of the card into our system. This allows you to reference it for later.
➢ ❖ Gift Certificate: This allows the customer to pay using a gift card/certificate. If you’re
interested in creating some gift cards, please give us a call or take a look at the samples on our website.
❖ Check: This allows you to take a check as a form of payment. It will ask for the customer’s driver license and check number.
❖ No Charge: This allows you to waive the customer’s cost. To do this you would the need the owner/manager code. (Owner default: 1234 Manager Default:0000)
❖ Multiple Forms of Payment: If the customer has multiple forms of payment, please follow this order: Cash, Gift Card, Credit.

Website: http://www.atsoft123.com ATSoft, Inc.
16
❖ Selling OPI and Products: This section will show you how to sell a product.
❖ To access this page, click on sell OPI and Products(Number 8). ❖ Making a sale:
➢ Step 1: Click on the product ➢ Step 2: Click on Sale This.
❖ Button Information: ❖ Barcode: This is the product’s identification number. The only way to change it is to click on
edit barcode. ❖ Product Name: This is where you can label the product. It is what the product is. ❖ Location: This allows you to set up where the product will be around the store. For example,
you put the shampoos in closet. You would write closet under location. ❖ Price: This allows you to set the price of your product. ❖ Unit: This is basically how many products you’ll be selling under the same price. So for
example if I put two under unit for red polish, I would get 2 bottles for $6.00. ❖ Stocked: This is how much you originally have. So if you originally have fifteen pink polish,
then you would put 15 there. ❖ In-stocked: This is basically how much you have left after every sale. It will decrease
automatically.

Website: http://www.atsoft123.com ATSoft, Inc.
17
❖ Low-Limit: This works as a reminder for you to restock. You select when you want to be notified that you’re low on product. For example, if you pick ten, when the unstocked number drops to ten you will get a reminder to restock.
❖ INV-Item: By checking this, it will allow the system to put the item in inventory so you can check up on it. To access inventory, please go to Owner/Manager button on the main screen.
❖ Add Product: This allows you to add a new product. ❖ Edit Barcode: This allows you to change the product’s number. ❖ Delete Product: This allows you to delete a product. ❖ Sale Item: Click this to sell the product. ❖ Stock Count: This will let you print out the inventory for record keeping. ❖ Inventory Record and Points: This is just a printable list of your inventory.
❖ Sell Gift Card: This section will show you how to sell a gift card.
❖ To sell a gift card:

Website: http://www.atsoft123.com ATSoft, Inc.
18
➢ Step 1: Click on sell gift card in the transaction screen and you will see the screen above.
➢ Step 2: Either scan or manually input the barcode on the new gift card and then proceed to click enter.(Left Side of the screen)
➢ Step 3: Input the amount of money going into the card. (Right side) ➢ Step 4: Click Ok.
❖ Customer: This is how you will keep track of customers in your system.
❖ Selected By Name, Search by Phone#, and Not Selected Yet: These three options will
allow you to put a customer’s account in this box. ➢ Select By Name: This allows you to search the customer up by their name. ➢ Search By Phone#: This allows you to search the customer up by their phone#. ➢ Not Selected Yet: This allows you to set up a customer on the spot. If you click on
this you are putting them in your system. This screen will show up:

Website: http://www.atsoft123.com ATSoft, Inc.
19
■ ❖ Points Balance: This goes towards your rewards system if you choose to set one up. It will
show the how amount of points they have translated into money. (See Owner/Manger set-up for more information) When the customer has enough point balance to redeem a coupon or get a discount a screen like this will appear:

Website: http://www.atsoft123.com ATSoft, Inc.
20
➢ ❖ When at 10 Rewards, $10.00 off: This is another rewards program if you choose to set it
up. It works like a stamp card. Every time the customer visits and has their name in this section, the bar will automatically change on its own.
❖ A typical customer section would look like this:
➢

Website: http://www.atsoft123.com ATSoft, Inc.
21
Managing Customers
❖ To access this page, simply click on manage customers on the main screen.

Website: http://www.atsoft123.com ATSoft, Inc.
23
❖ How to Add a New Customer:
❖ Step 1: Click on Add New Customer to get to this page. ❖ Step 2: Add the customer's information. If you do not have all the information that’s okay,
all you really need is the name and both phone numbers. If they only have phone, just copy and paste.
❖ Step 3: At this time, also feel free to sign them up for the membership program if you have one.
❖ Favorite: If you would like to add them on as favorite, check the little box. ❖ Step 4: To finish up, click on apply to add the customer.

Website: http://www.atsoft123.com ATSoft, Inc.
24
❖ Customer Service Informations: This will let you learn more about what you can do with this section.
❖ 10 Rewards/$10 off: This automatically keeps tracks of how many visits a customer has and
if you set up a rewards system, every 10 visits will give the customer $10.00 off. ❖ Last Service Technician: This is also automatically set-up. It tells you who last served the
customer. ❖ Preferred Technician: This lets you see who the customer prefers so you can satisfy their
needs. ❖ Last Visit: This lets you see the last time your customer came to the store. ❖ Cust. Since: This lets you see how long they’ve been customers. ❖ # Visit: This lets you see how many times they have visited. ❖ Reward Points: This lets you see how many rewards point a customer has. Depending on
how you set up your rewards, a certain amount of points will qualify the customer for a discount.
❖ Total Spend: This is the total amount of money the customer has spent at your store.
❖ Membership Code: This allows you to register the customer in your rewards system. Just scan their card.
❖ VIP Code: This allows you to scan the membership card. ❖ Expire: This is when their membership will expire. It is up to you to choose. ❖ Extend: This will let you extend or basically renew their membership.

Website: http://www.atsoft123.com ATSoft, Inc.
25
❖ Invite Texting: This allows you to send out a mass texts to all of your customers. (This option is only available if you have our texting service.)
❖ This page lets you choose the customers you want to send the text too.

Website: http://www.atsoft123.com ATSoft, Inc.
26
❖ Here’s how to compose a select a message:
➢ Step 1: Compose a Message. Click on compose message and type away. ➢ Step 2: The message will now show up on the right-hand side. That message will
now stay there forever as a message template if you ever need to use it again. Anyways click on that message and then click select.
➢ Step 3: Click on start send and the software will send out the message to all the customers you selected from the last screen.

Website: http://www.atsoft123.com ATSoft, Inc.
27
Managing Appointments
❖ To access this page, click on the appointment button on the top right corner of the main screen.

Website: http://www.atsoft123.com ATSoft, Inc.
28
❖ How to Make an Appointment:
➢ Step 1: Based on the type of appointment it’s going to be click on the appropriate screen: Hair or Nails.
➢ Step 2: Select the technician the customer would want. And use your mouse to select the time of the appointment, then drag it to how long the appoint would take. For example, if the customer wants a haircut at 3PM and it takes half an hour. You would go under one of the technician’s name click on 3:00 PM and drag it to 3:30PM.
➢ Step 3: Next use the customer service box(Number 6) to write down anything the technician would need to know for the appointment.
➢ Texting Service: At this time, if you have our texting services, a message will be sent out to your customer, telling them you’re setting an appointment. You’re screen will show this:

Website: http://www.atsoft123.com ATSoft, Inc.
29
■ ❖ Appointment Utility Box: This section will break down the parts of the utility box for you.
➢ Locking and Unlocking: This helps out with the touch screen features of our system. Once you lock an appointment it simply means that you can’t move the appointment around the screen. This is great because no one can accidentally move your appointments somewhere else. If the appointment is unlock, you can move it around.
➢ Cut and Delete: These two options lets you cut and delete your appointments. The scissors means you are cutting the appointment, but you can paste it somewhere else. The X means you’re deleting the appointment for good.
➢ Copy: This lets you make a copy of the appointment, and paste it somewhere else.
➢ Print: This lets you print out a copy of your appointment.
➢ Status: This will let you update the status of the appointment. It could either be waiting, cancelled,servicing, reschedule,no show, etc…
➢ Extra Notes: This operates the same way the customer service box(number 6) works. You can put in extra notes in the appointment box.
➢ Services: Once you click on this, it lets you choose the service the customer is requesting to get done.
➢ Customer: This allows you to put the customer information down, if the customer is in your system. This is also how you’ll be able to send out the automatic messages.

Website: http://www.atsoft123.com ATSoft, Inc.
30
Texting Services
❖ What is it: ➢ Our system offers customer texting services. This allow you to send messages to customers
via the POS software. You can use it to send reminders, ask about cancellations, rescheduling or even for advertisement. If you would like to learn more about our service or even try it out, please give us a call.
❖ The Set-Up:
❖ In order to use the texting service, you must first setup your store’s texting account. To reach this
page click on text set-up on the appointment page(Number 13). Once you’re in there proceed to click on text account set-up.
➢ Texting Account: ■ Store Text Phone #: The phone number you put in here will be the number that will
receive all of the customers’ responses. ■ Account: This is your system’s license number. ■ Send Test: This allows you to send a out a fake text to make sure your phone is
connected to the system. ➢ Store Address Information: This is the information that will be used at the end of all text
messages sent toward the customers. It will let them know who sent them a text. ➢ Appointment Setting:

Website: http://www.atsoft123.com ATSoft, Inc.
31
■ Send confirmation to customers: If this is marked, it means that after an appointment is set, the customer will get a text sent to them regarding their appointment.
■ Sent text reminder: If this is marked, it means that a reminder text will be sent to the customer. You can choose how many hours before the appointment will a text be sent out.
■ Your Time Zone: This lets you adjust your clock and timer for sending text messages to the correct time zones.
■ Pop-Up message dialog after TEXT sent!: If this is marked, it simply means that every time a text is sent, a small screen will pop up confirming that the text has been sent.
❖ After setting up an account, you must now set up the message templates. These message templates
are text messages your customer can receive from you. ➢ 1. Marketing Messages: These messages are for group/mass text. They can be set up here or
in the manage customer section shown earlier. ➢ 2. Send Confirmation Messages: These messages are the ones send out after you placed an
appointment down.(automatic messages)

Website: http://www.atsoft123.com ATSoft, Inc.
32
➢ 3. Send Reminder Messages: These get sent out twice if you set it up that way. This messages is usually sent out with the confirmation messages so the customer can reply back. This message is the only message where a response from the customer is received. The customer can either confirm or cancel.(automatic messages)
➢ 4. Canceled Message: This message is sent out to confirm a cancellation of an appointment.(This you must sent out by yourself.)
➢ 5. Custom Message: This message allows you to send anything you want to the customer. (This must be sent out by yourself.)
➢ 6. Compose: You would click on this whenever you want to change your template. The template for all four would look something like this:
■ ■ Everything in between the brackets [] will change according to the information.
Everything else will remain the same. ➢ 7. Text Account Set-Up: This was how you would enter the account set-up page from earlier. ➢ 8. Close: You must click this whenever you make any changes, it is how the changes will be
saved.

Website: http://www.atsoft123.com ATSoft, Inc.
33
❖ How to Send Out a Message:
❖ This is how you sent out a normal message to the customer:
➢ Step 1: Click on the customer you would like to send the text messages to. ➢ Step 2: Click on text now and this screen will show up:

Website: http://www.atsoft123.com ATSoft, Inc.
34
■ ➢ Step 3: Pick out the message you would like to send. ➢ Step 4: This text sent message should pop up, confirming that that your message got
through. ❖ This is how to send a reminder text to all customers with an appointment.
➢ Step 1: Click on Text All Reminder and this screen will show up, just click yes to confirm:
■

Website: http://www.atsoft123.com ATSoft, Inc.
35
III/ Owner and Manager Setup ❖ To access the owner and manager section, click on the owner/manager button on the bottom left
corner of the main screen page. This button is protected by a security code and only accessible to the owner and manager. (The owner default is 1234 and the manager default is 0000.)
Ticket Screen
❖ This page lets the owner/manager manage all transactions and ticket sales. The manager can be
restricted on certain things based on the owner’s preference. (See set-up)
Website: http://www.atsoft123.com ATSoft, Inc.
37
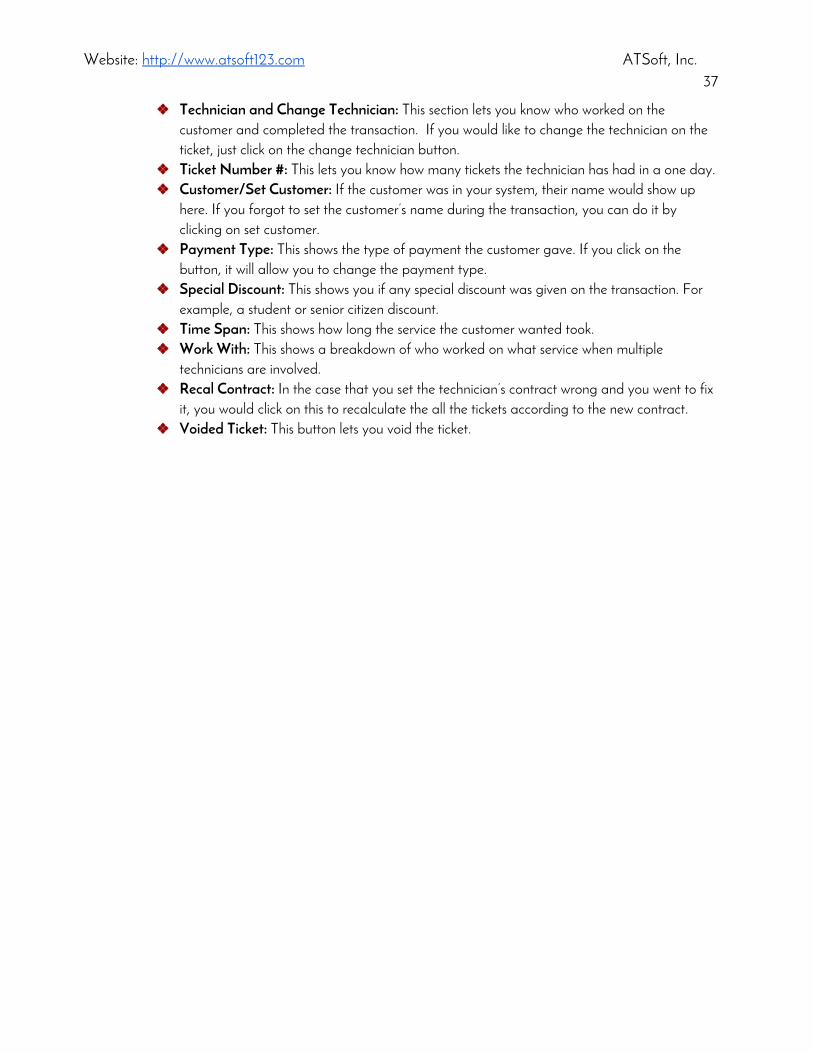
❖ Technician and Change Technician: This section lets you know who worked on the customer and completed the transaction. If you would like to change the technician on the ticket, just click on the change technician button.
❖ Ticket Number #: This lets you know how many tickets the technician has had in a one day. ❖ Customer/Set Customer: If the customer was in your system, their name would show up
here. If you forgot to set the customer’s name during the transaction, you can do it by clicking on set customer.
❖ Payment Type: This shows the type of payment the customer gave. If you click on the button, it will allow you to change the payment type.
❖ Special Discount: This shows you if any special discount was given on the transaction. For example, a student or senior citizen discount.
❖ Time Span: This shows how long the service the customer wanted took. ❖ Work With: This shows a breakdown of who worked on what service when multiple
technicians are involved. ❖ Recal Contract: In the case that you set the technician’s contract wrong and you went to fix
it, you would click on this to recalculate the all the tickets according to the new contract. ❖ Voided Ticket: This button lets you void the ticket.

Website: http://www.atsoft123.com ATSoft, Inc.
38
Credit Card
❖ To access the screen, you have go to the owner/manager button and then click on c-card. All the
buttons on this screen are accessible to both the owner and manager except close batch and detailed report which is only accessible to the owner.

Website: http://www.atsoft123.com ATSoft, Inc.
39
Expense
❖ To access this page, simply click on the the expense button after clicking on owner/manager on the
main screen. This page will helps you calculate and keep track of your expenses.

Website: http://www.atsoft123.com ATSoft, Inc.
40
❖ How to Record an Expense:
➢ Step 1: Select the category your expense is in. ➢ Step 2: Select the expense. ➢ Step 3: Enter the amount you spent.
❖ How to Add a Category/Expense: You do both the same way. ➢ Step 1: Select Add Category (number 8) or Add Sale Item (number 9) depending on what
you want to do. ➢ A box with the word no name will show up. ➢ Step 2: Go to the expense editing box and put down the name of the category or expense.

Website: http://www.atsoft123.com ATSoft, Inc.
41
Inventory
❖ To access this screen, click on owner/manager from the main screen, then proceed to click on
inventory. This is the same inventory as the one shown during the transaction section but with a few extra things.

Website: http://www.atsoft123.com ATSoft, Inc.
42
❖ How to Add a New Product:
➢ Step 1: Click on Add Product (number 14) ➢ Step 2: Next click on Edit Barcode. Enter the product’s identification number or scan it. ➢ Step 3: Now go to product name and enter the name. ➢ Step 4: Fill out the stock, unit, limit, inv, cm, and nt information. ➢ Step 5: Fill out a the location. ➢ Step 6: Click on save changes (number 18)

Website: http://www.atsoft123.com ATSoft, Inc.
43
Reports
❖ To access this screen click on report after clicking owner/manager from the main screen. This screen
will help keep track of everything related to your stores from employees to cost and expenses.

Website: http://www.atsoft123.com ATSoft, Inc.
44
❖ Total Sales: Here is what the page will look like:
❖ This page lets you see the combined amount of money all the technicians made. You can
view this by day, week, or month.

Website: http://www.atsoft123.com ATSoft, Inc.
45
❖ Sale Balance Adjustment: If you click on this it will allow you to balance out your total.
❖ Technician Report: Here is what this page looks like.
❖ This page lets you see the technicians tickets, the amount of money they made in services,
the amount in product, any extra costs, and tips. It also keeps track of commission.

Website: http://www.atsoft123.com ATSoft, Inc.
46
❖ Technician Payroll: Here is what this page looks like.
❖ This page shows you a pay breakdown for your technician based on what they made during
that day,week,or month. Payment is based on the contract you set up when you added them as an employee.
❖ Technician Service (Excel): Here is what this page looks like.
❖ This page carries a list of your employees and the amount of money they have made and
turns it into the salary amount. It also take in the factor of discounts. At the bottom, it also

Website: http://www.atsoft123.com ATSoft, Inc.
47
totals up the amount money in the different forms of payment. The page also keeps track of cash withdraws.
❖ Gift Certificate: Here is what this page looks like.
❖ This page lets you keep track of all the gift cards in your system. ❖ Alive Gift Card: If you check on this, it will show you all the alive gift cards that was used
and still has money in store in the time period that you selected. ❖ Dead Gift: If you check on this, it will show you all the gift cards that was used up in your
store in the time period that you selected. ❖ All Alive Gift: If you check on this, it will show all the gift cards that still have money in them. ❖ All Dead Gift: If you check on this, it will show all the gift cards that have been used up. ❖ Edit Card: This allows you to change the value of the gift card. You can add or take away
money. ❖ Delete: This lets you delete a gift card and remove it from you system’s record. ❖ Import/Export: This allows you to transfer gift card information to and from your system. ❖ Delete All Dead: This removes all the dead gift cards from your system. ❖ Delete All Expired: This removes all the expired gifts cards from your system. ❖ Set Lost or Stolen: If your customer lost his or her card or had it stolen, they can come here
and click on this. This will cancel the card so if anyone were to use the missing card, the system would reject it.

Website: http://www.atsoft123.com ATSoft, Inc.
48
❖ Service and Products: This is what this page looks like.
❖ This page keeps tracks of all the products you’ve sold and all the services given. In the
sidebar, you have the ability to separate this into different categories. ❖ Expense: This is what this page looks like:
❖ This page puts all of your expenses from the expense screen onto a printable list. You can
view everything together or in their separate categories.

Website: http://www.atsoft123.com ATSoft, Inc.
49
❖ Time Card: This is what this page looks like.
❖ This page helps you keep track of your employees’ time ins and time outs. If the employee is
paid by the hr, it will also tell you how much you need to pay the employee. ❖ Technician Year to Date: This is what this page looks like.
❖ This page gives you a detailed breakdown of your employee’s information and how his or
her payroll will work. It also gives information on tickets, services, commissions, and bonuses.

Website: http://www.atsoft123.com ATSoft, Inc.
50
Back Up
❖ To access this page, simply click on the backup button after clicking on owner/manager. This page
will let you backup your software so you can either clear or export information. Unlike the other pages, this page can only be access by the owner and no one else.
❖ Clean Up Disk Space:
➢ What we will get cleared out: When clearing out your software in here, everything will be gone besides the technicians, customers, and services/product. Other information that can stay depends on when you set the date.
➢ Date: The date is basically the ending point of where you’ll delete your information. When you clear your system, it will clear everything from that date and back. Any information after that date will be kept.
➢ Begin Clean-Up Disk Space: This deletes all information from the date and back besides the things mentioned above.
➢ Clean-Up Settled Credit Card Transaction: This just clears out credit card transactions from the date and back.
➢ Initialization (Begin Operations): After using the demo version or when you want to clear or restart your system, you can click on this to clear everything in your system except for the things mentioned above.

Website: http://www.atsoft123.com ATSoft, Inc.
51
Setup
❖ To access this page, simply click on setup after clicking on owner/manager from the main screen.
This screen allow you to customize your software setup to the way you would like.

Website: http://www.atsoft123.com ATSoft, Inc.
53
❖ System: This section lets you choose the payment options and the screen layout.
❖ Sound: This lets you decide whether or not you want to hear the system’s internal sound. ❖ Charge Sale Tax: This lets decide whether or not you want to charge a tax for your
products and services. ❖ Set Sales Tax: You would click on this to adjust your tax percentage. ❖ Accepting Returns: This lets you choose whether or not your system will be accepting
returns on products. ❖ Accepting Payment Types: This section lets you decide the type of payment you’ll be
accepting. ➢ Cash ➢ Credit Card: For credit cards, you can either use your own merchant terminal or AT
Soft's very own integrable system. For more information on ours, please feeling free to give us a call.
➢ Gift Certificate/Cards ➢ Checks: Customer paying with checks will need their driver’s license. ➢ No Charge: This option means the customer will not have to pay. This option is
security locked on the transaction screen. Only the manager and owner is allows to click on this button.
➢ Skipp CC#: This option only comes to play if you do not use our credit card terminals. If you don’t use our terminals , the system will always ask for the last four

Website: http://www.atsoft123.com ATSoft, Inc.
54
digits of the card for bookkeeping. If you don’t want to input the numbers you can click this to skip it.
➢ Skip Check #: This will allow you to skip the part where you have to enter the check number for a transaction.
➢ Skip License#: This will allow you to skip the part where you have to enter the customer’s driver license number during a check transaction.
➢ Gift as Cash: This means that every time someone uses a gift card to pay, the transaction will go under cash instead of gift card.
➢ No Tips: This means the customer can’t add a tip during the transaction. ➢ Manual CC: This allows you to hand type in the credit card information instead of
swiping the card. This is useful if they forget their card. You can only use this setting if your credit terminal is from us.
❖ User Screens Selection: This section lets you decide between two screens for your home screen. The first screen is the default one which shows all of your technicians on one page. The second one shows you your technician according to their specialty.
❖ Customer Discount: This section deals with the different forms of discounts a customer can get.
❖ $ Reward Points: This lets you decide the customer’s discount based on points. The first box
is how many points needed for a certain discount. The second box is how much those points will be worth. In the case of the screen above, 100 points means a five dollar discount. The little toolbox will let you decide how many points you’ll give for every dollar spent.
❖ When at #Visits then reward discount: This lets you decide the customer’s discount based on the number of visits. The first box lets you decide the number of visits the customer needs to qualify for the discount. The % box lets you give the discount by a percentage. The other box lets you give the discount by a certain set amount.

Website: http://www.atsoft123.com ATSoft, Inc.
55
❖ Printing Receipt For?: This section lets you decide when a receipt is being printed and how a receipt will look.
❖ Customer: Every time you print a receipt, it will print out the customer’s copy. ❖ Technician: Every time you print a receipt, a technician copy with the ticket breakdown will
also be printed. ❖ Owner: Every time you print a receipt, an owner copy will be printed out,the ticket
breakdown will also be included. ❖ Gift Card: This option will print a receipt specifically made for gift card purchases. ❖ Selectable: If this is selected, it will give you a choice of whether or not you want to print a
receipt per transaction. Two buttons will show up on the transaction screen. There will be a Complete Sale(No Print) and a Complete Sale(Print).
❖ Show Sub Total: This will show the customer the subtotal before taxes on their receipt. ❖ Do Not Print Tech Name: The receipt usually shows the name of the technician who
worked on the ticket but if you click this, it will remove the name. ❖ Combine Owner Print: This section relates to having multiple technicians working on one
customer. Normally, the owner would receive a ticket for each technician but if this is checked the software will combine everything on one receipt for the you.
❖ Copy Gift Card: This lets you print out a copy of the gift card receipt. ❖ Design Customer Receipt Layout: This lets you design the receipt template for your
customers. It very similar to the text message layout. Make sure to save your changes. ❖ Print Receipt Layout: This section is related to the design customer receipt layout. If you
made any changes in the sectioned mention, please make sure to click this button afterwards to confirm the change so your software can print out your receipts correctly.

Website: http://www.atsoft123.com ATSoft, Inc.
56
❖ More: This button shows up on both the customer discount and printing receipt for page. It will lead you to the screen down below. This screen deals with the extra settings of both of the sections mentioned above.
❖ Printing Receipt For:
➢ Print Customer Name: If the customer is in your system and you check this, the customer’s name will show up on the receipt.
➢ Don’t Ask Tips on Draft Print: If you click on this, there will not be a tip line on the draft receipt.
➢ Draft Print as Customer Receipt: This will let you a draft receipt and use it as the customer’s final receipt.
➢ Print Store Address First: This will just let you have the store address as the first thing on your receipt.
❖ Label Printer: This lets you connect to a printer so you so can print labels for your products. ❖ Gift Card Reward Point Counts: This section is concerning rewards and gift cards.
➢ Not count when Buy gift cards: This means that when a customer buys a gift card, the money used is not counted for points.
➢ Not count when PAY by gift cards: This means that when a customer pays for a transaction using a gift card, the money is not counted for points.
➢ Convert Reward $ to Gift Certificate: This lets you change the discount amount onto a gift card/certificate.
➢ Only reward the Set Amount each Time: This means that the customer is not allow to store up his/her points. They get the exact amount for a discount each time, no more no less.

Website: http://www.atsoft123.com ATSoft, Inc.
57
❖ Reports: ➢ Enter a reason when Void and Delete ticket: This makes the person write down
his/her reason for voiding or deleting. It will also help track of who is doing what. ➢ Reconcile Total Sale Report: This lets you rebalance your total sales when there is
an error with old or other stores’ gift cards. ❖ Apply Total Tip to Bonus: This lets you put down the technician tips as bonuses. ❖ Setting:
➢ Membership Card Subscription: This allows you to set up the rewards system for your software.
➢ Buffer “Save This” Option: This allows you to save a transaction before payment. It allows you to exit out of the transaction screen.
➢ Optimize to Full Turn: This part is for the turn tracker. It means that when you have two half turns, it will turn them into one turn.
➢ Not show “Online Report Button”: This will remove the online report button from your main screen. You can still access it using a internet browser.
➢ Auto Locked Appointment Item: This will locked all of your appointments automatically instead of you doing it yourself.
➢ Secure Unlocked Appointment Items:This will require you to enter the security code when you are trying to lock an appointment. It can only be unlocked using the owner/manager code. (Owner default is 1234 and manager default is 0000.)
➢ Secure Cash Payments: This is will require a security code for all cash transactions. It will only accept the owner/manager code. (Owner default is 1234 and manager default is 0000.)
➢ Suggested Tips: This lets you setup a suggested tip bar ranging from any three percentage you want.
❖ Other: For this section for any changes to go through, you must reset the software. ➢ Search Customer by Kit #: This is only if the customer has a custom kit for their
services. ➢ Employee Receipt Same as Customer: This will let the technician have the same
receipt as the customer. ➢ Owner Reciept Same as Customer: This will let the owner have the same receipt as
the customer. ➢ Autocompletion Sale (Cash): This will let the software finish the sale automatically if
the customer paid full in cash. ➢ No Autocompletion Sale (Credit, Gift, Check): This means that you will have to click
the complete sale button on your own, the system will not do it for you. ➢ Ask to Dividing Tips and Discounts: This is for when multiple technicians work on a
customer at a time. The system will ask you to divide tips, and how it will be split if their was a discount.
➢ Order Technician by Name: This puts the technician in alphabetical order. ➢ Receptionist Login Control: This options just helps better secure transactions and
protect your profits. It requires you to setup a receptionist for the store. Everyday the receptionist would have to sign in, so money can be accounted for. To begin the

Website: http://www.atsoft123.com ATSoft, Inc.
58
receptionist would have to count the money already made in the cash register at the beginning of the day and record it. From there the software will track it on its own. At the end of the day, the receptionist will recount the final amount. The software will then do calculations to see how much was made or how much was lost.
➢ Show Technician Paid Type: This will show the technician’s total sale by payment breakdown. For example, how much he/she made in cash, credit, and gift cards.
➢ Tanning As Cash Back: This just acts as a way to give cash back to the customer. Instead of charging for a service, the technician will just click on this, and give cash back when the customer using a credit card.
❖ Printers: This section will let you connect to your printers and fix any problems.
❖ Fix Printer Jam: This button will lead you to the print queue page. From there you’ll be able
to fix the problem. ❖ For Receipt: This will allow you to connect to your printer that will be printing out the
receipts. ❖ For Reports: This will allow you to connect to your printer that will print out your daily,
weekly, monthly, quarterly, and yearly reports.

Website: http://www.atsoft123.com ATSoft, Inc.
59
❖ Security: This section will let you set-up security codes and find forgotten ones.
❖ Technician Security On: This will require the technician to enter their security code before
they can enter a transaction. These codes can be set up in the Add/Edit technician page. However the owner or manager can always override this code. (Owner default is 1234 and manager default is 0000.)
❖ Security Lookup: This button will help you look up a technician’s security code if he/she forgets it. In order to do this, it first starts with the technician. When the screen ask for the code, the technician must hit the “Oops I forgot” button. From there a screen will show up with a fourteen digit code. The technician will then have to give that code to the owner/manager. The owner/manager will then go to this button and enter the code and then the system will pull up the technician’s security code.
❖ Change Owner Security Code: This button is only accessible to the owner. It will let you change the owner security code. (If you forget your own, then please call ATSoft and we will retrieve it for you.)
❖ Change Manager Security Code: This button can be access by both the owner and manager. It will let you change the manager’s security code.
❖ Manager Options: This button is only accessible to the owner. It lets you decide what the manager can and cannot do.

Website: http://www.atsoft123.com ATSoft, Inc.
60
❖ Begin Day of the Week and Payroll Periods: This lets you decided when the week will begin and if you want to do payroll every two weeks.
❖ Store Business Information: This section carries your basic store information.
❖ Store Address Information: This lets you input all of your store’s information including
address, contact number, and email. ❖ 123 System License Number: This is just your software’s license number. You will need this
number when calling in for customer support so that our representatives can ensure that you are one of our customers.
❖ Technicians: This section can let you choose what you can and can not see about a technician.
❖ Display Services Info.: This will let you see the amount of turns and service money the
technician received in the their box on the main screen.

Website: http://www.atsoft123.com ATSoft, Inc.
61
❖ Do Not Show at POS: This will remove the turn and service information from the technician
bar in the transaction screen.
→
❖ Display Contract Info: This is related to the owner and technician receipts. This will put the technician’s contract on the receipt so you are able to see the pay breakdown for each ticket.
❖ Don’t Deduct Tip From Cash: This means that the amount of money made from services
will include tips.

Website: http://www.atsoft123.com ATSoft, Inc.
62
❖ Open Cash Drawer: This section lets you choose where you can use the cash drawer.
❖ User Screen: This is the main screen page.
➢ Show Button: This lets the cash drawer button appear the main screen. You can use this to access the cash drawer from outside the transaction screen.
➢ Security: This puts a security code on the cash drawer. This requirement is just for the drawer on the main screen. You must use the owner/manager code to access it. (Owner default is 1234 and manager default is 0000.)
❖ POS Screen: This is the transaction screen. ➢ Show Button: This lets the cash drawer button on appear on the transaction screen.
This is completely separate from when the cash drawers open on the transaction. ➢ Security: This puts a security code on the drawer. You must use the owner/manager
code to access it. (Owner default is 1234 and manager default is 0000.) ❖ No Cash Drawer: This means that there is no cash drawer available.

Website: http://www.atsoft123.com ATSoft, Inc.
63
❖ Misc: This section deals with the actual transaction process itself.
❖ Security Discount: This will require you to enter the owner/manager code whenever a
discount it being given. (Owner default is 1234 and manager default is 0000) ❖ Don’t Ask Discounter: This deals with the discount default below. Usually when you give a
discount, the discounter screen will pop up and ask which type you would like to do but if this is activated, it will just go with the default.
❖ Cent Keypad: This will put the cent option of your keypad, so you won’t have to manually click on .00.
❖ Print Draft: This lets you print out draft receipts.
❖ Discount Default: This section lets you decide how the money will be divided if a discount was given.
❖ Owner and Tech: This is the basic contract split. It means that the money will be splitting
according to the contract based on the after discount price. For example, the original price is $15.00 but the new discounted price is $10.00, and the contract is 60/40, you would split it to $6 and $4.
❖ Owner Only: This means that the discount will only affect the owner’s cut of the split. For example, the service is $30 but the owner gave a $10 discount making the new total $20. The technician’s pay cut if unaffected by this, he/she will still receive the %60 cut form the $30, so the tech would still receive $18. The owner however will only get $2 because he/she gave $10 away on the discount.

Website: http://www.atsoft123.com ATSoft, Inc.
64
❖ Tech Only: This means that the discount will only affect the tech’s cut from the split. This works exactly the same as owner only but in reversed with the tech being affected instead.
❖ VN Discount: This is the vietnamese discount. For more information, please give our store a call.
❖ Setup: This lets you decide which type of discount is allowed and whether or not discounts are allowed at all.
❖ Other Selling: This section lets you decide what type of gift cards the store will be taking.
❖ Accepting Gift Cert. from other stores: This means you’ll be accepting gift cards from any
other store. ❖ Not Accepting Old Gift: This means your store will not be accepting old gift cards(dead
ones). ❖ Allow Cash Advance: This allows the technician to borrow money before payday.

Website: http://www.atsoft123.com ATSoft, Inc.
65
❖ Turn Tracker: This screen lets you decided which turn tracker you’ll be using. You can use multiple trackers at a time. It will help you keep track your employee’s turns. The page below is what will show up after you click on the button (Number 14).
❖ Even Turn Tracking: This is the simplest tracker of the four we offer. It also updates
automatically. With this tracker, every transaction is considered a turn. It shows the employee in the order of who made the least to the most money.
➢ Show Turn $: This shows you the amount of money made on each turn. ❖ Manual Turn Setting: This turn tracker allows you to manually track everything.
➢ In order to use this tracker, the technician must first sign-in.
➢ Click on this everytime something new is added to ensure that everything is up to date.
➢ This removes the selected technician from the turn sheet.

Website: http://www.atsoft123.com ATSoft, Inc.
66
➢ This removes everything from the turn tracker. Use this when you’re starting a new day.
➢ This removes the selected technician's turns.
➢ This just closes the the turn tracker screen.
➢ This means half a turn. If you click on this it just means that the technician only did half a turn.
➢ This means a full turn. If you click on this it just means that the technician completed one full turn.
➢ This means half a turn on a manicure. If you click on this, it means that the manicure the technician worked on is worth just half a turn.
➢ This means half a turn on a filling. If you click on this, it means that the filling the technician worked on is worth just half a turn.
➢ : This means half a turn on a pedicure refresh. If you click on this, it means that the pedicure refresh the technician worked on is worth just half a turn.
❖ Services $ Turn Tracking: This tracker is similar to the even turn tracking, the only difference
is that it tracks the turn by a set of amount of money. You would get to decided this amount and every time a technician makes that amount it counts as a turn. For example, if a one turn is $20 and then tech made $60, that would be three turns. This also updates automatically.
❖ Ticket Turn Tracking: This turn tracker involves a bit of the service $ turn tracking and is also automatic. Like the service $ turn tracking, you decide the set amount for a turn. However with this turn tracker, once the technician hits this amount their name drops to the bottom of the list. This works out because it lets you know who is next on the list for a customer.
➢ Auto Register Ticket-Turn when Log In (In/Out):This means that the technician is automatically put in the tracker once they sign in.
➢ Take Turn Mode: This means that you will use the tracker manually instead of automatically.
➢ Dual Screen: This allows you to use the tracker on a second screen if you have a second monitor.

Website: http://www.atsoft123.com ATSoft, Inc.
67
❖ Show User Ticket#: This is will show you the ticket number instead of the turn number. ❖ Show User Service $: This works with the very first turn tracker. It shows the amount of
money made on every turn. ❖ Security User Tracker: This puts a security code on the tracker button. It can only be
unlocked by the owner/manager. (Owner default is 1234 and manager default is 0000.) ❖ Disable Change Payment Type: This means that once the transaction goes through, you
are unable to change the payment type. ❖ Text Message: This is the same as the texting services section above. Please go to that page to learn
more about our messaging service.
❖ Appointment Store Hours: This section will let you set up your store hours.
❖ Select the Work Day: This lets you select the days the store will be open and operating. ❖ Title Schedule: This lets you decide the types of appointments screens and menus you’ll be
having. ❖ Mon-Sun: This is where you would set your store hours.

Website: http://www.atsoft123.com ATSoft, Inc.
68
❖ Tickets: This lets you decide whether or not you want the technician tickets to restart everyday or be continuous.
❖ Timesheet: This lets you set up timesheets for your employees.
❖ Login Time: This lets you activate the time sheets. If this is on, the time in and out buttons
will show up on the transaction screen. ❖ Ticket Timer: This lets you time how long the service was. ❖ Print In/Out Receipt: This lets you print out the timesheet for your records.
Website: http://www.atsoft123.com ATSoft, Inc.
69
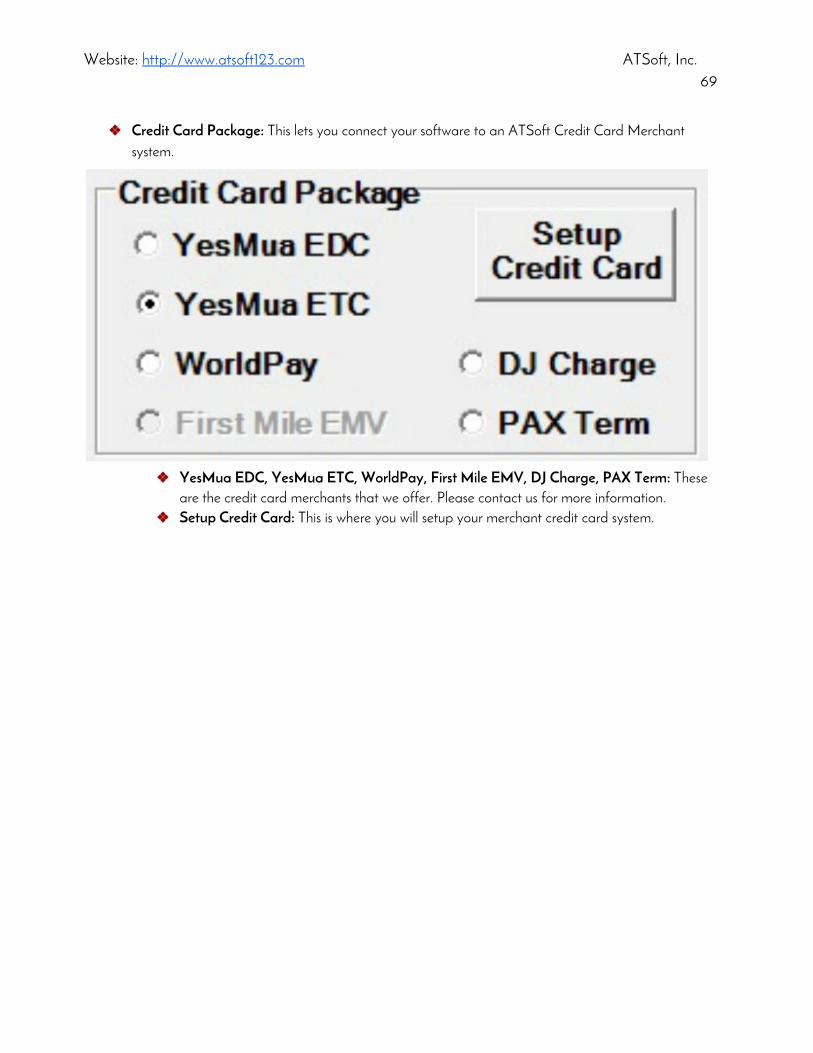
❖ Credit Card Package: This lets you connect your software to an ATSoft Credit Card Merchant system.
❖ YesMua EDC, YesMua ETC, WorldPay, First Mile EMV, DJ Charge, PAX Term: These
are the credit card merchants that we offer. Please contact us for more information. ❖ Setup Credit Card: This is where you will setup your merchant credit card system.

Website: http://www.atsoft123.com ATSoft, Inc.
70
❖ Advance Setup: This section lets you design the look of your software. To access the page below, simply click on the button. If you make any changes, you must restart the software in order for the system to update.
❖ Tables: This option only works on our Food123 POS. ❖ Button Color Configuration: This is where you get to decide the colors that will on your
Button Color Configuration bar. ❖ POS Menu: This is where you will get to design your transaction screen.
➢ Categories: This is where you will create the look for all category buttons. ■ Pages: This will let you decide how many pages of rows you’ll have for the
category section. ■ Rows: This lets you how many categories you can have. ■ Dropdown Bar: This lets you decide where the font will be placed on the
box. ■ Font Button: This is where you will decide the font and size of the wording.

Website: http://www.atsoft123.com ATSoft, Inc.
71
■ Text: This is where you’ll be able to see a sample of what your design will look like.
➢ Menu Items: This is where you will get to design your services and product boxes. ■ Pages: This lets you decide how many pages of services you’ll have. ■ Row/Column: This lets you decide the grid of your services and how many
services you can have on you page. ■ Dropdown Bar: This lets you decide where the font will be placed on the
box. ■ Font Button: This is where you will decided the font and size of the wording. ■ Text: This is where you’ll be able to see a sample of what your design will
look like. ➢ English/More: This is where you can choose the language for your software. ➢ Enable Product Labor: This lets you charge for a product and its labor fees. ➢ Enable Help Button: This lets you enable help buttons on the software. They look
like mini question marks. When you click on them it will tell you what each button does in the case that you forget.
➢ Other Income: This is for any other source of income you might have. For example, if you are renting out room in your facility, you can add that to your total;
➢ Credit Card System: This is what will let you connect to a credit card merchant system.
➢ Secure Customer Information: This will remove the customer’s information on the appointment screen. This way the customer’s information can be protected. For a technician to view the information, they must enter their own security code. (The owner/manager code will override all codes.
➢ Customer Profile: This lets you add a customer profile to the customer section. It will let you have more information on your customer.
➢ Customer Sign-in: This is a now a separate component for our software. For more information, please give ATSoft a call.
➢ Inventory Control: This allows you to activate the inventory setting. ➢ Old Appointment: This will save all of your customers’ appointments. ➢ Show Logo: This allows you to change the logo that is on the corner of the
transaction screen. ➢ Stations/Timers: This section lets you choose how often your system updates, and
lets you manage multiple stations at a time. ■ Multi-Stations Mode: This means you have multiple stations working at a
time. ■ Station #: This is where you put what station number that station is. ■ Update Time: This is where you can choose when your system updates.
● Customer Sign-In: This lets you decide how long before your softwares updates the sign-in list for customers.
● Appointments: This lets you decide how long before your appointment screen will update.

Website: http://www.atsoft123.com ATSoft, Inc.
72
■ Set Default: This lets you reset the whole entire advanced set-up screen and everything that it affects.
❖ Lottery Ticket Winner: This lets you set-up a system where the customer can get a random discount.
❖ Enable Ticket Lottery: This sets up the button. ❖ Ticket Count: This lets you decide how many tickets it will take before a reward will be
given. ❖ Win: This lets you decided the amount of money the customer will receive. ❖ Current Tickets Count: This will update automatically. It lets you keep track of the number
of tickets made.