ASP.NET Web Pages With Razor Syntax
270
ASP.NET Web Pages Using the Razor Syntax Microsoft® ASP.NET Web Pages is a free Web development technology that is designed to deliver the world's best experience for Web developers who are building websites for the Internet. This book provides an overview of how to create dynamic Web content using ASP.NET Web Pages with the Razor syntax. Last update: 20 May 2011 Note To get the complete sample code for this book, go to the Microsoft Download Center. Contents Chapter 1 – Getting Started with WebMatrix and ASP.NET Web Pages ................................................5 What is WebMatrix? ................................................................................................................................................. 5 Installing WebMatrix ................................................................................................................................................. 5 Getting Started with WebMatrix ............................................................................................................................... 6 Creating a Web Page ................................................................................................................................................. 9 Installing Helpers with the Administration Tool ......................................................................................................12 Using ASP.NET Web Pages Code ............................................................................................................................. 17 Programming ASP.NET Razor Pages in Visual Studio .............................................................................................. 19 Creating and Testing ASP.NET Pages Using Your Own Text Editor .....................................................................21 Chapter 2 – Introduction to ASP.NET Web Programming Using the Razor Syntax ............................... 23 The Top 8 Programming Tips ...................................................................................................................................23 HTML Encoding ................................................................................................................................................... 24 HTTP GET and POST Methods and the IsPost Property....................................................................................... 29 A Simple Code Example ...........................................................................................................................................29 Basic Programming Concepts ..................................................................................................................................31 Classes and Instances..........................................................................................................................................32 Language and Syntax ............................................................................................................................................... 33 Additional Resources ............................................................................................................................................... 53 Chapter 3 – Creating a Consistent Look ............................................................................................. 54 Creating Reusable Blocks of Content ...................................................................................................................... 54 Creating a Consistent Look Using Layout Pages ......................................................................................................57 Designing Layout Pages That Have Multiple Content Sections ............................................................................... 60 Making Content Sections Optional .......................................................................................................................... 63 Passing Data to Layout Pages ..................................................................................................................................64 Creating and Using a Basic Helper ........................................................................................................................... 68
Transcript of ASP.NET Web Pages With Razor Syntax

ASP.NET Web Pages Using the Razor Syntax
Microsoft® ASP.NET Web Pages is a free Web development technology that is designed to deliver the
world's best experience for Web developers who are building websites for the Internet. This book
provides an overview of how to create dynamic Web content using ASP.NET Web Pages with the Razor
syntax.
Last update: 20 May 2011
Note To get the complete sample code for this book, go to the Microsoft Download Center.
Contents
Chapter 1 – Getting Started with WebMatrix and ASP.NET Web Pages ................................................5
What is WebMatrix? ................................................................................................................................................. 5
Installing WebMatrix ................................................................................................................................................. 5
Getting Started with WebMatrix ............................................................................................................................... 6
Creating a Web Page ................................................................................................................................................. 9
Installing Helpers with the Administration Tool ...................................................................................................... 12
Using ASP.NET Web Pages Code ............................................................................................................................. 17
Programming ASP.NET Razor Pages in Visual Studio .............................................................................................. 19
Creating and Testing ASP.NET Pages Using Your Own Text Editor ..................................................................... 21
Chapter 2 – Introduction to ASP.NET Web Programming Using the Razor Syntax ............................... 23
The Top 8 Programming Tips ................................................................................................................................... 23
HTML Encoding ................................................................................................................................................... 24 HTTP GET and POST Methods and the IsPost Property ....................................................................................... 29
A Simple Code Example ........................................................................................................................................... 29
Basic Programming Concepts .................................................................................................................................. 31
Classes and Instances.......................................................................................................................................... 32
Language and Syntax ............................................................................................................................................... 33
Additional Resources ............................................................................................................................................... 53
Chapter 3 – Creating a Consistent Look ............................................................................................. 54
Creating Reusable Blocks of Content ...................................................................................................................... 54
Creating a Consistent Look Using Layout Pages ...................................................................................................... 57
Designing Layout Pages That Have Multiple Content Sections ............................................................................... 60
Making Content Sections Optional .......................................................................................................................... 63
Passing Data to Layout Pages .................................................................................................................................. 64
Creating and Using a Basic Helper ........................................................................................................................... 68

Additional Resources ............................................................................................................................................... 70
Chapter 4 – Working with Forms ...................................................................................................... 71
Creating a Simple HTML Form ................................................................................................................................. 71
Reading User Input From the Form ......................................................................................................................... 72
HTML Encoding for Appearance and Security ..................................................................................................... 74
Validating User Input ............................................................................................................................................... 75
Restoring Form Values After Postbacks .................................................................................................................. 76
Additional Resources ............................................................................................................................................... 78
Chapter 5 – Working with Data ......................................................................................................... 79
Introduction to Databases ....................................................................................................................................... 79
Relational Databases .......................................................................................................................................... 79
Creating a Database ................................................................................................................................................ 80
Adding Data to the Database .................................................................................................................................. 81
Displaying Data from a Database ............................................................................................................................ 82
Structured Query Language (SQL)....................................................................................................................... 84
Inserting Data in a Database ................................................................................................................................... 85
Updating Data in a Database ................................................................................................................................... 88
Deleting Data in a Database .................................................................................................................................... 93
Connecting to a Database ................................................................................................................................... 96
Additional Resources ............................................................................................................................................... 97
Chapter 6 – Displaying Data in a Grid ................................................................................................ 99
The WebGrid Helper ................................................................................................................................................ 99
Displaying Data Using the WebGrid Helper............................................................................................................. 99
Specifying and Formatting Columns to Display ..................................................................................................... 101
Styling the Grid as a Whole ................................................................................................................................... 103
Paging Through Data ............................................................................................................................................. 105
Additional Resources ............................................................................................................................................. 106
Chapter 7 – Displaying Data in a Chart ............................................................................................ 107
The Chart Helper ................................................................................................................................................... 107
Creating a Chart from Data ................................................................................................................................... 109
"Using" Statements and Fully Qualified Names ................................................................................................ 115
Displaying Charts Inside a Web Page .................................................................................................................... 116
Styling a Chart ....................................................................................................................................................... 117
Saving a Chart ........................................................................................................................................................ 118
Additional Resources ............................................................................................................................................. 124
Chapter 8 – Working with Files ....................................................................................................... 125
Creating a Text File and Writing Data to It ............................................................................................................ 125
Appending Data to an Existing File ........................................................................................................................ 128
Reading and Displaying Data from a File ............................................................................................................... 129

Displaying Data from a Microsoft Excel Comma-Delimited File ....................................................................... 131
Deleting Files ......................................................................................................................................................... 131
Letting Users Upload a File .................................................................................................................................... 133
Letting Users Upload Multiple Files....................................................................................................................... 136
Additional Resources ............................................................................................................................................. 138
Chapter 9 – Working with Images ................................................................................................... 139
Adding an Image to a Web Page Dynamically ....................................................................................................... 139
Uploading an Image .............................................................................................................................................. 141
About GUIDs ..................................................................................................................................................... 144
Resizing an Image .................................................................................................................................................. 144
Rotating and Flipping an Image ............................................................................................................................. 146
Adding a Watermark to an Image ......................................................................................................................... 147
Using an Image As a Watermark ........................................................................................................................... 149
Additional Resources ............................................................................................................................................. 150
Chapter 10 – Working with Video ................................................................................................... 151
Choosing a Video Player ........................................................................................................................................ 151
MIME Types ...................................................................................................................................................... 152
Playing Flash (.swf) Videos .................................................................................................................................... 152
Playing MediaPlayer (.wmv) Videos ...................................................................................................................... 155
Playing Silverlight Videos ....................................................................................................................................... 157
Additional Resources ............................................................................................................................................. 158
Chapter 11 – Adding Email to Your Website .................................................................................... 159
Sending Email Messages from Your Website ........................................................................................................ 159
Sending a File Using Email ..................................................................................................................................... 162
Additional Resources ............................................................................................................................................. 164
Chapter 12 – Adding Search to Your Website .................................................................................. 165
Searching from Your Website ......................................................................................................... 165
Additional Resources ............................................................................................................................................. 167
Chapter 13 – Adding Social Networking to Your Web Site ................................................................ 168
Linking Your Website on Social Networking Sites ................................................................................................. 168
Adding a Twitter Feed ........................................................................................................................................... 169
Rendering a Gravatar Image.................................................................................................................................. 171
Displaying an Xbox Gamer Card ............................................................................................................................ 172
Displaying a Facebook "Like" Button ..................................................................................................................... 173
Additional Resources ............................................................................................................................................. 175
Chapter 14 – Analyzing Traffic ........................................................................................................ 176
Tracking Visitor Information (Analytics) ................................................................................................................ 176
Chapter 15 – Caching to Improve the Performance of Your Website ................................................ 179
Caching to Improve Website Responsiveness ....................................................................................................... 179

Additional Resources ............................................................................................................................................. 181
Chapter 16 – Adding Security and Membership ............................................................................... 182
Introduction to Website Membership .................................................................................................................. 182
Creating a Website That Has Registration and Login Pages .................................................................................. 183
Creating a Members-Only Page ............................................................................................................................. 187
Creating Security for Groups of Users (Roles) ....................................................................................................... 188
Creating a Password-Change Page ........................................................................................................................ 190
Letting Users Generate a New Password .............................................................................................................. 191
Preventing Automated Programs from Joining Your Website .............................................................................. 195
Additional Resources ............................................................................................................................................. 197
Chapter 17 – Introduction to Debugging ......................................................................................... 198
Using the ServerInfo Helper to Display Server Information .................................................................................. 198
Embedding Output Expressions to Display Page Values ....................................................................................... 200
Using the ObjectInfo Helper to Display Object Values .......................................................................................... 203
Using Debugging Tools .......................................................................................................................................... 205
Additional Resources ............................................................................................................................................. 207
Chapter 18 – Customizing Site-Wide Behavior ................................................................................. 208
Adding Website Startup Code ............................................................................................................................... 208
Running Code Before and After Files in a Folder................................................................................................... 212
Creating More Readable and Searchable URLs ..................................................................................................... 218
Additional Resources ............................................................................................................................................. 220
Appendix – ASP.NET Quick API Reference ....................................................................................... 221
Classes ................................................................................................................................................................... 221
Data ....................................................................................................................................................................... 228
Helpers .................................................................................................................................................................. 229
Appendix – ASP.NET Web Pages Visual Basic .................................................................................. 236
The Top 8 Programming Tips ................................................................................................................................. 236
HTML Encoding ................................................................................................................................................. 237 HTTP GET and POST Methods and the IsPost Property ..................................................................................... 242
A Simple Code Example ......................................................................................................................................... 242
Visual Basic Language and Syntax ......................................................................................................................... 244
Additional Resources ............................................................................................................................................. 263
Appendix – Programming ASP.NET Web Pages in Visual Studio ....................................................... 264
Why Use Visual Studio? ......................................................................................................................................... 264
Installing the ASP.NET Razor Tools ........................................................................................................................ 264
Using the ASP.NET Razor Tools for Visual Studio .................................................................................................. 265
Disclaimer ...................................................................................................................................... 270

ASP.NET Web Pages Using The Razor Syntax Chapter 1 – Getting Started with WebMatrix and ASP.NET Web Pages 5
Chapter 1 – Getting Started with WebMatrix and ASP.NET Web Pages
This chapter introduces Microsoft WebMatrix, a free web development technology that delivers the
world's best experience for web developers.
What you'll learn
What is WebMatrix? How to install WebMatrix. How to get started creating a simple website using WebMatrix. How to create a dynamic web page using WebMatrix. How to program your web pages in Visual Studio to take advantage of more advanced features.
What is WebMatrix?
WebMatrix is a free, lightweight set of web development tools that provides the easiest way to build
websites. It includes IIS Express (a development web server), ASP.NET (a web framework), and SQL
Server Compact (an embedded database). It also includes a simple tool that streamlines website
development and makes it easy to start websites from popular open source apps. The skills and code
you develop with WebMatrix transition seamlessly to Visual Studio and SQL Server.
The web pages that you create using WebMatrix can be dynamic—that is, they can alter their content or
style based on user input or on other information, such as database information. To program dynamic
Web pages, you use ASP.NET with the Razor syntax and with the C# or Visual Basic programming
languages.
If you already have programming tools that you like, you can try the WebMatrix tools or you can use
your own tools to create websites that use ASP.NET.
This chapter shows you how WebMatrix makes it easy to get started creating websites and dynamic web
pages.
Installing WebMatrix
To install WebMatrix, you can use Microsoft’s Web Platform Installer, which is a free application that
makes it easy to install and configure web-related technologies.
1. If you don't already have the Web Platform Installer, download it from the following URL:
http://go.microsoft.com/fwlink/?LinkID=205867

ASP.NET Web Pages Using The Razor Syntax Chapter 1 – Getting Started with WebMatrix and ASP.NET Web Pages 6
2. Run the Web Platform Installer, select Spotlight, and then click Add to install WebMatrix.
Note If you already have a WebMatrix Beta version installed, the Web Platform Installer upgrades
the installation to WebMatrix 1.0. However, sites you created with earlier Beta editions might not
appear in the My Sites list when you first open WebMatrix. To open a previously created site, click
the Site From Folder icon, browse to the site, and open it. The next time you open WebMatrix, the
site will appear in the My Sites list.
Getting Started with WebMatrix
To begin, you'll create a new website and a simple web page.
1. Start WebMatrix.

ASP.NET Web Pages Using The Razor Syntax Chapter 1 – Getting Started with WebMatrix and ASP.NET Web Pages 7
2. Click Site From Template. Templates include prebuilt files and pages for different types of websites.

ASP.NET Web Pages Using The Razor Syntax Chapter 1 – Getting Started with WebMatrix and ASP.NET Web Pages 8
3. Select Empty Site and name the new site Hello World. 4. Click OK. WebMatrix creates and opens the new site.
At the top, you see a Quick Access Toolbar and a ribbon, as in Microsoft Office 2010. At the
bottom left, you see the workspace selector, which contains buttons that determine what
appears above them in the left pane. On the right is the content pane, which is where you view
reports, edit files, and so on. Finally, across the bottom is the notification bar, which displays
messages as needed.
ASP.NET Web Pages Using The Razor Syntax Chapter 1 – Getting Started with WebMatrix and ASP.NET Web Pages 9
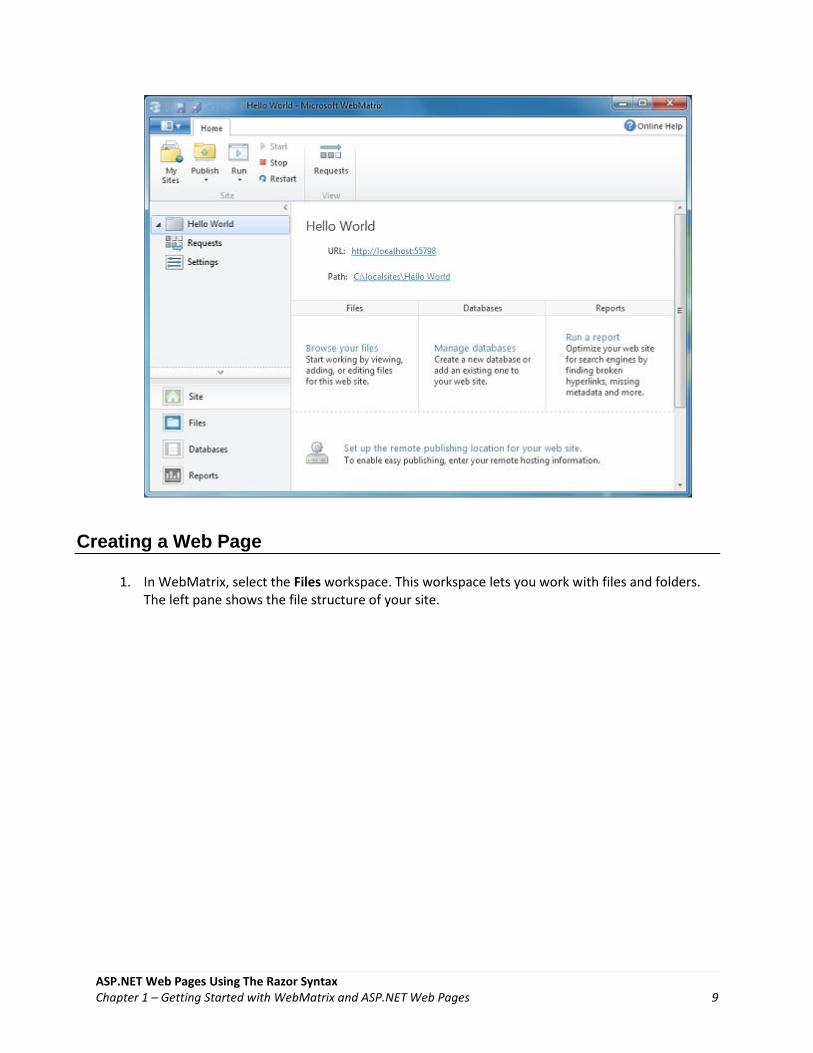
Creating a Web Page
1. In WebMatrix, select the Files workspace. This workspace lets you work with files and folders. The left pane shows the file structure of your site.

ASP.NET Web Pages Using The Razor Syntax Chapter 1 – Getting Started with WebMatrix and ASP.NET Web Pages 10
2. In the ribbon, click New and then click New File.
WebMatrix displays a list of file types.

ASP.NET Web Pages Using The Razor Syntax Chapter 1 – Getting Started with WebMatrix and ASP.NET Web Pages 11
3. Select CSHTML, and in the Name box, type default.cshtml. A CSHTML page is a special type of page in WebMatrix that can contain the usual contents of a web page, such as HTML and JavaScript code, and that can also contain code for programming web pages. (You'll learn more about CSHTML files later.)
4. Click OK. WebMatrix creates the page and opens it in the editor.
As you can see, this is ordinary HTML markup.
5. Add the following title, heading, and paragraph content to the page:
<!DOCTYPE html> <html lang="en"> <head> <meta charset="utf-8" /> <title>Hello World Page</title>

ASP.NET Web Pages Using The Razor Syntax Chapter 1 – Getting Started with WebMatrix and ASP.NET Web Pages 12
</head> <body> <h1>Hello World Page</h1> <p>Hello World!</p> </body> </html>
6. In the Quick Access Toolbar, click Save.
7. In the ribbon, click Run.
Note Before you click Run, make sure that the web page you want to run is selected in the
navigation pane of the Files workspace. WebMatrix runs the page that's selected, even if you're
currently editing a different page. If no page is selected, WebMatrix tries to run the default page for
the site (default.cshtml), and if there is no default page, the browser displays an error.
WebMatrix starts a web server (IIS Express) that you can use to test pages on your computer.
The page is displayed in your default browser.
Installing Helpers with the Administration Tool
Now that you have WebMatrix installed and a site created, it's a good idea learn how to use the ASP.NET
Web Pages Administration tool and the Package Manager to install helpers. WebMatrix contains helpers
(components) that simplify common programming tasks and that you'll use throughout these tutorials.
(Some helpers are already included with WebMatrix, but you can install others as well.) In the appendix

ASP.NET Web Pages Using The Razor Syntax Chapter 1 – Getting Started with WebMatrix and ASP.NET Web Pages 13
you can find a quick reference for the included helpers and for other helpers that you can install as part
of a package called the ASP.NET Web Helpers Library. The following procedure shows how to use the
Administration tool to install the ASP.NET Web Helpers Library. You will use some of these helpers in
this tutorial and other tutorials in this series.
1. In WebMatrix, click the Site workspace. 2. In the content pane, click ASP.NET Web Pages Administration. This loads an administration
page into your browser. Because this is the first time you're logging into the administration page, it prompts you to create a password.
3. Create a password.
After you click Create Password, a security-check page that looks like the following screen shot
prompts you to rename the password file for security reasons. If this is the first time you're
seeing this page, don't try to rename the file yet. Proceed to the next step and follow the
directions there.

ASP.NET Web Pages Using The Razor Syntax Chapter 1 – Getting Started with WebMatrix and ASP.NET Web Pages 14
4. Leave the browser open on the security-check page, return to WebMatrix, and click the Files workspace.
5. Right-click the Hello World folder for your site and then click Refresh. The list of files and folders now displays an App_Data folder. Open that and you see an Admin folder. The newly created password file (_Password.config) is displayed in the ./App_Data/Admin/ folder. The following illustration shows the updated file structure with the password file selected:
6. Rename the file to Password.config by removing the leading underscore (_) character. 7. Return to the security-check page in the browser, and click the Click Here link near the end of
the message about renaming the password file. 8. Log into the Administration page using the password you created. The page displays the Package
Manager, which contains a list of add-on packages.

ASP.NET Web Pages Using The Razor Syntax Chapter 1 – Getting Started with WebMatrix and ASP.NET Web Pages 15
If you ever want to display other feed locations, click the Manage Package Sources link to add,
change, or remove feeds.
9. Find the ASP.NET Web Helpers Library package. To narrow down the list, search for helpers using the Search field. The following image shows the result of searching for helpers. Notice that several versions of this package are available.

ASP.NET Web Pages Using The Razor Syntax Chapter 1 – Getting Started with WebMatrix and ASP.NET Web Pages 16
10. Select the version that you want, click the Install button, and then install the package as directed. After the package is installed, the Package Manager displays the result.
This page also lets you uninstall packages, and you can use the page to update packages when
newer versions are available. You can go to the Show drop-down list and click Installed to
display the packages you have installed, or click Updates to display available updates for the
installed packages.
Note The default website templates (Bakery, Calendar, Photo Gallery, and Starter Site) are
available in C# and Visual Basic versions. You can install the Visual Basic templates by using the
ASP.NET Web Pages Administration tool in WebMatrix. Open the Administration tool as described
in this section and search for VB, and then install the templates you need. Website templates are
installed in the root folder of your site in a folder named Microsoft Templates.
In the next section, you'll see how easy is it is to add code to the default.cshtml page in order to
create a dynamic page.

ASP.NET Web Pages Using The Razor Syntax Chapter 1 – Getting Started with WebMatrix and ASP.NET Web Pages 17
Using ASP.NET Web Pages Code
In this procedure, you'll create a page that uses simple code to display the server date and time on the
page. The example here will introduce you to the Razor syntax that lets you embed code into the HTML
on ASP.NET Web Pages. (You can read more about this in the next chapter.) The code introduces one of
the helpers that you read about earlier in the chapter.
Note To get the complete sample code for this book, go to the Microsoft Download Center.
1. Open your default.cshtml file. 2. Add markup to the page so that it looks like the following example:
<!DOCTYPE html> <html lang="en"> <head> <meta charset="utf-8" /> <title>Hello World Page</title> </head> <body> <h1>Hello World Page</h1> <p>Hello World!</p> <p>The time is @DateTime.Now</p> </body> </html>
The page contains ordinary HTML markup, with one addition: the @ character marks ASP.NET
program code.
3. Save the page and run it in the browser. You now see the current date and time on the page.
The single line of code you've added does all the work of determining the current time on the
server, formatting it for display, and sending it to the browser. (You can specify formatting
options; this is just the default.)
Suppose you want to do something more complex, such as displaying a scrolling list of tweets from a
Twitter user that you select. You can use a helper for that; as noted earlier, a helper is a component that

ASP.NET Web Pages Using The Razor Syntax Chapter 1 – Getting Started with WebMatrix and ASP.NET Web Pages 18
simplifies common tasks. In this case, all the work you'd otherwise have to do fetch and display a Twitter
feed.
1. Create a new CSHTML file and name it TwitterFeed.cshtml. 2. In the page, replace the existing code with the following code:
<!DOCTYPE html> <html lang="en"> <head> <meta charset="utf-8" /> <title>Twitter Feed</title> </head> <body> <h1>Twitter Feed</h1> <form action="" method="POST"> <div> Enter the name of another Twitter feed to display: <input type="text" name="TwitterUser" value=""/> <input type="submit" value="Submit" /> </div> <div> @if (Request["TwitterUser"].IsEmpty()) { @Twitter.Search("microsoft") } else { @Twitter.Profile(Request["TwitterUser"]) } </div> </form> </body> </html>
This HTML creates a form that displays a text box for entering a user name, plus a Submit
button. These are between the first set of <div> tags.
Between the second set of <div> tags there's some code. (As you saw earlier, to mark code in
ASP.NET Web pages, you use the @ character.) The first time this page is displayed, or if the user
clicks Submit but leaves the text box blank, the conditional expression
Request["TwitterUser"].IsEmpty will be true. In that case, the page shows a Twitter feed that
searches for the term "microsoft". Otherwise, the page shows a Twitter feed for whatever user
name you entered in the text box.
3. Run the page in the browser. The Twitter feed displays tweets with "microsoft" in them.

ASP.NET Web Pages Using The Razor Syntax Chapter 1 – Getting Started with WebMatrix and ASP.NET Web Pages 19
4. Enter a Twitter user name and then click Submit. The new feed is displayed. (If you enter a nonexistent name, a Twitter feed is still displayed, it's just blank.)
This example has shown you a little bit about how you can use WebMatrix and how you can
program dynamic web pages using simple ASP.NET code using the Razor syntax. The next
chapter examines code in more depth. The subsequent chapters then show you how to use
code for many different types of website tasks.
Programming ASP.NET Razor Pages in Visual Studio
Besides using WebMatrix to program ASP.NET Razor pages, you can also use Visual Studio 2010, either
one of the full editions or the free Visual Web Developer Express edition. If you use Visual Studio or
Visual Web Developer to edit ASP.NET Razor pages, you get two programming tools that can enhance
your productivity—IntelliSense and the debugger. IntelliSense works in the editor by displaying context-
appropriate choices. For example, as you enter an HTML element, IntelliSense shows you a list of
attributes that the element can have, and it even can show you what values you can set those attributes
for. IntelliSense works for HTML, JavaScript, and C# and Visual Basic (the programming languages you
use for ASP.NET Razor pages.)

ASP.NET Web Pages Using The Razor Syntax Chapter 1 – Getting Started with WebMatrix and ASP.NET Web Pages 20
The debugger lets you stop a program while it's running. You can then examine things like the values of
variables, and you can step line by line through the program to see how it runs.
To work with ASP.NET Razor Pages in Visual Studio, you need the following software installed on your
computer:
Visual Studio 2010 or Visual Web Developer 2010 Express ASP.NET MVC 3 RTM.
Note You can install both Visual Web Developer 2010 Express and ASP.NET MVC 3 using the Web
Platform Installer.
If you have Visual Studio installed, when you are editing a website in WebMatrix, you can launch the site
in Visual Studio to take advantage of IntelliSense and the debugger.
1. Open the site that you created in this chapter and then click the Files workspace. 2. In the ribbon, click the Visual Studio Launch button.
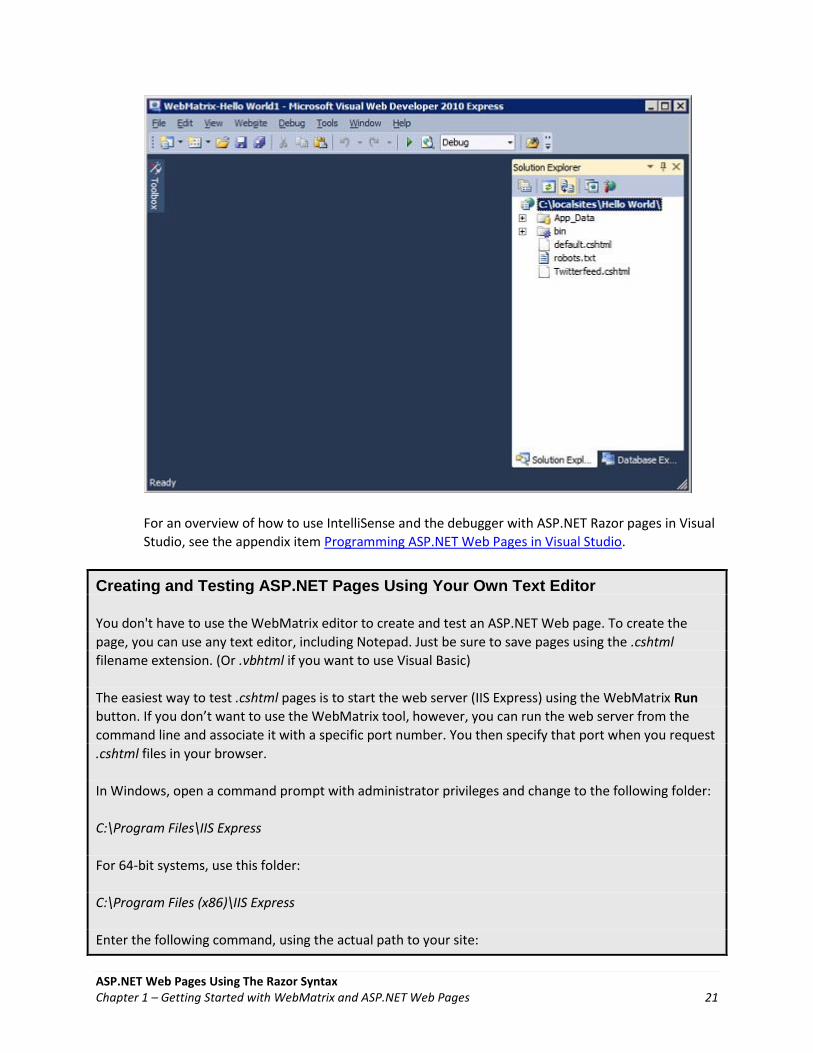
After the site opens in Visual Studio, you can see the site structure in Visual Studio in the
Solution Explorer pane. The following illustration shows the website opened in Visual Web
Developer 2010 Express:
ASP.NET Web Pages Using The Razor Syntax Chapter 1 – Getting Started with WebMatrix and ASP.NET Web Pages 21
For an overview of how to use IntelliSense and the debugger with ASP.NET Razor pages in Visual
Studio, see the appendix item Programming ASP.NET Web Pages in Visual Studio.
Creating and Testing ASP.NET Pages Using Your Own Text Editor
You don't have to use the WebMatrix editor to create and test an ASP.NET Web page. To create the
page, you can use any text editor, including Notepad. Just be sure to save pages using the .cshtml
filename extension. (Or .vbhtml if you want to use Visual Basic)
The easiest way to test .cshtml pages is to start the web server (IIS Express) using the WebMatrix Run
button. If you don’t want to use the WebMatrix tool, however, you can run the web server from the
command line and associate it with a specific port number. You then specify that port when you request
.cshtml files in your browser.
In Windows, open a command prompt with administrator privileges and change to the following folder:
C:\Program Files\IIS Express
For 64-bit systems, use this folder:
C:\Program Files (x86)\IIS Express
Enter the following command, using the actual path to your site:

ASP.NET Web Pages Using The Razor Syntax Chapter 1 – Getting Started with WebMatrix and ASP.NET Web Pages 22
iisexpress.exe /port:35896 /path:C:\BasicWebSite
It doesn't matter what port number you use, as long as the port isn't already reserved by some other
process. (Port numbers above 1024 are typically free.)
For the path value, use the path of the website where the .cshtml files are that you want to test.
After this command runs, you can open a browser and browse to a .cshtml file, like this:
http://localhost:35896/default.cshtml
For help with IIS Express command line options, enter iisexpress.exe /? at the command line.

ASP.NET Web Pages Using The Razor Syntax Chapter 2 – Introduction to ASP.NET Web Programming Using the Razor Syntax 23
Chapter 2 – Introduction to ASP.NET Web Programming Using the Razor Syntax
This chapter gives you an overview of programming with ASP.NET Web Pages using the Razor syntax.
ASP.NET is Microsoft's technology for running dynamic web pages on web servers.
What you'll learn
The top 8 programming tips for getting started with programming ASP.NET Web Pages using Razor syntax.
Basic programming concepts you'll need for this book. What ASP.NET server code and the Razor syntax is all about.
The Top 8 Programming Tips
This section lists a few tips that you absolutely need to know as you start writing ASP.NET server code
using the Razor syntax.
Note The Razor syntax is based on the C# programming language, and that's the language used
throughout this book. However, the Razor syntax also supports the Visual Basic language, and
everything you see in this book you can also do in Visual Basic. For details, see the appendix Visual
Basic Language and Syntax.
You can find more details about most of these programming techniques later in the chapter.
1. You add code to a page using the @ character
The @ character starts inline expressions, single statement blocks, and multi-statement blocks:
<!-- Single statement blocks --> @{ var total = 7; } @{ var myMessage = "Hello World"; } <!-- Inline expressions --> <p>The value of your account is: @total </p> <p>The value of myMessage is: @myMessage</p> <!-- Multi-statement block --> @{ var greeting = "Welcome to our site!"; var weekDay = DateTime.Now.DayOfWeek; var greetingMessage = greeting + " Today is: " + weekDay; }

ASP.NET Web Pages Using The Razor Syntax Chapter 2 – Introduction to ASP.NET Web Programming Using the Razor Syntax 24
<p>The greeting is: @greetingMessage</p>
This is what these statements look like when the page runs in a browser:
HTML Encoding
When you display content in a page using the @ character, as in the preceding examples, ASP.NET HTML-
encodes the output. This replaces reserved HTML characters (such as < and > and &) with codes that
enable the characters to be displayed as characters in a web page instead of being interpreted as HTML
tags or entities. Without HTML encoding, the output from your server code might not display correctly,
and could expose a page to security risks.
If your goal is to output HTML markup that renders tags as markup (for example <p></p> for a paragraph
or <em></em> to emphasize text), see the section Combining Text, Markup, and Code in Code Blocks later
in this chapter.
You can read more about HTML encoding in Chapter 4 - Working with Forms.
2. You enclose code blocks in braces
A code block includes one or more code statements and is enclosed in braces.
<!-- Single statement block. --> @{ var theMonth = DateTime.Now.Month; } <p>The numeric value of the current month: @theMonth</p> <!-- Multi-statement block. --> @{ var outsideTemp = 79; var weatherMessage = "Hello, it is " + outsideTemp + " degrees."; } <p>Today's weather: @weatherMessage</p>
The result displayed in a browser:

ASP.NET Web Pages Using The Razor Syntax Chapter 2 – Introduction to ASP.NET Web Programming Using the Razor Syntax 25
3. Inside a block, you end each code statement with a semicolon
Inside a code block, each complete code statement must end with a semicolon. Inline expressions don't
end with a semicolon.
<!-- Single-statement block --> @{ var theMonth = DateTime.Now.Month; } <!-- Multi-statement block --> @{ var outsideTemp = 79; var weatherMessage = "Hello, it is " + outsideTemp + " degrees."; } <!-- Inline expression, so no semicolon --> <p>Today's weather: @weatherMessage</p>
4. You use variables to store values
You can store values in a variable, including strings, numbers, and dates, etc. You create a new variable
using the var keyword. You can insert variable values directly in a page using @.
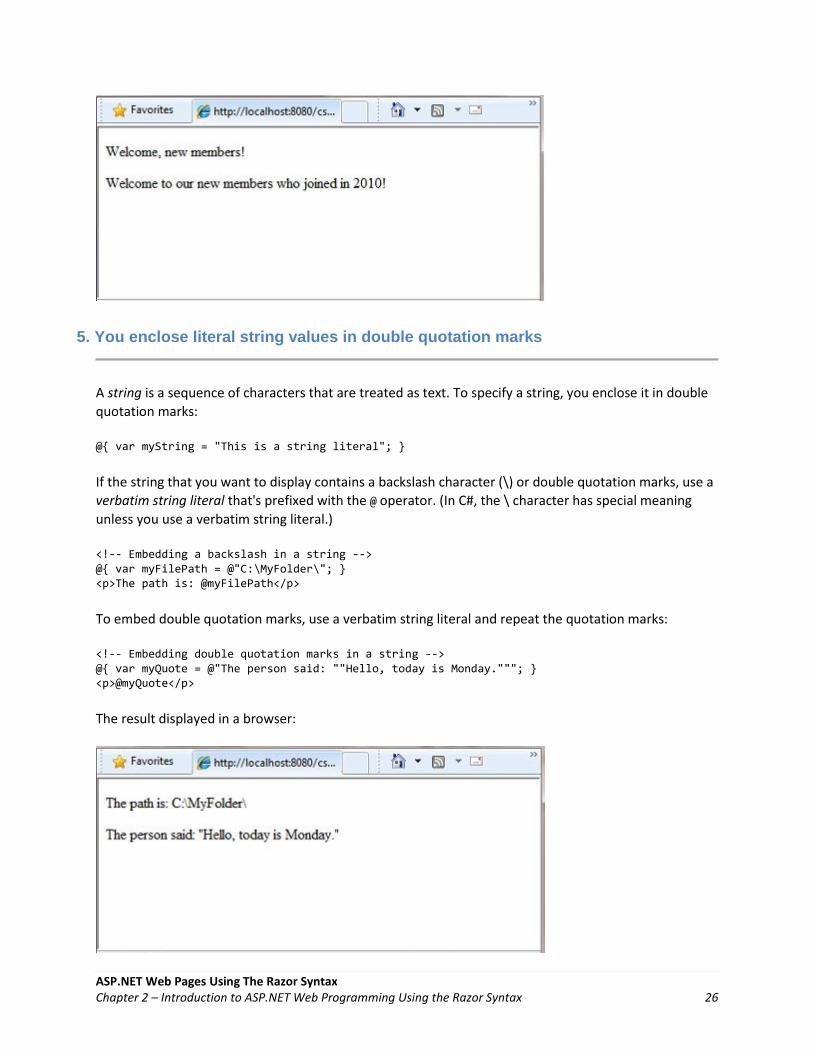
<!-- Storing a string --> @{ var welcomeMessage = "Welcome, new members!"; } <p>@welcomeMessage</p> <!-- Storing a date --> @{ var year = DateTime.Now.Year; } <!-- Displaying a variable --> <p>Welcome to our new members who joined in @year!</p>
The result displayed in a browser:
ASP.NET Web Pages Using The Razor Syntax Chapter 2 – Introduction to ASP.NET Web Programming Using the Razor Syntax 26
5. You enclose literal string values in double quotation marks
A string is a sequence of characters that are treated as text. To specify a string, you enclose it in double
quotation marks:
@{ var myString = "This is a string literal"; }
If the string that you want to display contains a backslash character (\) or double quotation marks, use a
verbatim string literal that's prefixed with the @ operator. (In C#, the \ character has special meaning
unless you use a verbatim string literal.)
<!-- Embedding a backslash in a string --> @{ var myFilePath = @"C:\MyFolder\"; } <p>The path is: @myFilePath</p>
To embed double quotation marks, use a verbatim string literal and repeat the quotation marks:
<!-- Embedding double quotation marks in a string --> @{ var myQuote = @"The person said: ""Hello, today is Monday."""; } <p>@myQuote</p>
The result displayed in a browser:

ASP.NET Web Pages Using The Razor Syntax Chapter 2 – Introduction to ASP.NET Web Programming Using the Razor Syntax 27
Note The @ character is used both to mark verbatim string literals in C# and to mark code in
ASP.NET pages.
6. Code is case sensitive
In C#, keywords (like var, true, and if) and variable names are case sensitive. The following lines of code
create two different variables, lastName and LastName.
@{ var lastName = "Smith"; var LastName = "Jones"; }
If you declare a variable as var lastName = "Smith"; and if you try to reference that variable in your
page as @LastName, an error results because LastName won't be recognized.
Note In Visual Basic, keywords and variables are not case sensitive.
7. Much of your coding involves objects
An object represents a thing that you can program with — a page, a text box, a file, an image, a web
request, an email message, a customer record (database row), etc. Objects have properties that
describe their characteristics — a text box object has a Text property (among others), a request object
has a Url property, an email message has a From property, and a customer object has a FirstName
property. Objects also have methods that are the "verbs" they can perform. Examples include a file
object's Save method, an image object's Rotate method, and an email object's Send method.
You'll often work with the Request object, which gives you information like the values of form fields on
the page (text boxes, etc.), what type of browser made the request, the URL of the page, the user
identity, etc. This example shows how to access properties of the Request object and how to call the
MapPath method of the Request object, which gives you the absolute path of the page on the server:
<table border="1"> <tr> <td>Requested URL</td> <td>Relative Path</td> <td>Full Path</td> <td>HTTP Request Type</td> </tr> <tr> <td>@Request.Url</td> <td>@Request.FilePath</td> <td>@Request.MapPath(Request.FilePath)</td> <td>@Request.RequestType</td> </tr> </table>

ASP.NET Web Pages Using The Razor Syntax Chapter 2 – Introduction to ASP.NET Web Programming Using the Razor Syntax 28
The result displayed in a browser:
8. You can write code that makes decisions
A key feature of dynamic web pages is that you can determine what to do based on conditions. The
most common way to do this is with the if statement (and optional else statement).
@{ var result = ""; if(IsPost) { result = "This page was posted using the Submit button."; } else { result = "This was the first request for this page."; } } <!DOCTYPE html> <html> <head> <title></title> </head> <body> <form method="POST" action="" > <input type="Submit" name="Submit" value="Submit"/> <p>@result</p> </form> </body> </html> </body> </html>
The statement if(IsPost) is a shorthand way of writing if(IsPost == true). Along with if statements,
there are a variety of ways to test conditions, repeat blocks of code, and so on, which are described later
in this chapter.
The result displayed in a browser (after clicking Submit):

ASP.NET Web Pages Using The Razor Syntax Chapter 2 – Introduction to ASP.NET Web Programming Using the Razor Syntax 29
HTTP GET and POST Methods and the IsPost Property
The protocol used for web pages (HTTP) supports a very limited number of methods (verbs) that are
used to make requests to the server. The two most common ones are GET, which is used to read a page,
and POST, which is used to submit a page. In general, the first time a user requests a page, the page is
requested using GET. If the user fills in a form and then clicks Submit, the browser makes a POST request
to the server.
In web programming, it's often useful to know whether a page is being requested as a GET or as a POST
so that you know how to process the page. In ASP.NET Web Pages, you can use the IsPost property to
see whether a request is a GET or a POST. If the request is a POST, the IsPost property will return true,
and you can do things like read the values of text boxes on a form. Many examples in this book show
you how to process the page differently depending on the value of IsPost.
A Simple Code Example
This procedure shows you how to create a page that illustrates basic programming techniques. In the
example, you create a page that lets users enter two numbers, then it adds them and displays the result.
1. In your editor, create a new file and name it AddNumbers.cshtml. 2. Copy the following code and markup into the page, replacing anything already in the page.
@{ var total = 0; var totalMessage = ""; if(IsPost) { // Retrieve the numbers that the user entered. var num1 = Request["text1"]; var num2 = Request["text2"]; // Convert the entered strings into integers numbers and add. total = num1.AsInt() + num2.AsInt(); totalMessage = "Total = " + total; }

ASP.NET Web Pages Using The Razor Syntax Chapter 2 – Introduction to ASP.NET Web Programming Using the Razor Syntax 30
} <!DOCTYPE html> <html lang="en"> <head> <title>Add Numbers</title> <meta charset="utf-8" /> <style type="text/css"> body {background-color: beige; font-family: Verdana, Arial; margin: 50px; } form {padding: 10px; border-style: solid; width: 250px;} </style> </head> <body> <p>Enter two whole numbers and then click <strong>Add</strong>.</p> <form action="" method="post"> <p><label for="text1">First Number:</label> <input type="text" name="text1" /> </p> <p><label for="text2">Second Number:</label> <input type="text" name="text2" /> </p> <p><input type="submit" value="Add" /></p> </form> <p>@totalMessage</p> </body> </html>
Here are some things for you to note:
The @ character starts the first block of code in the page, and it precedes the
totalMessage variable that's embedded near the bottom of the page.
The block at the top of the page is enclosed in braces.
In the block at the top, all lines end with a semicolon.
The variables total, num1, num2, and totalMessage store several numbers and a string.
The literal string value assigned to the totalMessage variable is in double quotation
marks.
Because the code is case-sensitive, when the totalMessage variable is used near the
bottom of the page, its name must match the variable at the top exactly.
The expression num1.AsInt() + num2.AsInt() shows how to work with objects and
methods. The AsInt method on each variable converts the string entered by a user to a
number (an integer) so that you can perform arithmetic on it.
The <form> tag includes a method="post" attribute. This specifies that when the user
clicks Add, the page will be sent to the server using the HTTP POST method. When the
page is submitted, the if(IsPost) test evaluates to true and the conditional code runs,
displaying the result of adding the numbers.
3. Save the page and run it in a browser. (Make sure the page is selected in the Files workspace before you run it.) Enter two whole numbers and then click the Add button.

ASP.NET Web Pages Using The Razor Syntax Chapter 2 – Introduction to ASP.NET Web Programming Using the Razor Syntax 31
Basic Programming Concepts
As you saw in Chapter 1 - Getting Started with ASP.NET Web Pages and in the previous example, even if
you've never programmed before, with WebMatrix, ASP.NET web pages, and the Razor syntax, you can
quickly create dynamic web pages with sophisticated features, and it won't take much code to get things
done.
This chapter provides you with an overview of ASP.NET web programming. It isn't an exhaustive
examination, just a quick tour through the programming concepts you'll use most often. Even so, it
covers almost everything you'll need for the rest of the book.
But first, a little technical background.
The Razor Syntax, Server Code, and ASP.NET
Razor syntax is a simple programming syntax for embedding server-based code in a web page. In a web
page that uses the Razor syntax, there are two kinds of content: client content and server code. Client
content is the stuff you're used to in web pages: HTML markup (elements), style information such as
CSS, client script such as JavaScript, and plain text.
Razor syntax lets you add server code to this client content. If there's server code in the page, the server
runs that code first, before it sends the page to the browser. By running on the server, the code can
perform tasks that can be a lot more complex to do using client content alone, like accessing server-
based databases. Most importantly, server code can dynamically create client content — it can generate
HTML markup or other content on the fly and then send it to the browser along with any static HTML
that the page might contain. From the browser's perspective, client content that's generated by your

ASP.NET Web Pages Using The Razor Syntax Chapter 2 – Introduction to ASP.NET Web Programming Using the Razor Syntax 32
server code is no different than any other client content. As you've already seen, the server code that's
required is quite simple.
ASP.NET web pages that include the Razor syntax have a special file extension (.cshtml or .vbhtml). The
server recognizes these extensions, runs the code that's marked with Razor syntax, and then sends the
page to the browser.
Where does ASP.NET fit in?
Razor syntax is based on a technology from Microsoft called ASP.NET, which in turn is based on the
Microsoft .NET Framework. The.NET Framework is a big, comprehensive programming framework from
Microsoft for developing virtually any type of computer application. ASP.NET is the part of the .NET
Framework that's specifically designed for creating web applications. Developers have used ASP.NET to
create many of the largest and highest-traffic websites in the world. (Any time you see the file-name
extension .aspx as part of the URL in a site, you'll know that the site was written using ASP.NET.)
The Razor syntax gives you all the power of ASP.NET, but using a simplified syntax that's easier to learn if
you're a beginner and that makes you more productive if you're an expert. Even though this syntax is
simple to use, its family relationship to ASP.NET and the .NET Framework means that as your websites
become more sophisticated, you have the power of the larger frameworks available to you.
Classes and Instances
ASP.NET server code uses objects, which are in turn built on the idea of classes. The class is the
definition or template for an object. For example, an application might contain a Customer class that
defines the properties and methods that any customer object needs.

ASP.NET Web Pages Using The Razor Syntax Chapter 2 – Introduction to ASP.NET Web Programming Using the Razor Syntax 33
When the application needs to work with actual customer information, it creates an instance of (or
instantiates) a customer object. Each individual customer is a separate instance of the Customer class.
Every instance supports the same properties and methods, but the property values for each instance are
typically different, because each customer object is unique. In one customer object, the LastName
property might be "Smith"; in another customer object, the LastName property might be "Jones."
Similarly, any individual web page in your site is a Page object that's an instance of the Page class. A
button on the page is a Button object that is an instance of the Button class, and so on. Each instance has
its own characteristics, but they all are based on what's specified in the object's class definition.
Language and Syntax
Earlier you saw a basic example of how to create an ASP.NET Web Pages page, and how you can add
server code to HTML markup. Here you'll learn the basics of writing ASP.NET server code using the Razor
syntax — that is, the programming language rules.
If you're experienced with programming (especially if you've used C, C++, C#, Visual Basic, or JavaScript),
much of what you read here will be familiar. You'll probably need to familiarize yourself only with how
server code is added to markup in .cshtml files.
Basic Syntax
Combining Text, Markup, and Code in Code Blocks
In server code blocks, you'll often want to output text or markup (or both) to the page. If a server code
block contains text that's not code and that instead should be rendered as is, ASP.NET needs to be able
to distinguish that text from code. There are several ways to do this.
Enclose the text in an HTML element like <p></p> or <em></em>:
@if(IsPost) { // This line has all content between matched <p> tags. <p>Hello, the time is @DateTime.Now and this page is a postback!</p> } else { // All content between matched tags, followed by server code. <p>Hello <em>stranger</em>, today is: <br /> </p> @DateTime.Now }
The HTML element can include text, additional HTML elements, and server-code expressions.
When ASP.NET sees the opening HTML tag, it renders everything including the element and its
content as is to the browser (and resolves the server-code expressions).
Use the @: operator or the <text> element. The @: outputs a single line of content containing plain text or unmatched HTML tags; the <text> element encloses multiple lines to output. These options are useful when you don't want to render an HTML element as part of the output.

ASP.NET Web Pages Using The Razor Syntax Chapter 2 – Introduction to ASP.NET Web Programming Using the Razor Syntax 34
@if(IsPost) { // Plain text followed by an unmatched HTML tag and server code. @: The time is: <br /> @DateTime.Now // Server code and then plain text, matched tags, and more text. @DateTime.Now @:is the <em>current</em> time. }
If you want to output multiple lines of text or unmatched HTML tags, you can precede each line
with @:, or you can enclose the line in a <text> element. Like the @: operator, <text> tags are
used by ASP.NET to identify text content and are never rendered in the page output.
@if(IsPost) { // Repeat the previous example, but use <text> tags. <text> The time is: <br /> @DateTime.Now @DateTime.Now is the <em>current</em> time. </text> } @{ var minTemp = 75; <text>It is the month of @DateTime.Now.ToString("MMMM"), and it's a <em>great</em> day! <br /><p>You can go swimming if it's at least @minTemp degrees. </p></text> }
The first example repeats the previous example but uses a single pair of <text> tags to enclose
the text to render. In the second example, the <text> and </text> tags enclose three lines, all of
which have some uncontained text and unmatched HTML tags (<br />), along with server code
and matched HTML tags. Again, you could also precede each line individually with the @:
operator; either way works.
Note When you output text as shown in this section — using an HTML element, the @: operator, or
the <text> element — ASP.NET doesn't HTML-encode the output. (As noted earlier, ASP.NET does
encode the output of server code expressions and server code blocks that are preceded by @, except
in the special cases noted in this section.)
Whitespace
Extra spaces in a statement (and outside of a string literal) don't affect the statement:
@{ var lastName = "Smith"; }
A line break in a statement has no effect on the statement, and you can wrap statements for readability.
The following statements are the same:
@{ var theName = "Smith"; } @{
ASP.NET Web Pages Using The Razor Syntax Chapter 2 – Introduction to ASP.NET Web Programming Using the Razor Syntax 35
var personName = "Smith" ; }
However, you can't wrap a line in the middle of a string literal. The following example doesn't work:
@{ var test = "This is a long string"; } // Does not work!
To combine a long string that wraps to multiple lines like the above code, there are two options. You can
use the concatenation operator (+), which you'll see later in this chapter. You can also use the @
character to create a verbatim string literal, as you saw earlier in this chapter. You can break verbatim
string literals across lines:
@{ var longString = @"This is a long string"; }
Code (and Markup) Comments
Comments let you leave notes for yourself or others. They also allow you to disable ("comment out") a
section of code or markup that you don't want to run but want to keep in your page for the time being.
There's different commenting syntax for Razor code and for HTML markup. As with all Razor code, Razor
comments are processed (and then removed) on the server before the page is sent to the browser.
Therefore, the Razor commenting syntax lets you put comments into the code (or even into the markup)
that you can see when you edit the file, but that users don't see, even in the page source.
For ASP.NET Razor comments, you start the comment with @* and end it with *@. The comment can be
on one line or multiple lines:
@* A one-line code comment. *@ @* This is a multiline code comment. It can continue for any number of lines. *@
Here is a comment within a code block:
@{ @* This is a comment. *@ var theVar = 17; }

ASP.NET Web Pages Using The Razor Syntax Chapter 2 – Introduction to ASP.NET Web Programming Using the Razor Syntax 36
Here is the same block of code, with the line of code commented out so that it won't run:
@{ @* This is a comment. *@ @* var theVar = 17; *@ }
Inside a code block, as an alternative to using Razor comment syntax, you can use the commenting
syntax of the programming language you're using, such as C#:
@{ // This is a comment. var myVar = 17; /* This is a multi-line comment that uses C# commenting syntax. */ }
In C#, single-line comments are preceded by the // characters, and multi-line comments begin with /*
and end with */. (As with Razor comments, C# comments are not rendered to the browser.)
For markup, as you probably know, you can create an HTML comment:
<!-- This is a comment. -->
HTML comments start with <!-- characters and end with -->. You can use HTML comments to surround
not only text, but also any HTML markup that you may want to keep in the page but don't want to
render. This HTML comment will hide the entire content of the tags and the text they contain:
<!-- <p>This is my paragraph.</p> -->
Unlike Razor comments, HTML comments are rendered to the page and the user can see them by
viewing the page source.
Variables
A variable is a named object that you use to store data. You can name variables anything, but the name
must begin with an alphabetic character and it cannot contain whitespace or reserved characters.
Variables and Data Types
A variable can have a specific data type, which indicates what kind of data is stored in the variable. You
can have string variables that store string values (like "Hello world"), integer variables that store whole-
number values (like 3 or 79), and date variables that store date values in a variety of formats (like
4/12/2010 or March 2009). And there are many other data types you can use.
However, you generally don't have to specify a type for a variable. Most of the time, ASP.NET can figure
out the type based on how the data in the variable is being used. (Occasionally you must specify a type;
you'll see examples in this book where this is true.)

ASP.NET Web Pages Using The Razor Syntax Chapter 2 – Introduction to ASP.NET Web Programming Using the Razor Syntax 37
You declare a variable using the var keyword (if you don't want to specify a type) or by using the name
of the type:
@{ // Assigning a string to a variable. var greeting = "Welcome!"; // Assigning a number to a variable. var theCount = 3; // Assigning an expression to a variable. var monthlyTotal = theCount + 5; // Assigning a date value to a variable. var today = DateTime.Today; // Assigning the current page's URL to a variable. var myPath = this.Request.Url; // Declaring variables using explicit data types. string name = "Joe"; int count = 5; DateTime tomorrow = DateTime.Now.AddDays(1); }
The following example shows some typical uses of variables in a web page:
@{ // Embedding the value of a variable into HTML markup. <p>@greeting, friends!</p> // Using variables as part of an inline expression. <p>The predicted annual total is: @( monthlyTotal * 12)</p> // Displaying the page URL with a variable. <p>The URL to this page is: @myPath</p> }
The result displayed in a browser:
ASP.NET Web Pages Using The Razor Syntax Chapter 2 – Introduction to ASP.NET Web Programming Using the Razor Syntax 38
Converting and Testing Data Types
Although ASP.NET can usually determine a data type automatically, sometimes it can't. Therefore, you
might need to help ASP.NET out by performing an explicit conversion. Even if you don't have to convert
types, sometimes it's helpful to test to see what type of data you might be working with.
The most common case is that you have to convert a string to another type, such as to an integer or
date. The following example shows a typical case where you must convert a string to a number.
@{ var total = 0; if(IsPost) { // Retrieve the numbers that the user entered. var num1 = Request["text1"]; var num2 = Request["text2"]; // Convert the entered strings into integers numbers and add. total = num1.AsInt() + num2.AsInt(); } }
As a rule, user input comes to you as strings. Even if you've prompted users to enter a number, and even
if they've entered a digit, when user input is submitted and you read it in code, the data is in string
format. Therefore, you must convert the string to a number. In the example, if you try to perform
arithmetic on the values without converting them, the following error results, because ASP.NET cannot
add two strings:
Cannot implicitly convert type 'string' to 'int'.
To convert the values to integers, you call the AsInt method. If the conversion is successful, you can
then add the numbers.
The following table lists some common conversion and test methods for variables.
Method Description Example
AsInt(),
IsInt()
Converts a string that represents a
whole number (like "593") to an
integer.
var myIntNumber = 0; var myStringNum = "539"; if(myStringNum.IsInt()==true){ myIntNumber = myStringNum.AsInt(); }
AsBool(),
IsBool()
Converts a string like "true" or "false"
to a Boolean type.
var myStringBool = "True"; var myVar = myStringBool.AsBool();
AsFloat(),
IsFloat()
Converts a string that has a decimal
value like "1.3" or "7.439" to a floating-
point number.
var myStringFloat = "41.432895"; var myFloatNum = myStringFloat.AsFloat();

ASP.NET Web Pages Using The Razor Syntax Chapter 2 – Introduction to ASP.NET Web Programming Using the Razor Syntax 39
AsDecimal(),
IsDecimal()
Converts a string that has a decimal
value like "1.3" or "7.439" to a decimal
number. (In ASP.NET, a decimal
number is more precise than a
floating-point number.)
var myStringDec = "10317.425"; var myDecNum = myStringDec.AsDecimal();
AsDateTime(),
IsDateTime()
Converts a string that represents a
date and time value to the ASP.NET
DateTime type.
var myDateString = "12/27/2010"; var newDate = myDateString.AsDateTime();
ToString() Converts any other data type to a
string.
int num1 = 17; int num2 = 76; // myString is set to 1776 string myString = num1.ToString() + num2.ToString();
Operators
An operator is a keyword or character that tells ASP.NET what kind of command to perform in an
expression. The C# language (and the Razor syntax that's based on it) supports many operators, but you
only need to recognize a few to get started. The following table summarizes the most common
operators.
Operator Description Examples
+
-
*
/
Math operators used in numerical expressions. @(5 + 13) @{ var netWorth = 150000; } @{ var newTotal = netWorth * 2; } @(newTotal / 2)
= Assignment. Assigns the value on the right side of
a statement to the object on the left side.
var age = 17;
== Equality. Returns true if the values are equal.
(Notice the distinction between the = operator
and the == operator.)
var myNum = 15; if (myNum == 15) { // Do something. }
!= Inequality. Returns true if the values are not
equal.
var theNum = 13; if (theNum != 15) { // Do something. }
<
>
<=
>=
Less-than,
greater-than,
less-than-or-equal, and
greater-than-or-equal.
if (2 < 3) { // Do something. } var currentCount = 12; if(currentCount >= 12) { // Do something. }

ASP.NET Web Pages Using The Razor Syntax Chapter 2 – Introduction to ASP.NET Web Programming Using the Razor Syntax 40
+ Concatenation, which is used to join strings.
ASP.NET knows the difference between this
operator and the addition operator based on the
data type of the expression.
// The displayed result is "abcdef". @("abc" + "def")
+=
-=
The increment and decrement operators, which
add and subtract 1 (respectively) from a variable.
int theCount = 0; theCount += 1; // Adds 1 to count
. Dot. Used to distinguish objects and their
properties and methods.
var myUrl = Request.Url; var count = Request["Count"].AsInt();
() Parentheses. Used to group expressions and to
pass parameters to methods.
@(3 + 7) @Request.MapPath(Request.FilePath);
[] Brackets. Used for accessing values in arrays or
collections.
var income = Request["AnnualIncome"];
! Not. Reverses a true value to false and vice
versa. Typically used as a shorthand way to test
for false (that is, for not true).
bool taskCompleted = false; // Processing. if(!taskCompleted) { // Continue processing }
&&
||
Logical AND and OR, which are used to link
conditions together.
bool myTaskCompleted = false; int totalCount = 0; // Processing. if(!myTaskCompleted && totalCount < 12) { // Continue processing. }
Working with File and Folder Paths in Code
You'll often work with file and folder paths in your code. Here is an example of physical folder structure
for a website as it might appear on your development computer:
C:\WebSites\MyWebSite
default.cshtml
datafile.txt
\images
Logo.jpg
\styles
Styles.css
Here are some essential details about URLs and paths:

ASP.NET Web Pages Using The Razor Syntax Chapter 2 – Introduction to ASP.NET Web Programming Using the Razor Syntax 41
A URL begins with either a domain name (http://www.example.com) or a server name (http://localhost, http://mycomputer).
A URL corresponds to a physical path on a host computer. For example, http://myserver might correspond to the folder C:\websites\mywebsite on the server.
A virtual path is shorthand to represent paths in code without having to specify the full path. It includes the portion of a URL that follows the domain or server name. When you use virtual paths, you can move your code to a different domain or server without having to update the paths.
Here's an example to help you understand the differences:
Complete URL http://mycompanyserver/humanresources/CompanyPolicy.htm
Server name mycompanyserver
Virtual path /humanresources/CompanyPolicy.htm
Physical path C:\mywebsites\humanresources\CompanyPolicy.htm
The virtual root is /, just like the root of your C: drive is \. (Virtual folder paths always use forward
slashes.) The virtual path of a folder doesn't have to have the same name as the physical folder; it can be
an alias. (On production servers, the virtual path rarely matches an exact physical path.)
When you work with files and folders in code, sometimes you need to reference the physical path and
sometimes a virtual path, depending on what objects you're working with. ASP.NET gives you these
tools for working with file and folder paths in code: the ~ operator, the Server.MapPath method, and the
Href method.
The ~ operator: Getting the virtual root
In server code, to specify the virtual root path to folders or files, use the ~ operator. This is useful
because you can move your website to a different folder or location without breaking the paths in your
code.
@{ var myImagesFolder = "~/images"; var myStyleSheet = "~/styles/StyleSheet.css"; }
The Server.MapPath method: Converting virtual to physical paths
The Server.MapPath method converts a virtual path (like /default.cshtml) to an absolute physical path
(like C:\WebSites\MyWebSiteFolder\default.cshtml). You use this method for tasks that require a
complete physical path, like reading or writing a text file on the web server. (You typically don't know
the absolute physical path of your site on a hosting site's server.) You pass the virtual path to a file or
folder to the method, and it returns the physical path:

ASP.NET Web Pages Using The Razor Syntax Chapter 2 – Introduction to ASP.NET Web Programming Using the Razor Syntax 42
@{ var dataFilePath = "~/dataFile.txt"; } <!-- Displays a physical path C:\Websites\MyWebSite\datafile.txt --> <p>@Server.MapPath(dataFilePath)</p>
The Href method: Creating paths to site resources
The Href method of the WebPage object converts paths that you create in server code (which can include
the ~ operator) to paths that the browser understands. (The browser can't understand the ~ operator,
because that's strictly an ASP.NET operator.) You use the Href method to create paths to resources like
image files, other web pages, and CSS files. For example, you can use this method in HTML markup for
attributes of <img> elements, <link> elements, and <a> elements.
@{ var myImagesFolder = "~/images"; var myStyleSheet = "~/styles/StyleSheet.css"; } <!-- This code creates the path "../images/Logo.jpg" in the src attribute. --> <img src="@Href(myImagesFolder)/Logo.jpg" /> <!-- This produces the same result, using a path with ~ --> <img src="@Href("~/images")/Logo.jpg" /> <!-- This creates a link to the CSS file. --> <link rel="stylesheet" type="text/css" href="@Href(myStyleSheet)" />
Conditional Logic and Loops
ASP.NET server code lets you perform tasks based on conditions and write code that repeats statements
a specific number of times (that is, code that runs a loop).
Testing Conditions
To test a simple condition you use the if statement, which returns true or false based on a test you
specify:
@{ var showToday = true; if(showToday) { @DateTime.Today; } }
The if keyword starts a block. The actual test (condition) is in parentheses and returns true or false. The
statements that run if the test is true are enclosed in braces. An if statement can include an else block
that specifies statements to run if the condition is false:
@{

ASP.NET Web Pages Using The Razor Syntax Chapter 2 – Introduction to ASP.NET Web Programming Using the Razor Syntax 43
var showToday = false; if(showToday) { @DateTime.Today; } else { <text>Sorry!</text> } }
You can add multiple conditions using an else if block:
@{ var theBalance = 4.99; if(theBalance == 0) { <p>You have a zero balance.</p> } else if (theBalance > 0 && theBalance <= 5) { <p>Your balance of $@theBalance is very low.</p> } else { <p>Your balance is: $@theBalance</p> } }
In this example, if the first condition in the if block is not true, the else if condition is checked. If that
condition is met, the statements in the else if block are executed. If none of the conditions are met,
the statements in the else block are executed. You can add any number of else if blocks, and then close
with an else block as the "everything else" condition.
To test a large number of conditions, use a switch block:
@{ var weekday = "Wednesday"; var greeting = ""; switch(weekday) { case "Monday": greeting = "Ok, it's a marvelous Monday"; break; case "Tuesday": greeting = "It's a tremendous Tuesday"; break; case "Wednesday": greeting = "Wild Wednesday is here!"; break; default: greeting = "It's some other day, oh well."; break; }

ASP.NET Web Pages Using The Razor Syntax Chapter 2 – Introduction to ASP.NET Web Programming Using the Razor Syntax 44
<p>Since it is @weekday, the message for today is: @greeting</p> }
The value to test is in parentheses (in the example, the weekday variable). Each individual test uses a
case statement that ends with a colon (:). If the value of a case statement matches the test value, the
code in that case block is executed. You close each case statement with a break statement. (If you forget
to include break in each case block, the code from the next case statement will run also.) A switch block
often has a default statement as the last case for an "everything else" option that runs if none of the
other cases are true.
The result of the last two conditional blocks displayed in a browser:
Looping Code
You often need to run the same statements repeatedly. You do this by looping. For example, you often
run the same statements for each item in a collection of data. If you know exactly how many times you
want to loop, you can use a for loop. This kind of loop is especially useful for counting up or counting
down:
@for(var i = 10; i < 21; i++) { <p>Line #: @i</p> }
The loop begins with the for keyword, followed by three statements in parentheses, each terminated
with a semicolon.
Inside the parentheses, the first statement (var i=10;) creates a counter and initializes it to 10. You don't have to name the counter i — you can use any legal variable name. When the for loop runs, the counter is automatically incremented.
The second statement (i < 21;) sets the condition for how far you want to count. In this case, you want it to go to a maximum of 20 (that is, keep going while the counter is less than 21).
The third statement (i++ ) uses an increment operator, which simply specifies that the counter should have 1 added to it each time the loop runs.

ASP.NET Web Pages Using The Razor Syntax Chapter 2 – Introduction to ASP.NET Web Programming Using the Razor Syntax 45
Inside the braces is the code that will run for each iteration of the loop. The markup creates a new
paragraph (<p> element) each time and adds a line to the output, displaying the value of i (the counter).
When you run this page, the example creates 11 lines displaying the output, with the text in each line
indicating the item number.
If you're working with a collection or array, you often use a foreach loop. A collection is a group of
similar objects, and the foreach loop lets you carry out a task on each item in the collection. This type of
loop is convenient for collections, because unlike a for loop, you don't have to increment the counter or
set a limit. Instead, the foreach loop code simply proceeds through the collection until it's finished.
This example returns the items in the Request.ServerVariables collection that (which is an object that
contains information about your web server). It uses a foreach loop to display the name of each item by
creating a new <li> element in an HTML bulleted list.
<ul> @foreach (var myItem in Request.ServerVariables) { <li>@myItem</li> } </ul>
The foreach keyword is followed by parentheses where you declare a variable that represents a single
item in the collection (in the example, var item), followed by the in keyword, followed by the collection
you want to loop through. In the body of the foreach loop, you can access the current item using the
variable that you declared earlier.

ASP.NET Web Pages Using The Razor Syntax Chapter 2 – Introduction to ASP.NET Web Programming Using the Razor Syntax 46
To create a more general-purpose loop, use the while statement:
@{ var countNum = 0; while (countNum < 50) { countNum += 1; <p>Line #@countNum: </p> } }
A while loop begins with the while keyword, followed by parentheses where you specify how long the
loop continues (here, for as long as countNum is less than 50), then the block to repeat. Loops typically
increment (add to) or decrement (subtract from) a variable or object used for counting. In the example,
the += operator adds 1 to countNum each time the loop runs. (To decrement a variable in a loop that
counts down, you would use the decrement operator -=).
Objects and Collections
Nearly everything in an ASP.NET website is an object, including the web page itself. This section
discusses some important objects you'll work with frequently in your code.
ASP.NET Web Pages Using The Razor Syntax Chapter 2 – Introduction to ASP.NET Web Programming Using the Razor Syntax 47
Page Objects
The most basic object in ASP.NET is the page. You can access properties of the page object directly
without any qualifying object. The following code gets the page's file path, using the Request object of
the page:
@{ var path = Request.FilePath; }
To make it clear that you're referencing properties and methods on the current page object, you can
optionally use the keyword this to represent the page object in your code. Here is the previous code
example, with this added to represent the page:
@{ var path = this.Request.FilePath; }
You can use properties of the Page object to get a lot of information, such as:
Request. As you've already seen, this is a collection of information about the current request, including what type of browser made the request, the URL of the page, the user identity, etc.
Response. This is a collection of information about the response (page) that will be sent to the browser when the server code has finished running. For example, you can use this property to write information into the response.
@{ // Access the page's Request object to retrieve the Url. var pageUrl = this.Request.Url; } <a href="@pageUrl">My page</a>
Collection Objects (Arrays and Dictionaries)
A collection is a group of objects of the same type, such as a collection of Customer objects from a
database. ASP.NET contains many built-in collections, like the Request.Files collection.
You'll often work with data in collections. Two common collection types are the array and the
dictionary. An array is useful when you want to store a collection of similar items but don't want to
create a separate variable to hold each item:
@* Array block 1: Declaring a new array using braces. *@ @{ <h3>Team Members</h3> string[] teamMembers = {"Matt", "Joanne", "Robert", "Nancy"}; foreach (var person in teamMembers) { <p>@person</p> } }
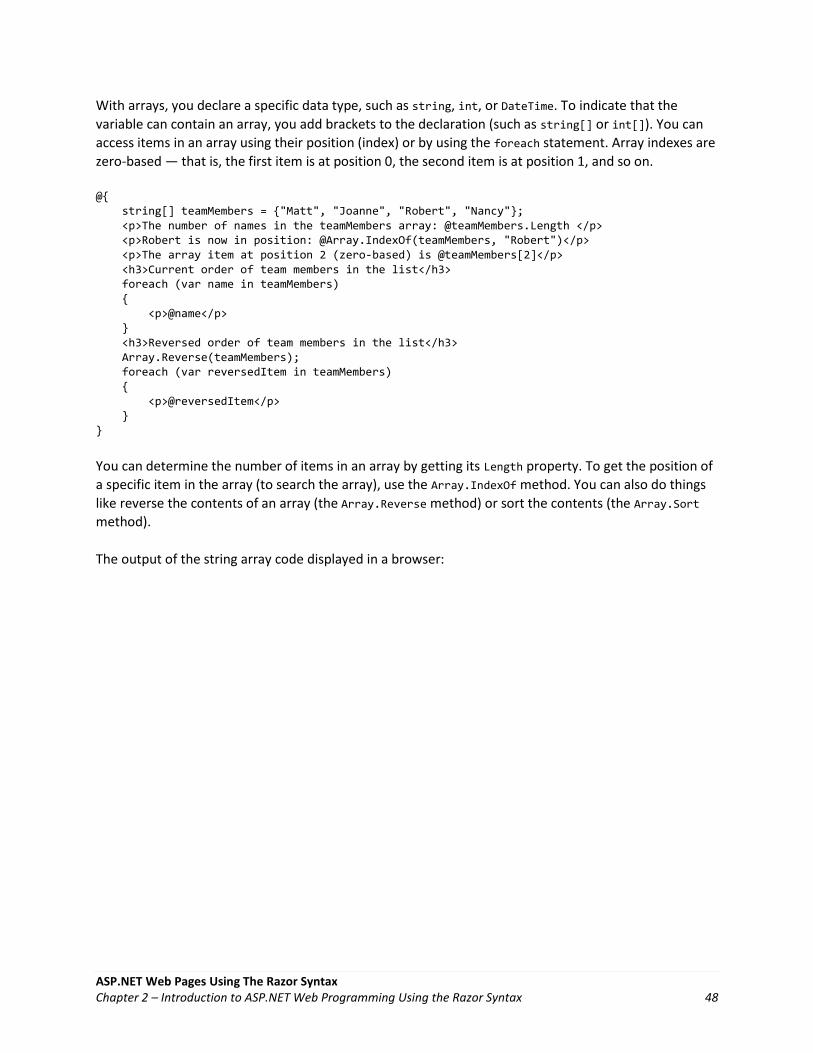
ASP.NET Web Pages Using The Razor Syntax Chapter 2 – Introduction to ASP.NET Web Programming Using the Razor Syntax 48
With arrays, you declare a specific data type, such as string, int, or DateTime. To indicate that the
variable can contain an array, you add brackets to the declaration (such as string[] or int[]). You can
access items in an array using their position (index) or by using the foreach statement. Array indexes are
zero-based — that is, the first item is at position 0, the second item is at position 1, and so on.
@{ string[] teamMembers = {"Matt", "Joanne", "Robert", "Nancy"}; <p>The number of names in the teamMembers array: @teamMembers.Length </p> <p>Robert is now in position: @Array.IndexOf(teamMembers, "Robert")</p> <p>The array item at position 2 (zero-based) is @teamMembers[2]</p> <h3>Current order of team members in the list</h3> foreach (var name in teamMembers) { <p>@name</p> } <h3>Reversed order of team members in the list</h3> Array.Reverse(teamMembers); foreach (var reversedItem in teamMembers) { <p>@reversedItem</p> } }
You can determine the number of items in an array by getting its Length property. To get the position of
a specific item in the array (to search the array), use the Array.IndexOf method. You can also do things
like reverse the contents of an array (the Array.Reverse method) or sort the contents (the Array.Sort
method).
The output of the string array code displayed in a browser:

ASP.NET Web Pages Using The Razor Syntax Chapter 2 – Introduction to ASP.NET Web Programming Using the Razor Syntax 49
A dictionary is a collection of key/value pairs, where you provide the key (or name) to set or retrieve the
corresponding value:
@{ var myScores = new Dictionary<string, int>(); myScores.Add("test1", 71); myScores.Add("test2", 82); myScores.Add("test3", 100); myScores.Add("test4", 59); } <p>My score on test 3 is: @myScores["test3"]%</p> @(myScores["test4"] = 79) <p>My corrected score on test 4 is: @myScores["test4"]%</p>
To create a dictionary, you use the new keyword to indicate that you're creating a new dictionary object.
You can assign a dictionary to a variable using the var keyword. You indicate the data types of the items
in the dictionary using angle brackets ( < > ). At the end of the declaration, you must add a pair of
parentheses, because this is actually a method that creates a new dictionary.
To add items to the dictionary, you can call the Add method of the dictionary variable (myScores in this
case), and then specify a key and a value. Alternatively, you can use square brackets to indicate the key
and do a simple assignment, as in the following example:

ASP.NET Web Pages Using The Razor Syntax Chapter 2 – Introduction to ASP.NET Web Programming Using the Razor Syntax 50
myScores["test4"] = 79;
To get a value from the dictionary, you specify the key in brackets:
var testScoreThree = myScores["test3"];
Calling Methods with Parameters
As you read earlier in this chapter, the objects that you program with can have methods. For example, a
Database object might have a Database.Connect method. Many methods also have one or more
parameters. A parameter is a value that you pass to a method to enable the method to complete its
task. For example, look at a declaration for the Request.MapPath method, which takes three parameters:
public string MapPath(string virtualPath, string baseVirtualDir, bool allowCrossAppMapping);
This method returns the physical path on the server that corresponds to a specified virtual path. The
three parameters for the method are virtualPath, baseVirtualDir, and allowCrossAppMapping. (Notice
that in the declaration, the parameters are listed with the data types of the data that they'll accept.)
When you call this method, you must supply values for all three parameters.
The Razor syntax gives you two options for passing parameters to a method: positional parameters and
named parameters. To call a method using positional parameters, you pass the parameters in a strict
order that's specified in the method declaration. (You would typically know this order by reading
documentation for the method.) You must follow the order, and you can't skip any of the parameters —
if necessary, you pass an empty string ("") or null for a positional parameter that you don't have a value
for.
The following example assumes you have a folder named scripts on your website. The code calls the
Request.MapPath method and passes values for the three parameters in the correct order. It then
displays the resulting mapped path.
// Pass parameters to a method using positional parameters. var myPathPositional = Request.MapPath("/scripts", "/", true); <p>@myPathPositional</p>
When a method has many parameters, you can keep your code more readable by using named
parameters. To call a method using named parameters, you specify the parameter name followed by a
colon (:), and then the value. The advantage of named parameters is that you can pass them in any
order you want. (A disadvantage is that the method call is not as compact.)
The following example calls the same method as above, but uses named parameters to supply the
values:
// Pass parameters to a method using named parameters. var myPathNamed = Request.MapPath(baseVirtualDir: "/", allowCrossAppMapping: true, virtualPath: "/scripts"); <p>@myPathNamed</p>

ASP.NET Web Pages Using The Razor Syntax Chapter 2 – Introduction to ASP.NET Web Programming Using the Razor Syntax 51
As you can see, the parameters are passed in a different order. However, if you run the previous
example and this example, they'll return the same value.
Handling Errors
Try-Catch Statements
You'll often have statements in your code that might fail for reasons outside your control. For example:
If your code tries to open, create, read, or write a file, all sorts of errors might occur. The file you want might not exist, it might be locked, the code might not have permissions, and so on.
Similarly, if your code tries to update records in a database, there can be permissions issues, the connection to the database might be dropped, the data to save might be invalid, and so on.
In programming terms, these situations are called exceptions. If your code encounters an exception, it
generates (throws) an error message that's, at best, annoying to users:
In situations where your code might encounter exceptions, and in order to avoid error messages of this
type, you can use try/catch statements. In the try statement, you run the code that you're checking. In
one or more catch statements, you can look for specific errors (specific types of exceptions) that might
have occurred. You can include as many catch statements as you need to look for errors that you are
anticipating.

ASP.NET Web Pages Using The Razor Syntax Chapter 2 – Introduction to ASP.NET Web Programming Using the Razor Syntax 52
Note We recommend that you avoid using the Response.Redirect method in try/catch
statements, because it can cause an exception in your page.
The following example shows a page that creates a text file on the first request and then displays a
button that lets the user open the file. The example deliberately uses a bad file name so that it will
cause an exception. The code includes catch statements for two possible exceptions:
FileNotFoundException, which occurs if the file name is bad, and DirectoryNotFoundException, which
occurs if ASP.NET can't even find the folder. (You can uncomment a statement in the example in order
to see how it runs when everything works properly.)
If your code didn't handle the exception, you would see an error page like the previous screen shot.
However, the try/catch section helps prevent the user from seeing these types of errors.
@{ var dataFilePath = "~/dataFile.txt"; var fileContents = ""; var physicalPath = Server.MapPath(dataFilePath); var userMessage = "Hello world, the time is " + DateTime.Now; var userErrMsg = ""; var errMsg = ""; if(IsPost) { // When the user clicks the "Open File" button and posts // the page, try to open the created file for reading. try { // This code fails because of faulty path to the file. fileContents = File.ReadAllText(@"c:\batafile.txt"); // This code works. To eliminate error on page, // comment the above line of code and uncomment this one. //fileContents = File.ReadAllText(physicalPath); } catch (FileNotFoundException ex) { // You can use the exception object for debugging, logging, etc. errMsg = ex.Message; // Create a friendly error message for users. userErrMsg = "A file could not be opened, please contact " + "your system administrator."; } catch (DirectoryNotFoundException ex) { // Similar to previous exception. errMsg = ex.Message; userErrMsg = "A directory was not found, please contact " + "your system administrator."; } } else { // The first time the page is requested, create the text file. File.WriteAllText(physicalPath, userMessage); } }

ASP.NET Web Pages Using The Razor Syntax Chapter 2 – Introduction to ASP.NET Web Programming Using the Razor Syntax 53
<!DOCTYPE html> <html lang="en"> <head> <meta charset="utf-8" /> <title>Try-Catch Statements</title> </head> <body> <form method="POST" action="" > <input type="Submit" name="Submit" value="Open File"/> </form> <p>@fileContents</p> <p>@userErrMsg</p> </body> </html>
Additional Resources
Programming with Visual Basic
Appendix: Visual Basic Language and Syntax
Reference Documentation
ASP.NET
C# Language

ASP.NET Web Pages Using The Razor Syntax Chapter 3 – Creating a Consistent Look 54
Chapter 3 – Creating a Consistent Look
To make it more efficient to create web pages for your site, you can create reusable blocks of content
(like headers and footers) for your website, and you can create a consistent layout for all the pages.
What you'll learn
How to create reusable blocks of content like headers and footers. How to create a consistent look for all the pages in your site using a layout page. How to pass data at run time to a layout page. How to create and use a simple helper.
These are the ASP.NET features introduced in the chapter:
Content blocks, which are files that contain HTML-formatted content to be inserted in multiple pages.
Layout pages, which are pages that contain HTML-formatted content that can be shared by pages on the website.
The RenderPage, RenderBody, and RenderSection methods, which tell ASP.NET where to insert page elements.
The PageData dictionary that lets you share data between content blocks and layout pages.
Creating Reusable Blocks of Content
Many websites have content that's displayed on every page, like a header and footer, or a box that tells
users that they're logged in. ASP.NET lets you create a separate file with a content block that can contain
text, markup, and code, just like a regular web page. You can then insert the content block in other
pages on the site where you want the information to appear. That way you don't have to copy and paste
the same content into every page. Creating common content like this also makes it easier to update
your site. If you need to change the content, you can just update a single file, and the changes are then
reflected everywhere the content has been inserted.
The following diagram shows how content blocks work. When a browser requests a page from the web
server, ASP.NET inserts the content blocks at the point where the RenderPage method is called in the
main page. The finished (merged) page is then sent to the browser.

ASP.NET Web Pages Using The Razor Syntax Chapter 3 – Creating a Consistent Look 55
In this procedure, you'll create a page that references two content blocks (a header and a footer) that
are located in separate files. You can use these same content blocks in any page in your site. When
you're done, you'll get a page like this:
1. In the root folder of your website, create a file named Index.cshtml. 2. Replace the existing markup with the following:
<!DOCTYPE html> <html> <head> <title>Main Page</title> </head> <body> <h1>Index Page Content</h1> <p>This is the content of the main page.</p> </body> </html>

ASP.NET Web Pages Using The Razor Syntax Chapter 3 – Creating a Consistent Look 56
3. In the root folder, create a folder named Shared.
Note It's common practice to store files that are shared among web pages in a folder named
Shared.
4. In the Shared folder, create a file named _Header.cshtml. 5. Replace any existing content with the following:
<div class="header">This is header text.</div>
Notice that the file name is _Header.cshtml, with an underscore (_) as a prefix. ASP.NET won't
send a page to the browser if its name starts with an underscore. This prevents people from
requesting (inadvertently or otherwise) these pages. It's a good idea to use an underscore to
name pages that have content blocks in them, because you don't really want users to be able to
request these pages — they exist strictly to be inserted into other pages.
6. In the Shared folder, create a file named _Footer.cshtml and replace the content with the following:
<div class="footer">© 2010 Contoso Pharmaceuticals. All rights reserved. </div>
7. In the Index.cshtml page, add the following highlighted code, which makes two calls to the RenderPage method:
<!DOCTYPE html> <html> <head> <title>Main Page</title> </head> <body> @RenderPage("/Shared/_Header.cshtml") <h1>Index Page Content</h1> <p>This is the content of the main page.</p> @RenderPage("/Shared/_Footer.cshtml") </body> </html>
This shows how to insert a content block into a web page. You call the RenderPage method and
pass it the name of the file whose contents you want to insert at that point. Here, you're
inserting the contents of the _Header.cshtml and _Footer.cshtml files into the Index.cshtml file.
8. Run the Index.cshtml page in a browser. (Make sure the page is selected in the Files workspace before you run it.)
9. In the browser, view the page source. (For example, in Internet Explorer, right-click the page and then click View Source.)

ASP.NET Web Pages Using The Razor Syntax Chapter 3 – Creating a Consistent Look 57
This lets you see the web page markup that's sent to the browser, which combines the index
page markup with the content blocks. The following example shows the page source that's
rendered for Index.cshtml. The calls to RenderPage that you inserted into Index.cshtml have been
replaced with the actual contents of the header and footer files.
<!DOCTYPE html> <html> <head> <title>Main Page</title> </head> <body> <div class="header"> This is header text. </div> <h1>Index Page Content</h1> <p>This is the content of the main page.</p> <div class="footer"> © 2010 Contoso Pharmaceuticals. All rights reserved. </div> </body> </html>
Creating a Consistent Look Using Layout Pages
So far you've seen that it's easy to include the same content on multiple pages. A more structured
approach to creating a consistent look for a site is to use layout pages. A layout page defines the
structure of a web page, but doesn't contain any actual content. After you've created a layout page, you
can create web pages that contain the content and then link them to the layout page. When these pages
are displayed, they'll be formatted according to the layout page. (In this sense, a layout page acts as a
kind of template for content that's defined in other pages.)
The layout page is just like any HTML page, except that it contains a call to the RenderBody method. The
position of the RenderBody method in the layout page determines where the information from the
content page will be included.
The following diagram shows how content pages and layout pages are combined at run time to produce
the finished web page. The browser requests a content page. The content page has code in it that
specifies the layout page to use for the page's structure. In the layout page, the content is inserted at
the point where the RenderBody method is called. Content blocks can also be inserted into the layout
page by calling the RenderPage method, the way you did in the previous section. When the web page is
complete, it's sent to the browser.

ASP.NET Web Pages Using The Razor Syntax Chapter 3 – Creating a Consistent Look 58
The following procedure shows how to create a layout page and link content pages to it.
1. In the Shared folder of your website, create a file named _Layout1.cshtml. 2. Replace any existing content with the following:
<!DOCTYPE html> <head> <title> Structured Content </title> <link href="@Href("/Styles/Site.css")" rel="stylesheet" type="text/css" /> </head> <body> @RenderPage("/Shared/_Header2.cshtml") <div id="main"> @RenderBody() </div> <div id="footer"> © 2010 Contoso Pharmaceuticals. All rights reserved. </div> </body> </html>
You use the RenderPage method in a layout page to insert content blocks. A layout page can
contain only one call to the RenderBody method.
Note Web servers don't all handle hyperlink references (the href attribute of links) in the same
way. Therefore, ASP.NET provides the @Href helper, which accepts a path and provides the path to
the web server in the form that the web server expects.
3. In the Shared folder, create a file named _Header2.cshtml and replace any existing content with the following:
<div id="header">Chapter 3: Creating a Consistent Look</div>
4. In the root folder, create a new folder and name it Styles.

ASP.NET Web Pages Using The Razor Syntax Chapter 3 – Creating a Consistent Look 59
5. In the Styles folder, create a file named Site.css and add the following style definitions:
h1 { border-bottom: 3px solid #cc9900; font: 2.75em/1.75em Georgia, serif; color: #996600; } ul { list-style-type: none; } body { margin: 0; padding: 1em; background-color: #ffffff; font: 75%/1.75em "Trebuchet MS", Verdana, sans-serif; color: #006600; } #list { margin: 1em 0 7em -3em; padding: 1em 0 0 0; background-color: #ffffff; color: #996600; width: 25%; float: left; } #header, #footer { margin: 0; padding: 0; color: #996600; }
These style definitions are here only to show how style sheets can be used with layout pages. If
you want, you can define your own styles for these elements.
6. In the root folder, create a file named Content1.cshtml and replace any existing content with the following:
@{ Layout = "/Shared/_Layout1.cshtml"; } <h1> Structured Content </h1> <p>Lorem ipsum dolor sit amet, consectetur adipisicing elit, sed do eiusmod tempor incididunt ut labore et dolore magna aliqua. Ut enim ad minim veniam, quis nostrud exercitation ullamco laboris nisi ut aliquip ex ea commodo consequat. Duis aute irure dolor in reprehenderit in voluptate velit esse cillum dolore eu fugiat nulla pariatur. Excepteur sint occaecat cupidatat non proident, sunt in culpa qui officia deserunt mollit anim id est laborum.</p>
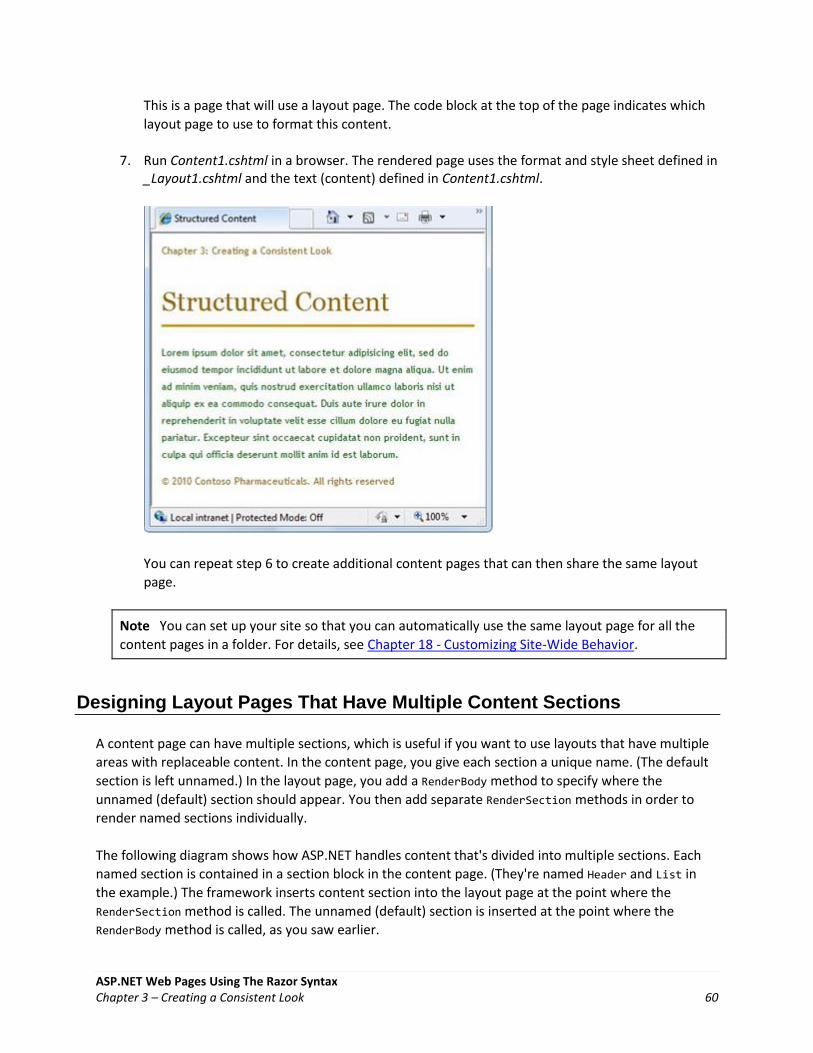
ASP.NET Web Pages Using The Razor Syntax Chapter 3 – Creating a Consistent Look 60
This is a page that will use a layout page. The code block at the top of the page indicates which
layout page to use to format this content.
7. Run Content1.cshtml in a browser. The rendered page uses the format and style sheet defined in _Layout1.cshtml and the text (content) defined in Content1.cshtml.
You can repeat step 6 to create additional content pages that can then share the same layout
page.
Note You can set up your site so that you can automatically use the same layout page for all the
content pages in a folder. For details, see Chapter 18 - Customizing Site-Wide Behavior.
Designing Layout Pages That Have Multiple Content Sections
A content page can have multiple sections, which is useful if you want to use layouts that have multiple
areas with replaceable content. In the content page, you give each section a unique name. (The default
section is left unnamed.) In the layout page, you add a RenderBody method to specify where the
unnamed (default) section should appear. You then add separate RenderSection methods in order to
render named sections individually.
The following diagram shows how ASP.NET handles content that's divided into multiple sections. Each
named section is contained in a section block in the content page. (They're named Header and List in
the example.) The framework inserts content section into the layout page at the point where the
RenderSection method is called. The unnamed (default) section is inserted at the point where the
RenderBody method is called, as you saw earlier.

ASP.NET Web Pages Using The Razor Syntax Chapter 3 – Creating a Consistent Look 61
This procedure shows how to create a content page that has multiple content sections and how to
render it using a layout page that supports multiple content sections.
1. In the Shared folder, create a file named _Layout2.cshtml. 2. Replace any existing content with the following:
<!DOCTYPE html> <html> <head> <title>Multisection Content</title> <link href="@Href("/Styles/Site.css")" rel="stylesheet" type="text/css" /> </head> <body> <div id="header"> @RenderSection("header") </div> <div id="list"> @RenderSection("list") </div> <div id="main"> @RenderBody() </div> <div id="footer"> © 2010 Contoso Pharmaceuticals. All rights reserved. </div> </body> </html>
You use the RenderSection method to render both the header and list sections.
3. In the root folder, create a file named Content2.cshtml and replace any existing content with the following:
@{

ASP.NET Web Pages Using The Razor Syntax Chapter 3 – Creating a Consistent Look 62
Layout = "/Shared/_Layout2.cshtml"; } @section header { <div id="header"> Chapter 3: Creating a Consistent Look </div> } @section list { <ul> <li>Lorem</li> <li>Ipsum</li> <li>Dolor</li> <li>Consecte</li> <li>Eiusmod</li> <li>Tempor</li> <li>Incididu</li> </ul> } <h1>Multisection Content</h1> <p>Lorem ipsum dolor sit amet, consectetur adipisicing elit, sed do eiusmod tempor incididunt ut labore et dolore magna aliqua. Ut enim ad minim veniam, quis nostrud exercitation ullamco laboris nisi ut aliquip ex ea commodo consequat. Duis aute irure dolor in reprehenderit in voluptate velit esse cillum dolore eu fugiat nulla pariatur. Excepteur sint occaecat cupidatat non proident, sunt in culpa qui officia deserunt mollit anim id est laborum.</p>
This content page contains a code block at the top of the page. Each named section is contained
in a section block. The rest of the page contains the default (unnamed) content section.
4. Run the page in a browser.

ASP.NET Web Pages Using The Razor Syntax Chapter 3 – Creating a Consistent Look 63
Making Content Sections Optional
Normally, the sections that you create in a content page have to match sections that are defined in the
layout page. You can get errors if any of the following occur:
The content page contains a section that has no corresponding section in the layout page. The layout page contains a section for which there's no content. The layout page includes method calls that try to render the same section more than once.
However, you can override this behavior for a named section by declaring the section to be optional in
the layout page. This lets you define multiple content pages that can share a layout page but that might
or might not have content for a specific section.
1. Open Content2.cshtml and remove the following section:
@section header { <div id="header"> Chapter 3: Creating a Consistent Look </div> }
2. Save the page and then run it in a browser. An error message is displayed, because the content page doesn't provide content for a section defined in the layout page, namely the header section.
3. In the Shared folder, open the _Layout2.cshtml page and replace this line:
@RenderSection("header")
with the following code:
@RenderSection("header", required: false)

ASP.NET Web Pages Using The Razor Syntax Chapter 3 – Creating a Consistent Look 64
As an alternative, you could replace the previous line of code with the following code block,
which produces the same results:
@if (IsSectionDefined("header")) { @RenderSection("header") }
4. Run the Content2.cshtml page in a browser again. (If you still have this page open in the browser, you can just refresh it.) This time the page is displayed with no error, even though it has no header.
Passing Data to Layout Pages
You might have data defined in the content page that you need to refer to in a layout page. If so, you
need to pass the data from the content page to the layout page. For example, you might want to display
the login status of a user, or you might want to show or hide content areas based on user input.
To pass data from a content page to a layout page, you can put values into the PageData property of the
content page. The PageData property is a collection of name/value pairs that hold the data that you want
to pass between pages. In the layout page, you can then read values out of the PageData property.
Here's another diagram. This one shows how ASP.NET can use the PageData property to pass values from
a content page to the layout page. When ASP.NET begins building the web page, it creates the PageData
collection. In the content page, you write code to put data in the PageData collection. Values in the
PageData collection can also be accessed by other sections in the content page or by additional content
blocks.
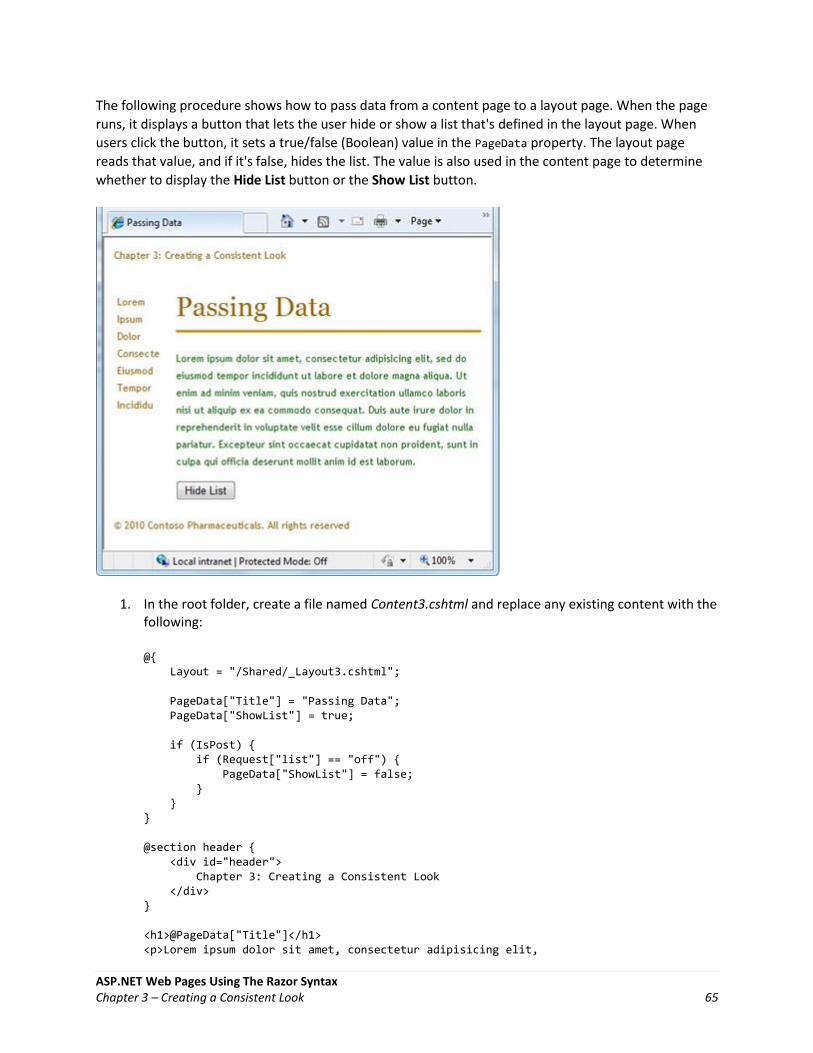
ASP.NET Web Pages Using The Razor Syntax Chapter 3 – Creating a Consistent Look 65
The following procedure shows how to pass data from a content page to a layout page. When the page
runs, it displays a button that lets the user hide or show a list that's defined in the layout page. When
users click the button, it sets a true/false (Boolean) value in the PageData property. The layout page
reads that value, and if it's false, hides the list. The value is also used in the content page to determine
whether to display the Hide List button or the Show List button.
1. In the root folder, create a file named Content3.cshtml and replace any existing content with the following:
@{ Layout = "/Shared/_Layout3.cshtml"; PageData["Title"] = "Passing Data"; PageData["ShowList"] = true; if (IsPost) { if (Request["list"] == "off") { PageData["ShowList"] = false; } } } @section header { <div id="header"> Chapter 3: Creating a Consistent Look </div> } <h1>@PageData["Title"]</h1> <p>Lorem ipsum dolor sit amet, consectetur adipisicing elit,

ASP.NET Web Pages Using The Razor Syntax Chapter 3 – Creating a Consistent Look 66
sed do eiusmod tempor incididunt ut labore et dolore magna aliqua. Ut enim ad minim veniam, quis nostrud exercitation ullamco laboris nisi ut aliquip ex ea commodo consequat. Duis aute irure dolor in reprehenderit in voluptate velit esse cillum dolore eu fugiat nulla pariatur. Excepteur sint occaecat cupidatat non proident, sunt in culpa qui officia deserunt mollit anim id est laborum.</p> @if (PageData["ShowList"] == true) { <form method="post" action=""> <input type="hidden" name="list" value="off" /> <input type="submit" value="Hide List" /> </form> } else { <form method="post" action=""> <input type="hidden" name="list" value="on" /> <input type="submit" value="Show List" /> </form> }
The code stores two pieces of data in the PageData property — the title of the web page and
true or false to specify whether to display a list.
Notice that ASP.NET lets you put HTML markup into the page conditionally using a code block.
For example, the if/else block in the body of the page determines which form to display
depending on whether PageData["ShowList"] is set to true.
2. In the Shared folder, create a file named _Layout3.cshtml and replace any existing content with the following:
<!DOCTYPE html> <html> <head> <title>@PageData["Title"]</title> <link href="@Href("/Styles/Site.css")" rel="stylesheet" type="text/css" /> </head> <body> <div id="header"> @RenderSection("header") </div> @if (PageData["ShowList"] == true) { <div id="list"> @RenderPage("/Shared/_List.cshtml") </div> } <div id="main"> @RenderBody() </div> <div id="footer"> © 2010 Contoso Pharmaceuticals. All rights reserved. </div> </body> </html>

ASP.NET Web Pages Using The Razor Syntax Chapter 3 – Creating a Consistent Look 67
The layout page includes an expression in the <title> element that gets the title value from the
PageData property. It also uses the ShowList value of the PageData property to determine
whether to display the list content block.
3. In the Shared folder, create a file named _List.cshtml and replace any existing content with the following:
<ul> <li>Lorem</li> <li>Ipsum</li> <li>Dolor</li> <li>Consecte</li> <li>Eiusmod</li> <li>Tempor</li> <li>Incididu</li> </ul>
4. Run the Content3.cshtml page in a browser. The page is displayed with the list visible on the left side of the page and a Hide List button at the bottom.
5. Click Hide List. The list disappears and the button changes to Show List.

ASP.NET Web Pages Using The Razor Syntax Chapter 3 – Creating a Consistent Look 68
6. Click the Show List button, and the list is displayed again.
Creating and Using a Basic Helper
Another option for creating a consistent look in your website is to create a custom helper. As you
learned in Chapter 1 - Getting Started with ASP.NET Web Pages, a helper is a component that lets you
accomplish a task using a single line of code. ASP.NET includes many helpers, and you'll work with many
of them in later chapters. A complete list of helpers is listed in the ASP.NET API Quick Reference.
A helper can help you create a consistent look on your website by letting you use a common block of
code across multiple pages. Suppose that in your page you often want to create a note item that's set
apart from normal paragraphs, which you create using a <div> element that's styled as a box with a
border. Rather than add the same markup to every page, you can package it as a helper, and then insert
the note with a single line of code anywhere you need it. This makes the code in each of your pages
simpler and easier to read. It also makes it easier to maintain your site, because if you need to change
how the notes look, you can change the markup in one place.
This procedure shows you how to create a helper that creates the note, as just described. This is a
simple example, but the custom helper can include any markup and ASP.NET code that you need.
1. In the root folder of the website, create a folder named App_Code. 2. In the App_Code folder create a new .cshtml file and name it MyHelpers.cshtml. 3. Replace the existing content with the following:
@helper MakeNote(string content) {

ASP.NET Web Pages Using The Razor Syntax Chapter 3 – Creating a Consistent Look 69
<div class="note" style="border: 1px solid black; width: 90%; padding: 5px; margin-left: 15px;"> <p> <strong>Note</strong> @content </p> </div> }
The code uses the @helper syntax to declare a new helper named MakeNote. This particular
helper lets you pass a parameter named content that can contain a combination of text and
markup. The helper inserts the string into the note body using the @content variable.
Notice that the file is named MyHelpers.cshtml, but the helper is named MakeNote. You can put
multiple custom helpers into a single file.
4. Save and close the file.
The next procedure shows how to use the helper you created to insert a note item into a web page.
1. In the root folder, create a new blank file called TestHelper.cshtml. 2. Add the following code to the file:
<!DOCTYPE html> <head> <title>Test Helpers Page</title> </head> <body> <p>This is some opening paragraph text.</p> <!-- Insert the call to your note helper here. --> @MyHelpers.MakeNote("My test note content.") <p>This is some following text.</p> </body> </html>
To call the helper you created, use @ followed by the file name where the helper is, a dot, and
then the helper name. (If you had multiple folders in the App_Code folder, you could use the
syntax @FolderName.FileName.HelperName to call your helper within any nested folder level).
The text that you add in quotation marks within the parentheses is the text that the helper will
display as part of the note in the web page.
3. Save the page and run it in a browser. The helper generates the note item right where you called the helper: between the two paragraphs.

ASP.NET Web Pages Using The Razor Syntax Chapter 3 – Creating a Consistent Look 70
Additional Resources
Chapter 18 - Customizing Site-Wide Behavior

ASP.NET Web Pages Using The Razor Syntax Chapter 4 – Working with Forms 71
Chapter 4 – Working with Forms
A form is a section of an HTML document where you put user-input controls, like text boxes, check
boxes, radio buttons, and pull-down lists. You use forms when you want to collect and process user
input.
What you'll learn
How to create an HTML form. How to read user input from the form. How to validate user input. How to restore form values after the page is submitted.
These are the ASP.NET programming concepts introduced in the chapter:
The Request object. Input validation. HTML encoding.
Creating a Simple HTML Form
1. Create a new website. 2. In the root folder, create a web page named Form.cshtml and enter the following markup:
<!DOCTYPE html> <html> <head> <title>Customer Form</title> </head> <body> <form method="post" action=""> <fieldset> <legend>Add Customer</legend> <div> <label for="CompanyName">Company Name:</label> <input type="text" name="CompanyName" value="" /> </div> <div> <label for="ContactName">Contact Name:</label> <input type="text" name="ContactName" value="" /> </div> <div> <label for="Employees">Employee Count:</label> <input type="text" name="Employees" value="" /> </div> <div> <label> </label> <input type="submit" value="Submit" class="submit" /> </div> </fieldset>

ASP.NET Web Pages Using The Razor Syntax Chapter 4 – Working with Forms 72
</form> </body> </html>
3. Launch the page in your browser. (Make sure the page is selected in the Files workspace before you run it.) A simple form with three input fields and a Submit button is displayed.
At this point, if you click the Submit button, nothing happens. To make the form useful, you
have to add some code that will run on the server.
Reading User Input From the Form
To process the form, you add code that reads the submitted field values and does something with them.
This procedure shows you how to read the fields and display the user input on the page. (In a production
application, you generally do more interesting things with user input. You'll do that in the chapter about
working with databases.)
1. At the top of the Form.cshtml file, enter the following code:
@{ if (IsPost) { string companyname = Request["companyname"]; string contactname = Request["contactname"]; int employeecount = Request["employees"].AsInt(); <text> You entered: <br /> Company Name: @companyname <br /> Contact Name: @contactname <br /> Employee Count: @employeecount <br /> </text> } }
The way this page works, when the user first requests the page, only the empty form is
displayed. The user (which will be you) fills in the form and then clicks Submit. This submits

ASP.NET Web Pages Using The Razor Syntax Chapter 4 – Working with Forms 73
(posts) the user input to the server. The request goes to the same page (namely, Form.cshtml)
because when you created the form in the previous procedure, you left the action attribute of
the form element blank:
<form method="post" action="">
When you submit the page this time, the values you entered are displayed just above the form:
Look at the code for the page. You first use the IsPost method to determine whether the page is
being posted — that is, whether a user clicked the Submit button. If this is a post, IsPost returns
true. This is the standard way in ASP.NET Web Pages to determine whether you're working with
an initial request (a GET request) or a postback (a POST request). (For more information about
GET and POST, see the sidebar "HTTP GET and POST and the IsPost Property" in Chapter2 -
Introduction to ASP.NET Web Programming Using the Razor Syntax.)
Next, you get the values that the user filled in from the Request object, and you put them in
variables for later. The Request object contains all the values that were submitted with the page,
each identified by a key. The key is the equivalent to the name attribute of the form field that you
want to read. For example, to read the companyname field (text box), you use
Request["companyname"].
Form values are stored in the Request object as strings. Therefore, when you have to work with
a value as a number or a date or some other type, you have to convert it from a string to that
type. In the example, the AsInt method of the Request is used to convert the value of the
employees field (which contains an employee count) to an integer.
2. Launch the page in your browser, fill in the form fields, and click Submit. The page displays the values you entered.

ASP.NET Web Pages Using The Razor Syntax Chapter 4 – Working with Forms 74
HTML Encoding for Appearance and Security
HTML has special uses for characters like <, >, and &. If these special characters appear where they're
not expected, they can ruin the appearance and functionality of your web page. For example, the
browser interprets the < character (unless it's followed by a space) as the beginning of an HTML
element, like <b> or <input ...>. If the browser doesn't recognize the element, it simply discards the
string that begins with < until it reaches something that it again recognizes. Obviously, this can result in
some weird rendering in the page.
HTML encoding replaces these reserved characters with a code that browsers interpret as the correct
symbol. For example, the < character is replaced with < and the > character is replaced with >. The
browser renders these replacement strings as the characters that you want to see.
It's a good idea to use HTML encoding any time you display strings (input) that you got from a user. If
you don't, a user can try to get your web page to run a malicious script or do something else that
compromises your site security or that's just not what you intend. (This is particularly important if you
take user input, store it someplace, and then display it later — for example, as a blog comment, user
review, or something like that.)
To help prevent these problems, ASP.NET Web Pages automatically HTML-encodes any text content that
you output from your code. For example, when you display the content of a variable or an expression
using code such as @MyVar, ASP.NET Web Pages automatically encodes the output.

ASP.NET Web Pages Using The Razor Syntax Chapter 4 – Working with Forms 75
Validating User Input
Users make mistakes. You ask them to fill in a field, and they forget to, or you ask them to enter the
number of employees and they type a name instead. To make sure that a form has been filled in
correctly before you process it, you validate the user's input.
This procedure shows how to validate all three form fields to make sure the user didn't leave them
blank. You also check that the employee count value is a number. If there are errors, you'll display an
error message that tells the user what values didn't pass validation.
1. In the Form.cshtml file, replace the first block of code with the following code:
@{ if (IsPost) { var errors = false; var companyname = Request["companyname"]; if (companyname.IsEmpty()) { errors = true; @:Company name is required.<br /> } var contactname = Request["contactname"]; if (contactname.IsEmpty()) { errors = true; @:Contact name is required.<br /> } var employeecount = 0; if (Request["employees"].IsInt()) { employeecount = Request["employees"].AsInt(); } else { errors = true; @:Employee count must be a number.<br /> } if (errors == false) { <text> You entered: <br /> Company Name: @companyname <br /> Contact Name: @contactname <br /> Employee Count: @employeecount <br /> </text> } } }
This code is similar to the code you replaced, but there are a few differences. The first difference
is that it initializes a variable named errors to false. You'll set this variable to true if any
validation tests fail.
Each time the code reads the value of a form field, it performs a validation test. For the
companyname and contactname fields, you validate them by calling the IsEmpty function. If the test
fails (that is, if IsEmpty returns true) the code sets the errors variable to true and the
appropriate error message is displayed.

ASP.NET Web Pages Using The Razor Syntax Chapter 4 – Working with Forms 76
The next step is to make sure that the user entered a numeric value (an integer) for the
employee count. To do this, you call the IsInt function. This function returns true if the value
you're testing can be converted from a string to an integer. (Or of course false if the value can't
be converted.) Remember that all values in the Request object are strings. Although in this
example it doesn’t really matter, if you wanted to do math operations on the value, the value
would have to be converted to a number.
If IsInt tells you that the value is an integer, you set the employeecount variable to that value.
However, before you do that, you have to actually convert it to an integer, because when
employeecount was initialized, it was typed using int. Notice the pattern: the IsInt function tells
you whether it's an integer; the AsInt function in the next line actually performs the conversion.
If IsInt doesn't return true, the statements in the else block set the errors variable to true.
Finally, after all the testing is done, the code determines whether the errors variable is still
false. If it is, the code displays the text block that contains the values the user entered. Launch
the page in your browser, leave the form fields blank, and click Submit. Errors are displayed.
2. Enter values into the form fields and then click Submit. A page that shows the submitted values like you saw earlier is displayed.
Restoring Form Values After Postbacks
When you tested the page in the previous section, you might have noticed that if you had a validation
error, everything you entered (not just the invalid data) was gone, and you had to re-enter values for all
the fields. This illustrates an important point: when you submit a page, process it, and then render the
page again, the page is re-created from scratch. As you saw, this means that any values that were in the
page when it was submitted are lost.

ASP.NET Web Pages Using The Razor Syntax Chapter 4 – Working with Forms 77
You can fix this easily, however. You have access to the values that were submitted (in the Request
object, so you can fill those values back into the form fields when the page is rendered.
1. In the Form.cshtml file, replace the default page with the following markup:
<!DOCTYPE html> <html> <head> <title>Customer Form</title> </head> <body> <form method="post" action=""> <fieldset> <legend>Add Customer</legend> <div> <label for="CompanyName">Company Name:</label> <input type="text" name="CompanyName" value="@Request["companyname"]" /> </div> <div> <label for="ContactName">Contact Name:</label> <input type="text" name="ContactName" value="@Request["contactname"]" /> </div> <div> <label for="Employees">Employee Count:</label> <input type="text" name="Employees" value="@Request["employees"]" /> </div> <div> <label> </label> <input type="submit" value="Submit" class="submit" /> </div> </fieldset> </form> </body> </html>
The value attribute of the <input> elements has been set to dynamically read the field value out
of the Request object. The first time that the page is requested, the values in the Request object
are all empty. This is fine, because that way the form is blank.
2. Launch the page in your browser, fill in the form fields or leave them blank, and click Submit. A page that shows the submitted values is displayed.

ASP.NET Web Pages Using The Razor Syntax Chapter 4 – Working with Forms 78
Additional Resources
1,001 Ways to Get Input from Web Users Using Forms and Processing User Input Using AutoComplete in HTML Forms Gathering Information With HTML Forms Go Beyond HTML Forms With AJAX

ASP.NET Web Pages Using The Razor Syntax Chapter 5 – Working with Data 79
Chapter 5 – Working with Data
This chapter describes how to access data from a database and display it using ASP.NET Web Pages.
What you'll learn
How to create a database. How to connect to a database. How to display data in a web page. How to insert, update, and delete database records.
These are the features introduced in the chapter:
Working with a Microsoft SQL Server Compact Edition database. Working with SQL queries. The Database class.
Introduction to Databases
Imagine a typical address book. For each entry in the address book (that is, for each person) you have
several pieces of information such as first name, last name, address, email address, and phone number.
A typical way to picture data like this is as a table with rows and columns. In database terms, each row is
often referred to as a record. Each column (sometimes referred to as fields) contains a value for each
type of data: first name, last name, and so on.
ID FirstName LastName Address Email Phone
1 Jim Abrus 210 100th St SE Orcas WA 98031 [email protected] 555 0100
2 Terry Adams 1234 Main St. Seattle WA 99011 [email protected] 555 0101
For most database tables, the table has to have a column that contains a unique identifier, like a
customer number, account number, etc. This is known as the table's primary key, and you use it to
identify each row in the table. In the example, the ID column is the primary key for the address book.
With this basic understanding of databases, you're ready to learn how to create a simple database and
perform operations such as adding, modifying, and deleting data.
Relational Databases
You can store data in lots of ways, including text files and spreadsheets. For most business uses, though,
data is stored in a relational database.

ASP.NET Web Pages Using The Razor Syntax Chapter 5 – Working with Data 80
This chapter doesn't go very deeply into databases. However, you might find it useful to understand a
little about them. In a relational database, information is logically divided into separate tables. For
example, a database for a school might contain separate tables for students and for class offerings. The
database software (such as SQL Server) supports powerful commands that let you dynamically establish
relationships between the tables. For example, you can use the relational database to establish a logical
relationship between students and classes in order to create a schedule. Storing data in separate tables
reduces the complexity of the table structure and reduces the need to keep redundant data in tables.
Creating a Database
This procedure shows you how to create a database named SmallBakery by using the SQL Server
Compact Database design tool that’s included in WebMatrix. Although you can create a database using
code, it's more typical to create the database and database tables using a design tool like WebMatrix.
1. Start WebMatrix, and on the Quick Start page, click Site From Template. 2. Select Empty Site, and in the Site Name box enter "SmallBakery" and then click OK. The site is
created and displayed in WebMatrix. 3. In the left pane, click the Databases workspace. 4. In the ribbon, click New Database. An empty database is created with the same name as your
site. 5. In the left pane, expand the SmallBakery.sdf node and then double-click Tables. 6. In the ribbon, click New Table. WebMatrix opens the table designer.
7. Under Column Properties, for (Name), enter "Id". 8. For the new Id column, set Is Identity and Is Primary Key to true.
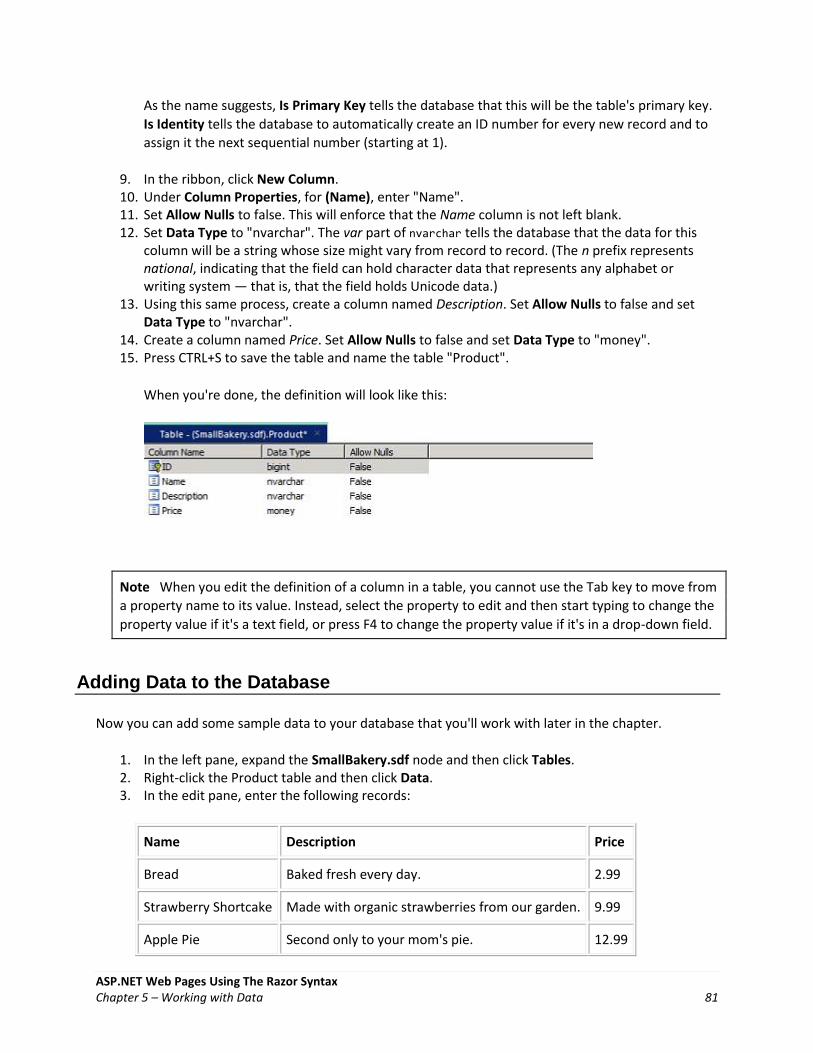
ASP.NET Web Pages Using The Razor Syntax Chapter 5 – Working with Data 81
As the name suggests, Is Primary Key tells the database that this will be the table's primary key.
Is Identity tells the database to automatically create an ID number for every new record and to
assign it the next sequential number (starting at 1).
9. In the ribbon, click New Column. 10. Under Column Properties, for (Name), enter "Name". 11. Set Allow Nulls to false. This will enforce that the Name column is not left blank. 12. Set Data Type to "nvarchar". The var part of nvarchar tells the database that the data for this
column will be a string whose size might vary from record to record. (The n prefix represents national, indicating that the field can hold character data that represents any alphabet or writing system — that is, that the field holds Unicode data.)
13. Using this same process, create a column named Description. Set Allow Nulls to false and set Data Type to "nvarchar".
14. Create a column named Price. Set Allow Nulls to false and set Data Type to "money". 15. Press CTRL+S to save the table and name the table "Product".
When you're done, the definition will look like this:
Note When you edit the definition of a column in a table, you cannot use the Tab key to move from
a property name to its value. Instead, select the property to edit and then start typing to change the
property value if it's a text field, or press F4 to change the property value if it's in a drop-down field.
Adding Data to the Database
Now you can add some sample data to your database that you'll work with later in the chapter.
1. In the left pane, expand the SmallBakery.sdf node and then click Tables. 2. Right-click the Product table and then click Data. 3. In the edit pane, enter the following records:
Name Description Price
Bread Baked fresh every day. 2.99
Strawberry Shortcake Made with organic strawberries from our garden. 9.99
Apple Pie Second only to your mom's pie. 12.99

ASP.NET Web Pages Using The Razor Syntax Chapter 5 – Working with Data 82
Pecan Pie If you like pecans, this is for you. 10.99
Lemon Pie Made with the best lemons in the world. 11.99
Cupcakes Your kids and the kid in you will love these. 7.99
4. Remember that you don't have to enter anything for the Id column. When you created the Id column, you set its Is Identity property to true, which causes it to automatically be filled in.
5. When you're finished entering the data, the table designer will look like this:
6. 7. Close the tab that contains the database data.
Displaying Data from a Database
Once you've got a database with data in it, you can display the data in an ASP.NET web page. To select
the table rows to display, you use a SQL statement, which is a command that you pass to the database.
1. In the left pane, click the Files workspace. 2. In the root of the website, create a new CSHTML page named ListProducts.cshtml. 3. Replace the existing markup with the following:
@{ var db = Database.Open("SmallBakery"); var selectQueryString = "SELECT * FROM Product ORDER BY Name"; } <!DOCTYPE html> <html> <head> <title>Small Bakery Products</title> <style> table, th, td { border: solid 1px #bbbbbb; border-collapse: collapse; padding: 2px; } </style> </head> <body> <h1>Small Bakery Products</h1> <table> <thead> <tr> <th>Id</th>

ASP.NET Web Pages Using The Razor Syntax Chapter 5 – Working with Data 83
<th>Product</th> <th>Description</th> <th>Price</th> </tr> </thead> <tbody> @foreach(var row in db.Query(selectQueryString)){ <tr> <td>@row.Id</td> <td>@row.Name</td> <td>@row.Description</td> <td>@row.Price</td> </tr> } </tbody> </table> </body> </html>
In the first code block, you open the SmallBakery.sdf file (database) that you created earlier. The
Database.Open method assumes that the .sdf file is in your website's App_Data folder. (Notice
that you don't need to specify the .sdf extension — in fact, if you do, the Open method won't
work.)
Note The App_Data folder is a special folder in ASP.NET that's used to store data files. For more
information, see Connecting to a Database later in this chapter.
You then make a request to query the database using the following SQL Select statement:
SELECT * FROM Product ORDER BY Name
In the statement, Product identifies the table to query. The * character specifies that the query
should return all the columns from the table. (You could also list columns individually, separated
by commas, if you wanted to see only some of the columns.) The Order By clause indicates how
the data should be sorted — in this case, by the Name column. This means that the data is
sorted alphabetically based on the value of the Name column for each row.
In the body of the page, the markup creates an HTML table that will be used to display the data.
Inside the <tbody> element, you use a foreach loop to individually get each data row that's
returned by the query. For each data row, you create an HTML table row (<tr> element). Then
you create HTML table cells (<td> elements) for each column. Each time you go through the
loop, the next available row from the database is in the row variable (you set this up in the
foreach statement). To get an individual column from the row, you can use row.Name or
row.Description or whatever the name is of the column you want.
4. Run the page in a browser. (Make sure the page is selected in the Files workspace before you run it.) The page displays a list like the following:

ASP.NET Web Pages Using The Razor Syntax Chapter 5 – Working with Data 84
Structured Query Language (SQL)
SQL is a language that's used in most relational databases for managing data in a database. It includes
commands that let you retrieve data and update it, and that let you create, modify, and manage
database tables. SQL is different than a programming language (like the one you're using in WebMatrix)
because with SQL, the idea is that you tell the database what you want, and it's the database's job to
figure out how to get the data or perform the task. Here are examples of some SQL commands and what
they do:
SELECT Id, Name, Price FROM Product WHERE Price > 10.00 ORDER BY Name
This fetches the Id, Name, and Price columns from records in the Product table if the value of Price is
more than 10, and returns the results in alphabetical order based on the values of the Name column.
This command will return a result set that contains the records that meet the criteria, or an empty set if
no records match.
INSERT INTO Product (Name, Description, Price) VALUES ("Croissant", "A flaky delight", 1.99)
This inserts a new record into the Product table, setting the Name column to "Croissant", the Description
column to "A flaky delight", and the price to 1.99.
DELETE FROM Product WHERE ExpirationDate < "01/01/2008"
This command deletes records in the Product table whose expiration date column is earlier than January
1, 2008. (This assumes that the Product table has such a column, of course.) The date is entered here in
MM/DD/YYYY format, but it should be entered in the format that's used for your locale.
The Insert Into and Delete commands don’t return result sets. Instead, they return a number that tells
you how many records were affected by the command.
For some of these operations (like inserting and deleting records), the process that's requesting the
operation has to have appropriate permissions in the database. This is why for production databases
you often have to supply a username and password when you connect to the database.

ASP.NET Web Pages Using The Razor Syntax Chapter 5 – Working with Data 85
There are dozens of SQL commands, but they all follow a pattern like this. You can use SQL commands to
create database tables, count the number of records in a table, calculate prices, and perform many
more operations.
Inserting Data in a Database
This section shows how to create a page that lets users add a new product to the Product database
table. After a new product record is inserted, the page displays the updated table using the
ListProducts.cshtml page that you created in the previous section.
The page includes validation to make sure that the data that the user enters is valid for the database.
For example, code in the page makes sure that a value has been entered for all required columns.
Note For some of these operations (like inserting and deleting records), the process that's
requesting the operation has to have appropriate permissions in the database. For production
databases (as opposed to the test database that you're working with in WebMatrix) you often have
to supply a username and password when you connect to the database.
1. In the website, create a new CSHTML file named InsertProducts.cshtml. 2. Replace the existing markup with the following:
@{ var db = Database.Open("SmallBakery"); var Name = Request["Name"]; var Description = Request["Description"]; var Price = Request["Price"]; if (IsPost) { // Read product name. Name = Request["Name"]; if (Name.IsEmpty()) { ModelState.AddError("Name", "Product name is required."); } // Read product description. Description = Request["Description"]; if (Description.IsEmpty()) { ModelState.AddError("Description", "Product description is required."); } // Read product price Price = Request["Price"]; if (Price.IsEmpty()) { ModelState.AddError("Price", "Product price is required."); } // Define the insert query. The values to assign to the // columns in the Product table are defined as parameters

ASP.NET Web Pages Using The Razor Syntax Chapter 5 – Working with Data 86
// with the VALUES keyword. if(ModelState.IsValid) { var insertQuery = "INSERT INTO Product (Name, Description, Price) " + "VALUES (@0, @1, @2)"; db.Execute(insertQuery, Name, Description, Price); // Display the page that lists products. Response.Redirect(@Href("~/ListProducts")); } } } <!DOCTYPE html> <html> <head> <title>Add Products</title> <style type="text/css"> label {float:left; width: 8em; text-align: right; margin-right: 0.5em;} fieldset {padding: 1em; border: 1px solid; width: 35em;} legend {padding: 2px 4px; border: 1px solid; font-weight:bold;} .validation-summary-errors {font-weight:bold; color:red; font-size: 11pt;} </style> </head> <body> <h1>Add New Product</h1> @Html.ValidationSummary("Errors with your submission:") <form method="post" action=""> <fieldset> <legend>Add Product</legend> <div> <label>Name:</label> <input name="Name" type="text" size="50" value="@Name" /> </div> <div> <label>Description:</label> <input name="Description" type="text" size="50" value="@Description" /> </div> <div> <label>Price:</label> <input name="Price" type="text" size="50" value="@Price" /> </div> <div> <label> </label> <input type="submit" value="Insert" class="submit" /> </div> </fieldset> </form> </body> </html>
The body of the page contains an HTML form with three text boxes that let users enter a name,
description, and price. When users click the Insert button, the code at the top of the page opens
ASP.NET Web Pages Using The Razor Syntax Chapter 5 – Working with Data 87
a connection to the SmallBakery.sdf database. You then get the values that the user has
submitted by using the Request object and assign those values to local variables.
To validate that the user entered a value for each required column, you do this:
Name = Request["Name"]; if (Name.IsEmpty()) { ModelState.AddError("Name", "Product name is required."); }
If the value of the Name column is empty, you use the ModelState.AddError method and pass it
an error message. You repeat this for each column you want to check. After all the columns have
been checked, you perform this test:
if(ModelState.IsValid) { // ... }
If all the columns validated (none were empty), you go ahead and create a SQL statement to
insert the data and then execute it as shown next:
var insertQuery = "INSERT INTO Product (Name, Description, Price) VALUES (@0, @1, @2)";
For the values to insert, you include parameter placeholders (@0, @1, @2).
Note As a security precaution, always pass values to a SQL statement using parameters, as you see
in the preceding example. This gives you a chance to validate the user's data, plus it helps protect
against attempts to send malicious commands to your database (sometimes referred to as SQL
injection attacks).
To execute the query, you use this statement, passing to it the variables that contain the values
to substitute for the placeholders:
db.Execute(insertQuery, Name, Description, Price);
After the Insert Into statement has executed, you send the user to the page that lists the
products using this line:
Response.Redirect("~/ListProducts");
If validation didn't succeed, you skip the insert. Instead, you have a helper in the page that can
display the accumulated error messages (if any):
@Html.ValidationSummary("Errors with your submission:")
Notice that the style block in the markup includes a CSS class definition named .validation-
summary-errors. This is the name of the CSS class that's used by default for the <div> element

ASP.NET Web Pages Using The Razor Syntax Chapter 5 – Working with Data 88
that contains any validation errors. In this case, the CSS class specifies that validation summary
errors are displayed in red and in bold, but you can define the .validation-summary-errors class
to display any formatting you like.
3. View the page in a browser. The page displays a form that's similar to the one that's shown in the following illustration.
4. Enter values for all the columns, but make sure that you leave the Price column blank. 5. Click Insert. The page displays an error message, as shown in the following illustration. (No new
record is created.)
6. Fill the form out completely, and then click Insert. This time, the ListProducts.cshtml page is displayed and shows the new record.
Updating Data in a Database
After data has been entered into a table, you might need to update it. This procedure shows you how to
create two pages that are similar to the ones you created for data insertion earlier. The first page
displays products and lets users select one to change. The second page lets the users actually make the
edits and save them.
Important In a production website, you typically restrict who's allowed to make changes to the data.
For information about how to set up membership and about ways to authorize users to perform tasks
on the site, see Chapter 16 - Adding Security and Membership.
1. In the website, create a new CSHTML file named EditProducts.cshtml. 2. Replace the existing markup in the file with the following:
@{ var db = Database.Open("SmallBakery"); var selectQueryString = "SELECT * FROM Product ORDER BY Name";

ASP.NET Web Pages Using The Razor Syntax Chapter 5 – Working with Data 89
} <!DOCTYPE html> <html> <head> <title>Edit Products</title> <style type="text/css"> table, th, td { border: solid 1px #bbbbbb; border-collapse: collapse; padding: 2px; } </style> </head> <body> <h1>Edit Small Bakery Products</h1> <table> <thead> <tr> <th> </th> <th>Name</th> <th>Description</th> <th>Price</th> </tr> </thead> <tbody> @foreach (var row in db.Query(selectQueryString)) { <tr> <td><a href="@Href("~/UpdateProducts", row.Id)">Edit</a></td> <td>@row.Name</td> <td>@row.Description</td> <td>@row.Price</td> </tr> } </tbody> </table> </body> </html>
The only difference between this page and the ListProducts.cshtml page from earlier is that the
HTML table in this page includes an extra column that displays an Edit link. When you click this
link, it takes you to the UpdateProducts.cshtml page (which you'll create next) where you can
edit the selected record.
Look at the code that creates the Edit link:
<a href="@Href("~/UpdateProducts", row.Id)">Edit</a></td>
This creates an HTML anchor (an <a> element) whose href attribute is set dynamically. The href
attribute specifies the page to display when the user clicks the link. It also passes the Id value of
the current row to the link. When the page runs, the page source might contain links like these:
<a href="UpdateProducts/1">Edit</a></td> <a href="UpdateProducts/2">Edit</a></td> <a href="UpdateProducts/3">Edit</a></td>

ASP.NET Web Pages Using The Razor Syntax Chapter 5 – Working with Data 90
Notice that the href attribute is set to UpdateProducts/n, where n is a product number. When a
user clicks one of these links, the resulting URL will look something like this:
http://localhost:18816/UpdateProducts/6
In other words, the product number to be edited will be passed in the URL.
3. View the page in a browser. The page displays the data in a format like this:
Next, you'll create the page that lets users actually update the data. The update page includes
validation to validate the data that the user enters. For example, code in the page makes sure
that a value has been entered for all required columns.
4. In the website, create a new CSHTML file named UpdateProducts.cshtml. 5. Replace the existing markup in the file with the following:
@{ var db = Database.Open("SmallBakery"); var selectQueryString = "SELECT * FROM Product WHERE Id=@0"; var ProductId = UrlData[0]; if (ProductId.IsEmpty()) { Response.Redirect(@Href("~/EditProducts")); } var row = db.QuerySingle(selectQueryString, ProductId); var Name = row.Name; var Description = row.Description; var Price = row.Price; if (IsPost) { Name = Request["Name"]; if (String.IsNullOrEmpty(Name)) { ModelState.AddError("Name", "Product name is required."); } Description = Request["Description"]; if (String.IsNullOrEmpty(Description)) { ModelState.AddError("Description",

ASP.NET Web Pages Using The Razor Syntax Chapter 5 – Working with Data 91
"Product description is required."); } Price = Request["Price"]; if (String.IsNullOrEmpty(Price)) { ModelState.AddError("Price", "Product price is required."); } if(ModelState.IsValid) { var updateQueryString = "UPDATE Product SET Name=@0, Description=@1, Price=@2 WHERE Id=@3" ; db.Execute(updateQueryString, Name, Description, Price, ProductId); Response.Redirect(@Href("~/EditProducts")); } } } <!DOCTYPE html> <html> <head> <title>Add Products</title> <style type="text/css"> label { float: left; width: 8em; text-align: right; margin-right: 0.5em;} fieldset { padding: 1em; border: 1px solid; width: 35em;} legend { padding: 2px 4px; border: 1px solid; font-weight: bold;} .validation-summary-errors {font-weight:bold; color:red; font-size:11pt;} </style> </head> <body> <h1>Update Product</h1> @Html.ValidationSummary("Errors with your submission:") <form method="post" action=""> <fieldset> <legend>Update Product</legend> <div> <label>Name:</label> <input name="Name" type="text" size="50" value="@Name" /> </div> <div> <label>Description:</label> <input name="Description" type="text" size="50" value="@Description" /> </div> <div> <label>Price:</label> <input name="Price" type="text" size="50" value="@Price" /> </div> <div> <label> </label> <input type="submit" value="Update" class="submit" /> </div> </fieldset> </form> </body> </html>

ASP.NET Web Pages Using The Razor Syntax Chapter 5 – Working with Data 92
The body of the page contains an HTML form where a product is displayed and where users can
edit it. To get the product to display, you use this SQL statement:
SELECT * FROM Product WHERE Id=@0
This will select the product whose ID matches the value that's passed in the @0 parameter.
(Because Id is the primary key and therefore must be unique, only one product record can ever
be selected this way.) To get the ID value to pass to this Select statement, you can read the
value that's passed to the page as part of the URL, using the following syntax:
var ProductId = UrlData[0];
To actually fetch the product record, you use the QuerySingle method, which will return just one
record:
var row = db.QuerySingle(selectQueryString, ProductId);
The single row is returned into the row variable. You can get data out of each column and assign
it to local variables like this:
var Name = row.Name; var Description = row.Description; var Price = row.Price;
In the markup for the form, these values are displayed automatically in individual text boxes by
using embedded code like the following:
<input name="Name" type="text" size="50" value="@Name" />
That part of the code displays the product record to be updated. Once the record has been
displayed, the user can edit individual columns.
When the user submits the form by clicking the Update button, the code in the if(IsPost) block
runs. This gets the user's values from the Request object, stores the values in variables, and
validates that each column has been filled in. If validation passes, the code creates the following
SQL Update statement:
UPDATE Product SET Name=@0, Description=@1, Price=@2, WHERE ID=@3
In a SQL Update statement, you specify each column to update and the value to set it to. In this
code, the values are specified using the parameter placeholders @0, @1, @2, and so on. (As noted
earlier, for security, you should always pass values to a SQL statement by using parameters.)
When you call the db.Execute method, you pass the variables that contain the values in the
order that corresponds to the parameters in the SQL statement:
db.Execute(updateQueryString, Name, Description, Price, ProductId);

ASP.NET Web Pages Using The Razor Syntax Chapter 5 – Working with Data 93
After the Update statement has been executed, you call the following method in order to
redirect the user back to the edit page:
Response.Redirect(@Href("~/EditProducts"));
The effect is that the user sees an updated listing of the data in the database and can edit
another product.
6. Save the page. 7. Run the EditProducts.cshtml page (not the update page) and then click Edit to select a product
to edit. The UpdateProducts.cshtml page is displayed, showing the record you selected.
8. Make a change and click Update. The products list is shown again with your updated data.
Deleting Data in a Database
This section shows how to let users delete a product from the Product database table. The example
consists of two pages. In the first page, users select a record to delete. The record to be deleted is then
displayed in a second page that lets them confirm that they want to delete the record.
Important In a production website, you typically restrict who's allowed to make changes to the
data. For information about how to set up membership and about ways to authorize user to
perform tasks on the site, see Chapter 16 - Adding Security and Membership.
1. In the website, create a new CSHTML file named ListProductsForDelete.cshtml. 2. Replace the existing markup with the following:
@{ var db = Database.Open("SmallBakery"); var selectQueryString = "SELECT * FROM Product ORDER BY Name"; } <!DOCTYPE html> <html> <head> <title>Delete a Product</title> <style> table, th, td { border: solid 1px #bbbbbb; border-collapse: collapse; padding: 2px; } </style>

ASP.NET Web Pages Using The Razor Syntax Chapter 5 – Working with Data 94
</head> <body> <h1>Delete a Product</h1> <form method="post" action="" name="form"> <table border="1"> <thead> <tr> <th> </th> <th>Name</th> <th>Description</th> <th>Price</th> </tr> </thead> <tbody> @foreach (var row in db.Query(selectQueryString)) { <tr> <td><a href="@Href("~/DeleteProduct", row.Id)">Delete</a></td> <td>@row.Name</td> <td>@row.Description</td> <td>@row.Price</td> </tr> } </tbody> </table> </form> </body> </html>
This page is similar to the EditProducts.cshtml page from earlier. However, instead of displaying
an Edit link for each product, it displays a Delete link. The Delete link is created using the
following embedded code in the markup:
<a href="@Href("~/DeleteProduct", row.Id)">Delete</a>
This creates a URL that looks like this when users click the link:
http://<server>/DeleteProduct/4
The URL calls a page named DeleteProduct.cshtml (which you'll create next) and passes it the ID
of the product to delete (here, 4).
3. Save the file, but leave it open. 4. Create another CHTML file named DeleteProduct.cshtml and replace the existing content with
the following:
@{ var db = Database.Open("SmallBakery"); var ProductId = UrlData[0]; if (ProductId.IsEmpty()) { Response.Redirect(@Href("~/ListProductsForDelete")); } var prod = db.QuerySingle("SELECT * FROM PRODUCT WHERE ID = @0", ProductId); if( IsPost && !ProductId.IsEmpty()) { var deleteQueryString = "DELETE FROM Product WHERE Id=@0";

ASP.NET Web Pages Using The Razor Syntax Chapter 5 – Working with Data 95
db.Execute(deleteQueryString, ProductId); Response.Redirect("~/ListProductsForDelete"); } } <!DOCTYPE html> <html <head> <title>Delete Product</title> </head> <body> <h1>Delete Product - Confirmation</h1> <form method="post" action="" name="form"> <p>Are you sure you want to delete the following product?</p> <p>Name: @prod.Name <br /> Description: @prod.Description <br /> Price: @prod.Price</p> <p><input type="submit" value="Delete" /></p> </form> </body> </html>
This page is called by ListProductsForDelete.cshtml and lets users confirm that they want to
delete a product. To list the product to be deleted, you get the ID of the product to delete from
the URL using the following code:
var ProductId = UrlData[0];
The page then asks the user to click a button to actually delete the record. This is an important
security measure: when you perform sensitive operations in your website like updating or
deleting data, these operations should always be done using a POST operation, not a GET
operation. If your site is set up so that a delete operation can be performed using a GET
operation, anyone can pass a URL like http://<server>/DeleteProduct/4 and delete anything they
want from your database. By adding the confirmation and coding the page so that the deletion
can be performed only by using a POST, you add a measure of security to your site.
The actual delete operation is performed using the following code, which first confirms that this
is a post operation and that the ID isn't empty:
if( IsPost && !ProductId.IsEmpty()) { var deleteQueryString = "DELETE FROM Product WHERE Id=@0"; db.Execute(deleteQueryString, ProductId); Response.Redirect("~/ListProductsForDelete"); }
The code runs a SQL statement that deletes the specified record and then redirects the user
back to the listing page.
5. Run ListProductsForDelete.cshtml in a browser.

ASP.NET Web Pages Using The Razor Syntax Chapter 5 – Working with Data 96
6. Click the Delete link for one of the products. The DeleteProduct.cshtml page is displayed to confirm that you want to delete that record.
7. Click the Delete button. The product record is deleted and the page is refreshed with an updated product listing.
Connecting to a Database
You can connect to a database in two ways. The first is to use the Database.Open method and to specify
the name of the database file (less the .sdf extension):
var db = Database.Open("SmallBakery");
The Open method assumes that the .sdf file is in the website’s App_Data folder. This folder is designed
specifically for holding data. For example, it has appropriate permissions to allow the website to read
and write data, and as a security measure, WebMatrix does not allow access to files from this folder.
The second way is to use a connection string. A connection string contains information about how to
connect to a database. This can include a file path, or it can include the name of a SQL Server database
on a local or remote server, along with a user name and password to connect to that server. (If you keep
data in a centrally managed version of SQL Server, such as on a hosting provider's site, you always use a
connection string to specify the database connection information.)
In WebMatrix, connection strings are usually stored in an XML file named Web.config. As the name
implies, you can use a Web.config file in the root of your website to store the site's configuration
information, including any connection strings that your site might require. An example of a connection
string in a Web.config file might look like the following:
<?xml version="1.0" encoding="utf-8" ?> <configuration> <connectionStrings> <add name="SQLServerConnectionString" connectionString= "server=myServer;database=myDatabase;uid=username;pwd=password" providerName="System.Data.SqlClient" /> </connectionStrings> </configuration>

ASP.NET Web Pages Using The Razor Syntax Chapter 5 – Working with Data 97
In the example, the connection string points to a database in an instance of SQL Server that's running on
a server somewhere (as opposed to a local .sdf file). You would need to substitute the appropriate
names for myServer and myDatabase, and specify SQL Server login values for username and password. (The
username and password values are not necessarily the same as your Windows credentials or as the
values that your hosting provider has given you for logging in to their servers. Check with the
administrator for the exact values you need.)
The Database.Open method is flexible, because it lets you pass either the name of a database .sdf file or
the name of a connection string that's stored in the Web.config file. The following example shows how
to connect to the database using the connection string illustrated in the previous example:
@{ var db = Database.Open("SQLServerConnectionString"); }
As noted, the Database.Open method lets you pass either a database name or a connection string, and
it'll figure out which to use. This is very useful when you deploy (publish) your website. You can use an
.sdf file in the App_Data folder when you're developing and testing your site. Then when you move your
site to a production server, you can use a connection string in the Web.config file that has the same
name as your .sdf file but that points to the hosting provider's database — all without having to change
your code.
Finally, if you want to work directly with a connection string, you can call the
Database.OpenConnectionString method and pass it the actual connection string instead of just the
name of one in the Web.config file. This might be useful in situations where for some reason you don't
have access to the connection string (or values in it, such as the .sdf file name) until the page is running.
However, for most scenarios, you can use Database.Open as described in this chapter.
Additional Resources
SQL Server Compact
Connecting to a SQL Server or MySQL Database in WebMatrix

ASP.NET Web Pages Using The Razor Syntax Chapter 5 – Working with Data 98

ASP.NET Web Pages Using The Razor Syntax Chapter 6 – Displaying Data in a Grid 99
Chapter 6 – Displaying Data in a Grid
This chapter explains how to use a helper to display data in an HTML table (in a grid).
What you'll learn
How to display data in a web page using the WebGrid helper. How to format the data that's displayed in the grid. How to add paging to the grid.
These are the ASP.NET programming features introduced in the chapter:
The WebGrid helper.
The WebGrid Helper
In the previous chapter, you displayed data in a page by doing all the work yourself. But there's also an
easier way to display data — use the WebGrid helper. The helper can render an HTML table for you that
displays data. The helper supports options for formatting, for creating a way to page through the data,
and for letting users sort just by clicking a column heading.
Displaying Data Using the WebGrid Helper
This procedure shows you how to display data in a WebGrid helper by using its simplest configuration.
1. Open the website you created for Chapter 5 - Working with Data.
If you didn't run the procedures in that chapter, you don't need to run all of them now.
However, you do need the SmallBakery.sdf database file that's created at the beginning of
Chapter 5. This file must be in the App_Data folder of the website you're working with.
2. In your website, create a new CSHTML file named WebGridBasic.cshtml. 3. Replace the existing markup with the following:
@{ var db = Database.Open("SmallBakery") ; var selectQueryString = "SELECT * FROM Product ORDER BY Id"; var data = db.Query(selectQueryString); var grid = new WebGrid(data); } <!DOCTYPE html> <html> <head> <title>Displaying Data Using the WebGrid Helper</title> </head> <body>
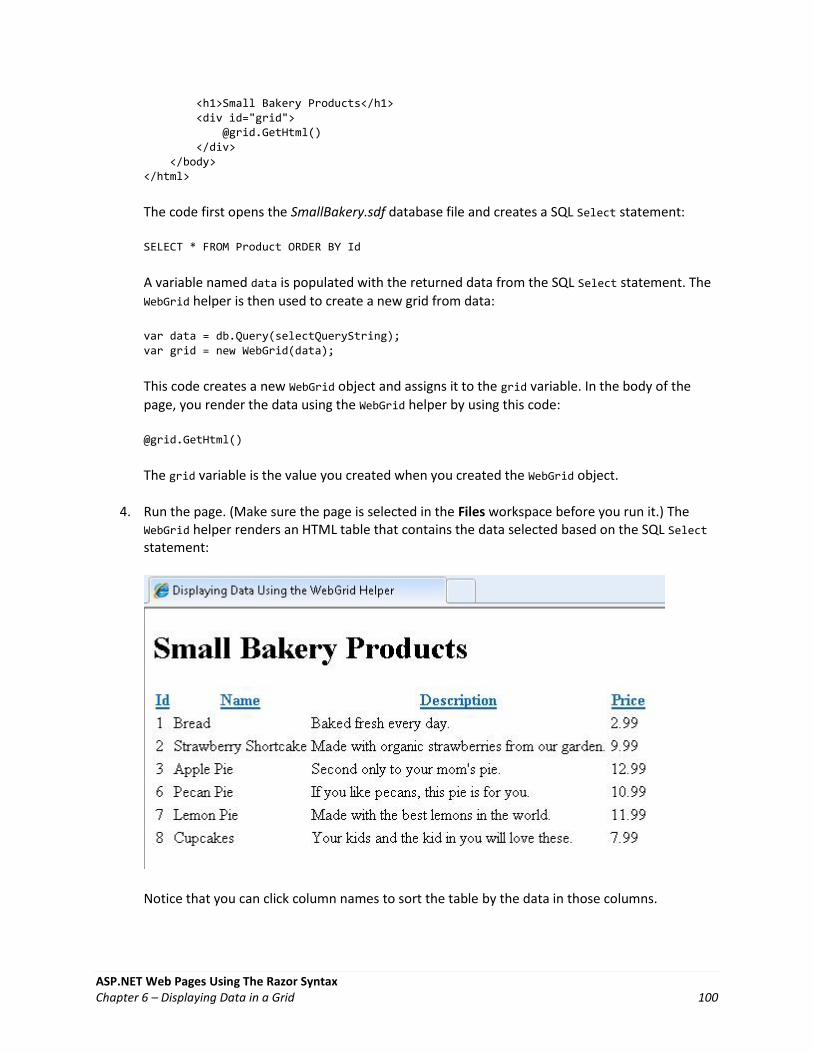
ASP.NET Web Pages Using The Razor Syntax Chapter 6 – Displaying Data in a Grid 100
<h1>Small Bakery Products</h1> <div id="grid"> @grid.GetHtml() </div> </body> </html>
The code first opens the SmallBakery.sdf database file and creates a SQL Select statement:
SELECT * FROM Product ORDER BY Id
A variable named data is populated with the returned data from the SQL Select statement. The
WebGrid helper is then used to create a new grid from data:
var data = db.Query(selectQueryString); var grid = new WebGrid(data);
This code creates a new WebGrid object and assigns it to the grid variable. In the body of the
page, you render the data using the WebGrid helper by using this code:
@grid.GetHtml()
The grid variable is the value you created when you created the WebGrid object.
4. Run the page. (Make sure the page is selected in the Files workspace before you run it.) The WebGrid helper renders an HTML table that contains the data selected based on the SQL Select statement:
Notice that you can click column names to sort the table by the data in those columns.

ASP.NET Web Pages Using The Razor Syntax Chapter 6 – Displaying Data in a Grid 101
As you can see, even using the simplest possible code for the WebGrid helper does a lot of work for you
when displaying (and sorting) the data. The helper can do quite a bit more as well. In the remainder of
this chapter, you'll see how you can configure the WebGrid helper to do the following:
Specify which data columns to display and how to format the display of those columns. Style the grid as a whole. Page through data.
Specifying and Formatting Columns to Display
By default, the WebGrid helper displays all the data columns that are returned by the SQL query. You can
customize the display of this data in the following ways:
Specify which columns the helper displays, and in what order. You might do this if you want to display only a subset of the data columns that are returned by the SQL query.
Specify formatting instructions for how data should be displayed — for example, add a currency symbol (like "$") to data that represents money.
In this procedure, you'll use WebGrid helper options to format individual columns.
1. In the website, create a new page named WebGridColumnFormat.cshtml. 2. Replace the existing markup with the following:
@{ var db = Database.Open("SmallBakery") ; var selectQueryString = "SELECT * FROM Product ORDER BY Id"; var data = db.Query(selectQueryString); var grid = new WebGrid(data); } <!DOCTYPE html> <html> <head> <title>Displaying Data Using the WebGrid Helper (Custom Formatting)</title> <style type="text/css"> .product { width: 200px; font-weight:bold;} </style> </head> <body> <h1>Small Bakery Products</h1> <div id="grid"> @grid.GetHtml( columns: grid.Columns( grid.Column("Name", "Product", style: "product"), grid.Column("Description", format:@<i>@item.Description</i>), grid.Column("Price", format:@<text>[email protected]</text>) ) ) </div> </body> </html>

ASP.NET Web Pages Using The Razor Syntax Chapter 6 – Displaying Data in a Grid 102
This example is like the previous one, except that when you render the grid in the body of the
page by calling grid.GetHtml, you're specifying both the columns to display and how to display
them. The following code shows how to specify which columns to display and the order in which
they should be displayed:
@grid.GetHtml( columns: grid.Columns( grid.Column("Name", "Product", style: "product"), grid.Column("Description", format:@<i>@item.Description</i>), grid.Column("Price", format:@<text>[email protected]</text>) )
To tell the helper which columns to display, you must include a columns parameter for the
GetHtml method of the WebGrid helper, and pass in a collection of columns. In this collection, you
can specify each column to include. You specify an individual column to display by including a
grid.Column object, and pass in the name of the data column you want. In this example, the
code causes the WebGrid object to display only three columns: Name, Description, and Price.
(These columns must be included in the SQL query results — the helper cannot display columns
that were not returned by the query.)
However, notice that in addition to just passing a column name to the grid, you can pass other
formatting instructions. In the example, the code displays the Name column using the following
code:
grid.Column("Name", "Product", style: "product")
This tells the WebGrid helper to do the following:
Display values from the Name data column.
Use the string "Product" as the column heading instead of the default name for the
heading (which in this case would be "Name").
Apply the CSS style class named "product". In the example page markup, this CSS class
sets a column width (200 pixels) and a font weight (bold).
The example for the Description column uses the following code:
grid.Column("Description", format:@<i>@item.Description</i>)
This tells the helper to display the Description column. It specifies a format by using an
expression that wraps the value from the data column in some HTML markup:
@<i>@item.Description</i>
The example for the Price column shows another variation of how to specify the format
property:
grid.Column("Price", format:@<text>[email protected]</text>)
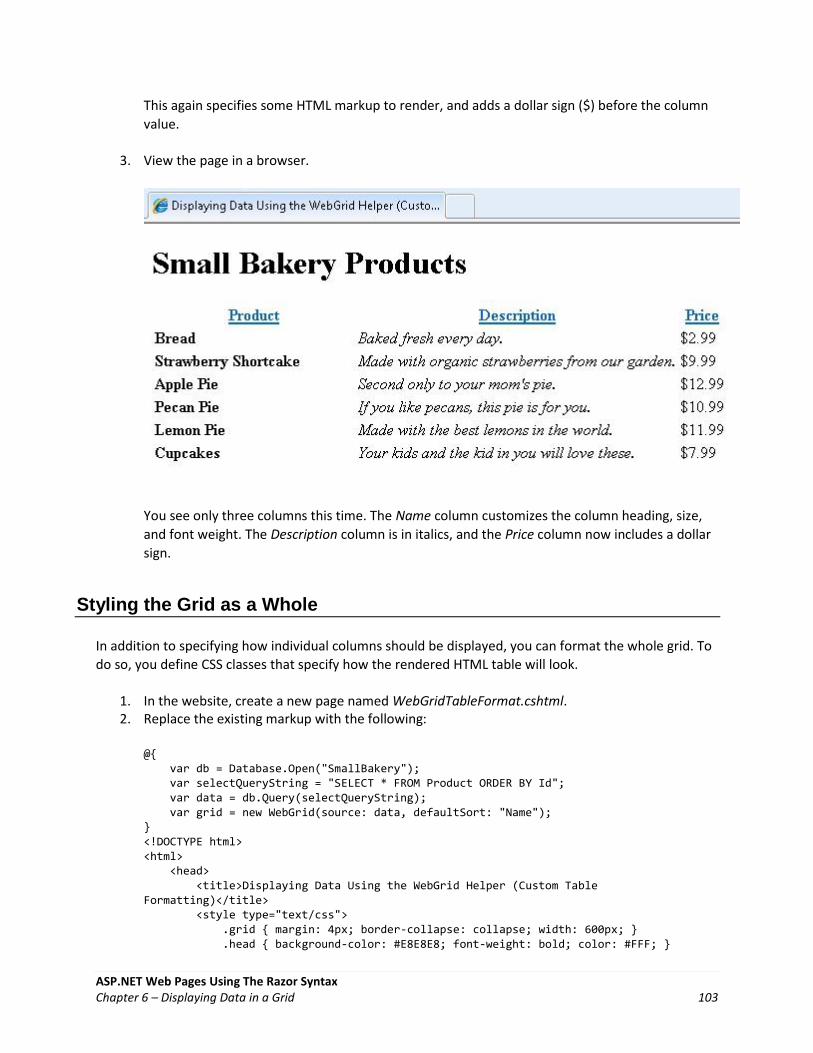
ASP.NET Web Pages Using The Razor Syntax Chapter 6 – Displaying Data in a Grid 103
This again specifies some HTML markup to render, and adds a dollar sign ($) before the column
value.
3. View the page in a browser.
You see only three columns this time. The Name column customizes the column heading, size,
and font weight. The Description column is in italics, and the Price column now includes a dollar
sign.
Styling the Grid as a Whole
In addition to specifying how individual columns should be displayed, you can format the whole grid. To
do so, you define CSS classes that specify how the rendered HTML table will look.
1. In the website, create a new page named WebGridTableFormat.cshtml. 2. Replace the existing markup with the following:
@{ var db = Database.Open("SmallBakery"); var selectQueryString = "SELECT * FROM Product ORDER BY Id"; var data = db.Query(selectQueryString); var grid = new WebGrid(source: data, defaultSort: "Name"); } <!DOCTYPE html> <html> <head> <title>Displaying Data Using the WebGrid Helper (Custom Table Formatting)</title> <style type="text/css"> .grid { margin: 4px; border-collapse: collapse; width: 600px; } .head { background-color: #E8E8E8; font-weight: bold; color: #FFF; }

ASP.NET Web Pages Using The Razor Syntax Chapter 6 – Displaying Data in a Grid 104
.grid th, .grid td { border: 1px solid #C0C0C0; padding: 5px; } .alt { background-color: #E8E8E8; color: #000; } .product { width: 200px; font-weight:bold;} </style> </head> <body> <h1>Small Bakery Products</h1> <div id="grid"> @grid.GetHtml( tableStyle: "grid", headerStyle: "head", alternatingRowStyle: "alt", columns: grid.Columns( grid.Column("Name", "Product", style: "product"), grid.Column("Description", format:@<i>@item.Description</i>), grid.Column("Price", format:@<text>[email protected]</text>) ) ) </div> </body> </html>
This code builds on the previous example by showing you how to create new style classes (grid,
head, grid th, grid td, and alt). The grid.GetHtml method then assigns these styles to various
elements of the grid using the tableStyle, headerStyle, and alternatingRowStyle parameters.
3. View the page in a browser. This time, the grid is displayed using different styles that apply to the table as a whole, such a banding for alternating rows.

ASP.NET Web Pages Using The Razor Syntax Chapter 6 – Displaying Data in a Grid 105
Paging Through Data
Rather than displaying all the data in the grid at once, you can let users page through the data. For the
small quantity of data that you're working with here, paging isn't very important. But if you've got
hundreds or thousands of data rows to display, paging is very handy.
To add paging to the rendered grid, you specify an additional parameter for the WebGrid helper.
1. In the website, create a new page named WebGridPaging.cshtml. 2. Replace the existing markup with the following:
@{ var db = Database.Open("SmallBakery"); var selectQueryString = "SELECT * FROM Product ORDER BY Id"; var data = db.Query(selectQueryString); var grid = new WebGrid(source: data, defaultSort: "Name", rowsPerPage: 3); } <!DOCTYPE html> <html> <head> <title>Displaying Data Using the WebGrid Helper (with Paging)</title> <style type="text/css"> .grid { margin: 4px; border-collapse: collapse; width: 600px; } .head { background-color: #E8E8E8; font-weight: bold; color: #FFF; } .grid th, .grid td { border: 1px solid #C0C0C0; padding: 5px; } .alt { background-color: #E8E8E8; color: #000; } .product { width: 200px; font-weight:bold;} </style> </head> <body> <h1>Small Bakery Products</h1> <div id="grid"> @grid.GetHtml( tableStyle: "grid", headerStyle: "head", alternatingRowStyle: "alt", columns: grid.Columns( grid.Column("Name", "Product", style: "product"), grid.Column("Description", format:@<i>@item.Description</i>), grid.Column("Price", format:@<text>[email protected]</text>) ) ) </div> </body> </html>
This code expands the previous example by adding a rowsPerPage parameter when creating the
WebGrid object. This parameter lets you set the number of rows that are displayed. By including
this parameter, you automatically enable paging.

ASP.NET Web Pages Using The Razor Syntax Chapter 6 – Displaying Data in a Grid 106
3. View the page in a browser. Notice that only three rows are shown. At the bottom of the grid, you see controls that let you page through the remaining data rows.
Additional Resources
Chapter 5 - Working with Data
Chapter 7 - Displaying Data in a Chart
ASP.NET Web Pages with Razor Syntax Reference

ASP.NET Web Pages Using The Razor Syntax Chapter 7 – Displaying Data in a Chart 107
Chapter 7 – Displaying Data in a Chart
This chapter explains how to display data in a chart.
In the previous chapters, you learned how to display data manually and in a grid. This chapter explains
how to display data using the Chart helper.
What you'll learn
How to display data in a chart. How to style charts using built-in themes. How to save charts and how to cache them for better performance.
These are the ASP.NET programming features introduced in the chapter:
The Chart helper.
The Chart Helper
When you want to display your data in graphical form, you can use Chart helper. The Chart helper can
render an image that displays data in a variety of chart types. It supports many options for formatting
and labeling. The Chart helper can render more than 30 types of charts, including all the types of charts
that you might be familiar with from Microsoft Excel or other tools — area charts, bar charts, column
charts, line charts, and pie charts, along with more specialized charts like stock charts.
Area chart
Bar chart
Column chart
Line chart

ASP.NET Web Pages Using The Razor Syntax Chapter 7 – Displaying Data in a Chart 108
Pie chart
Stock chart
Chart Elements
Charts show data and additional elements like legends, axes, series, and so on. The following picture
shows many of the chart elements that you can customize when you use the Chart helper. This chapter
shows you how to set some (not all) of these elements.

ASP.NET Web Pages Using The Razor Syntax Chapter 7 – Displaying Data in a Chart 109
Creating a Chart from Data
The data you display in a chart can be from an array, from the results returned from a database, or from
data that's in an XML file.
Using an Array
As explained in Chapter 2 – Introduction to ASP.NET Web Programming Using the Razor Syntax, an array
lets you store a collection of similar items in a single variable. You can use arrays to contain the data that
you want to include in your chart.
This procedure shows how you can create a chart from data in arrays, using the default chart type. It
also shows how to display the chart within the page.
1. Create a new file named ChartArrayBasic.cshtml. 2. Replace the existing code with the following:
@{ var myChart = new Chart(width: 600, height: 400) .AddTitle("Chart Title") .AddSeries( name: "Employee", xValue: new[] { "Peter", "Andrew", "Julie", "Mary", "Dave" }, yValues: new[] { "2", "6", "4", "5", "3" }) .Write(); }

ASP.NET Web Pages Using The Razor Syntax Chapter 7 – Displaying Data in a Chart 110
The code first creates a new chart and sets its width and height. You specify the chart title by
using the AddTitle method. To add data, you use the AddSeries method. In this example, you
use the name, xValue, and yValues parameters of the AddSeries method. The name parameter is
displayed in the chart legend. The xValue parameter contains an array of data that's displayed
along the horizontal axis of the chart. The yValues parameter contains an array of data that's
used to plot the vertical points of the chart.
The Write method actually renders the chart. In this case, because you didn't specify a chart
type, the Chart helper renders its default chart, which is a column chart.
3. Run the page in the browser. (Make sure the page is selected in the Files workspace before you run it.) The browser displays the chart.
Using a Database Query for Chart Data
If the information you want to chart is in a database, you can run a database query and then use data
from the results to create the chart. This procedure shows you how to read and display the data that
you created in the previous example.
1. Add an App_Data folder to the root of the website if the folder does not already exist. 2. In the App_Data folder, add the database file named SmallBakery.sdf that you created in
Chapter 5 - Working with Data. 3. Create a new file named ChartDataQuery.cshtml. 4. Replace the existing code with the following:
@{ var db = Database.Open("SmallBakery"); var data = db.Query("SELECT Name, Price FROM Product"); var myChart = new Chart(width: 600, height: 400) .AddTitle("Product Sales") .DataBindTable(dataSource: data, xField: "Name") .Write();

ASP.NET Web Pages Using The Razor Syntax Chapter 7 – Displaying Data in a Chart 111
}
The code first opens the SmallBakery database and assigns it to a variable named db. This
variable represents a Database object that can be used to read from and write to the database.
Next, the code runs a SQL query to get the name and price of each product. The code creates a
new chart and passes the database query to it by calling the chart's DataBindTable method. This
method takes two parameters: the dataSource parameter is for the data from the query, and the
xField parameter lets you set which data column is used for the chart's x-axis.
As an alternative to using the DataBindTable method, you can use the AddSeries method of the
Chart helper. The AddSeries method lets you set the xValue and yValues parameters. For
example, instead of using the DataBindTable method like this:
.DataBindTable(data, "Name")
You can use the AddSeries method like this:
.AddSeries("Default", xValue: data, xField: "Name", yValues: data, yFields: "Price")
Both render the same results. The AddSeries method is more flexible because you can specify
the chart type and data more explicitly, but the DataBindTable method is easier to use if you
don't need the extra flexibility.
5. Run the page in a browser.

ASP.NET Web Pages Using The Razor Syntax Chapter 7 – Displaying Data in a Chart 112
Using XML Data
The third option for charting is to use an XML file as the data for the chart. This requires that the XML
file also have a schema file (.xsd file) that describes the XML structure. This procedure shows you how to
read data from an XML file.
1. In the App_Data folder, create a new XML file named data.xml. 2. Replace the existing XML with the following, which is some XML data about employees in a
fictional company.
<?xml version="1.0" standalone="yes" ?> <NewDataSet xmlns="http://tempuri.org/data.xsd"> <Employee> <Name>Erin</Name> <Sales>10440</Sales> </Employee> <Employee> <Name>Kim</Name> <Sales>17772</Sales> </Employee> <Employee> <Name>Dean</Name> <Sales>23880</Sales> </Employee>

ASP.NET Web Pages Using The Razor Syntax Chapter 7 – Displaying Data in a Chart 113
<Employee> <Name>David</Name> <Sales>7663</Sales> </Employee> <Employee> <Name>Sanjay</Name> <Sales>21773</Sales> </Employee> <Employee> <Name>Michelle</Name> <Sales>32294</Sales> </Employee> </NewDataSet>
3. In the App_Data folder, create a new XML file named data.xsd. (Note that the extension this time is .xsd.)
4. Replace the existing XML with the following:
<?xml version="1.0" ?> <xs:schema id="NewDataSet" targetNamespace="http://tempuri.org/data.xsd" xmlns:mstns="http://tempuri.org/data.xsd" xmlns="http://tempuri.org/data.xsd" xmlns:xs="http://www.w3.org/2001/XMLSchema" xmlns:msdata="urn:schemas-microsoft-com:xml-msdata" attributeFormDefault="qualified" elementFormDefault="qualified"> <xs:element name="NewDataSet" msdata:IsDataSet="true" msdata:EnforceConstraints="False"> <xs:complexType> <xs:choice maxOccurs="unbounded"> <xs:element name="Employee"> <xs:complexType> <xs:sequence> <xs:element name="Name" type="xs:string" minOccurs="0" /> <xs:element name="Sales" type="xs:double" minOccurs="0" /> </xs:sequence> </xs:complexType> </xs:element> </xs:choice> </xs:complexType> </xs:element> </xs:schema>
5. In the root of the website, create a new file named ChartDataXML.cshtml. 6. Replace the existing code with the following:
@using System.Data;

ASP.NET Web Pages Using The Razor Syntax Chapter 7 – Displaying Data in a Chart 114
@{ var dataSet = new DataSet(); dataSet.ReadXmlSchema(Server.MapPath("~/App_Data/data.xsd")); dataSet.ReadXml(Server.MapPath("~/App_Data/data.xml")); var dataView = new DataView(dataSet.Tables[0]); var myChart = new Chart(width: 600, height: 400) .AddTitle("Sales Per Employee") .AddSeries("Default", chartType: "Pie", xValue: dataView, xField: "Name", yValues: dataView, yFields: "Sales") .Write(); }
The code first creates a DataSet object. This object is used to manage the data that's read from
the XML file and organize it according to the information in the schema file. (Notice that the top
of the code includes the statement using SystemData. This is required in order to be able to
work with the DataSet object. For more information, see the sidebar "Using" Statements and
Fully Qualified Names.)
Next, the code creates a DataView object based on the dataset. The data view provides an object
that the chart can bind to — that is, read and plot. The chart binds to the data using the
AddSeries method, as you saw earlier when charting the array data, except that this time the
xValue and yValues parameters are set to the DataView object.
This example also shows you how to specify a particular chart type. When the data is added in
the AddSeries method, the chartType parameter is also set to display a pie chart.
7. Run the page in a browser.

ASP.NET Web Pages Using The Razor Syntax Chapter 7 – Displaying Data in a Chart 115
"Using" Statements and Fully Qualified Names
The .NET Framework that ASP.NET Web Pages with Razor syntax is based on consists of thousands and
thousands of components (classes). To make it manageable to work with all these classes, they're
organized into namespaces, which are somewhat like libraries. For example, the System.Web namespace
contains classes that support browser/server communication, the System.Xml namespace contains
classes that are used to create and read XML files, and the System.Data namespace contains classes that
let you work with data.
In order to access any given class in the .NET Framework, code needs to know not just the class name,
but also the namespace that the class is in. For example, in order to use the Chart helper, code needs to
find the System.Web.Helpers.Chart class, which combines the namespace (System.Web.Helpers) with the
class name (Chart). This is known as the class's fully-qualified name — its complete, unambiguous
location within the vastness of the .NET Framework. In code, this would look like the following:
var myChart = new System.Web.Helpers.Chart(width: 600, height: 400) // etc.
However, it's cumbersome (and error prone) to have to use these long, fully-qualified names every time
you want to refer to a class or helper. Therefore, to make it easier to use class names, you can import
the namespaces you're interested in, which is usually is just a handful from among the many
namespaces in the .NET Framework. If you've imported a namespace, you can use just a class name
(Chart) instead of the fully qualified name (System.Web.Helpers.Chart). When your code runs and
encounters a class name, it can look in just the namespaces you've imported to find that class.
When you use ASP.NET Web Pages with Razor syntax to create web pages, you typically use the same
set of classes each time, including the WebPage class, the various helpers, and so on. To save you the
work of importing the relevant namespaces every time you create a website, ASP.NET is configured so it
automatically imports a set of core namespaces for every website. That's why you haven't had to deal
with namespaces or importing up to now; all the classes you've worked with are in namespaces that are
already imported for you.
However, sometimes you need to work with a class that isn't in a namespace that's automatically
imported for you. In that case, you can either use that class's fully-qualified name, or you can manually
import the namespace that contains the class. To import a namespace, you use the using statement
(import in Visual Basic), as you saw in an example earlier the chapter.
For example, the DataSet class is in the System.Data namespace. The System.Data namespace is not
automatically available to ASP.NET Razor pages. Therefore, to work with the DataSet class using its fully
qualified name, you can use code like this:
var dataSet = new System.Data.DataSet();
If you have to use the DataSet class repeatedly you can import a namespace like this and then use just
the class name in code:

ASP.NET Web Pages Using The Razor Syntax Chapter 7 – Displaying Data in a Chart 116
@using System.Data; @{ var dataSet = new DataSet(); // etc. }
You can add using statements for any other .NET Framework namespaces that you want to reference.
However, as noted, you won't need to do this often, because most of the classes that you'll work with
are in namespaces that are imported automatically by ASP.NET for use in .cshtml and .vbhtml pages.
Displaying Charts Inside a Web Page
In the examples you've seen so far, you create a chart and then the chart is rendered directly to the
browser as a graphic. In many cases, though, you want to display a chart as part of a page, not just by
itself in the browser. To do that requires a two-step process. The first step is to create a page that
generates the chart, as you've already seen.
The second step is to display the resulting image in another page. To display the image, you use an
HTML <img> element, in the same way you would to display any image. However, instead of referencing
a .jpg or .png file, the <img> element references the .cshtml file that contains the Chart helper that
creates the chart. When the display page runs, the <img> element gets the output of the Chart helper
and renders the chart.
1. Create a file named ShowChart.cshtml. 2. Replace the existing code with the following:

ASP.NET Web Pages Using The Razor Syntax Chapter 7 – Displaying Data in a Chart 117
<!DOCTYPE html> <html> <head> <title>Chart Example</title> </head> <body> <h1>Chart Example</h1> <p>The following chart is generated by the <em>ChartArrayBasic.cshtml</em> file, but is shown in this page.</p> <p><img src="ChartArrayBasic.cshtml" /> </p> </body> </html>
The code uses the <img> element to display the chart that you created earlier in the
ChartArrayBasic.cshtml file.
3. Run the web page in a browser. The ShowChart.cshtml file displays the chart image based on the code contained in the ChartArrayBasic.cshtml file.
Styling a Chart
The Chart helper supports a large number of options that let you customize the appearance of the chart.
You can set colors, fonts, borders, and so on. An easy way to customize the appearance of a chart is to
use a theme. Themes are collections of information that specify how to render a chart using fonts,
colors, labels, palettes, borders, and effects. (Note that the style of a chart does not indicate the type of
chart.)
The following table lists built-in themes.
Theme Description
Vanilla Displays red columns on a white background.
Blue Displays blue columns on a blue gradient background.
Green Displays blue columns on a green gradient background.
Yellow Displays orange columns on a yellow gradient background.
Vanilla3D Displays 3-D red columns on a white background.
You can specify the theme to use when you create a new chart.
1. Create a new file named ChartStyleGreen.cshtml. 2. Replace the default markup and code in the page with the following:
@{ var db = Database.Open("SmallBakery"); var data = db.Query("SELECT Name, Price FROM Product"); var myChart = new Chart(width: 600, height: 400,
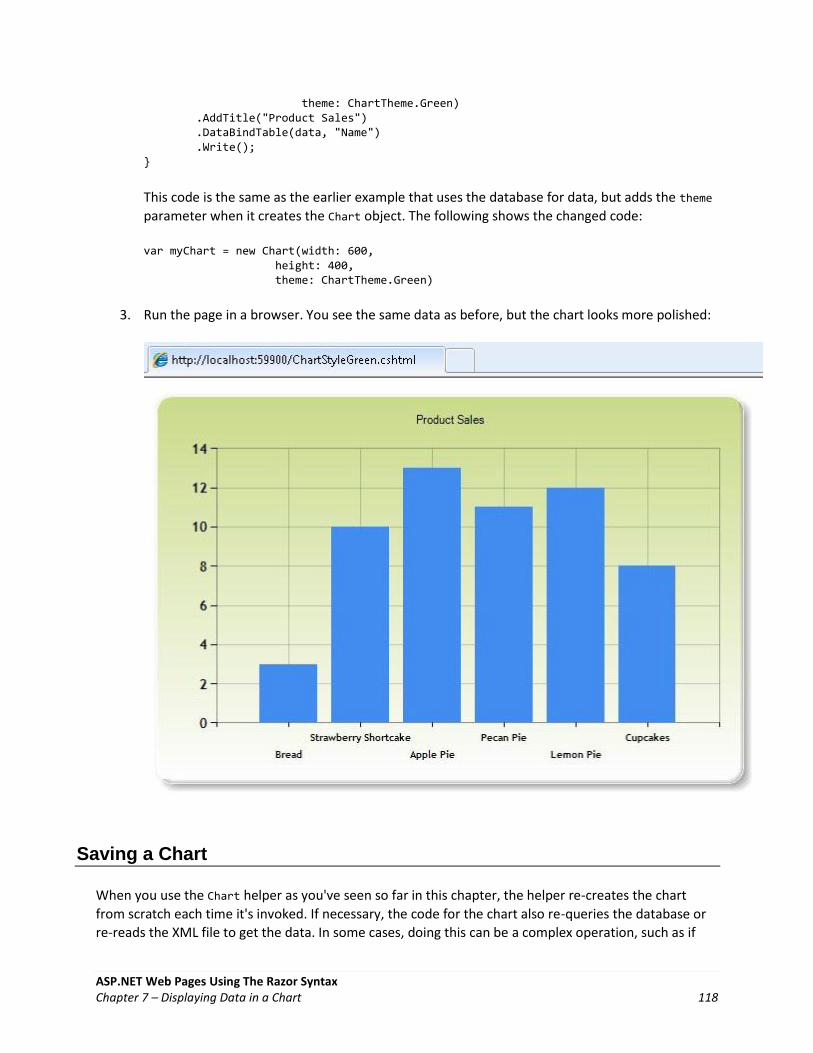
ASP.NET Web Pages Using The Razor Syntax Chapter 7 – Displaying Data in a Chart 118
theme: ChartTheme.Green) .AddTitle("Product Sales") .DataBindTable(data, "Name") .Write(); }
This code is the same as the earlier example that uses the database for data, but adds the theme
parameter when it creates the Chart object. The following shows the changed code:
var myChart = new Chart(width: 600, height: 400, theme: ChartTheme.Green)
3. Run the page in a browser. You see the same data as before, but the chart looks more polished:
Saving a Chart
When you use the Chart helper as you've seen so far in this chapter, the helper re-creates the chart
from scratch each time it's invoked. If necessary, the code for the chart also re-queries the database or
re-reads the XML file to get the data. In some cases, doing this can be a complex operation, such as if

ASP.NET Web Pages Using The Razor Syntax Chapter 7 – Displaying Data in a Chart 119
the database that you're querying is large, or if the XML file contains a lot of data. Even if the chart
doesn't involve a lot of data, the process of dynamically creating an image takes up server resources,
and if many people request the page or pages that display the chart, there can be an impact on the
performance of your website.
To help you reduce the potential performance impact of creating a chart, you can create a chart the first
time you need it and then save it. When the chart is needed again, rather than regenerating it, you can
just fetch the saved version and render that.
You can save a chart in these ways:
Cache the chart in computer memory (on the server). Save the chart as an image file. Save the chart as an XML file. This option lets you modify the chart before you save it.
Caching a Chart
After you've created a chart, you can cache it. Caching a chart means that it doesn't have to be re-
created if it needs to be displayed again. When you save a chart in the cache, you give it a key that must
be unique to that chart.
Charts saved to the cache might be removed if the server runs low on memory. In addition, the cache is
cleared if your application restarts for any reason. Therefore, the standard way to work with a cached
chart is to always check first whether it's available in the cache, and if not, then to create or re-create it.
1. At the root of your website, create a file named ShowCachedChart.cshtml. 2. Replace the existing code with the following:
<!DOCTYPE html> <html> <head> <title>Chart Example</title> </head> <body> <h1>Chart Example</h1> <img src="ChartSaveToCache.cshtml?key=myChartKey" /> </body> </html>
The <img> tag includes a src attribute that points to the ChartSaveToCache.cshtml file and
passes a key to the page as a query string. The key contains the value "myChartKey". The
ChartSaveToCache.cshtml file contains the Chart helper that creates the chart. You'll create this
page next.
3. At the root of your website, create a new file named ChartSaveToCache.cshtml. 4. Replace the existing code with the following:
@{

ASP.NET Web Pages Using The Razor Syntax Chapter 7 – Displaying Data in a Chart 120
var chartKey = Request["key"]; if (chartKey != null) { var cachedChart = Chart.GetFromCache(key: chartKey); if (cachedChart == null) { cachedChart = new Chart(600, 400); cachedChart.AddTitle("Cached Chart -- Cached at " + DateTime.Now); cachedChart.AddSeries( name: "Employee", axisLabel: "Name", xValue: new[] { "Peter", "Andrew", "Julie", "Mary", "Dave" }, yValues: new[] { "2", "6", "4", "5", "3" }); cachedChart.SaveToCache(key: chartKey, minutesToCache: 2, slidingExpiration: false); } Chart.WriteFromCache(chartKey); } }
The code first checks whether anything was passed as the key value in the query string. If so, the
code tries to read a chart out of the cache by calling the GetFromCache method and passing it the
key. If it turns out that there's nothing in the cache under that key (which would happen the first
time that the chart is requested), the code creates the chart as usual. When the chart is finished,
the code saves it to the cache by calling SaveToCache. That method requires a key (so the chart
can be requested later), and the amount of time that the chart should be saved in the cache.
(The exact time you'd cache a chart would depend on how often you thought the data it
represents might change.) The SaveToCache method also requires a slidingExpiration
parameter — if this is set to true, the timeout counter is reset each time the chart is accessed. In
this case, it in effect means that the chart's cache entry expires 2 minutes after the last time
someone accessed the chart. (The alternative to sliding expiration is absolute expiration,
meaning that the cache entry would expire exactly 2 minutes after it was put into the cache, no
matter how often it had been accessed.)
Finally, the code uses the WriteFromCache method to fetch and render the chart from the cache.
Note that this method is outside the if block that checks the cache, because it will get the chart
from the cache whether the chart was there to begin with or had to be generated and saved in
the cache.
Notice that in the example, the AddTitle method includes a timestamp. (It adds the current date
and time — DateTime.Now — to the title.)
5. Run the ShowCachedChart.cshtml web page in a browser. The page displays the chart image based on the code contained in the ChartSaveToCache.cshtml file. Take note of what the timestamp says in the chart title.

ASP.NET Web Pages Using The Razor Syntax Chapter 7 – Displaying Data in a Chart 121
6. Close the browser. 7. Run the ShowCachedChart.cshtml again. Notice that the timestamp is the same as before, which
indicates that the chart was not regenerated, but was instead read from the cache. 8. In WebMatrix, in the Site group of the Home tab on the ribbon, click Restart. This stops and
then restarts IIS Express, which has the effect of restarting your website application.
Alternatively, wait two minutes for the cache entry to expire.
9. Run the ShowCachedChart.cshtml again. Notice that this time the timestamp has changed, because restarting the application also clears the cache. Therefore, the code had to regenerate the chart and put it back into the cache.
Saving a Chart as an Image File
You can also save a chart as an image file (for example, as a .jpg file) on the server. You can then use the
image file the way you would any image. The advantage is the file is stored rather than saved to a
temporary cache. You can save a new chart image at different times (for example, every hour) and then
keep a permanent record of the changes that occur over time. Note that you must make sure that your
web application has permission to save a file to the folder on the server where you want to put the
image file.
1. At the root of your website, create a folder named _ChartFiles if it does not already exist. 2. At the root of your website, create a new file named ChartSave.cshtml. 3. Replace the existing code with the following:

ASP.NET Web Pages Using The Razor Syntax Chapter 7 – Displaying Data in a Chart 122
@{ var filePathName = "_ChartFiles/chart01.jpg"; if (!File.Exists(Server.MapPath(filePathName))) { var chartImage = new Chart(600, 400); chartImage.AddTitle("Chart Title"); chartImage.AddSeries( name: "Employee", axisLabel: "Name", xValue: new[] { "Peter", "Andrew", "Julie", "Mary", "Dave" }, yValues: new[] { "2", "6", "4", "5", "3" }); chartImage.Save(path: filePathName); } } <!DOCTYPE html> <html> <head> <title>Chart Example</title> </head> <body> <img src="@filePathName" /> </body> </html>
The code first checks to see whether the .jpg file exists by calling the File.Exists method. If the
file does not exist, the code creates a new Chart from an array. This time, the code calls the Save
method and passes the path parameter to specify the file path and file name of where to save
the chart. In the body of the page, an <img> element uses the path to point to the .jpg file to
display.
4. Run the ChartSave.cshtml file.
Saving a Chart as an XML File
Finally, you can save a chart as an XML file on the server. An advantage of using this method over
caching the chart or saving the chart to a file is that you could modify the XML before displaying the
chart if you wanted to. Your application has to have read/write permissions for the folder on the server
where you want to put the image file.
1. At the root of your website, create a new file named ChartSaveXml.cshtml. 2. Replace the existing code with the following:
@{ Chart chartXml; var filePathName = "_ChartFiles/XmlChart.xml"; if (File.Exists(Server.MapPath(filePathName))) { chartXml = new Chart(width: 600, height: 400, themePath: filePathName); } else { chartXml = new Chart(width: 600, height: 400); chartXml.AddTitle("Chart Title -- Saved at " + DateTime.Now);
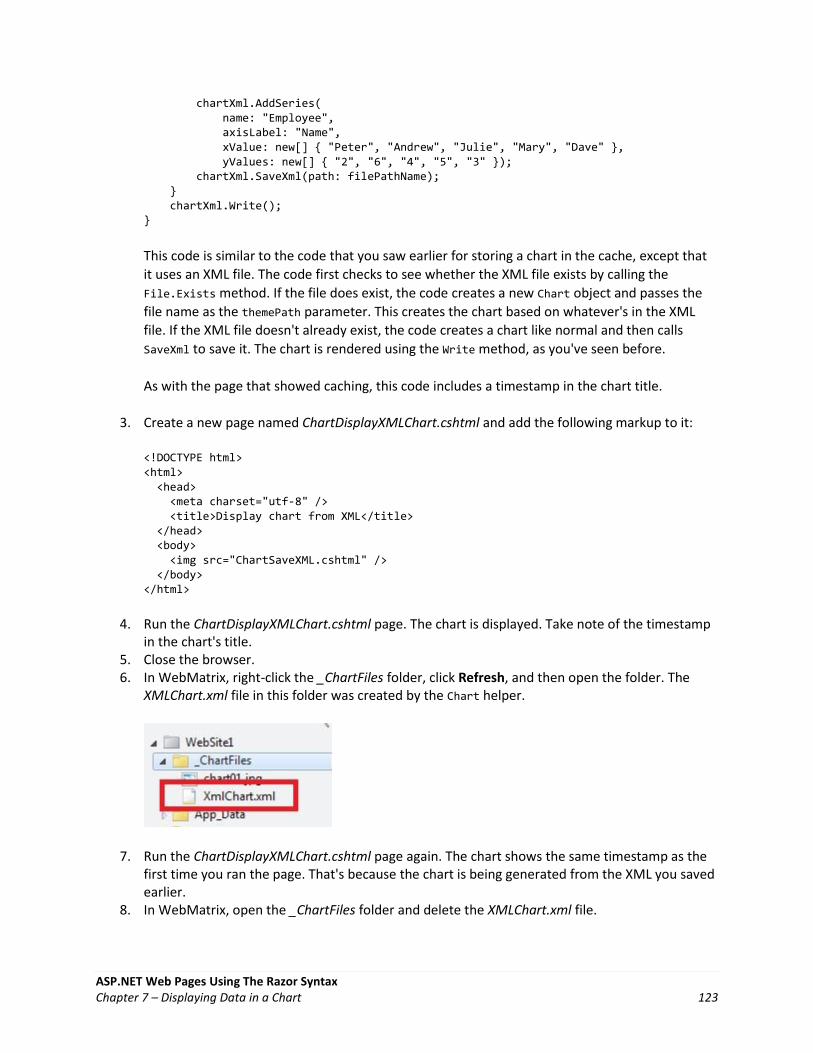
ASP.NET Web Pages Using The Razor Syntax Chapter 7 – Displaying Data in a Chart 123
chartXml.AddSeries( name: "Employee", axisLabel: "Name", xValue: new[] { "Peter", "Andrew", "Julie", "Mary", "Dave" }, yValues: new[] { "2", "6", "4", "5", "3" }); chartXml.SaveXml(path: filePathName); } chartXml.Write(); }
This code is similar to the code that you saw earlier for storing a chart in the cache, except that
it uses an XML file. The code first checks to see whether the XML file exists by calling the
File.Exists method. If the file does exist, the code creates a new Chart object and passes the
file name as the themePath parameter. This creates the chart based on whatever's in the XML
file. If the XML file doesn't already exist, the code creates a chart like normal and then calls
SaveXml to save it. The chart is rendered using the Write method, as you've seen before.
As with the page that showed caching, this code includes a timestamp in the chart title.
3. Create a new page named ChartDisplayXMLChart.cshtml and add the following markup to it:
<!DOCTYPE html> <html> <head> <meta charset="utf-8" /> <title>Display chart from XML</title> </head> <body> <img src="ChartSaveXML.cshtml" /> </body> </html>
4. Run the ChartDisplayXMLChart.cshtml page. The chart is displayed. Take note of the timestamp in the chart's title.
5. Close the browser. 6. In WebMatrix, right-click the _ChartFiles folder, click Refresh, and then open the folder. The
XMLChart.xml file in this folder was created by the Chart helper.
7. Run the ChartDisplayXMLChart.cshtml page again. The chart shows the same timestamp as the first time you ran the page. That's because the chart is being generated from the XML you saved earlier.
8. In WebMatrix, open the _ChartFiles folder and delete the XMLChart.xml file.

ASP.NET Web Pages Using The Razor Syntax Chapter 7 – Displaying Data in a Chart 124
9. Run the ChartDisplayXMLChart.cshtml page once more. This time, the timestamp is updated, because the Chart helper had to recreate the XML file. If you want, check the _ChartFiles folder and notice that the XML file is back.
Additional Resources
Chapter 5 - Working with Data
Chapter 6 - Displaying Data in a Grid
Chapter 15 - Caching to Improve the Performance of Your Website
Chart Controls
ASP.NET Web Pages with Razor Syntax Reference

ASP.NET Web Pages Using The Razor Syntax Chapter 8 – Working with Files 125
Chapter 8 – Working with Files
This chapter explains how to read, write, append, delete, and upload files.
In previous chapters, you learned how to store data in a database. However, you might also work with
text files in your website. For example, you might use text files as a simple way to store data for the site.
(A text file that's used to store data is sometimes called a flat file.) Text files can be in different formats,
like .txt, .xml, or .csv (comma-delimited values).
What you'll learn
How to create a text file and write data to it. How to append data to an existing file. How to read a file and display from it. How to delete files from a website. How to let users upload one file or multiple files.
These are the ASP.NET programming features introduced in the chapter:
The File object, which provides a way to manage files. The FileUpload helper. The Path object, which provides methods that let you manipulate path and file names.
Note If you want to upload images and manipulate them (for example, flip or resize them), see
Chapter 9 - Working with Images.
Creating a Text File and Writing Data to It
If you want to store data in a text file, you can use the File.WriteAllText method to specify the file to
create and the data to write to it. In this procedure, you'll create a page that contains a simple form with
three input elements (first name, last name, and email address) and a Submit button. When the user
submits the form, you'll store the user's input in a text file.
1. Create a new folder named App_Data, if it doesn't exist already. 2. At the root of your website, create a new file named UserData.cshtml. 3. Replace the default markup and code with the following:
@{ var result = ""; if (IsPost) { var firstName = Request["FirstName"]; var lastName = Request["LastName"]; var email = Request["Email"]; var userData = firstName + "," + lastName +

ASP.NET Web Pages Using The Razor Syntax Chapter 8 – Working with Files 126
"," + email + Environment.NewLine; var dataFile = Server.MapPath("~/App_Data/data.txt"); File.WriteAllText(@dataFile, userData); result = "Information saved."; } } <!DOCTYPE html> <html> <head> <title>Write Data to a File</title> </head> <body> <form id="form1" method="post"> <div> <table> <tr> <td>First Name:</td> <td><input id="FirstName" name="FirstName" type="text" /></td> </tr> <tr> <td>Last Name:</td> <td><input id="LastName" name="LastName" type="text" /></td> </tr> <tr> <td>Email:</td> <td><input id="Email" name="Email" type="text" /></td> </tr> <tr> <td></td> <td><input type="submit" value="Submit"/></td> </tr> </table> </div> <div> @if(result != ""){ <p>Result: @result</p> } </div> </form> </body> </html>
The HTML markup creates the form with the three text boxes. In the code, you use the IsPost
property to determine whether the page has been submitted before you start processing.
The first task is to get the user input and assign it to variables. The code then concatenates the
values of the separate variables into one comma-delimited string, which is then stored in a
different variable. Notice that the comma separator is a string contained in quotation marks
(","), because you're literally embedding a comma into the big string that you're creating. At the
end of the data that you concatenate together, you add Environment.NewLine. This adds a line
break (a newline character). What you're creating with all this concatenation is a string that
looks like this:

ASP.NET Web Pages Using The Razor Syntax Chapter 8 – Working with Files 127
David,Jones,[email protected]
(With an invisible line break at the end.)
You then create a variable (dataFile) that contains the location and name of the file to store the
data in. Setting the location requires some special handling. In websites, it's a bad practice to
refer in code to absolute paths like C:\Folder\File.txt for files on the web server. If a website is
moved, an absolute path will be wrong. Moreover, for a hosted site (as opposed to on your own
computer) you typically don't even know what the correct path is when you're writing the code.
But sometimes (like now, for writing a file) you do need a complete path. The solution is to use
the MapPath method of the Server object. This returns the complete path to your website. To get
the path for the website root, you pass "~" to MapPath. (You can also pass a subfolder name to it,
like ~/App_Data/, to get the path for that subfolder.) You can then concatenate additional
information onto whatever the method returns in order to create a complete path. In this
example, you add a file name. (You can read more about how to work with file and folder paths
in Chapter 2 – Introduction to ASP.NET Web Programming Using the Razor Syntax.)
The file is saved in the App_Data folder. This folder is a special folder in ASP.NET that's used to
store data files, as described in Chapter 5 - Working with Data.
The WriteAllText method of the File object writes the data to the file. This method takes two
parameters: the name (with path) of the file to write to, and the actual data to write. Notice
that the name of the first parameter has an @ character as a prefix. This tells ASP.NET that
you're providing a verbatim string literal, and that characters like "/" should not be interpreted
in special ways. (For more information, see Chapter 2.)
Note In order for your code to save files in the App_Data folder, the application needs read-write
permissions for that folder. On your development computer this is not typically an issue. However,
when you publish your site to a hosting provider's web server, you might need to explicitly set those
permissions. If you run this code on a hosting provider's server and get errors, check with the
hosting provider to find out how to set those permissions.
4. Run the page in a browser. (Make sure the page is selected in the Files workspace before you run it.)

ASP.NET Web Pages Using The Razor Syntax Chapter 8 – Working with Files 128
5. Enter values into the fields and then click Submit. 6. Close the browser. 7. Return to the project and refresh the view. 8. Open the data.txt file. The data you submitted in the form is in the file.
9. Close the data.txt file.
Appending Data to an Existing File
In the previous example, you used WriteAllText to create a text file that's got just one piece of data in
it. If you call the method again and pass it the same file name, the existing file is completely overwritten.
However, after you've created a file you often want to add new data to the end of the file. You can do
that using the AppendAllText method of the File object.
1. In the website, make a copy of the UserData.cshtml file and name the copy UserDataMultiple.cshtml.
2. Replace the code block before the opening <!DOCTYPE html> tag with the following code block:
@{ var result = ""; if (IsPost) { var firstName = Request["FirstName"]; var lastName = Request["LastName"]; var email = Request["Email"]; var userData = firstName + "," + lastName + "," + email + Environment.NewLine; var dataFile = Server.MapPath("~/App_Data/data.txt"); File.AppendAllText (@dataFile, userData); result = "Information saved."; } }
This code has one change in it from the previous example. Instead of using WriteAllText, it uses
the AppendAllText method. The methods are similar, except that AppendAllText adds the data

ASP.NET Web Pages Using The Razor Syntax Chapter 8 – Working with Files 129
to the end of the file. As with WriteAllText, AppendAllText creates the file if it doesn't already
exist.
3. Run the page in a browser. 4. Enter values for the fields and then click Submit. 5. Add more data and submit the form again. 6. Return to your project, right-click the project folder, and then click Refresh. 7. Open the data.txt file. It now contains the new data that you just entered.
Reading and Displaying Data from a File
Even if you don't need to write data to a text file, you'll probably sometimes need to read data from
one. To do this, you can again use the File object. You can use the File object to read each line
individually (separated by line breaks) or to read individual item no matter how they're separated.
This procedure shows you how to read and display the data that you created in the previous example.
1. At the root of your website, create a new file named DisplayData.cshtml. 2. Replace the existing code with the following:
@{ var result = ""; Array userData = null; char[] delimiterChar = {','}; var dataFile = Server.MapPath("~/App_Data/data.txt"); if (File.Exists(dataFile)) { userData = File.ReadAllLines(dataFile); if (userData == null) { // Empty file. result = "The file is empty."; } } else { // File does not exist. result = "The file does not exist."; }

ASP.NET Web Pages Using The Razor Syntax Chapter 8 – Working with Files 130
} <!DOCTYPE html> <html> <head> <title>Reading Data from a File</title> </head> <body> <div> <h1>Reading Data from a File</h1> @result @if (result == "") { <ol> @foreach (string dataLine in userData) { <li> User <ul> @foreach (string dataItem in dataLine.Split(delimiterChar)) { <li>@dataItem</li > } </ul> </li> } </ol> } </div> </body> </html>
The code starts by reading the file that you created in the previous example into a variable
named userData, using this method call:
File.ReadAllLines(dataFile)
The code to do this is inside an if statement. When you want to read a file, it's a good idea to
use the File.Exists method to determine first whether the file is available. The code also
checks whether the file is empty.
The body of the page contains two foreach loops, one nested inside the other. The outer
foreach loop gets one line at a time from the data file. In this case, the lines are defined by line
breaks in the file — that is, each data item is on its own line. The outer loop creates a new item
(<li> element) inside an ordered list (<ol> element).
The inner loop splits each data line into items (fields) using a comma as a delimiter. (Based on
the previous example, this means that each line contains three fields — the first name, last
name, and email address, each separated by a comma.) The inner loop also creates a <ul> list
and displays one list item for each field in the data line.
The code illustrates how to use two data types, an array and the char data type. The array is
required because the File.ReadAllLines method returns data as an array. The char data type is
required because the Split method returns an array in which each element is of the type char.

ASP.NET Web Pages Using The Razor Syntax Chapter 8 – Working with Files 131
(For information about arrays, see Chapter 2 – Introduction to ASP.NET Web Programming Using
the Razor Syntax.)
3. Run the page in a browser. The data you entered for the previous examples is displayed.
Displaying Data from a Microsoft Excel Comma-Delimited File
You can use Microsoft Excel to save the data contained in a spreadsheet as a comma-delimited file (.csv
file). When you do, the file is saved in plain text, not in Excel format. Each row in the spreadsheet is
separated by a line break in the text file, and each data item is separated by a comma. You can use the
code shown in the previous example to read an Excel comma-delimited file just by changing the name of
the data file in your code.
Deleting Files
To delete files from your website, you can use the File.Delete method. This procedure shows how to
let users delete an image (.jpg file) from an images folder if they know the name of the file.
Important In a production website, you typically restrict who's allowed to make changes to the data.
For information about how to set up membership and about ways to authorize users to perform tasks
on the site, see Chapter 16 - Adding Security and Membership.
1. In the website, create a subfolder named images.
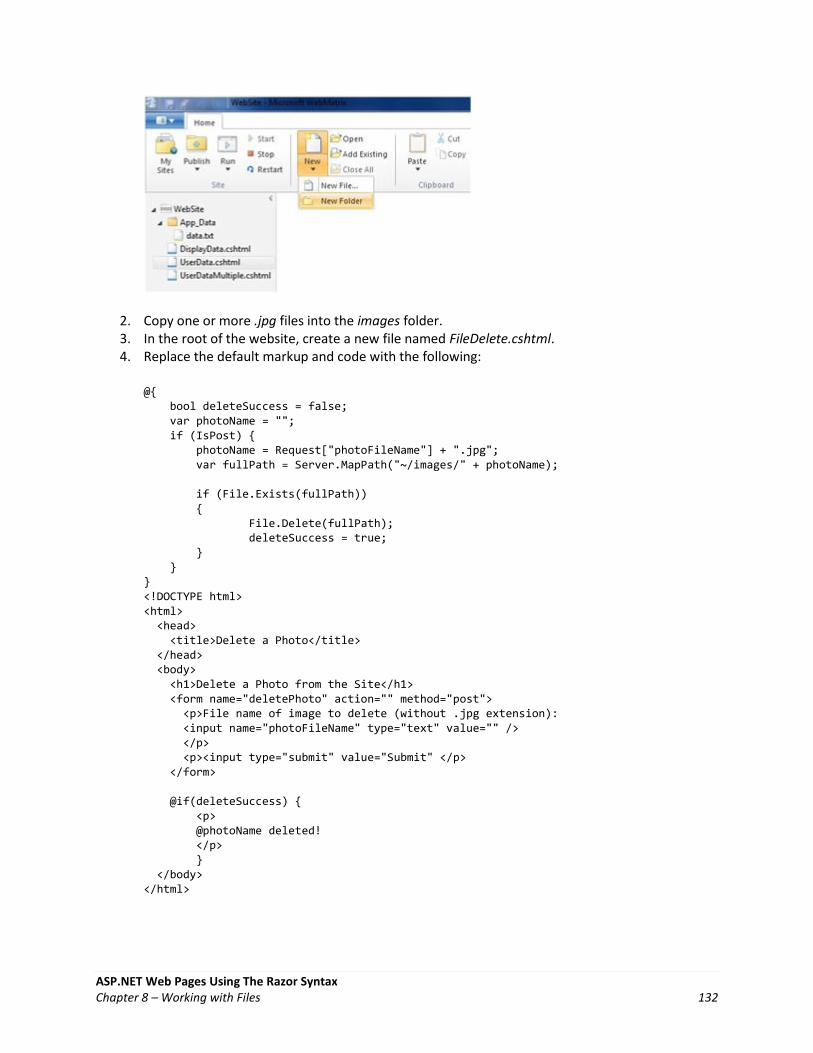
ASP.NET Web Pages Using The Razor Syntax Chapter 8 – Working with Files 132
2. Copy one or more .jpg files into the images folder. 3. In the root of the website, create a new file named FileDelete.cshtml. 4. Replace the default markup and code with the following:
@{ bool deleteSuccess = false; var photoName = ""; if (IsPost) { photoName = Request["photoFileName"] + ".jpg"; var fullPath = Server.MapPath("~/images/" + photoName); if (File.Exists(fullPath)) { File.Delete(fullPath); deleteSuccess = true; } } } <!DOCTYPE html> <html> <head> <title>Delete a Photo</title> </head> <body> <h1>Delete a Photo from the Site</h1> <form name="deletePhoto" action="" method="post"> <p>File name of image to delete (without .jpg extension): <input name="photoFileName" type="text" value="" /> </p> <p><input type="submit" value="Submit" </p> </form> @if(deleteSuccess) { <p> @photoName deleted! </p> } </body> </html>

ASP.NET Web Pages Using The Razor Syntax Chapter 8 – Working with Files 133
This page contains a form where users can enter the name of an image file. They don't enter the
.jpg file-name extension; by restricting the file name like this, you help prevents users from
deleting arbitrary files on your site.
The code reads the file name that the user has entered and then constructs a complete path. To
create the path, the code uses the current website path (as returned by the Server.MapPath
method), the images folder name, the name that the user has provided, and ".jpg" as a literal
string.
To delete the file, the code calls the File.Delete method, passing it the full path that you just
constructed. At the end of the markup, code displays a confirmation message that the file was
deleted.
5. Run the page in a browser.
6. Enter the name of the file to delete and then click Submit. If the file was deleted, the name of the file is displayed at the bottom of the page.
Letting Users Upload a File
The FileUpload helper lets users upload files to your website. The procedure below shows you how to
let users upload a single file.
1. Add the ASP.NET Web Helpers Library to your website as described in Chapter 1 - Getting Started with ASP.NET Web Pages, if you didn't add it previously.
2. In the App_Data folder, create a new a folder and name it UploadedFiles. 3. In the root, create a new file named FileUpload.cshtml. 4. Replace the default markup and code in the page with the following:
@{ var fileName = ""; if (IsPost) { var fileSavePath = ""; var uploadedFile = Request.Files[0]; fileName = Path.GetFileName(uploadedFile.FileName); fileSavePath = Server.MapPath("~/App_Data/UploadedFiles/" + fileName); uploadedFile.SaveAs(fileSavePath); } }

ASP.NET Web Pages Using The Razor Syntax Chapter 8 – Working with Files 134
<!DOCTYPE html> <html> <head> <title>FileUpload - Single-File Example</title> </head> <body> <h1>FileUpload - Single-File Example</h1> @FileUpload.GetHtml( initialNumberOfFiles:1, allowMoreFilesToBeAdded:false, includeFormTag:true, uploadText:"Upload") @if (IsPost) { <span>File uploaded!</span><br/> } </body> </html>
The body portion of the page uses the FileUpload helper to create the upload box and buttons
that you're probably familiar with:
The properties that you set for the FileUpload helper specify that you want a single box for the
file to upload and that you want the submit button to read Upload. (You'll add more boxes later
in the chapter.)
When the user clicks Upload, the code at the top of the page gets the file and saves it. The
Request object that you normally use to get values from form fields also has a Files array that
contains the file (or files) that have been uploaded. You can get individual files out of specific
positions in the array — for example, to get the first uploaded file, you get Request.Files[0], to
get the second file, you get Request.Files[1], and so on. (Remember that in programming,
counting usually starts at zero.)
When you fetch an uploaded file, you put it in a variable (here, uploadedFile) so that you can
manipulate it. To determine the name of the uploaded file, you just get its FileName property.
However, when the user uploads a file, FileName contains the user's original name, which
includes the entire path. It might look like this:
C:\Users\Public\Sample.txt
You don't want all that path information, though, because that's the path on the user's
computer, not for your server. You just want the actual file name (Sample.txt). You can strip out
just the file from a path by using the Path.GetFileName method, like this:
Path.GetFileName(uploadedFile.FileName)

ASP.NET Web Pages Using The Razor Syntax Chapter 8 – Working with Files 135
The Path object is a utility that has a number of methods like this that you can use to strip paths,
combine paths, and so on.
Once you've gotten the name of the uploaded file, you can build a new path for where you want
to store the uploaded file in your website. In this case, you combine Server.MapPath, the folder
names (App_Data/UploadedFiles), and the newly stripped file name to create a new path. You
can then call the uploaded file's SaveAs method to actually save the file.
5. Run the page in a browser.
6. Click Browse and then select a file to upload.
The text box next to the Browse button will contain the path and file location.

ASP.NET Web Pages Using The Razor Syntax Chapter 8 – Working with Files 136
7. Click Upload. 8. In the website, right-click the project folder and then click Refresh. 9. Open the UploadedFiles folder. The file that you uploaded is in the folder.
Letting Users Upload Multiple Files
In the previous example, you let users upload one file. But you can use the FileUpload helper to upload
more than one file at a time. This is handy for scenarios like uploading photos, where uploading one file
at a time is tedious. (You can read about uploading photos in Chapter 9 - Working with Images.) This
example shows how to let users upload two at a time, although you can use the same technique to
upload more than that.
1. Add the ASP.NET Web Helpers Library to your website as described in Chapter 1 - Getting Started with ASP.NET Web Pages, if you haven't already.
2. Create a new page named FileUploadMultiple.cshtml. 3. Replace the default markup and code in the page with the following:
@{ var message = ""; if (IsPost) { var fileName = ""; var fileSavePath = ""; int numFiles = Request.Files.Count; int uploadedCount = 0; for(int i =0; i < numFiles; i++) { var uploadedFile = Request.Files[i]; if (uploadedFile.ContentLength > 0) { fileName = Path.GetFileName(uploadedFile.FileName); fileSavePath = Server.MapPath("~/App_Data/UploadedFiles/" + fileName); uploadedFile.SaveAs(fileSavePath); uploadedCount++; } } message = "File upload complete. Total files uploaded: " + uploadedCount.ToString(); } } <!DOCTYPE html> <html>

ASP.NET Web Pages Using The Razor Syntax Chapter 8 – Working with Files 137
<head><title>FileUpload - Multiple File Example</title></head> <body> <form id="myForm" method="post" enctype="multipart/form-data" action=""> <div> <h1>File Upload - Multiple-File Example</h1> @if (!IsPost) { @FileUpload.GetHtml( initialNumberOfFiles:2, allowMoreFilesToBeAdded:true, includeFormTag:true, addText:"Add another file", uploadText:"Upload") } <span>@message</span> </div> </form> </body> </html>
In this example, the FileUpload helper in the body of the page is configured to let users upload
two files by default. Because allowMoreFilesToBeAdded is set to true, the helper renders a link
that lets user add more upload boxes:
To process the files that the user uploads, the code uses the same basic technique that you used
in the previous example — get a file from Request.Files and then save it. (Including the various
things you need to do to get the right file name and path.) The innovation this time is that the
user might be uploading multiple files and you don't know many. To find out, you can get
Request.Files.Count.
With this number in hand, you can loop through Request.Files, fetch each file in turn, and save
it. When you want to loop a known number of times through a collection, you can use a for
loop, like this:
for(int i =0; i < numFiles; i++) { var uploadedFile = Request.Files[i]; if (uploadedFile.ContentLength > 0) { fileName = Path.GetFileName(uploadedFile.FileName); // etc. }

ASP.NET Web Pages Using The Razor Syntax Chapter 8 – Working with Files 138
The variable i is just a temporary counter that will go from zero to whatever upper limit you set.
In this case, the upper limit is the number of files. But because the counter starts at zero, as is
typical for counting scenarios in ASP.NET, the upper limit is actually one less than the file count.
(If three files are uploaded, the count is zero to 2.)
The uploadedCount variable totals all the files that are successfully uploaded and saved. This
code accounts for the possibility that an expected file may not be able to be uploaded.
4. Run the page in a browser. The browser displays the page and its two upload boxes. 5. Select two files to upload. 6. Click Add another file. The page displays a new upload box.
7. Click Upload. 8. In the website, right-click the project folder and then click Refresh. 9. Open the UploadedFiles folder to see the successfully uploaded files.
Additional Resources
Chapter 9 - Working with Images
Exporting to a CSV File
ASP.NET Web Pages with Razor Syntax Reference

ASP.NET Web Pages Using The Razor Syntax Chapter 9 – Working with Images 139
Chapter 9 – Working with Images
This chapter shows you how to add, display, and manipulate images (resize, flip, and add watermarks) in
your website.
What you'll learn
How to add an image to a page dynamically. How to let users upload an image. How to resize an image. How to flip or rotate an image. How to add a watermark to an image. How to use an image as a watermark.
These are the ASP.NET programming features introduced in the chapter:
The WebImage helper. The Path object, which provides methods that let you manipulate path and file names.
Adding an Image to a Web Page Dynamically
You can add images to your website and to individual pages while you're developing the website. You
can also let users upload images, which might be useful for tasks like letting them add a profile photo.
If an image is already available on your site and you just want to display it on a page, you use an HTML
<img> element like this:
<img src="images/Photo1.jpg" alt="Sample Photo" />
Sometimes, though, you need to be able to display images dynamically — that is, you don't know what
image to display until the page is running.
The procedure in this section shows how to display an image on the fly where users specify the image
file name from a list of image names. They select the name of the image from a drop-down list, and
when they submit the page, the image they selected is displayed.
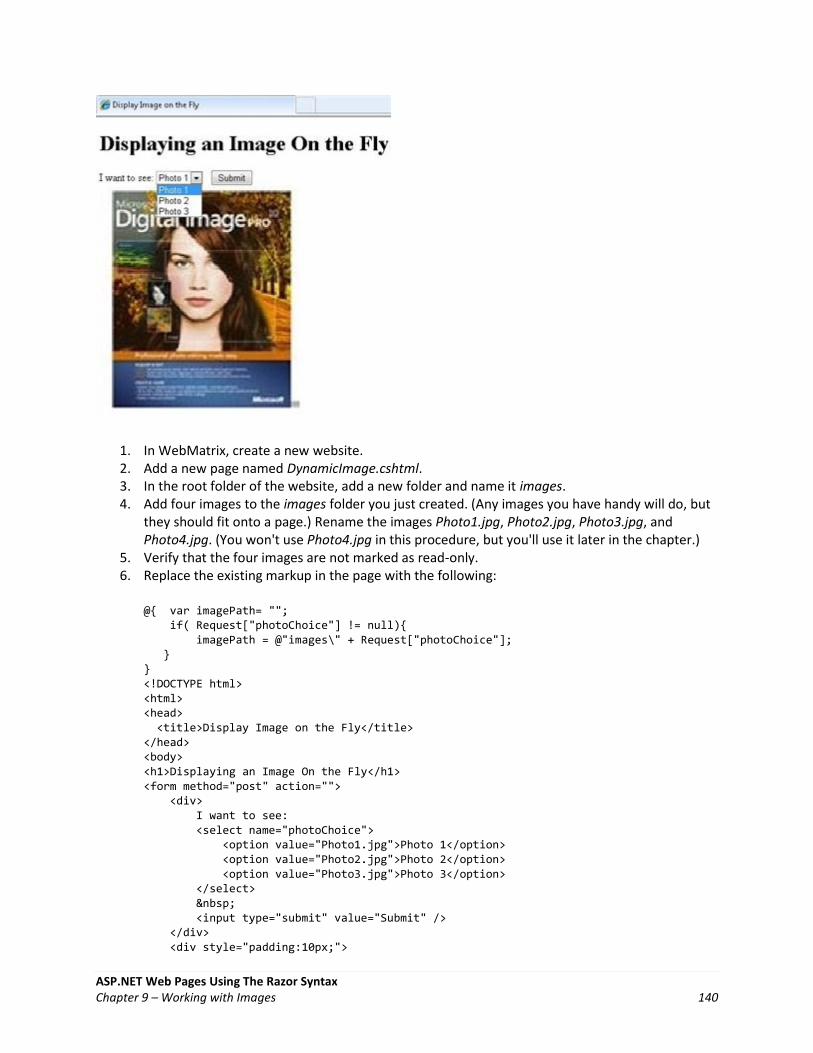
ASP.NET Web Pages Using The Razor Syntax Chapter 9 – Working with Images 140
1. In WebMatrix, create a new website. 2. Add a new page named DynamicImage.cshtml. 3. In the root folder of the website, add a new folder and name it images. 4. Add four images to the images folder you just created. (Any images you have handy will do, but
they should fit onto a page.) Rename the images Photo1.jpg, Photo2.jpg, Photo3.jpg, and Photo4.jpg. (You won't use Photo4.jpg in this procedure, but you'll use it later in the chapter.)
5. Verify that the four images are not marked as read-only. 6. Replace the existing markup in the page with the following:
@{ var imagePath= ""; if( Request["photoChoice"] != null){ imagePath = @"images\" + Request["photoChoice"]; } } <!DOCTYPE html> <html> <head> <title>Display Image on the Fly</title> </head> <body> <h1>Displaying an Image On the Fly</h1> <form method="post" action=""> <div> I want to see: <select name="photoChoice"> <option value="Photo1.jpg">Photo 1</option> <option value="Photo2.jpg">Photo 2</option> <option value="Photo3.jpg">Photo 3</option> </select> <input type="submit" value="Submit" /> </div> <div style="padding:10px;">
ASP.NET Web Pages Using The Razor Syntax Chapter 9 – Working with Images 141
@if(imagePath != ""){ <img src="@imagePath" alt="Sample Image" width="300px" /> } </div> </form> </body> </html>
The body of the page has a drop-down list (a <select> element) that's named photoChoice. The
list has three options, and the value attribute of each list option has the name of one of the
images that you put in the images folder. Essentially, the list lets the user select a friendly name
like "Photo 1", and it then passes the .jpg file name when the page is submitted.
In the code, you can get the user's selection (in other words, the image file name) from the list
by reading Request["photoChoice"]. You first see if there's a selection at all. If there is, you
construct a path for the image that consists of the name of the folder for the images and the
user's image file name. (If you tried to construct a path but there was nothing in
Request["photoChoice"], you'd get an error.) This results in a relative path like this:
images/Photo1.jpg
The path is stored in variable named imagePath that you'll need later in the page.
In the body, there's also an <img> element that's used to display the image that the user picked.
The src attribute isn't set to a file name or URL, like you'd do to display a static element.
Instead, it's set to @imagePath, meaning that it gets its value from the path you set in code.
The first time that the page runs, though, there's no image to display, because the user hasn't
selected anything. This would normally mean that the src attribute would be empty and the
image would show up as a red "x" (or whatever the browser renders when it can't find an
image). To prevent this, you put the <img> element in an if block that tests to see whether the
imagePath variable has anything in it. If the user made a selection, imagePath contains the path.
If the user didn't pick an image or if this is the first time the page is displayed, the <img> element
isn't even rendered.
7. Save the file and run the page in a browser. (Make sure the page is selected in the Files workspace before you run it.)
Uploading an Image
The previous example showed you how to display an image dynamically, but it worked only with images
that were already on your website. This procedure shows how to let users upload an image, which is
then displayed on the page. In ASP.NET, you can manipulate images on the fly using the WebImage helper,
which has methods that let you create, manipulate, and save images. The WebImage helper supports all
the common web image file types, including .jpg, .png, and .bmp. Throughout this chapter, you'll use
.jpg images, but you can use any of the image types.

ASP.NET Web Pages Using The Razor Syntax Chapter 9 – Working with Images 142
1. Add a new page and name it UploadImage.cshtml. 2. Replace the existing markup in the page with the following:
@{ WebImage photo = null; var newFileName = ""; var imagePath = ""; if(IsPost){ photo = WebImage.GetImageFromRequest(); if(photo != null){ newFileName = Guid.NewGuid().ToString() + "_" + Path.GetFileName(photo.FileName); imagePath = @"images\" + newFileName; photo.Save(@"~\" + imagePath); } } } <!DOCTYPE html> <html> <head> <title>Image Upload</title> </head> <body> <form action="" method="post" enctype="multipart/form-data"> <fieldset> <legend> Upload Image </legend> <label for="Image">Image</label> <input type="file" name="Image" /> <br/> <input type="submit" value="Upload" /> </fieldset> </form> <h1>Uploaded Image</h1>
ASP.NET Web Pages Using The Razor Syntax Chapter 9 – Working with Images 143
@if(imagePath != ""){ <div class="result"> <img src="@imagePath" alt="image" /> </div> } </body> </html>
The body of the text has an <input type="file"> element, which lets users select a file to
upload. When they click Submit, the file they picked is submitted along with the form.
To get the uploaded image, you use the WebImage helper, which has all sorts of useful methods
for working with images. Specifically, you use WebImage.GetImageFromRequest to get the
uploaded image (if any) and store it in a variable named photo.
A lot of the work in this example involves getting and setting file and path names. The issue is
that you want to get the name (and just the name) of the image that the user uploaded, and
then create a new path for where you're going to store the image. Because users could
potentially upload multiple images that have the same name, you use a bit of extra code to
create unique names and make sure that users don't overwrite existing pictures.
If an image actually has been uploaded (the test if (photo != null)), you get the image name
from the image’s FileName property. When the user uploads the image, FileName contains the
user's original name, which includes the path from the user's computer. It might look like this:
C:\Users\Joe\Pictures\SamplePhoto1.jpg
You don't want all that path information, though — you just want the actual file name
(SamplePhoto1.jpg). You can strip out just the file from a path by using the Path.GetFileName
method, like this:
Path.GetFileName(photo.FileName)
You then create a new unique file name by adding a GUID to the original name. (For more about
GUIDs, see About GUIDs later in this chapter.) Then you construct a complete path that you can
use to save the image. The save path is made up of the new file name, the folder (images), and
the current website location.
Note In order for your code to save files in the images folder, the application needs read-write
permissions for that folder. On your development computer this is not typically an issue. However,
when you publish your site to a hosting provider's web server, you might need to explicitly set those
permissions. If you run this code on a hosting provider's server and get errors, check with the
hosting provider to find out how to set those permissions.
Finally, you pass the save path to the Save method of the WebImage helper. This stores the
uploaded image under its new name. The save method looks like this: photo.Save(@"~\" +

ASP.NET Web Pages Using The Razor Syntax Chapter 9 – Working with Images 144
imagePath). The complete path is appended to @"~\", which is the current website location. (For
information about the ~ operator, see Chapter 2 – Introduction to ASP.NET Web Programming
Using the Razor Syntax.)
As in the previous example, the body of the page contains an <img> element to display the
image. If imagePath has been set, the <img> element is rendered and its src attribute is set to the
imagePath value.
3. Run the page in a browser.
About GUIDs
A GUID (globally-unique ID) is an identifier that looks something like this: 936DA01F-9ABD-4d9d-80C7-
02AF85C822A8. (Technically, it's a 16-byte/128-bit number.) When you need a GUID, you can call
specialized code that generates a GUID for you. The idea behind GUIDs is that between the enormous
size of the number (3.4 x 1038) and the algorithm for generating it, the resulting number is virtually
guaranteed to be one of a kind. GUIDs therefore are a good way to generate names for things when you
must guarantee that you won't use the same name twice. The downside, of course, is that GUIDs aren't
particularly user friendly, so they tend to be used when the name is used only in code.
Resizing an Image
If your website accepts images from a user, you might want to resize the images before you display or
save them. You can again use the WebImage helper for this.
This procedure shows how to resize an uploaded image to create a thumbnail and then save the
thumbnail and original image in the website. You display the thumbnail on the page and use a hyperlink
to redirect users to the full-sized image.

ASP.NET Web Pages Using The Razor Syntax Chapter 9 – Working with Images 145
1. Add a new page named Thumbnail.cshtml. 2. In the images folder, create a subfolder named thumbs. 3. Replace the existing markup in the page with the following:
@{ WebImage photo = null; var newFileName = ""; var imagePath = ""; var imageThumbPath = ""; if(IsPost){ photo = WebImage.GetImageFromRequest(); if(photo != null){ newFileName = Guid.NewGuid().ToString() + "_" + Path.GetFileName(photo.FileName); imagePath = @"images\" + newFileName; photo.Save(@"~\" + imagePath); imageThumbPath = @"images\thumbs\" + newFileName; photo.Resize(width: 60, height: 60, preserveAspectRatio: true, preventEnlarge: true); photo.Save(@"~\" + imageThumbPath); } } } <!DOCTYPE html> <html> <head> <title>Resizing Image</title> </head> <body> <h1>Thumbnail Image</h1> <form action="" method="post" enctype="multipart/form-data"> <fieldset> <legend> Creating Thumbnail Image </legend> <label for="Image">Image</label> <input type="file" name="Image" /> <br/> <input type="submit" value="Submit" /> </fieldset> </form> @if(imagePath != ""){ <div class="result"> <img src="@imageThumbPath" alt="Thumbnail image" /> <a href="@Html.AttributeEncode(imagePath)" target="_Self"> View full size </a> </div> } </body> </html>
This code is similar to the code from the previous example. The difference is that this code saves
the image twice, once normally and once after you create a thumbnail copy of the image. First
you get the uploaded image and save it in the images folder. You then construct a new path for
the thumbnail image. To actually create the thumbnail, you call the WebImage helper's Resize
method to create a 60-pixel by 60-pixel image. The example shows how you preserve the aspect

ASP.NET Web Pages Using The Razor Syntax Chapter 9 – Working with Images 146
ratio and how you can prevent the image from being enlarged (in case the new size would
actually make the image larger). The resized image is then saved in the thumbs subfolder.
At the end of the markup, you use the same <img> element with the dynamic src attribute that
you've seen in the previous examples to conditionally show the image. In this case, you display
the thumbnail. You also use an <a> element to create a hyperlink to the big version of the image.
As with the src attribute of the <img> element, you set the href attribute of the <a> element
dynamically to whatever is in imagePath. To make sure that the path can work as a URL, you pass
imagePath to the Html.AttributeEncode method, which converts reserved characters in the path
to characters that are ok in a URL.
4. Run the page in a browser.
Rotating and Flipping an Image
The WebImage helper also lets you flip and rotate images. This procedure shows how to get an image
from the server, flip the image upside down (vertically), save it, and then display the flipped image on
the page. In this example, you're just using a file you already have on the server (Photo2.jpg). In a real
application, you'd probably flip an image whose name you get dynamically, like you did in previous
examples.
1. Add a new page named Flip.cshtml. 2. Replace the existing markup in the file with the following:
@{ var imagePath= ""; WebImage photo = new WebImage(@"~\Images\Photo2.jpg"); if(photo != null){ imagePath = @"images\Photo2.jpg"; photo.FlipVertical(); photo.Save(@"~\" + imagePath); } }

ASP.NET Web Pages Using The Razor Syntax Chapter 9 – Working with Images 147
<!DOCTYPE html> <html> <head> <title>Get Image From File</title> <meta http-equiv="content-type" content="text/html;charset=utf-8" /> </head> <body> <h1>Flip Image Vertically</h1> @if(imagePath != ""){ <div class="result"> <img src="@imagePath" alt="Image" /> </div> } </body> </html>
The code uses the WebImage helper to get an image from the server. You create the path to the
image using the same technique you used in earlier examples for saving images, and you pass
that path when you create an image using WebImage:
WebImage photo = new WebImage(@"~\Images\Photo2.jpg");
If an image is found, you construct a new path and file name, like you did in earlier examples. To
flip the image, you call the FlipVertical method, and then you save the image again.
The image is again displayed on the page by using the <img> element with the src attribute set
to imagePath.
3. Run the page in a browser. The image for Photo2.jpg is shown upside down. If you request the page again, the image is flipped right side up again.
To rotate an image, you use the same code, except that instead of calling the FlipVertical or
FlipHorizontal, you call RotateLeft or RotateRight.
Adding a Watermark to an Image
When you add images to your website, you might want to add a watermark to the image before you
save it or display it on a page. People often use watermarks to add copyright information to an image or
to advertise their business name.

ASP.NET Web Pages Using The Razor Syntax Chapter 9 – Working with Images 148
1. Add a new page named Watermark.cshtml. 2. Replace the existing markup with the following:
@{ var imagePath= ""; WebImage photo = new WebImage(@"~\Images\Photo3.jpg"); if(photo != null){ imagePath = @"images\Photo3.jpg"; photo.AddTextWatermark("My Watermark", fontColor:"Yellow", fontFamily: "Arial"); photo.Save(@"~\" + imagePath); } } <!DOCTYPE html> <html> <head> <title>Water Mark</title> <meta http-equiv="content-type" content="text/html;charset=utf-8" /> </head> <body> <h1>Adding a Watermark to an Image</h1> @if(imagePath != ""){ <div class="result"> <img src="@imagePath" alt="Image" /> </div> } </body> </html>
This code is like the code in the Flip.cshtml page from earlier (although this time it uses the
Photo3.jpg file). To add the watermark, you call the WebImage helper's AddTextWatermark method
before you save the image. In the call to AddTextWatermark, you pass the text "My Watermark",
set the font color to yellow, and set the font family to Arial. (Although it's not shown here, the
WebImage helper also lets you specify opacity, font family and font size, and the position of the
watermark text.) When you save the image it must not be read-only.
As you've seen before, the image is displayed on the page by using the <img> element with the
src attribute set to @imagePath.

ASP.NET Web Pages Using The Razor Syntax Chapter 9 – Working with Images 149
3. Run the page in a browser.
Using an Image As a Watermark
Instead of using text for a watermark, you can use another image. People sometimes use images like a
company logo as a watermark, or they use a watermark image instead of text for copyright information.
1. Add a new page named ImageWatermark.cshtml. 2. Add an image to the images folder that you can use as a logo, and rename the image
MyCompanyLogo.jpg. This image should be an image that you can see clearly when it's set to 80 pixels wide and 20 pixels high.
3. Replace the existing markup with the following:
@{ var imagePath = ""; WebImage WatermarkPhoto = new WebImage(@"~\" + @"\Images\MyCompanyLogo.jpg"); WebImage photo = new WebImage(@"~\Images\Photo4.jpg"); if(photo != null){ imagePath = @"images\Photo4.jpg"; photo.AddImageWatermark(WatermarkPhoto, width: 80, height: 20, horizontalAlign:"Center", verticalAlign:"Bottom", opacity:100, padding:10); photo.Save(@"~\" + imagePath); } } <!DOCTYPE html> <html> <head> <title>Image Watermark</title> <meta http-equiv="content-type" content="text/html;charset=utf-8" /> </head> <body> <h1>Using an Image as a Watermark</h1> @if(imagePath != ""){ <div class="result"> <img src="@imagePath" alt="Image" /> </div>

ASP.NET Web Pages Using The Razor Syntax Chapter 9 – Working with Images 150
} </body> </html>
This is another variation on the code from earlier examples. In this case, you call
AddImageWatermark to add the watermark image to the target image (Photo3.jpg) before you
save the image. When you call AddImageWatermark, you set its width to 80 pixels and the height
to 20 pixels. The MyCompanyLogo.jpg image is horizontally aligned in the center and vertically
aligned at the bottom of the target image. The opacity is set to 100% and the padding is set to
10 pixels. If the watermark image is bigger than the target image, nothing will happen. If the
watermark image is bigger than the target image and you set the padding for the image
watermark to zero, the watermark is ignored.
As before, you display the image using the <img> element and a dynamic src attribute.
4. Run the page in a browser.
Additional Resources
Chapter 8 - Working with Files
ASP.NET Web Pages with Razor Syntax Reference

ASP.NET Web Pages Using The Razor Syntax Chapter 10 – Working with Video 151
Chapter 10 – Working with Video
This chapter explains how to display video in an ASP.NET Web Pages with Razor syntax page.
ASP.NET Web Pages with Razor syntax lets you play Flash (.swf), Media Player (.wmv), and Silverlight
(.xap) videos.
What you'll learn
How to choose a video player. How to add video to a web page. How to set video player attributes.
These are the ASP.NET Razor pages features introduced in the chapter:
The Video helper.
Choosing a Video Player
There are lots of formats for video files, and each format typically requires a different player and a
different way to configure the player. In ASP.NET Razor pages, you can play a video in a web page using
the Video helper. The Video helper simplifies the process of embedding videos in a web page because it
automatically generates the object and embed HTML elements that are normally used to add video to
the page.
The Video helper supports the following media players:
Adobe Flash Windows Media Player Microsoft Silverlight
The Flash Player
The Flash player of the Video helper let you play Flash videos (.swf files) in a web page. At a minimum,
you have to provide a path to the video file. If you specify nothing but the path, the player uses default
values that are set by the current version of Flash. Typical default settings are:
The video is displayed using its default width and height and without a background color. The video plays automatically when the page loads. The video loops continuously until it's explicitly stopped. The video is scaled to show all of the video, rather than cropping the video to fit a specific size. The video plays in a window.

ASP.NET Web Pages Using The Razor Syntax Chapter 10 – Working with Video 152
The MediaPlayer Player
The MediaPlayer player of the Video helper lets you play Windows Media videos (.wmv files), Windows
Media audio (.wma files), and MP3 (.mp3 files) in a web page. You must include path of the media file to
play; all other parameters are optional. If you specify only a path, the player uses default settings set by
the current version of MediaPlayer, such as:
The video is displayed using its default width and height. The video plays automatically when the page loads. The video plays once (it doesn't loop). The player displays the full set of controls in the user interface. The video plays in in a window.
The Silverlight Player
The Silverlight player of the Video helper lets you play Windows Media Video (.wmv files), Windows
Media Audio (.wma files), and MP3 (.mp3 files). You must set the path parameter to point to a
Silverlight-based application package (.xap file). You also must set the width and height parameters. All
other parameters are optional. When you use the Silverlight player for video, if you set only the required
parameters, the Silverlight player displays the video without a background color.
Note In case you don't already know Silverlight: the .xap file is a compressed file that contains
layout instructions in a .xaml file, managed code in assemblies, and optional resources. You can
create a .xap file in Visual Studio as a Silverlight application project.
The Silverlight video player uses both the settings that you provide for the player and the settings that
are provided in the .xap file.
MIME Types
When a browser downloads a file, the browser makes sure that the file type matches the MIME type
that's specified for the document that's being rendered. The MIME type is the content type or media
type of a file. The Video helper uses the following MIME types:
application/x-shockwave-flash application/x-mplayer2 application/x-silverlight-2
Playing Flash (.swf) Videos
This procedure shows you how to play a Flash video named sample.swf. The procedure assumes that
you've got a folder named Media on your site and that the .swf file is in that folder.

ASP.NET Web Pages Using The Razor Syntax Chapter 10 – Working with Video 153
1. Add the ASP.NET Web Helpers Library to your website as described in Chapter 1 - Getting Started with ASP.NET Web Pages, if you haven't already added it.
2. In the website, add a page and name it FlashVideo.cshtml. 3. Add the following markup to the page:
<!DOCTYPE html> <html> <head> <title>Flash Video</title> </head> <body> @Video.Flash(path: "Media/sample.swf", width: "400", height: "600", play: true, loop: true, menu: false, bgColor: "red", quality: "medium", scale: "exactfit", windowMode: "transparent") </body> </html>
4. Run the page in a browser. (Make sure the page is selected in the Files workspace before you run it.) The page is displayed and the video plays automatically.

ASP.NET Web Pages Using The Razor Syntax Chapter 10 – Working with Video 154
You can set the quality parameter for a Flash video to low, autolow, autohigh, medium, high, and best:
<!-- Set the Flash video quality --> @Video.Flash(path: "Media/sample.swf", quality: "autohigh")
You can change the Flash video to play at a specific size using the scale parameter, which you can set to
the following:
showall. This makes the entire video visible while maintaining the original aspect ratio. However, you might end up with borders on each side.
noorder. This scales the video while maintaining the original aspect ratio, but it might be cropped.
exactfit. This makes the entire video visible without preserving the original aspect ratio, but distortion may occur.
If you don't specify a scale parameter, the entire video will be visible and the original aspect ratio will be
maintained without any cropping. The following example shows how to use the scale parameter:
<!-- Set the Flash video to an exact size --> @Video.Flash(path: "Media/sample.swf", width: "1000", height: "100", scale: "exactfit")

ASP.NET Web Pages Using The Razor Syntax Chapter 10 – Working with Video 155
The Flash player supports a video mode setting named windowMode. You can set this to window, opaque,
and transparent. By default, the windowMode is set to window, which displays the video in a separate
window on the web page. The opaque setting hides everything behind the video on the web page. The
transparent setting lets the background of the web page show through the video, assuming any part of
the video is transparent.
Playing MediaPlayer (.wmv) Videos
The following procedure shows you how to play a Window Media video named sample.wmv that's in the
Media folder.
1. Add the ASP.NET Web Helpers Library to your website as described in Chapter 1, if you haven't already.
2. Create a new page named MediaPlayerVideo.cshtml. 3. Add the following markup to the page:
<!DOCTYPE html> <html> <head> <title>MediaPlayer Video</title> </head> <body> @Video.MediaPlayer( path: "Media/sample.wmv", width: "400", height: "600", autoStart: true, playCount: 2, uiMode: "full", stretchToFit: true, enableContextMenu: true, mute: false, volume: 75) </body> </html>
4. Run the page in a browser. The video loads and plays automatically.

ASP.NET Web Pages Using The Razor Syntax Chapter 10 – Working with Video 156
You can set playCount to an integer that indicates how many times to play the video automatically:
<!-- Set the MediaPlayer video playCount --> @Video.MediaPlayer(path: "Media/sample.wmv", playCount: 2)
The uiMode parameter lets you specify which controls show up in the user interface. You can set uiMode
to invisible, none, mini, or full. If you don't specify a uiMode parameter, the video will be displayed
with the status window, seek bar, control buttons, and volume controls in addition to the video window.
These controls will also be displayed if you use the player to play an audio file. Here's an example of how
to use the uiMode parameter:
<!-- Set the MediaPlayer control UI --> @Video.MediaPlayer(path: "Media/sample.wmv", uiMode: "mini")
By default, audio is on when the video plays. You can mute the audio by setting the mute parameter to
true:
<!-- Play the MediaPlayer video without audio --> @Video.MediaPlayer(path: "Media/sample.wmv", mute: true)
You can control the audio level of the MediaPlayer video by setting the volume parameter to a value
between 0 and 100. The default value is 50. Here's an example:

ASP.NET Web Pages Using The Razor Syntax Chapter 10 – Working with Video 157
<!-- Play the MediaPlayer video without audio --> @Video.MediaPlayer(path: "Media/sample.wmv", volume: 75)
Playing Silverlight Videos
This procedure shows you how to play video contained in a Silverlight .xap page that's in a folder named
Media.
1. Add the ASP.NET Web Helpers Library to your website as described in Chapter 1, if you haven't already .
2. Create a new page named SilverlightVideo.cshtml. 3. Add the following markup to the page:
<!DOCTYPE html> <html> <head> <title>Silverlight Video</title> </head> <body> @Video.Silverlight( path: "Media/sample.xap", width: "400", height: "600", bgColor: "red", autoUpgrade: true) </body> </html>
4. Run the page in a browser.

ASP.NET Web Pages Using The Razor Syntax Chapter 10 – Working with Video 158
Additional Resources
Silverlight Overview
Flash OBJECT and EMBED tag attributes
Windows Media Player 11 SDK PARAM Tags
ASP.NET Web Pages with Razor Syntax Reference

ASP.NET Web Pages Using The Razor Syntax Chapter 11 – Adding Email to Your Website 159
Chapter 11 – Adding Email to Your Website
This chapter explains how to send an automated email message from a website.
What you'll learn
How to send an email message from your website. How to attach a file to an email message.
This is the ASP.NET feature introduced in the chapter:
The WebMail helper.
Sending Email Messages from Your Website
There are all sorts of reasons why you might need to send email from your website. You might send
confirmation messages to users, or you might send notifications to yourself (for example, that a new
user has registered.) The WebMail helper makes it easy for you to send email.
To use the WebMail helper, you have to have access to an SMTP server. (SMTP stands for Simple Mail
Transfer Protocol.) An SMTP server is an email server that only forwards messages to the recipient’s
server — it's the outbound side of email. If you use a hosting provider for your website, they probably
set you up with email and they can tell you what your SMTP server name is. If you're working inside a
corporate network, an administrator or your IT department can usually give you the information about
an SMTP server that you can use. If you're working at home, you might even be able to test using your
ordinary email provider, who can tell you the name of their SMTP server. You typically need:
The name of the SMTP server.ga The port number. (This is almost always 25. However, your ISP may require you to use port 587.) Credentials (user name, password).
In this procedure, you create two pages. The first page has a form that lets users enter a description, as
if they were filling in a technical-support form. The first page submits its information to a second page.
In the second page, code extracts the user’s information and sends an email message. It also displays a
message confirming that the problem report has been received.

ASP.NET Web Pages Using The Razor Syntax Chapter 11 – Adding Email to Your Website 160
Note To keep this example simple, the code initializes the WebMail helper right in the page where
you use it. However, for real websites, it's a better idea to put initialization code like this in a global
file, so that you initialize the WebMail helper for all files in your website. For more information, see
Chapter 18 - Customizing Site-Wide Behavior.
1. Create a new website. 2. Add a new page named EmailRequest.cshtml and add the following markup:
<!DOCTYPE html> <html> <head> <title>Request for Assistance</title> </head> <body> <h2>Submit Email Request for Assistance</h2> <form method="post" action="ProcessRequest.cshtml"> <div> Your name: <input type="text" name="customerName" /> </div> <div> Details about your problem: <br /> <textarea name="customerRequest" cols="45" rows="4"></textarea> </div> <div> <input type="submit" value="Submit" /> </div> </form> </body> </html>
Notice that the action attribute of the form element has been set to ProcessRequest.cshtml.
This means that the form will be submitted to that page instead of back to the current page.

ASP.NET Web Pages Using The Razor Syntax Chapter 11 – Adding Email to Your Website 161
3. Add a new page named ProcessRequest.cshtml to the website and add the following code and markup:
@{ var customerName = Request["customerName"]; var customerRequest = Request["customerRequest"]; try { // Initialize WebMail helper WebMail.SmtpServer = "your-SMTP-host"; WebMail.SmtpPort = 25; WebMail.EnableSsl = true; WebMail.UserName = "your-user-name-here"; WebMail.From = "your-email-address-here"; WebMail.Password = "your-account-password"; // Send email WebMail.Send(to: "target-email-address-here", subject: "Help request from - " + customerName, body: customerRequest ); } catch (Exception ex ) { <text> <b>The email was <em>not</em> sent.</b> The code in the ProcessRequest page must provide an SMTP server name, a user name, a password, and a "from" address. </text> } } <!DOCTYPE html> <html> <head> <title>Request for Assistance</title> </head> <body> <p>Sorry to hear that you are having trouble, <b>@customerName</b>.</p> <p>An email message has been sent to our customer service department regarding the following problem:</p> <p><b>@customerRequest</b></p> </body> </html>
In the code, you get the values of the form fields that were submitted to the page. You then call
the WebMail helper’s Send method to create and send the email message. In this case, the values
to use are made up of text that you concatenate with the values that were submitted from the
form.
The code for this page is inside a try/catch block. If for any reason the attempt to send an email
doesn't work (for example, the settings aren't right), the page displays a message. The <text>
tag is used to mark multiple lines of text within a code block. (For more information about
try/catch blocks or the <text> tag, see Chapter2 - Introduction to ASP.NET Web Programming
Using the Razor Syntax.)

ASP.NET Web Pages Using The Razor Syntax Chapter 11 – Adding Email to Your Website 162
4. Modify the following email related settings in the code:
Set your-SMTP-host to the name of the SMTP server that you have access to.
Set your-user-name-here to the user name for your SMTP server account.
Set your-email-address-here to your own email address. This is the email address that
the message is sent from.
Set your-account-password to the password for your SMTP server account.
Set target-email-address-here to the email address of the person you want to send the
message to. Normally this would be the email address of the recipient. For testing,
though, you want the message to be sent to you. Therefore, set this to your own email
address. When the page runs, you'll receive the message.
5. Run the EmailRequest.cshtml page in a browser. (Make sure the page is selected in the Files workspace before you run it.)
6. Enter your name and a problem description, and then click the Submit button. You're redirected to the ProcessRequest.cshtml page, which confirms your message and which sends you an email message.
Sending a File Using Email
You can also send files that are attached to email messages. In this procedure, you create a text file and
two HTML pages. You'll use the text file as an email attachment.
1. In the website, add a new text file and name it MyFile.txt. 2. Copy the following text and paste it in the file:
Lorem ipsum dolor sit amet, consectetur adipisicing elit, sed do eiusmod tempor
incididunt ut labore et dolore magna aliqua. Ut enim ad minim veniam, quis nostrud
exercitation ullamco laboris nisi ut aliquip ex ea commodo consequat.
3. Create a page named SendFile.cshtml and add the following markup:
<!DOCTYPE html> <html> <head>

ASP.NET Web Pages Using The Razor Syntax Chapter 11 – Adding Email to Your Website 163
<title>Attach File</title> </head> <body> <h2>Submit Email with Attachment</h2> <form method="post" action="ProcessFile.cshtml"> <div> Your name: <input type="text" name="customerName" /> </div> <div> Subject line: <br /> <input type="text" size= 30 name="subjectLine" /> </div> <div> File to attach: <br /> <input type="text" size=60 name="fileAttachment" /> </div> <div> <input type="submit" value="Submit" /> </div> </form> </body> </html>
4. Create a page named ProcessFile.cshtml and add the following markup:
@{ var customerName = Request["customerName"]; var subjectLine = Request["subjectLine"]; var fileAttachment = Request["fileAttachment"]; try { // Initialize WebMail helper WebMail.SmtpServer = "your-SMTP-host"; WebMail.SmtpPort = 25; WebMail.EnableSsl = true; WebMail.UserName = "your-user-name-here"; WebMail.From = "your-email-address-here"; WebMail.Password = "your-account-password"; // Create array containing file name var filesList = new string [] { fileAttachment }; // Attach file and send email WebMail.Send(to: "target-email-address-here", subject: subjectLine, body: "File attached. <br />From: " + customerName, filesToAttach: filesList); } catch (Exception ex) { <text> <b>The email was <em>not</em> sent.</b> The code in the ProcessFile page must provide an SMTP server name, a user name, a password, and a "from" address.

ASP.NET Web Pages Using The Razor Syntax Chapter 11 – Adding Email to Your Website 164
</text> } } <!DOCTYPE html> <html> <head> <title>Request for Assistance </title> </head> <body> <p><b>@customerName</b>, thank you for your interest.</p> <p>An email message has been sent to our customer service department with the <b>@fileAttachment</b> file attached.</p> </body> </html>
5. Modify the following email related settings in the code from the example:
Set your-SMTP-host to the name of an SMTP server that you have access to.
Set your-user-name-here to the user name for your SMTP server account.
Set your-email-address-here to your own email address. This is the email address that
the message is sent from.
Set your-account-password to the password for your SMTP server account.
Set target-email-address-here to your own email address. (As before, you'd normally
send an email to someone else, but for testing, you can send it to yourself.)
6. Run the SendFile.cshtml page in a browser. 7. Enter your name, a subject line, and the name of the text file to attach (MyFile.txt). 8. Click the Submit button. As before, you're redirected to the ProcessFile.cshtml page, which
confirms your message and which sends you an email message with the attached file.
Additional Resources
Chapter 18 - Customizing Site-Wide Behavior
Simple Mail Transfer Protocol
ASP.NET Web Pages with Razor Syntax Reference

ASP.NET Web Pages Using The Razor Syntax Chapter 12 – Adding Search to Your Website 165
Chapter 12 – Adding Search to Your Website
This chapter explains how to add the ability to search a website using the Bing search engine.
What you'll learn:
How to add the ability to search a website (including your own) to your website.
This is the ASP.NET feature introduced in the chapter:
The Bing helper.
Searching from Your Website
By adding the capability to search the web from your website, you can include Internet search results
without leaving your site. Adding search to your site can be useful in these ways:
Add a "Search this site" box that lets users search your site (that is, the current site). This makes it easy for users to find content on your site.
Add a box that lets users easily search related sites. For example, if your site is for a school sports team, you could add a search box that lets users also search the school's website.
Add a box that lets users search the web, but without having to leave your site to launch a search in another window.
To add search to your site, you use the Bing helper and (optionally) specify the URL of the site to search.
The Bing helper renders a text box where users can enter a search term.
The Bing helper renders a box that includes the Bing search icon that users can click in order to launch
the search:
If you've specified a site to search, the helper also renders radio buttons that let the user specify
whether to search only the specified site or the web in general. When the user submits the search, the
helper redirects the search to the Bing site (http://bing.com). The results are displayed in a new browser
window, as if the user had entered the search term in the Bing home page:

ASP.NET Web Pages Using The Razor Syntax Searching from Your Website 166
In this procedure, you create a web page that shows how to use the Bing search helper which displays a
custom search title and that can search the www.asp.net site.
1. Create a new website. 2. Add the ASP.NET Web Helpers Library to your website as described in Chapter 1 - Getting
Started with ASP.NET Web Pages, if you haven't already added it. 3. Add a new page named Search.cshtml and add the following markup:
@{ Bing.SiteUrl = "www.asp.net"; Bing.SiteTitle = "ASP.NET Custom Search"; } <!DOCTYPE html> <html> <head> <title>Bing Search Box</title> </head> <body> <div> <h1>Bing Search</h1> <p>Search displays results by opening a new browser window that shows the Bing home page with search results.</p> Search the ASP.NET site: <br/> @Bing.SearchBox() </div> </body> </html>
In the code, you call the Bing helper. The SearchBox method uses the the optional siteUrl
parameter, which lets you specify which site to search. (If you don't specify a URL, Bing just
searches the web.) In this case, you're searching the www.asp.net website. If you wanted to
search your own site, you'd substitute that URL for www.asp.net.
4. Run the Search.cshtml page in a browser. (Make sure the page is selected in the Files workspace before you run it.)

ASP.NET Web Pages Using The Razor Syntax Searching from Your Website 167
5. Enter a search term in the box, and then click the button. The results are displayed in a new browser window.
Note In order for the Bing helper to return results, the site you're searching must be publicly
available and its contents must have been examined ("crawled") by Bing. If you add a "Search this
site" box and configure the Bing helper to search your own site, you won't be able to test it until the
site has been live long enough for search engines to have found it. In other words, you won't be able
to test the search capability in WebMatrix directly.
Additional Resources
Make your Website SEO friendly
Locale ID (LCID) Chart
ASP.NET Web Pages with Razor Syntax Reference
Bing API documentation
Bing Box documentation

ASP.NET Web Pages Using The Razor Syntax Chapter 13 – Adding Social Networking to Your Web Site 168
Chapter 13 – Adding Social Networking to Your Web Site
This chapter explains how to integrate your site with social networking services.
In this chapter, you'll learn how to let people bookmark/link your website on sites like Facebook or Digg,
to add Twitter feeds to your site, and to dress up your site with Gravatar images and Xbox gamer cards.
What you'll learn
How to let people bookmark/link your site. How to add a Twitter feed. How to render Gravatar.com images. How to display an Xbox gamer card on your site. How to add a Facebook Like button to pages.
These are the ASP.NET programming concepts introduced in the chapter:
The LinkShare helper. The Twitter helper. The Gravatar helper. The GamerCard helper. The Facebook helper.
Linking Your Website on Social Networking Sites
If people like something on your site, they often want to share it with friends. You can make this easy by
displaying glyphs (icons) that people can click to share a page on Digg, Reddit, Facebook, Twitter, or
similar sites. To display these glyphs, add the LinkShare helper to a page. People who visit your page can
click an individual glyph. If they have an account with that social networking site, they can then post a
link to your page on that site.
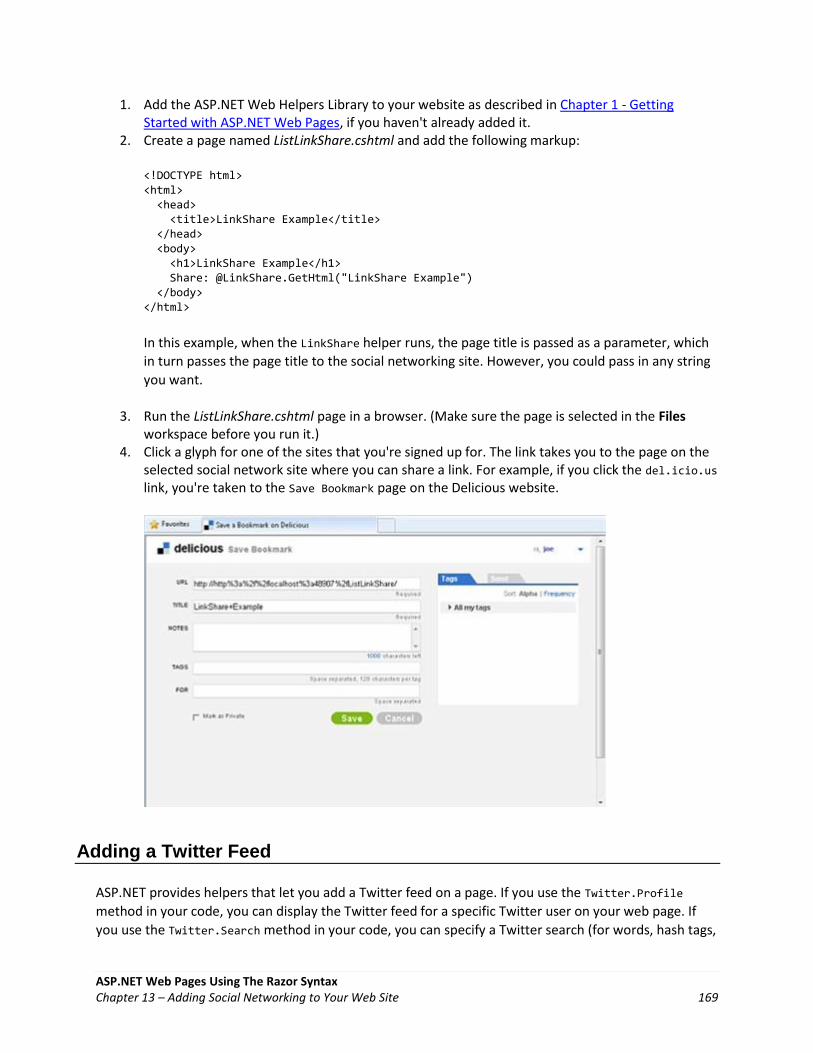
ASP.NET Web Pages Using The Razor Syntax Chapter 13 – Adding Social Networking to Your Web Site 169
1. Add the ASP.NET Web Helpers Library to your website as described in Chapter 1 - Getting Started with ASP.NET Web Pages, if you haven't already added it.
2. Create a page named ListLinkShare.cshtml and add the following markup:
<!DOCTYPE html> <html> <head> <title>LinkShare Example</title> </head> <body> <h1>LinkShare Example</h1> Share: @LinkShare.GetHtml("LinkShare Example") </body> </html>
In this example, when the LinkShare helper runs, the page title is passed as a parameter, which
in turn passes the page title to the social networking site. However, you could pass in any string
you want.
3. Run the ListLinkShare.cshtml page in a browser. (Make sure the page is selected in the Files workspace before you run it.)
4. Click a glyph for one of the sites that you're signed up for. The link takes you to the page on the selected social network site where you can share a link. For example, if you click the del.icio.us link, you're taken to the Save Bookmark page on the Delicious website.
Adding a Twitter Feed
ASP.NET provides helpers that let you add a Twitter feed on a page. If you use the Twitter.Profile
method in your code, you can display the Twitter feed for a specific Twitter user on your web page. If
you use the Twitter.Search method in your code, you can specify a Twitter search (for words, hash tags,

ASP.NET Web Pages Using The Razor Syntax Chapter 13 – Adding Social Networking to Your Web Site 170
or any other searchable text) and display the results on your page. Both helpers also let you configure
settings like width, height, and styles.
Access to Twitter information is public, so you don't need a Twitter account in order to use the Twitter
helpers on your pages.
The following procedure shows you how to create a web page that demonstrates both Twitter helpers.
1. Add the ASP.NET Web Helpers Library to your website as described in Chapter 1, if you haven't already.
2. Add a new page named Twitter.cshtml to the website. 3. Add the following code and markup to the page:
<!DOCTYPE html> <html> <head> <title>Twitter Example</title> </head> <body> <table> <tr> <td>Twitter profile helper</td> <td>Twitter search helper</td> </tr> <tr> <td>@Twitter.Profile("<Insert User Name>")</td> <td>@Twitter.Search("<Insert search criteria here>")</td> </tr> </table>

ASP.NET Web Pages Using The Razor Syntax Chapter 13 – Adding Social Networking to Your Web Site 171
</body> </html>
4. In the Twitter.Profile code statement, replace <Insert User Name> with the account name of the feed you want to display.
5. In the Twitter.Search code statement, replace <Insert search criteria here> with the text you want to search for.
6. Run the page in a browser.
Rendering a Gravatar Image
A Gravatar (a "globally recognized avatar") is an image that can be used on multiple websites as your
avatar — that is, an image that represents you. For example, a Gravatar can identify a person in a forum
post, in a blog comment, and so on. (You can register your own Gravatar at the Gravatar website at
http://www.gravatar.com/.) If you want to display images next to people's names or email addresses on
your website, you can use the Gravatar helper.
In this example, you're using a single Gravatar that represents yourself. Another way to use Gravatars is
to let people specify their Gravatar address when they register on your site. (You can learn how to let
people register in Chapter 16 - Adding Security and Membership.) Then whenever you display
information for that user, you can just add the Gravatar to where you display the user's name.
1. Add the ASP.NET Web Helpers Library to your website as described in Chapter 1 - Getting Started with ASP.NET Web Pages, if you haven't already.
2. Create a new web page named Gravatar.cshtml. 3. Add the following markup to the file:
<!DOCTYPE html> <html> <head> <title>Gravatar Example</title> </head> <body> <h1>Gravatar Example</h1> @Gravatar.GetHtml("<Your Gravatar account here>") @Gravatar.GetHtml("<Your Gravatar account here>", 40) </body> </html>
The Gravatar.GetHtml method displays the Gravatar image on the page. To change the size of
the image, you can include a number as a second parameter. The default size is 80. Numbers
less than 80 make the image smaller. Numbers greater than 80 make the image larger.
4. In the Gravatar.GetHtml methods, replace <Your Gravatar account here> with the email address that you use for your Gravatar account. (If you don't have a Gravatar account, you can use the email address of someone who does.)

ASP.NET Web Pages Using The Razor Syntax Chapter 13 – Adding Social Networking to Your Web Site 172
5. Run the page in your browser. The page displays two Gravatar images for the email address you specified. The second image is smaller than the first.
Displaying an Xbox Gamer Card
When people play Microsoft Xbox games online, each user has a unique ID. Statistics are kept for each
player in the form of a gamer card, which shows their reputation, gamer score, and recently played
games. If you're an Xbox gamer, you can show your gamer card on pages in your site by using the
GamerCard helper.
1. Add the ASP.NET Web Helpers Library to your website as described in Chapter 1 - Getting Started with ASP.NET Web Pages, if you haven't already.
2. Create a new page named XboxGamer.cshtml and add the following markup.
<!DOCTYPE html> <html> <head> <title>Xbox Gamer Card</title> </head> <body> <h1>Xbox Gamer Card</h1> @GamerCard.GetHtml("major nelson") </body> </html>
You use the GamerCard.GetHtml property to specify the alias for the gamer card to be displayed.
3. Run the page in your browser. The page displays the Xbox gamer card that you specified.

ASP.NET Web Pages Using The Razor Syntax Chapter 13 – Adding Social Networking to Your Web Site 173
Displaying a Facebook "Like" Button
You can make it easy for people to share your content with their Facebook friends by using the Facebook
helper's LikeButton method.
The Facebook helper renders a Like button itself as well as a count (which is read from Facebook) of how
many other people have clicked Like for the page:
When people click the Facebook Like button on your site, a link appears on the user's Facebook feed
that says that they "Like" the page.
By default, the Facebook helper's LikeButton method generates a Like button that points to the current
page. That's the most common scenario — when you see a Like button, it's giving you a chance to create
a Facebook link to whatever you're reading at the moment. Alternatively, you can pass a URL to the
Facebook helper using the LikeButton method. In that case, the Like link in Facebook points to whatever
page you've specified. This is useful if the page you're on lists other sites and you want to provide a Like
button for each of those sites individually.
The LikeButton method lets you specify options for how to display the Like button, including:
Whether the link shows a Like link or a Recommend link.

ASP.NET Web Pages Using The Razor Syntax Chapter 13 – Adding Social Networking to Your Web Site 174
How to show the count of the other people who like the page:
Whether to show Facebook profile pictures of the people who have already liked the page:
The width and color scheme (light or dark) of the Like button display.
In the following example, you'll create two Like buttons. One points to the current page, and the other
points to a specific URL (the ASP.NET WebMatrix website). To test the example, you must have a
Facebook account.
1. Add the Facebook.Helper library to your website as described in Chapter 1 - Getting Started with ASP.NET Web Pages, if you haven't already. (Note that the Facebook helper is in a different library than many of the other helpers.)
2. Create a new page named FacebookLikeBtn.cshtml and add the following markup.
<!DOCTYPE html> <html> <head> <title>Facebook 'Like' Button</title> <style>body {font-family:verdana;font-size:9pt;}</style> </head> <body> <p>Points to the current page, uses default settings:</p> @Facebook.LikeButton() <p>Points to the ASP.NET Web site:</p> @Facebook.LikeButton( href: "http://www.asp.net/webmatrix", action: "recommend", width: 250, buttonLayout: "button_count", showFaces: true, colorScheme: "dark") </body> </html>

ASP.NET Web Pages Using The Razor Syntax Chapter 13 – Adding Social Networking to Your Web Site 175
The first instance of the Facebook.LikeButton method uses all default settings, so it points to the
current page. The second instance includes options. You use the url parameter to specify the
URL to like. To change Like to Recommend, you set the action parameter to "recommend" (the
default is "like"). To specify the "button" style for the count, you set the layout parameter to
"button_count" (versus "standard" or "box_count"). To show Facebook profile pictures below
the Like button, you set the showFaces parameter to true. Finally, to set the color scheme, you
set the colorScheme parameter to "dark" (the default is "light").
3. Run the web page in your browser. The page displays the Facebook Like buttons that you specified.
4. Click the Recommend button that points to the ASP.NET website. If you're not logged into Facebook, you're prompted to do so. When you are, you'll be able to see the Recommend link on your wall.
If you're testing the page within WebMatrix, you won't be able to test the first link (the Like
button that points to the current page). Because you're running on the local computer (using
the localhost URL), Facebook can't link back to you. However, once your site goes live, the link
will work.
Additional Resources
ASP.NET Web Pages with Razor Syntax Reference

ASP.NET Web Pages Using The Razor Syntax Chapter 14 – Analyzing Traffic 176
Chapter 14 – Analyzing Traffic
After you've gotten your website going, you might want to analyze your website traffic.
What you'll learn
How to send information about your website traffic to an analytics provider.
These are the ASP.NET programming features introduced in the chapter:
The Analytics helper.
Tracking Visitor Information (Analytics)
Analytics is a general term for technology that measures traffic on your website so you can understand
how people use the site. Many analytics services are available, including services from Google, Yahoo,
StatCounter, and others.
The way analytics works is that you sign up for an account with the analytics provider, where you
register the site that you want to track. The provider sends you a snippet of JavaScript code that
includes an ID for your account. You add the JavaScript snippet to the web pages on the site that you
want to track. (You typically add the analytics snippet to a footer or layout page or other HTML markup
that appears on every page in your site.) When users request a page that contains one of these
JavaScript snippets, the snippet sends information about the current page to the analytics provider, who
records various details about the page.
When you want to have a look at your site statistics, you log into the analytics provider's website. You
can then view all sorts of reports about your site, like:
The number of page views for individual pages. Obviously, this tells you (roughly) how many people are visiting the site, and which pages on your site are the most popular.
How long people spend on specific pages. This can tell you things like whether your home page is keeping people's interest.
What sites people were on before they visited your site. This helps you understand whether your traffic is coming from links, from searches, and so on.
When people visit your site and how long they stay. What countries your visitors are from. What browsers and operating systems your visitors are using.
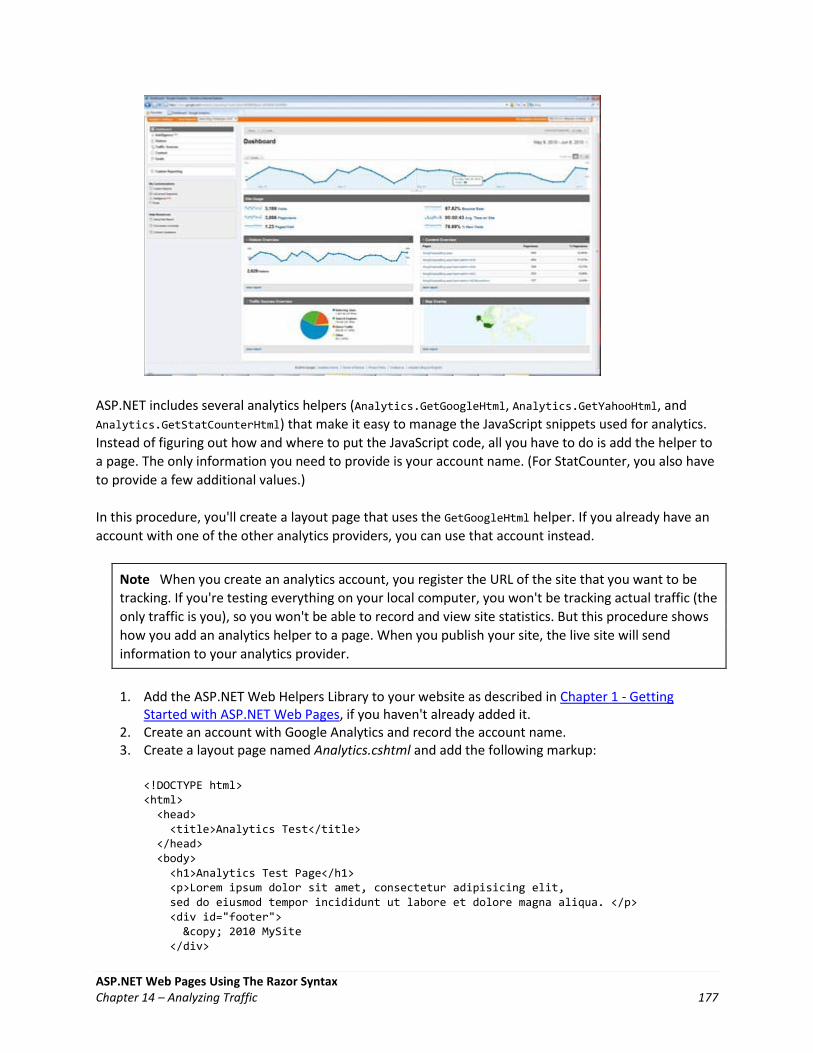
ASP.NET Web Pages Using The Razor Syntax Chapter 14 – Analyzing Traffic 177
ASP.NET includes several analytics helpers (Analytics.GetGoogleHtml, Analytics.GetYahooHtml, and
Analytics.GetStatCounterHtml) that make it easy to manage the JavaScript snippets used for analytics.
Instead of figuring out how and where to put the JavaScript code, all you have to do is add the helper to
a page. The only information you need to provide is your account name. (For StatCounter, you also have
to provide a few additional values.)
In this procedure, you'll create a layout page that uses the GetGoogleHtml helper. If you already have an
account with one of the other analytics providers, you can use that account instead.
Note When you create an analytics account, you register the URL of the site that you want to be
tracking. If you're testing everything on your local computer, you won't be tracking actual traffic (the
only traffic is you), so you won't be able to record and view site statistics. But this procedure shows
how you add an analytics helper to a page. When you publish your site, the live site will send
information to your analytics provider.
1. Add the ASP.NET Web Helpers Library to your website as described in Chapter 1 - Getting Started with ASP.NET Web Pages, if you haven't already added it.
2. Create an account with Google Analytics and record the account name. 3. Create a layout page named Analytics.cshtml and add the following markup:
<!DOCTYPE html> <html> <head> <title>Analytics Test</title> </head> <body> <h1>Analytics Test Page</h1> <p>Lorem ipsum dolor sit amet, consectetur adipisicing elit, sed do eiusmod tempor incididunt ut labore et dolore magna aliqua. </p> <div id="footer"> © 2010 MySite </div>

ASP.NET Web Pages Using The Razor Syntax Chapter 14 – Analyzing Traffic 178
@Analytics.GetGoogleHtml("myaccount") </body> </html>
Note You must place the call to the Analytics helper in the body of your web page (before the
</body> tag). Otherwise, the browser will not run the script.
If you're using a different analytics provider, use one of the following helpers instead:
(Yahoo) @Analytics.GetYahooHtml("myaccount")
(StatCounter) @Analytics.GetStatCounterHtml("project", "security")
4. Replace myaccount with the name of the account that you created in step 1. 5. Run the page in the browser. (Make sure the page is selected in the Files workspace before you
run it.) 6. In the browser, view the page source. You'll be able to see the rendered analytics code:
<!DOCTYPE html> <html> <head> <title>Analytics Test</title> </head> <body> <h1>Analytics Test Page</h1> <p>Lorem ipsum dolor sit amet, consectetur adipisicing elit, sed do eiusmod tempor incididunt ut labore et dolore magna aliqua.</p> <div id="footer"> © 2010 MySite </div> <script type="text/javascript"> var gaJsHost = (("https:" == document.location.protocol) ? "https://ssl." : "http://www."); document.write(unescape("%3Cscript src='" + gaJsHost + "google-analytics.com/ga.js' type='text/javascript'%3E%3C/script%3E")); </script> <script type="text/javascript"> try{ var pageTracker = _gat._getTracker("myaccount"); pageTracker._trackPageview(); } catch(err) {} </script> </body> </html>
7. Log onto the Google Analytics site and examine the statistics for your site. If you're running the page on a live site, you see an entry that logs the visit to your page.

ASP.NET Web Pages Using The Razor Syntax Chapter 15 – Caching to Improve the Performance of Your Website 179
Chapter 15 – Caching to Improve the Performance of Your Website
You can speed up your website by having it store — that is, cache — the results of data that ordinarily
would take considerable time to retrieve or process and that does not change often.
What you'll learn
How to use caching to improve the responsiveness of your website.
These are the ASP.NET features introduced in the chapter:
The WebCache helper.
Caching to Improve Website Responsiveness
Every time someone requests a page from your site, the web server has to do some work in order to
fulfill the request. For some of your pages, the server might have to perform tasks that take a
(comparatively) long time, such as retrieving data from a database. Even if in absolute terms one of
these tasks doesn't take long, if your site experiences a lot of traffic, a whole series of individual
requests that cause the web server to perform the complicated or slow task can add up to a lot of work.
This can ultimately affect the performance of the site.
One way to improve the performance of your website in circumstances like this is to cache data. If your
site gets repeated requests for the same information, and the information does not need to be modified
for each person, and it's not time sensitive, instead of re-fetching or recalculating it, you can fetch the
data once and then store the results. The next time a request comes in for that information, you just get
it out of the cache.
In general, you cache information that doesn't change frequently. When you put information in the
cache, it's stored in memory on the web server. You can specify how long it should be cached, from
seconds to days. When the caching period expires, the information is automatically removed from the
cache.
Note Entries in the cache might be removed for reasons other than that they've expired. For
example, the web server might temporarily run low on memory, and one way it can reclaim memory
is by throwing entries out of the cache. As you'll see, even if you've put information into the cache,
you have to check to be sure it's still there when you need it.
Imagine your website has a page that displays the current temperature and weather forecast. To get this
type of information, you might send a request to an external service. Since this information doesn't
change much (within a two-hour time period, for example) and since external calls require time and
bandwidth, it's a good candidate for caching.

ASP.NET Web Pages Using The Razor Syntax Chapter 15 – Caching to Improve the Performance of Your Website 180
ASP.NET includes a WebCache helper that makes it easy to add caching to your site and add data to the
cache. In this procedure, you'll create a page that caches the current time. This isn't a real-world
example, since the current time is something that does change often, and that moreover isn't complex
to calculate. However, it's a good way to illustrate caching in action.
1. Add a new page named WebCache.cshtml to the website. 2. Add the following code and markup to the page:
@{ var cacheItemKey = "Time"; var cacheHit = true; var time = WebCache.Get(cacheItemKey); if (time == null) { cacheHit = false; } if (cacheHit == false) { time = @DateTime.Now; WebCache.Set(cacheItemKey, time, 1, false); } } <!DOCTYPE html> <html> <head> <title>WebCache Helper Sample</title> </head> <body> <div> @if (cacheHit) { @:Found the time data in the cache. } else { @:Did not find the time data in the cache. } </div> <div> This page was cached at @time. </div> </body> </html>
When you cache data, you put it into the cache using a name this is unique across the website.
In this case, you'll use a cache entry named Time. This is the cacheItemKey shown in the code
example.
The code first reads the Time cache entry. If a value is returned (that is, if the cache entry isn't
null), the code just sets the value of the time variable to the cache data.
However, if the cache entry doesn't exist (that is, it's null), the code sets the time value, adds it
to the cache, and sets an expiration value to one minute. If the page isn't requested again within
one minute, the cache entry is discarded. (The default expiration value for an item in the cache
is 20 minutes.)

ASP.NET Web Pages Using The Razor Syntax Chapter 15 – Caching to Improve the Performance of Your Website 181
This code illustrates the pattern you should always use when you cache data. Before you get
something out of the cache, always check first whether the WebCache.Get method has returned
null. Remember that the cache entry might have expired or might have been removed for some
other reason, so any given entry is never guaranteed to be in the cache.
3. Run WebCache.cshtml in a browser. (Make sure the page is selected in the Files workspace before you run it.) The first time you request the page, the time data isn't in the cache, and the code has to add the time value to the cache.
4. Refresh WebCache.cshtml in the browser. This time, the time data is in the cache. Notice that the time hasn't changed since the last time you viewed the page.
5. Wait one minute for the cache to be emptied, and then refresh the page. The page again indicates that the time data wasn't found in the cache, and the updated time is added to the cache.
Additional Resources
Chapter 7 - Displaying Data in a Chart

ASP.NET Web Pages Using The Razor Syntax Chapter 16 – Adding Security and Membership 182
Chapter 16 – Adding Security and Membership
This chapter shows you how to secure your website so that some of the pages are available only to
people who log in. (You'll also see how to create pages that anyone can access.)
What you'll learn
How to create a website that has a registration page and a login page so that for some pages you can limit access to only members.
How to create public and member-only pages. How to use CAPTCHA to prevent automated programs (bots) from creating member accounts.
These are the ASP.NET features introduced in the chapter:
The WebSecurity helper. The SimpleMembership helper. The ReCaptcha helper.
Introduction to Website Membership
You can set up your website so that users can log into it — that is, so that the site supports membership.
This can be useful for many reasons. For example, your site might have features that are available only
to members. In some cases, you might require users to log in in order to send you feedback or leave a
comment.
Even if your website supports membership, users aren't necessarily required to log in before they use
some of the pages on the site. Users who aren't logged in are known as anonymous users.
A user can register on your website and can then log in to the site. The website requires a user name
(often an email address) and a password to confirm that users are who they claim to be. This process of
logging in and confirming a user's identity is known as authentication.
In WebMatrix, you can use the Starter Site template to create a website that contains the following:
A database that's used to store user names and passwords for your members.
A registration page where anonymous (new) users can register.
A login and logout page.
A password recovery and reset page.
Note Although the Start Site template automatically creates these pages for you, in this chapter
you'll create simplified versions of them manually in order to learn the basics of ASP.NET security
and membership.
ASP.NET Web Pages Using The Razor Syntax Chapter 16 – Adding Security and Membership 183
Creating a Website That Has Registration and Login Pages
1. Start WebMatrix. 2. In the Quick Start page, select Site From Template. 3. Select the Starter Site template and then click OK. WebMatrix creates a new site. 4. In the left pane, click the Files workspace selector. 5. In the root folder of your website, open the _AppStart.cshtml file, which is a special file that's
used to contain global settings. It contains some statements that are commented out using the // characters:
@{ WebSecurity.InitializeDatabaseConnection("StarterSite", "UserProfile", "UserId", "Email", true); // WebMail.SmtpServer = "mailserver.example.com"; // WebMail.EnableSsl = true; // WebMail.UserName = "[email protected]"; // WebMail.Password = "your-password"; // WebMail.From = "[email protected]"; }
In order to be able to send email, you can use the WebMail helper. This in turn requires access to
an SMTP server, as described in Chapter 11 - Adding Email to your Website. That chapter
showed you how to set various SMTP settings in a single page. In this chapter, you'll use those
same settings, but you'll store them in a central file so that you don't have to keep coding them
into each page. (You don't need to configure SMTP settings to set up a registration database;
you only need SMTP settings if you want to validate users from their email alias and let users
reset a forgotten password.)
6. Uncomment the statements. (Remove // from in front of each one.) 7. Modify the following email-related settings in the code:
Set WebMail.SmtpServer to the name of the SMTP server that you have access to.
Leave WebMail.EnableSsl set to true. This setting secures the credentials that are sent
to the SMTP server by encrypting them.
Set WebMail.UserName to the user name for your SMTP server account.
Set WebMail.Password to the password for your SMTP server account.
Set WebMail.From to your own email address. This is the email address that the message
is sent from.
8. Save and close _AppStart.cshtml. 9. Open the Default.cshtml file.

ASP.NET Web Pages Using The Razor Syntax Chapter 16 – Adding Security and Membership 184
10. Run the Default.cshtml page in a browser.
11. In the upper-right corner of the page, click the Register link. 12. Enter a user name and password and then click Register.

ASP.NET Web Pages Using The Razor Syntax Chapter 16 – Adding Security and Membership 185
When you created the website from the Starter Site template, a database named StarterSite.sdf
was created in the site's App_Data folder. During registration, your user information is added to
the database. A message is sent to the email address you used so you can finish registering.
13. Go to your email program and find the message, which will have your confirmation code and a hyperlink to the site.

ASP.NET Web Pages Using The Razor Syntax Chapter 16 – Adding Security and Membership 186
14. Click the hyperlink to activate your account. The confirmation hyperlink opens a registration confirmation page.
15. Click the Login link, and then log in using the account that you registered.
After you log in, the Login and Register links are replaced by a Logout link.
16. Click the About link.
The About.cshtml page is displayed. Right now, the only visible change when you log in is a
change to the logged-in status (the message Welcome Joe! and a Logout link).
Note By default, ASP.NET web pages send credentials to the server in clear text (as human-
readable text). A production site should use secure HTTP (https://, also known as the secure sockets
layer or SSL) to encrypt sensitive information that's exchanged with the server. You can encrypt
sensitive information by setting WebMail.EnableSsl=true as in the previous example. For more
information about SSL, see Securing Web Communications: Certificates, SSL, and https://.

ASP.NET Web Pages Using The Razor Syntax Chapter 16 – Adding Security and Membership 187
Creating a Members-Only Page
For the time being, anyone can browse to any page in your website. But you might want to have pages
that are available only to people who have logged in (that is, to members). ASP.NET lets you configure
pages so they can be accessed only by logged-in members. Typically, if anonymous users try to access a
members-only page, you redirect them to the login page.
In this procedure, you'll limit access to the About page (About.cshtml) so that only logged-in users can
access it.
1. Open the About.cshtml file. This is a content page that uses the _SiteLayout.cshtml page as its layout page. (For more about layout pages, see Chapter 3 - Creating a Consistent Look.)
2. Replace all the code in the About.cshtml file with the following code. This code tests the IsAuthenticated property of the WebSecurity object, which returns true if the user has logged in. Otherwise, the code calls Response.Redirect to send the user to the Login.cshtml page in the Account folder. Here's the complete About.cshtml file:
@if (!WebSecurity.IsAuthenticated) { Response.Redirect("~/Account/Login"); } @{ Layout = "~/_SiteLayout.cshtml"; Page.Title = "About My Site"; } <p> This web page was built using ASP.NET Web Pages. For more information, visit the ASP.NET home page at <a href="http://www.asp.net" target="_blank">http://www.asp.net</a> </p>
Note The URLs in the example (like ~/Account/Login) don't include the .cshtml file extension.
ASP.NET does not require file extensions in URLs that point to .cshtml pages. For more information,
see the section on routing in Chapter 18 - Customizing Site-Wide Behavior.
3. Run Default.cshtml in a browser. If you're logged into the site, click the Logout link. 4. Click the About link. You're redirected to the Login.cshtml page, because you aren't logged in.
To secure access to multiple pages, you can either add the security check to each page or you
can create a layout page similar to _SiteLayout.cshtml that includes the security check. You
would then reference the layout page with the security-check from the other pages in your site,
in the same way that Default.cshtml currently references _SiteLayout.cshtml.

ASP.NET Web Pages Using The Razor Syntax Chapter 16 – Adding Security and Membership 188
Creating Security for Groups of Users (Roles)
If your site has a lot of members, it's not efficient to check permission for each user individually before
you let them see a page. What you can do instead is to create groups, or roles, that individual members
belong to. You can then check permissions based on role. In this section, you'll create an "admin" role
and then create a page that's accessible to users who are in (who belong to) that role.
To begin, you need to add role information to the members database.
1. In WebMatrix, click the Databases workspace selector. 2. In the left pane, open the StarterSite.sdf node, open the Tables node, and then double-click the
webpages_Roles table.
3. Add a role named "admin". The RoleId field is filled in automatically. (It's the primary key and has been set to be an identify field, as explained in Chapter 5 - Working with Data.)
4. Take note of what the value is for the RoleId field. (If this is the first role you're defining, it will be 1.)
5. Close the webpages_Roles table. 6. Open the UserProfile table.

ASP.NET Web Pages Using The Razor Syntax Chapter 16 – Adding Security and Membership 189
7. Make a note of the UserId value of one or more of the users in the table and then close the table.
8. Open the webpages_UserInRoles table and enter a UserID and a RoleID value into the table. For example, to put user 3 into the "admin" role, you'd enter these values:
9. Close the webpages_UsersInRoles table.
Now that you have roles defined, you can configure a page that's accessible to users who are in
that role.
10. In the website root folder, create a new page named AdminError.cshtml and replace the existing content with the following code. This will be the page that users are redirected to if they aren't allowed access to a page.
@{ Layout = "~/_SiteLayout.cshtml"; PageData["Title"] = "Admin-only Error"; } <p>You must log in as an admin to access that page.</p>
11. In the website root folder, create a new page named AdminOnly.cshtml and replace the existing code with the following code:
@{ Layout = "~/_SiteLayout.cshtml"; PageData["Title"] = "Administrators only"; } @if ( Roles.IsUserInRole("admin")) { <span> Welcome <b>@WebSecurity.CurrentUserName</b>! </span> } else { Response.Redirect("~/AdminError"); }
The Roles.IsUserInRole method returns true if the current user is a member of the "admin"
role.
12. Run Default.cshtml in a browser, but don't log in. (If you're already logged in, log out.) 13. In the browser's address bar, change "Default" to "AdminOnly" in the URL. (In other words,
request the AdminOnly.cshtml file.) You're redirected to the AdminError.cshtml page, because you aren't currently logged in as a user in the "admin" role.
14. Return to Default.cshtml and log in as the user you added to the "admin" role. 15. Browse to AdminOnly.cshtml page. This time you see the page.

ASP.NET Web Pages Using The Razor Syntax Chapter 16 – Adding Security and Membership 190
Creating a Password-Change Page
You can let users change their passwords by creating a password-change page. This example shows the
basics of a page that does this. (The Starter Site template includes a ChangePassword.cshtml file that
contains more complete error checking than the page that you'll create in this procedure.)
1. In the Account folder of the website, create a page named ChangePassword2.cshtml. 2. Replace the contents with the following code:
@{ Layout = "~/_SiteLayout.cshtml"; PageData["Title"] = "Change Password"; var message = ""; if(IsPost) { string username = Request["username"]; string newPassword = Request["newPassword"]; string oldPassword = Request["oldPassword"]; if(WebSecurity.ChangePassword(username, oldPassword, newPassword)) { message="Password changed successfully!"; } else { message="Password could not be changed."; } } } <style> .message {font-weight:bold; color:red; margin:10px;} </style> <form method="post" action=""> Username: <input type="text" name="username" value="@WebSecurity.CurrentUserName" /> <br/> Old Password: <input type="password" name="oldPassword" value="" /> <br/> New Password: <input type="password" name="newPassword" value="" />

ASP.NET Web Pages Using The Razor Syntax Chapter 16 – Adding Security and Membership 191
<br/><br/> <input type="submit" value="Change Password" /> <div class="message">@message</div> <div><a href="Default.cshtml">Return to home page</a></div> </form>
The body of the page contains text boxes that let users enter their user name and old and new
passwords. In the code, you call the WebSecurity helper's ChangePassword method and pass it the
values you get from the user.
3. Run the page in a browser. If you're already logged in, your user name is displayed in the page. 4. Try entering your old password incorrectly. When you don't enter a correct password, the
WebSecurity.ChangePassword method fails and a message is displayed.
5. Enter valid values and try changing your password again.
Letting Users Generate a New Password
If users forget their password, you can let them generate a new one. (This is different from changing a
password that they know.) To let users get a new password, you use the WebSecurity helper's
GeneratePasswordResetToken method to generate a token. A token is a cryptographically secure string
that's sent to the user and that uniquely identifies the user for purposes like resetting a password. This
procedure shows a typical way to do all this — generate the token, send it to the user in email, and then
link to a page that reads the token and lets the user enter a new password. The link that the user will
see in email will look something like this:
http://localhost:36916/Account/PasswordReset2?PasswordResetToken=08HZGH0ALZ3CGz3
The random-looking characters at the end of the URL are the token.
(The Starter Site template includes a ForgotPassword.cshtml file that contains more complete error
checking than the sample below.)

ASP.NET Web Pages Using The Razor Syntax Chapter 16 – Adding Security and Membership 192
1. In the Account folder of the website, add a new page named ForgotPassword2.cshtml. 2. Replace the existing content with the following code:
@{ Layout = "~/_SiteLayout.cshtml"; PageData["Title"] = "Forgot your password?"; var message = ""; var username = ""; if (WebMail.SmtpServer.IsEmpty() ){ // The default SMTP configuration occurs in _start.cshtml message = "Please configure the SMTP server."; } if(IsPost) { username = Request["username"]; var resetToken = WebSecurity.GeneratePasswordResetToken(username); var portPart = ":" + Request.Url.Port; var confirmationUrl = Request.Url.Scheme + "://" + Request.Url.Host + portPart + VirtualPathUtility.ToAbsolute("~/Account/PasswordReset2?PasswordResetToken=" + Server.UrlEncode(resetToken)); WebMail.Send( to: username, subject: "Password Reset", body: @"Your reset token is:<br/><br/>" + resetToken + @"<br/><br/>Visit <a href=""" + confirmationUrl + @""">" + confirmationUrl + @"</a> to activate the new password." ); message = "An email has been sent to " + username + " with a password reset link."; } } <style> .message {font-weight:bold; color:red; margin:10px;} </style> <form method="post" action="">

ASP.NET Web Pages Using The Razor Syntax Chapter 16 – Adding Security and Membership 193
@if(!message.IsEmpty()) { <div class="error">@message</div> } else{ <div> Enter your email address: <input type="text" name="username" /> <br/> <br/><br/> <input type="submit" value="Get New Password" /> </div> } </form>
The body of the page contains the text box that prompts the user for an email address. When
the user submits the form, you first make sure that the SMTP mail settings have been made,
since the point of the page is to send an email message.
The heart of the page is in creating the password-reset token, which you do this way, passing
the email address (user name) that the user provided:
string resetToken = WebSecurity.GeneratePasswordResetToken(username);
The rest of the code is for sending the email message. Most of it is adapted from what's already
in the Register.cshtml file that was created as part of your site from the template.
You actually send the email by calling the WebMail helper's Send method. The body of the email is
created by concatenating together variables with strings that include both text and HTML
elements. When a user gets the email, the body of it looks something like this:
3. In the Account folder, create another new page named PasswordReset2.cshtml and replace the contents with the following code:
@{ Layout = "~/_SiteLayout.cshtml"; PageData["Title"] = "Password Reset"; var message = ""; var passwordResetToken = ""; if(IsPost) { var newPassword = Request["newPassword"]; var confirmPassword = Request["confirmPassword"]; passwordResetToken = Request["passwordResetToken"]; if( !newPassword.IsEmpty() && newPassword == confirmPassword && WebSecurity.ResetPassword(passwordResetToken, newPassword)) {

ASP.NET Web Pages Using The Razor Syntax Chapter 16 – Adding Security and Membership 194
message = "Password changed!"; } else { message = "Password could not be reset."; } } } <style> .message {font-weight:bold; color:red; margin:10px;} </style> <div class="message">@message</div> <form method="post" action=""> Enter your new password: <input type="password" name="newPassword" /> <br/> Confirm new password: <input type="password" name="confirmPassword" /><br/> <br/> <input type="submit" value="Submit"/> </form>
This page is what runs when the user clicks the link in the email to reset their password. The
body contains text boxes to let the user enter a password and confirm it.
You get the password token out of the URL by reading Request["PasswordResetToken"].
Remember that the URL will look something like this:
http://localhost:36916/Account/PasswordReset2?PasswordResetToken=08HZGH0ALZ3CGz3
Your code gets the token (here, 08HZGH0ALZ3CGz3) and then calls the WebSecurity helper's
ResetPassword method, passing it the token and the new password. If the token is valid, the
helper updates the password for the user who got the token in email. If the reset is successful,
the ResetPassword method returns true.
In this example, the call to ResetPassword is combined with some validation checks using the &&
(logical AND) operator. The logic is that the reset is successful if:
The newPassword text box is not empty (the ! operator means not); and
The values in newPassword and confirmPassword match; and
The ResetPassword method was successful.
4. Run ForgotPassword2.cshtml in a browser.
5. Enter your email address and then click Get New Password. The page sends an email. (There might be a short delay while it does this.)

ASP.NET Web Pages Using The Razor Syntax Chapter 16 – Adding Security and Membership 195
6. Check your email and look for a message whose subject line is "Password Reset." 7. In the email, click the link. You're taken to the PasswordReset2.cshtml page. 8. Enter a new password and then click Submit.
Preventing Automated Programs from Joining Your Website
The login page will not stop automated programs (sometimes referred to as web robots or bots) from
registering with your website. (A common motivation for bots joining groups is to post URLs of products
for sale.) You can help make sure the user is real person and not a computer program by using a
CAPTCHA test to validate the input. (CAPTCHA stands for Completely Automated Public Turing test to
tell Computers and Humans Apart.)
In ASP.NET pages, you can use the ReCaptcha helper to render a CAPTCHA test that is based on the
reCAPTCHA service (http://recaptcha.net). The ReCaptcha helper displays an image of two distorted
words that users have to enter correctly before the page is validated. The user response is validated by
the ReCaptcha.Net service.
1. Register your website at ReCaptcha.Net (http://recaptcha.net). When you've completed registration, you'll get a public key and a private key.
2. Add the ASP.NET Web Helpers Library to your website as described in Chapter 1 - Getting Started with ASP.NET Web Pages, if you haven't already.

ASP.NET Web Pages Using The Razor Syntax Chapter 16 – Adding Security and Membership 196
3. In the Account folder, open the file named Register.cshtml. 4. Remove the // comment characters for the captchaMessage variable. 5. Replace the PRIVATE_KEY string with your private key. 6. Remove the //comment characters from the line that contains the ReCaptcha.Validate call.
The following example shows the completed code. (Substitute your key for user-key-here.)
// Validate the user's response if (!ReCaptcha.Validate("user-key-here")) { captchaMessage = "Response was not correct"; isValid = false; }
6. At the bottom of the Register.cshtml page, replace the PUBLIC_KEY string with your public key. 7. Remove the comment characters from the line that contains the ReCaptcha call. The following
example shows the completed code (except that you again substitute your key for user-key-here):
@ReCaptcha.GetHtml("user-key-here", theme: "white")
8. Run Default.cshtml in a browser. If you're logged into the site, click the Logout link. 9. Click the Register link and test the registration using the CAPTCHA test.
Note If your computer is on a domain that uses proxy server, you might need to configure the
defaultproxy element of the Web.config file. The following example shows a Web.config file with
the defaultproxy element configured to enable the reCAPTCHA service to work.
<?xml version="1.0" encoding="utf-8"?>

ASP.NET Web Pages Using The Razor Syntax Chapter 16 – Adding Security and Membership 197
<configuration>
<system.net>
<defaultProxy>
<proxy
usesystemdefault = "false"
proxyaddress="http://myProxy.MyDomain.com"
bypassonlocal="true"
autoDetect="False"
/>
</defaultProxy>
</system.net>
</configuration>
Additional Resources
Chapter 18 - Customizing Site-Wide Behavior
Securing Web Communications: Certificates, SSL, And Https://

ASP.NET Web Pages Using The Razor Syntax Chapter 17 – Introduction to Debugging 198
Chapter 17 – Introduction to Debugging
Debugging is the process of finding and fixing errors in your code pages. This chapter shows you some
tools and techniques you can use to debug and to analyze your site.
What you'll learn
How to display information that helps analyze and debug pages. How to use debugging tools such as Internet Explorer Developer Tools and Firebug to analyze
web pages.
These are the ASP.NET features and WebMatrix (and other) tools introduced in the chapter:
The ServerInfo helper. The ObjectInfo helper. The Internet Explorer Developer Tools and the Firebug debugging tool.
An important aspect of troubleshooting errors and problems in your code is to avoid them in the first
place. You can do that by putting sections of your code that are likely to cause errors into try/catch
blocks. For more information, see the section on handling errors in Chapter 2 – Introduction to ASP.NET
Web Programming Using the Razor Syntax. For information about using the integrated debugger in
Visual Studio to debug ASP.NET Razor pages, see Appendix – Programming ASP.NET Web Pages in Visual
Studio.
Using the ServerInfo Helper to Display Server Information
The ServerInfo helper is a diagnostic tool that gives you an overview of information about the web
server environment that hosts your page. It also shows you HTTP request information that's sent when a
browser requests the page. The ServerInfo helper displays the current user identity, the type of
browser that made the request, and so on. This kind of information can help you troubleshoot common
issues.
1. Create a new web page named ServerInfo.cshtml. 2. At the end of the page, just before the closing </body> tag, add @ServerInfo.GetHtml():
<!DOCTYPE html> <html> <head> <title></title> </head> <body> @ServerInfo.GetHtml() </body> </html>

ASP.NET Web Pages Using The Razor Syntax Chapter 17 – Introduction to Debugging 199
You can add the ServerInfo code anywhere in the page. But adding it at the end will keep its
output separate from your other page content, which makes it easier to read.
Note You should remove any diagnostic code from your web pages before you move web pages to
a production server. This applies to the ServerInfo helper as well as the other diagnostic techniques
in this chapter that involve adding code to a page. You don't want your website visitors to see
information about your server name, user names, paths on your server, and similar details, because
this type of information might be useful to people with malicious intent.
3. Save the page and run it in a browser. (Make sure the page is selected in the Files workspace before you run it.)
The ServerInfo helper displays four tables of information in the page:
Server Configuration. This section provides information about the hosting web server,
including computer name, the version of ASP.NET you're running, the domain name,
and server time.
ASP.NET Server Variables. This section provides details about the many HTTP protocol
details (called HTTP variables) and values that are part of each web page request.
HTTP Runtime Information. This section provides details about that the version of the
Microsoft .NET Framework that your web page is running under, the path, details about
the cache, and so on. (As you learned in Chapter 2 – Introduction to ASP.NET Web
Programming Using the Razor Syntax, ASP.NET Web Pages using the Razor syntax are
built on Microsoft's ASP.NET web server technology, which is itself built on an extensive
software development library called the .NET Framework.)
Environment Variables. This section provides a list of all the local environment variables
and their values on the web server.
A full description of all the server and request information is beyond the scope of this chapter,
but you can see that the ServerInfo helper returns a lot of diagnostic information. For more
information about the values that ServerInfo returns, see Recognized Environment Variables on
the Microsoft TechNet website and IIS Server Variables on the MSDN website.

ASP.NET Web Pages Using The Razor Syntax Chapter 17 – Introduction to Debugging 200
Embedding Output Expressions to Display Page Values
Another way to see what's happening in your code is to embed output expressions in the page. As you
know, you can directly output the value of a variable by adding something like @myVariable or
@(subTotal * 12) to the page. For debugging, you can place these output expressions at strategic points
in your code. This enables you to see the value of key variables or the result of calculations when your
page runs. When you're done debugging, you can remove the expressions or comment them out. This
procedure illustrates a typical way to use embedded expressions to help debug a page.
1. Create a new WebMatrix page that's named OutputExpression.cshtml. 2. Replace the page content with the following:
<!DOCTYPE html> <html> <head> <title></title> </head> <body> @{ var weekday = DateTime.Now.DayOfWeek; // As a test, add 1 day to the current weekday. if(weekday.ToString() != "Saturday") { // If weekday is not Saturday, simply add one day. weekday = weekday + 1; } else { // If weekday is Saturday, reset the day to 0, or Sunday. weekday = 0; } // Convert weekday to a string value for the switch statement. var weekdayText = weekday.ToString(); var greeting = ""; switch(weekdayText) { case "Monday": greeting = "Ok, it's a marvelous Monday."; break; case "Tuesday": greeting = "It's a tremendous Tuesday."; break; case "Wednesday": greeting = "Wild Wednesday is here!"; break; case "Thursday": greeting = "All right, it's thrifty Thursday."; break; case "Friday": greeting = "It's finally Friday!"; break; case "Saturday": greeting = "Another slow Saturday is here."; break;
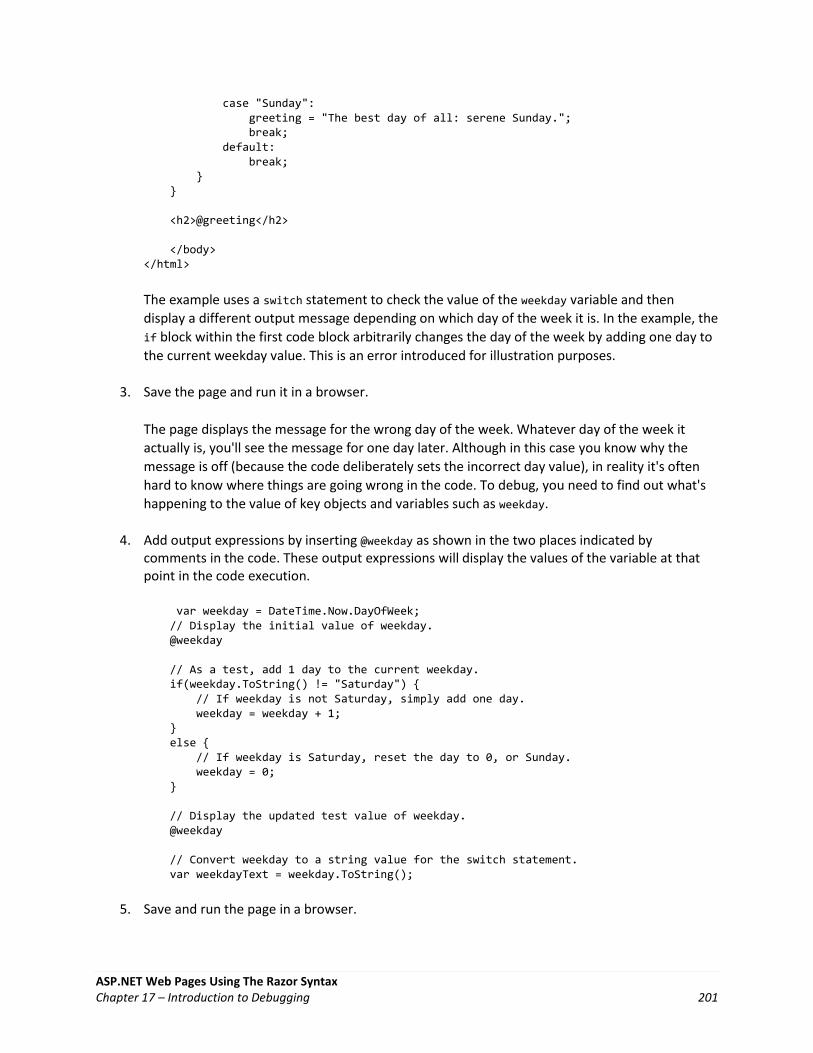
ASP.NET Web Pages Using The Razor Syntax Chapter 17 – Introduction to Debugging 201
case "Sunday": greeting = "The best day of all: serene Sunday."; break; default: break; } } <h2>@greeting</h2> </body> </html>
The example uses a switch statement to check the value of the weekday variable and then
display a different output message depending on which day of the week it is. In the example, the
if block within the first code block arbitrarily changes the day of the week by adding one day to
the current weekday value. This is an error introduced for illustration purposes.
3. Save the page and run it in a browser.
The page displays the message for the wrong day of the week. Whatever day of the week it
actually is, you'll see the message for one day later. Although in this case you know why the
message is off (because the code deliberately sets the incorrect day value), in reality it's often
hard to know where things are going wrong in the code. To debug, you need to find out what's
happening to the value of key objects and variables such as weekday.
4. Add output expressions by inserting @weekday as shown in the two places indicated by comments in the code. These output expressions will display the values of the variable at that point in the code execution.
var weekday = DateTime.Now.DayOfWeek; // Display the initial value of weekday. @weekday // As a test, add 1 day to the current weekday. if(weekday.ToString() != "Saturday") { // If weekday is not Saturday, simply add one day. weekday = weekday + 1; } else { // If weekday is Saturday, reset the day to 0, or Sunday. weekday = 0; } // Display the updated test value of weekday. @weekday // Convert weekday to a string value for the switch statement. var weekdayText = weekday.ToString();
5. Save and run the page in a browser.

ASP.NET Web Pages Using The Razor Syntax Chapter 17 – Introduction to Debugging 202
The page displays the real day of the week first, then the updated day of the week that results
from adding one day, and then the resulting message from the switch statement. The output
from the two variable expressions (@weekday) have no spaces between them because you didn't
add any HTML <p> tags to the output; the expressions are just for testing.
Now you can see where the error is. When you first display the weekday variable in the code, it
shows the correct day. When you display it the second time, after the if block in the code, the
day is off by one, so you know that something has happened between the first and second
appearance of the weekday variable. If this were a real bug, this kind of approach would help
you narrow down the location of the code that's causing the problem.
6. Fix the code in the page by removing the two output expressions you added, and removing the code that changes the day of the week. The remaining, complete block of code looks like the following example:
@{ var weekday = DateTime.Now.DayOfWeek; var weekdayText = weekday.ToString(); var greeting = ""; switch(weekdayText) { case "Monday": greeting = "Ok, it's a marvelous Monday."; break; case "Tuesday": greeting = "It's a tremendous Tuesday."; break; case "Wednesday": greeting = "Wild Wednesday is here!"; break; case "Thursday": greeting = "All right, it's thrifty Thursday."; break; case "Friday": greeting = "It's finally Friday!"; break; case "Saturday": greeting = "Another slow Saturday is here.";

ASP.NET Web Pages Using The Razor Syntax Chapter 17 – Introduction to Debugging 203
break; case "Sunday": greeting = "The best day of all: serene Sunday."; break; default: break; } }
7. Run the page in a browser. This time you see the correct message displayed for the actual day of the week.
Using the ObjectInfo Helper to Display Object Values
The ObjectInfo helper displays the type and the value of each object you pass to it. You can use it to
view the value of variables and objects in your code (like you did with output expressions in the previous
example), plus you can see data type information about the object.
1. Open the file named OutputExpression.cshtml that you created earlier. 2. Replace all code in the page with the following block of code:
<!DOCTYPE html> <html> <head> <title></title> </head> <body> @{ var weekday = DateTime.Now.DayOfWeek; @ObjectInfo.Print(weekday) var weekdayText = weekday.ToString(); var greeting = ""; switch(weekdayText) { case "Monday": greeting = "Ok, it's a marvelous Monday."; break;

ASP.NET Web Pages Using The Razor Syntax Chapter 17 – Introduction to Debugging 204
case "Tuesday": greeting = "It's a tremendous Tuesday."; break; case "Wednesday": greeting = "Wild Wednesday is here!"; break; case "Thursday": greeting = "All right, it's thrifty Thursday."; break; case "Friday": greeting = "It's finally Friday!"; break; case "Saturday": greeting = "Another slow Saturday is here."; break; case "Sunday": greeting = "The best day of all: serene Sunday."; break; default: break; } } @ObjectInfo.Print(greeting) <h2>@greeting</h2> </body> </html>
3. Save and run the page in a browser.
In this example, the ObjectInfo helper displays two items:
The type. For the first variable, the type is DayOfWeek. For the second variable, the type is
String.
The value. In this case, because you already display the value of the greeting variable in
the page, the value is displayed again when you pass the variable to ObjectInfo.
For more complex objects, the ObjectInfo helper can display more information — basically, it
can display the types and values of all of an object's properties.

ASP.NET Web Pages Using The Razor Syntax Chapter 17 – Introduction to Debugging 205
Using Debugging Tools
In addition to displaying information in the page to help you debug, you can use tools that provide
information about how your pages are running. This section shows you how to use the most popular
diagnostic tools for web pages, and how to use some tools in WebMatrix that also can help you debug
your site.
Internet Explorer Developer Tools
Internet Explorer Developer Tools is a package of web tools built into Internet Explorer 8. (For previous
versions of Internet Explorer, you can install the tools from the Internet Explorer Developer Toolbar
page on the Microsoft Download Center.) This tool does not specifically let you debug ASP.NET code, but
can be very useful for debugging HTML, CSS, and script, including the markup and script that's generated
dynamically by ASP.NET.
This procedure gives you an idea of how to work with the Internet Explorer Developer Tools. It assumes
you're working with Internet Explorer 8.
1. In Internet Explorer, browse to a public web page such as www.microsoft.com. 2. In the Tools menu, click Developer Tools. 3. Click the HTML tab, open the <html> element, and then open the <body> element. The window
shows you all the tags in the <body> element. 4. In the right-hand pane, click the Attributes tab to see the attributes for the <body> tag:

ASP.NET Web Pages Using The Razor Syntax Chapter 17 – Introduction to Debugging 206
5. In the right-hand pane, click Style to see the CSS styles that apply to the body section of the page.
To learn more the Internet Explorer Developer Tools, see Discovering the Internet Explorer
Developer Tools on the MSDN website.
Firebug
Firebug is an add-on for Mozilla Firefox that lets you inspect HTML markup and CSS, debug client script,
and view cookies and other page information. You can install Firebug from the Firebug website
(http://getfirebug.com/). As with the Internet Explorer debugging tools, this tool does not specifically let
you debug ASP.NET code, but can be very useful for examining the HTML and other page elements,
including those that ASP.NET generates dynamically.
This procedure shows you a few of the things you can do with Firebug after you've installed it.
1. In Firebox, browse to www.microsoft.com. 2. In the Tools menu, click Firebug, and then click Open Firebug in New Window. 3. In the Firebug main window, click the HTML tab and then expand the <html> node in the left
pane. 4. Select the <body> tag, and then click the Style tab in the right pane. Firebug displays style
information about the Microsoft site.
Firebug includes many options for editing and validating your HTML and CSS styles, and for
debugging and improving your script. In the Net tab, you can analyze the network traffic
between a server and a web page. For example, you can profile your page and see how long it

ASP.NET Web Pages Using The Razor Syntax Chapter 17 – Introduction to Debugging 207
takes to download all the content to a browser. To learn more about Firebug, see the Firebug
main site and the Firebug Documentation Wiki.
Additional Resources
MSDN Online Documentation
IIS Server Variables
Debugging with Visual Studio
Appendix – Programming ASP.NET Web Pages in Visual Studio
TechNet Online Documentation
Recognized Environment Variables
Internet Explorer Developer Tools
Discovering the Internet Explorer Developer Tools Download the IE Developer Tools (Internet Explorer versions earlier than version 8) Debugging HTML and CSS with the Developer Tools Debugging Script with the Developer Tools
Firebug Add-on for Web Developers
Firebug main site Firebug Documentation Wiki

ASP.NET Web Pages Using The Razor Syntax Chapter 18 – Customizing Site-Wide Behavior 208
Chapter 18 – Customizing Site-Wide Behavior
This chapter explains how to make settings to your entire website or an entire folder, rather than just a
page.
What you'll learn
How to run code that lets you set values (global values or helper settings) for all pages in a site. How to run code that lets you set values for all pages in a folder. How to run code before and after a page loads. How to send errors to a central error page. How to add authentication to all pages in a folder. How ASP.NET uses routing to let you use more readable and searchable URLs.
Adding Website Startup Code
Most of the code you write and the settings you make are in individual pages. For example, if a page
sends an email message, the page typically contains all the code that's needed in order to initialize the
settings for sending email (that is, for the SMTP server) and for sending the email message.
However, in some situations, you might want to run some code before any page on the site runs. This is
useful for setting values that can be used anywhere in the site (referred to as global values.) Some
helpers require you to provide values like email settings or account keys, for example, and it can be
handy to keep these settings in global values.
You can do this by creating a page named _AppStart.cshtml in the root of the site. If this page exists, it
runs the first time any page in the site is requested. Therefore, it's a good place to run code to set global
values. (Because _AppStart.cshtml has an underscore prefix, ASP.NET won't send the page to a browser
even if users request it directly.)
The following diagram shows how the _AppStart.cshtml page works. When a request comes in for a
page, and if this is the first request for any page in the site, ASP.NET first checks whether a
_AppStart.cshtml page exists. If so, any code in the _AppStart.cshtml page runs, and then the requested
page runs.

ASP.NET Web Pages Using The Razor Syntax Chapter 18 – Customizing Site-Wide Behavior 209
Setting Global Values for Your Website
1. In the root folder of a WebMatrix website, create a file named _AppStart.cshtml. The file must be in the root of the site.
2. Replace the default markup and code with the following:
@{ AppState["customAppName"] = "Application Name"; }
This code stores a value in the AppState dictionary, which is automatically available to all pages
in the site.
Note Be careful when you put code in the _AppStart.cshtml file. If any errors occur in code in the
_AppStart.cshtml file, the website won't start.
3. In the root folder, create a new page named AppName.cshtml. 4. Replace the default markup and code with the following:
<!DOCTYPE html> <html> <head> <title>Show Application Name</title> </head> <body> <h1>@AppState["customAppName"]</h1>

ASP.NET Web Pages Using The Razor Syntax Chapter 18 – Customizing Site-Wide Behavior 210
</body> </html>
This code extracts the value from the AppState object that you set in the _AppStart.cshtml page.
5. Run the AppName.cshtml page in a browser. (Make sure the page is selected in the Files workspace before you run it.) The page displays the global value.
Setting Values for Helpers
A good use for the _AppStart.cshtml file is to set values for helpers that you use in your site and that
have to be initialized. A perfect example is the ReCaptcha helper, which requires you to specify public
and private keys for your reCAPTCHA account. Instead of setting these keys on each page where you
want to use the ReCaptcha helper, you can set them once in the _AppStart.cshtml and then they're
already set for all the pages in your site. Other values you can set in the _AppStart.cshtml are settings
for sending email using an SMTP server, as you saw in Chapter 16 - Adding Security and Membership.
This procedure shows you how to set the ReCaptcha keys globally. (For more information about using
the ReCaptcha helper, see Chapter 16 - Adding Security and Membership.)
1. Add the ASP.NET Web Helpers Library to your website as described in Chapter 1 - Getting Started with ASP.NET Web Pages, if you haven't already added it.
2. If you haven't already, register your website at ReCaptcha.Net (http://recaptcha.net). When you've completed registration, you'll get a public key and a private key.
3. If you don't already have a _AppStart.cshtml file, in the root folder of a website create a file named _AppStart.cshtml.
4. Replace the existing code in the _AppStart.cshtml file with the following code:
@{ // Add the PublicKey and PrivateKey strings with your public // and private keys. Obtain your PublicKey and PrivateKey // at the ReCaptcha.Net (http://recaptcha.net) website. ReCaptcha.PublicKey = ""; ReCaptcha.PrivateKey = "";
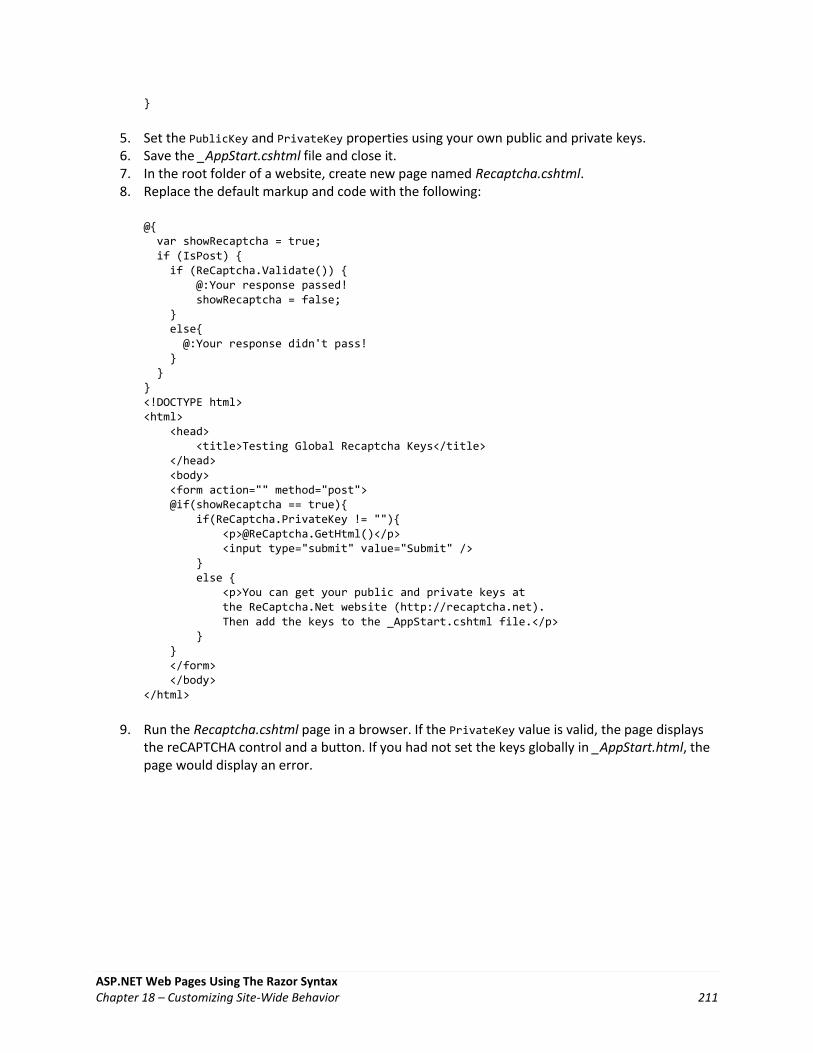
ASP.NET Web Pages Using The Razor Syntax Chapter 18 – Customizing Site-Wide Behavior 211
}
5. Set the PublicKey and PrivateKey properties using your own public and private keys. 6. Save the _AppStart.cshtml file and close it. 7. In the root folder of a website, create new page named Recaptcha.cshtml. 8. Replace the default markup and code with the following:
@{ var showRecaptcha = true; if (IsPost) { if (ReCaptcha.Validate()) { @:Your response passed! showRecaptcha = false; } else{ @:Your response didn't pass! } } } <!DOCTYPE html> <html> <head> <title>Testing Global Recaptcha Keys</title> </head> <body> <form action="" method="post"> @if(showRecaptcha == true){ if(ReCaptcha.PrivateKey != ""){ <p>@ReCaptcha.GetHtml()</p> <input type="submit" value="Submit" /> } else { <p>You can get your public and private keys at the ReCaptcha.Net website (http://recaptcha.net). Then add the keys to the _AppStart.cshtml file.</p> } } </form> </body> </html>
9. Run the Recaptcha.cshtml page in a browser. If the PrivateKey value is valid, the page displays the reCAPTCHA control and a button. If you had not set the keys globally in _AppStart.html, the page would display an error.

ASP.NET Web Pages Using The Razor Syntax Chapter 18 – Customizing Site-Wide Behavior 212
10. Enter the words for the test. If you pass the reCAPTCHA test, you see a message to that effect; otherwise you see an error message and the reCAPTCHA control is redisplayed.
Running Code Before and After Files in a Folder
Just like you can use _AppStart.cshtml to write code before pages in the site run, you can write code
that runs before (and after) any page in a particular folder run. This is useful for things like setting the
same layout page for all the pages in a folder, or for checking that a user is logged in before running a
page in the folder.
For pages in particular folders, you can create code in a file named _PageStart.cshtml. The following
diagram shows how the _PageStart.cshtml page works. When a request comes in for a page, ASP.NET
first checks for a _AppStart.cshtml page and runs that. Then ASP.NET checks whether there's an
_PageStart.cshtml page, and if so, runs that. It then runs the requested page.
Inside the _PageStart.cshtml page, you can specify where during processing you want the requested
page to run by including a RunPage method. This lets you run code before the requested page runs and
then again after it. If you don't include RunPage, all the code in _PageStart.cshtml runs, and then the
requested page runs automatically.

ASP.NET Web Pages Using The Razor Syntax Chapter 18 – Customizing Site-Wide Behavior 213
ASP.NET lets you create a hierarchy of _PageStart.cshtml files. You can put an _PageStart.cshtml file in
the root of the site and in any subfolder. When a page is requested, the _PageStart.cshtml file at the
top-most level (nearest to the site root) runs, followed by the _PageStart.cshtml file in the next
subfolder, and so on down the subfolder structure until the request reaches the folder that contains the
requested page. After all the applicable _PageStart.cshtml files have run, the requested page runs.
For example, you might have the following combination of _PageStart.cshtml files and default.cshtml
file:
@* ~/_PageStart.cshtml *@ @{ PageData["Color1"] = "Red"; PageData["Color2"] = "Blue"; } @* ~/myfolder/_PageStart.cshtml *@ @{ PageData["Color2"] = "Yellow"; PageData["Color3"] = "Green"; } @* ~/myfolder/default.cshtml *@ @PageData["Color1"] <br/> @PageData["Color2"] <br/> @PageData["Color3"]
When you run default.cshtml, you'll see the following:

ASP.NET Web Pages Using The Razor Syntax Chapter 18 – Customizing Site-Wide Behavior 214
Red
Yellow
Green
Running Initialization Code for All Pages in a Folder
A good use for _PageStart.cshtml files is to initialize the same layout page for all files in a single folder.
1. In the root folder, create a new folder named InitPages. 2. In the InitPages folder of your website, create a file named _PageStart.cshtml and replace the
default markup and code with the following:
@{ // Sets the layout page for all pages in the folder. Layout = "~/Shared/_Layout1.cshtml"; // Sets a variable available to all pages in the folder. PageData["MyBackground"] = "Yellow"; }
3. In the root of the website, create a folder named Shared. 4. In the Shared folder, create a file named _Layout1.cshtml and replace the default markup and
code with the following:
@{ var backgroundColor = PageData["MyBackground"]; } <!DOCTYPE html> <html> <head> <title>Page Title</title> <link type="text/css" href="/Styles/Site.css" rel="stylesheet" /> </head> <body> <div id="header"> Using the _PageStart.cshtml file </div> <div id="main" style="background-color:@backgroundColor"> @RenderBody() </div> <div id="footer"> © 2010 Contoso. All rights reserved </div> </body> </html>
5. In the InitPages folder, create a file named Content1.cshtml and replace the default markup with the following:
<p>This is content page 1.</p>

ASP.NET Web Pages Using The Razor Syntax Chapter 18 – Customizing Site-Wide Behavior 215
6. In the InitPages folder, create another file named Content2.cshtml and replace the default markup with the following:
<p>This is content page 2.</p>
7. Run Content1.cshtml in a browser.
When the Content1.cshtml page runs, the _PageStart.cshtml file sets Layout and also sets
PageData["MyBackground"] to a color. In Content1.cshtml, the layout and color are applied.
8. Display Content2.cshtml in a browser.
The layout is the same, because both pages use the same layout page and color as initialized in
_PageStart.cshtml.
Using _PageStart.cshtml to Handle Errors
Another good use for the _PageStart.cshtml file is to create a way to handle programming errors
(exceptions) that might occur in any .cshtml page in a folder. This example shows you one way to do
this.
1. In the root folder, create a folder named InitCatch. 2. In the InitCatch folder of your website, create a file named _PageStart.cshtml and replace the
existing markup and code with the following:
@{ try { RunPage(); } catch (Exception ex) { Response.Redirect("~/Error.cshtml?source=" + HttpUtility.UrlEncode(Request.AppRelativeCurrentExecutionFilePath)); } }
In this code, you try running the requested page explicitly by calling the RunPage method inside a
try block. If any programming errors occur in the requested page, the code inside the catch
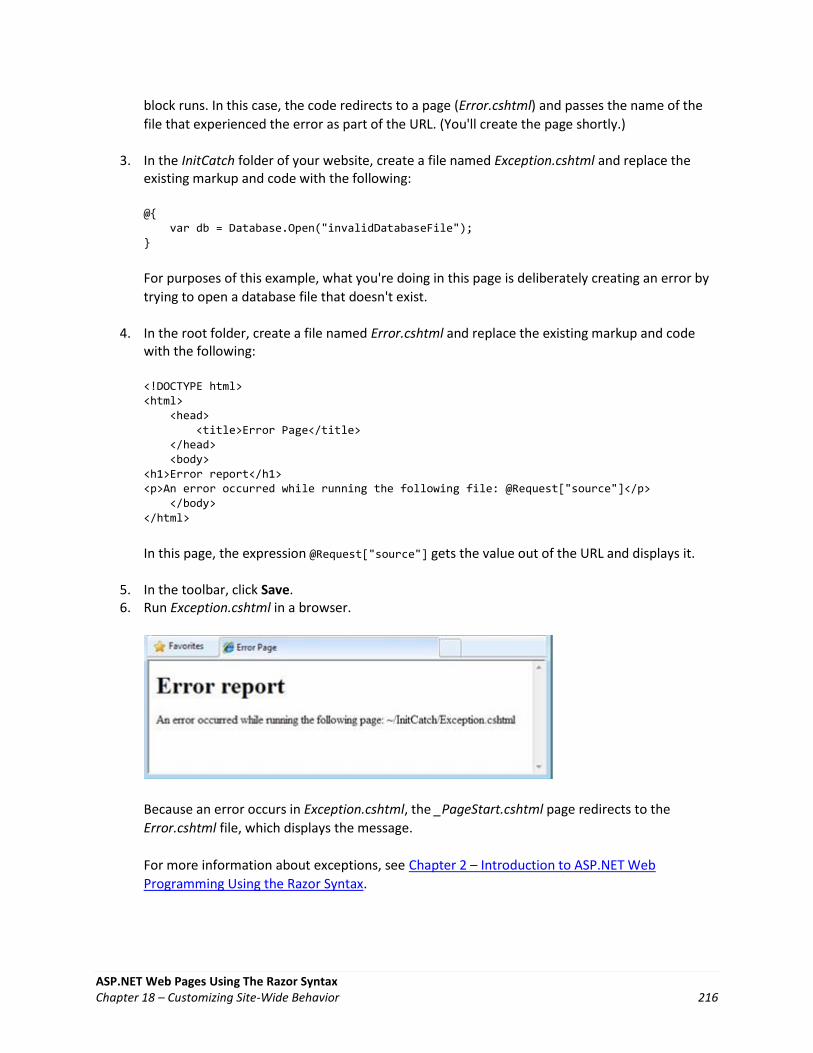
ASP.NET Web Pages Using The Razor Syntax Chapter 18 – Customizing Site-Wide Behavior 216
block runs. In this case, the code redirects to a page (Error.cshtml) and passes the name of the
file that experienced the error as part of the URL. (You'll create the page shortly.)
3. In the InitCatch folder of your website, create a file named Exception.cshtml and replace the existing markup and code with the following:
@{ var db = Database.Open("invalidDatabaseFile"); }
For purposes of this example, what you're doing in this page is deliberately creating an error by
trying to open a database file that doesn't exist.
4. In the root folder, create a file named Error.cshtml and replace the existing markup and code with the following:
<!DOCTYPE html> <html> <head> <title>Error Page</title> </head> <body> <h1>Error report</h1> <p>An error occurred while running the following file: @Request["source"]</p> </body> </html>
In this page, the expression @Request["source"] gets the value out of the URL and displays it.
5. In the toolbar, click Save. 6. Run Exception.cshtml in a browser.
Because an error occurs in Exception.cshtml, the _PageStart.cshtml page redirects to the
Error.cshtml file, which displays the message.
For more information about exceptions, see Chapter 2 – Introduction to ASP.NET Web
Programming Using the Razor Syntax.

ASP.NET Web Pages Using The Razor Syntax Chapter 18 – Customizing Site-Wide Behavior 217
Using _PageStart.cshtml to Restrict Folder Access
You can also use the _PageStart.cshtml file to restrict access to all the files in a folder.
1. Create a new website using the Site From Template option. 2. From the available templates, select Starter Site. 3. In the root folder, create a folder named AuthenticatedContent. 4. In the AuthenticatedContent folder, create a file named _PageStart.cshtml and replace the
existing markup and code with the following:
@{ Response.CacheControl = "no-cache"; if (!WebSecurity.IsAuthenticated) { Response.Redirect("~/Account/Login"); } }
The code starts by preventing all files in the folder from being cached. (This is required for
scenarios like public computers, where you don't want one user's cached pages to be available
to the next user.) Next, the code determines whether the user has signed in to the site before
they can view any of the pages in the folder. If the user is not signed in, the code redirects to the
login page.
5. Create a new page in the AuthenticatedContent folder named Page.cshtml. 6. Replace the default markup with the following:
@{ Layout = "~/_SiteLayout.cshtml"; Page.Title = "Authenticated Content"; } <!DOCTYPE html> <html> <head> <meta charset="utf-8" /> </head> <body> Thank you for authenticating! </body> </html>
7. Run Page.cshtml in a browser. The code redirects you to a login page. You must register before logging in. After you've registered and logged in, you can navigate to the page and view its contents.

ASP.NET Web Pages Using The Razor Syntax Chapter 18 – Customizing Site-Wide Behavior 218
Creating More Readable and Searchable URLs
The URLs for the pages in your site can have an impact on how well the site works. A URL that's
"friendly" can make it easier for people to use the site. It can also help with search-engine optimization
(SEO) for the site. ASP.NET websites include the ability to use friendly URLs automatically.
About Routing
ASP.NET lets you create meaningful URLs that describe user actions instead of just pointing to a file on
the server. Compare these pairs of URLs for a fictional blog:
http://www.contoso.com/Blog/blog.cshtml?categories=hardware
http://www.contoso.com//Blog/blog.cshtml?startdate=2009-11-01&enddate=2009-11-30
http://www.contoso.com/Blog/categories/hardware/
http://www.contoso.com/Blog/2009/November
In the first pair, a user would have to know that the blog is displayed using the blog.cshtml page, and
would then have to construct a query string that gets the right category or date range. The second set of
examples is much easier to comprehend and create.
The URLs for the first example also point directly to a specific file (blog.cshtml). If for some reason the
blog were moved to another folder on the server, or if the blog were rewritten to use a different page,
the links would be wrong. The second set of URLs doesn't point to a specific page, so even if the blog
implementation or location changes, the URLs would still be valid.
In ASP.NET, you can create friendlier URLs like those in the above examples because ASP.NET uses
routing. Routing creates logical mapping from a URL to a page (or pages) that can fulfill the request.
Because the mapping is logical (not physical, to a specific file), routing provides great flexibility in how
you define the URLs for your site.
How Routing Works
When ASP.NET processes a request, it reads the URL to determine how to route it. ASP.NET tries to
match individual segments of the URL to files on disk, going from left to right. If there's a match,
anything remaining in the URL is passed to the page as path information. For example, imagine the
following folder structure in a website:
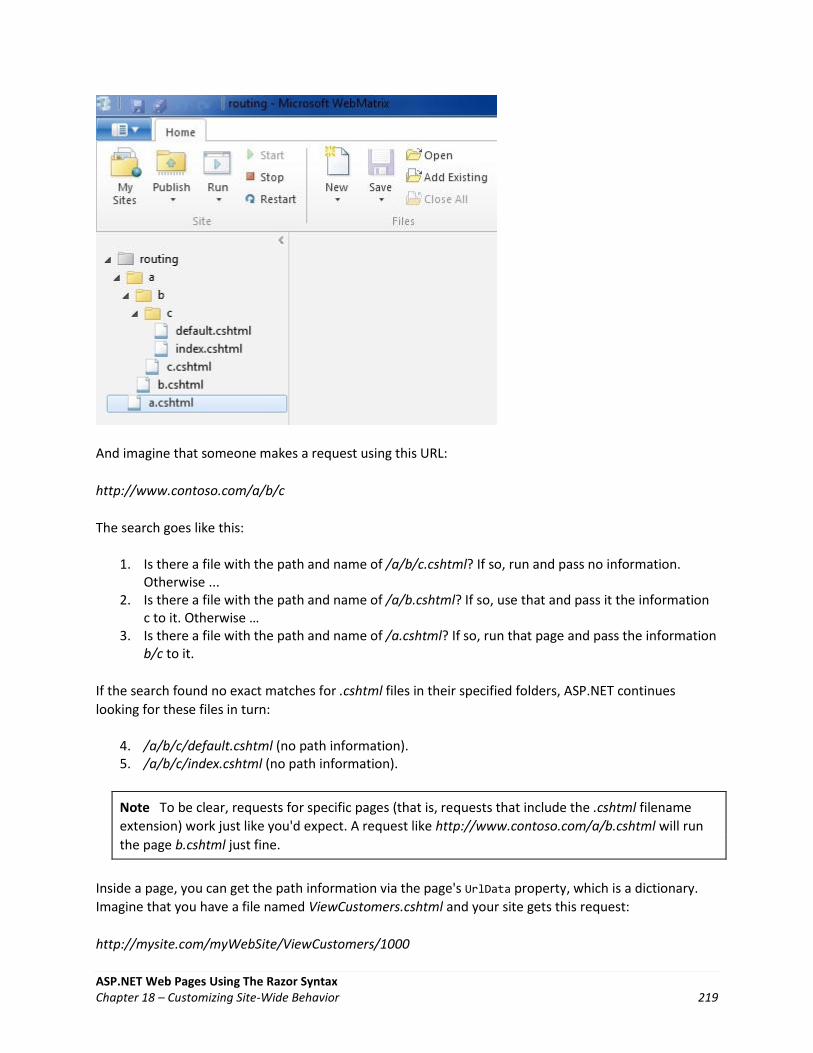
ASP.NET Web Pages Using The Razor Syntax Chapter 18 – Customizing Site-Wide Behavior 219
And imagine that someone makes a request using this URL:
http://www.contoso.com/a/b/c
The search goes like this:
1. Is there a file with the path and name of /a/b/c.cshtml? If so, run and pass no information. Otherwise ...
2. Is there a file with the path and name of /a/b.cshtml? If so, use that and pass it the information c to it. Otherwise …
3. Is there a file with the path and name of /a.cshtml? If so, run that page and pass the information b/c to it.
If the search found no exact matches for .cshtml files in their specified folders, ASP.NET continues
looking for these files in turn:
4. /a/b/c/default.cshtml (no path information). 5. /a/b/c/index.cshtml (no path information).
Note To be clear, requests for specific pages (that is, requests that include the .cshtml filename
extension) work just like you'd expect. A request like http://www.contoso.com/a/b.cshtml will run
the page b.cshtml just fine.
Inside a page, you can get the path information via the page's UrlData property, which is a dictionary.
Imagine that you have a file named ViewCustomers.cshtml and your site gets this request:
http://mysite.com/myWebSite/ViewCustomers/1000

ASP.NET Web Pages Using The Razor Syntax Chapter 18 – Customizing Site-Wide Behavior 220
As described in the rules above, the request will go to your page. Inside the page, you can use code like
the following to get and display the path information (in this case, the value "1000"):
<!DOCTYPE html> <html> <head> <title>URLData</title> </head> <body> Customer ID: @UrlData[0].ToString() </body> </html>
Note Because routing doesn't involve complete file names, there can be ambiguity if you have
pages that have the same name but different file-name extensions (for example, MyPage.cshtml
and MyPage.html). In order to avoid problems with routing, it's best to make sure that you don't
have pages in your site whose names differ only in their extension.
Additional Resources
ASP.NET Web Pages with Razor Syntax Reference

ASP.NET Web Pages Using The Razor Syntax Appendix – ASP.NET Quick API Reference 221
Appendix – ASP.NET Quick API Reference
This page contains a list with brief examples of the most commonly used objects, properties, and
methods for programming ASP.NET Web Pages with Razor syntax.
For API reference documentation, see the ASP.NET Web Pages Reference Documentation on MSDN.
This appendix contains reference information for the following:
Classes Data Helpers
Classes
AsBool(), AsBool(true|false)
Converts a string value to a Boolean value (true/false). Returns false or the specified value if the string
does not represent true/false.
bool b = stringValue.AsBool();
AsDateTime(), AsDateTime(value)
Converts a string value to date/time. Returns DateTime.MinValue or the specified value if the string
does not represent a date/time.
DateTime dt = stringValue.AsDateTime();
AsDecimal(), AsDecimal(value)
Converts a string value to a decimal value. Returns 0.0 or the specified value if the string does not
represent a decimal value.
decimal d = stringValue.AsDecimal();
AsFloat(), AsFloat(value)
Converts a string value to a float. Returns 0.0 or the specified value if the string does not represent a
decimal value.
float d = stringValue.AsFloat();
AsInt(), AsInt(value)

ASP.NET Web Pages Using The Razor Syntax Appendix – ASP.NET Quick API Reference 222
Converts a string value to an integer. Returns 0 or the specified value if the string does not represent an
integer.
int i = stringValue.AsInt();
Href(path [, param1 [, param2]])
Creates a browser-compatible URL from a local file path, with optional additional path parts.
<a href="@Href("~/Folder/File")">Link to My File</a> <a href="@Href("~/Product", "Tea")">Link to Product</a>
Html.Raw(value)
Renders value as HTML markup instead of rendering it as HTML-encoded output.
@* Inserts markup into the page. *@ @Html.Raw("<div>Hello <em>world</em>!</div>")
IsBool(), IsDateTime(), IsDecimal(), IsFloat(), IsInt()
Returns true if the value can be converted from a string to the specified type.
var isint = stringValue.IsInt();
IsEmpty()
Returns true if the object or variable has no value.
if (Request["companyname"].IsEmpty()) { @:Company name is required.<br /> }
IsPost
Returns true if the request is a POST. (Initial requests are usually a GET.)
if (IsPost) { Response.Redirect("Posted"); }
Layout
Specifies the path of a layout page to apply to this page.
Layout = "_MyLayout.cshtml";
PageData[key], PageData[index], Page
Contains data shared between the page, layout pages, and partial pages in the current request. You can
use the dynamic Page property to access the same data, as in the following example:
PageData["FavoriteColor"] = "red"; PageData[1] = "apples"; Page.MyGreeting = "Good morning";

ASP.NET Web Pages Using The Razor Syntax Appendix – ASP.NET Quick API Reference 223
// Displays the value assigned to PageData[1] in the page. @Page[1] // Displays the value assigned to Page.MyGreeting. @Page.MyGreeting
RenderBody()
(Layout pages) Renders the content of a content page that is not in any named sections.
@RenderBody()
RenderPage(path, values)
RenderPage(path[, param1 [, param2]])
Renders a content page using the specified path and optional extra data. You can get the values of the
extra parameters from PageData by position (example 1) or key (example 2).
RenderPage("_MySubPage.cshtml", "red", 123, "apples") RenderPage("_MySubPage.cshtml", new { color = "red", number = 123, food = "apples" })
RenderSection(sectionName [, required = true|false])
(Layout pages) Renders a content section that has a name. Set required to false to make a section
optional.
@RenderSection("header")
Request.Cookies[key]
Gets or sets the value of an HTTP cookie.
var cookieValue = Request.Cookies["myCookie"].Value;
Request.Files[key]
Gets the files that were uploaded in the current request.
Request.Files["postedFile"].SaveAs(@"MyPostedFile");
Request.Form[key]
Gets data that was posted in a form (as strings). Request[key] checks both the Request.Form and the
Request.QueryString collections.
var formValue = Request.Form["myTextBox"]; // This call produces the same result. var formValue = Request["myTextBox"];
Request.QueryString[key]
Gets data that was specified in the URL query string. Request[key] checks both the Request.Form and
the Request.QueryString collections.
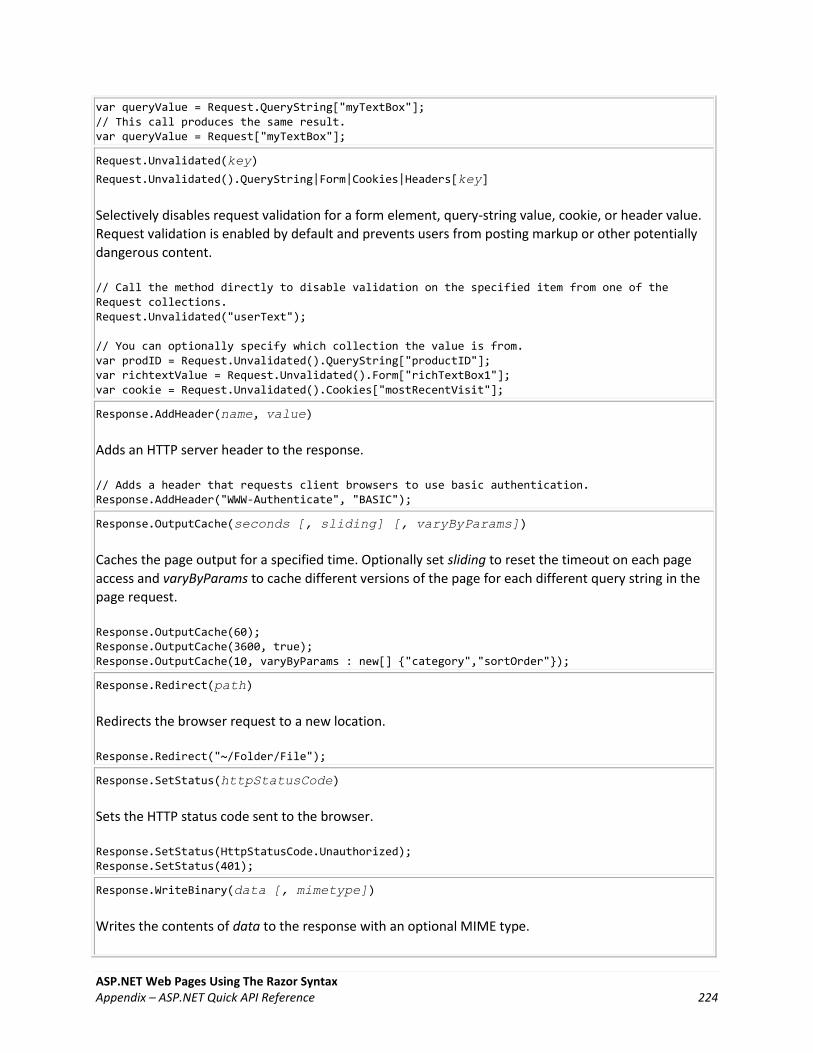
ASP.NET Web Pages Using The Razor Syntax Appendix – ASP.NET Quick API Reference 224
var queryValue = Request.QueryString["myTextBox"]; // This call produces the same result. var queryValue = Request["myTextBox"];
Request.Unvalidated(key)
Request.Unvalidated().QueryString|Form|Cookies|Headers[key]
Selectively disables request validation for a form element, query-string value, cookie, or header value.
Request validation is enabled by default and prevents users from posting markup or other potentially
dangerous content.
// Call the method directly to disable validation on the specified item from one of the Request collections. Request.Unvalidated("userText"); // You can optionally specify which collection the value is from. var prodID = Request.Unvalidated().QueryString["productID"]; var richtextValue = Request.Unvalidated().Form["richTextBox1"]; var cookie = Request.Unvalidated().Cookies["mostRecentVisit"];
Response.AddHeader(name, value)
Adds an HTTP server header to the response.
// Adds a header that requests client browsers to use basic authentication. Response.AddHeader("WWW-Authenticate", "BASIC");
Response.OutputCache(seconds [, sliding] [, varyByParams])
Caches the page output for a specified time. Optionally set sliding to reset the timeout on each page
access and varyByParams to cache different versions of the page for each different query string in the
page request.
Response.OutputCache(60); Response.OutputCache(3600, true); Response.OutputCache(10, varyByParams : new[] {"category","sortOrder"});
Response.Redirect(path)
Redirects the browser request to a new location.
Response.Redirect("~/Folder/File");
Response.SetStatus(httpStatusCode)
Sets the HTTP status code sent to the browser.
Response.SetStatus(HttpStatusCode.Unauthorized); Response.SetStatus(401);
Response.WriteBinary(data [, mimetype])
Writes the contents of data to the response with an optional MIME type.

ASP.NET Web Pages Using The Razor Syntax Appendix – ASP.NET Quick API Reference 225
Response.WriteBinary(image, "image/jpeg");
Response.WriteFile(file)
Writes the contents of a file to the response.
Response.WriteFile("file.ext");
@section(sectionName) { content }
(Layout pages) Defines a content section that has a name.
@section header { <div>Header text</div> }
Server.HtmlDecode(htmlText)
Decodes a string that is HTML encoded.
var htmlDecoded = Server.HtmlDecode("<html>");
Server.HtmlEncode(text)
Encodes a string for rendering in HTML markup.
var htmlEncoded = Server.HtmlEncode("<html>");
Server.MapPath(virtualPath)
Returns the server physical path for the specified virtual path.
var dataFile = Server.MapPath("~/App_Data/data.txt");
Server.UrlDecode(urlText)
Decodes text from a URL.
var urlDecoded = Server.UrlDecode("url%20data");
Server.UrlEncode(text)
Encodes text to put in a URL.
var urlEncoded = Server.UrlEncode("url data");
Session[key]
Gets or sets a value that exists until the user closes the browser.
Session["FavoriteColor"] = "red";
ToString()

ASP.NET Web Pages Using The Razor Syntax Appendix – ASP.NET Quick API Reference 226
Displays a string representation of the object's value.
<p>It is now @DateTime.Now.ToString()</p>
UrlData[index]
Gets additional data from the URL (for example, /MyPage/ExtraData).
var pathInfo = UrlData[0];
WebSecurity.ChangePassword(userName, currentPassword, newPassword)
Changes the password for the specified user.
var success = WebSecurity.ChangePassword("my-username","current-password", "new-password");
WebSecurity.ConfirmAccount(accountConfirmationToken)
Confirms an account using the account confirmation token.
var confirmationToken = Request.QueryString["ConfirmationToken"]; if(WebSecurity.ConfirmAccount(confirmationToken)) { //... }
WebSecurity.CreateAccount(userName, password
[, requireConfirmationToken = true|false])
Creates a new user account with the specified user name and password. To require a confirmation
token, pass true for requireConfirmationToken.
WebSecurity.CreateAccount("my-username", "secretpassword");
WebSecurity.CurrentUserId
Gets the integer identifier for the currently logged-in user.
var userId = WebSecurity.CurrentUserId;
WebSecurity.CurrentUserName
Gets the name for the currently logged-in user.
var welcome = "Hello " + WebSecurity.CurrentUserName;
WebSecurity.GeneratePasswordResetToken(username
[, tokenExpirationInMinutesFromNow])
Generates a password-reset token that can be sent in email to a user so that the user can reset the
password.
var resetToken = WebSecurity.GeneratePasswordResetToken("my-username"); var message = "Visit http://example.com/reset-password/" + resetToken +

ASP.NET Web Pages Using The Razor Syntax Appendix – ASP.NET Quick API Reference 227
" to reset your password"; WebMail.Send(..., message);
WebSecurity.GetUserId(userName)
Returns the user ID from the user name.
var userId = WebSecurity.GetUserId(userName);
WebSecurity.IsAuthenticated
Returns true if the current user is logged in.
if(WebSecurity.IsAuthenticated) {...}
WebSecurity.IsConfirmed(userName)
Returns true if the user has been confirmed (for example, through a confirmation email).
if(WebSecurity.IsConfirmed("[email protected]")) { ... }
WebSecurity.IsCurrentUser(userName)
Returns true if the current user’s name matches the specified user name.
if(WebSecurity.IsCurrentUser("[email protected]")) { ... }
WebSecurity.Login(userName, password[, persistCookie])
Logs the user in by setting an authentication token in the cookie.
if(WebSecurity.Login("username", "password")) { ... }
WebSecurity.Logout()
Logs the user out by removing the authentication token cookie.
WebSecurity.Logout();
WebSecurity.RequireAuthenticatedUser()
If the user is not authenticated, sets the HTTP status to 401 (Unauthorized).
WebSecurity.RequireAuthenticatedUser();
WebSecurity.RequireRoles(roles)
If the current user is not a member of one of the specified roles, sets the HTTP status to 401
(Unauthorized).
WebSecurity.RequireRoles("Admin", "Power Users");
WebSecurity.RequireUser(userId)

ASP.NET Web Pages Using The Razor Syntax Appendix – ASP.NET Quick API Reference 228
WebSecurity.RequireUser(userName)
If the current user is not the user specified by username, sets the HTTP status to 401 (Unauthorized).
WebSecurity.RequireUser("[email protected]");
WebSecurity.ResetPassword(passwordResetToken, newPassword)
If the password reset token is valid, changes the user’s password to the new password.
WebSecurity.ResetPassword( "A0F36BFD9313", "new-password")
Data
Database.Execute(SQLstatement [, parameters]
Executes SQLstatement (with optional parameters) such as INSERT, DELETE, or UPDATE and returns a
count of affected records.
db.Execute("INSERT INTO Data (Name) VALUES ('Smith')"); db.Execute("INSERT INTO Data (Name) VALUES (@0)", "Smith");
Database.GetLastInsertId()
Returns the identity column from the most recently inserted row.
db.Execute("INSERT INTO Data (Name) VALUES ('Smith')"); var id = db.GetLastInsertId();
Database.Open(filename)
Database.Open(connectionStringName)
Opens either the specified database file or the database specified using a named connection string
from the Web.config file.
// Note that no filename extension is specified. var db = Database.Open("SmallBakery"); // Opens SmallBakery.sdf in App_Data // Opens a database by using a named connection string. var db = Database.Open("SmallBakeryConnectionString");
Database.OpenConnectionString(connectionString)
Opens a database using the connection string. (This contrasts with Database.Open, which uses a
connection string name.)
var db = Database.OpenConnectionString("Data Source=|DataDirectory|\SmallBakery.sdf");
Database.Query(SQLstatement[, parameters])

ASP.NET Web Pages Using The Razor Syntax Appendix – ASP.NET Quick API Reference 229
Queries the database using SQLstatement (optionally passing parameters) and returns the results as a
collection.
foreach (var result in db.Query("SELECT * FROM PRODUCT")) {<p>@result.Name</p>} foreach (var result = db.Query("SELECT * FROM PRODUCT WHERE Price > @0", 20)) { <p>@result.Name</p> }
Database.QuerySingle(SQLstatement [, parameters])
Executes SQLstatement (with optional parameters) and returns a single record.
var product = db.QuerySingle("SELECT * FROM Product WHERE Id = 1"); var product = db.QuerySingle("SELECT * FROM Product WHERE Id = @0", 1);
Database.QueryValue(SQLstatement [, parameters])
Executes SQLstatement (with optional parameters) and returns a single value.
var count = db.QueryValue("SELECT COUNT(*) FROM Product"); var count = db.QueryValue("SELECT COUNT(*) FROM Product WHERE Price > @0", 20);
Helpers
Analytics.GetGoogleHtml(webPropertyId)
Renders the Google Analytics JavaScript code for the specified ID.
@Analytics.GetGoogleHtml("MyWebPropertyId")
Analytics.GetStatCounterHtml(project, security)
Renders the StatCounter Analytics JavaScript code for the specified project.
@Analytics.GetStatCounterHtml(89, "security")
Analytics.GetYahooHtml(account)
Renders the Yahoo Analytics JavaScript code for the specified account.
@Analytics.GetYahooHtml("myaccount")
Bing.SearchBox([boxWidth])
Passes a search to Bing. To specify the site to search and a title for the search box, you can set the
Bing.SiteUrl and Bing.SiteTitle properties. Normally you set these properties in the _AppStart page.
@Bing.SearchBox() @* Searches the web.*@

ASP.NET Web Pages Using The Razor Syntax Appendix – ASP.NET Quick API Reference 230
@{ Bing.SiteUrl = "www.asp.net"; @* Limits search to the www.asp.net site. *@ } @Bing.SearchBox()
Chart(width, height [, template] [, templatePath])
Initializes a chart.
@{ var myChart = new Chart(width: 600, height: 400); }
Chart.AddLegend([title] [, name])
Adds a legend to a chart.
@{ var myChart = new Chart(width: 600, height: 400) .AddLegend("Basic Chart") .AddSeries( name: "Employee", xValue: new[] { "Peter", "Andrew", "Julie", "Mary", "Dave" }, yValues: new[] { "2", "6", "4", "5", "3" }) .Write(); }
Chart.AddSeries([name] [, chartType] [, chartArea]
[, axisLabel] [, legend] [, markerStep] [, xValue]
[, xField] [, yValues] [, yFields] [, options])
Adds a series of values to the chart.
@{ var myChart = new Chart(width: 600, height: 400) .AddSeries( name: "Employee", xValue: new[] { "Peter", "Andrew", "Julie", "Mary", "Dave" }, yValues: new[] { "2", "6", "4", "5", "3" }) .Write(); }
Crypto.Hash(string [, algorithm])
Crypto.Hash(bytes [, algorithm])
Returns a hash for the specified data. The default algorithm is sha256.
@Crypto.Hash("data")
Facebook.LikeButton(href [, buttonLayout] [, showFaces] [, width] [, height]
[, action] [, font] [, colorScheme] [, refLabel])
Lets Facebook users make a connection to pages.

ASP.NET Web Pages Using The Razor Syntax Appendix – ASP.NET Quick API Reference 231
@Facebook.LikeButton("www.asp.net")
FileUpload.GetHtml([initialNumberOfFiles] [, allowMoreFilesToBeAdded]
[, includeFormTag] [, addText] [, uploadText])
Renders UI for uploading files.
@FileUpload.GetHtml(initialNumberOfFiles:1, allowMoreFilesToBeAdded:false, includeFormTag:true, uploadText:"Upload")
GamerCard.GetHtml(gamerTag)
Renders the specified Xbox gamer tag.
@GamerCard.GetHtml("joe")
Gravatar.GetHtml(email [, imageSize] [, defaultImage] [, rating]
[, imageExtension] [, attributes])
Renders the Gravatar image for the specified email address.
@Gravatar.GetHtml("[email protected]")
Json.Encode(object)
Converts a data object to a string in the JavaScript Object Notation (JSON) format.
var myJsonString = Json.Encode(dataObject);
Json.Decode(string)
Converts a JSON-encoded input string to a data object that you can iterate over or insert into a
database.
var myJsonObj = Json.Decode(jsonString);
LinkShare.GetHtml(pageTitle [, pageLinkBack] [, twitterUserName]
[, additionalTweetText] [, linkSites])
Renders social networking links using the specified title and optional URL.
@LinkShare.GetHtml("ASP.NET Web Pages Samples") @LinkShare.GetHtml("ASP.NET Web Pages Samples", "http://www.asp.net")
ModelStateDictionary.AddError(key, errorMessage)
Associates an error message with a form field. Use the ModelState helper to access this member.
ModelState.AddError("email", "Enter an email address");
ModelStateDictionary.AddFormError(errorMessage)

ASP.NET Web Pages Using The Razor Syntax Appendix – ASP.NET Quick API Reference 232
Associates an error message with a form. Use the ModelState helper to access this member.
ModelState.AddFormError("Password and confirmation password do not match.");
ModelStateDictionary.IsValid
Returns true if there are no validation errors. Use the ModelState helper to access this member.
if (ModelState.IsValid) { // Save the form to the database }
ObjectInfo.Print(value [, depth] [, enumerationLength])
Renders the properties and values of an object and any child objects.
@ObjectInfo.Print(person)
Recaptcha.GetHtml([, publicKey] [, theme] [, language] [, tabIndex])
Renders the reCAPTCHA verification test.
@ReCaptcha.GetHtml()
ReCaptcha.PublicKey
ReCaptcha.PrivateKey
Sets public and private keys for the reCAPTCHA service. Normally you set these properties in the
_AppStart page.
ReCaptcha.PublicKey = "your-public-recaptcha-key"; ReCaptcha.PrivateKey = "your-private-recaptcha-key";
ReCaptcha.Validate([, privateKey])
Returns the result of the reCAPTCHA test.
if (ReCaptcha.Validate()) { // Test passed. }
ServerInfo.GetHtml()
Renders status information about ASP.NET Web Pages.
@ServerInfo.GetHtml()
Twitter.Profile(twitterUserName)
Renders a Twitter stream for the specified user.
@Twitter.Profile("billgates")
Twitter.Search(searchQuery)

ASP.NET Web Pages Using The Razor Syntax Appendix – ASP.NET Quick API Reference 233
Renders a Twitter stream for the specified search text.
@Twitter.Search("asp.net")
Video.Flash(filename [, width, height])
Renders a Flash video player for the specified file with optional width and height.
@Video.Flash("test.swf", "100", "100")
Video.MediaPlayer(filename [, width, height])
Renders a Windows Media player for the specified file with optional width and height.
@Video.MediaPlayer("test.wmv", "100", "100")
Video.Silverlight(filename, width, height)
Renders a Silverlight player for the specified .xap file with required width and height.
@Video.Silverlight("test.xap", "100", "100")
WebCache.Get(key)
Returns the object specified by key, or null if the object is not found.
var username = WebCache.Get("username")
WebCache.Remove(key)
Removes the object specified by key from the cache.
WebCache.Remove("username")
WebCache.Set(key, value [, minutesToCache] [, slidingExpiration])
Puts value into the cache under the name specified by key.
WebCache.Set("username", "[email protected] ")
WebGrid(data)
Creates a new WebGrid object using data from a query.
var db = Database.Open("SmallBakery"); var grid = new WebGrid(db.Query("SELECT * FROM Product"));
WebGrid.GetHtml()
Renders markup to display data in an HTML table.
@grid.GetHtml()// The 'grid' variable is set when WebGrid is created.

ASP.NET Web Pages Using The Razor Syntax Appendix – ASP.NET Quick API Reference 234
WebGrid.Pager()
Renders a pager for the WebGrid object.
@grid.Pager() // The 'grid' variable is set when WebGrid is created.
WebImage(path)
Loads an image from the specified path.
var image = new WebImage("test.png");
WebImage.AddImagesWatermark(image)
Adds the specified image as a watermark.
WebImage photo = new WebImage("test.png"); WebImage watermarkImage = new WebImage("logo.png"); photo.AddImageWatermark(watermarkImage);
WebImage.AddTextWatermark(text)
Adds the specified text to the image.
image.AddTextWatermark("Copyright")
WebImage.FlipHorizontal()
WebImage.FlipVertical()
Flips the image horizontally or vertically.
image.FlipHorizontal(); image.FlipVertical();
WebImage.GetImageFromRequest()
Loads an image when an image is posted to a page during a file upload.
var image = WebImage.GetImageFromRequest();
WebImage.Resize(width, height)
Resizes an the image.
image.Resize(100, 100);
WebImage.RotateLeft()
WebImage.RotateRight()
Rotates the image to the left or the right.
image.RotateLeft(); image.RotateRight();
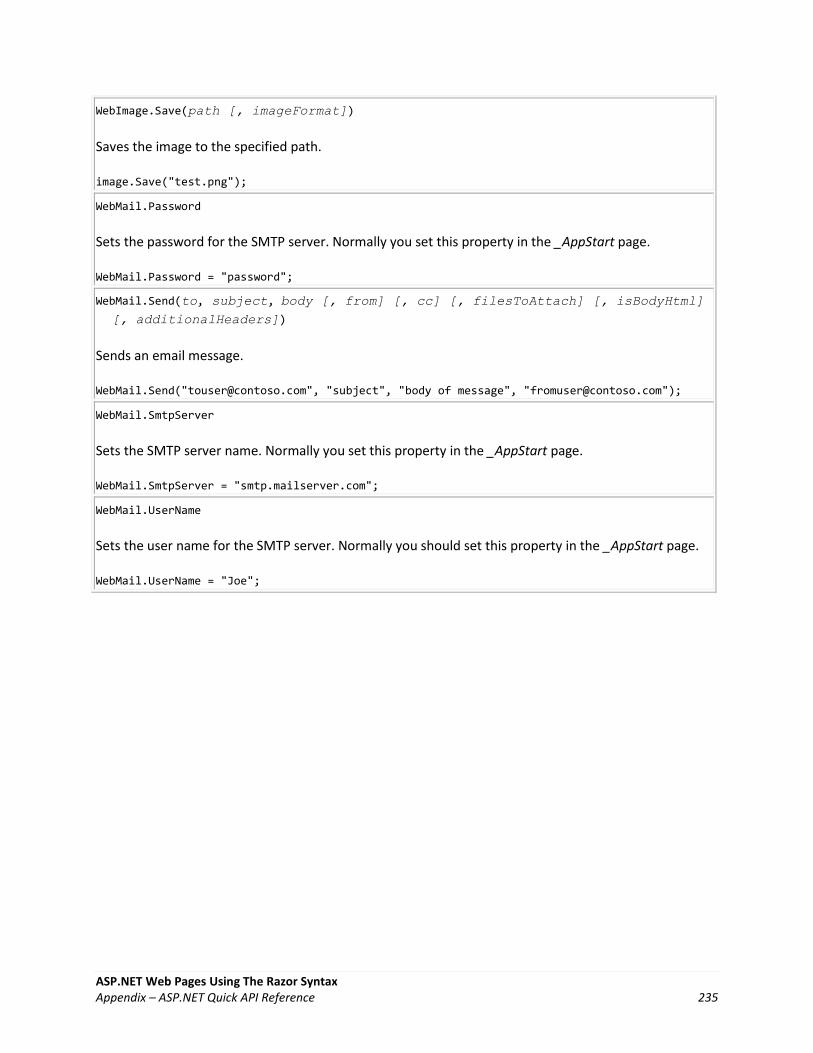
ASP.NET Web Pages Using The Razor Syntax Appendix – ASP.NET Quick API Reference 235
WebImage.Save(path [, imageFormat])
Saves the image to the specified path.
image.Save("test.png");
WebMail.Password
Sets the password for the SMTP server. Normally you set this property in the _AppStart page.
WebMail.Password = "password";
WebMail.Send(to, subject, body [, from] [, cc] [, filesToAttach] [, isBodyHtml]
[, additionalHeaders])
Sends an email message.
WebMail.Send("[email protected]", "subject", "body of message", "[email protected]");
WebMail.SmtpServer
Sets the SMTP server name. Normally you set this property in the _AppStart page.
WebMail.SmtpServer = "smtp.mailserver.com";
WebMail.UserName
Sets the user name for the SMTP server. Normally you should set this property in the _AppStart page.
WebMail.UserName = "Joe";

ASP.NET Web Pages Using The Razor Syntax Appendix – ASP.NET Web Pages Visual Basic 236
Appendix – ASP.NET Web Pages Visual Basic
This appendix gives you an overview of programming with ASP.NET Web pages in Visual Basic, using the
Razor syntax.
In this book the ASP.NET code examples using the Razor syntax are based on C#. But the Razor syntax
also supports Visual Basic. To program an ASP.NET web page in Visual Basic, you create a web page with
a .vbhtml filename extension, and then add Visual Basic code. This appendix gives you an overview of
working with the Visual Basic language and syntax to create ASP.NET Webpages.
Note The default website templates (Bakery, Calendar, Photo Gallery, and Starter Site) are
available in C# and Visual Basic versions. You can install the Visual Basic templates by using the
ASP.NET Web Pages Administration tool in WebMatrix. Open the Administration tool as described
in Chapter 1 and search for VB, and then install the templates you need. Website templates are
installed in the root folder of your site in a folder named Microsoft Templates.
What you'll learn
The top 8 programming tips. Visual Basic language and syntax.
The Top 8 Programming Tips
This section lists a few tips that you absolutely need to know as you start writing ASP.NET server code
using the Razor syntax.
1. You add code to a page using the @ character
The @ character starts inline expressions, single-statement blocks, and multi-statement blocks:
<!-- Single statement blocks --> @Code Dim total = 7 End Code @Code Dim myMessage = "Hello World" End Code <!-- Inline expressions --> <p>The value of your account is: @total </p> <p>The value of myMessage is: @myMessage</p> <!-- Multi-statement block --> @Code Dim greeting = "Welcome to our site!" Dim weekDay = DateTime.Now.DayOfWeek Dim greetingMessage = greeting & " Today is: " & weekDay.ToString() End Code <p>The greeting is: @greetingMessage</p>
The result displayed in a browser:

ASP.NET Web Pages Using The Razor Syntax Appendix – ASP.NET Web Pages Visual Basic 237
HTML Encoding
When you display content in a page using the @ character, as in the preceding examples, ASP.NET HTML-
encodes the output. This replaces reserved HTML characters (such as < and > and &) with codes that
enable the characters to be displayed as characters in a web page instead of being interpreted as HTML
tags or entities. Without HTML encoding, the output from your server code might not display correctly,
and could expose a page to security risks.
If your goal is to output HTML markup that renders tags as markup (for example <p></p> for a paragraph
or <em></em> to emphasize text), see the section Combining Text, Markup, and Code in Code Blocks later
in this chapter.
You can read more about HTML encoding in Chapter 4 - Working with Forms.
2. You enclose code blocks with Code...End Code
A code block includes one or more code statements and is enclosed with the keywords Code and End
Code. Place the opening Code keyword immediately after the @ character — there can't be whitespace
between them.
<!-- Single statement block. --> @Code Dim theMonth = DateTime.Now.Month End Code <p>The numeric value of the current month: @theMonth</p> <!-- Multi-statement block. --> @Code Dim outsideTemp = 79 Dim weatherMessage = "Hello, it is " & outsideTemp & " degrees." End Code <p>Today's weather: @weatherMessage</p>
The result displayed in a browser:

ASP.NET Web Pages Using The Razor Syntax Appendix – ASP.NET Web Pages Visual Basic 238
3. Inside a block, you end each code statement with a line break
In a Visual Basic code block, each statement ends with a line break. (Later in the chapter you'll see a way
to wrap a long code statement into multiple lines if needed.)
<!-- Single statement block. --> @Code Dim theMonth = DateTime.Now.Month End Code <!-- Multi-statement block. --> @Code Dim outsideTemp = 79 Dim weatherMessage = "Hello, it is " & outsideTemp & " degrees." End Code <!-- An inline expression, so no line break needed. --> <p>Today's weather: @weatherMessage</p>
4. You use variables to store values
You can store values in a variable, including strings, numbers, and dates, etc. You create a new variable
using the Dim keyword. You can insert variable values directly in a page using @.
<!-- Storing a string --> @Code Dim welcomeMessage = "Welcome, new members!" End Code <p>@welcomeMessage</p> <!-- Storing a date --> @Code Dim year = DateTime.Now.Year End Code <!-- Displaying a variable --> <p>Welcome to our new members who joined in @year!</p>
The result displayed in a browser:
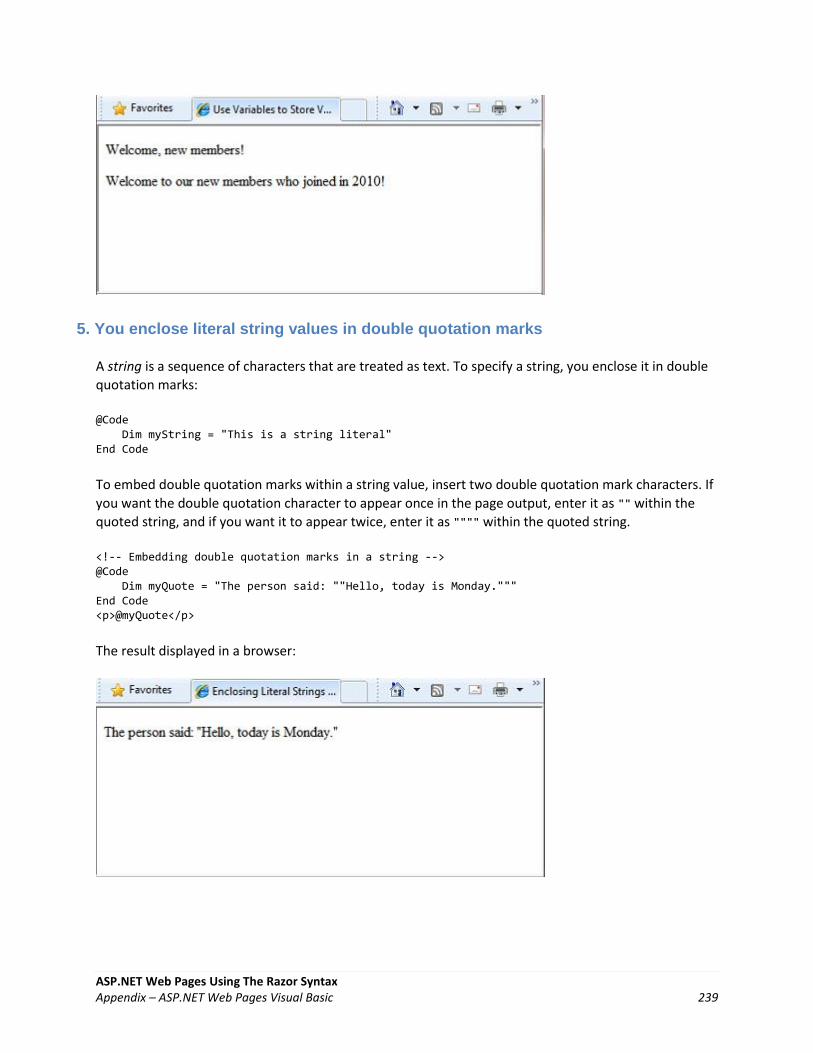
ASP.NET Web Pages Using The Razor Syntax Appendix – ASP.NET Web Pages Visual Basic 239
5. You enclose literal string values in double quotation marks
A string is a sequence of characters that are treated as text. To specify a string, you enclose it in double
quotation marks:
@Code Dim myString = "This is a string literal" End Code
To embed double quotation marks within a string value, insert two double quotation mark characters. If
you want the double quotation character to appear once in the page output, enter it as "" within the
quoted string, and if you want it to appear twice, enter it as """" within the quoted string.
<!-- Embedding double quotation marks in a string --> @Code Dim myQuote = "The person said: ""Hello, today is Monday.""" End Code <p>@myQuote</p>
The result displayed in a browser:

ASP.NET Web Pages Using The Razor Syntax Appendix – ASP.NET Web Pages Visual Basic 240
6. Visual Basic code is not case sensitive
The Visual Basic language is not case sensitive. Programming keywords (like Dim, If, and True) and
variable names (like myString, or subTotal) can be written in any case.
The following lines of code assign a value to the variable lastname using a lowercase name, and then
output the variable value to the page using an uppercase name.
@Code Dim lastName = "Smith" ' Keywords like dim are also not case sensitive. DIM someNumber = 7 End Code <p>The value of the <code>lastName</code> variable is: @LASTNAME</p>
The result displayed in a browser:
7. Much of your coding involves working with objects
An object represents a thing that you can program with — a page, a text box, a file, an image, a web
request, an email message, a customer record (database row), etc. Objects have properties that
describe their characteristics — a text box object has a Text property, a request object has a Url
property, an email message has a From property, and a customer object has a FirstName property.
Objects also have methods that are the "verbs" they can perform. Examples include a file object's Save
method, an image object's Rotate method, and an email object's Send method.
You'll often work with the Request object, which gives you information like the values of form fields on
the page (text boxes, etc.), what type of browser made the request, the URL of the page, the user
identity, etc. This example shows how to access properties of the Request object and how to call the
MapPath method of the Request object, which gives you the absolute path of the page on the server:
<table border="1"> <tr> <td>Requested URL</td> <td>Relative Path</td>
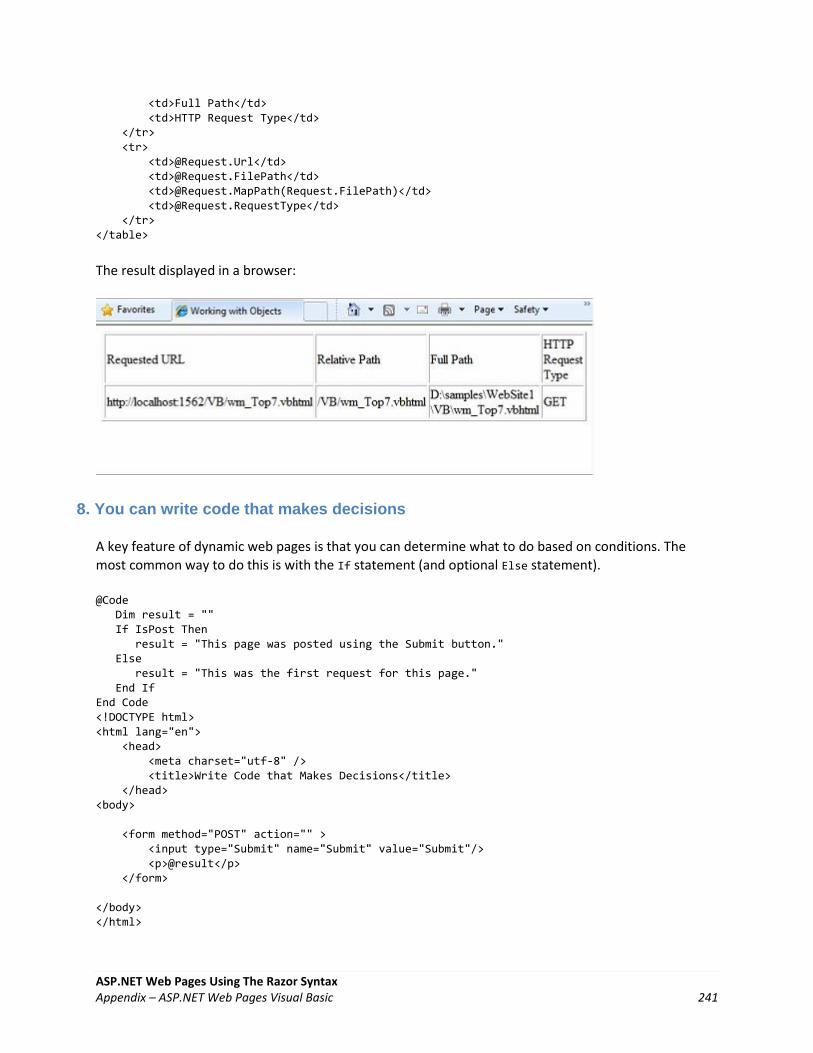
ASP.NET Web Pages Using The Razor Syntax Appendix – ASP.NET Web Pages Visual Basic 241
<td>Full Path</td> <td>HTTP Request Type</td> </tr> <tr> <td>@Request.Url</td> <td>@Request.FilePath</td> <td>@Request.MapPath(Request.FilePath)</td> <td>@Request.RequestType</td> </tr> </table>
The result displayed in a browser:
8. You can write code that makes decisions
A key feature of dynamic web pages is that you can determine what to do based on conditions. The
most common way to do this is with the If statement (and optional Else statement).
@Code Dim result = "" If IsPost Then result = "This page was posted using the Submit button." Else result = "This was the first request for this page." End If End Code <!DOCTYPE html> <html lang="en"> <head> <meta charset="utf-8" /> <title>Write Code that Makes Decisions</title> </head> <body> <form method="POST" action="" > <input type="Submit" name="Submit" value="Submit"/> <p>@result</p> </form> </body> </html>

ASP.NET Web Pages Using The Razor Syntax Appendix – ASP.NET Web Pages Visual Basic 242
The statement If IsPost is a shorthand way of writing If IsPost = True. Along with If statements,
there are a variety of ways to test conditions, repeat blocks of code, and so on, which are described later
in this chapter.
The result displayed in a browser (after clicking Submit):
HTTP GET and POST Methods and the IsPost Property
The protocol used for web pages (HTTP) supports a very limited number of methods ("verbs") that are
used to make requests to the server. The two most common ones are GET, which is used to read a page,
and POST, which is used to submit a page. In general, the first time a user requests a page, the page is
requested using GET. If the user fills in a form and then clicks Submit, the browser makes a POST request
to the server.
In web programming, it's often useful to know whether a page is being requested as a GET or as a POST
so that you know how to process the page. In ASP.NET Web Pages, you can use the IsPost property to
see whether a request is a GET or a POST. If the request is a POST, the IsPost property will return true,
and you can do things like read the values of text boxes on a form. Many examples in this book show
you how to process the page differently depending on the value of IsPost.
A Simple Code Example
This procedure shows you how to create a page that illustrates basic programming techniques. In the
example, you create a page that lets users enter two numbers, then it adds them and displays the result.
1. In your editor, create a new file and name it AddNumbers.vbhtml. 2. Copy the following code and markup into the page, replacing anything already in the page.
@Code Dim total = 0 Dim totalMessage = ""

ASP.NET Web Pages Using The Razor Syntax Appendix – ASP.NET Web Pages Visual Basic 243
if IsPost Then ' Retrieve the numbers that the user entered. Dim num1 = Request("text1") Dim num2 = Request("text2") ' Convert the entered strings into integers numbers and add. total = num1.AsInt() + num2.AsInt() totalMessage = "Total = " & total End If End Code <!DOCTYPE html> <html lang="en"> <head> <meta charset="utf-8" /> <title>Adding Numbers</title> <style type="text/css"> body {background-color: beige; font-family: Verdana, Ariel; margin: 50px; } form {padding: 10px; border-style: solid; width: 250px;} </style> </head> <body> <p>Enter two whole numbers and click <strong>Add</strong> to display the result.</p> <p></p> <form action="" method="post"> <p><label for="text1">First Number:</label> <input type="text" name="text1" /> </p> <p><label for="text2">Second Number:</label> <input type="text" name="text2" /> </p> <p><input type="submit" value="Add" /></p> </form> <p>@totalMessage</p> </body> </html>
Here are some things for you to note:
The @ character starts the first block of code in the page, and it precedes the
totalMessage variable embedded near the bottom.
The block at the top of the page is enclosed in Code...End Code.
The variables total, num1, num2, and totalMessage store several numbers and a string.
The literal string value assigned to the totalMessage variable is in double quotation
marks.
Because Visual Basic code is not case sensitive, when the totalMessagevariable is used
near the bottom of the page, its name only needs to match the spelling of the variable
declaration at the top of the page. The casing doesn't matter.
The expression num1.AsInt() + num2.AsInt() shows how to work with objects and
methods. The AsInt method on each variable converts the string entered by a user to a
whole number (an integer) that can be added.
The <form> tag includes a method="post" attribute. This specifies that when the user
clicks Add, the page will be sent to the server using the HTTP POST method. When the

ASP.NET Web Pages Using The Razor Syntax Appendix – ASP.NET Web Pages Visual Basic 244
page is submitted, the code If IsPost evaluates to true and the conditional code runs,
displaying the result of adding the numbers.
3. Save the page and run it in a browser. (Make sure the page is selected in the Files workspace before you run it.) Enter two whole numbers and then click the Add button.
Visual Basic Language and Syntax
In Chapter 1 - Getting Started with ASP.NET Web Pages, you saw a basic example of how to create an
ASP.NET web page, and how you can add server code to HTML markup. Here you'll learn the basics of
using Visual Basic to write ASP.NET server code using the Razor syntax — that is, the programming
language rules.
If you're experienced with programming (especially if you've used C, C++, C#, Visual Basic, or JavaScript),
much of what you read here will be familiar. You'll probably need to familiarize yourself only with how
WebMatrix code is added to markup in .vbhtml files.
Basic Syntax
Combining Text, Markup, and Code in Code Blocks
In server code blocks, you'll often want to output text and markup to the page. If a server code block
contains text that's not code and that instead should be rendered as is, ASP.NET needs to be able to
distinguish that text from code. There are several ways to do this.
Enclose the text in an HTML block element like <p></p> or <em></em>:

ASP.NET Web Pages Using The Razor Syntax Appendix – ASP.NET Web Pages Visual Basic 245
@If IsPost Then ' This line has all content between matched <p> tags. @<p>Hello, the time is @DateTime.Now and this page is a postback!</p> Else ' All content between matched tags, followed by server code. @<p>Hello, <em>Stranger!</em> today is: </p> @DateTime.Now End If
The HTML element can include text, additional HTML elements, and server-code expressions.
When ASP.NET sees the opening HTML tag, it renders everything the element and its content as
is to the browser (and resolves the server-code expressions).
Use the @: operator or the <text> element. The @: outputs a single line of content containing plain text or unmatched HTML tags; the <text> element encloses multiple lines to output. These options are useful when you don't want to render an HTML element as part of the output.
@If IsPost Then ' Plain text followed by an unmatched HTML tag and server code. @:The time is: <br /> @DateTime.Now ' Server code and then plain text, matched tags, and more text. @DateTime.Now @:is the <em>current</em> time. End If
The following example repeats the previous example but uses a single pair of <text> tags to
enclose the text to render.
@If IsPost Then @<text> The time is: <br /> @DateTime.Now @DateTime.Now is the <em>current</em> time. </text> End If
In the following example, the <text> and </text> tags enclose three lines, all of which have
some uncontained text and unmatched HTML tags (<br />), along with server code and
matched HTML tags. Again, you could also precede each line individually with the @: operator;
either way works.
@Code dim minTemp = 75 @<text>It is the month of @DateTime.Now.ToString("MMMM"), and it's a <em>great</em> day! <p>You can go swimming if it's at least @minTemp degrees.</p></text> End Code
Note When you output text as shown in this section — using an HTML element, the @: operator, or
the <text> element — ASP.NET doesn't HTML-encode the output. (As noted earlier, ASP.NET does
encode the output of server code expressions and server code blocks that are preceded by @, except
in the special cases noted in this section.)

ASP.NET Web Pages Using The Razor Syntax Appendix – ASP.NET Web Pages Visual Basic 246
Whitespace
Extra spaces in a statement (and outside of a string literal) don't affect the statement:
@Code Dim personName = "Smith" End Code
Breaking Long Statements into Multiple Lines
You can break a long code statement into multiple lines by using the underscore character _ (which in
Visual Basic is called the continuation character) after each line of code. To break a statement onto the
next line, at the end of the line add a space and then the continuation character. Continue the
statement on the next line. You can wrap statements onto as many lines as you need to improve
readability. The following statements are the same:
@Code Dim familyName _ = "Smith" End Code @Code Dim _ theName _ = _ "Smith" End Code
However, you can't wrap a line in the middle of a string literal. The following example doesn't work:
@Code ' Doesn't work. Dim test = "This is a long _ string" End Code
To combine a long string that wraps to multiple lines like the above code, you would need to use the
concatenation operator (&), which you'll see later in this chapter.
Code Comments
Comments let you leave notes for yourself or others. Razor syntax comments are prefixed with @* and
end with *@.
@* A single-line comment is added like this example. *@ @* This is a multiline code comment. It can continue for any number of lines. *@

ASP.NET Web Pages Using The Razor Syntax Appendix – ASP.NET Web Pages Visual Basic 247
Within code blocks you can use the Razor syntax comments, or you can use ordinary Visual Basic
comment character, which is a single quote (') prefixed to each line.
@Code ' You can make comments in blocks by just using ' before each line. End Code @Code ' There is no multi-line comment character in Visual Basic. ' You use a ' before each line you want to comment. End Code
Variables
A variable is a named object that you use to store data. You can name variables anything, but the name
must begin with an alphabetic character and it cannot contain whitespace or reserved characters. In
Visual Basic, as you saw earlier, the case of the letters in a variable name doesn't matter.
Variables and Data Types
A variable can have a specific data type, which indicates what kind of data is stored in the variable. You
can have string variables that store string values (like "Hello world"), integer variables that store whole-
number values (like 3 or 79), and date variables that store date values in a variety of formats (like
4/12/2010 or March 2009). And there are many other data types you can use. However, you don't have
to specify a type for a variable. In most cases ASP.NET can figure out the type based on how the data in
the variable is being used. (Occasionally you must specify a type; you'll see examples in this book where
this is true.)
To declare a variable without specifying a type, use Dim plus the variable name (for instance, Dim myVar).
To declare a variable with a type, use Dim plus the variable name, followed by As and then the type name
(for instance, Dim myVar As String).
@Code ' Assigning a string to a variable. Dim greeting = "Welcome" ' Assigning a number to a variable. Dim theCount = 3 ' Assigning an expression to a variable. Dim monthlyTotal = theCount + 5 ' Assigning a date value to a variable. Dim today = DateTime.Today ' Assigning the current page's URL to a variable. Dim myPath = Request.Url ' Declaring variables using explicit data types. Dim name as String = "Joe" Dim count as Integer = 5

ASP.NET Web Pages Using The Razor Syntax Appendix – ASP.NET Web Pages Visual Basic 248
Dim tomorrow as DateTime = DateTime.Now.AddDays(1) End Code
The following example shows some inline expressions that use the variables in a web page.
@Code ' Embedding the value of a variable into HTML markup. ' Precede the markup with @ because we are in a code block. @<p>@greeting, friends!</p> End Code <!-- Using a variable with an inline expression in HTML. --> <p>The predicted annual total is: @( monthlyTotal * 12)</p> <!-- Displaying the page URL with a variable. --> <p>The URL to this page is: @myPath</p>
The result displayed in a browser:
Converting and Testing Data Types
Although ASP.NET can usually determine a data type automatically, sometimes it can't. Therefore, you
might need to help ASP.NET out by performing an explicit conversion. Even if you don't have to convert
types, sometimes it's helpful to test to see what type of data you might be working with.
The most common case is that you have to convert a string to another type, such as to an integer or
date. The following example shows a typical case where you must convert a string to a number.
@Code Dim total = 0 Dim totalMessage = "" if IsPost Then ' Retrieve the numbers that the user entered. Dim num1 = Request("text1") Dim num2 = Request("text2") ' Convert the entered strings into integers numbers and add. total = num1.AsInt() + num2.AsInt()
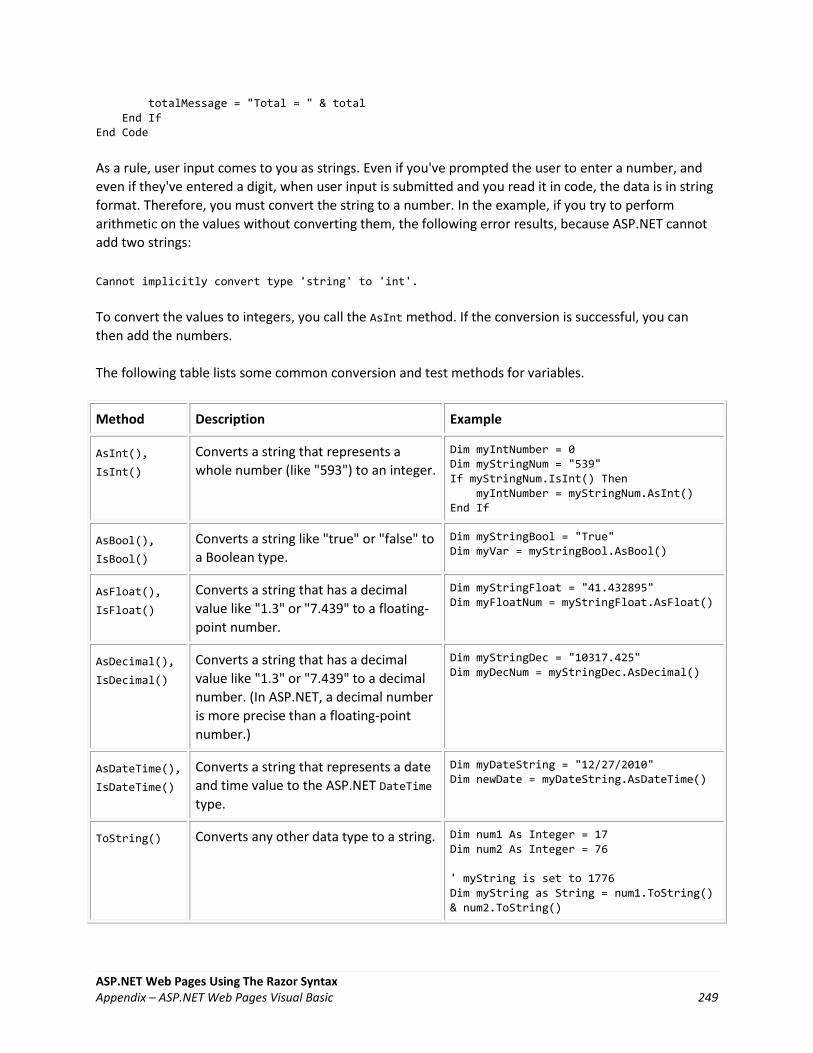
ASP.NET Web Pages Using The Razor Syntax Appendix – ASP.NET Web Pages Visual Basic 249
totalMessage = "Total = " & total End If End Code
As a rule, user input comes to you as strings. Even if you've prompted the user to enter a number, and
even if they've entered a digit, when user input is submitted and you read it in code, the data is in string
format. Therefore, you must convert the string to a number. In the example, if you try to perform
arithmetic on the values without converting them, the following error results, because ASP.NET cannot
add two strings:
Cannot implicitly convert type 'string' to 'int'.
To convert the values to integers, you call the AsInt method. If the conversion is successful, you can
then add the numbers.
The following table lists some common conversion and test methods for variables.
Method Description Example
AsInt(),
IsInt()
Converts a string that represents a
whole number (like "593") to an integer.
Dim myIntNumber = 0 Dim myStringNum = "539" If myStringNum.IsInt() Then myIntNumber = myStringNum.AsInt() End If
AsBool(),
IsBool()
Converts a string like "true" or "false" to
a Boolean type.
Dim myStringBool = "True" Dim myVar = myStringBool.AsBool()
AsFloat(),
IsFloat()
Converts a string that has a decimal
value like "1.3" or "7.439" to a floating-
point number.
Dim myStringFloat = "41.432895" Dim myFloatNum = myStringFloat.AsFloat()
AsDecimal(),
IsDecimal()
Converts a string that has a decimal
value like "1.3" or "7.439" to a decimal
number. (In ASP.NET, a decimal number
is more precise than a floating-point
number.)
Dim myStringDec = "10317.425" Dim myDecNum = myStringDec.AsDecimal()
AsDateTime(),
IsDateTime()
Converts a string that represents a date
and time value to the ASP.NET DateTime
type.
Dim myDateString = "12/27/2010" Dim newDate = myDateString.AsDateTime()
ToString() Converts any other data type to a string. Dim num1 As Integer = 17 Dim num2 As Integer = 76 ' myString is set to 1776 Dim myString as String = num1.ToString() & num2.ToString()

ASP.NET Web Pages Using The Razor Syntax Appendix – ASP.NET Web Pages Visual Basic 250
Operators
An operator is a keyword or character that tells ASP.NET what kind of command to perform in an
expression. Visual Basic supports many operators, but you only need to recognize a few to get started
developing ASP.NET web pages. The following table summarizes the most common operators.
Operator Description Examples
+
-
*
/
Math operators used in numerical expressions. @(5 + 13) Dim netWorth = 150000 Dim newTotal = netWorth * 2 @(newTotal / 2)
= Assignment and equality. Depending on
context, either assigns the value on the right
side of a statement to the object on the left
side, or checks the values for equality.
Dim age = 17 Dim income = Request("AnnualIncome")
<> Inequality. Returns True if the values are not
equal.
Dim theNum = 13 If theNum <> 15 Then ' Do something. End If
<
>
<=
>=
Less than,
greater than,
less than or equal, and
greater than or equal.
If 2 < 3 Then ' Do something. End If Dim currentCount = 12 If currentCount >= 12 Then ' Do something. End If
& Concatenation, which is used to join strings. ' The displayed result is "abcdef". @("abc" & "def")
+=
-=
The increment and decrement operators, which
add and subtract 1 (respectively) from a
variable.
Dim theCount As Integer = 0 theCount += 1 ' Adds 1 to count
. Dot. Used to distinguish objects and their
properties and methods.
Dim myUrl = Request.Url Dim count = Request("Count").AsInt()
() Parentheses. Used to group expressions, to pass
parameters to methods, and to access members
of arrays and collections.
@(3 + 7) @Request.MapPath(Request.FilePath)

ASP.NET Web Pages Using The Razor Syntax Appendix – ASP.NET Web Pages Visual Basic 251
Not Not. Reverses a true value to false and vice
versa. Typically used as a shorthand way to test
for False (that is, for not True).
Dim taskCompleted As Boolean = False ' Processing. If Not taskCompleted Then ' Continue processing End If
AndAlso
OrElse
Logical AND and OR, which are used to link
conditions together.
Dim myTaskCompleted As Boolean = false Dim totalCount As Integer = 0 ' Processing. If (Not myTaskCompleted) AndAlso totalCount < 12 Then ' Continue processing. End If
Working with File and Folder Paths in Code
You'll often work with file and folder paths in your code. Here is an example of physical folder structure
for a website as it might appear on your development computer:
C:\WebSites\MyWebSite default.cshtml datafile.txt \images Logo.jpg \styles Styles.css
On a web server, a website also has a virtual folder structure that corresponds (maps) to the physical
folders on your site. (One way to think of the virtual path is that it's the part of a URL that follows the
domain.) By default, virtual folder names are the same as the physical folder names. The virtual root is
represented as a slash (/), just like the root folder on the C: drive of your computer is represented by a
backslash (\). (Virtual folder paths always use forward slashes.) Here are the physical and virtual paths
for the file StyleSheet.css from the structure shown earlier:
Physical path: C:\WebSites\MyWebSiteFolder\styles\StyleSheet.css Virtual path (from the virtual root path /): /styles/StyleSheet.css
When you work with files and folders in code, sometimes you need to reference the physical path and
sometimes a virtual path, depending on what objects you're working with. ASP.NET gives you these
tools for working with file and folder paths in code: the ~ operator, the Server.MapPath method, and the
Href method.
The ~ operator: Getting the virtual root
In server code, to specify the virtual root path to folders or files, use the ~ operator. This is useful
because you can move your website to a different folder or location without breaking the paths in your
code.

ASP.NET Web Pages Using The Razor Syntax Appendix – ASP.NET Web Pages Visual Basic 252
@Code Dim myImagesFolder = "~/images" Dim myStyleSheet = "~/styles/StyleSheet.css" End Code
The Server.MapPath method: Converting virtual to physical paths
The Server.MapPath method converts a virtual path (like /default.cshtml) to an absolute physical path
(like C:\WebSites\MyWebSiteFolder\default.cshtml). You use this method for tasks that require a
complete physical path, like reading or writing a text file on the web server. (You typically don't know
the absolute physical path of your site on a hosting site's server.) You pass the virtual path to a file or
folder to the method, and it returns the physical path:
@Code Dim dataFilePath = "~/dataFile.txt" End Code <!-- Displays a physical path C:\Websites\MyWebSite\datafile.txt --> <p>@Server.MapPath(dataFilePath)</p>
The Href method: Creating paths to site resources
The Href method of the WebPage object converts paths that you create in server code (which can include
the ~ operator) to paths that the browser understands. (The browser can't understand the ~ operator,
because that's strictly an ASP.NET operator.) You use the Href method to create paths to resources like
image files, other web pages, and CSS files. For example, you can use this method in HTML markup for
attributes of <img> elements, <link> elements, and <a> elements.
@Code Dim myImagesFolder = "~/images" Dim myStyleSheet = "~/styles/StyleSheet.css" End Code <!-- This code creates the path "../images/Logo.jpg" in the src attribute. --> <img src="@Href(myImagesFolder)/Logo.jpg" /> <!-- This produces the same result, using a path with ~ --> <img src="@Href("~/images")/Logo.jpg" /> <!-- This creates a link to the CSS file. --> <link rel="stylesheet" type="text/css" href="@Href(myStyleSheet)" />
Conditional Logic and Loops
ASP.NET server code lets you perform tasks based on conditions and write code that repeats statements
a specific number of times that is, code that runs a loop).

ASP.NET Web Pages Using The Razor Syntax Appendix – ASP.NET Web Pages Visual Basic 253
Testing Conditions
To test a simple condition you use the If...Then statement, which returns True or False based on a test
you specify:
@Code Dim showToday = True If showToday Then DateTime.Today End If End Code
The If keyword starts a block. The actual test (condition) follows the If keyword and returns true or
false. The If statement ends with Then. The statements that will run if the test is true are enclosed by If
and End If. An If statement can include an Else block that specifies statements to run if the condition is
false:
@Code Dim showToday = False If showToday Then DateTime.Today Else @<text>Sorry!</text> End If End Code
If an If statement starts a code block, you don't have to use the normal Code...End Code statements to
include the blocks. You can just add @ to the block, and it will work. This approach works with If as well
as other Visual Basic programming keywords that are followed by code blocks, including For, For Each,
Do While, etc.
@If showToday Then DateTime.Today Else @<text>Sorry!</text> End If
You can add multiple conditions using one or more ElseIf blocks:
@Code Dim theBalance = 4.99 If theBalance = 0 Then @<p>You have a zero balance.</p> ElseIf theBalance > 0 AndAlso theBalance <= 5 Then ' If the balance is above 0 but less than ' or equal to $5, display this message. @<p>Your balance of $@theBalance is very low.</p> Else ' For balances greater than $5, display balance. @<p>Your balance is: $@theBalance</p> End If End Code

ASP.NET Web Pages Using The Razor Syntax Appendix – ASP.NET Web Pages Visual Basic 254
In this example, if the first condition in the If block is not true, the ElseIf condition is checked. If that
condition is met, the statements in the ElseIf block are executed. If none of the conditions are met, the
statements in the Else block are executed. You can add any number of ElseIf blocks, and then close
with an Else block as the "everything else" condition.
To test a large number of conditions, use a Select Case block:
@Code Dim weekday = "Wednesday" Dim greeting = "" Select Case weekday Case "Monday" greeting = "Ok, it's a marvelous Monday." Case "Tuesday" greeting = "It's a tremendous Tuesday." Case "Wednesday" greeting = "Wild Wednesday is here!" Case Else greeting = "It's some other day, oh well." End Select End Code <p>Since it is @weekday, the message for today is: @greeting</p>
The value to test is in parentheses (in the example, the weekday variable). Each individual test uses a
Case statement that lists a value. If the value of a Case statement matches the test value, the code in
that Case block is executed.
The result of the last two conditional blocks displayed in a browser:
Looping Code
You often need to run the same statements repeatedly. You do this by looping. For example, you often
run the same statements for each item in a collection of data. If you know exactly how many times you
want to loop, you can use a For loop. This kind of loop is especially useful for counting up or counting
down:

ASP.NET Web Pages Using The Razor Syntax Appendix – ASP.NET Web Pages Visual Basic 255
@For i = 10 To 20 @<p>Item #: @i</p> Next i
The loop begins with the For keyword, followed by three elements:
Immediately after the For statement, you declare a counter variable (you don't have to use Dim) and then indicate the range, as in i = 10 to 20. This means the variable i will start counting at 10 and continue until it reaches 20 (inclusive).
Between the For and Next statements is the content of the block. This can contain one or more code statements that execute with each loop.
The Next i statement ends the loop. It increments the counter and starts the next iteration of the loop.
The line of code between the For and Next lines contains the code that runs for each iteration of the
loop. The markup creates a new paragraph (<p> element) each time and adds a line to the output,
displaying the value of i (the counter). When you run this page, the example creates 11 lines displaying
the output, with the text in each line indicating the item number.
If you're working with a collection or array, you often use a For Each loop. A collection is a group of
similar objects, and the For Each loop lets you carry out a task on each item in the collection. This type
of loop is convenient for collections, because unlike a For loop, you don't have to increment the counter
or set a limit. Instead, the For Each loop code simply proceeds through the collection until it's finished.
This example returns the items in the Request.ServerVariables collection (which contains information
about your web server). It uses a For Each loop to display the name of each item by creating a new <li>
element in an HTML bulleted list.

ASP.NET Web Pages Using The Razor Syntax Appendix – ASP.NET Web Pages Visual Basic 256
<ul> @For Each myItem In Request.ServerVariables @<li>@myItem</li> Next myItem </ul>
The For Each keyword is followed by a variable that represents a single item in the collection (in the
example, myItem), followed by the In keyword, followed by the collection you want to loop through. In
the body of the For Each loop, you can access the current item using the variable that you declared
earlier.
To create a more general-purpose loop, use the Do While statement:
@Code Dim countNum = 0 Do While countNum < 50 countNum += 1 @<p>Line #@countNum: </p> Loop End Code
This loop begins with the Do While keyword, followed by a condition, followed by the block to repeat.
Loops typically increment (add to) or decrement (subtract from) a variable or object used for counting.

ASP.NET Web Pages Using The Razor Syntax Appendix – ASP.NET Web Pages Visual Basic 257
In the example, the += operator adds 1 to the value of a variable each time the loop runs. (To decrement
a variable in a loop that counts down, you would use the decrement operator -=.)
Objects and Collections
Nearly everything in an ASP.NET website is an object, including the web page itself. This section
discusses some important objects you'll work with frequently in your code.
Page Objects
The most basic object in ASP.NET is the page. You can access properties of the page object directly
without any qualifying object. The following code gets the page's file path, using the Request object of
the page:
@Code Dim path = Request.FilePath End Code
You can use properties of the Page object to get a lot of information, such as:
Request. As you've already seen, this is a collection of information about the current request, including what type of browser made the request, the URL of the page, the user identity, etc.
Response. This is a collection of information about the response (page) that will be sent to the browser when the server code has finished running. For example, you can use this property to write information into the response.
@Code ' Access the page's Request object to retrieve the URL. Dim pageUrl = Request.Url End Code <a href="@pageUrl">My page</a>
Collection Objects (Arrays and Dictionaries)
A collection is a group of objects of the same type, such as a collection of Customer objects from a
database. ASP.NET contains many built-in collections, like the Request.Files collection.
You'll often work with data in collections. Two common collection types are the array and the
dictionary. An array is useful when you want to store a collection of similar items but don't want to
create a separate variable to hold each item:
<h3>Team Members</h3> @Code Dim teamMembers() As String = {"Matt", "Joanne", "Robert", "Nancy"} For Each name In teamMembers @<p>@name</p> Next name End Code

ASP.NET Web Pages Using The Razor Syntax Appendix – ASP.NET Web Pages Visual Basic 258
With arrays, you declare a specific data type, such as String, Integer, or DateTime. To indicate that the
variable can contain an array, you add parentheses to the variable name in the declaration (such as Dim
myVar() As String). You can access items in an array using their position (index) or by using the For
Each statement. Array indexes are zero-based — that is, the first item is at position 0, the second item is
at position 1, and so on.
@Code Dim teamMembers() As String = {"Matt", "Joanne", "Robert", "Nancy"} @<p>The number of names in the teamMembers array: @teamMembers.Length </p> @<p>Robert is now in position: @Array.IndexOf(teamMembers, "Robert")</p> @<p>The array item at position 2 (zero-based) is @teamMembers(2)</p> @<h3>Current order of team members in the list</h3> For Each name In teamMembers @<p>@name</p> Next name @<h3>Reversed order of team members in the list</h3> Array.Reverse(teamMembers) For Each reversedItem In teamMembers @<p>@reversedItem</p> Next reversedItem End Code
You can determine the number of items in an array by getting its Length property. To get the position of
a specific item in the array (that is, to search the array), use the Array.IndexOf method. You can also do
things like reverse the contents of an array (the Array.Reverse method) or sort the contents (the
Array.Sort method).
The output of the string array code displayed in a browser:

ASP.NET Web Pages Using The Razor Syntax Appendix – ASP.NET Web Pages Visual Basic 259
A dictionary is a collection of key/value pairs, where you provide the key (or name) to set or retrieve the
corresponding value:
@Code Dim myScores = New Dictionary(Of String, Integer)() myScores.Add("test1", 71) myScores.Add("test2", 82) myScores.Add("test3", 100) myScores.Add("test4", 59) End Code <p>My score on test 3 is: @myScores("test3")%</p> @Code myScores("test4") = 79 End Code <p>My corrected score on test 4 is: @myScores("test4")%</p>
To create a dictionary, you use the New keyword to indicate that you're creating a new Dictionary
object. You can assign a dictionary to a variable using the Dim keyword. You indicate the data types of
the items in the dictionary using parentheses ( ( ) ). At the end of the declaration, you must add
another pair of parentheses, because this is actually a method that creates a new dictionary.

ASP.NET Web Pages Using The Razor Syntax Appendix – ASP.NET Web Pages Visual Basic 260
To add items to the dictionary, you can call the Add method of the dictionary variable (myScores in this
case), and then specify a key and a value. Alternatively, you can use parentheses to indicate the key and
do a simple assignment, as in the following example:
@Code myScores("test4") = 79 End Code
To get a value from the dictionary, you specify the key in parentheses:
@myScores("test4")
Calling Methods with Parameters
As you saw earlier in the chapter, when you program with objects, the objects can have methods. For
example, a Database object might have a Database.Connect method. Some methods also have one or
more parameters. A parameter is a value that you pass to a method to enable the method to complete
its task. For example, look at a declaration for the Request.MapPath method, which you might use when
you work with paths in your web pages. For example, look at the declaration for the Request.MapPath
method, which has three parameters:
Public Overridable Function MapPath (virtualPath As String, _ baseVirtualDir As String, _ allowCrossAppMapping As Boolean)
This method returns the physical path on the server that corresponds to a specified virtual path. The
three parameters for the method are virtualPath, baseVirtualDir, and allowCrossAppMapping. (Notice
that in the declaration, the parameters are listed with the data types of the data that they'll accept.)
When you call this method, you must supply values for all three parameters.
When you're using Visual Basic with the Razor syntax, you have two options for passing parameters to a
method: positional parameters or named parameters. To call a method using positional parameters, you
pass the parameters in a strict order that's specified in the method declaration. (You would typically
know this order by reading documentation for the method.) You must follow the order, and you can't
skip any of the parameters — if necessary, you pass an empty string ("") or null for a positional
parameter that you don't have a value for.
The following example assumes you have a folder named scripts on your website. The code calls the
Request.MapPath method and passes values for the three parameters in the correct order. It then
displays the resulting mapped path.
@Code ' Pass parameters to a method using positional parameters. Dim myPathPositional = Request.MapPath("/scripts", "/", true) End Code <p>@myPathPositional</p>

ASP.NET Web Pages Using The Razor Syntax Appendix – ASP.NET Web Pages Visual Basic 261
When there are many parameters for a method, you can keep your code cleaner and more readable by
using named parameters. To call a method using named parameters, specify the parameter name
followed by := and then provide the value. An advantage of named parameters is that you can add them
in any order you want. (A disadvantage is that the method call is not as compact.)
The following examples calls the same method as above, but uses named parameters to supply the
values in a different order from the positional parameters:
@Code ' Pass parameters to a method using named parameters. Dim myPathNamed = Request.MapPath(baseVirtualDir:= "/", allowCrossAppMapping:= true, virtualPath:= "/scripts") End Code <p>@myPathNamed</p>
As you can see, the parameters are passed in a different order. However, if you run the previous
example and this example, they'll return the same value.
Handling Errors
Try-Catch Statements
You'll often have statements in your code that might fail for reasons outside your control. For example:
If your code tries to open, create, read, or write a file, all sorts of errors might occur. The file you want might not exist, it might be locked, the code might not have permissions, and so on.
Similarly, if your code tries to update records in a database, there can be permissions issues, the connection to the database might be dropped, the data to save might be invalid, and so on.
In programming terms, these situations are called exceptions. If your code encounters an exception, it
generates (throws) an error message that is, at best, annoying to users.

ASP.NET Web Pages Using The Razor Syntax Appendix – ASP.NET Web Pages Visual Basic 262
In situations where your code might encounter exceptions, and in order to avoid error messages of this
type, you can use Try/Catch statements. In the Try statement, you run the code that you're checking. In
one or more Catch statements, you can look for specific errors (specific types of exceptions) that might
have occurred. You can include as many Catch statements as you need to look for errors that you're
anticipating.
Note We recommend that you avoid using the Response.Redirect method in Try/Catch
statements, because it can cause an exception in your page.
The following example shows a page that creates a text file on the first request and then displays a
button that lets the user open the file. The example deliberately uses a bad file name so that it will
cause an exception. The code includes Catch statements for two possible exceptions:
FileNotFoundException, which occurs if the file name is bad, and DirectoryNotFoundException, which
occurs if ASP.NET can't even find the folder. (You can uncomment a statement in the example in order
to see how it runs when everything works properly.)
If your code didn't handle the exception, you would see an error page like the previous screen shot.
However, the Try/Catch section helps prevent the user from seeing these types of errors.
@Code Dim dataFilePath = "~/dataFile.txt" Dim fileContents = "" Dim physicalPath = Server.MapPath(dataFilePath) Dim userMessage = "Hello world, the time is " + DateTime.Now Dim userErrMsg = "" Dim errMsg = "" If IsPost Then ' When the user clicks the "Open File" button and posts

ASP.NET Web Pages Using The Razor Syntax Appendix – ASP.NET Web Pages Visual Basic 263
' the page, try to open the file. Try ' This code fails because of faulty path to the file. fileContents = File.ReadAllText("c:\batafile.txt") ' This code works. To eliminate error on page, ' comment the above line of code and uncomment this one. ' fileContents = File.ReadAllText(physicalPath) Catch ex As FileNotFoundException ' You can use the exception object for debugging, logging, etc. errMsg = ex.Message ' Create a friendly error message for users. userErrMsg = "The file could not be opened, please contact " _ & "your system administrator." Catch ex As DirectoryNotFoundException ' Similar to previous exception. errMsg = ex.Message userErrMsg = "The file could not be opened, please contact " _ & "your system administrator." End Try Else ' The first time the page is requested, create the text file. File.WriteAllText(physicalPath, userMessage) End If End Code <!DOCTYPE html> <html lang="en"> <head> <meta charset="utf-8" /> <title>Try-Catch Statements</title> </head> <body> <form method="POST" action="" > <input type="Submit" name="Submit" value="Open File"/> </form> <p>@fileContents</p> <p>@userErrMsg</p> </body> </html>
Additional Resources
Reference Documentation
ASP.NET Visual Basic Language

ASP.NET Web Pages Using The Razor Syntax Appendix – Programming ASP.NET Web Pages in Visual Studio 264
Appendix – Programming ASP.NET Web Pages in Visual Studio
This appendix explains how you can use Visual Studio 2010 or Visual Web Developer 2010 Express to
program ASP.NET Web Pages with the Razor syntax.
What you'll learn
How to Install Visual Web Developer 2010 Express and the ASP.NET Razor Tools (included with the ASP.NET MVC3 RTM release)
Using features in Visual Studio to work with ASP.NET Razor pages, including IntelliSense and the debugger.
Why Use Visual Studio?
You can program ASP.NET Web pages with Razor syntax using WebMatrix or many other code editors.
You can also use Microsoft Visual Studio 2010, which is a full-featured integrated development
environment (IDE) that provides a powerful set of tools for creating many types of applications (not just
websites). To work with ASP.NET Razor pages, you can either use one of the full editions of Visual Studio
or the free Visual Web Developer Express edition.
Two particularly useful features that Visual Studio provides for programming with ASP.NET Razor web
pages are:
IntelliSense. This improves your programming productivity by completing statements and by listing information about the classes and methods that you're working with in the editor. (WebMatrix includes IntelliSense for some programming elements, like HTML and CSS, but not for programming code in C# or Visual Basic.)
Debugger. The debugger lets you troubleshoot your code by stopping a program while it's running, examining variables, and stepping through the code line by line.
These features are currently available only in Visual Studio.
Installing the ASP.NET Razor Tools
This section shows how to install Visual Web Developer Express 2010 and the ASP.NET Web Pages Tools
for Visual Studio.
1. If you don't already have the Web Platform Installer, download it from the following URL:
http://www.microsoft.com/web/downloads/platform.aspx
2. Run the Web Platform Installer.

ASP.NET Web Pages Using The Razor Syntax Appendix – Programming ASP.NET Web Pages in Visual Studio 265
3. If you don't already have Visual Studio or Visual Web Developer Express installed, find Visual Web Developer Express and then click Add.
4. Find ASP.NET MVC 3, and then click Add. This product includes Visual Studio tools for building ASP.NET Razor websites.
5. Click Install to complete the installation.
Using the ASP.NET Razor Tools for Visual Studio
To use IntelliSense and the debugger, you need to create an ASP.NET Razor website in Visual Studio.
1. Start Visual Studio or Visual Web Developer. 2. In the File menu, click New Web Site. 3. In the New Web Site dialog box, select the language to use (Visual C# or Visual Basic). 4. Select the ASP.NET Web Site (Razor) template. 5. In the drop-down list near Web locations, select File System, and for the path, enter a local
folder.

ASP.NET Web Pages Using The Razor Syntax Appendix – Programming ASP.NET Web Pages in Visual Studio 266
6. Click OK.
Using IntelliSense
Now that you've created a site, you can see how IntelliSense works in Visual Studio.
1. In the website you just created, open the Default.cshtml page. At the bottom of the window, make sure the Source tab is selected.
2. After the closing </p> tag in the page, type @ServerInfo. (including the dot). Notice how IntelliSense displays the available methods for the ServerInfo helper in a drop-down list.

ASP.NET Web Pages Using The Razor Syntax Appendix – Programming ASP.NET Web Pages in Visual Studio 267
3. Select the GetHtml method from the list and then press Enter. IntelliSense automatically fills in the method. (As with any method in C#, you must add () characters after the method.) The completed code for the GetHtml method looks like the following example:
@Server.GetHtml()
4. Press Ctrl+F5 to run the page. This is what the page looks like when displayed in a browser:
5. Close the browser, and then save the updated Default.cshtml page.
Using the Debugger
1. At the top of the Default.cshtml page, after the line that begins with Page.Title, add the following line of code:
var myTime = DateTime.Now.TimeOfDay;
2. In the gray margin of the editor to the left of the code, click next to this new line in order to add a breakpoint. A breakpoint is a marker that tells the debugger to stop running the program at that point so you can see what's happening.
3. Remove the call to the ServerInfo.GetHtml method, and add a call to the @myTime variable in its place. This call displays the current time value that's returned by the new line of code.
The updated page with the two new lines of code and the breakpoint looks like the following:

ASP.NET Web Pages Using The Razor Syntax Appendix – Programming ASP.NET Web Pages in Visual Studio 268
4. Press F5 to run the page in the debugger. The page stops on the breakpoint that you set. The following image shows what the page looks like in the editor with the breakpoint (in yellow), the Debug toolbar, and the Step Into button.
5. Click the Step Into button (or press F11). This runs the next line of code. Pressing F11 again moves to the next line of executable code, and so on.
6. Examine the value of the myTime variable by holding your mouse pointer over it or by inspecting the values displayed in the Locals and Call Stack windows.
7. When you're done examining the variable and stepping through code, press F5 to continue running the page without stopping at each line. This is what the page looks like when displayed in a browser:

ASP.NET Web Pages Using The Razor Syntax Appendix – Programming ASP.NET Web Pages in Visual Studio 269
To learn more about the debugger and about how to debug code in Visual Studio, see Walkthrough:
Debugging Web Pages in Visual Web Developer.

ASP.NET Web Pages Using The Razor Syntax Disclaimer 270
Disclaimer
This document is provided “as-is”. Information and views expressed in this document, including URL and
other Internet website references, may change without notice. You bear the risk of using it.
Some examples depicted herein are provided for illustration only and are fictitious. No real association
or connection is intended or should be inferred.
This document does not provide you with any legal rights to any intellectual property in any Microsoft
product. You may copy and use this document for your internal, reference purposes. This document is
confidential and proprietary to Microsoft. It is disclosed and can be used only pursuant to a non-
disclosure agreement.
© 2011 Microsoft. All Rights Reserved.
Microsoft is a trademark of the Microsoft group of companies. All other trademarks are property of their
respective own