ARCHITECTURAL ELEVATION...
15
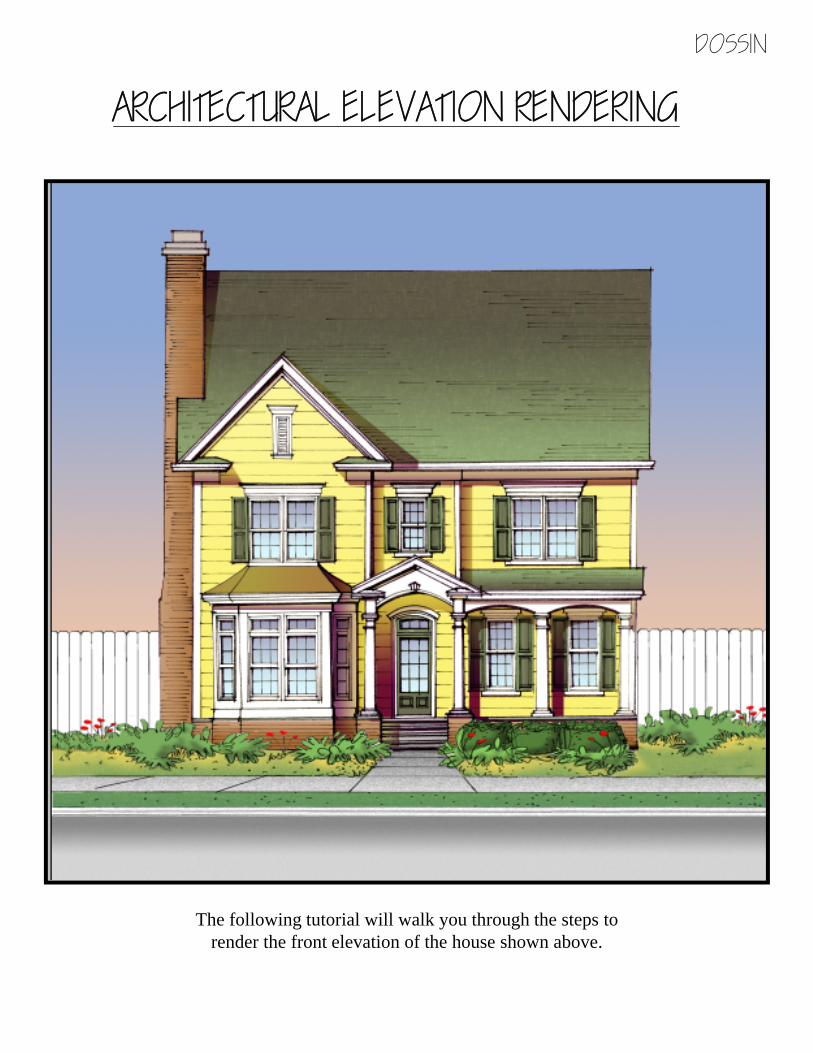
ARCHITECTURAL ELEVATION RENDERING DOSSIN The following tutorial will walk you through the steps to render the front elevation of the house shown above.
-
Upload
truongnguyet -
Category
Documents
-
view
223 -
download
0
Transcript of ARCHITECTURAL ELEVATION...
ARCHITECTURAL ELEVATION RENDERING
DOSSIN
The following tutorial will walk you through the steps to render the front elevation of the house shown above.
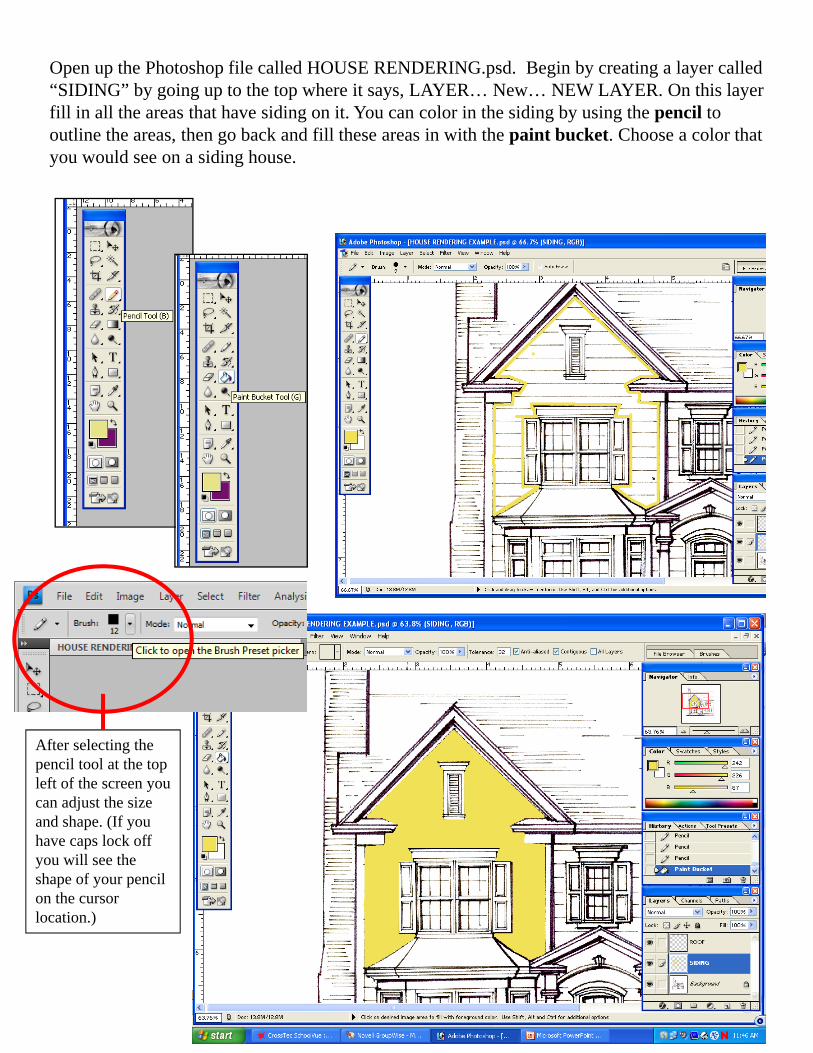
Open up the Photoshop file called HOUSE RENDERING.psd. Begin by creating a layer called “SIDING” by going up to the top where it says, LAYER… New… NEW LAYER. On this layer fill in all the areas that have siding on it. You can color in the siding by using the pencil to outline the areas, then go back and fill these areas in with the paint bucket. Choose a color that you would see on a siding house.
After selecting the pencil tool at the top left of the screen you can adjust the size and shape. (If you have caps lock off you will see the shape of your pencil on the cursor location.)
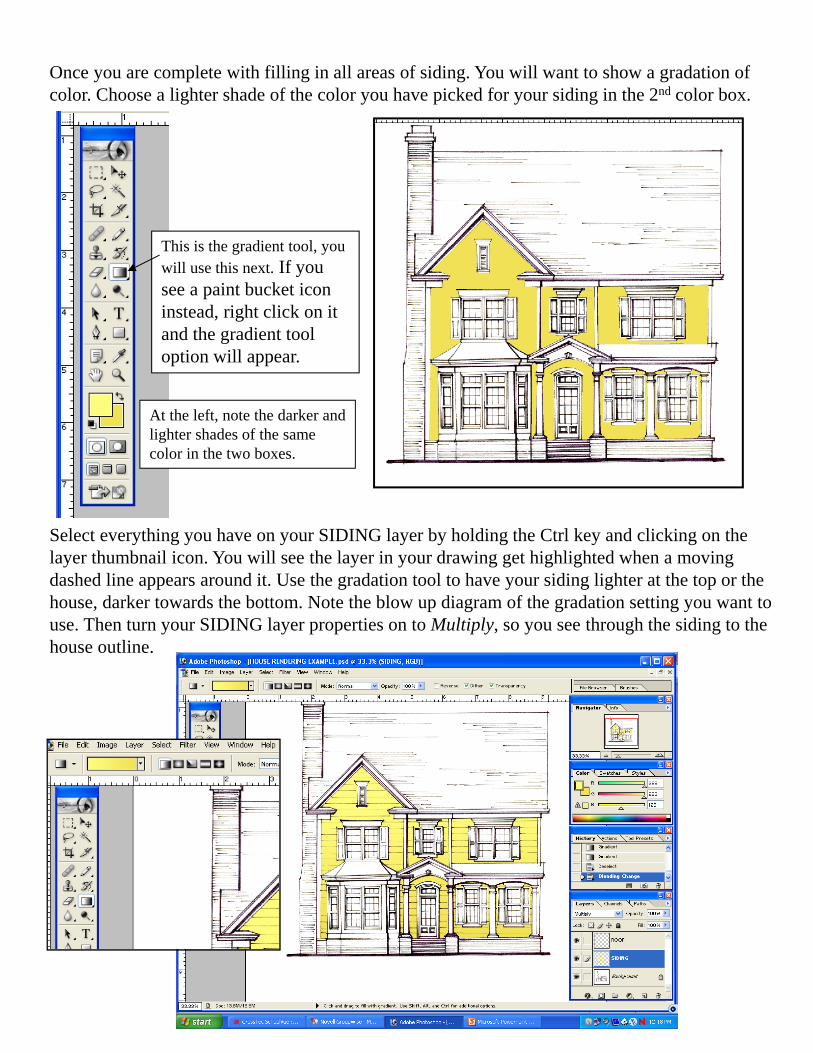
Once you are complete with filling in all areas of siding. You will want to show a gradation of color. Choose a lighter shade of the color you have picked for your siding in the 2nd color box.
At the left, note the darker and lighter shades of the same color in the two boxes.
This is the gradient tool, you will use this next. If you see a paint bucket icon instead, right click on it and the gradient tool option will appear.
Select everything you have on your SIDING layer by holding the Ctrl key and clicking on the layer thumbnail icon. You will see the layer in your drawing get highlighted when a moving dashed line appears around it. Use the gradation tool to have your siding lighter at the top or the house, darker towards the bottom. Note the blow up diagram of the gradation setting you want to use. Then turn your SIDING layer properties on to Multiply, so you see through the siding to the house outline.
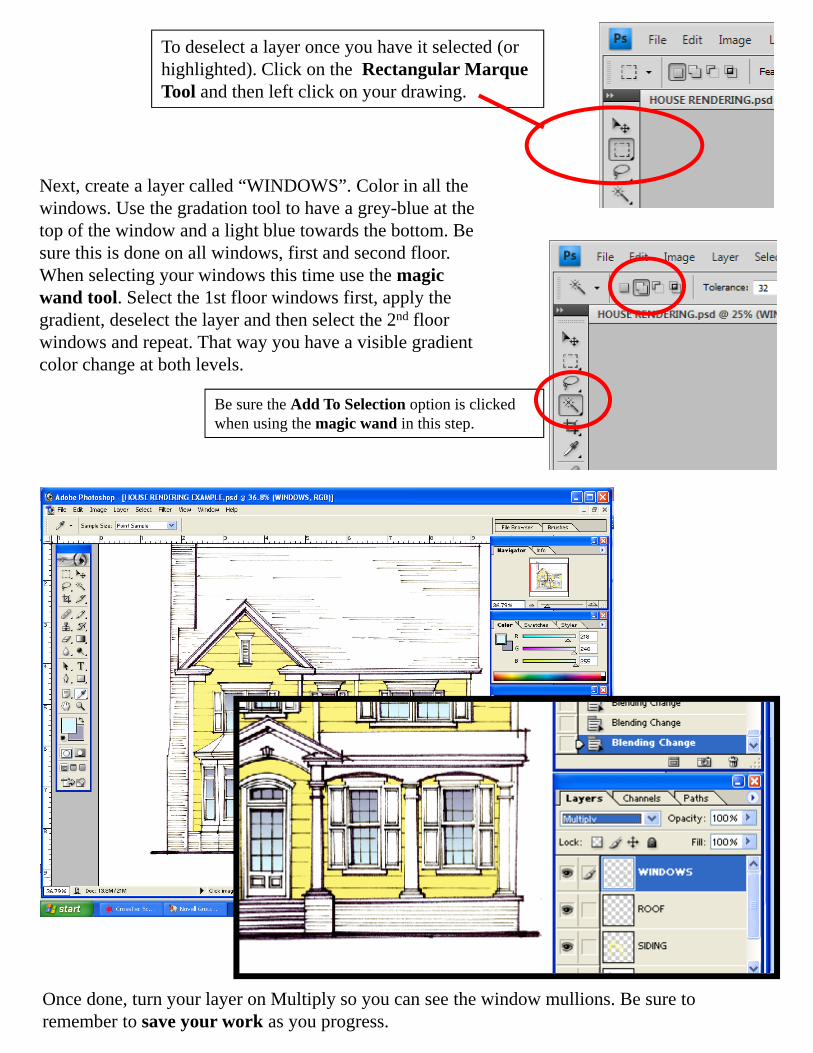
Next, create a layer called “WINDOWS”. Color in all the windows. Use the gradation tool to have a grey-blue at the top of the window and a light blue towards the bottom. Be sure this is done on all windows, first and second floor. When selecting your windows this time use the magic wand tool. Select the 1st floor windows first, apply the gradient, deselect the layer and then select the 2nd floor windows and repeat. That way you have a visible gradient color change at both levels.
Once done, turn your layer on Multiply so you can see the window mullions. Be sure to remember to save your work as you progress.
Be sure the Add To Selection option is clicked when using the magic wand in this step.
To deselect a layer once you have it selected (or highlighted). Click on the Rectangular Marque Tool and then left click on your drawing.
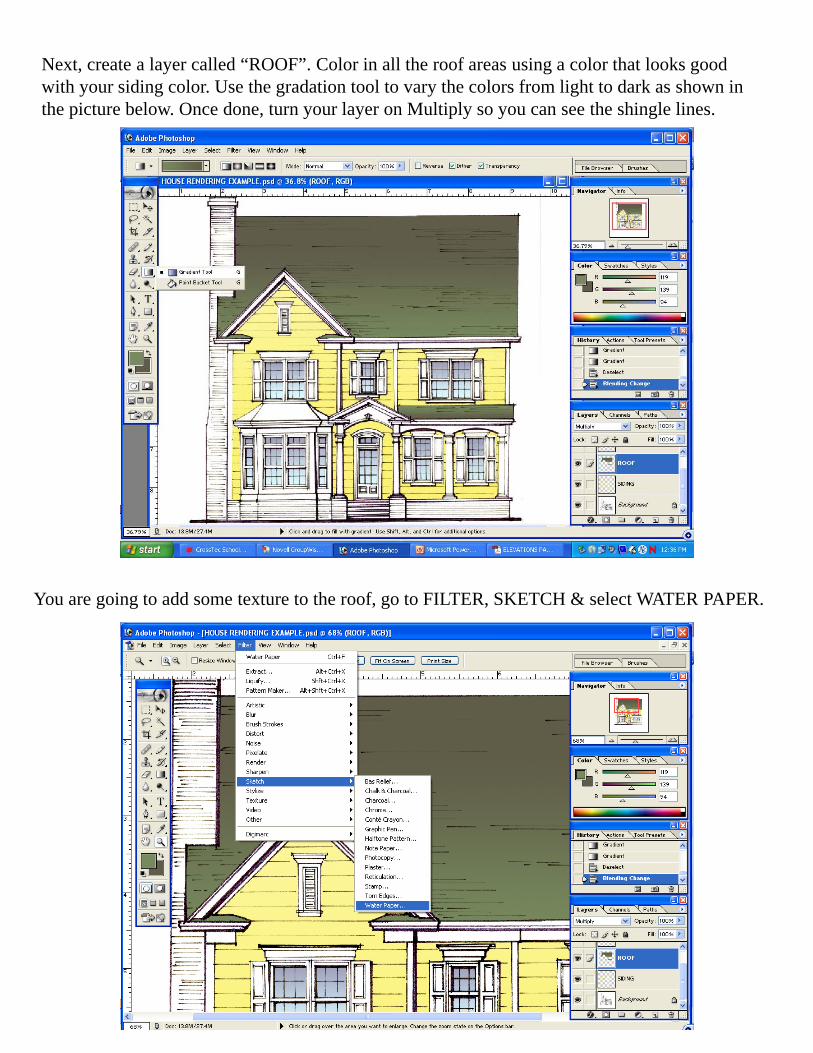
Next, create a layer called “ROOF”. Color in all the roof areas using a color that looks good with your siding color. Use the gradation tool to vary the colors from light to dark as shown in the picture below. Once done, turn your layer on Multiply so you can see the shingle lines.
You are going to add some texture to the roof, go to FILTER, SKETCH & select WATER PAPER.
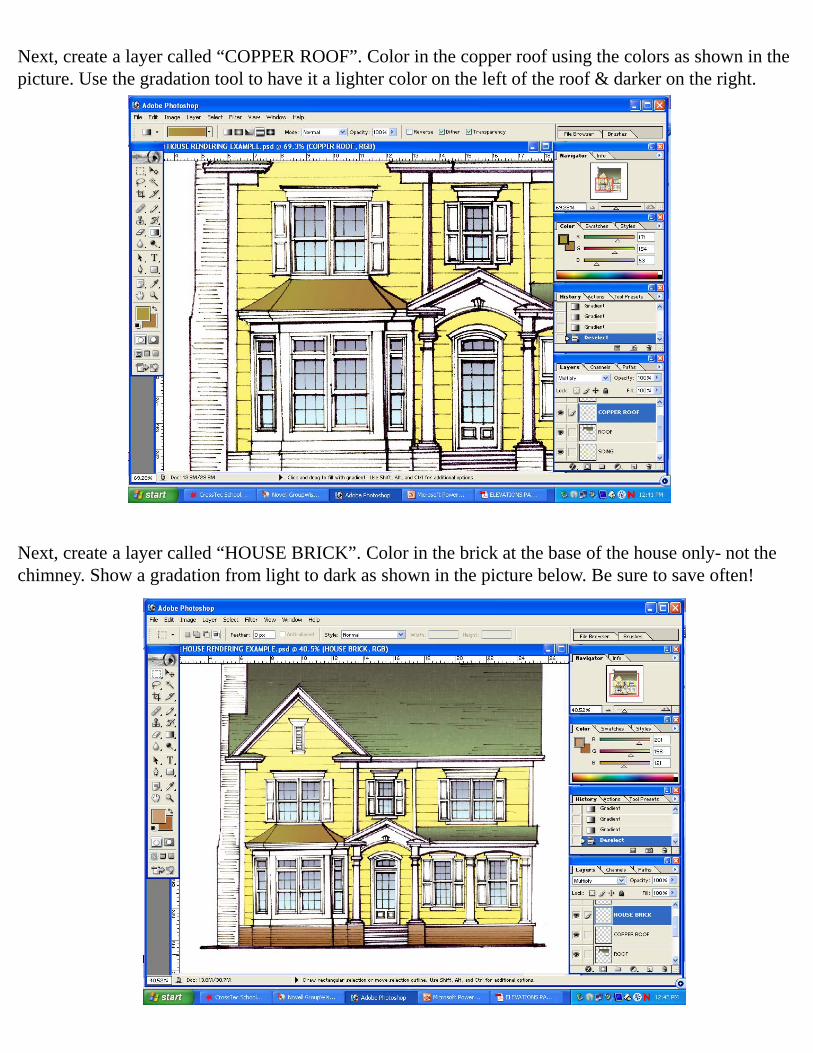
Next, create a layer called “COPPER ROOF”. Color in the copper roof using the colors as shown in the picture. Use the gradation tool to have it a lighter color on the left of the roof & darker on the right.
Next, create a layer called “HOUSE BRICK”. Color in the brick at the base of the house only- not the chimney. Show a gradation from light to dark as shown in the picture below. Be sure to save often!
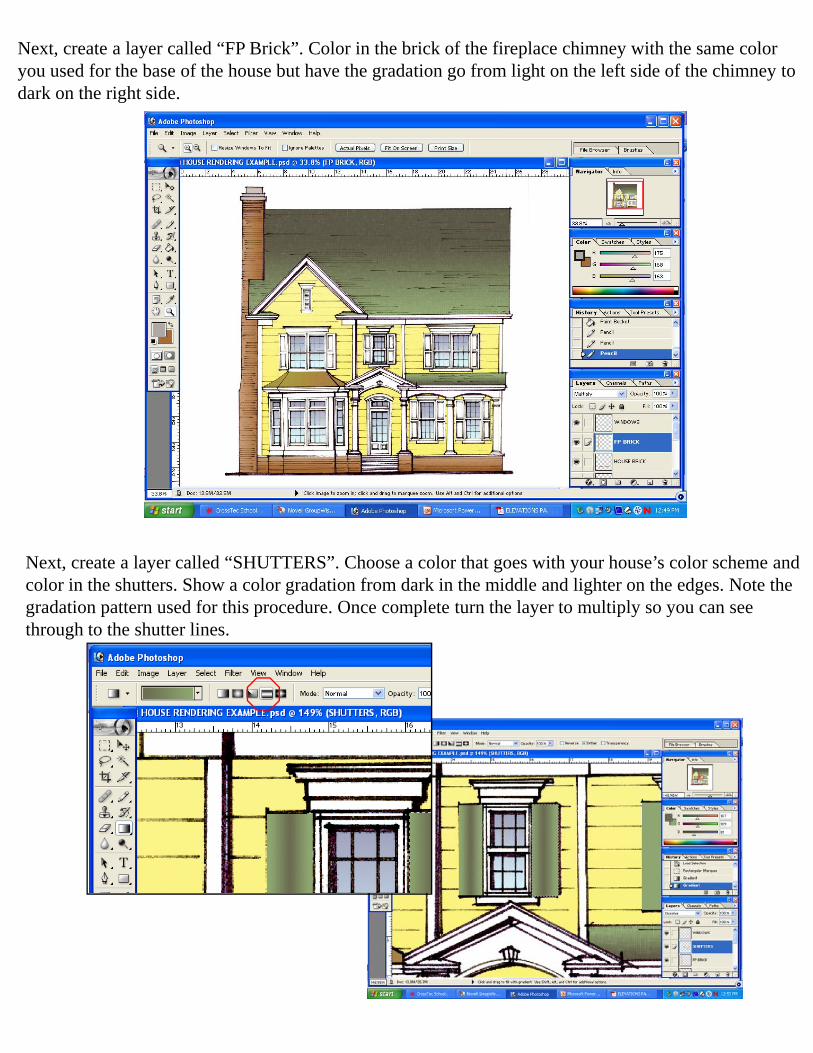
Next, create a layer called “FP Brick”. Color in the brick of the fireplace chimney with the same color you used for the base of the house but have the gradation go from light on the left side of the chimney to dark on the right side.
Next, create a layer called “SHUTTERS”. Choose a color that goes with your house’s color scheme and color in the shutters. Show a color gradation from dark in the middle and lighter on the edges. Note the gradation pattern used for this procedure. Once complete turn the layer to multiply so you can see through to the shutter lines.
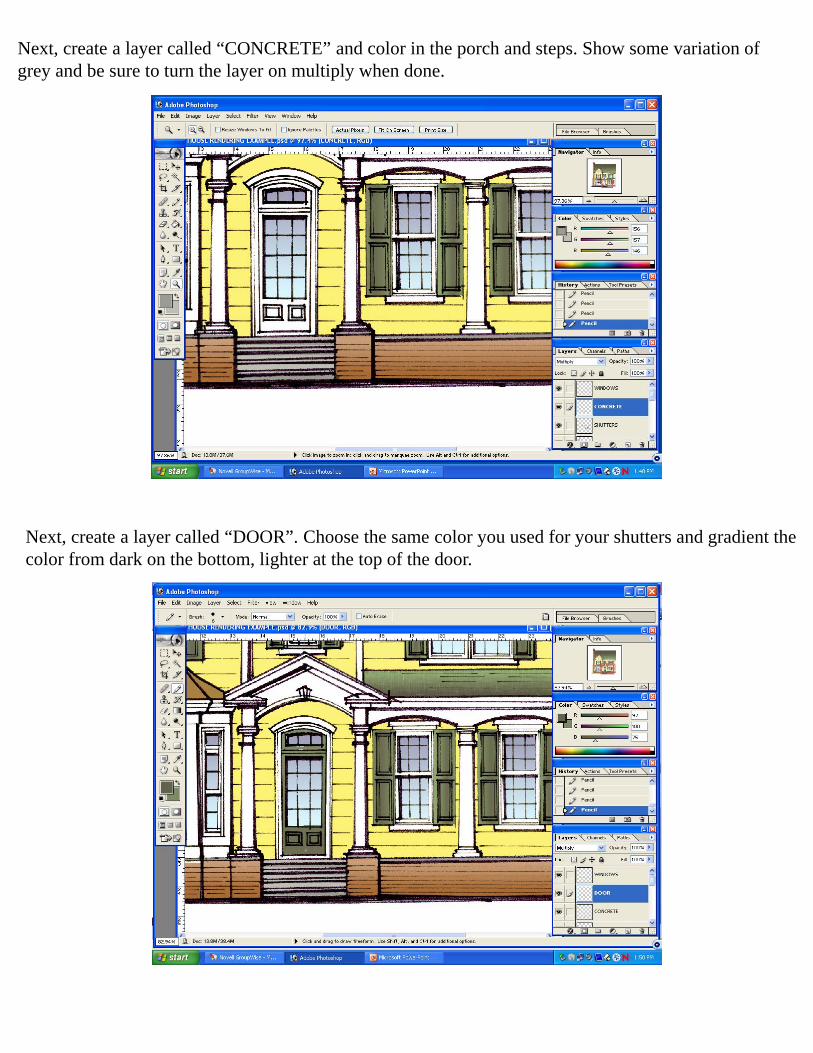
Next, create a layer called “CONCRETE” and color in the porch and steps. Show some variation of grey and be sure to turn the layer on multiply when done.
Next, create a layer called “DOOR”. Choose the same color you used for your shutters and gradient the color from dark on the bottom, lighter at the top of the door.
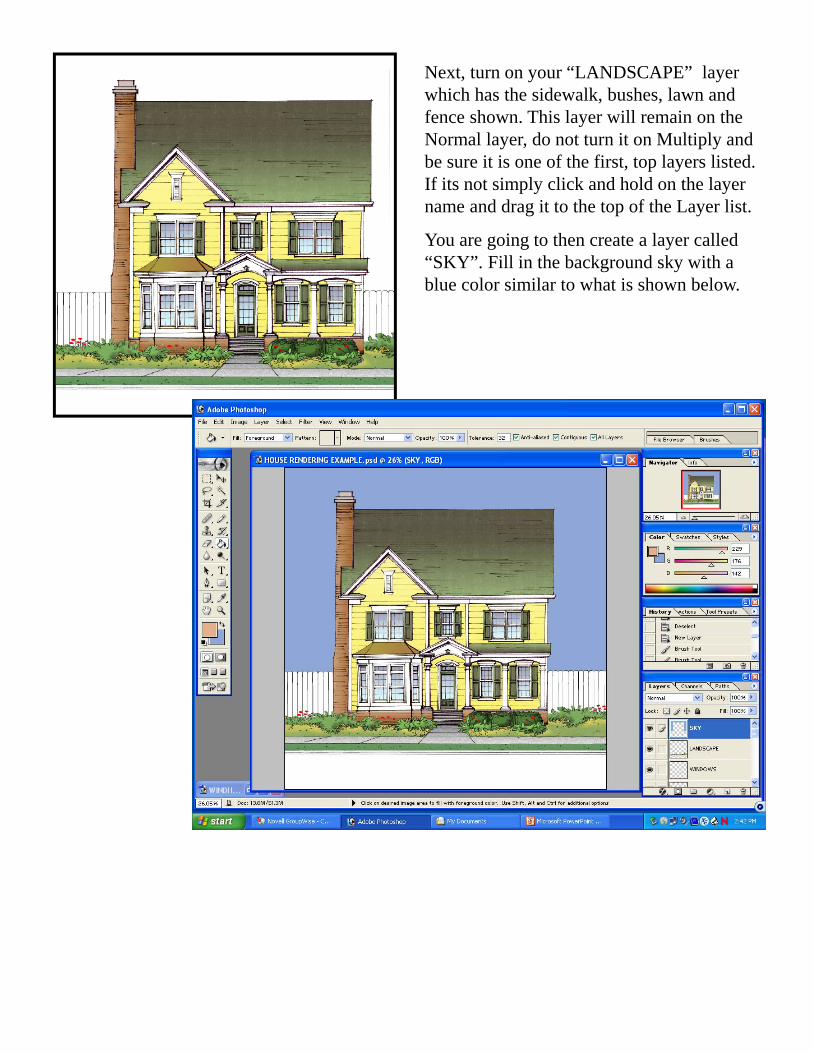
Next, turn on your “LANDSCAPE” layer which has the sidewalk, bushes, lawn and fence shown. This layer will remain on the Normal layer, do not turn it on Multiply and be sure it is one of the first, top layers listed. If its not simply click and hold on the layer name and drag it to the top of the Layer list.
You are going to then create a layer called “SKY”. Fill in the background sky with a blue color similar to what is shown below.
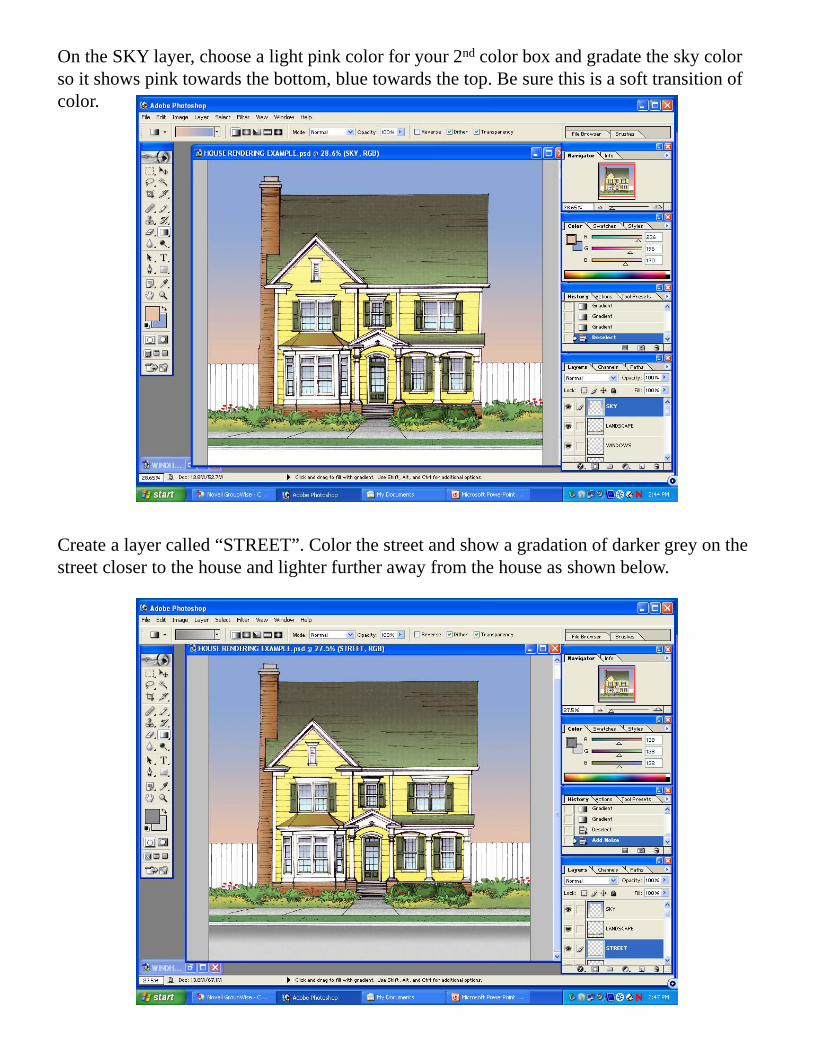
On the SKY layer, choose a light pink color for your 2nd color box and gradate the sky color so it shows pink towards the bottom, blue towards the top. Be sure this is a soft transition of color.
Create a layer called “STREET”. Color the street and show a gradation of darker grey on the street closer to the house and lighter further away from the house as shown below.
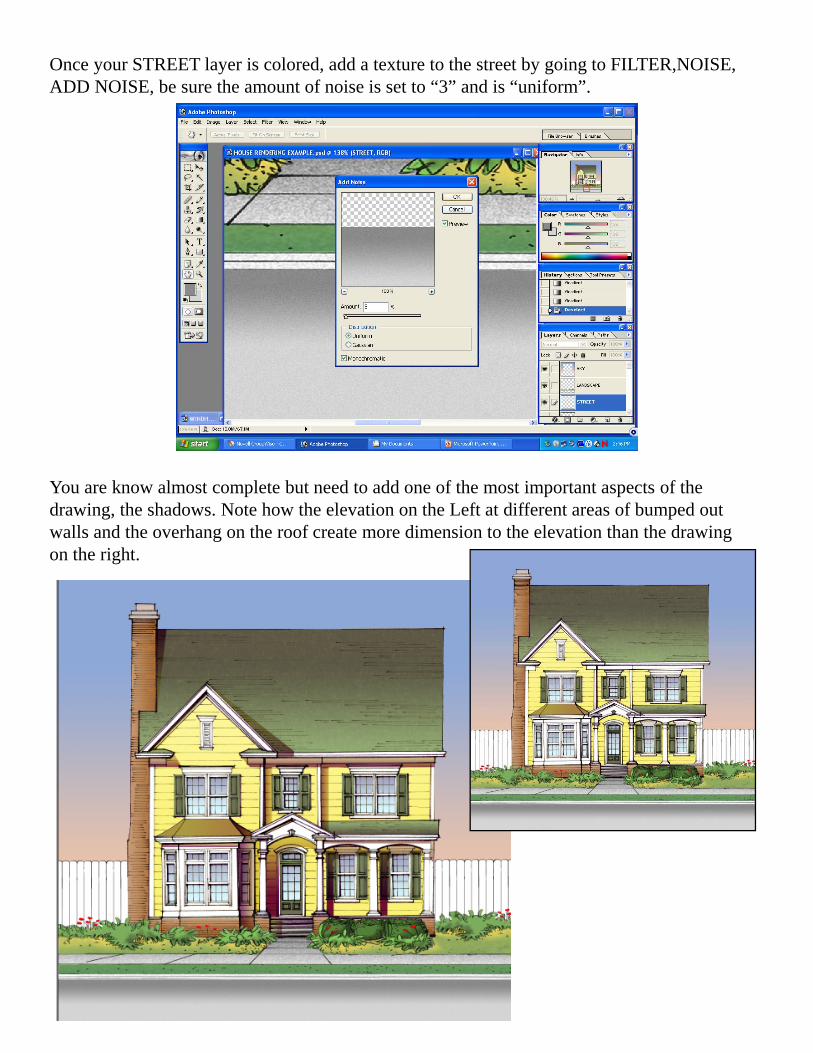
Once your STREET layer is colored, add a texture to the street by going to FILTER,NOISE, ADD NOISE, be sure the amount of noise is set to “3” and is “uniform”.
You are know almost complete but need to add one of the most important aspects of the drawing, the shadows. Note how the elevation on the Left at different areas of bumped out walls and the overhang on the roof create more dimension to the elevation than the drawing on the right.
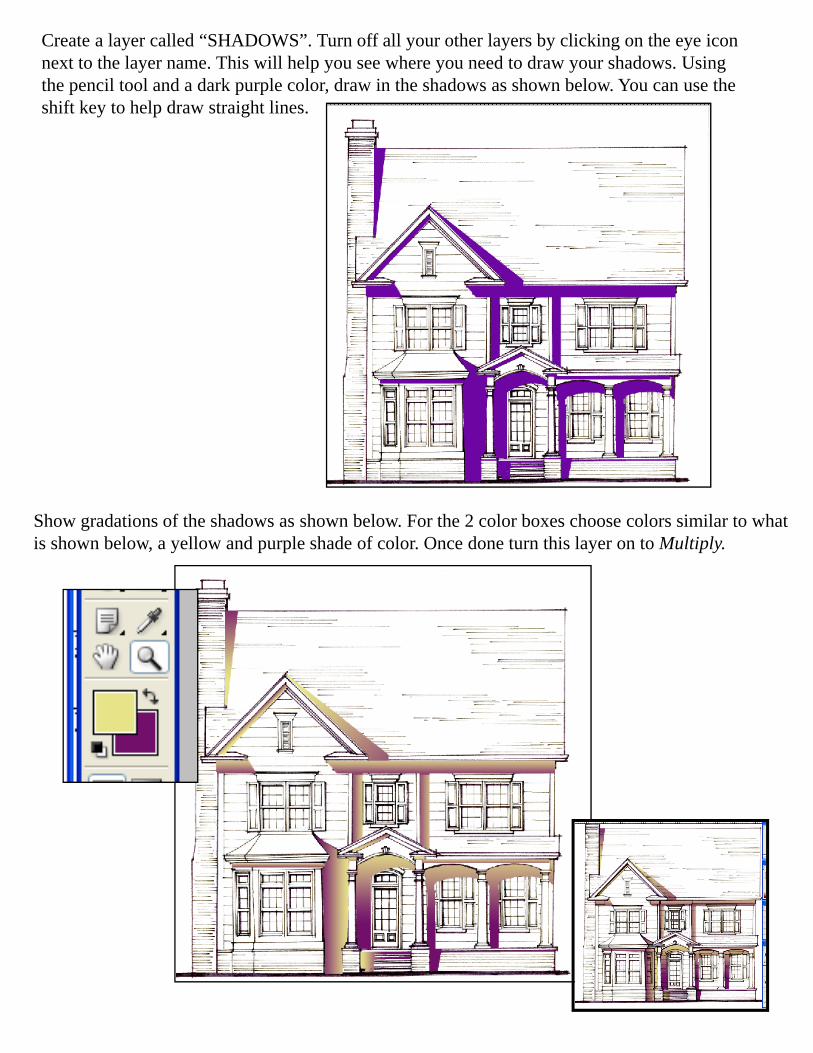
Create a layer called “SHADOWS”. Turn off all your other layers by clicking on the eye icon next to the layer name. This will help you see where you need to draw your shadows. Using the pencil tool and a dark purple color, draw in the shadows as shown below. You can use the shift key to help draw straight lines.
Show gradations of the shadows as shown below. For the 2 color boxes choose colors similar to what is shown below, a yellow and purple shade of color. Once done turn this layer on to Multiply.
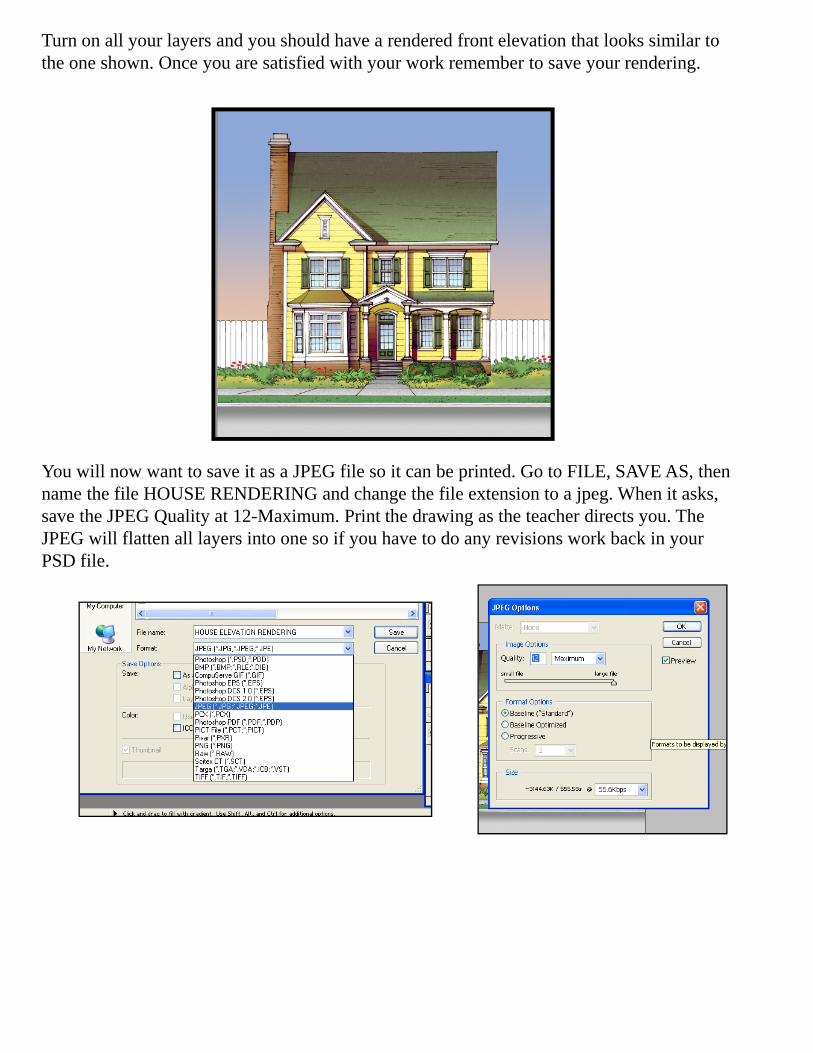
Turn on all your layers and you should have a rendered front elevation that looks similar to the one shown. Once you are satisfied with your work remember to save your rendering.
You will now want to save it as a JPEG file so it can be printed. Go to FILE, SAVE AS, then name the file HOUSE RENDERING and change the file extension to a jpeg. When it asks, save the JPEG Quality at 12-Maximum. Print the drawing as the teacher directs you. The JPEG will flatten all layers into one so if you have to do any revisions work back in your PSD file.
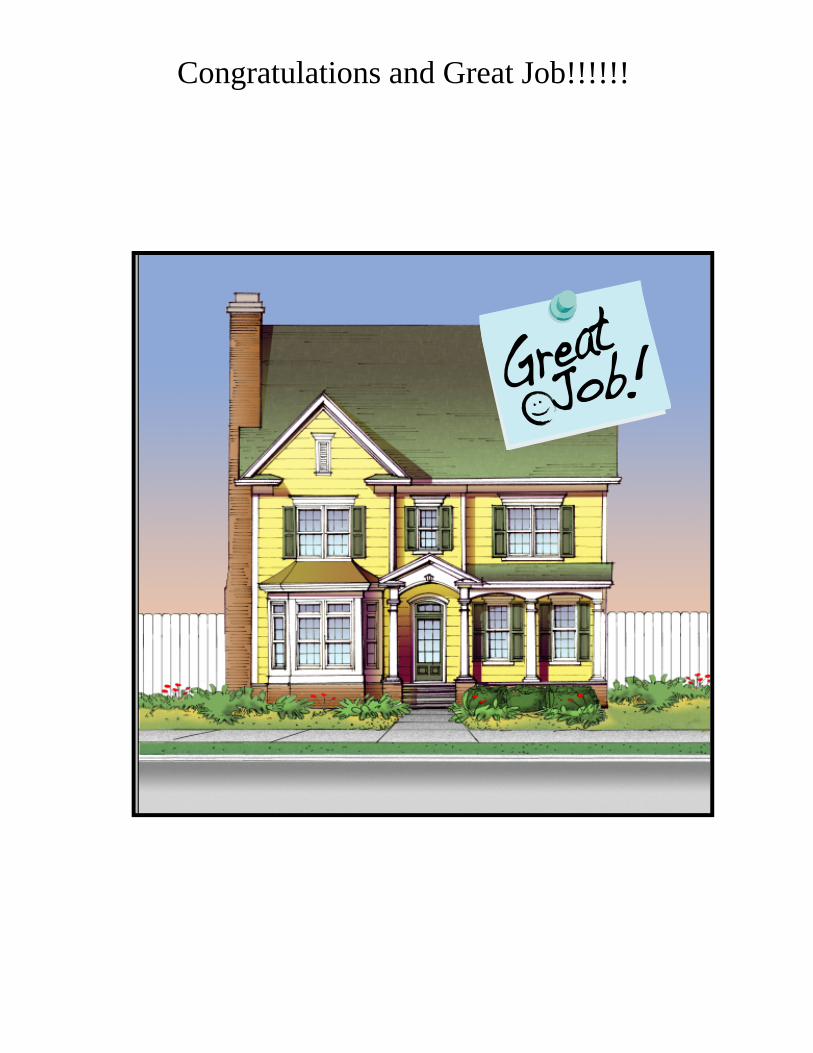
Congratulations and Great Job!!!!!!