APPLICATIONS FORD TAURUS 2000 - 2003 99-5718 · ford taurus 2000- 2003 99-5718 dash disassembly ......
6
METRA. THE WORLD’S BEST KITS.™ © COPYRIGHT 2004-2010 METRA ELECTRONICS CORPORATION APPLICATIONS KIT FEATURES KIT COMPONENTS TOOLS REQUIRED 1-800-221-0932 metraonline.com METRA. THE WORLD’S BEST KITS.™ © COPYRIGHT 2004-2010 METRA ELECTRONICS CORPORATION REV. 1/20/2010 1-800-221-0932 metraonline.com INSTALLATION INSTRUCTIONS FOR PART 99-5718 INSTALLATION INSTRUCTIONS FOR PART 99-5718 FORD TAURUS 2000 - 2003 99-5718 • ISO & DIN Head Unit Provision w/ Pocket • DDIN Head unit provisions • Integrated auto climate controls and display • Painted Scratch Resistant Matte Black • A) Radio Housing • B) ISO Brackets • C) ISO Trim Plate • D) Pocket • E) DDIN Brackets • F) DDIN Trim Plate • G) In-Car Temp Sensor Housing • H) Harness Extension • Radio Removal Tool (Metra Part #86-5618) • Phillips Screwdriver • Panel Removal Tool • Socket Set • Cutting Tool or File • T10 Torx Screwdirver C D E F G H B A
Transcript of APPLICATIONS FORD TAURUS 2000 - 2003 99-5718 · ford taurus 2000- 2003 99-5718 dash disassembly ......

METRA. THE WORLD’S BEST KITS.™
© COPYRIGHT 2004-2010 METRA ELECTRONICS CORPORATION
APPLICATIONS
KIT FEATURES
KIT COMPONENTS
TOOLS REQUIRED
1-800-221-0932 metraonline.com
METRA. THE WORLD’S BEST KITS.™
© COPYRIGHT 2004-2010 METRA ELECTRONICS CORPORATION
RE
V. 1
/20/
2010
1-800-221-0932 metraonline.com
INSTALLATION INSTRUCTIONS FOR PART 99-5718INSTALLATION INSTRUCTIONS FOR PART 99-5718
FORD TAURUS 2000 - 2003
99-5718
• ISO & DIN Head Unit Provision w/ Pocket• DDIN Head unit provisions• Integrated auto climate controls and display• Painted Scratch Resistant Matte Black
• A) Radio Housing • B) ISO Brackets • C) ISO Trim Plate • D) Pocket • E) DDIN Brackets • F) DDIN Trim Plate • G) In-Car Temp Sensor Housing • H) Harness Extension
• Radio Removal Tool (Metra Part #86-5618) • Phillips Screwdriver • Panel Removal Tool • Socket Set • Cutting Tool or File • T10 Torx Screwdirver
C D E
F G H
B
A
TABLE OF CONTENTS NOTESDASH DISASSEMBLY
• FORD TAURUS 2000 - 2003 . . . . . . . . . . . 1
KIT PREPARATION
• FORD TAURUS 2000 - 2003 . . . . . . . . . . . 2
KIT ASSEMBLY
• FORD TAURUS 2000 - 2003 . . . . . . . . . 3-6
*NOTE: Refer Also to the instructions included with the aftermarket radio.
*NOTE: This product has software that can be flashed via the AXXESS USB-CAB cable and AXXESSINTERFACE.COM. Please contact the Metra tech support team if you feel this product is not performing properly.
Metra recommends MECP certified technicians
KNOWLEDGE IS POWEREnhance your installation and fabrication skills by enrolling in the most recognized and respected mobile electronics school in our industry.Log onto www.installerinstitute.com or call 800-354-6782 for more information and take steps toward a better tomorrow.
99-5718 99-5718

1
FORD TAURUS 2000- 2003
99-5718 DASH DISASSEMBLY
Disconnect the negative battery terminal to prevent an accidental short circuit.
Using Metra’s 86-5618, pull the factory radio/climate control panel from the dash. (Fig. A)
Disconnect the audio system connectors, blower motor switch connector, vacuum hose harness, a/c damper door switch connector, and potentiometer connector. Remove the panel.
Remove (2) torx-head screws securing the mounting clips to the sides of the factoryradio/climate control panel and remove the clips. (Fig. B)
Mount the clips to theIntegrated Mounting Kit with the same torx-head screws.
1
2
3
A
B
4
5
NOTES
99-5718
2 7
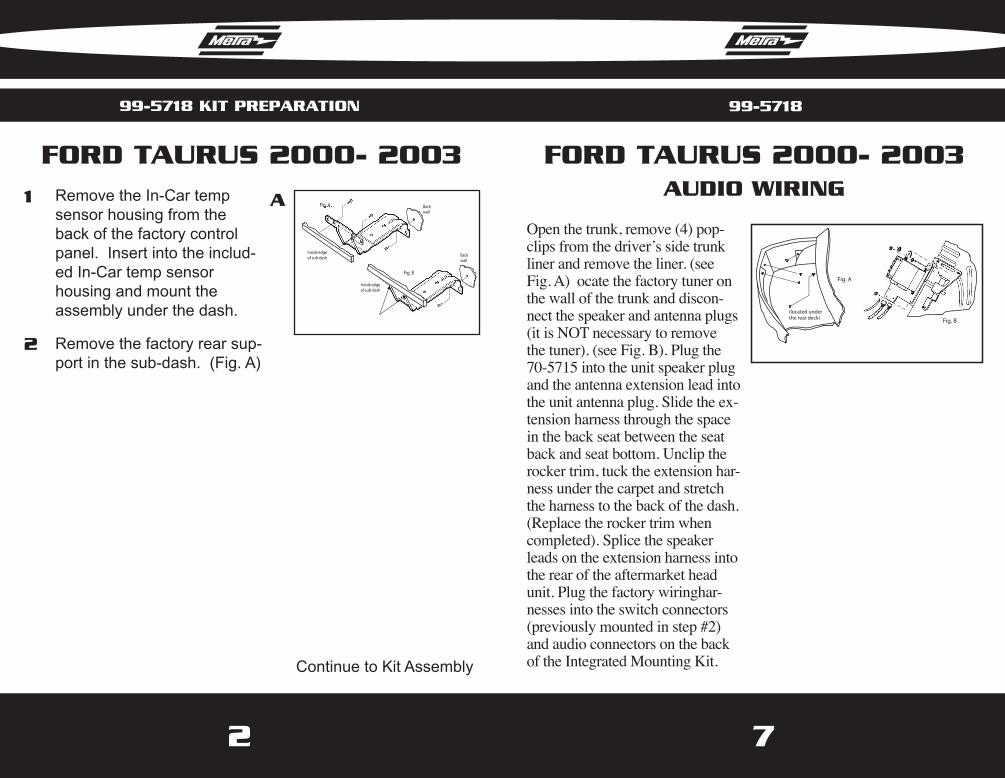
Remove the In-Car temp sensor housing from the back of the factory control panel. Insert into the includ-ed In-Car temp sensor housing and mount the assembly under the dash.
Remove the factory rear sup-port in the sub-dash. (Fig. A)
99-5718 KIT PREPARATION
1
2
A
Continue to Kit Assembly
FORD TAURUS 2000- 2003 FORD TAURUS 2000- 20032
Fig. A
Fig. B
Back wall
Inside edge of sub-dash
Inside edge of sub-dash
Back wall
99-5718
AUDIO WIRING
Open the trunk, remove (4) pop-clips from the driver’s side trunk liner and remove the liner. (see Fig. A) ocate the factory tuner on the wall of the trunk and discon-nect the speaker and antenna plugs (it is NOT necessary to remove the tuner). (see Fig. B). Plug the 70-5715 into the unit speaker plug and the antenna extension lead into the unit antenna plug. Slide the ex-tension harness through the space in the back seat between the seat back and seat bottom. Unclip the rocker trim, tuck the extension har-ness under the carpet and stretch the harness to the back of the dash. (Replace the rocker trim when completed). Splice the speaker leads on the extension harness into the rear of the aftermarket head unit. Plug the factory wiringhar-nesses into the switch connectors (previously mounted in step #2) and audio connectors on the back of the Integrated Mounting Kit.
(located under the rear deck)
Fig. A
Fig. B
6 3
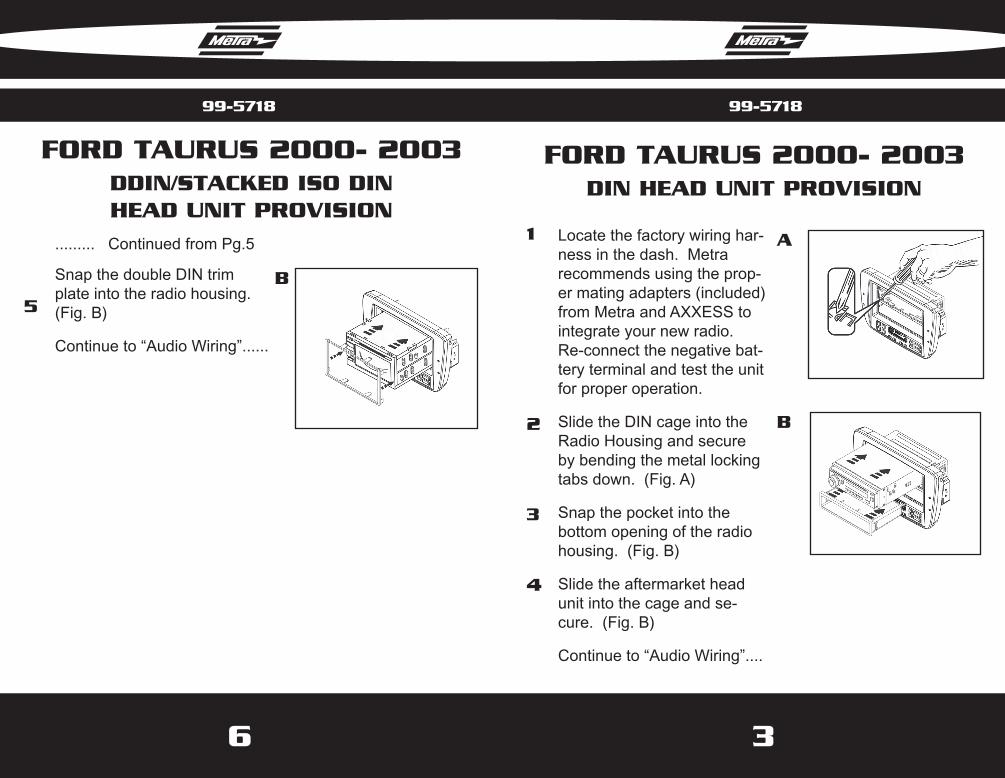
Locate the factory wiring har-ness in the dash. Metra recommends using the prop-er mating adapters (included) from Metra and AXXESS to integrate your new radio. Re-connect the negative bat-tery terminal and test the unit for proper operation.
Slide the DIN cage into the Radio Housing and secure by bending the metal locking tabs down. (Fig. A)
Snap the pocket into the bottom opening of the radio housing. (Fig. B)
Slide the aftermarket head unit into the cage and se-cure. (Fig. B)
Continue to “Audio Wiring”....
1
2
3
4
A
B
FORD TAURUS 2000- 2003DIN HEAD UNIT PROVISION
5
......... Continued from Pg.5
Snap the double DIN trim plate into the radio housing.(Fig. B)
Continue to “Audio Wiring”......
FORD TAURUS 2000- 2003DDIN/STACKED ISO DIN HEAD UNIT PROVISION
B
99-571899-5718
4 5
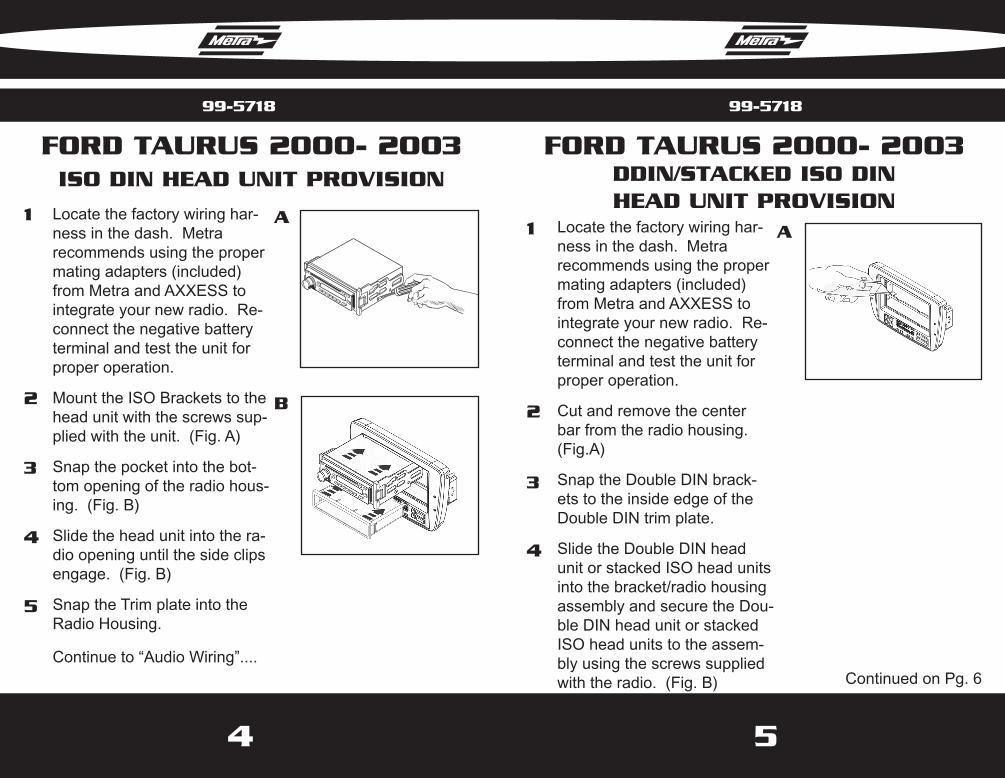
Locate the factory wiring har-ness in the dash. Metra recommends using the proper mating adapters (included) from Metra and AXXESS to integrate your new radio. Re-connect the negative battery terminal and test the unit for proper operation.
Mount the ISO Brackets to the head unit with the screws sup-plied with the unit. (Fig. A)
Snap the pocket into the bot-tom opening of the radio hous-ing. (Fig. B)
Slide the head unit into the ra-dio opening until the side clips engage. (Fig. B)
Snap the Trim plate into the Radio Housing.
Continue to “Audio Wiring”....
Locate the factory wiring har-ness in the dash. Metra recommends using the proper mating adapters (included) from Metra and AXXESS to integrate your new radio. Re-connect the negative battery terminal and test the unit for proper operation.
Cut and remove the center bar from the radio housing. (Fig.A)
Snap the Double DIN brack-ets to the inside edge of the Double DIN trim plate.
Slide the Double DIN head unit or stacked ISO head units into the bracket/radio housing assembly and secure the Dou-ble DIN head unit or stacked ISO head units to the assem-bly using the screws supplied with the radio. (Fig. B)
11
22
33
44
5
AA
B
FORD TAURUS 2000- 2003 FORD TAURUS 2000- 2003ISO DIN HEAD UNIT PROVISION DDIN/STACKED ISO DIN
HEAD UNIT PROVISION
Continued on Pg. 6
99-571899-5718