Apollo SL50 and SL60 - Integrated Avionicsintegratedavionics.net/IAS/manuals/UPSAT/SL...
137
Apollo SL50 and SL60 GPS Receiver and VHF Communications Transceiver User’s Guide 560-0955-00 March 1997
-
Upload
truongdiep -
Category
Documents
-
view
221 -
download
0
Transcript of Apollo SL50 and SL60 - Integrated Avionicsintegratedavionics.net/IAS/manuals/UPSAT/SL...
Apollo
SL50 and SL60GPS Receiver and
VHF Communications
Transceiver
User’s Guide
560-0955-00 March 1997

No part of this document may be reproduced in anyform or by any means without the express writtenconsent of II Morrow Inc.
II Morrow and Apollo are trademarks of II Morrow Inc.© 1997 by II Morrow Inc. All rights reserved.Printed in the U.S.A.
II Morrow Inc.Consumer Products Division2345 Turner Road, S.E.Salem, OR 97302
U.S.A. Toll Free 800.525.6726Canada Toll Free 800.654.3415International 503.391.3411FAX 503.364.2138
Visit our web page at http://www.iimorrow.comSend comments about this manual by email to:[email protected]
II MORROW
V I S I O N A R Y T H I N K I N G T O D A Y
Welcome ...
Welcome to a new era of aviation navigation
communication. Once again, II Morrow Inc. has set
new standards in features and ease of use for the
general aviation public. The Apollo SL50 and SL60
are unequaled in providing the features, level of
performance, and reliability that aviation users
require. The Apollo slim line series of avionics sets
a precedent that will be the standard that all other
avionics will be compared to. The Apollo SL50 is a
full-featured slim line GPS receiver. The Apollo
SL60 combines the capabilities of our outstanding
GPS receiver with a state-of-the-art VHF
communications transceiver in the same small
package. You can be confident in knowing that you
are the owner of the state-of-the-art in aviation
navigation and communication. Our products are
built to last and to satisfy your navigation needs.
i
Welcome ...
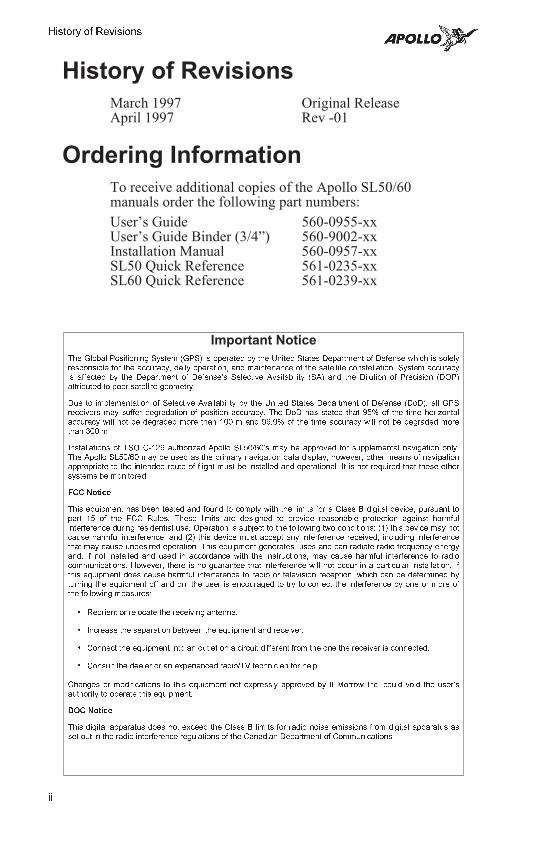
History of Revisions
March 1997 Original ReleaseApril 1997 Rev -01
Ordering Information
To receive additional copies of the Apollo SL50/60manuals order the following part numbers:
User’s Guide 560-0955-xxUser’s Guide Binder (3/4”) 560-9002-xxInstallation Manual 560-0957-xxSL50 Quick Reference 561-0235-xxSL60 Quick Reference 561-0239-xx
ii
History of Revisions
Important Notice
The Global Positioning System (GPS) is operated by the United States Department of Defense which is solely
responsible for the accuracy, daily operation, and maintenance of the satellite constellation. System accuracy
is affected by the Department of Defense�s Selective Availability (SA) and the Dilution of Precision (DOP)
attributed to poor satellite geometry.
Due to implementation of Selective Availability by the United States Department of Defense (DoD), all GPS
receivers may suffer degradation of position accuracy. The DoD has stated that 95% of the time horizontal
accuracy will not be degraded more than 100 m and 99.9% of the time accuracy will not be degraded more
than 300 m.
Installations of TSO C-129 authorized Apollo SL50/60�s may be approved for supplemental navigation only.
The Apollo SL50/60 may be used as the primary navigation data display, however, other means of navigation
appropriate to the intended route of flight must be installed and operational. It is not required that these other
systems be monitored.
FCC Notice
This equipment has been tested and found to comply with the limits for a Class B digital device, pursuant to
part 15 of the FCC Rules. These limits are designed to provide reasonable protection against harmful
interference during residential use. Operation is subject to the following two conditions: (1) this device may not
cause harmful interference, and (2) this device must accept any interference received, including interference
that may cause undesired operation. This equipment generates, uses and can radiate radio frequency energy
and, if not installed and used in accordance with the instructions, may cause harmful interference to radio
communications. However, there is no guarantee that interference will not occur in a particular installation. If
this equipment does cause harmful interference to radio or television reception, which can be determined by
turning the equipment off and on, the user is encouraged to try to correct the interference by one or more of
the following measures:
� Reorient or relocate the receiving antenna.
� Increase the separation between the equipment and receiver.
� Connect the equipment into an outlet on a circuit different from the one the receiver is connected.
� Consult the dealer or an experienced radio/TV technician for help.
Changes or modifications to this equipment not expressly approved by II Morrow Inc. could void the user�s
authority to operate this equipment.
DOC Notice
This digital apparatus does not exceed the Class B limits for radio noise emissions from digital apparatus as
set out in the radio interference regulations of the Canadian Department of Communications.
TABLE OF CONTENTS
Welcome ...· · · · · · · · · · · · · · · · · · · · · · · · · · · · · · · · · · · · · · i
History of Revisions · · · · · · · · · · · · · · · · · · · · · · · · · · · · · · ii
Ordering Information · · · · · · · · · · · · · · · · · · · · · · · · · · · · · ii
Introduction · · · · · · · · · · · · · · · · · · · · · · · · · · · · · · · · · · · · · 1
SL50· · · · · · · · · · · · · · · · · · · · · · · · · · · · · · · · · · · · · 1
SL60· · · · · · · · · · · · · · · · · · · · · · · · · · · · · · · · · · · · · 2
Display· · · · · · · · · · · · · · · · · · · · · · · · · · · · · · · · · · · 2
Annun-ciators· · · · · · · · · · · · · · · · · · · · · · · · · · · · · · · · · · · · 3
Relative Bearing Indicator· · · · · · · · · · · · · · · · · 3
Controls· · · · · · · · · · · · · · · · · · · · · · · · · · · · · · · · · · 4
Power Knob (SL50)· · · · · · · · · · · · · · · · · · · · · · 4
Small and Large Knobs· · · · · · · · · · · · · · · · · · · 4
Keys· · · · · · · · · · · · · · · · · · · · · · · · · · · · · · · · · · · · · 4
Flip/Flop (Arrows) - SL60· · · · · · · · · · · · · · · · 4
NRST (Nearest Waypoint) - SL50· · · · · · · · · · 4
COM (Communications Radio Mode) - SL60 · 4
WPT (Waypoint) - SL50· · · · · · · · · · · · · · · · · · 5
NAV (Navigation)· · · · · · · · · · · · · · · · · · · · · · · 5
SYS (System Mode)· · · · · · · · · · · · · · · · · · · · · 5
MSG (Message)· · · · · · · · · · · · · · · · · · · · · · · · · 5
DIRECT-TO · · · · · · · · · · · · · · · · · · · · · · · · · · · 5
INFO (Information)· · · · · · · · · · · · · · · · · · · · · · 5
i

SEL (Select)· · · · · · · · · · · · · · · · · · · · · · · · · · · 5
ENT (Enter)· · · · · · · · · · · · · · · · · · · · · · · · · · · · 5
Apollo SL50/60 Features· · · · · · · · · · · · · · · · · · · · · · · 6
Getting Started the First Time · · · · · · · · · · · · · · · · · · 9
Power Up· · · · · · · · · · · · · · · · · · · · · · · · · · · · · · · · · 9
Seed Position· · · · · · · · · · · · · · · · · · · · · · · · · · · · · · 9
Entering a Seed Position· · · · · · · · · · · · · · · · · · · · 10
Change Reference Waypoint· · · · · · · · · · · · · · 10
Change Lat/Lon Reference Position· · · · · · · · 11
Checking GPS Signal Strength· · · · · · · · · · · · · · · 13
Entering a Destination Waypoint· · · · · · · · · · · · · · 14
Using the Nearest Waypoint Function· · · · · · 14
· · · · · · · · · · · · · · · · · · · · · · · · · · · · · · · · · · · · · 14
Using the Direct-To Function· · · · · · · · · · · · · 15
Navigation Basics· · · · · · · · · · · · · · · · · · · · · · · · · · · · 17
About the Navigation Function· · · · · · · · · · · · · · · 17
About the Navigation Function Displays· · · · · · · · 17
Nav Home Page· · · · · · · · · · · · · · · · · · · · · · · · · · · 17
Autonav· · · · · · · · · · · · · · · · · · · · · · · · · · · · · · · · · 18
Nav Pages· · · · · · · · · · · · · · · · · · · · · · · · · · · · · · · · 19
Nav Display Choices· · · · · · · · · · · · · · · · · · · · 19
Emergency Search· · · · · · · · · · · · · · · · · · · · · · · · · 25
Starting Emergency Search· · · · · · · · · · · · · · · 25
Searching Around a Reference Waypoint· · · · 26
ii

Setting Runway Limits· · · · · · · · · · · · · · · · · · 27
Special Use Airspace· · · · · · · · · · · · · · · · · · · · · · · 28
Parallel Track Offset· · · · · · · · · · · · · · · · · · · · · · · 29
GPS Position· · · · · · · · · · · · · · · · · · · · · · · · · · · · · 30
Countdown Timer· · · · · · · · · · · · · · · · · · · · · · · · · 30
From/To/-Next Waypoint· · · · · · · · · · · · · · · · · · · · · · · · · · · · 32
Creating From/To/Next Waypoints· · · · · · · · · 32
Placing the To Waypoint on Hold· · · · · · · · · · 35
Using Direct-To· · · · · · · · · · · · · · · · · · · · · · · · · · · 36
Direct-To OBS· · · · · · · · · · · · · · · · · · · · · · · · · · · · 36
Waypoint Functions · · · · · · · · · · · · · · · · · · · · · · · · · · · · · 37
Waypoint Information· · · · · · · · · · · · · · · · · · · · · · 37
Available Waypoint Information· · · · · · · · · · · · · · 37
ARPT Waypoint Information· · · · · · · · · · · · · 37
Getting Information about a Waypoint· · · · · · · · · 39
Database Update· · · · · · · · · · · · · · · · · · · · · · · · · · 40
Nearest(EmergencySearch) Waypoint· · · · · · · · · 41
Starting Emergency Search· · · · · · · · · · · · · · · 41
Create User Waypoint by Lat/Lon· · · · · · · · · · · · · 42
Create User Waypoint by Radial/-Distance· · · · · · · · · · · · · · · · · · · · · · · · · · · · · · · · · 44
Delete User Waypoint· · · · · · · · · · · · · · · · · · · · · · 45
Modify User Waypoint· · · · · · · · · · · · · · · · · · · · · 46
iii
Waypoint Comments· · · · · · · · · · · · · · · · · · · · · · · 46
Flight Plan Functions · · · · · · · · · · · · · · · · · · · · · · · · · 47
Flight Plan Pages· · · · · · · · · · · · · · · · · · · · · · · · · · 47
Reaching the Flight Plan Function· · · · · · · · · 47
Active Flight Plan· · · · · · · · · · · · · · · · · · · · · · 48
Creating a Flight Plan· · · · · · · · · · · · · · · · · · · · · · 48
Flight Plan Leg Information· · · · · · · · · · · · · · · · · · 50
ETA · · · · · · · · · · · · · · · · · · · · · · · · · · · · · · · · · 51
ETA?· · · · · · · · · · · · · · · · · · · · · · · · · · · · · · · · 51
Leg ETE · · · · · · · · · · · · · · · · · · · · · · · · · · · · · 51
Leg ETE?· · · · · · · · · · · · · · · · · · · · · · · · · · · · · 51
ETE · · · · · · · · · · · · · · · · · · · · · · · · · · · · · · · · · 51
ETE?· · · · · · · · · · · · · · · · · · · · · · · · · · · · · · · · 52
Fuel? · · · · · · · · · · · · · · · · · · · · · · · · · · · · · · · · 52
Direct-To· · · · · · · · · · · · · · · · · · · · · · · · · · · · · 53
Manual Leg Activation· · · · · · · · · · · · · · · · · · · · · 53
Flight Plan Editing· · · · · · · · · · · · · · · · · · · · · · · · · 53
Changing Existing Flight Plan Legs· · · · · · · · 54
Inserting a New Waypoint· · · · · · · · · · · · · · · · 54
Deleting a Waypoint· · · · · · · · · · · · · · · · · · · · 55
Flight Plan Options· · · · · · · · · · · · · · · · · · · · · · · · 56
Activate· · · · · · · · · · · · · · · · · · · · · · · · · · · · · · 56
Rev Activate· · · · · · · · · · · · · · · · · · · · · · · · · · 56
Reactivate· · · · · · · · · · · · · · · · · · · · · · · · · · · · 56
iv
Rename· · · · · · · · · · · · · · · · · · · · · · · · · · · · · · 56
Copy Plan· · · · · · · · · · · · · · · · · · · · · · · · · · · · 57
Estimate Ground Speed· · · · · · · · · · · · · · · · · · 57
Clear Waypoints· · · · · · · · · · · · · · · · · · · · · · · 57
Reverse Flight Plan· · · · · · · · · · · · · · · · · · · · · 57
Estimated Fuel Flow· · · · · · · · · · · · · · · · · · · · 57
Delete Plan· · · · · · · · · · · · · · · · · · · · · · · · · · · 58
Hold· · · · · · · · · · · · · · · · · · · · · · · · · · · · · · · · · 58
Continue · · · · · · · · · · · · · · · · · · · · · · · · · · · · · 59
Destination Waypoint Information· · · · · · · · · · · · 59
Flight Plan Comments· · · · · · · · · · · · · · · · · · · · · · 59
Copying the Active Flight Plan· · · · · · · · · · · · · · · 60
System Functions· · · · · · · · · · · · · · · · · · · · · · · · · · · · · · · · 61
Flight Plans· · · · · · · · · · · · · · · · · · · · · · · · · · · · · · 61
Waypoint Database· · · · · · · · · · · · · · · · · · · · · · · · 61
Com Radio Information (SL60 Only)· · · · · · · 62
Software Version· · · · · · · · · · · · · · · · · · · · · · · 63
RF Signal Strength· · · · · · · · · · · · · · · · · · · · · 63
Audio Noise Level· · · · · · · · · · · · · · · · · · · · · · 63
Intercom Squelch LevelAdjustment· · · · · · · · 63
Sidetone LevelAdjustment· · · · · · · · · · · · · · · 64
Navigation Information· · · · · · · · · · · · · · · · · · · · · 65
Airspace Setup· · · · · · · · · · · · · · · · · · · · · · · · · 65
Airspace Buffers· · · · · · · · · · · · · · · · · · · · · · · 65
v
Airspace Selections· · · · · · · · · · · · · · · · · · · · · 66
Autonav Time· · · · · · · · · · · · · · · · · · · · · · · · · 67
Navigation Mode Programmable Pages andAutonav Pages· · · · · · · · · · · · · · · · · · · · · · · · · 67
Creating a New Custom Nav Page· · · · · · · · · 69
Setting Units· · · · · · · · · · · · · · · · · · · · · · · · · · 71
Magnetic Variation· · · · · · · · · · · · · · · · · · · · · 71
Flight Timer Trigger· · · · · · · · · · · · · · · · · · · · 72
Direct-To Entry Options· · · · · · · · · · · · · · · · · 73
CDI Scaling· · · · · · · · · · · · · · · · · · · · · · · · · · · 74
System Information· · · · · · · · · · · · · · · · · · · · · · · · 75
Date and Time· · · · · · · · · · · · · · · · · · · · · · · · · 75
Software Version· · · · · · · · · · · · · · · · · · · · · · · 76
Fuel Measure Units· · · · · · · · · · · · · · · · · · · · · 77
Test Display· · · · · · · · · · · · · · · · · · · · · · · · · · · 77
Owner Information· · · · · · · · · · · · · · · · · · · · · 77
GPS Sensor· · · · · · · · · · · · · · · · · · · · · · · · · · · · · · 79
Satellite Search Status· · · · · · · · · · · · · · · · · · · 80
GPS Date and Time Page· · · · · · · · · · · · · · · · 80
GPS Normal Reset Page· · · · · · · · · · · · · · · · · 80
Comm Radio Operation· · · · · · · · · · · · · · · · · · · · · · · 81
Power On/Off· · · · · · · · · · · · · · · · · · · · · · · · · · · · · 81
Volume· · · · · · · · · · · · · · · · · · · · · · · · · · · · · · · · · · 81
vi
Small and Large Knobs· · · · · · · · · · · · · · · · · · 81
SelectingFrequencies· · · · · · · · · · · · · · · · · · · · · · · 81
Frequency Monitoring· · · · · · · · · · · · · · · · · · · · · · 82
Recalling a Frequency· · · · · · · · · · · · · · · · · · · · · · 83
TO, FROM, and INFO Frequency Database· · 83
Auto Stored Frequencies (Auto) · · · · · · · · · 85
User Stored Frequencies· · · · · · · · · · · · · · · · · 86
Weather Channels· · · · · · · · · · · · · · · · · · · · · · 87
Emergency Channel· · · · · · · · · · · · · · · · · · · · 87
Intercom Function· · · · · · · · · · · · · · · · · · · · · · · · · 88
Introduction to GPS Navigation · · · · · · · · · · · · · · · · · · · 89
GPS Overview· · · · · · · · · · · · · · · · · · · · · · · · · · · · 89
GPS System Accuracy· · · · · · · · · · · · · · · · · · · · · · 90
Summary· · · · · · · · · · · · · · · · · · · · · · · · · · · · · · · · 90
Start Up Displays · · · · · · · · · · · · · · · · · · · · · · · · · · · · · · · 91
Owner Message· · · · · · · · · · · · · · · · · · · · · · · · · · · 91
Memory Tests· · · · · · · · · · · · · · · · · · · · · · · · · · · · 91
Software Memory Test· · · · · · · · · · · · · · · · · · 92
Non-Volatile RAM Tests· · · · · · · · · · · · · · · · 93
User Database Memory Failure· · · · · · · · · · · · 93
Miscellaneous NVRAM Memory Failure· · · · 94
Database Test· · · · · · · · · · · · · · · · · · · · · · · · · 94
Special Use Airspace Displays· · · · · · · · · · · · · · · 95
Database Message· · · · · · · · · · · · · · · · · · · · · · · · · 95
vii
IFR Output Tests· · · · · · · · · · · · · · · · · · · · · · · · · · 95
Message Function· · · · · · · · · · · · · · · · · · · · · · · · · · · · 97
New Messages· · · · · · · · · · · · · · · · · · · · · · · · · · · · 98
Old Messages· · · · · · · · · · · · · · · · · · · · · · · · · · · · · 98
Messages· · · · · · · · · · · · · · · · · · · · · · · · · · · · · · · · 98
Special Use Airspace Messages· · · · · · · · · · · 98
Soon· · · · · · · · · · · · · · · · · · · · · · · · · · · · · · · · · 98
· · · · · · · · · · · · · · · · · · · · · · · · · · · · · · · · · · · · · 98
· · · · · · · · · · · · · · · · · · · · · · · · · · · · · · · · · · · · · 98
Close· · · · · · · · · · · · · · · · · · · · · · · · · · · · · · · · 99
Inside· · · · · · · · · · · · · · · · · · · · · · · · · · · · · · · · 99
Empty To Waypoint: Cannot Compute Nav · · 99
GPS Communications Failure· · · · · · · · · · · · · 99
GPS Command Failure· · · · · · · · · · · · · · · · · · 99
GPS Self Test Failure· · · · · · · · · · · · · · · · · · 100
GPS Sensor Lat/Lon Failure· · · · · · · · · · · · · 100
GPS RAIM Not Available· · · · · · · · · · · · · · · 100
GPS RAIM Position Error· · · · · · · · · · · · · · · 100
GPS HDOP Position Error· · · · · · · · · · · · · · 101
Arrival At the To Waypoint · · · · · · · · · · · · · 101
Holding at the To Waypoint· · · · · · · · · · · · · 101
To Waypoint Sequence· · · · · · · · · · · · · · · · · 102
Auto OBS Crossing Holding Waypoint· · · · 102
viii
User Database Memory Loss· · · · · · · · · · · · 102
Comm Radio Failure (SL60 only)· · · · · · · · · 102
Flight Plan Memory Loss· · · · · · · · · · · · · · · 103
User Memory Failure· · · · · · · · · · · · · · · · · · 103
Database Expired· · · · · · · · · · · · · · · · · · · · · · 103
Database Invalid· · · · · · · · · · · · · · · · · · · · · · 103
Manual Magnetic Variation· · · · · · · · · · · · · · 104
Low Internal Battery Voltage· · · · · · · · · · · · 104
High Battery Voltage· · · · · · · · · · · · · · · · · · · 104
Countdown Timer Expired· · · · · · · · · · · · · · 104
Flight Simulator · · · · · · · · · · · · · · · · · · · · · · · · · · · · · · · 105
About the Flight Simulator· · · · · · · · · · · · · · · · · 105
Starting the Flight Simulation· · · · · · · · · · · · · · · 106
Flight Simulator Operations· · · · · · · · · · · · · · · · · 107
Troubleshooting · · · · · · · · · · · · · · · · · · · · · · · · · · · · · · · 109
Contacting the Factory· · · · · · · · · · · · · · · · · · · · · 109
Glossary of Navigation Terms· · · · · · · · · · · · · · · · · · · · 111
ix

Introduction
This guide describes the operation of the ApolloSL50 GPS Receiver and the Apollo SL60 GPSReceiver and VHF Communication Transceiver.
SL50 The Apollo SL50 is a high performance GPS
receiver with a high intensity LED display packed
into a 1.3 inch high by 6.25 inch wide package that
conserves panel space. The SL50 uses the same
8-channel GPS engine that is used in II Morrow’s
high end TSO C129 terminal and enroute certified
products. The 32 character alphanumeric LED
display uses an automatic intensity control to keep
it easily readable in all conditions from direct
sunlight to the dark of night.
The Apollo SL50 has a wealth of easy to use
features that every pilot needs. The large waypoint
database has information about airports, VORs,
NDBs, intersections, and special use airspaces that
makes the Apollo SL50 an encyclopedia of
aviation. The database can be updated by
connecting the SL50 serial port to a computer with
II Morrow’s innovative Waypoint Manager
software. The database can also include 200 custom
1
Introduction
Power
Photocell
NearestWaypoint
NavigationMode
Direct To
MessageMode
SystemMode
GPS
OFF/ON
Ete SLE 00:22 Brg 082 74 nmPOLLOA SL50
SELINFO ENTD
InformationDisplay
Large, OuterKnob
Small, InnerKnob
WaypointMode
InfoMode
Select
Enter
WPT SYSNAV MSGNRST
MessageAnnunciator
Apollo SL50 Front Panel Description

waypoints created by the user. Ten flight plans can
be saved with up to twenty legs for setting up
custom tailored routes. The detailed Navigation
information displays are also customizable and can
be set to automatically scroll through the desired
information. The Emergency Search feature,
invented by II Morrow, when used with the
Direct-To feature makes it easy to quickly select an
airport as a new destination whether because of a
change in plans, or to react to an emergency.
SL60 The Apollo SL60 combines all of the features of the
SL50 with a state-of-the-art VHF communications
transceiver in the same compact package. The VHF
comm radio covers all 760 channels with 8+ watts
(10 W typical for most frequencies) without any
external cooling devices required. A built-in
intercom capability works either with or replaces an
audio panel. The features and packaging of the
SL60 keeps your power requirements and
installation costs low. You can easily switch
between active and standby frequencies, select a
weather channel, activate the emergency channel, or
choose from one of ten customized frequencies or
one of the last ten used.
Display
2
Introduction
Power/Volume/Squelch
Photocell
Flip/FlopFrequency
NavigationMode
Direct To
MessageMode
SystemMode
TX
GPS/COMM
PULL SQUELCH
VOL
OFF
119.80 s121.50POLLOA SL60
COM SYSNAV MSG SELINFO ENTD
BRG 210' 17.1nm
ActiveFrequency
Large, OuterKnob
Small, InnerKnob
TransmitAnnunciator
Comm XcvrMode
InfoMode
Select
Enter
StandbyFrequency
NAVInfo
MessageAnnunciator
Apollo SL60 Front Panel Description

The display is a 1-line by 32-character 5x7 dot
matrix alphanumeric display. A photocell is located
in the top left corner of the front panel display. The
photocell automatically controls the light intensity
of the display LEDs from low brightness at night to
high brightness during daylight operation.
Annun-ciators
Several annunciators are used to help indicate the
operating modes of your SL60. The TX (Transmit)
annunciator is lighted whenever you are
transmitting. If the avionics bus drops below 9
VDC, the SL60 will not transmit. An LED will be
lighted above the WPT/COM, NAV, SYS, or MSG
keys when they are pressed. An “s” normally
appears to the left of the Standby frequency. An “I”
appears to the left of the Standby frequency when
the Intercom function is active. An “m” will appear
to the left of the Standby frequency when you are
using the Monitor function.
TX - Transmit (SL60)
s - Standby Frequency (SL60)
m - Monitor Mode (SL60)
I - Intercom (SL60)
Relative Bearing Indicator
The Relative Bearing Indicator indicates anapproximate bearing to a waypoint or airspacerelative to the aircraft’s current Track when yourcurrent ground speed is more than 5 knots. Thefollowing illustration describes the bearing rangefor each arrow.
M N O P Q R \ T23º to
67º
68º to
112º
113º
to
157º
158º
to
202º
203º
to
247º
248º
to
292º
293º
to
337º
338º
to
22º
3
Introduction

Controls Power/Volume/Squelch Knob(SL60)The knob on the left side of the SL60 controls power
on/off, volume, and squelch test. Rotate the knob
clockwise (CW) past the detent to turn the power on.
Continue rotating the knob to the right to increase
speaker and headphone amplifier volume level.
Rotate the knob to the left to reduce the volume
level. Pull the knob out to disable automatic squelch.
Power Knob (SL50)
The knob on the left side of the SL50 controls
power on/off. Rotate the knob clockwise (CW) past
the detent to turn the power on. Rotate the knob
fully counterclockwise to turn the power off.
Small and Large Knobs
The dual concentric knobs on the right side of the
front panel are used to select pages, edit characters
and values, or other options.
Keys Nine backlighted keys allow you access the
functions in your Apollo SL50/60.
Flip/Flop (Arrows) - SL60
Press the Flip/Flop key to switch between the
active (left-most) and standby (right-most)
frequency while in the Nav or Com functions. You
may use an optional external Flip/Flop key for the
same operation as the front panel control. Switching
between frequencies is disabled while you are
transmitting or editing in any function.
NRST (Nearest Waypoint) - SL50
The Nearest Waypoint (Emergency) mode displays
the closest waypoints to your position.
COM (Communications Radio Mode) - SL60
Press the COM key to operate the Communications
radio functions.
4
Introduction
COM
NRST
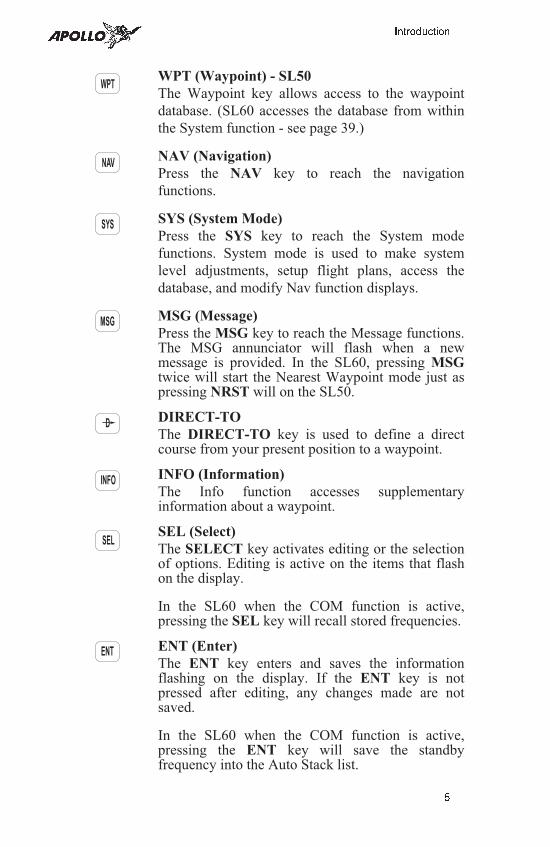
WPT (Waypoint) - SL50
The Waypoint key allows access to the waypoint
database. (SL60 accesses the database from within
the System function - see page 39.)
NAV (Navigation)
Press the NAV key to reach the navigation
functions.
SYS (System Mode)
Press the SYS key to reach the System mode
functions. System mode is used to make system
level adjustments, setup flight plans, access the
database, and modify Nav function displays.
MSG (Message)
Press the MSG key to reach the Message functions.The MSG annunciator will flash when a newmessage is provided. In the SL60, pressing MSGtwice will start the Nearest Waypoint mode just aspressing NRST will on the SL50.
DIRECT-TO
The DIRECT-TO key is used to define a directcourse from your present position to a waypoint.
INFO (Information)
The Info function accesses supplementaryinformation about a waypoint.
SEL (Select)
The SELECT key activates editing or the selectionof options. Editing is active on the items that flashon the display.
In the SL60 when the COM function is active,pressing the SEL key will recall stored frequencies.
ENT (Enter)
The ENT key enters and saves the informationflashing on the display. If the ENT key is notpressed after editing, any changes made are notsaved.
In the SL60 when the COM function is active,pressing the ENT key will save the standbyfrequency into the Auto Stack list.
5
Introduction
SEL
ENT
INFO
D
NAV
SYS
MSG
WPT
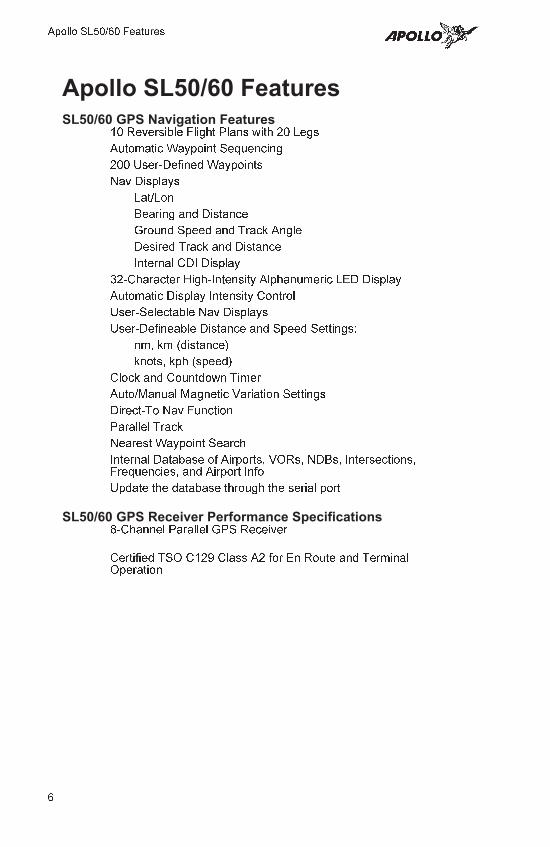
Apollo SL50/60 FeaturesSL50/60 GPS Navigation Features
10 Reversible Flight Plans with 20 Legs
Automatic Waypoint Sequencing
200 User-Defined Waypoints
Nav Displays
Lat/Lon
Bearing and Distance
Ground Speed and Track Angle
Desired Track and Distance
Internal CDI Display
32-Character High-Intensity Alphanumeric LED Display
Automatic Display Intensity Control
User-Selectable Nav Displays
User-Defineable Distance and Speed Settings:
nm, km (distance)
knots, kph (speed)
Clock and Countdown Timer
Auto/Manual Magnetic Variation Settings
Direct-To Nav Function
Parallel Track
Nearest Waypoint Search
Internal Database of Airports, VORs, NDBs, Intersections,Frequencies, and Airport Info
Update the database through the serial port
SL50/60 GPS Receiver Performance Specifications8-Channel Parallel GPS Receiver
Certified TSO C129 Class A2 for En Route and TerminalOperation
6
Apollo SL50/60 Features

SL60 Comm Radio Features760 Communication Channels
Frequency Range: 118 to 136.975 MHz
Weather Channels: Receive only
Active and Standby Flip/Flop Frequencies
Volume Control
32-Character High-Intensity Alphanumeric LED Display
Transmit Status Indicator
Backlit Keypad Controls
Automatic Display Intensity Control
2x10 Frequency Memory and Recall
Stores/Recalls Ten User-Defined Frequencies
Stores/Recalls Previous Ten Frequencies
Frequency Monitor Function (listens to standby whilemonitoring the active)
Squelch Test Function
Stuck Mic Time-Out - 35 seconds
SL60 Comm Radio PerformanceTransmit Power: 8 watts Carrier Power (35 watts Input Power)
Input Voltage Range: 10 to 40 VDC
Operating Temperature Range: -20° to +55° C
Certified TSO C37d (transmitting)
Certified TSO C38d (receiving)
Certified TSO C128 (microphone)
Physical SpecificationsHeight: 1.3 inchesWidth: 6.25 inchesDepth: 11.45 inches
Weight:
SL50: 2.3 poundsSL60: 2.8 pounds
InterfacesExternal:
CDI Left/Right
TO/FROM Flag
Nav Valid Flag
Nav Superflag
Three External Annunciators
RS-232 Bi-Directional Serial Ports
Optional External:
Flip/Flop Switch
OBS/Hold
7
Apollo SL50/60 Features

Notes
8
Apollo SL50/60 Features
Getting Started the First Time
This section explains how to get started using yourApollo SL50/60. Information in this sectionexplains how to startup the unit, check signals fromthe GPS satellites, enter a seed position, and GOTOa destination waypoint.
It is necessary to enter a seed position and thecurrent time the first time you turn the unit on.
• Power on
• Enter a seed position (your dealer may have alreadycompleted this step for you), if necessary
• Enter the current time
• Check satellite signal strength
• Enter a “GOTO” waypoint
• Begin navigating
Power Up Turn the Power knob clockwise to switch the unit
on. The startup screen, testing, position, and
database information shows on the display for
several seconds and then will go into the Navigation
function.
SeedPosition
Each time the Apollo SL50/60 is switched on, it must
locate satellites in the sky to acquire signals before
determining a position fix in a complex process
involving lengthy mathematical operations. Without a
seed position and the current UTC time and date, this
process can take 10 minutes or more to complete.
Enter a Seed Position to allow the receiver to quickly
locate and track available satellites.
NoteThe seed position and current time only
need to be entered the first time the receiver
is switched on. This information is stored in
memory and need not be entered again. If
you move about three hundred miles
without the Apollo SL50/60 turned on and
tracking its position, reenter the seed
position.
9
Getting Started the First Time

Entering aSeed
Position
After the start up tests, you will always have the
choice of entering a Seed Position. The Seed
Position is a starting reference point so the GPS
receiver knows what satellites it is looking for. If a
Seed Position has been previously entered, you do
not need to select a new Present Position or a
Reference Waypoint. If you do not make any
selections, the Apollo SL50/60 will automatically
progress into the Navigation function.
1. The previous Seed Position will display with the
choice of SEL/ENT for a few seconds. If you don’t
do anything, the Apollo SL50/60 will continue
normally. You can also press ENT to accept the
current position, though this is not required.
0.3nm 2770 To SLE SEL/ENT
2. Press SEL to change the Seed Position.
3. The current Reference Position will be displayed
and the Chg? prompt will flash.
44054.46N 122059.69W Ref: Chg?
Press ENT to change the Reference Waypoint or
turn the Large knob to change to Lat/Lon
Reference Position. Use the appropriate following
description: Change Reference Waypoint or Change
Lat/Lon Reference Position.
Change Reference Waypoint
1. After pressing ENT, the first character of the
Reference Waypoint name will flash. You can
change the waypoint type by turning the Large
knob ccw one click and the turning the Small
knob.
aPDX c PORTLAND OR USA
10
Getting Started the First Time
SEL
ENT
ENT
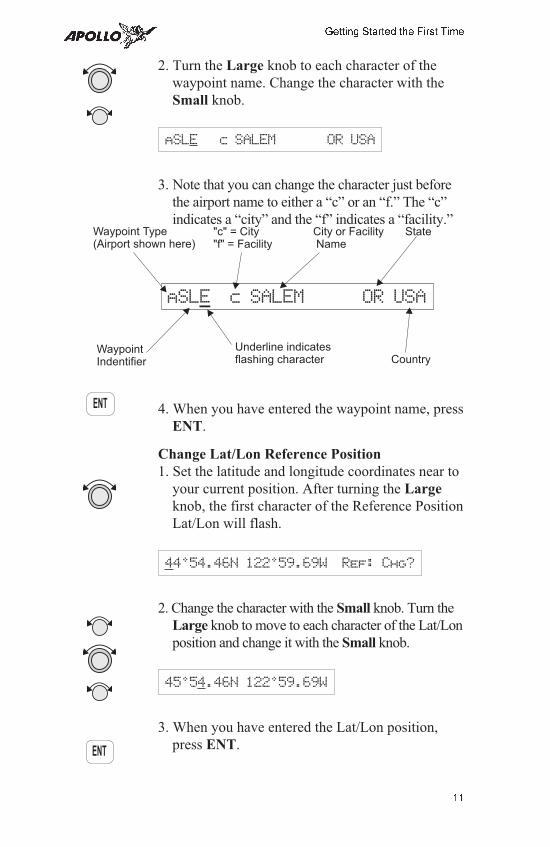
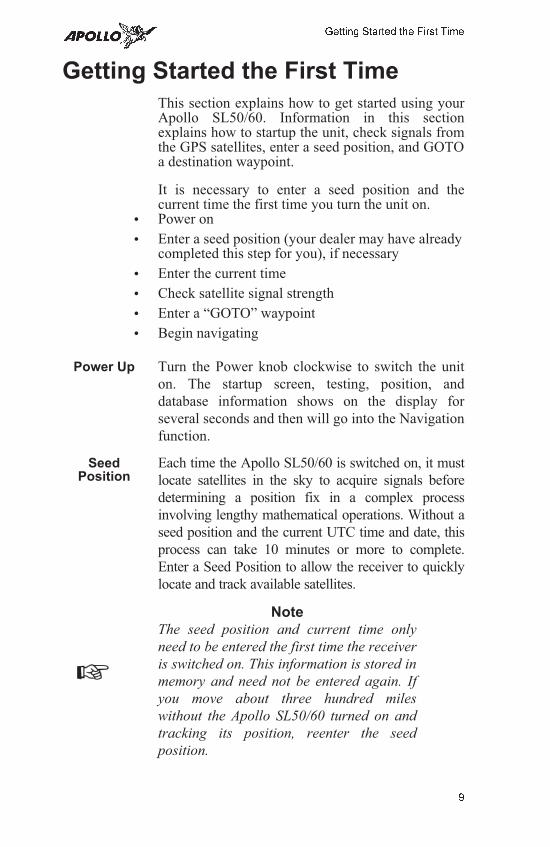
2. Turn the Large knob to each character of the
waypoint name. Change the character with the
Small knob.
aSLE c SALEM OR USA
3. Note that you can change the character just before
the airport name to either a “c” or an “f.” The “c”
indicates a “city” and the “f” indicates a “facility.”
4. When you have entered the waypoint name, press
ENT.
Change Lat/Lon Reference Position
1. Set the latitude and longitude coordinates near to
your current position. After turning the Large
knob, the first character of the Reference Position
Lat/Lon will flash.
44054.46N 122059.69W Ref: Chg?
2. Change the character with the Small knob. Turn the
Large knob to move to each character of the Lat/Lon
position and change it with the Small knob.
45054.46N 122059.69W
3. When you have entered the Lat/Lon position,
press ENT.
11
Getting Started the First Time
ENT
ENT
aSL c SALEM OR USAE
Waypoint Type(Airport shown here)
WaypointIndentifier
Underline indicatesflashing character
"c" = City"f" = Facility
City or FacilityName
State
Country

4. After entering the Seed Position, you will be
prompted next to clear the active flight plan.
Choose Yes or No with the Small knob. Press
ENT to now continue normal operations.
Clear Active Flight Plan YES?
12
Getting Started the First Time
ENT
CheckingGPS Signal
Strength
The unit shows the GPS signal strength screen in
the GPS Sensor function. Make it a habit to check
this screen to make sure that the unit is properly
tracking visible satellites before you fly. The Apollo
SL50/60 requires signals from at least four satellites
to calculate a 3D position fix (Lat/Lon and GPS
altitude). More details are available in the GPS
Sensor part of the System section of this manual,
see page 79.
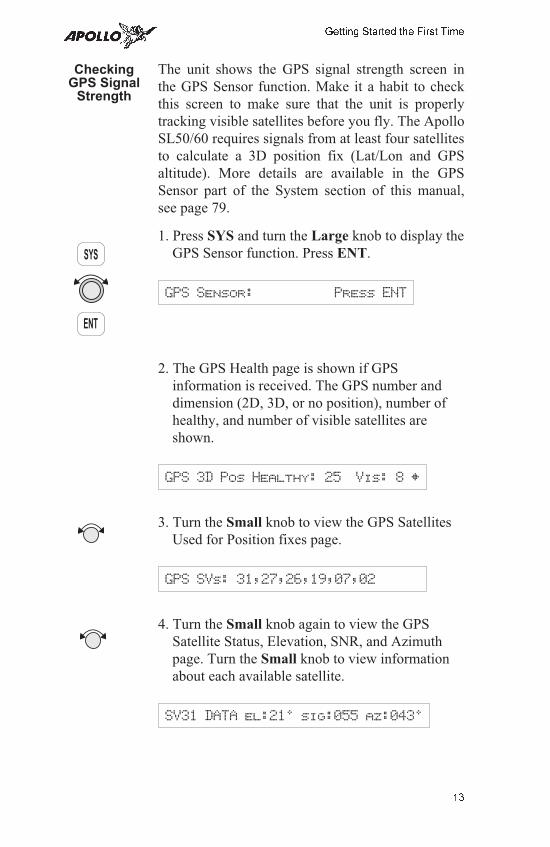
1. Press SYS and turn the Large knob to display the
GPS Sensor function. Press ENT.
GPS Sensor: Press ENT
2. The GPS Health page is shown if GPS
information is received. The GPS number and
dimension (2D, 3D, or no position), number of
healthy, and number of visible satellites are
shown.
GPS 3D Pos Healthy: 25 Vis: 8 Y
3. Turn the Small knob to view the GPS Satellites
Used for Position fixes page.
GPS SVs: 31,27,26,19,07,02
4. Turn the Small knob again to view the GPS
Satellite Status, Elevation, SNR, and Azimuth
page. Turn the Small knob to view information
about each available satellite.
SV31 DATA el:210 sig:055 az:0430
13
Getting Started the First Time
ENT
SYS

NoteThe GPS antenna must be able to “see”
each satellite it is tracking. If a satellite is
“shaded” by the wing or fuselage during a
turn, it may temporarily lose track of that
satellite. If this happens, or if the geometry
of the satellites available is poor, the unit
may temporarily calculate a “2D Fix” and
Nav information will not be available. A
NAV INVALID FLAG will be generated and
all Nav information will be dashed.
Entering aDestinationWaypoint
With a seed position and the current UTC time and
date set, the Apollo SL50/60 is ready to begin
navigating a trip. Prepare for trip navigation by
entering a destination waypoint.
Using the Nearest Waypoint Function
1. Press the NRST key in the SL50 or press MSG
twice in the SL60. The GOTO Nearest Waypoint
function is displayed with the distance and
bearing from your present position to the
indicated waypoint. See page 41 in the Waypoint
section for a more complete description of using
the Nearest Waypoint function.
ARPT 1 SLE Brg 3520 5.4nm
2. Turn the Large knob to view the different
waypoint types.
VOR 1 UBG Brg 3440 26.6nm
3. Turn the Small knob to view the 20 nearest
waypoints.
VOR 2 CVO Brg 1890 27.5nm
14
Getting Started the First Time
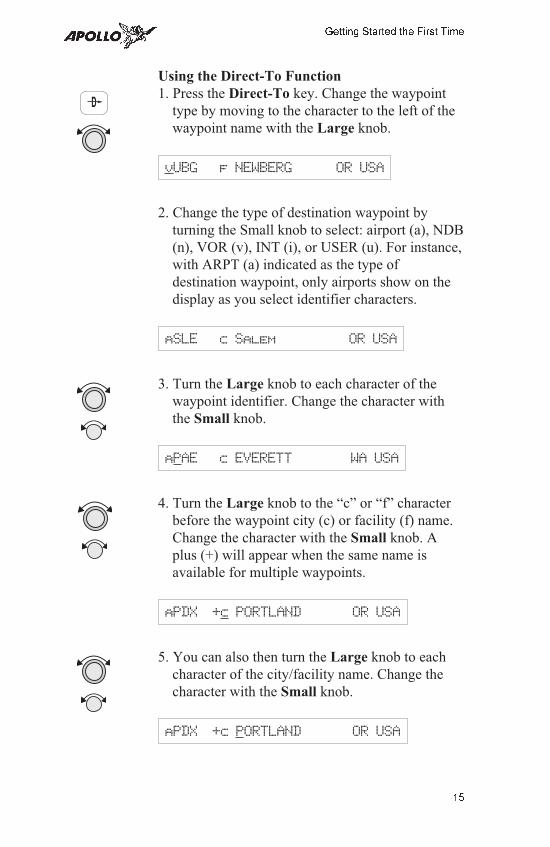
Using the Direct-To Function
1. Press the Direct-To key. Change the waypoint
type by moving to the character to the left of the
waypoint name with the Large knob.
vUBG f NEWBERG OR USA
2. Change the type of destination waypoint by
turning the Small knob to select: airport (a), NDB
(n), VOR (v), INT (i), or USER (u). For instance,
with ARPT (a) indicated as the type of
destination waypoint, only airports show on the
display as you select identifier characters.
aSLE c Salem OR USA
3. Turn the Large knob to each character of the
waypoint identifier. Change the character with
the Small knob.
aPAE c EVERETT WA USA
4. Turn the Large knob to the “c” or “f” character
before the waypoint city (c) or facility (f) name.
Change the character with the Small knob. A
plus (+) will appear when the same name is
available for multiple waypoints.
aPDX +c PORTLAND OR USA
5. You can also then turn the Large knob to each
character of the city/facility name. Change the
character with the Small knob.
aPDX +c PORTLAND OR USA
15
Getting Started the First Time
D
6. Press SEL again to select the entire city name.
aPDX +c PORTLAND OR USA
7. Turn the Small knob to view each airport with
the current city name. The city name can be a
maximum of 16 characters. Longer names will be
truncated.
aHIO +c PORTLAND OR USA
8. When you have entered the waypoint name, press
ENT. Your Apollo SL50/60 will now switch to
the Navigation function and show information
based on your present position to the Direct-To
destination waypoint.
ete HIO 00:13 Brg 345 36.6nm
16
Getting Started the First Time
ENT
SEL
Navigation Basics
This section explores the navigation function and
describes the powerful features it contains. When
you become comfortable operating the unit, you
may wish to “fly” the Apollo SL50/60 using the
built-in simulator. Follow the instructions in the
Simulator section for using the simulator.
About theNavigationFunction
The navigation function is always active. When you
use other functions, the navigation function
continues to run “in the background” calculating
your present position, navigating your programmed
route (if active), and alerting you to events or
conditions important to navigation. When you
finish using other functions and return to the
navigation function, the last navigation display used
is shown.
About theNavigationFunctionDisplays
While you navigate, the Apollo SL50/60 gives you
information in the Navigation function displays.
The navigation information displays and
sequencing speed are user-programmable. See the
Nav info section of the System Functions chapter
(see page 65). The Large knob will select the
higher level Nav functions: Nav pages, Emergency
Search, Parallel Track Offset, GPS Position,
Countdown Timer, and the From/To/Next
Waypoints. The Small knob will look at the pages
available for each function; a diamond will be
shown on the right side of the display if more pages
are available.
Nav HomePage
The Nav Home Page is a default page that is the
first page available in the Navigation function. The
Nav Home Page is not customizable. The
information in the Home Page shows the
Destination Waypoint identifier, Estimated Time
Enroute, Bearing, and Range (distance) to the
destination waypoint.
Ete EUG 00:22 Brg 082 74nm Y
17
Navigation Basics
Turn the Small knob to view the other available
Navigation displays.
Autonav The Autonav feature lets you select certain Nav
display choices and have them rotate in sequence
displaying each one from one to nine seconds. The
selection of displays and sequencing time is
performed in the Nav Info part of the System
Functions (see page 67).
1. Start Autonav by pressing ENT while displaying
the Nav Home Page, or one of its sub-pages.
Ete EUG 00:22 Brg 082 74nm Y
2. Stop Autonav rotation by pressing any key or
turning either knob.
18
Navigation Basics
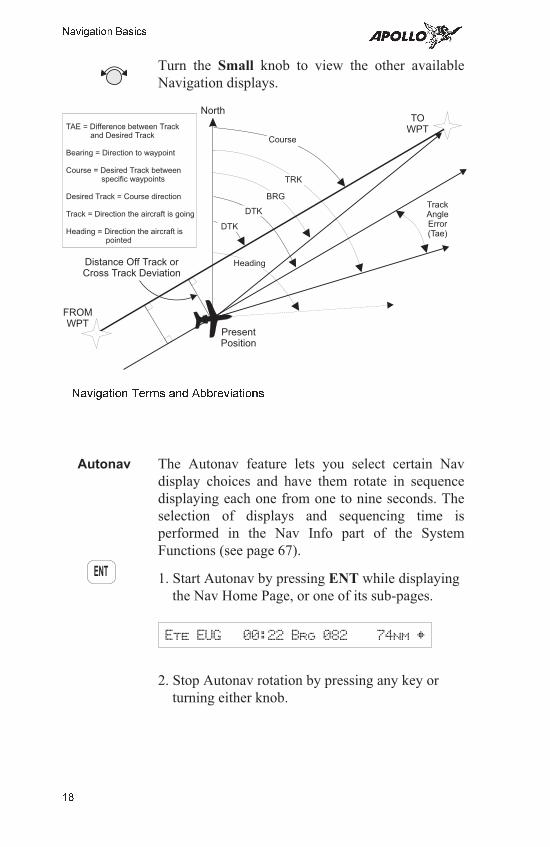
TOWPT
FROMWPT
North
TrackAngleError(Tae)
PresentPosition
BRG
TRK
DTK
Distance Off Track orCross Track Deviation
Course
DTK
TAE = Difference between Trackand Desired Track
Bearing = Direction to waypoint
Course = Desired Track betweenspecific waypoints
Desired Track = Course direction
Track = Direction the aircraft is going
Heading = Direction the aircraft ispointed
Heading
Navigation Terms and Abbreviations
ENT
Nav Pages
Nav Display Choices
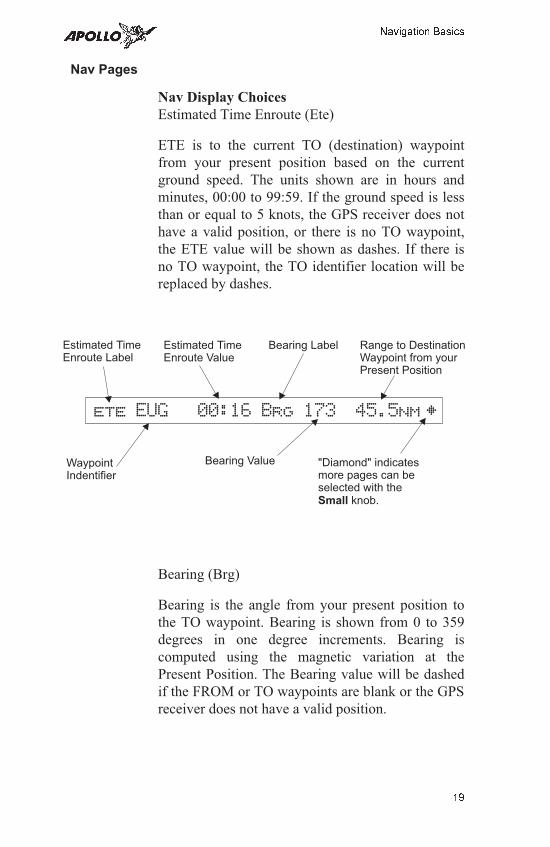
Estimated Time Enroute (Ete)
ETE is to the current TO (destination) waypoint
from your present position based on the current
ground speed. The units shown are in hours and
minutes, 00:00 to 99:59. If the ground speed is less
than or equal to 5 knots, the GPS receiver does not
have a valid position, or there is no TO waypoint,
the ETE value will be shown as dashes. If there is
no TO waypoint, the TO identifier location will be
replaced by dashes.
Bearing (Brg)
Bearing is the angle from your present position to
the TO waypoint. Bearing is shown from 0 to 359
degrees in one degree increments. Bearing is
computed using the magnetic variation at the
Present Position. The Bearing value will be dashed
if the FROM or TO waypoints are blank or the GPS
receiver does not have a valid position.
19
Navigation Basics
Estimated TimeEnroute Label
WaypointIndentifier
Bearing Value
Estimated TimeEnroute Value
Bearing Label Range to DestinationWaypoint from yourPresent Position
"Diamond" indicatesmore pages can beselected with the
knob.Small
ete EUG 00:16 Brg 173 45.5nm Y

Range (Rge)
The distance from your present position to the TO
waypoint. Units can be set as either nautical miles
or kilometers in the Nav Info section of the System
functions (see page 71). Nautical mile units are 0.00
to 9.00 nm in 0.01 nm increments, 10.0 to 99.9 nm
in 0.1 nm increments, and 100 to 9999 nm in 1 nm
increments. Kilometer units are 0.00 to 99.99 km in
0.01 km increments, 100.0 to 999.9 km in 0.1 km
increments, and 1000 to 9999 km in 1 km
increments. The Range value will be dashed if the
FROM or TO waypoints are blank or the GPS
receiver does not have a valid position.
Course Deviation Indicator (CDI) and Distance Off
Track
The airplane symbol (A) referenced to a bar graph
shows your position relative to being on-course.
When the airplane is to the right of the center bar,
you must fly left to return on-course; the bar graph
indicates you are off-course to the right. Fly the
aircraft in the direction of the bar graph to return
on-course.
#### A Brg 173 42.4nm
CDI Sensitivity =
0.3 nm
CDI Sensitivity =
1.0 nm
CDI Sensitivity =
5.0 nm
each 7 = 0.01 nm each $ = 0.05 nm each H = 0.24 nm
each 6 = 0.04 nm each z = 0.14 nm each B = 0.71 nm
A 66666
(full scale) = 0.3 nm
A zzzzzz
(full scale) = 1.0 nm
A BBBBB
(full scale) = 5.0 nm
A single dot thickness bar indicates that CDI
sensitivity is set to 0.3 nm full scale per side. The
two dot bar indicates a sensitivity of 1.0 nm full
scale per side. The three dot bar indicates a
sensitivity of 5.0 nm full scale per side. The manual
sensitivity of the CDI may be set to 0.3, 1.0, or 5.0
20
Navigation Basics
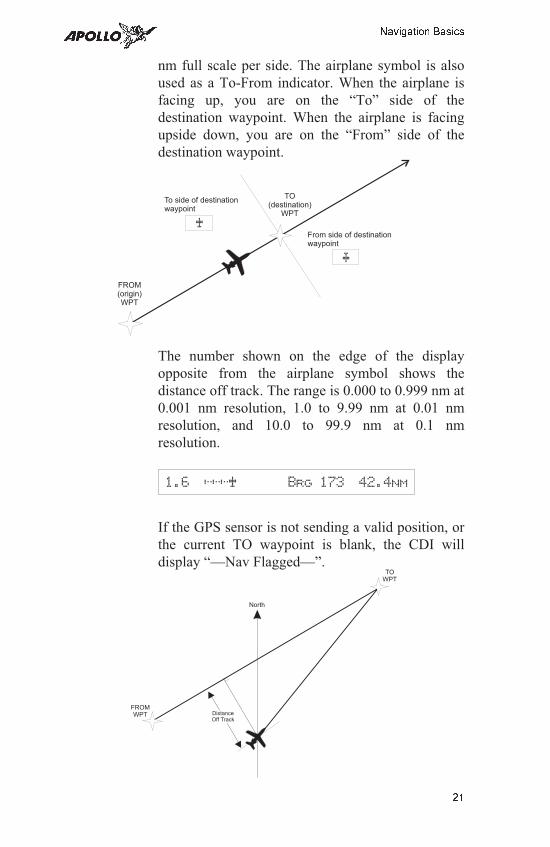
nm full scale per side. The airplane symbol is also
used as a To-From indicator. When the airplane is
facing up, you are on the “To” side of the
destination waypoint. When the airplane is facing
upside down, you are on the “From” side of the
destination waypoint.
The number shown on the edge of the display
opposite from the airplane symbol shows the
distance off track. The range is 0.000 to 0.999 nm at
0.001 nm resolution, 1.0 to 9.99 nm at 0.01 nm
resolution, and 10.0 to 99.9 nm at 0.1 nm
resolution.
1.6 <<<A Brg 173 42.4nm
If the GPS sensor is not sending a valid position, or
the current TO waypoint is blank, the CDI will
display “—Nav Flagged—”.
21
Navigation Basics
TO(destination)
WPT
FROM(origin)WPT
To side of destinationwaypoint
From side of destinationwaypoint
A
L
TOWPT
FROMWPT
North
DistanceOff Track
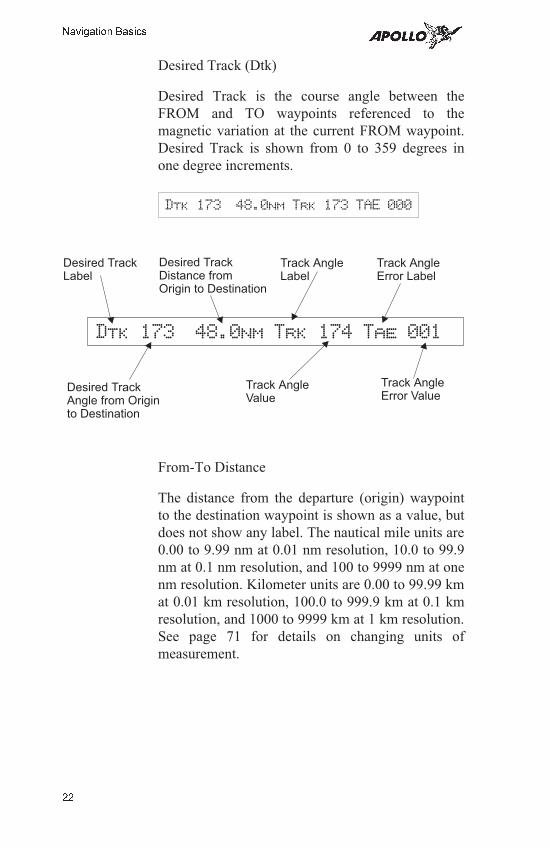
Desired Track (Dtk)
Desired Track is the course angle between the
FROM and TO waypoints referenced to the
magnetic variation at the current FROM waypoint.
Desired Track is shown from 0 to 359 degrees in
one degree increments.
Dtk 173 48.0nm Trk 173 TAE 000
From-To Distance
The distance from the departure (origin) waypoint
to the destination waypoint is shown as a value, but
does not show any label. The nautical mile units are
0.00 to 9.99 nm at 0.01 nm resolution, 10.0 to 99.9
nm at 0.1 nm resolution, and 100 to 9999 nm at one
nm resolution. Kilometer units are 0.00 to 99.99 km
at 0.01 km resolution, 100.0 to 999.9 km at 0.1 km
resolution, and 1000 to 9999 km at 1 km resolution.
See page 71 for details on changing units of
measurement.
22
Navigation Basics
Desired TrackLabel
Desired TrackAngle from Originto Destination
Track AngleValue
Track AngleLabel
Track AngleError Label
Dtk 173 48.0nm Trk 174 Tae 001
Desired TrackDistance fromOrigin to Destination
Track AngleError Value

Track (Trk) Angle
Track Angle is the angle of your actual direction of
travel. Track is shown from 0 to 359 degrees in one
degree increments. Track is computed using the
magnetic variation at the Present Position. The
Track value will be dashed if the FROM or TO
waypoints are blank, if the GPS receiver does not
have a valid position, or if ground speed is less than
5 knots.
Track Angle Error (Tae)
Track Angle Error is the difference between the
Desired Track and Track Angle (Dtk - Trk). Track
Angle Error is shown from 0 to 359 degrees in one
degree increments. Track Angle Error is computed
using the magnetic variation at the Present Position.
The Track Angle Error value will be dashed if the
FROM or TO waypoints are blank, if the GPS
receiver does not have a valid position, or if ground
speed is less than 5 knots.
Ground Speed (GS)
Ground Speed is the measure of your progress over
the ground, not airspeed. Ground Speed units are
from 0 to 999 knots in 1 knot increments. The
Ground Speed value will be replaced with dashes if
the speed is less than 5 knots, there is no valid GPS
position, or the TO waypoint is blank. See page 71
for details on changing units of measurement.
Trk 173 173 Ground Sp 170 kts
23
Navigation Basics

Minimum Safe Altitude (MSA)
The elevation of the highest obstruction near the
aircraft plus a 1,000 or 2,000 foot buffer added for
safety. In non-mountainous terrain, a 1,000 foot
buffer is added. In mountainous terrain, a 2,000 foot
buffer is added. The result is rounded to the nearest
100 feet. The value will be replaced with dashes if
there is no valid GPS position, the TO waypoint is
blank, or the current position is outside of the
database coverage area.
MinSafeA 5700« EnrtSafeA 5700«
Minimum Enroute Safe Altitude (MESA)
Minimum Enroute Safe Altitude is the highest MSA
for every point between the aircraft present position
and the “TO” waypoint with a 5 nm buffer around
the course. The value will be replaced with dashes
if there is no valid GPS position, the TO waypoint
is blank, or the current position is outside of the
database coverage area.
Flight Time
Flight Time shows the elapsed time in hours and
minutes (00:00 to 99:59) from departure. If the
Flight Timer is not started the value will be
replaced with dashes. The Flight Timer options are
set in the System Functions (see page 72).
Flt Time 00:07 Time 13:15 UTC
Time UTC
Time is displayed using the 24 hour clock based on
Universal Coordinated Time. Units are hours and
minutes (00:00 to 23:59).
24
Navigation Basics
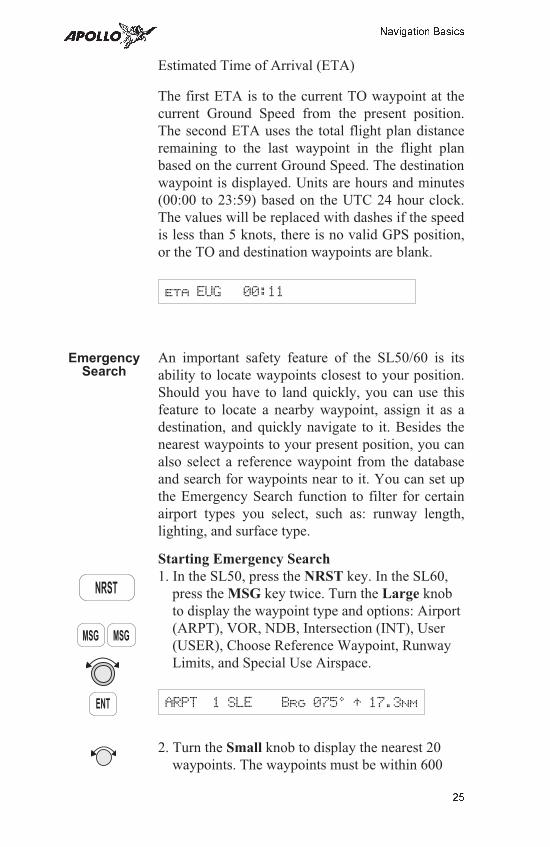
Estimated Time of Arrival (ETA)
The first ETA is to the current TO waypoint at the
current Ground Speed from the present position.
The second ETA uses the total flight plan distance
remaining to the last waypoint in the flight plan
based on the current Ground Speed. The destination
waypoint is displayed. Units are hours and minutes
(00:00 to 23:59) based on the UTC 24 hour clock.
The values will be replaced with dashes if the speed
is less than 5 knots, there is no valid GPS position,
or the TO and destination waypoints are blank.
eta EUG 00:11
EmergencySearch
An important safety feature of the SL50/60 is its
ability to locate waypoints closest to your position.
Should you have to land quickly, you can use this
feature to locate a nearby waypoint, assign it as a
destination, and quickly navigate to it. Besides the
nearest waypoints to your present position, you can
also select a reference waypoint from the database
and search for waypoints near to it. You can set up
the Emergency Search function to filter for certain
airport types you select, such as: runway length,
lighting, and surface type.
Starting Emergency Search
1. In the SL50, press the NRST key. In the SL60,
press the MSG key twice. Turn the Large knob
to display the waypoint type and options: Airport
(ARPT), VOR, NDB, Intersection (INT), User
(USER), Choose Reference Waypoint, Runway
Limits, and Special Use Airspace.
ARPT 1 SLE Brg 0750 T 17.3nm
2. Turn the Small knob to display the nearest 20
waypoints. The waypoints must be within 600
25
Navigation Basics
ENT
NRST
MSG MSG
miles of your present position. The Bearing and
Distance to the displayed waypoint is shown on
the right side of the display. Press ENT to set the
displayed waypoint as the new destination (TO)
waypoint.
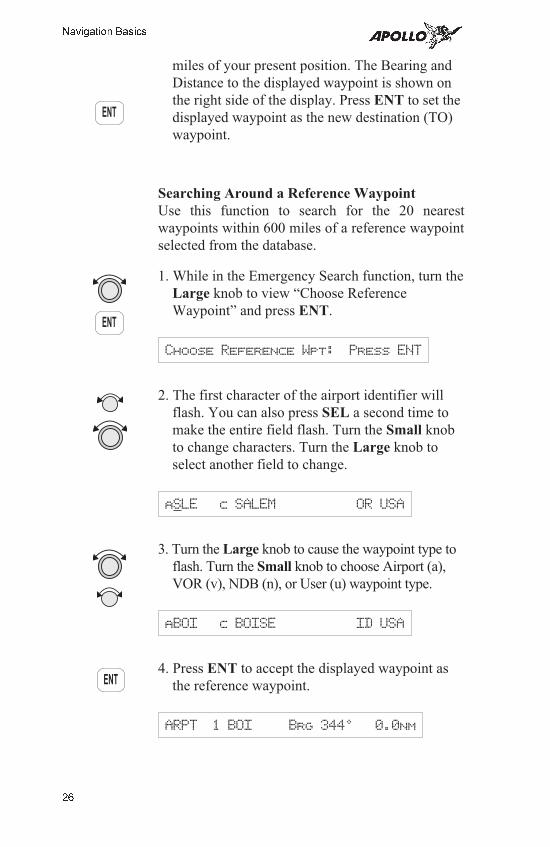
Searching Around a Reference Waypoint
Use this function to search for the 20 nearest
waypoints within 600 miles of a reference waypoint
selected from the database.
1. While in the Emergency Search function, turn the
Large knob to view “Choose Reference
Waypoint” and press ENT.
Choose Reference Wpt: Press ENT
2. The first character of the airport identifier will
flash. You can also press SEL a second time to
make the entire field flash. Turn the Small knob
to change characters. Turn the Large knob to
select another field to change.
aSLE c SALEM OR USA
3. Turn the Large knob to cause the waypoint type to
flash. Turn the Small knob to choose Airport (a),
VOR (v), NDB (n), or User (u) waypoint type.
aBOI c BOISE ID USA
4. Press ENT to accept the displayed waypoint as
the reference waypoint.
ARPT 1 BOI Brg 3440 0.0nm
26
Navigation Basics
ENT
ENT
ENT

5. Turn the Small knob to view the nearest 20
waypoints.
Setting Runway Limits
Narrow the type of airports that you will accept by
choosing the runway length, lighting, and surface
type.
1. While in the Emergency Search function, turn the
Large knob to view the “Runway Limits”
display.
Rwy Limits:H/S/W Ft:0 Lit:No
2. Press SEL. The runway length value will flash.
Turn the Small knob to select the minimum
runway length you want considered. Choosing a
length of 0 feet means you will accept any
runway length.
Rwy Limits:H/S/W Ft:3500 Lit:No
3. Turn the Large knob to move to the next
selection. With the “Lit” value flashing, turn the
Small knob to choose “Yes” or “No” for the
runway lighting requirement.
Rwy Limits:H/S/W Ft:3500 Lit:Yes
4. Turn the Large knob to cause the runway surface
type to flash. Turn the Small knob to choose
from the Hard (H), Soft (S), or Water (W)
surface types. Soft refers to grass, dirt, or gravel
runways.
Rwy Limits:H/S Ft:3500 Lit:Yes
5. Press ENT to save your choices.
27
Navigation Basics
SEL
ENT
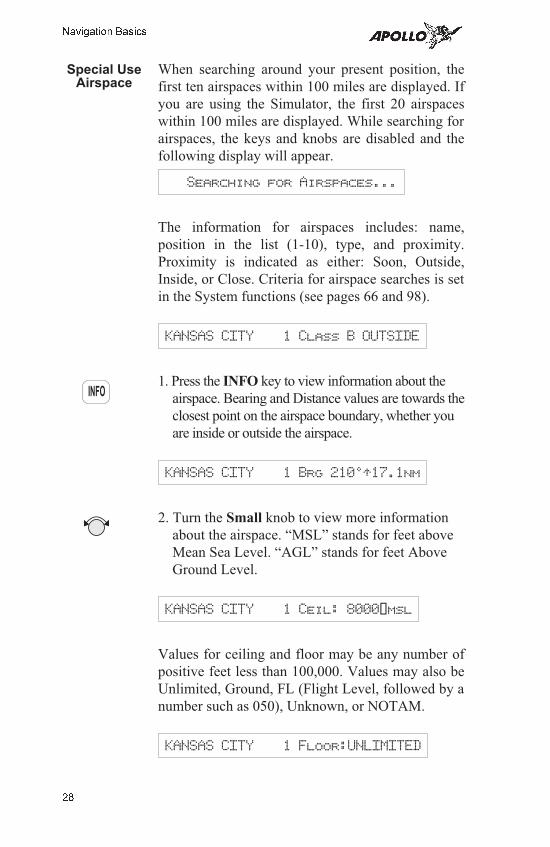
Special UseAirspace
When searching around your present position, the
first ten airspaces within 100 miles are displayed. If
you are using the Simulator, the first 20 airspaces
within 100 miles are displayed. While searching for
airspaces, the keys and knobs are disabled and the
following display will appear.
Searching for Airspaces...
The information for airspaces includes: name,
position in the list (1-10), type, and proximity.
Proximity is indicated as either: Soon, Outside,
Inside, or Close. Criteria for airspace searches is set
in the System functions (see pages 66 and 98).
KANSAS CITY 1 Class B OUTSIDE
1. Press the INFO key to view information about the
airspace. Bearing and Distance values are towards the
closest point on the airspace boundary, whether you
are inside or outside the airspace.
KANSAS CITY 1 Brg 2100T17.1nm
2. Turn the Small knob to view more information
about the airspace. “MSL” stands for feet above
Mean Sea Level. “AGL” stands for feet Above
Ground Level.
KANSAS CITY 1 Ceil: 8000«msl
Values for ceiling and floor may be any number of
positive feet less than 100,000. Values may also be
Unlimited, Ground, FL (Flight Level, followed by a
number such as 050), Unknown, or NOTAM.
KANSAS CITY 1 Floor:UNLIMITED
28
Navigation Basics
INFO
The Nearest Airspace list is updated periodically as
your aircraft moves and the following display will
appear.
Re-Organizing Airspaces...
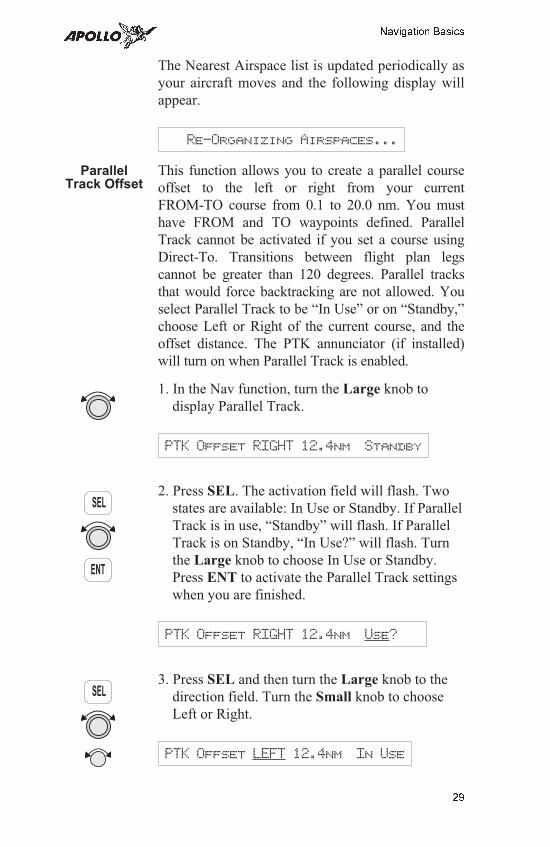
ParallelTrack Offset
This function allows you to create a parallel course
offset to the left or right from your current
FROM-TO course from 0.1 to 20.0 nm. You must
have FROM and TO waypoints defined. Parallel
Track cannot be activated if you set a course using
Direct-To. Transitions between flight plan legs
cannot be greater than 120 degrees. Parallel tracks
that would force backtracking are not allowed. You
select Parallel Track to be “In Use” or on “Standby,”
choose Left or Right of the current course, and the
offset distance. The PTK annunciator (if installed)
will turn on when Parallel Track is enabled.
1. In the Nav function, turn the Large knob to
display Parallel Track.
PTK Offset RIGHT 12.4nm Standby
2. Press SEL. The activation field will flash. Two
states are available: In Use or Standby. If Parallel
Track is in use, “Standby” will flash. If Parallel
Track is on Standby, “In Use?” will flash. Turn
the Large knob to choose In Use or Standby.
Press ENT to activate the Parallel Track settings
when you are finished.
PTK Offset RIGHT 12.4nm Use?
3. Press SEL and then turn the Large knob to the
direction field. Turn the Small knob to choose
Left or Right.
PTK Offset LEFT 12.4nm In Use
29
Navigation Basics
SEL
ENT
SEL
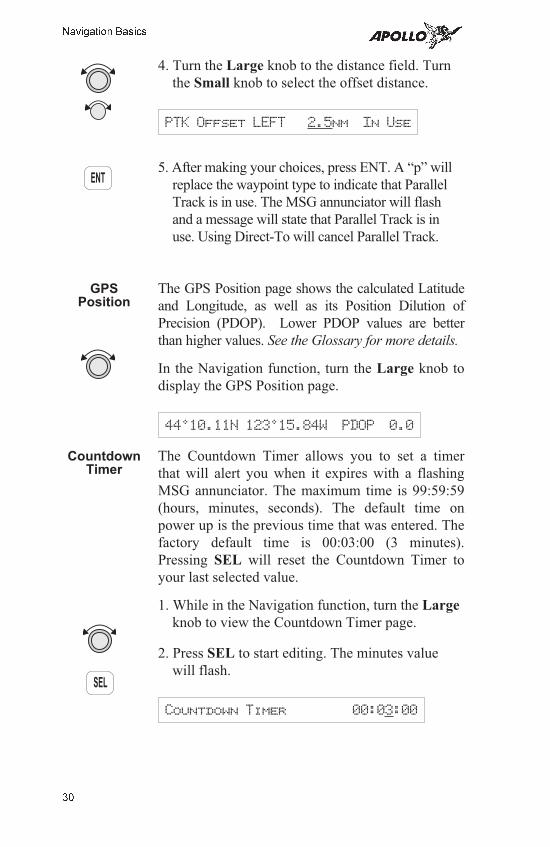
4. Turn the Large knob to the distance field. Turn
the Small knob to select the offset distance.
PTK Offset LEFT 2.5nm In Use
5. After making your choices, press ENT. A “p” will
replace the waypoint type to indicate that Parallel
Track is in use. The MSG annunciator will flash
and a message will state that Parallel Track is in
use. Using Direct-To will cancel Parallel Track.
GPSPosition
The GPS Position page shows the calculated Latitude
and Longitude, as well as its Position Dilution of
Precision (PDOP). Lower PDOP values are better
than higher values. See the Glossary for more details.
In the Navigation function, turn the Large knob to
display the GPS Position page.
44010.11N 123015.84W PDOP 0.0
CountdownTimer
The Countdown Timer allows you to set a timer
that will alert you when it expires with a flashing
MSG annunciator. The maximum time is 99:59:59
(hours, minutes, seconds). The default time on
power up is the previous time that was entered. The
factory default time is 00:03:00 (3 minutes).
Pressing SEL will reset the Countdown Timer to
your last selected value.
1. While in the Navigation function, turn the Large
knob to view the Countdown Timer page.
2. Press SEL to start editing. The minutes value
will flash.
Countdown Timer 00:03:00
30
Navigation Basics
ENT
SEL

3. Turn the Large knob to move between the time
value fields.
Countdown Timer 00:05:00
4. Turn the Small knob to edit the hours, minutes,
or seconds value.
Countdown Timer 01:05:00
5. Press ENT to start the timer at the selected time
value.
6. After the Countdown Timer value expires, press
the MSG key to note the time out message.
31
Navigation Basics
ENT
MSG
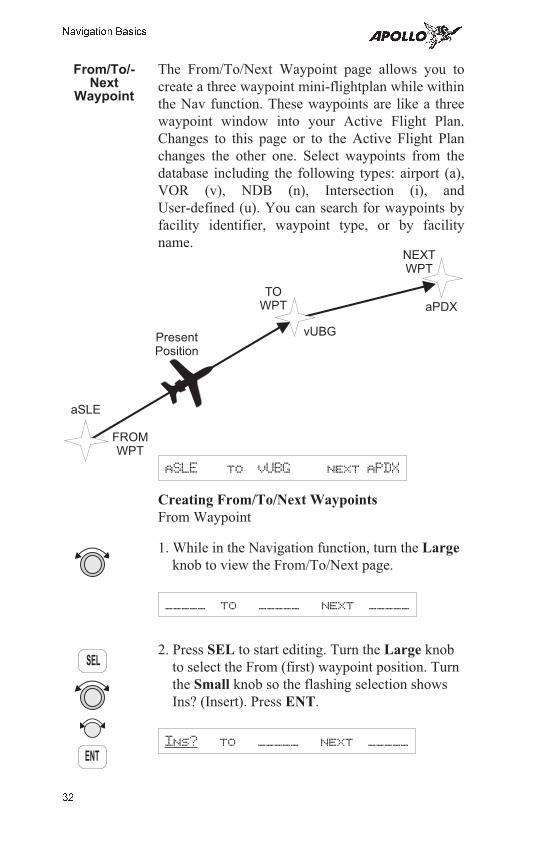
From/To/-Next
Waypoint
The From/To/Next Waypoint page allows you to
create a three waypoint mini-flightplan while within
the Nav function. These waypoints are like a three
waypoint window into your Active Flight Plan.
Changes to this page or to the Active Flight Plan
changes the other one. Select waypoints from the
database including the following types: airport (a),
VOR (v), NDB (n), Intersection (i), and
User-defined (u). You can search for waypoints by
facility identifier, waypoint type, or by facility
name.
aSLE to vUBG next aPDX
Creating From/To/Next Waypoints
From Waypoint
1. While in the Navigation function, turn the Large
knob to view the From/To/Next page.
_____ to _____ next _____
2. Press SEL to start editing. Turn the Large knob
to select the From (first) waypoint position. Turn
the Small knob so the flashing selection shows
Ins? (Insert). Press ENT.
Ins? to _____ next _____
32
Navigation Basics
ENT
SEL
TOWPT
FROMWPT
PresentPosition
NEXTWPT
vUBG
aPDX
aSLE
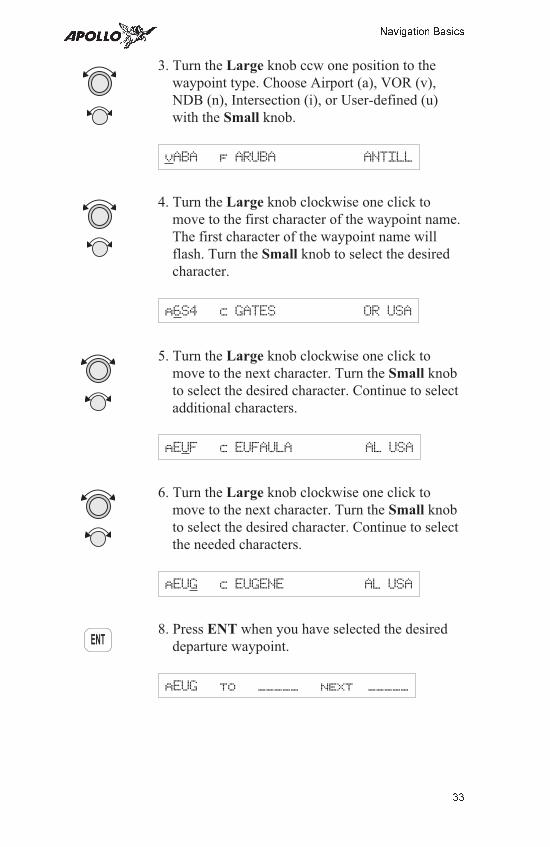
3. Turn the Large knob ccw one position to the
waypoint type. Choose Airport (a), VOR (v),
NDB (n), Intersection (i), or User-defined (u)
with the Small knob.
vABA f ARUBA ANTILL
4. Turn the Large knob clockwise one click to
move to the first character of the waypoint name.
The first character of the waypoint name will
flash. Turn the Small knob to select the desired
character.
a6S4 c GATES OR USA
5. Turn the Large knob clockwise one click to
move to the next character. Turn the Small knob
to select the desired character. Continue to select
additional characters.
aEUF c EUFAULA AL USA
6. Turn the Large knob clockwise one click to
move to the next character. Turn the Small knob
to select the desired character. Continue to select
the needed characters.
aEUG c EUGENE AL USA
8. Press ENT when you have selected the desired
departure waypoint.
aEUG to _____ next _____
33
Navigation Basics
ENT

To Waypoint
1. Press SEL and move to the To waypoint with the
Large knob.
aEUG to Ins? next _____
2. The insert (Ins?) choice will flash. Press ENT
and then select the To waypoint as you did for
the From waypoint.
3. After selecting a To waypoint, press ENT.
aEUG to aSLE next _____
Next Waypoint
1. Press SEL and move to the Next waypoint with
the Large knob.
aEUG to aSLE next Ins?
2. The insert (Ins?) choice will flash. Press ENT
and then select the Next waypoint as you did for
the From waypoint.
3. After selecting a Next waypoint, press ENT.
aEUG to aSLE next HIO
34
Navigation Basics
ENT
SEL
ENT
SEL
ENT
ENT
Editing
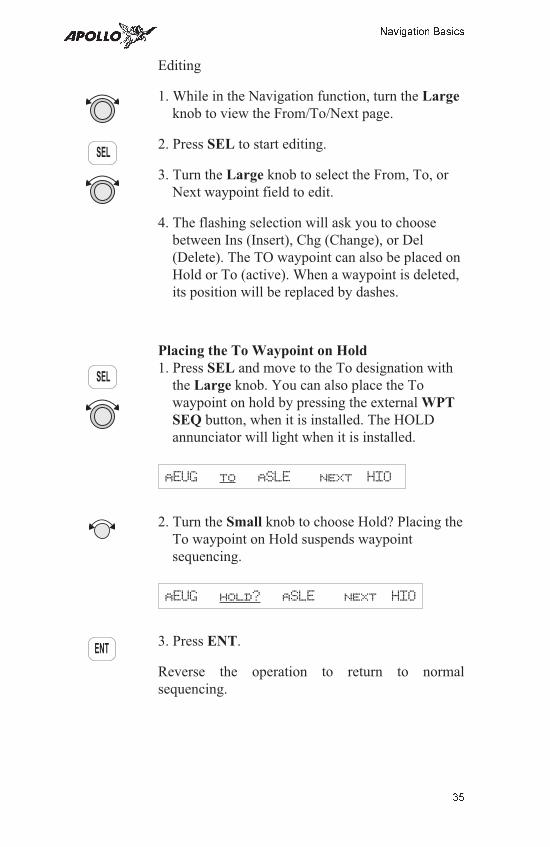
1. While in the Navigation function, turn the Large
knob to view the From/To/Next page.
2. Press SEL to start editing.
3. Turn the Large knob to select the From, To, or
Next waypoint field to edit.
4. The flashing selection will ask you to choose
between Ins (Insert), Chg (Change), or Del
(Delete). The TO waypoint can also be placed on
Hold or To (active). When a waypoint is deleted,
its position will be replaced by dashes.
Placing the To Waypoint on Hold
1. Press SEL and move to the To designation with
the Large knob. You can also place the To
waypoint on hold by pressing the external WPT
SEQ button, when it is installed. The HOLD
annunciator will light when it is installed.
aEUG to aSLE next HIO
2. Turn the Small knob to choose Hold? Placing the
To waypoint on Hold suspends waypoint
sequencing.
aEUG hold? aSLE next HIO
3. Press ENT.
Reverse the operation to return to normal
sequencing.
35
Navigation Basics
ENT
SEL
SEL

UsingDirect-To
Pressing the Direct-To key sets the From locationas your present position. When using the Direct-Tofunction, the From waypoint identifier isoverwritten with the word “Direct.” If you removethe Direct-To position with the Del? option, the oldFrom waypoint is returned to that position. If youedit the From position, Direct-To navigation will bereplaced by the new entered waypoint. ActivatingDirect-To will disable Parallel Track.
1. Press the Direct-To key.
2. Select the waypoint using the Small and Large
knobs.
3. Press ENT.
Direct-ToOBS
Pressing the Direct-To key twice starts the OBS
desired track editor. This feature is useful for
defining the inbound course for holding patterns.
OBS Desired Track allows entry of a desired track
to the current To waypoint. The current desired
track in the navigation pages will be replaced by the
OBS Desired Track value entered. Waypoint
sequencing at the To waypoint is automatically
inhibited; placed on Hold.
1. Press Direct-To twice. The first character of the
Desired Track value will flash. Turn the Small knob
to change the value. This value defaults to the
current inbound course for the active waypoint.
OBS DTK: 3290 to SLE
2. Turn the Large knob to move to the next character.
Turn the Small knob to change the value.
OBS DTK: 2790 to SLE
3. Press ENT when the desired track value is
complete.
36
Navigation Basics
ENT
D
ENT
D
Waypoint Functions
WaypointInformation
The Apollo SL50/60 provides an extensive built-in
database of waypoint information to aid the
navigator. Waypoints in the database are divided
into 5 categories. This structure allows you to easily
select a waypoint as a destination, search for
waypoint information, search for nearest waypoints,
or insert waypoints into a flight plan.
The waypoint types are:
• Airports (ARPTs)
• Very high frequency omniranges (VORs)
• Non-directional beacons (NDBs)
• Enroute intersections (INTs)
• User created (USERs)
AvailableWaypoint
Information
The following information is available for each
waypoint type. Use the waypoint INFO function to
get this information as the Introduction describes in
“Waypoint Information.”
ARPT Waypoint Information
• Bearing and distance from present position
• Airport type
• Airport elevation
• Fuel availability by type
• Runway length(s) and surface type
• Radio communication frequencies (an asterisk atthe frequency indicates part-time availability)
• Lat/Lon coordinates
• Identifier
• City/Facility name
• Waypoint comments
37
Waypoint Functions
VOR Waypoint Information
• Identifier
• Name
• Radial and distance from the VOR
• Bearing and distance from present position
• Operating frequency
• Lat/Lon coordinates
NDB Waypoint Information
• Bearing and distance from present position
• Operating frequency
• Lat/Lon coordinates
• Identifier
• Name
INT Waypoint Information
• Country
• Bearing and distance from present position
• Identifier
• Lat/Lon coordinates
USER Waypoint Information
• Bearing and distance from present position
• Distance from present position
• Lat/Lon coordinates
• Runway Length
• Identifier
• Waypoint comments
38
Waypoint Functions
GettingInformation
about aWaypoint
You can access the Waypoint database by either
looking directly or by using a feature that draws
information from the database, such as using
Emergency Search or creating a Flightplan. This
section will describe going directly into the
database, the other methods of using the waypoint
database will be covered in the sections about the
specific features.
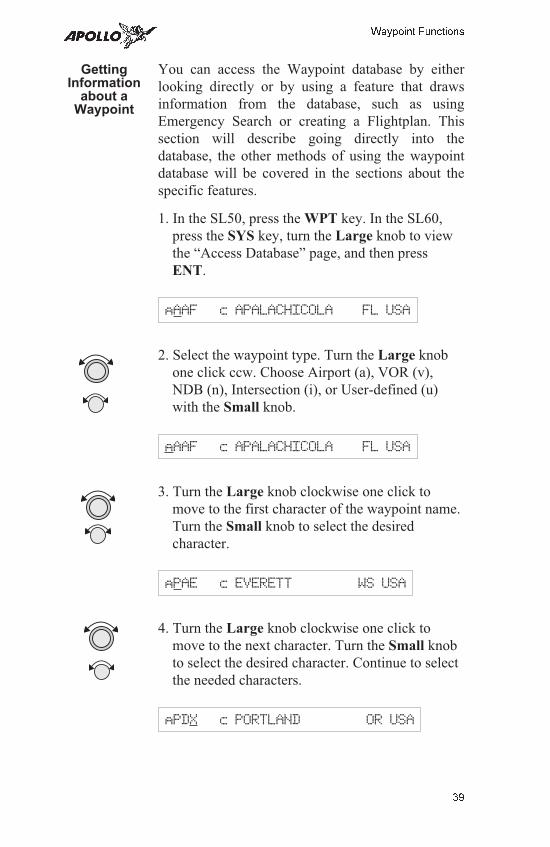
1. In the SL50, press the WPT key. In the SL60,
press the SYS key, turn the Large knob to view
the “Access Database” page, and then press
ENT.
aAAF c APALACHICOLA FL USA
2. Select the waypoint type. Turn the Large knob
one click ccw. Choose Airport (a), VOR (v),
NDB (n), Intersection (i), or User-defined (u)
with the Small knob.
aAAF c APALACHICOLA FL USA
3. Turn the Large knob clockwise one click to
move to the first character of the waypoint name.
Turn the Small knob to select the desired
character.
aPAE c EVERETT WS USA
4. Turn the Large knob clockwise one click to
move to the next character. Turn the Small knob
to select the desired character. Continue to select
the needed characters.
aPDX c PORTLAND OR USA
39
Waypoint Functions
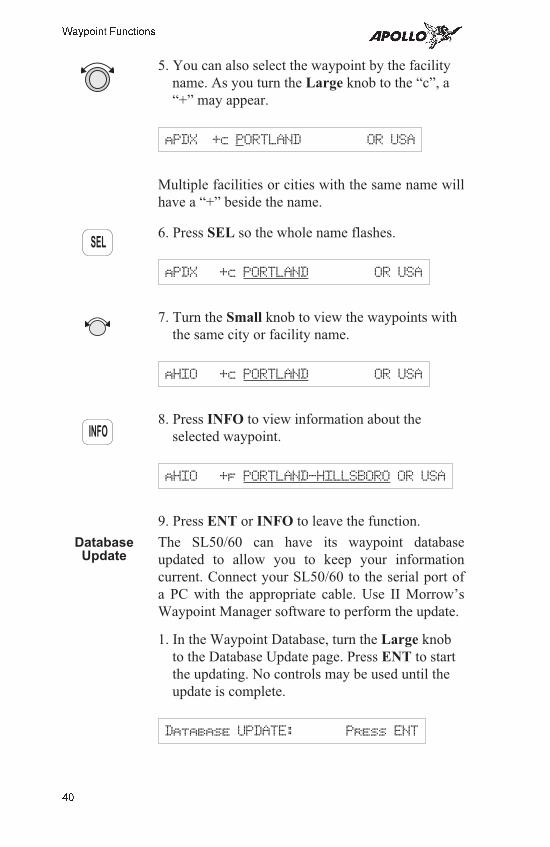
5. You can also select the waypoint by the facility
name. As you turn the Large knob to the “c”, a
“+” may appear.
aPDX +c PORTLAND OR USA
Multiple facilities or cities with the same name will
have a “+” beside the name.
6. Press SEL so the whole name flashes.
aPDX +c PORTLAND OR USA
7. Turn the Small knob to view the waypoints with
the same city or facility name.
aHIO +c PORTLAND OR USA
8. Press INFO to view information about the
selected waypoint.
aHIO +f PORTLAND-HILLSBORO OR USA
9. Press ENT or INFO to leave the function.
DatabaseUpdate
The SL50/60 can have its waypoint database
updated to allow you to keep your information
current. Connect your SL50/60 to the serial port of
a PC with the appropriate cable. Use II Morrow’s
Waypoint Manager software to perform the update.
1. In the Waypoint Database, turn the Large knob
to the Database Update page. Press ENT to start
the updating. No controls may be used until the
update is complete.
Database UPDATE: Press ENT
40
Waypoint Functions
SEL
INFO
2. The SL50/60 will provide a series of displays
showing your progress during the update process.
Follow the directions in the Waypoint Manager
documentation.
Nearest(Emergency
Search)Waypoint
An important safety feature of the SL50/60 is its
ability to locate waypoints closest to your position.
Should you have to land quickly, you can use this
feature to locate a nearby waypoint, assign it as a
destination, and quickly navigate to it. Besides the
nearest waypoints to your present position, you can
also select a reference waypoint from the database
and search for waypoints near to it. You can set up
the Emergency Search function to filter for certain
airport types you select, such as: runway length,
lighting, and surface type. See page 25 in the
Navigation Basics section for more details on using
Emergency Search.
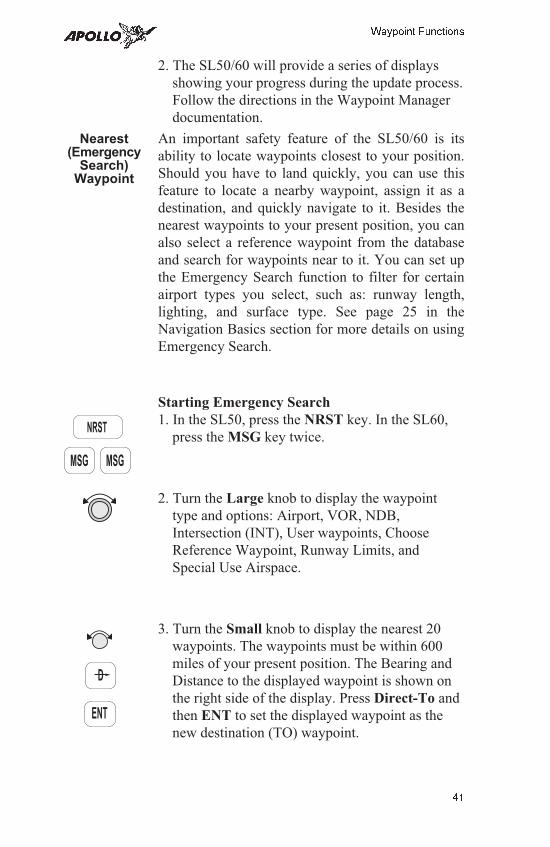
Starting Emergency Search
1. In the SL50, press the NRST key. In the SL60,
press the MSG key twice.
2. Turn the Large knob to display the waypoint
type and options: Airport, VOR, NDB,
Intersection (INT), User waypoints, Choose
Reference Waypoint, Runway Limits, and
Special Use Airspace.
3. Turn the Small knob to display the nearest 20
waypoints. The waypoints must be within 600
miles of your present position. The Bearing and
Distance to the displayed waypoint is shown on
the right side of the display. Press Direct-To and
then ENT to set the displayed waypoint as the
new destination (TO) waypoint.
41
Waypoint Functions
MSG MSG
ENT
NRST
D
Create UserWaypoint by
Lat/Lon
The Apollo SL50/60 allows you to create up to 200
of your own waypoints to the waypoint database.
You can create a waypoint based on a Lat/Lon or
using a radial and distance from another waypoint.
You can also add the runway length.
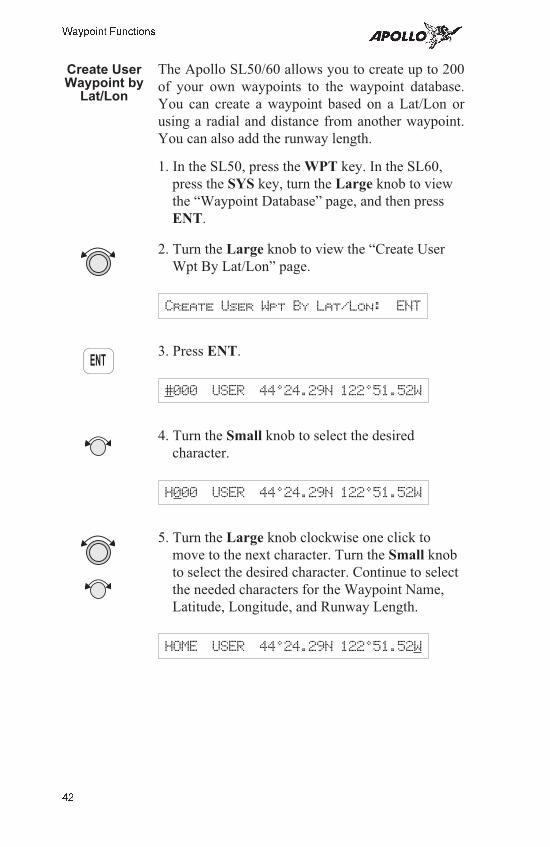
1. In the SL50, press the WPT key. In the SL60,
press the SYS key, turn the Large knob to view
the “Waypoint Database” page, and then press
ENT.
2. Turn the Large knob to view the “Create User
Wpt By Lat/Lon” page.
Create User Wpt By Lat/Lon: ENT
3. Press ENT.
#000 USER 44024.29N 122051.52W
4. Turn the Small knob to select the desired
character.
H000 USER 44024.29N 122051.52W
5. Turn the Large knob clockwise one click to
move to the next character. Turn the Small knob
to select the desired character. Continue to select
the needed characters for the Waypoint Name,
Latitude, Longitude, and Runway Length.
HOME USER 44024.29N 122051.52W
42
Waypoint Functions
ENT
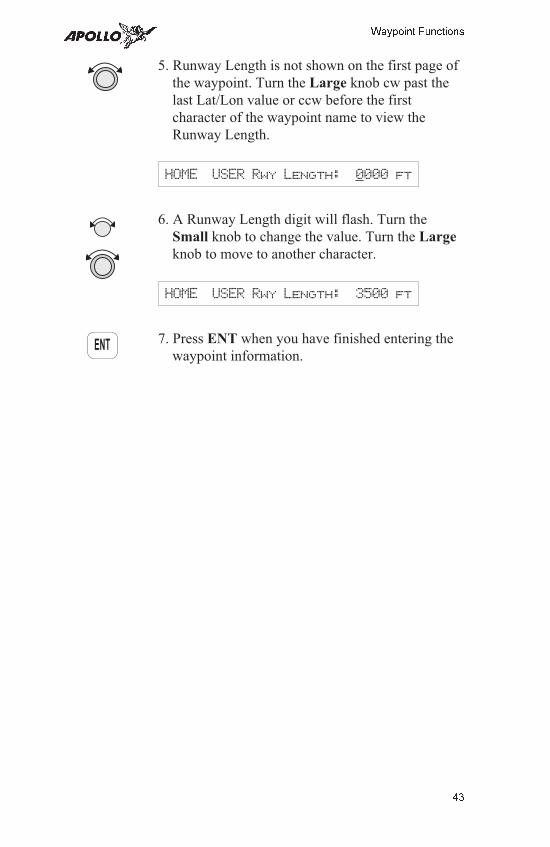
5. Runway Length is not shown on the first page of
the waypoint. Turn the Large knob cw past the
last Lat/Lon value or ccw before the first
character of the waypoint name to view the
Runway Length.
HOME USER Rwy Length: 0000 ft
6. A Runway Length digit will flash. Turn the
Small knob to change the value. Turn the Large
knob to move to another character.
HOME USER Rwy Length: 3500 ft
7. Press ENT when you have finished entering the
waypoint information.
43
Waypoint Functions
ENT
Create UserWaypoint by
Radial/-Distance
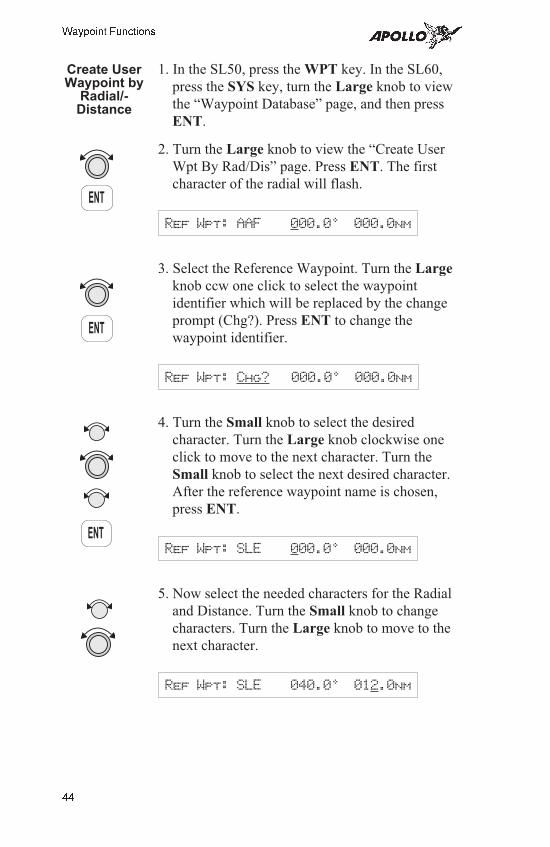
1. In the SL50, press the WPT key. In the SL60,
press the SYS key, turn the Large knob to view
the “Waypoint Database” page, and then press
ENT.
2. Turn the Large knob to view the “Create User
Wpt By Rad/Dis” page. Press ENT. The first
character of the radial will flash.
Ref Wpt: AAF 000.00 000.0nm
3. Select the Reference Waypoint. Turn the Large
knob ccw one click to select the waypoint
identifier which will be replaced by the change
prompt (Chg?). Press ENT to change the
waypoint identifier.
Ref Wpt: Chg? 000.00 000.0nm
4. Turn the Small knob to select the desired
character. Turn the Large knob clockwise one
click to move to the next character. Turn the
Small knob to select the next desired character.
After the reference waypoint name is chosen,
press ENT.
Ref Wpt: SLE 000.00 000.0nm
5. Now select the needed characters for the Radial
and Distance. Turn the Small knob to change
characters. Turn the Large knob to move to the
next character.
Ref Wpt: SLE 040.00 012.0nm
44
Waypoint Functions
ENT
ENT
ENT

6. Press ENT when you have finished entering the
waypoint information. You will be prompted to
create a name for the waypoint.
#000 USER 44010.96N 121043.35W
7. Now, use the Large and Small knobs to enter the
waypoint name. You can also adjust Lat/Lon and
add the Runway Length. Press ENT when you
are finished.
CABIN USER 44010.96N 121043.35W
NoteYou should never create a Radial/DistanceUser waypoint from another Radial/DistanceUser waypoint. “Chaining” this type ofwaypoint in a string may cause additiveerrors in the waypoint position.
Delete UserWaypoint
1. In the SL50, press the WPT key. In the SL60,
press the SYS key, turn the Large knob to view
the “Waypoint” page, and then press ENT.
2. Turn the Large knob to view the “Delete User
Waypoint” page.
Delete User Wpt: Press ENT
3. Press ENT. Turn the Small knob to view the
User waypoints.
WPT to Delete: CABIN Press ENT
4. When the waypoint to delete is displayed, press
ENT.
45
Waypoint Functions
ENT
ENT
ENT
ENT
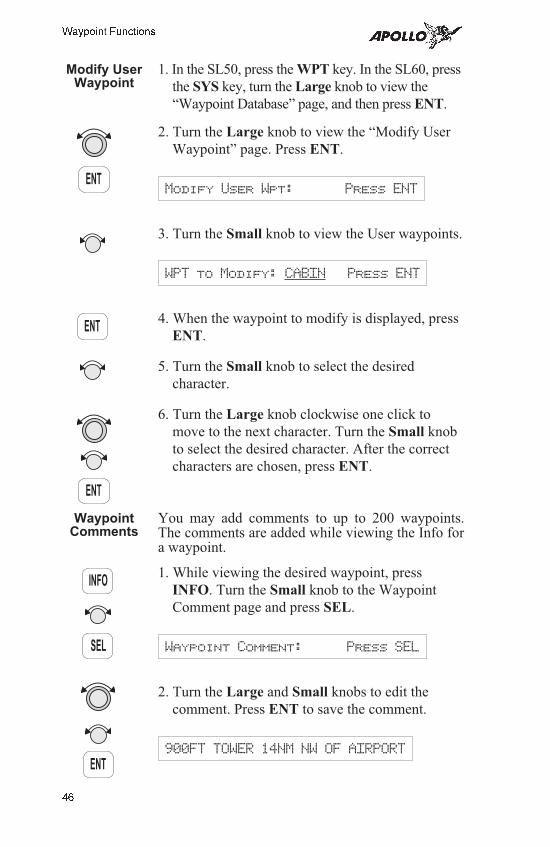
Modify UserWaypoint
1. In the SL50, press the WPT key. In the SL60, press
the SYS key, turn the Large knob to view the
“Waypoint Database” page, and then press ENT.
2. Turn the Large knob to view the “Modify User
Waypoint” page. Press ENT.
Modify User Wpt: Press ENT
3. Turn the Small knob to view the User waypoints.
WPT to Modify: CABIN Press ENT
4. When the waypoint to modify is displayed, press
ENT.
5. Turn the Small knob to select the desired
character.
6. Turn the Large knob clockwise one click to
move to the next character. Turn the Small knob
to select the desired character. After the correct
characters are chosen, press ENT.
WaypointComments
You may add comments to up to 200 waypoints.The comments are added while viewing the Info fora waypoint.
1. While viewing the desired waypoint, press
INFO. Turn the Small knob to the Waypoint
Comment page and press SEL.
Waypoint Comment: Press SEL
2. Turn the Large and Small knobs to edit the
comment. Press ENT to save the comment.
900FT TOWER 14NM NW OF AIRPORT
46
Waypoint Functions
ENT
ENT
ENT
ENT
INFO
SEL

Flight Plan Functions
Flight plans are specific routes between waypointsyou may store in the Apollo SL50/60’s memory.This information is used to calculate useful flightstatistics. The Flight Plan function allows you tohave up to 10 stored flight plans. Each flight planmay have up to 20 legs. The Active flight plan isalways used for the current flight. Inactive flightplans may be activated in the Flight Plan function tobe copied into the Active flight plan. TheFrom-To-Next waypoint page in the Nav function isa two-leg window of the Active Flight Planshowing the current and next leg.
Flight Plan Leg pages show the leg number andFrom and To waypoint identifiers on the display,along with the bearing and distance between theFrom and To waypoints. One asterisk (*) next to theleg number means that the displayed leg is in theActive flight plan. Two asterisks (**) mean that thedisplayed leg shows the current From and Towaypoints which are being used for navigation.
Flight PlanPages
The first page of each flight plan is the Name Page.
The Name Page displays the flight plan name, total
distance, and the destination waypoint. Distance is
displayed as 0.0 to 99.9 nm at 0.1 nm resolution and
100 to 99999 nm at 1 nm resolution. A diamond Yat the right side of the display indicates that more
pages can be viewed by turning the Small knob.
Reaching the Flight Plan Function
1. Press SYS to reach the System function and then
press SYS a second time, or turn the Large knob,
to reach the Flight Plan access display.
Flight Plans: Press ENT
2. Press ENT to enter into the Flight Plan function.
47
Flight Plan Functions
ENT
SYS

Active Flight Plan
The first plan in the Flight Plan function is the
Active plan and is noted by the name *Active* with
asterisks. This name cannot be changed in the
Active page.
*Active* 259nm Dest: PDT Y
Creating aFlight Plan
The basic steps for creating a flight plan include:entering the plan name and inserting waypoints.You may then view flight plan information, activatethe plan, and use the other options.
1. In the Flight Plan function, turn the Large knob to
view the “Create a New Flightplan: SEL” page.
Create a New Flightplan: SEL
2. Press SEL.
________ Enter a New Plan Name
48
Flight Plan Functions
SEL
SYS
WPT2
WPT1(Departure WPT)
PresentPosition
WPT3
WPT4
WPT5
Leg 1
Leg 2
Leg 3
Leg 4
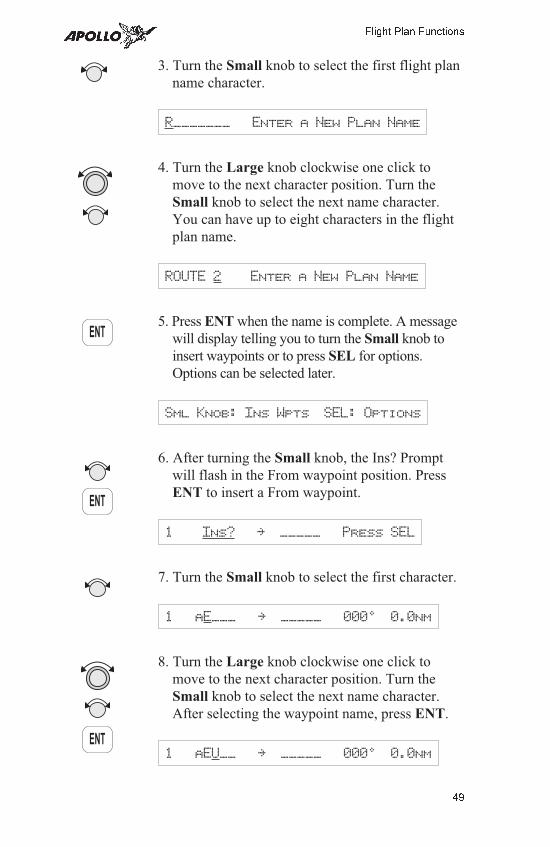
3. Turn the Small knob to select the first flight plan
name character.
R_______ Enter a New Plan Name
4. Turn the Large knob clockwise one click to
move to the next character position. Turn the
Small knob to select the next name character.
You can have up to eight characters in the flight
plan name.
ROUTE 2 Enter a New Plan Name
5. Press ENT when the name is complete. A message
will display telling you to turn the Small knob to
insert waypoints or to press SEL for options.
Options can be selected later.
Sml Knob: Ins Wpts SEL: Options
6. After turning the Small knob, the Ins? Prompt
will flash in the From waypoint position. Press
ENT to insert a From waypoint.
1 Ins? N _____ Press SEL
7. Turn the Small knob to select the first character.
1 aE___ N _____ 0000 0.0nm
8. Turn the Large knob clockwise one click to
move to the next character position. Turn the
Small knob to select the next name character.
After selecting the waypoint name, press ENT.
1 aEU__ N _____ 0000 0.0nm
49
Flight Plan Functions
ENT
ENT
ENT

9. The Ins? Prompt will flash in the To waypoint
position. Press ENT.
1 aEUG N Ins? 0000 0.0nm
10. Repeat steps 7-9 for the remaining waypoints in
your flight plan.
11. Press SEL when your flight plan is complete.
Flight PlanLeg
Information
Two types of information are available within flight
plan legs. Pressing INFO will provide information
about the destination waypoint. Information about
the ETA, ETE, Ground Speed, and Fuel is also
available for each leg by selecting which option you
like to view in the leg display.
1. While viewing a flight plan leg, press SEL. The
From waypoint field will flash.
1** Chg? N aSLE 3530 48.0nm
2. Turn the Large knob ccw one click to choose the
Bearing and Distance field for selection.
1** Chg? N aSLE 3530 48.0nm
3. Turn the Small knob to choose from the list of
available leg information options.
1** Chg? N aSLE LegETE 00:28
4. Press ENT to keep your choice displayed or
press SEL to cancel viewing and return to the
Bearing and Distance information.
50
Flight Plan Functions
ENT
SEL
SEL
ENT

ETA
Estimated Time of Arrival is for the displayed To
waypoint. It is available only in the Active flight
plan and requires an actual ground speed of more
than 5 knots. If there is no valid ETA for the leg,
dashes will replace the value.
1 ** aEUG N aSLE ETA 00:26
ETA?
ETA? is the same as ETA, except the Estimated
Ground Speed is used for the calculation.
1 ** aEUG N aSLE ETA? 00:27
Leg ETE
The Estimated Time Enroute between the displayed
From and To waypoints. Leg ETE requires an
actual ground speed of more than 5 knots. If there is
no valid ETA for the leg, dashes will replace the
value.
1 ** aEUG N aSLE LegETE 00:28
Leg ETE?
Leg ETE? is the same as ETE, except the Estimated
Ground Speed is used for the calculation.
1 ** aEUG N aSLE LegETE?00:30
ETE
Estimated Time Enroute in the Active flight plan is
from your present position. In an inactive flight
plan, ETE uses the From waypoint. ETE requires an
actual ground speed of more than 5 knots. If there is
no valid ETE for the leg, dashes will replace the
value.
1 ** aEUG N aSLE ETE 00:24
51
Flight Plan Functions
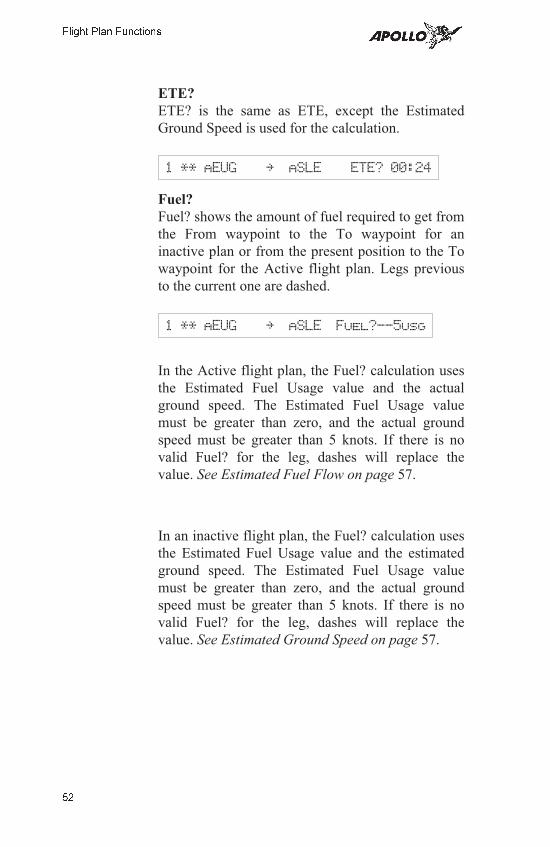
ETE?
ETE? is the same as ETE, except the Estimated
Ground Speed is used for the calculation.
1 ** aEUG N aSLE ETE? 00:24
Fuel?
Fuel? shows the amount of fuel required to get from
the From waypoint to the To waypoint for an
inactive plan or from the present position to the To
waypoint for the Active flight plan. Legs previous
to the current one are dashed.
1 ** aEUG N aSLE Fuel?^-5usg
In the Active flight plan, the Fuel? calculation uses
the Estimated Fuel Usage value and the actual
ground speed. The Estimated Fuel Usage value
must be greater than zero, and the actual ground
speed must be greater than 5 knots. If there is no
valid Fuel? for the leg, dashes will replace the
value. See Estimated Fuel Flow on page 57.
In an inactive flight plan, the Fuel? calculation uses
the Estimated Fuel Usage value and the estimated
ground speed. The Estimated Fuel Usage value
must be greater than zero, and the actual ground
speed must be greater than 5 knots. If there is no
valid Fuel? for the leg, dashes will replace the
value. See Estimated Ground Speed on page 57.
52
Flight Plan Functions
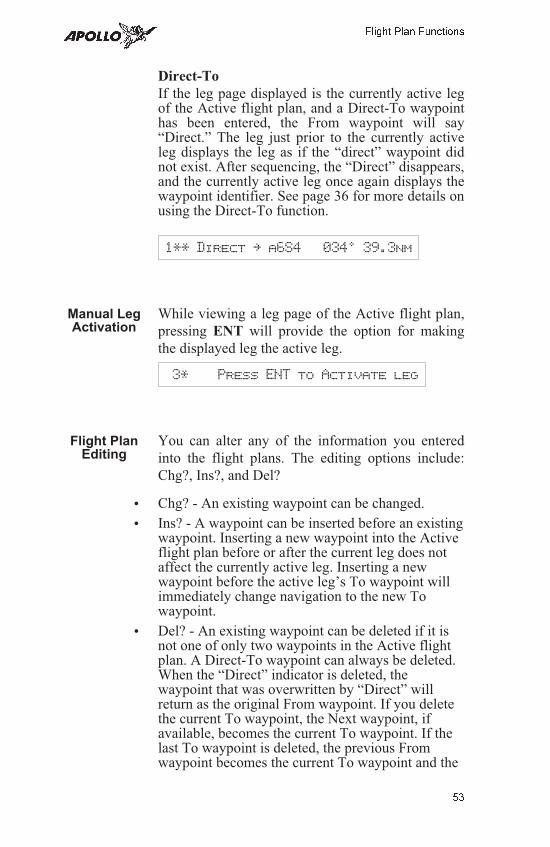
Direct-To
If the leg page displayed is the currently active legof the Active flight plan, and a Direct-To waypointhas been entered, the From waypoint will say“Direct.” The leg just prior to the currently activeleg displays the leg as if the “direct” waypoint didnot exist. After sequencing, the “Direct” disappears,and the currently active leg once again displays thewaypoint identifier. See page 36 for more details onusing the Direct-To function.
1** Direct N a6S4 0340 39.3nm
Manual LegActivation
While viewing a leg page of the Active flight plan,
pressing ENT will provide the option for making
the displayed leg the active leg.
3* Press ENT to Activate leg
Flight PlanEditing
You can alter any of the information you entered
into the flight plans. The editing options include:
Chg?, Ins?, and Del?
• Chg? - An existing waypoint can be changed.
• Ins? - A waypoint can be inserted before an existingwaypoint. Inserting a new waypoint into the Activeflight plan before or after the current leg does notaffect the currently active leg. Inserting a newwaypoint before the active leg’s To waypoint willimmediately change navigation to the new Towaypoint.
• Del? - An existing waypoint can be deleted if it isnot one of only two waypoints in the Active flightplan. A Direct-To waypoint can always be deleted.When the “Direct” indicator is deleted, thewaypoint that was overwritten by “Direct” willreturn as the original From waypoint. If you deletethe current To waypoint, the Next waypoint, ifavailable, becomes the current To waypoint. If thelast To waypoint is deleted, the previous Fromwaypoint becomes the current To waypoint and the
53
Flight Plan Functions

active leg number will be reduced (i.e. from leg 7 toleg 6).
Changing Existing Flight Plan Legs
1. In the Flight Plan function, turn the Large knob
to a flight plan and then use the Small knob to
display the leg of the plan that you want to edit.
2* aSLE N aHIO 3450 37.9nm
2. Press SEL. The From waypoint will flash with
the Chg? prompt. Turn the Large knob to the
desired waypoint.
2* Chg? N aHIO 3450 37.9nm
3. Press ENT. This takes you into the waypoint
database. Use the Large and Small knobs to
select the desired waypoint and then press ENT.
a6S4 c GATES OR USA
Inserting a New Waypoint
1. In the Flight Plan function, display the leg of the
plan that you want to edit.
3* a6S4 N aPDT 0500 162nm
2. Press SEL. The From waypoint will flash with
the Ins? prompt. Turn the Large knob if
necessary to the waypoint you want changed.
3* a6S4 N Ins? 0500 162nm
54
Flight Plan Functions
SEL
ENT
ENT
SEL
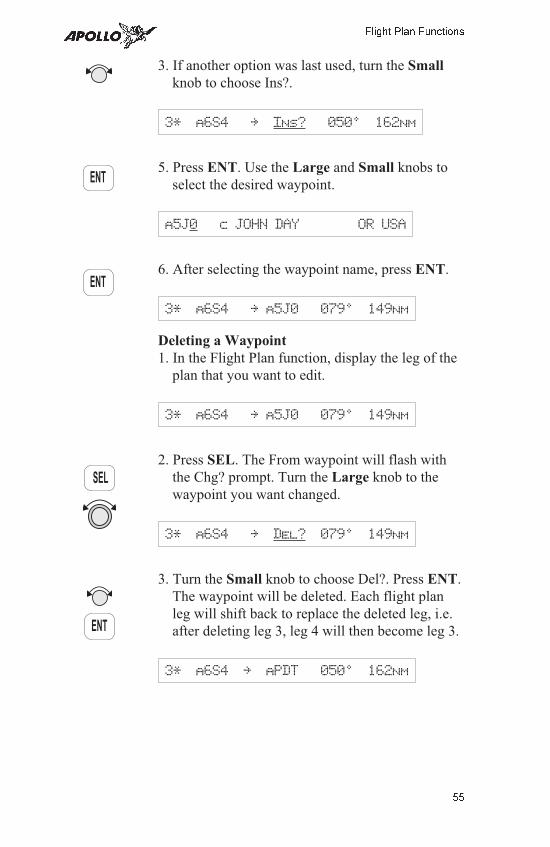
3. If another option was last used, turn the Small
knob to choose Ins?.
3* a6S4 N Ins? 0500 162nm
5. Press ENT. Use the Large and Small knobs to
select the desired waypoint.
a5J0 c JOHN DAY OR USA
6. After selecting the waypoint name, press ENT.
3* a6S4 N a5J0 0790 149nm
Deleting a Waypoint
1. In the Flight Plan function, display the leg of the
plan that you want to edit.
3* a6S4 N a5J0 0790 149nm
2. Press SEL. The From waypoint will flash with
the Chg? prompt. Turn the Large knob to the
waypoint you want changed.
3* a6S4 N Del? 0790 149nm
3. Turn the Small knob to choose Del?. Press ENT.
The waypoint will be deleted. Each flight plan
leg will shift back to replace the deleted leg, i.e.
after deleting leg 3, leg 4 will then become leg 3.
3* a6S4 N aPDT 0500 162nm
55
Flight Plan Functions
ENT
SEL
ENT
ENT
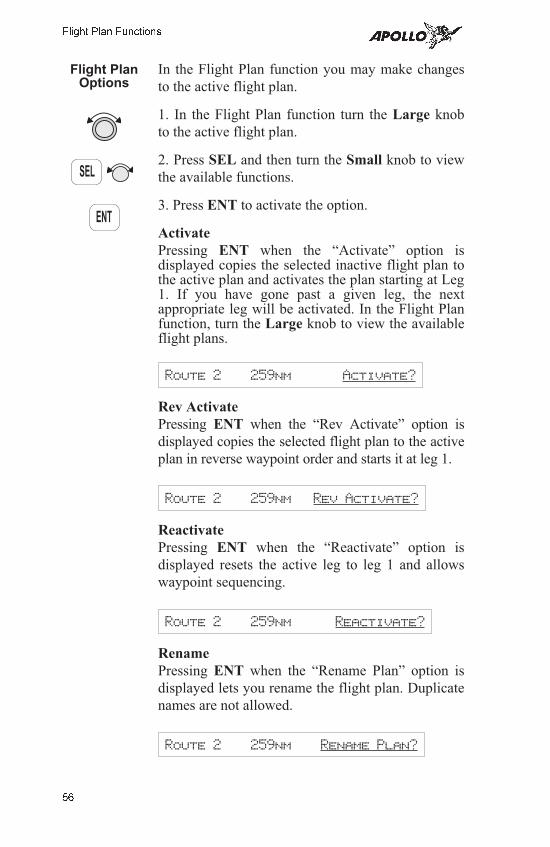
Flight PlanOptions
In the Flight Plan function you may make changes
to the active flight plan.
1. In the Flight Plan function turn the Large knob
to the active flight plan.
2. Press SEL and then turn the Small knob to view
the available functions.
3. Press ENT to activate the option.
Activate
Pressing ENT when the “Activate” option isdisplayed copies the selected inactive flight plan tothe active plan and activates the plan starting at Leg1. If you have gone past a given leg, the nextappropriate leg will be activated. In the Flight Planfunction, turn the Large knob to view the availableflight plans.
Route 2 259nm Activate?
Rev Activate
Pressing ENT when the “Rev Activate” option is
displayed copies the selected flight plan to the active
plan in reverse waypoint order and starts it at leg 1.
Route 2 259nm Rev Activate?
Reactivate
Pressing ENT when the “Reactivate” option is
displayed resets the active leg to leg 1 and allows
waypoint sequencing.
Route 2 259nm Reactivate?
Rename
Pressing ENT when the “Rename Plan” option is
displayed lets you rename the flight plan. Duplicate
names are not allowed.
Route 2 259nm Rename Plan?
56
Flight Plan Functions
ENT
SEL
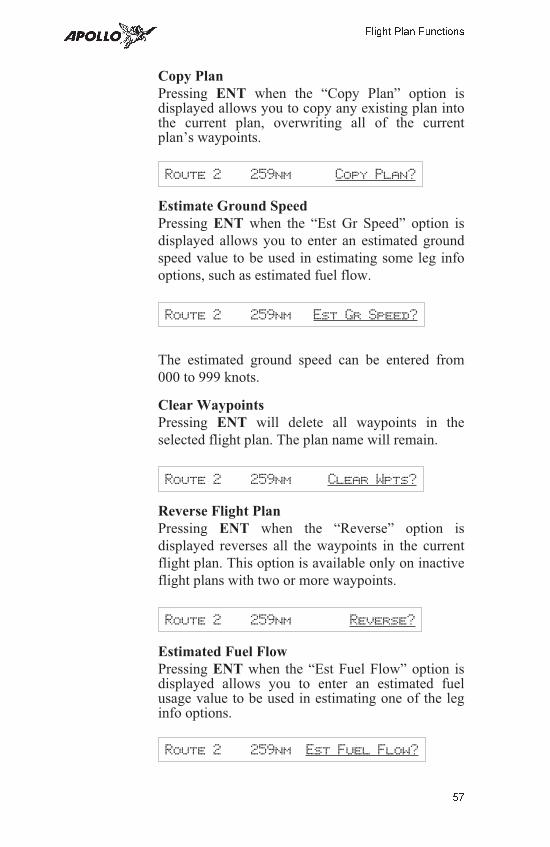
Copy Plan
Pressing ENT when the “Copy Plan” option isdisplayed allows you to copy any existing plan intothe current plan, overwriting all of the currentplan’s waypoints.
Route 2 259nm Copy Plan?
Estimate Ground Speed
Pressing ENT when the “Est Gr Speed” option is
displayed allows you to enter an estimated ground
speed value to be used in estimating some leg info
options, such as estimated fuel flow.
Route 2 259nm Est Gr Speed?
The estimated ground speed can be entered from
000 to 999 knots.
Clear Waypoints
Pressing ENT will delete all waypoints in the
selected flight plan. The plan name will remain.
Route 2 259nm Clear Wpts?
Reverse Flight Plan
Pressing ENT when the “Reverse” option is
displayed reverses all the waypoints in the current
flight plan. This option is available only on inactive
flight plans with two or more waypoints.
Route 2 259nm Reverse?
Estimated Fuel Flow
Pressing ENT when the “Est Fuel Flow” option isdisplayed allows you to enter an estimated fuelusage value to be used in estimating one of the leginfo options.
Route 2 259nm Est Fuel Flow?
57
Flight Plan Functions
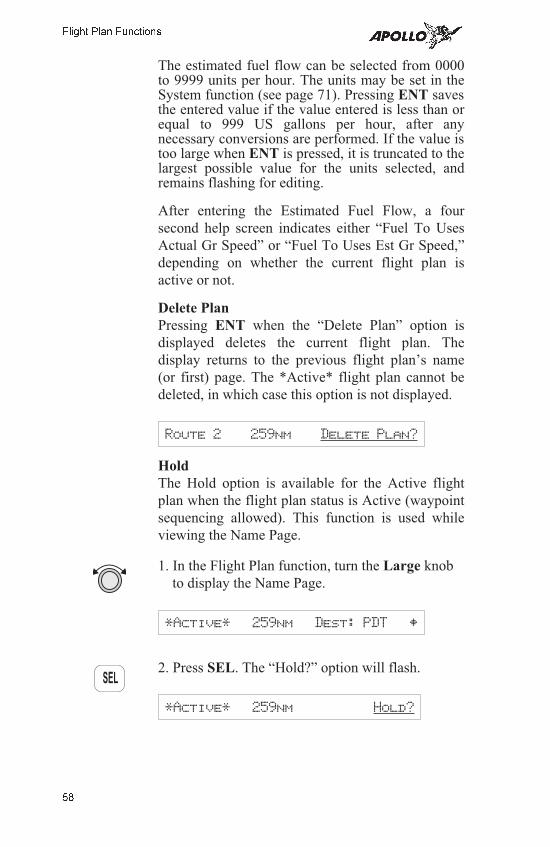
The estimated fuel flow can be selected from 0000to 9999 units per hour. The units may be set in theSystem function (see page 71). Pressing ENT savesthe entered value if the value entered is less than orequal to 999 US gallons per hour, after anynecessary conversions are performed. If the value istoo large when ENT is pressed, it is truncated to thelargest possible value for the units selected, andremains flashing for editing.
After entering the Estimated Fuel Flow, a four
second help screen indicates either “Fuel To Uses
Actual Gr Speed” or “Fuel To Uses Est Gr Speed,”
depending on whether the current flight plan is
active or not.
Delete Plan
Pressing ENT when the “Delete Plan” option is
displayed deletes the current flight plan. The
display returns to the previous flight plan’s name
(or first) page. The *Active* flight plan cannot be
deleted, in which case this option is not displayed.
Route 2 259nm Delete Plan?
Hold
The Hold option is available for the Active flight
plan when the flight plan status is Active (waypoint
sequencing allowed). This function is used while
viewing the Name Page.
1. In the Flight Plan function, turn the Large knob
to display the Name Page.
*Active* 259nm Dest: PDT Y
2. Press SEL. The “Hold?” option will flash.
*Active* 259nm Hold?
58
Flight Plan Functions
SEL
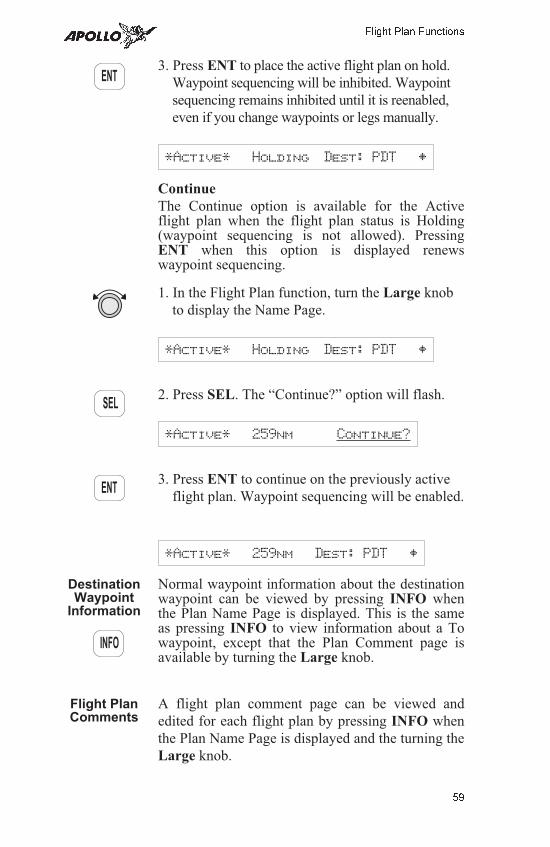
3. Press ENT to place the active flight plan on hold.
Waypoint sequencing will be inhibited. Waypoint
sequencing remains inhibited until it is reenabled,
even if you change waypoints or legs manually.
*Active* Holding Dest: PDT Y
Continue
The Continue option is available for the Activeflight plan when the flight plan status is Holding(waypoint sequencing is not allowed). PressingENT when this option is displayed renewswaypoint sequencing.
1. In the Flight Plan function, turn the Large knob
to display the Name Page.
*Active* Holding Dest: PDT Y
2. Press SEL. The “Continue?” option will flash.
*Active* 259nm Continue?
3. Press ENT to continue on the previously active
flight plan. Waypoint sequencing will be enabled.
*Active* 259nm Dest: PDT Y
DestinationWaypoint
Information
Normal waypoint information about the destinationwaypoint can be viewed by pressing INFO whenthe Plan Name Page is displayed. This is the sameas pressing INFO to view information about a Towaypoint, except that the Plan Comment page isavailable by turning the Large knob.
Flight PlanComments
A flight plan comment page can be viewed and
edited for each flight plan by pressing INFO when
the Plan Name Page is displayed and the turning the
Large knob.
59
Flight Plan Functions
ENT
SEL
ENT
INFO
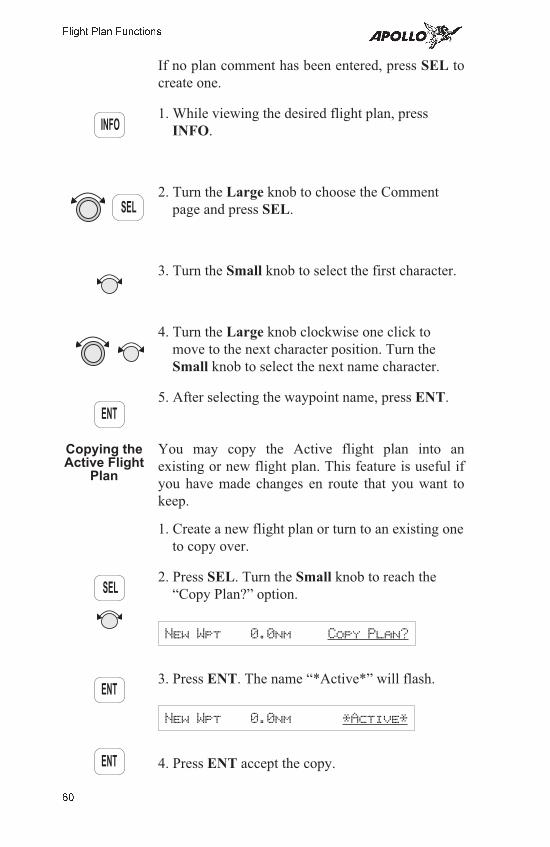
If no plan comment has been entered, press SEL to
create one.
1. While viewing the desired flight plan, press
INFO.
2. Turn the Large knob to choose the Comment
page and press SEL.
3. Turn the Small knob to select the first character.
4. Turn the Large knob clockwise one click to
move to the next character position. Turn the
Small knob to select the next name character.
5. After selecting the waypoint name, press ENT.
Copying theActive Flight
Plan
You may copy the Active flight plan into an
existing or new flight plan. This feature is useful if
you have made changes en route that you want to
keep.
1. Create a new flight plan or turn to an existing one
to copy over.
2. Press SEL. Turn the Small knob to reach the
“Copy Plan?” option.
New Wpt 0.0nm Copy Plan?
3. Press ENT. The name “*Active*” will flash.
New Wpt 0.0nm *Active*
4. Press ENT accept the copy.
60
Flight Plan Functions
INFO
ENT
SEL
ENT
ENT
SEL

System Functions
Pressing the SYS key allows you to access the
System functions. After pressing the SYS key, turn
the Large knob to view the available functions.
Press ENT when viewing the desired System
function.
Flight Plans Press ENT to reach the Flight Plan functions. The
available pages include: the Active flight plan,
inactive flight plans, and the page to create new
flight plans. Complete details on using the Flight
Plan function are available in the Flight Plan
section.
Flight Plans: Press ENT
WaypointDatabase
The Waypoint Database page allows you to view all
of the waypoint information in the database. In the
Apollo SL50, pressing the WPT key will take you
into the Waypoint database. In the SL60, press
SYS, turn the Large knob to the Waypoint
Database page, and then press ENT.
Access Database: Press ENT
1. The first character of the waypoint name flashes.
Turn the Large knob ccw one click to select the
waypoint type character. Turn the Small knob to
select the Waypoint type.
aPDT c PENDLETON OR USA
2. Turn the Large knob clockwise to move to the
first character of the waypoint name.
aPDT c PENDLETON OR USA
61
System Functions
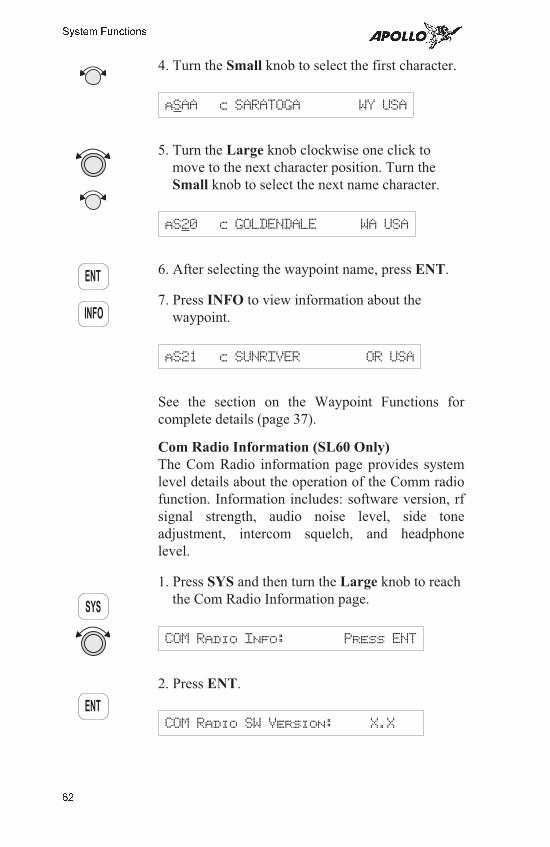
4. Turn the Small knob to select the first character.
aSAA c SARATOGA WY USA
5. Turn the Large knob clockwise one click to
move to the next character position. Turn the
Small knob to select the next name character.
aS20 c GOLDENDALE WA USA
6. After selecting the waypoint name, press ENT.
7. Press INFO to view information about the
waypoint.
aS21 c SUNRIVER OR USA
See the section on the Waypoint Functions for
complete details (page 37).
Com Radio Information (SL60 Only)
The Com Radio information page provides system
level details about the operation of the Comm radio
function. Information includes: software version, rf
signal strength, audio noise level, side tone
adjustment, intercom squelch, and headphone
level.
1. Press SYS and then turn the Large knob to reach
the Com Radio Information page.
COM Radio Info: Press ENT
2. Press ENT.
COM Radio SW Version: X.X
62
System Functions
ENT
SYS
ENT
INFO
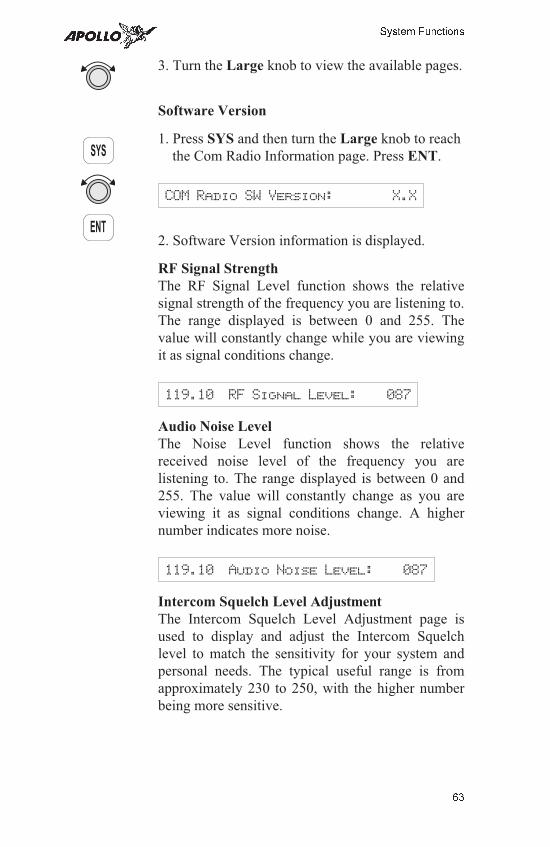
3. Turn the Large knob to view the available pages.
Software Version
1. Press SYS and then turn the Large knob to reach
the Com Radio Information page. Press ENT.
COM Radio SW Version: X.X
2. Software Version information is displayed.
RF Signal Strength
The RF Signal Level function shows the relative
signal strength of the frequency you are listening to.
The range displayed is between 0 and 255. The
value will constantly change while you are viewing
it as signal conditions change.
119.10 RF Signal Level: 087
Audio Noise Level
The Noise Level function shows the relative
received noise level of the frequency you are
listening to. The range displayed is between 0 and
255. The value will constantly change as you are
viewing it as signal conditions change. A higher
number indicates more noise.
119.10 Audio Noise Level: 087
Intercom Squelch Level Adjustment
The Intercom Squelch Level Adjustment page is
used to display and adjust the Intercom Squelch
level to match the sensitivity for your system and
personal needs. The typical useful range is from
approximately 230 to 250, with the higher number
being more sensitive.
63
System Functions
SYS
ENT

1. In the Com Radio Information function, turn the
Large knob to the Intercom Squelch Level page.
Intercom Squelch: 187
2. Turn the Small knob to adjust the level.
Intercom Squelch: 197
3. The desired level will be activated as selected.
You do not need to press ENT.
Sidetone Level Adjustment
The Sidetone Level Adjustment page is used to display
and adjust the headphone sidetone level.
1. In the Com Radio Information function, turn the
Large knob to view the Sidetone Level
Adjustment page.
Sidetone Level: 187
2. Turn the Small knob to adjust the level.
Sidetone Level: 197
3. The desired level will be activated as selected. You
do not need to press ENT.
64
System Functions
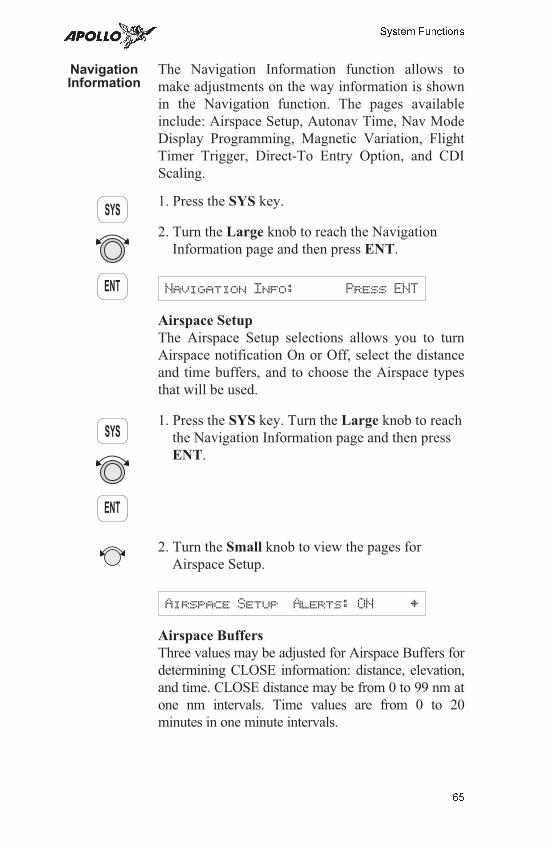
NavigationInformation
The Navigation Information function allows to
make adjustments on the way information is shown
in the Navigation function. The pages available
include: Airspace Setup, Autonav Time, Nav Mode
Display Programming, Magnetic Variation, Flight
Timer Trigger, Direct-To Entry Option, and CDI
Scaling.
1. Press the SYS key.
2. Turn the Large knob to reach the Navigation
Information page and then press ENT.
Navigation Info: Press ENT
Airspace Setup
The Airspace Setup selections allows you to turn
Airspace notification On or Off, select the distance
and time buffers, and to choose the Airspace types
that will be used.
1. Press the SYS key. Turn the Large knob to reach
the Navigation Information page and then press
ENT.
2. Turn the Small knob to view the pages for
Airspace Setup.
Airspace Setup Alerts: ON Y
Airspace Buffers
Three values may be adjusted for Airspace Buffers for
determining CLOSE information: distance, elevation,
and time. CLOSE distance may be from 0 to 99 nm at
one nm intervals. Time values are from 0 to 20
minutes in one minute intervals.
65
System Functions
SYS
ENT
SYS
ENT
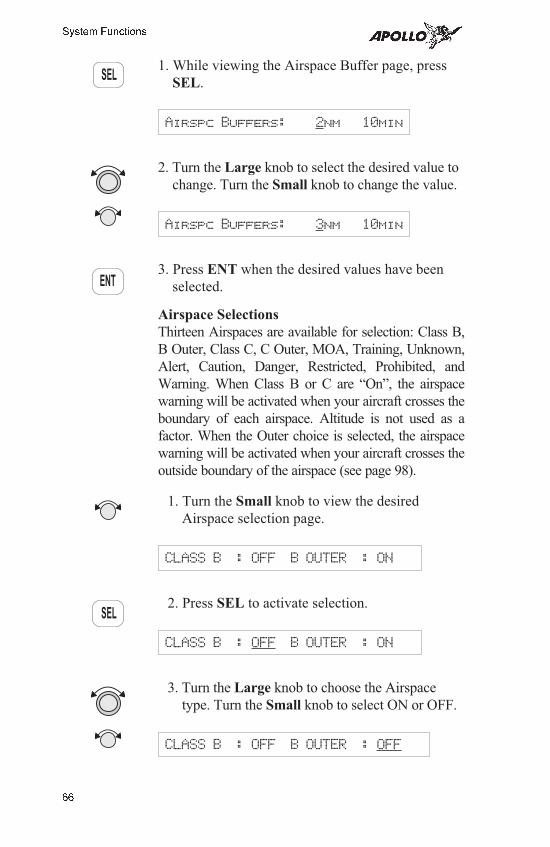
1. While viewing the Airspace Buffer page, press
SEL.
Airspc Buffers: 2nm 10min
2. Turn the Large knob to select the desired value to
change. Turn the Small knob to change the value.
Airspc Buffers: 3nm 10min
3. Press ENT when the desired values have been
selected.
Airspace Selections
Thirteen Airspaces are available for selection: Class B,
B Outer, Class C, C Outer, MOA, Training, Unknown,
Alert, Caution, Danger, Restricted, Prohibited, and
Warning. When Class B or C are “On”, the airspace
warning will be activated when your aircraft crosses the
boundary of each airspace. Altitude is not used as a
factor. When the Outer choice is selected, the airspace
warning will be activated when your aircraft crosses the
outside boundary of the airspace (see page 98).
1. Turn the Small knob to view the desired
Airspace selection page.
CLASS B : OFF B OUTER : ON
2. Press SEL to activate selection.
CLASS B : OFF B OUTER : ON
3. Turn the Large knob to choose the Airspace
type. Turn the Small knob to select ON or OFF.
CLASS B : OFF B OUTER : OFF
66
System Functions
SEL
ENT
SEL
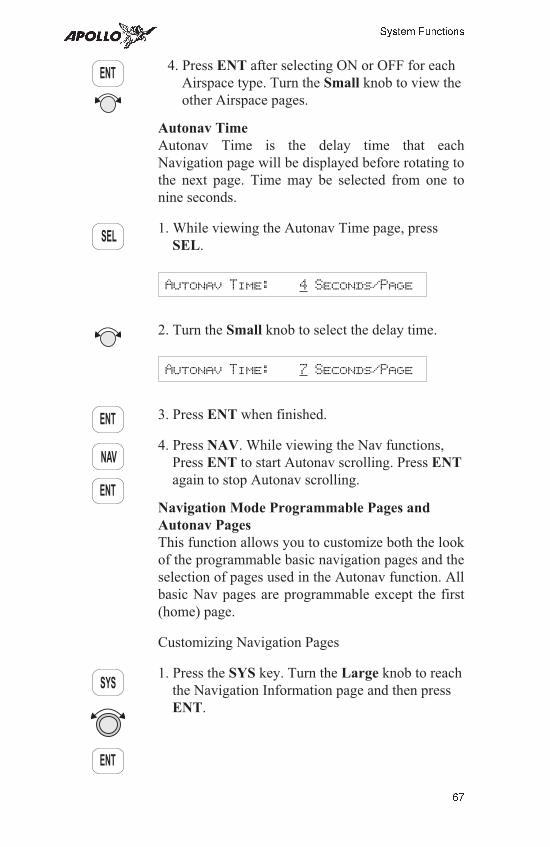
4. Press ENT after selecting ON or OFF for each
Airspace type. Turn the Small knob to view the
other Airspace pages.
Autonav Time
Autonav Time is the delay time that each
Navigation page will be displayed before rotating to
the next page. Time may be selected from one to
nine seconds.
1. While viewing the Autonav Time page, press
SEL.
Autonav Time: 4 Seconds/Page
2. Turn the Small knob to select the delay time.
Autonav Time: 7 Seconds/Page
3. Press ENT when finished.
4. Press NAV. While viewing the Nav functions,
Press ENT to start Autonav scrolling. Press ENT
again to stop Autonav scrolling.
Navigation Mode Programmable Pages and
Autonav Pages
This function allows you to customize both the look
of the programmable basic navigation pages and the
selection of pages used in the Autonav function. All
basic Nav pages are programmable except the first
(home) page.
Customizing Navigation Pages
1. Press the SYS key. Turn the Large knob to reach
the Navigation Information page and then press
ENT.
67
System Functions
SEL
ENT
NAV
ENT
SYS
ENT
ENT
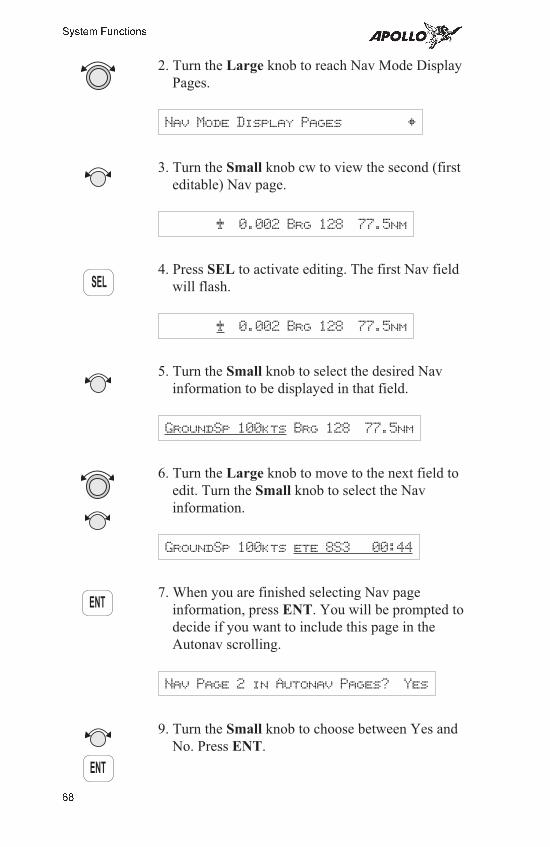
2. Turn the Large knob to reach Nav Mode Display
Pages.
Nav Mode Display Pages Y
3. Turn the Small knob cw to view the second (first
editable) Nav page.
A 0.002 Brg 128 77.5nm
4. Press SEL to activate editing. The first Nav field
will flash.
A 0.002 Brg 128 77.5nm
5. Turn the Small knob to select the desired Nav
information to be displayed in that field.
GroundSp 100kts Brg 128 77.5nm
6. Turn the Large knob to move to the next field to
edit. Turn the Small knob to select the Nav
information.
GroundSp 100kts ete 8S3 00:44
7. When you are finished selecting Nav page
information, press ENT. You will be prompted to
decide if you want to include this page in the
Autonav scrolling.
Nav Page 2 in Autonav Pages? Yes
9. Turn the Small knob to choose between Yes and
No. Press ENT.
68
System Functions
SEL
ENT
ENT

10. Turn the Small knob to view another Nav page
and repeat steps 4-9.
Selecting Autonav Pages
1. While you are viewing a Nav page information
page, press SEL and then ENT.
2. You will be prompted to decide if you want to
include this page in the Autonav scrolling. Turn
the Small knob to choose between Yes and No.
Nav Page 4 in Autonav Pages? Yes
3. Press ENT.
Creating a New Custom Nav Page
Besides being able to customize most of the Nav pages,
you can also create an entirely new one. You can select
information for up to four fields on the display.
1. Press SYS. Turn the Large knob to Nav Info and
press ENT. Turn the Large knob to the Nav
Mode Display Pages.
Nav Mode Display Pages Y
2. Turn the Small knob to reach the new Nav Page
display.
<Blank Nav Page> Y
2. Press SEL to start editing. The first field will
flash showing a series of dashes.
______
69
System Functions
SEL
ENT
ENT
ENT
SEL
SYS
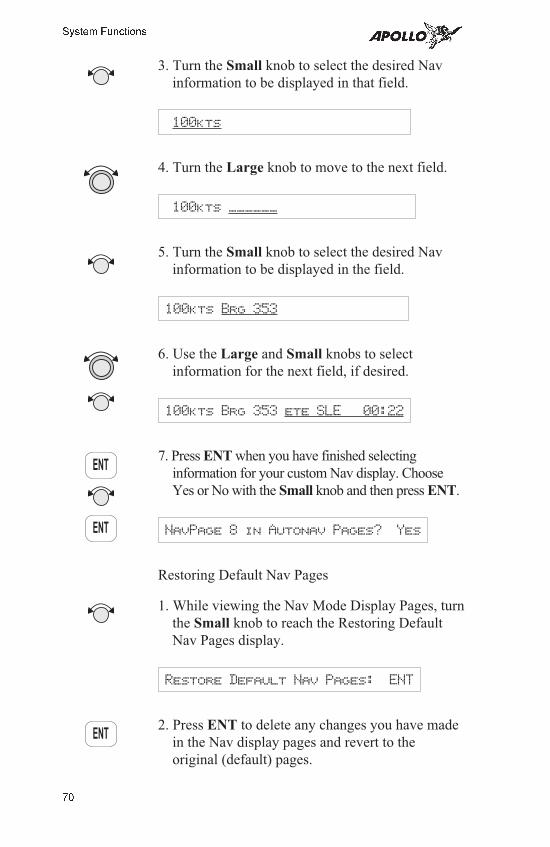
3. Turn the Small knob to select the desired Nav
information to be displayed in that field.
100kts
4. Turn the Large knob to move to the next field.
100kts ______
5. Turn the Small knob to select the desired Nav
information to be displayed in the field.
100kts Brg 353
6. Use the Large and Small knobs to select
information for the next field, if desired.
100kts Brg 353 ete SLE 00:22
7. Press ENT when you have finished selecting
information for your custom Nav display. Choose
Yes or No with the Small knob and then press ENT.
NavPage 8 in Autonav Pages? Yes
Restoring Default Nav Pages
1. While viewing the Nav Mode Display Pages, turn
the Small knob to reach the Restoring Default
Nav Pages display.
Restore Default Nav Pages: ENT
2. Press ENT to delete any changes you have made
in the Nav display pages and revert to the
original (default) pages.
70
System Functions
ENT
ENT
ENT
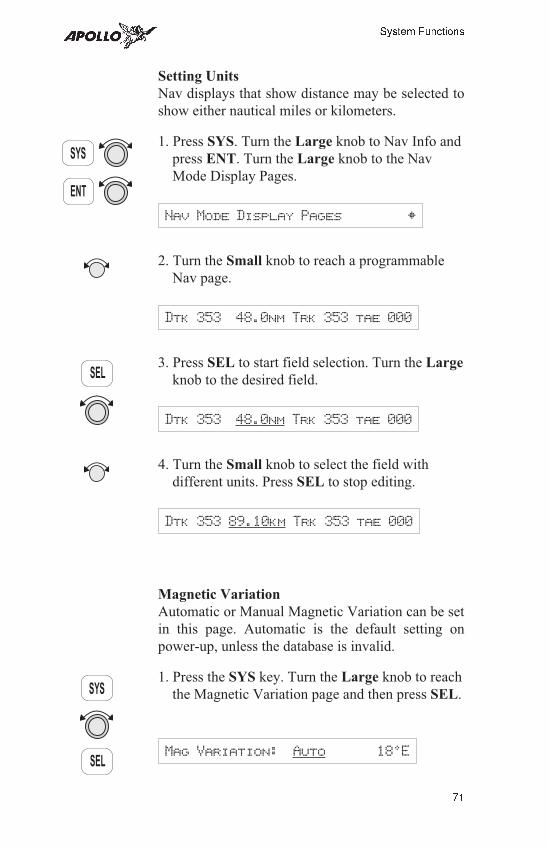
Setting Units
Nav displays that show distance may be selected to
show either nautical miles or kilometers.
1. Press SYS. Turn the Large knob to Nav Info and
press ENT. Turn the Large knob to the Nav
Mode Display Pages.
Nav Mode Display Pages Y
2. Turn the Small knob to reach a programmable
Nav page.
Dtk 353 48.0nm Trk 353 tae 000
3. Press SEL to start field selection. Turn the Large
knob to the desired field.
Dtk 353 48.0nm Trk 353 tae 000
4. Turn the Small knob to select the field with
different units. Press SEL to stop editing.
Dtk 353 89.10km Trk 353 tae 000
Magnetic Variation
Automatic or Manual Magnetic Variation can be set
in this page. Automatic is the default setting on
power-up, unless the database is invalid.
1. Press the SYS key. Turn the Large knob to reach
the Magnetic Variation page and then press SEL.
Mag Variation: Auto 180E
71
System Functions
SEL
ENT
SYS
SEL
SYS
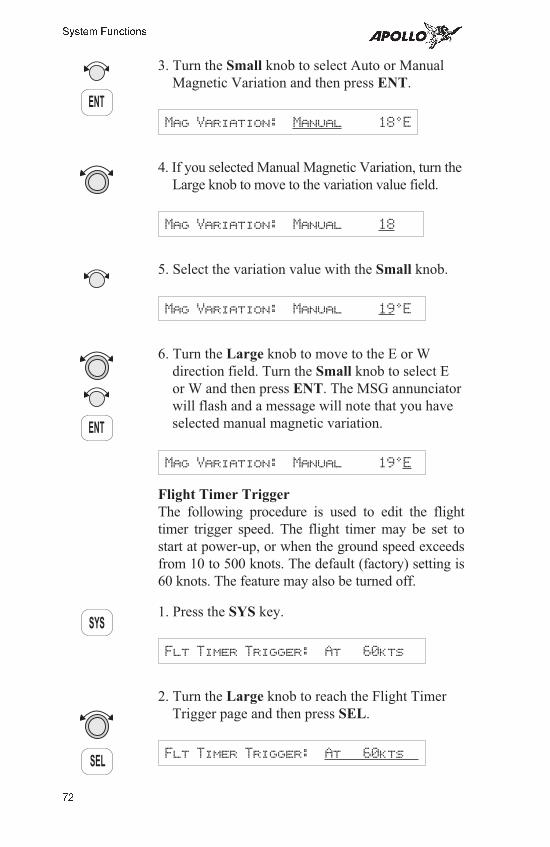
3. Turn the Small knob to select Auto or Manual
Magnetic Variation and then press ENT.
Mag Variation: Manual 180E
4. If you selected Manual Magnetic Variation, turn the
Large knob to move to the variation value field.
Mag Variation: Manual 18
5. Select the variation value with the Small knob.
Mag Variation: Manual 190E
6. Turn the Large knob to move to the E or W
direction field. Turn the Small knob to select E
or W and then press ENT. The MSG annunciator
will flash and a message will note that you have
selected manual magnetic variation.
Mag Variation: Manual 190E
Flight Timer Trigger
The following procedure is used to edit the flight
timer trigger speed. The flight timer may be set to
start at power-up, or when the ground speed exceeds
from 10 to 500 knots. The default (factory) setting is
60 knots. The feature may also be turned off.
1. Press the SYS key.
Flt Timer Trigger: At 60kts
2. Turn the Large knob to reach the Flight Timer
Trigger page and then press SEL.
Flt Timer Trigger: At 60kts
72
System Functions
ENT
SEL
SYS
ENT
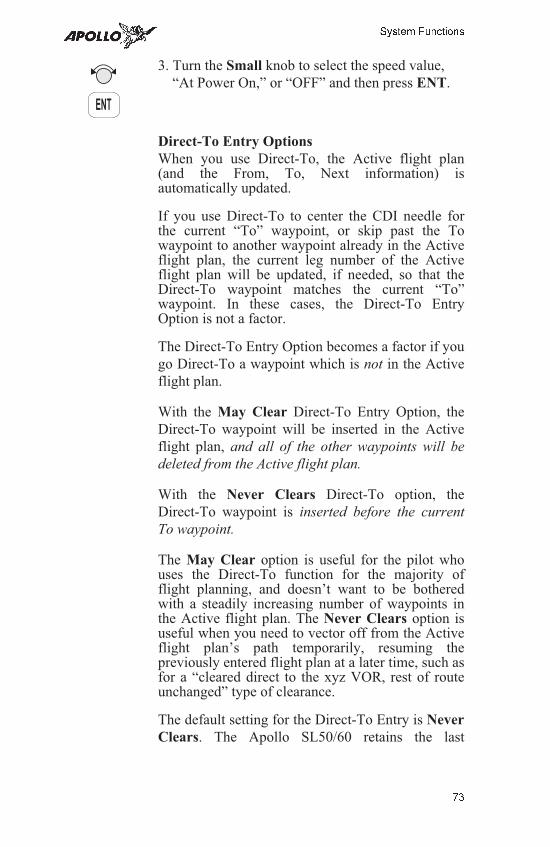
3. Turn the Small knob to select the speed value,
“At Power On,” or “OFF” and then press ENT.
Direct-To Entry Options
When you use Direct-To, the Active flight plan(and the From, To, Next information) isautomatically updated.
If you use Direct-To to center the CDI needle forthe current “To” waypoint, or skip past the Towaypoint to another waypoint already in the Activeflight plan, the current leg number of the Activeflight plan will be updated, if needed, so that theDirect-To waypoint matches the current “To”waypoint. In these cases, the Direct-To EntryOption is not a factor.
The Direct-To Entry Option becomes a factor if you
go Direct-To a waypoint which is not in the Active
flight plan.
With the May Clear Direct-To Entry Option, the
Direct-To waypoint will be inserted in the Active
flight plan, and all of the other waypoints will be
deleted from the Active flight plan.
With the Never Clears Direct-To option, the
Direct-To waypoint is inserted before the current
To waypoint.
The May Clear option is useful for the pilot whouses the Direct-To function for the majority offlight planning, and doesn’t want to be botheredwith a steadily increasing number of waypoints inthe Active flight plan. The Never Clears option isuseful when you need to vector off from the Activeflight plan’s path temporarily, resuming thepreviously entered flight plan at a later time, such asfor a “cleared direct to the xyz VOR, rest of routeunchanged” type of clearance.
The default setting for the Direct-To Entry is Never
Clears. The Apollo SL50/60 retains the last
73
System Functions
ENT

Direct-To Entry Option setting when it is powered
up.
1. Press the SYS key. Turn the Large knob to reach
the Direct-To page and then press SEL.
Direct-To Never Clears Active
2. Turn the Small knob to select “May Clear” or
“Never Clears” and then press ENT.
Direct-To May Clear Active
CDI Scaling
The CDI Scaling option allows you to select manual
or automatic full scale deflection of the internal
CDI. Manual full scale deflection options include:
0.30 nm, 1.00 nm, and 5.00 nm. Automatic scaling
will use 5.00 nm as the setting.
1. Press the SYS key. Turn the Large knob to reach
the CDI Scaling page and then press SEL.
CDI Scaling: Auto GGGGG 5.00nm
2. Turn the Small knob to select Automatic or
Manual.
CDI Scaling: Manual GGGGG 5.00nm
3. If you chose manual, turn the Large knob to
move to the distance value.
CDI Scaling: Manual GGGGG 5.00nm
74
System Functions
ENT
SYS
SYS
SEL
SEL
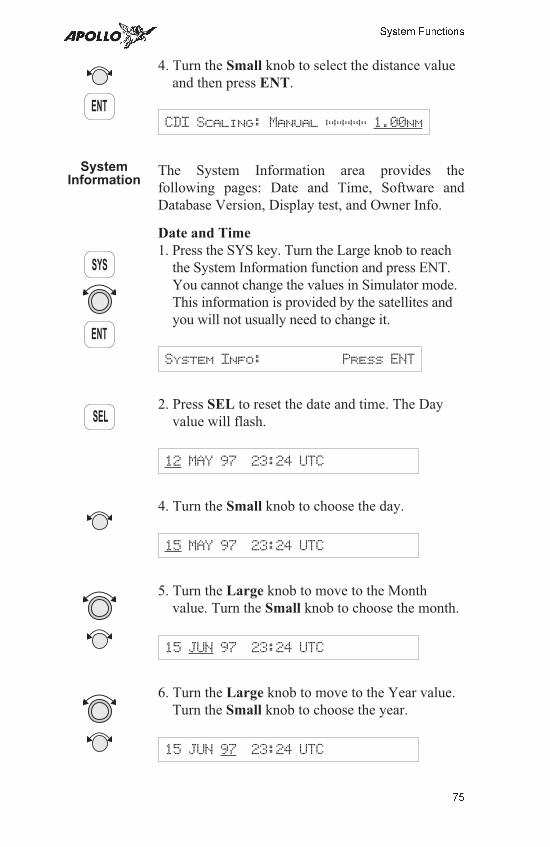
4. Turn the Small knob to select the distance value
and then press ENT.
CDI Scaling: Manual ##### 1.00nm
SystemInformation
The System Information area provides the
following pages: Date and Time, Software and
Database Version, Display test, and Owner Info.
Date and Time
1. Press the SYS key. Turn the Large knob to reach
the System Information function and press ENT.
You cannot change the values in Simulator mode.
This information is provided by the satellites and
you will not usually need to change it.
System Info: Press ENT
2. Press SEL to reset the date and time. The Day
value will flash.
12 MAY 97 23:24 UTC
4. Turn the Small knob to choose the day.
15 MAY 97 23:24 UTC
5. Turn the Large knob to move to the Month
value. Turn the Small knob to choose the month.
15 JUN 97 23:24 UTC
6. Turn the Large knob to move to the Year value.
Turn the Small knob to choose the year.
15 JUN 97 23:24 UTC
75
System Functions
ENT
SEL
SYS
ENT

7. Turn the Large knob to move to the Time-Hours
value. Turn the Small knob to choose the hours.
15 JUN 97 20:24 UTC
8. Turn the Large knob to move to the
Time-Minutes value. Turn the Small knob to
choose the minutes.
15 JUN 97 20:24 UTC
9. After completing your entries, press ENT.
15 JUN 97 20:24 UTC
Software Version
The Software Version function provides version
information about the Apollo software, serial number,
database, GPS sensor, display software, and Com
Radio software for the Apollo SL60.
1. In the System Information function turn the
Large knob to reach Software Version page.
Apollo SL50/60 SW Vers X.X Y
2. Turn the Small knob cw one click to view the
Serial Number page.
Serial Number: XXXXXXXX
3. Turn the Small knob cw one click to view the
Database Version page.
Americas DB Exp: xx/xx/xx
76
System Functions
ENT
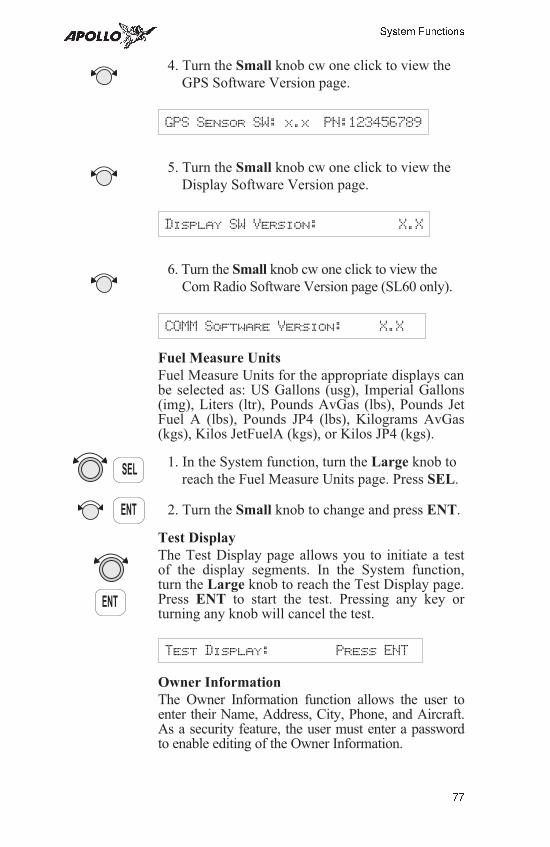
4. Turn the Small knob cw one click to view the
GPS Software Version page.
GPS Sensor SW: x.x PN:123456789
5. Turn the Small knob cw one click to view the
Display Software Version page.
Display SW Version: X.X
6. Turn the Small knob cw one click to view the
Com Radio Software Version page (SL60 only).
COMM Software Version: X.X
Fuel Measure Units
Fuel Measure Units for the appropriate displays canbe selected as: US Gallons (usg), Imperial Gallons(img), Liters (ltr), Pounds AvGas (lbs), Pounds JetFuel A (lbs), Pounds JP4 (lbs), Kilograms AvGas(kgs), Kilos JetFuelA (kgs), or Kilos JP4 (kgs).
1. In the System function, turn the Large knob to
reach the Fuel Measure Units page. Press SEL.
2. Turn the Small knob to change and press ENT.
Test Display
The Test Display page allows you to initiate a testof the display segments. In the System function,turn the Large knob to reach the Test Display page.Press ENT to start the test. Pressing any key orturning any knob will cancel the test.
Test Display: Press ENT
Owner Information
The Owner Information function allows the user toenter their Name, Address, City, Phone, and Aircraft.As a security feature, the user must enter a passwordto enable editing of the Owner Information.
77
System Functions
ENT
SEL
ENT
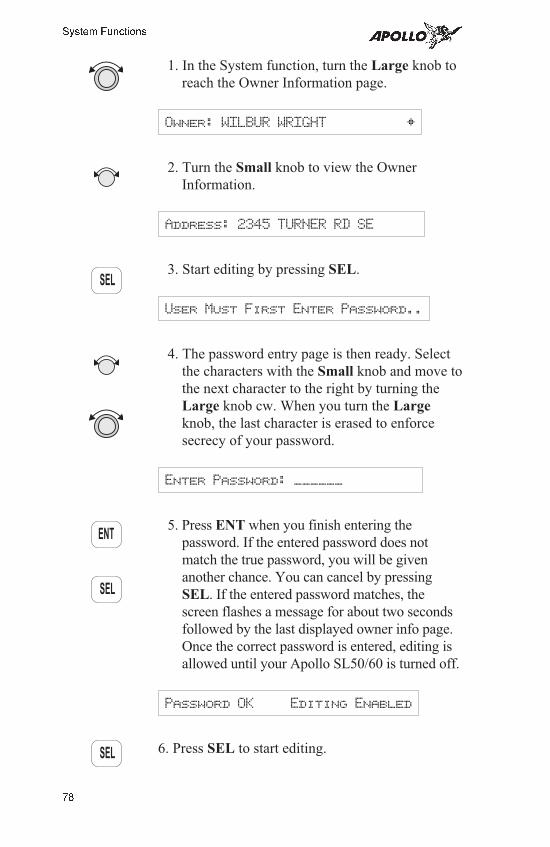
1. In the System function, turn the Large knob to
reach the Owner Information page.
Owner: WILBUR WRIGHT Y
2. Turn the Small knob to view the Owner
Information.
Address: 2345 TURNER RD SE
3. Start editing by pressing SEL.
User Must First Enter Password..
4. The password entry page is then ready. Select
the characters with the Small knob and move to
the next character to the right by turning the
Large knob cw. When you turn the Large
knob, the last character is erased to enforce
secrecy of your password.
Enter Password: ______
5. Press ENT when you finish entering the
password. If the entered password does not
match the true password, you will be given
another chance. You can cancel by pressing
SEL. If the entered password matches, the
screen flashes a message for about two seconds
followed by the last displayed owner info page.
Once the correct password is entered, editing is
allowed until your Apollo SL50/60 is turned off.
Password OK Editing Enabled
6. Press SEL to start editing.
78
System Functions
ENT
SEL
SEL
SEL
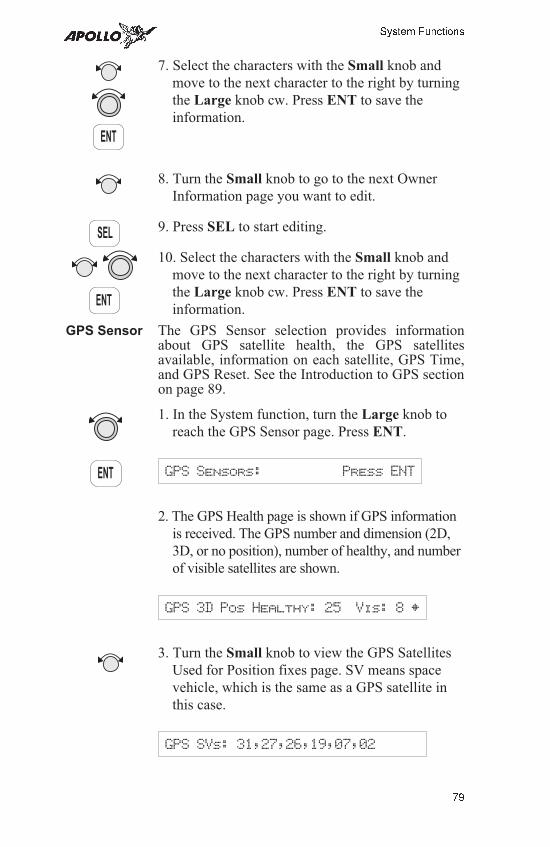
7. Select the characters with the Small knob and
move to the next character to the right by turning
the Large knob cw. Press ENT to save the
information.
8. Turn the Small knob to go to the next Owner
Information page you want to edit.
9. Press SEL to start editing.
10. Select the characters with the Small knob and
move to the next character to the right by turning
the Large knob cw. Press ENT to save the
information.
GPS Sensor The GPS Sensor selection provides informationabout GPS satellite health, the GPS satellitesavailable, information on each satellite, GPS Time,and GPS Reset. See the Introduction to GPS sectionon page 89.
1. In the System function, turn the Large knob to
reach the GPS Sensor page. Press ENT.
GPS Sensors: Press ENT
2. The GPS Health page is shown if GPS information
is received. The GPS number and dimension (2D,
3D, or no position), number of healthy, and number
of visible satellites are shown.
GPS 3D Pos Healthy: 25 Vis: 8 Y
3. Turn the Small knob to view the GPS Satellites
Used for Position fixes page. SV means space
vehicle, which is the same as a GPS satellite in
this case.
GPS SVs: 31,27,26,19,07,02
79
System Functions
ENT
ENT
SEL
ENT
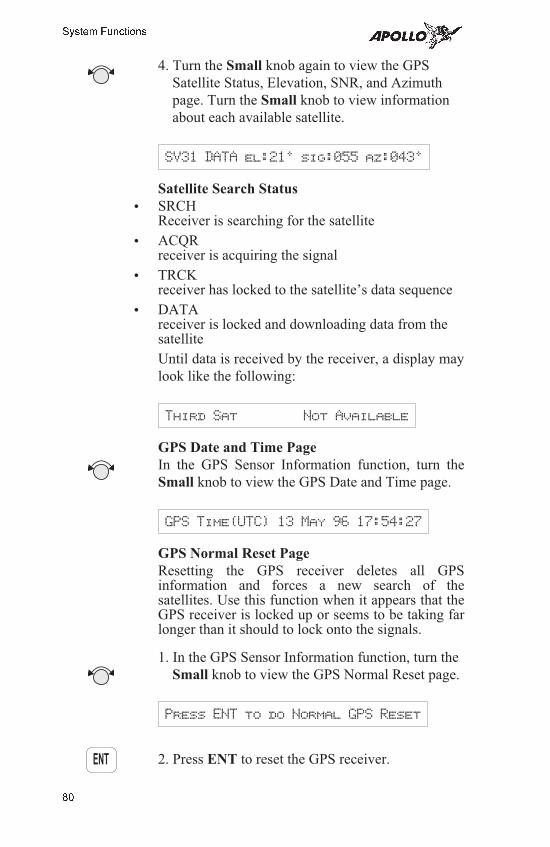
4. Turn the Small knob again to view the GPS
Satellite Status, Elevation, SNR, and Azimuth
page. Turn the Small knob to view information
about each available satellite.
SV31 DATA el:210 sig:055 az:0430
Satellite Search Status
• SRCHReceiver is searching for the satellite
• ACQRreceiver is acquiring the signal
• TRCKreceiver has locked to the satellite’s data sequence
• DATAreceiver is locked and downloading data from thesatellite
Until data is received by the receiver, a display may
look like the following:
Third Sat Not Available
GPS Date and Time Page
In the GPS Sensor Information function, turn the
Small knob to view the GPS Date and Time page.
GPS Time(UTC) 13 May 96 17:54:27
GPS Normal Reset Page
Resetting the GPS receiver deletes all GPSinformation and forces a new search of thesatellites. Use this function when it appears that theGPS receiver is locked up or seems to be taking farlonger than it should to lock onto the signals.
1. In the GPS Sensor Information function, turn the
Small knob to view the GPS Normal Reset page.
Press ENT to do Normal GPS Reset
2. Press ENT to reset the GPS receiver.
80
System Functions
ENT

Comm Radio Operation
This section introduces the basic operating details
of the VHF Communications Transceiver portion of
the Apollo SL60.
PowerOn/Off
Turn the Power/Volume control clockwise past the
OFF detent.
Volume Turn the Power/Volume control clockwise to
increase the volume level and counterclockwise to
decrease volume.
Small and Large Knobs
The dual concentric knobs on the right side of the
SL60 are used to select frequencies or other
options. The Large outer knob is used to change the
MHz value in 1 MHz steps.
The Small inner knob changes the kHz values in 25
kHz steps.
In both the SL50 and SL60, the Large and Small
knobs are used to view different functions and for
editing. Other functions will be described in the
affected section.
SelectingFrequencies
New frequencies are first selected as a Standby
frequency and then toggled to the Active side when
desired. While viewing the frequency display, use
the Large and Small knobs on the right side of the
SL60 to select the desired frequency.
1. Press COM to reach the Comm radio function.
119.80 s121.30 Brg 353 46.3nm
2. Turn the Large knob to change the values in one
MHz increments. The MHz selection range is
between 118 and 136 in one MHz steps.
119.80 s121.30 Brg 353 46.3nm
81
Comm Radio Operation
COM
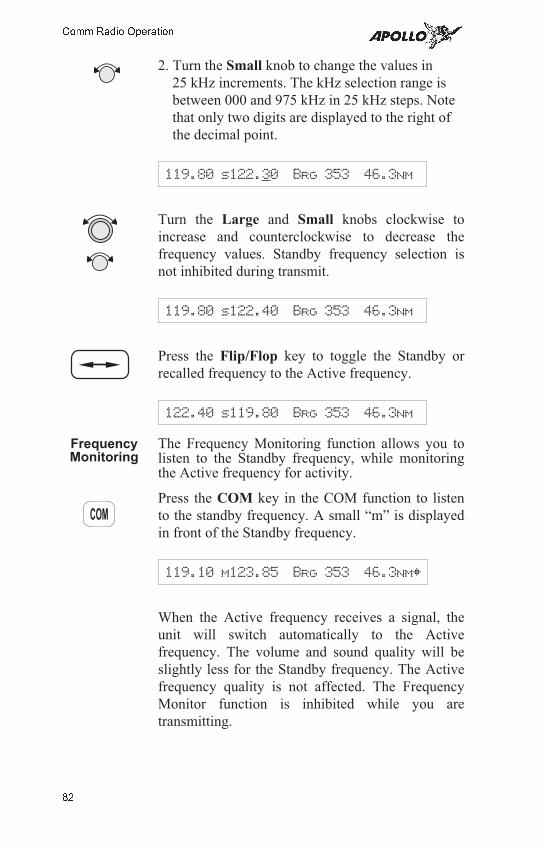
2. Turn the Small knob to change the values in
25 kHz increments. The kHz selection range is
between 000 and 975 kHz in 25 kHz steps. Note
that only two digits are displayed to the right of
the decimal point.
119.80 s122.30 Brg 353 46.3nm
Turn the Large and Small knobs clockwise to
increase and counterclockwise to decrease the
frequency values. Standby frequency selection is
not inhibited during transmit.
119.80 s122.40 Brg 353 46.3nm
Press the Flip/Flop key to toggle the Standby or
recalled frequency to the Active frequency.
122.40 s119.80 Brg 353 46.3nm
FrequencyMonitoring
The Frequency Monitoring function allows you tolisten to the Standby frequency, while monitoringthe Active frequency for activity.
Press the COM key in the COM function to listen
to the standby frequency. A small “m” is displayed
in front of the Standby frequency.
119.10 m123.85 Brg 353 46.3nmY
When the Active frequency receives a signal, the
unit will switch automatically to the Active
frequency. The volume and sound quality will be
slightly less for the Standby frequency. The Active
frequency quality is not affected. The Frequency
Monitor function is inhibited while you are
transmitting.
82
Comm Radio Operation
COM
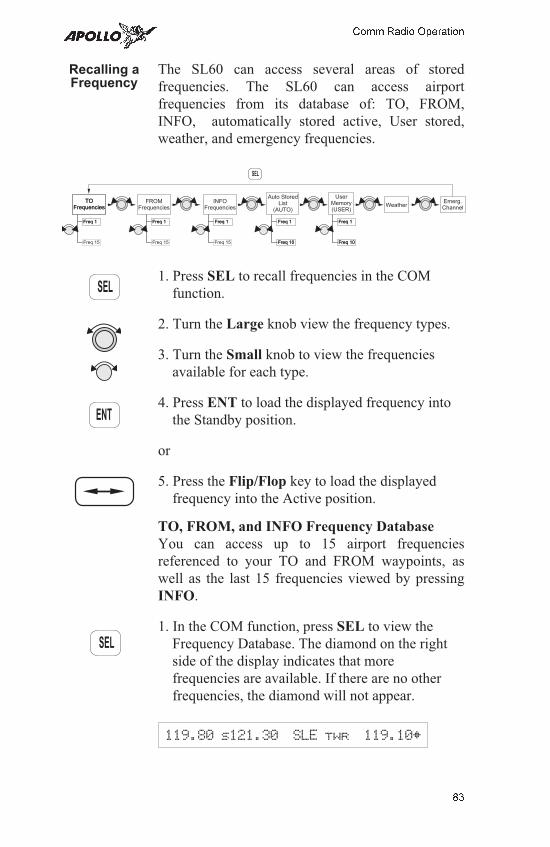
Recalling aFrequency
The SL60 can access several areas of stored
frequencies. The SL60 can access airport
frequencies from its database of: TO, FROM,
INFO, automatically stored active, User stored,
weather, and emergency frequencies.
1. Press SEL to recall frequencies in the COM
function.
2. Turn the Large knob view the frequency types.
3. Turn the Small knob to view the frequencies
available for each type.
4. Press ENT to load the displayed frequency into
the Standby position.
or
5. Press the Flip/Flop key to load the displayed
frequency into the Active position.
TO, FROM, and INFO Frequency Database
You can access up to 15 airport frequencies
referenced to your TO and FROM waypoints, as
well as the last 15 frequencies viewed by pressing
INFO.
1. In the COM function, press SEL to view the
Frequency Database. The diamond on the right
side of the display indicates that more
frequencies are available. If there are no other
frequencies, the diamond will not appear.
119.80 s121.30 SLE twr 119.10Y
83
Comm Radio Operation
SEL
SEL
TOFrequencies
Auto StoredList
(AUTO)
UserMemory(USER)
WeatherEmerg.Channel
TOFrequencies
FROMFrequencies
INFOFrequencies
Freq 1Freq 1
Freq 15
Freq 1Freq 1 Freq 1Freq 1 Freq 1
Freq 10
Freq 1
Freq 10
Freq 1
Freq 10
Freq 1
Freq 10Freq 15 Freq 15
SEL
ENT
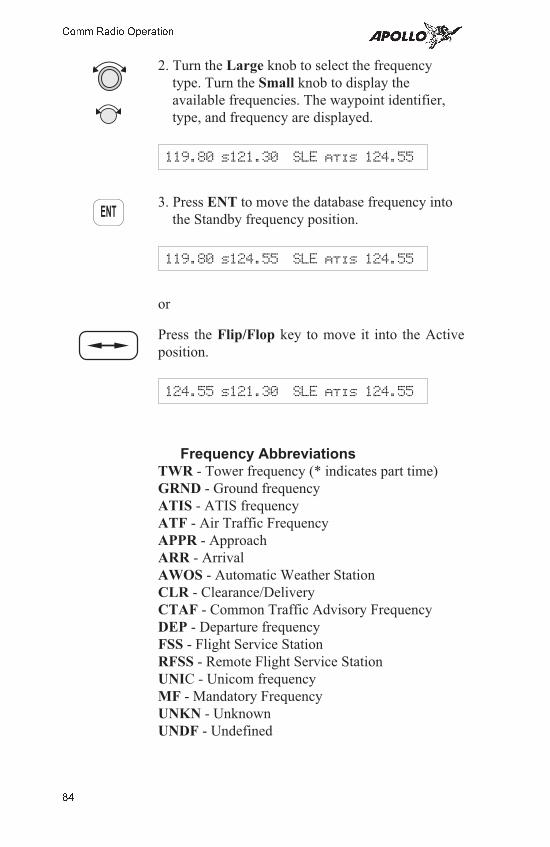
2. Turn the Large knob to select the frequency
type. Turn the Small knob to display the
available frequencies. The waypoint identifier,
type, and frequency are displayed.
119.80 s121.30 SLE atis 124.55
3. Press ENT to move the database frequency into
the Standby frequency position.
119.80 s124.55 SLE atis 124.55
or
Press the Flip/Flop key to move it into the Active
position.
124.55 s121.30 SLE atis 124.55
Frequency AbbreviationsTWR - Tower frequency (* indicates part time)
GRND - Ground frequency
ATIS - ATIS frequency
ATF - Air Traffic Frequency
APPR - Approach
ARR - Arrival
AWOS - Automatic Weather Station
CLR - Clearance/Delivery
CTAF - Common Traffic Advisory Frequency
DEP - Departure frequency
FSS - Flight Service Station
RFSS - Remote Flight Service Station
UNIC - Unicom frequency
MF - Mandatory Frequency
UNKN - Unknown
UNDF - Undefined
84
Comm Radio Operation
ENT
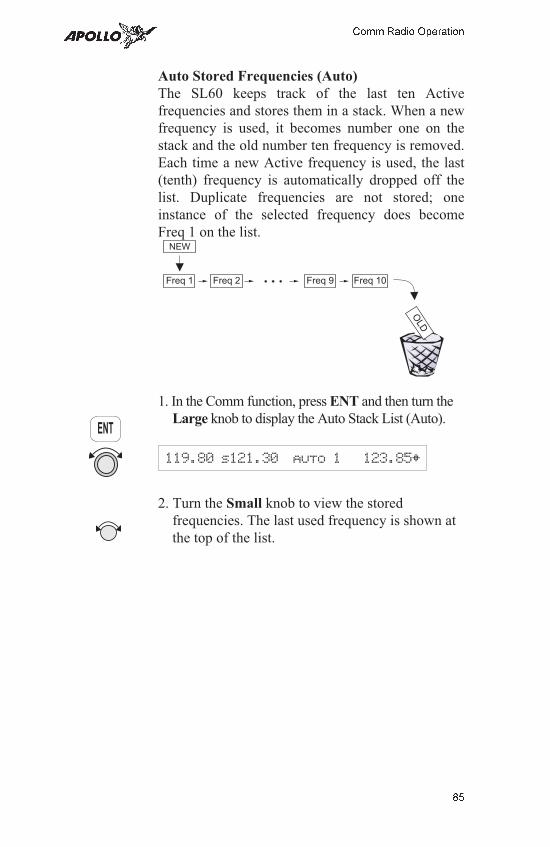
Auto Stored Frequencies (Auto)
The SL60 keeps track of the last ten Active
frequencies and stores them in a stack. When a new
frequency is used, it becomes number one on the
stack and the old number ten frequency is removed.
Each time a new Active frequency is used, the last
(tenth) frequency is automatically dropped off the
list. Duplicate frequencies are not stored; one
instance of the selected frequency does become
Freq 1 on the list.
1. In the Comm function, press ENT and then turn the
Large knob to display the Auto Stack List (Auto).
119.80 s121.30 auto 1 123.85Y
2. Turn the Small knob to view the stored
frequencies. The last used frequency is shown at
the top of the list.
85
Comm Radio Operation
ENT
Freq 1 Freq 2 Freq 9 Freq 10
NEW
OLD
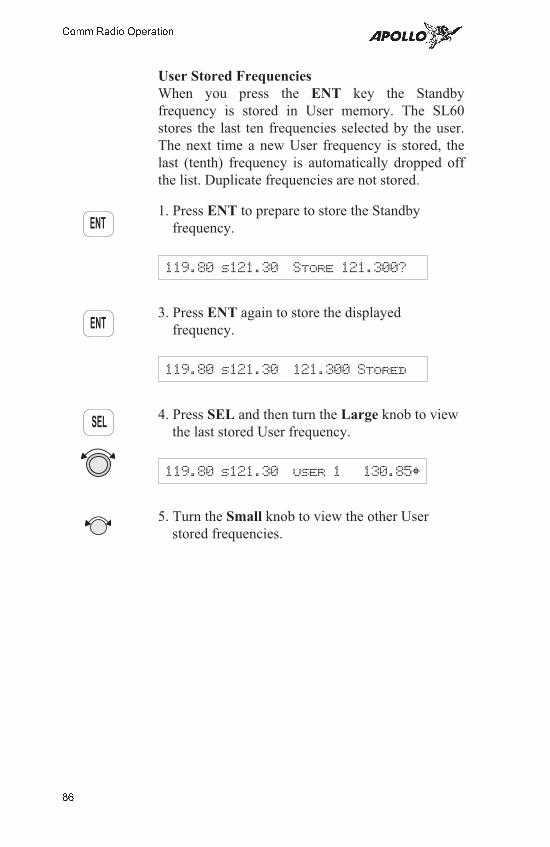
User Stored Frequencies
When you press the ENT key the Standby
frequency is stored in User memory. The SL60
stores the last ten frequencies selected by the user.
The next time a new User frequency is stored, the
last (tenth) frequency is automatically dropped off
the list. Duplicate frequencies are not stored.
1. Press ENT to prepare to store the Standby
frequency.
119.80 s121.30 Store 121.300?
3. Press ENT again to store the displayed
frequency.
119.80 s121.30 121.300 Stored
4. Press SEL and then turn the Large knob to view
the last stored User frequency.
119.80 s121.30 user 1 130.85Y
5. Turn the Small knob to view the other User
stored frequencies.
86
Comm Radio Operation
ENT
ENT
SEL
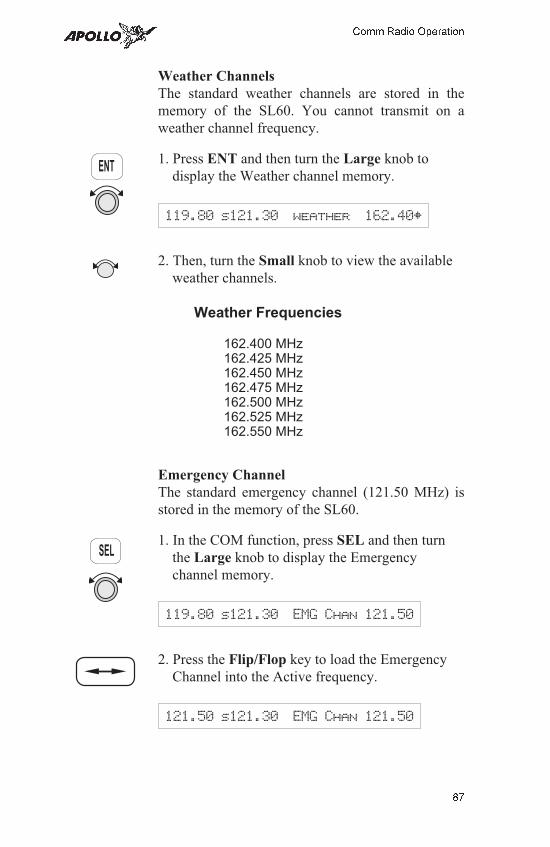
Weather Channels
The standard weather channels are stored in the
memory of the SL60. You cannot transmit on a
weather channel frequency.
1. Press ENT and then turn the Large knob to
display the Weather channel memory.
119.80 s121.30 weather 162.40Y
2. Then, turn the Small knob to view the available
weather channels.
Weather Frequencies
162.400 MHz162.425 MHz162.450 MHz162.475 MHz162.500 MHz162.525 MHz162.550 MHz
Emergency Channel
The standard emergency channel (121.50 MHz) is
stored in the memory of the SL60.
1. In the COM function, press SEL and then turn
the Large knob to display the Emergency
channel memory.
119.80 s121.30 EMG Chan 121.50
2. Press the Flip/Flop key to load the Emergency
Channel into the Active frequency.
121.50 s121.30 EMG Chan 121.50
87
Comm Radio Operation
SEL
ENT

IntercomFunction
When two headphone and microphone jacks are
connected to the SL60, these headsets can be used
as a voice-activated intercom.
When you select the Intercom function with the
installed selector switch, the intercom function is
enabled. The Volume control will control the
headphone listening level. The receive function will
automatically become active when a signal is
detected. Frequency monitoring will be disabled
when the intercom is selected. An “I” is displayed
in front of the Standby frequency to indicate the
Intercom function is selected.
119.10 i122.85 Brg 2100 17.1nm
The Intercom Squelch Sensitivity can be set in the
System Functions.
Stuck Mic The SL60 helps protect you from a situation where
the microphone may get stuck in the ON or
Transmit position. If the microphone is keyed for
longer than 35 seconds, the SL60 will return to the
receive mode on the selected frequency.
A flashing “Stuc Mic” message will display until
the transmit key is released.
119.10 STUC MIC Brg 2100 17.1nm
88
Comm Radio Operation
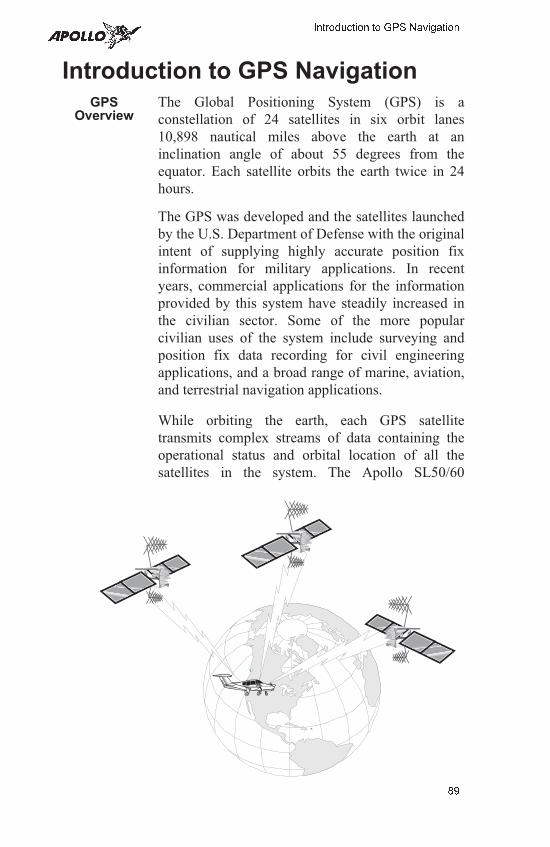
Introduction to GPS NavigationGPS
OverviewThe Global Positioning System (GPS) is a
constellation of 24 satellites in six orbit lanes
10,898 nautical miles above the earth at an
inclination angle of about 55 degrees from the
equator. Each satellite orbits the earth twice in 24
hours.
The GPS was developed and the satellites launched
by the U.S. Department of Defense with the original
intent of supplying highly accurate position fix
information for military applications. In recent
years, commercial applications for the information
provided by this system have steadily increased in
the civilian sector. Some of the more popular
civilian uses of the system include surveying and
position fix data recording for civil engineering
applications, and a broad range of marine, aviation,
and terrestrial navigation applications.
While orbiting the earth, each GPS satellite
transmits complex streams of data containing the
operational status and orbital location of all the
satellites in the system. The Apollo SL50/60
89
Introduction to GPS Navigation

receives this data stream and processes the
information to determine which satellites are
“visible” to the receiver’s antenna. With this
determination made, the receiver chooses satellites
to calculate a position fix. Using information
transmitted from three or more satellites, the unit
can calculate latitude and longitude (usually
abbreviated Lat/Lon); with four or more satellites,
GPS altitude can also be calculated.
GPS SystemAccuracy
The GPS allows a high degree of position fix
accuracy. The system can produce a position fix
accurate to within less than one meter. Due to
concern for national security, the U.S. Department
of Defense introduces constant errors to the
transmitted satellite data to degrade the accuracy of
the system. Called Selective Availability, this
practice limits GPS position fix accuracy to about
100 meters, although the relative position of the
satellites to one another, their elevation above the
horizon, and other factors can also affect accuracy
of the position fix. Under optimal conditions,
accuracy can improve to within 10 meters. GPS
position fix accuracy is not affected by atmospheric
conditions.
GPS altitude is based on a mathematical model of
the sphere of the earth. Including intentional
degradation, GPS altitude may differ from
barometric altitude by several hundred feet.
Summary Unlike navigation aids providing a position fix with
data from land-based sources, the Apollo GPS can
provide an accurate position fix over land or sea
anywhere in the world. The unit includes an
extensive database of useful waypoint informationand allows you to create up to 200 “customized”waypoints of your own. With the power of thisnavigation device in the cockpit, you can easilynavigate with unsurpassed accuracy.
90
Introduction to GPS Navigation
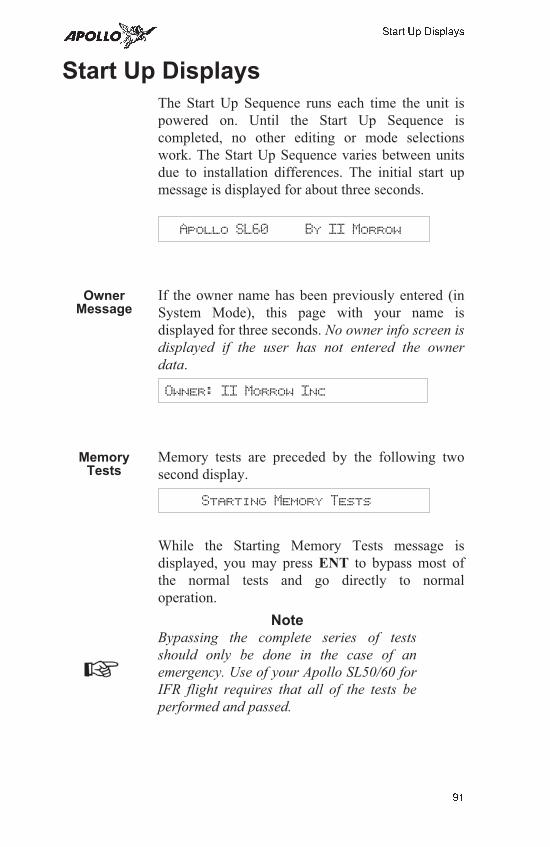
Start Up Displays
The Start Up Sequence runs each time the unit is
powered on. Until the Start Up Sequence is
completed, no other editing or mode selections
work. The Start Up Sequence varies between units
due to installation differences. The initial start up
message is displayed for about three seconds.
Apollo SL60 By II Morrow
OwnerMessage
If the owner name has been previously entered (in
System Mode), this page with your name is
displayed for three seconds. No owner info screen is
displayed if the user has not entered the owner
data.
Owner: II Morrow Inc
MemoryTests
Memory tests are preceded by the following two
second display.
Starting Memory Tests
While the Starting Memory Tests message is
displayed, you may press ENT to bypass most of
the normal tests and go directly to normal
operation.
NoteBypassing the complete series of tests
should only be done in the case of an
emergency. Use of your Apollo SL50/60 for
IFR flight requires that all of the tests be
performed and passed.
91
Start Up Displays
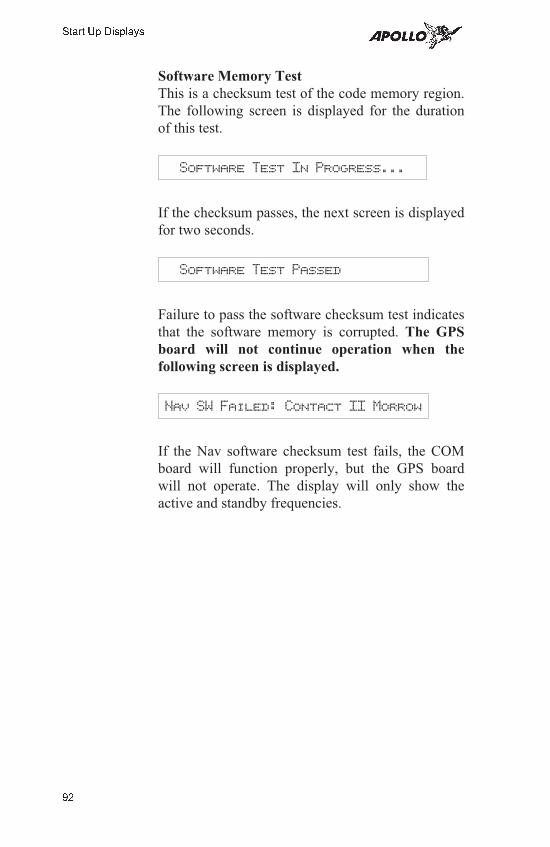
Software Memory Test
This is a checksum test of the code memory region.
The following screen is displayed for the duration
of this test.
Software Test In Progress...
If the checksum passes, the next screen is displayed
for two seconds.
Software Test Passed
Failure to pass the software checksum test indicates
that the software memory is corrupted. The GPS
board will not continue operation when the
following screen is displayed.
Nav SW Failed: Contact II Morrow
If the Nav software checksum test fails, the COM
board will function properly, but the GPS board
will not operate. The display will only show the
active and standby frequencies.
92
Start Up Displays
Non-Volatile RAM Tests
The non-volatile RAM validation code does the
following checks every time the unit is powered up.
Any tests which detect a failure reset the failed
values. Generally, the non-volatile RAM test pages
are not displayed, since in most cases the tests pass.
User Database Memory Failure
User waypoint checksums exist for each User
waypoint. If the checksums do not match, the User
waypoint is deleted. If this occurs, any flight plan
which references this user waypoint is also deleted.
In addition, User comment checksums exist for
each user-defined waypoint comment. The
comment is deleted if the calculated checksum does
not match the saved checksum.
User DB Test Failed: Press ENT
If the User DB checksum test fails, both the COM
board and the GPS board continue to function.
Flight Plan Memory Failure
Flight plan checksums exist for all flight plan
information. If a particular flight plan checksum
does not match the calculated checksum, the flight
plan is deleted, or in the case of the Active Flight
Plan, the plan is reinitialized. The following
message is then displayed until you press ENT.
Flight Plan Memory Failed: ENT
If the flight plan memory checksum test fails, both
the COM board and the GPS board continue to
function.
93
Start Up Displays
Miscellaneous NVRAM Memory Failure
All other user input values which are held in
non-volatile RAM are checked for validity,
producing the following message if any of the
values needed to be reset.
Memory Test Failed: Press ENT
If the memory checksum test fails, both the COM
board and the GPS board continue to function.
Database Test
This checksum test compares the stored database
checksum with the calculated database checksum.
Since this test may take several seconds to
complete, the following screen is displayed until the
test is completed.
Database Test In Progress...
If the checksum test passes, the next screen is
displayed for two seconds.
Database Test Passed
Failure to pass the database checksum test indicates
that memory in the database is corrupted, and the
following message is displayed until you press
ENT.
Database Failed: Press ENT
If the database checksum test fails, both the COM
board and the GPS board continue to function.
94
Start Up Displays
Special UseAirspaceDisplays
This display indicates whether Airspace Alerts have
been selected.
Airspace Alrts OFF: SEL to Reset
DatabaseMessage
This page shows the database name and expiration
date. If the database has expired, the message
“Press ENT” will flash. Press ENT to continue
operation.
Americas DB mm/dd/yy
IFR OutputTests
A series of tests covering connections for IFR flight
are tested if your Apollo SL50/60 has been installed
for IFR flight.
Starting IFR Output Tests
After the completion of all tests the Apollo SL50/60
will start normal navigation operation.
95
Start Up Displays

Notes
96
Start Up Displays
Message Function
Message function is responsible for warning the
user of changing conditions which require
immediate attention.
When a new message exists, the MSG annunciator
flashes on and off approximately twice per second,
until either the user views the new message, or the
condition causing the message goes away. If
multiple messages exist, the annunciator continues
to flash until all new messages have been viewed.
Most new messages continue to be relevant
following viewing of the new message, and are put
into the old message list, where they remain until
the condition causing the message goes away. Other
messages are cleared from the message list as soon
as they are viewed (they don’t become old
messages). The decision whether a new message
becomes an old message after viewing is described
for each individual case below in the List of
Messages section. The formats of all messages are
the same if they are in the new or old message list.
While any old message exists, the MSG annunciator
remains steadily on at all times unless new
messages arrive or all old message conditions go
away.
The home page in message mode is the first new
message, if one exists, or the New Message
Summary page if no new messages exist.
97
Message Function

NewMessages
The New Message page shows how many new
messages are stored.
1. Press MSG. Turn the Large knob to switch
between Old and New messages.
2. Turn the Small knob to view each message.
OldMessages
The Old Message page shows how many old
messages are stored.
1. Press MSG. Turn the Large knob to switch
between Old and New messages.
2. Turn the Small knob to view each message.
Messages The following is a summary of the conditions that
cause a message warning, and examples of the
messages generated for each condition.
Special Use Airspace Messages
Following is a list of the types of airspace messages
which can be generated. All of the airspace
messages become old messages after they are
viewed. The Airspace Messages are unique in
Message Mode in that they are the only messages
which the INFO key is used to find out more
information concerning the message.
Soon
This condition occurs when penetration of the
airspace is within 10 minutes (or user-selected limit
in System Mode)
Within 10 Min GABBS CENTRAL
98
Message Function
MSG
MSG
Close
This condition occurs when the airspace is less than
2 nm (or user-selected limit in System Mode, see
page 65).
Within 2 nm SUNDANCE
Inside
This condition occurs when the plane penetrates the
airspace.
Inside NORTON AFB
Empty To Waypoint: Cannot Compute Nav
Anytime the current To waypoint is empty, this
message is generated. It becomes an old message
after viewing.
Empty To Waypoint: Cannot Compute Nav
GPS Communications Failure
When the GPS sensor stops communicating (after it
has established communications), this message is
generated. It becomes an old message after viewing.
GPS Communications Failure
GPS Command Failure
When data is being received from the GPS sensor
but responses to commands sent to the GPS sensor
are not being received, this message is generated.
This problem indicates that the GPS is not receiving
transmissions and cannot be used for IFR flight. It
becomes an old message after viewing and remains
an old message even if the condition does not
persist.
Tx to GPS Failed: Not for IFR
99
Message Function

GPS Self Test Failure
If the GPS self-test fails, a message displays
indicating the cause of the failure in four hex digits.
It becomes an old message after viewing.
GPS Self Test Failure: 1FFF
GPS Sensor Lat/Lon Failure
When the GPS sensor cannot compute the latitude
and longitude, the following message displays. It
becomes an old message after viewing.
GPS Cannot Compute Lat/Lon
GPS RAIM Not Available
When RAIM detection is not available for the GPS
sensor, a warning is generated. The current flight
phase is displayed first (either Terminal or
Enroute). It becomes an old message after viewing.
Enroute GPS RAIM Not Available
GPS RAIM Position Error
When RAIM detection is available for the GPS
sensor and it detects a RAIM alarm, a warning is
generated. The current flight phase is displayed first
(either Terminal or Enroute). It becomes an old
message after viewing.
Terminal GPS RAIM Position Error
100
Message Function
GPS HDOP Position Error
When the HDOP for the GPS sensor exceeds
current flight phase HDOP requirements, a warning
is generated. The current flight phase is displayed
first (either Terminal or Enroute). It becomes an old
message after viewing.
Terminal GPS HDOP Position Error
Arrival At the To Waypoint
The arrival message is generated when within 36
seconds of arrival at the current To waypoint. It is
cleared after viewing it; it does not become an old
message after viewing. The arrival condition will
also go away without viewing the message after
crossing the angle bisector.
Not Holding at the To Waypoint
This form of the Arrival Alert is provided when not
holding at the current To waypoint. In addition to
the arrival waypoint identifier, the next leg’s
desired track is shown, when available; otherwise, it
is dashed.
Arrival: SLE Next Dtk: 321
Holding at the To Waypoint
This form of the Arrival Alert is provided when
holding at the current To waypoint.
Arrival: SLE - Holding -
101
Message Function

To Waypoint Sequence
When a waypoint sequence occurs and the user has
not viewed the arrival alert, the following alert is
provided if you are traveling faster than 5 knots
(this reduces the chance of nuisance alerts). The
new waypoint, bearing and desired track are
provided. This message does not become an old
message after viewing.
New Wpt: SLE Brg 073 Dtk 069
Auto OBS Crossing Holding Waypoint
When a waypoint on hold is crossed to the From
side the first time, the following message is
provided. If you press ENT, the OBS Desired Track
screen is displayed. This message does not become
an old message after viewing.
Push ENT to set OBS Course
User Database Memory Loss
This message indicates that one or more user
waypoints or user-defined comments had a
checksum error. This message is cleared after the
message is viewed.
User DB Memory Loss: 2 Deleted
Comm Radio Failure (SL60 only)
This message indicates that the Comm Radio
module has failed. Call factory service.
Comm radio failure! : Service Now
102
Message Function
Flight Plan Memory Loss
This message indicates that one or more flight plans
had a checksum error. This message is cleared after
the message is viewed.
Flt Plan Memory Loss: 1 Deleted
User Memory Failure
This message indicates that one or more user
settings were not within valid limits at power-up
and needed to be reset. This message is cleared after
the message is viewed.
Memory Failure: Setups Reset
Database Expired
This message indicates that the internal waypoint
database’s expiration date is before the current UTC
date. This message is cleared after the message is
viewed.
Americas DB Exp: 03/30/97
Database Invalid
This message indicates that the internal waypoint
database’s memory has been corrupted. It becomes
an old message after being viewed. Contact your
dealer or the factory for service.
Database Invalid: Mem Corrupted
103
Message Function
Manual Magnetic Variation
This message indicates that magnetic variation is on
a manual setting. This occurs when the database is
not valid, or when the user selects manual magnetic
variation in System Mode. It becomes an old
message after being viewed.
Using Manual Mag Var: 130 E
Low Internal Battery Voltage
This message is generated when low internal
battery voltage is detected. It becomes an old
message after being viewed. Battery voltage is
checked every 15 seconds. This battery backs up
the memory for information added by the user.
Low Battery Voltage: Service Now
High Battery Voltage
This message is generated when high battery
voltage is detected. It becomes an old message after
being viewed. Battery voltage is checked every 15
seconds.
Battery Failure: Turn Off Unit!
Countdown Timer Expired
This message is generated when the Countdown
Timer (which must have been counting down) goes
to 0. The message is cleared when the user views
the message or reactivates the Countdown Timer.
Countdown Timer Expired
104
Message Function
Flight Simulator
Your Apollo SL50/60 is provided with a Flight
Simulation program that allows you to “fly” your
unit by simulating your ground speed. This section
describes the procedures used to run the Flight
Simulator, and re-install the unit.
About theFlight
Simulator
The Flight Simulator is programmed into your
Apollo SL50/60 at the factory. Your Apollo must
be removed from the front panel of your aircraft
and connected to a power supply with the
appropriate power cable. The Flight Simulator is
activated during start up.
The Apollo SL50/60 “asks” you to input a ground
speed and altitude each time it is powered-up. This
speed and altitude information will remain constant
throughout the simulation. The Apollo SL50/60
uses a simulated GPS sensor to provide position,
speed, and course information. As no external
sensors are connected while the simulation is
running, no information is displayed about external
sensors. The simulated altitude does not change
while the Flight Simulator is running.
The Apollo SL50/60 uses the position of the first
From waypoint in the Active flight plan as the
initial position and simulates flight along the
desired track to each successive To waypoint.
While “en route,” the Apollo SL50/60 generates
updated navigation information and alert messages
consistent with the simulated flight path. When the
Apollo SL50/60 “arrives” at the final waypoint of
your flight plan, it stops waypoint sequencing. The
Apollo SL50/60 continues to simulate flight past
the waypoint and provides bearing and distance
information to the last To waypoint.
105
Flight Simulator

Starting theFlight
Simulation
The following procedure is used to start the flight
simulation. It is recommended that you have a data
card properly inserted into the data card slot so you
can use the appropriate functions.
1. Remove the Apollo SL50/60 from the front panel
of your aircraft. Use a 3/32” hex driver
(p/n 998-0048 included with installation kit).
2. Connect the Power/PC Cable (p/n 500-4026-xx)
to the connector on the back of your Apollo
SL50/60.
3. Turn on the power for the power supply. Turn on
the power for the Apollo SL50/60.
4. The Apollo SL50/60 will run its database and
memory tests. The display will then shown that it
is ready to start the Flight Simulator.
Simulator - NOT FOR FLIGHT - SEL
5. Press SEL to start the Flight Simulator. The
default ground speed will be displayed. The
ground speed value will flash. Turn the Small
knob to display the desired ground speed. Speed
values are changed in 10 kt increments.
Simulation Ground Speed 100kts
106
Flight Simulator
TX
GPS/COMM
PULL SQUELCH
VOL
OFF
119.80 s121.50POLLOA SL60
COM SYSNAV MSG SELINFO ENTD
BRG 210' 17.1nm
Mounting Screw
SEL
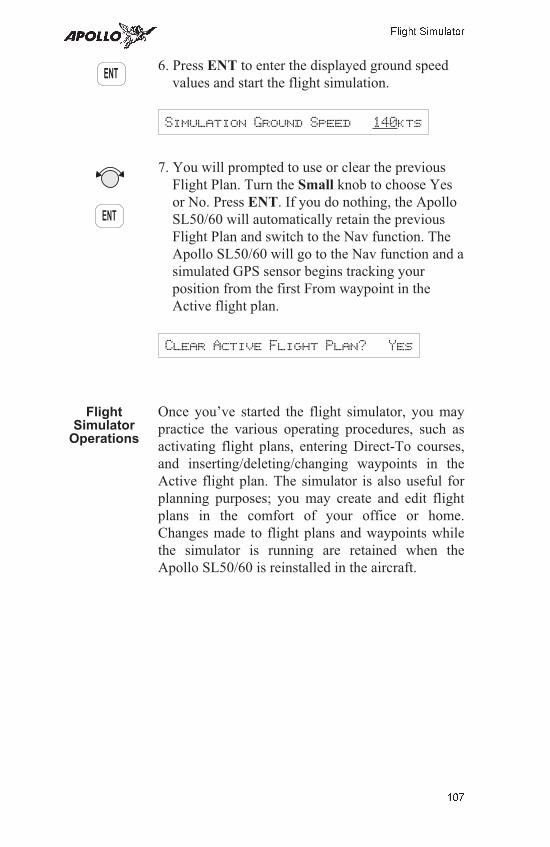
6. Press ENT to enter the displayed ground speed
values and start the flight simulation.
Simulation Ground Speed 140kts
7. You will prompted to use or clear the previous
Flight Plan. Turn the Small knob to choose Yes
or No. Press ENT. If you do nothing, the Apollo
SL50/60 will automatically retain the previous
Flight Plan and switch to the Nav function. The
Apollo SL50/60 will go to the Nav function and a
simulated GPS sensor begins tracking your
position from the first From waypoint in the
Active flight plan.
Clear Active Flight Plan? Yes
FlightSimulator
Operations
Once you’ve started the flight simulator, you may
practice the various operating procedures, such as
activating flight plans, entering Direct-To courses,
and inserting/deleting/changing waypoints in the
Active flight plan. The simulator is also useful for
planning purposes; you may create and edit flight
plans in the comfort of your office or home.
Changes made to flight plans and waypoints while
the simulator is running are retained when the
Apollo SL50/60 is reinstalled in the aircraft.
107
Flight Simulator
ENT
ENT

Notes
108
Flight Simulator
Troubleshooting
This section contains information to troubleshoot
your Apollo GPS Receiver when improper
operation is observed. The following table lists
possible problems you could encounter while
operating the unit. Examine the possible causes of
the problem and take the action listed to correct the
trouble. If you cannot correct the problem, contact
your dealer. If your dealer is unavailable, contact
the II Morrow factory at the address and phone
number listed.
Contactingthe Factory
If efforts to resolve the problem fail, contact your
dealer or the factory weekdays from 8:00 A.M. until
5:00 P.M. Pacific time for technical assistance. The
II Morrow technical service staff will gladly assist
you.
Please have the following information ready:
• System configuration (products, antennas, mountinglocations, etc.)
• Model No., part number, and serial number
• Software versions
• Description of the problem
• Efforts made to isolate/solve the problem
• Computed Lat/Lon position shown on your Apollo
• Local time, UTC time, and date
II Morrow Inc.
Technical Service Department
2345 Turner Road S.E.
Salem, OR 97302 U.S.A.
U.S.A. Toll Free 800-525-6726
Canada Toll Free 800-654-3415
FAX (503) 364-2138
International (503) 391-3411
109
Troubleshooting

Problem Possible Cause Action
Unit does not
power on
Open in power
supply circuit
Check circuit
breaker - reset if
necessary
Faulty electrical
wiring or
connection
Contact your
dealer to perform
electrical system
test
No GPS signal
reception
Obstructed signal
path
Move aircraft out
of hangar or away
from buildings to
provide an
unobstructed view
of the sky for the
antenna
Incorrect seed
position, time, or
UTC differential
entered
Check these
settings, if
necessary
If using a wrong
antenna: faulty
external antenna,
wiring, or
connections
Contact your
dealer to check the
antenna and other
wiring
Search for nearest
waypoints reveals
too few or wrong
types of waypoints
Incorrect selection
of waypoint types
to show after
search
Check “Airspace
Setup” function
and verify that the
desired waypoint
type to search is
“ON”
Position fix seems
inaccurate
Wrong seed
position
Re-enter seed
position
Waypoints
sequencing is
erratic
Direct-To entry
option setting may
not be correct
If you are flying
Direct-To, the
option should be
set to “May Clear”,
see page 73
Wrong bearing
and track values
Incorrect magnetic
variation entered
Check Magnetic
Var option - select
“Automatic” or
enter correct value
Can’t change
active frequency
Comm Radio not
communicating
Contact dealer.
110
Troubleshooting

Glossary of Navigation TermsA Altitude (GPS ALT): Altitude, as calculated by the
Apollo SL50/60, based upon a mathematical modelof the earth’s surface curvature. A substantialdifference between this altitude value and altitudereferenced to sea level may exist.
Almanac: Data transmitted by a GPS satellite
including orbit information on all satellites, clock
correction, and atmospheric delays.
Automatic Terminal Information Service
(ATIS): Recorded information about weather and
other conditions at an airport, periodically updated
when conditions change.
Autonav: The function that allows you to set the
SL50/60 to scroll automatically through selected
navigation displays .
Azimuth: an arc, as measured clockwise from true
or magnetic north.
B Bearing (BRG): The direction to any point, usually
measured in degrees relative to true or magnetic
north.
C Circular Error Probable (CEP): As applied to
GPS position fix accuracy, the radius of a circle
inside of which there exists a 50 percent chance of
being located.
Constellation: A group of stars or objects, such as
GPS satellites, in the heavens.
Coordinates: Values for latitude and longitude that
describe a geographical point on the surface of the
earth.
Course: The planned direction of travel between
the departure and destination waypoints.
111
Glossary of Navigation Terms
Course Deviation: A measurement of distance left
or right from the desired course of travel.
Course Deviation Indicator (CDI): A graphic
indicator of course deviation typically shown as a
graduated horizontal bar with an icon indicating the
deviation distance left or right of course.
Common Traffic Advisory Frequency (CTAF)
D Database: A collection of data structured in such a
way as to allow quick and convenient access to any
particular record or records. The Apollo SL50/60
contains a built-in database of waypoints andwaypoint information. Users may add waypoints tothis database.
Degree: 1/360th of a circle.
Departure: The first waypoint in the active route.
Desired Track (DTK): The desired course of
navigation between a point of origin and a
destination waypoint.
Destination: The last waypoint in the active route.
Dilution of Precision (DOP): A merit value for the
calculated position based on the geometrical
configuration of the satellites used; 3 is considered
good, greater than 7 is considered poor. Also called
Position Dilution of Precision or PDOP.
Direct-To: The function or procedure that directs
you from your present position to the designated
TO, or destination, waypoint.
Distance: A measure of interval in space. Also
referred to as range.
DME - Distance Measuring Equipment
112
Glossary of Navigation Terms
Drift: Displacement from the intended course of
travel.
E Elevation: The angle of a GPS satellite above the
horizon.
Emergency Search: The function that allows to
immediately navigate to the nearest airport in the
case of an emergency.
Ephemeris: A list of accurate positions or locations
of a celestial object as function of time.
Estimated Time of Arrival (ETA) - The estimated
time from your present position to the destination
(TO) waypoint.
Estimated Time Enroute (ETE) - The estimated
time from your starting (FROM) waypoint to the
destination (TO) waypoint.
F Fix: A geographical location determined by either
visual reference or by electronic navigation aids.
Flight Time: Flight Time shows the elapsed time in
hours and minutes (00:00 to 99:59) from departure.
If the Flight Timer is not started the value will be
replaced with dashes. The Flight Timer options are
set in the System Functions (see page 72).
Flight Plan: A series of two or more waypoints.
G GDOP: Geometric Dilution of Precision. The
relationship between errors in receiver position and
time and in satellite range.
Global Positioning System (GPS): Also known as
NAVSTAR. A constellation of satellites launched by
the U.S. Department of Defense into six orbit lanes
(four satellites per plane) at an altitude of 10,898 nm
above the earth.
Greenwich Mean Time (GMT): See Universal
Time Coordinate (UTC).
113
Glossary of Navigation Terms

Ground (GRND): Ground communication
frequency
Ground Speed (GS): Speed of travel across the
ground. In aviation, the relation between ground
speed and air speed is affected by the prevailing
winds.
H HDOP: Horizontal Dilution of Precision. See
Dilution Of Precision.
Heading: The direction that the aircraft is pointing.
I Identifier: A name, typically abbreviated, assigned
to a waypoint. The identifier may consist of
numbers and alpha characters, up to six in length.
For example, the airport identifier for Los Angeles
International Airport is LAX.
Instrument Flight Rules (IFR)
Intersection (INT): A point defined by any
combination of courses, radials, or bearings of two or
more navigational aids.
K Knot (kt): A unit of speed equal to one nautical
mile per hour.
L Latitude (Lat): Any line circling the earth parallel
to the equator, measured in degrees, minutes, and
seconds north and south of the equator.
LFAC: Landing FACility.
Longitude (Lon): Any line from the north to the
south pole, measured in degrees, minutes, and
seconds of a circle, east or west of the Prime
Meridian (Greenwich, England).
M Magnetic North: The region, some distance from
the geographic north pole where the earth’s
114
Glossary of Navigation Terms
magnetic lines concentrate. A magnetic compass
points to the magnetic north.
Magnetic Variation (Mag Var): The angle
between the magnetic and true north. At various
points on the earth it is different due to local
magnetic disturbances. It is shown on charts as
isogonic lines marked with degrees of variation,
either east or west. These degrees must be added to
or subtracted from the true course to get the
magnetic course. (Easterly variations are deducted,
and westerly variations are added.) The Apollo
SL50/60 automatically sets magnetic variation to 0degrees at positions above 70 degrees north or southlatitude.
Map Datum: A mathematical model of the earth
used for the purpose of creating navigation charts
and maps. The Apollo SL50/60 uses the WGS84map datum.
MESA: Minimum Enroute Safe Altitude is the
highest MSA for every point between the aircraft
present position and the “TO” waypoint with a 5
nm buffer around the course.
Meter (m): A metric distance measurement equal
to 39.37 inches.
Minute: 1/60th of a degree.
MSA: Minimum Safe Altitude. The elevation of the
highest obstruction near the aircraft plus a 1,000 or
2,000 foot buffer added for safety. In
non-mountainous terrain, a 1,000 foot buffer is
added. In mountainous terrain, a 2,000 foot buffer is
added. The result is rounded to the nearest 100 feet.
N Nautical Mile (nm): A distance measurement equal
to 6,076 feet, or 1.15 statute mile. One nautical mile
is also equal to one minute of latitude.
115
Glossary of Navigation Terms

NAVSTAR: The name given to GPS satellites
formed from the acronym for NAVigation System
with Time And Ranging.
Non-Directional Beacon (NDB): A low
frequency/medium frequency navigation aid
sending non-directional signals that can be used for
navigation.
O OBS: Omni-Bearing Selector.
P Parallel Track Offset: A course that is parallel to
the designated course, but offset to the right or left
by a given distance.
PDOP: Position Dilution of Precision. See Dilution
of Precision.
R Radial: Any of the 360 magnetic courses from a
VOR or similar navigational aid, beginning at the
navigational aid and proceeding outward in a
straight line.
RAIM: Receiver Autonomous Integrity
Monitoring. A method of predicting possible
system accuracy errors that may be caused by bad
satellite data. The RAIM algorithm requires that
more satellites are available and usable than
required for a normal GPS position fix.
Range (RNG): The distance from the present
position to a destination waypoint.
S Second: 1/60th of a minute of a degree.
Seed Position: A latitude and longitude position fix
approximately equal to the current position that the
Apollo SL50/60 uses to determine the location ofavailable satellites from which signals may bereceived.
116
Glossary of Navigation Terms
Selective Availability (SA): The degradation of
accuracy of GPS position fix data by the United
States Department of Defense for civilian use.
Space Vehicle (SV): A GPS satellite.
Statute Mile: A distance measurement equal to
5,280 feet or 0.87 of a nautical mile.
T Three-dimensional (3D) Position Fix: A position
fix defined by latitude, longitude, and altitude.
Track (TRK): The imaginary line that the flight
path of an airplane makes over the earth.
Track Angle: The angle of your actual direction of
travel. Track angle is computed using the magnetic
variation at the Present Position.
Track Angle Error (TAE): The difference
between the Desired Track and the Track Angle
(Dtk - Trk = Tae). Track angle is computed using
the magnetic variation at the Present Position.
True North: Geographic north, at the earth’s north
pole.
Tower (TWR): Airport tower communication
frequency
U UNICOM: The radio frequencies assigned to
aeronautical advisory stations for communication
with aircraft. Unicoms may provide such airport
information as active runway, wind direction and
velocity and other conditions of importance to
pilots.
Universal Time Coordinate (UTC): Greenwich
Mean Time, or the time at the Prime Meridian in
Greenwich, England. Also referred to as Zulu time.
UTC Differential: The difference in time between
that at the present position and UTC.
117
Glossary of Navigation Terms

Universal Transverse Mercator Map Projection
System (UTM): Also known as Military Grid
Coordinates, the UTM grid consists of 60
north-south/east-west zones, each six degrees wide
in longitude.
V Very High Frequency Omnirange (VOR): A
navigational aid that transmits signals such that a
receiver can indicate its current radial or bearing
from the transmitter.
VHF: Very High Frequency. The range of
frequencies between 30 and 300 MHz.
W Waypoint: A navigation fix used in area navigation
and defined by latitude and longitude coordinates.
118
Glossary of Navigation Terms
INDEX
AAirspace95
Buffers65
Selections66
Setup65
Airspace 96
Close99
Inside99
Soon98
Altitude90
Annunciators3
Arriving at To wpt101
Autonav18, 67
BBar graph20
Battery voltage104
Bearing19
CCDI20
Scaling74
Sensitivity20
City name15, 16
Com
Audio noise level63
Headphone level63
Info62
Key4
Sidetone level64
Signal strength63
Software version63
Comm Radio81, 82, 83, 84, 85,
86, 87, 88
Auto stack list85
Frequency
abbreviations84
Intercom88
Monitoring frequencies
82
Recalling frequencies83
Remote frequencies83
Selecting frequencies81
Squelch88
Stuc mic88
User frequencies86
Controls4
Countdown timer30
Cross track distance21
DDatabase message95
Database test94
Database version76
119
Date and Time75
Description
Cross track distance21
Desired track22
Nav display19
Nav terms18
SL501
SL602
To-From switching21
Waypoint11
Desired track22
Direct-To15, 36, 53, 73
Key5
OBS36
Direct-To 15, 36, 53, 73
May Clear73
Never Clears73
Display2
Test77
Display software version77
Distance off track20
EE-Mailii
Emergency channel87
Emergency search25, 41
Enter key5
Estimate ground speed57
Estimated time enroute19, 51,
52
Estimated time of arrival25, 51
FFacility name15
Factory109
Flight plan61
Active48
Comments59
Continue59
Creating48
Deleting legs55
Editing53, 54
Hold58
Inserting legs54
Leg info50
Manual leg53
Options56
Flight plan 6147, 48, 49, 50,
51, 52, 53, 54, 55, 56, 57, 58,
59, 60
Activate56
Clear waypoints57
120
Copy plan57
Delete plan58
Estimate ground speed
57
Estimated fuel flow57
Pages47
Reactivate56
Rename56
Rev activate56
Reverse flight plan57
Flight Simulation106
Flight simulator105, 106, 107,
108
Operation107
Starting106
Flight time24, 72
Flip/Flop key4
From/To/Next32, 35
From-To distance22
Fuel52
Fuel measure units77
GGlossary111, 112, 113, 114,
115, 116, 117, 118
GPS79, 80, 89
Failure100
Health13
Introduction89
Position30
Reset80
Satellites13, 80
Signal strength13
GPS 79, 80, 89
Health79
Time79
GPS software version77
Ground speed23
HHistory of Revisionsii
Hold35
Holding at To wpt101
IIFR output tests95
Info28, 37, 40, 59, 62, 98
Key5
Info 28, 37, 40, 60, 62, 9883
Intercom3
KKey4
MMagnetic variation71
Memory test91
Memory test 9294
121

Message5, 97, 98, 99, 100, 101,
102, 103, 104
Minimum enroute safe altitude
24
Minimum safe altitude24
Monitor3
Multiple facilities40
NNavigation17, 65
Customizing pages69
Home page17
Pages19, 70
Navigation 17, 64
Empty To waypoint99
Programmable pages67
Nearest
Key4
Nearest waypoint14
Non-volatile RAM test93
OOrdering Informationii
Owner information77
Owner message91
PPages 19, 7069
Parallel track29
Parallel track 2930
Part numbersii
Password78
Password 7778
PDOP30
Plus sign15
Power Up9
RRange20
Reference Waypoint10, 26
Reference Waypoint 10, 2611
Relative Bearing Indicator3
Remove unit from aircraft106
Runway length43
Runway limits27
Runway surface27
SSeed Position9, 10
Select key5
Serial number76
Setting units71
Software memory test92
Software version76
Special use airspace28
Specifications6, 7, 8
Squelch knob4
122
Standby29
Standby 293
Start up displays91, 92, 93, 94,
95, 96
Symbol
Airplane20
System61, 62, 63, 64, 65, 66,
67, 68, 69, 70, 71, 72, 73, 74,
75, 76, 77, 78, 79, 80
TTrack angle23
Track angle error23
Transmit3
Troubleshooting109, 110
UUser database memory failure93
UTC time24
VVolume knob4
WWaypoint61, 90
Airport info37
Destination14, 59
Getting info39
Information37
Intersection info38
NDB info38
Nearest14
Next34
To34
Type32
User42, 44, 45, 46
User info38
VOR info38
Waypoint 61, 90
Auto OBS crossing102
Comments46
To102
Weather channel87
Web Pageii
123

© 1997 by II Morrow Inc.
2345 Turner Rd., S.E.
Salem, OR 97302
U.S.A.
Phone 503.581.8101
800.525.6726
In Canada 800.654.3415
FAX 503.364.2138
http://www.iimorrow.com
Part #560-0955-01
April 1997
II MORROW
V I S I O N A R Y T H I N K I N G T O D A Y