Anviz M5 Quick Guide-M5 V1.4-F.02.02185-161013
14
Transcript of Anviz M5 Quick Guide-M5 V1.4-F.02.02185-161013

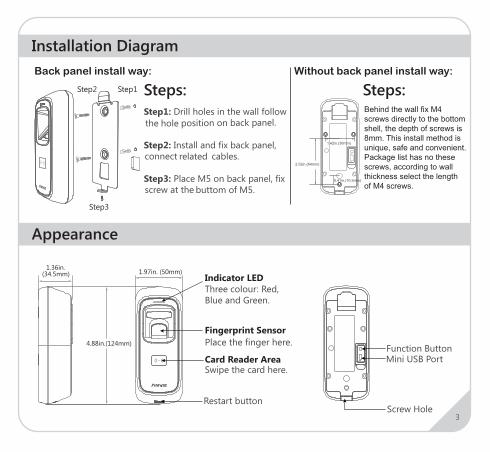
2.52in.(64mm)
1.42in.(36mm)
0.41in.(10.5mm)
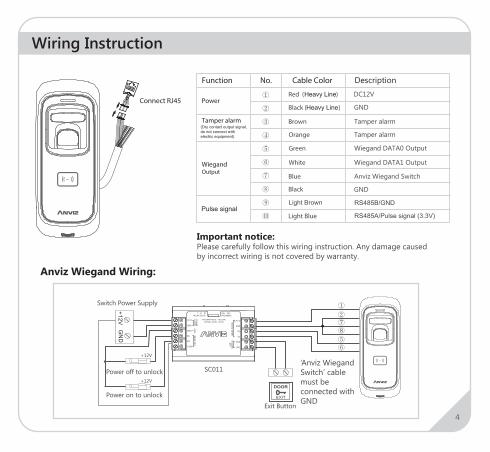
RS485B/GND
8
RS485A/Pulse signal (3.3V)
‘Anviz Wiegand Switch’ cable must be connected with GND
Anviz Wiegand Wiring:
7
+12V
+12V
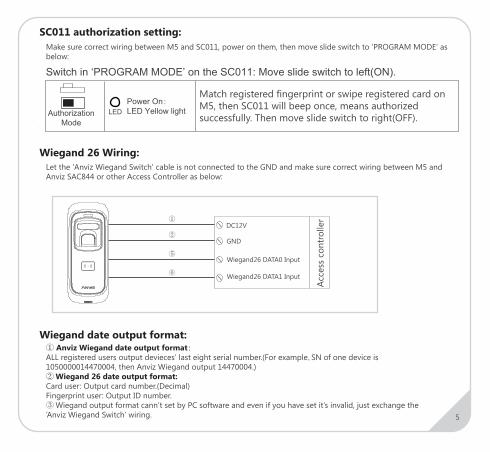
SC011 authorization setting: Make sure correct wiring between M5 and SC011, power on them, then move slide switch to ‘PROGRAM MODE’ as below:
Match registered fingerprint or swipe registered card on M5, then SC011 will beep once, means authorized successfully. Then move slide switch to right(OFF).
Wiegand 26 Wiring: Let the 'Anviz Wiegand Switch' cable is not connected to the GND and make sure correct wiring between M5 and Anviz SAC844 or other Access Controller as below:
Wiegand date output format: ① Anviz Wiegand date output format:ALL registered users output devieces’ last eight serial number.(For example, SN of one device is 1050000014470004, then Anviz Wiegand output 14470004.)② Wiegand 26 date output format:Card user: Output card number.(Decimal)Fingerprint user: Output ID number.③ Wiegand output format cann’t set by PC software and even if you have set it’s invalid, just exchange the ‘Anviz Wiegand Switch’ wiring.
1
2
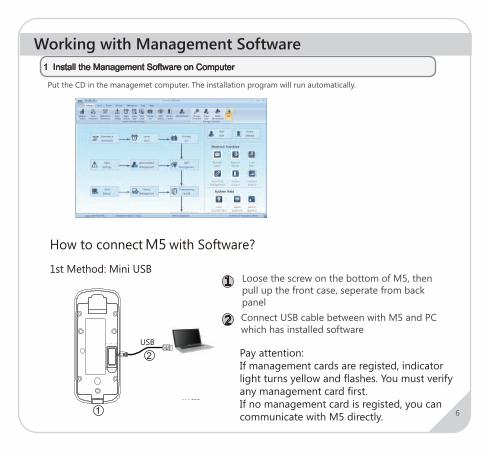
Put the CD in the managemet computer. The installation program will run automatically.
Loose the screw on the bottom of M5, then pull up the front case, seperate from back panelConnect USB cable between with M5 and PC which has installed software
Pay attention: If management cards are registed, indicator light turns yellow and flashes. You must verify any management card first.If no management card is registed, you can communicate with M5 directly.
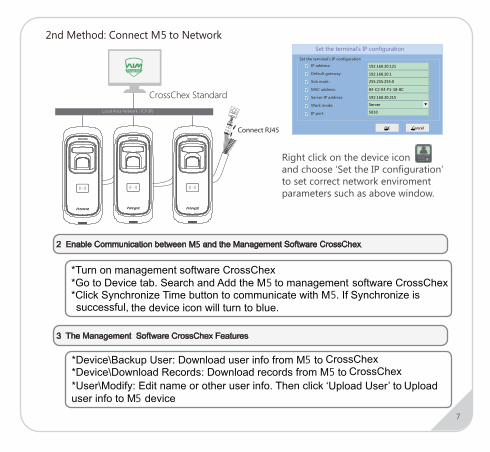
Local Area Network (TCP/IP)
Right click on the device icon and choose ‘Set the IP configuration’ to set correct network enviroment parameters such as above window.
9