Anne Lucas RN, MSN OB Clinical Systems Administrator Winthrop University Hospital New York.
24
Working with Print Templates (PLD) A Birth Certificate Worksheet Anne Lucas RN, MSN OB Clinical Systems Administrator Winthrop University Hospital New York
-
Upload
lewis-russell -
Category
Documents
-
view
218 -
download
2
Transcript of Anne Lucas RN, MSN OB Clinical Systems Administrator Winthrop University Hospital New York.

Working with Print Templates (PLD)
A Birth Certificate WorksheetAnne Lucas RN, MSN
OB Clinical Systems AdministratorWinthrop University Hospital
New York

Conflict of Interest Disclosure
The content of this presentation represents the views of the author and presenters. GE, the GE Monogram, Centricity and Imagination at Work are trademarks of General Electric Company.
The faculty and planning committee have declared no conflict of interest.
The purpose of this presentation
Describe the use of the print template. Enable the Centricity™ Perinatal system manager to build a basic print template, a birth certificate worksheet, by identifying the necessary steps and methods utilized to format the print template.

ObjectivesDefine a print template and understand its use.Discuss the planning of the print template. Describe how to add items to the print template. Describe how to format the print template. Describe how to link print templates.Discuss how to attach a print template to a form.
Criteria for successful completion include attending the entire session and turning in an evaluation form.
What is a Print Template?A Print Template is known as a Print
Layout Design or a PLD.A printoutCan be created from a form or a chartExamples:
Current AdmissionDelivery Summary

The Problem at Hand
Planning, Planning, Planning!Identified all the data items needed for the
PLDListed the Centricity Perinatal item names
accuratelyTook screen shots of the DOH data entry
screensPlanned the layout of the PLD on paperSelected the Birth Certificate Worksheet A
Form in Centricity Perinatal – noted the nameIdentified the PLD attached to that form from
the properties of the form in designer

This is the Birth Certificate Worksheet A
form in designerRight click to identify the PLD attached to that form, select properties of the form
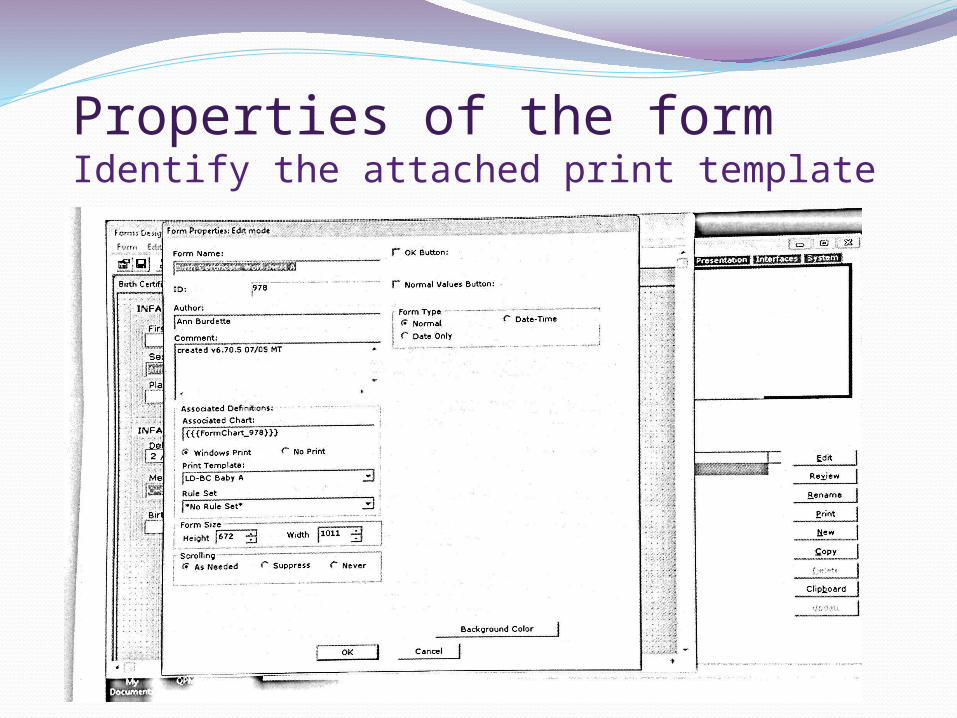
Properties of the form Identify the attached print template

Select LD-BC Baby AMust open PLD to copy it, select EDIT
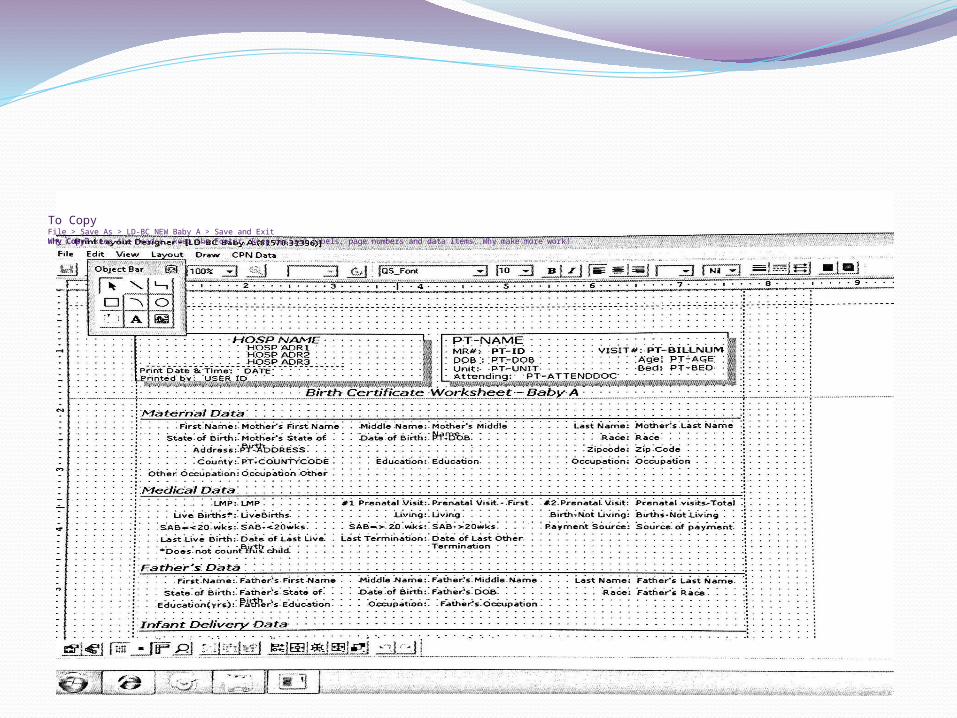
To CopyFile > Save As > LD-BC NEW Baby A > Save and Exit Why Copy? keep the Header, keep the Footer, keep desired labels, page numbers and data items. Why make more work!

Delete the unwanted labels and itemsAdd the desired Text Labels and Add Data Items to match the list created. These are the basic components.
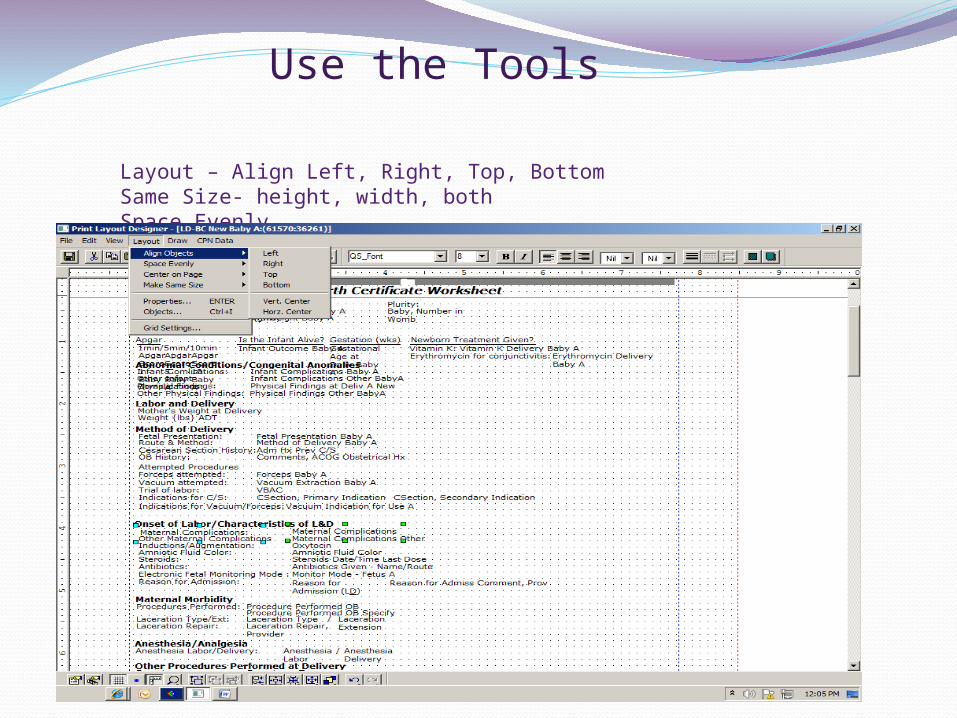
Layout – Align Left, Right, Top, BottomSame Size- height, width, bothSpace Evenly
Use the Tools

Use the ToolsTool Bar – Font, Size, Bold, Arrows, Lines, Align Text
Left, Right, CenterEdit – Cut, Copy, PasteHint: Select the wrong item on the PLD, right click
and drag the correct item from the item list to the wrong item and drop it.
Add Objects – Lines, curves, shapes, arrows, etc
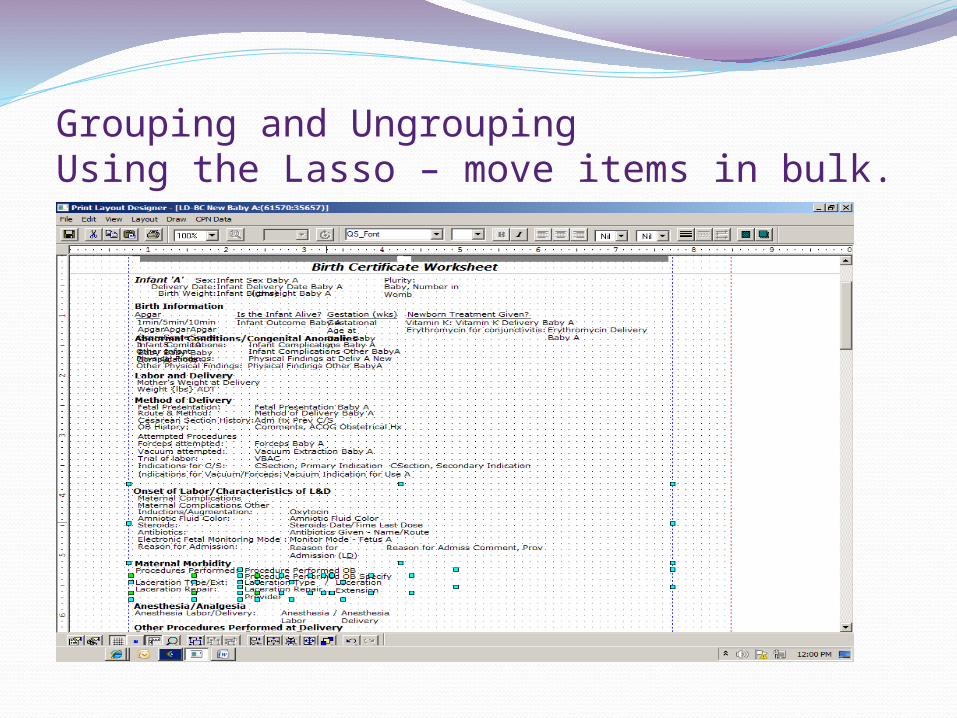
Grouping and UngroupingUsing the Lasso – move items in bulk.

Important: Each Print Template is limited to 61570KB of memory. This means that you will be unable to add items once the limit is reached.
So what can we do?? Think Link!
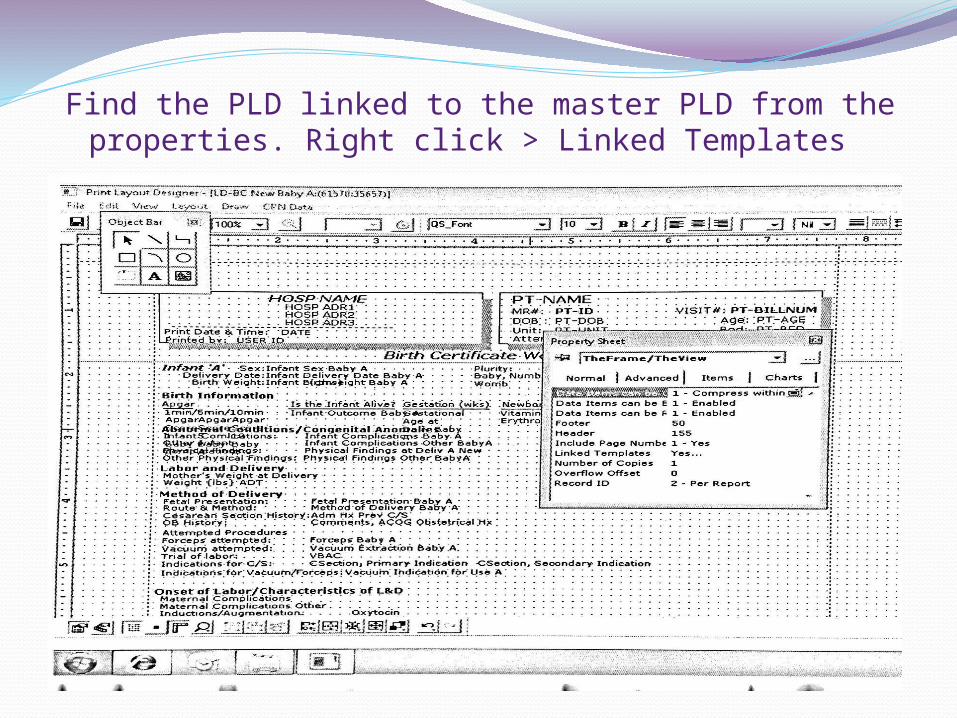
Find the PLD linked to the master PLD from the properties. Right click > Linked Templates

Identify the linked template
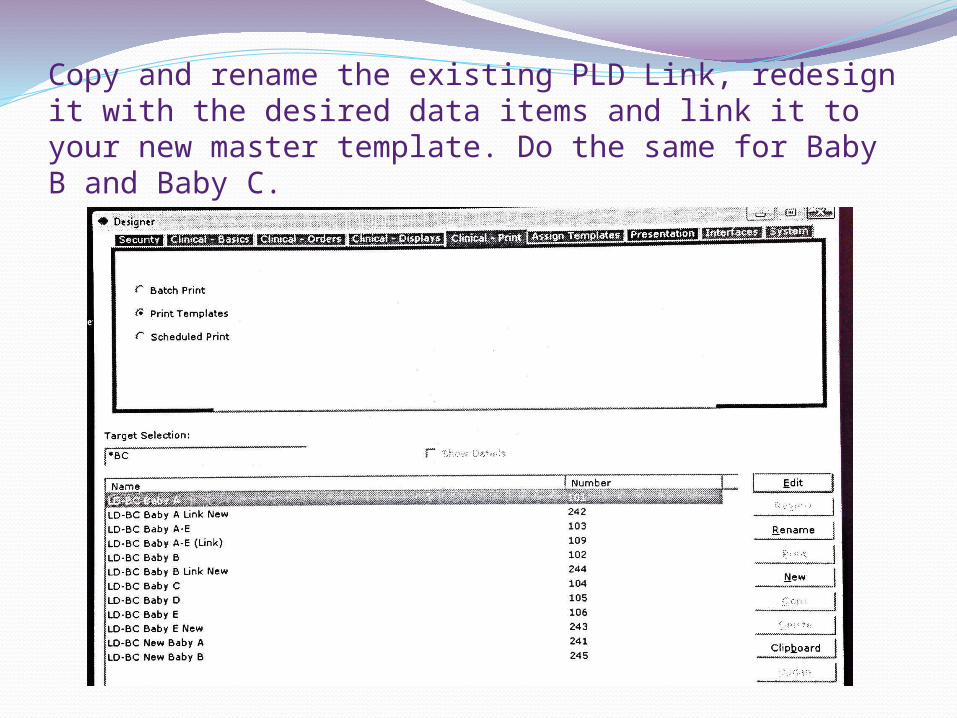
Copy and rename the existing PLD Link, redesign it with the desired data items and link it to your new master template. Do the same for Baby B and Baby C.

Link all 3 templates to the master template.

Getting the Birth Certificate Worksheet Printed
Attach the new master PLD to the properties of the Birth Certificate Worksheet A Form

Other ConsiderationsWhat other print options do we have?
Print from the menu?Print directly from the form?Scheduled Print?
Workflow – Who will print the Birth Certificate Worksheet?
When will it be printed?Print Location?
Many choices to consider
Work as a teamBe CreativePlan wellRecord every step of the processDon’t work harder than you have to
QUESTIONS?
In Conclusion

Thank You