andbook! - IQRA · andbook - Android Programming 5 powered by anddev.org Foreword / How to read...
62
andbook! release.002 Android Programming with Tutorials from the anddev.org-Community. written by Nicolas Gramlich Check for the latest version on http://andbook.anddev.org
-
Upload
nguyenhanh -
Category
Documents
-
view
234 -
download
0
Transcript of andbook! - IQRA · andbook - Android Programming 5 powered by anddev.org Foreword / How to read...
andbook! release.002
Android Programming
with Tutorials from the anddev.org-Community.
written by Nicolas Gramlich
Check for the latest version on
http://andbook.anddev.org

andbook - Android Programming
2 powered by anddev.org
Content
Foreword / How to read this doc ................................................. 5
Introduction................................................................................ 6
What is Android – a GPhone? ...................................................... 7
Android from above ........................................................................ 8
Openness ....................................................................................................... 8
All applications are created equal ................................................................. 9
Breaking down application boundaries ......................................................... 9
Fast & easy application development ........................................................... 9
The first weeks .............................................................................. 12
Dalvik.equals(Java) == false ........................................................... 13
Differences to a normal JavaVM ................................................................. 13
The Android Code Challenge ..................................................... 14
Creating Android Applications .................................................. 15
Anatomy of an Android Application ............................................... 15
Activity ......................................................................................................... 15
Intent Receiver ............................................................................................ 17
Service ......................................................................................................... 17
Content Provider ......................................................................................... 18
Android User Interfaces ................................................................. 19
Hierarchy of Screen Elements ..................................................................... 19
Comparing Android UI Elements to Swing UI Elements .............................. 22
The AndroidManifest.xml ......................................................... 23
General ......................................................................................... 24
<manifest> ................................................................................................... 25
<uses-permission> ....................................................................................... 25
<permission> ............................................................................................... 25
<instrumentation> ....................................................................................... 25
<application> ............................................................................................... 25

andbook - Android Programming
3 powered by anddev.org
<meta-data> ................................................................................................ 27
<receiver> .................................................................................................... 27
<service> ...................................................................................................... 27
<provider> ................................................................................................... 28
Resources and the magic R.java ................................................ 29
Resources ..................................................................................... 29
List of resources ........................................................................................... 29
Using resources in code ............................................................................... 30
Referencing Resources ................................................................................ 31
Alternate Resources & Localization ................................................ 32
The magic R.java ........................................................................... 33
Hello World – The Android way. ................................................ 34
Installing the Android SDK ............................................................. 35
The Android Development Tools (ADT) ....................................................... 35
Installation done, let’s do some code ............................................. 37
Creating a new Android Project .................................................................. 37
Running your first application ..................................................................... 43
UIs the Java way ........................................................................... 45
System.out.println(…) ? ................................................................. 46
The LogCat ................................................................................................... 46
Using Intents ............................................................................ 49
Starting (Sub)Activities .................................................................. 49
Finding XML-defined Views in Java-Code .................................................... 52
Handling Clicks to Views .............................................................................. 53
Returning values from SubActivities ........................................................... 56
Passing Data to (Sub)Activities ...................................................... 58
Important Layouts and ViewGroups .......................................... 60
The RelativeLayout ........................................................................ 60

andbook - Android Programming
4 powered by anddev.org
Bibliography ............................................................................. 61
Lost chapters ............................................................................ 62
The communities .......................................................................... 62
andbook - Android Programming
5 powered by anddev.org
Foreword / How to read this doc This document was written for developers who have worked with Java™
before and want to start developing for the Android Platform. I tried to
make this as much “hands on” as possible, placing example codes
everywhere it fit. Also I tried to insert as many picture as possible,
because they liven up the learning process and relax the reader’s eyes.
But unfortunately coding is not everything; one has to learn about
some basic facts of the Android Platform to fully understand. That is
what is described on the first ~XXX pages. It is not necessary to read all
those describing pages, but it is preferable. You could decide to treat it as
a kind of reference. What you would read there is also explained when it
occurs during the “hands on”-process. So you could directly start at Hello
World – The Android Way.
All codes you see in this document (the whole workspace) will be
available on:
http://andbook.anddev.org/sources/
Have fun reading…
andbook - Android Programming
6 powered by anddev.org
Introduction The Open Handset Alliance (1) released the Google Android SDK on
November 12th, 2007, having announced it about a week before. The
impact was unbelievable, almost every IT/programming-related news-
page dumped a news-post about the SDK release – the Google Groups (2)
was overwhelmed with over 2000 Messages within the first two Days.
The idea of the Android Platform was and still is amazing and is of course
attracting more and more programmers every day. Especially the open
architecture based on Intents and the possibility to replace even the
Home-application grant a really large amount of flexibility to the whole
platform.
“Android – Imagination is the limit”1
1 Nicolas Gramlich – anddev.org Site-Admin

andbook - Android Programming
7 powered by anddev.org
What is Android – a GPhone? The weeks and months before Google released the Android SDK there
had been a lot of rumors about a so called GPhone. It was said to be a
mobile device manufactured by Google providing free communication by
showing context-sensitive advertisements to the user on the device
itself.
Picture 1 Render of a potential GPhone
But on November 5th 2007 Andy Rubin2 announced:
“[The] Android [Platform] – is more significant and ambitious than a single
phone.”
Google within the Open Handset Alliance (OHA) delivers a complete set
of software for mobile devices: an operating system, middleware and key
mobile applications. What was released a week later was not a final
product, but a “First Look SDK” what many did not realize. Major news
sites grabbed the discomforts of some developers who said that Android
is full of bugs and heavily lacks of documentation. But the majority says
that Android is not buggier than any other software at this stage.
2 Andy Rubin – Google Director of Mobile Platforms

andbook - Android Programming
8 powered by anddev.org
Android from above Let’s take a look at what the OHA emphasizes on its Android Platform:
Openness
“Android was built from the ground-up to enable developers to create
compelling mobile applications that take full advantage of all a
handset has to offer. It is built to be truly open. For example, an
application could call upon any of the phone's core functionality such
as making calls, sending text messages, or using the camera, allowing
developers to create richer and more cohesive experiences for users.”
This is true, as a developer you can do everything, from sending short
messages with just 2 lines of code, up to replacing even the HOME-
Screen of your device. One could easily create a fully customized
operating system within weeks, providing no more of Google’s default
application to the user.
“Android is built on the open Linux Kernel. Furthermore, it utilizes a
custom virtual machine that has been designed to optimize memory
and hardware resources in a mobile environment. Android will be
open source; it can be liberally extended to incorporate new cutting
edge technologies as they emerge. The platform will continue to
evolve as the developer community works together to build innovative
mobile applications.”
Here Google is talking of the so called Dalvik virtual machine (DalvikVM),
which is a register based virtual machine, designed and written by Dan
Bornstein and some other Google engineers, to be an important part of
the Android platform. In the words “register based” we find the first
difference to normal Java virtual machines (JVM) which are stack based.
See the “Dalvik.equals(Java) == false”-chapter for more details on that
issue.
andbook - Android Programming
9 powered by anddev.org
All applications are created equal
“Android does not differentiate between the phone's core applications
and third-party applications. They can all be built to have equal access
to a phone's capabilities providing users with a broad spectrum of
applications and services. With devices built on the Android Platform,
users will be able to fully tailor the phone to their interests. They can
swap out the phone's home screen, the style of the dialer, or any of
the applications. They can even instruct their phones to use their
favorite photo viewing application to handle the viewing of all
photos.”
Once again this is all true. Developers can 100% customize their Android-
Device. The Android System Communication is based on so called Intents,
which are more or less just a String (with some data attached) which
defines an action that needs to be handled. An example for this is:
”android.provider.Telephony.SMS_RECEIVED”
One can simply listen on that Intent by writing about 5 lines of
definitions. The system would then recognize that there is more than one
application that wants to handle that Intent and ask the user to choose
which one he or she would like to handle the Intent.
Breaking down application boundaries
“Android breaks down the barriers to building new and innovative
applications. For example, a developer can combine information from
the web with data on an individual's mobile phone - such as the user's
contacts, calendar, or geographic location - to provide a more relevant
user experience. With Android, a developer could build an application
that enables users to view the location of their friends and be alerted
when they are in the vicinity giving them a chance to connect.”
Fast & easy application development
“Android provides access to a wide range of useful libraries and tools
that can be used to build rich applications. For example, Android

andbook - Android Programming
10 powered by anddev.org
enables developers to obtain the location of the device, and allows
devices to communicate with one another enabling rich peer-to-peer
social applications. In addition, Android includes a full set of tools that
have been built from the ground up alongside the platform providing
developers with high productivity and deep insight into their
applications.”
Since the Web 2.0 revolution, making content rich applications within
minutes is no more illusion. Android has brought developing to unknown
speeds. Let me provide an example:
Someday I stumbled over the Buzzword ‘DrivingDirections’ within the
Android-Documentation.
Thought – done.
Picture 2 Google DrivingDirections implementation in Android
The development process of the application in the picture above took
about 1½ hours! (Including the simple user interface and all images you
see). Could one create such a sophisticated application on any other
mobile-platform? – No.
andbook - Android Programming
11 powered by anddev.org
Additionally this application could be enriched with the current GPS-
position of the device within a handful of code-lines.
Google emphasizes Androids power of providing location-based-services.
Google Maps are so neat within Android as if it was just developed for
Android. One can integrate a fully zoom and drag enabled map by adding
just 3(!) characters in the Java-Code of the Android-Default-Application
and 3 lines of XML-Code.
Other nice features that are easy to use with Android are Animations and
media-playback. Since version m5, the Android SDK contains functions
for straight and reverse GeoCoding and in addition to mp3, playback of:
ogg-Vorbis, MIDI and a bunch of other formats.

andbook - Android Programming
12 powered by anddev.org
The first weeks Unfortunately the developers had to deal with a not fully implemented
preview-SDK (initially released build: ‘m3-rc20’), where even some key-
parts of the SDK were poorly documented. The lack of documentation
leaded to an explosion of the Android-Developer-Group within the
Google-Groups. Sooner or later one had to respect the statement from
Google:
“If it is not documented it is not meant to work yet.“
Many developers did not realize that fact that the first SDK released were
first-looks or developer-previews, where changes in the API had to be
awaited.
Another annoying bug was the choppy emulator-sound, which was said
fixed with the release of build ‘m3-rc37a’ about 4 weeks later, but still
happened on some setups up to m5.

andbook - Android Programming
13 powered by anddev.org
Dalvik.equals(Java) == false Why “Dalvik”? – The Dalvik virtual machine was named by Bornstein after
the fishing village of Dalvík in Eyjafjörður (Iceland), where some of his
ancestors lived.
As you may have heard of, Dalvik is the name of Android's virtual
machine. It is an interpreter-only virtual machine that executes files in
the Dalvik Executable (*.dex) format, a format that is optimized for
efficient storage and memory-mappable execution. The virtual machine
is register-based, and it can run classes compiled by a Java language
compiler that have been transformed into its native format using the
included "dx" tool. The VM runs on top of a Linux 2.6 kernel, which it
relies on for underlying functionality (such as threading and low level
memory management). The DalvikVM was also optimized to be running
in multiple instances with a very low memory-footprint. Several VMs
protect ones application from being dragged down by another crashed
Application.
Differences to a normal JavaVM
JavaVM’s one can find on almost any desktop computer nowadays are
Stack-based Virtual Machines (VM).The DalvikVM on the other hand is
register based, because on mobile-processors are optimized for register-
based execution. Also of register-based VMs allow faster execution times
at the expense of programs which are larger after compilation.

andbook - Android Programming
14 powered by anddev.org
The Android Code Challenge The Android Code Challenge (ADC) is an idea of Google to encourage the
community to build cool applications for the Android Platform by
rewarding the 50 most promising applications submitted.
Picture 3 Android Developer Challenge Logo
Of course the Android Developers Challenge, with its overall 10 Million
Dollars of prize money, was attracting even more software-developers to
create a bunch of really useful applications. On the other side many
voices said, that this was no good choice from Google, because it would
lead to less code-sharing, as many would fear sharing their ideas with a
community, during the first important months after the SDK release.
There were two Challenges planned:
Android Developer Challenge I: Submissions up to April 14, 2008
Android Developer Challenge II: This part will launch after the
first handsets built on the platform become available in the
second half of 2008.
In the Android Developer Challenge I, the 50 most promising entries
submitted by April 14 will each receive a $25,000 award to fund further
development. Those selected will then be eligible for even greater
recognition via ten $275,000 awards and ten $100,000 awards.
Applications submitted to the Challenge were supposed to be innovative
and demonstrate all the capabilities of the Android platform, like location
based services, media consumption, gaming and social networking, to
enrich mobile experience.

andbook - Android Programming
15 powered by anddev.org
Creating Android Applications In this chapter we will concentrate on the specialties in creating any
Android-Application.
Anatomy of an Android Application There are four building blocks to an Android application:
Activity
Intent Receiver
Service
Content Provider
Not every application needs to have all four, but your application will be
written with some combination of these.
Once you have decided what components you need for your application,
you should list them in a file called AndroidManifest.xml. This is an
XML file where you declare the components of your application and what
their capabilities and requirements are. We will discuss soon, what the
AndroidManifest.xml is responsible for.
Activity
Activities are the most common of the four Android building blocks. An
activity is usually a single screen in your application. Each activity is
implemented as a single class that extends the Activity base class. Your
class will display a user interface composed of Views and respond to
events. Most applications consist of multiple screens. For example, a text
messaging application might have one screen that shows a list of
contacts to send messages to, a second screen to write the message to
the chosen contact, and other screens to review old messages or change
settings. Each of these screens would be implemented as an activity.
Moving to another screen is accomplished by a starting a new activity. In
some cases an Activity may return a value to the previous activity - for

andbook - Android Programming
16 powered by anddev.org
example an activity that lets the user pick a photo would return the
chosen photo to the caller.
When a new screen opens, the previous screen is paused and put onto a
history stack. The user can navigate backward through previously opened
screens in the history. Screens can also choose to be removed from the
history stack when it would be inappropriate for them to remain.
Android retains history stacks for each application launched from the
home screen.
Intent and Intent Filters
Android uses a special class called Intent to move from screen to
screen. Intent describe what an application wants done. The two most
important parts of the intent data structure are the action and the data
to act upon. Typical values for action are MAIN (the front door of the
application), VIEW, PICK, EDIT, etc. The data is expressed as a Uniform
Resource Indicator (URI). For example, to view a website in the browser,
you would create an Intent with the VIEW action and the data set to a
Website-URI.
new Intent(android.content.Intent.VIEW_ACTION,
ContentURI.create("http://anddev.org"));
There is a related class called an IntentFilter. While an intent is
effectively a request to do something, an intent filter is a description of
what intents an activity (or intent receiver, see below) is capable of
handling. An activity that is able to display contact information for a
person would publish an IntentFilter that said that it knows how to
handle the action VIEW when applied to data representing a person.
Activities publish their IntentFilters in the AndroidManifest.xml
file.
Navigating from screen to screen is accomplished by resolving intents. To
navigate forward, an activity calls startActivity(myIntent). The
system then looks at the intent filters for all installed applications and
andbook - Android Programming
17 powered by anddev.org
picks the activity whose intent filters best matches myIntent. The new
activity is informed of the intent, which causes it to be launched. The
process of resolving intents happens at run time when startActivity is
called, which offers two key benefits:
Activities can reuse functionality from other components simply
by making a request in the form of an Intent
Activities can be replaced at any time by a new Activity with an
equivalent IntentFilter
Intent Receiver
You can use an IntentReceiver when you want code in your
application to execute in reaction to an external event, for example,
when the phone rings, or when the data network is available, or when it's
midnight. Intent receivers do not display a UI, although they may display
Notifications to alert the user if something interesting has
happened. Intent receivers are also registered in
AndroidManifest.xml, but you can also register them from code
using Context.registerReceiver(). Your application does not
have to be running for its intent receivers to be called; the system will
start your application, if necessary, when an intent receiver is triggered.
Applications can also send their own intent broadcasts to others with
Context.broadcastIntent().
Service
A Service is code that is long-lived and runs without a UI. A good
example of this is a media player playing songs from a play list. In a
media player application, there would probably be one or more activities
that allow the user to choose songs and start playing them. However, the
music playback itself should not be handled by an activity because the
user will expect the music to keep playing even after navigating to a new
screen. In this case, the media player activity could start a service using
Context.startService() to run in the background to keep the
music going. The system will then keep the music playback service
andbook - Android Programming
18 powered by anddev.org
running until it has finished. (You can learn more about the priority given
to services in the system by reading Life Cycle of an Android Application.)
Note that you can connect to a service (and start it if it's not already
running) with the Context.bindService() method. When
connected to a service, you can communicate with it through an
interface exposed by the service. For the music service, this might allow
you to pause, rewind, etc.
Content Provider
Applications can store their data in files, a SQLite database, preferences
or any other mechanism that makes sense. A content provider, however,
is useful if you want your application's data to be shared with other
applications. A content provider is a class that implements a standard set
of methods to let other applications store and retrieve the type of data
that is handled by that content provider.
andbook - Android Programming
19 powered by anddev.org
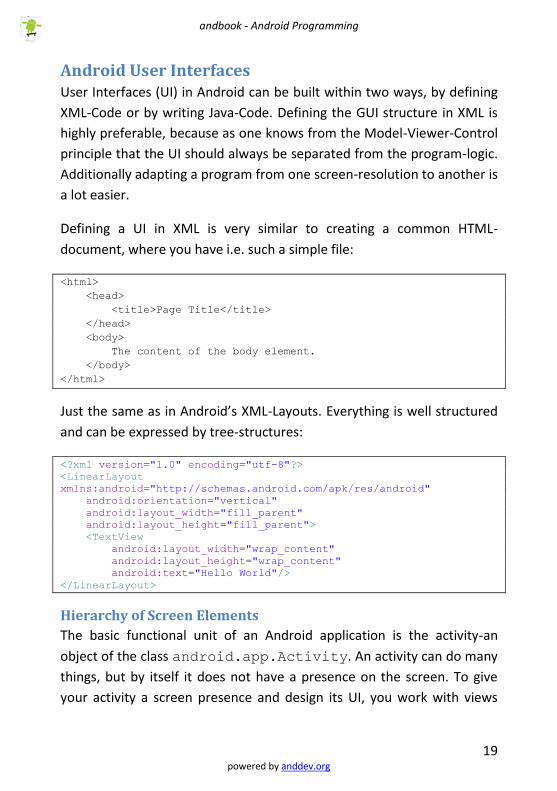
Android User Interfaces User Interfaces (UI) in Android can be built within two ways, by defining
XML-Code or by writing Java-Code. Defining the GUI structure in XML is
highly preferable, because as one knows from the Model-Viewer-Control
principle that the UI should always be separated from the program-logic.
Additionally adapting a program from one screen-resolution to another is
a lot easier.
Defining a UI in XML is very similar to creating a common HTML-
document, where you have i.e. such a simple file:
<html>
<head>
<title>Page Title</title>
</head>
<body>
The content of the body element.
</body>
</html>
Just the same as in Android’s XML-Layouts. Everything is well structured
and can be expressed by tree-structures:
<?xml version="1.0" encoding="utf-8"?>
<LinearLayout
xmlns:android="http://schemas.android.com/apk/res/android"
android:orientation="vertical"
android:layout_width="fill_parent"
android:layout_height="fill_parent">
<TextView
android:layout_width="wrap_content"
android:layout_height="wrap_content"
android:text="Hello World"/>
</LinearLayout>
Hierarchy of Screen Elements
The basic functional unit of an Android application is the activity-an
object of the class android.app.Activity. An activity can do many
things, but by itself it does not have a presence on the screen. To give
your activity a screen presence and design its UI, you work with views

andbook - Android Programming
20 powered by anddev.org
and viewgroups - basic units of user interface expression on the Android
platform.
Views
A view is an object extending the base class android.view.View. It's
a data structure whose properties store the layout and content for a
specific rectangular area of the screen. A View object handles measuring,
its layout, drawing, focus changes, scrolling, and key/gestures for the
screen area it represents.
The View class serves as a base class for all widgets - a set of fully
implemented subclasses that draw interactive screen elements. Widgets
handle their own measuring and drawing, so you can use them to build
your UI more quickly. The list of widgets available includes i.e. TextView,
EditText, Button, RadioButton, Checkbox, ScrollView, …
Viewgroups
A viewgroup is an object of class android.view.Viewgroup. As its
name indicates, a viewgroup is a special type of view object whose
function is to contain and manage a subordinate set of views and other
viewgroups, Viewgroups let you add structure to your UI and build up
complex screen elements that can be addressed as a single entity.
The Viewgroup class serves as a base class for layouts - a set of fully
implemented subclasses that provide common types of screen layout.
The layouts give you a way to build a structure for a set of views.
A Tree-Structured UI
On the Android platform, you define an Activity's UI using a tree of view
and viewgroup nodes, as shown in the diagram below. The tree can be as
simple or complex as you need to make it, and you can build it up using
Android's set of predefined widgets and layouts or custom view types
that you create yourself.

andbook - Android Programming
21 powered by anddev.org
Picture 4 Android UI - Tree structure
To attach the tree to the screen for rendering, your Activity calls its
setContentView() method and passes a reference to the root node
object. Once the Android system has the reference to the root node
object, it can work directly with the node to invalidate, measure, and
draw the tree. When your Activity becomes active and receives focus, the
system notifies your activity and requests the root node to measure and
draw the tree. The root node then requests that its child nodes draw
themselves - in turn, each viewgroup node in the tree is responsible for
drawing its direct children.
As mentioned previously, each view group has the responsibility of
measuring its available space, laying out its children, and calling draw()
on each child to let it render itself. The children may request a size and
location in the parent, but the parent object has the final decision on
where how big each child can be.
andbook - Android Programming
22 powered by anddev.org
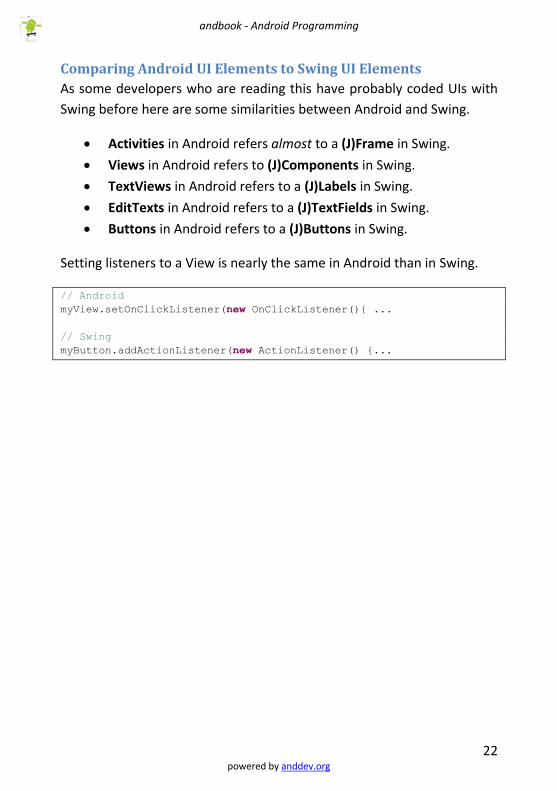
Comparing Android UI Elements to Swing UI Elements
As some developers who are reading this have probably coded UIs with
Swing before here are some similarities between Android and Swing.
Activities in Android refers almost to a (J)Frame in Swing.
Views in Android refers to (J)Components in Swing.
TextViews in Android refers to a (J)Labels in Swing.
EditTexts in Android refers to a (J)TextFields in Swing.
Buttons in Android refers to a (J)Buttons in Swing.
Setting listeners to a View is nearly the same in Android than in Swing.
// Android
myView.setOnClickListener(new OnClickListener(){ ...
// Swing
myButton.addActionListener(new ActionListener() {...

andbook - Android Programming
23 powered by anddev.org
The AndroidManifest.xml The AndroidManifest.xml is a required file for every Android
application. It is located in the root folder of the application, and
describes global values for your package, including the application
components (activities, services, etc) that the package exposes to the
‘outer world’, what kind of data each of our Activities and co. can handle,
and how they can be launched.
An important thing to mention of this file are its so called IntentFilters.
These filters describe where and when that activity can be started. When
an activity (or the operating system) wants to perform an action such as
open a Web page or open a contact picker screen, it creates an Intent
object. This Intent-object can hold several information describing what
you want to do, what data is needed to accomplish it and other bits of
information. Android compares the information in an Intent object with
the intent filter exposed by every application and finds the activity most
appropriate to handle the data or action specified by the caller. If there it
more than one application capable of handling that Intent, the user gets
asked, which app he would prefer handling it.
Besides declaring your application's Activities, Content Providers,
Services, and Intent Receivers, you can also specify permissions in
AndroidManifest.xml.

andbook - Android Programming
24 powered by anddev.org
General A very simple AndroidManifest.xml looks like this:
<?xml version="1.0" encoding="utf-8"?>
<manifest xmlns:android="http://schemas.android.com/apk/res/android"
package="org.anddev.android.hello_android">
<application android:icon="@drawable/icon">
<activity android:name=".Hello_Android"
android:label="@string/app_name">
<intent-filter>
<action android:name="android.intent.action.MAIN" />
<category android:name="android.intent.category.LAUNCHER" />
</intent-filter>
</activity>
</application>
</manifest>
Almost every AndroidManifest.xml (as well as many other
Android XML files) will include the namespace declaration (xmlns:android=http://schemas.android.com/apk/res/android)
in its first element. This makes a variety of standard Android
attributes available in the file, which will be used to supply most
of the data for elements in that file.
Almost every manifest includes a single <application> tag,
which itself contains several tags describing Applications,
IntentReceivers, etc… that are available in this application.
If you want to make an Activity launchable directly through the
user, you will need to make it support the MAIN action and
LAUNCHER category, what result as shown here:
Picture 5 Directly launchable Activity

andbook - Android Programming
25 powered by anddev.org
What follows is a detailed list of the structure of an
AndroidManifest file, describing all available <tags>, with an
Example for each:
<manifest>
This is the root node of each AndroisManifest.xml. It contains the
package-attribute, which points to any package in out Activity. Other
Activities-path will base relative to its value.
<manifest xmlns:android="http://schemas.android.com/apk/res/android"
package="org.anddev.android.smstretcher">
<uses-permission>
Describes a security permission, which your package must be
granted in order for it to operate correctly (i.e. when you want to send
SMS or use the Phone-Contacts). The permissions get granted by the user
during installation of your application. Quantity: 0+
<uses-permission android:name=" android.permission.RECEIVE_SMS"/>
<permission>
Declares a security permission that can be used to restrict which
applications can access components or features in your (or another)
package. Quantity: 0+
<instrumentation>
Declares the code of an instrumentation component that is
available to test the functionality of this or another package. See
Instrumentation for more details. Quantity: 0+
<application>
Root element containing declarations of the application-level
components contained in the package. This element can also include
global and/or default attributes for the application, such as a label, icon,
theme, required permission, etc. Quantity: 0 or 1.
<application android:icon="@drawable/icon">

andbook - Android Programming
26 powered by anddev.org
You can place 0+of each of the following children:
<activity>
An Activity is the primary thing for an application to
interact with the user. The initial screen the user sees when
launching an application is an activity, and most other screens
they use will be implemented as separate activities declared with
additional activity tags.
<activity android:name=".Welcome" android:label="@string/app_name">
Note: Every Activity must have an <activity> tag in the
manifest whether it is exposed to the world or intended for use
only within its own package. If an Activity has no matching tag
in the manifest, you won't be able to launch it.
Optionally, to support late runtime lookup, you can
include 1+ <intent-filter> elements to describe the actions the
activity supports.
<intent-filter>
Declares what kind of Intents a component
supports. In addition to the various kinds of values that
can be specified under this element, attributes can be
given here to supply a unique label, icon, and other
information for the action being described.
<intent-filter>
<action>
An action-type that the component
supports. Example:
<action android:name="android.intent.action.MAIN" />

andbook - Android Programming
27 powered by anddev.org
<category>
A category-type that the component
supports. Example:
<category android:name="android.intent.category.LAUNCHER" />
<data>
An MIME type, URI scheme, URI
authority, or URI path that the component
supports.
You can also associate 1+ pieces of meta-
data with your activity:
<meta-data>
Adds a new piece of meta data to the activity,
which clients can retrieve through
ComponentInfo.metaData.
<receiver>
An IntentReceiver allows an application to be told
about changes to data or actions that happen, even if it is not
currently running. As with the activity tag, you can optionally
include 1+ <intent-filter> elements that the receiver
supports or <meta-data> values, just all the same as with
<activity>.
<receiver android:name=".SMSReceiver">
<service>
A Service is a component that can run in the background
for an arbitrary amount of time. As with the activity tag, you can
optionally include one or more <intent-filter> elements that the
service supports or <meta-data> values; see the activity's
<intent-filter> and <meta-data> descriptions for more
information.

andbook - Android Programming
28 powered by anddev.org
<provider>
A ContentProvider is a component that manages
persistent data and publishes it for access by other applications.
You can also optionally attach one or more <meta-data> values,
as described in the activity's <meta-data> description.
Of course all <tags> have to be </closed> or closed
<directly/>.

andbook - Android Programming
29 powered by anddev.org
Resources and the magic R.java The resources of a project and the R.java are very close related.
Resources Resources are external files (non-code files) that are used by your code
and compiled into your application at build time. Android supports a
number of different kinds of resource files, including XML, PNG, and JPEG
files. The XML files have very different formats depending on what they
describe.
Resources are externalized from source code, and XML files are compiled
into a binary, fast loading format for efficiency reasons. Strings are
compressed into a more efficient storage form.
List of resources
Resource-types and where to place them:
layout-files “/res/layout/”
images “/res/drawable/”
animations “/res/anim/”
styles, strings and arrays “/res/values/”
o Names do not have to be exactly like:
o ‘arrays.xml’ to define arrays
o ‘colors.xml’ to define colors
#RGB, #ARGB, #RRGGBB, #AARRGGBB
o ‘dimens.xml’ to define dimensions
o ‘strings.xml’ to define strings
o ‘styles.xml’ to define style objects
raw files like mp3s or videos “/res/raw/”

andbook - Android Programming
30 powered by anddev.org
Using resources in code
Using resources in code is just a matter of knowing the full resource ID
and what type of object your resource has been compiled into. Here is
the syntax for referring to a resource:
R.resource_type.resource_name
or
android.R.resource_type.resource_name
Where resource_type is the R subclass that holds a specific type of
resource.resource_name is the name attribute for resources
defined in XML files, or the file name (without the extension) for
resources defined by other file types. Each type of resource will be added
to a specific R subclass, depending on the type of resource it is.
Resources compiled by your own application can be referred to without a
package name (simply as R.resource_type.resource_name).
Android contains a number of standard resources, such as screen styles
and button backgrounds. To refer to these in code, you must qualify
them with android, as for example in:
android.R.drawable.button_background.

andbook - Android Programming
31 powered by anddev.org
Referencing Resources
A value supplied in an attribute (or resource) can also be a reference to
another resource. This is often used in layout files to supply strings (so
they can be localized) and images (which exist in another file), though a
reference can be any resource type including colors and integers.
For example, if we have color resources, we can write a layout file that
sets the text color size to be the value contained in one of those
resources:
<EditText
android:layout_width="fill_parent"
android:layout_height="fill_parent"
android:textColor="@color/opaque_red"
android:text="Hello, World!" />
Note here the use of the '@' prefix to introduce a resource reference --
the text following that is the name of a resource in the form of
@[package:]type/name. In this case we didn't need to specify the
package because we are referencing a resource in our own package. To
reference a system resource, you would need to write:
<EditText
android:layout_width="fill_parent"
android:layout_height="fill_parent"
android:textColor="@android:color/opaque_red"
android:text="Hello, World!" />
As another example, you should always use resource references when
supplying strings in a layout file so that they can be localized:
<EditText
android:layout_width="fill_parent"
android:layout_height="fill_parent"
android:textColor="@android:color/opaque_red"
android:text="@string/hello_world" />
andbook - Android Programming
32 powered by anddev.org
Alternate Resources & Localization Alternate Resources and Localization is a very useful issue you will love
Android for. Expect you would have to design a GUI that fits landscape
and portrait screen-orientation well at the same time – that is almost
impossible.
You can supply different resources for your application according to the
UI language or hardware configuration of the device. Note that
eventhough you can include different string, layout, and all other
resources, the SDK does not expose methods to let you specify which
alternate resource set to be used. Android detects the proper set for the
hardware and location, and loads them as appropriate. Only the user can
select alternate language settings using the settings panel on the device.
To include alternate resources, create parallel resource folders with
dash-separated qualifiers appended to the folder names, indicating the
configuration it applies to (language, screen orientation, dpi, resolution,
…).
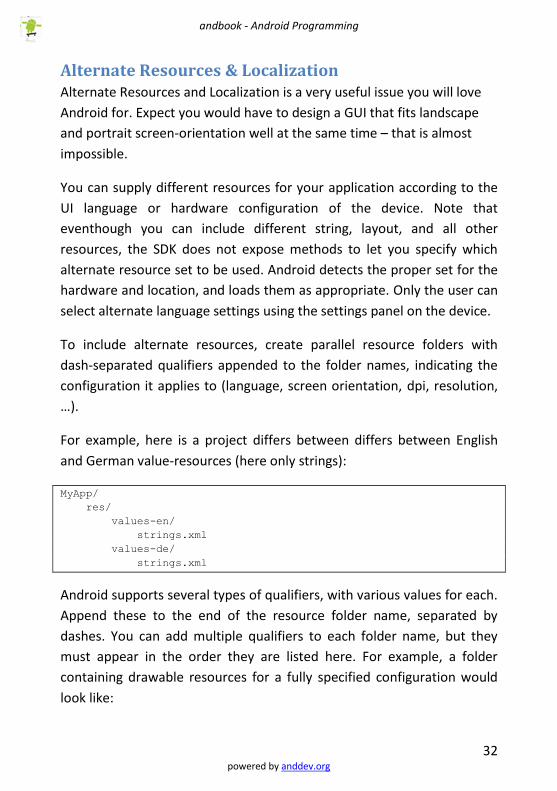
For example, here is a project differs between differs between English
and German value-resources (here only strings):
MyApp/
res/
values-en/
strings.xml
values-de/
strings.xml
Android supports several types of qualifiers, with various values for each.
Append these to the end of the resource folder name, separated by
dashes. You can add multiple qualifiers to each folder name, but they
must appear in the order they are listed here. For example, a folder
containing drawable resources for a fully specified configuration would
look like:

andbook - Android Programming
33 powered by anddev.org
MyApp/
res/
drawable-en-rUS-port-92dpi-finger-keyshidden-12key-dpad-480x320/
More typically, you will only specify a few specific configuration options
that a resource is defined for. You may drop any of the values from the
complete list, as long as the remaining values are still in the same order:
MyApp/
res/
drawable-en-rUS-finger/
drawable-port/
drawable-port-160dpi/
drawable-qwerty/
Android will pick which of the various underlying resource files fits best
during runtime, depending on the current device-configuration.
The magic R.java A project's R.java is an auto-generated file indexing all the resources of
your project. You use this class in your source code as a sort of short-
hand way to refer to resources you've included in your project. This is
particularly powerful with the code-completion features of IDEs like
Eclipse because it lets you quickly and interactively locate the specific
reference you're looking for.
Additionally you gain compile-time safety that the resource you want to
use really exists.

andbook - Android Programming
34 powered by anddev.org
Hello World – The Android way. In this very first tutorial one will learn how to create an Android
Application using a XML layout. Keep in mind that, using XML-Layouts is
highly preferable!
What it will finally look like:
Picture 6 First Android Application - Final look (sdk-version: m5)
But before all that one needs to download and install the Android SDK…

andbook - Android Programming
35 powered by anddev.org
Installing the Android SDK The latest Android SDK for Windows, Mac and Linux can always be
obtained from the following URI:
http://code.google.com/android/download.html
It only needs to be downloaded and unzipped to your preferred hdd-
location.
The Android Development Tools (ADT)
Android provides an Eclipse plugin called ‘ADT’ to make programming and debugging easier. The ADT provides easy access to the LogCat, the Android-Manifest/Resource-Editor, File, Thread, and Heap Control, incoming call/sms simulation, etc… – since SDK-version m5 all for multiple emulator instances at the same time.
Installing the Eclipse Plugin (ADT)
To download and install the ADT plugin, follow the steps Google provides to developers:
1. Start Eclipse, then select Help > Software Updates > Find and Install....
2. In the dialog that appears, select Search for new features to install and press Next.
3. Press New Remote Site. 4. In the resulting dialog box, enter a name for the remote site (e.g.
Android Plugin) and enter this as its URL:
https://dl-ssl.google.com/android/eclipse/
Press OK.
5. You should now see the new site added to the search list (and checked). Press Finish.

andbook - Android Programming
36 powered by anddev.org
6. In the subsequent Search Results dialog box, select the checkbox for Android Plugin > Developer Tools. This will check both features: "Android Developer Tools", and "Android Editors". The Android Editors feature is optional, but recommended. If you choose to install it, you need the WST plugin mentioned earlier in this page.
Now press Next.
7. Read the license agreement and then select Accept terms of the license agreement, if appropriate. Press Next.
8. Press Finish. 9. The ADT plugin is not signed; you can accept the installation
anyway by pressing Install All. 10. Restart Eclipse. 11. After restart, update your Eclipse preferences to point to the
SDK directory: a. Select Window > Preferences... to open the Preferences
panel. (Mac OS X: Eclipse > Preferences) b. Select Android from the left panel. c. For the SDK Location in the main panel, press Browse...
and locate the SDK directory. d. Press Apply, then OK.
Updating the ADT Plugin
Updating the ADT Plugin follows the standard procedure of upgrading a
common Eclipse plugin:
1. Select Help > Software Updates > Find and Install.... 2. Select Search for updates of the currently installed features and
press Finish. 3. If any update for ADT is available, select and install.

andbook - Android Programming
37 powered by anddev.org
Installation done, let’s do some code Before we can start coding we obviously have to create a new Android
Project.
Creating a new Android Project
1. The first thing that needs to be for every Android Application is
to create a new Android Project. To do that, simply open
the Package Exlporer in Eclipse right-click on some blank space
and choose:
New > Project…
Picture 7 First Android Application - Step 1
2. Select:
Android > Android Project

andbook - Android Programming
38 powered by anddev.org
Picture 8 First Android Application - Step 2
3. Fill out the form with values fitting your applications purpose...
Picture 9 First Android Application - Step 3

andbook - Android Programming
39 powered by anddev.org
4. This are all the files for your first Android-Application (don't
panic, mostly all of them are resource-files)
Picture 10 First Android Application - Step 4
Huh, what are all that files supposed to do ?
As you now have created your first Android Project you will see a bunch
of files appear in that new project.
The Main Activity
You’ll see some default code like the following, when you now navigate
to:
“/src/your_package_Structure/Hello_Android.java”
package org.anddev.android.Hello_Android;
import android.app.Activity;
import android.os.Bundle;
public class Hello_Android extends Activity {
/** Called when the activity is first created. */
@Override
public void onCreate(Bundle icicle) {
super.onCreate(icicle);
/* Make this application use
* the main.xml-layout-file. */
this.setContentView(R.layout.main);
}
}
andbook - Android Programming
40 powered by anddev.org
We could now immediately our Application but let me explain of the
other files too.
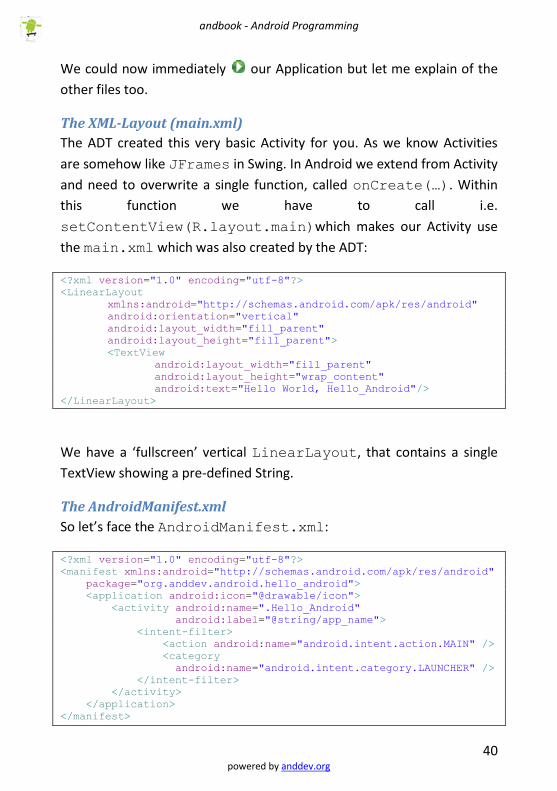
The XML-Layout (main.xml)
The ADT created this very basic Activity for you. As we know Activities
are somehow like JFrames in Swing. In Android we extend from Activity
and need to overwrite a single function, called onCreate(…). Within
this function we have to call i.e.
setContentView(R.layout.main)which makes our Activity use
the main.xml which was also created by the ADT:
<?xml version="1.0" encoding="utf-8"?>
<LinearLayout
xmlns:android="http://schemas.android.com/apk/res/android"
android:orientation="vertical"
android:layout_width="fill_parent"
android:layout_height="fill_parent">
<TextView
android:layout_width="fill_parent"
android:layout_height="wrap_content"
android:text="Hello World, Hello_Android"/>
</LinearLayout>
We have a ‘fullscreen’ vertical LinearLayout, that contains a single
TextView showing a pre-defined String.
The AndroidManifest.xml
So let’s face the AndroidManifest.xml:
<?xml version="1.0" encoding="utf-8"?>
<manifest xmlns:android="http://schemas.android.com/apk/res/android"
package="org.anddev.android.hello_android">
<application android:icon="@drawable/icon">
<activity android:name=".Hello_Android"
android:label="@string/app_name">
<intent-filter>
<action android:name="android.intent.action.MAIN" />
<category
android:name="android.intent.category.LAUNCHER" />
</intent-filter>
</activity>
</application>
</manifest>

andbook - Android Programming
41 powered by anddev.org
Let’s split that up…
Every xml-file starts with the following line, it defines the xml-version and
encoding-type of the xml-text. Just copy-paste it to every new file.
<?xml version="1.0" encoding="utf-8"?>
As we know the outermost tag in every xml-file should contain this attribute: xmlns:android="http://schemas.android.com/apk/res/android"
Because it makes a variety of general Android attributes available in the
file.
<manifest xmlns:android="http://schemas.android.com/apk/res/android"
package="org.anddev.android.hello_android">
.....
</manifest>
The <application> tag is the root element containing declarations of
all application-level components contained in the package. This element
can also include global and/or default attributes for the application, such
as a label, icon, theme, required permission, etc…
Here we define just the icon, by making a ‘@-refer’ to a image placed
under "/res/drawable/".
<application android:icon="@drawable/icon">
.....
</application>
Inside of the <application> tag we need to define all
Activities/IntentReceivers that need to be started via Intents. In this case
we have only one simple Activity.
<activity android:name=".Hello_Android"
android:label="@string/app_name">
.....
</activity>

andbook - Android Programming
42 powered by anddev.org
You probably have recognizes that the package-attribute from the
<manifest> tag together with the android:name attribute from
the <activity> tag always result in the complete package-path to the
Activity described.
The innermost tag is the <intent-filter> tag which defines on
which Intents we want to listen. Here we want the Hello_Android Activity
launchable from within the emulator by clicking the icon (that was
defined in the <application> tag).
<intent-filter>
<action android:name="android.intent.action.MAIN" />
<category
android:name="android.intent.category.LAUNCHER" />
</intent-filter>
Note: The debugging-process with a Android Application is
exactly the same than with a normal Java Application.

andbook - Android Programming
43 powered by anddev.org
Running your first application
Now we need to create a ‘ -Configuration’. Open the -DropDown in
the Eclipses upper menu and Click "Open Run Dialog..."
Picture 11 Opening the run-dialog
Picture 12 Creating a run-configuration

andbook - Android Programming
44 powered by anddev.org
From now on you can run your application by clicking the button.
Having done that you’ll see this:
Picture 13 First Android Application - The result (sdk-version m5)
After the first deploy you can also see your application being listed in the
quick-menu, displayed with the default icon:
Picture 14 First Android Application - Added to QuickMenu (sdk-version m5)
andbook - Android Programming
45 powered by anddev.org
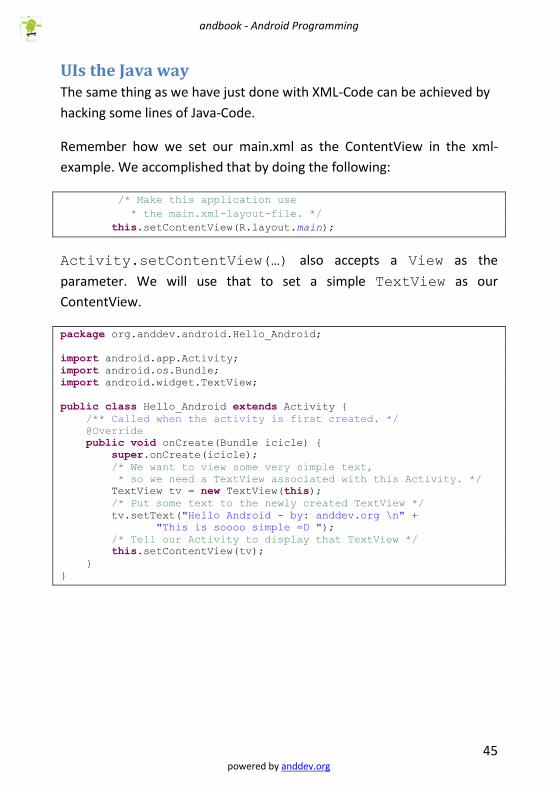
UIs the Java way The same thing as we have just done with XML-Code can be achieved by
hacking some lines of Java-Code.
Remember how we set our main.xml as the ContentView in the xml-
example. We accomplished that by doing the following:
/* Make this application use
* the main.xml-layout-file. */
this.setContentView(R.layout.main);
Activity.setContentView(…) also accepts a View as the
parameter. We will use that to set a simple TextView as our
ContentView.
package org.anddev.android.Hello_Android;
import android.app.Activity;
import android.os.Bundle;
import android.widget.TextView;
public class Hello_Android extends Activity {
/** Called when the activity is first created. */
@Override
public void onCreate(Bundle icicle) {
super.onCreate(icicle);
/* We want to view some very simple text,
* so we need a TextView associated with this Activity. */
TextView tv = new TextView(this);
/* Put some text to the newly created TextView */
tv.setText("Hello Android - by: anddev.org \n" +
"This is soooo simple =D ");
/* Tell our Activity to display that TextView */
this.setContentView(tv);
}
}

andbook - Android Programming
46 powered by anddev.org
System.out.println(…) ? Debugging in Android cannot be done using
System.out.println(…) because as we know Android is not
running on a normal VM but inside of emulated hardware on the
DalvikVM. ( To be honest, it can be done but is should definitely be not
your choice)
But don’t worry, Android provides a much more powerful debugging
feature – The LogCat.
The LogCat
The LogCat is a part of the DDMS (Dalvik Debug Monitor service) that
provides a mechanism for collecting and viewing system debug output.
Logs from various applications and portions of the system are collected in
the LogCat, which then can be viewed and filtered.
If you cannot see A, do it the B way.
Picture 15 Opening the DDMS View
Using the LogCat
Every Android log message has a tag and a priority associated with it.

andbook - Android Programming
47 powered by anddev.org
The tag of a log message is a short string indicating the system
component from which the message originates (for example, "View" for
the view system).
The priority is one of the following character values, ordered from lowest
to highest priority:
V — Verbose (lowest priority)
D — Debug
I — Info
W — Warning
E — Error (highest priority)
As we are using Eclipse we can simply filter by priority clicking the “V-D-I-
W-E” Buttons in the LogCat View one can also see below. You’ll love the
ADT plugin for that feature, because, in the masses of output the whole
system generates, it is really hard to find anything without filters.
Picture 16 The LogCat
The usage in the code is pretty simple. You need to make a single import:
import android.util.Log;
Then you are able to use debugging statements, like this:
Log.d("DEBUGTAG", "My debug-message.");
andbook - Android Programming
48 powered by anddev.org
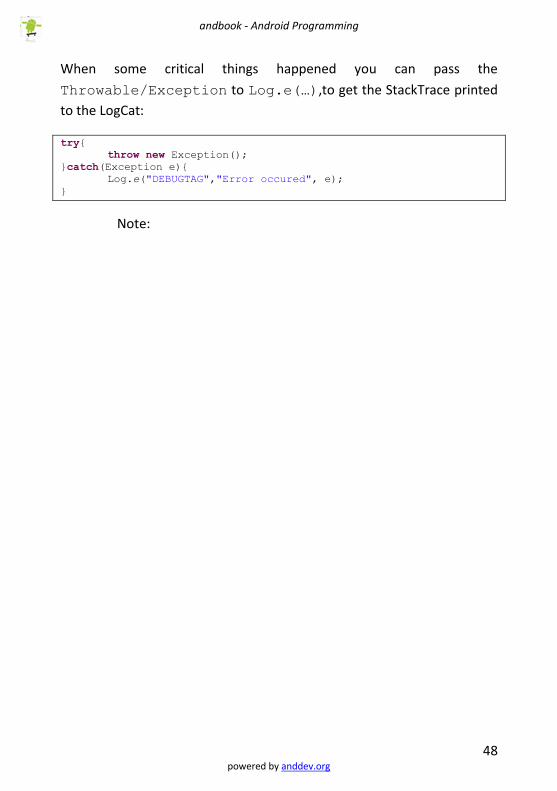
When some critical things happened you can pass the
Throwable/Exception to Log.e(…),to get the StackTrace printed
to the LogCat:
try{
throw new Exception();
}catch(Exception e){
Log.e("DEBUGTAG","Error occured", e);
}
Note:

andbook - Android Programming
49 powered by anddev.org
Using Intents As we know things needed to be done are expressed by Intents. Intents
can i.e. be used to start other Activities.
Starting (Sub)Activities An essential thing in the lifetime of an application, that is more
sophisticated than a HelloWorld Application, is to start other Activities,
especially SubActivitites. Let’s assume the following scenario:
We want to have something like an InputDialog where the user can write
a keyword he wants to search on Google for.
So we will create a new Android Project as we already did it before. The
first thing we will do is to add a second Activity we will name
“MySecondActivity”.
In the beginning the code shall look like this:
package org.anddev.andbook.startingsubactivities;
import android.app.Activity;
import android.os.Bundle;
public class MySecondActivity extends Activity {
/** Called when the activity is first created. */
@Override
public void onCreate(Bundle icicle) {
super.onCreate(icicle);
setContentView(R.layout.main);
}
}
andbook - Android Programming
50 powered by anddev.org
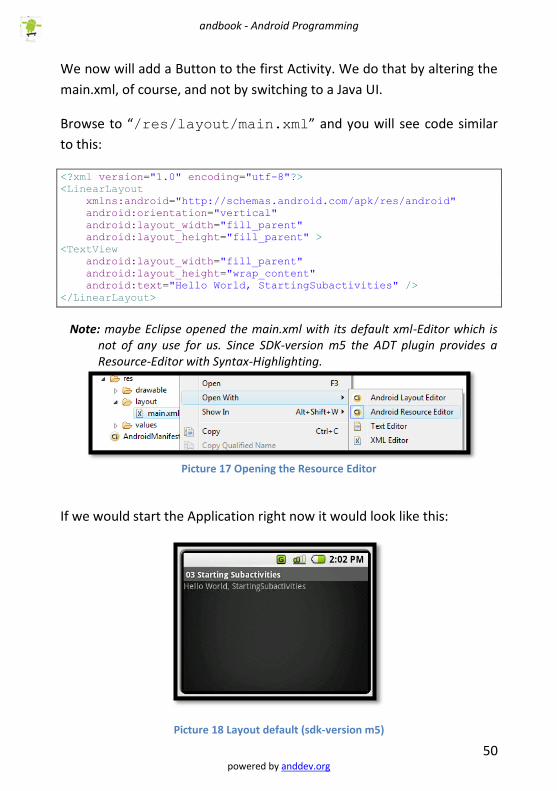
We now will add a Button to the first Activity. We do that by altering the
main.xml, of course, and not by switching to a Java UI.
Browse to “/res/layout/main.xml” and you will see code similar
to this:
<?xml version="1.0" encoding="utf-8"?>
<LinearLayout
xmlns:android="http://schemas.android.com/apk/res/android"
android:orientation="vertical"
android:layout_width="fill_parent"
android:layout_height="fill_parent" >
<TextView
android:layout_width="fill_parent"
android:layout_height="wrap_content"
android:text="Hello World, StartingSubactivities" />
</LinearLayout>
Note: maybe Eclipse opened the main.xml with its default xml-Editor which is not of any use for us. Since SDK-version m5 the ADT plugin provides a Resource-Editor with Syntax-Highlighting.
Picture 17 Opening the Resource Editor
If we would start the Application right now it would look like this:
Picture 18 Layout default (sdk-version m5)

andbook - Android Programming
51 powered by anddev.org
As we want to have a Button in our application, we will have to come up
with some xml-code:
<Button
android:layout_width="fill_parent"
android:layout_height="wrap_content"
android:text="Open Search-Dialog" />
As one can imagine, “fill_parent” makes a View us all space the
parent View provides and “wrap_content” uses just as much layout
space as it needs to display its content correctly.
So our button will fill the whole screen in width and wrap around the
“Open Search-Dialog” we typed for the android:text attribute.
Our application now looks like this:
Picture 19 Layout with Button (sdk-version m5)
When we now click the button – nothing happens, of course. We will
have to apply a Listener to be specific an OnClickListener to Handle clicks
to this Buttons.
But wait… how can we refer to that Button in Java Code ?

andbook - Android Programming
52 powered by anddev.org
Finding XML-defined Views in Java-Code
To find a View that was defined in XML we first have to add one single
line to the XML-definition of that View, an android:id attribute. In
this case we will give it the id “btn_open_search”:
<Button
android:id="@+id/btn_open_search"
android:layout_width="fill_parent"
android:layout_height="wrap_content"
android:text="Open Search-Dialog" />
Finding that View in Java Code is same easy. Within an Activity you can
use the findViewById(int resourceID) method, to get a
reference to a View using the android:id that has been defined in
XML.
The same can be done with any other class that extends View, i.e.
EditText, TextView, MapView, etc…
But findViewById(…) can only be used with Views that are
placed within the Layout that was loaded to that Activity using
setContentView(…)!
Coming back to our example, we add the following in Code to
onCreate(…), right after the setContentView(…):
/* Find the Button from our XML-layout. */
Button b = (Button)this.findViewById(R.id.btn_open_search);
If Eclipse cannot find i.e. the Button-Class, just hit ‘CTRL+SHIFT+O’
what will organize the imports and automatically add (in this case):
import android.widget.Button;
andbook - Android Programming
53 powered by anddev.org
Handling Clicks to Views
We now remember that we once wanted to make our button
clickable. Therefore we simply set an anonymous OnClickListener
to our Button:
b.setOnClickListener(new OnClickListener(){
public void onClick(View arg0) {
// Place code to handle Button-Click here.
}
});
Note: Eclipse might not recognize the following import by itself:
import android.view.View.OnClickListener;
Now we will add an Intent to the onClick-Event that will start our
SubActivity:
/* Create an Intent to start
* MySecondActivity. */
Intent i = new Intent(
StartingSubactivities.this,
MySecondActivity.class);
/* Send intent to the OS to make
* it aware that we want to start
* MySecondActivity as a SubActivity. */
startSubActivity(i, 0x1337);
The second parameter of startSubActivity can be any unique
Integer. It will get useful later on (then we will be placing it declared as
final to our Activity), when we want to retrieve a result from the
SubActivity.

andbook - Android Programming
54 powered by anddev.org
If we would now run our code and click our button we would receive the
following error-message:
Picture 20 Activity not defined in AndroidManifest.xml
Note: Some of the messages shown are really helpful, read them.
So we need to define our “MySecondActivity” in the
AndroidManiufest.xml too. Just after the first </activity> tag
we write:
<activity android:name=".MySecondActivity"
android:label="@string/app_name">
<intent-filter>
<action
android:name="android.intent.action.VIEW" />
<category
android:name="android.intent.category.DEFAULT" />
</intent-filter>
</activity>
This time we did not choose “…MAIN” for <action> and
“…LAUNCHER” for <category> because there is no need to get
“MySecondActivity” launched from outside of our Application.

andbook - Android Programming
55 powered by anddev.org
“MySecondActivity” is now reachable through a click to the button,
but it also refers to our main.xml:
setContentView(R.layout.main);
So we have to create an additional layout file for
“MySecondActivity”. It will contain a so called EditText what in
Swing jargon would be a TextField and another Button to return to
our “Main”-Activity:
<?xml version="1.0" encoding="utf-8"?>
<LinearLayout
xmlns:android="http://schemas.android.com/apk/res/android"
android:orientation="vertical"
android:layout_width="fill_parent"
android:layout_height="fill_parent" >
<EditText
android:id="@+id/et_keyword"
android:layout_width="fill_parent"
android:layout_height="wrap_content"/>
<Button
android:id="@+id/btn_return"
android:layout_width="fill_parent"
android:layout_height="wrap_content"
android:text="Submit" />
</LinearLayout>
Of course both need an android:id that we can use the in our
JavaCode. Now we can change the setContentView of
“MySecondActivity” to:
/* Get the EditText from the XML-file. */
this.et_keyword = (EditText)this.findViewById(R.id.et_keyword);
/* Get the return-Button from the XML-file. */
Button b = (Button)this.findViewById(R.id.btn_return);
/* Make that Button handle clicks to itself. */
b.setOnClickListener(new OnClickListener(){
public void onClick(View arg0) {
/* Place code to handle Button-Click here. */
}
});

andbook - Android Programming
56 powered by anddev.org
Returning values from SubActivities
Returning values from SubActivities to the caller is also very simple:
/* Retrieve the Text from the EditText. */
String keyword =
MySecondActivity.this.et_keyword.getText().toString();
/* The parameters passed to this function
* will be available to the caller. */
MySecondActivity.this.setResult(1, keyword);
/* Our Activity is done and shall be closed. */
MySecondActivity.this.finish();
One could additionally pass a so called Bundle back to the caller (what
is more or less a HashMap), but I’ll tell you more of that soon.
Obviously the caller has to react on the fact that the SubActivity decided
to return. To accomplish that, we have to override a single method
coming from the Activity class. It is called onActivityResult(…):
@Override
protected void onActivityResult(int requestCode, int resultCode,
String data, Bundle extras) {
/* Place out code to react on Activity-Result here. */
super.onActivityResult(requestCode, resultCode, data, extras);
}
You probably recognized that the first parameter is called
requestCode – yes it is the same requestCode that we passed to
startSubActivity earlier. So if we have more than one SubActivity,
we can use requestCode to differentiate which SubActivity has just
returned.
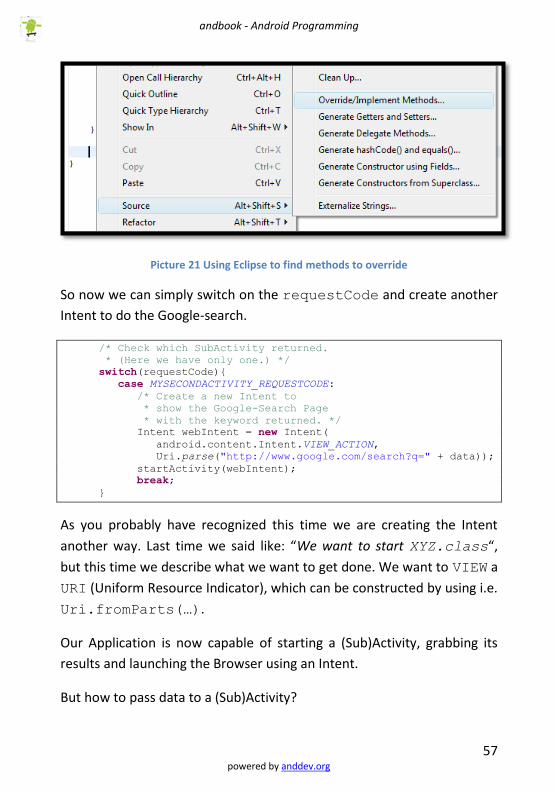
Tipp: Eclipse provides a very useful function that you’ll learn to love,
especially if you are extending a base-class and search for methods to
override:
andbook - Android Programming
57 powered by anddev.org
Picture 21 Using Eclipse to find methods to override
So now we can simply switch on the requestCode and create another
Intent to do the Google-search.
/* Check which SubActivity returned.
* (Here we have only one.) */
switch(requestCode){
case MYSECONDACTIVITY_REQUESTCODE:
/* Create a new Intent to
* show the Google-Search Page
* with the keyword returned. */
Intent webIntent = new Intent(
android.content.Intent.VIEW_ACTION,
Uri.parse("http://www.google.com/search?q=" + data));
startActivity(webIntent);
break;
}
As you probably have recognized this time we are creating the Intent
another way. Last time we said like: “We want to start XYZ.class“,
but this time we describe what we want to get done. We want to VIEW a
URI (Uniform Resource Indicator), which can be constructed by using i.e.
Uri.fromParts(…).
Our Application is now capable of starting a (Sub)Activity, grabbing its
results and launching the Browser using an Intent.
But how to pass data to a (Sub)Activity?

andbook - Android Programming
58 powered by anddev.org
Passing Data to (Sub)Activities Passing data to (Sub)Activities is, once again, not hard to manage. One
can use so called Bundles, which are more or less ordinary HashMap’s
that can take only trivial data types, to carry information from one
Activity to another. Just remember where we started our SubActivity in
the last chapter:
/* Create an Intent to start
* MySecondActivity. */
Intent i = new Intent(
StartingSubactivities.this,
MySecondActivity.class);
/* Send intent to the OS to make
* it aware that we want to start
* MySecondActivity as a SubActivity. */
startSubActivity(i, 0x1337);
Right between these two lines, we will put the following:
/* Create a bundle which will be
* attached to the Intent, to carry
* information to our SubActivity. */
Bundle b = new Bundle();
b.putString(MY_DEFAULTSTRING_ID, "anddev.org");
/* Attach Bundle to our Intent. */
i.putExtras(b);
Where MY_DEFAULTSTRING_ID can be any identifying String you can
imagine. There is also a method Intent.putExtra(…,…) which takes only
one information each call, which we could have used also.

andbook - Android Programming
59 powered by anddev.org
Now we have to extract that information within our SubActivity. Every
Activity can access the original Intent it was started with, by calling
getIntent(). If there was a Bundle attached to the Intent we can
grab that by using getIntent().getExtras(). In this case we, we
will fill the EditText, where the user would type the keyword(s) with
the DefaultString we passed over the Intent :
//…
setContentView(R.layout.second);
/* Get the Bundle from the Intent
* this Activity was started with.*/
Bundle bundle = getIntent().getExtras();
/* Extract the default keyword
* by using the public ID we
* defined in the caller. */
String default_keyword = bundle.getString(
StartingSubactivities.MY_DEFAULTSTRING_ID);
/* Get the EditText from the XML-file. */
this.et_keyword = (EditText)this.findViewById(R.id.et_keyword);
/* Set the default keyword to the EditText. */
this.et_keyword.setText(default_keyword);
/* Get the return-Button from the XML-file. */
//…
So let’s resume what you have learned up to here:
Create an simple Application using a XML Layout
Do the same with a Java-based Layout
Run Android Applications
Using the LogCat for debugging purpose
Use Intents to start (Sub)Activities
Find Views defined in XML to use them in Java Code
Handle Clicks to Views
Return values from SubActivities
Pass data to SubActivities using Bundles
Not bad for now .
andbook - Android Programming
60 powered by anddev.org
Important Layouts and ViewGroups Android provides many more Layouts than just the LinearLayout we used
up to here. The most important Layouts, except LinearLayout, you will
get to know closer here are:
RelativeLayout (Views are placed relative to each other)
TableLayout (Uses tables like in HTML)
Additionally to that I will introduce to you the following really often used
ViewGroups:
GridView (similar to TableLayout, supports ‘Adapters’)
ScrollView (If your content exceeds the screen-size, you’ll need
to scroll)
TabHost (Displays content in tabs)
The RelativeLayout According to its name, when using RelativeLayouts one defines the
position of Views relative to other ‘neighbors-Views’.
andbook - Android Programming
61 powered by anddev.org
Bibliography 1. Open Hanset Alliance. Open Hanset Alliance. [Online]
http://www.openhandsetalliance.com/.
2. GoogleGroups. Android Discussion Groups. [Online]
http://code.google.com/android/groups.html.
3. Alexa Webstats. The Web Information Company. alexa.com. [Online]
http://www.alexa.com.
4. Gramlich, Nicolas. Android Development Community | Android
Tutorials. [Online] http://anddev.org.
5. Hobbs, Zach. Hello Android. [Online] http://helloandroid.com/.
6. Nguyen, Vincent. Android Community. [Online]
http://androidcommunity.com/.
7. Srinivas, Davanum. Show me the code! [Online]
http://davanum.wordpress.com/.

andbook - Android Programming
62 powered by anddev.org
Lost chapters
The communities From the first day on, a couple of communities arose from the depth of
the internet. The most important community-website to mention
(depending on Alexa-stats (3)) is anddev.org (4) , which is the most
viewed Tutorial/Community-Board for Google Android up to date. Also
well known are the Community-Boards: helloandroid.com (5) and
androidcommunity.com (6). Last but definitely not least to mention is the
davanum.wordpress.com-Blog (7), which provided some very early
sample code where many programmers found a good first source.
Some sites were more, some less promising, so sooner or later the
viewers pointed their focus to the more-important sites listed above.