AMP Oil Free Manual - Silent Aire Technology Manual.pdfAMP Oil Free Manual AMP 50-8-TC ... sound...
11
AMP Oil Free Manual AMP 50-8-TC AMP 50-6-D AMP 50-24 General User and Maintenance Instructions 1 Silentaire Technology 8614 Veterans Memorial Dr. • Houston, TX 77088 800-972-7668 • Fax 832-327-0669 www.silentaire.com • [email protected]
Transcript of AMP Oil Free Manual - Silent Aire Technology Manual.pdfAMP Oil Free Manual AMP 50-8-TC ... sound...
AMP Oil Free Manual AMP 50-8-TC
AMP 50-6-D
AMP 50-24
General User and Maintenance Instructions
1
Silentaire Technology 8614 Veterans Memorial Dr. • Houston, TX 77088
800-972-7668 • Fax 832-327-0669 www.silentaire.com • [email protected]

Thank you and congratulations on the purchase of your AMP Oil Free Compressor! Silentaire Technology is the leader in portable quiet air compressors and we are here to help you throughout the lifetime of your new air compressor.
AMP Compressors are built to the highest quality standards which produce excellent efficiency. If you use it properly and maintain it according to this manual, it will perform to your fullest satis-faction for many years to come.
Please read this manual carefully and follow the instructions, it will guarantee you trouble free operation.
A. Installation 1. After taking your Silentaire AMP Oil Free Compressor out of its packaging, please check it carefully for any damages from shipping.
2. Install the compressor on a flat surface in a suitably sized, dry room with good ventilation, where the temperature is not likely to rise above 94 Degrees Fahren-heit (35 Centigrade).
3. Dispose of the Packing Material in compliance with the regulations in the coun-try or state where the compressor is installed.
B. Safety 1. Do not use the Silentaire AMP Oil Free Compressor for purposes other than those for which they have been designed.
2. Do not modify or repair the compressor while it is connected to the electric current or while the tank is still pressurized.
•The "bolt of lightning" indicates un-insulated material within your unit may
cause an electrical shock. For the safety of everyone please do not
remove product covering.
•The "exclamation point" calls attention to features for which you should
read the enclosed literature closely to prevent operating and maintenance
problems.
WARNING: TO PREVENT FIRE OR SHOCK HAZARD, DO NOT EXPOSE THIS EQUIPMENT TO RAIN OR MOISTURE..
2
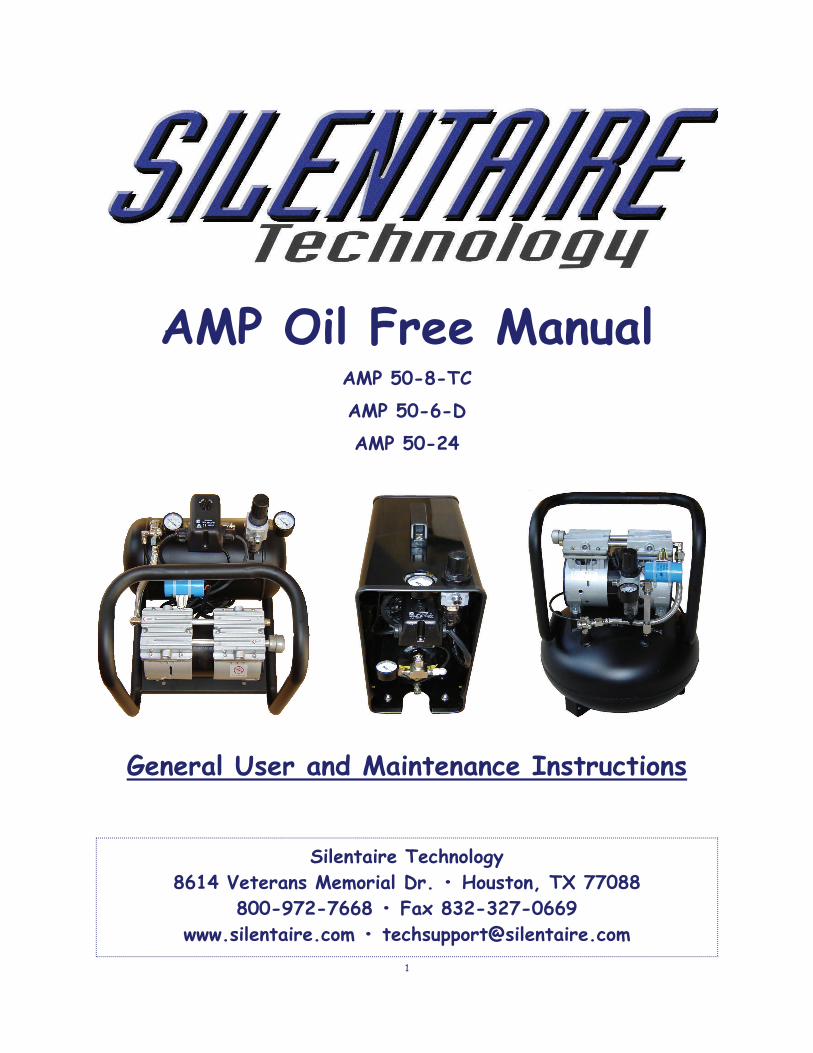
C. Operating Instructions 1. Check that the automatic OFF/AUTO-Pressure Switch (Fig. 1) is in the OFF-position.
2. The Silentaire AMP Oil Free Air Compressors are available in the following different models: AMP 50-8-TC, AMP 50-6-D and AMP 50-24.
All these models are available in either 110V/60Hz, 220V/60Hz or 220V/50Hz. Check to see if the outlet of your electric supply corresponds to your compressor model.
3. Connect the equipment for your application to the outgoing 1/4" male fitting on the Filter/Regulator (Fig. 1). To keep the connecting fitting from leaking air you should always apply Teflon Tape to the threads of the fitting.
4. Plug the cord into a properly installed and grounded outlet of electric supply corresponding to your purchased AMP compressor (the unit should be grounded for your own safety; in the event of a short it reduces the risk of an electric shock). If you need an extension cord for you to operate the unit, only use a heavy duty extension cord, no longer than 20 feet or 6.0 m (no household cord; it might cause a loss of power and damage the electrical components).
Notice: Tampering with the Power Cord or Grounding Terminal will void warranty.
5. Turn the knob on the automatic ON/OFF-Pressure Switch (Fig. 1) to the AUTO-position until it stops. The Pressure Switch has been set to automatically start and stop the compressor at the preset pressure levels. Leave it in the AUTO-position until you want to turn off your compressor.
Note: Never remove or repair the ON/OFF-switch while the compressor is con-nected to the electric outlet!
Fig. 1
3
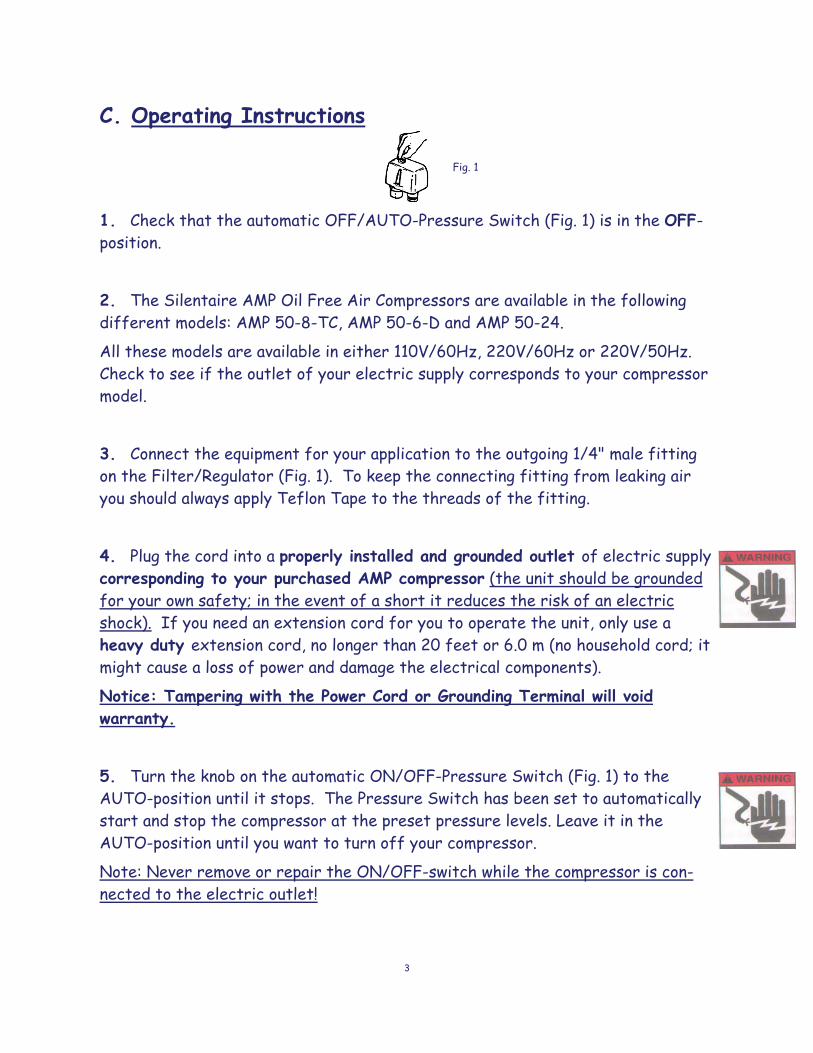
6. After the compressor has run for a complete cycle to pressurize the tank and then shut off, set the desired pressure with the Filter/Regulator (Fig. 2). Simply lift the knob up until it unlocks, then turn it clockwise to increase the pressure, until the Pressure Gauge on the Filter/Regulator shows the desired pressure. To reduce the pressure also lift the knob on the Filter/Regulator and turn it coun-terclockwise.
Note: Never open the Filter/Regulator completely, it would ruin your compressor in a short period of time. If you notice that your compressor pump is running more than 50% of the time, this indicates that you might have an air-leak in your system or that your compressor is too small for your application.
7. To turn off your compressor, simply turn the knob on the Pressure Switch (Fig. 1) to the OFF-position (counterclockwise). If the electrical power is inter-rupted while the compressor is in operation and it fails to restart after the power comes back on, turn the knob on the Pressure Switch to the OFF-position; this will release any pressure in the line and enable the compressor to restart again.
Notice: The Safety Relief Valve is a standard feature on your compressor. This valve opens automatically if the tank pressure goes beyond a safe level.
Do not attempt to adjust or remove this device!
Fig. 2
4
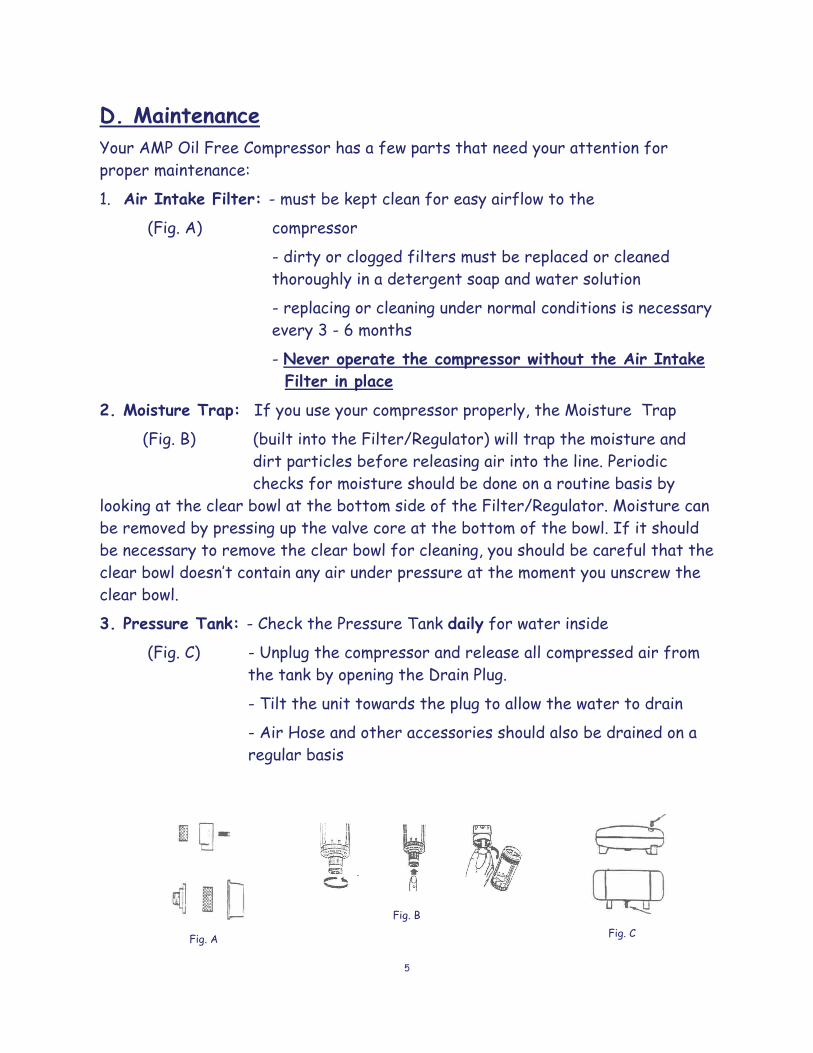
D. Maintenance Your AMP Oil Free Compressor has a few parts that need your attention for proper maintenance:
1. Air Intake Filter: - must be kept clean for easy airflow to the
(Fig. A) compressor
- dirty or clogged filters must be replaced or cleaned thoroughly in a detergent soap and water solution
- replacing or cleaning under normal conditions is necessary every 3 - 6 months
- Never operate the compressor without the Air Intake Filter in place
2. Moisture Trap: If you use your compressor properly, the Moisture Trap
(Fig. B) (built into the Filter/Regulator) will trap the moisture and dirt particles before releasing air into the line. Periodic checks for moisture should be done on a routine basis by looking at the clear bowl at the bottom side of the Filter/Regulator. Moisture can be removed by pressing up the valve core at the bottom of the bowl. If it should be necessary to remove the clear bowl for cleaning, you should be careful that the clear bowl doesn’t contain any air under pressure at the moment you unscrew the clear bowl.
3. Pressure Tank: - Check the Pressure Tank daily for water inside
(Fig. C) - Unplug the compressor and release all compressed air from the tank by opening the Drain Plug.
- Tilt the unit towards the plug to allow the water to drain
- Air Hose and other accessories should also be drained on a regular basis
Fig. A
Fig. B Fig. C
5

E. Troubleshooting For any kind of repair or replacement only use original spare parts! They are available at every authorized service center. Imitation spare parts may irrepara-bly damage your compressor. When asking for information or services always specify the Model, Type and Serial-Number of your compressor. This information is on a label on your compressor.
Compressor will not start -No Power
-Thermal overload protec-tor has tripped
Check outlet voltage, fuse and circuit breaker. Wait 30 minutes and try starting the compressor again, or press button from the top of the pres-sure switch.
Pressure drops in the tank -Air leak at connectors Pressurize the tank to maximum pressure, switch it off and control all the fitting and hose connec-tors with a soap/water solution for leaks (bubbles) and repair the leaks (tighten connec-tions or replace seals e.g.).
Head Pressure Release Valve is leaking while the compressor is idle
-Check Valve is not sealing Drain tank-pressure, remove the plug of the check-valve and clean the seat, if necessary re-place the seal and remount all the components.
(Part# AMP022)
Head Pressure Release Valve is leaking while the compressor is running
-Head Pressure Release Valve is defective
Replace Pressure Release Valve.
The compressor keeps running and the Safety Release Valve (Part# AMP020) is releasing air
-Pressure Switch is defec-tive
Replace Pressure Switch.
The compressor does not reach the shut off pres-sure and overheats
-Air leaks at fitting con-nections or defective com-pressor head (gasket or valve)
Check for air leaks and repair them, If you think there might be a defect in the compressor head, contact Tech Support.
The compressor is noisy and produces a metallic sound
-Broken Rubber Mounts or defective bearing in com-pressor pump
Replace the Rubber Mounts. If metallic noise does not go away, contact Tech Support.
Symptom: Cause: Remedy:
If your AMP Oil Free Compressor has a different symptom of a fault from the above troubleshooting chart-list, please contact Tech Support.
Tech Support is available Mon-Fri 8-5 Central Time
6
F. Limited Warranty
The warranty is for the original purchaser. We will repair or replace, without charge, any part of a compressor we find to be defective in factory material or workmanship within one year of purchase. Warranty services are provided at our service facility located in Houston at the address shown below. You must pay all shipping and handling charges for your compressor. Any material that is shipped to Silentaire Technology without prior approval will not be accepted.
This warranty does not cover your compressor if the Serial Number or Model Number is removed or illegible. Or, if your compressor is (a) damaged in trans-port, by fire, corrosion, moisture or any occurrences beyond our control, (b) sub-jected to negligence or misuse, or (c) operated or maintained contrary to our in-structions.
We will not be liable for damage to persons or property, commercial loss or incidental or consequential damage due to a defective compressor.
All implied warranties, including warranty of merchantability or fitness, are lim-ited to the duration of this written warranty. However, some states do not allow the exclusion or limitation of incidental or consequential damages. Therefore the above limitation may not apply to you.
If you wish to obtain warranty service or further information concerning this warranty, contact:
Silentaire Technology
8614 Veterans Memorial.
Houston, Texas 77088
Phone: (832) 327 - 9378 FAX: (832) 327 – 0669
This warranty will be void unless the attached warranty registration card is completed and re-ceived by us within 30 days of the date of the original purchase.
7

AMP 50-8-TC
8
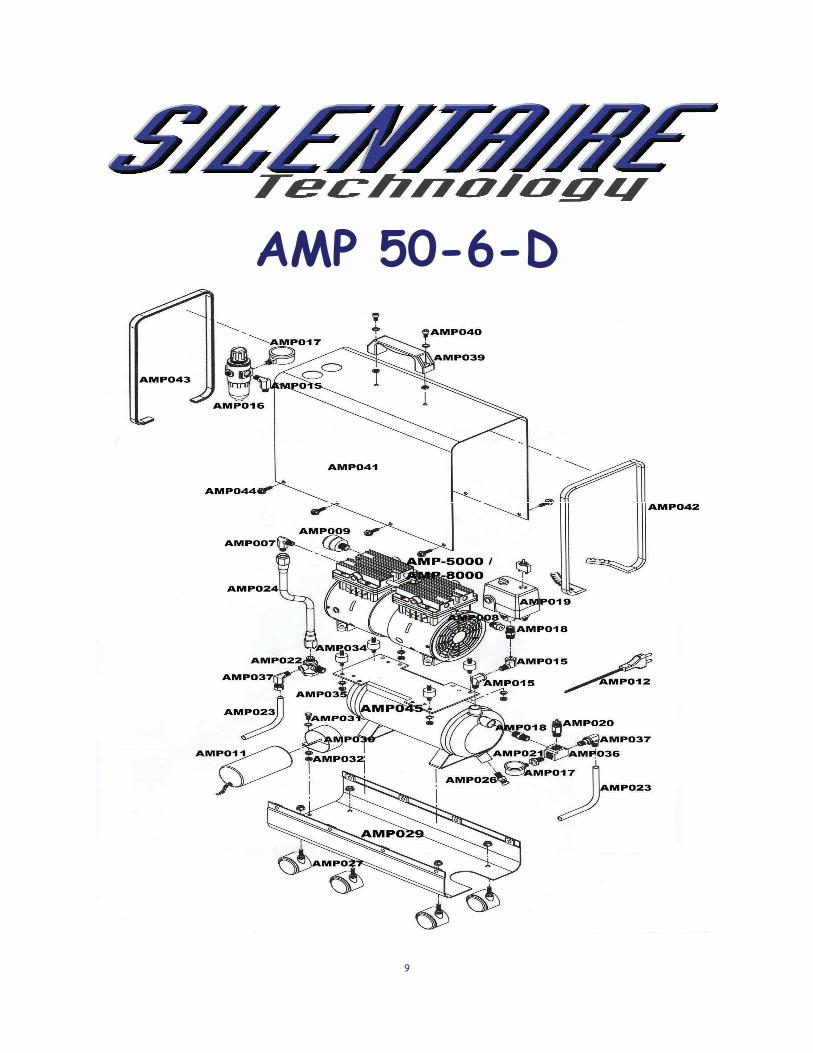
AMP 50-6-D
9

AMP 50-24
10
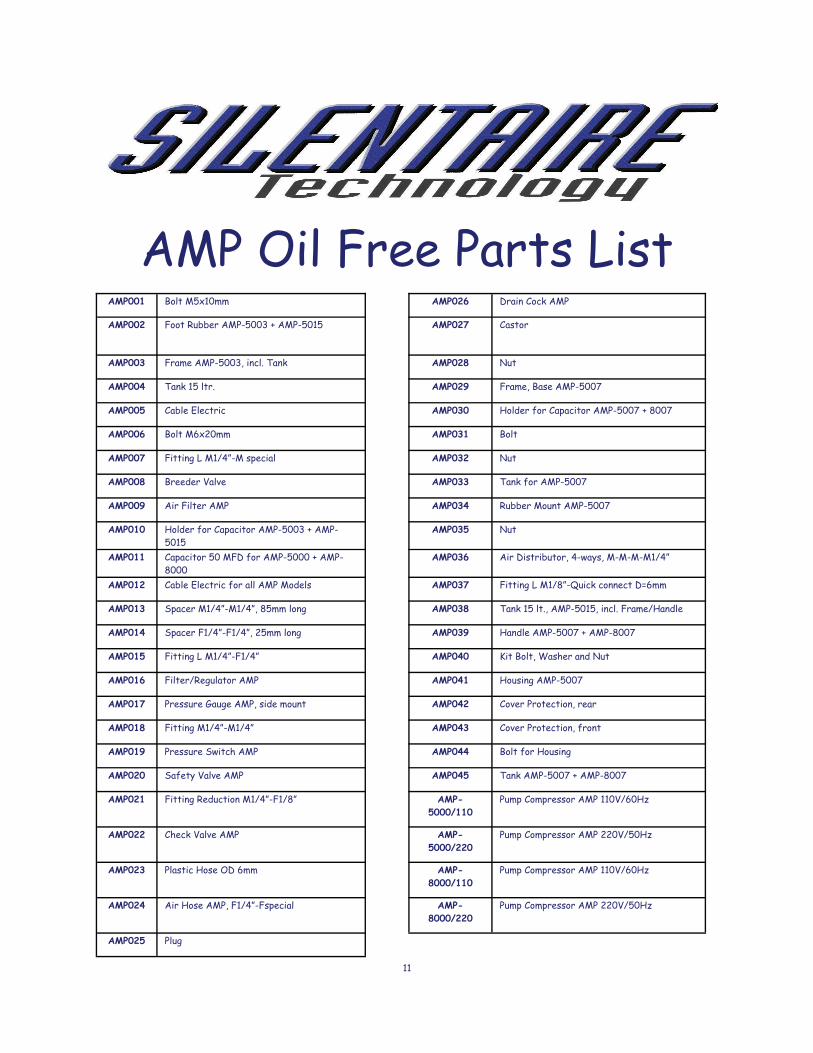
AMP001 Bolt M5x10mm AMP026 Drain Cock AMP
AMP002 Foot Rubber AMP-5003 + AMP-5015 AMP027 Castor
AMP003 Frame AMP-5003, incl. Tank AMP028 Nut
AMP004 Tank 15 ltr. AMP029 Frame, Base AMP-5007
AMP005 Cable Electric AMP030 Holder for Capacitor AMP-5007 + 8007
AMP006 Bolt M6x20mm AMP031 Bolt
AMP007 Fitting L M1/4”-M special AMP032 Nut
AMP008 Breeder Valve AMP033 Tank for AMP-5007
AMP009 Air Filter AMP AMP034 Rubber Mount AMP-5007
AMP010 Holder for Capacitor AMP-5003 + AMP-5015
AMP035 Nut
AMP011 Capacitor 50 MFD for AMP-5000 + AMP-8000
AMP036 Air Distributor, 4-ways, M-M-M-M1/4”
AMP012 Cable Electric for all AMP Models AMP037 Fitting L M1/8”-Quick connect D=6mm
AMP013 Spacer M1/4”-M1/4”, 85mm long AMP038 Tank 15 lt., AMP-5015, incl. Frame/Handle
AMP014 Spacer F1/4”-F1/4”, 25mm long AMP039 Handle AMP-5007 + AMP-8007
AMP015 Fitting L M1/4”-F1/4” AMP040 Kit Bolt, Washer and Nut
AMP016 Filter/Regulator AMP AMP041 Housing AMP-5007
AMP017 Pressure Gauge AMP, side mount AMP042 Cover Protection, rear
AMP018 Fitting M1/4”-M1/4” AMP043 Cover Protection, front
AMP019 Pressure Switch AMP AMP044 Bolt for Housing
AMP020 Safety Valve AMP AMP045 Tank AMP-5007 + AMP-8007
AMP021 Fitting Reduction M1/4”-F1/8” AMP-5000/110
Pump Compressor AMP 110V/60Hz
AMP022 Check Valve AMP AMP-5000/220
Pump Compressor AMP 220V/50Hz
AMP023 Plastic Hose OD 6mm AMP-8000/110
Pump Compressor AMP 110V/60Hz
AMP024 Air Hose AMP, F1/4”-Fspecial AMP-8000/220
Pump Compressor AMP 220V/50Hz
AMP025 Plug
AMP Oil Free Parts List
11