Amigurumi Presentation
24
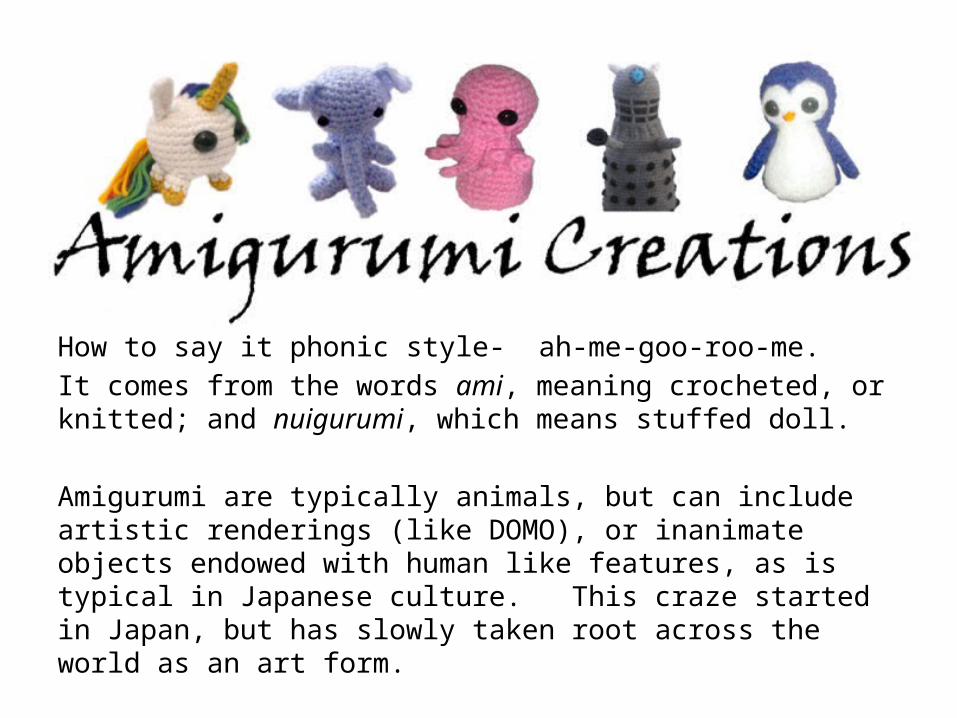
How to say it phonic style- ah-me-goo-roo-me. It comes from the words ami, meaning crocheted, or knitted; and nuigurumi, which means stuffed doll. Amigurumi are typically animals, but can include artistic renderings (like DOMO), or inanimate objects endowed with human like features, as is typical in Japanese culture. This craze started in Japan, but has slowly taken root across the world as an art form.
-
Upload
sarah-cole -
Category
Art & Photos
-
view
243 -
download
4
Transcript of Amigurumi Presentation
How to say it phonic style- ah-me-goo-roo-me. It comes from the words ami, meaning crocheted, or knitted; and nuigurumi, which means stuffed doll.
Amigurumi are typically animals, but can include artistic renderings (like DOMO), or inanimate objects endowed with human like features, as is typical in Japanese culture. This craze started in Japan, but has slowly taken root across the world as an art form.
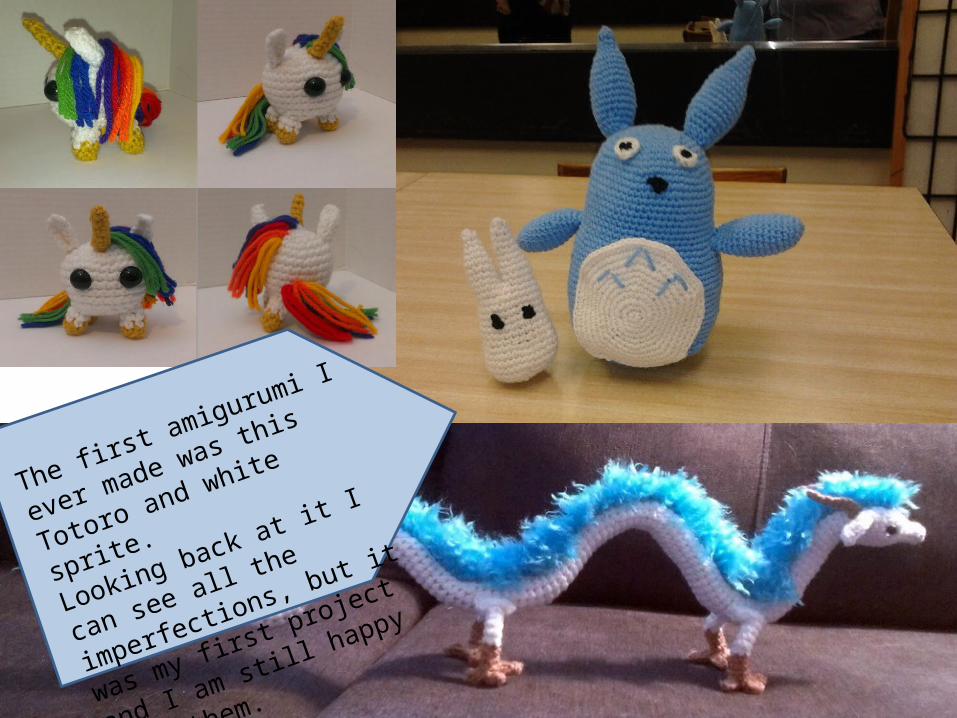
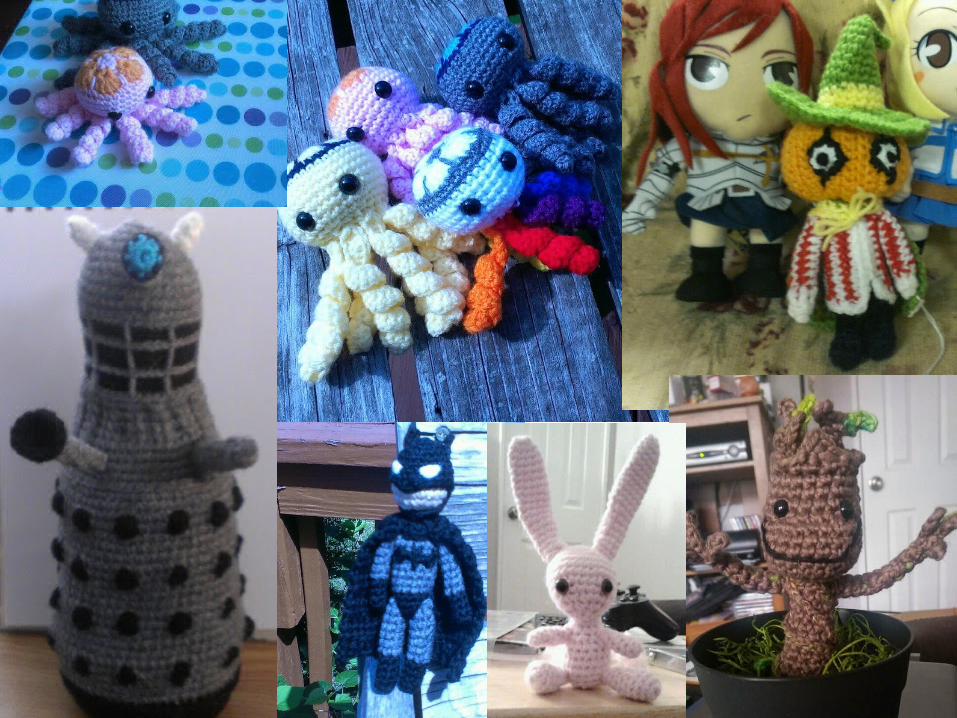
The first amigurumi I ever made
was this Totoro and white sprite.
Looking back at it I can see all the
imperfections, but it was my first
project and I am still happy with
them.
Where does Amigurumi come from?Knitting and crochet were not indigenous to Japan, even though they have a rich
history of textiles, like their stunning kinomos fabric. So how did amigurumi come to be?
Amigurumi style comes from animism, a philosophy in the foundations of many Japanese traditions and customs the belief that gods belong to everything: water, food, nature, buildings and houses, even technology. In Japanese, this is called “Yaoyorozu no Kami” roughly meaning 8 million gods. Amigurumi really popularized in the 1950’s in Japan, when they made a push to change the way the world viewed its culture and people (just after WWII).
We have the samurai warriors to thank for introducing knitting/crochet to Japan. They took it up to create toe socks for better freedom of motion. In the western lands knitting and crochet were well known and thought of for making cloths, gloves, hats, and blankets it was kind of set in stone that is all it was used for.
Japan did not have this set structure of what knitting and crochet was or was not. They were able to take it and create a whole new art form and purpose.
It wasn’t until 2007 that amigurumi worked its way to the USA main stream with amigurumi books being published.
I am a crocheter so my whole discussion will slant towards crocheting, I can and have knit but my preference is for crochet. It is also the more popular method you will see ami worked in and patterns written for. Its easier to learn to crochet ami with out having a lot of crochet skill, the same can not be said for knitting.
Even if you have never crocheted before, with a little bit of effort and practice you will be able to make kawaii amigurumi for yourself. All you need is 1 hook and yarn to start crocheting ami.
If you have never knit before, you cant just jump straight to ami. You need 3 or more (depending on the size) double sided knitting needles, and yarn. You also need to know how to knit in the round, all of this is more complex to pick up and really requires you to learn basic knitting first.
That being said Crochet is more forgiving and easy for a beginner to pick up. If you are not a beginner and have some skill in knitting in the round you might want to do the knitting route.
Crochet VS Knitting
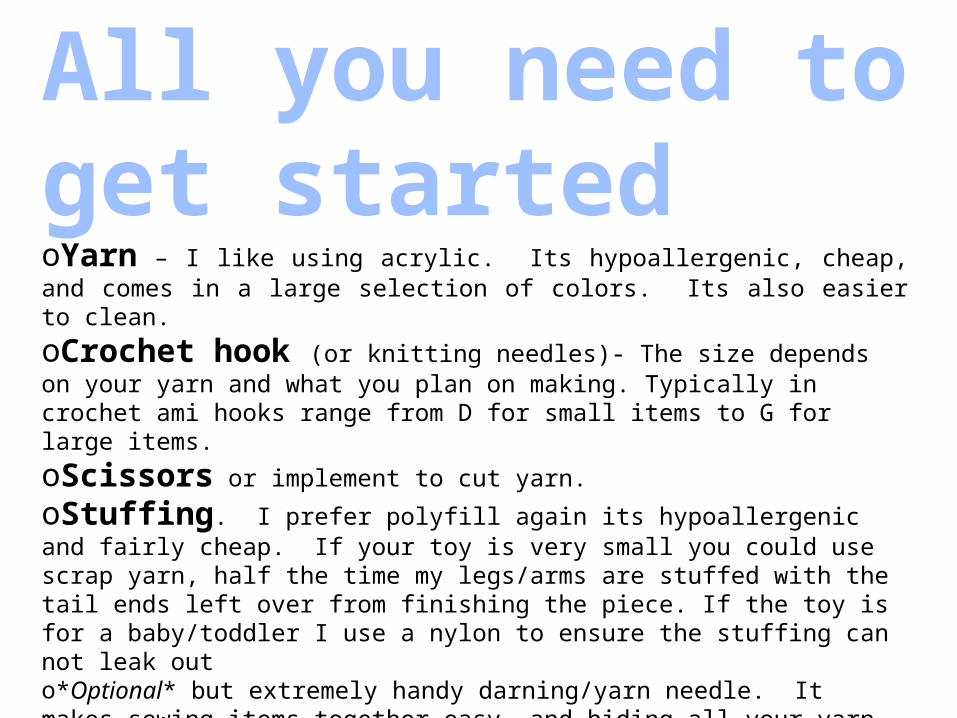
All you need to get started oYarn – I like using acrylic. Its hypoallergenic, cheap, and comes in a large selection of colors. Its also easier to clean.oCrochet hook (or knitting needles)- The size depends on your yarn and what you plan on making. Typically in crochet ami hooks range from D for small items to G for large items.oScissors or implement to cut yarn.oStuffing. I prefer polyfill again its hypoallergenic and fairly cheap. If your toy is very small you could use scrap yarn, half the time my legs/arms are stuffed with the tail ends left over from finishing the piece. If the toy is for a baby/toddler I use a nylon to ensure the stuffing can not leak outo*Optional* but extremely handy darning/yarn needle. It makes sewing items together easy, and hiding all your yarn tails.o*Optional* Pattern. No seriously its optional. Once you get the basic shapes down you can make almost anything.o*Optional* Safety eyes/nose, buttons, felt, contrasting yarn for embellishing the face. I do not recommend any small items like buttons or safety eyes/noses if the toy is going to a 0-4 year old because they are choking hazards. You can always embroider on eyes, glue/sew on felt eyes/nose/mouth.
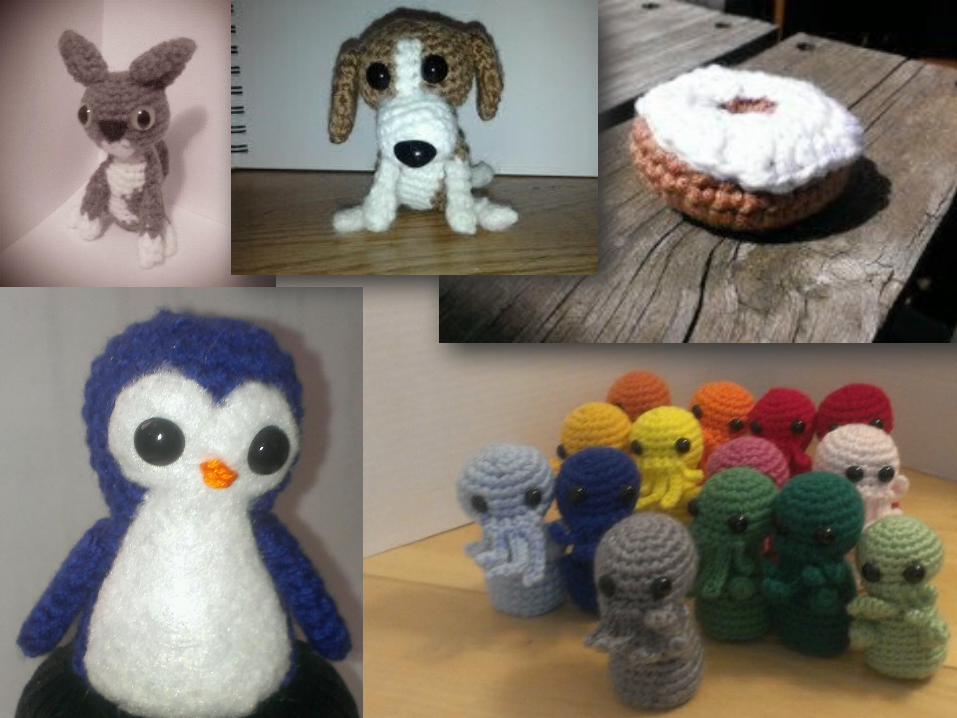

You can get started with Amigurumi by making simple basic shapes that you whip stitch together.Most every ami starts with a simple sphere. Other shapes like cylinders are commonly used for arms and legs , and egg shapes for some body's. Master these three shapes and you will be well on your way to amigurumi obsession.
.
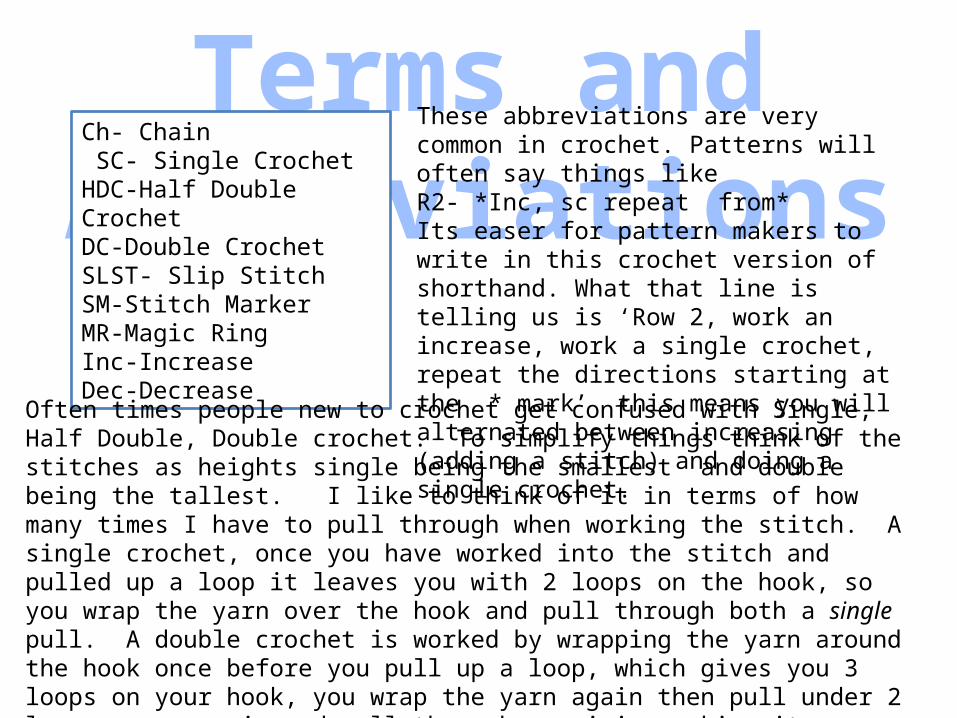
Terms and Abbreviations
Ch- Chain SC- Single CrochetHDC-Half Double CrochetDC-Double CrochetSLST- Slip StitchSM-Stitch MarkerMR-Magic RingInc-IncreaseDec-Decrease
These abbreviations are very common in crochet. Patterns will often say things likeR2- *Inc, sc repeat from*Its easer for pattern makers to write in this crochet version of shorthand. What that line is telling us is ‘Row 2, work an increase, work a single crochet, repeat the directions starting at the * mark’ this means you will alternated between increasing (adding a stitch) and doing a single crochet.
Often times people new to crochet get confused with Single, Half Double, Double crochet. To simplify things think of the stitches as heights single being the smallest and double being the tallest. I like to think of it in terms of how many times I have to pull through when working the stitch. A single crochet, once you have worked into the stitch and pulled up a loop it leaves you with 2 loops on the hook, so you wrap the yarn over the hook and pull through both a single pull. A double crochet is worked by wrapping the yarn around the hook once before you pull up a loop, which gives you 3 loops on your hook, you wrap the yarn again then pull under 2 loops, wrap again and pull through remaining making it a double pull.The Half Double, you start like a DC BUT work the pull like a SC by doing one pull threw all 3 loops.
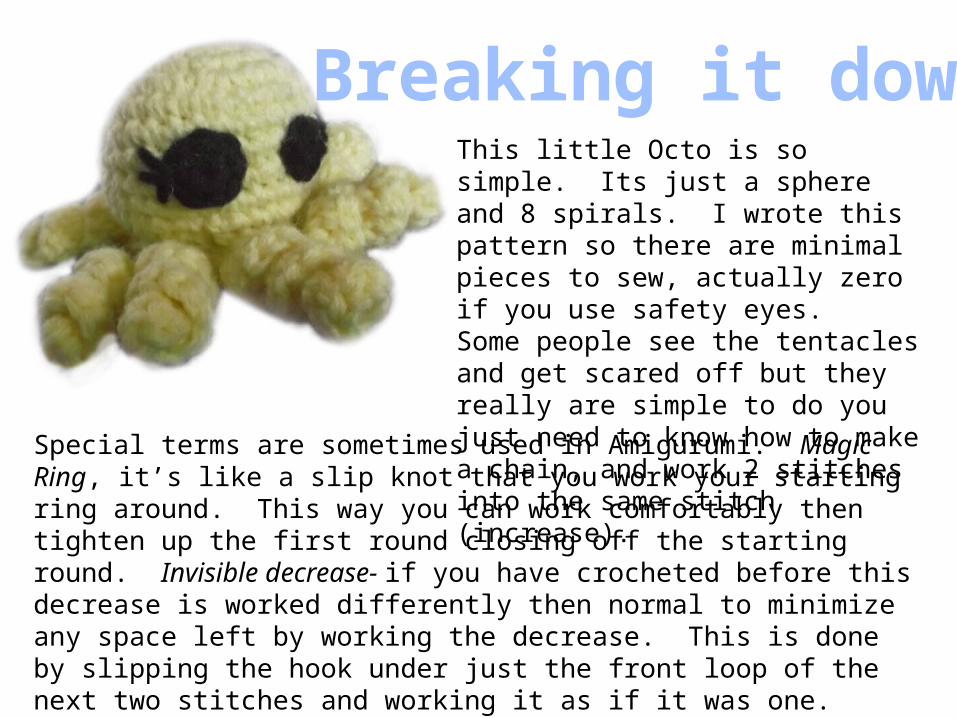
This little Octo is so simple. Its just a sphere and 8 spirals. I wrote this pattern so there are minimal pieces to sew, actually zero if you use safety eyes. Some people see the tentacles and get scared off but they really are simple to do you just need to know how to make a chain, and work 2 stitches into the same stitch (increase).
Special terms are sometimes used in Amigurumi. Magic Ring, it’s like a slip knot that you work your starting ring around. This way you can work comfortably then tighten up the first round closing off the starting round. Invisible decrease- if you have crocheted before this decrease is worked differently then normal to minimize any space left by working the decrease. This is done by slipping the hook under just the front loop of the next two stitches and working it as if it was one.
Breaking it down
Octopus Pattern
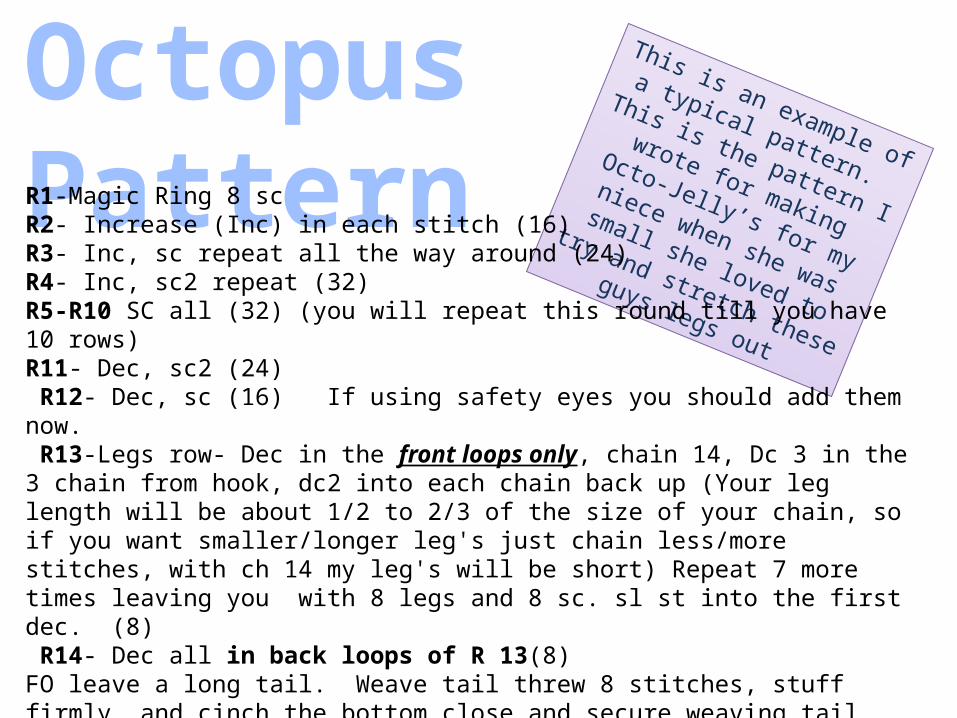
This is an example of a typical
pattern. This is the pattern I
wrote for making Octo-Jelly’s
for my niece when she was
small she loved to try and
stretch these guys legs out
R1-Magic Ring 8 sc R2- Increase (Inc) in each stitch (16)R3- Inc, sc repeat all the way around (24)R4- Inc, sc2 repeat (32)R5-R10 SC all (32) (you will repeat this round till you have 10 rows)R11- Dec, sc2 (24) R12- Dec, sc (16) If using safety eyes you should add them now. R13-Legs row- Dec in the front loops only, chain 14, Dc 3 in the 3 chain from hook, dc2 into each chain back up (Your leg length will be about 1/2 to 2/3 of the size of your chain, so if you want smaller/longer leg's just chain less/more stitches, with ch 14 my leg's will be short) Repeat 7 more times leaving you with 8 legs and 8 sc. sl st into the first dec. (8) R14- Dec all in back loops of R 13(8)FO leave a long tail. Weave tail threw 8 stitches, stuff firmly, and cinch the bottom close and secure weaving tail threw the body.Crochet Eyes make 2- MR Sc 6 FO, leave long tail for sewing and embellishing the eyes.
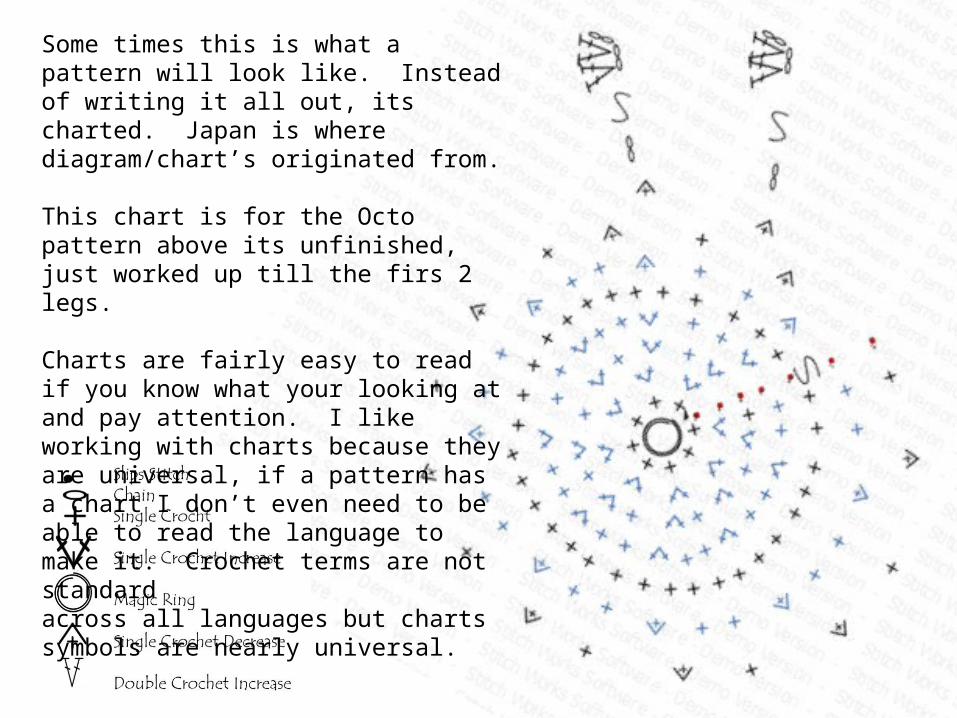
Some times this is what a pattern will look like. Instead of writing it all out, its charted. Japan is where diagram/chart’s originated from.
This chart is for the Octo pattern above its unfinished, just worked up till the firs 2 legs.
Charts are fairly easy to read if you know what your looking at and pay attention. I like working with charts because they are universal, if a pattern has a chart I don’t even need to be able to read the language to make it. Crochet terms are not standard across all languages but chartssymbols are nearly universal.
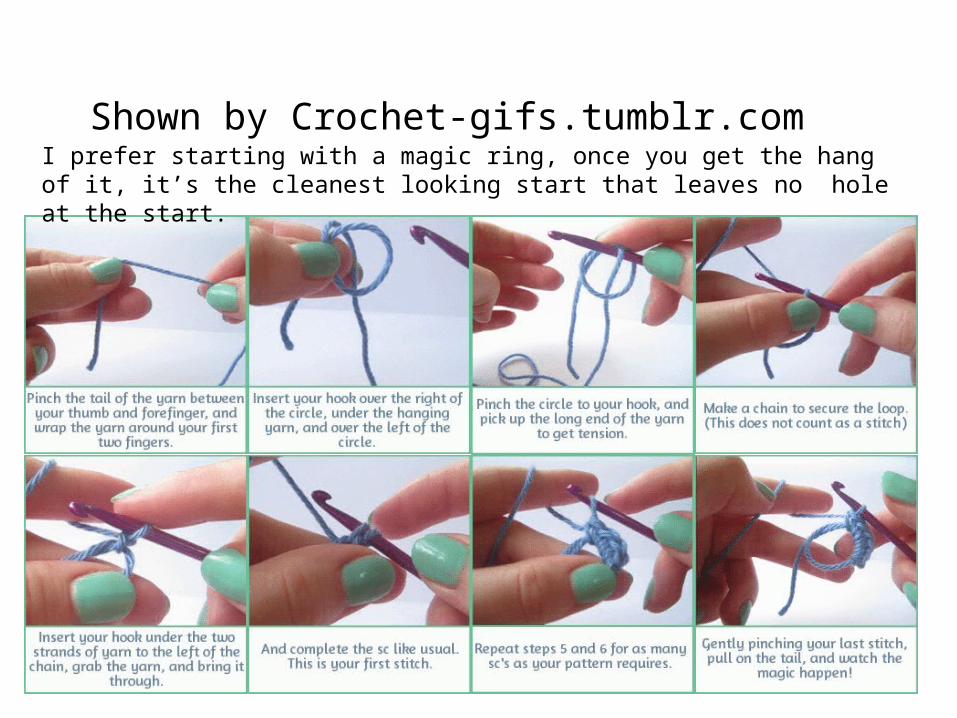
How to do the Magic RingShown by Crochet-gifs.tumblr.com
I prefer starting with a magic ring, once you get the hang of it, it’s the cleanest looking start that leaves no hole at the start.
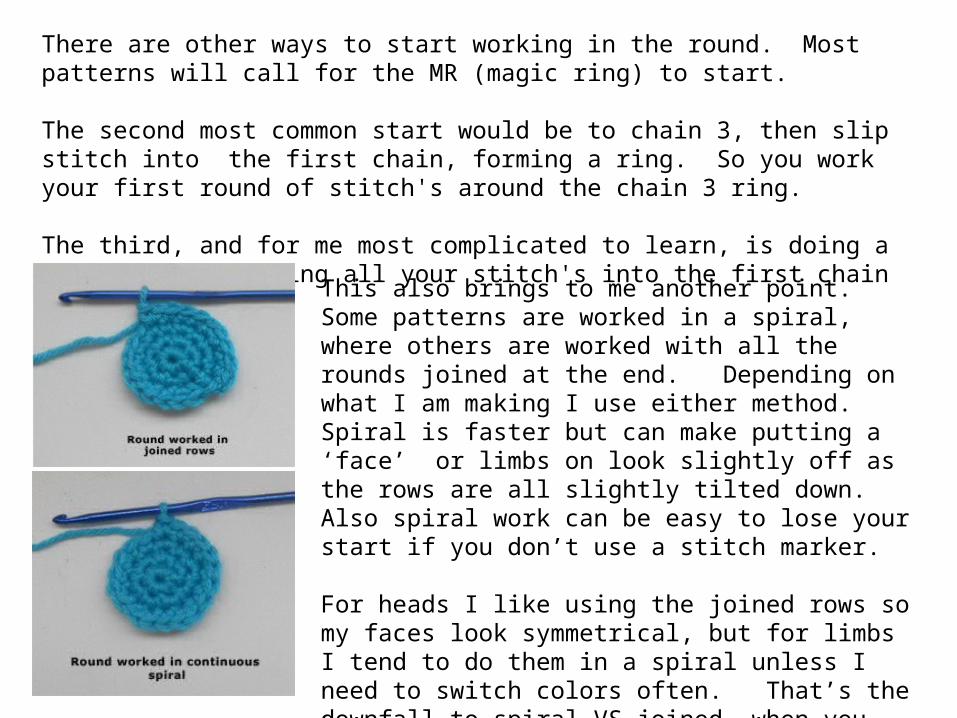
There are other ways to start working in the round. Most patterns will call for the MR (magic ring) to start.
The second most common start would be to chain 3, then slip stitch into the first chain, forming a ring. So you work your first round of stitch's around the chain 3 ring. The third, and for me most complicated to learn, is doing a chain 2 then working all your stitch's into the first chain stitch.
This also brings to me another point. Some patterns are worked in a spiral, where others are worked with all the rounds joined at the end. Depending on what I am making I use either method. Spiral is faster but can make putting a ‘face’ or limbs on look slightly off as the rows are all slightly tilted down. Also spiral work can be easy to lose your start if you don’t use a stitch marker.
For heads I like using the joined rows so my faces look symmetrical, but for limbs I tend to do them in a spiral unless I need to switch colors often. That’s the downfall to spiral VS joined, when you change colors at the end of a row its noticeable in spiral where its cleaner in joined.
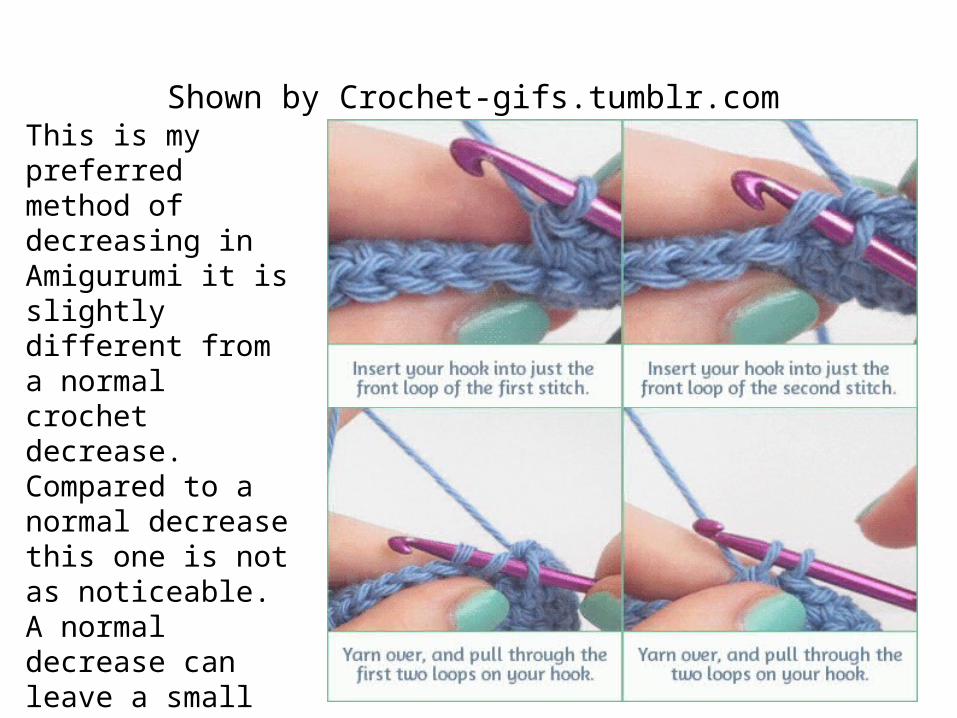
Invisible DecreaseShown by Crochet-gifs.tumblr.com
This is my preferred method of decreasing in Amigurumi it is slightly different from a normal crochet decrease.Compared to a normal decrease this one is not as noticeable. A normal decrease can leave a small hole in the fabric, which can be noticeable when you stuff your finished piece unlike the invisible decrease.
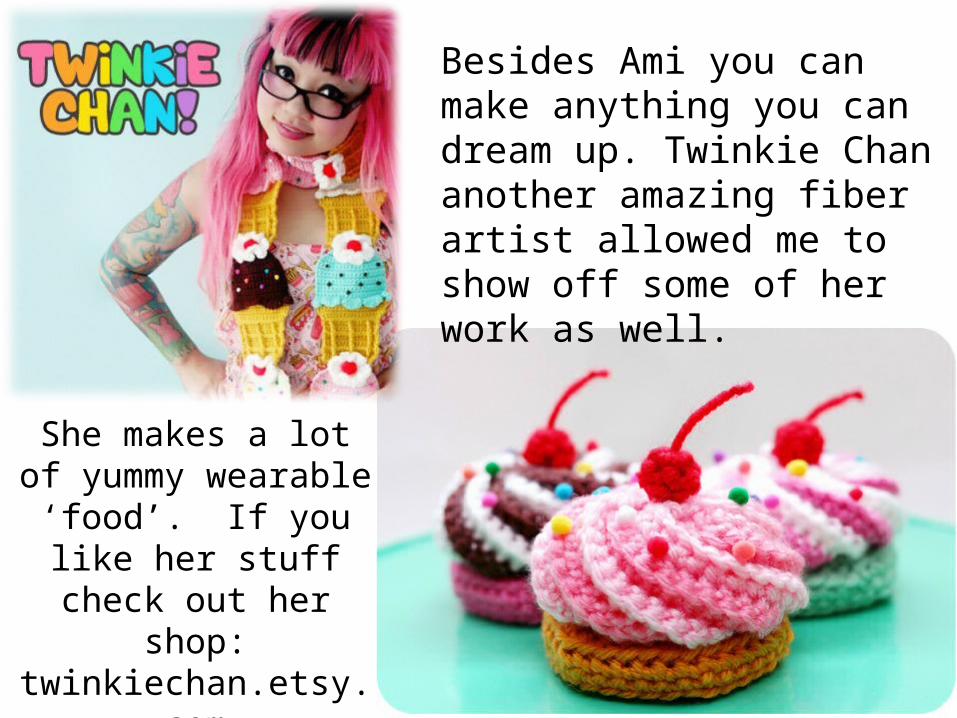
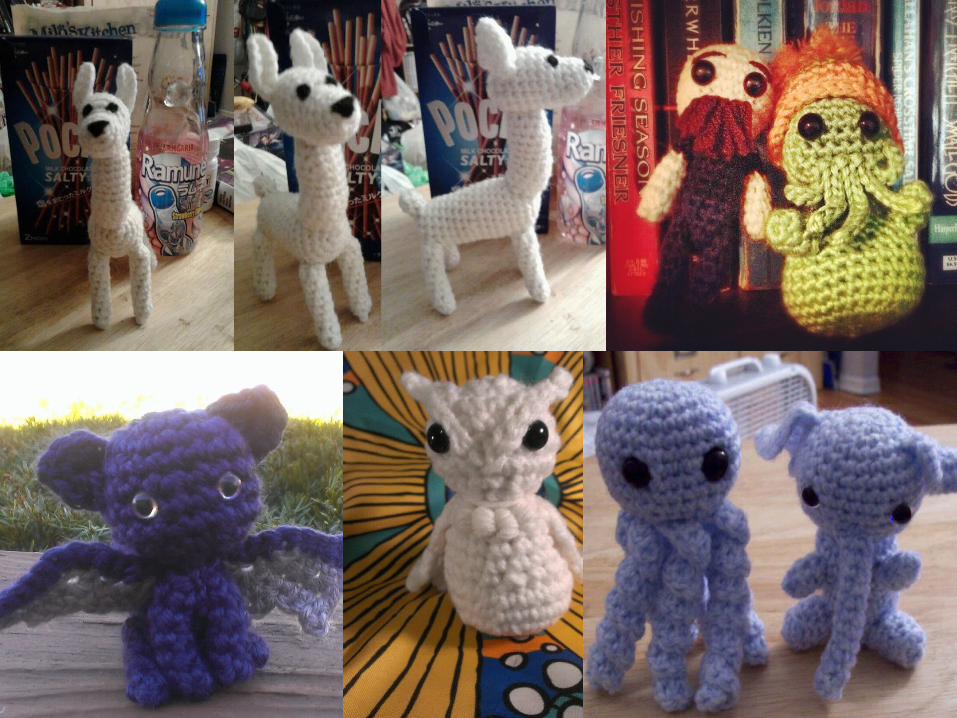
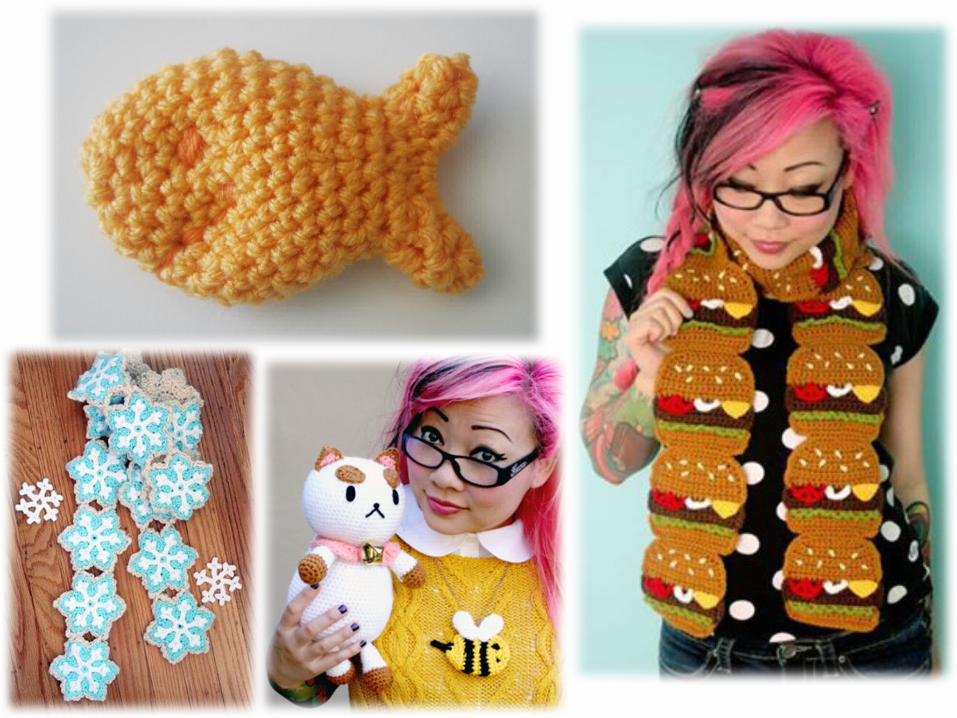
Besides Ami you can make anything you can dream up. Twinkie Chan another amazing fiber artist allowed me to show off some of her work as well.
She makes a lot of yummy wearable ‘food’. If you like her stuff check out
her shop: twinkiechan.etsy.com
Or her website: twinkiechan.com
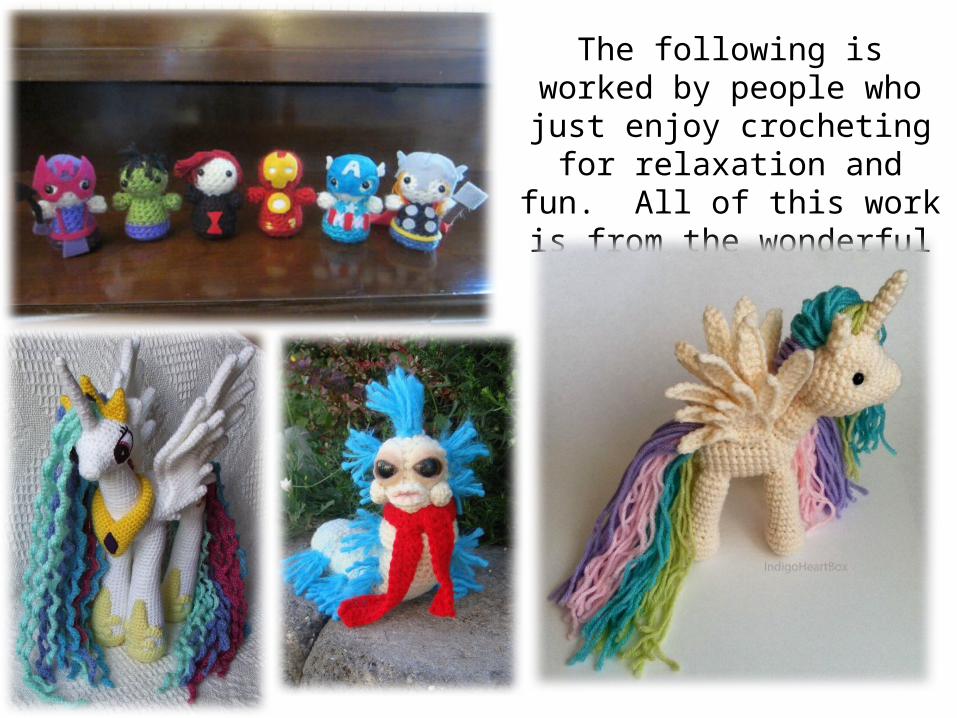
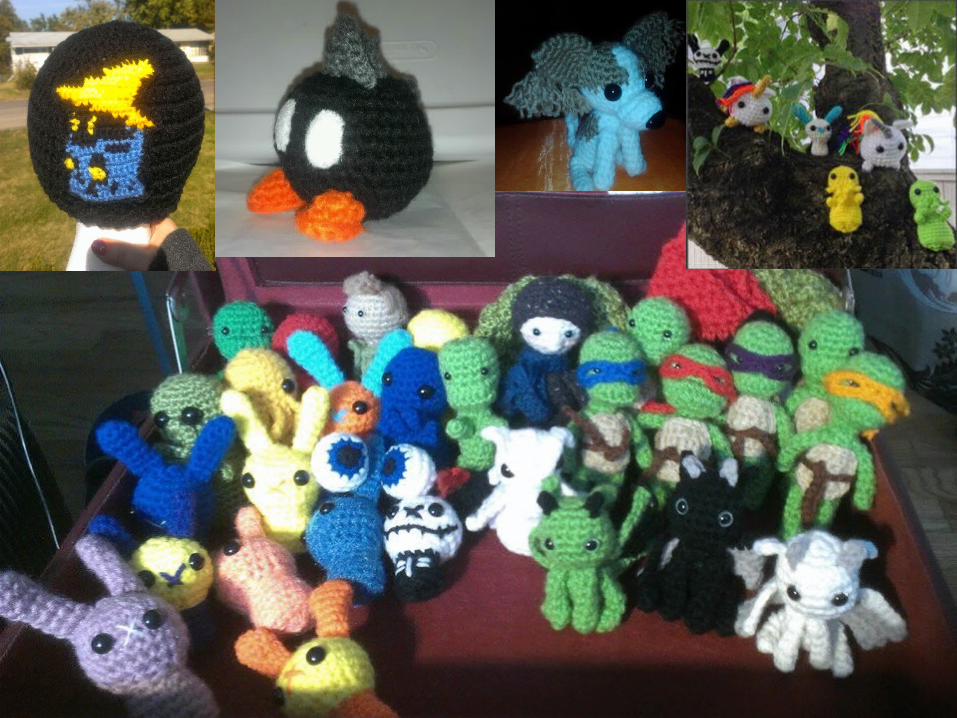
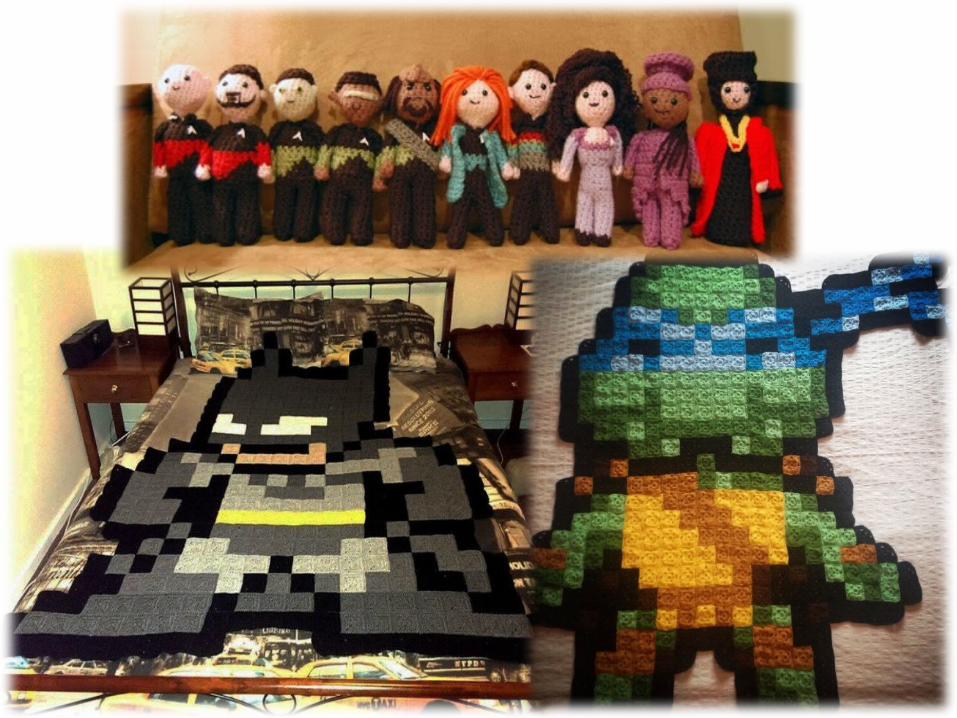
The following is worked by people who just enjoy crocheting for relaxation and fun. All of this
work is from the wonderful people on Reddit
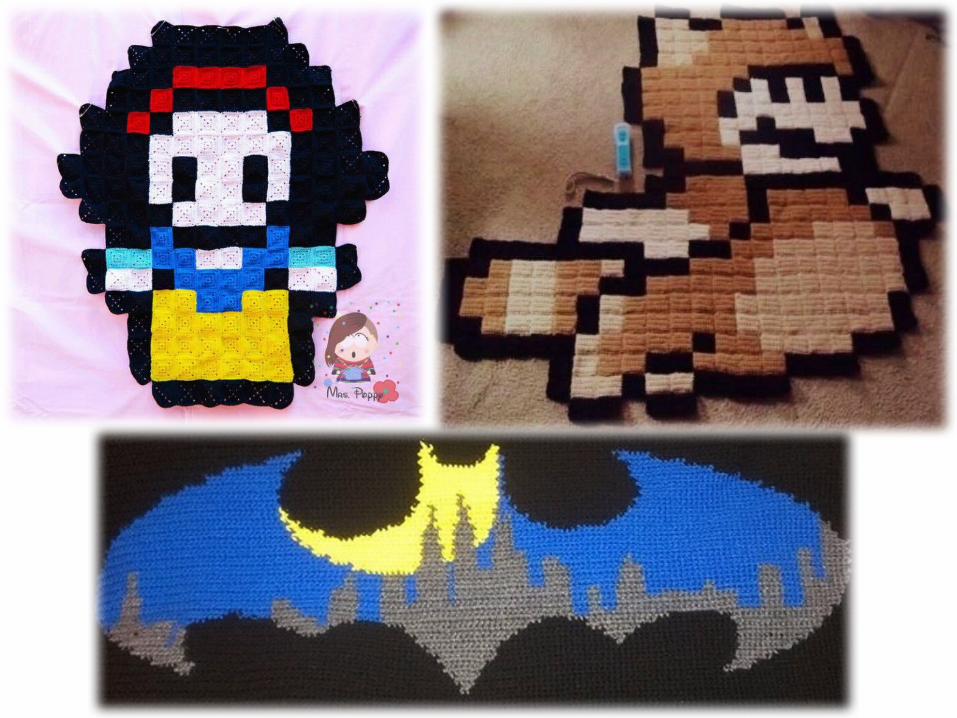
The Character blankets you see are all made with granny squares. It’s a great way to make 8-bit characters into blankets.
The Batman, Gotham cityscape is an example of tapestry crochet. Which is a way crocheter’s mimic tapestry's only in yarn. Its typically worked all in single crochet, working all the colors at the same time. Depending on the crocheter they yarn could all be held on the wrong side, so if you flipped it over one side would look unfinished with tails of yarn or just strands strung across while the other side looks finished. Some crocheter are good enough they can ‘carry’ the yarn inside the stitches so both sides look finished.

This is work by Su-ami. Its all micro amigurumi, most of these pieces are the size of a quarter. This amazing work is done with thread instead of yarn, and often under a magnifying lens so you can see the stitches clearly.