Airside Safety & Security Training Reference book | P a g e ARUBA AIRPORT AUTHORITY N.V. Airside...
63
1 | Page ARUBA AIRPORT AUTHORITY N.V. Airside Safety & Security Training Reference book All Regulations and procedures in this document are mandatory Third Edition 04/2010 Document : Airside Safety & Security Training Processed by : Airport Training Unit ________________________ Peter Steinmetz Managing Director
Transcript of Airside Safety & Security Training Reference book | P a g e ARUBA AIRPORT AUTHORITY N.V. Airside...
1 | P a g e
ARUBA AIRPORT AUTHORITY N.V.
Airside Safety & Security Training
Reference book
All Regulations and procedures in this document are mandatory
Third Edition 04/2010
Document : Airside Safety & Security Training Processed by : Airport Training Unit ________________________ Peter Steinmetz Managing Director

2 | P a g e
Table of Contents
PAGE Foreword ____________________________________3 Chapter 1 General Information & Procedures ____________________________________4 Chapter 2 Basic Parts of the Airside _________________________5, 6, 7, 8, 9, 10 Chapter 3 Causes of Accidents, Mishaps & injuries___________________________________11 Chapter 4 Airside Safety and its Enemies ___________________________________12 Chapter 5 Personal Protection Equipment ___________________________________13 Chapter 6 Working in Bad Weather ___________________________________14 Chapter 7 Safety Procedures & Regulations ________________________________15, 16 Chapter 8 FOD Prevention & Removal ___________________________________17 Chapter 9 Working Safety Area around Aircraft _____________________________18, 19, 20 Chapter 10 Aircraft Ground Damage ___________________________________21 Chapter 11 Fuelling & Spills ___________________________________22 Chapter 12 Smoke & Fire Procedures ________________________________23, 24 Chapter 13 Dangerous Goods ___________________________________25 Chapter 14 Emergency Procedures ___________________________________26 Chapter 15 Security ___________27, 28, 29, 30, 31, 32, 33, 34, 35
3 | P a g e
Foreword
Various incidents and accidents occur each year between aircraft, vehicles and persons on many airports around the world, sometimes resulting in considerate damages to properties, personnel and sometimes even with fatal results. This training is conducted by Aruba Airport Authority N.V. (AAA N.V.) to optimize safety and security on the Airside of Aeropuerto International Reina Beatrix (AIRB).
YOU are the key ingredient in creating a safe environment around your
workplace!

4 | P a g e
CHAPTER 1 General Information and procedures Description of the ASST This training is intended to all persons who are currently working or will be working on AIRB International Airport and have access to airside areas. The requirements to obtain an Airside Access Badge from Aruba Airport Authority N.V. are: Comply with all necessary AIRB International Airport ID badge application procedures and obtain a score of at least 70% on the Airside Safety and Security Training (ASST) exam. If the result is less than 70%, than the participant has the opportunity to attend another ASST session. There will be only three opportunities for the participant to successfully pass the ASST exam. If applicant does not pass the ASST exam after the third attempt, Aruba Airport Authority N.V. has the right to refuse the applicant an Airside Access Badge. Recurrent ASST The AIRB International Airport ID badge is valid for one year. The badge holder is responsible to pass the recurrent training and test prior to the expiration date of the AIRB International Airport ID badge. If a badge holder remains with an AIRB International Airport ID badge for three years consecutively, on the third year he/she must attend a complete ASST session. Obligation of the employer It is the responsibility of the employer to keep their employees updated with changes of the procedures and regulations of the Airside.
5 | P a g e
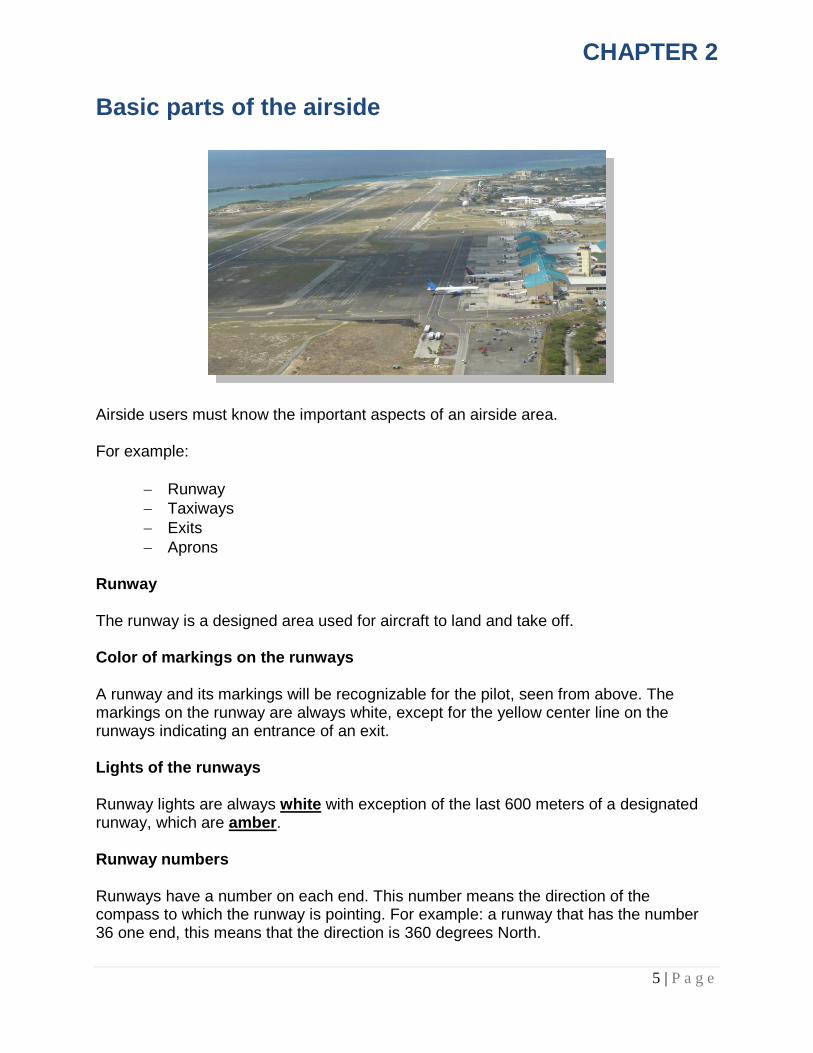
CHAPTER 2 Basic parts of the airside
Airside users must know the important aspects of an airside area. For example:
Runway
Taxiways
Exits
Aprons Runway The runway is a designed area used for aircraft to land and take off. Color of markings on the runways A runway and its markings will be recognizable for the pilot, seen from above. The markings on the runway are always white, except for the yellow center line on the runways indicating an entrance of an exit. Lights of the runways Runway lights are always white with exception of the last 600 meters of a designated runway, which are amber. Runway numbers Runways have a number on each end. This number means the direction of the compass to which the runway is pointing. For example: a runway that has the number 36 one end, this means that the direction is 360 degrees North.
6 | P a g e
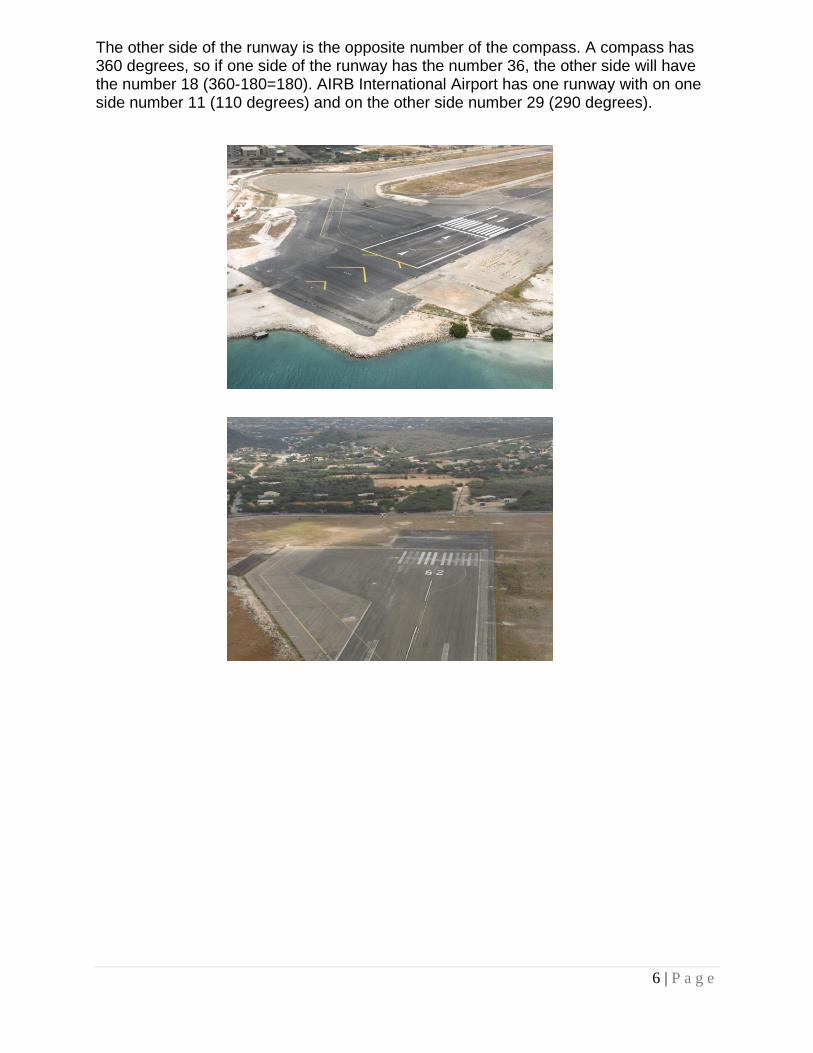
The other side of the runway is the opposite number of the compass. A compass has 360 degrees, so if one side of the runway has the number 36, the other side will have the number 18 (360-180=180). AIRB International Airport has one runway with on one side number 11 (110 degrees) and on the other side number 29 (290 degrees).
7 | P a g e
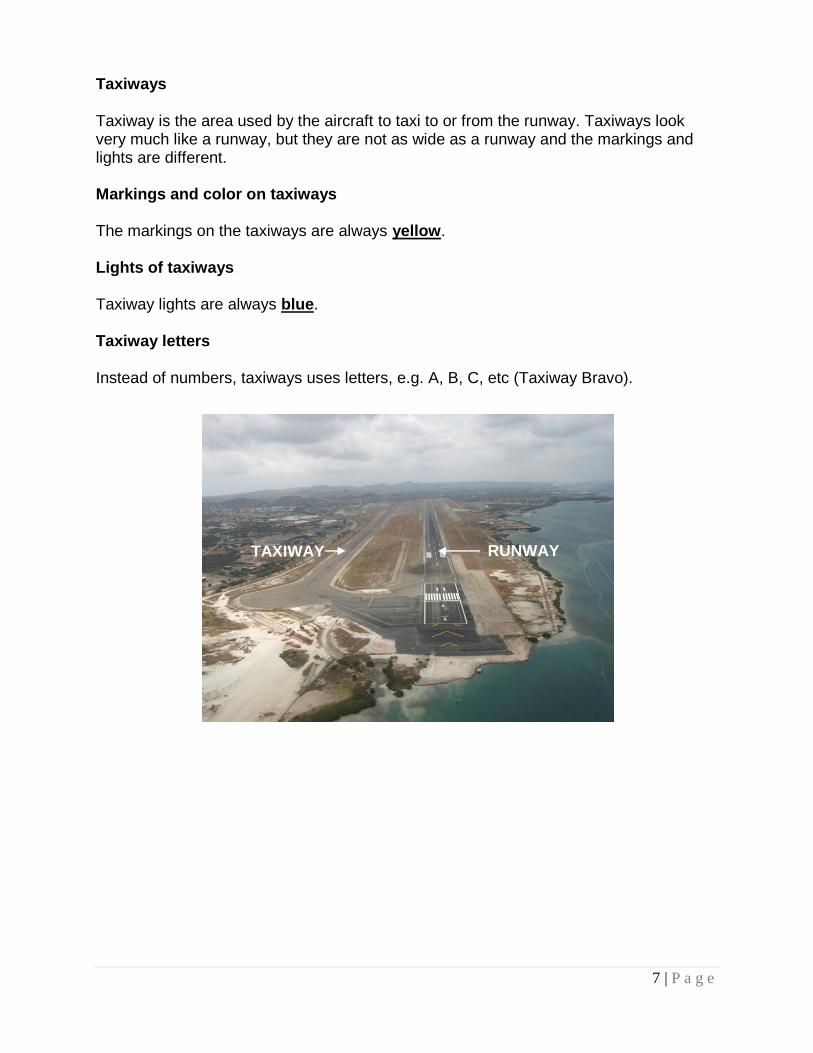
Taxiways Taxiway is the area used by the aircraft to taxi to or from the runway. Taxiways look very much like a runway, but they are not as wide as a runway and the markings and lights are different. Markings and color on taxiways The markings on the taxiways are always yellow. Lights of taxiways Taxiway lights are always blue. Taxiway letters Instead of numbers, taxiways uses letters, e.g. A, B, C, etc (Taxiway Bravo).
TAXIWAY RUNWAY
8 | P a g e
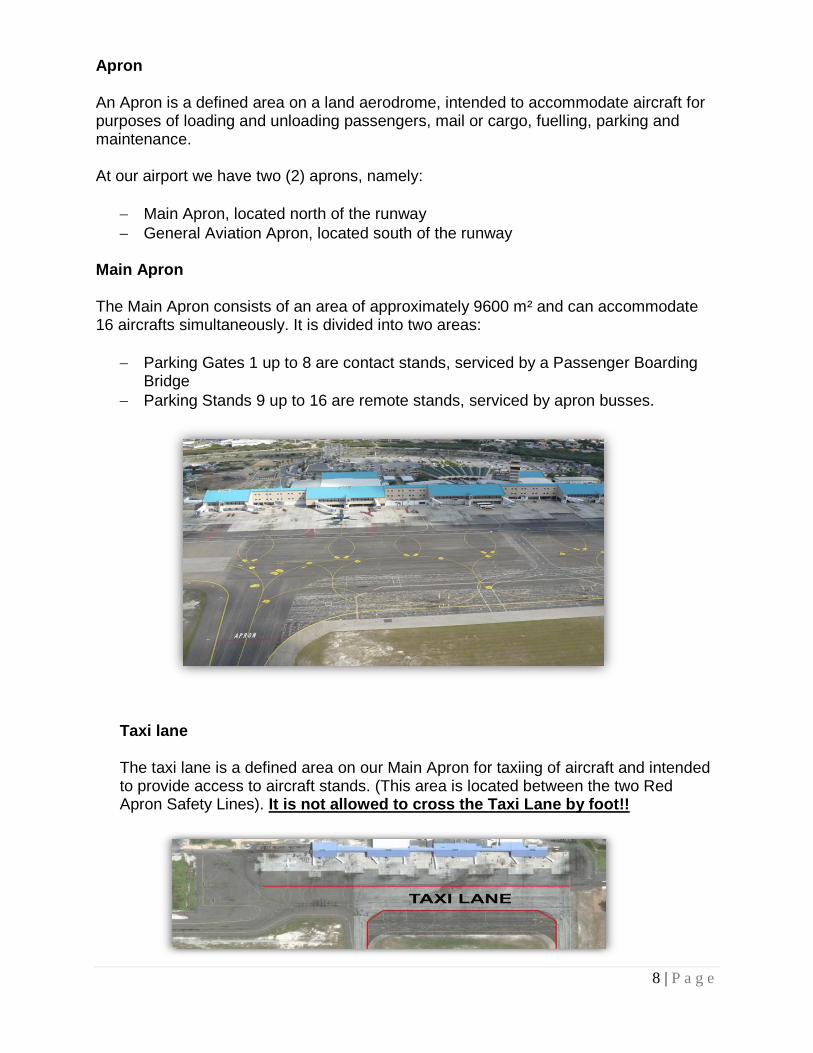
Apron An Apron is a defined area on a land aerodrome, intended to accommodate aircraft for purposes of loading and unloading passengers, mail or cargo, fuelling, parking and maintenance. At our airport we have two (2) aprons, namely:
Main Apron, located north of the runway
General Aviation Apron, located south of the runway Main Apron The Main Apron consists of an area of approximately 9600 m² and can accommodate 16 aircrafts simultaneously. It is divided into two areas:
Parking Gates 1 up to 8 are contact stands, serviced by a Passenger Boarding Bridge
Parking Stands 9 up to 16 are remote stands, serviced by apron busses.
Taxi lane The taxi lane is a defined area on our Main Apron for taxiing of aircraft and intended to provide access to aircraft stands. (This area is located between the two Red Apron Safety Lines). It is not allowed to cross the Taxi Lane by foot!!
9 | P a g e
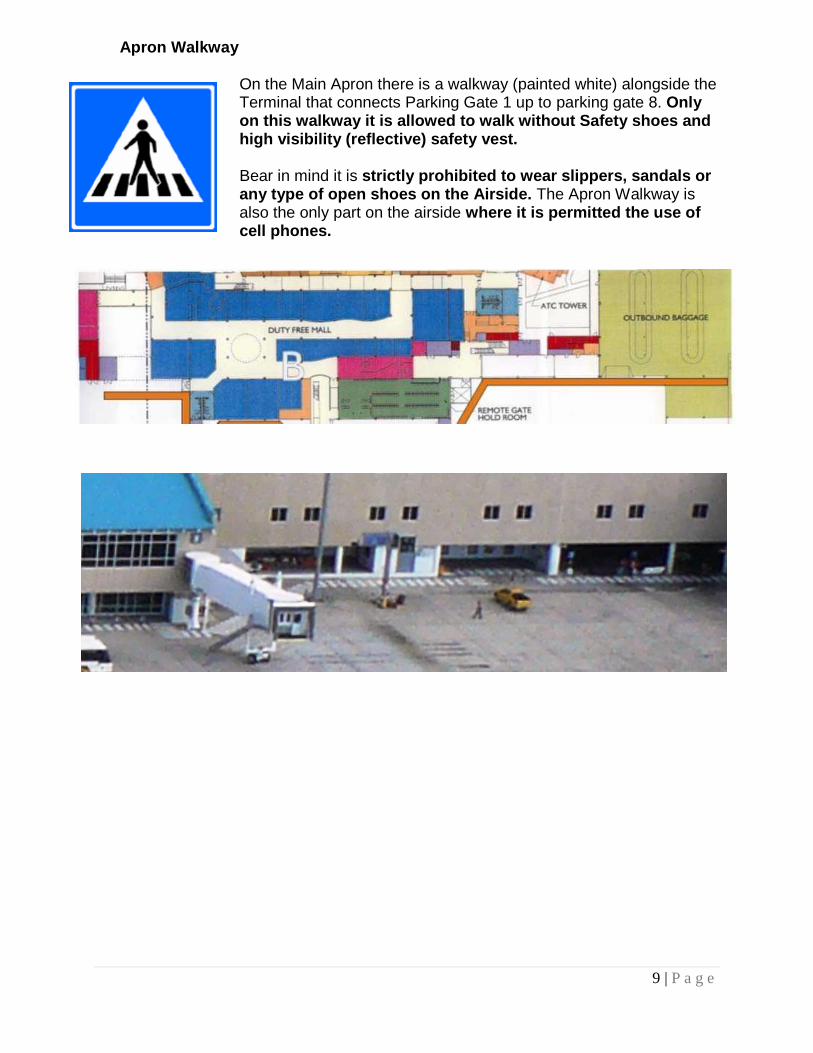
Apron Walkway
On the Main Apron there is a walkway (painted white) alongside the Terminal that connects Parking Gate 1 up to parking gate 8. Only on this walkway it is allowed to walk without Safety shoes and high visibility (reflective) safety vest. Bear in mind it is strictly prohibited to wear slippers, sandals or any type of open shoes on the Airside. The Apron Walkway is also the only part on the airside where it is permitted the use of cell phones.
10 | P a g e
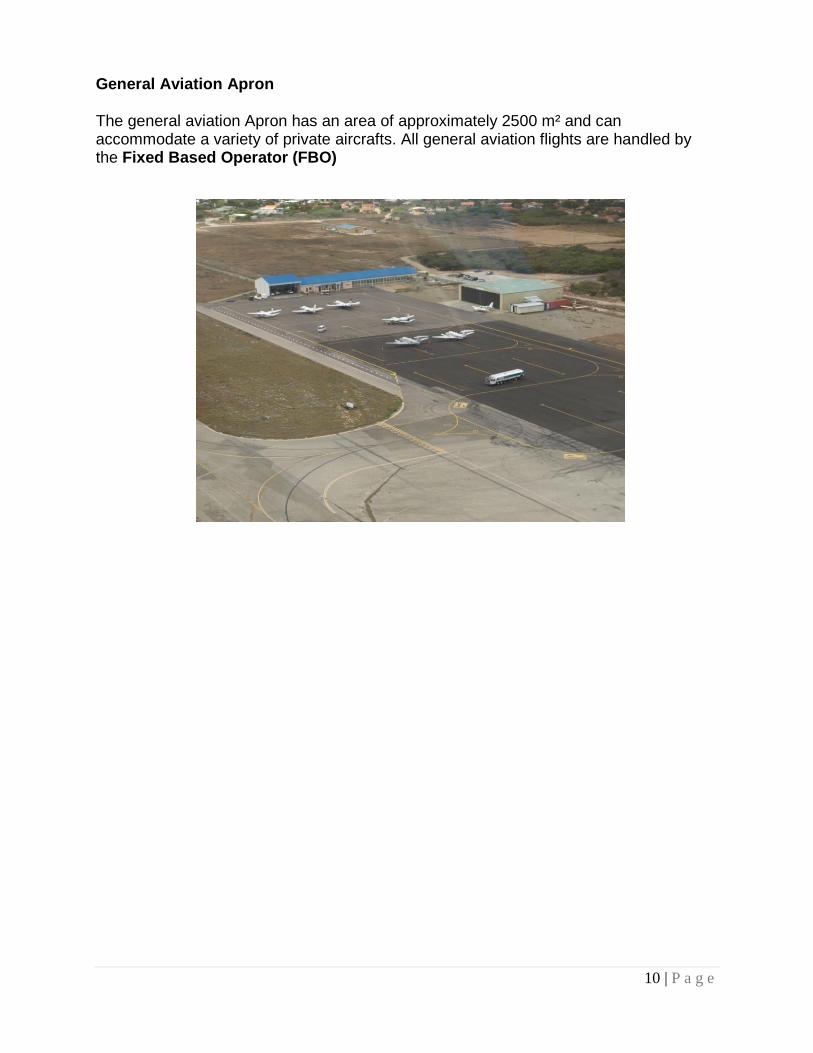
General Aviation Apron
The general aviation Apron has an area of approximately 2500 m² and can accommodate a variety of private aircrafts. All general aviation flights are handled by the Fixed Based Operator (FBO)
11 | P a g e
CHAPTER 3 Causes of Accidents, Mishaps and Injuries The vast majority of accidents, mishaps and injuries can be attributed to the following:
a) People:
Failure to correctly follow procedures and comply with established policies
Complacency and lack of awareness
Lack of pre-planning
Hurrying without focusing on safety to complete a task
b) Equipment:
Equipment abuse
Failure to inspect an properly service equipment prior to use
Failure to perform regular preventive maintenance on GSE leads to equipment failures that lead to mishaps
Improper operation of equipment
c) The Environment:
Failure to adjust to severe weather warnings
Facility constrains (e.g. Ground Service Equipments left on parking area)
Uncontrollable natural disasters
12 | P a g e
CHAPTER 4 Airside Safety and its Enemies Safety requirements (the eight Safety commandments):
1. Always put safety as first priority. 2. Adhere to correct practices and procedures. 3. Use good judgment and common sense to guide your actions. 4. Use job knowledge and observation to detect problems and unsafe conditions. 5. Take the initiative to report problems and unsafe conditions immediately. Where
possible, correct these situations yourself. 6. Report any accident, aircraft damage or injury immediately. 7. Be aware of changing conditions and adjust your actions accordingly. 8. Never perform any task that you are not trained for.
Remember: SAFETY FIRST !!!!! Safety Enemies There is always something that’s against personal safety. These are “The Three Safety Enemies”, that might be a potential hazard towards the safety, which are:
Habit Working with danger daily, one begins to take it for granted, thereby making it easier to overlook danger and makes one indifferent and careless. Always take care even if nothing has happened to you disadvantage.
Haste It’s necessary to work calmly. Haste influences your concentration and control.
The Other Person Always be aware of the other person who may not be aware of the rules and regulations of our airport’s safety.
13 | P a g e
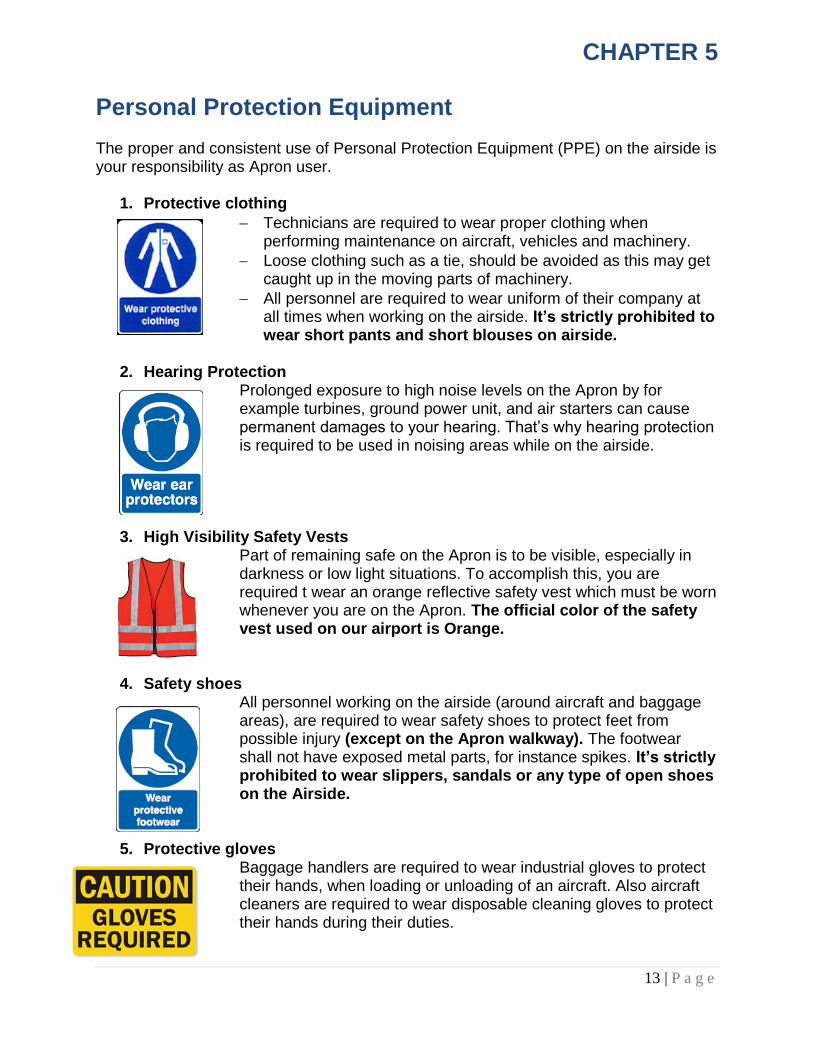
CHAPTER 5 Personal Protection Equipment The proper and consistent use of Personal Protection Equipment (PPE) on the airside is your responsibility as Apron user.
1. Protective clothing
Technicians are required to wear proper clothing when performing maintenance on aircraft, vehicles and machinery.
Loose clothing such as a tie, should be avoided as this may get caught up in the moving parts of machinery.
All personnel are required to wear uniform of their company at all times when working on the airside. It’s strictly prohibited to wear short pants and short blouses on airside.
2. Hearing Protection
Prolonged exposure to high noise levels on the Apron by for example turbines, ground power unit, and air starters can cause permanent damages to your hearing. That’s why hearing protection is required to be used in noising areas while on the airside.
3. High Visibility Safety Vests Part of remaining safe on the Apron is to be visible, especially in darkness or low light situations. To accomplish this, you are required t wear an orange reflective safety vest which must be worn whenever you are on the Apron. The official color of the safety vest used on our airport is Orange.
4. Safety shoes All personnel working on the airside (around aircraft and baggage areas), are required to wear safety shoes to protect feet from possible injury (except on the Apron walkway). The footwear shall not have exposed metal parts, for instance spikes. It’s strictly prohibited to wear slippers, sandals or any type of open shoes on the Airside.
5. Protective gloves Baggage handlers are required to wear industrial gloves to protect their hands, when loading or unloading of an aircraft. Also aircraft cleaners are required to wear disposable cleaning gloves to protect their hands during their duties.
14 | P a g e
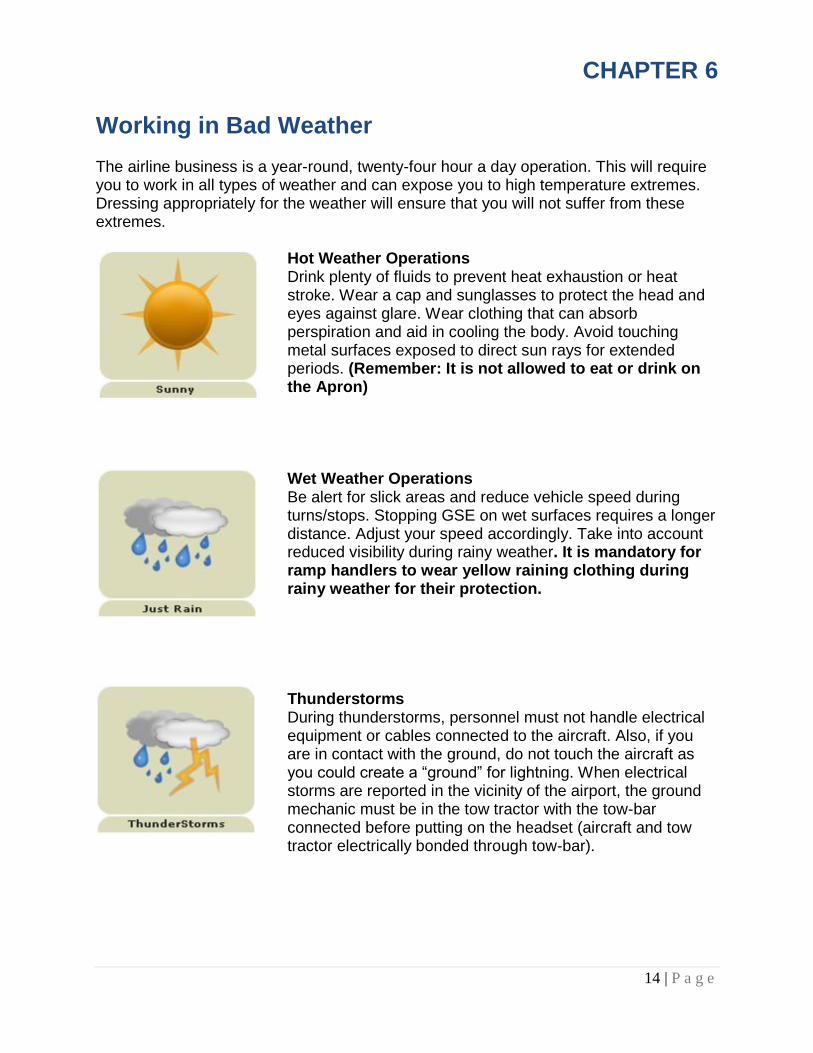
CHAPTER 6 Working in Bad Weather
The airline business is a year-round, twenty-four hour a day operation. This will require you to work in all types of weather and can expose you to high temperature extremes. Dressing appropriately for the weather will ensure that you will not suffer from these extremes. Hot Weather Operations
Drink plenty of fluids to prevent heat exhaustion or heat stroke. Wear a cap and sunglasses to protect the head and eyes against glare. Wear clothing that can absorb perspiration and aid in cooling the body. Avoid touching metal surfaces exposed to direct sun rays for extended periods. (Remember: It is not allowed to eat or drink on the Apron)
Wet Weather Operations Be alert for slick areas and reduce vehicle speed during
turns/stops. Stopping GSE on wet surfaces requires a longer distance. Adjust your speed accordingly. Take into account reduced visibility during rainy weather. It is mandatory for ramp handlers to wear yellow raining clothing during rainy weather for their protection.
Thunderstorms
During thunderstorms, personnel must not handle electrical equipment or cables connected to the aircraft. Also, if you are in contact with the ground, do not touch the aircraft as you could create a “ground” for lightning. When electrical storms are reported in the vicinity of the airport, the ground mechanic must be in the tow tractor with the tow-bar connected before putting on the headset (aircraft and tow tractor electrically bonded through tow-bar).

15 | P a g e
CHAPTER 7 Safety Procedures and Regulations
Airside users on the airport premises are prohibited to consume food or drinks on the airside area. It is only allowed to drink and eat at indicated areas, example in lunch rooms. (Not on the Apron, near baggage belts, vehicles, tugs, conveyor belts)
It is prohibited to cross the service lane by foot, nor cross the taxi lane boundary lines. Exception: Only the ground mechanic can cross this boundary line during the pushback service.
Smoking on the airside area is strictly prohibited, including in vehicles and restrooms. The use of any sparking materials, such as matches or lighters is also prohibited. Smoking is only permitted in a closed locality and with prior approval of Aruba Airport Authority N.V.

16 | P a g e
Airside Areas The following areas are considered airside:
1. When entering through a security checkpoint that gives access to the airside such as checkpoints Orlando, Main Gate, Jupiter (cargo) and Omega (FBO).
2. When entering the gates: Mahuma, Las Americas, Valero and Fire Department.
3. When leaving Gate A-B (Main Terminal).
Safety Procedures and Regulations on Apron – Aircraft Handling
a) Employees will not approach the aircraft until it has:
1. Chocks positioned 2. Engines shut down 3. Approval of the ground agent attending the aircraft has been received.
b) It’s prohibited to board/de-board passengers of an aircraft while engines are
running.
c) It is prohibited to load and unload an aircraft while engines are running.
d) Baggage cart/dollies are not allowed to be loaded higher than 1 meter.
e) It is prohibited to walk or stand on a moving belt. The side rail of the motor belt must be placed prior to using it.
f) Prior to servicing the aircraft, personnel must verify if the equipment is
properly chocked.
g) It is prohibited to transport persons on equipment/vehicle unless there are seats available. It’s also a requirement that all doors of the vehicle must be closed during movement on the Apron.
h) Personnel on moving equipment must be seated properly and should keep
their body within the confines of the vehicle’s structure.
i) It is prohibited to ride on elevating platforms when the vehicle is moving forward or backwards.
j) Airside users should not lift or move more than their personal physical
capabilities. Lifting should be done by using legs and arms for strength.
k) When handling live animals, fingers and hands should be kept clear of the interior of the kennel to avoid being bitten.

17 | P a g e
Enforcement of airside procedures and regulations The personnel of the Apron Management Unit (AMU) are authorized to enforce all rules on the airside area and must report all irregularities to the Business Unit Manager Airside (BUMA).
CHAPTER 8 F.O.D. Prevention and Removal Foreign Object Debris (F.O.D.) What is F.O.D.? Foreign Object Debris (F.O.D.), are objects that are found on the Apron (also runway and taxiway) such as pebbles, nails, buckles, nuts, cans, luggage wheels, padlocks, mowed grass etc. The cleanliness of apron is essential to ensure safe operation on the airside. Items dropped onto our Apron, may be ingested by aircraft engines or damage wheels, tires, structures and even endanger lives. It is prohibited to put any kind of trash, not F.O.D. related, in the yellow F.O.D. bins. Foreign objects debris at airports can cause damage that cost airlines, airports, and airport tenants millions of dollars every year.
It is the responsibility of every ramp user to pick-up any found F.O.D. and toss it in one of the F.O.D. bins on the airside.
18 | P a g e
CHAPTER 9 Working Safety Area around Aircraft Aircraft Safety Zones There are two (2) types of safety zones that have been established to protect the aircraft:
1. Aircraft Clearance Zone
2. Aircraft Buffer Zone
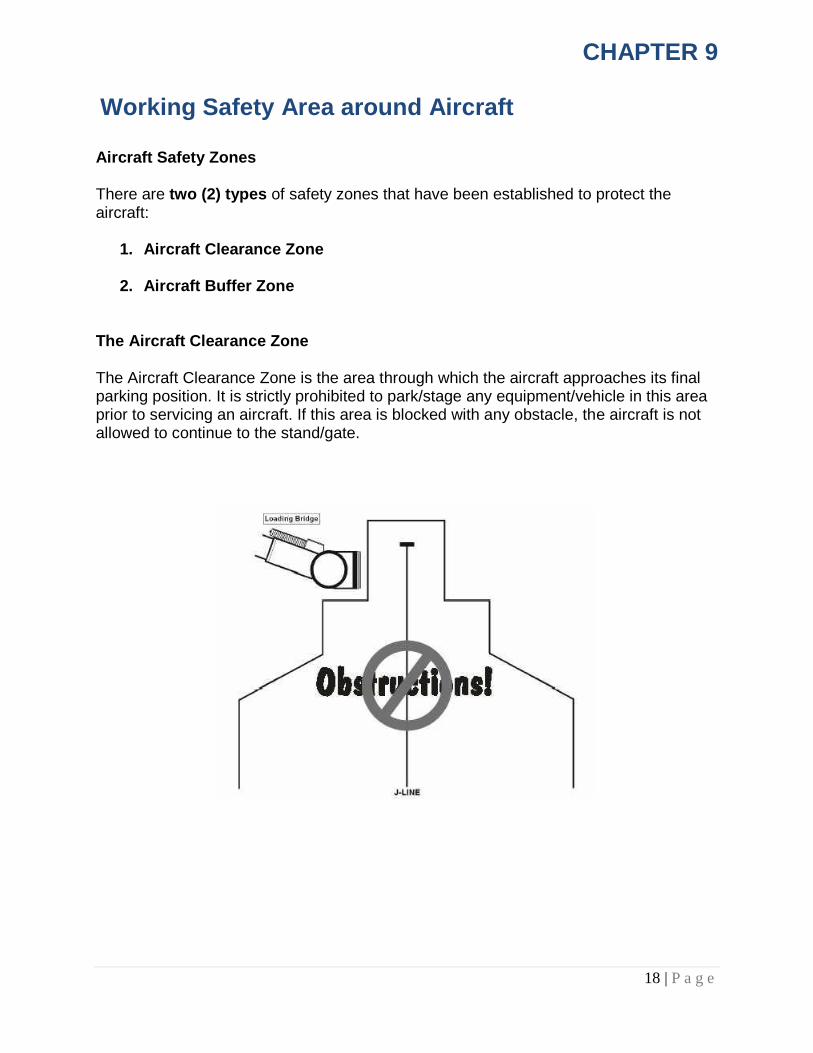
The Aircraft Clearance Zone The Aircraft Clearance Zone is the area through which the aircraft approaches its final parking position. It is strictly prohibited to park/stage any equipment/vehicle in this area prior to servicing an aircraft. If this area is blocked with any obstacle, the aircraft is not allowed to continue to the stand/gate.
19 | P a g e
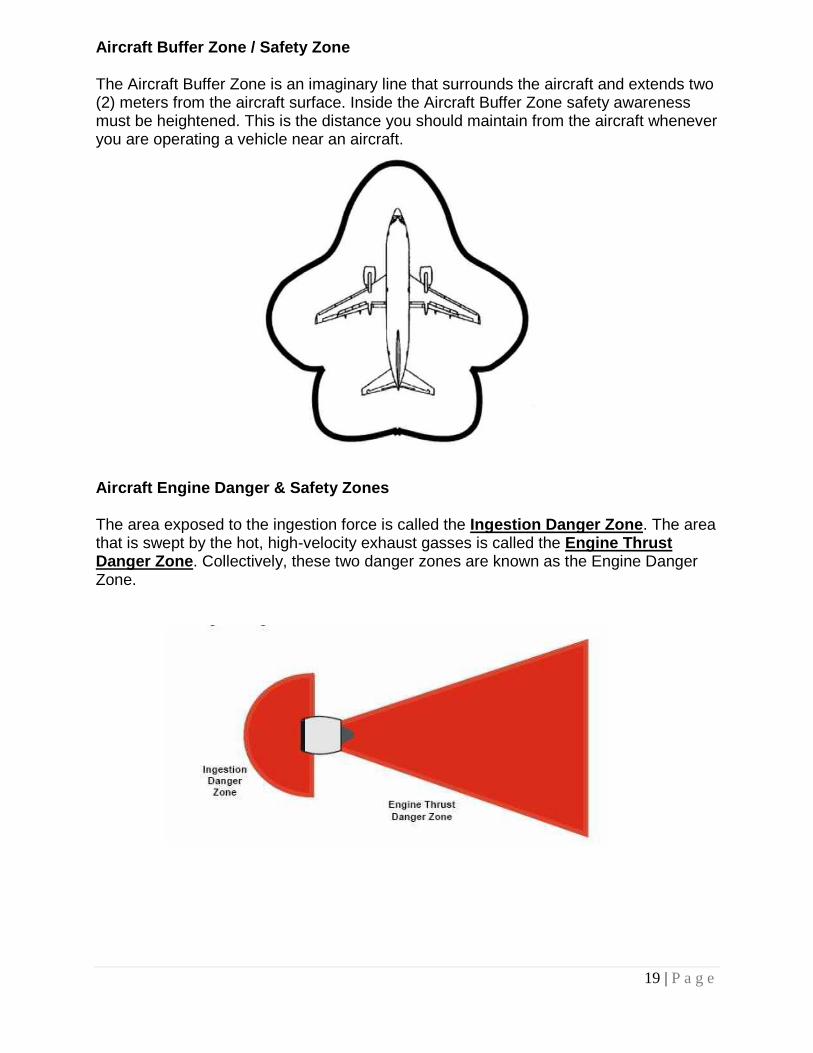
Aircraft Buffer Zone / Safety Zone The Aircraft Buffer Zone is an imaginary line that surrounds the aircraft and extends two (2) meters from the aircraft surface. Inside the Aircraft Buffer Zone safety awareness must be heightened. This is the distance you should maintain from the aircraft whenever you are operating a vehicle near an aircraft.
Aircraft Engine Danger & Safety Zones The area exposed to the ingestion force is called the Ingestion Danger Zone. The area that is swept by the hot, high-velocity exhaust gasses is called the Engine Thrust Danger Zone. Collectively, these two danger zones are known as the Engine Danger Zone.
20 | P a g e
Engine Danger Zone Precautions
Never approach an aircraft or enter an Engine Danger Zone when an engine is running or if it is spooling down.
Look for signs that the engine is running such as heat distortion, flashing beacons and spinning engine compressor blades or propellers.
Consider all engines unsafe until you personally verify that they are safe to approach.
Ingestion Danger The Ingestion Danger Zone is the area in which a running engine exerts a dangerous and deadly suction force which can ingest people and objects. This hazard area extends to the front, sides and behind the lip of every engine intake. Engine ingestion zones differ by aircraft type. Factors such as engine type, engine height from the ground, and engine power settings (i.e., idle power or break-away power) determine ingestion zone size. On aircraft with low, wing-mounted engines, such as the B737, B777 and DC10, the ingestion danger zone is particularly severe. Safe distance to avoid ingestion: Narrow body Aircraft – An area extending 7.5 meters to the front and sides of the engine intake. Wide body Aircraft – An area extending 15 meters to the front and sides of the engine intake. Engine Thrust Danger Zone The Engine Thrust Danger Zone (or Exhaust zone) is the area behind the running engines that is impacted by the force of the exhaust blast. The heat and high velocity exhaust winds generated by the engines can cause severe injuries to personnel and can severely damage equipment or facilities. Never enter the Engine Thrust Danger Zone during engine operation or until the engines have been shut down and allowed to spool down. The Engine Thrust Danger Zone can extend form up to one hundred (100) meters behind narrow-body aircraft to more than one hundred and sixty five (165) meters behind wide-body aircraft. Note:
Always look for the red anti collision lights of the aircraft. Flashing means that the engines are running.
Never walk or drive behind an aircraft with running.
21 | P a g e
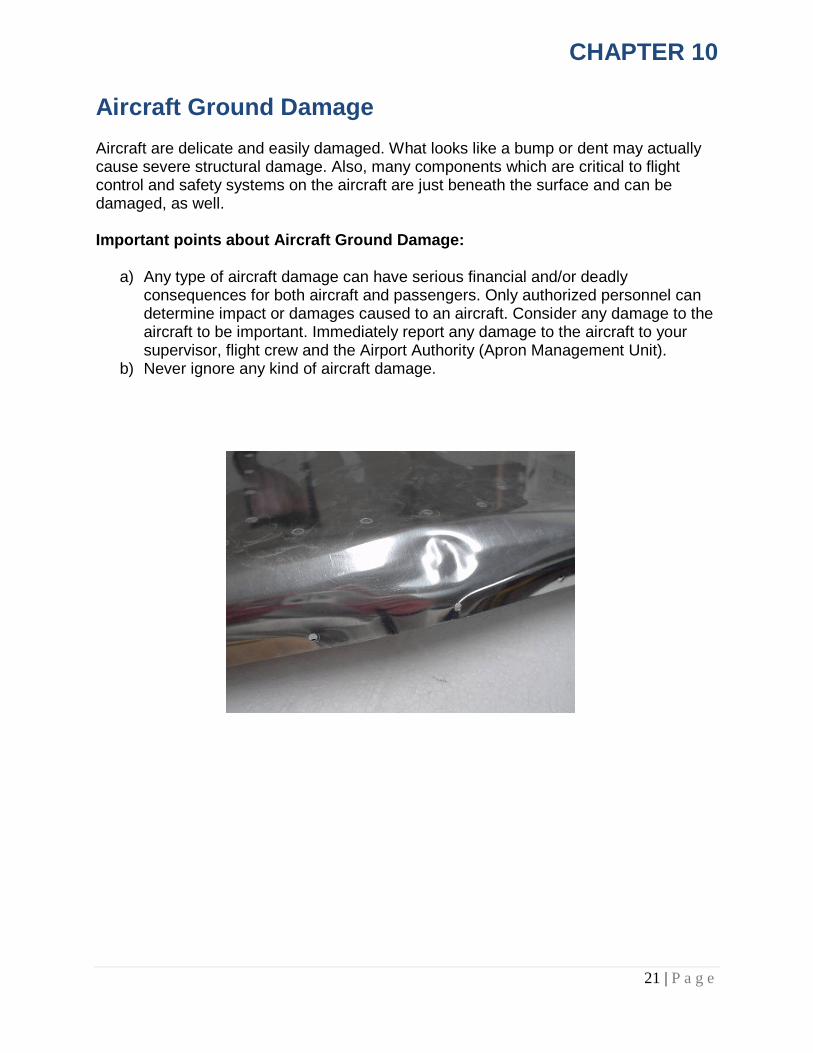
CHAPTER 10 Aircraft Ground Damage Aircraft are delicate and easily damaged. What looks like a bump or dent may actually cause severe structural damage. Also, many components which are critical to flight control and safety systems on the aircraft are just beneath the surface and can be damaged, as well. Important points about Aircraft Ground Damage:
a) Any type of aircraft damage can have serious financial and/or deadly consequences for both aircraft and passengers. Only authorized personnel can determine impact or damages caused to an aircraft. Consider any damage to the aircraft to be important. Immediately report any damage to the aircraft to your supervisor, flight crew and the Airport Authority (Apron Management Unit).
b) Never ignore any kind of aircraft damage.
22 | P a g e
CHAPTER 11
Fuelling & Spills Fuel and Oil spills Fuel spills are potentially fire hazards to personnel, aircraft and equipment. Every effort should therefore be made to prevent them. Any spillage on the apron, e.g. fuel, oil, hydraulic fluids, liquids, etc, must be reported immediately to the Apron Management Unit. There are three kinds of spills, which are:
Small spills, less than 0.50 m²
Medium spills, between 0.51 m² and 3.0 m²
Large spills, over 3.0 m² What to do in a fuel spill situation
1. The refueling company must notify the Apron Management Unit immediately. 2. The ground handler must place a fire extinguisher in the vicinity of the spill. 3. No personnel should walk through the spill area. 4. The driver is not allowed to drive through the spill. 5. Engines of motorized equipment within the spill area should not be started before
a spill is cleaned up. It’s also not allowed to turn off the engine of the vehicle/equipment parked in the fuel spill.
6. It is not allowed to board the aircraft. After cleaning the area, boarding process may continue.
7. Pushback shall not commence prior the fuel spill has been cleaned. Fuelling Regulations
1. Prior to fueling, the fuel company must receive authorization of the ground mechanic. This is to verify e.g. if there are still passengers in the aircraft.
2. The fuel company is not allowed to fuel with passengers on board according to the Fueling Overseer manual. This can be done only with a Fuel Overseer present who will be in charge of overseeing the safe fueling of an aircraft with twenty (20) seats or more.
3. During fueling with passengers on board, no vehicles or equipment may park near the emergency exits, so that in case of emergency, the emergency EXIT chutes can be deployed without hindrance.
4. It is prohibited to fuel an aircraft when there is a thunderstorm in the airport vicinity.
5. As an emergency procedure, never obstruct the fuel trucks while in the fueling process.

23 | P a g e
CHAPTER 12 Smoke & Fire procedures Fire Triangle Fire is a chemical reaction when three elements are present together. The three elements are:
Heat (Energy)
Fuel
Oxygen Fire Prevention Fire prevention is even more important than fire-fighting. The following fire prevention points should be observed:
1. Good housekeeping is essential. Garbage should not be allowed to accumulate, but should be disposed of in approved containers.
2. The location of fire-fighting equipment, fire alarms and telephones that can be used in an emergency should be known to all Airside users.
3. Fire-fighting equipment should be located in such a way that it can be brought quickly into use.
4. Fire-fighting equipment also should be inspected regularly and refilled. 5. Smoking on the Airside area is strictly prohibited, including in vehicles and
restrooms. The use of any sparking materials, such as matches or lighters is also prohibited.
6. The wearing of shoes with steel tips, steel heels or nails in soles is prohibited. 7. Use of naked flames and tools causing smoke, will be allowed only with the
airport authority’s permission. 8. Always report faults or discrepancies in fire-fighting equipment.
Smoke & Fire warnings in aircraft holds When an aircraft arrives with suspected fire or smoke warning in the baggage compartment area, a full passenger evacuation of the aircraft should be carried out before any baggage compartment door is opened. The baggage compartment door must not be opened except by a fire fighting crew with necessary equipment. Failure to obey this instruction will result in a flow of air into the hold of the aircraft, which could cause the fire to erupt with explosive force and with potential disastrous consequences if passengers and crew remain on board the aircraft.

24 | P a g e
Fire in unattended aircraft If a fire is discovered in an unattended aircraft, immediately inform Apron Management Unit by using the Emergency phones located at the AGNIS/PAPA poles.
1. If possible try to extinguish the fire. 2. If not possible to extinguish the fire, reduce the rate of fire spread by closing the
doors. 3. The bridge operator will retract the Passenger Boarding Bridge form the aircraft.
Fire in any Airside Area When a fire is discovered on the Airside area, always inform Apron Management unit immediately by using the Emergency Phones. Try to extinguish the fire, but never put yourself in danger! How to use a fire extinguisher
1. Attack fire with the wind behind your back. 2. Aim at the bottom of the fire and not the flames. 3. Start at the edge of the fire.

25 | P a g e
CHAPTER 13
Dangerous Goods What are dangerous goods? Dangerous goods are articles or substances which are capable of posing a significant risk to health, safety or property when transported. Packages containing dangerous goods are recognized by a diamond shaped () sticker. Before handling dangerous goods, you should be able to recognize some symbols. It is important for you to know them, when loading or unloading an aircraft. In case of emergency, the following should be complied with:
1. The damaged freight item must be duly secured. Unauthorized persons are not allowed in the vicinity of the item.
2. Avoid ingestion, i.e. do not eat, drink or inhale. 3. Inform the Airport Authority and wait for help and instructions of the Apron
Management Unit. Dangerous goods Classification Dangerous Goods are divided into nine (9) classes. Class 1 Explosives Class 2 Gases Class 3 Flammable Liquids Class 4 Flammable Solids Class 5 Oxidizing Substances Class 6 Poisonous Substances Class 7 Radio Active Material Class 8 Corrosives Class 9 Miscellaneous Dangerous Goods
26 | P a g e
CHAPTER 14 Emergency Procedures The following list of emergency procedures is general You are responsible to familiarize yourself with AIRB International Airport emergency procedures, phone numbers, manuals, and emergency evacuation plans. Know the location of first aid kits, fire extinguisher and other emergency equipment. The Key to dealing with these situations is preparedness and knowing what to do. How to report an emergency If you are involved in an emergency / incident / accident and you are able to communicate, or if you colleague is the one involved and does not have the ability to do so, follow these procedures:
1. Immediately inform the Airport Authority (Apron Management Unit) and your company about the incident or accident.
2. In case of injuries, first aid could be rendered if you are qualified. 3. When requesting help at Apron Management Unit, provide the following;
a. Your name b. Name of the company you work for c. The number of people injured d. The exact location of the emergency e. If dangerous goods are present, give also the identification of the
damaged goods or UN number f. Wait for further instructions by Apron Management Unit personnel
Emergency Phones There are 13 Emergency Phones located on the Main Apron. The phones are posted against the AGNIS/PAPA poles at parking position 1 up to 13. The emergency phones are recognized by a sign visible from all directions.
These phones are only allowed to be used for Emergency situations, e.g.:
1. Any fire situation 2. Fuel and Oil Spills 3. Any Accident or Incident 4. Health condition of a person that need Paramedic
assistance Airside Evacuation Plan In the event of an emergency situation that require evacuation, Airside users shall take the shortest way to one of the Security Checkpoints “Main Gate” or “Orlando”.
27 | P a g e
CHAPTER 15 Security
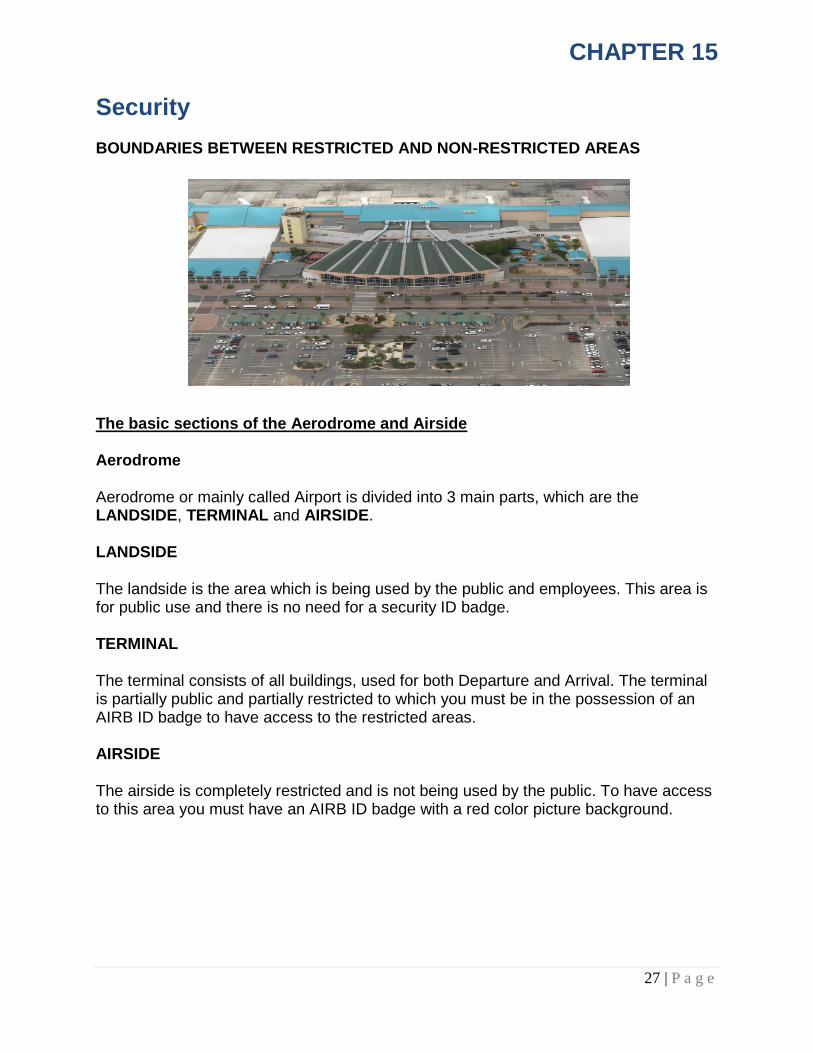
BOUNDARIES BETWEEN RESTRICTED AND NON-RESTRICTED AREAS
The basic sections of the Aerodrome and Airside Aerodrome Aerodrome or mainly called Airport is divided into 3 main parts, which are the LANDSIDE, TERMINAL and AIRSIDE. LANDSIDE The landside is the area which is being used by the public and employees. This area is for public use and there is no need for a security ID badge. TERMINAL The terminal consists of all buildings, used for both Departure and Arrival. The terminal is partially public and partially restricted to which you must be in the possession of an AIRB ID badge to have access to the restricted areas. AIRSIDE The airside is completely restricted and is not being used by the public. To have access to this area you must have an AIRB ID badge with a red color picture background.

28 | P a g e
TYPES OF AIRB ID BADGES
What is the purpose of the Rules and Regulations for access Control and Security ID Badges? The Rules & Regulations (R&R) for Access Control and Security ID Badge details the step-by-step procedures required in order to obtain an Aeropuerto International Reina Beatrix (AIRB) Security Identification Badge (ID Badge). These R&R are promulgated under the Airport Security Program. Amendments may be issued in the form of Airport Director’s Instructions (ADI’s). To whom are these rules and regulations distributed? These R&R are distributed to the AAA N.V. personnel, Government Authorities with locations at the Airport, airlines & ground handlers, concessionaires, and other tenants conducting business at the AIRB. There are three (3) types of AIRB ID badges;
Regular AIRB ID Badge Short-term pass ID Badge Counter pass ID Badge
REGULAR ID BADGE Regular AIRB ID Badges A regular AIRB Badge is only issued to an individual for a period of twelve (12) months or less, as the case may be. The AIRB ID Badge is issued only to individuals who are assigned to, or have continuing frequent presence at AIRB such as Airport Authorities, tenants, concessionaires, contractors, off-airport vendors and other service firms or agencies who are authorized unescorted access to the AIRB restricted areas. The ID Badge is only issued after a successful completion of the VDA background check with positive results. This background check will have a validity of three (3) years. ALARM OPTION The “ALARM” option on an AIRB ID Badge is issued based on an individual’s role in an Alarm-situation. This option allows the badge holder to access the Airport during emergency situations. It does however not grant any rights to additional access to Airport restricted area
29 | P a g e
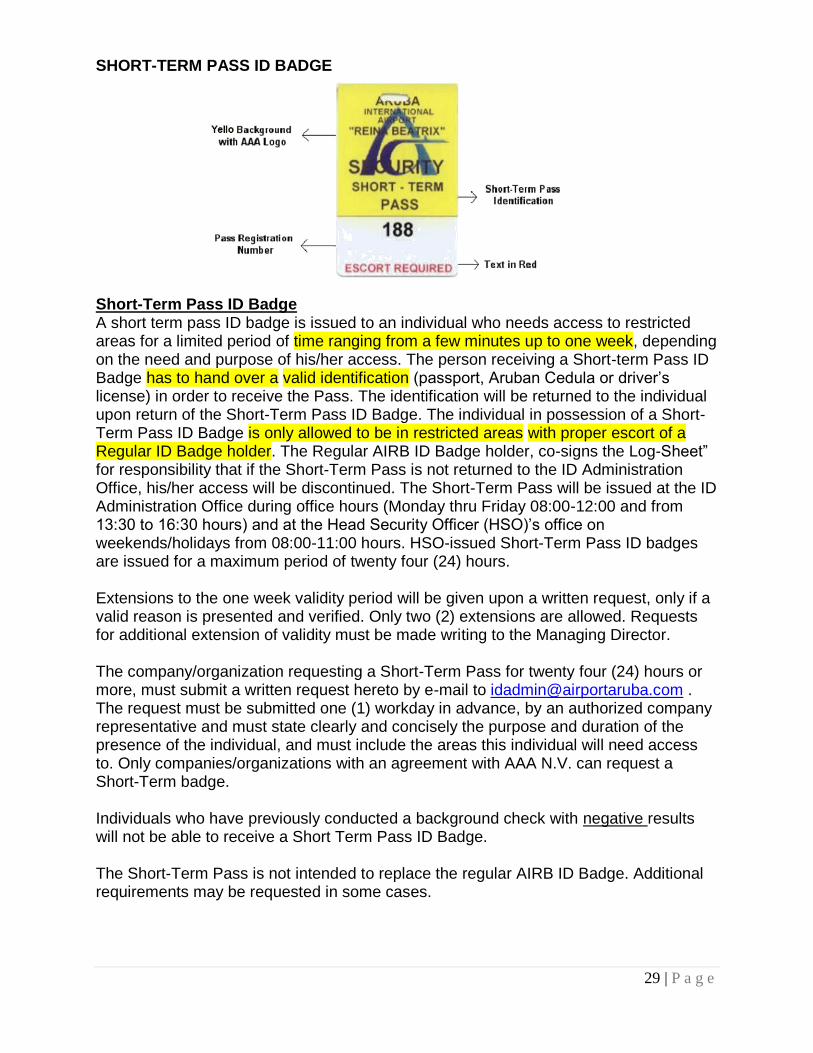
SHORT-TERM PASS ID BADGE Short-Term Pass ID Badge A short term pass ID badge is issued to an individual who needs access to restricted areas for a limited period of time ranging from a few minutes up to one week, depending on the need and purpose of his/her access. The person receiving a Short-term Pass ID Badge has to hand over a valid identification (passport, Aruban Cedula or driver’s license) in order to receive the Pass. The identification will be returned to the individual upon return of the Short-Term Pass ID Badge. The individual in possession of a Short-Term Pass ID Badge is only allowed to be in restricted areas with proper escort of a Regular ID Badge holder. The Regular AIRB ID Badge holder, co-signs the Log-Sheet” for responsibility that if the Short-Term Pass is not returned to the ID Administration Office, his/her access will be discontinued. The Short-Term Pass will be issued at the ID Administration Office during office hours (Monday thru Friday 08:00-12:00 and from 13:30 to 16:30 hours) and at the Head Security Officer (HSO)’s office on weekends/holidays from 08:00-11:00 hours. HSO-issued Short-Term Pass ID badges are issued for a maximum period of twenty four (24) hours. Extensions to the one week validity period will be given upon a written request, only if a valid reason is presented and verified. Only two (2) extensions are allowed. Requests for additional extension of validity must be made writing to the Managing Director. The company/organization requesting a Short-Term Pass for twenty four (24) hours or more, must submit a written request hereto by e-mail to [email protected] . The request must be submitted one (1) workday in advance, by an authorized company representative and must state clearly and concisely the purpose and duration of the presence of the individual, and must include the areas this individual will need access to. Only companies/organizations with an agreement with AAA N.V. can request a Short-Term badge. Individuals who have previously conducted a background check with negative results will not be able to receive a Short Term Pass ID Badge. The Short-Term Pass is not intended to replace the regular AIRB ID Badge. Additional requirements may be requested in some cases.
30 | P a g e
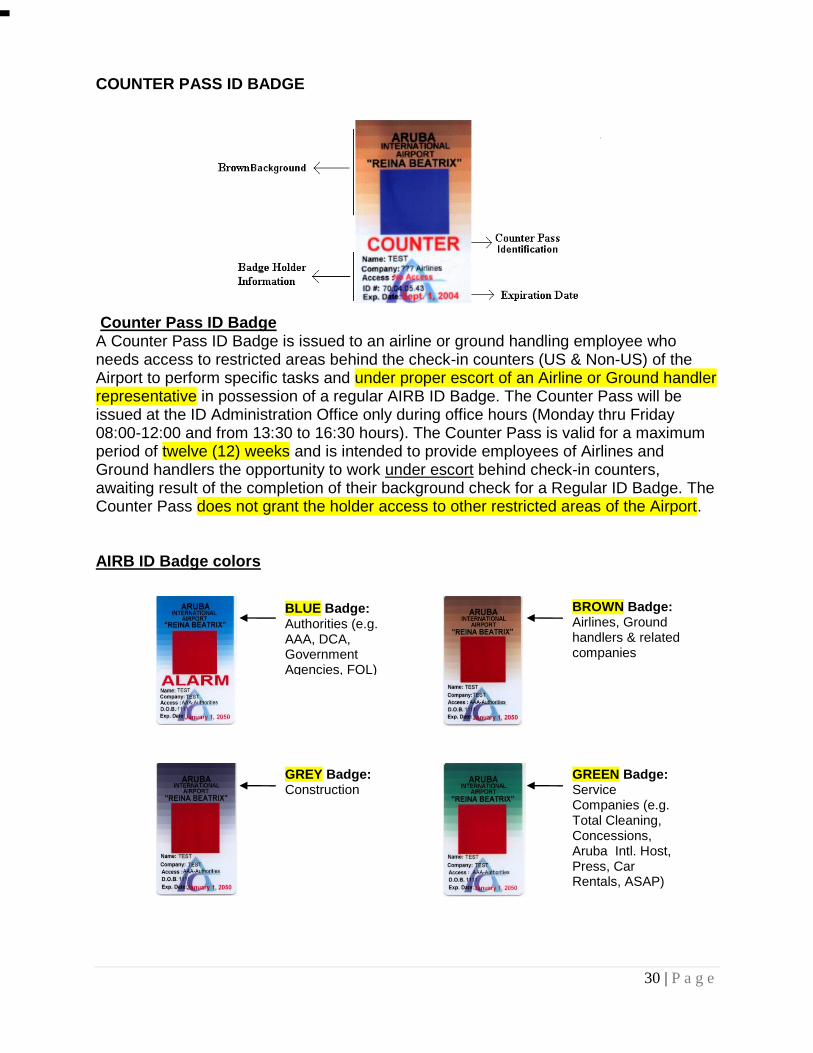
COUNTER PASS ID BADGE Counter Pass ID Badge A Counter Pass ID Badge is issued to an airline or ground handling employee who needs access to restricted areas behind the check-in counters (US & Non-US) of the Airport to perform specific tasks and under proper escort of an Airline or Ground handler representative in possession of a regular AIRB ID Badge. The Counter Pass will be issued at the ID Administration Office only during office hours (Monday thru Friday 08:00-12:00 and from 13:30 to 16:30 hours). The Counter Pass is valid for a maximum period of twelve (12) weeks and is intended to provide employees of Airlines and Ground handlers the opportunity to work under escort behind check-in counters, awaiting result of the completion of their background check for a Regular ID Badge. The Counter Pass does not grant the holder access to other restricted areas of the Airport. AIRB ID Badge colors
BLUE Badge: Authorities (e.g. AAA, DCA, Government Agencies, FOL)
BROWN Badge: Airlines, Ground handlers & related companies
GREY Badge: Construction
GREEN Badge: Service Companies (e.g. Total Cleaning, Concessions, Aruba Intl. Host, Press, Car Rentals, ASAP)
31 | P a g e
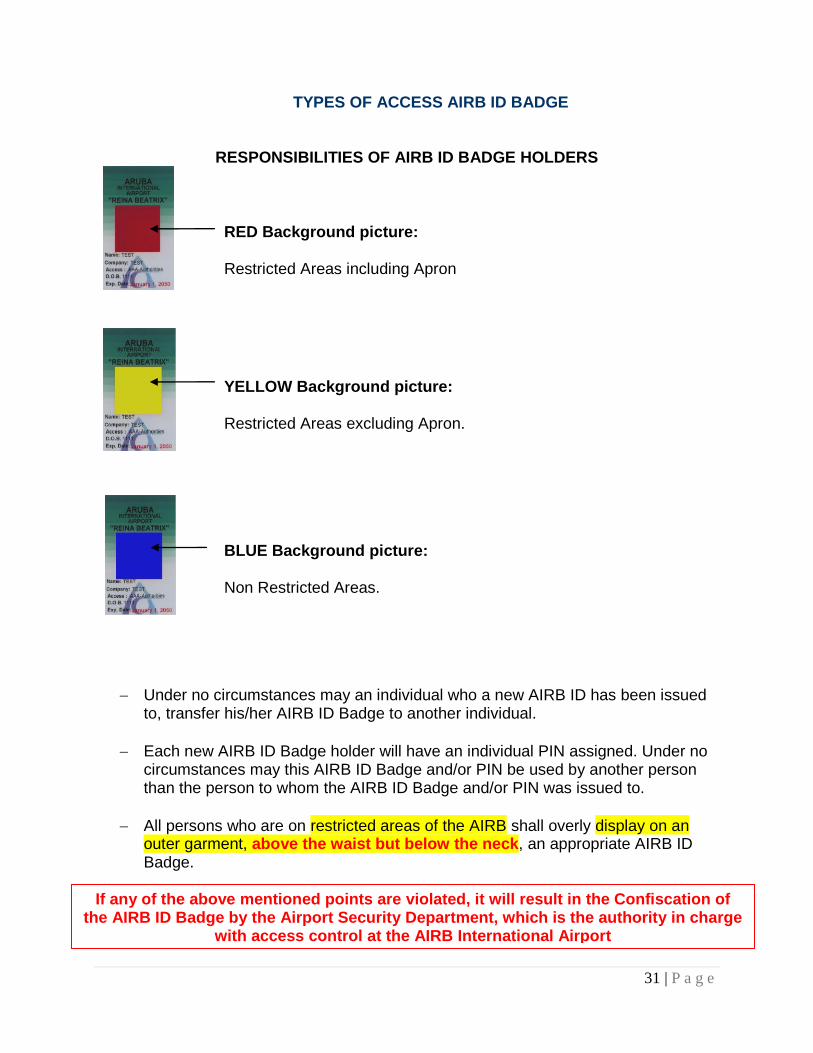
TYPES OF ACCESS AIRB ID BADGE
RESPONSIBILITIES OF AIRB ID BADGE HOLDERS
Under no circumstances may an individual who a new AIRB ID has been issued
to, transfer his/her AIRB ID Badge to another individual.
Each new AIRB ID Badge holder will have an individual PIN assigned. Under no circumstances may this AIRB ID Badge and/or PIN be used by another person than the person to whom the AIRB ID Badge and/or PIN was issued to.
All persons who are on restricted areas of the AIRB shall overly display on an outer garment, above the waist but below the neck, an appropriate AIRB ID Badge.
RED Background picture: Restricted Areas including Apron
YELLOW Background picture: Restricted Areas excluding Apron.
BLUE Background picture: Non Restricted Areas.
If any of the above mentioned points are violated, it will result in the Confiscation of the AIRB ID Badge by the Airport Security Department, which is the authority in charge
with access control at the AIRB International Airport
32 | P a g e
ESCORT PROCEDURES A Regular AIRB Badge holder (Escorter) may escort a maximum of five (5) temporary visitors (Escorted individual) who do not have independent access to the restricted and/or Air Operations Area’s (AOA) of the airport, provided the Escorter is authorized such access and that the visitor (Escorted individual) has in his/her possession a Short-Term Pass. It is the responsibility of the Escorter to ensure that the individual being escorted remains in direct line of sight of him/her at all times. If the escorted individual is challenged by an airport employee or security personnel, the person must immediately identify his/her escort. If at any time the escorted individual does not follow the Escorter’s directions, the Escorter must contact the Airport Security Unit immediately and have the individual removed from the restricted and/or AOA areas. The Escorter remains at all time responsible for all actions taken by the escorted individual.
AIRB ID Badge Fees
Regular AIRB ID Badges Fees Initial issue Awg. 20, 00 First reissue Awg. 30, 00 Second or more reissues Awg. 75, 00 Annual renewal Awg. 20, 00 Unreturned Badge (termination/suspension) Awg. 100, 00 Reissue is defined as replacement of a lost, stolen or damaged AIRB ID Badge. Replacement of an inoperable AIRB ID Badge will be free of charge. Short-Term Pass ID Badges Fees Initial issue Awg. 10, 00 Each one-week extension Awg. 20, 00 Replacement fee Awg. 100, 00 Replacement is defined as replacement of a lost, stolen, misplaced or damaged AIRB Short Term Pass ID Badge. The Short-Term Pass ID Badges are available for use by individuals who do not possess a Regular AIRB ID Badge. A non-refundable fee of Awg. 20, 00 will apply for each one-week extension of the Short-Term Pass ID Badge. Counter Pass Fees Initial issue Awg. 20, 00 Replacement fee Awg. 100, 00 Unreturned Badge Awg. 100, 00

33 | P a g e
AIRB ID Badge: PROPERTY The AIRB ID Badge remains property of the Aruba Airport Authority N.V. and must be surrendered upon the request of the Authority authorized personnel. Any attempt by an AIRB ID Badge holder to help, assist or aid anyone in circumventing Airport security and screening systems will result in temporary or permanent suspension of access and can lead to legal prosecution. AIRPORT POLICY AND RULES/PROCEDURES REGARDING IDENTIFICATION OF
EMPLOYEES AND VISITORS
1. All persons working in a restricted area of the Airport and those persons who have a regular need to enter restricted areas of the Airport must display at all times an AIRB ID Badge on their outer garments, while in such areas.
2. The AIRB ID badge shall not be used for Private purposes. 3. For aircraft crew not based in Aruba, a crew member’s license or certification
issued in compliance with relevant ICAO specifications will also be accepted as a valid identification document, particularly when the crew identity is verified by a photographic laminated identification card.
4. Uniformed police, Immigration, Customs and Military personnel not stationed at the
airport are not required to wear a Security ID badge, provided that its identity is verified by an approved valid identity document (legitimatie bewijs)
5. The Airport Authority retains the right at any time to prohibit the badge holder from
entering any restricted area on the airport. 6. The Regular AIRB ID Badge must incorporate a photograph of the individual as an
integral part of the badge and must show name of badge holder, employer and location to which access is authorized.
7. The AIRB ID Badge must be issued by the Airport Security ID Administration
Department. 8. An AIRB ID Badge will not be issued to non-airport personnel except in cases
approved by the Airport Management. 9. All companies and organizations must vouch for validity of and need for an AIRB ID
Badge by their staff. This entails a responsibility on their part to have completed adequate pre-employment or other inquiries to ensure that the individual will not be a potential threat to the Airport security program.
10. No Regular AIRB ID Badge will be issued to non-residents or to persons who have
no valid work permit. 11. No Regular AIRB ID Badge will be issued to persons under the age of 18 years.
34 | P a g e
12. An AIRB ID Badge may not be issued to persons arrested, convicted for any
offense or crime even though subject of pardon, amnesty, or other such legal action.
13. Individuals who failed to pass successfully the background check are not eligible to
receive any AIRB ID Badge. 14. Any person whose Security ID badge is lost, stolen or misplaced must promptly
report such lost to his supervisor who must ensure that the Security ID Administration department is advised immediately.
15. Use by a person other than the person to whom the security ID Badge and/or Pin
number was issued will result in the confiscation of the badge. 16. The Security ID Badge remains the property of the Aruba Airport Authority N.V. and
must be returned;
Upon request
For inspection and verification
When the individual’s access authorization is terminated due to transfers, termination of services or suspensions.
17. The Airport Security must stop any individual found at a place on the Airport to
which his/her access is not authorized. 18. The Airport Security is entitled to search each pass-holder, including the items in
his possession and vehicle in which he transports items and/or himself. This rule is applicable at all access points to or within all restricted areas.
19. Short Term Passes may be issued by the Security ID Administration Department to
individuals who need access to restricted areas to perform specific tasks of short duration, on an exceptional basis. Short Term passes will be issued only on Monday thru Friday 08:00-12:00 and from 13:30 to 16:30 hours) and at the Head Security Officer (HSO)’s office on weekends/holidays from 08:00-11:00 hours. HSO-issued Short-Term Pass ID badges are issued for a maximum period of twenty four (24) hours.
35 | P a g e
RULES AND REGULATIONS FOR AIRB ID BADGE HOLDERS
Under no circumstances may an AIRB ID Badge holder allow anyone else to use his/her ID Badge.
Any AIRB ID Badge holder has the responsibility to challenge any individual who finds him/her self in a restricted area without an ID badge.
The AIRB ID Badge holders must ensure the proper closing and locking of any Security door or gate after use.
The AIRB ID Badge holders must never allow any individual to follow them through any door or gate.
The AIRB ID Badge holder must never open any door or gate for another AIRB ID Badge holder.
The AIRB ID Badge holder must immediately report the theft or lost of their ID Badge at the Airport ID Administration Department or Airport Security.
The AIRB ID Badge holder must immediately report any security violation they witness to the Airport Security.
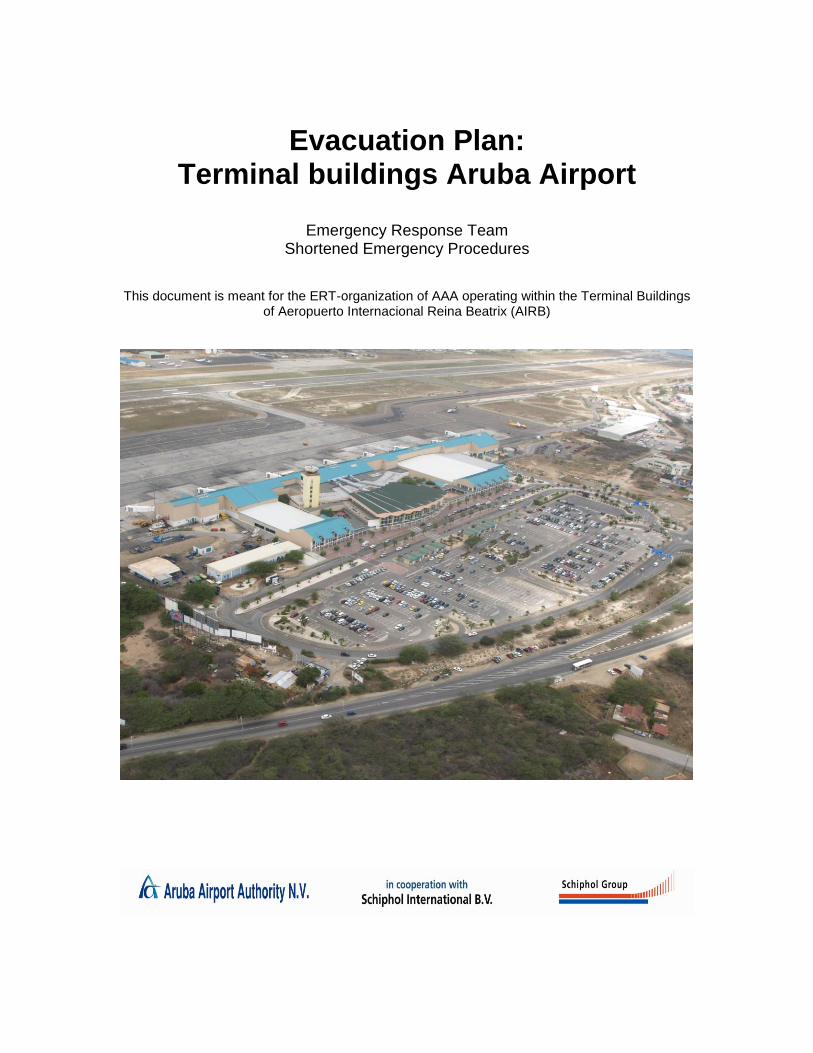
Evacuation Plan: Terminal buildings Aruba Airport
Emergency Response Team Shortened Emergency Procedures
This document is meant for the ERT-organization of AAA operating within the Terminal Buildings of Aeropuerto Internacional Reina Beatrix (AIRB)
Evacuation Plan Terminal Buildings
2
Content
Content ................................................................................................................................ 2
Chapter 1 The ERT-organization .................................................................................... 4
1.1 Introduction ......................................................................................................... 4
1.2 Area of Coverage ................................................................................................ 4
1.3 Operational ERT-organization ............................................................................ 4
1.4 Reaction time ERT-organization ........................................................................ 4
1.5 ERT-coverage during the day within the Terminal Buildings ............................ 4
1.6 Rendezvous points Terminal Buildings .............................................................. 4
Chapter 2 Building-, Installation- and Organizational data ............................................. 8
2.1 Data of the building ............................................................................................ 8
2.2 Alarm Notification .............................................................................................. 8
2.3 ERT-organization .............................................................................................. 11
Chapter 3 Alarm procedure ........................................................................................... 11
3.1 Alarm numbers professional emergency responders ........................................ 11
3.2 Local alarm numbers......................................................................................... 11
3.3 Other important alarm numbers ........................................................................ 11
Chapter 4 Alarm connection diagram ............................................................................ 12
Chapter 5 Method of evacuation and organisation of the evacuation ........................... 12
Chapter 5 Method of evacuation and organisation of the evauctaion ........................... 13
Chapter 6 How to act in case of incidents ..................................................................... 14
6.1 Fire .................................................................................................................... 14
6.2 Bodily injury ..................................................................................................... 14
6.3 Evacuation......................................................................................................... 15
6.4 Dangerous substances ....................................................................................... 16
6.5 Bomb-threat………………………………………………………………….. 16
6.6 Threat of danger from outside......................................................................... 177
6.7 Other acts of unlawfull interference ................................................................. 17
Chapter 7 Assigments and responsibilities .................................................................... 18
7.1 ERT Shift Leader .............................................................................................. 18
7.2 ERT member ..................................................................................................... 19
Chapter 8 Lay outs / Symbols........................................................................................ 21
Chapter 9 Logbook evacuation plan .............................................................................. 24
Chapter 10 Attachments .............................................................................................. 25
10.1 Attachment 1 ERT members ............................................................................. 25
10.2 Attachment 2 IRF Form .................................................................................... 26
10.3 Attachment 4 Evaluation form ERT-action ..................................................... 27
10.4 Attacment 5 List of definitions and abbreviations ........................................... 27
Evacuation Plan Terminal Buildings
3
Distribution This document is meant for the ERT-organization of AAA operating within the Terminals of Aruba International Reina Beatrix and will be distributed amongst the ERT Shift leaders, HSO and the ERT members. Amendments In case this document needs to be amended or adjusted you are requested to do this through the person mentioned here below. An update of the plan will be prepared annually.
Name Chito Geerman
Function Head Terminal Services / Head ERT
Telephone 524-2483
E-mail [email protected]
Evacuation Plan Terminal Buildings
4
Chapter 1 The ERT-organization
1.1 Introduction The shortened emergency procedures are meant for the ERT Shift leaders/HSO/ERT members and for CSC. The shortened emergency procedures are updated by the Head ERT. In case of an emergency evacuation the ERT Shift Leaders and HSO with a team of ERT members will carry the responsibilities within the Terminal buildings, landside and Apron areas for the assistance until the government response services arrive. Guidance of the ERT team will go through the ERT Shift Leader. This means that the communication between the ERT Shift Leaders, HSO and the ERT members is of utmost importance. The ERT members are alarmed through the alarm signal in case of a fire or an evacuation or via telephone or 2-way radio. It is off course also possible that an ERT member is made aware of an incident through a colleague, a passer-by or through self observation. Other airport users present at the time have to follow instructions of the ERT-team. They will have to abandon the risk area and direct themselves by means of the shortest evacuation routes to the rendezvous points (see Chapter 8). Any actions taken by non ERT members during an emergency evacuation will be completely on their own responsibility.
1.2 Area of Coverage The area of coverage of the ERT-organization entails the following areas:
Ground Floor up to and including the 2nd Floor of the Terminal Buildings A - H.
Landside and Apron areas.
1.3 Operational ERT-organization The ERT-organization falls under the Business Unit Manager Terminal and consists of 29 members from different departments within the Business units and Support units of AAA. There are three shift leaders among the members to coordinate the activities and one Head ERT to manage the organization. The ERT Shift Leader guides the ERT-team. The ERT members proceed to perform their duties as much as possible in couples. CSC is responsible within the ERT-organization for the communication lines between the various parties (internally and externally).
1.4 Reaction time ERT-organization In order to provide assistance the ERT members have to be at the place of the incident within 3 minutes after having received a notification hereof.
1.5 ERT-coverage during the day within the Terminal Buildings The ERT-coverage for the airport is available daily between 07.00 - 23.00 hours, 7 days a week.. Between 23.00 – 07.00 hours the terminal is under surveillance of CSC and HSO.
1.6 Rendezvous points Terminal Buildings In case the Terminal, or sections hereof, need to be evacuated, all persons have to report outside on landside or airside at the rendezvous point. This serves to check if there are any persons missing. The rendezvous points ensure that the persons gather at a point is sufficiently far away from the building. Off course one can deviate from these rendezvous points in certain (dangerous) situations.
Evacuation Plan Terminal Buildings
5
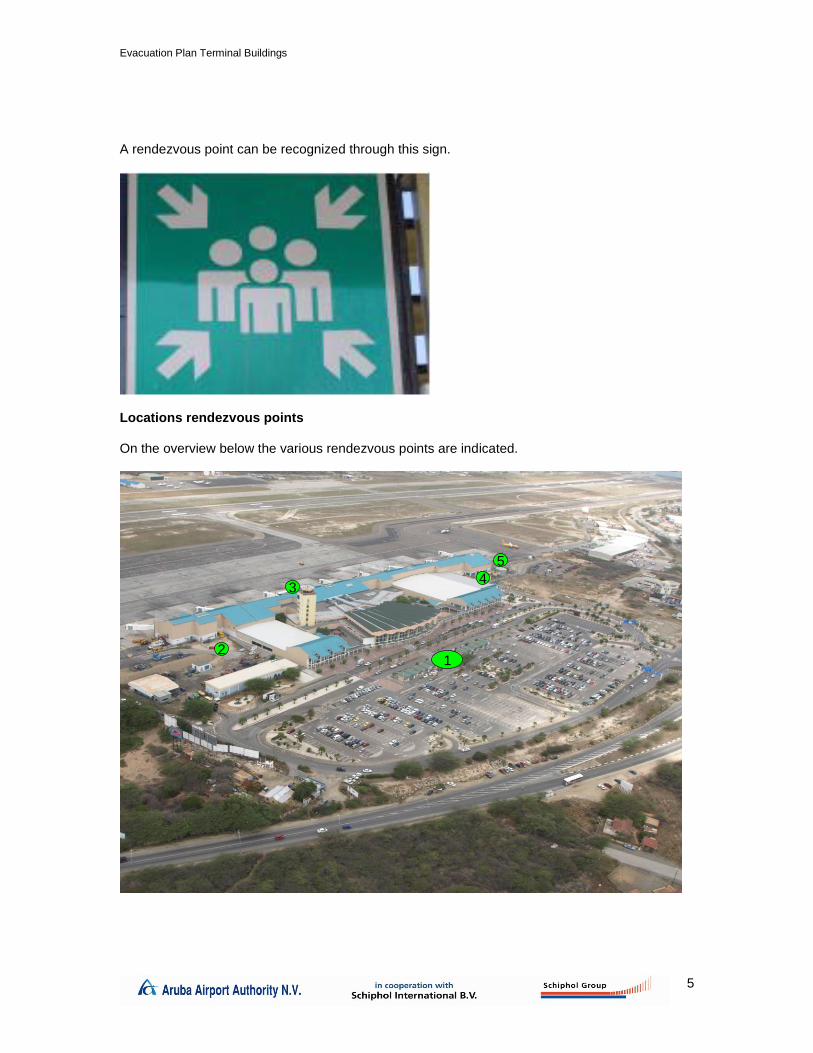
A rendezvous point can be recognized through this sign.
Locations rendezvous points On the overview below the various rendezvous points are indicated.
1
4
5
2
3

Evacuation Plan Terminal Buildings
6
Rendezvous point 1 Rendezvous point 1 is located in front of the terminal building in between the 2 car rental booth buildings.
Rendezvous point 2 Rendezvous point 2 is located on the airside on the north side of Building A.
Rendezvous point 3 Rendezvous point 3 is located on the airside near the Orlando Security Screening Point/ parking position # 3.
Evacuation Plan Terminal Buildings
7
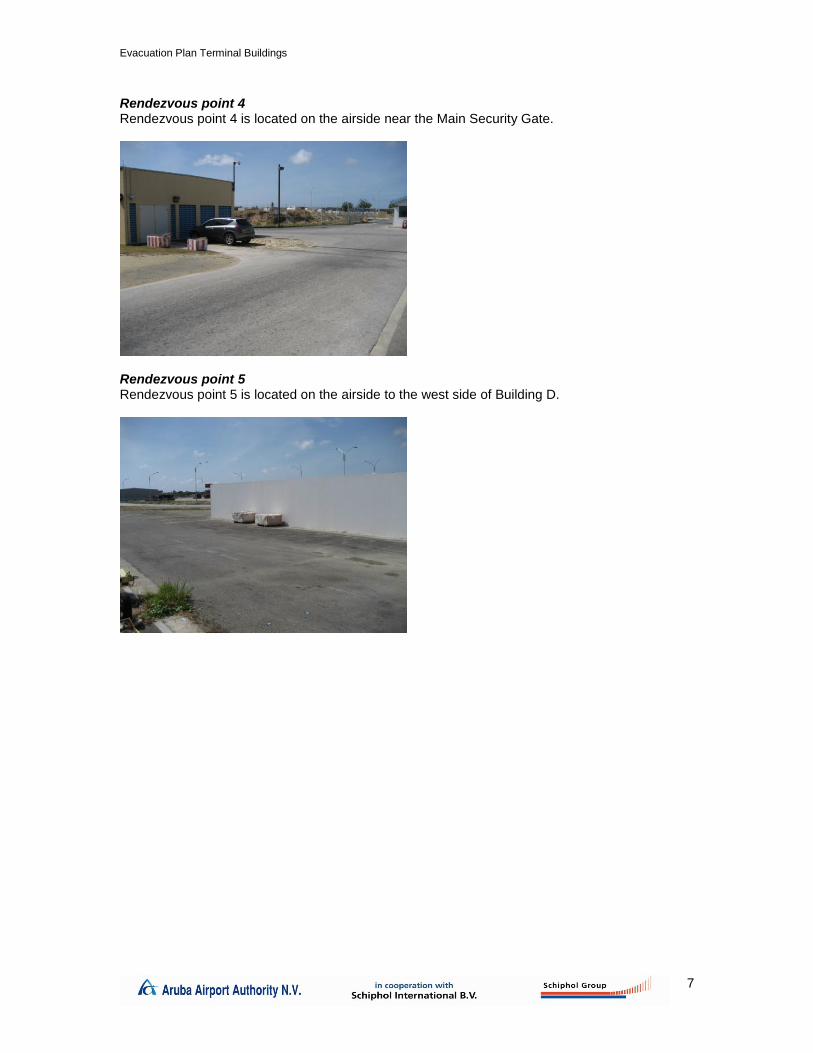
Rendezvous point 4 Rendezvous point 4 is located on the airside near the Main Security Gate.
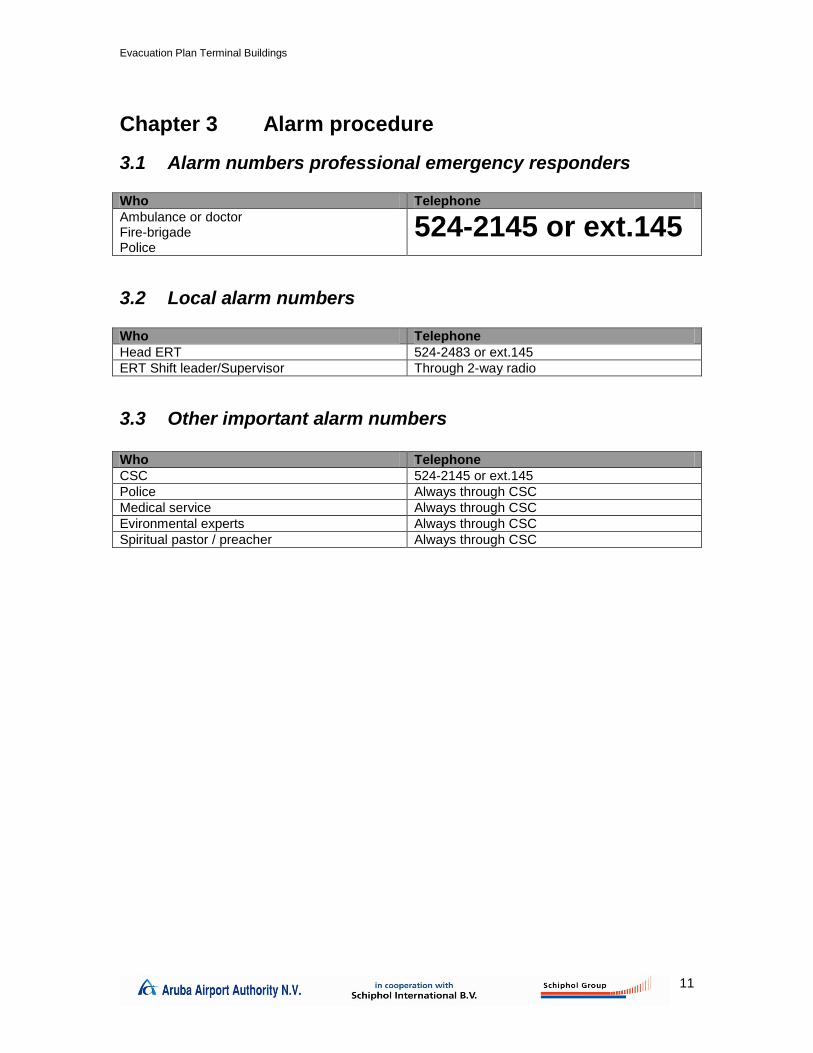
Rendezvous point 5 Rendezvous point 5 is located on the airside to the west side of Building D.

Evacuation Plan Terminal Buildings
8
Chapter 2 Building-, Installation- and Organizational data
2.1 Data of the building
Name Terminal Buildings
Type of Building Terminal
Address Wayaca z/n
Head ERT Chito Geerman
Tel. Number 524-2483
Opening hours 07.00 – 23.00 uur
The building is a terminal which renders various functions (commercial and non-commercial). The average amount of people present during opening hours in the building can vary heavily. During peak moments approximately 5000 people can be present in the building. During night hours it is possible that there are some people present within the office areas. In the building there are various main and emergency staircases/wells which end up onto landside areas and airside areas. During night hours (non-operational hours) many parts of the building are locked for security purposes
2.2 Alarm Notification There are various ways in which an alarm notification can be emitted in case of fire
o Through the automatic fire alarm notification. o Through the manual fire alarms. o Through telephone.
The evacuation installation can be activated in various ways o Automatically through the fire alarm notification installation. o Through the manual fire alarms. o CSC can activate the installation within the various building areas.
By means of the evacuation alarm installation the complete building can be evacuated.
The elevators do not automatically go to the groundfloor, except for the elevator located within the Tower Building.
It is prohibited to use elevators during emergency.

Evacuation Plan Terminal Buildings
9
2.3 ERT-organization
Persons The ERT organization consists of 29 persons of which 3 are ERT Shift leaders and one is Head ERT. See Chapter 10, Annex 1 for an overview of the ERT members. The complete ERT plan can be reviewed at the office of the Head ERT.
Communication The ERT organization communicates through 2-way radio. The communication diagram is indicated here below.
Aids and Appliances ERT cabinet: There are in total 13 ERT cabinets located throughout the various buildings on various floors.
The content of the ERT cabinet is as follows:
1x First Aid Kit
1x Megaphone
2x Cordon tapes
2x Safety helms
2x Safety goggles
2x Safety gloves
1x Flashlight
1x Hammer/screwdrivers/plyer
CSC
ERT SUPERVISOR/SHIFT
LEADER
EMERGENCY
RESPONSE OFFICER
EMERGENCY
RESPONSE OFFICER

Evacuation Plan Terminal Buildings
10
AED: There are in total 8 AED’s located throughout the various buildings on various floors.
* Exact locations can be requested from the Head ERT. Should someone observe that above indicated aids and appliances are missing or broken CSC should be contacted directly at ext.145 or telephone number 524-2145. The CSC officers will notify the ERT shift leader or the ERT officer on duty for further handling.
Evacuation Plan Terminal Buildings
11
Chapter 3 Alarm procedure
3.1 Alarm numbers professional emergency responders
Who Telephone
Ambulance or doctor Fire-brigade Police
524-2145 or ext.145
3.2 Local alarm numbers
Who Telephone
Head ERT 524-2483 or ext.145
ERT Shift leader/Supervisor Through 2-way radio
3.3 Other important alarm numbers
Who Telephone
CSC 524-2145 or ext.145
Police Always through CSC
Medical service Always through CSC
Evironmental experts Always through CSC
Spiritual pastor / preacher Always through CSC
Evacuation Plan Terminal Buildings
12
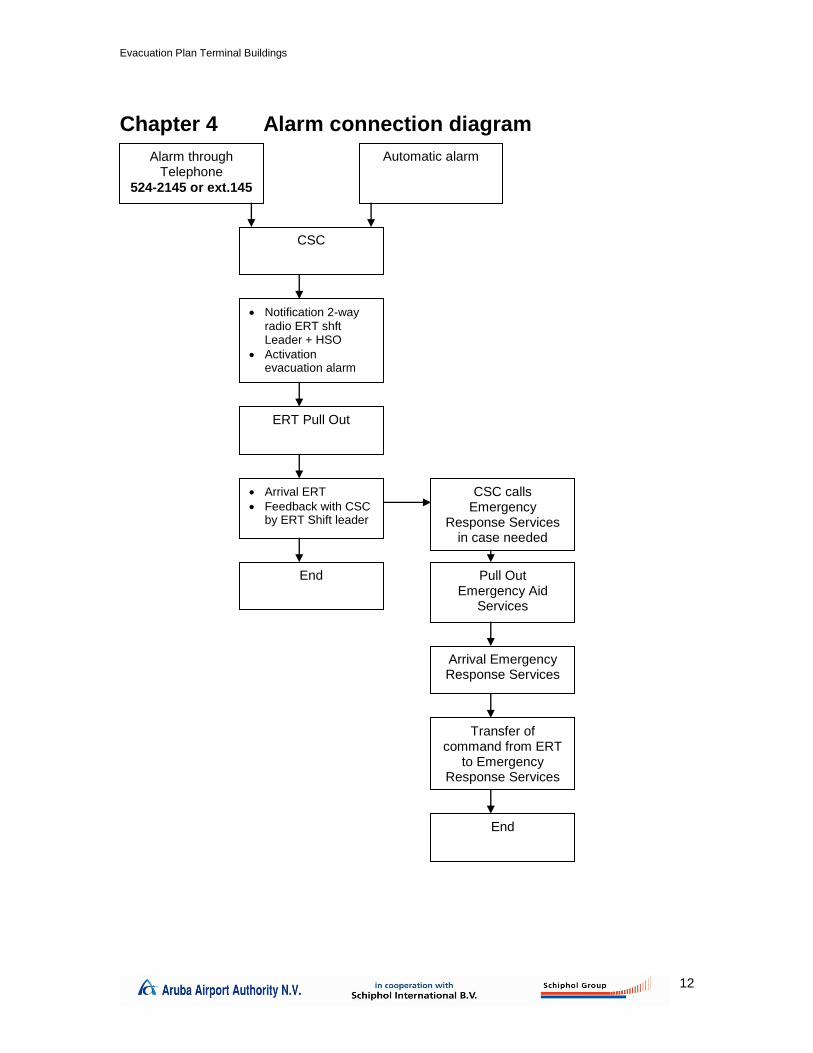
Chapter 4 Alarm connection diagram
Alarm through Telephone
524-2145 or ext.145
Automatic alarm
Pull Out Emergency Aid
Services
Arrival Emergency Response Services
Transfer of command from ERT
to Emergency Response Services
CSC calls Emergency
Response Services in case needed
CSC
Notification 2-way radio ERT shft Leader + HSO
Activation evacuation alarm
ERT Pull Out
Arrival ERT
Feedback with CSC by ERT Shift leader
End
End
Evacuation Plan Terminal Buildings
13
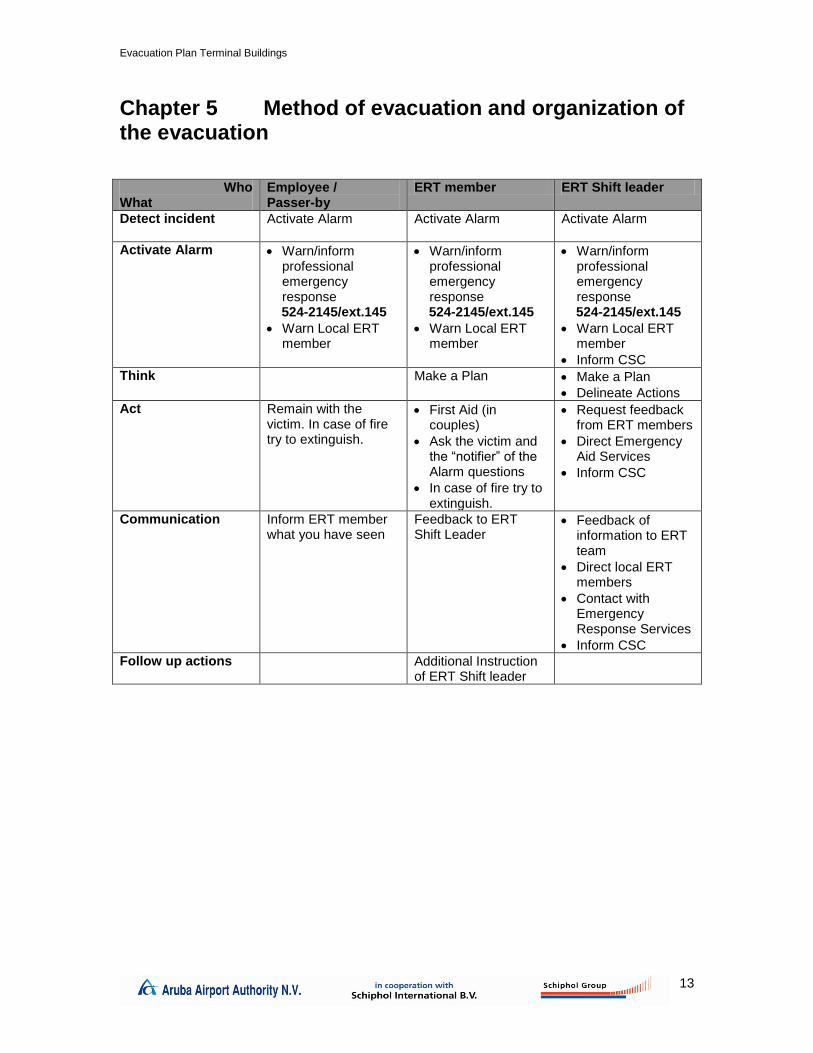
Chapter 5 Method of evacuation and organization of the evacuation
Who What
Employee / Passer-by
ERT member ERT Shift leader
Detect incident
Activate Alarm Activate Alarm Activate Alarm
Activate Alarm Warn/inform professional emergency response
524-2145/ext.145
Warn Local ERT member
Warn/inform professional emergency response
524-2145/ext.145
Warn Local ERT member
Warn/inform professional emergency response
524-2145/ext.145
Warn Local ERT member
Inform CSC
Think Make a Plan Make a Plan
Delineate Actions
Act Remain with the victim. In case of fire try to extinguish.
First Aid (in couples)
Ask the victim and the “notifier” of the Alarm questions
In case of fire try to extinguish.
Request feedback from ERT members
Direct Emergency Aid Services
Inform CSC
Communication Inform ERT member what you have seen
Feedback to ERT Shift Leader
Feedback of information to ERT team
Direct local ERT members
Contact with Emergency Response Services
Inform CSC
Follow up actions Additional Instruction of ERT Shift leader
Evacuation Plan Terminal Buildings
14
Chapter 6 How to act in case of incidents An attempt is made to indicate in each type of incident what is most important for the emergency assistance. The list is not complete and additions hereto can be communicated to the Head ERT or the ERT Shift Leader/Supervisor.
When acting always take into consideration the effect on your own safety.
Work in pair as much as possible.
6.1 Fire
1. Alarm notification
Notify the Fire-brigade through telephone number 524-2145 or ext.145 and indicate the location, nature and the extent of the fire.
2. Think Gather ERT team in a safe place near the incident (always think about your own safety).
3. Act
Start investigating the nature and the extent of the incident and evacuate the risk area (minimum of 2 ERT members). For evacuation the Evacuation Notice can be used (this will activate by pressing the manual fire alarm).
If possible start combating the fire by using the fire-extinguisher or the fire-hose if it is in its initial stage.
Procure for the saving of persons who are in danger and transport victims to a safe area.
Only move victims if there is direct danger and apply First Aid.
Prevent spreading: remove people, vehicles and dangerous goods from the (near) vicinity of the risk area (pressure retainers should be cooled).
Provide access to and assist professional Emergency Response Services. 4. Communication
The contractor is responsible to close off fuel dispensers, electrical connections, HVAC and ventilation through CSC 524-2145 or ext.145 . Request feedback!
Close of smoke and fire separators (in case needed through CSC 524-2145 or ext.145).
If (possible) danger is imminent for other parts of the building inform CSC 524-2145 or ext.145, they can arrange that the threatened areas are also evacuated.
Exchange information with the commander of the fire-brigade. 5. Follow up actions
Make and inventory of the victims and assist the victims with the evacuation of the employees/passengers to a safe location.
6.2 Bodily injury
1. Alarm notification Notify the ambulance/doctor through telephone number 524-2145 or ext.145 and indicate the location, nature and extent and the amount of victims as a result of the incident.
2. Think 3. Act
Procure for the saving of the persons that are in danger and transport the victim(s) only in case needed to a safe area in the vicinity and stabilize the victim(s).
Start with resuscitation in case of a heart attack or respiratory attack.
Safeguard a free respiratory function.
Cool wounds caused by fire.
Evacuation Plan Terminal Buildings
15
Ask the victim(s) for his/her name (note) and what happened. Also ask if victim uses medicine or if there are other issues that the emergency response service providers should be aware of.
Try to appease the victim as much as possible. 4. Communication
Procure that the professional Emergency Response Services are received and assisted and indicate clearly what you have found and what you have done up to then and why.
In case of dangerous substances/medicine give information on the substance (if possible at the first notification of the incident, if not as soon as possible).
5. Follow up actions
Protect victim(s) from onlookers as much as possible.
Procure assistance of the Emergency Response Service providers to the exit.
Procure information to concerned persons (head of organization, family).
Procure for cleaning of the polluted area.
6.3 Evacuation
1. Alarm notification
ERT Shift leaders/ ERT members and HSO are notified by CSC
They will proceed to the location of the alarm and determine if evacuation should be commenced (this can also be done automatically through the fire notification system).
2. Think
Determine which rendezvous point is applicable.
The ERT Shift leader/ERT member will go to the rendezvous point.
Remember your physically challenged colleagues and visitors/ passengers.
Gather at the determined rendezvous point or at a safe distance near the calamity (indicate different locations during convocation ERT members).
3. Act
The ERT member puts on a yellow ERT vest en makes sure that everyone (employees, visitors, and others) exit the building through the indicated escape routes and emergency exits.
The ERT member, the ERT Shift leader, the HSO or the fire-brigade give instruction to exit the building through the evacuation notice (manual fire alarm) (in case this was not activated yet).
Inspect all areas; restrooms, conference rooms should also be inspected on persons who might have stayed behind.
Close the doorways (of controlled areas) inside the building.
The ERT members will escort the persons and will provide further information.
Indicate where one should go (rendezvous point). 4. Communication
To personnel and users you say: “we need to evacuate the building”. This command means that all activities should be stopped and possible telephone calls should be ended with the sentence “we need to evacuate the building”.
Feedback from the ERT members to the ERT Shift Leader/HSO: when the area is evacuated return to the rendezvous point and inform the ERT Shift leader on your own acts (which area or part of the building was evacuated and indicate if there are any victims or any other relevant information).
Transfer to professional Emergency Response Services by ERT Shift leader. 5. Follow up actions
The ERT members will remain at the disposal of the ERT Shift leader.
Evacuation Plan Terminal Buildings
16
6.4 Dangerous substances
1. Alarm notification
CSC notifies the Fire-brigade/Environmental Department. Inform on possible substance data right away. This is recognizable from the danger label(s) (numbers on to of and under the orange labels).
ERT organization (ERT Shift leader, HSO and ERT members) are notified.
Fire-brigade, police and ambulance are notified through CSC 524-2145 or ext.145. Also indicate that it concerns an accident involving dangerous substances (and if known, which one(s)).
2. Think
ERT members and ERT Shift leader gather at the closest rendezvous point.
Own safety, use protective gear (for example gloves, boots, month and nose covers). 3. Act
Investigate the nature and extent of the incident (avoid long dwelling in the risk areas)
Evacuate the area at risk and make sure that the area at risk is closed off.
Try to stop leakage (in case of a central supply have the supply closed of by the responsible department).
Assure rescue of those in danger (do not provide mouth to mouth resuscitation).
Transport victims to a safe location and supervise until professional emergency aids arrive.
Victims that have been affected internally and externally by chemicals have to somehow be washed down with water (fire hose) and should not be given water to drink.
Do not remove clothing and beware of body temperature. 4. Communication
Transfer information to other (professional) emergency aids and indicate what has already happened/been determined.
5. Follow up action
Make sure the contaminated area is cleaned.
6.5 Bomb-threat Bomb threat procedure and form, (see Aerodrome Emergency Plan (AEP), Chapter 7).
1. Follow up action Depending on the investigation the following actions could or could not be necessary for the experts:
The ERT Shift Leader with the ERT members will prepare for the evacuation ( see Evacuation procedures)
The HSO will prevent unauthorized persons from coming near the location of the incident area.
The ERT Shift leader and ERT members will be responsible for informing the personnel
Evacuation Plan Terminal Buildings
17
6.6 Threat of danger from outside
In case danger threatens from outside and in case the evacuation to a safe area is not possible or not an option the building should be temporarily closed off for the outside.
1. Alarm notification
CSC 524-2415 or ext.145
ERT-organisation + HSO 2. Think
Gather ERT members
The HSO is internally in command with the assistance of the ERT shift leader and the ERT members and arranges the internal transfer of information.
3. Act
Close windows and doors. 4. Communication
Internal communication occurs by means of internal communication systems (telephone, PA system or other).
5. Follow up action
Make sure windows and doors are closed.
6.7 Other acts of unlawfull interference Do not take any responsibility!
2. Alarm notification
CSC 524-2145 or ext.145
ERT-organisation 3. Think 4. Acts
Do not agree with any demands
Note the time and all observations (see “AEP, chapter 7”). 5. Communication
Internal communication occurs by means of internal communication systems (telephone, PA system or other).
6. Follow up action Depending on the investigation the following actions could or could not be necessary for the experts:
The ERT Shift Leader with the ERT members will prepare for the evacuation( see Evacuation procedures)
The HSO will prevent unauthorized persons from coming near the location of the incident area.
The ERT Shift leader and ERT members will be responsible for informing the personnel.
Evacuation Plan Terminal Buildings
18
Chapter 7 Assignments and responsibilities
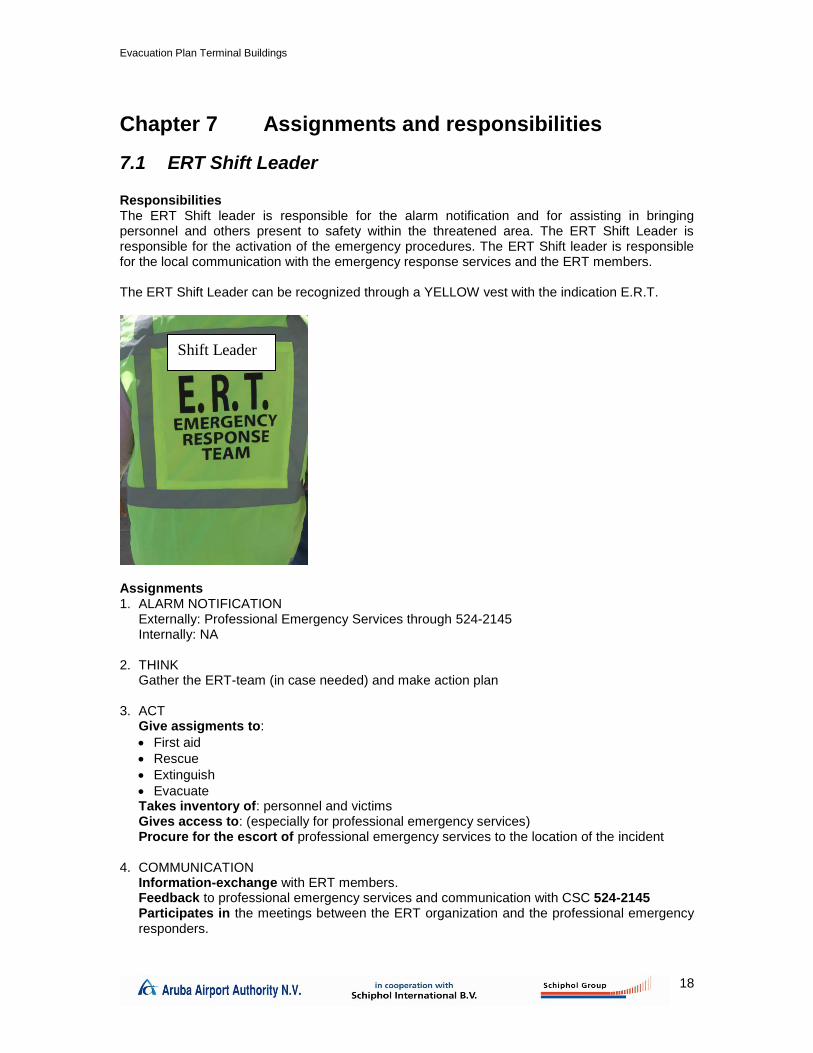
7.1 ERT Shift Leader Responsibilities The ERT Shift leader is responsible for the alarm notification and for assisting in bringing personnel and others present to safety within the threatened area. The ERT Shift Leader is responsible for the activation of the emergency procedures. The ERT Shift leader is responsible for the local communication with the emergency response services and the ERT members. The ERT Shift Leader can be recognized through a YELLOW vest with the indication E.R.T.
Assignments 1. ALARM NOTIFICATION
Externally: Professional Emergency Services through 524-2145 Internally: NA
2. THINK Gather the ERT-team (in case needed) and make action plan
3. ACT Give assigments to:
First aid
Rescue
Extinguish
Evacuate Takes inventory of: personnel and victims Gives access to: (especially for professional emergency services) Procure for the escort of professional emergency services to the location of the incident
4. COMMUNICATION Information-exchange with ERT members. Feedback to professional emergency services and communication with CSC 524-2145 Participates in the meetings between the ERT organization and the professional emergency responders.
Shift Leader
Evacuation Plan Terminal Buildings
19
5. FOLLOW UP ON ACTIONS Take care of possible needs of the evacuated personnel. Incident Report forms (IRF) should be completed and submitted to the Head ERT (see attachment). Reporting (evaluation form, see attached, indicate ERT deployment). Evaluate incident with the involved (external) parties. Takes care of the replenishment of the general provisions (such as content of ERT cabinets, AED).
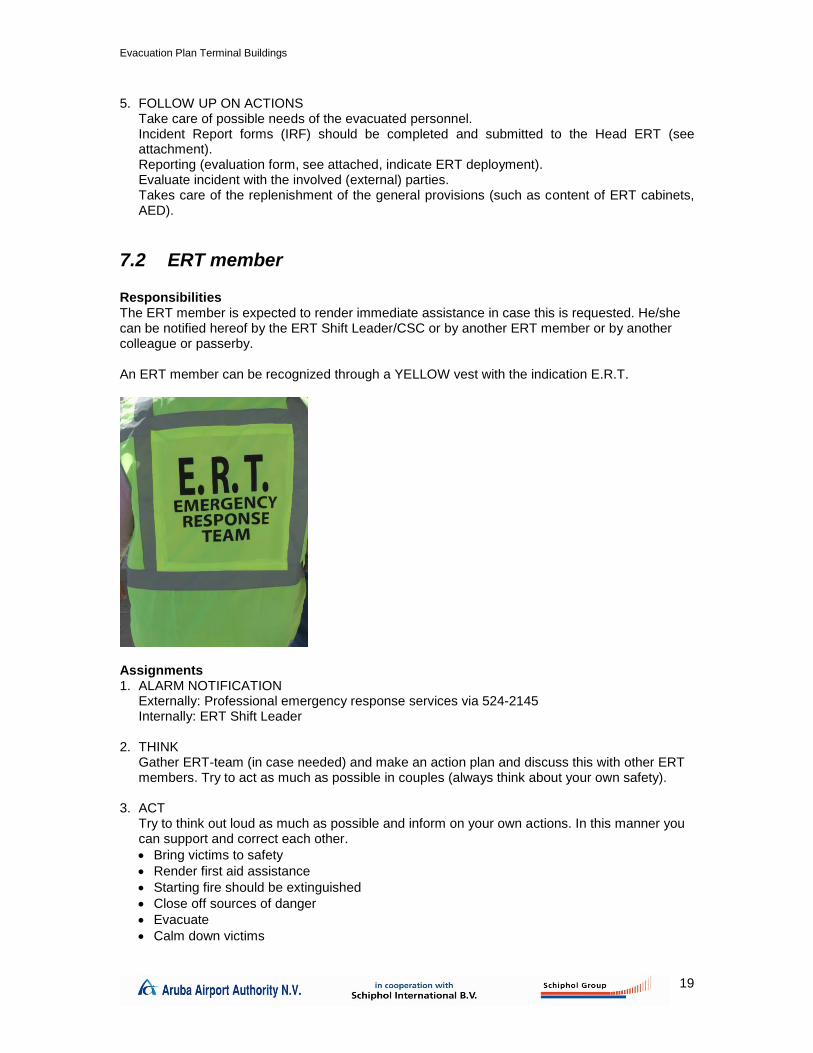
7.2 ERT member Responsibilities The ERT member is expected to render immediate assistance in case this is requested. He/she can be notified hereof by the ERT Shift Leader/CSC or by another ERT member or by another colleague or passerby. An ERT member can be recognized through a YELLOW vest with the indication E.R.T.
Assignments 1. ALARM NOTIFICATION
Externally: Professional emergency response services via 524-2145 Internally: ERT Shift Leader
2. THINK Gather ERT-team (in case needed) and make an action plan and discuss this with other ERT members. Try to act as much as possible in couples (always think about your own safety).
3. ACT Try to think out loud as much as possible and inform on your own actions. In this manner you can support and correct each other.
Bring victims to safety
Render first aid assistance
Starting fire should be extinguished
Close off sources of danger
Evacuate
Calm down victims
Evacuation Plan Terminal Buildings
20
Keep onlookers at a distance (close off incident area)
Follow indications of the ERT Shift Leader
4. COMMUNICATION Information-exchange with ERT members.
5. FOLLOW UP ACTIONS
Indicate if resources (for example fire extinguishing equipment) should be controlled, replaced or replenished. This information can be given to the local ERT Shift Leader. Own resources need to be replenished and replaced by the organization itself.
Reporting should be performed together with the ERT Shift Leader.
Evacuation Plan Terminal Buildings
21
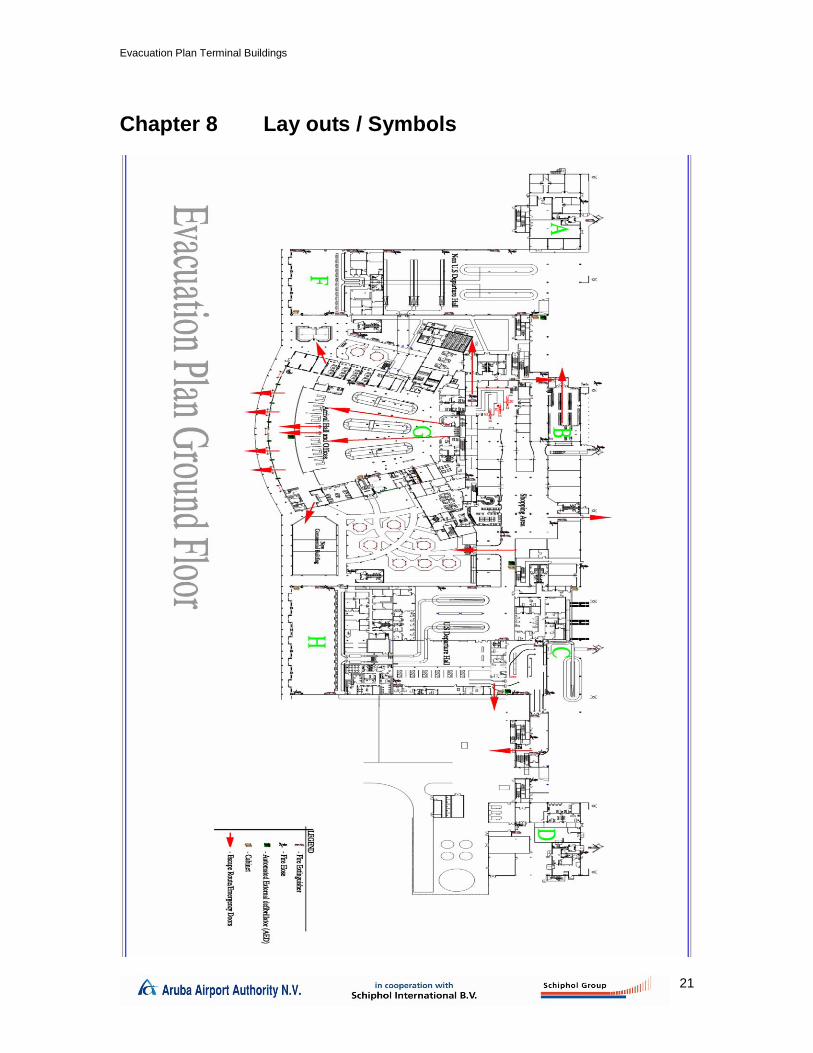
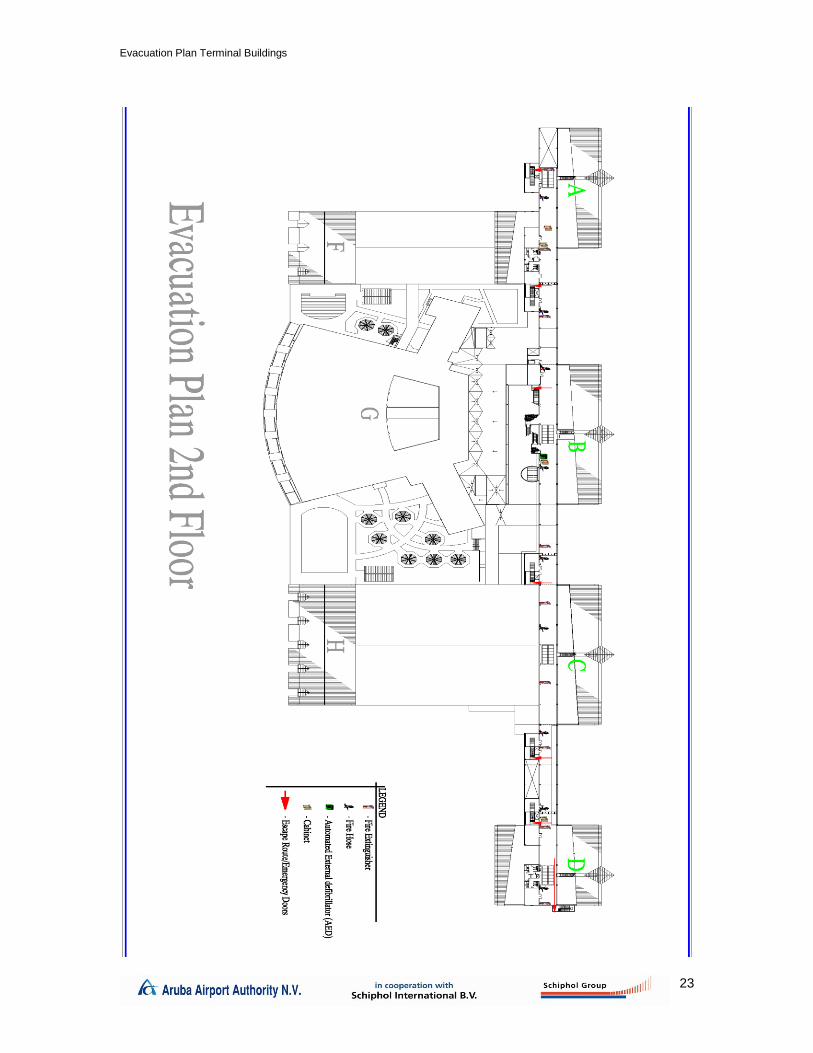
Chapter 8 Lay outs / Symbols

Evacuation Plan Terminal Buildings
22
Evacuation Plan Terminal Buildings
23
Evacuation Plan Terminal Buildings
24
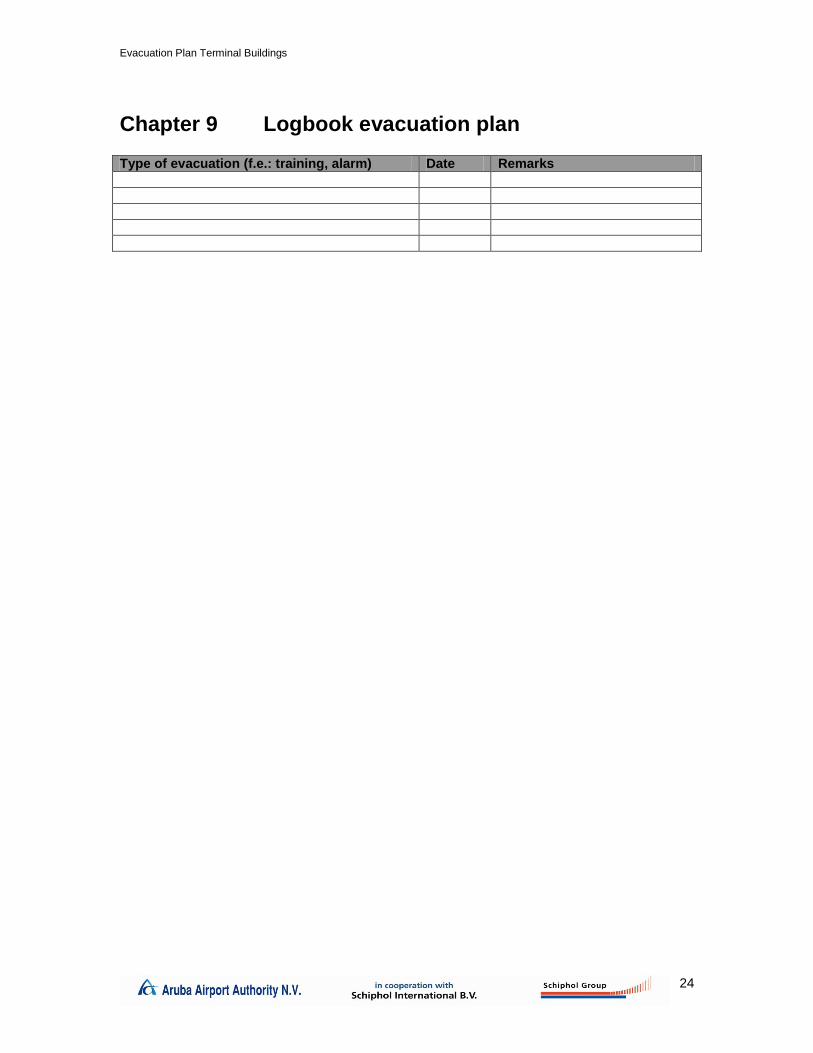
Chapter 9 Logbook evacuation plan
Type of evacuation (f.e.: training, alarm) Date Remarks
Evacuation Plan Terminal Buildings
25
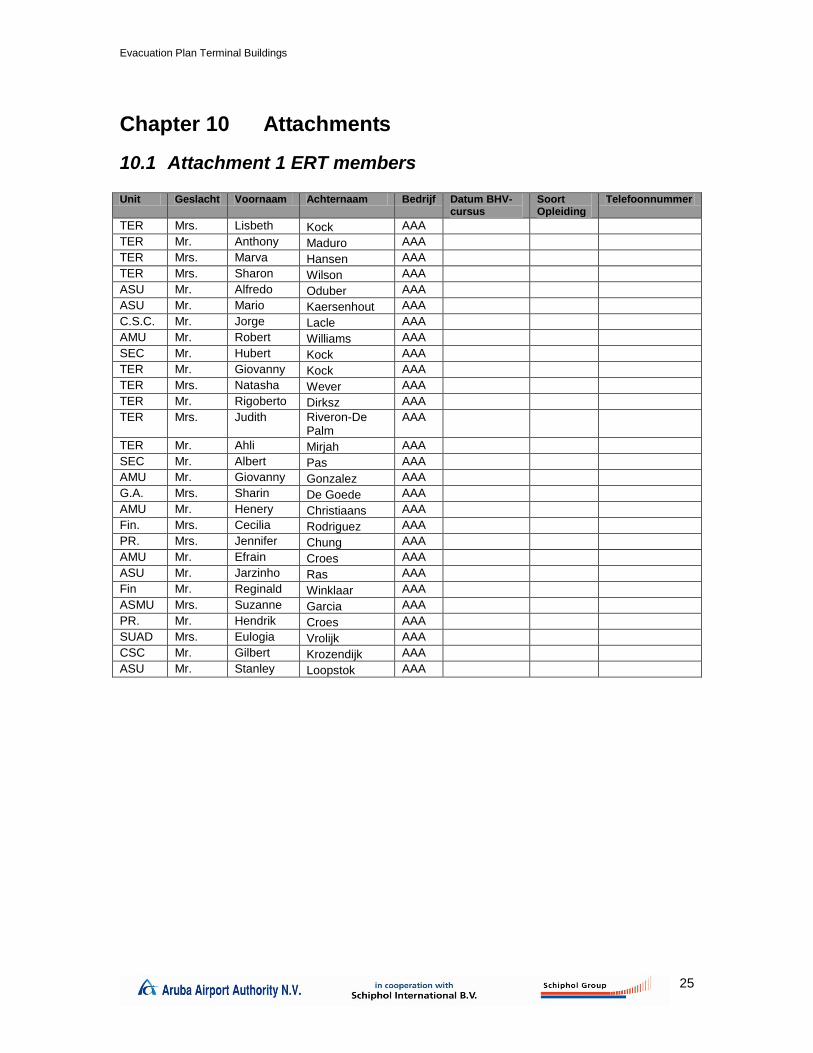
Chapter 10 Attachments
10.1 Attachment 1 ERT members Unit Geslacht Voornaam Achternaam Bedrijf Datum BHV-
cursus Soort Opleiding
Telefoonnummer
TER Mrs. Lisbeth Kock AAA TER Mr. Anthony Maduro AAA TER Mrs. Marva Hansen AAA TER Mrs. Sharon Wilson AAA ASU Mr. Alfredo Oduber AAA ASU Mr. Mario Kaersenhout AAA C.S.C. Mr. Jorge Lacle AAA AMU Mr. Robert Williams AAA SEC Mr. Hubert Kock AAA TER Mr. Giovanny Kock AAA TER Mrs. Natasha Wever AAA TER Mr. Rigoberto Dirksz AAA TER Mrs. Judith Riveron-De
Palm AAA
TER Mr. Ahli Mirjah AAA SEC Mr. Albert Pas AAA AMU Mr. Giovanny Gonzalez AAA G.A. Mrs. Sharin De Goede AAA AMU Mr. Henery Christiaans AAA Fin. Mrs. Cecilia Rodriguez AAA PR. Mrs. Jennifer Chung AAA AMU Mr. Efrain Croes AAA ASU Mr. Jarzinho Ras AAA Fin Mr. Reginald Winklaar AAA ASMU Mrs. Suzanne Garcia AAA PR. Mr. Hendrik Croes AAA SUAD Mrs. Eulogia Vrolijk AAA CSC Mr. Gilbert Krozendijk AAA ASU Mr. Stanley Loopstok AAA

Evacuation Plan Terminal Buildings
26
10.2 Attachment 2 IRF Form
Airport Emergency Response Team
Incident Registration Form “I.R.F.” FILL IN BY: …. ………
Date: Reported Time:
Who reported:
Location of incident: Description of incident:
First action taken Name: Time:
Assistance called? Yes/no
Government entities
Fire Department Min Professional assistance at location Ambulance Min
Police Min
Task executed Provided First Aid / Extinguished starting fire /Assisted with evacuation / *other action
Eventual Comment:.
* If yes, describe :
Result of action:
Response Time < 2 minutes
Y
x
N
If > 2 min reason hereof
Time finished:
Material used Personal/Cabinet Y N
Description
Replenish: Y N
Victim personal information
Name:
Telephone:
Address/Flight Info:
E:Mail:

Evacuation Plan Terminal Buildings
27
10.3 Attachment 4 Evaluation form ERT-action
Evaluation form for: Action / Excersice:
Organisation: Location:
Date: Time:
Responsibilities: supervise safety in general.
Yes
No
Remarks:
Safety in general:
Was there a correct estimation done of the nature and the gravity of the situation?
Was the evacuation done correctly?
Was the evacuation supervised correctly?
Were unnecessary risks taken during the evacuation, in particular within the stairwells?
Have the evacuated persons been guided to the rendezvous points?
Was their any attention given to the traffic when guidance was given to the rendezvous points?
Is attention given to safe/unsafe area?
Is the safe/unsafe area being closed off?
Is supervision given to the fact that persons are not allowed to access the unsafe area?
Have safety procedures been followed?
Have safety aids been used?
Have the extinguishers been used correctly?
Were the wounded assisted adequately (transport, treatment, transfer to the Emergency Response Services)?
Was attention given to the physically challenged (in case present)?
General Impression:
Were procedures strictly followed?
Was there enough experience and ability available?
Particularities:

Evacuation Plan Terminal Buildings
28
10.4 Attachment 5 List of definitions and abbreviations ERT Emergency Response Team ERT member Emergency Response Team member ERT Shift Leader ERT Shift Leader (arranges for the coordination and guidance of the ERT
members and is responsible for the communication with other shift leader(s), CSC and is the contact person for professional emergency services.
CSC Communication & Surveillance Center, also known as Charlie Charlie. This is the communication center of the Aruba Airport Authority. This is the central communication to the ERT organization and the emergency services.
HSO Head Security Officer