Can Breast Self-Examination Continue to Be Touted Justifiably as ...
Standard
Us� ��e
Advanced BreastExamination TrainerPart No: 40201
l imbsandthings.com�r m�e sk�� train ��uc� ��t
Limbs & Things Ltd.Sussex Street, St Philips
Bristol, BS2 0RA, [email protected]
+44 (0) 117 311 0500
Issue 1, November 2013
Part No: 065-970
© 2013 Limbs & Things
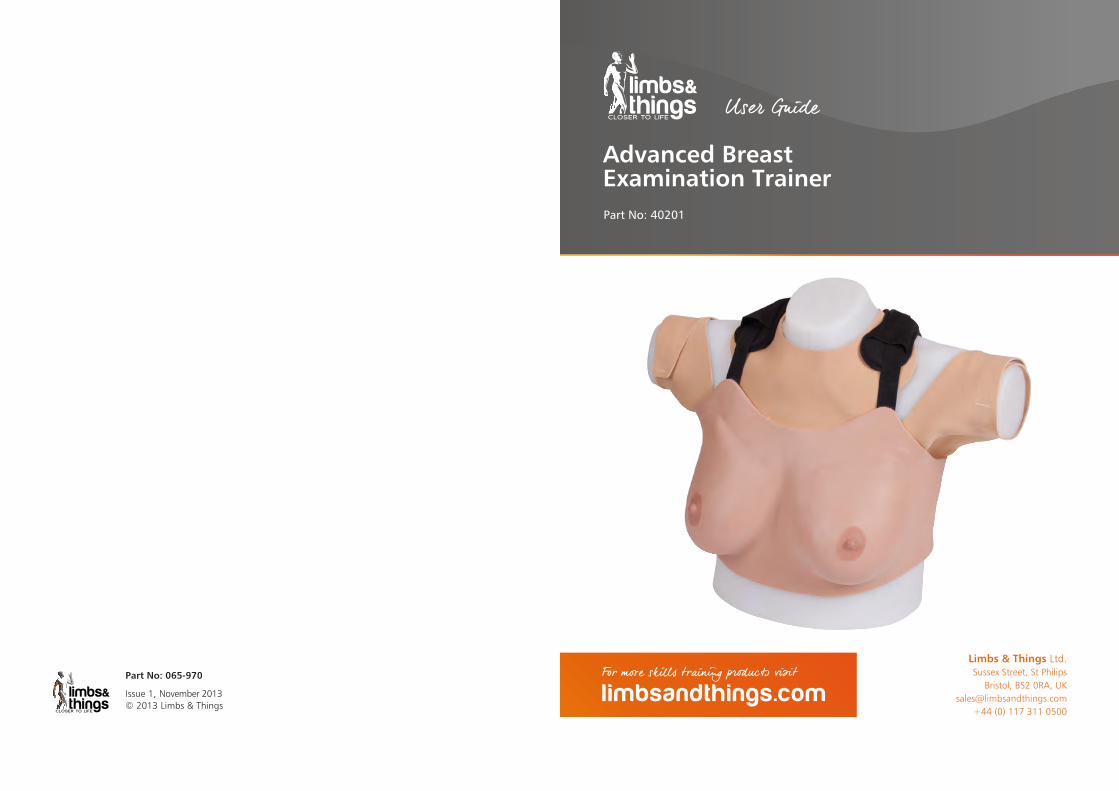
Advanced Breast Examination TrainerPart No: 40201
The Breast Examination Trainer provides a realistic platform for acquiring the delicate skillsrequired for Clinical Breast Examination (CBE). Consisting of realistic soft tissue, with theversatility of interchangeable pathologies, it can be used either as a bench top teaching aid, orworn by a simulated patient during student assessment. An ideal product for anyundergraduate programme running OSCEs, or healthcare professionals promoting bestpractice diagnostic skills to trainees and patients. This product has been designed in closecollaboration with Mr Peter Donnelly of Torbay Hospital, UK. With the help and advice of staffat the Clinical Skills Resource Centre, University of Liverpool and the Clinical Practice Centre, St James’s University Hospital, Leeds.
Skills• Clinical breast examination techniques (CBE & SBE)• Professional-to-patient communication • Identification of anatomical landmarks and lymph nodes (axillary, supra and infraclavicular)• Diagnosis of pathologies
Features• Soft tissue looks and feels realistic• Soft tissue breasts, with clavicular and axilla pads for lymph node placement • Comfortable to wear for long periods of time during OSCEs• Easy for the user to fit and remove• Dual purpose product: bench top and hybrid use• Pathologies supplied:- carcinomas: 2cm, 3cm, 5cm- cyst- fibrocystic disease- fibroadenoma
• Pathologies can be placed in various predetermined location points and are easilychangeable
• Hard torso available for bench top use• Latex free
Package supplied• Wearable Breasts• Torso• Pathologies• Lymph Node Pads
Notes
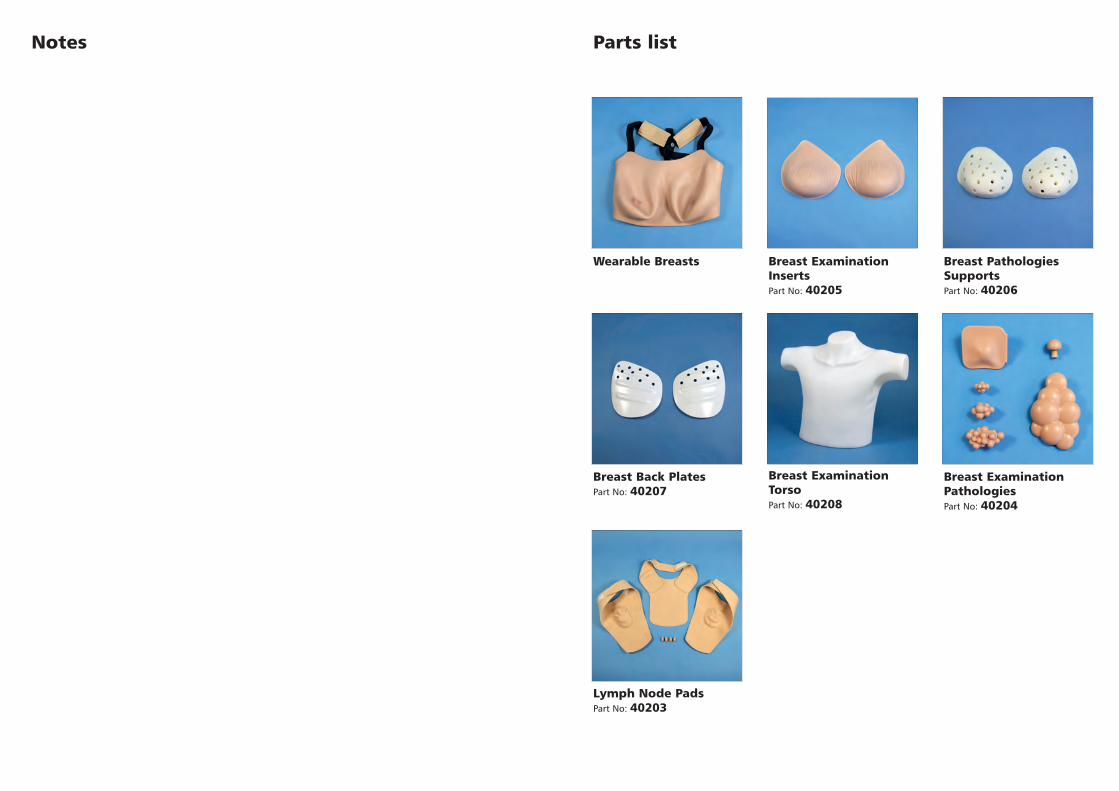
Parts list
Breast ExaminationInserts Part No: 40205
Breast ExaminationTorsoPart No: 40208
Wearable Breasts
Breast Back Plates Part No: 40207
Lymph Node PadsPart No: 40203
Breast PathologiesSupports Part No: 40206
Breast ExaminationPathologiesPart No: 40204
Notes
2
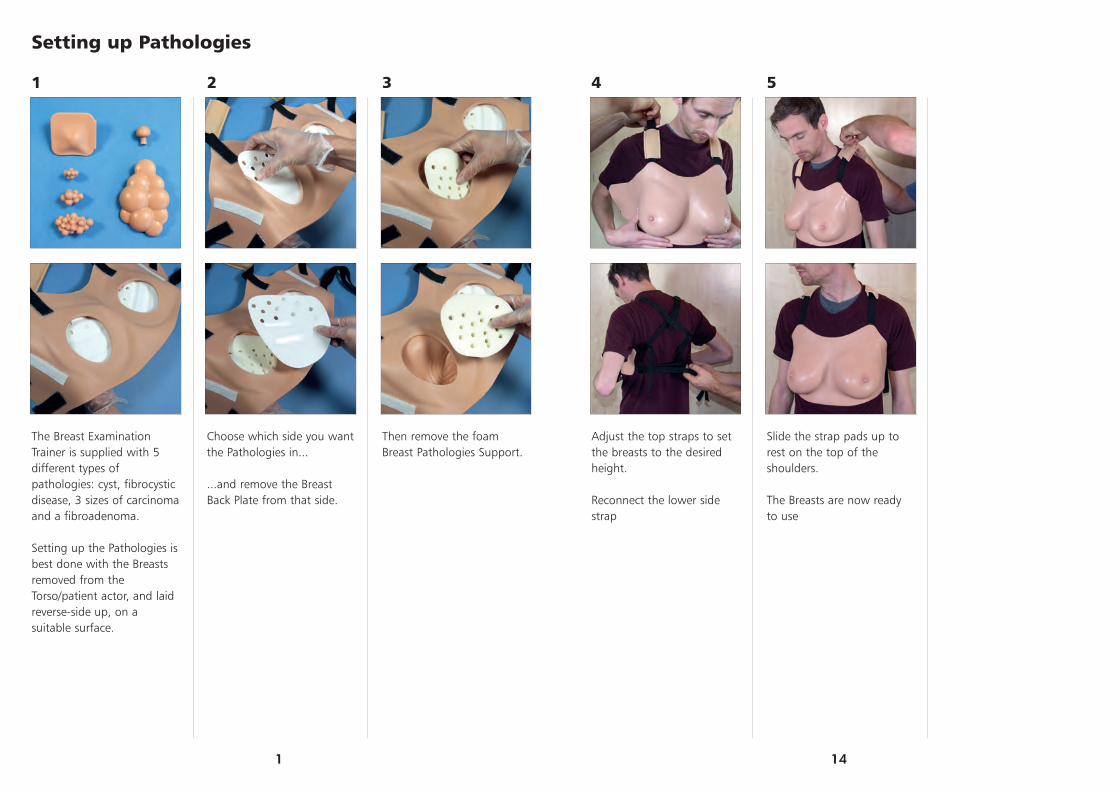
Choose which side you wantthe Pathologies in...
...and remove the BreastBack Plate from that side.
1
The Breast ExaminationTrainer is supplied with 5different types ofpathologies: cyst, fibrocysticdisease, 3 sizes of carcinomaand a fibroadenoma.
Setting up the Pathologies isbest done with the Breastsremoved from theTorso/patient actor, and laidreverse-side up, on asuitable surface.
3
Then remove the foamBreast Pathologies Support.
Setting up Pathologies
1
5
Slide the strap pads up torest on the top of theshoulders.
The Breasts are now readyto use
4
Adjust the top straps to setthe breasts to the desiredheight.
Reconnect the lower sidestrap
6
Ensu
14

5
Refit the Support.
Make sure the Support isrefitted in the correctorientation.
4
Select the Pathology youwant and insert it into theSupport.
You may need to rotate thepathology from side to sidewhilst pushing it into thefoam (the material it ismade from can stick to thefoam if it is only pushed in).
6
Select the Pathology youwant and insert it into thePlate.
Pathologies are easier toinsert into the rigid BackPlate.
2
2
Loop your wrists under theconnected top side straps.
Grasp the top straps.
1
Remove the wearableBreasts from the Torso.
Reconnect the upper sidebuckle leaving the lowerside free. NB: The pictureshows this on the Torsofor clarity. Ensure this isdone after the Breast isremoved from the Torso.
3
Holding both top straps, liftthe breasts...
...over the head.
Ensure both arms are in theloops formed between thetop straps and their upperside connection.
Fitting the Breast skin for wearable use
13

8
Work the lip of the recessaround the rest of the backPlate.
The Breasts are now readyto use.
7
Now replace the Back Plate.Make sure the Plate isrefitted in the correctorientation.
Replace the Plate byinserting the pointed endinto the recess first.
9
The Trainer is now ready tofit onto the Torso or SP(Standardized/SimulatedPatient).
3
2
Place the Node in the lowerpart of the pocket for aninfraclavicular node.
1
If attached, remove the Padfrom the rest of the Traineror the Standardised PatientThe pockets are on theunderside of the Pad.
Lift the slit and insert aLymph Node.
3
Place the Node in the upperpart of the pocket for asupraclavicular node.
Refit the Clavicle Pad to theTorso or StandardizedPatient and check theposition of the lymph node.
Fitting Lymph Nodes in the Clavicle Pad
12
2
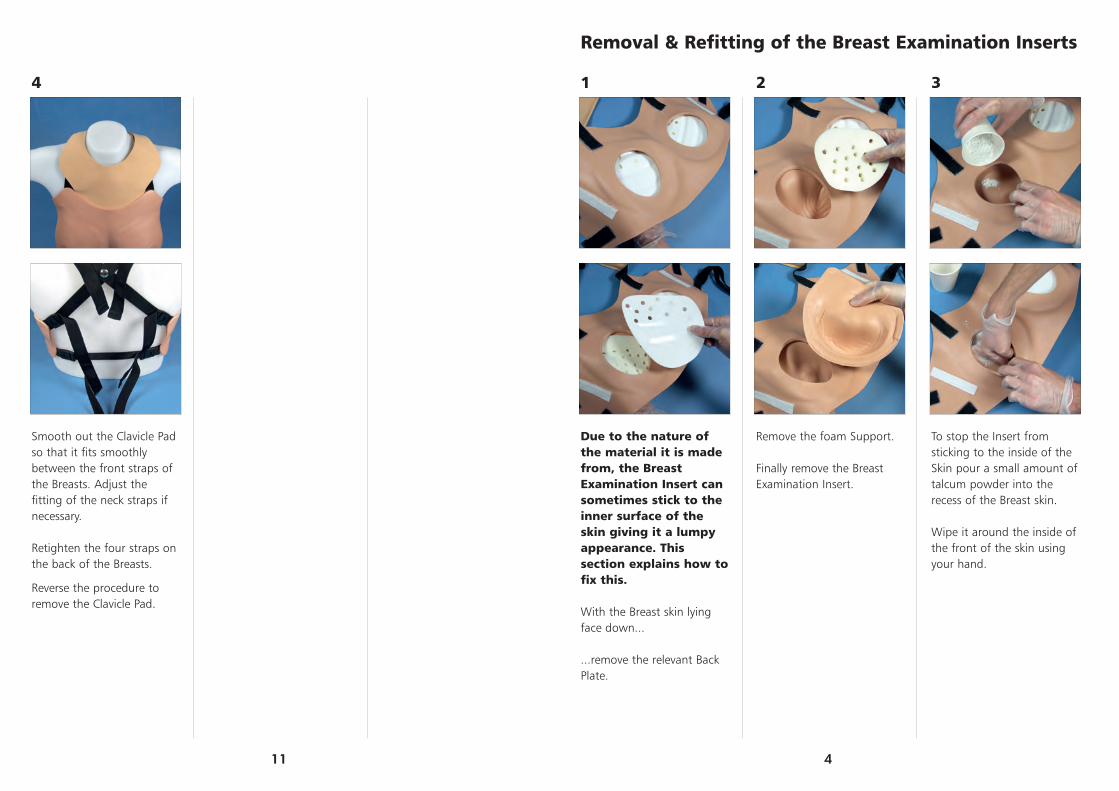
Remove the foam Support.
Finally remove the BreastExamination Insert.
1
Due to the nature ofthe material it is madefrom, the BreastExamination Insert cansometimes stick to theinner surface of theskin giving it a lumpyappearance. Thissection explains how tofix this.
With the Breast skin lyingface down...
...remove the relevant BackPlate.
3
To stop the Insert fromsticking to the inside of theSkin pour a small amount oftalcum powder into therecess of the Breast skin.
Wipe it around the inside ofthe front of the skin usingyour hand.
Removal & Refitting of the Breast Examination Inserts
4
5
The
4
Smooth out the Clavicle Padso that it fits smoothlybetween the front straps ofthe Breasts. Adjust thefitting of the neck straps ifnecessary.
Retighten the four straps onthe back of the Breasts.
Reverse the procedure toremove the Clavicle Pad.
6
Ensu
11
5
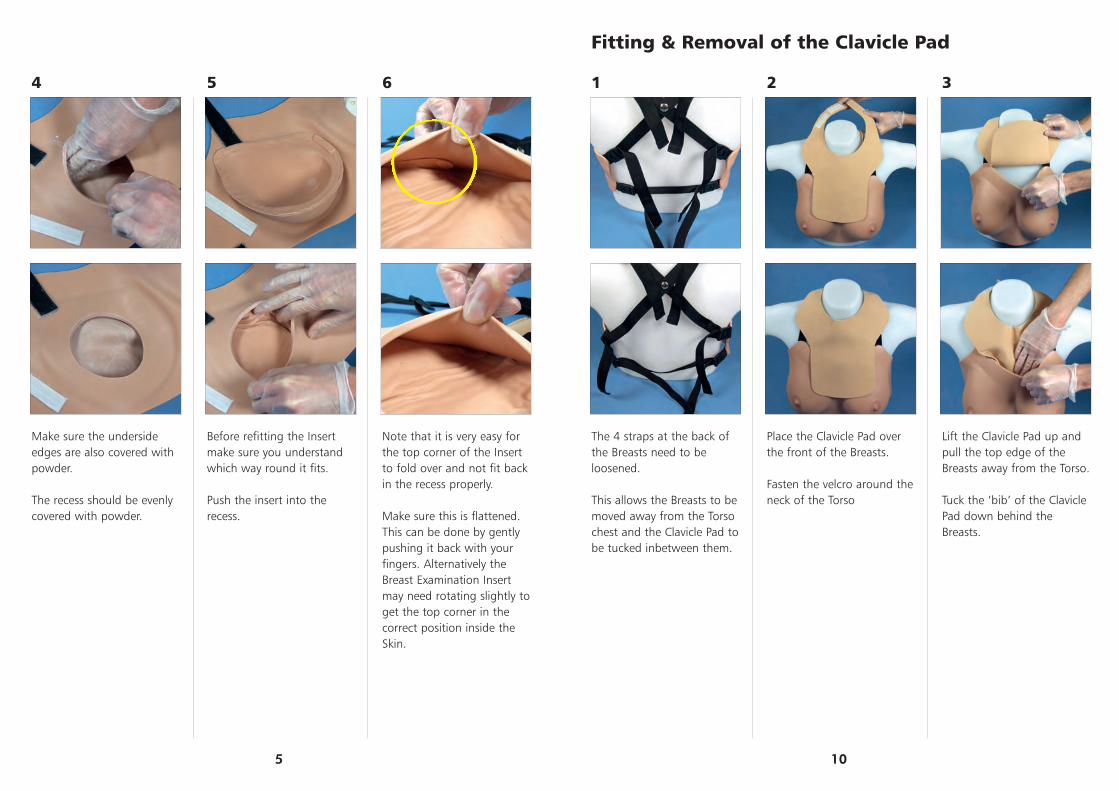
Before refitting the Insertmake sure you understandwhich way round it fits.
Push the insert into therecess.
4
Make sure the undersideedges are also covered withpowder.
The recess should be evenlycovered with powder.
6
Note that it is very easy forthe top corner of the Insertto fold over and not fit backin the recess properly.
Make sure this is flattened.This can be done by gentlypushing it back with yourfingers. Alternatively theBreast Examination Insertmay need rotating slightly toget the top corner in thecorrect position inside theSkin.
5
2
Place the Clavicle Pad overthe front of the Breasts.
Fasten the velcro around theneck of the Torso
1
The 4 straps at the back ofthe Breasts need to beloosened.
This allows the Breasts to bemoved away from the Torsochest and the Clavicle Pad tobe tucked inbetween them.
3
Lift the Clavicle Pad up andpull the top edge of theBreasts away from the Torso.
Tuck the ‘bib’ of the ClaviclePad down behind theBreasts.
Fitting & Removal of the Clavicle Pad
10
2
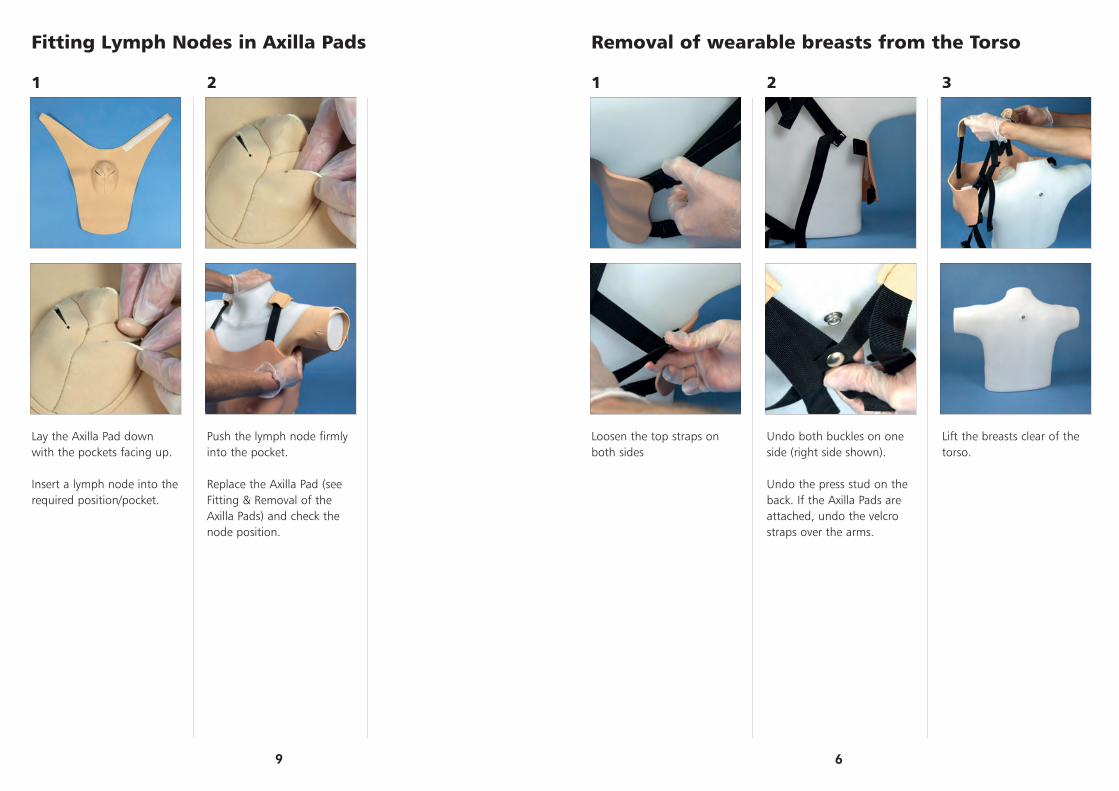
Undo both buckles on oneside (right side shown).
Undo the press stud on theback. If the Axilla Pads areattached, undo the velcrostraps over the arms.
1
Loosen the top straps onboth sides
3
Lift the breasts clear of thetorso.
Removal of wearable breasts from the Torso
6
2
Push the lymph node firmlyinto the pocket.
Replace the Axilla Pad (seeFitting & Removal of theAxilla Pads) and check thenode position.
1
Lay the Axilla Pad downwith the pockets facing up.
Insert a lymph node into therequired position/pocket.
3
Ensu
Fitting Lymph Nodes in Axilla Pads
9

2
...and place it in the axilla.
Hold the axilla pad inposition and roll the innerstrap over the top of thearm.
1
The process describedin this section appliesto both Torso andSimulated Patient.
Start by undoing both clipson the side of the Breastsyou intend to fit the AxillaPad to.
Support the Pad with yourhand...
3
Hold the strap in place withyour thumb.
Bring the outer straparound. Make sure thevelcro strips engage.
Fitting & Removal of the Axilla Pads
7
5
Bring the side of the Breastsback over the lower part ofthe Pad.
Reconnect the upper strapon the back of the Breasts.
4
The Pad is now in place.
Now bring the side of theBreasts forward and pushthe lower part of the padagainst the side of theTorso.
6
Reconnect the lower strapon the back of the Breasts.
Check that the Axilla Pad iscorrectly oriented within theTorso armpit. The Pad canbe repositioned by reversingthe stages.
8