Adult Stitching Series - egausa.org · The Embroiderers’ Guild of America The Embroiderers' Guild...
74
The Embroiderers’ Guild of America, Inc. Adult Stitching Series An Outreach and Marketing Tool for Chapters Created by The Gulfview Chapter Copyright 2008 All Rights Reserved. This publication is for the exclusive use of The Embroiderers’ Guild of America chapters and regions.
-
Upload
nguyentram -
Category
Documents
-
view
215 -
download
0
Transcript of Adult Stitching Series - egausa.org · The Embroiderers’ Guild of America The Embroiderers' Guild...
The Embroiderers’ Guild of America, Inc.
Adult Stitching Series An Outreach and Marketing Tool for Chapters
Created by
The Gulfview Chapter
Copyright 2008 All Rights Reserved. This publication is for the exclusive use of The Embroiderers’ Guild of America
chapters and regions.
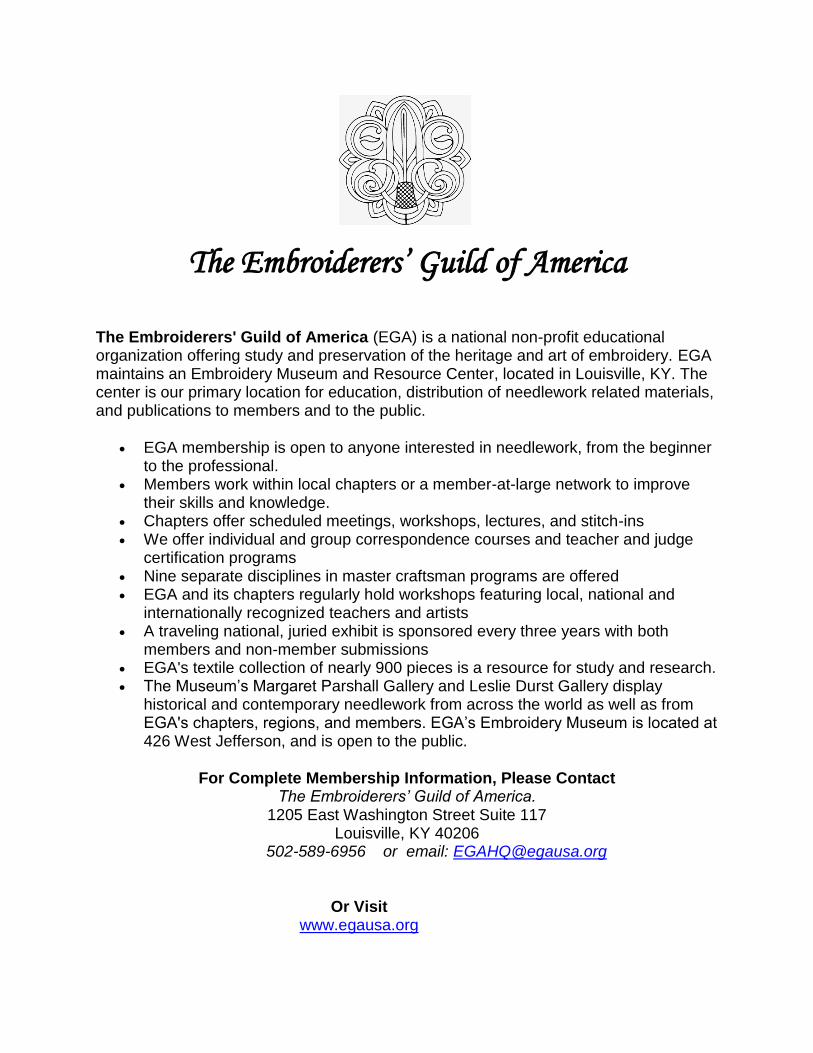
The Embroiderers’ Guild of America
The Embroiderers' Guild of America (EGA) is a national non-profit educational organization offering study and preservation of the heritage and art of embroidery. EGA maintains an Embroidery Museum and Resource Center, located in Louisville, KY. The center is our primary location for education, distribution of needlework related materials, and publications to members and to the public.
EGA membership is open to anyone interested in needlework, from the beginner to the professional.
Members work within local chapters or a member-at-large network to improve their skills and knowledge.
Chapters offer scheduled meetings, workshops, lectures, and stitch-ins We offer individual and group correspondence courses and teacher and judge
certification programs Nine separate disciplines in master craftsman programs are offered EGA and its chapters regularly hold workshops featuring local, national and
internationally recognized teachers and artists A traveling national, juried exhibit is sponsored every three years with both
members and non-member submissions EGA's textile collection of nearly 900 pieces is a resource for study and research. The Museum’s Margaret Parshall Gallery and Leslie Durst Gallery display
historical and contemporary needlework from across the world as well as from EGA's chapters, regions, and members. EGA’s Embroidery Museum is located at 426 West Jefferson, and is open to the public.
For Complete Membership Information, Please Contact The Embroiderers’ Guild of America.
1205 East Washington Street Suite 117 Louisville, KY 40206
502-589-6956 or email: [email protected]
Or Visit
www.egausa.org
Introduction Stitching Series
Approximately a year ago, the Pasco County Regional Library presented the Gulfview Chapter with a
challenge; design a beginning needlework class. The audience was to be adults and older teens.
Classes needed to be held in the evening, one night a week and span 4 to 6 weeks.
This turned out to be a wonderful opportunity for our chapter in terms of an outreach project. In
addition to pursuing one of our chapter goals (to preserve the art of needlework), we received a
great deal of exposure and opportunities to attract new members.
This CD contains all the information and documents you will need to get started with this program.
These documents are not in PDF format, so any changes that you may find necessary can be made
by transferring them to a PC. In fact, you are encouraged to personalize this program to suit your
chapter’s needs.
The design process included the following goals:
1. Create a course that is “turn-key” and ready-to-go when it is needed.
2. Allow a variety of teachers to participate.
3. Standardize all materials so that students experience consistency.
4. Present information in a variety of ways to appeal to the way students learn; visual,
auditory, demonstration & hands-on.
5. Present a variety of techniques to enhance needlework appreciation.
6. Provide a project opportunity that can be completed in a reasonably short time.
An important benefit of this program is the opportunity to use individual modules to attract
prospective members. Guests attending stitch-ins or other chapter meetings can be exposed to a
module of their choice. For example, we have met many cross-stitchers that would like to move on
to something else. In this case, the Hardanger and Canvas projects have been popular choices. We
started this aspect of the program in February, 2007 and by mid-March, we acquired three new
members.
On behalf of the Gulfview Chapter, Sun Region, we sincerely hope you enjoy this program.

Stitching Series
Getting Started
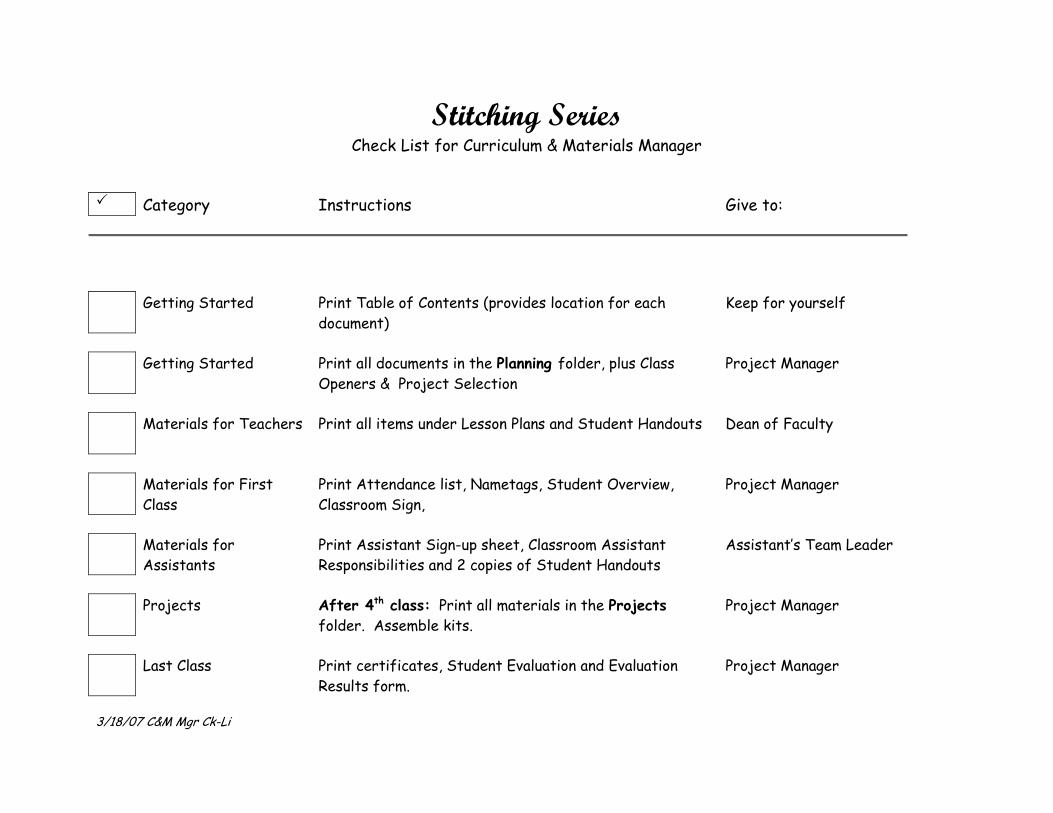
Stitching Series Check List for Curriculum & Materials Manager
Category Instructions Give to:
Getting Started Print Table of Contents (provides location for each
document)
Keep for yourself
Getting Started Print all documents in the Planning folder, plus Class
Openers & Project Selection
Project Manager
Materials for Teachers Print all items under Lesson Plans and Student Handouts Dean of Faculty
Materials for First
Class
Print Attendance list, Nametags, Student Overview,
Classroom Sign,
Project Manager
Materials for
Assistants
Print Assistant Sign-up sheet, Classroom Assistant
Responsibilities and 2 copies of Student Handouts
Assistant’s Team Leader
Projects After 4th class: Print all materials in the Projects
folder. Assemble kits.
Project Manager
Last Class Print certificates, Student Evaluation and Evaluation
Results form.
Project Manager
3/18/07 C&M Mgr Ck-Li
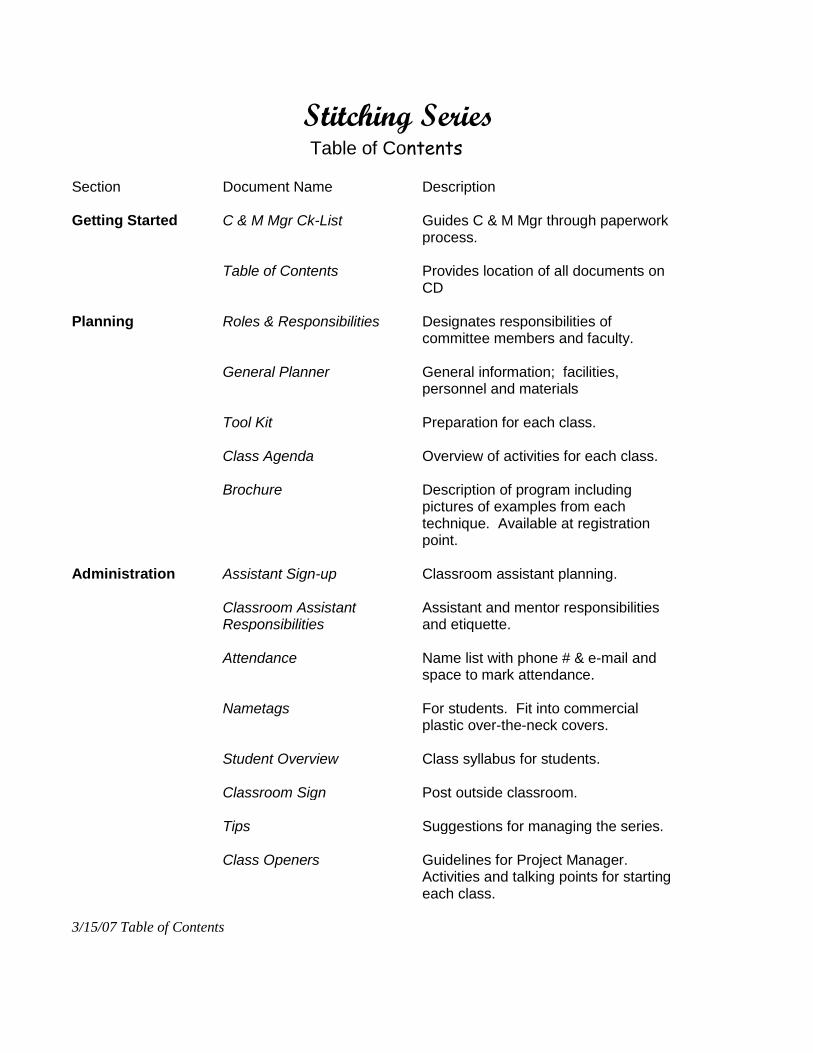
Stitching Series Table of Contents
Section Document Name Description
Getting Started C & M Mgr Ck-List Guides C & M Mgr through paperwork process.
Table of Contents
Provides location of all documents on CD
Planning Roles & Responsibilities Designates responsibilities of committee members and faculty.
General Planner
General information; facilities, personnel and materials
Tool Kit
Preparation for each class.
Class Agenda
Overview of activities for each class.
Brochure
Description of program including pictures of examples from each technique. Available at registration point.
Administration Assistant Sign-up Classroom assistant planning.
Classroom Assistant Responsibilities
Assistant and mentor responsibilities and etiquette.
Attendance
Name list with phone # & e-mail and space to mark attendance.
Nametags
For students. Fit into commercial plastic over-the-neck covers.
Student Overview
Class syllabus for students.
Classroom Sign
Post outside classroom.
Tips
Suggestions for managing the series.
Class Openers
Guidelines for Project Manager. Activities and talking points for starting each class.
3/15/07 Table of Contents
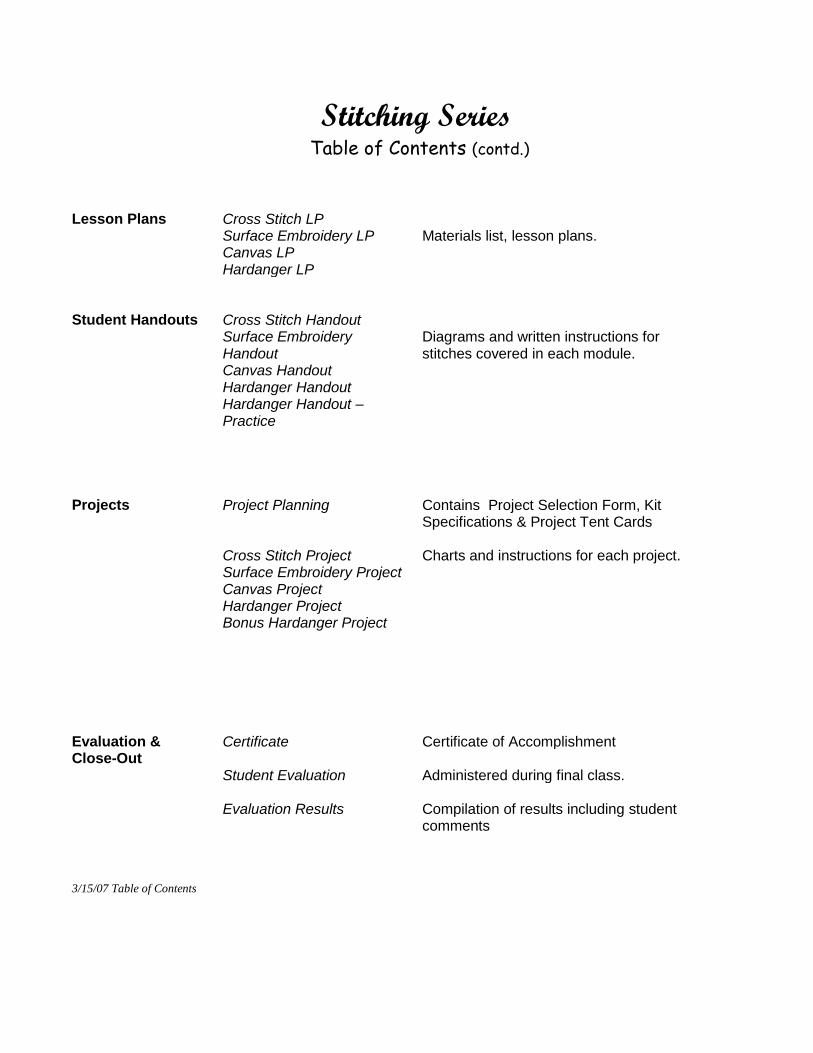
Stitching Series Table of Contents (contd.)
Lesson Plans Cross Stitch LP
Materials list, lesson plans. Surface Embroidery LP Canvas LP Hardanger LP
Student Handouts Cross Stitch Handout Diagrams and written instructions for stitches covered in each module.
Surface Embroidery Handout Canvas Handout Hardanger Handout Hardanger Handout – Practice
Projects Project Planning Contains Project Selection Form, Kit Specifications & Project Tent Cards
Cross Stitch Project Surface Embroidery Project Canvas Project Hardanger Project Bonus Hardanger Project
Charts and instructions for each project.
Evaluation & Certificate Certificate of Accomplishment Close-Out
Student Evaluation Administered during final class.
Evaluation Results
Compilation of results including student comments
3/15/07 Table of Contents

Stitching Series
Planning

Stitching Series Roles and Responsibilities
Committee
Members
Project
Manager
Arranges classroom location and facilities.
Oversees all aspects of the program. Speaks to
students at beginning and end of each class.
Curriculum &
Materials
Manager
Prints and distributes all written materials (lesson
plans, student handouts, kit instructions and
administrative paperwork. Assembles materials
and prepares class and project kits.
Dean of
Faculty
Selects teachers and distributes student’s class
kits (fabric & threads) in advance of class.
Assistant’s
Team Leader
Schedules appropriate number of assistants. For
each class or project night.
Conducts briefings, distributes “Classroom
Assistant’s Responsibilities” handout.
Photography &
Signs
Takes digital photographs throughout series.
Creates necessary signs for classrooms or advance
publicity.
Faculty Teachers Team teaching concept: Each teacher teaches one
class.
Assistants &
Project
Mentors
For consistency, assistants re encouraged to
participate in as many classes or “project nights”
as possible. Responsible for supporting the
teacher, observing students, assisting them when
needed and generally following established
procedures.
2/10/07 Roles and Responsibilities

Stitching Series Planner (General)
Committee Project Manager:
Curriculum & Materials Manager:
Dean of Faculty:
Assistant’s Team Leader:
Photography & Signs
Teachers (4):
1,
2.
3.
4.
Assistants (4-6 per class, additional for mentoring) (sign-up sheet)
Dates:
Times:
Location:
Facilities:
Students
Older teens and adults (16 years or older) **
Maximum class size: 12 to 13 (overbook registration to 13 or 14)
Curriculum
Four basic techniques presented (one each for the first four weeks)
Cross Stitch
Surface Embroidery
Canvas
Hardanger
Students will select one of the above techniques for their “project”
for the 5th and 6th weeks.
Materials
Fabric, floss, pearl cotton, needles, scissors, hoops etc., donated by
chapter.
Advertising Poster in library (or public meeting place) lobby. Brochure with details
produced by chapter located at reference desk.
Various forms of advertisement by library and chapter such as
newspapers.
Registration Registration conducted by library. 3/15/07 General Planner
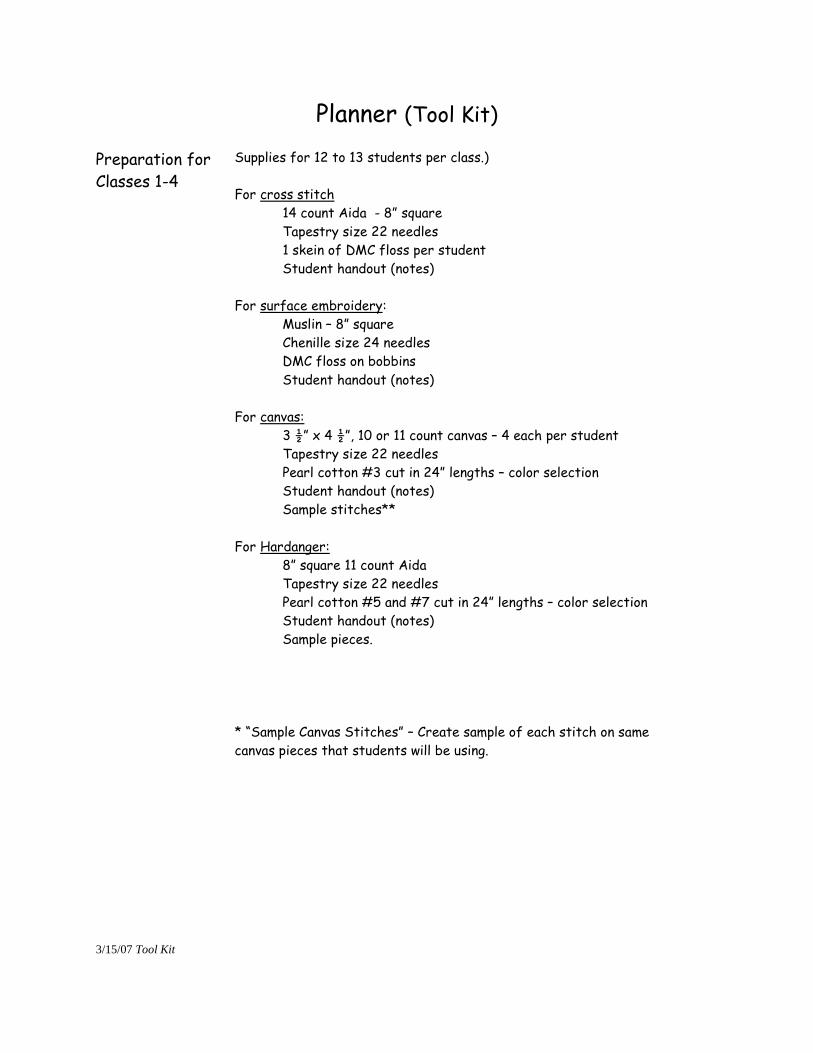
Planner (Tool Kit)
Preparation for
Classes 1-4
Supplies for 12 to 13 students per class.)
For cross stitch
14 count Aida - 8” square
Tapestry size 22 needles
1 skein of DMC floss per student
Student handout (notes)
For surface embroidery:
Muslin – 8” square
Chenille size 24 needles
DMC floss on bobbins
Student handout (notes)
For canvas:
3 ½” x 4 ½”, 10 or 11 count canvas – 4 each per student
Tapestry size 22 needles
Pearl cotton #3 cut in 24” lengths – color selection
Student handout (notes)
Sample stitches**
For Hardanger:
8” square 11 count Aida
Tapestry size 22 needles
Pearl cotton #5 and #7 cut in 24” lengths – color selection
Student handout (notes)
Sample pieces.
* “Sample Canvas Stitches” – Create sample of each stitch on same
canvas pieces that students will be using.
3/15/07 Tool Kit
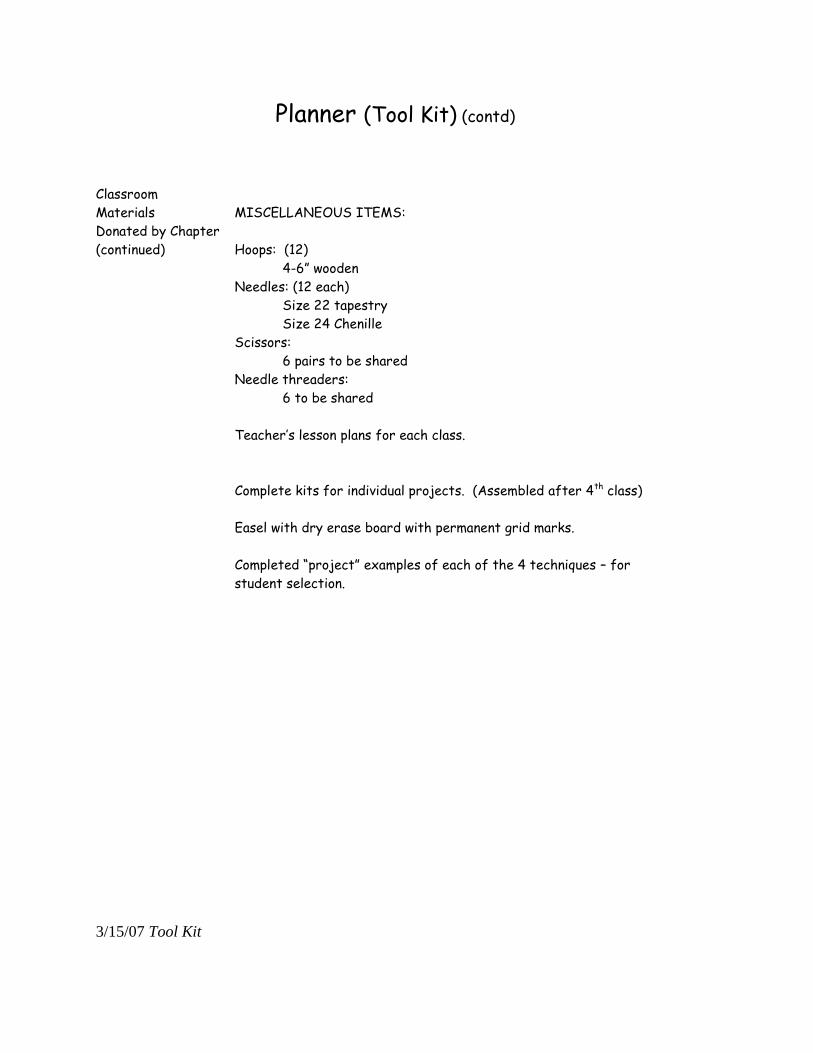
Planner (Tool Kit) (contd)
Classroom
Materials
Donated by Chapter
(continued)
MISCELLANEOUS ITEMS:
Hoops: (12)
4-6” wooden
Needles: (12 each)
Size 22 tapestry
Size 24 Chenille
Scissors:
6 pairs to be shared
Needle threaders:
6 to be shared
Teacher’s lesson plans for each class.
Complete kits for individual projects. (Assembled after 4th class)
Easel with dry erase board with permanent grid marks.
Completed “project” examples of each of the 4 techniques – for
student selection.
3/15/07 Tool Kit
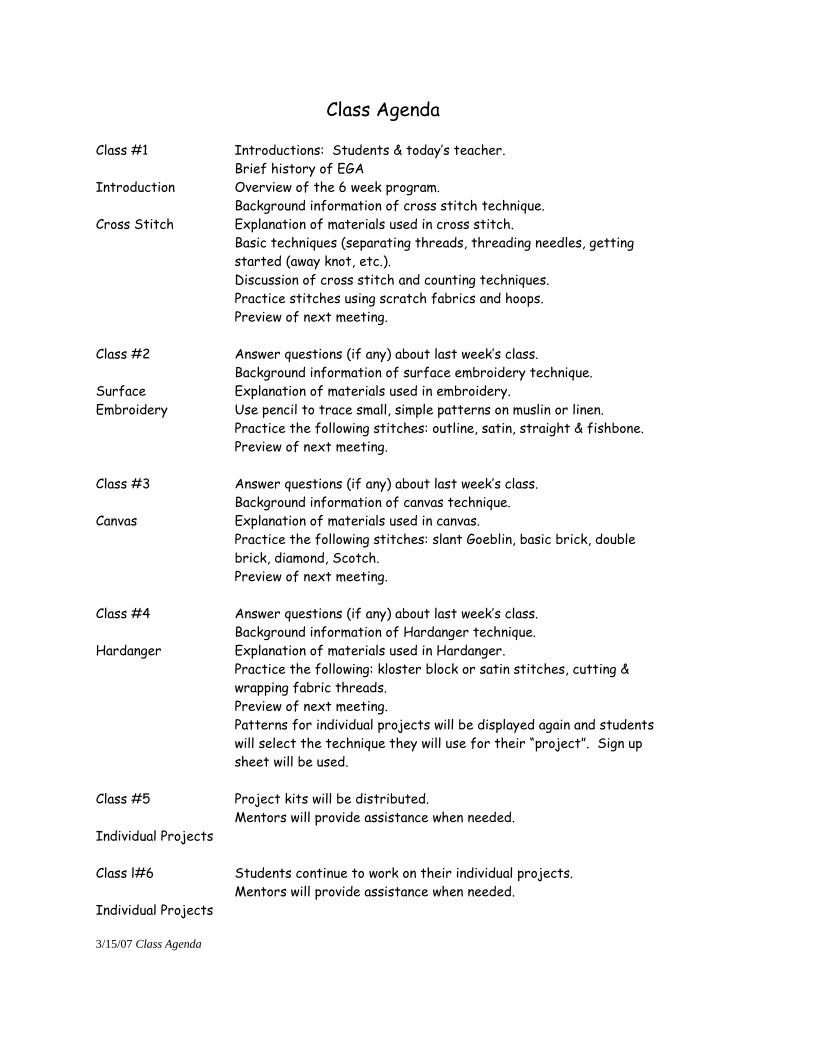
Class Agenda
Class #1
Introduction
Cross Stitch
Introductions: Students & today’s teacher.
Brief history of EGA
Overview of the 6 week program.
Background information of cross stitch technique.
Explanation of materials used in cross stitch.
Basic techniques (separating threads, threading needles, getting
started (away knot, etc.).
Discussion of cross stitch and counting techniques.
Practice stitches using scratch fabrics and hoops.
Preview of next meeting.
Class #2
Surface
Embroidery
Answer questions (if any) about last week’s class.
Background information of surface embroidery technique.
Explanation of materials used in embroidery.
Use pencil to trace small, simple patterns on muslin or linen.
Practice the following stitches: outline, satin, straight & fishbone.
Preview of next meeting.
Class #3
Canvas
Answer questions (if any) about last week’s class.
Background information of canvas technique.
Explanation of materials used in canvas.
Practice the following stitches: slant Goeblin, basic brick, double
brick, diamond, Scotch.
Preview of next meeting.
Class #4
Hardanger
Answer questions (if any) about last week’s class.
Background information of Hardanger technique.
Explanation of materials used in Hardanger.
Practice the following: kloster block or satin stitches, cutting &
wrapping fabric threads.
Preview of next meeting.
Patterns for individual projects will be displayed again and students
will select the technique they will use for their “project”. Sign up
sheet will be used.
Class #5
Individual Projects
Project kits will be distributed.
Mentors will provide assistance when needed.
Class l#6
Individual Projects
Students continue to work on their individual projects.
Mentors will provide assistance when needed.
3/15/07 Class Agenda
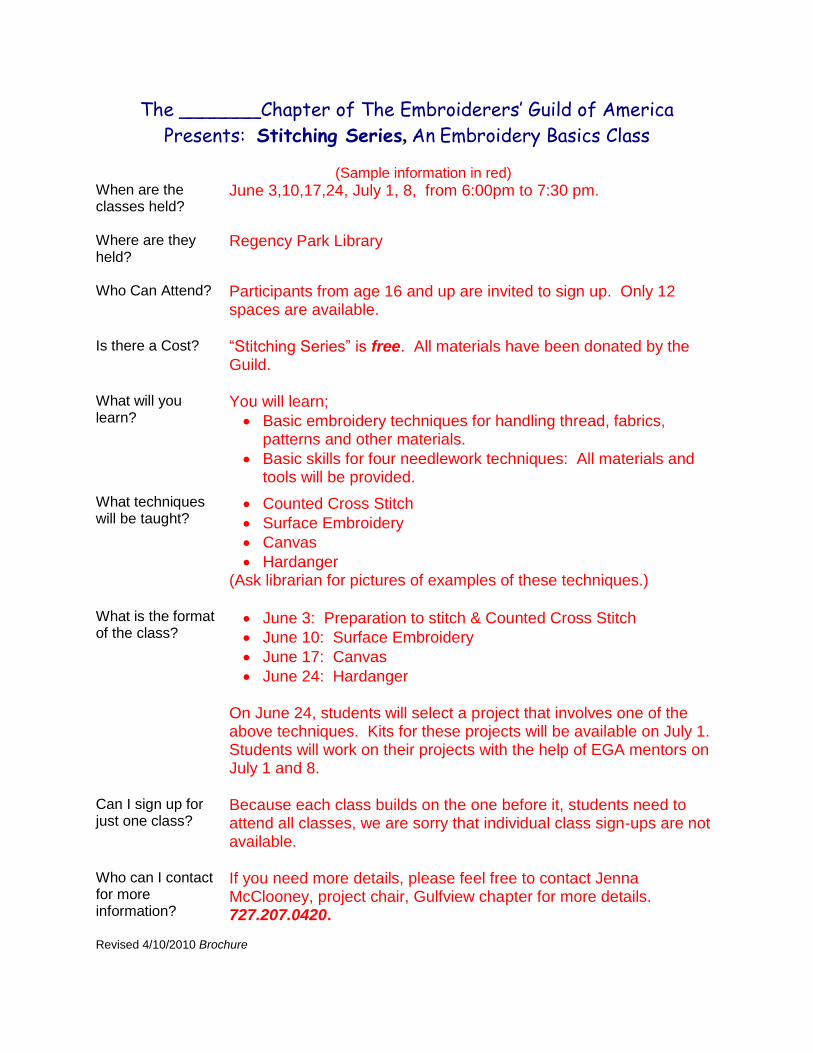
The _______Chapter of The Embroiderers’ Guild of America
Presents: Stitching Series, An Embroidery Basics Class (Sample information in red) When are the classes held?
June 3,10,17,24, July 1, 8, from 6:00pm to 7:30 pm.
Where are they held?
Regency Park Library
Who Can Attend? Participants from age 16 and up are invited to sign up. Only 12 spaces are available.
Is there a Cost? “Stitching Series” is free. All materials have been donated by the Guild.
What will you learn?
You will learn;
Basic embroidery techniques for handling thread, fabrics, patterns and other materials.
Basic skills for four needlework techniques: All materials and tools will be provided.
What techniques will be taught?
Counted Cross Stitch
Surface Embroidery
Canvas
Hardanger (Ask librarian for pictures of examples of these techniques.)
What is the format of the class?
June 3: Preparation to stitch & Counted Cross Stitch
June 10: Surface Embroidery
June 17: Canvas
June 24: Hardanger On June 24, students will select a project that involves one of the above techniques. Kits for these projects will be available on July 1. Students will work on their projects with the help of EGA mentors on July 1 and 8.
Can I sign up for just one class?
Because each class builds on the one before it, students need to attend all classes, we are sorry that individual class sign-ups are not available.
Who can I contact for more information?
If you need more details, please feel free to contact Jenna McClooney, project chair, Gulfview chapter for more details. 727.207.0420.
Revised 4/10/2010 Brochure
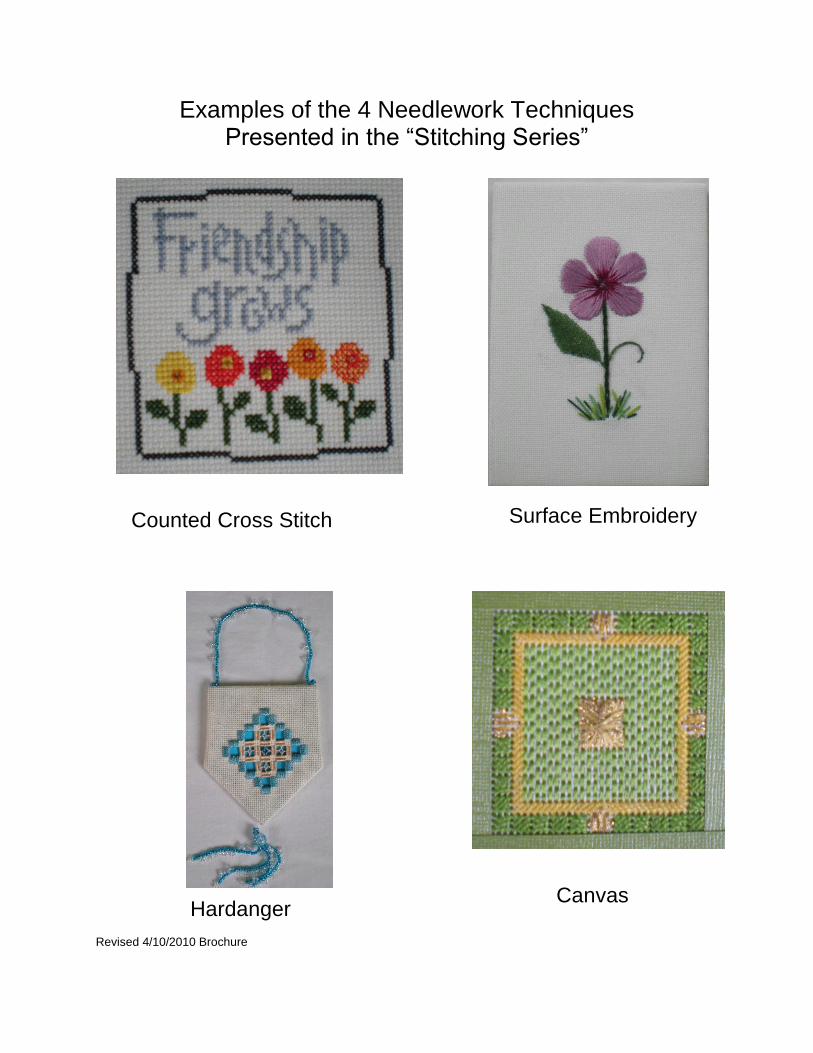
Examples of the 4 Needlework Techniques Presented in the “Stitching Series”
Counted Cross Stitch
Surface Embroidery
Hardanger
Canvas
Revised 4/10/2010 Brochure

Stitching Series
Administration
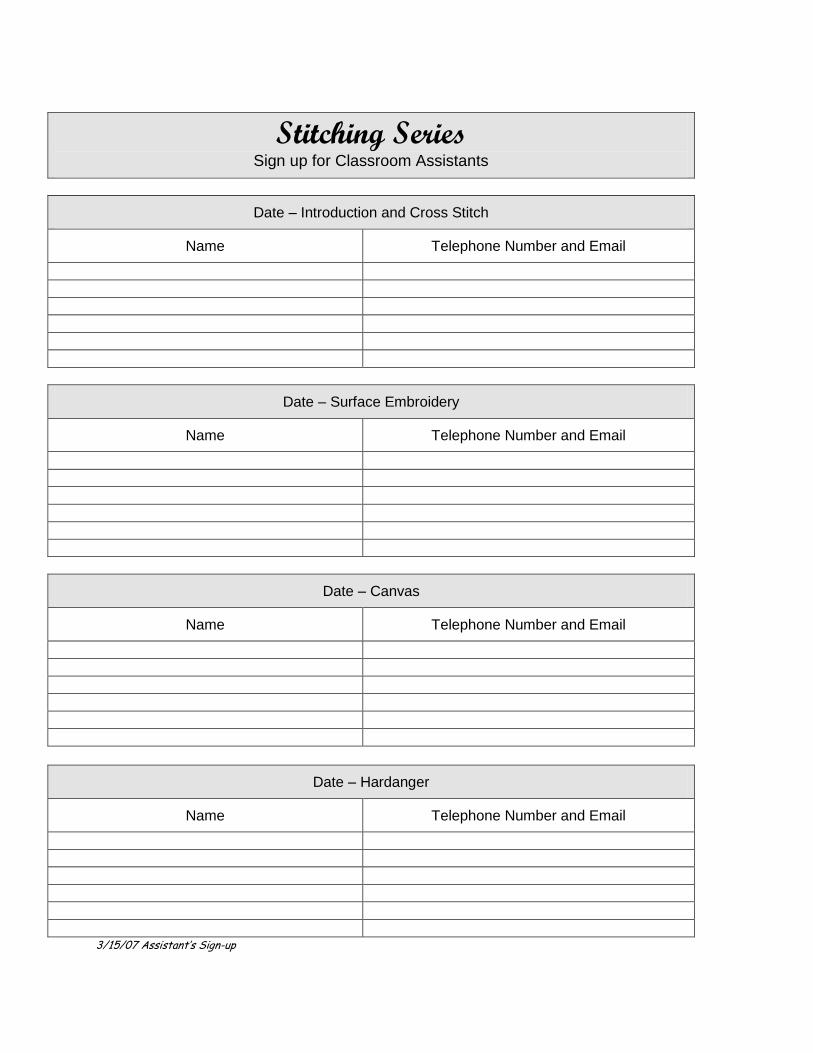
Stitching Series Sign up for Classroom Assistants
Date – Introduction and Cross Stitch
Name Telephone Number and Email
Date – Surface Embroidery
Name Telephone Number and Email
Date – Canvas
Name Telephone Number and Email
Date – Hardanger
Name Telephone Number and Email
3/15/07 Assistant’s Sign-up
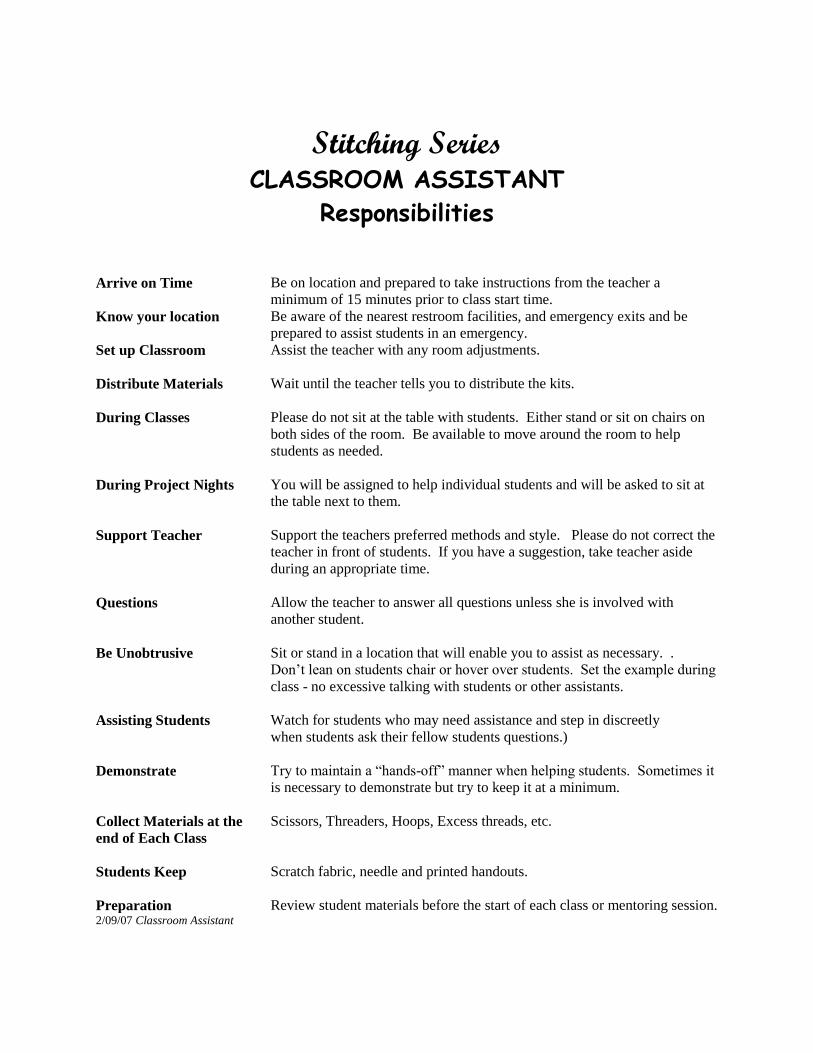
Stitching Series CLASSROOM ASSISTANT
Responsibilities
Arrive on Time Be on location and prepared to take instructions from the teacher a
minimum of 15 minutes prior to class start time.
Know your location Be aware of the nearest restroom facilities, and emergency exits and be
prepared to assist students in an emergency.
Set up Classroom Assist the teacher with any room adjustments.
Distribute Materials Wait until the teacher tells you to distribute the kits.
During Classes Please do not sit at the table with students. Either stand or sit on chairs on
both sides of the room. Be available to move around the room to help
students as needed.
During Project Nights You will be assigned to help individual students and will be asked to sit at
the table next to them.
Support Teacher Support the teachers preferred methods and style. Please do not correct the
teacher in front of students. If you have a suggestion, take teacher aside
during an appropriate time.
Questions Allow the teacher to answer all questions unless she is involved with
another student.
Be Unobtrusive Sit or stand in a location that will enable you to assist as necessary. .
Don’t lean on students chair or hover over students. Set the example during
class - no excessive talking with students or other assistants.
Assisting Students Watch for students who may need assistance and step in discreetly
when students ask their fellow students questions.)
Demonstrate Try to maintain a “hands-off” manner when helping students. Sometimes it
is necessary to demonstrate but try to keep it at a minimum.
Collect Materials at the
end of Each Class
Scissors, Threaders, Hoops, Excess threads, etc.
Students Keep Scratch fabric, needle and printed handouts.
Preparation Review student materials before the start of each class or mentoring session. 2/09/07 Classroom Assistant
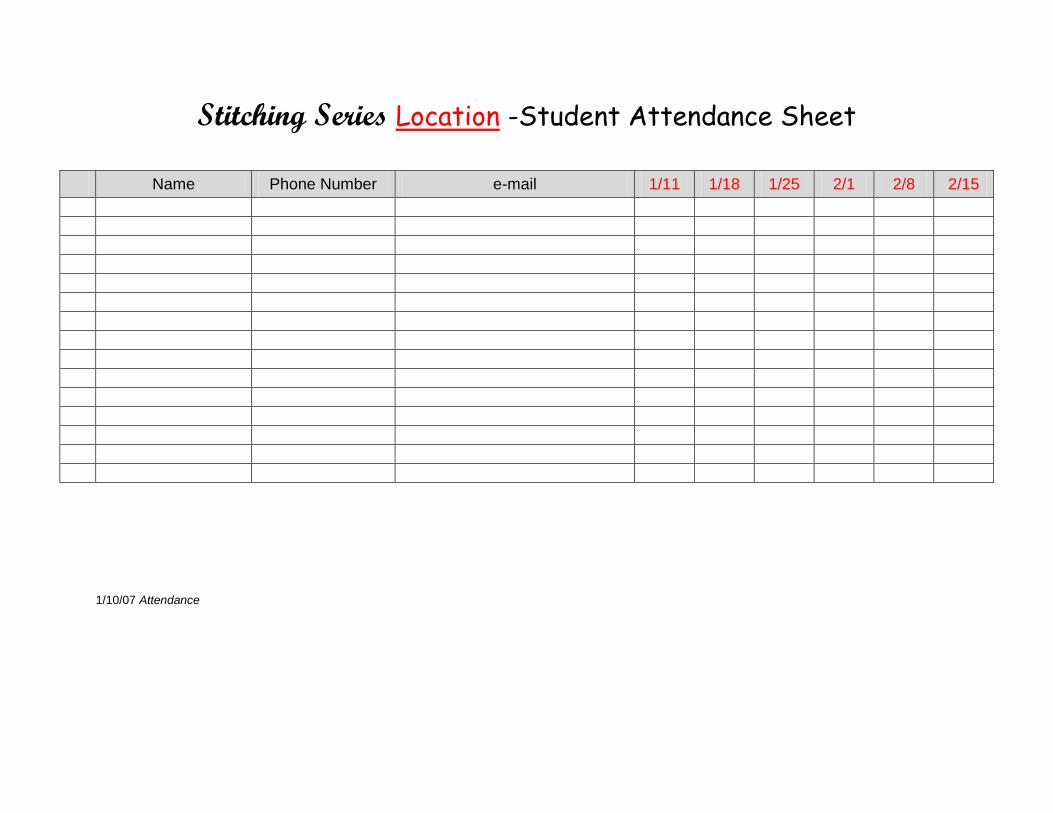
Stitching Series Location -Student Attendance Sheet
Name Phone Number e-mail 1/11 1/18 1/25 2/1 2/8 2/15
1/10/07 Attendance
Print on card stock
First
Last
First
Last
First
Last
First
Last
1/10/07 - Nametags
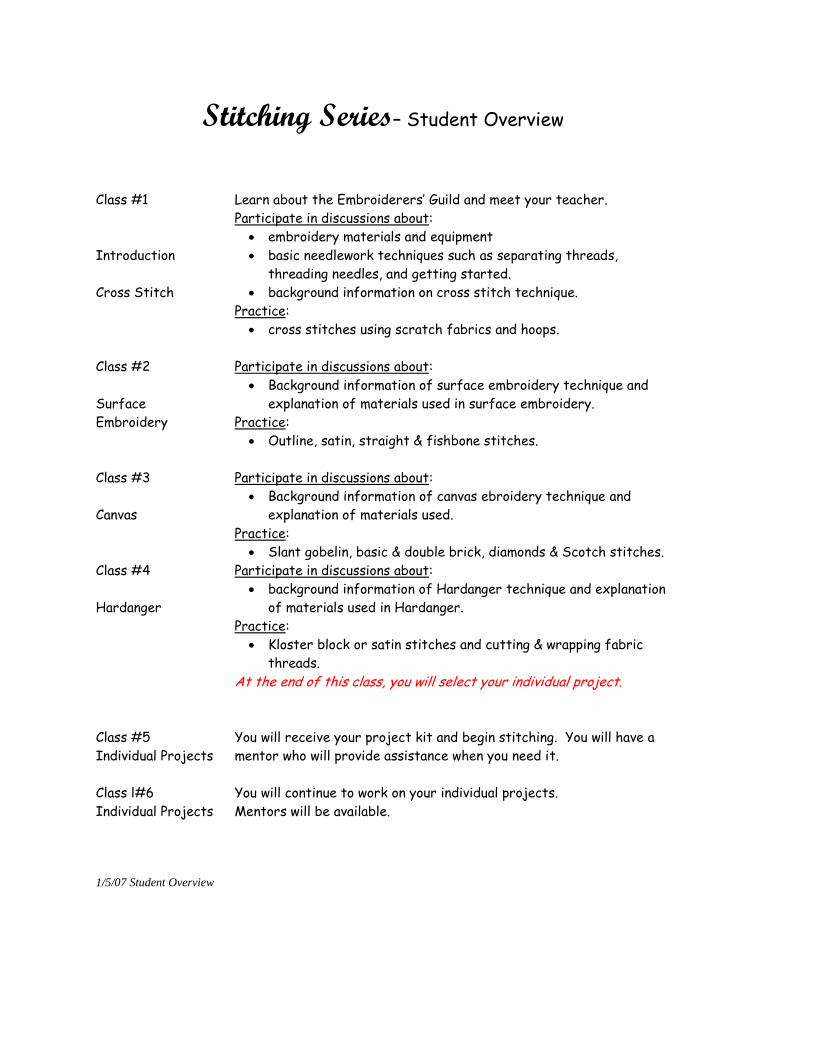
Stitching Series– Student Overview
Class #1
Introduction
Cross Stitch
Learn about the Embroiderers’ Guild and meet your teacher.
Participate in discussions about:
embroidery materials and equipment
basic needlework techniques such as separating threads,
threading needles, and getting started.
background information on cross stitch technique.
Practice:
cross stitches using scratch fabrics and hoops.
Class #2
Surface
Embroidery
Participate in discussions about:
Background information of surface embroidery technique and
explanation of materials used in surface embroidery.
Practice:
Outline, satin, straight & fishbone stitches.
Class #3
Canvas
Participate in discussions about:
Background information of canvas ebroidery technique and
explanation of materials used.
Practice:
Slant gobelin, basic & double brick, diamonds & Scotch stitches.
Class #4
Hardanger
Participate in discussions about:
background information of Hardanger technique and explanation
of materials used in Hardanger.
Practice:
Kloster block or satin stitches and cutting & wrapping fabric
threads.
At the end of this class, you will select your individual project.
Class #5
Individual Projects
You will receive your project kit and begin stitching. You will have a
mentor who will provide assistance when you need it.
Class l#6
Individual Projects
You will continue to work on your individual projects.
Mentors will be available.
1/5/07 Student Overview
__________ Chapter
The Embroiderers’ Guild of America
Stitching Series
Class
1/09/2007 Classroom Sign
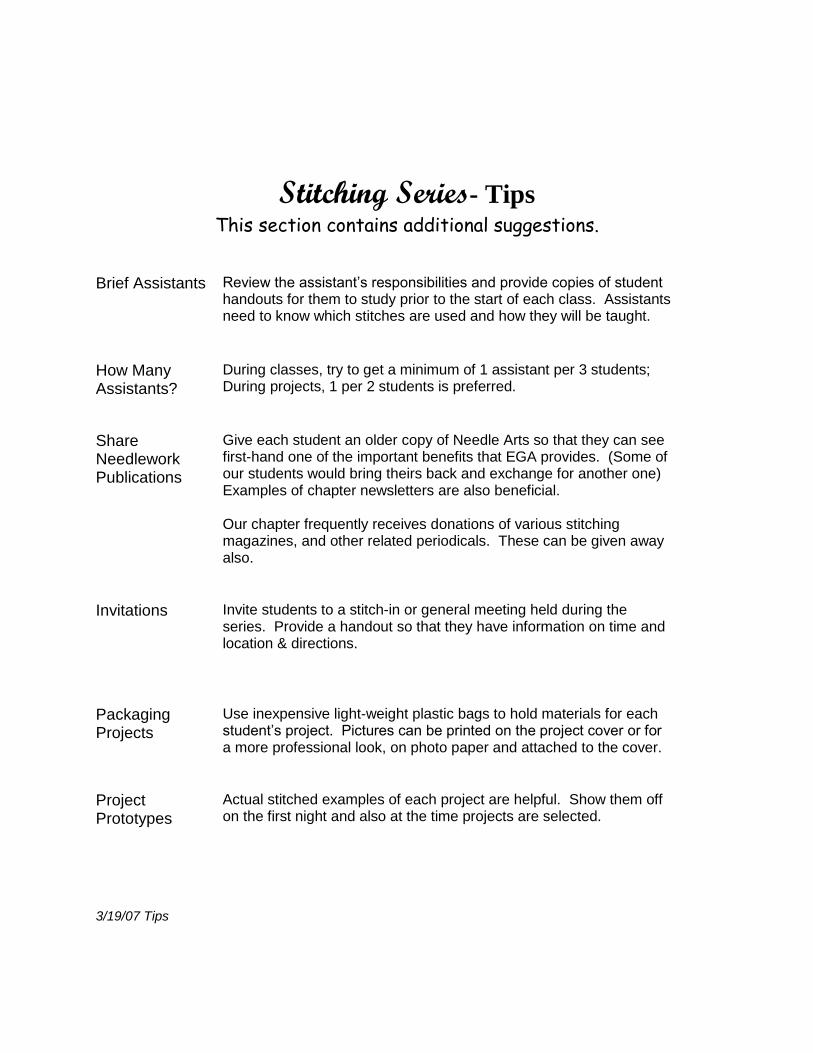
Stitching Series- Tips This section contains additional suggestions.
Brief Assistants Review the assistant’s responsibilities and provide copies of student handouts for them to study prior to the start of each class. Assistants need to know which stitches are used and how they will be taught.
How Many Assistants?
During classes, try to get a minimum of 1 assistant per 3 students; During projects, 1 per 2 students is preferred.
Share Needlework Publications
Give each student an older copy of Needle Arts so that they can see first-hand one of the important benefits that EGA provides. (Some of our students would bring theirs back and exchange for another one) Examples of chapter newsletters are also beneficial. Our chapter frequently receives donations of various stitching magazines, and other related periodicals. These can be given away also.
Invitations Invite students to a stitch-in or general meeting held during the
series. Provide a handout so that they have information on time and location & directions.
Packaging Projects
Use inexpensive light-weight plastic bags to hold materials for each student’s project. Pictures can be printed on the project cover or for a more professional look, on photo paper and attached to the cover.
Project Prototypes
Actual stitched examples of each project are helpful. Show them off on the first night and also at the time projects are selected.
3/19/07 Tips
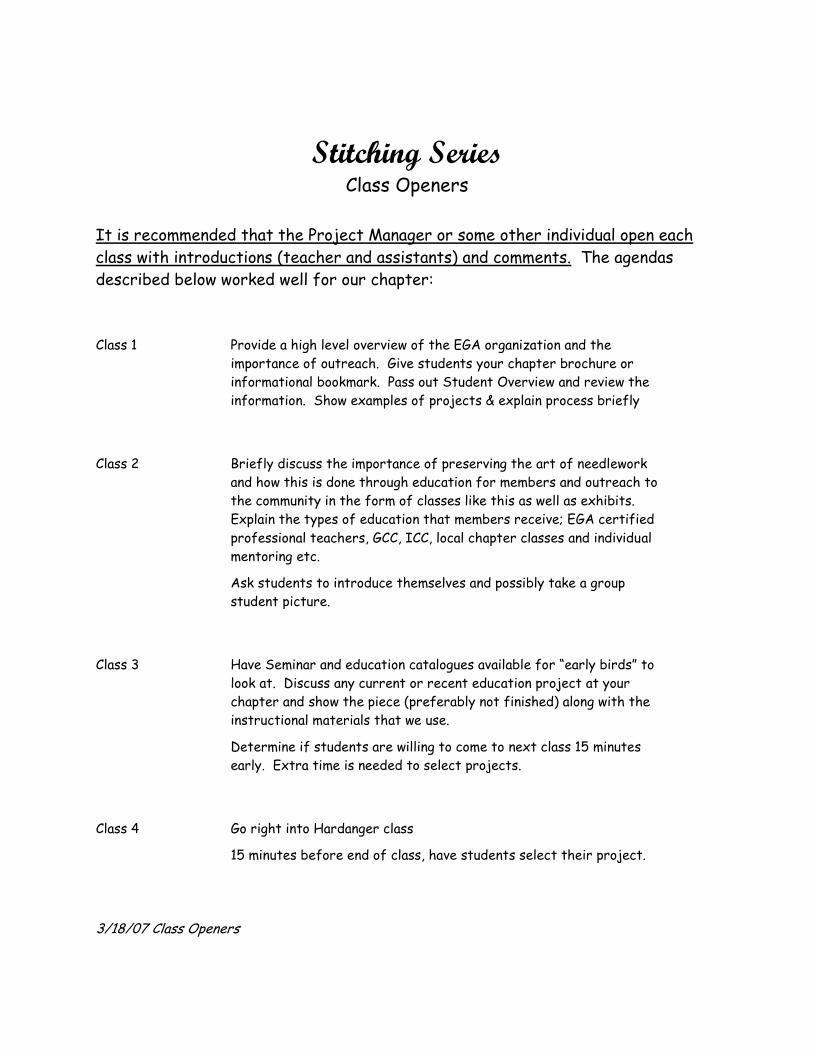
Stitching Series Class Openers
It is recommended that the Project Manager or some other individual open each
class with introductions (teacher and assistants) and comments. The agendas
described below worked well for our chapter:
Class 1 Provide a high level overview of the EGA organization and the
importance of outreach. Give students your chapter brochure or
informational bookmark. Pass out Student Overview and review the
information. Show examples of projects & explain process briefly
Class 2 Briefly discuss the importance of preserving the art of needlework
and how this is done through education for members and outreach to
the community in the form of classes like this as well as exhibits.
Explain the types of education that members receive; EGA certified
professional teachers, GCC, ICC, local chapter classes and individual
mentoring etc.
Ask students to introduce themselves and possibly take a group
student picture.
Class 3 Have Seminar and education catalogues available for “early birds” to
look at. Discuss any current or recent education project at your
chapter and show the piece (preferably not finished) along with the
instructional materials that we use.
Determine if students are willing to come to next class 15 minutes
early. Extra time is needed to select projects.
Class 4 Go right into Hardanger class
15 minutes before end of class, have students select their project.
3/18/07 Class Openers
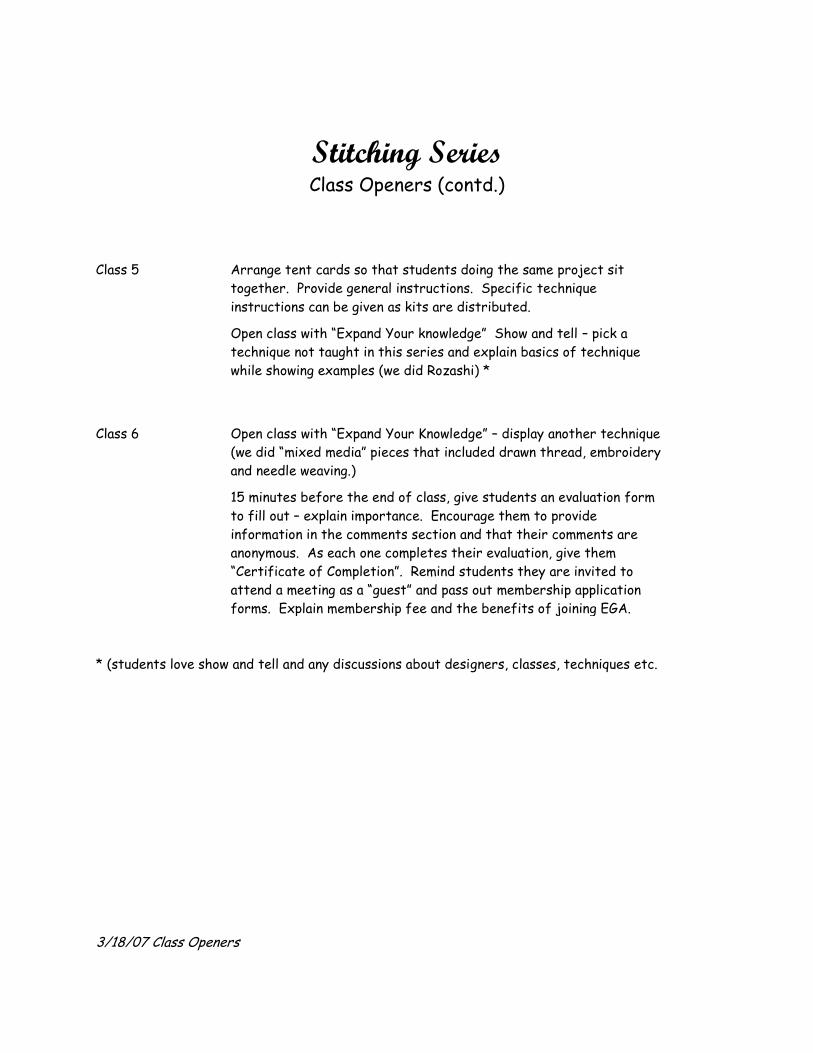
Stitching Series Class Openers (contd.)
Class 5 Arrange tent cards so that students doing the same project sit
together. Provide general instructions. Specific technique
instructions can be given as kits are distributed.
Open class with “Expand Your knowledge” Show and tell – pick a
technique not taught in this series and explain basics of technique
while showing examples (we did Rozashi) *
Class 6 Open class with “Expand Your Knowledge” – display another technique
(we did “mixed media” pieces that included drawn thread, embroidery
and needle weaving.)
15 minutes before the end of class, give students an evaluation form
to fill out – explain importance. Encourage them to provide
information in the comments section and that their comments are
anonymous. As each one completes their evaluation, give them
“Certificate of Completion”. Remind students they are invited to
attend a meeting as a “guest” and pass out membership application
forms. Explain membership fee and the benefits of joining EGA.
* (students love show and tell and any discussions about designers, classes, techniques etc.
3/18/07 Class Openers
Stitching Series
Lesson Plans
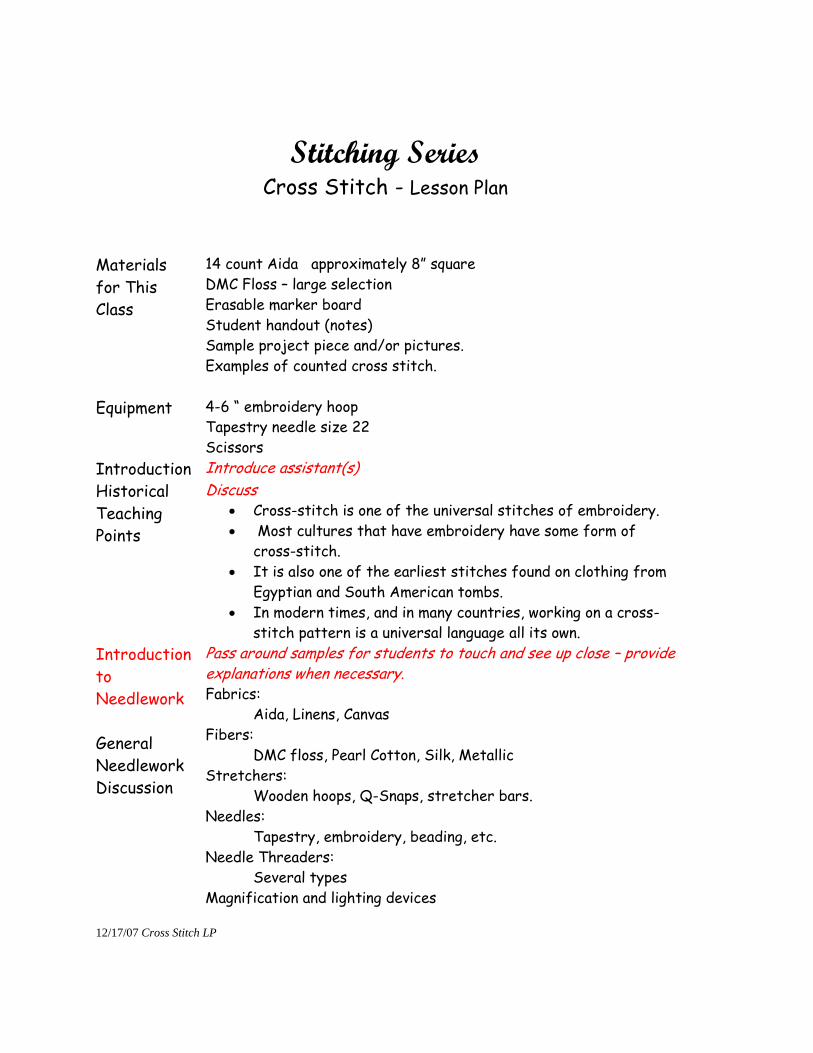
Stitching Series Cross Stitch - Lesson Plan
Materials
for This
Class
14 count Aida approximately 8” square
DMC Floss – large selection
Erasable marker board
Student handout (notes)
Sample project piece and/or pictures.
Examples of counted cross stitch.
Equipment 4-6 “ embroidery hoop
Tapestry needle size 22
Scissors
Introduction Introduce assistant(s)
Historical
Teaching
Points
Discuss Cross-stitch is one of the universal stitches of embroidery.
Most cultures that have embroidery have some form of
cross-stitch.
It is also one of the earliest stitches found on clothing from
Egyptian and South American tombs.
In modern times, and in many countries, working on a cross-
stitch pattern is a universal language all its own.
Introduction
to
Needlework
General
Needlework
Discussion
Pass around samples for students to touch and see up close – provide explanations when necessary. Fabrics:
Aida, Linens, Canvas
Fibers:
DMC floss, Pearl Cotton, Silk, Metallic
Stretchers:
Wooden hoops, Q-Snaps, stretcher bars.
Needles:
Tapestry, embroidery, beading, etc.
Needle Threaders:
Several types
Magnification and lighting devices 12/17/07 Cross Stitch LP
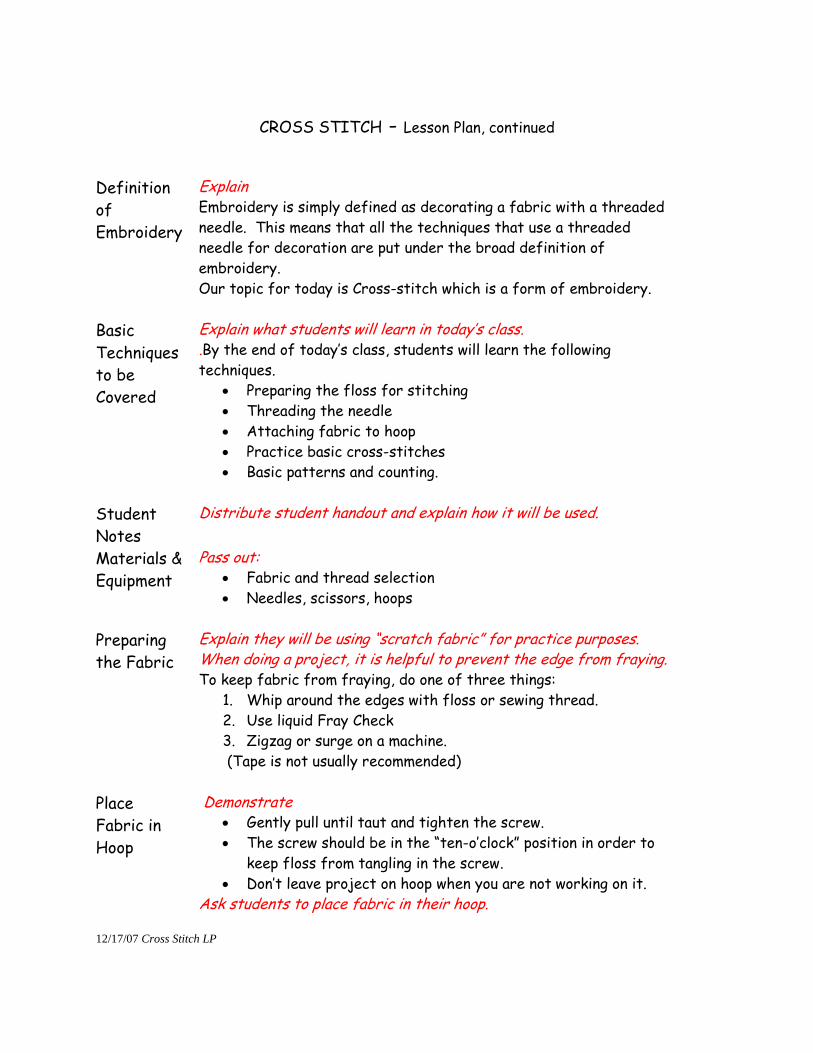
CROSS STITCH - Lesson Plan, continued
Definition
of
Embroidery
Explain
Embroidery is simply defined as decorating a fabric with a threaded
needle. This means that all the techniques that use a threaded
needle for decoration are put under the broad definition of
embroidery.
Our topic for today is Cross-stitch which is a form of embroidery.
Basic
Techniques
to be
Covered
Explain what students will learn in today’s class. .By the end of today’s class, students will learn the following
techniques.
Preparing the floss for stitching
Threading the needle
Attaching fabric to hoop
Practice basic cross-stitches
Basic patterns and counting.
Student
Notes
Distribute student handout and explain how it will be used.
Materials &
Equipment
Pass out: Fabric and thread selection
Needles, scissors, hoops
Preparing
the Fabric
Explain they will be using “scratch fabric” for practice purposes. When doing a project, it is helpful to prevent the edge from fraying. To keep fabric from fraying, do one of three things:
1. Whip around the edges with floss or sewing thread.
2. Use liquid Fray Check
3. Zigzag or surge on a machine.
(Tape is not usually recommended)
Place
Fabric in
Hoop
Demonstrate
Gently pull until taut and tighten the screw.
The screw should be in the “ten-o’clock” position in order to
keep floss from tangling in the screw.
Don’t leave project on hoop when you are not working on it.
Ask students to place fabric in their hoop. 12/17/07 Cross Stitch LP
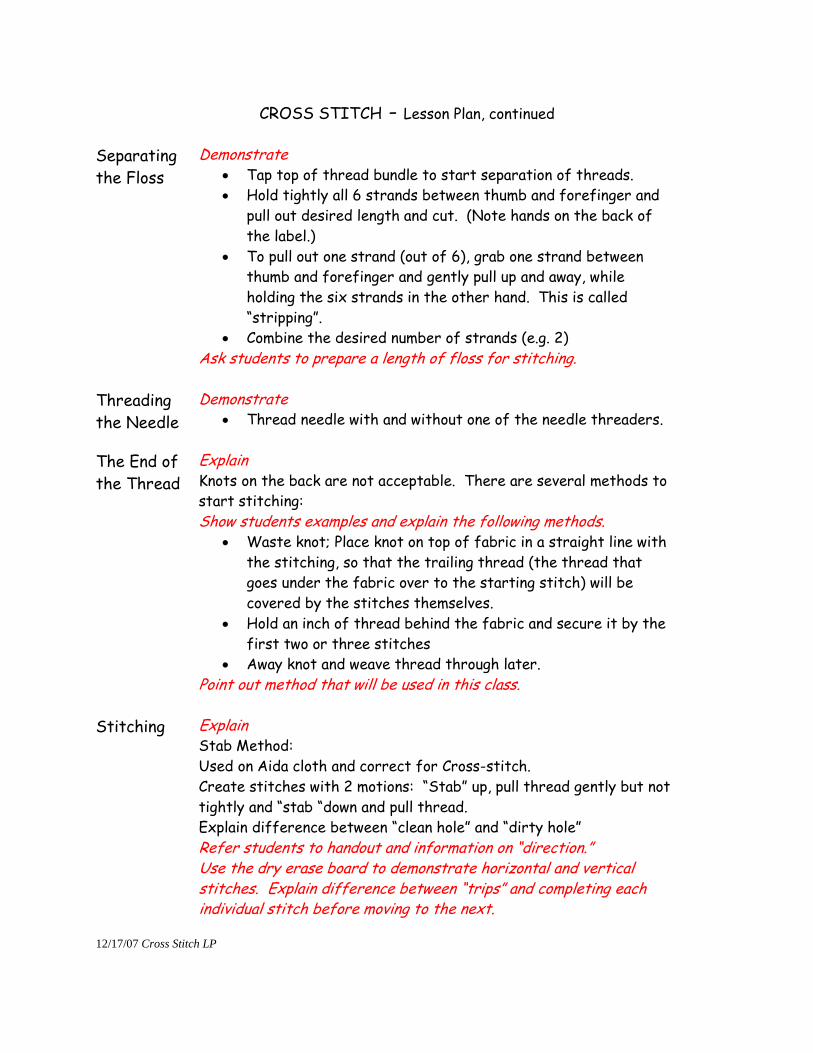
CROSS STITCH - Lesson Plan, continued
Separating
the Floss
Demonstrate
Tap top of thread bundle to start separation of threads.
Hold tightly all 6 strands between thumb and forefinger and
pull out desired length and cut. (Note hands on the back of
the label.)
To pull out one strand (out of 6), grab one strand between
thumb and forefinger and gently pull up and away, while
holding the six strands in the other hand. This is called
“stripping”.
Combine the desired number of strands (e.g. 2)
Ask students to prepare a length of floss for stitching.
Threading
the Needle
Demonstrate
Thread needle with and without one of the needle threaders.
The End of
the Thread
Explain
Knots on the back are not acceptable. There are several methods to
start stitching:
Show students examples and explain the following methods. Waste knot; Place knot on top of fabric in a straight line with
the stitching, so that the trailing thread (the thread that
goes under the fabric over to the starting stitch) will be
covered by the stitches themselves.
Hold an inch of thread behind the fabric and secure it by the
first two or three stitches
Away knot and weave thread through later.
Point out method that will be used in this class.
Stitching Explain
Stab Method:
Used on Aida cloth and correct for Cross-stitch.
Create stitches with 2 motions: “Stab” up, pull thread gently but not
tightly and “stab “down and pull thread.
Explain difference between “clean hole” and “dirty hole”
Refer students to handout and information on “direction.” Use the dry erase board to demonstrate horizontal and vertical stitches. Explain difference between “trips” and completing each individual stitch before moving to the next.
12/17/07 Cross Stitch LP
CROSS STITCH - Lesson Plan, continued
Twisted
Thread
Explain
If floss becomes twisted, drop the needle and let it hang down. It
will unwind. It is wise to do this often.
Finishing
Thread
Explain
Run the needle under three to five stitches on the back of the
design and cut close.
Practice Assist students as they practice each stitch.
Wrap Up Collect the following: Hoops & scissors
Students can keep handouts and scratch fabrics and needle
to practice.
Ask: Are there any questions?
Next week: Surface Embroidery.
Cross stitch LP
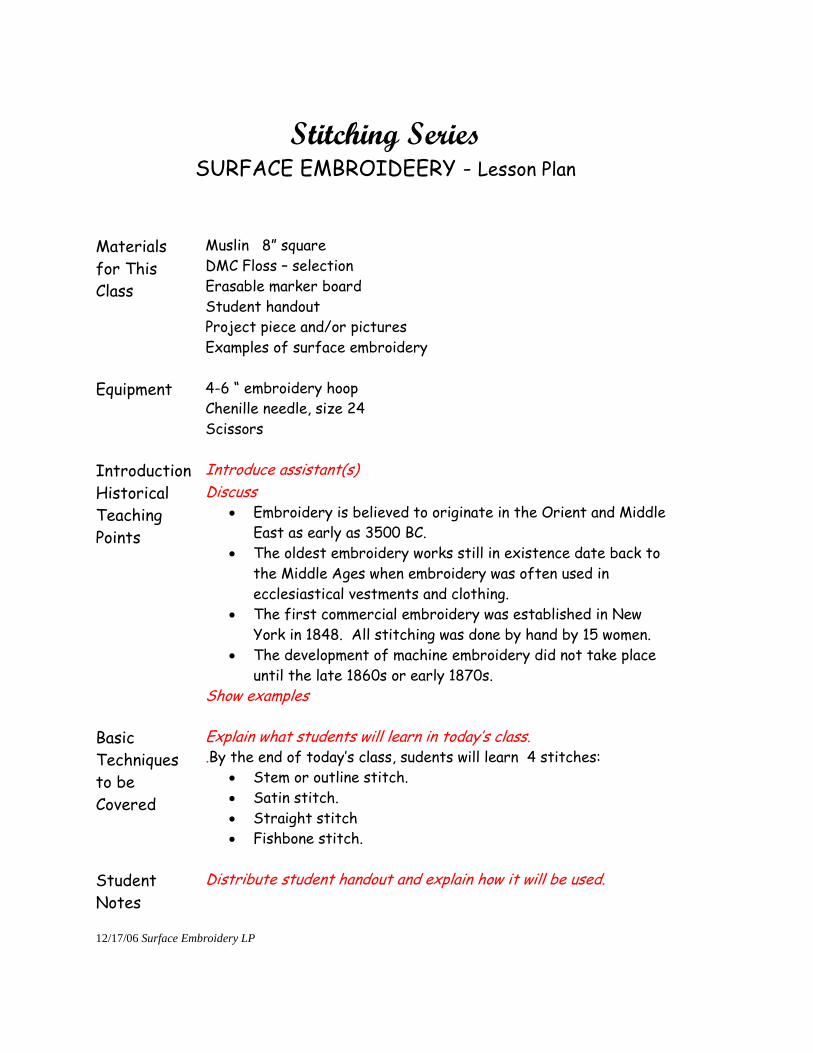
Stitching Series SURFACE EMBROIDEERY - Lesson Plan
Materials
for This
Class
Muslin 8” square
DMC Floss – selection
Erasable marker board
Student handout
Project piece and/or pictures
Examples of surface embroidery
Equipment 4-6 “ embroidery hoop
Chenille needle, size 24
Scissors
Introduction Introduce assistant(s)
Historical
Teaching
Points
Discuss Embroidery is believed to originate in the Orient and Middle
East as early as 3500 BC.
The oldest embroidery works still in existence date back to
the Middle Ages when embroidery was often used in
ecclesiastical vestments and clothing.
The first commercial embroidery was established in New
York in 1848. All stitching was done by hand by 15 women.
The development of machine embroidery did not take place
until the late 1860s or early 1870s.
Show examples
Basic
Techniques
to be
Covered
Explain what students will learn in today’s class. .By the end of today’s class, sudents will learn 4 stitches:
Stem or outline stitch.
Satin stitch.
Straight stitch
Fishbone stitch.
Student
Notes
Distribute student handout and explain how it will be used.
12/17/06 Surface Embroidery LP
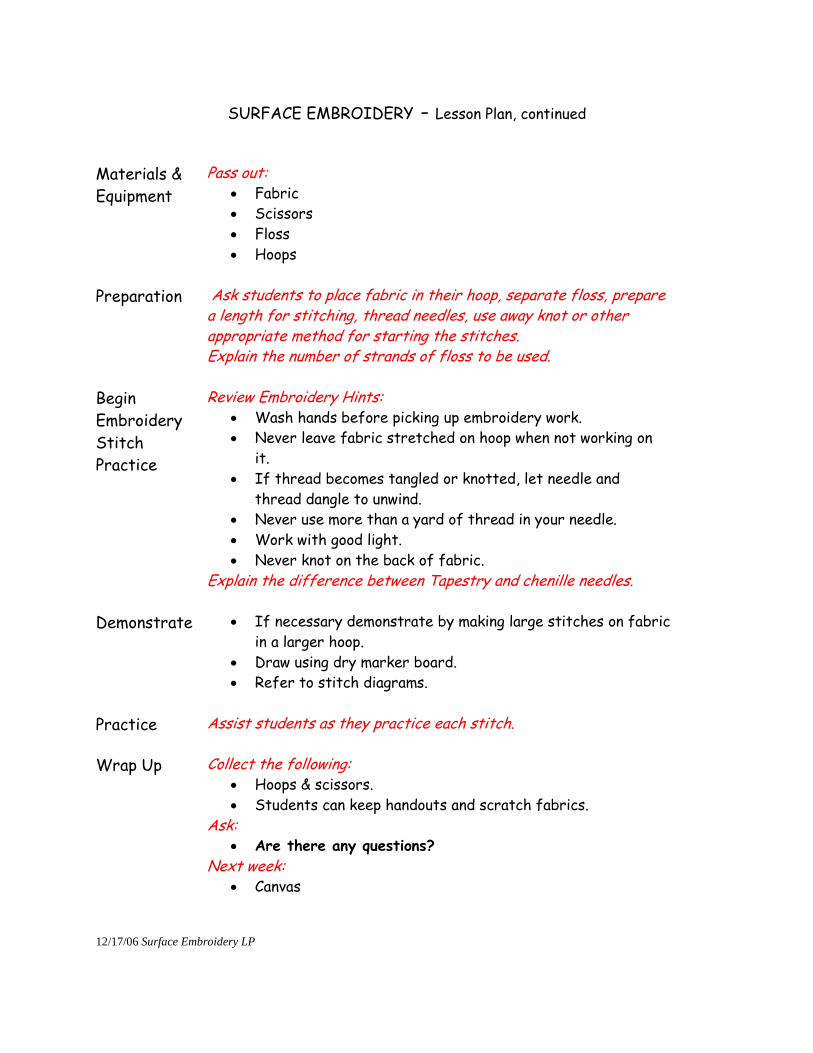
SURFACE EMBROIDERY - Lesson Plan, continued
Materials &
Equipment
Pass out: Fabric
Scissors
Floss
Hoops
Preparation Ask students to place fabric in their hoop, separate floss, prepare a length for stitching, thread needles, use away knot or other appropriate method for starting the stitches. Explain the number of strands of floss to be used.
Begin
Embroidery
Stitch
Practice
Review Embroidery Hints: Wash hands before picking up embroidery work.
Never leave fabric stretched on hoop when not working on
it.
If thread becomes tangled or knotted, let needle and
thread dangle to unwind.
Never use more than a yard of thread in your needle.
Work with good light.
Never knot on the back of fabric.
Explain the difference between Tapestry and chenille needles.
Demonstrate If necessary demonstrate by making large stitches on fabric
in a larger hoop.
Draw using dry marker board.
Refer to stitch diagrams.
Practice Assist students as they practice each stitch.
Wrap Up Collect the following: Hoops & scissors.
Students can keep handouts and scratch fabrics.
Ask: Are there any questions?
Next week: Canvas
12/17/06 Surface Embroidery LP
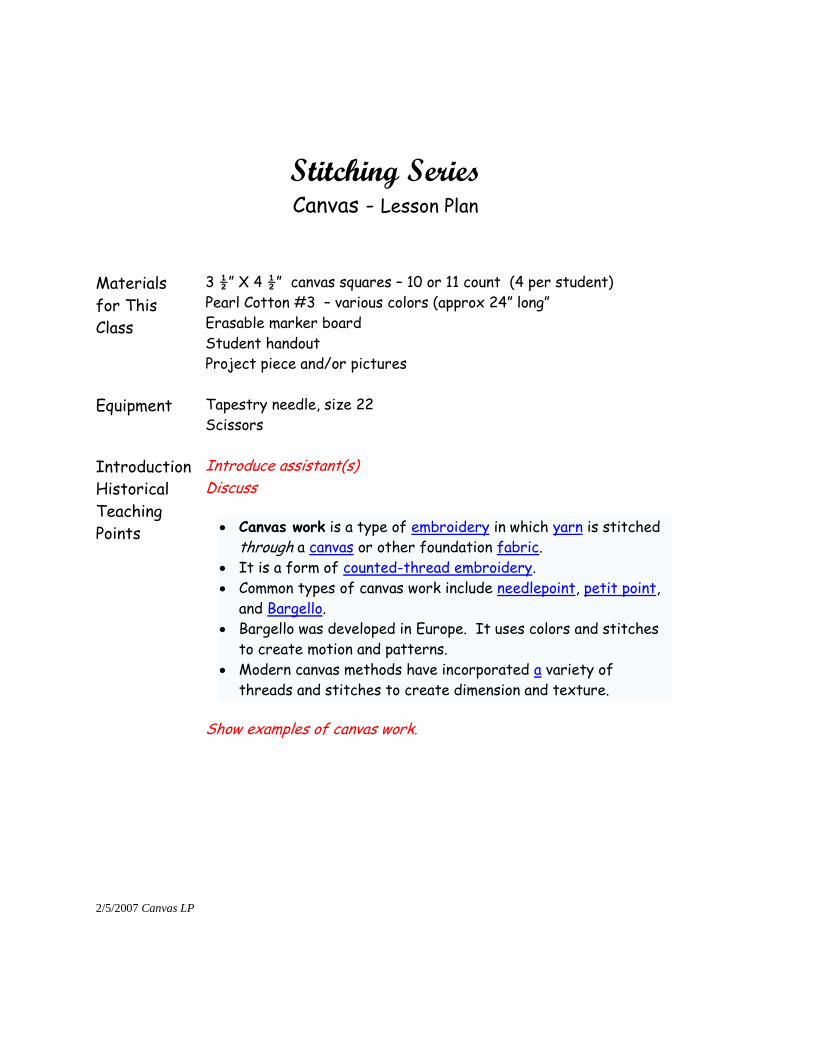
Stitching Series Canvas - Lesson Plan
Materials
for This
Class
3 ½” X 4 ½” canvas squares – 10 or 11 count (4 per student)
Pearl Cotton #3 – various colors (approx 24” long”
Erasable marker board
Student handout
Project piece and/or pictures
Equipment Tapestry needle, size 22
Scissors
Introduction Introduce assistant(s)
Historical
Teaching
Points
Discuss
Canvas work is a type of embroidery in which yarn is stitched
through a canvas or other foundation fabric.
It is a form of counted-thread embroidery.
Common types of canvas work include needlepoint, petit point,
and Bargello.
Bargello was developed in Europe. It uses colors and stitches
to create motion and patterns.
Modern canvas methods have incorporated a variety of
threads and stitches to create dimension and texture.
Show examples of canvas work.
2/5/2007 Canvas LP
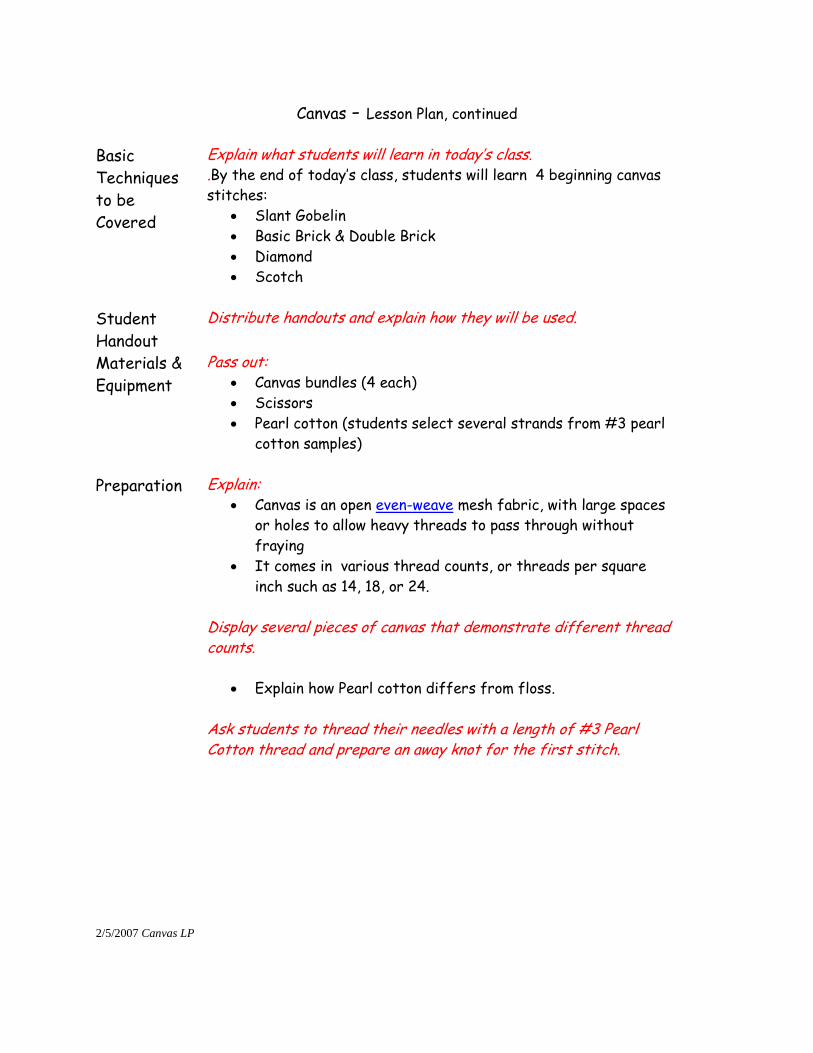
Canvas - Lesson Plan, continued
Basic
Techniques
to be
Covered
Explain what students will learn in today’s class. .By the end of today’s class, students will learn 4 beginning canvas
stitches:
Slant Gobelin
Basic Brick & Double Brick
Diamond
Scotch
Student
Handout
Distribute handouts and explain how they will be used.
Materials &
Equipment
Pass out: Canvas bundles (4 each)
Scissors
Pearl cotton (students select several strands from #3 pearl
cotton samples)
Preparation Explain: Canvas is an open even-weave mesh fabric, with large spaces
or holes to allow heavy threads to pass through without
fraying
It comes in various thread counts, or threads per square
inch such as 14, 18, or 24.
Display several pieces of canvas that demonstrate different thread counts.
Explain how Pearl cotton differs from floss.
Ask students to thread their needles with a length of #3 Pearl Cotton thread and prepare an away knot for the first stitch.
2/5/2007 Canvas LP
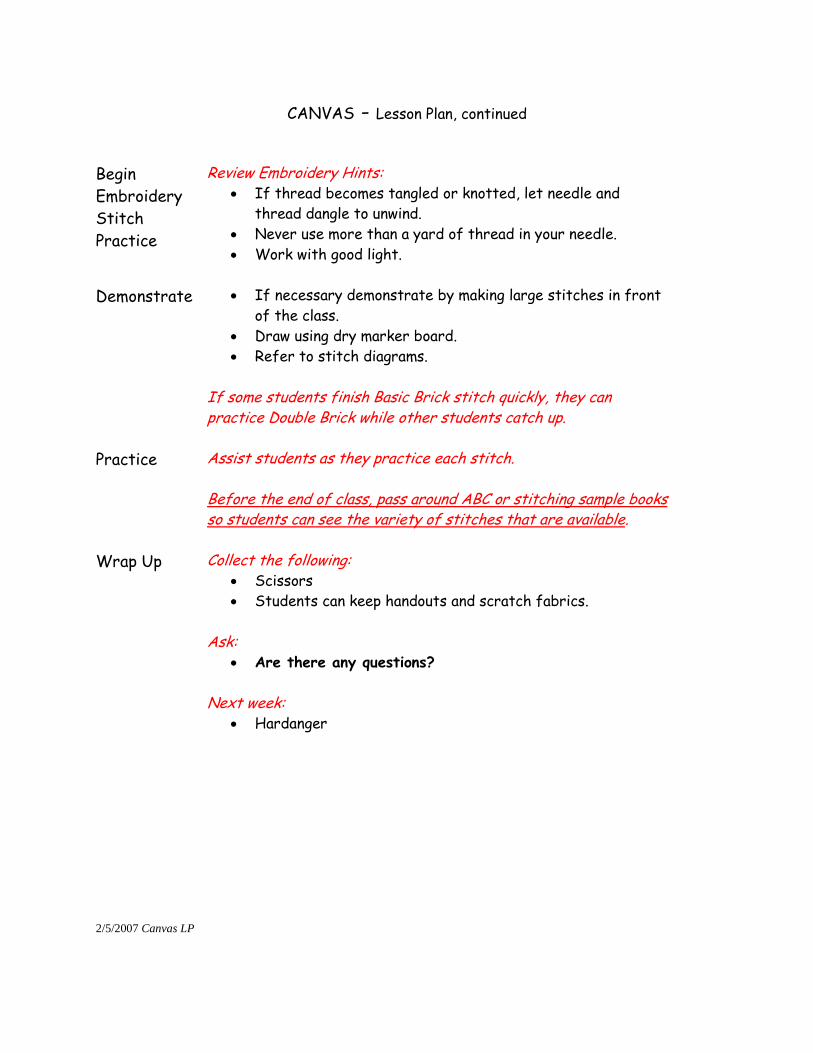
CANVAS - Lesson Plan, continued
Begin
Embroidery
Stitch
Practice
Review Embroidery Hints: If thread becomes tangled or knotted, let needle and
thread dangle to unwind.
Never use more than a yard of thread in your needle.
Work with good light.
Demonstrate If necessary demonstrate by making large stitches in front
of the class.
Draw using dry marker board.
Refer to stitch diagrams.
If some students finish Basic Brick stitch quickly, they can practice Double Brick while other students catch up.
Practice Assist students as they practice each stitch. Before the end of class, pass around ABC or stitching sample books so students can see the variety of stitches that are available.
Wrap Up Collect the following: Scissors
Students can keep handouts and scratch fabrics.
Ask:
Are there any questions?
Next week:
Hardanger
2/5/2007 Canvas LP
Stitching Series Hardanger - Lesson Plan
Materials
for This
Class
11 count Aida, 6” square
Pearl cotton thread, 5 & 8
Student handout (notes)
2 examples of classroom practice: one with only Kloster blocks, the
second including cut and drawn threads and a single woven bar.
Equipment Tapestry needles size 22.
Scissors
Erasable marker board
Introduction Introduce assistant(s)
Historical
Teaching
Points
Discuss Hardanger embroidery originally came from ancient Asia and
Persia.
It is an open type of needlework.
It reached Norway and other Scandinavian countries just
prior to the 1800's where it evolved into traditional folk
embroidery.
Hardanger uses geometric elements to embellished
household linens, blouses, caps, and aprons for the
traditional peasant costume.
Show examples.
Basic
Techniques
to be
Covered
Explain what students will learn in today’s class. .By the end of today’s class, sudents will learn these techniques:
Handling the fabric and threads.
Kloster block or satin stitch.
Cutting fabric threads.
Weaving fabric threads.
2/10/2007 Hardanger LP
HARDANGER - Lesson Plan, continued
Student
Notes
Distribute handouts and explain how they will be used. (This includes diagrams of stitches, cutting and wrapping plus pattern for classroom practice.)
Materials &
Equipment
Pass out: Fabric
Scissors
Threads (#5 and #8 pearl cotton)
Explain: The 11 count Aida is a good fabric to use during the initial
learning opportunity.
It would never be used on an actual project.
Preparation Explain: Types of fabrics used (usually even weave)
Why fabric is held in the hand rather than hoop.
Method of stitching (sewing rather than stabbing).
Kloster
Block
Format
Explain: Kloster blocks are the basis of the Hardanger technique.
Blocks usually provide the basic outline or shape of a design.
Kloster blocks consist of 5 satin stitches over 4 threads.
Always count over 4 threads, do not count holes.
Demonstrate
Kloster
Block
Explain: Pattern that will be used to practice (square with two
kloster blocks on each side.
Pass around 2 classroom practice examples. Ask students to thread needle with #5 Pearl cotton, set an
away knot and come up where first stitch will be located.
Demonstrate the sewing technique…
or sketch a diagram using dry marker board.
Explain proper tension
Refer to stitch diagrams.
Practice Assist students as they complete the pattern.
2/10/2007 Hardanger LP
HARDANGER - Lesson Plan, continued
Demonstrate
Cutting
Demonstrate cutting and removing threads Or draw using dry marker board.
Refer to stitch diagrams.
Don’t cut all fabric threads at one time. Start by cutting 4
threads in blocks directly across from each other (consider
it a “pair”.) Remove those fabric threads and then continue
to cut another “pair” and so on.
Practice Assist students as they cut.
Demonstrate
Wrapping
Threads
Demonstrate how fabric threads are wrapped using #8 Pearl cotton.
Or draw using dry marker board.
Refer to stitch diagrams.
Practice Assist students as they practice wrapping threads:
Wrap Up Collect the following: Scissors, excess threads
Students can keep handouts and scratch fabrics.
Ask: Are there any questions?
Select
Project
Assist students with selection of project. Students will now sign up for projects on sheet provided.
Kits will be distributed at the next class.
Students select from project samples. Where possible, allow
a selection of color.
2/10/2007 Hardanger LP
Stitching Series
Student Handouts
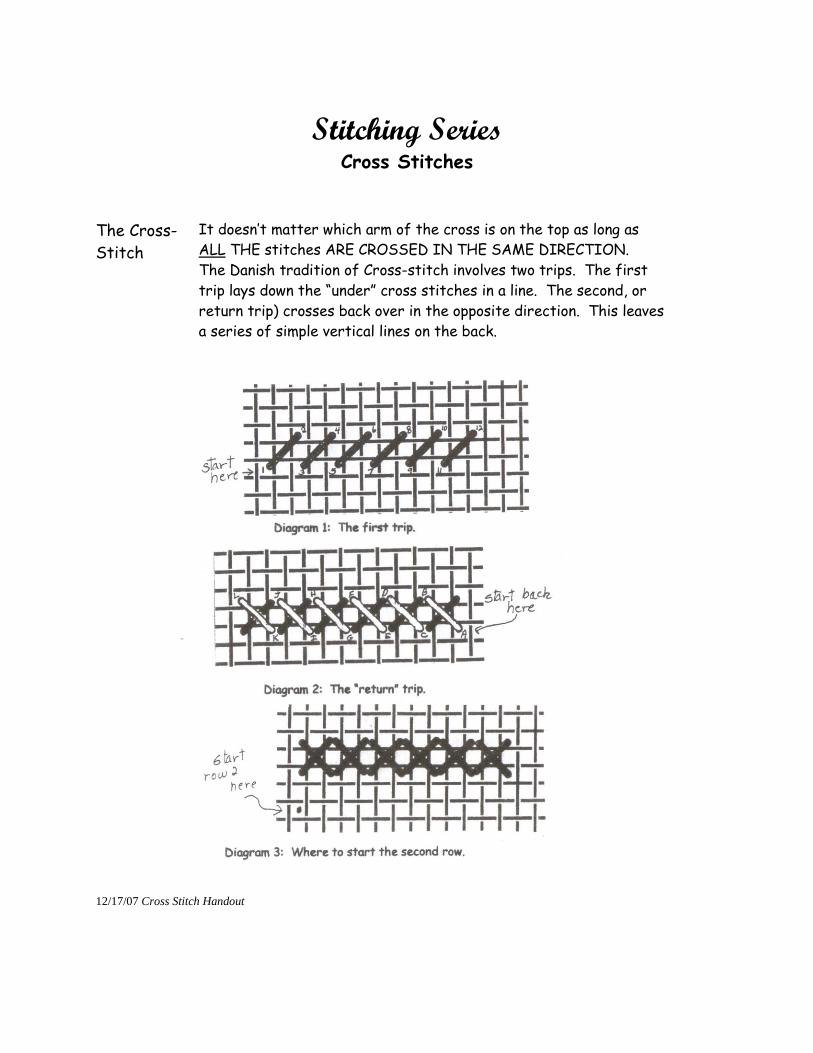
Stitching Series Cross Stitches
The Cross-
Stitch
It doesn’t matter which arm of the cross is on the top as long as
ALL THE stitches ARE CROSSED IN THE SAME DIRECTION.
The Danish tradition of Cross-stitch involves two trips. The first
trip lays down the “under” cross stitches in a line. The second, or
return trip) crosses back over in the opposite direction. This leaves
a series of simple vertical lines on the back.
12/17/07 Cross Stitch Handout
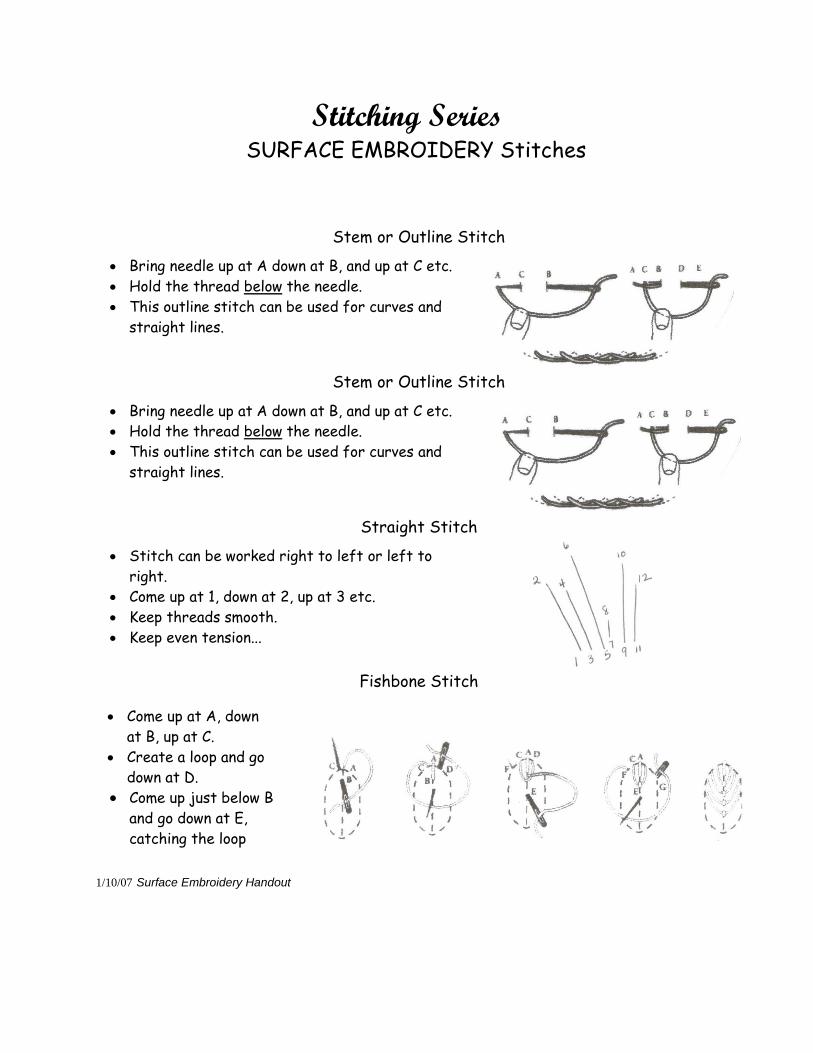
Stitching Series SURFACE EMBROIDERY Stitches
Stem or Outline Stitch
Bring needle up at A down at B, and up at C etc.
Hold the thread below the needle.
This outline stitch can be used for curves and
straight lines.
Stem or Outline Stitch
Bring needle up at A down at B, and up at C etc.
Hold the thread below the needle.
This outline stitch can be used for curves and
straight lines.
Straight Stitch
Stitch can be worked right to left or left to
right.
Come up at 1, down at 2, up at 3 etc.
Keep threads smooth.
Keep even tension...
Fishbone Stitch
Come up at A, down
at B, up at C.
Create a loop and go
down at D.
Come up just below B
and go down at E,
catching the loop
1/10/07 Surface Embroidery Handout

Stitching Series Canvas Stitches
Slant Gobelin
Also called Tent or Continental stitch
May be worked over 1 or 2 threads wide
And over 2 to 6 threads high.
Work in straight rows.
Example is stitched over 2 intersections.
Basic Brick
Worked vertically over 4 threads
1st row: a space is skipped between each stitch
2nd row: the tops of the stitches are placed in
the middle holes in the empty spaces of the first
row.
Double Brick
Over 4 threads
Skip 2 spaces between each pair of stitches
1/4/07 Canvas Handout
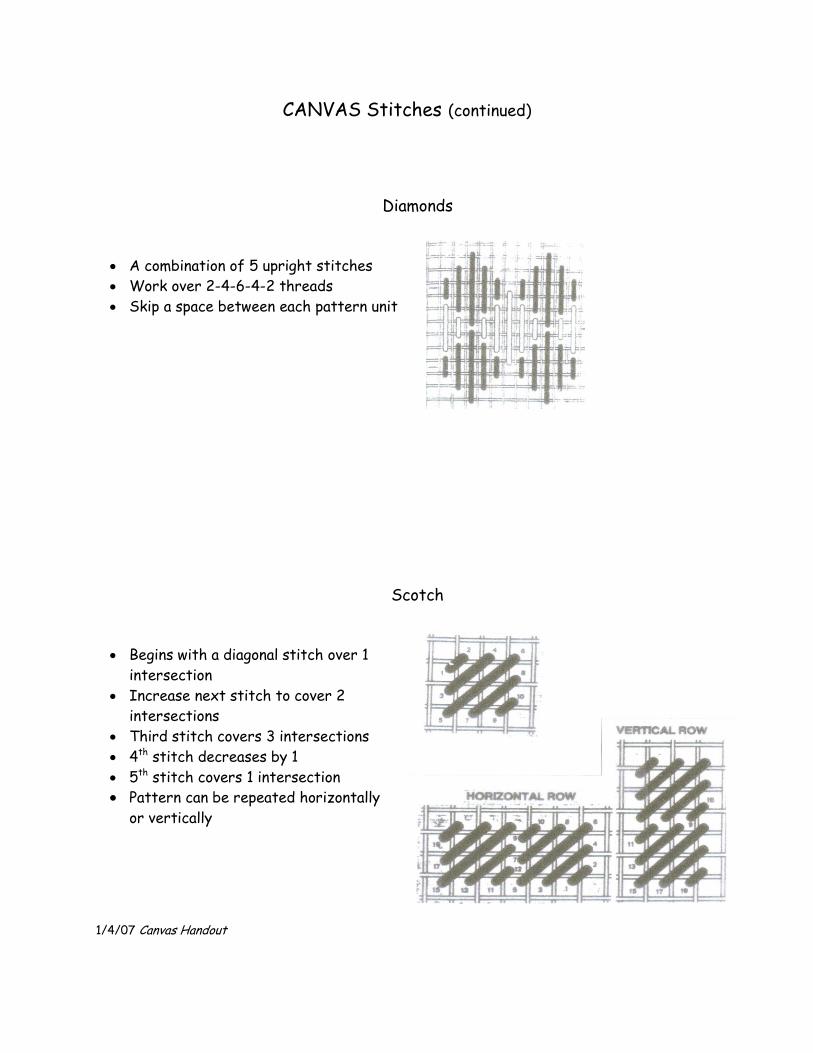
CANVAS Stitches (continued)
Diamonds
A combination of 5 upright stitches
Work over 2-4-6-4-2 threads
Skip a space between each pattern unit
Scotch
Begins with a diagonal stitch over 1
intersection
Increase next stitch to cover 2
intersections
Third stitch covers 3 intersections
4th stitch decreases by 1
5th stitch covers 1 intersection
Pattern can be repeated horizontally
or vertically
1/4/07 Canvas Handout
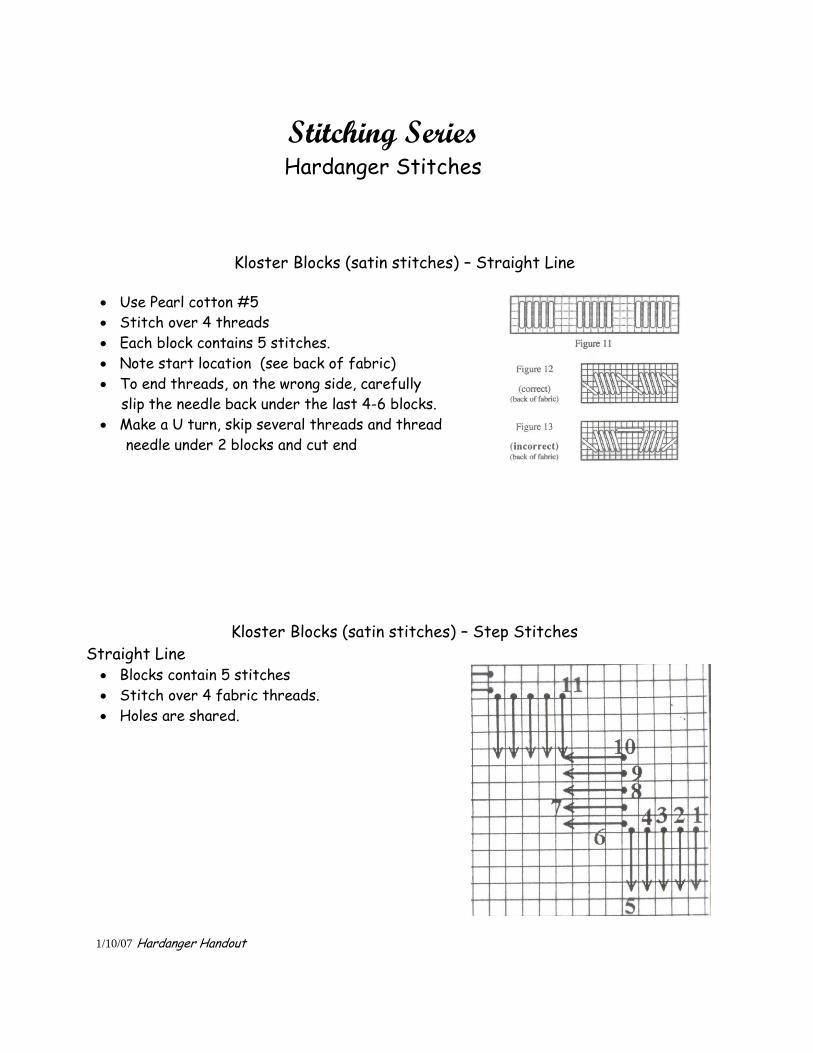
Stitching Series Hardanger Stitches
Kloster Blocks (satin stitches) – Straight Line
Use Pearl cotton #5
Stitch over 4 threads
Each block contains 5 stitches.
Note start location (see back of fabric)
To end threads, on the wrong side, carefully
slip the needle back under the last 4-6 blocks.
Make a U turn, skip several threads and thread
needle under 2 blocks and cut end
Kloster Blocks (satin stitches) – Step Stitches
Straight Line Blocks contain 5 stitches
Stitch over 4 fabric threads.
Holes are shared.
1/10/07 Hardanger Handout
HARDANGER Stitches, continued
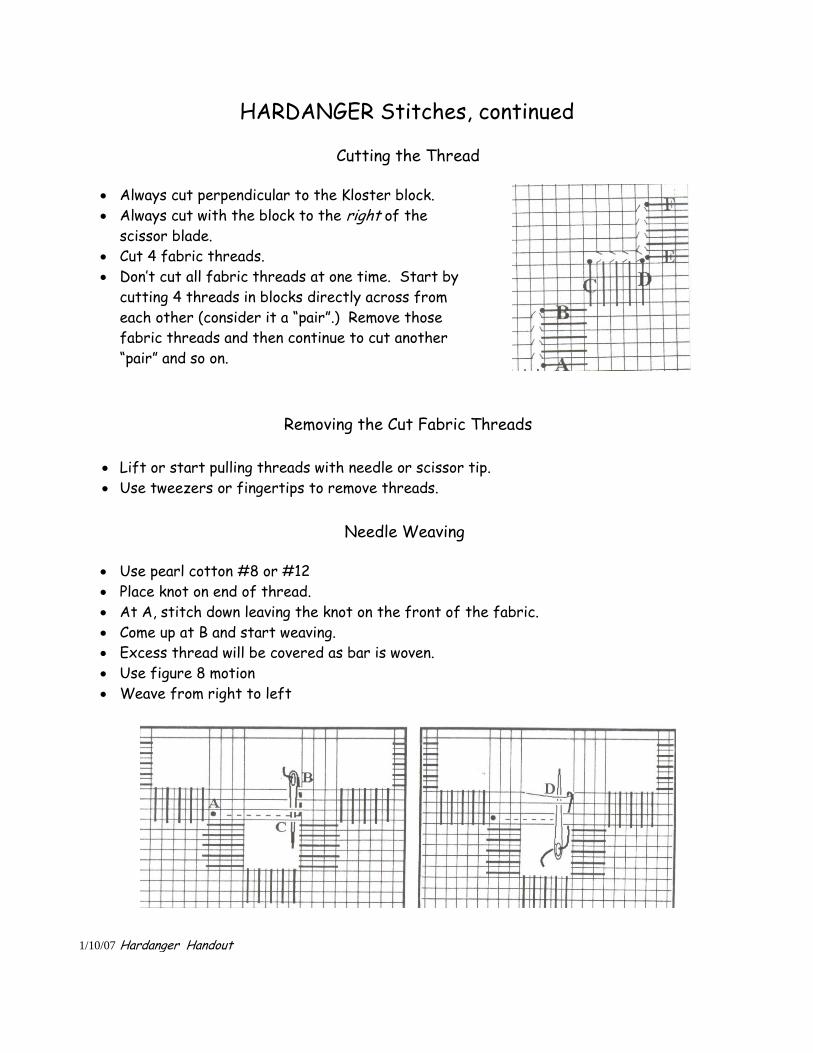
Cutting the Thread
Always cut perpendicular to the Kloster block.
Always cut with the block to the right of the
scissor blade.
Cut 4 fabric threads.
Don’t cut all fabric threads at one time. Start by
cutting 4 threads in blocks directly across from
each other (consider it a “pair”.) Remove those
fabric threads and then continue to cut another
“pair” and so on.
Removing the Cut Fabric Threads
Lift or start pulling threads with needle or scissor tip.
Use tweezers or fingertips to remove threads.
Needle Weaving
Use pearl cotton #8 or #12
Place knot on end of thread.
At A, stitch down leaving the knot on the front of the fabric.
Come up at B and start weaving.
Excess thread will be covered as bar is woven.
Use figure 8 motion
Weave from right to left
1/10/07 Hardanger Handout
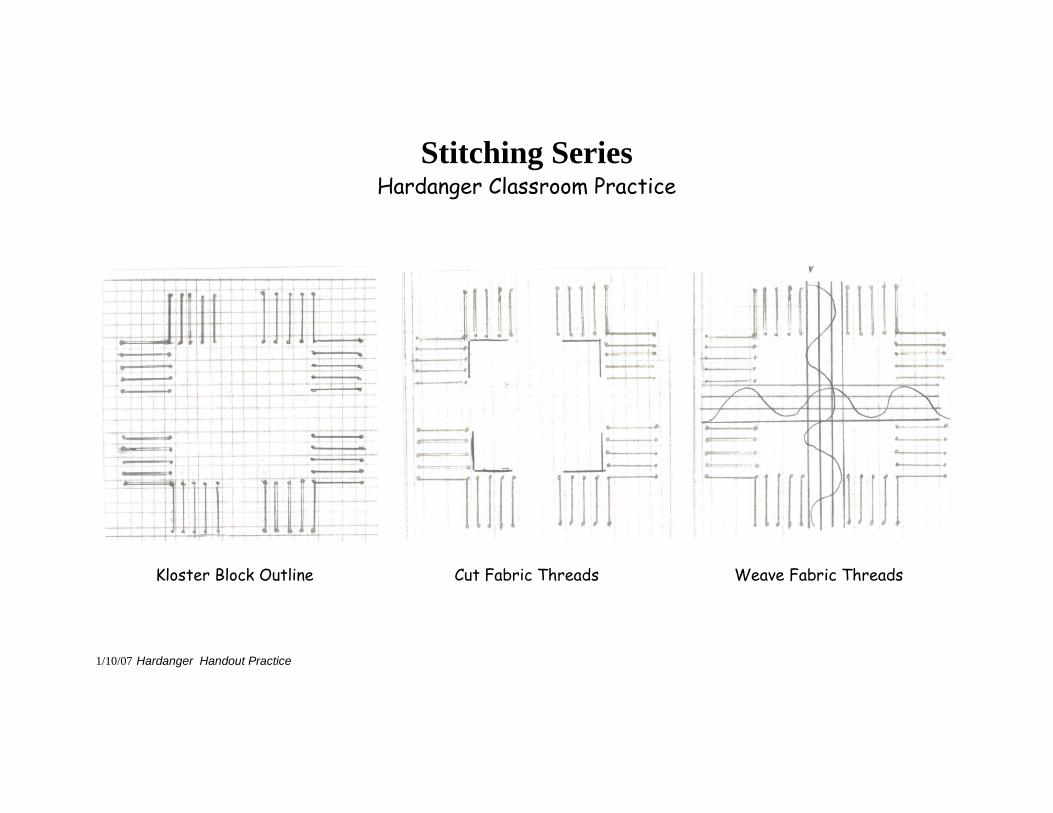
Stitching Series
Hardanger Classroom Practice
Kloster Block Outline
Cut Fabric Threads
Weave Fabric Threads
1/10/07 Hardanger Handout Practice
Stitching Series
Projects
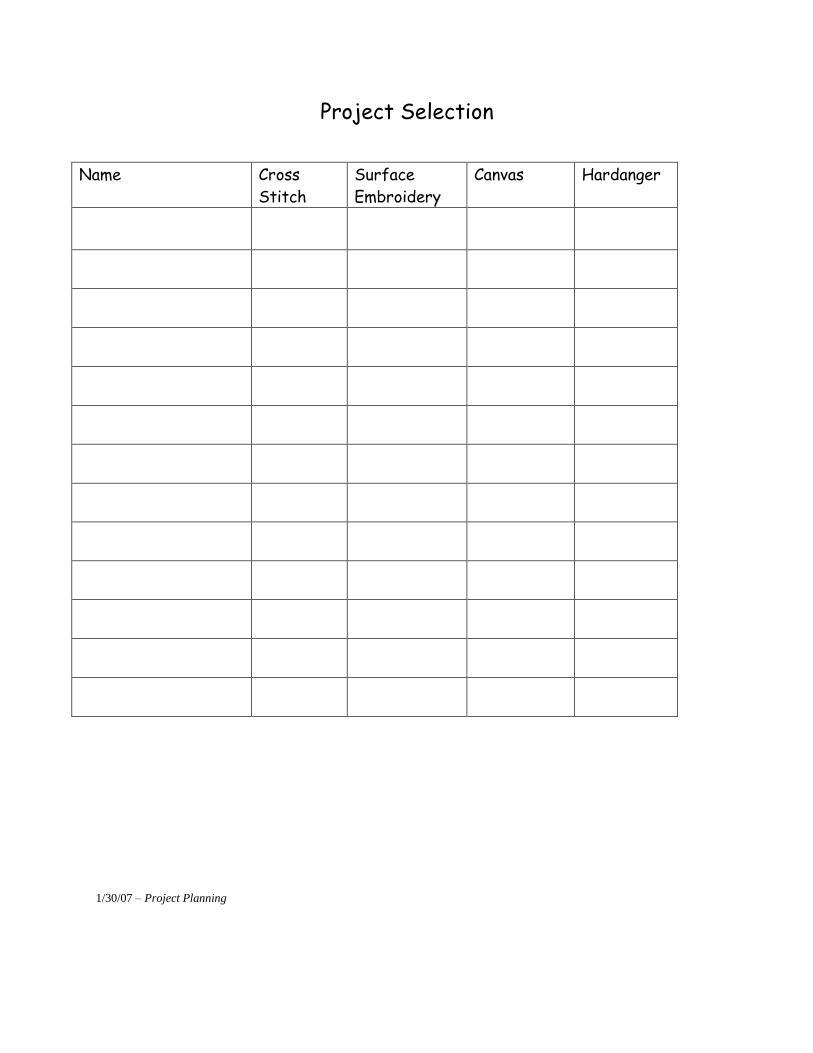
Project Selection
Name Cross
Stitch
Surface
Embroidery
Canvas Hardanger
1/30/07 – Project Planning
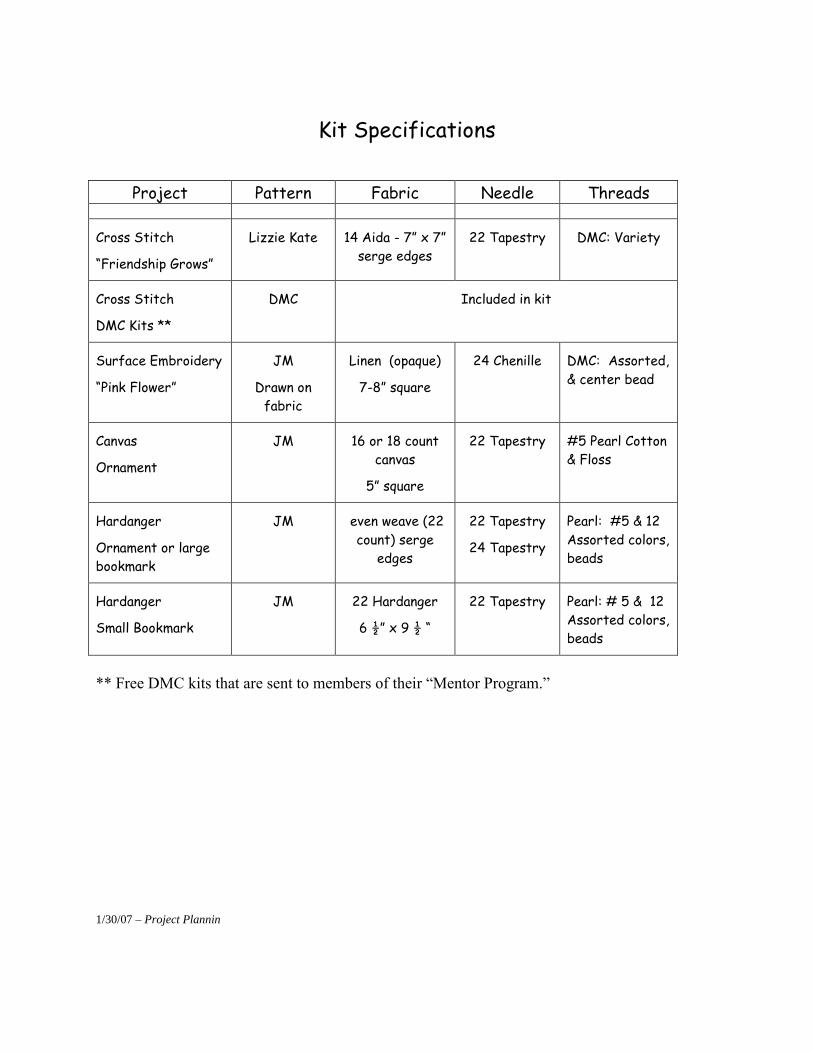
Kit Specifications
Project Pattern Fabric Needle Threads
Cross Stitch
“Friendship Grows”
Lizzie Kate 14 Aida - 7” x 7”
serge edges
22 Tapestry DMC: Variety
Cross Stitch
DMC Kits **
DMC Included in kit
Surface Embroidery
“Pink Flower”
JM
Drawn on
fabric
Linen (opaque)
7-8” square
24 Chenille DMC: Assorted,
& center bead
Canvas
Ornament
JM 16 or 18 count
canvas
5” square
22 Tapestry #5 Pearl Cotton
& Floss
Hardanger
Ornament or large
bookmark
JM even weave (22
count) serge
edges
22 Tapestry
24 Tapestry
Pearl: #5 & 12
Assorted colors,
beads
Hardanger
Small Bookmark
JM
22 Hardanger
6 ½” x 9 ½ “
22 Tapestry Pearl: # 5 & 12
Assorted colors,
beads
** Free DMC kits that are sent to members of their “Mentor Program.”
1/30/07 – Project Plannin
Tent Cards - Seating for Project Nights
Hardanger
Canvas
1/30/07 – Project Planning
Surface Embroidery
Cross Stitch
1/30/07 – Project Planning
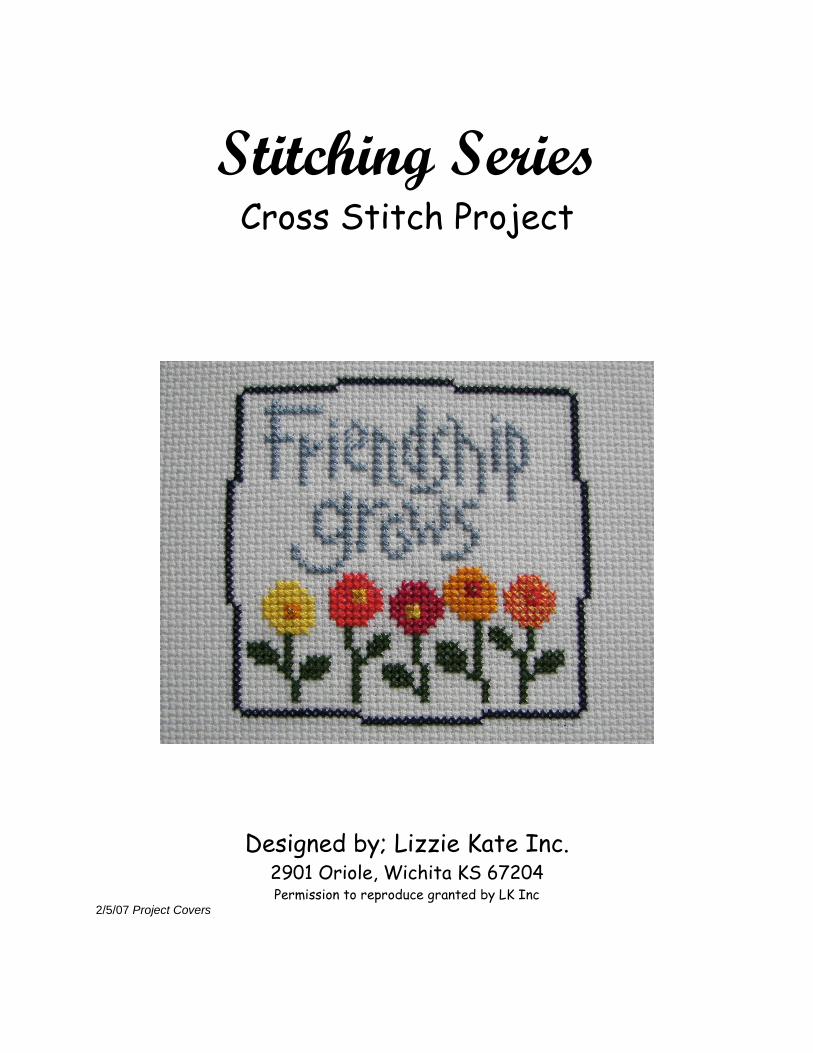
Stitching Series Cross Stitch Project
Designed by; Lizzie Kate Inc. 2901 Oriole, Wichita KS 67204 Permission to reproduce granted by LK Inc
2/5/07 Project Covers
Stitching Series
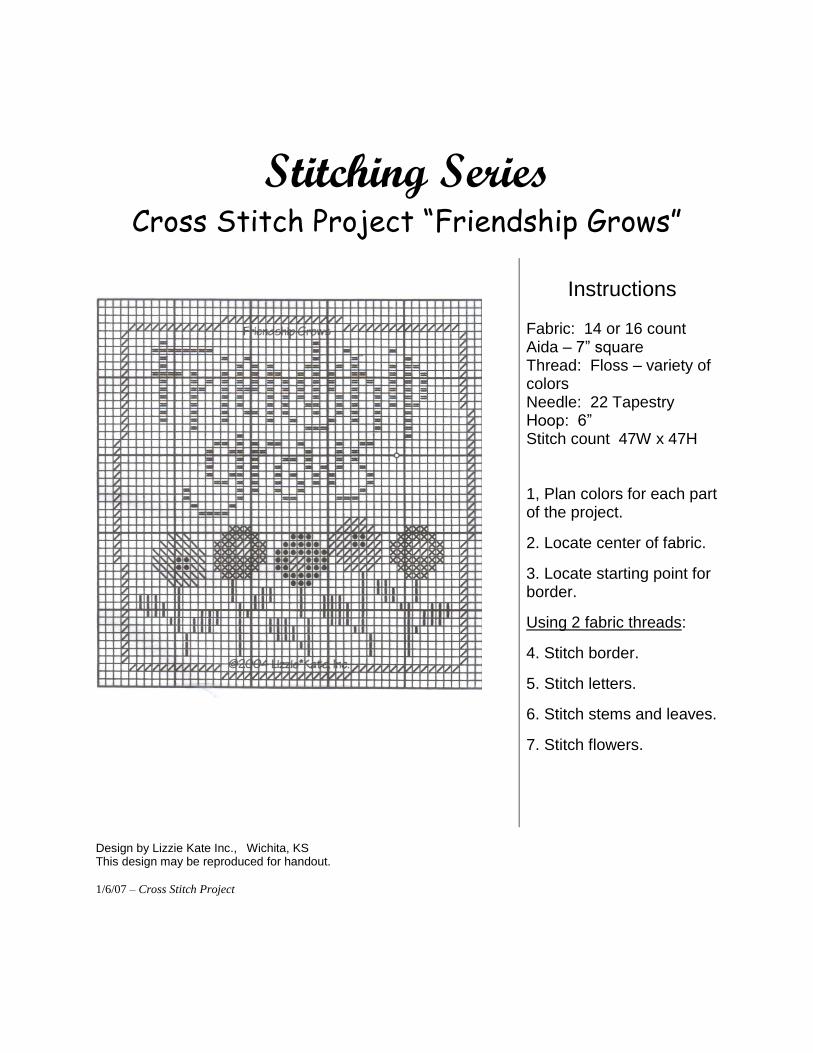
Cross Stitch Project “Friendship Grows”
Instructions
Fabric: 14 or 16 count Aida – 7” square Thread: Floss – variety of colors Needle: 22 Tapestry Hoop: 6” Stitch count 47W x 47H 1, Plan colors for each part of the project.
2. Locate center of fabric.
3. Locate starting point for border.
Using 2 fabric threads:
4. Stitch border.
5. Stitch letters.
6. Stitch stems and leaves.
7. Stitch flowers.
Design by Lizzie Kate Inc., Wichita, KS This design may be reproduced for handout.
1/6/07 – Cross Stitch Project
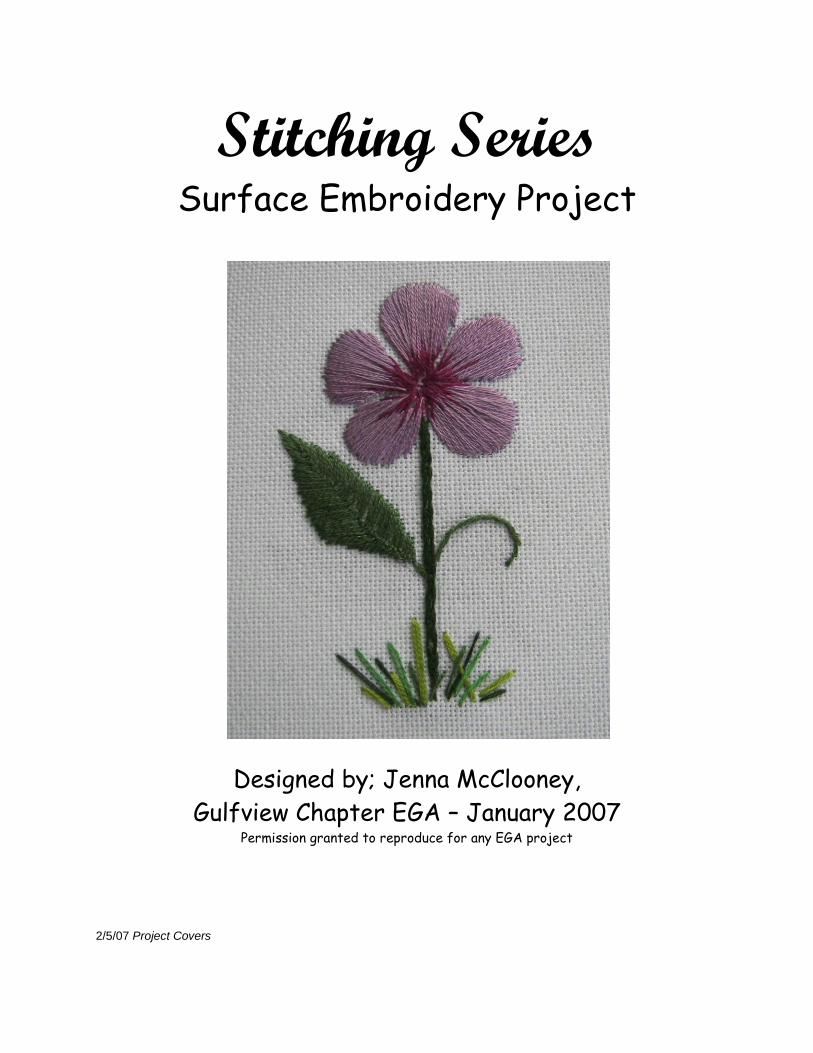
Stitching Series Surface Embroidery Project
Designed by; Jenna McClooney,
Gulfview Chapter EGA – January 2007 Permission granted to reproduce for any EGA project
2/5/07 Project Covers
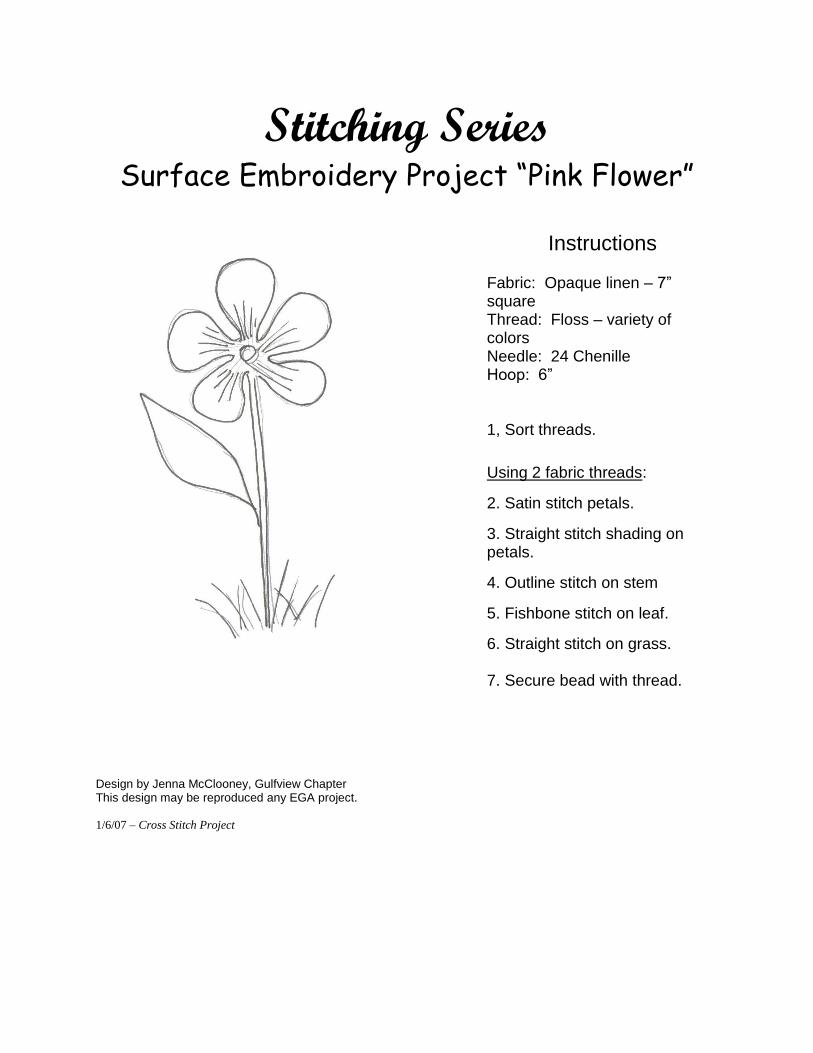
Stitching Series Surface Embroidery Project “Pink Flower”
Instructions
Fabric: Opaque linen – 7” square Thread: Floss – variety of colors Needle: 24 Chenille Hoop: 6” 1, Sort threads.
Using 2 fabric threads:
2. Satin stitch petals.
3. Straight stitch shading on petals.
4. Outline stitch on stem
5. Fishbone stitch on leaf.
6. Straight stitch on grass. 7. Secure bead with thread.
Design by Jenna McClooney, Gulfview Chapter This design may be reproduced any EGA project.
1/6/07 – Cross Stitch Project
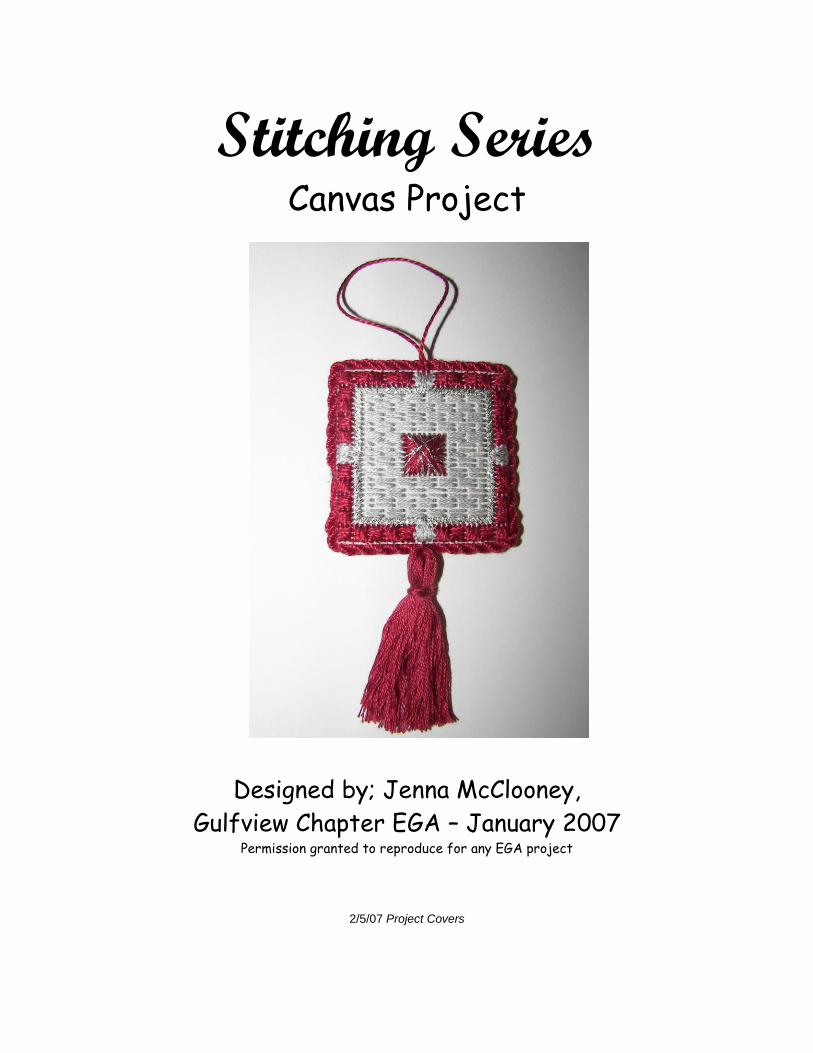
Stitching Series Canvas Project
Designed by; Jenna McClooney,
Gulfview Chapter EGA – January 2007 Permission granted to reproduce for any EGA project
2/5/07 Project Covers
Stitching Series Canvas Project
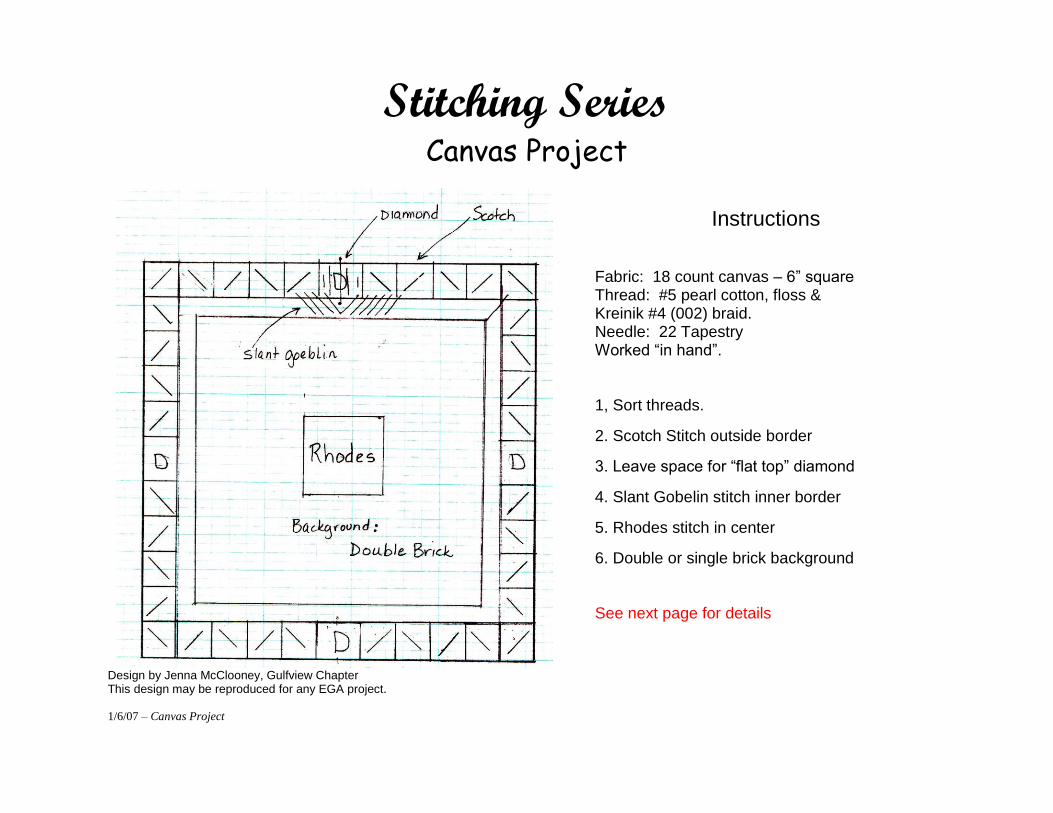
Instructions
Fabric: 18 count canvas – 6” square Thread: #5 pearl cotton, floss & Kreinik #4 (002) braid. Needle: 22 Tapestry Worked “in hand”. 1, Sort threads.
2. Scotch Stitch outside border
3. Leave space for “flat top” diamond
4. Slant Gobelin stitch inner border
5. Rhodes stitch in center
6. Double or single brick background See next page for details
Design by Jenna McClooney, Gulfview Chapter This design may be reproduced for any EGA project.
1/6/07 – Canvas Project
Instructions (continued)
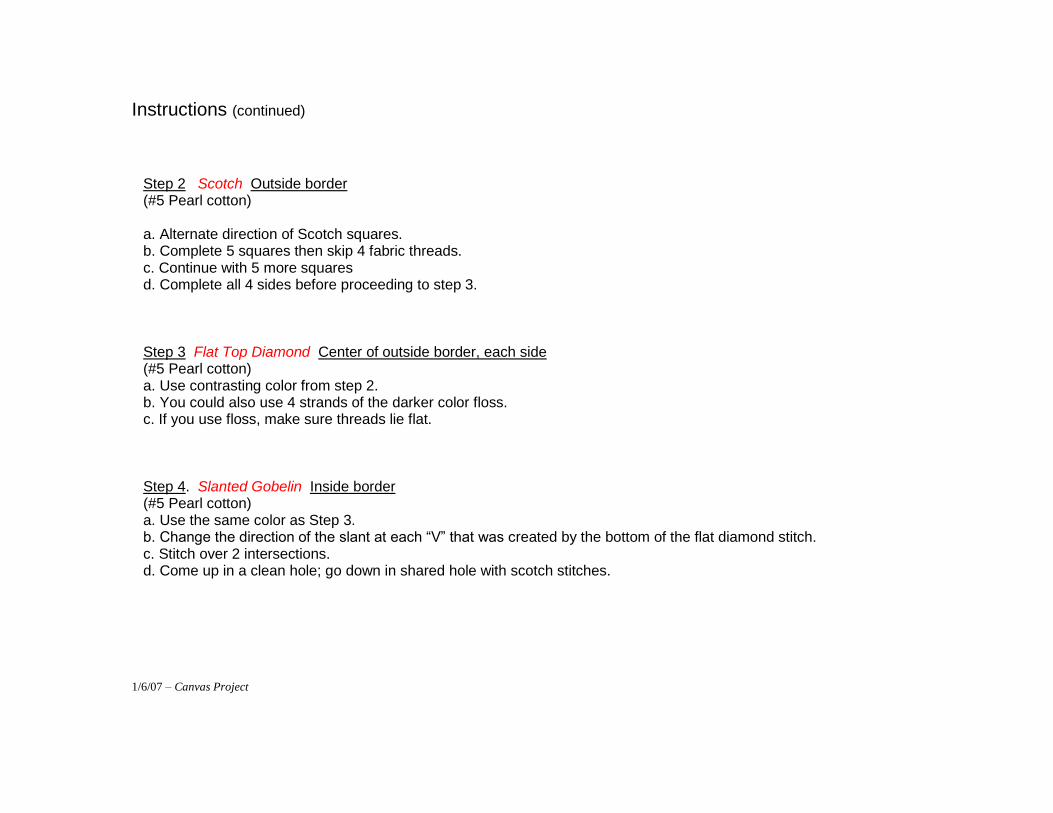
Step 2 Scotch Outside border (#5 Pearl cotton) a. Alternate direction of Scotch squares. b. Complete 5 squares then skip 4 fabric threads. c. Continue with 5 more squares d. Complete all 4 sides before proceeding to step 3. Step 3 Flat Top Diamond Center of outside border, each side (#5 Pearl cotton) a. Use contrasting color from step 2. b. You could also use 4 strands of the darker color floss. c. If you use floss, make sure threads lie flat. Step 4. Slanted Gobelin Inside border (#5 Pearl cotton) a. Use the same color as Step 3. b. Change the direction of the slant at each “V” that was created by the bottom of the flat diamond stitch. c. Stitch over 2 intersections. d. Come up in a clean hole; go down in shared hole with scotch stitches.
1/6/07 – Canvas Project
Instructions (continued)
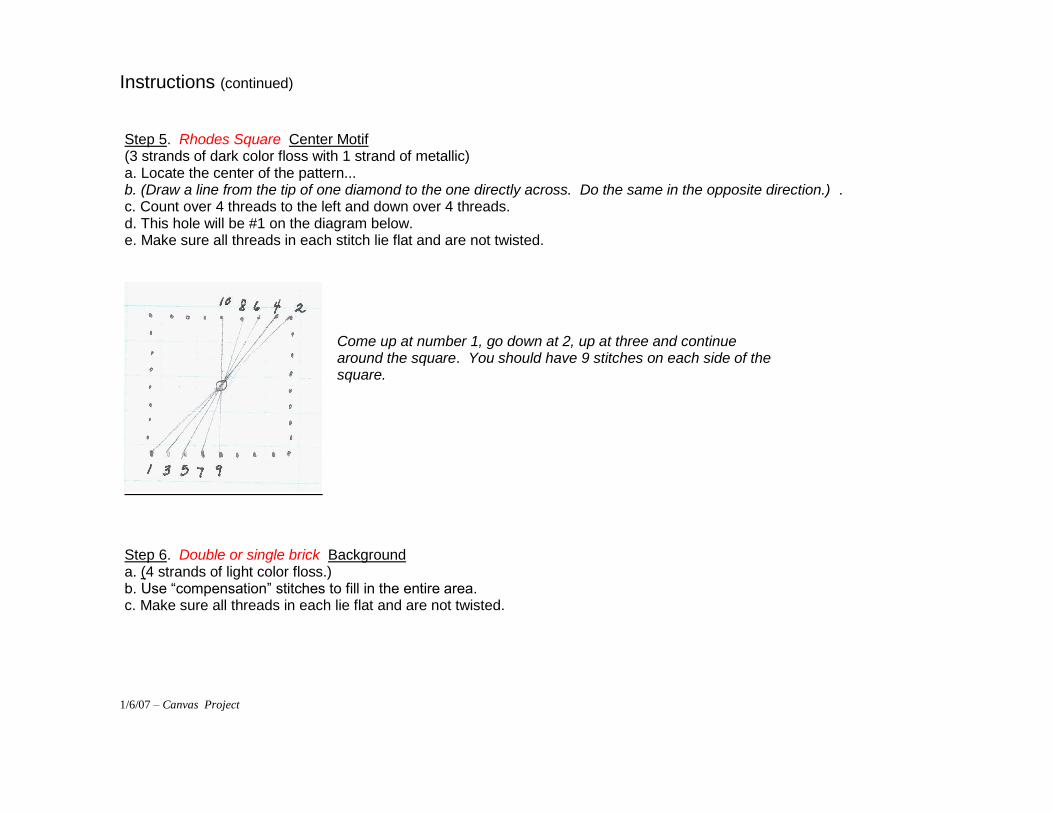
Step 5. Rhodes Square Center Motif (3 strands of dark color floss with 1 strand of metallic) a. Locate the center of the pattern... b. (Draw a line from the tip of one diamond to the one directly across. Do the same in the opposite direction.) . c. Count over 4 threads to the left and down over 4 threads. d. This hole will be #1 on the diagram below. e. Make sure all threads in each stitch lie flat and are not twisted.
Come up at number 1, go down at 2, up at three and continue around the square. You should have 9 stitches on each side of the square.
Step 6. Double or single brick Background a. (4 strands of light color floss.) b. Use “compensation” stitches to fill in the entire area. c. Make sure all threads in each lie flat and are not twisted.
1/6/07 – Canvas Project

Stitching Series Hardanger Project
Designed by; Jenna McClooney,
Gulfview Chapter EGA – January 2007 Permission granted to reproduce for any EGA project
2/5/07 Project Covers
Stitching Series Hardanger Project
Instructions
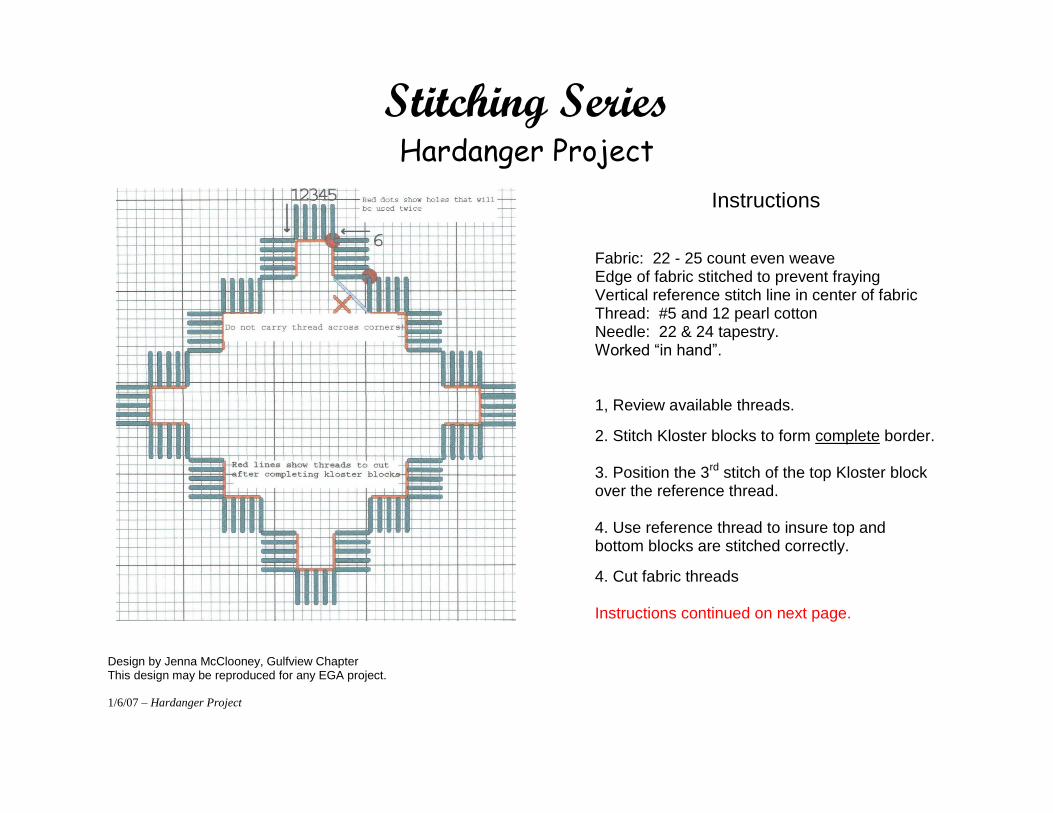
Fabric: 22 - 25 count even weave Edge of fabric stitched to prevent fraying Vertical reference stitch line in center of fabric Thread: #5 and 12 pearl cotton Needle: 22 & 24 tapestry. Worked “in hand”. 1, Review available threads.
2. Stitch Kloster blocks to form complete border. 3. Position the 3rd stitch of the top Kloster block over the reference thread. 4. Use reference thread to insure top and bottom blocks are stitched correctly.
4. Cut fabric threads Instructions continued on next page.
Design by Jenna McClooney, Gulfview Chapter This design may be reproduced for any EGA project.
1/6/07 – Hardanger Project
Instructions (continued)
Instructions (continued)
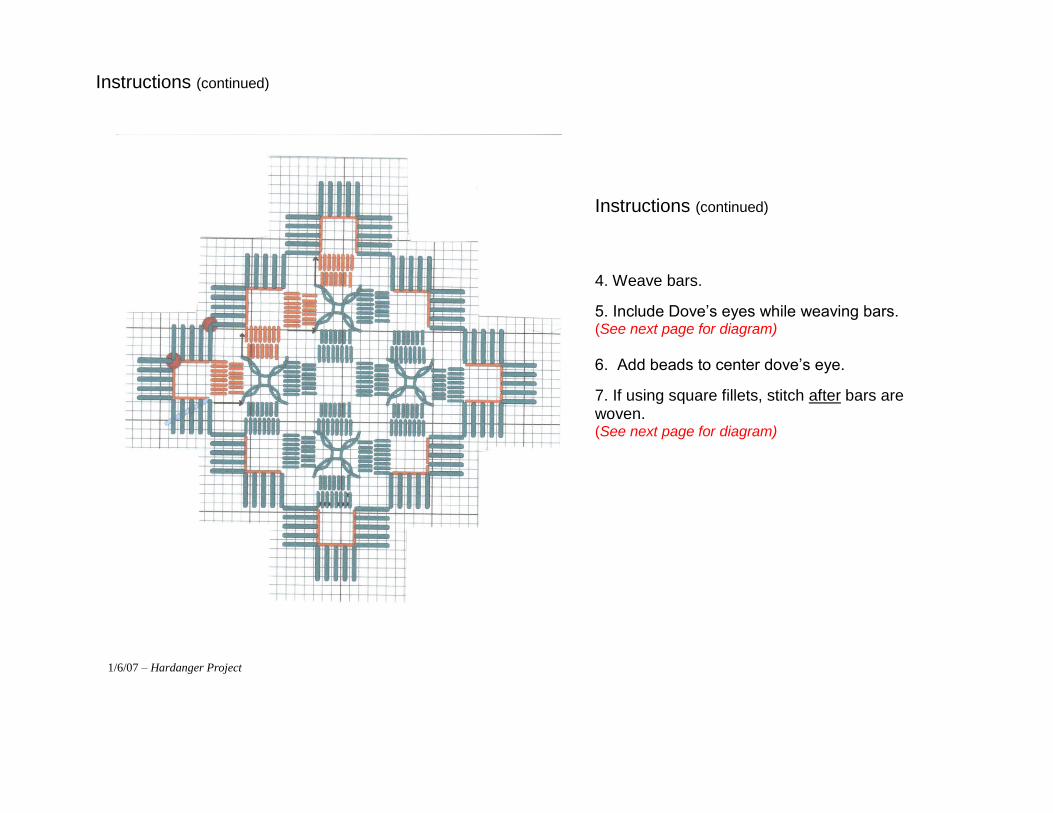
4. Weave bars.
5. Include Dove’s eyes while weaving bars. (See next page for diagram)
6. Add beads to center dove’s eye.
7. If using square fillets, stitch after bars are woven. (See next page for diagram)
1/6/07 – Hardanger Project
Instructions (continued)
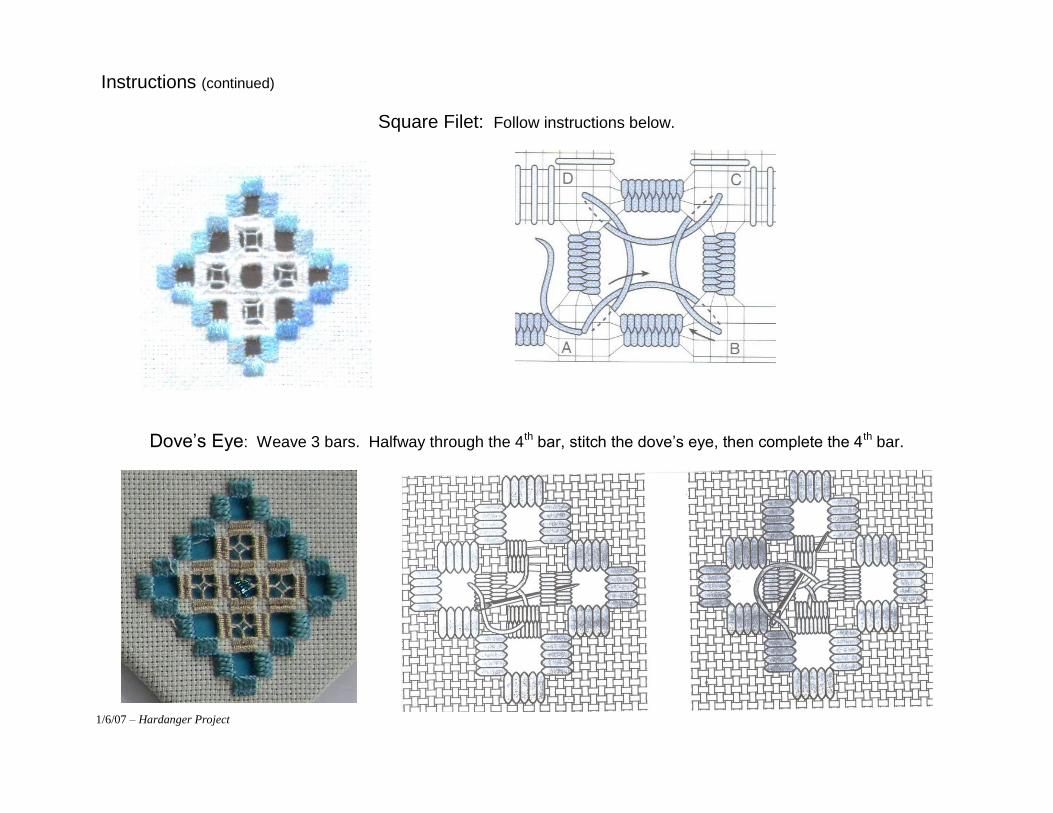
Square Filet: Follow instructions below.
Dove’s Eye: Weave 3 bars. Halfway through the 4th bar, stitch the dove’s eye, then complete the 4th bar.
1/6/07 – Hardanger Project
Stitching Series Bonus Hardanger Project
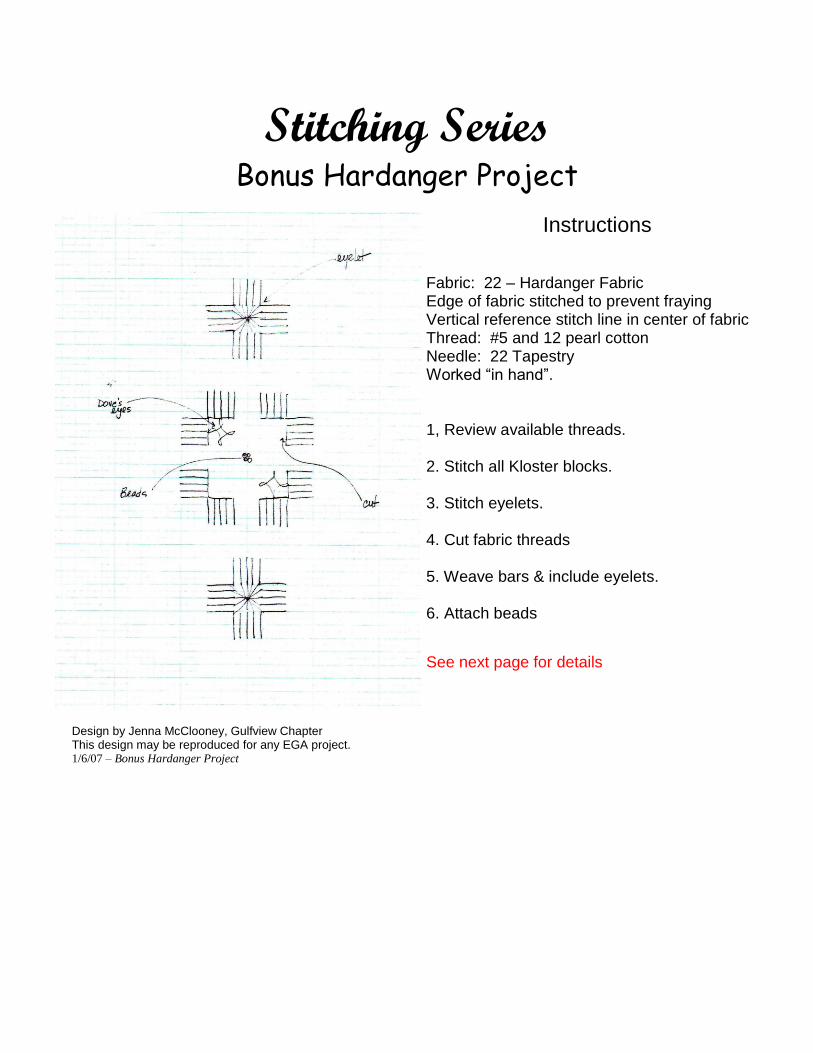
Instructions
Fabric: 22 – Hardanger Fabric Edge of fabric stitched to prevent fraying Vertical reference stitch line in center of fabric Thread: #5 and 12 pearl cotton Needle: 22 Tapestry Worked “in hand”. 1, Review available threads. 2. Stitch all Kloster blocks. 3. Stitch eyelets. 4. Cut fabric threads 5. Weave bars & include eyelets. 6. Attach beads
See next page for details
Design by Jenna McClooney, Gulfview Chapter This design may be reproduced for any EGA project. 1/6/07 – Bonus Hardanger Project
Instructions (continued)
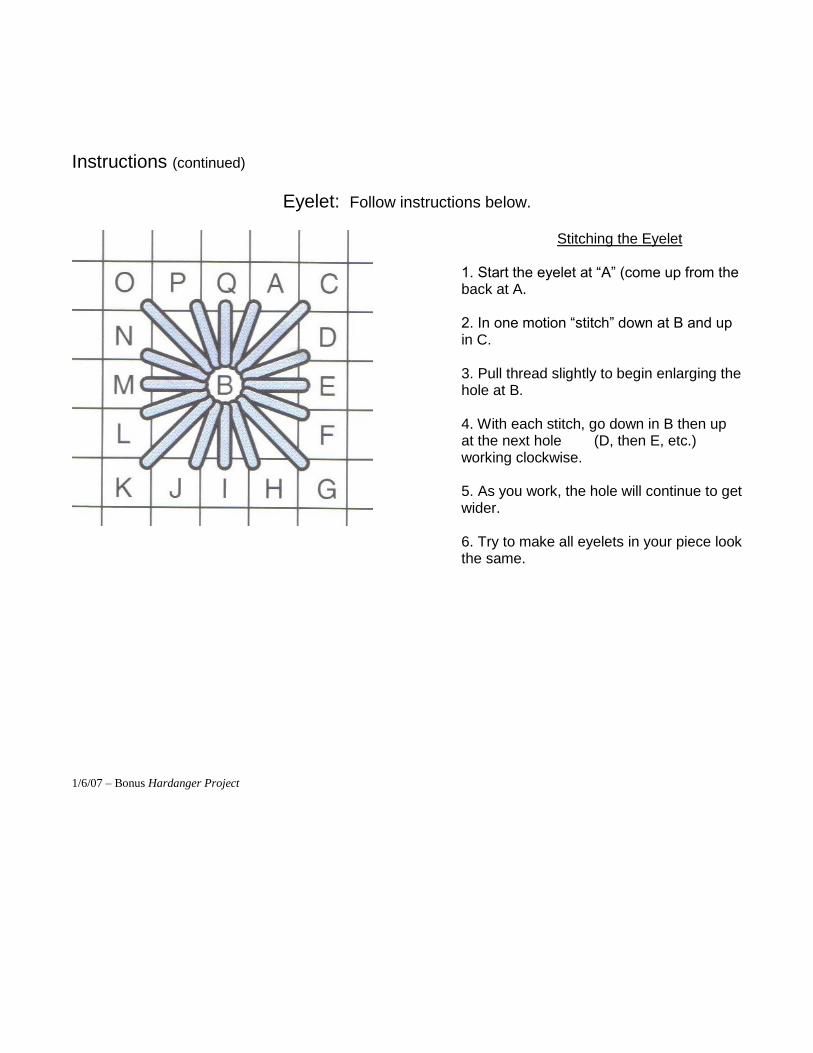
Eyelet: Follow instructions below.
Stitching the Eyelet 1. Start the eyelet at “A” (come up from the back at A. 2. In one motion “stitch” down at B and up in C. 3. Pull thread slightly to begin enlarging the hole at B. 4. With each stitch, go down in B then up at the next hole (D, then E, etc.) working clockwise. 5. As you work, the hole will continue to get wider. 6. Try to make all eyelets in your piece look the same.
1/6/07 – Bonus Hardanger Project
Finishing Embroidery
Consider giving a copy of this 2 page section on finishing, to your students at the end of class. A special thanks to Karen Wojahn of the Green Bay Area Chapter for providing
this helpful information.
Place name/initials and date on piece. Washing Embroidery – wash only if necessary. Test materials for colorfastness to prevent dyes from running. Gently rub a wet cotton swab over each different color in your piece. If there is any color transfer, don’t wash the piece at all. Canvas needs to be blocked. Crewel embroidery can be washed if stretched tightly on a frame.
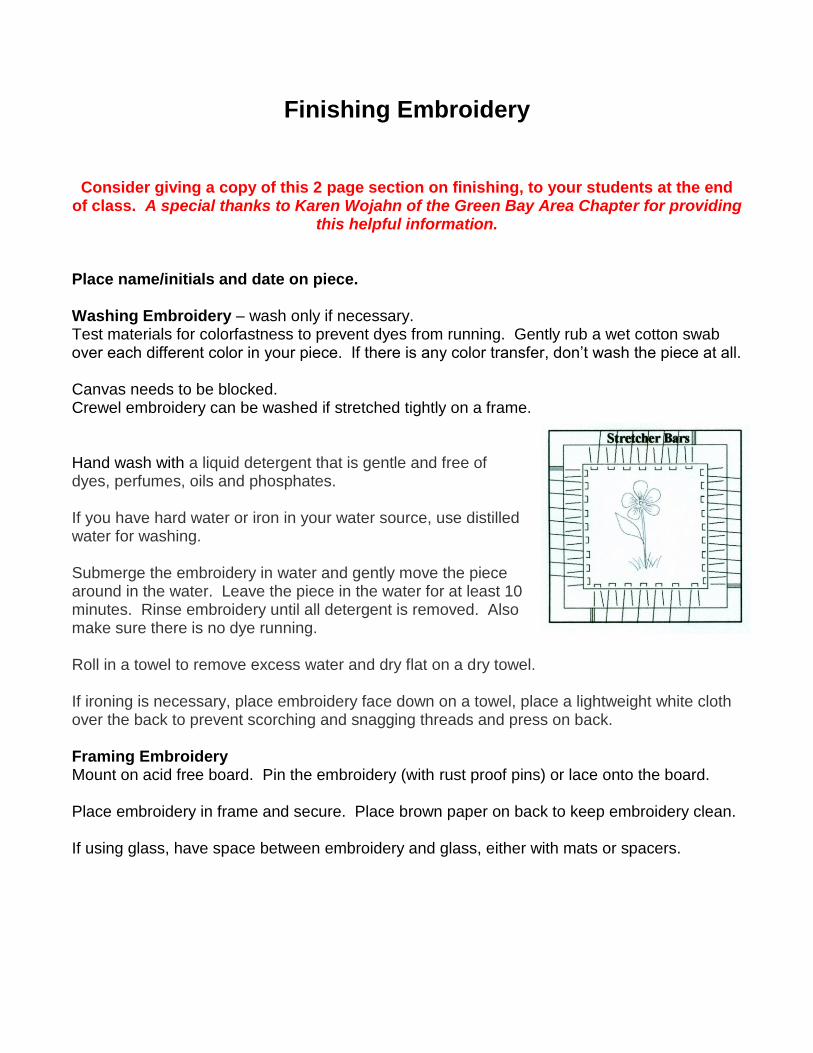
Hand wash with a liquid detergent that is gentle and free of dyes, perfumes, oils and phosphates. If you have hard water or iron in your water source, use distilled water for washing. Submerge the embroidery in water and gently move the piece around in the water. Leave the piece in the water for at least 10 minutes. Rinse embroidery until all detergent is removed. Also make sure there is no dye running. Roll in a towel to remove excess water and dry flat on a dry towel. If ironing is necessary, place embroidery face down on a towel, place a lightweight white cloth over the back to prevent scorching and snagging threads and press on back. Framing Embroidery Mount on acid free board. Pin the embroidery (with rust proof pins) or lace onto the board. Place embroidery in frame and secure. Place brown paper on back to keep embroidery clean. If using glass, have space between embroidery and glass, either with mats or spacers.
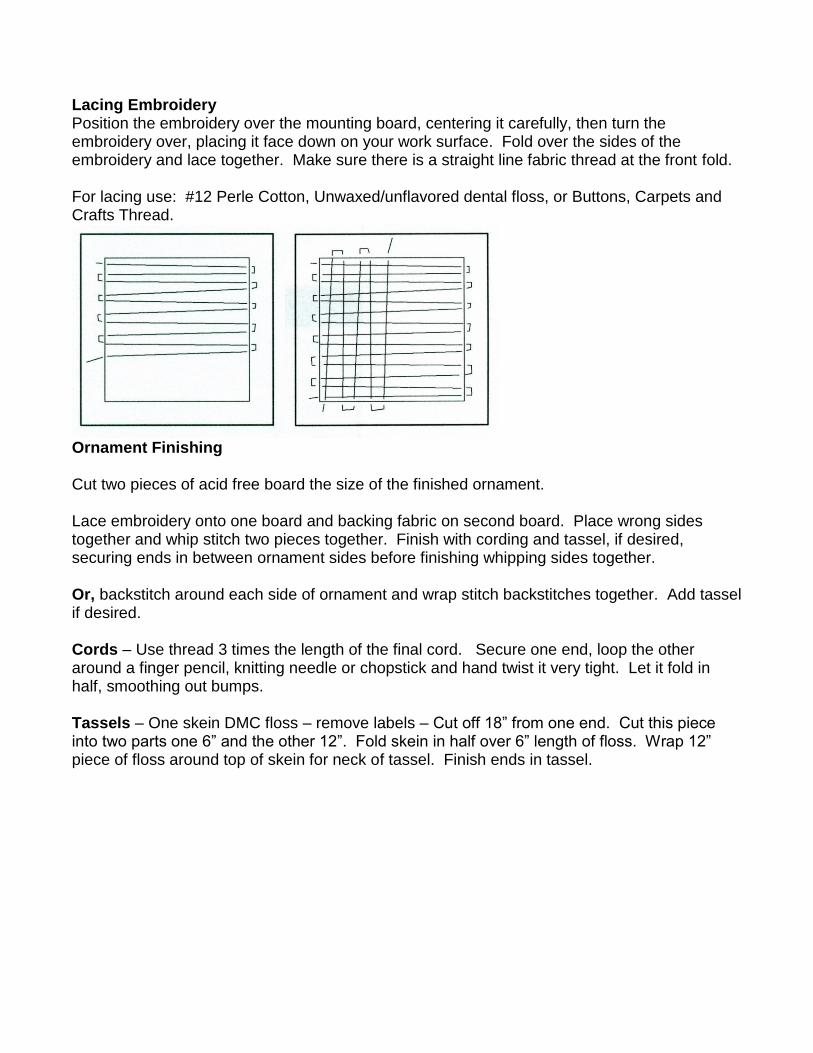
Lacing Embroidery Position the embroidery over the mounting board, centering it carefully, then turn the embroidery over, placing it face down on your work surface. Fold over the sides of the embroidery and lace together. Make sure there is a straight line fabric thread at the front fold. For lacing use: #12 Perle Cotton, Unwaxed/unflavored dental floss, or Buttons, Carpets and Crafts Thread.
Ornament Finishing Cut two pieces of acid free board the size of the finished ornament. Lace embroidery onto one board and backing fabric on second board. Place wrong sides together and whip stitch two pieces together. Finish with cording and tassel, if desired, securing ends in between ornament sides before finishing whipping sides together. Or, backstitch around each side of ornament and wrap stitch backstitches together. Add tassel if desired. Cords – Use thread 3 times the length of the final cord. Secure one end, loop the other around a finger pencil, knitting needle or chopstick and hand twist it very tight. Let it fold in half, smoothing out bumps. Tassels – One skein DMC floss – remove labels – Cut off 18” from one end. Cut this piece into two parts one 6” and the other 12”. Fold skein in half over 6” length of floss. Wrap 12” piece of floss around top of skein for neck of tassel. Finish ends in tassel.
Stitching Series
Evaluation and Close-out
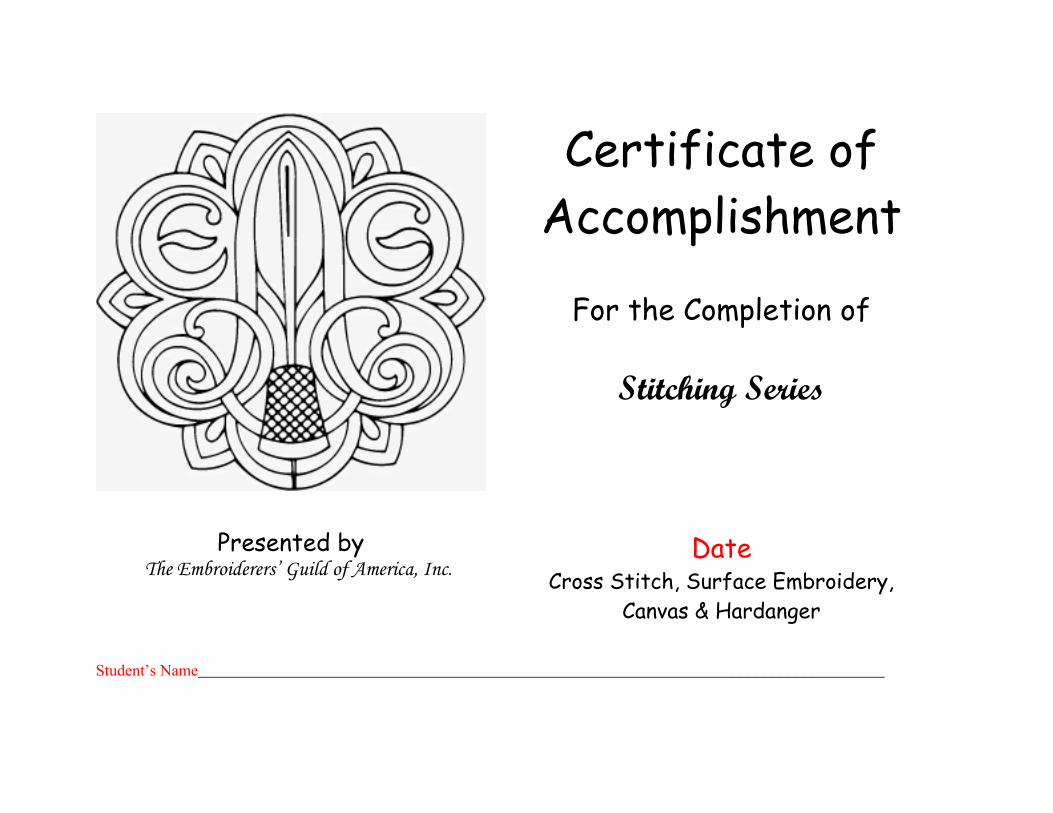
Certificate of
Accomplishment
For the Completion of
Stitching Series
Presented by The Embroiderers’ Guild of America, Inc.
Date
Cross Stitch, Surface Embroidery,
Canvas & Hardanger
Student’s Name______________________________________________________________________________________
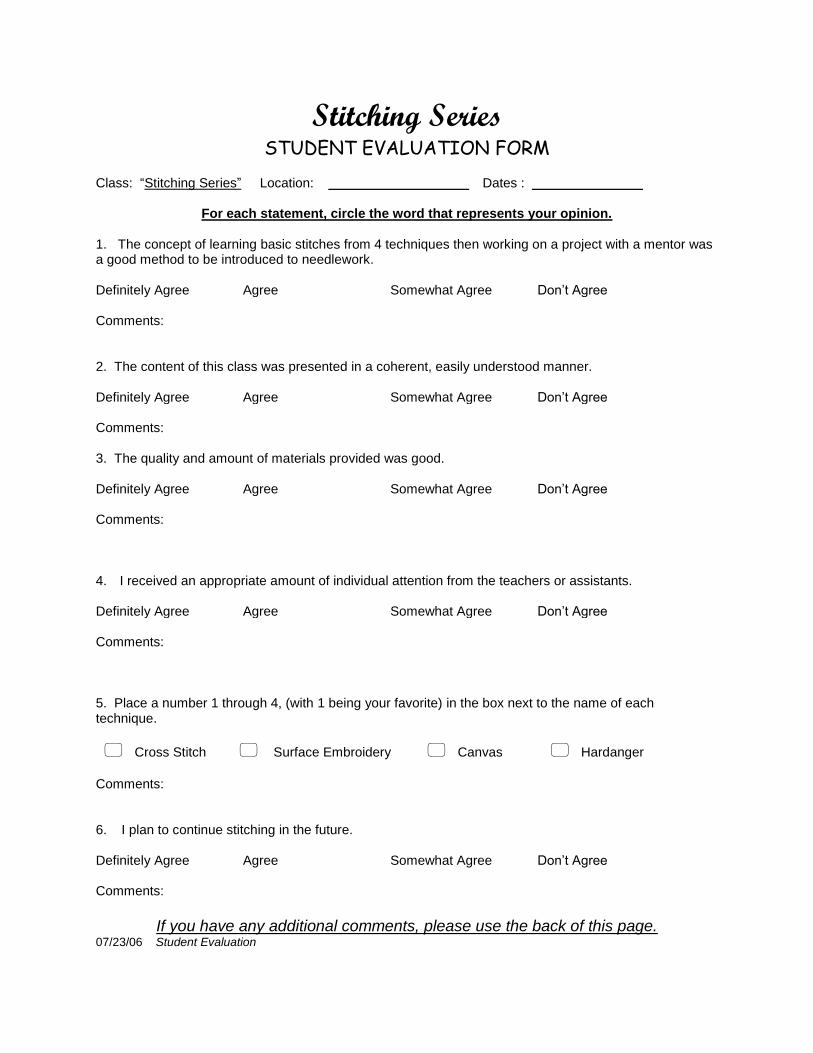
Stitching Series STUDENT EVALUATION FORM
Class: “Stitching Series” Location: ___________________ Dates : _______________
For each statement, circle the word that represents your opinion. 1. The concept of learning basic stitches from 4 techniques then working on a project with a mentor was a good method to be introduced to needlework. Definitely Agree
Agree
Somewhat Agree
Don’t Agree
Comments: 2. The content of this class was presented in a coherent, easily understood manner. Definitely Agree Agree Somewhat Agree Don’t Agree Comments: 3. The quality and amount of materials provided was good. Definitely Agree
Agree
Somewhat Agree
Don’t Agree
Comments: 4. I received an appropriate amount of individual attention from the teachers or assistants. Definitely Agree
Agree
Somewhat Agree
Don’t Agree
Comments: 5. Place a number 1 through 4, (with 1 being your favorite) in the box next to the name of each technique.
Cross Stitch Surface Embroidery Canvas Hardanger
Comments: 6. I plan to continue stitching in the future. Definitely Agree Agree Somewhat Agree Don’t Agree Comments:
If you have any additional comments, please use the back of this page.
07/23/06 Student Evaluation
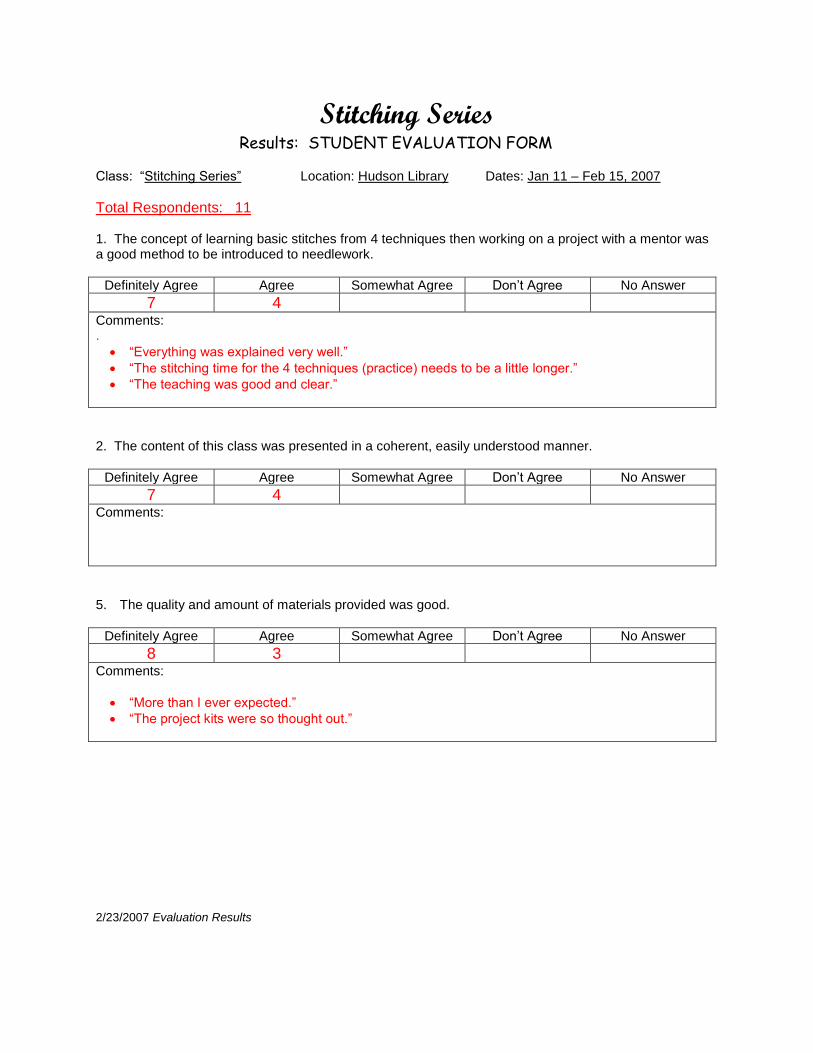
Stitching Series Results: STUDENT EVALUATION FORM
Class: “Stitching Series” Location: Hudson Library Dates: Jan 11 – Feb 15, 2007
Total Respondents: 11 1. The concept of learning basic stitches from 4 techniques then working on a project with a mentor was a good method to be introduced to needlework.
Definitely Agree Agree Somewhat Agree Don’t Agree No Answer
7 4 Comments: .
“Everything was explained very well.”
“The stitching time for the 4 techniques (practice) needs to be a little longer.”
“The teaching was good and clear.”
2. The content of this class was presented in a coherent, easily understood manner.
Definitely Agree Agree Somewhat Agree Don’t Agree No Answer
7 4 Comments:
5. The quality and amount of materials provided was good.
Definitely Agree Agree Somewhat Agree Don’t Agree No Answer
8 3 Comments:
“More than I ever expected.”
“The project kits were so thought out.”
2/23/2007 Evaluation Results
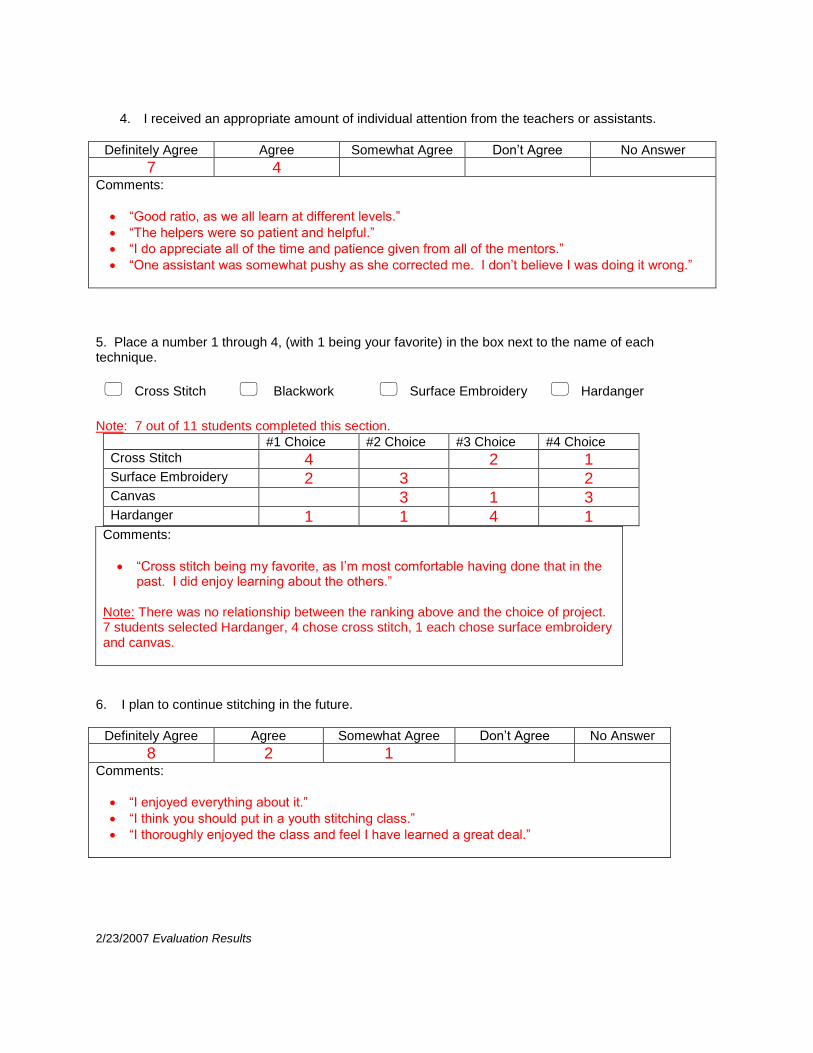
4. I received an appropriate amount of individual attention from the teachers or assistants.
Definitely Agree Agree Somewhat Agree Don’t Agree No Answer
7 4 Comments:
“Good ratio, as we all learn at different levels.”
“The helpers were so patient and helpful.”
“I do appreciate all of the time and patience given from all of the mentors.”
“One assistant was somewhat pushy as she corrected me. I don’t believe I was doing it wrong.”
5. Place a number 1 through 4, (with 1 being your favorite) in the box next to the name of each technique.
Cross Stitch Blackwork Surface Embroidery Hardanger
Note: 7 out of 11 students completed this section.
#1 Choice #2 Choice #3 Choice #4 Choice
Cross Stitch 4 2 1 Surface Embroidery 2 3 2 Canvas 3 1 3 Hardanger 1 1 4 1
Comments:
“Cross stitch being my favorite, as I’m most comfortable having done that in the past. I did enjoy learning about the others.”
Note: There was no relationship between the ranking above and the choice of project. 7 students selected Hardanger, 4 chose cross stitch, 1 each chose surface embroidery and canvas.
6. I plan to continue stitching in the future.
Definitely Agree Agree Somewhat Agree Don’t Agree No Answer
8 2 1 Comments:
“I enjoyed everything about it.”
“I think you should put in a youth stitching class.”
“I thoroughly enjoyed the class and feel I have learned a great deal.”
2/23/2007 Evaluation Results