Adobe Photoshop CS4 - Illustrated Unit H: Improving Productivity.
27
Adobe Photoshop CS4 - Illustrated Adobe Photoshop CS4 - Illustrated Unit H: Improving Productivity Unit H: Improving Productivity
-
Upload
gary-poole -
Category
Documents
-
view
224 -
download
0
Transcript of Adobe Photoshop CS4 - Illustrated Unit H: Improving Productivity.

Adobe Photoshop CS4 - IllustratedAdobe Photoshop CS4 - Illustrated
Unit H: Improving ProductivityUnit H: Improving Productivity

ObjectivesObjectives
Use the Image Processor
Create and run an action
Batch process an action
Use the History panel
Adobe Photoshop CS4 - Illustrated

ObjectivesObjectives
Create a snapshot and use the History Brush tool
Clone with the Clone Stamp tool
Clone with the Healing Brush tool
Experiment with cloning options
Adobe Photoshop CS4 - Illustrated

Improving ProductivityImproving Productivity
Photoshop is not only about design and photographs; it plays many roles in a graphics environment
Adobe has designed Photoshop to be something of a workhorse, with many built-in modules to make Photoshop very effective as an image processor in a graphics workflow environment
Adobe Photoshop CS4 - Illustrated

Using the Image ProcessorUsing the Image Processor
Certain types of workflows call for repetitive tasks; such as the web environment converting images to the same file format to be
used on a web site
Photoshop’s Image Processor feature is great for quickly converting groups of files to other file formats
There are a number of options available for converting files when using the Image Processor
Adobe Photoshop CS4 - Illustrated

Using the Image ProcessorUsing the Image Processor
Adobe Photoshop CS4 - Illustrated
Image Processor dialog boxImage Processor dialog box

Creating and Running an ActionCreating and Running an Action
Actions are about repetition as is Photoshop; the same things are done over and over again
It is a smart idea to save the repetitive steps as an action to save time
Actions are created, stored, and automatically saved in the Actions panel once an action is created it will be available on
the Actions panel for all future files that are opened, even after quitting Photoshop
Adobe Photoshop CS4 - Illustrated

Creating and Running an ActionCreating and Running an Action
A smart set of actions is a big plus for getting work completed quickly
Actions can be exported to a portable file that can be copied to a CD or emailed to have it available for different computers the saved file will have an ATN extension and will
need to be loaded from the Actions panel
Adobe Photoshop CS4 - Illustrated

Creating and Running an ActionCreating and Running an Action
Adobe Photoshop CS4 - Illustrated
New action added to the Actions panel
New action added to the Actions panel
Three commands added to the Invert action
Three commands added to the Invert action

Batch Processing an ActionBatch Processing an Action
Batch process means, rather than opening each image in the folder and executing the action by hand, Photoshop can apply the action to an entire folder of images
The primary function of the Image Processor is to convert files from one format to another; batch processing allows the application of a single action simultaneously to a bunch of images
Adobe Photoshop CS4 - Illustrated

Batch Processing an ActionBatch Processing an Action
Adobe Photoshop CS4 - Illustrated
Batch dialog boxBatch dialog box

Using the History PanelUsing the History Panel
The History panel provides great features; one of them is the ability to quickly revert a file to its first opened state, then bring it back to its current state
As an image is worked with, the History panel records all moves and lists the last twenty of them, called states, in the panel
The last state in the list represents the last change made to the file
Adobe Photoshop CS4 - Illustrated

Using the History PanelUsing the History Panel
At any time a state in the list can be clicked to return to that point and then start working from that state
The History panel logs each command performed as a new state it will log only a specific number of states which is
determined as a preference the higher the number entered as a preference
the more memory Photoshop requires to keep the states active
The Revert command, on the file Menu, returns to the state of the file the last time the file was saved
Adobe Photoshop CS4 - Illustrated

Using the History PanelUsing the History Panel
Adobe Photoshop CS4 - Illustrated
Viewing states on the History panelViewing states on the History panel
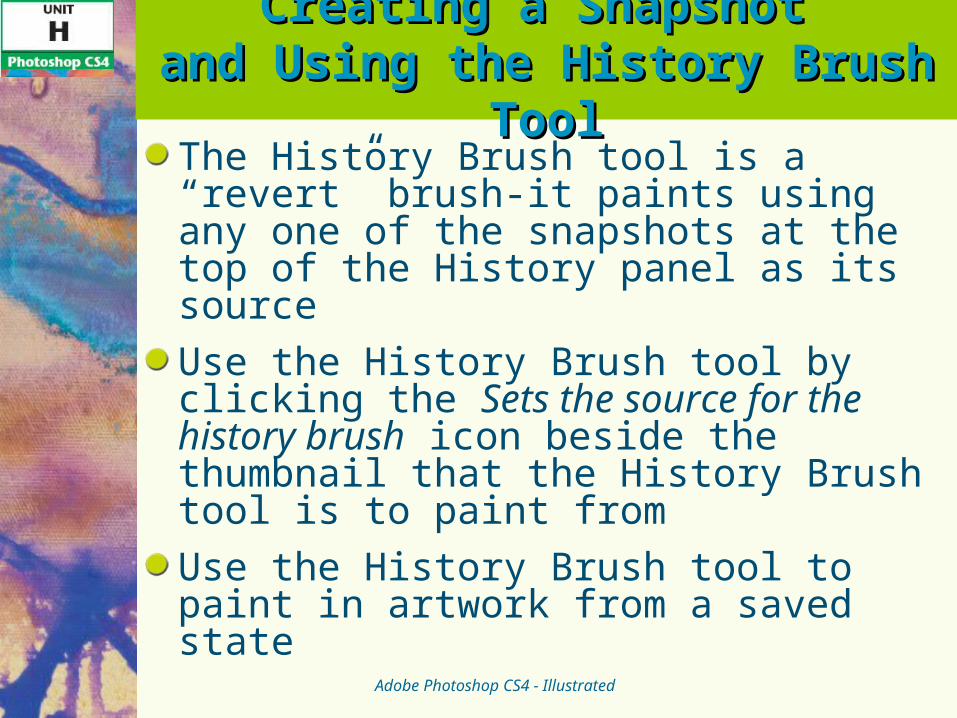
Creating a Snapshot Creating a Snapshot and Using the History Brush Tooland Using the History Brush ToolThe History Brush tool is a “revert” brush-it paints using any one of the snapshots at the top of the History panel as its source
Use the History Brush tool by clicking the Sets the source for the history brush icon beside the thumbnail that the History Brush tool is to paint from
Use the History Brush tool to paint in artwork from a saved state
Adobe Photoshop CS4 - Illustrated

Creating a Snapshot Creating a Snapshot and Using the History Brush Tooland Using the History Brush ToolThe History Brush tool can also function artistically; set it to a low opacity and gradually “paint in” artwork from a saved state
A tip--A smart way to work is to have the History panel automatically save a snapshot every time the artwork is saved
Adobe Photoshop CS4 - Illustrated
Creating a Snapshot Creating a Snapshot and Using the History Brush Tooland Using the History Brush Tool
Adobe Photoshop CS4 - Illustrated
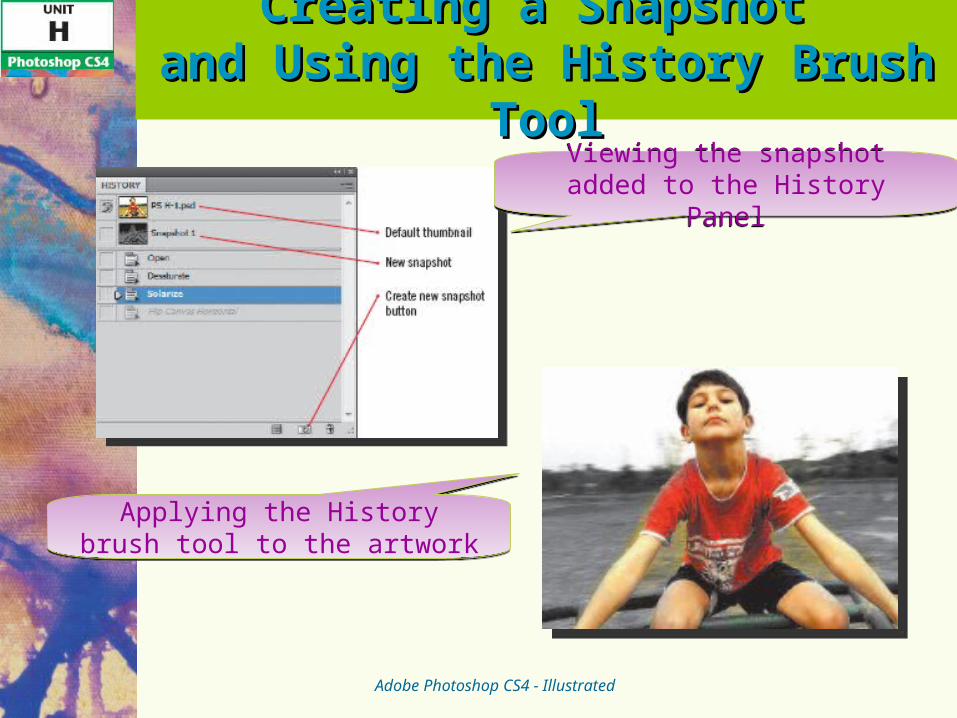
Viewing the snapshot added to the History Panel
Viewing the snapshot added to the History Panel
Applying the History brush tool to the artwork
Applying the History brush tool to the artwork

Cloning with the Clone Stamp ToolCloning with the Clone Stamp Tool
Cloning can be defined as copying pixels from one area to another
The Clone Stamp tool is a brush, when it is used to clone pixels there are options of brush size, hardness and opacity
Cloning has two parts: the sample is the source from where the clone
comes the clone refers to the copied pixels that are
created from the sample
Adobe Photoshop CS4 - Illustrated
Cloning with the Clone Stamp ToolCloning with the Clone Stamp Tool
Current & Below is one of three sampling option that can be used with the Clone Stamp tool
When using the Current & Below option it means that the Clone Stamp tool will sample artwork from the current layer and all the layers below it
All of the cloning tools including the Clone Stamp tool have an Aligned option that is available on the Tools panel with the Aligned option checked whatever was
previously sampled will be continuedAdobe Photoshop CS4 - Illustrated

Cloning with the Clone Stamp ToolCloning with the Clone Stamp Tool
Working “non-destructively” in Photoshop is a best practice-that goes for cloning
When using the Clone Stamp tool the best way is to work in a way that does not permanently affect the original artwork The Current & Below option is key to this
concept• When needing to clone create an empty layer
above the artwork for the clone
Adobe Photoshop CS4 - Illustrated

Cloning with the Clone Stamp ToolCloning with the Clone Stamp Tool
Adobe Photoshop CS4 - Illustrated
Viewing the finished artwork
Viewing the finished artwork
Viewing the cloned birdViewing the cloned bird

Cloning with the Healing Brush Cloning with the Healing Brush ToolTool
The Healing Brush tool is a cloning tool sample using the Healing Brush and clone to
another matches the clone to the texture, lighting, and
shading of the area being cloned to Is useful for cloning large areas of non-specific
data
Adobe Photoshop CS4 - Illustrated

Cloning with the Healing Brush Cloning with the Healing Brush ToolTool
Adobe Photoshop CS4 - Illustrated
Viewing the first cloneViewing the first clone
Viewing the finished artwork
Viewing the finished artwork

Experimenting with Cloning Experimenting with Cloning OptionsOptions
The options for the Clone Stamp and the Healing Brush tool are similar
The sampling options are: Current Layer-the tool samples artwork only on
the targeted layer; artwork or adjustments on layers above or below the targeted layer will not be involved in the sample
Current & Below-the tool samples the appearance of the artwork as a composite of the current layer and all the layers beneath it; Artwork or adjustments on layers above the targeted layer are not involved in the sample
All Layers-the tool samples the appearance of the artwork as the result of all layers in the image
Adobe Photoshop CS4 - Illustrated
Experimenting with Cloning Experimenting with Cloning OptionsOptions
Adobe Photoshop CS4 - Illustrated
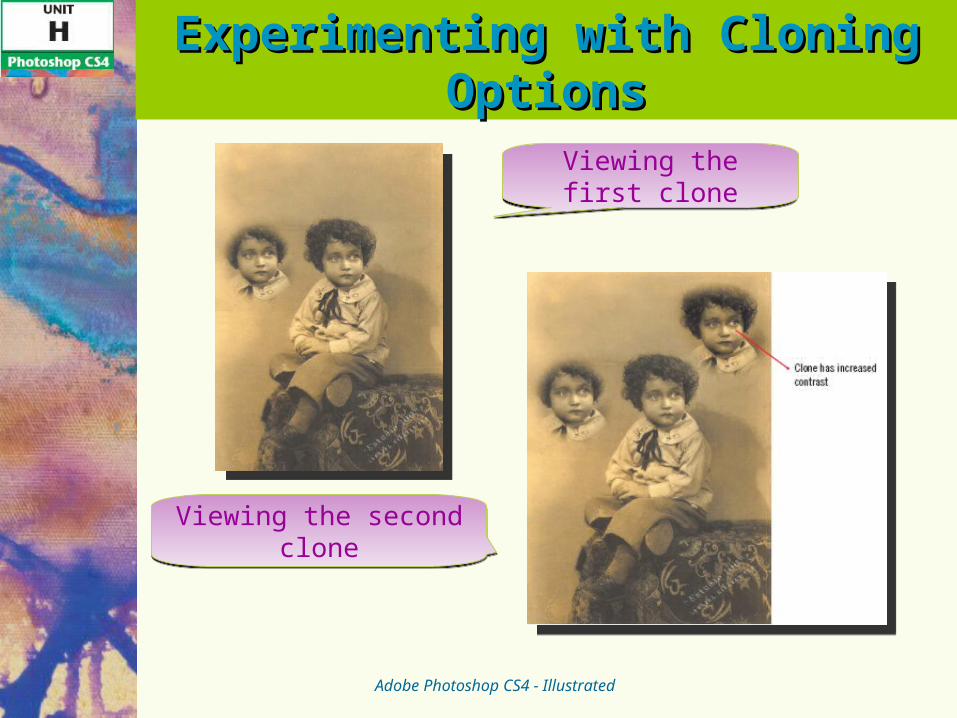
Viewing the first clone
Viewing the first clone
Viewing the second clone
Viewing the second clone
SummarySummary
Adobe has designed Photoshop to be something of a workhorse, with many built-in modules to make Photoshop very effective as an image processor in a graphics workflow environment
Photoshop’s Image Processor feature is great for quickly converting groups of files to other file formats
Adobe Photoshop CS4 - Illustrated

SummarySummary
Having the History panel automatically save a snapshot every time the artwork is saved is a smart way to work in Photoshop
Cloning can be defined as copying pixels from one area to another
Working “non-destructively” in Photoshop is a best practice-that includes cloning
Adobe Photoshop CS4 - Illustrated