Activities Guide Workshop 7. Chemistry and the Environment
17
Activities Guide Workshop 7. Chemistry and the Environment Solubility Class Activity: Al DeGennaro—Unit 7.2 Teacher’s Guide .................................................................................................................183 Solubility Worksheet .........................................................................................................185 Analysis of Water Laboratory: Veatta Berry—Unit 7.3 Teacher’s Guide .................................................................................................................186 Students’ Guide .................................................................................................................188 Purifying Water Laboratory: Isoke Baptiste—Unit 7.5 Teacher’s Guide .................................................................................................................192 Students’ Guide .................................................................................................................194 Aluminum Recycling Laboratory: Al DeGennaro—Unit 7.6 Teacher’s Guide .................................................................................................................196 Comment 1. All activities have been peer-reviewed but not tested. 2. Some safety considerations are suggested in the activities. For full safety information, consult the MSDS sheets (go to http://msds.pdc.cornell.edu/) before doing the experiment. 3. A concise source book for further assignments, activities, and background information is ChemSource, version 2.1 (Orna, Mary Virginia, O.S.U.; Schreck, James O. & Heikkinen, Henry, eds.), 1998. Visit the Web site at http://intro.chem.okstate.edu/ChemSource/chemsource.html. Appendix: Workshop 7 - 182 - Reactions in Chemistry
Transcript of Activities Guide Workshop 7. Chemistry and the Environment
Activities Guide
Workshop 7. Chemistry and theEnvironment
Solubility Class Activity: Al DeGennaro—Unit 7.2
Teacher’s Guide .................................................................................................................183
Solubility Worksheet .........................................................................................................185
Analysis of Water Laboratory: Veatta Berry—Unit 7.3
Teacher’s Guide .................................................................................................................186
Students’ Guide .................................................................................................................188
Purifying Water Laboratory: Isoke Baptiste—Unit 7.5
Teacher’s Guide .................................................................................................................192
Students’ Guide .................................................................................................................194
Aluminum Recycling Laboratory: Al DeGennaro—Unit 7.6
Teacher’s Guide .................................................................................................................196
Comment 1. All activities have been peer-reviewed but not tested.
2. Some safety considerations are suggested in the activities. For full safety information, consult the MSDSsheets (go to http://msds.pdc.cornell.edu/) before doing the experiment.
3. A concise source book for further assignments, activities, and background information is ChemSource,version 2.1 (Orna, Mary Virginia, O.S.U.; Schreck, James O. & Heikkinen, Henry, eds.), 1998. Visit the Web siteat http://intro.chem.okstate.edu/ChemSource/chemsource.html.
Appendix: Workshop 7 - 182 - Reactions in Chemistry
Solubility Class Activity: Al DeGennaro
Teacher’s GuideGoals
• To teach students about salt solubility in water
• To encourage all students to participate and to get involved
The Activity In this activity, students learn about the solubilities of different salts. They use solubility charts to find out whichsalts will form precipitates in solution. The lesson plan allows students to be involved, either by completing work-sheets, or by participating in a contest.
Materials • Fe(OH)3 saturated solution
• Zn(NO3)2 clear solution Solubility Worksheet
• Solubility charts.
Solubility Charts http://www.austin.cc.tx.us/rvsmthsc/chem/chem-Solubili.html
http://www.phys.virginia.edu/education/outreach/8thgradesol/ConservMatterSolubility.htm
SAFETY Wear goggles at all times when handling chemicals.
Handle solutions with care. Never hold bottle from top.
Lecture Notes I have a saturated solution of a chemical. I would like to find ways to make it dissolve better: Heat the liquid, addmore water to it.
That about covers it, since, if I stir it, will it dissolve better? No. Why not? Because it is already saturated.
Today we are going to talk about solubility and using reference.
I have two solutions here: zinc nitrate, which is completely dissolved, and ferric hydroxide, which does not dissolvevery well.
It would be nice if people could know ahead of time if things will dissolve or not.
When you do your experiments with precipitates, you usually need things that can dissolve in water, and if youdon’t, you should change the experiment.
The other way is to have a chart in which there is a summary of about a hundred solubility tests, which tells youif they can be dissolved or not.
Reactions in Chemistry - 183 - Appendix: Workshop 7
Take a look at the table (see Internet references at top of the page). There are several conditions: insoluble, nearlyinsoluble, (which means that they might be a little soluble under some conditions), slightly soluble, and soluble.And then, there are these materials which react with water, and for them, you cannot answer this question. Andfinally are those chemicals that you cannot separate from water by evaporating the water from it.
We are most interested in the soluble and the insoluble salts, and the ones which are between them.
What do all vertical and all horizontal entries in the solubility chart have in common? The ones going up and downmake negative ions, and the ones going across make positive ions.
One way you could know about it is by trying out different substances and seeing if they dissolve.
Locate zinc nitrate. Is it soluble? Yes, so it fits what we know from real life. [Try out some more pairs.]
Are there any ions that always form soluble salts? Sodium, acetate, etc.
Are there any that are almost always insoluble?
Go to your lab tables and do your solubility worksheets.
Notice that I have a blank table of solubilities. I am going to give you all answers from memory. If I make a mistake,the person who finds the mistake and corrects it will receive a small prize [offer candy to students who are correct].
Teaching Tips From Mr. DeGennaro The one thing that dawned on me is that kids don’t like when you give them problems, which are essentially:“I know something that you don’t know, and if you can’t guess it, that’s bad.” This ought to be something that weare approaching together, and kids are a lot more receptive to that.
They don’t mind the fact that you know things that they don’t, but they just don’t like the idea that I’m trying totrick them, that I’m giving them problems that are hard, and that they will have to come calling me. I don’t like tocreate such a climate.
References: Linkshttp://dbhs.wvusd.k12.ca.us/Solutions/Solubility-Rules.html A list of solubility rules similar to those used in video.
References: ReadingsAroti, A., and Leontidis, E. (2001) “Simultaneous Determination of the Ionization Constant and the Solubility ofSparingly Soluble Drug Substances. A Physical Chemistry Experiment,” Journal of Chemical Education, Vol. 78,No. 6, pp: 786-788.
Raviolo, Andres. (2001) “Assessing Students’ Conceptual Understanding of Solubility Equilibrium,” Journal of Chemical Education, Vol. 78, No. 5, pp: 629-631.
Letcher, T. M., and Battino, R. (2001) “An Introduction to the Understanding of Solubility,” Journal of Chemical Education, Vol. 78, No. 1, pp:103-121.
Brown, Pamela. (2001) “Understanding Solubility Through Excel Spreadsheets,” Journal of Chemical Education,Vol. 78, No. 2, pp: 268-270.
Appendix: Workshop 7 - 184 - Reactions in Chemistry
Solubility Class Activity: Teacher’s Guide, page 2
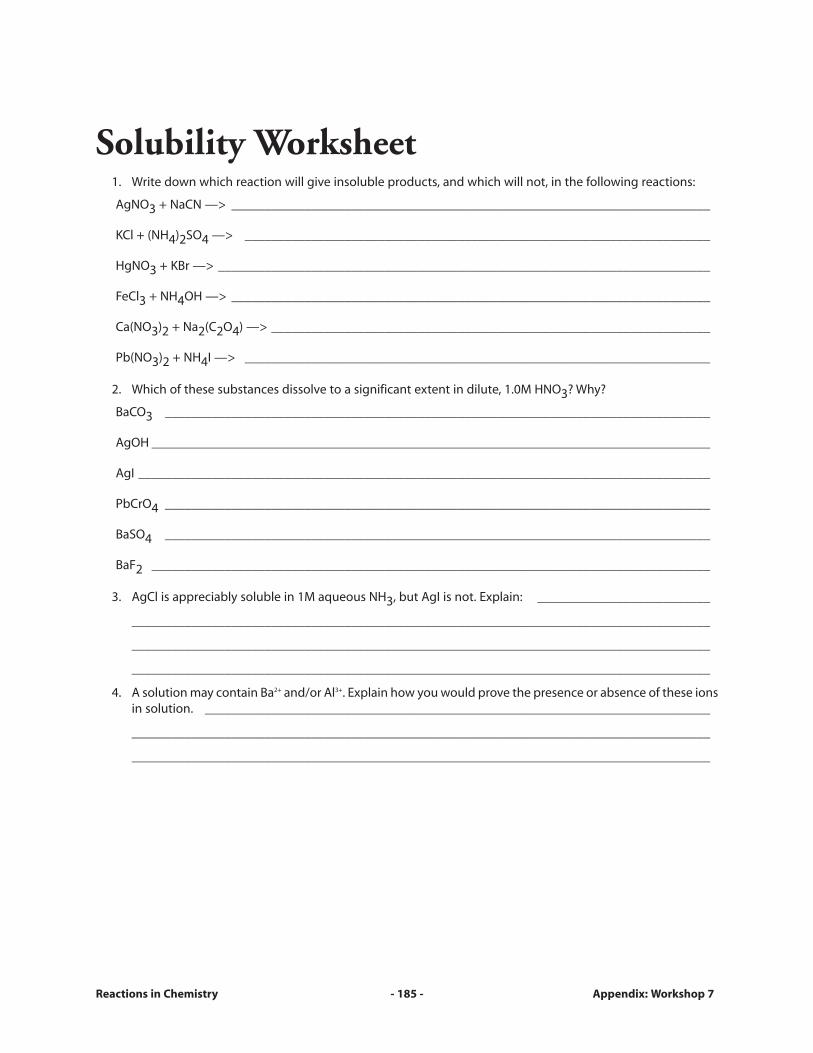
Solubility Worksheet 1. Write down which reaction will give insoluble products, and which will not, in the following reactions:
AgNO3 + NaCN —> ________________________________________________________________________
KCl + (NH4)2SO4 —> ______________________________________________________________________
HgNO3 + KBr —> __________________________________________________________________________
FeCl3 + NH4OH —> ________________________________________________________________________
Ca(NO3)2 + Na2(C2O4) —> __________________________________________________________________
Pb(NO3)2 + NH4I —> ______________________________________________________________________
2. Which of these substances dissolve to a significant extent in dilute, 1.0M HNO3? Why?
BaCO3 __________________________________________________________________________________
AgOH ____________________________________________________________________________________
AgI ______________________________________________________________________________________
PbCrO4 __________________________________________________________________________________
BaSO4 __________________________________________________________________________________
BaF2 ____________________________________________________________________________________
3. AgCl is appreciably soluble in 1M aqueous NH3, but AgI is not. Explain: __________________________
_______________________________________________________________________________________
_______________________________________________________________________________________
_______________________________________________________________________________________
4. A solution may contain Ba2+ and/or Al3+. Explain how you would prove the presence or absence of these ionsin solution. ____________________________________________________________________________
_______________________________________________________________________________________
_______________________________________________________________________________________
Reactions in Chemistry - 185 - Appendix: Workshop 7
Appendix: Workshop 7 - 186 - Reactions in Chemistry
Analysis of Water Laboratory: Veatta Berry
Teacher’s GuideGoals
• To practice chemical analysis of water samples
• To do real life environmental studies
The Laboratory In this laboratory, students go to a nearby lake, and measure the water’s content and quality. They measure several parameters, such as chemical content, pH, depth and so on. The students use both portable and labora-tory equipment and learn about the chemistry of the environment.
Materials for Each Group • A meter stick
• pH sticks
• Phosphate, nitrate, nitrite, and chloride chemical tester kits (HACH Co.)
• 500 ml water bottle
• Distilled water
• Markers and stickers
• Plastic box to carry these materials
• Temperature meter
• Oxygen measurement kit: methylene blue indicator solution, 20 ml test tubes, test tube rack, stop watch
• Apparatus for phosphate measurement in soil is described in:
Storer, D.A.; Sarquis, A. M. (2000) “Measuring Soil Phosphates Using Ion-Exchange Resins: A Final Project forFreshman Chemistry,” Journal of Chemical Education, Vol. 77, p: 748. Complete description and handouts forthe experiment may be found in the supplement for this paper.
See also the teacher’s guide at http://archive.globe.gov/globe_flash.html. The GLOBE program is a world-wideauthentic science program in which students take measurements—of water, land, etc.—in their own localeand report the data on the Web. Enter the GLOBE site and click on "Teacher’s Manual" on the left for activities.
Comment For measurements of chemical composition of water, there exist both indicator sticks and portable sensors. Askyour nearby dealer for these products.
Lecture Notes I gave each group a set of directions for when they’re down at the lake.
You will share the information with other groups, and you are going to analyze only one of the tests, so eachgroup is in charge of one test.
For each landmark around the lake you are getting different chemicals that may be washed into the lake: from aparking lot you can get grease, from a house you can get fertilizers, etc.
Teaching Tips From Ms. Berry In this exercise, groups collect samples from different sites around the lake, and when they get back, they have sixdifferent tasks that they have to perform for finding out how much phosphate and nitrate is in the water, as wellas how much organic and inorganic sediment is found.
Then, they are going to share their data, and each group will report one thing, for example, phosphates: how theyget into the water and why they are there. They are going to get their data from the other groups.
I would like to see the students relating what we have done all semester (what are chemicals, taking samples,testing in the lab) to everyday life.
I like to show them how a field study is done, and how you would pre-rinse your bottle with the water that youare actually collecting.
As we go along with the study, we talk about how we can get really good results. We would have to go back tothe lake several times and do a timed study, and see how things might change with the seasons. They can’t dothat; we can just give them a taste of what it’s like.
That’s one thing about teaching environmental science, that we don’t have control over the situation and some-times we are both looking for the answer.
They are doing an end-up study on one of the tests, and presenting it with Power Point. They will get a feeling forthe background research for all of the tests by presenting it to each other.
References: Linkshttp://archive.globe.gov/globe_flash.html The GLOBE program is a world-wide authentic science program in which students take measurements—ofwater, land, etc.—in their own locale and report the data on the Web. Enter the GLOBE site and click on"Teacher’s Manual" on the left for activities.
http://inlet.geol.sc.edu/level_1.html#3.1A Activities related to the chemistry of solubility and water quality.
References: ReadingsKelter, P.B., Grundman, J., Hage, D.S., Carr, J.D., and Mauricio, C. (1997) “A Discussion of Water Pollution in the UnitedStates and Mexico; With High School Laboratory Activities for the Analysis of Lead, Atrazine, and Nitrate,” Journalof Chemical Education, Vol. 74, No. 12, pp: 1413-1421.
Randall, Jack. (1997) “Integrating High School Chemistry With Environmental Studies and Research,” Journal ofChemical Education, Vol. 74, p: 1409.
Reactions in Chemistry - 187 - Appendix: Workshop 7
Analysis of Water Laboratory: Teacher’s Guide, page 2
Analysis of Water Laboratory: Veatta Berry
Students’ GuideGoals
• To practice chemical analysis of water samples
• To do real life environmental studies
The Laboratory In this laboratory, you will go to a nearby lake and measure the water’s content and quality, including several parameters such as chemical content, pH, depth, and so on.
Materials for Each Group • A meter stick
• pH sticks
• Phosphate, nitrate, nitrite, and chloride chemical tester kits (HACH Co.)
• 500 ml water bottle
• Distilled water
• Markers and stickers
• Plastic box for carrying these materials
• Temperature meter
• Oxygen measurement kit: methylene blue indicator solution, 20 ml test tubes, test tube racks, stopwatch
• Apparatus for phosphate measurement in soil
Instructions You have to perform six tests: Each of you is going to go to a different place around the lake, and when you comeback you will do all tests on your samples. Each group will summarize the results of one test from all lab groups,and present it to class using Power Point.
In Class Make sure that you have little bags for your sediment samples. Label them with the group and the date, andwhere you took it from.
Collect the water samples in the bottle. Put a piece of tape on the bottle, and write your group name and date on it.
Make sure you have everything that’s on the list in your box.
Appendix: Workshop 7 - 188 - Reactions in Chemistry
Reactions in Chemistry - 189 - Appendix: Workshop 7
At the Lake Taking the water sample:
A. You do not want to stir the sediments into the water, because you want to get it as naturally as possible.
B. Pre-rinse the water bottle of soap residues, or from something left in the bottle, by filling it half-way.
C. Dump the water in a different place than where you took it, and then fill up your bottle to the rim, living nospace for air. You want to find out how much oxygen is inside the water, and if you leave air, the oxygen content will change.
Taking Sediments:Take your bag, put your hand inside, and reach in the water as far as you can without falling in. Grab some dirtfrom the bottom of the lake, and close the bag.
Measuring Sediment Depth:Measure how far you can push your meter stick easily, at the place where you are getting your sediment sample:____________________________________________________________________________________________
Is the soil soft? What do you see in it? ____________________________________________________________
____________________________________________________________________________________________
What is the reason for this? ____________________________________________________________________
____________________________________________________________________________________________
Measuring pH:Measure the pH with the dipsticks that are in the box. Dip the sticks in the water for several seconds and then compare to the chart on the box, to see what the pH is: ______________________________________________
Compare to tap water: ________________________________________________________________________
Why is there a difference? ______________________________________________________________________
____________________________________________________________________________________________
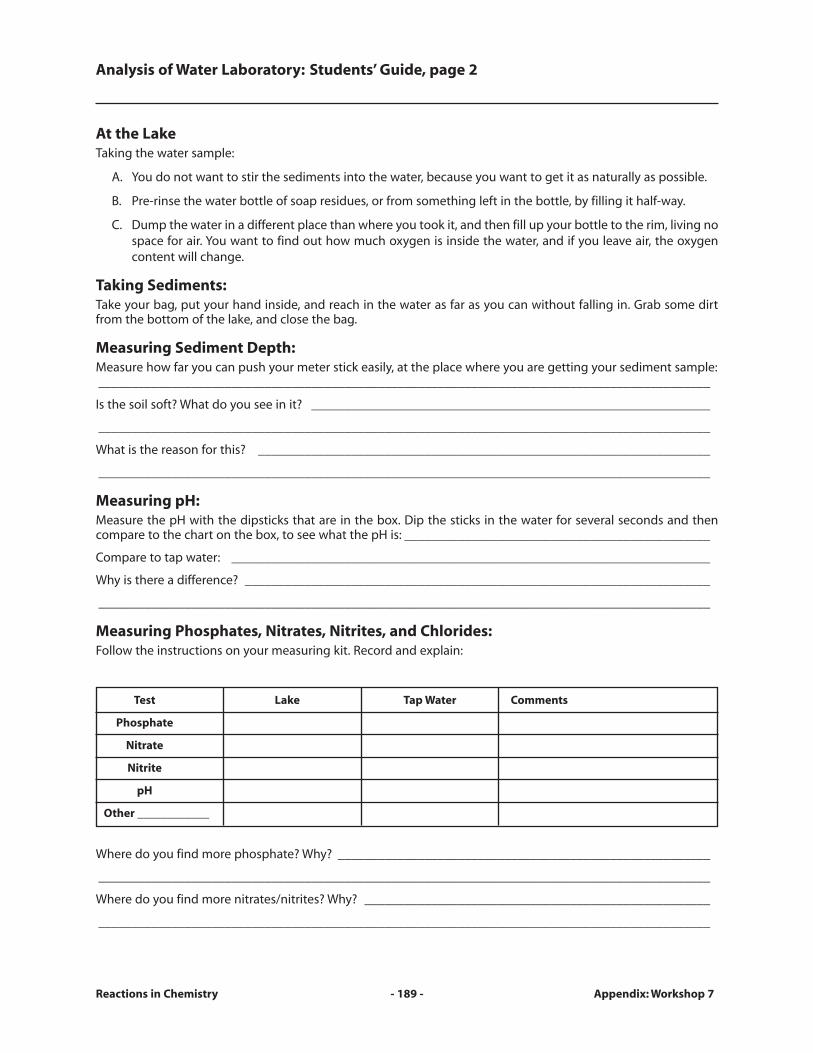
Measuring Phosphates, Nitrates, Nitrites, and Chlorides:Follow the instructions on your measuring kit. Record and explain:
Test Lake Tap Water Comments
Phosphate
Nitrate
Nitrite
pH
Other ____________
Where do you find more phosphate? Why? ________________________________________________________
____________________________________________________________________________________________
Where do you find more nitrates/nitrites? Why? ____________________________________________________
____________________________________________________________________________________________
Analysis of Water Laboratory: Students’ Guide, page 2
Appendix: Workshop 7 - 190 - Reactions in Chemistry
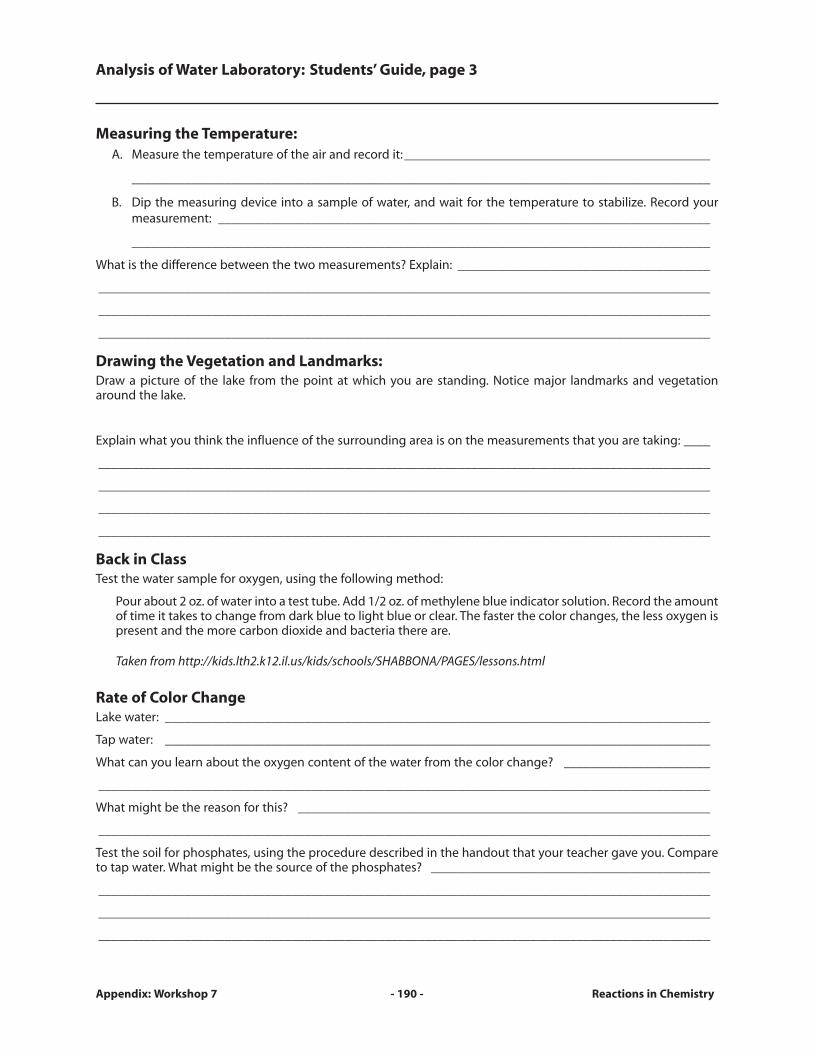
Measuring the Temperature:A. Measure the temperature of the air and record it: ______________________________________________
_______________________________________________________________________________________
B. Dip the measuring device into a sample of water, and wait for the temperature to stabilize. Record yourmeasurement: __________________________________________________________________________
_______________________________________________________________________________________
What is the difference between the two measurements? Explain: ______________________________________
____________________________________________________________________________________________
____________________________________________________________________________________________
____________________________________________________________________________________________
Drawing the Vegetation and Landmarks:Draw a picture of the lake from the point at which you are standing. Notice major landmarks and vegetationaround the lake.
Explain what you think the influence of the surrounding area is on the measurements that you are taking: ____
____________________________________________________________________________________________
____________________________________________________________________________________________
____________________________________________________________________________________________
____________________________________________________________________________________________
Back in Class Test the water sample for oxygen, using the following method:
Pour about 2 oz. of water into a test tube. Add 1/2 oz. of methylene blue indicator solution. Record the amountof time it takes to change from dark blue to light blue or clear. The faster the color changes, the less oxygen ispresent and the more carbon dioxide and bacteria there are.
Taken from http://kids.lth2.k12.il.us/kids/schools/SHABBONA/PAGES/lessons.html
Rate of Color ChangeLake water: __________________________________________________________________________________
Tap water: __________________________________________________________________________________
What can you learn about the oxygen content of the water from the color change? ______________________
____________________________________________________________________________________________
What might be the reason for this? ______________________________________________________________
____________________________________________________________________________________________
Test the soil for phosphates, using the procedure described in the handout that your teacher gave you. Compareto tap water. What might be the source of the phosphates? __________________________________________
____________________________________________________________________________________________
____________________________________________________________________________________________
____________________________________________________________________________________________
Analysis of Water Laboratory: Students’ Guide, page 3
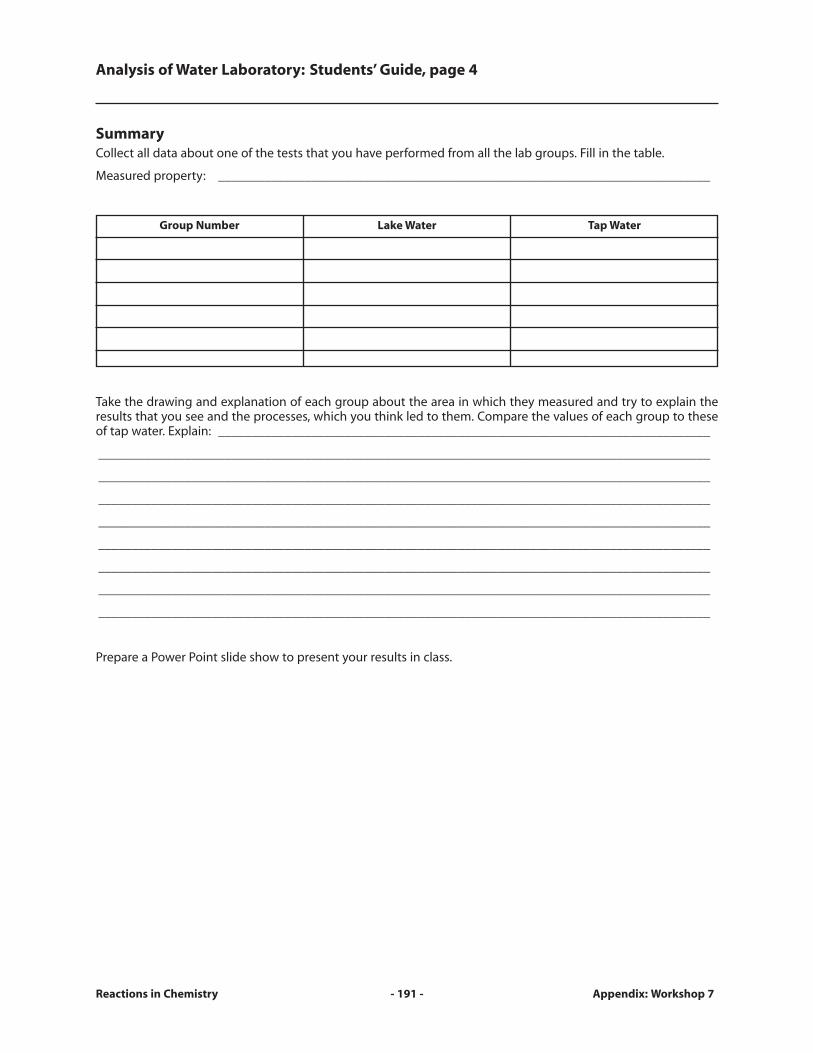
Summary Collect all data about one of the tests that you have performed from all the lab groups. Fill in the table.
Measured property: __________________________________________________________________________
Group Number Lake Water Tap Water
Take the drawing and explanation of each group about the area in which they measured and try to explain theresults that you see and the processes, which you think led to them. Compare the values of each group to theseof tap water. Explain: __________________________________________________________________________
____________________________________________________________________________________________
____________________________________________________________________________________________
____________________________________________________________________________________________
____________________________________________________________________________________________
____________________________________________________________________________________________
____________________________________________________________________________________________
____________________________________________________________________________________________
____________________________________________________________________________________________
Prepare a Power Point slide show to present your results in class.
Reactions in Chemistry - 191 - Appendix: Workshop 7
Analysis of Water Laboratory: Students’ Guide, page 4

Purifying Water Laboratory: Isoke Baptiste
Teacher’s GuideGoals
• To learn about the process of water purification
• To relate chemistry to everyday experience
The Laboratory In this laboratory, students learn to purify water using common separation techniques. They start out with a mix-ture of oil and water containing other ingredients, and they end up separating the components. Thus they learnabout the importance of water purification, and about the way it is done.
Materials for Each Group• 2 funnels with three pieces of filter paper
• A stand with ring holder
• Rubber tubing
• Four 250 ml beakers
• Two 100 ml beakers
• A 2-liter bottle filled with: tea, coffee, garlic, some old cafeteria grease, salad dressing, etc.
• Containers with sand, rubble, and activated charcoal
• A styrofoam cup
• An iron nail
SAFETY Wear safety goggles at all times.
Activated charcoal is relatively safe for handling.
Lecture Notes We have just finished reading the article about Riverwood, and we have to find out what happened to the fish?Why are the fish dying?
This is exactly what people do in a situation like this. They have a team of people to go in and take a sample of thewater. To check it they do different processes, they check out exactly what contaminant is in there, and after thisthey do a purification processes.
That’s what leads us to our experiment today. I got a sample from Riverwood’s foul water. We are going to gothrough the water purification processes that we’ve talked about.
Appendix: Workshop 7 - 192 - Reactions in Chemistry

Instructions The first one is going to be the oil separation, where we separate the oil from the other mixture. Then, we will dothe sand filtration and the last one will be the charcoal absorption, and that final product should give you a clearsolution.
Please keep your goggles on.
Make sure that you record the volume before you begin.
Make sure that you measure the volume after each process, because it is important for your end result.
After you finish the oil separation, make sure that you read the instructions for the sand/rubble filter.
Teaching Tips From Ms. Baptiste The first unit in ChemCom is about exploring water, and it is introduced with an article about a fictional town,Riverwood, that had water contamination. We built around that, we talk about direct and indirect uses of water. Ithelps relate chemistry to things that you see every day.
We do an experiment that shows us how, when water is contaminated, people go in and go through theseprocesses—they filter out the contaminants. The classes go in as a cleanup crew, and try to purify this watersample.
We use three steps; oil water separation was the first. The oil floats on top and they decant the oil off and take thebottom layer.
Too much chemistry in the beginning is discouraging for the students. Science is very discouraging for the students, as a whole. They are very intimidated by it.
So if you can introduce it to them, have them do chemistry, without even knowing that they are doing chemistry,it is a great way to bring them in.
Once you have them, you can say, look—you did chemistry, and this is what you did, and from there, you can writethe chemical components of it and exactly the scientific terms.
We did the charcoal absorption filtration and this was where the kids were really intrigued, because the charcoalabsorbed the rest of the contaminants, and the kids realized that they were actually doing chemistry.
The foul water was an excellent experiment to do, because we started out with a really dark, cloudy, oily solution,and we ended up with clear water, and the kids were amazed that we could do something like this in chemistrylab.
This really grabbed their attention, and when you grab their attention they are willing to learn more, so I thoughtthis was a great introduction, as far as a lab goes.
References: Linkshttp://www.epa.gov/OGWDW/kids/filter.html A procedure for water filtration.
References: ReadingsOughton, J., Xu, S., and Battino, R. (2001) “The Purification of Water by Freeze-Thaw or Zone Melting,” Journal ofChemical Education, Vol. 78, No. 10, pp: 1373-1374.
Reactions in Chemistry - 193 - Appendix: Workshop 7
Purifying Water Laboratory: Teacher’s Guide, page 2
Purifying Water Laboratory: Isoke Baptiste
Students’ GuideGoals
• To learn about the process of water purification
• To relate chemistry to everyday experience
The Laboratory In this laboratory, you will learn to purify water using common separation techniques. You will start out with a mix-ture of oil and water containing other ingredients, and end up separating the components.
Materials for Each Group • 2 funnels with three pieces of filter paper
• A stand with ring holder
• Rubber tubing
• Four 250 ml beakers
• Two 100 ml beakers
• A 2-liter bottle filled with: tea, coffee, garlic, some old cafeteria grease, salad dressing, etc.
• Containers with sand, rubble, and activated charcoal
• A styrofoam cup
• An iron nail
SAFETY Wear safety goggles at all times.
Activated charcoal is relatively safe for handling. See MSDS sheet for further information.
Instructions Take a sample of known volume of foul water in a 250 ml beaker.
Water/Oil Separation:a. Put a clean glass funnel on a ring stand.
b. Connect a piece of rubber tubing to the funnel. No filter paper is required at this stage.
c. Put another 25 ml beaker underneath the tubing.
d. Decant the oil and water solution over a glass funnel. Allow the water solution to drop through the tubing.It has all been collected.
Separate the oil into a 100 ml beaker.
Appendix: Workshop 7 - 194 - Reactions in Chemistry
Physical Separation of Solids:a. Make some holes in a plastic cup with an iron nail.
b. Fill cup with rubble and sand.
c. Put cup over a 100 ml beaker.
d. This step is optional: above the cup, hang a glass funnel on a ring stand, with rubber tubing going into theplastic cup. No filter paper is required at this stage.
e. Pour the solution into the funnel (or into the cup), and collect the liquids in the glass beaker.
Chemical Absorption With Charcoal:a. Put 4-5 spoons of activated charcoal in a 250 ml beaker and add to it what is left of the foul water solution.
b. Put a new filter paper in the funnel, and a clean beaker underneath the rubber tubing.
c. Shake the solution, and pour it over the funnel.
d. Collect the residual water solution. How much do you have left? _______
e. How much did you lose on the way? _______
Summary Is this an effective way to purify water? ____________________________________________________________
_____________________________________________________________________________________________
_____________________________________________________________________________________________
_____________________________________________________________________________________________
_____________________________________________________________________________________________
Suggest a way to reduce the amount of water that you loose in the process: ______________________________
_____________________________________________________________________________________________
_____________________________________________________________________________________________
_____________________________________________________________________________________________
_____________________________________________________________________________________________
How would you know if the water is really clean? ____________________________________________________
_____________________________________________________________________________________________
_____________________________________________________________________________________________
_____________________________________________________________________________________________
_____________________________________________________________________________________________
Reactions in Chemistry - 195 - Appendix: Workshop 7
Purifying Water Laboratory: Students’ Guide, page 2

Aluminum Recycling Laboratory: Al DeGennaro
Teacher’s GuideGoals
• To recycle aluminum cans and make a useful product, alum
• To understand the processes involved in recycling, their importance, and the difficulties in doing so
The Activity This is a two-day activity, in which students are involved in a real-life chemical procedure and recycle old aluminum cans into solid alum. The students follow the whole process, do the reactions, learn about the hazardsand difficulties involved in the process, and end up with a useful product. This experiment promotes the environ-mental consciousness of the students and educates for recycling.
CommentMaterials, SAFETY topics, and experimental procedures appear in the following sites:
http://sparkychem.wcu.edu/Alum.pdf
http://www.owlnet.rice.edu/~chem122/Lab122/Al/
or other sites, using the keywords aluminum, recycling, alum, experiment.
Lecture Notes—Day I Today’s class features an extremely cool lab with extremely nasty chemicals, and I hope no one gets injured.
In this particular lab, you are going to take a scrap piece of aluminum, and make it into a useful product.
The best thing that you can do with old pieces of aluminum is to make new pieces of aluminum. That’s why werecycle cans. It requires very low energy.
But the next best thing, if you can’t completely manufacture a brand new chemical just like it, is to make some-thing else that is useful. We are going to make something called alum.
When you want good quality printing paper, the gaps are filled in using alum. They make a very thick solution ofalum, they smear it on, run it through rollers, and that fills in the gaps between the fibers of the paper.
Other things that they use it for is purifying water and making very tiny particles clump together. They then theysink to the bottom and the water comes out of the faucet looking good.
You should be able to make good alum crystals. We hope that in our solid alum we will have only alums, and theywill be lined up, in nice rows, with no foreign atoms in between.
Appendix: Workshop 7 - 196 - Reactions in Chemistry

Now if there’s dirt, or leftover chemicals on the outside of the crystals, that’s not as bad as having them on theinside of the crystals, but still, it will make them stick to each other, and then they will not look as good.
One of the criteria that I will use to grade your crystals is how they avoid sticking together.
Alum crystal scoring: large amount, white colors, sparkles, uniform color, crunchy or fluffy (not sticky).
You should have the following: You should have lots of crystals, they should also be very white in color becausealum is supposed to be white. If they are not white they must have some impurities in them. They should alsosparkle: look like tiny ice particles, and they should be a uniform color and sometimes they will glob together, butif you tap them and they fall apart, they should not stick together again.
Lets talk about safety. Look at the bottom of the page where it says: this chemical [KOH] will dissolve skin. It reallywill. If you spill it on your hands, it will decompose your skin. Not instantly, though: it will actually take several seconds before it will start hurting.
Here’s where the KOH is going to be. It is going to stay in the fume hood, you are not going to carry them to thetable.
When you pour in your aluminum, it is going to react with KOH and start spattering. If that’s the case, we wouldn’twant to loose any of our product. First of all we don’t want it to spatter out, because it might hurt somebody andalso because it might be some of your aluminum atoms coming out—so you want to cover it with a watch glass.
Your starting chemical is a piece of an old soda can that was chopped off. It is painted on the outside, and youhave to get the paint off of it
It also has a plastic coating on the inside, which most people don’t know. The acids in soda pop will eventuallyreact with aluminum, and if there weren’t a coating on the inside, it would actually dissolve a hole in the aluminum can.
It’s going to be your job to clean off the lacquer and the paint.
You can cut the aluminum anyway that you want, as long as there is no paint on it, and that it is in small pieces.Small pieces will react faster.
Tomorrow, we are doing day two, so if you want to go over what you are doing ahead of time, that will give you ahead start.
Lecture Notes—Day II In the second session, you will have to filter out the brown impurity, and that will be thrown away. Then you willadd sulfuric acid, which will do two things. It will destroy the extra base, and it will add sulfate to the aluminum,which is part of the alum, and it will also make it turn into a solid.
As a result of that, we will get white crystals, which we will chill on ice, to make them dissolve as little as possible,and filter it.
There’s going to be a lot of filtering and waiting for stuff to drip. We want to give you the longest time possible todo your filtration.
You are going to filter the liquid from that brown sludge. It has junk that we don’t want, but also the chemicalsthat we do want.
Grab some goggles, start filtering. Once its dripping, I’m going to teach you a little bit, then you will go back, poura little bit more, then I will teach you more, then you should be able to finish the entire experiment in time.
It’s coming out clear, it’s a good sign. Remember, don’t throw away the wrong stuff.
This is going to be a suspense-filled one. You might do something wrong and not get any crystals. Or, sometimescrystals emerge all of a sudden.
Your closing activity, in addition to the questions in the procedure, will be to explain the two-day experimentalprocedure using the following diagram:
Reactions in Chemistry - 197 - Appendix: Workshop 7
Aluminum Recycling Laboratory: Teacher’s Guide, page 2
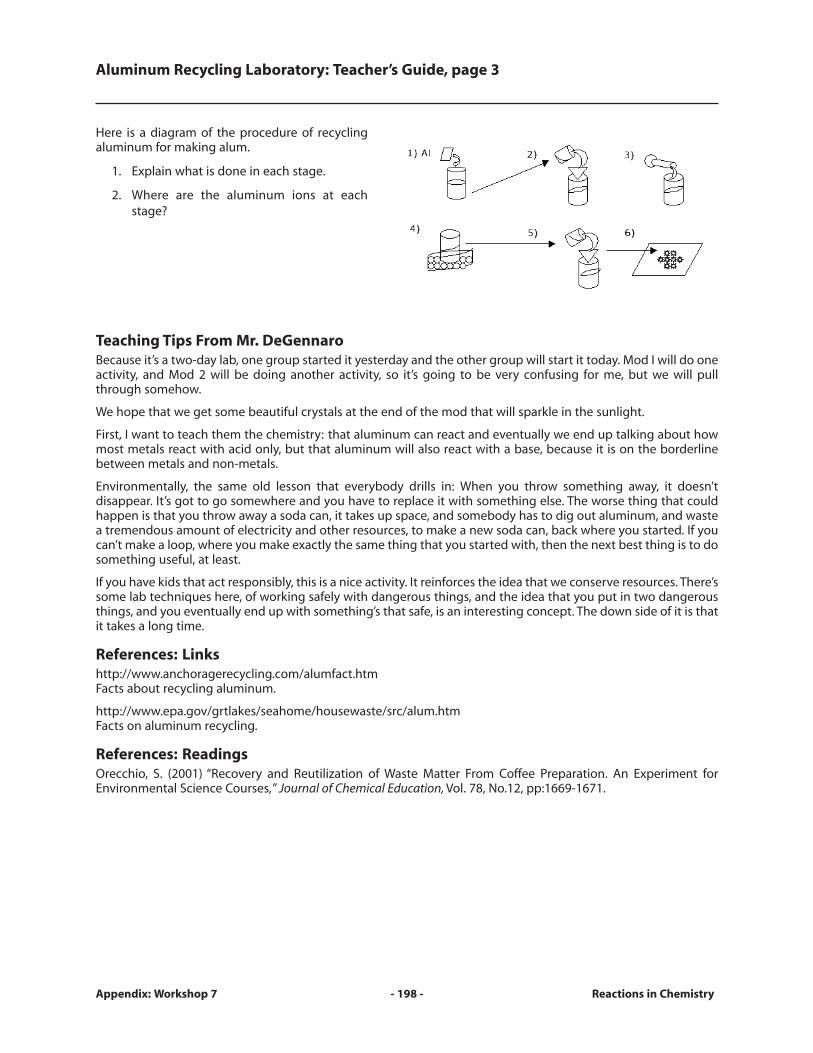
Here is a diagram of the procedure of recyclingaluminum for making alum.
1. Explain what is done in each stage.
2. Where are the aluminum ions at eachstage?
Teaching Tips From Mr. DeGennaro Because it’s a two-day lab, one group started it yesterday and the other group will start it today. Mod I will do oneactivity, and Mod 2 will be doing another activity, so it’s going to be very confusing for me, but we will pullthrough somehow.
We hope that we get some beautiful crystals at the end of the mod that will sparkle in the sunlight.
First, I want to teach them the chemistry: that aluminum can react and eventually we end up talking about howmost metals react with acid only, but that aluminum will also react with a base, because it is on the borderlinebetween metals and non-metals.
Environmentally, the same old lesson that everybody drills in: When you throw something away, it doesn’t disappear. It’s got to go somewhere and you have to replace it with something else. The worse thing that couldhappen is that you throw away a soda can, it takes up space, and somebody has to dig out aluminum, and wastea tremendous amount of electricity and other resources, to make a new soda can, back where you started. If youcan’t make a loop, where you make exactly the same thing that you started with, then the next best thing is to dosomething useful, at least.
If you have kids that act responsibly, this is a nice activity. It reinforces the idea that we conserve resources. There’ssome lab techniques here, of working safely with dangerous things, and the idea that you put in two dangerousthings, and you eventually end up with something’s that safe, is an interesting concept. The down side of it is thatit takes a long time.
References: Linkshttp://www.anchoragerecycling.com/alumfact.htm Facts about recycling aluminum.
http://www.epa.gov/grtlakes/seahome/housewaste/src/alum.htm Facts on aluminum recycling.
References: ReadingsOrecchio, S. (2001) “Recovery and Reutilization of Waste Matter From Coffee Preparation. An Experiment for Environmental Science Courses,” Journal of Chemical Education, Vol. 78, No.12, pp:1669-1671.
Appendix: Workshop 7 - 198 - Reactions in Chemistry
Aluminum Recycling Laboratory: Teacher’s Guide, page 3