Active Directory - Migration and BCDR Guide · Web viewActive Directory - Migration and BCDR Guide,...
34
August 2016 Version 3.0a Prepared by Active Directory - Migration and BCDR Guide
Transcript of Active Directory - Migration and BCDR Guide · Web viewActive Directory - Migration and BCDR Guide,...

August 2016Version 3.0a
Prepared by
Active Directory - Migration and BCDR Guide

Table of Contents
1 Introduction...............................................................................................51.1 Purpose..........................................................................................................51.2 Scenario Overview.........................................................................................5
2 Scenario 1: Host an Active Directory Domain Controller in Windows Azure7
2.1 High-Level Scenario Overview.......................................................................72.2 Dependencies................................................................................................72.3 Design and Deployment Considerations........................................................82.4 Configuration and Walkthrough Steps...........................................................9
2.4.1 Deploy Windows Server Virtual Machine in Azure.......................................92.4.2 Add Data Disk for Active Directory Database............................................102.4.3 Configure the Attached Data Disk on the Virtual Machine.......................112.4.4 Create Site, Subnet, and Site Link in Active Directory.............................112.4.5 Configure DNS and Join Virtual Machine to the Domain...........................132.4.6 Promote Windows Azure Virtual Machine to a Domain Controller...........142.4.7 Verify Domain Controller Functionality.......................................................17
3 Scenario 2: Delayed Replication Site in Windows Azure..........................183.1 High-Level Scenario Overview.....................................................................183.2 Dependencies..............................................................................................193.3 Design and Deployment Considerations......................................................193.4 Configuration and Walkthrough Steps.........................................................20
3.4.1 Create Sites and Site Links in Active Directory.........................................203.4.2 Configure Replication Schedules on the Lag Site Site-Links....................213.4.3 Deploy Additional Window Server Virtual Machines in Azure...................223.4.4 Optional: Creating Additional Replications Sites in Windows Azure........233.4.5 Prevent Registration of Global DC Locator Records..................................23
4 Scenario 3: Active Directory Backup to Azure Data Disks........................244.1 High-Level Scenario Overview.....................................................................244.2 Dependencies..............................................................................................25
Active Directory - Migration and BCDR Guide, , Version Prepared by ""
4.3 Design and Deployment Considerations......................................................254.4 Configuration and Walkthrough Steps.........................................................25
4.4.1 Attach Azure Data Disk to Domain Controller Virtual Machine................254.4.2 Install Windows Server Backup....................................................................264.4.3 Configure Windows Server Backup..............................................................264.4.4 Test Backup Settings....................................................................................27
5 Appendix: Configure Azure Virtual Networks and Site to Site VPN Gateway28
5.1 Dependencies..............................................................................................285.2 Configuration and Walkthrough Steps.........................................................28
5.2.1 Setup Virtual Network in Azure....................................................................285.2.2 Configure Local Edge Server........................................................................295.2.3 Connect the Azure Gateway.........................................................................30
Active Directory - Migration and BCDR Guide, , Version Prepared by ""

1 IntroductionThis guide is intended to provide technical details for supporting the planning and configuration of Business Continuity and Disaster Recovery (BC/DR) and Server Migration, for workloads which use Active Directory Domain Services. It includes sections outlined by technical scenario and is generalized to support several types of workload deployments.
1.1 PurposeThe purpose of the guide is to support lab and production configurations during customer engagements. It may not align exactly with the customer infrastructure, but the aim of the document is to simplify and outline common configuration steps associated with each scenario.
1.2 Scenario OverviewThe aforementioned BC/DR options can be applied to each workload using a series of scenarios. For Active Directory Domain Services, the following scenarios are defined:
1. On-Premises DCs with Replica DC in Azure VM: This scenario outlines providing capabilities for on-premises Active Directory Domain Services through cloud-based domain controller virtual machines. In addition, this scenario can be used to extent Active Directory Domain Services to Microsoft Azure.
2. On-Premises DCs with Delayed Replication DC in Azure VM: This scenario outlines providing DR capabilities for on-premises Active Directory Domain Services through cloud-based domain controller virtual machines with a delayed replication interval. Delayed replication allows a time window during which invalid or improper changes to Active Directory can be rolled back through the “authoritative restore” process.
3. Backup of Azure-based DC to Azure Data Disk: This scenario outlines scenarios related to backup and restore of Active Directory domain controllers to dedicated backup disks attached to Microsoft Azure IaaS Virtual Machines.
While these do not encompass all of the potential possible scenarios one could establish for BC/DR of Active Directory Domain Services using cloud infrastructures, it provides a basis for the most common scenarios which would be encountered. These scenarios will be expanded as newer data and cloud platform capabilities come available.
Page 4Active Directory - Migration and BCDR Guide, , Version 3.0aPrepared by "document.docx"
The following sections provide step-by-step examples of how these scenarios can be established in a cloud environment. This documentation assumes that the reader has access to and a working knowledge of the Windows Server Hyper-V and System Center private cloud environment and has access to a Microsoft Azure subscription.
Page 5Active Directory - Migration and BCDR Guide, , Version 3.0aPrepared by "document.docx"
2 Scenario 1: Host an Active Directory Domain Controller in Windows Azure
This section describes the scenario of deploying a domain controller within Microsoft Azure for disaster recovery of Active Directory Domain Services.
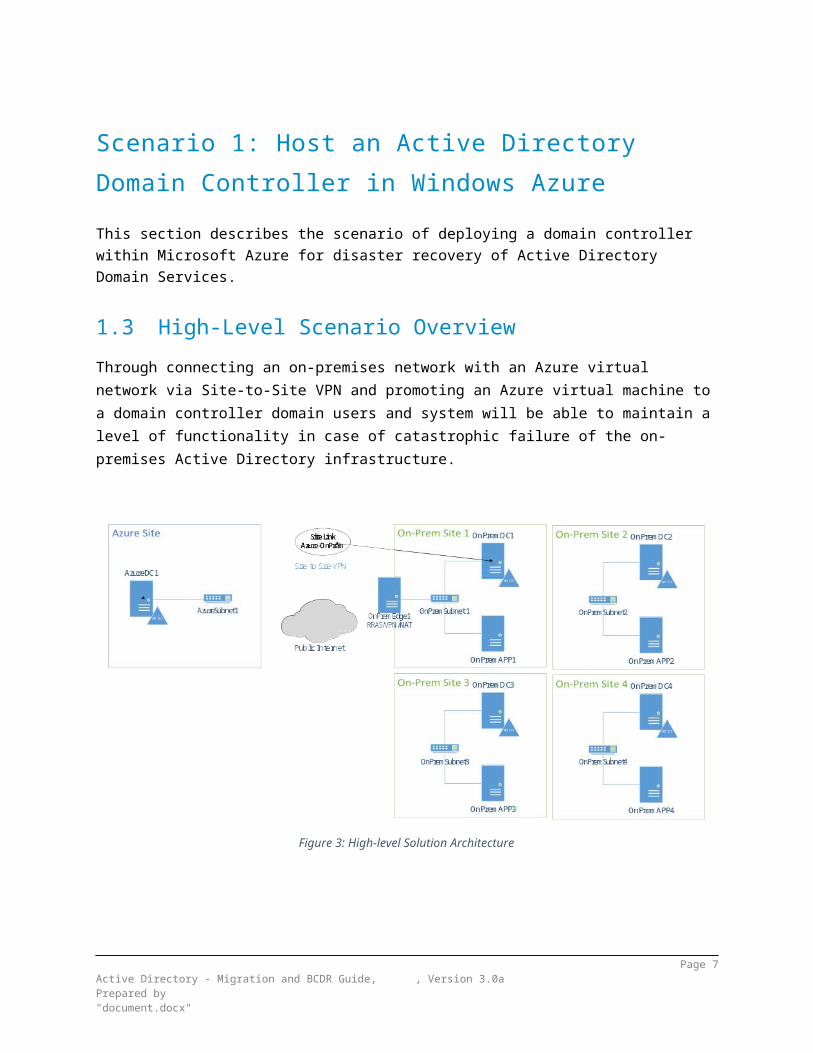
2.1 High-Level Scenario OverviewThrough connecting an on-premises network with an Azure virtual network via Site-to-Site VPN and promoting an Azure virtual machine to a domain controller domain users and system will be able to maintain a level of functionality in case of catastrophic failure of the on-premises Active Directory infrastructure.
Figure 3: High-level Solution Architecture
2.2 Dependencies Install and configure Windows Azure PowerShell on local machine. Complete the configuration of Windows Azure virtual network, local network, and
RRAS gateway. Create on-premises sites and subnets in Active Directory.
Page 6Active Directory - Migration and BCDR Guide, , Version 3.0aPrepared by "document.docx"
2.3 Design and Deployment ConsiderationsWhen hosting a domain controller in Windows Azure it is important to restrict access to the Azure Subscription. Users with administrator access to the Azure Subscription have access to a domain controller image and domain accounts. Azure Subscription administrators must be trusted as domain administrators. The Azure virtual network should have no publicly accessible endpoints, with the only connection being the site-to-site VPN. Azure ExpressRoute is recommended to increase the reliability and speed of the connection.The Azure virtual network address space must be reachable from one or more on-premises domain controllers for Active Directory replication to occur. On-premises servers and workstations must also have connectivity to the virtual network address space to communicate with Azure-based domain controllers in the event of an on-premises domain controller failure. For configuration simplicity and reduced time-to-recovery, it is recommended that domain controllers, servers, and client computers have access to the virtual network subnet at all times, rather than waiting for a failure to occur before allowing server and client access.Azure-based domain controllers should reside in a dedicated Active Directory site with an appropriate site link connecting the site to existing on-premises site(s). Azure will effectively become a new location for your organization. Adjustment of site link costs and DC locator DNS records can be used to optimize replication patterns, site coverage, and discovery of domain controllers by clients and servers. In the default configuration, Azure-based domain controllers in a separate site will not regularly service clients and servers from other sites, but some traffic may be seen if domain controllers are located using non-site-specific global records. Global locator record registration is important as it allows Azure domain controllers to quickly service Active Directory clients in the event of an on-premises domain controller failure. This can be disabled to reduce network traffic, but will delay failover to Azure domain controllers and may require manual administrator intervention. The decision to use schedule-driven replication or notification-driven replication over the Azure site link should consider network traffic, Azure bandwidth charges, and the risk of losing on-premises Active Directory changes in the event of an on-premises domain controller failure. Schedule-driven replication may help decrease network traffic depending on the nature of your organization’s Active Directory change patterns. Notification-driven replication will minimize replication latency, ensuring any Active Directory changes made to on-premises domain controllers are quickly replicated to cloud-based domain controllers. The Active Directory database, logs, and SYSVOL should be placed on a separate Azure data disk for data persistence through any site repair or recovery, and Active Directory database integrity in the case of a VM failure, reset, crash, or other case where the operating system is not shut down cleanly.
Page 7Active Directory - Migration and BCDR Guide, , Version 3.0aPrepared by "document.docx"

Consider the DNS configuration of your organization and determine the appropriate failover/DR approach. Azure domain controllers are configured as DNS servers and can host all required DNS zones, but this does not mean clients and servers will automatically use them in the event of an on-premises DC/DNS failure. If clients and servers are pointing exclusively to on-premises domain controllers for DNS, some level of intervention will be required to leverage the Azure domain controllers for DR. On the other hand, if clients and servers are configured with Azure domain controllers as a secondary or tertiary DNS server, some additional Azure network traffic will likely be seen during normal operations.The configuration and walkthrough steps provided below configure one domain controller to service a single-domain Active Directory environment. In the case of multiple domains or forests, the configuration steps should be followed for each domain that requires disaster recovery capabilities. All Azure domain controllers can reside on the same virtual network and share a common Active Directory site, subnet, and site link configuration, or can be configured in separate sites if your organization’s requirements dictate such a configuration.
2.4 Configuration and Walkthrough Steps2.4.1 Deploy Windows Server Virtual Machine in Azure
1. From the Microsoft Azure Management Portal (Azure Portal) create new virtual machine in Compute -> Virtual Machine -> From Gallery.
2. Select a Windows Server 2012 R2 Datacenter Image. 3. Configure the version (select the latest date), enter computer name,
standard, the appropriate size, administrator name use and password. Continue to the virtual machine configuration.
Note: If a cloud service exists, select the existing service and skip to step number 5.
4. Select “Create a new cloud service”.
Page 8Active Directory - Migration and BCDR Guide, , Version 3.0aPrepared by "document.docx"

Figure 4: Virtual Machine Configuration in Azure Portal.
Note: The name of the cloud service is the name of the new virtual machine being created and can be modified if needed.
5. Select the appropriate Affinity Group.Note: The subnet will be filled in based on the affinity. If there are additional subnets, select the appropriate one.
6. Use an automatically generated Storage Account, unless a previously created storage account is necessary.
7. Select an Availability Set if one is appropriate.8. Continue to the next Virtual machine configuration page. 9. Check the boxes for VM Agent and Microsoft Anti-Malware.10.Continue and the new virtual machine will be prepared.11.Confirm the virtual machine was created by navigating to Virtual Machines in
the Azure Portal.12.The status next to your new virtual machine should be a green check mark
“Running”.
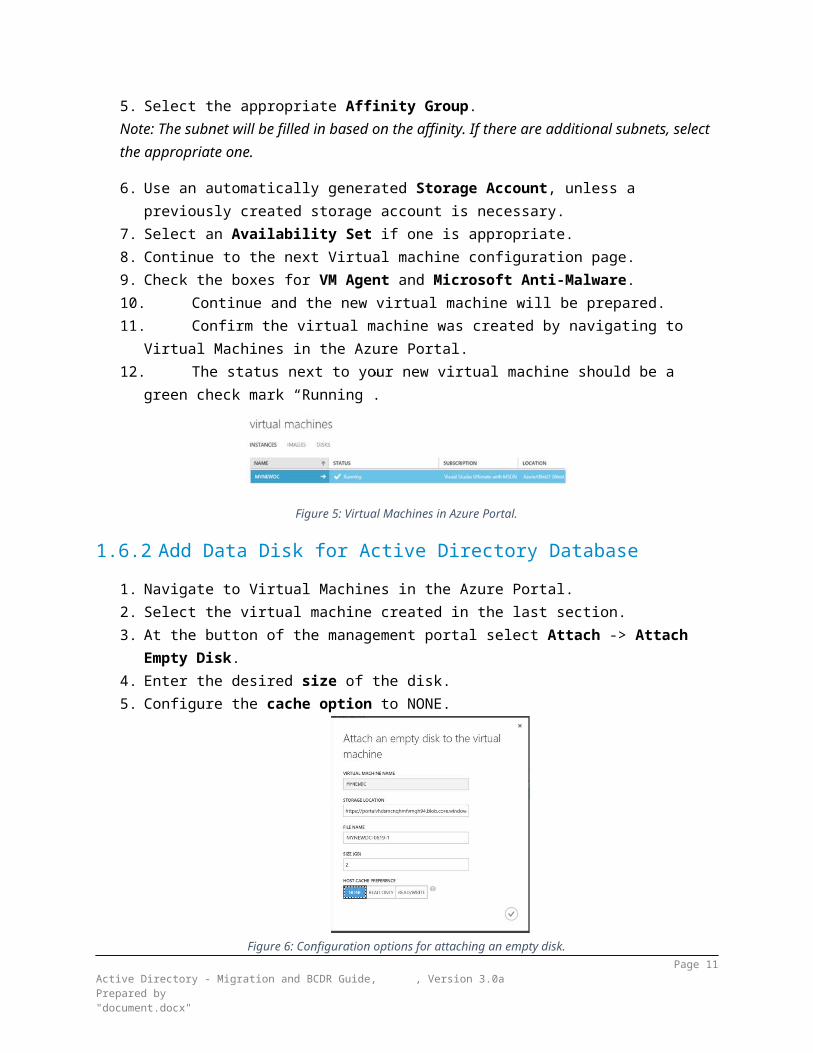
Figure 5: Virtual Machines in Azure Portal.
2.4.2 Add Data Disk for Active Directory Database1. Navigate to Virtual Machines in the Azure Portal.2. Select the virtual machine created in the last section.
Page 9Active Directory - Migration and BCDR Guide, , Version 3.0aPrepared by "document.docx"

3. At the button of the management portal select Attach -> Attach Empty Disk.
4. Enter the desired size of the disk.5. Configure the cache option to NONE.
Figure 6: Configuration options for attaching an empty disk.
6. Continue to create and attach the new disk.
2.4.3 Configure the Attached Data Disk on the Virtual Machine1. Connect to the virtual machine from the Azure Portal.2. Enter the Administrator credentials.3. Initialize and format the data disk in Disk Management.
2.4.4 Create Site, Subnet, and Site Link in Active DirectoryComplete this step with Windows PowerShell
1. Connect to an on-premises domain controller as an Administrator. 2. Open Active Directory Sites and Services.3. Right-click on Sites, select New Site.4. Enter the desired site name for the Azure Site and select the default site link
and click OK.Note: The site link will be changed to a new “Azure to on-premises” site link in a
later step.
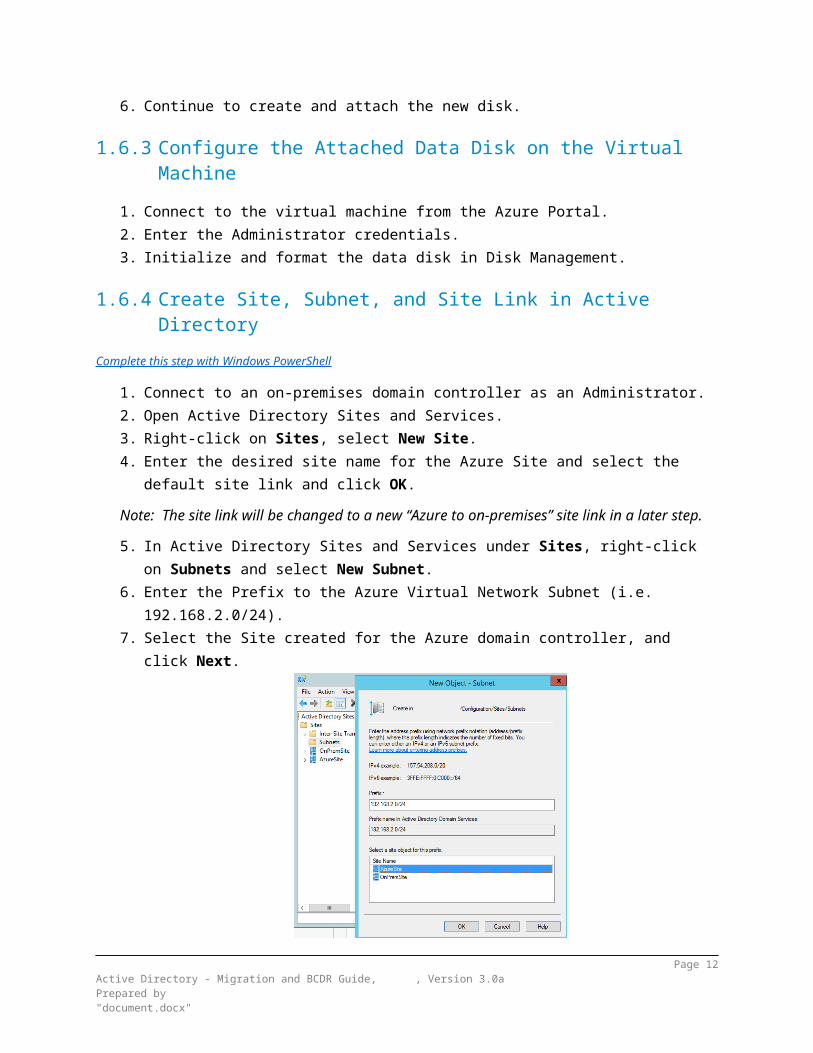
5. In Active Directory Sites and Services under Sites, right-click on Subnets and select New Subnet.
6. Enter the Prefix to the Azure Virtual Network Subnet (i.e. 192.168.2.0/24).7. Select the Site created for the Azure domain controller, and click Next.
Page 10Active Directory - Migration and BCDR Guide, , Version 3.0aPrepared by "document.docx"
8. In Active Directory Sites and Services under Sites, then Inter-Site Transports, right-click on IP and select New Site-Link.
9. Enter the desired Name (i.e. AzureSite-OnPremSite) for the Site-Link and select the sites to be added to the link (i.e. AzureSite, OnPremSite, etc).
Note: The Site-Link must contain the Azure site and one or more on-premises sites.
10.Back in Active Directory Sites and Services under Sites, Inter-Site Transports, then IP, right-click on the Site-Link created in the last step and select Properties.
11.Enter the desired Cost and Replication time in minutes.Note: Choose a cost to reflect the appropriate replication and site coverage preferences. This will likely be a cost higher than the cost used on most on-premises site links.
12.Optional: Configure Change Notification for the new Site-Link.13.In the Site-Link Properties, navigate to the Attribute Editor tab.14.Locate the Attribute options, and select Edit.
Page 11Active Directory - Migration and BCDR Guide, , Version 3.0aPrepared by "document.docx"
15.Enter the value of 1 to enable change notifications and a value of 0 to disable.
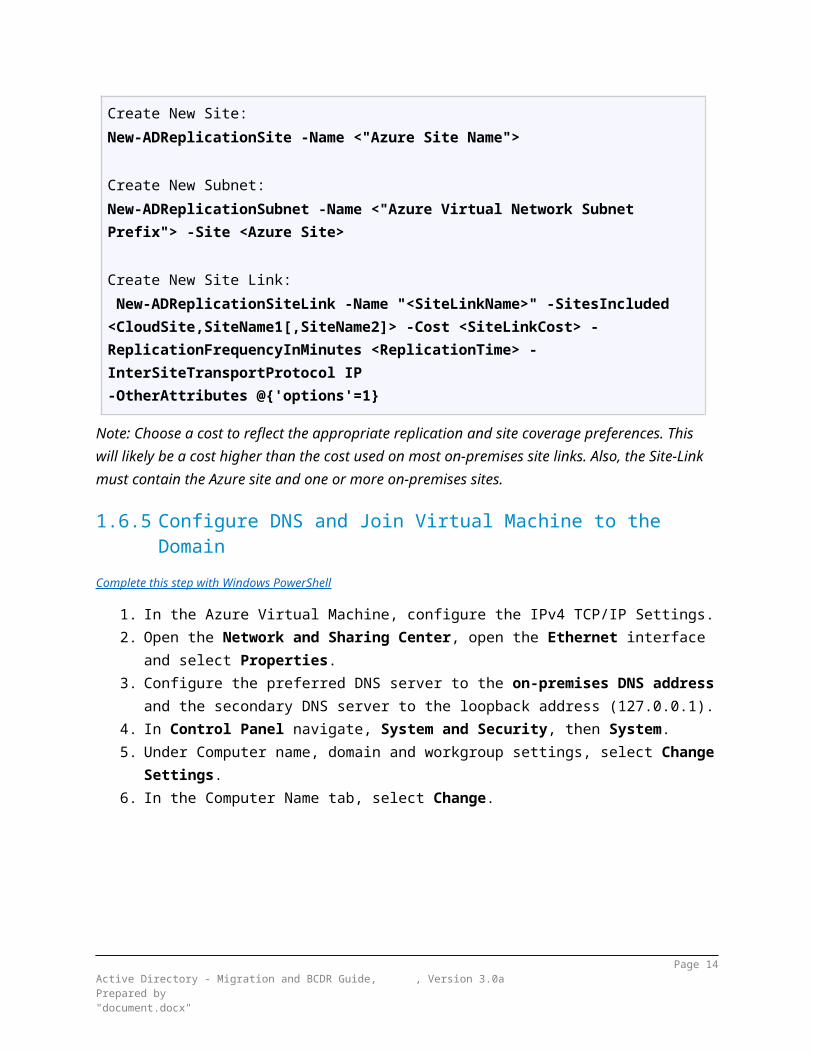
Windows PowerShell equivalent commands
The following Windows PowerShell commands, run at an administrator-level Windows PowerShell command prompt, perform the same function as the preceding procedure. Create New Site: New-ADReplicationSite -Name <"Azure Site Name">
Create New Subnet:New-ADReplicationSubnet -Name <"Azure Virtual Network Subnet Prefix"> -Site <Azure Site>
Create New Site Link: New-ADReplicationSiteLink -Name "<SiteLinkName>" -SitesIncluded <CloudSite,SiteName1[,SiteName2]> -Cost <SiteLinkCost> -ReplicationFrequencyInMinutes <ReplicationTime> -InterSiteTransportProtocol IP -OtherAttributes @{'options'=1}
Note: Choose a cost to reflect the appropriate replication and site coverage preferences. This will likely be a cost higher than the cost used on most on-premises site links. Also, the Site-Link must contain the Azure site and one or more on-premises sites.
2.4.5 Configure DNS and Join Virtual Machine to the DomainComplete this step with Windows PowerShell
1. In the Azure Virtual Machine, configure the IPv4 TCP/IP Settings.2. Open the Network and Sharing Center, open the Ethernet interface and
select Properties.3. Configure the preferred DNS server to the on-premises DNS address and
the secondary DNS server to the loopback address (127.0.0.1).4. In Control Panel navigate, System and Security, then System.5. Under Computer name, domain and workgroup settings, select Change
Settings.6. In the Computer Name tab, select Change.
Page 12Active Directory - Migration and BCDR Guide, , Version 3.0aPrepared by "document.docx"

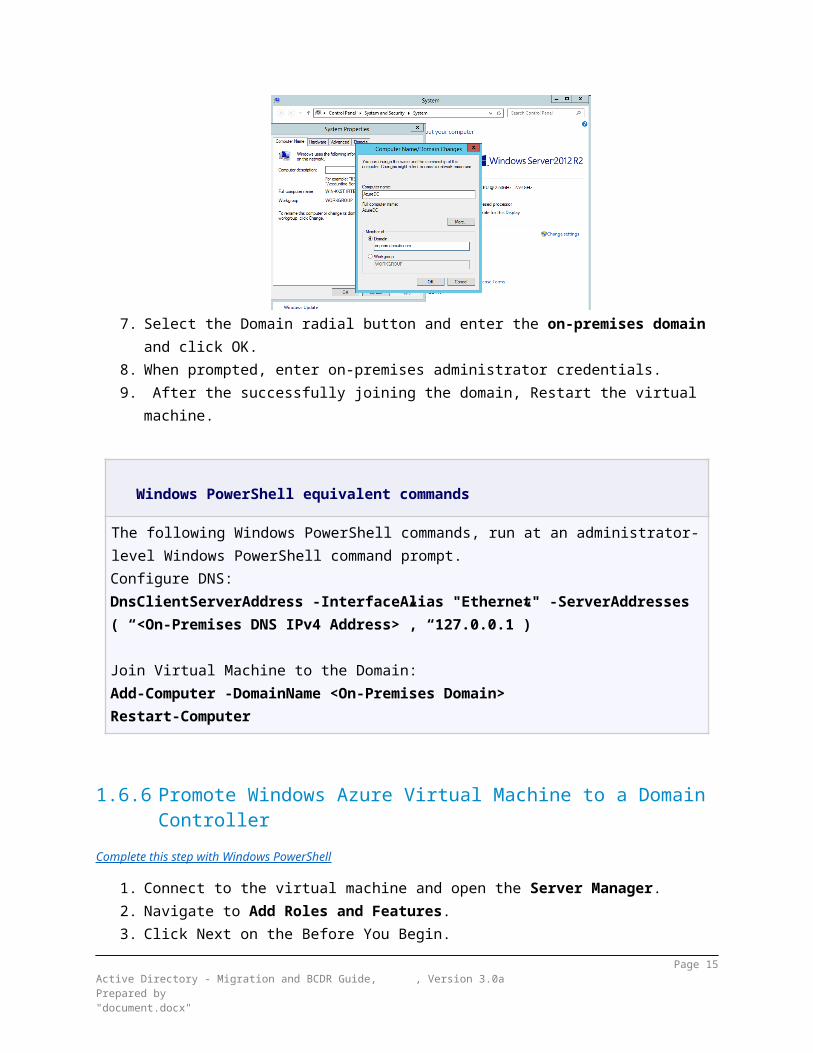
7. Select the Domain radial button and enter the on-premises domain and click OK.
8. When prompted, enter on-premises administrator credentials.9. After the successfully joining the domain, Restart the virtual machine.
Windows PowerShell equivalent commands
The following Windows PowerShell commands, run at an administrator-level Windows PowerShell command prompt.Configure DNS:DnsClientServerAddress -InterfaceAlias "Ethernet" -ServerAddresses ( “<On-Premises DNS IPv4 Address>”, “127.0.0.1”)
Join Virtual Machine to the Domain:Add-Computer -DomainName <On-Premises Domain>Restart-Computer
2.4.6 Promote Windows Azure Virtual Machine to a Domain Controller
Complete this step with Windows PowerShell
1. Connect to the virtual machine and open the Server Manager.2. Navigate to Add Roles and Features.3. Click Next on the Before You Begin.4. On the next page select the Role based or featured based installation
radial button and click Next.5. In the Server Selection page Select a server from the server pool radial
button and select the desired server from the list. Click next to continue. 6. On the Server Roles page select Active Directory Domain Services role.
Page 13Active Directory - Migration and BCDR Guide, , Version 3.0aPrepared by "document.docx"
7. In the new window, review the features and click Add Features.
.
8. Click Next on the Features page.9. Click Next on the AD DS page.10.On the Confirmation page check the box Restart the destination server
automatically if required and click Install.11.This will take a few minutes to complete, the virtual machine will
automatically reboot on completion.12.After the installation is complete, return to the Server Manager.13.Click on the flag with the yellow warning icon.14.In the down drop select Promote this server to a domain controller.15. This will launch the Active Directory Domain Services Configuration Wizard. 16.Select Add a domain controller to an existing domain radial button. 17.Enter your on-premises domain into the domain section.18.Add a domain administrator account for the credentials and click Next.19.Check the boxes for Domain Name System (DNS) Server and Global
Catalog (GC).20.Select the site created for the Azure.
Note: The site can be changed in the future if the proper site has not been created yet.
21.Enter and confirm the Directory Services Restore Mode (DSRM) and click Next.
22.Review the DNS Options page and click Next.23.Select the domain controller to replicate from in the Additional Options page
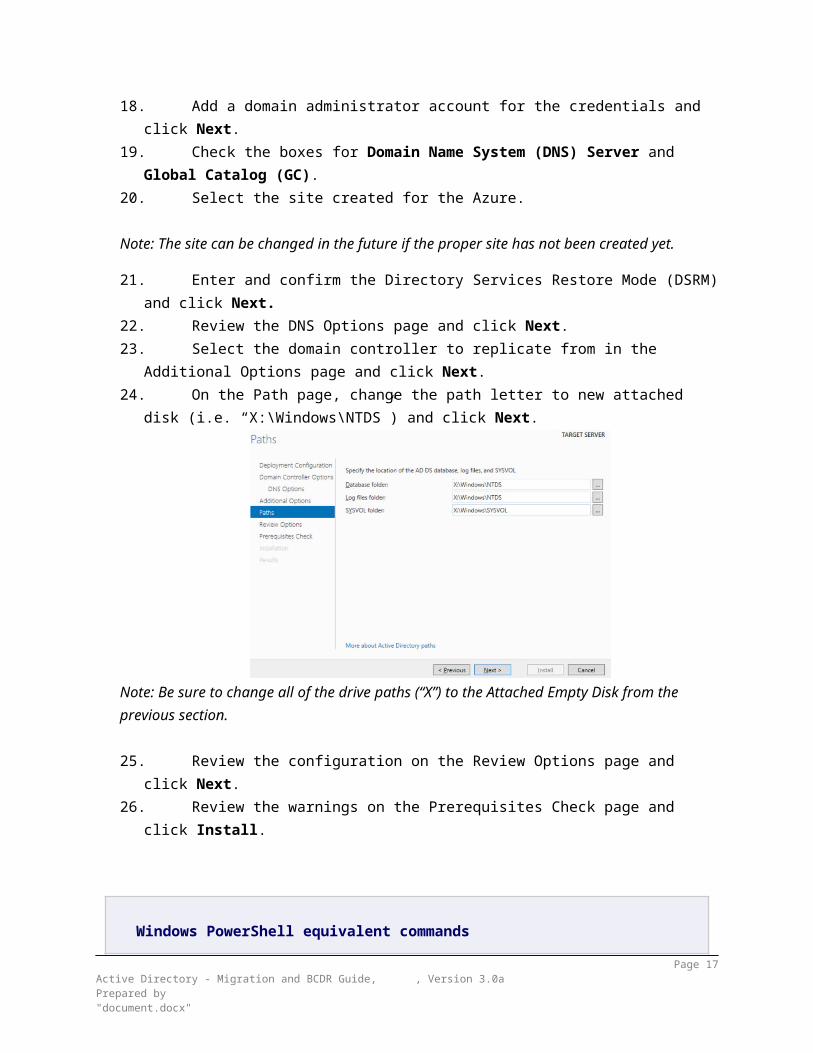
and click Next.24.On the Path page, change the path letter to new attached disk (i.e. “X:\
Windows\NTDS”) and click Next.
Page 14Active Directory - Migration and BCDR Guide, , Version 3.0aPrepared by "document.docx"
Note: Be sure to change all of the drive paths (“X”) to the Attached Empty Disk from the previous section.
25.Review the configuration on the Review Options page and click Next.26.Review the warnings on the Prerequisites Check page and click Install.
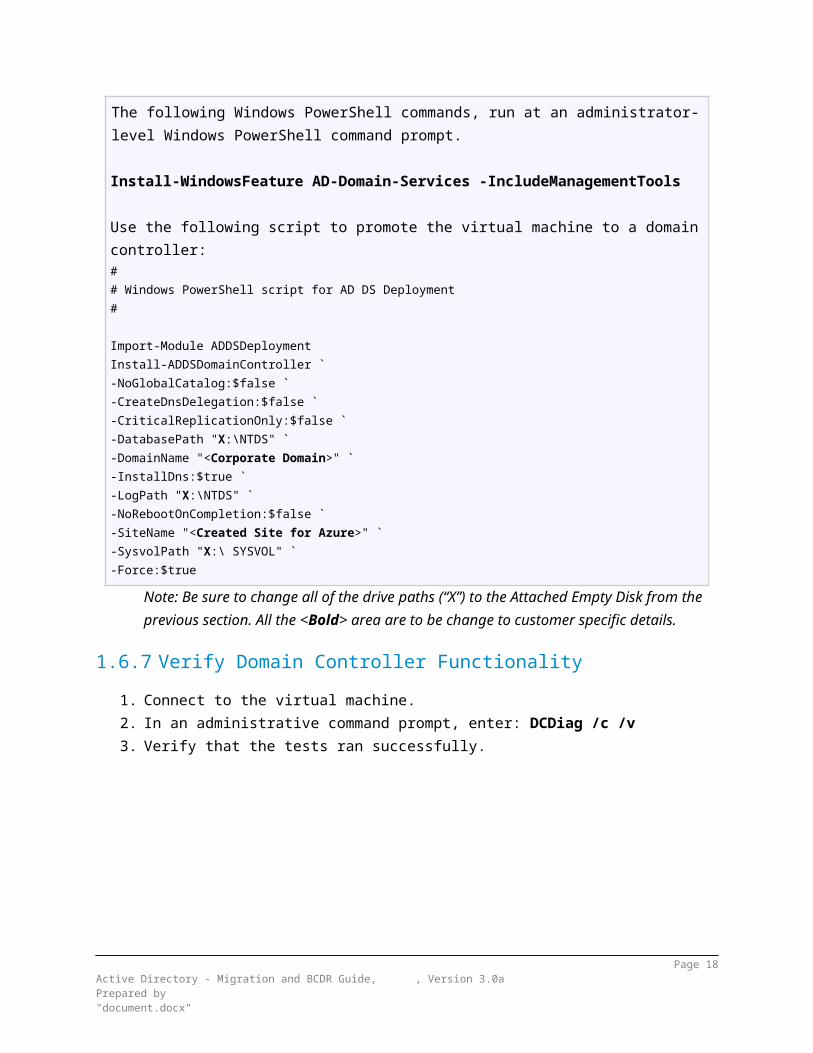
Windows PowerShell equivalent commands
The following Windows PowerShell commands, run at an administrator-level Windows PowerShell command prompt. Install-WindowsFeature AD-Domain-Services -IncludeManagementTools
Use the following script to promote the virtual machine to a domain controller:## Windows PowerShell script for AD DS Deployment#
Import-Module ADDSDeploymentInstall-ADDSDomainController `-NoGlobalCatalog:$false `-CreateDnsDelegation:$false `-CriticalReplicationOnly:$false `-DatabasePath "X:\NTDS" `-DomainName "<Corporate Domain>" `-InstallDns:$true `-LogPath "X:\NTDS" `-NoRebootOnCompletion:$false `-SiteName "<Created Site for Azure>" `-SysvolPath "X:\ SYSVOL" `-Force:$true
Page 15Active Directory - Migration and BCDR Guide, , Version 3.0aPrepared by "document.docx"

Note: Be sure to change all of the drive paths (“X”) to the Attached Empty Disk from the previous section. All the <Bold> area are to be change to customer specific details.
2.4.7 Verify Domain Controller Functionality1. Connect to the virtual machine.2. In an administrative command prompt, enter: DCDiag /c /v3. Verify that the tests ran successfully.
Page 16Active Directory - Migration and BCDR Guide, , Version 3.0aPrepared by "document.docx"
3 Scenario 2: Delayed Replication Site in Windows Azure
This section describes the scenario of adding Azure-based domain controllers in delayed replication sites for Active Directory object recovery.
3.1 High-Level Scenario OverviewDelayed replication or use of a “lag site” is a configuration in which certain Active Directory domain controllers are intentionally kept out-of-date relative to most other domain controllers in the domain. Delayed replication provides a quick way to recover objects and attributes which have been improperly modified or deleted. This recovery is performed using the Active Directory authoritative restore process without restoring a domain controller from backup. Delayed replication is not intended as a complete disaster recovery solution, and should only be used as part of a disaster recovery solution which includes regularly scheduled Active Directory backups.
Figure 7: High-level Solution Architecture
Page 17Active Directory - Migration and BCDR Guide, , Version 3.0aPrepared by "document.docx"
3.2 DependenciesComplete the configuration of Scenario 1: Host an Active Directory Domain Controller in Windows Azure, including all dependencies.
3.3 Design and Deployment ConsiderationsCreating a delayed replication site provides flexibility and recovery from unintended changes to Active Directory. If an unintended change is made, having a lag site allows an administrator to access domain controllers in the delayed site to perform an authoritative restore of selected Active Directory objects and attributes. Upon replication, the lag site objects marked as authoritative will replace objects on all other domain controllers.Azure-based domain controllers used for delayed replication should each reside in a dedicated Active Directory site with a dedicated site link connecting the site to existing on-premises sites or a non-delayed Azure site.Unlike Scenario 1, the Azure domain controllers in delayed replication sites will not register global DC locator records. This prevents servers and clients from using the delayed replication site for authentication or other domain controller services. For further isolation, consider restricting communication from additional clients and servers other than the direct replication partners and administrative workstations.Decide on the number of sites and the amount of latency by identifying organizational needs and limitations. The delayed replication design requires at least two lag sites with opposing replication schedules. A minimum of two Azure-based lag sites are required because a single replication site can result in replication occurring immediately following an unintended change. For example, having the first Azure-based lag site replicate at midnight and second replicate at noon provides at least a 12 hour delay at any time. This walkthrough will cover the creation of two lag sites, each scheduled to replicate once per day.Delayed replication allows for recovery of unintended changes by using authoritative restore to correct changes before replication. More information about the authoritative restore process can be found here: http://technet.microsoft.com/en-us/library/cc816878(v=ws.10).aspxNote that a lag site is not guaranteed to be intact in a disaster. If a problem is not discovered before replication occurs, the issues will be replicated to the lag sites. When a disaster occurs, inbound and outbound replication should be disabled and the “repadmin /force” command must not be used. This extends the amount of time available for the administrator to perform the authoritative restore procedure. More information on the limitations of lag sites can be found here: http://technet.microsoft.com/en-us/library/dd835581(v=ws.10).aspx
Page 18Active Directory - Migration and BCDR Guide, , Version 3.0aPrepared by "document.docx"

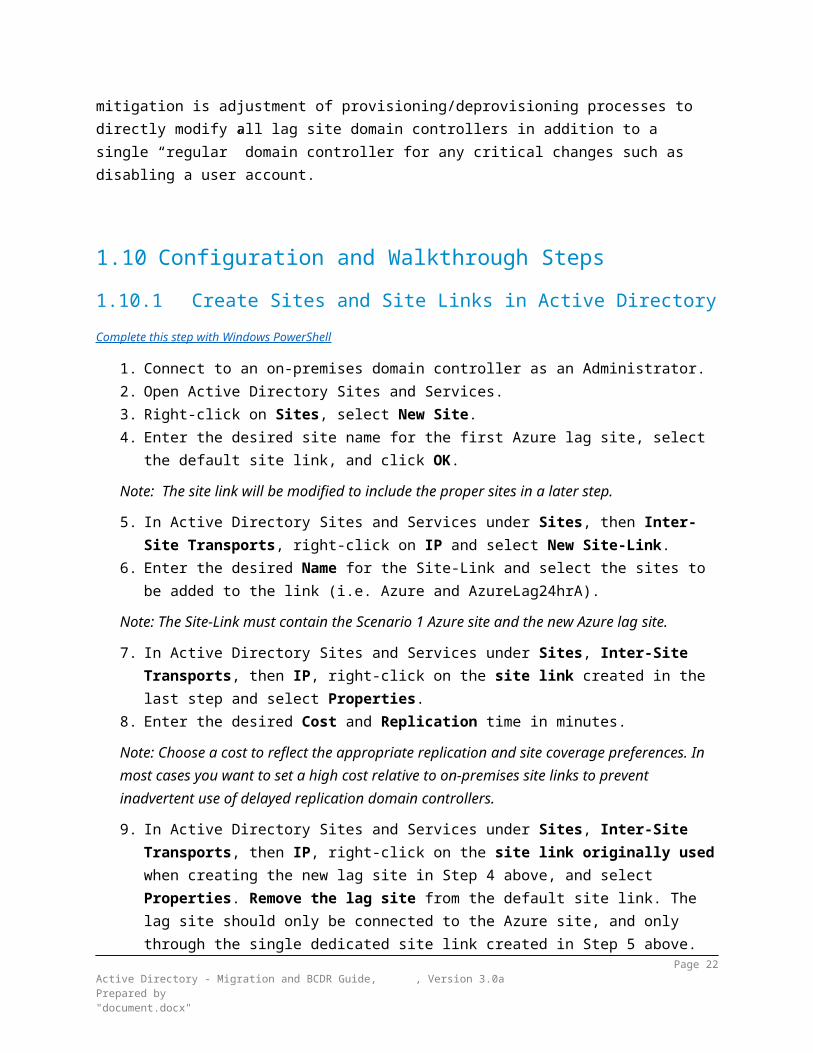
A lag site may pose a security threat if an Active Directory object is removed or modified but the object still exists in an earlier state in the lag site. For example, consider a user account that has been deleted, disabled, or removed from a group. If the user is able to authenticate to the lag site, they will continue to have access to systems and resources until the next lag site replication cycle. One possible mitigation is network isolation as described earlier in this section, preventing communication with lag site domain controllers for purposes other than administration or replication. Another possible mitigation is adjustment of provisioning/deprovisioning processes to directly modify all lag site domain controllers in addition to a single “regular” domain controller for any critical changes such as disabling a user account.
3.4 Configuration and Walkthrough Steps3.4.1 Create Sites and Site Links in Active DirectoryComplete this step with Windows PowerShell
1. Connect to an on-premises domain controller as an Administrator. 2. Open Active Directory Sites and Services.3. Right-click on Sites, select New Site.4. Enter the desired site name for the first Azure lag site, select the default site
link, and click OK.Note: The site link will be modified to include the proper sites in a later step.
5. In Active Directory Sites and Services under Sites, then Inter-Site Transports, right-click on IP and select New Site-Link.
6. Enter the desired Name for the Site-Link and select the sites to be added to the link (i.e. Azure and AzureLag24hrA).
Note: The Site-Link must contain the Scenario 1 Azure site and the new Azure lag site.
7. In Active Directory Sites and Services under Sites, Inter-Site Transports, then IP, right-click on the site link created in the last step and select Properties.
8. Enter the desired Cost and Replication time in minutes.Note: Choose a cost to reflect the appropriate replication and site coverage preferences. In most cases you want to set a high cost relative to on-premises site links to prevent inadvertent use of delayed replication domain controllers.
9. In Active Directory Sites and Services under Sites, Inter-Site Transports, then IP, right-click on the site link originally used when creating the new lag site in Step 4 above, and select Properties. Remove the lag site from
Page 19Active Directory - Migration and BCDR Guide, , Version 3.0aPrepared by "document.docx"

the default site link. The lag site should only be connected to the Azure site, and only through the single dedicated site link created in Step 5 above.
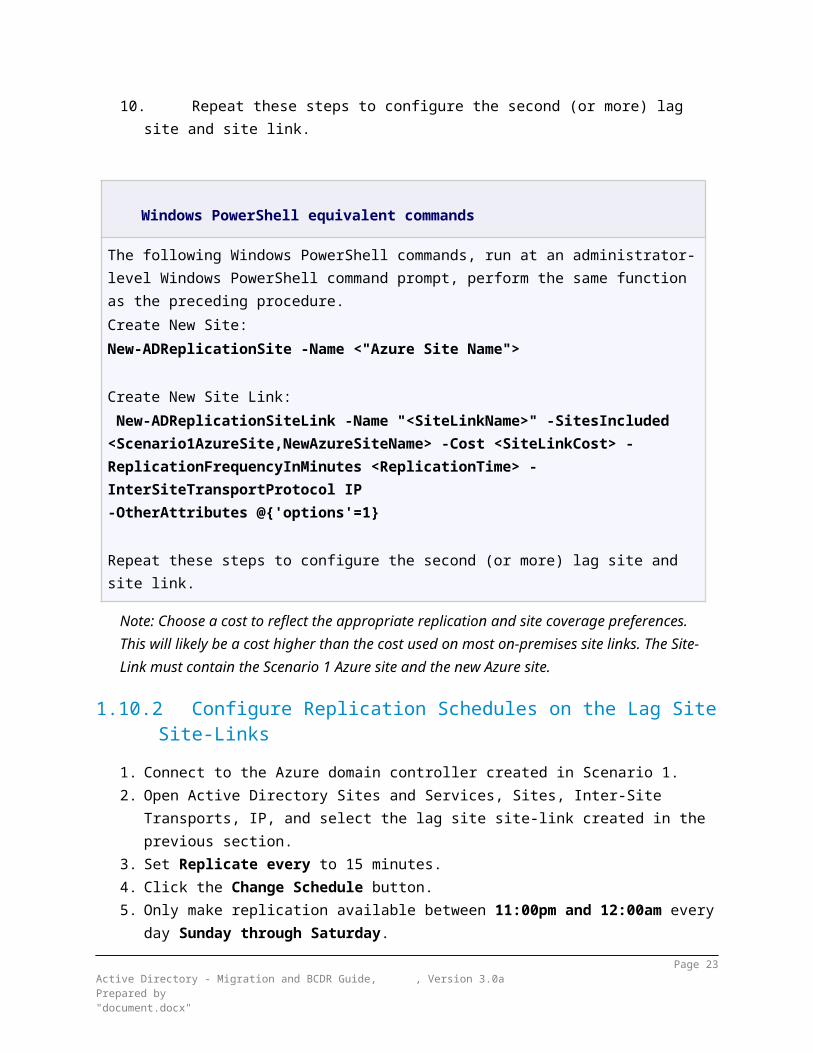
10.Repeat these steps to configure the second (or more) lag site and site link.
Windows PowerShell equivalent commands
The following Windows PowerShell commands, run at an administrator-level Windows PowerShell command prompt, perform the same function as the preceding procedure. Create New Site: New-ADReplicationSite -Name <"Azure Site Name">
Create New Site Link: New-ADReplicationSiteLink -Name "<SiteLinkName>" -SitesIncluded <Scenario1AzureSite,NewAzureSiteName> -Cost <SiteLinkCost> -ReplicationFrequencyInMinutes <ReplicationTime> -InterSiteTransportProtocol IP -OtherAttributes @{'options'=1}
Repeat these steps to configure the second (or more) lag site and site link.
Note: Choose a cost to reflect the appropriate replication and site coverage preferences. This will likely be a cost higher than the cost used on most on-premises site links. The Site-Link must contain the Scenario 1 Azure site and the new Azure site.
3.4.2 Configure Replication Schedules on the Lag Site Site-Links1. Connect to the Azure domain controller created in Scenario 1.2. Open Active Directory Sites and Services, Sites, Inter-Site Transports, IP, and
select the lag site site-link created in the previous section.3. Set Replicate every to 15 minutes.4. Click the Change Schedule button.5. Only make replication available between 11:00pm and 12:00am every day
Sunday through Saturday.
Page 20Active Directory - Migration and BCDR Guide, , Version 3.0aPrepared by "document.docx"

Note: The replication schedule for the matching pair of site links can be at any time of day as long as the schedules are opposite of each other. For sites replicating once per day, this means a 12 hour difference between the two site links. This helps make sure a minimum 12 hour replication delay at any point in time for one of the two lag sites.
6. Repeat this section for the second lag site site-link and set the replication schedule to 11:00am and 12:00pm every day Sunday through Saturday (or 12 hours after the replication time set for the first lag site site-link).
3.4.3 Deploy Additional Window Server Virtual Machines in AzureFollow the steps in Scenario 1 for Deploying Windows Server in Azure
1. Deploy Windows Server Virtual Machine in Azure.2. Add Data Disk for Active Directory Database.3. Configure the Attached Data Disk on the Virtual Machine.4. Configure DNS.Note: The new virtual machine will use the same Azure subnet as the Scenario 1 virtual machine. The new domain controller should be promoted directly into the new site with the appropriate and site link configured in the last step.
5. Promote Windows Azure Virtual Machine to a domain controller.6. Verify domain controller functionality.7. Repeat these steps for each lag site domain controller.
Page 21Active Directory - Migration and BCDR Guide, , Version 3.0aPrepared by "document.docx"
3.4.4 Optional: Creating Additional Replications Sites in Windows Azure
1. To create additional delayed replication sites, repeat all steps in this scenario, creating another pair of sites, site links, and domain controllers for each desired delayed replication interval (i.e. once per week, every four hours, etc)
2. For additional information on Designing Active Directory Site Topology visit http://technet.microsoft.com/en-us/library/cc787284(WS.10).aspx
3.4.5 Prevent Registration of Global DC Locator Records1. Create a Group Policy object linked to the Domain Controllers OU.2. Modify permissions on the new GPO to allow only delayed replication domain
controllers to apply the policy. The preferred method is to remove the Apply Group Policy permission from Authenticated Users and grant specific delayed replication domain controller computer accounts the Apply Group Policy permission.
3. Before proceeding, verify that the new group policy is only being applied to delayed replication domain controllers. Test this policy to help make sure the settings configured in the next step will not apply broadly to all domain controllers.
4. Enabled and configure the policy setting “Computer Configuration\Policies\Administrative Templates\System\Net Logon\DC Locator DNS Records\Specify DC Locator DNS records not registered by the DCs” to prevent registration of DC Locator records for all except site-specific records. Include all mnemonics in the list except those containing the word “site”.
Page 22Active Directory - Migration and BCDR Guide, , Version 3.0aPrepared by "document.docx"
4 Scenario 3: Active Directory Backup to Azure Data Disks
This scenario outlines scenarios related to backup and restore of Active Directory domain controllers to dedicated backup disks attached to Microsoft Azure IaaS Virtual Machines.
4.1 High-Level Scenario OverviewActive Directory domain controller backups are a critical part of an Active Directory disaster recovery strategy. Having multiple domain controllers in geographically dispersed locations and using techniques such as delayed replication sites can provide protection against server failures, location failures, and some types of content issues within Active Directory, but these techniques are not a replacement for full domain controller backups. This scenario describes the basic configuration of Windows Server Backup to maintain backups of a cloud-based domain controller. Backups are stored on an Azure data disk attached to each domain controller virtual machine.
Figure 7: High-level Solution Architecture
Page 23Active Directory - Migration and BCDR Guide, , Version 3.0aPrepared by "document.docx"

4.2 DependenciesComplete the configuration of Scenario 1: Host an Active Directory Domain Controller in Windows Azure, including all dependencies.
4.3 Design and Deployment ConsiderationsThis scenario will use Windows Server Backup to perform a full backup, including system state, of each Active Directory domain controller hosted in Windows Azure. In general, Microsoft recommends that at least two domain controllers in each domain are backed up regularly. Consider this recommendation when deciding on a backup strategy and create additional Azure-based domain controllers as needed. Azure-based domain controller backup can be used as a complement to or as a replacement for on-premises backup.Storage required for backups will vary based on the size of your organization’s domain controller virtual machines including the size of the Active Directory database, logs, and SYSVOL. Windows Server Backup will automatically retain backups on locally-attached dedicated backup disks and remove old backups as needed. Testing is recommended to determine the most appropriate backup disk size.Active Directory domain controller backups are generally only valid within the Active Directory forest tombstone lifetime. There are situations where domain controller backups older than the forest tombstone lifetime can be used to initiate a full forest recovery, but this is a complex scenario outside the scope of this scenario guide. Assistance from Microsoft Support is recommended if attempting such a recovery.Domain controller backups must be secured to the same degree as domain controllers. Make sure that any Azure subscription administrators and co-administrators are trusted to the same degree as domain administrators.
4.4 Configuration and Walkthrough StepsThis scenario walkthrough covers the configuration of Windows Server Backup for a single domain controller hosted in Windows Azure. The following steps should be repeated for each domain controller to be protected.
4.4.1 Attach Azure Data Disk to Domain Controller Virtual Machine
1. Using the Azure management console, add a data disk to an Azure domain controller virtual machine with non-delayed replication. Select an appropriate
Page 24Active Directory - Migration and BCDR Guide, , Version 3.0aPrepared by "document.docx"

data disk size based on the expected backup size and number of backups you want to store.
Note: The data disk need not be initialized or formatted at this time. Windows Server Backup will automatically initialize and format the backup disk when a backup schedule is configured.
4.4.2 Install Windows Server Backup1. From Server Manager, select Add Roles and Features and follow the
wizard to install the Windows Server Backup feature.
Windows PowerShell equivalent commands
The following Windows PowerShell commands, run at an administrator-level Windows PowerShell command prompt, perform the same function as the preceding procedure. Install Windows Server Backup: Install-WindowsFeature Windows-Server-Backup
4.4.3 Configure Windows Server Backup1. Start the Windows Server Backup console, right click Local Backup and
select Backup Schedule… to start the Backup Schedule Wizard2. On the Getting Started page, click Next3. On the Select Backup Configuration page, select Full server
(recommended) and click Next4. On the Specify Backup Time page, configure the desired backup
schedule and click Next5. On the Specify Destination Type page, select Back up to a hard disk that
is dedicated for backups (recommended) and click Next6. On the Select Destination Disk page, click Show All Available Disks7. In the Show All Available Disks dialog, place a check beside the dedicated
data disk for storing backups, and click Ok
Page 25Active Directory - Migration and BCDR Guide, , Version 3.0aPrepared by "document.docx"

Note: Any existing data on the selected disk will be destroyed. If the instructions in this guide have been followed, the newly added data disk will not be formatted or initialized and can be easily identified because it will have no volumes listed in the Show All Available Disk dialog. Be sure not to select the data disk in use by Active Directory for its database, logs, and/or SYSVOL.
8. The Select Destination Disk page should now display the data disk to be used for storing backups. Place a check beside the data disk and click Next. Read the warning about disk reformatting and click Yes to use the selected data disk.
9. Verify all settings on the Confirmation page and click Finish to format the backup data disk and create the new backup schedule.
10.Click Close when the backup schedule creation is complete.
4.4.4 Test Backup Settings1. Start Windows Server Backup console, right click Local Backup and select
Backup Once… to start the Backup Once Wizard2. On the Backup Options page, select Scheduled backup options and click
Next3. Verify all settings on the Confirmation page and click Backup to start a
backup immediately4. Wait for backup completion and help make sure the backup is successful.
Note: Testing the validity and restorability of the backup is beyond the scope of this guide, but is strongly recommended.
Page 26Active Directory - Migration and BCDR Guide, , Version 3.0aPrepared by "document.docx"

5 Appendix: Configure Azure Virtual Networks and Site to Site VPN Gateway
5.1 DependenciesInstall and configure Windows Azure PowerShell.
5.2 Configuration and Walkthrough Steps5.2.1 Setup Virtual Network in AzureCreate Affinity Group
1. Type, New-AzureAffinityGroup -Name <”Name”> -Location <”West US”>and press Enter.
Define Local Network and Create Virtual Network
2. Create Network ConfigurationNote: Change the server names highlighted in yellow and the corresponding IPv4 addresses. The yellow highlights are the properties of the on-premises network. The green highlights are properties of the Azure virtual network.
<NetworkConfiguration xmlns:xsd="http://www.w3.org/2001/XMLSchema" xmlns:xsi="http://www.w3.org/2001/XMLSchema-instance" xmlns="http://schemas.microsoft.com/ServiceHosting/2011/07/NetworkConfiguration"> <VirtualNetworkConfiguration> <Dns> <DnsServers> <DnsServer name="LocalDC" IPAddress="192.168.5.1" /> </DnsServers> </Dns> <LocalNetworkSites> <LocalNetworkSite name="LocalNetwork"> <AddressSpace> <AddressPrefix>192.168.5.0/24</AddressPrefix> </AddressSpace> <VPNGatewayAddress><Local Public IPv4 Number></VPNGatewayAddress> </LocalNetworkSite> </LocalNetworkSites> <VirtualNetworkSites> <VirtualNetworkSite name="VirtualNetwork" AffinityGroup="YourAffinity"> <AddressSpace> <AddressPrefix>192.168.2.0/24</AddressPrefix> </AddressSpace> <Subnets> <Subnet name="Subnet-1"> <AddressPrefix>192.168.2.0/28</AddressPrefix> </Subnet> <Subnet name="GatewaySubnet"> <AddressPrefix>192.168.2.16/29</AddressPrefix>
Page 27Active Directory - Migration and BCDR Guide, , Version 3.0aPrepared by "document.docx"
</Subnet> </Subnets> <DnsServersRef> <DnsServerRef name="LocalDC" /> </DnsServersRef> <Gateway> <ConnectionsToLocalNetwork> <LocalNetworkSiteRef name="LocalNetwork"> <Connection type="IPsec" /> </LocalNetworkSiteRef> </ConnectionsToLocalNetwork> </Gateway> </VirtualNetworkSite> </VirtualNetworkSites> </VirtualNetworkConfiguration>
</NetworkConfiguration>
3. Copy and Paste the configuration in notepad and save as AzureNetwork.netcfg in C:\.
4. Type, Set-AzureVNetConfig -ConfigurationPath C:\AzureNetwork.netcfg and press Enter.
5. Confirm the values match in the Azure Management Portal -> Networks -> Virtual Network, Local Network.
Create a VPN Gateway in Azure
6. Type, New-AzureVNetGateway –VNetName “VirtualNetwork” and press Enter
Note: Creating the VPN gateway in Azure can take over thirty minutes after running the command.
7. To confirm completion, type Get-AzureVNETGateway and Press Enter.
Download the VPN Device Script
8. In the Azure Management Center -> Networks -> Virtual Network -> “VirtualNetwork”, select download a VPN Device Configuration Script.
9. For the Vendor select, Microsoft.10.For the Platform select, RRAS.11.For the Operating System select, Windows Server 2012 R2.Note: The script will download as a .cfg file and will need to be changed to .ps1.
5.2.2 Configure Local Edge ServerExecution the VPN Device Script
1. On the Local Edge server, rename the downloaded VPN Device Script from .cfg to .ps1.
2. Set the PowerShell Execute policy to Unrestricted.
Page 28Active Directory - Migration and BCDR Guide, , Version 3.0aPrepared by "document.docx"

3. In Windows PowerShell (Administrator) type, Set-ExecutionPolicy Unrestricted and press Enter.
4. Execute the downloaded VpnDeviceScript.ps1.
5.2.3 Connect the Azure GatewayConnect the Gateway
1. Open the Windows Azure PowerShell as an Administrator.2. Type, Set-AzureVNetGateway -Connect –LocalNetworkSiteName
<“LocalNetwork”> –VNetName <“VirtualNetwork”> and press Enter.3. Confirm completion by running, Get-AzureVnetGateway –VNetName
<VirtualNetwork>.
Page 29Active Directory - Migration and BCDR Guide, , Version 3.0aPrepared by "document.docx"